Transcripts
1. Introduction: Are you looking to kick-start your watercolor painting
journey in Procreate. But maybe you are now so
competent yet as a beginner. And you want someone to hold your hand and guide
you each step of the way while stop searching because you're
in the right place. In this less than
30 minute course, we will do four
projects together, progressing from the easiest and simplest to slightly
more advanced. I won't overwhelm you
with anything that is not absolutely necessary. You can stay focused on
what's most important. As a beginner, these projects
might look a little bit intimidating to some of you because of how
beautiful they look. But they can all be done in a few simple steps with
the right supplies. And I will break them
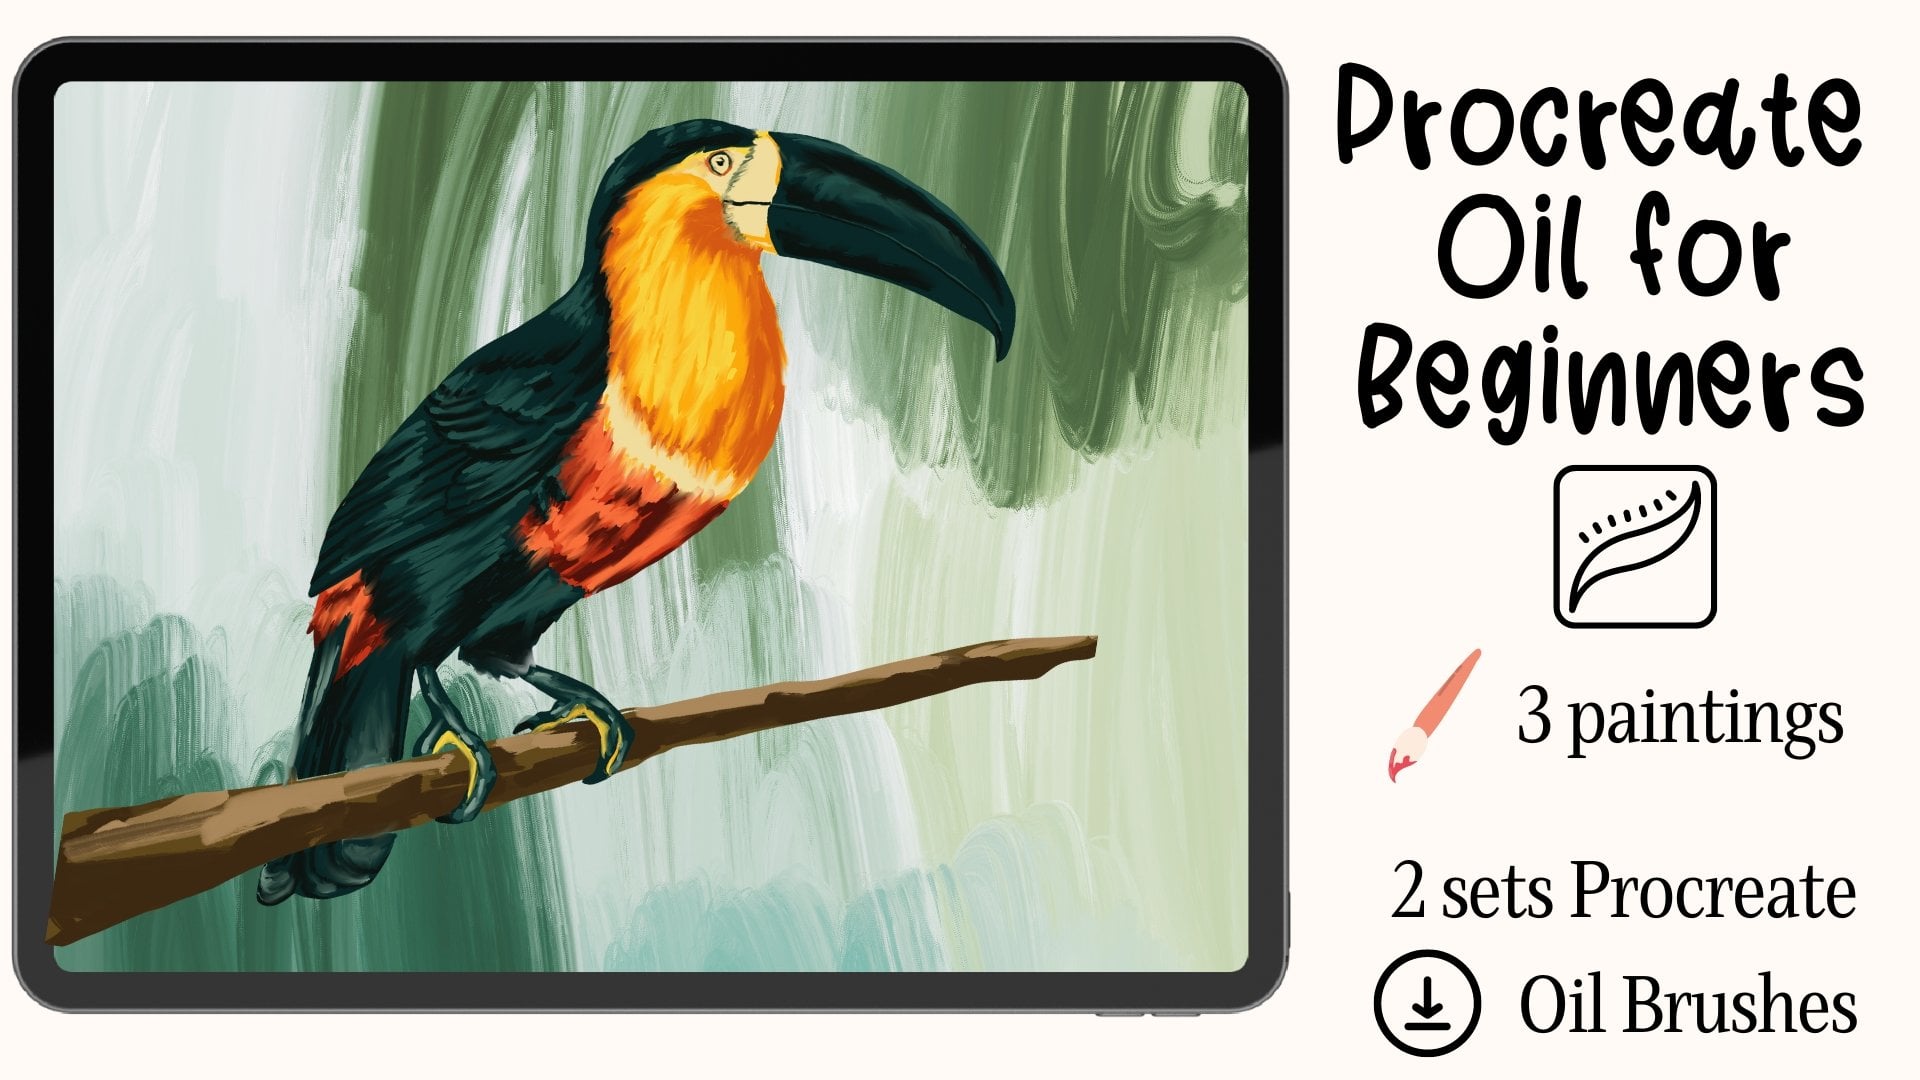
all down for you. As a bonus, you will receive
my most popular FLS, watercolor brush back
for Procreate all 27 brushes and stamps
that we use in this course completely for free. You may have some
additional questions before getting started and our
answer them right now. Do I need to know procreate
to take this class? Well, this class is
designed for beginners who have some knowledge in how
the software Procreate works. I do my best to explain every step in detail
in this class, but I'm not able to go into great detail on
every basic thing, like how to pick a brush. Because then each class will
be too long and there'll be too much repetition between
this one and future classes. Was all included in this class. You will receive
all the brushes I'm using in this class
completely for free. I saw these brushes
on my wife's side and on Etsy as a
separate product. But I will not make
your purchase them because I understand
is the crucial that you use the same tools
as I do in order to actually be able to follow
along and get the best result. In addition, you will also
get for artwork canvases, one for each project
we're doing together. You will also get for final
results of my paintings to use freely as reference
for sketches, also for reference
for color palettes, for illustration guides
showing rough steps, as well as for detailed
written step-by-step guides that we follow to
the.in this class. Why should I learn
from you and how is this class different from
other ones out there? My name is milli artists and
founder of Procreate bundle. As a self-taught artist, I know your struggles. I watched so many videos made by wonderful artists and
teachers when I got started. But I was always
overwhelmed because everything they painted
looked so amazing, but I just couldn't
get the same result. So in my class, I remove everything
that is less important, considered extra to advanced, too complicated or too fancy, and only keep what is absolutely
crucial and rudimentary. I also make sure to
break everything down into simple steps so anyone with basic knowledge in Procreate can actually
follow along. This class is tailored
for beginners. It's not like most
courses that are suitable for students
of all levels. This is exclusive for people who would love to create
digital artworks, but don't quite have the
knowledge or the confidence yet. Throughout the course, I will
hold your hand and we will start with really simple
things like coloring a page. Then move to tracing
our reference sketch, picking colors from
the reference to use to analyzing the steps and colors needed for
any reference image you will find later on your own. Gradually preparing you
to paint independently. I'll introduce one
painting process, the easiest and
best for beginners, in my opinion, will follow the same process for all four
are works in this class. So you don't get confused by too many methods or techniques. And when you practice making four paintings in a row
following the same method, I'm sure you'll be
imprinted in your mind. Does that sound like something
that would interest you? Let's get this party started.
2. Getting started: Before getting started,
you need to download all the assets first using
the link on the screen. Then you need to
unzip and import each Canvas I prepared
for you into procreate. These referred to all four files that end with dot Procreate. You should save all the
images as photos in your local photo app so you can refer to them easily later on.
3. Monstera: The first one is
the easiest to do. Once you learn it, you can turn any image with the
transparent background. You can get your hands-on ain't your digital coloring book. If you haven't already, just tap the most terror, effortless Watercolor
our work once to get it, import it into Procreate. Then you're going to want to tap the wrench tool than Canvas, then toggle on reference to import the image
most terrorist step-by-step and painting that you should have saved in
your photo app already. You can pinch the image
inside to zoom in or out and move the reference anywhere
you want on your screen. Step one, tap the double
square to open layers, then use Monstera final rough layer already in
your Canvas as a guide. Tap this layer wants to select it and then tap the arrow sign. Then pinch the element outward
with two fingers to make a bigger step to go
to Adjustment them, find hue saturation, brightness, and adjust the brightness
of the painting to almost white so you can see the new
colors you will add later. Step three, tablets
empty layer on top and set it as clipping mask. Make sure everything
you do moving forward will be on this layer. In procreate, everything is performed on the active layer, which is the one in blue, is always a good habit to
check back from time to time, so you don't waste your
work in the wrong layer. Step four, we need
to add a base color. Now, for this purpose, we will use the everyday
use watercolor brush. You can pick any color
you see on the screen, even if it's in
the reference tab, by pressing and holding your finger on the
color you want, which in this case is
the lightest green. Check the active color
in the color panel in the top right corner
and to make sure it is updated to the
one you just picked, because clipping
mask is turned on, you can go crazy and paint outside the border
too. If you want. The extra paint
just won't show up. Makes sure the
brush size is big, so you can do it fast. I recommend that
you go overboard a little bit just to make sure every pixel the monstera
leaf is completely covered. It's best to cover
the entire leaf in one stroke without lifting
your Apple pencil in between. Because otherwise
you will need to plan the awkward
overlapping paints. Step five, here we
will imitate the wet on wet technique digitally
by adding a darker green. Using the wet sponge dab brush. We usually move from light to dark colors in traditional
watercolor painting, right? And it's the same we're
trying to do here. You can pick your color
the same way as earlier, but you can also tap the eyedropper side and move the circle around to
pick a new color. If we follow the
step-by-step guide, you will see that we need
some slightly darker green, mostly in the center and
close to the borders. Now, moving to step six, we will now use the
fuzzy edge brush to paint the darker
parts of the Monstera. Because painting
traditional watercolor on paper is somewhat different
than doing it on the iPad. This swatch was not added to the step-by-step
illustration guide, but you can use your
finger to pick a color that's darker than the second
green swatch we just added, but lighter than the third one, which is the darkest green. I know it may seem a little tedious right now, but trust me, building up colors gradually is a great way to make the final
artwork look interesting. You don't want to spend
time learning how to create a flat looking watercolor
illustration do. In step seven, we will use the wet sponge dab brush again to add the
darkest green to leave. Don't worry if it
looks weird right now, we will smudge you later to make the new paint blend
into the old ones. Finally, step eight. Let's tap these major tool, not the brush tool, and use the brush called Blender to software and some
of the edges don't overdo it because then
we may lose some of the precious
watercolor texture we worked so hard to build. Just tap gently and
mostly around the edges. You can call it a day here. And I think it looks
amazing already. But if you can resist it, you can always introduce some additional
watercolor textures. And in this case, I'm
using add textures them three and splatter for
with a light green color. Okay, I want you to pat yourself on the bag right now because you just made one beautiful
painting in what, 10 min. Continue painting along this
class to unlock more power.
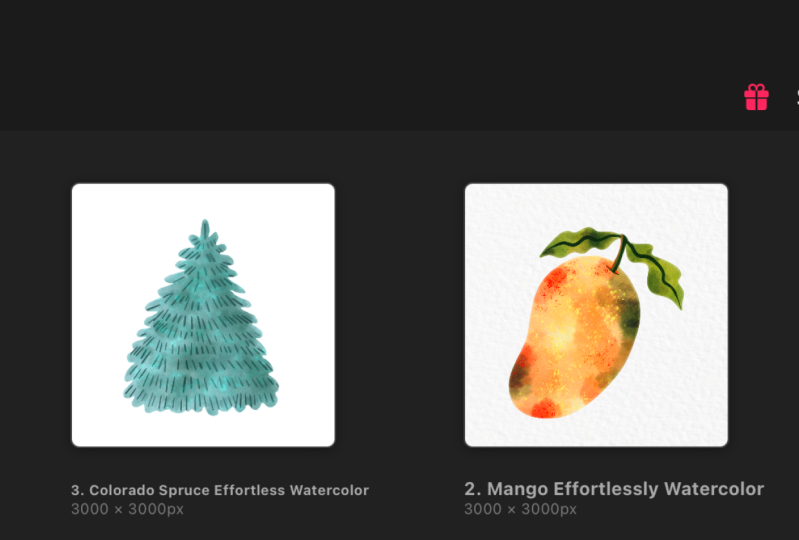
4. Mango and Leaves: It's not always easy to find perfect clip art with
transparent background, use as coloring page. So in the next artwork
I want to show you, you can trace the outline
of any imagery like and make a coloring page for yourself out of any reference. Another thing that's new we
are doing here is to separate our fruit from the
leaves on two layers. You don't have to
do that here if you prefer to put everything
on one layer. But I want to introduce
this method to prepare you for more complicated
projects in the future. Let's open the mango Canvas. Turn on reference and import the mango step-by-step
painting guide. First you're going to want to
insert the mango and leaves sketch onto the canvas and resize it to fit
the canvas better. I'm providing a ready-made
sketch for you to use, but you can directly
trace the outline of the final painting
too if you want. Next, let's add two new layers and label them as
mango and leaves. In the following step, we need to temporarily turn off the background just
to make it easier to see light colors and use the mono line brush to block sections with solid white color. Again, there are two things you need to pay attention to here. One, you must use a solid
brush like mono line, not one with textures. And two, you must make
sure not to leave any gap at all
between two strokes. The reason is that it's
impossible to fill an area with color when
there's a hole in the shape. Okay. Have you done it? Congratulations. You just made a coloring page for yourself. See, panting on Procreate doesn't have to be
intimidating at all. From now on, the process is
the same as the monstera. So now all we need to do is
add colors just like before. You're going to want to
add a layer on top of the mango layer and set
it as clipping mask. You want to toggle on
the background layer now and toggle off
the sketch layer. Let's use the everyday use
watercolor brush and the light yellow from mango
tutorial color swatches to blogging base colors. Feel free to drag the
color palette onto the canvas to make it
easier to pick colors. But you can always
continue to pick colors from the reference tab. Repeat the same steps
for the leaves. That means you're going
to add a layer on top of the leaves layer
and set it as clipping mask to then use the same brush and the
lightest green as a base wash. In the following step, you need to add a wet
wash of darker colors to the mango and leaves with
the wet sponge dab brush. Follow the reference tab
for the color placements. But in my observation, orange is used
liberally and red is used around the border
except the top right side. And plus where the
stem comes out of the fruit or connects
with the fruit. And green is used in the bottom left and
upper right corners. Moving to the leaves, it looks like green and
yellow blend into each other. If you don't place your colors exactly like how I am doing, it's not a realistic
painting anyways. So there's a lot of room for
creativity and personality. I'm sure yours will
look great too. And now it's time to add a dry and darkest details
using the sharp edge brush. Follow the guide to
see where you need to add the darker colors
or follow my video. As usual, you're going to
want to use the smarter tool and the blender brush to
soften some of the edges. Just as a reminder, you don't use the brush
directly from the brush tab, but you need to tap the
hand tool first and then select the brush
name the blender to tap, tap, tap everywhere
on the canvas to software and the
borders and edges. You can totally stop
here if you want. But you can always add
some final touches, final watercolor textures
on top if you want. In this case I'm using add texture stamps seven
and splatter five. Then feel free to
use the smudge tool again until you're satisfied.
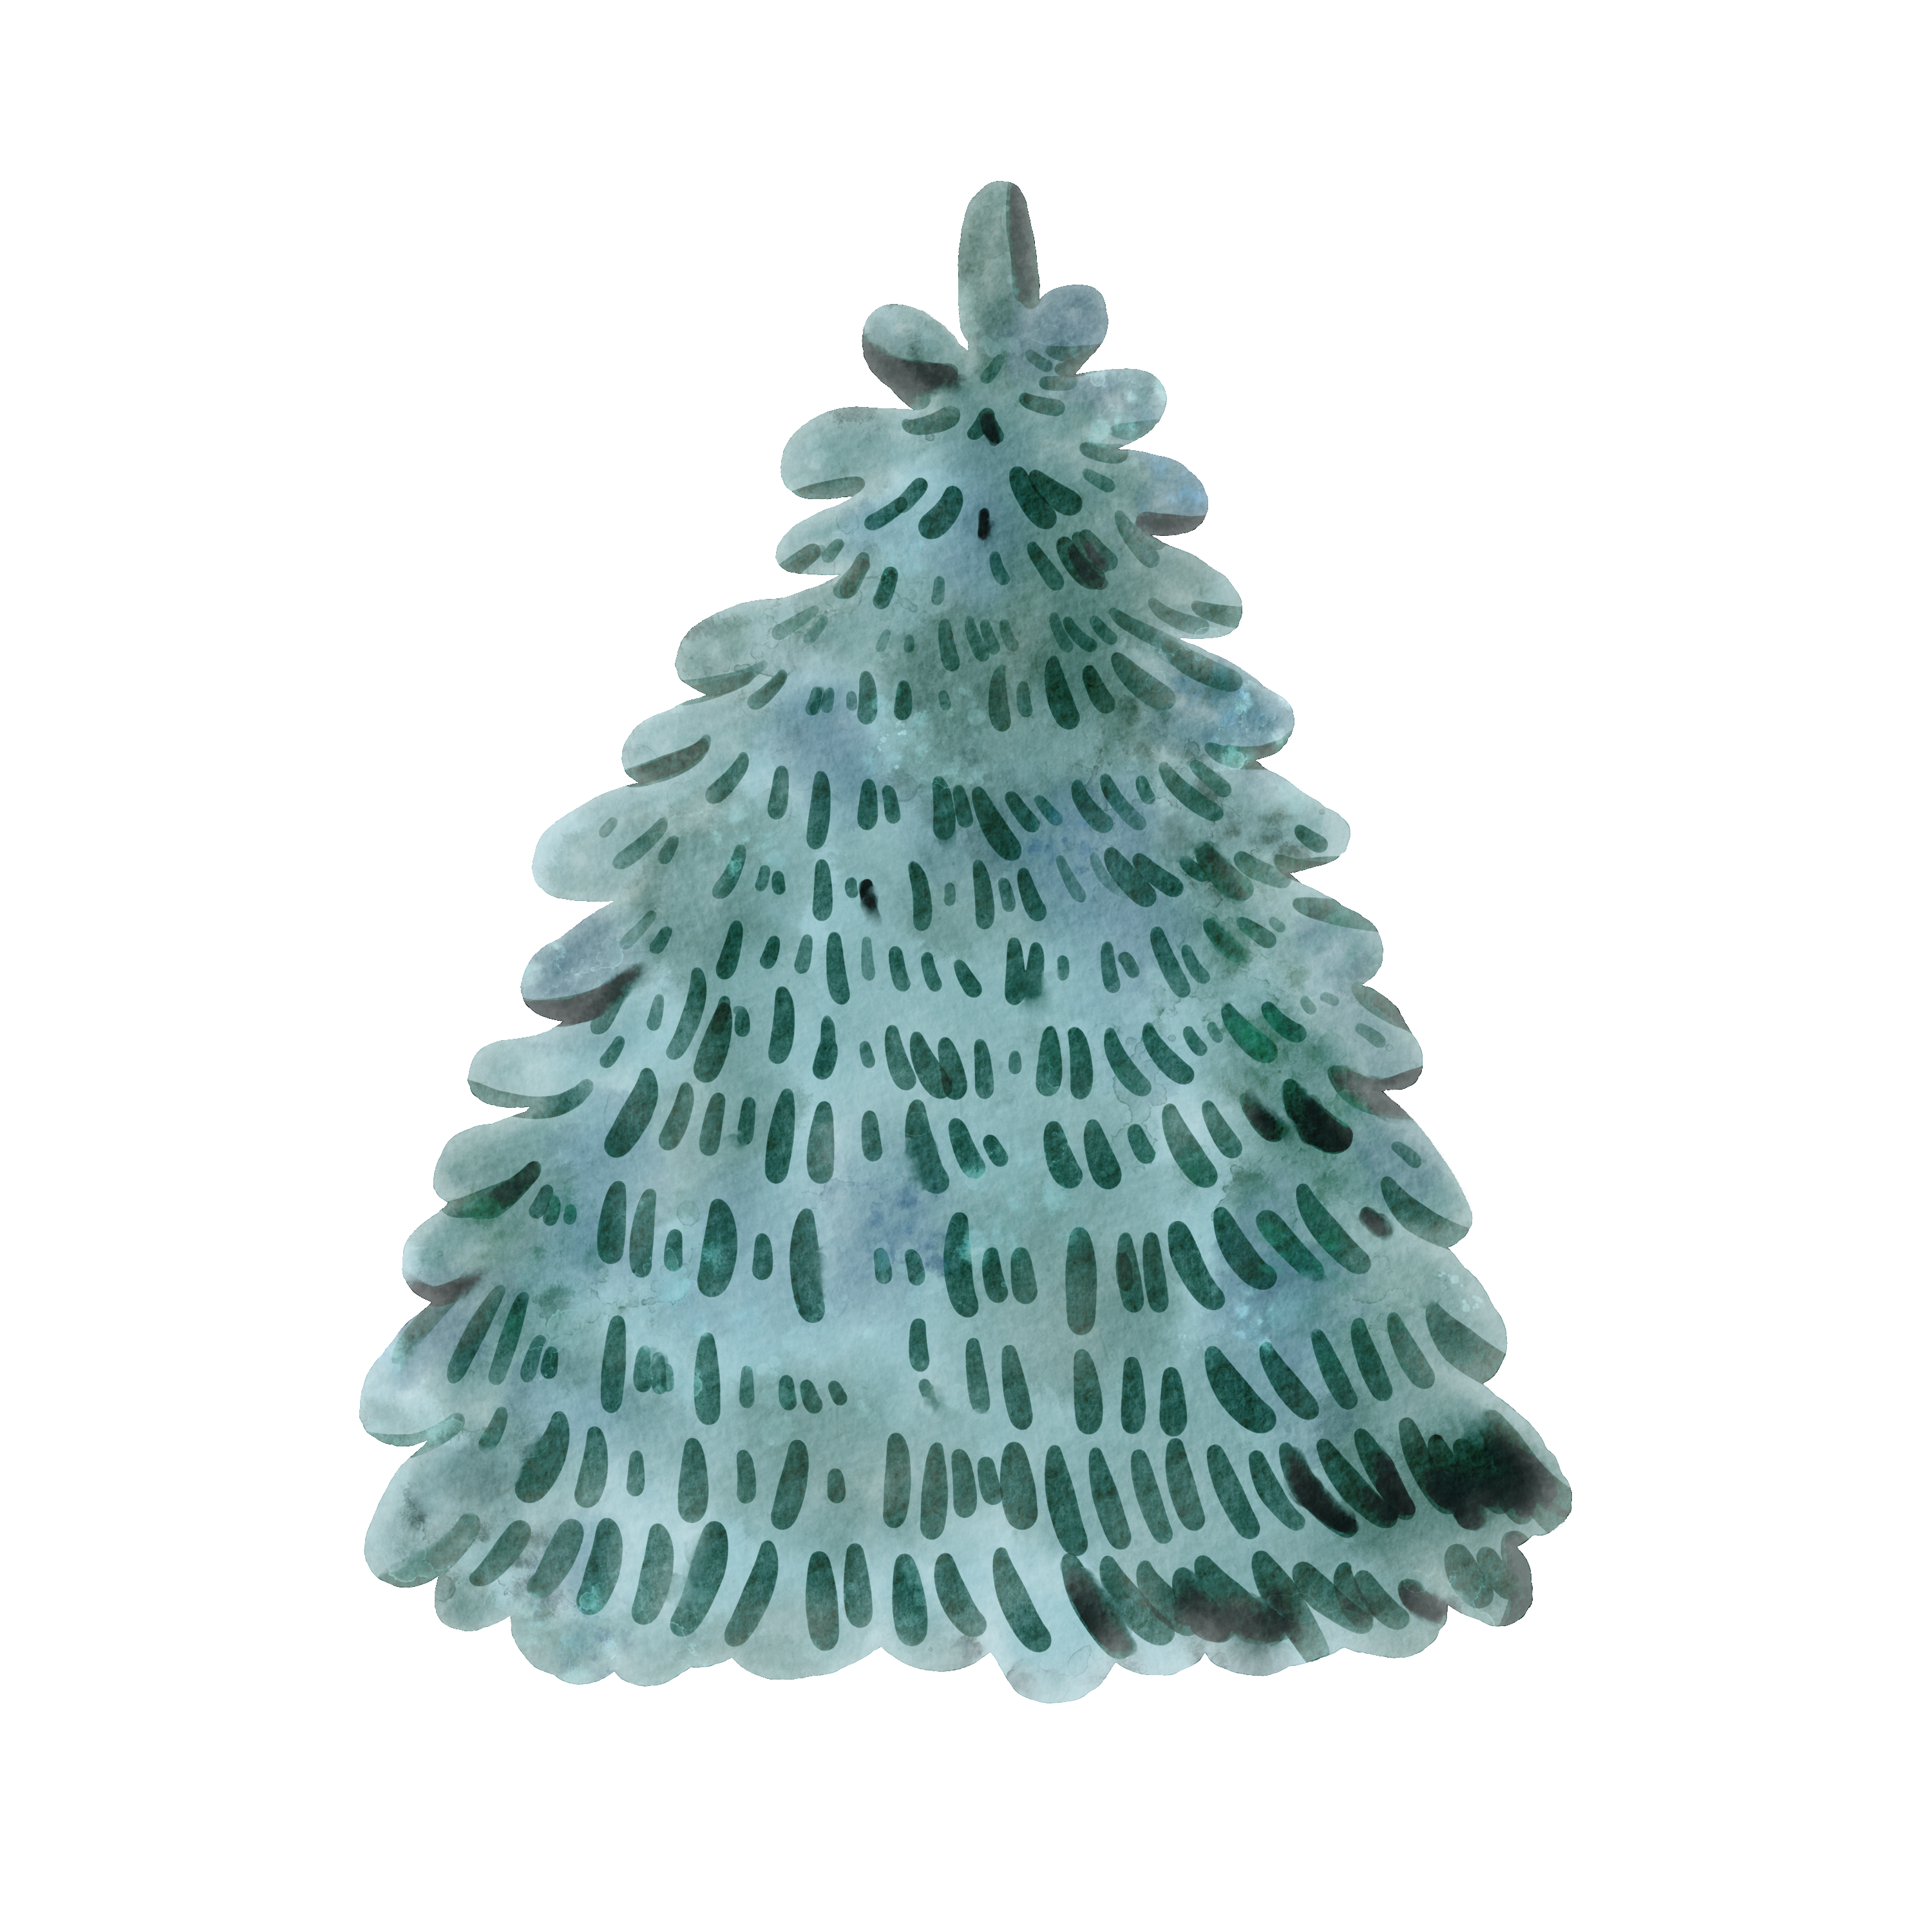
5. Colorado Spruce: You already know how to turn any reference image you want
into your own coloring page. But we relied on the sketch I provided and the colors
I picked out for you. So in this project, I'll further prepare you
to paint independently by showing you how to
pick colors from the reference image
to use for ourselves. And we'll trace the reference
image ourselves to. So you're going to want to open the Colorado spruce Canvas, insert the final stage
referenced painting and duplicate it. We will use one for planning the next steps and the
other one as a guide. Turn off the paper overlays so it won't alter the
color picking process. Feel free to take
the color palette with you by dragging it onto the canvas and use the detail eraser brush to
form a plan for the artwork. By forming a plan, I just mean deciding what colors you
want to use in each stage. Can also pick any additional
colors you'll want to incorporate in your painting and mark them on your canvas, on the planning layer. When you're done,
you're going to want to turn down the size of the planning layer and place it in the corner as a reference. Of course, you can
continue to use the irregular reference tab like usual if you prefer that method. To do that, simply
turn on the reference tap and tap Canvas, zooming on the plan
and set it aside. I'm keeping both options
on the screen for now. Okay, for the next stage, you're going to want to add
another layer on top of the guide for the
base color will use the hard edge brush now
to trace the outline of the guide layer and immediately
blocking the base color. Make sure you do
this in one stroke. It also helps to increase the size of the brush
to work faster. Don't worry if you paint over
the border because you can always clean it up afterwards
using the eraser tool. Toggle off the guide layer now to see if you're happy
with the base color. Now that we have the base color, we will move on to the
wet on wet process. You're going to want
to add a new color on top and set it as clipping mask. Again. Use the wide
sponge dab brush as usual to add a whitewash to the artwork using colors
from the second row. Afterwards, use the
smudge tool and the blender brush to
soften the edges, to imitate the look of white paint blending
into the base color. Finally, it's time to
add the dry details. Let's use the everyday use watercolor brush to
paint the needles. And you want to use the
darkest colors from the last row and blend a
little bit afterwards. When you're done, turn on the paper overlay to see how
it looks with the texture. Just like usual. You can call it a day. But if you want
some final touches, you can use add texture
stamp one and splatter one, and use the smudge tool as
well until you're satisfied.
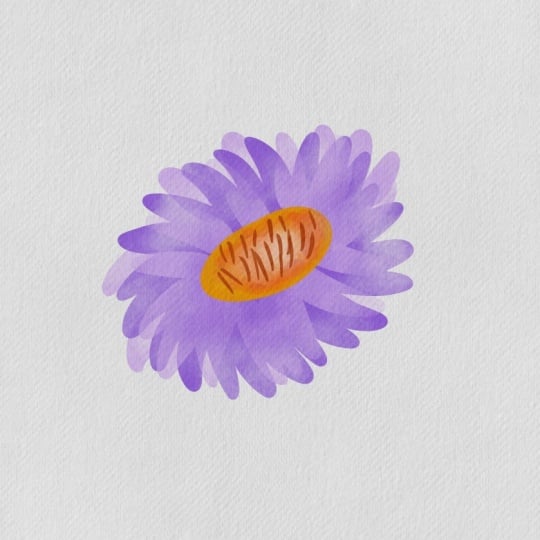
6. Aster: This final project prepares
you to plan, sketch, and paint and our work independently based off of
a reference image you find. I just want you to
know that as we approach more
complicated paintings, It's best we use more
layers to separate each step and name the
layers accordingly. This way, you can always
go back and change anything you want without
affecting other areas. I didn't force you
earlier with this because I didn't want to overwhelm you with
simpler projects, but I think you're
now ready for this. As usual, openly
asked her canvas our own reference and import
the asterisk final painting. You're going to want to
add a layer on top of the paper overlay for the
swatches and the planning. Let's use the
detail eraser brush to form a plan for the artwork. Remember, we work from
light to dark colors. If you observe the
reference image closely, you'll see that the base
wash is a light purple, and then a slightly
darker purple is added on wet and blends perfectly
into the base purple. And finally, a darker
purple is used as dry around the center
of the flower, right? Similarly, the base color of the center is a lighter yellow, and then a darker orange
is added on wet in the middle and lower right
corner of the center. And finally, read details are
added on top as dry paint. As we observe and analyze how
the reference was painted. Pick any relevant colors for
the petals and the center of the flower from
the reference tab and jot them down
on the new layer. If you have bought my
buildup flower stem set, then you can use the
stamp named flower 17 directly and skip
the sketching step, but it's not a problem
if you don't have it. And anyways, I wanted to show you how to do it from scratch. You're gonna want to use
the detail eraser brush for the stage and lower the brush opacity for
the rough sketch. Let's draw two circular shapes, but not as perfect circles. A pit, oval, if you like. And then roughly
blocking the petals. It's totally normal to look
like a mess right now, but don't worry,
you can clean it up afterwards using
the eraser tool. And when you're done
with the rough sketch, just increase the
opacity of the brush again and define the sketch. Okay, now you're going to
want to lower the opacity of the sketch layer so that you can see where you're going
to paint later better. And then you should add
two new layers below the sketch for the
base colors of the petals and the
center of the flower. Use the fuzzy edge
brush to blocking the base color and make sure
you do this in one stroke. You can always bring up
the size of the brush. If you want to do it faster. Then use the Eraser tool
to clean up mistakes. Repeat the same process for
the center of the flower. In the next step we need to add a whitewash to the petals and the center of the flower
with a wet sponge dab brush. You need to add a new layer for each part of the
flower on top of their base color
layers and set them as clipping mask and then
add the wet paints there. Then as usual, use the smudge tool and the blender brush to
soften some of the edges. And finally, for dry details, you're going to need to add
a new layer for each part on top of the white layers and
set them as clipping mask. Then use the hard edge brush for the details and play around
with the brush size and opacity to find the
settings you love and follow the reference image
to add the final colors. As usual, if you want, you can always add
a layer on top and add some additional
watercolor textures, the ones that I'm using today. Or add texture stamp
for and splatter for.
7. Recap: Let's do a quick recap. In order to keep
things manageable. I strictly followed the base color or
whitewash dry D cells and final adjustment process. The beginning of every project looks quite different
because I wanted to prepare you gradually from adding colors to an
existing coloring page, to creating your own
coloring page from a reference to tracing the outline of any
reference image, to picking colors
from paintings, to analyzing each step
needed in making an artwork, to make your own sketch, and finally to putting your own colors and
paint on paper. Feel free to watch the videos as many times as needed
and follow along.
8. Next Step: Now you must be wondering
what's the next step? Well, what I showed
you in this class are the easiest and most
important techniques. But I'd love to show you more so you can take your creative
journey to the next level. I'm in the process of
making new classes. And other than
watercolor techniques, I can also show you how to incorporate watercolor
in lettering. How to use mixed
media or a paint with other mediums
digitally or on paper. If you're interested in learning how to make a living
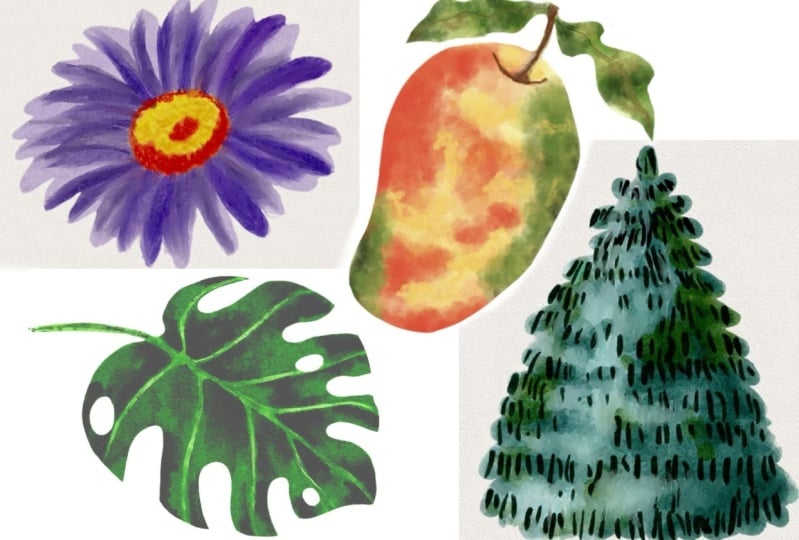
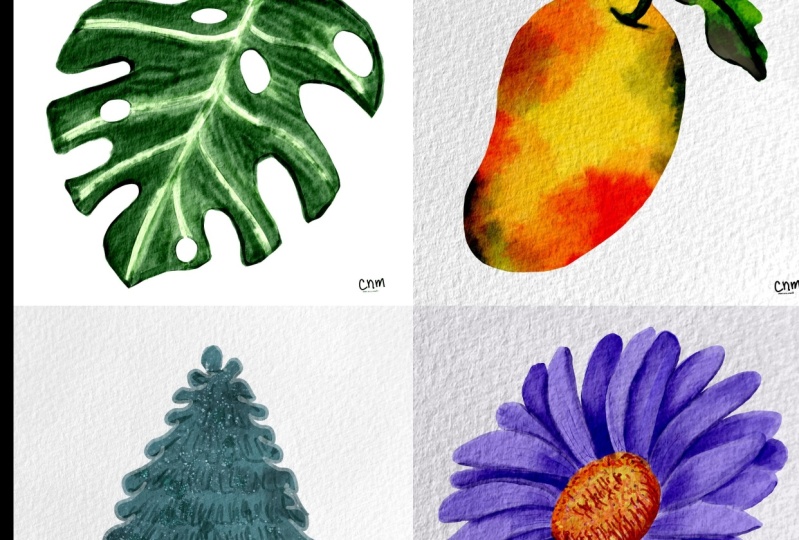
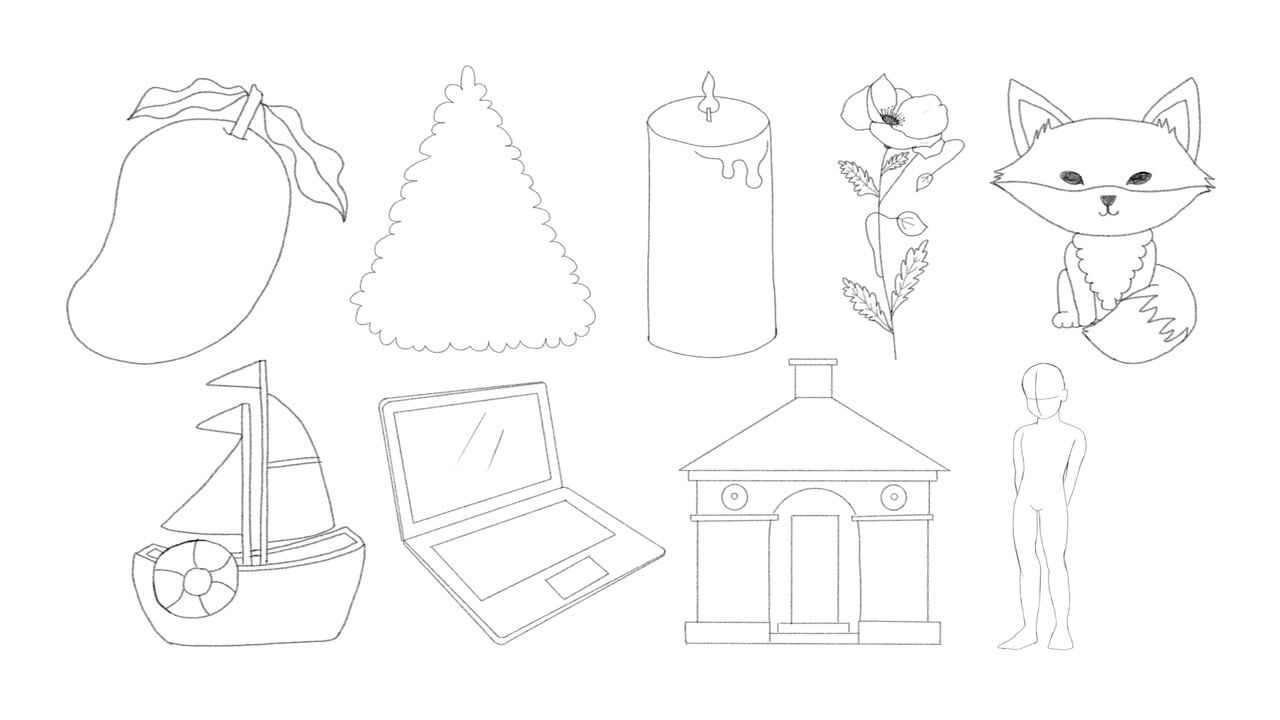
as an artist, I have a question for you. Why do you think I chose these four subjects
in this class? I tropical leaf of fruit, a tree, and a flower. Leave your answer in
the comments section, and I will reveal the
answer in the next class. If you haven't guessed already, I'm recording a new
class that teaches you how to prepare
illustrations for clip art. How to make patterns out of your previous illustrations
for graphic design. How to turn one our
work in Germany by changing colors,
shapes, et cetera. So you can work
smarter, not harder. And the best platforms in my personal experience
to sell your creations. Let me know in the
comments what you are most excited to learn next and make sure to follow
me so you can notify next time I
publish a new class. I'd love to see what
you've been painting, so I'll make sure to submit
them in the project section. If you wanted to be
part of a community, you can post your work
on Instagram and tag my new account at Millie
Procreate bundle. You can also find me on TikTok
with the same handle if you'd like some additional
quick tutorials and procreate hex. If you're interested in
longer form tutorials, feel free to go to YouTube
at Procreate bundle if you'd like my
watercolor brushes included in this class, I'm sure you're being priced by the quality of my other
brushes and stamps. Check them out at
Procreate bundled.com. Happy creating Until next time.
 Millie ProcreateBundle, Artist, Procreate Brush Developer