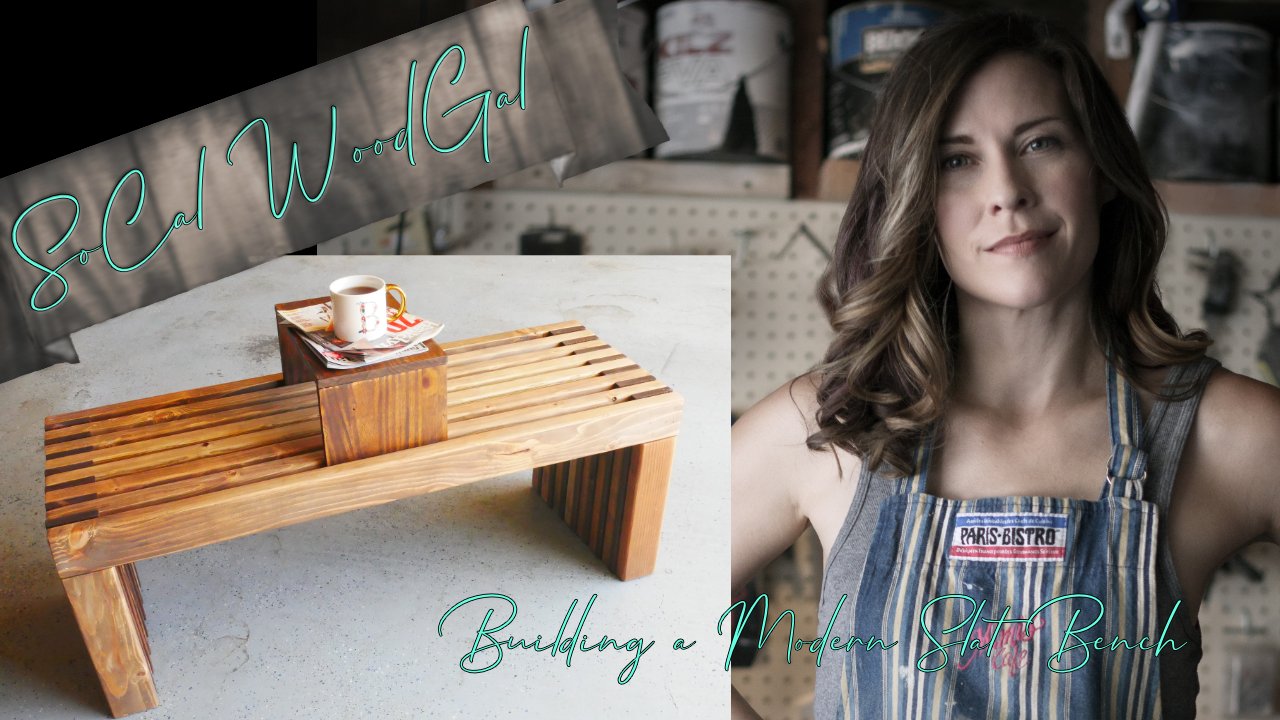
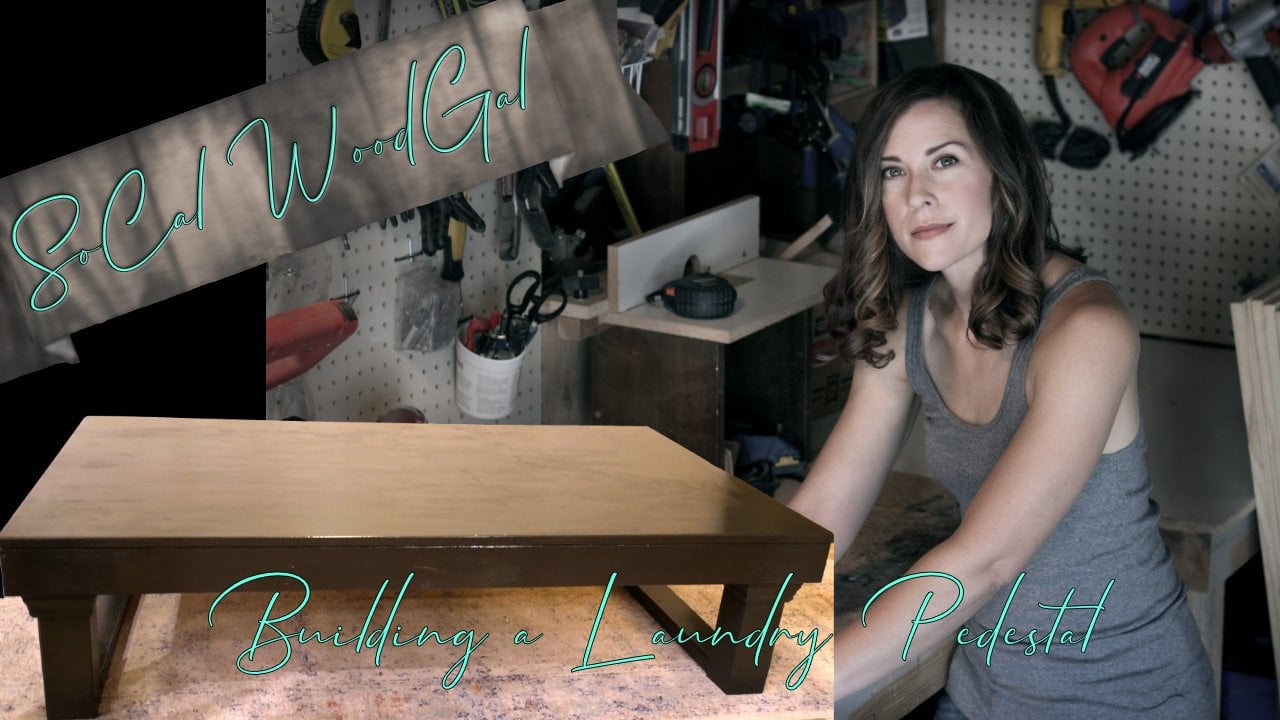
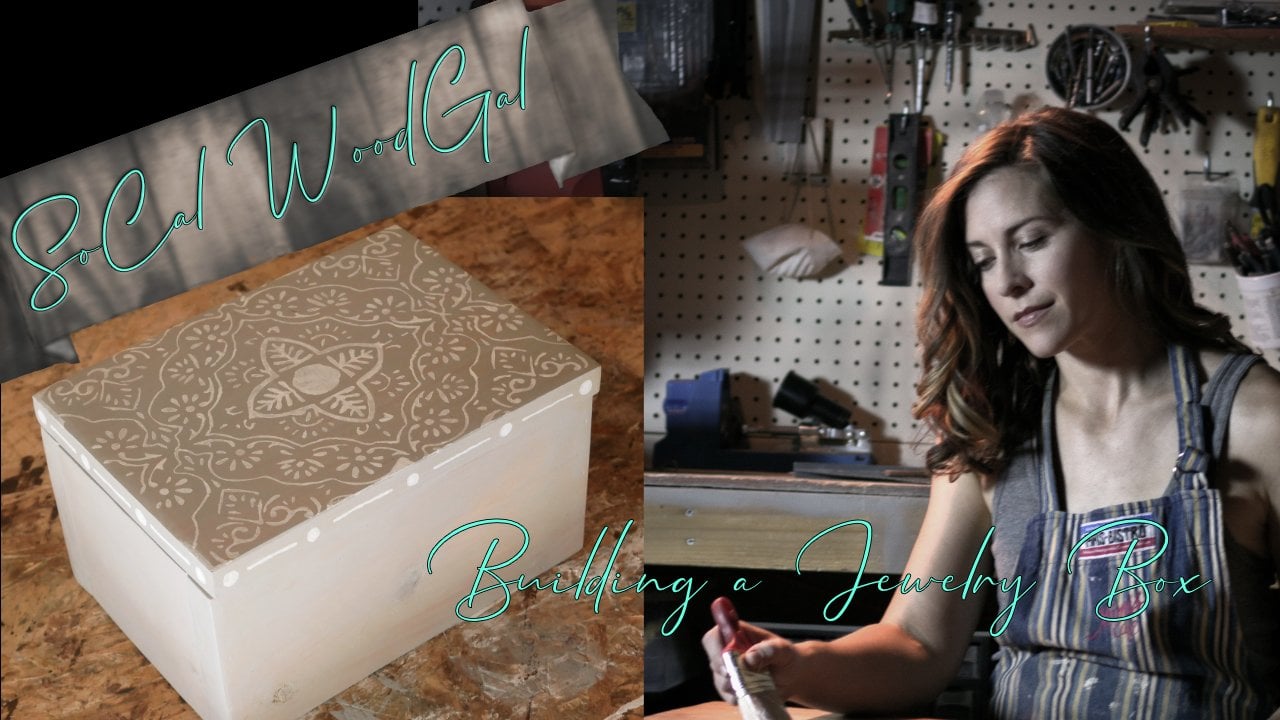
Transcripts
1. Intro to Building a Simple Table: Hi, everybody So called would gal here again for your second lesson building a simple table. Has this ever happened to you? Yeah, that's right. I forgot about that. 00 you're her roommate. Oh, I totally forgot about that. You guys guess what I started and SC shops. I'm a I'm selling trash that I found on the streets, and it's it's kind of going pretty awesome. Peter would have been up to Oh, uh, well, I I think I told you guys I recently went vegan. Yeah, it's ah, super hard. But I'm at my ideal weight. So I guess it's worth it for the animals. Of course. Pretty What do you have to? Oh, uh, not going vegan, that's for sure. I stay busy. You're always busy. What's new? That's not fair, Peter. Sometimes I rest. Yeah, right. That'll be the day. Why the cat mouse? Tell us what's up. Okay, fine. I, uh I build a coffee table coffee, coffee table you built yet with your hands and power tools? Yeah. What suit? You're literally standing right in front of it in front of it in front of it, where they're here. Oh, did that print me how you're like Michelangelo. Her woodworking angel. Britney, Huh? I totally underestimated you. It's incredible. Thanks. So cool. Depression had a coffee table. I like it. Okay, You're so lucky you can't have a table better. It's like courts. No. Well, let's fix that. Today's class is all about tables will start with the why and the types of tables planning your table dimensions for your space. Sketching your table, gathering your tools and you're would making your cuts, assembling your table and types of finish. This class is for anyone interested in building their own table. No prior experience is required, but you do need some basic tools. A drill saw measuring tape I hear and lung protection and a speed square. Optional tools include a miter, circular or jigsaw, a pocket whole jig and glue. If you need some more guidance, please don't skip out on Class one. Setting up your wood shop. I go over everything you'll need for this project. These classes are meant to build upon each other. One of my first builds when I set up my woodshop was a Pottery Barn style coffee table. That's the one that you saw in my overproduce short film that won the Tribeca Film Festival Audience Choice Award. Yeah, What's that? A short film is far too much effort for a skill share. Class on woodworking. Impossible. Moving on. Join me because today you're going to build a simple table.
2. Why A Table?: Let's start with why you're here. Tables. These are the workhorse of your home. They get more use than any other piece of furniture, and their variants are endless. You've got your dining table breakfast table, coffee table, craft table, desk also a table workbench, laptop table, shoe shelf. All of these are tables and minus the dining table. I made all of them. Oh, yeah, I guess you could call me the table zealot. That sounds like a feature film. Excuse me. I gotta go write a script. Who? Okay, I'm back. Table mania side tables air simply cool. With fairly minimal building on your part. You create something that is not only wicked, beautiful and functional, but it's hella impressive to your friends. See my Oscar nominated short film in the intro and also the table zealot starring Anna Kendrick in theaters this fall. As you advance in woodworking, you're still gonna be making tables because they're just that indispensable. You'll move on from basic builds into more intricate designs with interesting supports, drawers and even moving parts. Listen, I don't think I need to convince you more on this, so let's just get started on this project
3. Nominal Dimensions: all right, This is just a little sidebar on nominal dimensions of lumber just to mess with your head. The numbers that are identifying your would at thestreet ors. If you goto Home Depot or Lowe's and the United States, they're not actually the dimensions of the wood. Sure, when it's first milled, it's that size. But then, as the wood dries, it shrinks and it becomes a different dimension That's called nominal dimensions, and they're mostly as follows. Ah, one by is actually 3/4 inches thick. So when you have a one by three that's actually 3/4 in just thick by 2.5 inches. A two by four is 1.5 by 3.5 inches. One by 3 3/4 by 2.5 1 by 2 3/4 by 1.5 1 by 4 3/4 in 3.5 and so on. Now here's where it starts to get a little bit tricky over six inches, and you start to see the measurements changing. So a one by eight is actually 3/4 inch by seven and 1/4 inch, one by 9 3/4 inch by eight and 1/4 1 by 10 3/4 by nine and 1/4 inches. And with your to buy lumber, it's the same thing as the one by a two by two on up to two by six is half an inch less than one. It's actually called, but to buy eight is 1.5 by seven and 1/4 inches to buy. 10 1.5 by nine and 1/4 inches. I know that it's wonky, but you're going to get used to it after you do it for a little bit. And if you're like me, you will always have a trusty pocket tape measure with you whenever you go to the store, so you can always double check your measurements, so let's look at a one by two. This is 3/4 inches thick by 1.5 inches wide, one by two If you look at a two by two, it is 1.5 inches thick by 1.5 inches white and if you ever won by four, is 3/4 inches thick by 3.5 inches wide. Moving on up to your two by force 1.5 inches thick, by 3.5 inches wide and so on.
4. Planning your Table: a lion share of the work, and any build goes into your planning. Poor plans mean a poor build and a huge headache for you and also wasted would so take the time to get it right. It is a little bit difficult to take you on the planning journey because I don't know exactly what you're spaces, but I'm going to attempt to give you the tools to adapt to whatever it is that you're working with. You'll start by measuring your space. For example. I will be building a simple side table, and it's going to go right next to my couch. The space next to my couch measures 12 by 15 by 24. This is the space you have to work with. If you're building a dining table, first of all, good for you. Hello. You would measure the open space in your dining room where the table would sit. If it's a desk, measure the wall space you have open to push it against. There are definitely common dimensions of tables, and although when you're building things, you can pretty much do whatever you want, it can help to use standard dimensions. It takes some of the guesswork out of it. So, for example, it's good to know that the standard depth of an office desk is about 24 inches. If you went too much longer than that, then you'd have wasted space on your table and too much distance between you and the computer screen. Ah, coffee table usually is about 16 to 18 inches high, much higher than that, and it's awkward to sit around and prop your feet up on. By the way, don't ever do that my beautiful coffee table. So now that you know the dimensions of your space, click on over to anna white dot com, our shanty to sheik or any of the other woodworking sites that you've been pinning on your Pinterest page and find an example of the table you'd like to build that's relatively within the dimensions of your space. This gives you a great starting off point. You'll adjust it to fit your space exactly, but it helps to know the style of table. You like the amount of shelves. What kind of supports etcetera. Now let's talk about the different parts of the table. There are the legs, the supports, shelves, drawers now for this build. Let's just skip doors there really hard. Trust me on this, the top and what's called the apron. This is what's underneath the table top that acts as a supports and a link between the two legs that would be like this. Here's your legs and here's your apron. The heavier and larger the table, the thicker the legs need to be So. For example, my coffee table is a beast, and it's made up almost entirely of two by force my pub table. However, it's a little more life, and it uses two by twos. My desk needs side, so there are no legs, just large panels for my side. Table two by twos will work just fine. Now let's talk about how Maney supports are needed. If it's a very small table, such as my side table, no supports. Outside of the aprons under the top are needed. I will be using support, but they are not necessary for the functionality of the table. The bigger your build, the more supports are needed across supports are a good, sturdy way to support your tabletop. Making them into an X is a little more decorative but it also provides a little bit of stability to your table. So let's think about if you want any shelves. If you have a coffee table, for example, you might want a bottom shelf so that you can put books and different things there for storage. If it's a shoe shelf, you'll probably have one or two shelves, depending on how many shoes you want to store there. If it's a desk, you will have all kinds of shelves. Nothing but shelves. Now your talk will generally overhang the apron and the legs by 3/4 of an inch. So whatever your spaces that you're building for, subtract 1.5 inches from both front and back and the sides to get your measurement for the base of the table. That just means 3/4 inch on every side. So, for my example, build my space is about 12 by 15 minus 1.5 inches for each means 10.5 by 13.5. This is the base measurement. The top measurement is just what your open spaces. Let's talk about tops. There is a variety of ways to build a tabletop. You have separate pieces of wood joined together, so it looks kind of like a butcher block top. There is even panels that you can buy where they've already done the work for you at the store. There's plywood sheets and melamine tops. So what I want you to do is just think about how you're going to use this surface for my rolling workbench. I wanted to make sure would would slide really easily across it so I could passed through. Plywood from my table, saw onto that as an out feed table. So I needed a really smooth surface. And melamine does the trick just right. But melamine also is prone to chipping. It's not really all that attractive, and it's hard to screw into, so it's not a great option for everything, but it was right for that side note. See my video on the out feed support table on YouTube. I'll link it below for my pub table. I actually cannibalized an old particleboard top from a cheap like came or coffee table, my sister and given the years ago, I cut it to the size that I needed, and I stained it, and it works just great for my media center. I did use a panel for that. And then I bread board of the ends, This insurance stability and far less chance of warping over time for my side table. I'm going to use this piece of panel I had sitting around in my shop. So now that you know your dimensions, the next step is to sketch out your project.
5. Sketching your Table: Okay, so we're gonna sketch our table. If you've printed off a plan from a site, please feel free to use their drawings. But I really like to sketch out what I'm going to build. So I have a really clear idea of the cuts I'll be making. You can use sketch up. That's a Google app. I believe that's free. I do not have enough patients to use sketch up, so it wasn't for me. But it may be totally your jam, so check it out. There's other things online that you can check out as well. It's up to you. It's really what works for you. Me, I still use a planner that is hard copy, and I fill in everything on there myself. I do not use online one, so that's really just kind of the way that I work. I am no artist, as you will definitely clearly see, but I do need a visual representation of how this table will be put together in order to really understand how it works. So for me, if you fall along, take out a plain piece of paper, it doesn't matter what it is. It could be printer paper, yellow pad graph paper, paper, grocery sack your homeowners insurance. Whatever. I do like to use a ruler, so I don't get too wonky on my lines cause I'm incapable of drawing straight lines. I'll start by drawing the top, try to get a little bit of the angle here. But it's not a deal breaker. If what's on the paper cannot actually exist in the physical world, this is just for you. It's okay. And I definitely drew this at the wrong angle. That's okay. Attempt to put the thickness of the top there so that you know what side is facing you and then draw the legs in. Okay, so this leg is clearly didn't know what I was doing here. We're just gonna ignore that leg, and then I cannot find an eraser. Note to self. Always keep in a race or in the garage as well. This is not an art studio. It's a woodshop. We're just We're gonna ignore that leg. Okay. Onto the aprons. These air, usually one by threes, but can be bigger depending on how big your table is. A dining table would be more like a one by four. I've even seen two by twos and one by twos is well, it just depends on your table and kind of the look that you want to get. I'm gonna go ahead and fill these guys in so that it covers up some of my botched drawing on here. And I know that it's a separate part of the table and then you can add in any kind of supports or shelves. Now you have an idea what your table will look like. It's kind of exciting, right? I'm going to run your fun. Now it's time for arithmetic, electric calculator or longhand right in your margins. Because this part is very important for your table. You cannot make cuts until you are a 100% certain. These air, your measurements and just a P s A. Don't forget. These are measurements for my table. Yours may vary. Plug in your numbers and your sizes of legs, etcetera, not forgetting nominal measurements in order to get accurate planning. So, as I stated earlier, my tabletop is 12 by 15 inches. All enter those here putting a row. So I know what number is for what side. I know that my legs are two by two and 23 a quarter inches long. Because my available spaces 24 inches high and I subtracted the 3/4 inch of the tabletop from that number, that leaves me my leg height. And now here's where the math comes in. Figure out your base measurement first. If my tabletop is 15 inches long and I have a 3/4 inch overhang, then the width of my base is the tabletop length minus 1.5 inches. That's 3/4 inch overhang from each side. That's going to give me 13.5 inch with then for front to back. Or you can call it the depth of the table, going to take the 12 inch measurement from the top. And I'm going to take 1.5 inches from that, which is the 3/4 inch overhang from front and back, and that leaves me with 10.5 inches. So my based measurement is 13.5 inches by 10.5 inches, so the apron will be calculated from that measurement the base measurement minus the width of your legs. So with my two by twos, which remember, are actually 1.5 inches by 1.5 inches because of nominal measurements. I take that base measurement, and I subtract three inches, two legs at 1.5 inches each. That is the measurement of both your front and back apron. And I completely botched this whenever I was first labeling the measurements. So I had to go back through and recalculate and edit the numbers that are on the page that please ignore that and just look at the final numbers. If I take my based measurement of 13.5 inches and then I subtract three inches for the legs each leg, I am left with 10.5 inches. That is my front and back apron now for the side aprons. If you have a square table, lucky you. Your math is done because all the aprons will be the same length. Mine is not. I do a similar math for the side aprons. Side based measurement is 10.5 inches. I take away three inches for the legs, and I am left with 7.5 inches. So now my side aprons are 7.5 inches long and now for my table top, which I mentioned before in the planning stage is just your open space and minus 12 by 15. Now, if you don't have any supports or shelves, you are totally done. Congratulations. You can move on to the next lesson after writing down each piece of woods dimensions. If not, bear with me for a few more math problems. So for your supports, if it's just across being that's pretty simple. It'll be the same length of the apron since it spans the same space. If you're doing an X, that's a bit fancier, and I like to measure and cut as I go, all demonstrate that in the bill demo. So don't worry too much about the dimensions for that now. Just plan on having some extra wood for that part. That could be around 4 to 6 feet, depending on how tall your table is. So I just wrote in You can't see it on the paper extra for cross supports of two by twos for your shelf. There's a few ways that it can be attached, and that will determine the dimensions. Here's some basic attachments. What's easiest is screwing from the outside. You can counter sink your holes so that you can then fill it later because the screw head will be covered up with wood filler. With this yourself, dimensions will be the width matching the front and back aprons, but the depth will be the same dimension as the base sitting flush with the legs. Unless you wanna offset it a bit, then you just subtract that amount of offset from the base depth measurement Slightly more complicated and more tools are needed is the pocket hole. This will be the same as the dimensions of the screw from outside option, but with this one, you won't have visible holes. This is better for a stain project because stain always looks weird over wood filler. This is what I'll be using in my project. Another option is an adjustable shelf. I have a shelf dig that makes simple work of this, but you can just measure carefully or make a story stick, or even use if he's a big board to ensure even placement on both sides. Now, if you choose to do this, your shelf dimensions will be the same as the others minus 1/4 inch from the length to allow for shelf pins. The depth is the same. Ah, final option. That's more work, but nicer looking is cutting an ill notch in the corners of your shelf. It looks more built in this way. You're dimensions change a bit. Here you're with is the same as the base measurement, but your cutouts are matched to your legs. I'll demonstrate that in the bill demo. All right, guys, you are almost done with planning. Your table of the final step in planning is to make your cut list. This is so you know, for every single piece of wood, what you're going to cut and how much you need to buy at the store or just a little bit more math. Here I have four legs at two by two by 23 a quarter inches long. I absolutely 100% pulled out a calculator for this. I took 23.25 times for gave me 93 inches, so I need 93 inches of two by twos. An eight foot stick is 96 inches, since this is about three inches less than that I think I'll be just fine with 18 foot long stick of two by two. However, if it was more like 95 inches, I would go ahead and get more wood than 18 foot stick. I get a 10 foot or I'd get to six foot. It just kind of depends on the pricing and and how the cuts workout. So, for example, if you were to have two cuts at 48 inches each, that would not work for 1 96 inch long. That's eight foot long piece of wood because there's going to be some waste from the blade . It's, I don't know, maybe about an eighth of an inch. And that's called the kerf. So you always want to plan for a little bit extra. That's going to go to waste because of what the salt takes out of the wood. I hope that made sense. That was really hard to explain. Sorry. So I do have my two aprons at one by three by 10.5 inches. The correct measurement that I put in What I did then was I took 10.5 times to which is 21 I took 7.5 times two, which is 15 and I added those together, which makes 36 inches. So I have a total of 36 inches of one by three is needed. I'll be just fine with a one by three by six foot stick. And then, of course, I have my panel top at 12 by 15 inches and again, you can't see it on their. It just says extra for cross supports. That's two by twos. You'd want to go ahead and add in your shelves to this cut list. I do not have it, so I don't have it listed on here and then just add up the total length of each of those types of woods. So as a side note, depending on the width of the wood, they usually come in varying lengths. There are sometimes three foot length, four foot six foot, eight foot, 10 foot and 12 foot again, depending on which type of wood it is. Some of them are a little more limited in their lengths. A panel. I would just need one panel for this again. I'm using scrap, so it's It's the amount that I need, But I would just buy one panel for this cause. It's usually sold in a two foot by four foot piece, sometimes a little less or a little more. You could make the shelf out of that as well. So now let's move on to the last step before you start cutting your wood, and that's gathering your wood and tools.
6. Gathering your Tools and Wood: you were so close to starting this project. I'm already getting excited about building this site table, but before you begin your build, you're going to need to gather everything you're gonna need for this project. You're armed with your measurements, and you have the amount of each dimension of wood to buy. So now it's time to head to the lumber rack and pick some out. I used mine for almost every project I build. It's a softwood, so it's easy to screw into and cut. And it's also the cheapest option out of all of the wood at the store. If you're going for a different look and you want to spring for a little more K sh, then you can go with cherry poplar, redwood, cedar, whatever's at your store. By all means. Go for it. Just know that most of these woods are sold by the linear foot, not per eight foot piece like pine is, so you'll have to do a little bit of arithmetic at the store. Most of my lumber buying takes place at Home Depot because I live right around the corner from it, so it's really convenient. But lows is a fine choice. We do have a local lumber yard, but I've never been because it kind of intimidates me and to you don't get to pick out your would. So you can't go through and make sure that you don't have worked pieces or anything like that. They choose it for you. I do like to thoroughly choose each piece of wood, so I guarantee that the only thing that's gonna screw up this build is me. As I referenced in Class one setting up your wood shop, it is very important that you do the arrow test on every single piece of wood that you buy . Also check the would thoroughly for cracks or damage. It's amazing what they're going to try to sell to you now if you don't have a saw at home yet, you might consider having your pieces cut their at Home Depot or Lowe's. They'll do three cuts for free. I believe any more than that, they're gonna charge you a little bit, and you might have to come pick it up later. But that might be a good choice for you if you don't have the sol or if you don't have the place in your car to transport the would just be super clear with them the cuts that you want on each piece of wood and asked to keep the remnants because otherwise they'll just toss them into the lumber discount rack, and you're already paying for that would. So you keep it all and start building your scrap pile. Oh, there's even a place in the molding ill at my Home Depot that has a stand in a handsaw that you can use to cut your pieces. But that's a bit of a pain. Now that you've got your would, let's go over your tools at home for this project. Here are your must drill. I saw measuring tape, I hear and lung protection Speed Square. You're optional tools for this project. Ara miter, circular or jigsaw, A pocket hold jig and glue. I mentioned the pocket hold JAG in the planning video. I use pocket holes on pretty much every project that I build because the joints are really strong and the attachments are hidden underneath the wood. I started with the simple jig. This is $15. No sweat. The bigger version is $100 but I made many, many manning many projects with the single jig Look up Craig Pocket hold gigs as well as their other tools. I love Craig tools because they're super innovative and they're easy to use, and they take a huge amount of the guesswork out of your builds. So once you have all of these things in place, you are ready to start your build. I am so excited for you. Now, please note we are not messing with Sanders or staying at present, because that's gonna be the next lesson. It's going to be a super induct class on all types of finishes, so let's just leave it out for this one.
7. Cutting your Wood: Okay, now that you have everything ready to begin your table build, this is where things start to get really exciting. But before anything, let's get our safety on lung protection with a mask, eye protection with goggles and hearing protection with either earplugs or earmuffs. If you have been unable to source a miter saw, you can use a handsaw. Your cuts won't be quite as accurate, and you're going to get biceps galore, but it is an option. You're cuts will follow the same pattern as with the miter saw, and the same goes for the jigsaw. Are the circular soul. You'll just be using a different tool? Start with the legs. You'll have your measurements in front of you for my table. My legs air 23 a quarter inches long. I'll take my measuring tape and hook it on the end of the two by two and mark a small line where the measurement ends. Then I'm gonna take my speed square and mark a perfect right angle on the line spanning the width of the wood. Next, I'll take my leg to my miter saw. I'm gonna press the wood against the fence and then all measure one more time, nudged the wood into place until the saw blade hits on the outside of the line and then pressed it up against the fence once more and make my cut. You'll do the same thing with your hand saw or Jigsaw. I'll repeat that process for each of my four legs. After I cut each piece, I'm gonna go ahead label marking the peace what it is if it's a leg or apron, sometimes even the dimensions. That way, I don't get confused when I go to assemble it. You consent enough later, so don't worry about that. So next let's cut our aprons. If you have a square table, all four will be the same exact dimension. Mine is a rectangle, so all start with the front and back aprons. My friend back aprons are 10.5 inches long, so this is gonna be the same processes before measure twice. Cut once and now to the side aprons Minor 7.5 inches long. Rinse, wash. Repeat. So we're not gonna worry about the X Cross being that I want to do until the build. I can cut it as I go when I get there, and you're gonna find about the much easier process. If you have a straight across being, then you already know what the dimensions are. It's gonna be the same as whatever the apron is above it. Cut that as before, and your last cut is the tabletop. I'm using a panel because they're easy, and it's what I have sitting around mark both your length and wits on whatever would it is that you're using minus 12 by 15. This one likely will be too big for your miter saw, so we're gonna head on over to a different saw. For this part, you can use the jigsaw a circular, saw, a table saw or even go back to that hand saw. If you want to keep on getting those bulging arms, my preference is always the table saw, because it will always give you the best, most accurate cuts. And it's the easiest out of all of these, but it's likely that you don't have a table. So yet, and that's okay. Just start working up towards it cause you will love it. Here's the cut with the table saw. Make your mark and line up the blade to the outside of the line that you've put lock in your fence flush to the side of your would. Now, before you turn on the saw, ensure that your wood is not against the blade. Then slowly just push it through the blade until the wood has passed all the way through and use the push stick if necessary, for safety. If I have more than a five inch cut, I do like to set up offense on the wood to guide my jigsaw for a straighter cut. It is a huge pain. I'm not gonna lie to you because you'll be clamping for 10 minutes straight to get it right . But until I magically get a steadier hand, a jigsaw cutting this is gonna have to dio hold the jigsaw on your table. Top peace and line the blade up to the outside of your mark. Place your one by two against the edge of the jigsaw base. Make a mark where the wood fence sits. Clamp down this side, making sure not to encroach on the jigsaw. Nudge it until that thing lines up. Check your blade alignment one last time and make any final adjustments, then make your cut to the end of the wood. And here's the circular saw. I do much the same as the jigsaw with this because I do want an accurate cut. And if I do not hold it, study. Keep yourself unplugged, pulled the blade. Guard down while you line up the blade to the outside of the line on your table top. Place the wood and mark where it sits. Use a right angle and clamp both ends and then cut the wood until the very end. Now, each of these I've demonstrated just one cut, but you'll be cutting twice, once for the length of the tabletop and the other for the width. So check your measurements that your first length cut was correctly done and then mark your wood for the width, and now you just got to repeat that process. You might want to make X marks where the would will be discarded so you don't get confused as to what is the part that's going to be cut off of the wood. This isn't so much of a problem when you have smaller pieces, but when you get a big one, it gets a little bit confusing of what part you're keeping and what part you're throwing away after you have major length and width cut measure one last time to make sure you did it right. And if not totally fine, I do it all the time. Trim off a little bit by little bit, so you don't end up with less wood than you need. If you have shelves, cut them now as well. The length and width is going to be the same process as the tabletop, just different dimensions.
8. Assembling your Table: you guys. This is my absolute favorite part of woodworking. Hands down. It's like when you learn your basic chords on guitar, and all of a sudden you can play a song and you feel like Jimi Hendrix. It's amazing you start to see your table take shape very quickly, and it's immensely satisfying. But before you can build, we need to talk about the different types of joinery I mentioned in the planning videos and common types of joints. My preferences pocket holes, and that's what I'll be using on this table. But you can also attach pieces by screwing the men from the outside and using a counter sink a bit so that you can hide the screw head and fill in the hole before painting. I don't suggest this joint for staying as stain won't color the wood the same in these spots. Paint covers it. Find, though you can also attach would by screwing in at an angle. This way is a bit difficult, and it's very easy to split the wood, so it's not my preference. But if you're careful and pre drill, you can use this method. You'll also want to counter sink the screwheads so they could be hidden. These are the main methods I'm covering here in the future will cover other methods of joinery. Oh, as a side note, if you're going for more of an industrial look, you might consider l brackets for your joinery. Get them in black or spray paint silver ones and you can make your joinery look decorative . That's a really cool look, if that's what you're going for. All right, this next comment will be debatable by many. I don't use glue. Hardly ever. I like the flexibility of knowing that if I mess something up or if I want to change it in the future, all I have to do is unscrew it. Yes, it does make it a bit of a weaker joint, but I've never once had a piece of furniture fall apart due to lack of glue. You are by all means welcome to use it, but I just don't. The most important thing you want to go for is keeping your table square. You can do this with your speed square a block of two by four, basically anything with a solid right angle on it. You can even buy one of these. It's for keeping your build square. You clamp it on the angle while you're screwing, and it keeps it square for you. Okay, here are so cal would gals. Words of wisdom. Take your time, Enjoy the process. Put some tunes on and rock out. This is the funnest part. Now let's get building. Since I'm doing pocket holes, I'll show you that process. If you have the small pocket holder reacher directions for where to place it on the wood, it depends on the thickness of your wood. With the bigger jig, it's a bit simpler. I adjust the depth gauge to the thickness of my would 3/4 inch apron, and I double check that my collar stops on the drill bit as specified for 3/4 inch would adjust as needed for your would. You'll notice on the Craig Jake itself that there are different markings for different thicknesses of wood. You can place the drill bit in this cradle here and adjust the caller for whatever your thickness of wood is. Be sure to do that before you drill. I place the wood where I want my whole I've made. X is already on the inside face of the woods of the holes or hidden. I screw until the bit is stopped by the collar and now do the same for each mark with the one by 32 holes is plenty. Go ahead and drop pocket holes to attach the top later to for the side aprons. Three for the front and back. These will go upwards into the tabletop to secure it. You want to do this now, because after you assemble your table, it's gonna be a lot harder to reach inside of there. Do this for each side of your apron's front, back and sides. Here's my table. Example. The first joints I will make are the aprons to the legs forming the base of the table. Since my aprons air thinner than my legs, A won by three instead of a two by two. I like to put the apron right in the middle of the legs so that it has space on either side . I think it looks nice like that. All mark the middle of the two by two and place my apron centered on that line. Make sure it's flushed to the top of the legs mark around where the apron sets so that if you shift the would accidentally you comptel many times, it's hard to clamp in place, but if you can try to so that you have minimal shifting of your wood, hold it as tightly as you can with your opposite hand. If you're unable to clamp, screw in your pocket Whole screws into each hole. That's it. Do this for each apron. - Now , if you're screwing from the outside or inside, you'll place your apron where you want it on your legs. Make sure it's flush to the top of each leg, then pre drilled a hole where you want your screw. Make sure to drill through to the apron or, if you're drilling out of angle from the inside, drill through to the leg, then take it. Counter sink bit the size of the screw head you're using, or force in orbit and make a hole where the screw head will sink in. Check with your screw head and drill until you can tell the head will disappear. Now, if you're using a shelf, here's where you'll make your marks for either that L notch that you cut out or, if you've made it to fit inside the base. Put marks on each leg at the same height so that you screw in the shelf evenly on each side . You decide where you want the shelf for your purposes. If you're making less of a table and more of a shelving unit, you might want adjustable shelves. As I mentioned earlier, I have a great shelf pin jig that takes the guesswork out of it. It's by Craig, and it's about 30 bucks, but you can easily use a piece of pegboard or make a story. Stick with pre mark spots where you want to drill your holes. Not usually shelf pinholes are two inches apart with your first hole no lower than three inches from your floor base, often there two inches from the edge of your project. There are plenty of tutorials online. All link. A few in the project. Resource is on making your own jig. If you are not using an adjustable shelf, you'll attach yourself the same way as the aprons. Make sure your shelf is even on each leg and either screw from the outside and counter. Sink your whole or pre drill at an angle from the inside, or make pocket holes at the edges of your shelf, where they will meet the legs and attached by at the holes made from under the shelf. Now I mentioned making my ex cross supports to fit. Now is the time to do so, since you finally have a steady base with which to measure. If your supports are just lengthwise, then go ahead and attach them now marking on your legs the same measurement so that the support sits level. Screw from the outside angle. Screw from inside or pocket. Hold that thing if you want to get fancy and make an X crossbeam the grab a two by two or one by two and get ready for some fun cuts. Figure out how you want your ex across the full area, just a portion. I think I just want half of the base tohave an X on it and on Lee on the sides so that I can scoot things underneath the open space. Place your board over the legs about where you want it. Mark from the inside, where your ex meets your leg so that you know what angle to cut your ex. Do this at top and bottom. Take your first crossbeam to yourself choice and cut along the line. If you have the miter saw, set your angle to whatever matches your line. For me, this is 45 degrees. Cut now. Cut the other side, which will be a parallel cut to the other one, meaning that the angle falls the same way. Now take it back to your table and check the fit marking on your legs where it'll sit pocket, hold the ends or screw them in from the outside. Careful to choose a screw that won't poke through the X beam and have a tip poking out. I used a little piece of left over 45 degree angle would whenever I was pocket holding the cross beams. This made it easier for the cross beams to stay in place on the Craig jig because otherwise it wants to fall down on its angle. Attach. Use that piece of 45 degree angle would again. This helps hold it into place when you're clamping, because clamping something at an angle was really quite difficult. So keep these around for clamping. Your ex is in place while you screw them. Now take a second sick of two by two, or one by two and lay it over your first crossbeam, ensuring that the measurement from the ground up and top down are the same as your attached piece from the inside of your table base mark lines on your second cross being where they intersect with the first, you'll be cutting to pieces this time. This time, the angles are not parallel. Matchup your angle on the miter saw and cut or cut along your lines with the difference. All here's where the attaching is a little bit more difficult. Attaching to the legs is as before, pocket whole or screw from the outside. But where it meets the first cross being, you have to get creative. I can just fit in one to the outside of this two by two and another one on the other side of the two by two. But you have to be pretty careful with that. So after you have your first beam in, this is what I'm gonna dio. I'm going to take the top attachment and I'm going to attach it up on the leg and then on to the first cross being Make sure that your pocket hole is to the outside edge of your ex so that there's room for the other piece of the X to attach to the first crossbeam. Okay? And then you take the other piece of the X and you attach it to the leg and then to the crossbeam. That's pretty cool, huh? So do the same to the other side. Okay, so let's talk for a second about problem solving. I think you've seen that I have made a couple of mistakes along the way, and that is totally fine. I don't know if you remember in the first class, I talked about the ability to problem solve, and the willingness to problem solve is a huge part of woodworking. And being able to make anything is just realizing that it is not going to be perfect every time you do it. It would be weird if it waas and you need to be ableto just get back up and continue what you're doing. A lot of this was kind of trial and error with these cross beams, which is why you just kind of fit along the way there is a problem with you. Can't set it at an angle in the Craig dig and have it perfectly. Even So, you wanna have your leftover piece there, toe? Hold it into place, Andi, keep it straight. But then when you do a straight end one, it keeps the whole way up here. There's no way I have a long enough screw to be able to get it in there. So I took it down to one inch thickness on the Craig jig instead of the one in the half That's on the angled ones. And so then the latest problem was that this ripped through the wood. This is kind of brittle. I am using all scrap wood for this project just because I don't really need it in table. To be perfectly honest, this is just for demonstration purposes. So this is obviously a problem. If you can see the screw just went right through and landed in here, which is honestly not a big deal. This is not a very big piece of wood. Re cut it. You've already cut it once, so you can do it very quickly. That's what I'm gonna dio. So just problems will figure it out. You'll be fine, I promise. Just be safe and keep on making it until it's the way that you want it to be. I think you'll see also up here, these are not flush to the outside because they ended up moving. I wasn't holding it down enough. If you clamp it down to the table, then you're not gonna have that problem. But I was being lazy. Sorry, I did not Clampett. So the way that I'm gonna fix that is I'm just gonna sand it down. That's not a big deal to me. Cut a new piece of wood and then we're almost done. So now it's time to attach the top, which is your last building step. Set the top on the ground or your work table and place the leg base upside down on top of it. Keep it even on all sides. You can measure it to ensure accuracy or just eyeball it. If you're a free spirit like me, mark where it sets now attach it through the pocket holds you drilled earlier in the aprons . If you're not using a pocket hole, you can angle screw from the inside, making sure not to protrude the top of the table. Or you can drill from the top and counter sink those screws up to you. Just measure where the apron set. So you know how far over to drill your holes? Oh, my goodness. And that's it. That's a table rock on.
9. A Primer on Finishing: Okay, guys, let's talk about finishes and we're not gonna be going super in depth own finishes for this class because the next one that's gonna be a really in depth look at all the types of finishes that you can use on your projects. This will just be a quick primer. Now, as I mentioned earlier in the class, staying does not take well to wood filler or to glue. So if you have exposed screw holes on your project that you're going to later fill in with wood filler, you might consider making this a painted project. You can certainly use stain if you'd like, but just know that it's not gonna look exactly the same as the rest of your project that doesn't have wood filler on it. If you're gonna do that, fill the holes with wood filler, let it dry, and then just give it a little bit of a sand later. Now you are going to be saying in your project before you apply any finish. But again, I'm gonna go in depth on that on the next class, all about finishes. But if you want to go ahead and move forward with this step Because you're an overachiever . I totally get it. Just give your table a good sand until it's nice and smooth. Then make sure to wipe all the sawdust off before you do any kind of finishing. Now you can use a wood conditioner before you do any stain if you want. I use this maybe 20% of the time, but it's not always necessary. It's it's kind of up to you, maybe test and see what you think on little scrap pieces of wood. I do that sometimes until I find what I like. If you're gonna paint, you should probably use a primer before you do that so that you can have even coverage and a longer lasting finish. So I've heard I haven't actually done the testing on this, so maybe not. But I've heard that your paint last longer. If you use a primer, something you can do is mix and match paint and stain for a two tone effect. It could be really cool if you do the legs painted and then the top stained or vice versa. It's just a neat, different look, so if you are going to paint, be sure to use a good paintbrush, and if you're going to staying, use one of these sponge brushes there really cheap. Or you can use a shop tower old rag. Just make sure to use gloves to protect your hands. Oh, and if you want to just have the natural wood tones show through that's totally up to you. You can do whatever you want with this project, but whatever you dio, make sure to seal your project with polyurethane before using it. I use just a basic water based Paul your thing by very fain. It's up to you. This protects your wood, and it also protects your finish. I recommend at least two coats and more coats. If you're gonna be giving heavy use to your table, just follow the directions on the canvas. Faras Rico Times and dry times Each of them are a little bit different from one another.
10. Final Thoughts: Okay. I know this lesson was a doozy and very technical, but tell me that it wasn't fun. I will believe you. You should now be looking at your first simple table build. Amazing. Go make a cup of coffee and celebrate. I am so proud of you. Go show it off. Bring it to the grocery store and put it in your basket and tell the check out clerk that sure not buying it because you made it with your bare hands, you rock. Now you know how to build a simple table. This sets you up nicely for our next class finishing. I encourage you to continue building f your shop with tools and scrap wood and equipment so that you can make all the builds all the time. I encourage you to look around on Craigslist for free, would and start acquiring a scrap pile to play around with in your free time. Continue pinning. Inspirational would builds on Pinterest that maybe will motivate you to make future projects. And most importantly, please ease post a picture of your table here. We all want to see it and encourage you and tell you you're amazing. Alright, guys, Let's keep building. Yeah, I know, Mom, but sometimes I just wonder. Sure, I get about what? Should I just keep building to booze? No, I will tell you one thing. I'll never see Goodbye to build and table build and Teva. So, uh, yeah. Okay. Objectively. Yeah.
 Brittany Joyner, SoCal WoodGal