Transcripts
1. Introduction to Basic Skills: Welcome to the basic skills course in the art and science of drawing series. I'm your instructor, Brent Evanston. There are a few things I'd like to share with you before you start the first lesson. The first thing is that I absolutely love working with students. Teaching drawing is a joy and a privilege that I take very seriously. Before creating the art and science of drawing series. I taught drawing for 20 years in studios, schools, museums and universities, and while working with students, I would constantly ask myself, What are the teaching tools and techniques that really connect with students? What tools and techniques show the most improvement in their drawing skills? How can I teach these techniques in a way that really speeds up their skill development? This course is the answer to those questions. The courses and the art and science of drawing series contains some of the most powerful teaching tools and techniques that are proven to teach students how to draw, so here's how the course works. Each day, you're going to watch one video lesson, then be given a project to do. Once you've completed that days project, you re ready to begin the next video lesson. Now this course was designed so that you can watch one video lesson each day and do one project each day. But you're welcome to adapt the structure of the course to fit your schedule. If you can only get to one video lesson in project a week, that's fine. Feel free to make this course work for you. Now this is a project based course, which means that every lesson is going to come with a specific project that's designed for you to get the most out of the skills you've just learned. The practice that these projects provide is absolutely essential to your learning how to draw. If you're not practicing, you're not doing these projects, you will not improve. Having an intellectual understanding of these ideas is great, but practices required to really get good at drawing. Now one of my great joys is a teacher is to see students evolve and grow over time. I encourage you to share your work. You can share it with family and friends. You can share it on social media, and of course, you can share it right here on Skillshare, and when you share your work on social media, I encourage you to include the hashtag, evolve your art. Building a community when you're learning to draw is a great way to be inspired to practice and get feedback on your work. Now this course is one of seven in the art and science of drawing series. Each course in the series focuses on a different essential drawing skill. Now if you're a beginning student, I highly recommend going through this series in order. But if you've got some experience drawing, feel free to mix and match the courses to suit your own needs and interests. Now while you're taking the course, I recommend watching it on a larger screen. You're welcome to take the course on your phone if that's what you have available. But by watching it on a larger screen, you'll have a richer experience. You'll be able to see more detail in the drawings. If you'd like any other information on other courses and the art and science of drawing series, drawing resources, or a detailed description of what materials to use. I encourage you to visit the website, evolveyourart.com. It's a great place to go for further drawing resources. Well, thank you so much for joining me. It's an honor and a privilege to have you as a student. Let's get started with our first lesson.
2. How to Begin: The biggest elephant in the room when we start talking about drawing is the idea of talent. I have so many students coming into my classroom or my studio who tell me that they are there to discover if they have any talent for drawing. I'm going to get this right out of the way at the very beginning, drawing is not a talent. Drawing is a teachable and learnable skill. If you can learn to read or write, you can learn to draw. I have been teaching drawing for almost 20 years now. I have had literally thousands of students. My youngest student has been three, my oldest student has been 87, and not everybody becomes masterful at drawing but one thing they all have in common is that they all improve. One of the other biggest myths that we come across is this idea that the best drawers are the ones who get it right the first time. When we look at a drawing, it's easy to get caught up in a finished drawing in all of the detail and all of the beautiful lines and all of the beautiful strokes. It's really easy to assume that, that's all the artists made, they just started off with these beautiful dark lines. I would actually like an artist to a magician in the sense that when they perform a trick, hopefully you don't actually believe magic has been done. Once the magician explains how the trick is done, it becomes obvious, and drawing happens to the exact same way, we are performing a series of almost tricks that allow the viewer to see something on a page. If you don't know these tricks, if you don't know these tools and techniques, the process of drawing can look magical, even miraculous. But once you understand the tools and techniques involved, drawing becomes demystified. The very first thing you need to learn about drawing has to do with this misconception that good drawers get it right the first time, they don't. What we find when we look at master drawings is that artists are starting off every single drawing using incredibly light lines. Even the greatest masters of drawing who have ever lived didn't get it right the first time, and when we look closely, we can find evidence of these very, very light lines, usually around the edges of the drawing. Many of these light lines get covered up as the drawing is finished but on almost every master drawing you're going to see, if you look closely, you can find evidence of these incredibly light attempts at the form. Again, this is something we can see across times when we look at drawings. You will see over, and over, and over again the best drawers, starting off their drawings with these incredibly light lines and adjusting along the way. I'm going to start off showing you actually how to hold the pencil the way that you're going to see me holding the pencil, and it's not that something you have to hold your pencil this way, there isn't a particular right way to hold a pencil but what is important is that you find a way to hold the pencil that you can get really light soft lines from the beginning. Here's how you're going to see me holding my pencil. I'm right handed, so I'm going to put my right hand up with my thumb facing up, and I am going to place my pencil in between my thumb and forefinger, about an inch.
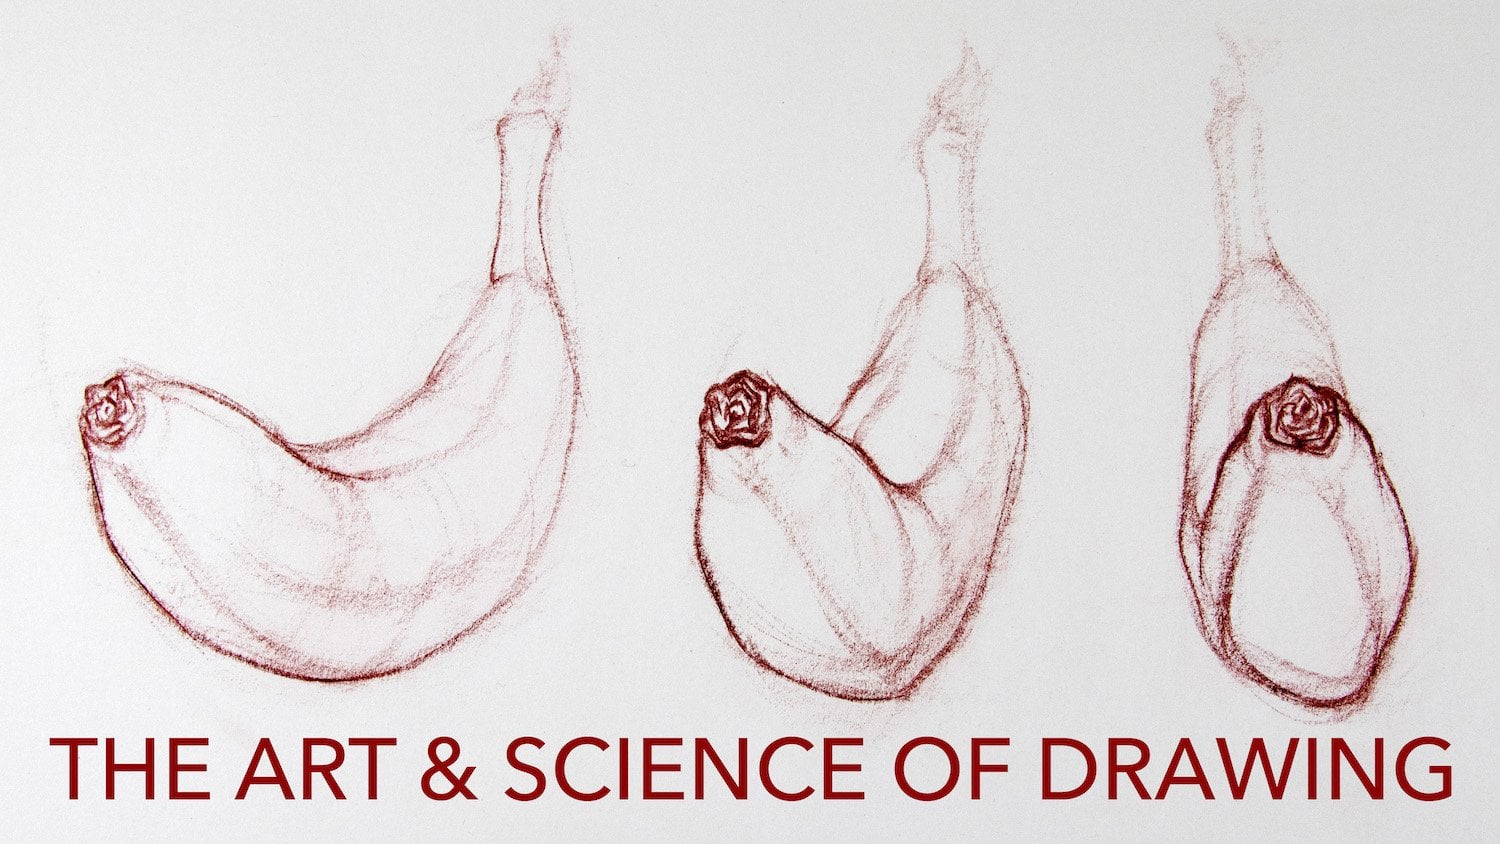
3. Circles & Ovals: Welcome to day 2 of the Art and Science of Drawing. On the first session what we talked about was the importance of learning to draw lightly. The reason is because every drawing you're going to do is going to start off with these incredibly light lines. Today what we're going to talk about is what to draw using these light lines. Most people are familiar with the idea of primary colors, that by mixing together red, blue, and yellow, you can create any color imaginable. However, most people are not familiar with the idea that form works the exact same way. All form, no matter how complex distills down to a few basic shapes. By understanding how to draw the shapes, you can draw anything you want to. The basic shapes we are going to talk about today are circles and ovals. Let's take a look at a drawing by Rembrandt. It's easy to get caught up in all of the beautiful line work contours and texture of this drawing. But before Rembrandt thought of any of that, he is more likely to have thought about this in terms of shapes. What good artists tend to do is translate complex form into basic drawable shapes. Although the forms of the Elephant are made up of a number of different shapes, circles and ovals play a large role in the construction of the form. In addition to the circles in ovals you see overlaid here, there are many smaller ones, but this gives you an idea of how Rembrandt was thinking about the elephant and the big shapes that he used to construct it. Although it's rare to find drawings that rely exclusively on circles and ovals, some come pretty close. The overlay here clearly demonstrates how reliant the artist is on using these basic forms. All of the contour shading and details of this drawing really only makes sense in relationship to the larger circles and ovals. Circles have a reputation for being notoriously difficult to draw. But I'm going to teach you some strategies today that are going to make this much easier. Many beginning drawing students try to draw a circle by starting off with the top and holding onto their pencil tiling and slowly making their way around with the hope that when they get back to the beginning, it will be a circle. This is the hardest way to draw a circle. What I'm going to teach you to do today is to use your shoulder as a compass in order to make the motion of a circle. I'm going to ask you to follow along with me for the next few minutes. What I'd like you to do is pick up a pencil and hold your arm straight out like this. Next, what I'd like you to do is make the motion of a circle in the air in front of you. Now, I want you to pay very close attention to the speed. You don't want to be out of control fast, but you don't want to go really slowly either. This method of circle drawing only works if you get up a good amount of momentum. Watch the speed that my pencil is going. Now, the next thing I'd like you to notice is when you watch the tip of your pencil, you'll know that you can actually tell what shape is going to come out of the pencil even while you're making this motion in the air. For example, if I'm making this motion, you can tell that it's not going to be a circle, it's going to be an oval. So when you're making the motion of a circle again, you should be able to get a sense of when it gets to a point of circularity. Every time I'm going to draw a circle, you're going to see me make the motion of a circle on the page, just pantomiming it. When I see that it's very circular and in the right size, the right place that I want it. I'm not going to stop this motion. I'm simply going to tip the pencil down and go around not only once, but go around multiple times. Now, what you're going to notice is that each individual pass will not be a perfect circle. In fact, each individual pass will be ovular, but by making multiple light passes, these lines are going to coalesce into a very workable circle. Now, one of the things I'd like to remind you before we start practicing circles today is we are still using our very, very light lines. It's very normal when people start trying to draw something with their lines instead of just scribbling lightly that they get darker. I want you to pay attention to this because now we're essentially practicing two things at once. We're practicing circle drawing, but I still want you to use these very, very light lines. In fact, everything we're going to be drawing for the next couple of sessions, we're going to draw very, very lightly. Again, practice your circles, but practice them as little lightly as you possibly can. Here's a demonstration of the technique we just discussed. I'm going to make the motion of the circle. Once I'm ready, I'm going to tip the pencil down and go around multiple times. It's the multiple passes around the circle that make this strategy work. No individual passes a perfect circle, but you can see that they coalesce to form a pretty workable circle. Let me demonstrate this again. I'm going to make the motion of a circle. Once I see the circle is in the right size at the right place, I'm not going to stop this motion. I'm simply going to tip the pencil down and go around not just once, but go around multiple times. I'll demonstrate this a few more times, and I want you to take note of a couple of things while you're watching. The first again is the speed of my hand. It is not moving slowly. This only works if you get up a critical momentum. The second thing is how lightly I'm drawing. We're building off what we talked about in the previous session. So not only are we drawing circles here, but this is also practicing light lines. Now, depending on your relationship to your drawing surface, it is okay to bend at the elbow a little bit, especially if you're working with a sketch pad or something that's very close to you. Remember, there is no one right way to do this. One of the most important things you're going to be doing while learning to draw is figuring out what works for you. Oval drawing is remarkably similar to circle drawing. Just like you did while drawing circles, you're going to start off oval drawing by making the motion of an oval on the page. Just like circle drawing, once you see the oval is the size and placement you want, you don't want to stop the motion, you want to keep moving your hand and just tip the pencil down. Make sure you go around multiple times, not just once. Circles don't have any directionality to them, but ovals do. Once you get comfortable drawing ovals horizontally, you can try them vertically, and diagonally. You want to get comfortable drawing ovals at any angle. All of the ovals I've drawn so far have been at the same size. But you can change the size of the ovals. Here's one that's much smaller. Or you can make them much larger. But the important thing is that you're comfortable drawing ovals at multiple sizes and angles. The other essential thing to learn about ovals is that they can be more open or more closed. In oval that is more open, it's closer to a circle. An oval that is more close is closer to a line. Of course, you can have a wide range of ovals in between. Now just watch for a moment as I demonstrate drawing a number of different ovals that are different angles, different levels of opened and closed, and different sizes. Again, pay attention to the speed of my hand and how it's moving. As you progress in your drawing education, you're going to learn to use circles or ovals in numerous different ways. But the most important part of the beginning is to recognize them and to get comfortable drawing them. We talked earlier about the artists translating form into basic shapes, and this needs to become a lifestyle. One of the best ways to train your brain to recognize circles and ovals in drawing is to scan your environment to recognize how many different circles and ovals you see in your everyday life. Just like drawing lightly needs to become your default reaction to a pencil in your hand, your default mindset needs to be one of looking around and translating everything you see into some kind of basic shape. Now, today we just focused on circles, and ovals, but as we progress through the drawing process, you're going to learn other shapes. This practice of translating everything into basic shapes is one of the first and most important steps to being able to draw them. Before I give you your assignment today, I want to give you a few thoughts on practice. When I was learning how to draw circles and ovals, my instructor told me that I needed to fill 10 pages front and back with circles and ovals every morning for a year. Although I'm sure I skipped a few days, I really tried to take the spirit of this assignment to heart, and it really speaks to how much practice this actually takes. I often have students coming into the studio who, after drawing three or four circles, get frustrated. It's important to remind them, as I'm reminding you that this is a skill that requires a lot of practice. You are going to draw hundreds of circles and ovals before you get comfortable with it. Remember, an intellectual understanding of what we're talking about does not always translate into a skill. To get this skill of drawing a circle, even though it's an easy concept to understand, requires a lot of practice. Here's your assignment today. I'm going to ask you to draw 100 circles and 100 ovals. They should be varied in shape, size, and their level of openness and closeness. For this assignment, you should just be using again, basic newsprint. Nothing precious because you're going to go through a lot of these. At the beginning, it's much more important just to get used to what it feels like to draw on this way. Again, this is a great way to practice your light lines and to instill this idea of longer more fluid strokes when you're drawing. Again, the circles don't happen slowly. They happen with a good amount of momentum and fluidity. Finally, as you're practicing, try not to evaluate how good each circle is every time you draw it. What we're really trying to do is build muscle memory. Your circles will improve over time as long as you're practicing. But if you get to the 20th one and they're not becoming perfect circles yet, don't worry about it. What you really want to do is just get into this mindset and get into this habit of doing the same things over and over again. One of the things that masters have in common is they never tire of reengaging the fundamentals. This is about as fundamental as it gets. Circular perfection is not the aim of this assignment. In fact, if you need a perfect circle, we have stencils, we have compasses, we have plenty of other ways to get a perfect circle. What we want to do is just get comfortable drawing workable and usable circles and ovals. There's an old story that there's only been one draftsman who's ever been able to draw a perfect circle freehand on command, and that's how he got the nickname the divine Raphael. The reason I tell you this story is so that you can let go of the expectation that you're going to be making perfect circles certainly at the beginning. In fact, the vast majority of the best drawers cannot make perfect circles. But with practice, we can all make very, very usable circles. Happy practicing, and I will see you at the next session.
4. Straight Lines & the Shapes They Make: Welcome back, you've made it to day three of the art and science of drawing. I really want to congratulate you on your persistence with this program. I know drawing requires a lot of practice and every day we're going to build on the previous skills. Before we get into any instruction today, I really want to communicate once again, the importance of practice. If you're just watching the videos, then you're really not going to get the full experience of this. Remember, drawing is a skill, and it's a skill that has to be developed through a lot of practice, please, I really want to encourage you to do the exercises. In the first session, we talked about the importance of starting off drawings and very lightly, because we know we're not going to get it right the first time, and we know we're going to want to drawing that we can adjust along the way. The second day, we talked about this idea that what artists do is they translate form into recognizable and drawable shapes. That's the way we can deal with any sort of complex form, remember, any form no matter how complex distills down into just a few basic shapes, and by understanding how to draw these shapes, we can draw anything we want to. Today we're going to expand on that idea and specifically, we're going to focus on shapes made using straight lines. If we simplify it all the way down, there are only two lines we can make, lines will either be straight or they will be curved. Now in the previous session, we introduced curved lines through circles and ovals, and we'll learn more about curved lines in the next session. But today, we're going to focus on straight lines and the shapes that they make. The first thing you're going to learn is how to draw a straight line. Drawing a straight line has a lot in common with drawing circles and novels in the sense that speed is really important. Once again, you're going to see me moving my pencil back and forth and very quickly, that is because we have to get a critical momentum up, for the lines to workout. I also want to communicate the idea that the straight lines you make don't have to be perfect. Once again, we have tools to help us make perfectly straight lines. If you ever need a perfectly straight line, you can get a ruler. What we need to do is just learn how to draw lines that read as being straight without being perfect. Again, very few people can draw perfectly straight lines that ruler, and it's not a very useful skill to have anyway. To start off, you're just going to see me practicing horizontal and vertical lines. Before we start drawing, let's take a look at this diagram. Right at the beginning, I'd like you to start thinking about every straight line as an angle, even horizontals and verticals. We'll expand on this idea further while we start to look at oblique angles, but for now I want you to think about a horizontal line as a 0 degree angle and a vertical line as a 90 degree angle. Similarly to how we begin circle drawing, we're simply going to start off by pantomiming a horizontal line. Pay close attention to the speed at which I'm moving my hand. Moving your hand too slowly actually makes it more difficult to draw straight line. The idea here, just like with circle drawing, is to get up a good amount of momentum. Notice you can tell where the line will be and approximately how straight it will be just by pantomiming it. When you're satisfied with the placement, length, and straightness of the line, don't stop moving your hand back and forth, simply tip of the pencil down and go back and forth multiple times. You'll notice that my first couple of passes back and forth are lighter, and once I see that the line is doing what I wanted to, I get progressively darker on the next passes. Go ahead and watch me demonstrate this a few more times. Just like with the circles, the goal isn't that every line is going to be perfect, you just want to start practicing drawing straight lines. It's very common for a natural arc to come out in some of these straight lines but with practice, this can be minimized. Remember, the more you practice your straight lines that better and straighter they will get. You'll make vertical lines with the same back and forth motion, except this time going up and down. Note that it does feel a little different in your arm. Again, the more different angles of lines you get used to making, the easier they become. Also, I want you to notice that I'm still using incredibly light line design drawing, because drawing lightly is going to be critical when we actually start trying to draw objects. Drawing a decent horizontal line is an essential skill, especially for anyone interested in the landscape, where establishing horizon line is going to be a common necessity. Using horizontals and verticals together in a drawing can add a strong sense of structure and stability. In this drawing by Daumier, the dynamic figures in the front are balanced by the strong use of horizontals and verticals in the background. It's important to note the Daumier straight lines are not perfectly straight. They have a beautiful handmade quality to them that will be lost if he made these lines with the ruler. Drawing squares and rectangles is nothing more than putting horizontal and vertical lines together. A square, of course, is a four-sided shape whose sides are all of equal length, a rectangle is an elongated version of this four-sided shape. Every rectangle you're going to draw has a width to height relationship. For example, this rectangle is exactly twice as wide as it is high, this rectangle is exactly three times as wide as it is high. Of course, not all rectangles have such a straightforward width to height relationship, for example, this rectangle is about 3 and 1 third times as wide as it is high. The other way you can think about the proportion of a rectangle is to evaluate the diagonal line from corner to corner. We'll learn more about how to evaluate angles and diagonals in a few minutes, but for now, I just want you to keep this idea in mind as I demonstrate how to draw squares and rectangles. Each square and rectangle you draw is going to be made by drawing four individual straight lines, two horizontals and two verticals. You want to start off by thinking about where on the page you want your square or rectangle to go and how big you want it to be. I'll be starting off this square, once I've decided it's size and placement, I'm going to begin by pantomiming the first line. It doesn't really matter which edge you choose to start with. Once you're satisfied with the line, just like we practiced, tip the pencil down and make your first attempt. While you're drawing the remaining three lines, don't worry about stopping the line right at the intersection at the corner, it's okay if the two lines overlap each other. Remember, these initial light shapes are just meant to serve as an under drawing that you can darken up later on in the drawing process. Each side of your square should be the same length as all of the others. Rectangles are drawn the exact same way, except there'll be an elongated version of this shape. Remember, your lines and shapes don't need to be perfect. A closer inspection of this drawing reveals that even a master draftsman like Daumier, is using the similar technique. You'll find horizontal line standing in for a horizon in most landscape drawings and paintings. If horizontal and vertical lines provide structure and stability, then oblique angles provide excitement and dynamism. An oblique is any straight line that is slanted and neither horizontal nor vertical. We mentioned before the most people are good at recognizing true verticals and horizontals. Most people can also recognize a 45-degree angle. A 45-degree angle is what we get when we divide a right angle in half. If we divide a right angle into thirds, we get 30 and 60 degree angles. Although this is a little trickier to recognize, most people can be easily taught to do it. By adding the 45-degree angled back in, we can start to compare the differences between these three. Note that they're each 15 degrees apart. By adding in the 15-degree and 75-degree angles, we can complete our right angle in increments of 15 degrees. A skilled to hardest we'll be able to recognize even minor changes in angles. But at the beginning, it's just important that you start to familiarize yourself with some of the basic angles. In this drawing, we see a smattering of vertical lines providing some structure, but it gets all of its excitement and dynamism from the obliques. Once again, a closer inspection reveals beautiful hand-drawn lines that often overshoot their corners. Triangles are three sided shapes that contain oblique angles, some triangles are symmetrical and often contain horizontal lines. Notice these triangles seem more structured and stable. Other triangles are made entirely of oblique angles. Notice these seem a little more chaotic and unbalanced. Oblique angles can also be used to make quadrilaterals that go far beyond right angles, squares, and rectangles. Quadrilaterals can add a lot of excitement and dynamism to a composition. They're also essential to recognize if you want to do any perspective drawing. Remember, just like squares and rectangles, you can begin to evaluate their shapes not only by the angles of their edges, but by their diagonals from corner to corner as well. Ultimately, there are no limits to how many sides a shape can have. By combining numerous horizontal, vertical, and oblique angled lines, you can create incredibly dynamic shapes. Drawing lines at various angles is just like drawing horizontals and verticals. You want to begin simply by pantomiming. When you're satisfied with the direction, length, and placement of the line, go ahead and tip the pencil down and go back and forth a few times, getting progressively darker. As you practice making lines going in different directions, I would recommend experimenting with different ways of holding your arm to find what is most comfortable for you. Again, just like when you draw rectangles and squares, it's okay to overshoot the corners. Another reminder that line should stay light and do not have to be perfect, or just trying to develop a comfort with these kinds of straight edge to shapes. For today's assignment, I'm going to provide you with a series of images that you're going to draw from. When you're instructed to do so, you're going to pause this video and draw directly from your screen. You'll be instructed to draw the contents of each image three times. Whenever you're done drawing the shapes or diagram provided on that image, go ahead and hit play and when you're instructed to do so, pause the video again and draw whatever shapes or diagram or on the next image. The learning outcomes are pretty simple. You want to get comfortable drawing straight lines at multiple different angles and you want to get comfortable constructing straight edge shapes. Remember, this is still just practice and we want to make sure we're still drawing lightly. For bonus challenge today, I provided the multi-sided shape for you to draw from. Remember, the key to drawing a complex shaped like that, is to not only evaluate and measure the edges of the shape, but to also evaluate the diagonals from corner to corner and point-to-point. We'll have fun practicing today and I will see you on day four. After pausing the video, draw each shape on the screen three times. Once you're done, hit play. After pausing the video, copy this diagram three times then hit play. After pausing the video, draw each shape on the screen three times. Once you're done, hit play. After pausing again, draw each shape on the screen three times and hit play. After pausing again, draw each shape on the screen three times and hit play. If you want more practice, try copying this multi-sided complex shape. By now, you should be feeling more confident in your ability to draw straight lines and their shapes. I'll see you on day four.
5. Charting the Course of Curved Lines: Congratulations. You've made it to day 4. What I'd like to do today is continue our conversation about basic shapes. On Day 1, we talked about drawing lightly, on day 2, you were introduced to circles and ovals, on day 3, you were introduced to straight-edge shapes and today we're going to continue our conversation about how to construct forms using shapes, but we're going to talk again about curved shapes. We started off with basic circles and ovals and again, those are very foundational forms. What we're going to do today is take those shapes and start to play with them, to bend them, to stretch them, to come up with a number of different kinds of rounded forms that are going to be much more useful when we start trying to draw objects. Now, you may have noticed that we're most of the way through week 1 and we haven't actually tried to draw anything yet. I want to talk a little bit about why that is. So many people when they start off drawing, jump in too quickly trying to draw subjects. Oftentimes, there subjects that are way beyond what a beginner should try and that's a really great way to start to develop bad habits. Instead of doing that, what I'm trying to do is just introduce you to the mechanics of how drawing works and some of the basic concepts. You'll notice that tomorrow when we actually start trying to draw our subject, you'll be very comfortable working with these shapes, working with evaluating angles, and just thinking through this process. When I ask you to place an oval at a certain angle, you won't struggle with it. It'll come much easier since we've spent some time dealing with this subject on its own without trying to draw anything. I really want to congratulate you on the investment in time you've made learning some of the basic fundamentals of drawing before jumping in and trying to draw actual objects. It's an invaluable investment and it'll stop you from making many mistakes and developing many bad habits down the road. Now, today is called charting the course of curves. What we're going to do is revisit rounded lines and shapes to really figure out how they work and to make some shapes that go well beyond basic circles and ovals. The reason we're focusing on this for an entire day is because you'll notice that there are many parts of a drawing that don't easily fall into a recognizable shape. Usually what we need to do is to evaluate those as the lines. Now, human beings are very good at looking at angles and being able to discern differences even between subtle differences in diagonals. But we're less good at looking at a curve in doing that. The whole concept that we're going to be focusing on today is how to translate curve lines and rounded shapes into angles. There are many different ways we can use straight lines and angles to evaluate curved lines and rounded shapes. Let's begin with a familiar shape, the oval. On day 2, we talked about ovals being oriented either horizontally or vertically. To illustrate this further, let's imagine a line following the long axis of the oval. This gives us a perfectly vertical line showing that this oval is on a vertical axis. There are as many angles of axis lines as there are angles. Here's an oval at a horizontal axis, a 45 degree axis and numerous others. Regardless of how opened or closed an oval is, it will have its own axis. It's important to note that the axis line also acts as a line of symmetry, dividing the oval into two halves. Each of these halves should mirror each other. While you're drawing your ovals this is an important thing to keep in mind. If you find that after you draw an axis line in your ovals, that the two signs are different, try and correct for this in your practice. In this piece by Eva Gonzales, we can clearly see one oval and one partial oval at a horizontal axis. When ovals are used to indicate a circle going into perspective, as is the case in the circular opening of a bowl, they are called ellipses. We'll talk more about ellipses in week 4 of the art and science of drawing. In this piece by Daumier we can see a number of ovals and partial ovals on slanted axes. Once again, we can see that these shapes are not drawn perfectly, but they do a wonderful job of giving us the idea. Whenever you come across a complex curve, such as this line shown here, it can be much easier to observe and evaluate if you first break it down into angles. There are two main ways in which this can be done. First, let's take a look at where the line begins and where it ends. Apart from the curved line connecting them, try and visualize the straight angle that connects both of these points. Before you draw any complex curve, it's important to know the exact angle between where it begins and where it ends. The second way to use angles to evaluate a complex curve is to break the curve down into the fewest number of angles. In this overlay, you could see how easily a curve can be translated into angles. Here we have the two main angles of the curve. Next, we can use angles to simplify the curves at the beginning and the end of the line. Finally, by adding in only three more angles, we're able to fully describe the curve. By breaking complex curves down into simple angles, they become much less abstract, and much more structured and easy to understand. This illustration of a flamingo does an excellent job of illustrating these two elements together. The simplified shapes of both the body and the head are ovals. Each of them is a different size, a different level of openness and has a different axis. The neck of the flamingo winds its way down from the body toward the head in a winding complex curve. But despite all of its subtle curvatures, it easily simplifies to just a few large angles. Take a look again without the overlay. Hopefully, you're beginning to see complex forms like this one as a series of basic shapes and angles. Often when students see a complex curve such as this one, they'll draw a loose approximation, often stating that they don't think curves are as specific as angles. In actuality, curves can be just as precise as angles. The other thing I often see that I would like you to avoid is drawing by using the sketchy staccato lines. Think about line quality in the same way you think of tone of voice. We respond better to confident and dynamic mark-making. Sketchy lines tend to communicate a timidness or nervousness. I'm not in the habit of pointing out things I don't want you to do, but I see this often enough in the studio that I think it's important that I call it out specifically. Here's a much better way to properly analyze and draw a complex curve. The first thing I'm going to do is figure out where the line should start and where the line should stop. Again, there is a specific distance and directional relationship between the start and stop of any curved line. Once you're confident about the placement of the beginning and end of the line, you can start analyzing the curve. Here you'll see me making a first attempt at the direction the line is moving at its starting point and stopping point. Again, note that I'm drawing an angle not a curve yet. As I search for the best placement and angle of the next part of the line, you'll see me constantly referring back to the point I've already drawn. I have now translated each end of the curve into two angles. Notice that the top section of the line I'm copying is a bit more curved than the bottom section. To account for this more extreme bowing of the top curve of the line, I'm going to add a third angle. Now I'll try for the larger angles in the center of the curve. Note that this is a very different method than just starting at the beginning of the curve and following it all the way down until I get to the end. By addressing both ends simultaneously, I'm able to get a much better sense of how the curve is moving. As I continue translating the curve into angles, notice how many times I evaluate and change things. Remember, drawing is a process that contains many iterations. You should always feel comfortable re-evaluating what you've drawn and making any necessary changes. It's important to note that there is no single solution to translating any curve into angles. We could reduce the number of angles or increase them, but the idea here is that it provides a structured way for you to think about curves, which can otherwise be a little wildly and hard to manage. Once I'm satisfied that I found a solution, now I can go over and darken the line. The metaphor I'm using here is that the angles provide a scaffolding for the curves of roller coaster track to go over later. We'll talk more about how to darken your lines tomorrow, but for now, this is a great illustration of the drawing process. That a drawing starts lightly, goes through multiple iterations and once you're pleased with the form, then you darken only the lines you want a viewer to see, confident that you've laid a solid foundation. Once again, we're not going for perfection, but hopefully, you can see how close this process has gotten us to the original line. Eggs are some of my very favorite shapes to draw, and they're essential for you to learn, if you want to do any figure drawing or animal drawing. An egg is an ovoid shape that is wider on one end and narrow on the other. Just like an oval, every egg has an axis. Eggs come in many shapes and sizes and are among some of the most versatile or organic forms. Although there's no one right way to draw an egg, the method I prefer is to start each egg by drawing a circle. Next, I will rock my hand, back and forth, across the top, once again, pantomiming to see what line is going to come out of it. Once I'm satisfied, tip the pencil down. Just like you practice with ovals, you should get used to drawing eggs in many different angles. Again, like ovals, your axis line should act as a line of symmetry. By drawing an axis line through the center, you can evaluate each side of your egg to make sure they're the same. Being able to place the axis first is a critical skill to have once you start drawing subjects. Once you've determined and drawn the axis, next, draw the circle, making sure that each side mirrors the other. Finally, rock your hand back and forth and construct the top of the egg. You'll also want to get comfortable varying the proportion of the egg, making them bigger, smaller, wider, or narrower. You might find it easier to draw the circle for the egg first and add the axis line afterwards. It can be easier to place an axis line at the center of the circle rather than to draw an axis first and place the circle properly on the axis. Not all eggs have a circular base. In this egg, you'll see me making the motion of the circle, but only drawing part of it. Next, I'll rock my hand back and forth to construct an egg that is much flatter and wider at one end. Part of your practice today is going to be to experiment drawing different shapes and sizes of eggs. Remember, there's no one right way to draw, it's up to you to experiment and figure out what works best for you. The last shapes we're going to talk about today are bent shapes. On Day 2, you learned how to construct shapes using straight lines, like rectangles. What I'm going to demonstrate now is what happens if we bent a rectangle. As you'll see, a bent rectangle has two straight sides, but also two carving sides. One of the important things to remember, while you're constructing these shapes, is to keep your lines fluid. Try not to revert back to any previous ways of drawing you've had. Keep drawing from your full arm using large fluid motions. Also, on Day 2, you learned how to construct different triangles. Triangles can also be bent. There are, of course, an infinite number of variations on bent rectangles and bent triangles. Keep in mind that a single bent rectangle or a triangle can bend multiple times. Part of your practice today will be to explore and invent these shapes. Ovals and eggs can be bent as well. First, I'm just going to draw a traditional oval with a horizontal axis. Note that the axis line does act as a line of symmetry where both sides of the overall, top and bottom, are mirroring one another. If we bent this oval, we might get a shape that looks something like this. Keep in mind that if you bend an oval, the axis line has to bend as well. A bent axis line like this is often referred to as a shape's gesture. Gesture drawing is a concept that is relied heavily on for figure drawing. The idea is that you can establish the direction and dynamism of a curved form before attempting to draw the contours of the form itself. A line of gesture is often, but not always, in the center of the form. Sometimes, they appear as center-lines and other times they established the edge of the form. Here, you'll see me starting with a gesture line and then constructing the shape around it. A curved axis line or gesture isn't quite as specific as a straight axis line, but it does a great job at describing the movement of the shape. Here, you'll see me constructing a traditional egg shape. Once again, note that I'm starting with a circle at the bottom and rocking the top back and forth. If we bend an egg shape though, notice how this changes both the shape and how I'm drawing it. The complex curve, I can't rely solely on circle drawing or rocking my hand back and forth. Again, watch the speed and the way the pencil moves while I'm drawing these shapes. Remember, you want to get in the habit of drawing fluidly and confidently. Pushed far enough, these bent egg shapes often start to resemble gourds, egg plants, or other organic forms. Once again, these forums are critical for you to learn if you want to do any figure drawing or animal drawing. Today, your practice is going to consist of three different projects. First, on one side of a sheet of paper, draw a curve line. Don't overthink it, any curve line will do. Right next to it, on the same sheet of paper, try analyzing and drawing this form exactly as you see it, by breaking it down into its basic angles. Remember, we're not going for perfection, we're just gaining experience through practice. The more you do projects like these, the better you will get at them. Once you've analyzed and copied at least one curve line, try the same project with a bending shape, such as an oval or an egg. You can use the same strategy of turning curves into angles to draw your shape as well. Finally, draw 100 freestyle forms using light, fluid lines. These forms can be anything that we've talked about so far: circles, ovals, quadrilaterals, or combinations of shapes. A great way to experiment is to start off with a shape like an egg and stretch it, bend it, and distort it in various ways. You can make shapes with both straight lines and curved lines. There are no rules here, the goal is just to get some experience drawing a wide range of different shapes using light, fluid lines. Today is our last day of working with basic shapes. Tomorrow, you're going to learn how to turn these basic shapes into recognizable forms. Now remember, I'm giving you the minimum amount of practice. But if you want to get really good at this, try doubling or tripling the amount you're practicing. The more you're able to practice these concepts and tools, the better you're going to get. I look forward to seeing you on Day 5, where we're going to put all of these tools and concepts together in order to draw recognizable forms. Have a great time practicing. I'll see you tomorrow.
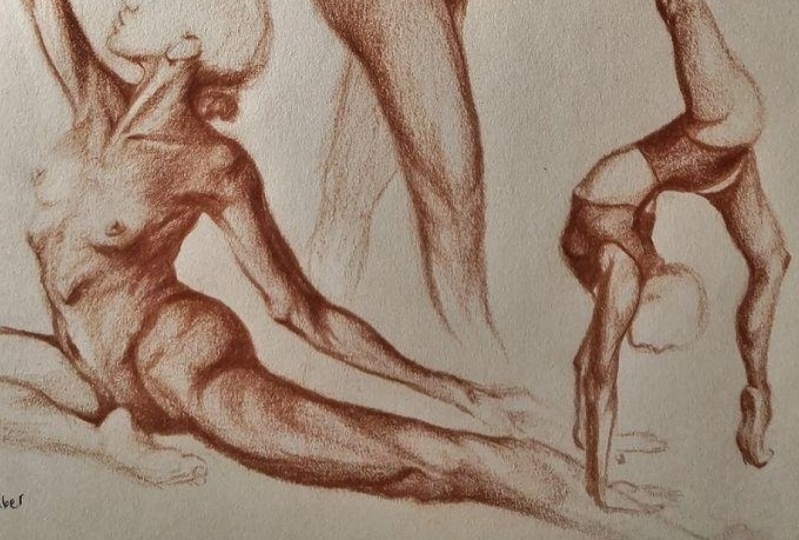
6. Putting it all Together: On day one of the art and science of drawing, we talked about drawing is being nothing more than smearing pigment around on a page. If we do it just right, we can give the viewer a sense of form, a sense of volume, texture, and even the illusion of life. What I'd like to do today is teach you how to take everything you've learned so far and use it to actually draw a subject. On day one, we talked about the idea that artists start off using these incredibly of light lines because they understand that they're not going to get it right the first time. On day two, we introduced the idea that what artists do, is they translate complex form into basic shapes that they understand how to draw, and we learned about circles and ovals. On day three, we taught you how to draw straight lines and explored some of the shapes that straight lines can make. On day four, we talked about how to stretch, bend, and manipulate these shapes and also how to look at curves and analyze them. The reason is, not every shape falls into a simple, recognizable basic shape. Now that you have all of these tools, what we're going to do today is teach you how to put everything together to actually get it recognizable form on the page. Before we begin, I'd like to talk to you a little bit about the drawing process as a whole. There are three key ideas that I want you to keep in mind as you're going through this process. The first, that you're already familiar with is that drawings begin with very light lines, and slowly as you develop confidence and you're more positive about the forms that you want, you can darken up these lines later on. Remember, you're only going to darken up the lines you want seen by a viewer. The second idea, is you're going to start off with the biggest shapes first and slowly work your way down to the smaller shapes in details. The third idea is that you're going to work with the most general information before going down to the specifics. Again, I want you to repeat this idea over and over as you're working through the drawing process. Your drawing should go from the lightest lines to dark, from the biggest shapes and forms to the smallest and from the very general information down to the specifics. In addition to that, remember, your drawing is going to evolve over time. The metaphor that I often use here, is that, doing a drawing is similar to building a house. When you start a house, you start by pouring the foundation and building the framework. All of the walls, the fixtures, the curtains, the paint, all of that is built upon a solid foundation. Now this foundation of 2 by 4 and concrete, you never actually see it, but if it wasn't there, the house would not stand. Drawing works the exact same way. All of these very, very light shapes and forms you're going to start with are never intended to be seen by a viewer, but they lay the foundation that all of the details, all of the shading and all of the passionate mark making is going to be built on top of. The type of drawing your learning in this program, is observational drawing. Now the reason it's called that is because we are observing, analyzing and drawing what we see. Now it's not an accident that the word observation comes before drawing. Many students are surprised to hear that you should spend 70 percent of your time simply observing and analyzing the form, and only 30 percent of the time, drawing with your pencil to paper. I want you to keep this in mind during the drawing process. It is okay and in fact, it's recommended that you spend far more time simply observing and analyzing the form, asking questions, really getting to understand the form before you make drawing attempts. I have an interesting way that I defined drawing. I think about drawing as a visual answer to the questions that we are asking ourselves about the subject in our minds. Now what this means, is that the quality and content of what comes out of your pencil and onto the page, is defined by the quality and content of the conversation that you're having with yourself in your head. What this means is that my job as a drawing instructor isn't so much to teach you techniques with a pencil, although I will be doing a lot of that, but what I'm really doing is teaching you how to manage the conversation in your head. Whatever and however you're thinking about your subject, is what comes out on the page. When you think about it, that's the only thing to come out on the page. You are making decisions about what to notice, what to observe, and how to choose to analyze the forms. That is what is going to come out of your pencil. What I'm going to do now is introduce five questions that you're going to repeatedly ask yourself when you're drawing a subject. Whenever you are ready to draw something, the biggest question is how to begin. We know we're going to begin with light lines, we know we're going to be analyzing form and translating into shapes, but these five questions will really help to focus your drawing process. Here they are. Question one, what is the biggest shape? Question two, what is its axis? Question three, how big does it need to be? Question four, where on the page should it go? Now, after you ask yourself these first four questions and you've answered them, that is when you're going to make your very first light attempt at that shape. After you've made your light attempt, you're going to ask one more important question, and that is, what changes can I make? The subject we're going to be working with today, is a scrub jay. Now, the scrub jay is a perfect subject for this basic skills weight, because it's made up of the basic shapes we've been talking about. We see egg shapes, we see ovals, we see bent forms, we see rectangles, and they're going to be at various axes. When we're ready to draw our scrub jay, remember we're going to spend most of our time observing and we really want to focus the conversation in our head. Let's take a look at our subject and ask ourselves question number one, what is the biggest shape? In any subject it's easy to get seduced by details. Most beginning artists assume that it's the details that make the drawing. But the reality is, none of these details make any sense if they're not meticulously arranged in relationship to the larger shapes. At the beginning, we ignore every detail and focus solely on the largest shape. Take a look at our subject. What do you see is the largest shape in the scrub jay. Hopefully after the previous four days, it's clear to you that the largest shape in this drawing is the oval of the bird's body. Once we're confident about the answer, we don't draw yet, we move on to question two. We can immediately see that the oval of the bird's body is not on a horizontal axis, nor is it a vertical axis, which means that it has to be on some kind of diagonal. The oval of the bird's body is pretty close to, but not quite a 45 degree angle. It's tilted slightly more down, probably a 42 or 43 degree angle. The exact number isn't important. What is important is that you observe and analyze the axis before attempting to draw the shape. When we are observing and analyzing the first shape at a drawing, the answer to this question depends on how big you want your drawing on the page. We know that we'll want to leave enough room with a top for the head, at the bottom for the legs, and to the left for the tail. Once we have an idea of how big we want the oval to be, we're still not going to draw, we now move on to question number four. Once again, because this is the first shape we're drawing, we answer this question in relationship to the page. I would like the bird to be on the right, so it can gaze left into the emptiness of the page. Before my pencil ever touches the paper, I figured out what the biggest shape is, what axis it's on, how big it should be and where on the page it should go. Once I've answered these four questions, I'm now ready to make my first light attempt. Keeping the answer to my four questions in mind, you'll first see me just pantomime while visualizing the shape on the page. Once I'm satisfied with the axis, size, and placement of my oval, I'll tip my pencil down and make my first soft light attempt. Despite all of the thought we've put into this shape before drawing it, we never want to assume that we've drawn it right the first time. So before moving on, we're going to ask what I consider to be the most important question and the question that makes the difference between good drawers and great ones. As we talked about on day one, very rarely to artists get it right the first time. Drawing is a process of iterations. In every iteration, we have to examine what we've drawn to see how close our attempts are to our intentions. This is an opportunity to see if there any changes or additions we can make. Is this oval at the right axis, in the right place and at the right size? If the answer is yes, you can move on. If the answer is no, don't bother erasing, simply alter the oval to make it a little closer. I'm happy with the axis, size and location of the oval. Now I'm noticing that the shape is a little more complex. It seems to have three sides that are flatter. Remember, the metaphor here is that these shapes are like lumps of clay. We want to get them at the right size, at the right place, but we can alter them. You'll see me now flatten out three sides to correspond with what I observe of the bird's body. You'll notice that I've drawn these three flatter lines darker than the initial oval. This is a way for me to keep track of which lines are more accurate. Take a look again at the reference drawing to see if you can observe the flat edges that I just drew. Because these flat lines are darker, I can move to another part of the drawing and when I come back, it will be clear to me which lines are my first attempt and which lines were my more accurate second attempt. Once I'm satisfied with this large foundational form, I will repeat this series of five questions, but this time asking what is the next biggest shape? I'm seeing the next biggest shape is this slightly bending rectangle for the tail. Now it's very common in a class for students to answer a question like this by saying tail. While technically not incorrect, it's important to note that tail is not a shape. As artists, it's critical that we're always translating objects like tail into basic drawable shapes like bent rectangle. It's also important to note that the tail isn't a perfect rectangle, but the idea isn't that a rectangle perfectly describes the tail it's that this is the closest and most foundational form. Remember, we will further shape this rectangle later on in the drawing process. Now that we know the next biggest shape, it's time to move on to question number two. One trick I often use to figure out angles and axes is to lay the pencil down on the page at the rough angle that the form appears. This allows me to visualize what angle the form will be on the page into compared back to the reference image. I can also think about it in terms of degrees. Once again, it's not important that you get the exact degree before you draw it, but it's one more way for you to evaluate your axis lines. The angle of this axis line appears to me to be right around 30 degrees. Once I have an idea of the angle of the axis, it's time to move on to question number three. You'll remember that the first time we asked this question regarding the oval for the bird's body, we answered it in relationship to the page. But from here on out, whatever new shape we draw will be compared back to the previous shapes we've drawn. For example, the rectangle of the tail is almost, but not quite as wide as the oval for the body. Remember, It's not important to know exactly how big it is compared to the oval. We just need to get enough of an idea to make our first attempt. The first answer to this question is rather obvious. The rectangle for the tail needs to be attached at the far left side of the oval for the body. But before we draw, let's investigate further. Does the rectangle connect nearer to the top of the oval or the bottom? The more you can inquire about the placement of the shape, the more accurate your first attempt will be. Now that we've answered the first four questions, it's time to make our light attempt at the shape. Keeping in mind the answer to my four questions, I'll now lightly draw in my first attempt to the shape. Although I'm conceiving of the form for the tail as a slightly bent rectangle. I can see the left side of it is slightly rounded and comes in a little more at the bottom than at the top. You'll see me modifying the form as I'm drawing it, just as a sculptor would while working with a lump of clay. This is my way of thinking about question five. What changes can I make as I'm drawing the form? The more you practice, the more you'll combine these questions in your head. The next biggest shape is the oval for the head. It's slightly tilted up on the left side. It's only about one quarter or one fifth the size of the oval for the body. It's located somewhere between one quarter and one and a half inch above the oval for the body, and the right side of the oval for the head is in just slightly from the right side of the oval from the body. Now that I know what shape I'm drawing, what axis it's at, how big it should be and where on the page it should go, I'm ready to make my light attempt. Although there's a lot more to drawing than just these five basic questions, this gives you a good idea about what the drawing process is all about. We start with the biggest forms, look for the most general relationships, and start off our drawing as lightly as possible with the idea that it will be modified along the way. We repeat the sequence of questions, the drawing will get more and more specific as we deal with smaller and smaller forms. The rectangular form for the leg. The triangle for the beak. The circle for the eye. With each of these shapes, we're paying close attention to its axis, size, and placement. Remember, none of these lines are intended to be seen by a viewer. They're intended to serve as a solid foundation upon which we will hang all of the details, the shading, and the dynamic and expressive marks that make a drawing beautiful. The more you go through this sequence of questions in your mind, the more intuitive they will become. As you gain experience and confidence, you can supplement your basic shapes with more complex forms that may not be easily named but overtime you'll develop an intuitive reaction to shapes, to be able to analyze complex forms and put them down on the page. If you're unsure about what the shape is, try and ask yourself what is the closest basic shape it looks like. It's important to remember that there's not always going to be one answer to this question. The fact that drawing is an art form means there's a lot of subjectivity involved but these five questions are meant to give you a rough framework to work within that hopefully demystifies the form, and allows you to understand it well enough to get something on the page. The five questions you've learned today are a wonderful way to train your brain to think like an artist. But I don't want to give the impression that just going through these five questions over and over and over again, encapsulates the entire drawing process. In this final demonstration, you'll see the result of hundreds of hours of practice of training my brain to translate everything I see into basic shapes and then immediately analyzing their axes, size, and placement on the page. Once your mind becomes acclimated to evaluating form in this way, you'll get quicker and quicker until it becomes intuitive. Your mind will immediately evaluate form in this way without you ever having to consciously think about it. You'll notice there are no long pauses for evaluation as you saw in the first demonstration. However, it should be clear to you that I'm still following the three principles of drawing we talked about earlier. The drawing starts out using the lightest lines and eventually gets darker as I developed more confidence and certainty about the form. I'm working with the biggest shapes and forms first and slowly moving my way down to the smaller ones and in working with the most general information first before ever dealing with specifics. Now that the basic information is drawn in, let's speed up the process. What you'll see is me sculpting the basic forms into the more complex forms required for drawing this bird. Every new pass is a new opportunity to refine and alter the forms and with each iteration, my lines gets slightly darker, signaling to me which lines are the most accurate. With confidence that my primary forms are correct, I can start to add secondary and tertiary forms but it's important to remember these are always drawn in relationship to the previous larger shapes that I've drawn. This constant re-evaluation and refinement of form ensures that when I darken up the details, they'll be in the right place. One of the most common missteps I see in drawing is students darkening details before they're sure about where the form should be. Countless times I've seen students lovingly render a detail only to realize that it's not in the right place and it has to be moved. This is why patience and a willingness to adjust the form is so important while you're learning to draw. The tiniest details are usually some of the last things to be added in the drawing process. One of the things I encourage my students to do in classes is to not only watch what comes out of the pencil, but to watch how the hand holds the pencil and how the arm moves while the drawing is happening. One of the things you'll notice is that at the beginning of the process, the arm moves quickly, fluidly, and in large motions across the page. Now that we're nearing the end of the drawing process, notice that my hand motions are much smaller, slower, and more articulate but even here during the final stages of the drawing, I'm still not just tracing over the lines that I've already made, every new pass is still an opportunity to alter or refine the forms. Try not to be in too much of a hurry to make more finished drawings. It's much more valuable to stick with these basic skills and really get good at them before attempting to darken up drawings or add any details. The reason I've included these final touches in this Basic Skills Program is to demonstrate the importance of these basic forms and the critical role they play in allowing me to add the details later on. You also may have noticed that I haven't used an eraser during this process. This has less to do with being a skilled draftsman and more to do with the drawing process as a whole because the initial basic forms and the multiple iterations that came later on in the process were made using such light lines, there's very little to erase. I would even argue that these kinds of process lines being visible at the end of the drawing add an interest and dynamism that wouldn't be there if we had erased them all. One of the reasons that drawing has fascinated human beings throughout history is the fact that it provides an intimate glimpse into exactly how the artist was thinking about a subject while they were drawing it. If you know what to look for, a drawing can reveal just as much as a diary entry, giving us a glimpse of the specific ways that artists think and feel about their subjects. The last thing I'd like to talk about before we wrap things up for the day, is how you're talking to yourself in your head when you make a mistake. Now remember, drawing is a process that takes a huge amount of practice and during that practice, you know that you're not going to get it right most of the time. It's important that when you attempt something and it doesn't work out, be kind to yourself. Be patient. I found that adult students who are learning to draw are often brutal with their own self-criticism during their learning process. So I'd like you to adopt this one simple rule: don't say anything to yourself in the privacy of your own mind that you wouldn't say to a child learning to draw. Remember, you're going to be doing a lot of drawings that simply don't work out. I would encourage you that when you do withdrawing that doesn't go the way that you hoped, get excited. You are one drawing closer to one that will. Your assignment today is simple, go find something that you're passionate about or fascinated by and use these five questions to get a basic form down on the page. Remember, keep your subject simple at the beginning. You'll have plenty of time later on in the drawing process to tackle more complex objects when you have more knowledge and experience but for now, try basic subjects. Birds are wonderful, but if they're not your thing, that's totally fine. The kitchen is a wonderful place to find cups, bowls, fruits, vegetables, and all kinds of basic forms to work with but the important thing is you choose something that you are interested in.
7. Scrub Jay Demo Pt 1: Simplifying Shapes: Welcome to the first full length demonstration of the basic skills section of the art and science of drawing series. In this demonstration, you're going to see me go through the entire process, start to finish from a blank page to a fully completed drawing. It's important for you to realize that because I'm doing a finished drawing, I'm going to go far beyond what you've learned in the basic skills section. You're going to see me add a lot more detail that I'm asking you to do in this first section. You'll also see me do shading and textural work. Now, even though I'm going to be using skills that you haven't been introduced to yet, it's important to me that you get a sense of the entire drawing process. In particular, how the basic shapes that you are learning to draw lay a foundation for the entire rest of the drawing. But in addition to that, I also want you to see that this idea of basic shapes goes through the entire drawing process. You're going to see me draw a lot of details in this drawing. But every detail, no matter how small, I am thinking of as a basic shape. Not only am I thinking of it as a basic shape, every tiny detail I'm thinking about the same concepts that you've learned in this basic skills week. I'm thinking about how big they are, what direction the lines are going, and where on the page they should be placed. These foundational skills that you've learned this week are going to be useful throughout the entire drawing process, from the biggest, most fundamental shapes to the tiniest of details. Every shadow has its own shape. Every detail has its own shape, every texture has its own shape. By recognizing and drawing them, you'll be able to produce drawings with a deep sense of texture in detail. Now as this drawing progresses, and as I draw more and more shapes, and the shapes I'm drawing gets smaller and smaller, you're going to see me talk more about patterns. When drawing details, you'll often find that shapes are repeated over and over and over again. I really want you to watch for that in this drawing, how shapes create patterns and to see if you can figure out how those patterns are organized. Now again, for those of you who have just started the art and science of drawing series, I don't want you to feel like you should rush into finishing a drawing like this. The art and science of drawing series contains many courses with different focuses. This is just the beginning. But even so, I wanted you to see how these ideas of basic shapes inform the entire drawing process. But I don't want you to be in a rush to feel like you have to do finished drawings like this. In fact, if you're intending to go through the entire series, then I would actually say to hold off on trying to finish drawings. But for those of you who have enrolled in this basic skills course and aren't intending to go further, I also want you to see how far you can take even these basic skills. How just breaking your subjects down into basic shapes will really improve your drawings. The final thing I want to address before we get to the demonstration is, this is not a directed draw. This isn't a step-by-step drawing that I want you to follow along with. I've been teaching drawing for many, many years. Although I think directed draws have their place, I think that adults learning to draw should really stay away from a step-by-step drawing process that you are expected to follow along with. Now when in directed draw, you're only learning how to draw one thing in a very specific way. Oftentimes, those skills don't translate to other subjects. But I'm more interested in giving you the tools and the concepts you need to learn how to draw anything and to do them on your own and in your own style. That's what being an artist is all about. You don't need to be shown how to do something step-by-step. You want to be able to create things on your own, in your own way, and have all of the tools necessary to do that. No matter what your goals are as an artist or where you are in the drawing process, I hope you find this demonstration useful and that you enjoy it. The very first thing you're going to see me do is break down the bird into its most basic shapes. I'll start with the biggest shape, which is the oval for the body. I'm paying attention to its axis, its size, and its placement on the page. You'll notice that almost immediately I'll begin refining it. You won't have to go through all five questions in order every time you draw. Remember, these are basic guidelines, it's not a system. It's not important that all of the shapes you draw are exactly in a descending order according to size. Here you can see I've got a small oval for the head, I've got a larger oval for the body, and it got kind of a rectangular shape for the tail. But I've already started to refine all of them. I want you to notice how lightly I've drawn these. Again, the lighter I can keep these lines beginning, the more room I'll have to darken them as I go on. You'll notice that throughout this process, I'll work around the entire image. I won't get caught up in just one place. You'll see me make constant small refinements. As the drawing progresses, you'll see me draw with darker and darker lines. Remember, this way I can tell which attempts were more accurate by the darkness of the lines. It's also important to note that, these light lines that get progressively darker have nothing to do with value at this point, it's not about shading. At some point later on in this demonstration, you'll see me shift over to drawing texture and shadows. But until then, these light to dark lines are just a system that I use so I can tell which parts of the drawing are more accurate because they're darker and which parts of the drawing are less accurate because they're drawn lighter. You can see that I've used a simple triangle for the beak and for the legs, you'll see me basically breaking them down into a angles first trying to figure out what direction the forms of the leg and the feeder going before attempting any detail. Before I move on and make any further refinement, it's important that I'm really certain that these big shapes are in the right place, at the right size, at the right axis, and that they're all working in relationship to one another. Now I can always come back and refine these shapes more. But once I'm certain that they're starting to work, I can go and add refinements to the drawing. One of the common questions I get from students at this stage of the drawing process is, do all shapes have to fall neatly into a category? For example, does every shape have to be either a triangle, a circle, a rectangle, or an oval? The answer, of course is no. You want to simplify the shapes, but not all of them are going to be easily recognizable or nameable. It's also really important to remember that there's not just one way to do this. Every artist will approach this a little differently, focus on different kinds of shapes, or simplify the bird into different shapes. There's no one right way to do this. Your job as an artist is to figure out what level of simplification works for you, what kinds of shapes make it easier for you to see the forms, and the order that you're going to place these shapes down on the page. Now you can start to see that I'm breaking down these shapes a little further, I have shapes for both wings. The larger one on the right that we can see more of, and the smaller shape on the left for the wing that's a little behind the bird. Once again, note that as the drawing progresses, my lines are getting a little darker and they're not quite as soft as they were before. Now I'm working on some of the extremely small shapes for the feet. The reason that I'm drawing the details of the feet before attempting the details on the head, is just to get my mind and hand used to dealing with smaller details. It's just a small way to get a little bit more practice putting small details in the right place before I try and place the eye or draw details on the beak which is a much more important section of the bird to get right. You'll also notice that as the drawing progresses, the kinds of strokes that I'm using are seeming to get smaller and more controlled. At the beginning of the drawing will draw in really big shapes. You saw me really swinging the pencil around quickly. But as the drawing progresses my hand slows down and the strokes are much tighter and more focused. Now the image of the bird is really coming along. We can really start to make out some of the specifics of the bird. There's a magical moment when the individual recognizable shapes like ovals and rectangles suddenly turn into something very organic and life-like. But it's critical for you to note that as I'm drawing, I'm not thinking in terms of words like eye, beak, body, or tail. I'm always translating these forms into basic shapes. As soon as you know what shape you're looking at, then you can draw it. If I'm not thinking in terms of shapes, I'm thinking in terms of how long the line is and exactly what direction it's traveling. I know this seems counter-intuitive, but by thinking of any form in terms of its shapes and the direction and lengths of its lines, is the easiest way to get something recognizable on the page. Between every phase of the drawing, I'm going to stop and really look at what I've drawn so far to really make sure that everything is in the right size, is at the right place, and is at the right angle. Now that I'm drawing the details of the head, I'm being much more careful than I was with the feet. The reason is that if I get the feet a little off, most viewers will not notice or care. But the eye, the beak, the shape of the head, these are all things that viewers are much more concerned with, and will be much more critical about. Each time I work my way around the drawing, you'll notice that I'm breaking up larger shapes into multiple smaller shapes. But because I put so much care and attention into the beginning of the drawing, I don't have to worry that the body or the tail or the wing are in the right place or at the right size. I know they are because I've checked them and I wouldn't move forward at the drawing until I'm sure. This allows me to layer these smaller shapes on top of the larger shapes certain that all of the larger shapes that I'm building upon are accurate. Now you can see I'm starting to work my way around the edge of the drawing and focusing on all the small details that I was ignoring before. I'm starting to record small curves in the contour. My new angle changes in some of the smaller details that will really bring this drawing to life. But I'm still thinking in terms of shapes and lines. Even though this is starting to really look like a bird to a viewer, in my mind, it is nothing more than a collection of shapes, lines, angles, and relationships. Now, you'll notice that I'm still making small refinements in the larger shapes. I don't want you to feel like you have to get each step perfectly accurate before moving on. But it's just a good habit to get into to really check the accuracy of what you've drawn before building on top of it. But assuming you're drawing lightly, you'll have ample opportunity to come back and change things even late in the drawing. Even though this drawing is getting darker and darker, you'll still notice that I'm using pretty light lines. Any line I've drawn so far would be pretty easy to move or erase. I haven't fully committed to any of them yet by darkening them. This is a great example of the collection of basic shapes that you want to break your drawing down into before you really do any detail, shading, or texture. Remember, drawing isn't a step-by-step process. There's not a clear moment where you should shift from thinking in terms of basic shapes and angles toward thinking in terms of texture and shadow. But generally speaking, you want to make sure that the form is leading at this simple, lightly drawn stage before adding details and darkening the drawing up in ways that are much more difficult to change. Before I move on and start to add details, I'm going to take one last look to make sure that there's nothing else I want to change, because the next part of the process will be darkening of the drawing and starting to place small details.
8. Scrub Jay Demo Pt 2: Adding Detail: Once our subjects has been broken down into its basic shapes, both big and small, we can begin to separate the darker areas from the lighter ones. Here you'll see me use this side of my pencil to lay in a light washer value. You'll see me do this in a number of areas. It's important to note that this isn't really shading, instead, I'm darkening the areas where the bird is blue and leaving the areas that are white, the color of the paper. Just like the other steps of the drawing process, when I lay down this blue, you'll notice that it's not very dark. I'm putting it in pretty lightly and I'll darken it as I become more confident. Now, that these darker areas are drawn in, you'll see me begin to add some detail. There are two things I'm thinking of when I'm adding these details. The first is the direction the lines are going. Our subject is incredibly textured with different feathers clumping together, layering over one another and traveling in many directions, I want to start to capture that in the drawing. Accurately observing and drawing the directions of all of these lines is very important. The second thing I'm thinking about is what line I want to use to draw these details. I can use light lines or dark lines, soft lines or hard edged lines. Now, even though I'm starting to draw details, it's really important to remember that I'm still thinking in terms of shapes. You'll notice that each of the forms of the bird that I'm putting in no matter how detailed, have their own specific shapes. For example, many of the shapes in the wing appear to be either long rectangles or long slender triangles. Near the white center of the bird's body, you'll see me use very soft lines because I want the bird to appear soft. To do this, you'll see me drawing with the side of my pencil, applying a very light amount of pressure to make sure that these lines don't get too dark. When I want certain areas to stand out, you'll see me darken the lines. Once again, you'll see me work around the entire drawing, I'm not detailing and finishing one section before moving on to the next. It's important that the drawing develop as a whole, this is the best way to have it appear unified at the end of the drawing. Because I very carefully drew in the shapes of the bird at the beginning of the process, I am now free to focus on all of the small details and textures. It's very common for students to try and add these details, and textures before ever even figuring out with a basic proportions of the subject are. This is a huge issue and you want to avoid it at all costs. This texturing in detail takes a good amount of time and effort, and you want to make sure that you're building it on top of an accurate collection of big shapes. You'll see me go through the same process at the tail, first, you'll see me break the tail down into shapes. Now, these aren't big shapes anymore and they're not all recognizable or easily named, but nevertheless, I'm thinking in terms of shape and direction. One thing to remember when you're drawing this detail, is that not all areas of your subject will require the same level of accuracy. What I mean is that if you're drawing the face of the bird, placing the eye or trying the beak, you need to be incredibly accurate because this is where people's eyes are going to look the most, and it's the place where they'll be able to tell most easily if something is off. However, when you're drawing tail feathers, people are much less likely to see any errors that you may make. They'll just assume that this particular birds arrangement of feathers looked the way you drew it. You can feel free in areas that require less accuracy to be a little more expressive and free with your mark making. One of the things I want you to pay attention to in this part of the demonstration, is how much layering it takes to get a good amount of texture and a drawing. You'll see me make multiple passes going over and over the same areas of the drawing, building up a dense layer of marks. One thing I often remind students at this stage of the drawing is it doesn't have to look good until the end of the drawing. During this texturing stage, drawings often look awkward and unfinished, and that's perfectly fine because they're not finished. You can take as much time as you need to add texture in detail and to refine the marks you put down on the page. If you're not happy with the way that drawing looks at this stage, remember that's perfectly normal. You just want to make sure to keep your mind focus on solutions. What does the drawing need to pull together? What can you add that'll make the drawing work better? What's missing that you haven't drawn yet?. Above all else, trust in the process. Again, drawing takes time and there are many awkward stages in a drawing where it seems to be getting further away. But if you keep an open mind and continue to problem-solve as things come up in your drawing, you will most likely end up with a lovely finished piece of work. Now, take a look at the lines and marks I'm using to draw the feet of the bird. Unlike the body of the bird, I want the feet to look hard and in certain places, sharp. This means I can draw with hard sharp lines. I want the feet really contrast with the softer body of the bird. You'll slowly see me transition into using darker and darker lines. Now it's important to remember the darker lines are difficult to erase. You really want to make sure that you're ready to start adding them. I always like to make one last check to make sure there's nothing I want to change in the larger shapes before I start adding hard and dark lines. Once you're ready, you can comfortably begin to darken more areas of your drawing. It's important to remember that these darker lines are layered over all of the softer lines underneath. Even though the darker lines stand out more, all of the marks underneath them will still be visible. One thing people often forget is the drawing is a transparent art. It's similar to watercolor in that sense. Each pass of the drawing is semi-transparent and often completely transparent and reveals all of the mark making underneath. This is why it can be so satisfying to create textures, and why drawings often contain more detailed than oil paintings or other kinds of opaque paints. Watch my pencil as I draw. You'll see me constantly shift back and forth between dark lines and light lines, soft lines and hard lines, and long and short strokes. Now you'll see me move away from the tail and move to the wing. Remember we want to constantly move around the drawing and not finish one section before moving on to the next. We want the drawing to develop as a whole. When I start drawing around the head of the bird, I'm going to pay much more attention to the specifics of the lines and marks I'm using. Remember, the head of the bird and the face in particular are where viewers will be most critical and be most likely to figure out if you've made an error. It's also the place that should contain the most detail because again, that's where viewers are going to look the most. Drawing the eye should be one of the most detailed things in the drawing because that is where people will look the most. When I start adding detail and darker lines to the eye, you'll see me switch to the tripod grip. Now 90 percent of the drawing I do, I do using the overhand grip so I can easily engage the side of the pencil. But when pressing very hard and doing tiny details like I need to do in the eye, the tripod grip is most useful. You'll notice that these are some of the smallest and most delicate strokes I'm making. Human beings love to look at faces and particularly eyes, even when they're looking at animals. You'll want to draw most of your detail around the eye. It's important to remember that the human eye can only focus on a small section of the drawing at once, and we know that human beings are going to be especially focused on the eyes. By focusing a lot of attention in detail right around the eye, the viewer will often assume the rest of the drawing is more detailed than it actually is. Now that I've addressed some texture in detail over the entire surface of the bird, I can start to think about what kind of details I want to add next. I know that the eye should be the most finished section of the drawing. For the time being, I'm going to continue to focus attention there. It's critical to note that even though I'm doing small details, I'm still thinking about them in terms of shapes. One of the things we're seeing a lot of in a drawing like this are patterns. You'll notice that every section of the bird seems to have a pattern of shapes. On the body of the bird, we see a lot of curving triangles that all seem to be going in a particular direction. Around the eye of the bird, we see different but distinct patterns of light and dark and of texture. The lines around the eye of the bird seem to create a sense of rhythm. I'll want to pay particular attention to the shapes of these details, as well as their placement and proportion. Sometimes detecting individual shapes of details can become difficult. But remember, even if you can't figure out the shape, every shape is made up of lines. Try asking yourself what direction the lines are going? How long they are? What type of line quality you should use to draw them. By repeating this process over and over, you'll add a dramatic sense of detail and texture to your drawings. We'll conclude the demonstration of this scripture in the next video.
9. Scrub Jay Demo Pt 3: Finishing the Drawing: In this final part of the demonstration, you're going to see me complete this drawing of the scrub jay. Now it's important to remember that this part of the demonstration goes far beyond the basic skills that you learned in this course. But it's important for me that you understand the drawing process as a whole and you can see how this thinking in terms of basic shapes, not only is the best way to start a drawing, but it's one of the most important skills and processes you're going to learn all the way through the very end of the drawing. To take a drawing to this stage requires a knowledge of shading and mark making that you haven't yet been introduced to. But this idea of basic shapes is at the foundation of every shadow I draw, every texture I create in every single mark that I make. First I drew the big basic shapes of the head, the body, and the tail. Next I started to draw the secondary shapes like the wings and the feet. I refine them and made sure that they were correct before I started building other parts of the drawing on top of them. Now that I'm doing detail, I can free my mind of being concerned with proportion or these big basic shapes. I already know that they've been done accurately because I've checked them. I wouldn't be drawing these kinds of details are dark lines over these basic shapes, if I weren't reasonably sure they were all correct and working for the drawing. Now my mind is freed up to focus on the exciting and dynamic details of the bird. I no longer have to worry whether or not the drawing is in proportion. I can focus on these tiny details knowing that they are in relationship to the larger whole. It's also important to remember that every detail has its own shape. Once again, I never stop thinking in terms of the shape that I'm drawing or the direction and length of the line. Adding detail and texture to a drawing can seem like it's a pretty redundant process. You'll see me go over the same parts of the drawing over and over again, adding small amounts of detail and texture. But again, this is why drawings can appear to be so detailed because all of those layers are transparent. The medium of drawing is similar to watercolor in that you can see all of the layers of detail underneath. Each new layer of detail, let's all of the details underneath it be seen. In that sense of building up texture is just a matter of patience and effort. One of the things you'll continue to see me do is use darker and harder lines for the area of the bird that I want to appear harder, such as the beak and the feet. You'll also see me use softer marks to create a sense of the softness of the feathers of the bird. I'd also like to remind you that about 90 percent of the marks you'll see me make are made using the overhand grip. The overhand grip makes it easy to make soft edge marks, but also it's easy for me to switch and immediately make a darker, harder edge to mark. In this long complete demonstration format, you'll see the drawing evolve a stroke by stroke. I would recommend watching this over and over again so you can see what the drawing looks like at each stage. Remember, drawing is not a step-by-step process. It's not as if I'm using the exact same set of steps every time I draw, but I am adhering to a few guidelines or principles. Students hear me say this over and over again in class, a drawing should go from big to small, from general to specific, and from simple to complex. You'll start off with the biggest shapes and slowly work your way down to the smallest shapes. You'll want to work with the subject in the most general way you can before adding any specifics, you want to think about the subject as simply as you can before thinking in terms of complexity. Around this point in the drawing, I started to ask myself this question, what does the drawing need to be finished? This is actually a much more difficult question to answer than you might assume there is no correct way to complete a drawing. Many people assume that a finished drawing means that all areas of the subject are addressed equally. But I actually don't think that's a very good definition of finished. I often like to intentionally leave parts of the drawing underdone, or at times almost entirely unaddressed for dramatic or atmospheric effects. I like to think of drawing as a form of communication. One of the ways I like to define a drawing is a visual way of me telling the viewer, "I thought this was very interesting and exciting, and I thought you might find it interesting and exciting as well." Therefore, one of my favorite definitions of when a drawing is finished, is when I have showed the viewer all of the parts that I think are most interesting to me. So let me talk about what that means to me in this drawing. I loved the dramatic turn of the bird's head to our right. I wanted to make sure that the direction of all of the feathers seem to amplify that twist of the bird's neck. How I've drawn the feathers that move from the head of the bird to the neck, almost appear to be like water flowing around a curve. Your eyes can follow this stream like collection of lines, that start at the bird's head and twist around its neck. I also loved the color contrast of the bird, that some areas were very dark blue and other areas were left lighter. I loved the contrast of the hardness of the feed and sharpness of the claws, to the softness of the feathers of the bird. I love all of these small textures, patterns, and details that can be found in the bird's feathers, and the way they all seem to have their own shapes in own directions. I love this determined to look on the bird's face. So for this drawing to be finished means that I've communicated to the viewer all of the things that are interesting and exciting to me. That often means that certain areas of the drawing will remain unfinished and that's fine. In fact, I would prefer that my drawings leave sections unfinished, and leave them open to interpretation, than overwork them. Drawings that are left unfinished or that have areas that are less finished than others, invite the viewer to complete the drawing. It allows the viewer to participate in creating the illusion. Here at the end of the drawing, I want to remind you of one of the first things that we talked about at the beginning of this course; that all drawing is, is smearing pigment around on a surface, but if done correctly, it tricks our mind into seeing all manner of objects and sometimes can even convey the illusion of life. A drawing where everything has been completely rendered seems closed to me. But a drawing that has left certain areas unfinished or less finished than others, allows the viewer to participate. It allows them to construct the illusion with you. Part of the fun of looking at drawings and doing drawings is that people know it's not real. People understand that a drawing is a perceptual trick. Even though we know the trick, it still seems rather astounding. Even though what you're seeing on the screen right now is nothing more than blue pigment carefully arranged on a piece of paper, it's difficult to not look at it and see a bird. So the question you want to answer when finishing a drawing is, what do you want the viewer to take away from this? What do you want to show them? What do you want them to see, and how do you want to make them feel? Once these questions are answered, that's how you'll know when you're drawing is finished. I'd like to conclude this demonstration with a few thoughts: First, it's important for you to remember that the skills I've used to complete this drawing go much further than what you've learned, the basic skills section of the art and science of drawing series. But it's important to me that you get a sense of the entire drawing process, so you understand what role basic shapes play in the initial stages of the drawing. But not only do basic shapes play a critical role at the beginning of a drawing, you should be thinking about basic shapes the entire way through. Every shadow has its own shape, every small texture has its own shape. There isn't a single detail, no matter how small, that doesn't have a shape. One of the most important skills you'll learn as an artist, is how to translate form into shapes. You shouldn't be thinking in terms of beaks, feathers, tails, or heads. You should be thinking in terms of their shapes. As soon as you understand what shape or form is, big or small, you'll understand how to draw it and the more skilled you are at observing, analyzing, and drawing the proper shapes in their proper places, the more prepared you'll be for the shading and texturing process later on.
10. Botanical Demo Pt 1: Basic Shapes: Welcome to the bonus demonstrations of the art and science of drawing, Week 1 basic skills. In this video, I'm going to demonstrate how to draw a botanical subject. For today's subjects, we're going to be drawing three flowers, two tulips and one callow lily. Now, all three of these subjects are complex compound organic forms. What that means is they're not regular and predictable, like something like a cup or a bowl. Instead, the form is irregular, it's less predictable. Yes, all tulips have similar sizes, shapes and petals, but every single one is completely unique and all of them change in unpredictable and organic ways. Now, we're working with organic subjects, we have some interesting opportunities. Even though organic compound subjects are more complex than other forms, when we're drawing subjects like flowers, we actually don't have to be quite as rigorous or accurate in our drawing. So what I mean by this is imagine that you are drawing a face, if you get an eye in the wrong place or at the wrong size, everybody notices. The people who have never drawn before in their life will come up to you and tell you that your drawing is wrong. But when you're drawing a subject like a tulip and you draw a pedal a little out of place or at the wrong size, most people won't notice or care. They will simply assume that that's what the tulip that your drawing actually looked like. Now, there are some limitations to this idea, but for the most part, you can free yourself up a little and not be so concerned about getting every tiny detail in the right place. Now, I want to be clear, even though you don't have to be as accurate with compound organic subjects, that is not a reason to do sloppy drawings. It's not an opportunity to start to being lazy with drawing process. Instead, what you're going to see me do is take liberties with the form. In this demonstration, you're going to see me intentionally alter the subject that I'm drawing for a dramatic or aesthetic effect. If I don't quite like the positioning of one of the flowers, I can change them. If I don't like the size, I can change them within a certain window. You'll also see me drawing the leaves of the flowers with a little more flair. I'll be making them a little more curvaceous than they are in the photograph. You have to remember that other than you, nobody's going to see your reference photo right next to your drawing. When the drawing is done, it stands on its own. Most people will just assume that whatever is in the drawing is what the subject looked like. Drawing organics subjects is a great opportunity to start to experiment and explore aesthetics a little more. If you don't like the way something looks or the position of something, change it. Now, also in this demonstration, you'll hear me talk a little more about shading. Now, I want to be clear that in the basic skills section, it's a little early for you to start trying to shade drawings, but I did want to give you a sense of what the shading process looked like, and a brief introduction to some of the ideas behind shading. One of the things you'll see me draw and talk about in today's demonstration is the idea that every shadow has its own shape. That's one of the most important ways that shading relates to this basic skill section. Remember, this basic skills part is all about basic shapes, translating form into shapes, and be able to accurately draw those shapes at the right size and at the right place. That includes shadows, every shadow has its own shape that you need to figure out before you actually apply any shading, and that's part of what you're going to see me do today. But again, I don't want you to be in a rush to do finished shaded drawings. If you're planning on going through the whole series and order, watch the demos, you'll get a good sense of how the shading process starts to interact with the basic drawing process. But, I would recommend holding off on doing shaded drawings until a little later in the series. For those of you who are only intending on taking this basic skills section of the art and science of drawing series, I wanted to make sure that you've got at least a brief introduction into some of the basic ideas behind shading. But whatever your intentions or wherever you are in your drawing process, I hope you find this demonstration useful and that you enjoy it. As always, the very first thing I'm going to ask myself is what are the biggest and most basic shapes of the subject? The biggest and most obvious shaped to me is the tulip on the upper right. It will easily simplify into a circle or a basic oblong shape. You can begin this one of two ways, you can start off by drawing it as a circle and then adjusting the shape into a more oblong shape. Or you can start off with a more oblong shape. If you are going to start off with the oblong shape, as you'll see me do here, you want to pay attention to the axis, it's tilting. Now instead of moving over to one of the other flowers, next, I'll draw the stem of the tulip. At this stage of the drawing, it's closer to a line then a shape. I'm going to use the skills you learned this week about crafting contours to get the direction the stem is traveling. Remember, this can be adjusted later on if necessary. We just need a starting point. Next, I'm going to try and draw the Callow Lily in the center. The Caliber Lily has a complex organic shape that it's going to be a little trickier to simplify, it's important to remember that there's not a single right way to simplify a shape like this. But instead of trying to capture all of the complex curves, you'll see me break this subject down into straight lines first at the top before using an oval shape at the bottom. Again, this is just a simplification. Once I've got the basic size and shape placed, I can move on. Finally, I'll draw the basic shape for the tool up on the left, which I'm just going to simplify into a circle. Now it's important to remember that when drawing organic forms, we don't always have to be as specific with the size and placement of all the shapes. People expect there to be a greater variation in the sizes of flowers and trees than in say, the human body. Think about it like this, if you're drawing a human face and you place the eyes in the wrong place, or get them too big, everyone immediately notices this. People who have never drawn a day in their life will come and tell you that your drawing is wrong. But when working with a botanical subject like this, if we get this size and placement of a tulip a little off, nobody will notice or care, and in this drawing, you're going to see me take this one step further. I'm actually going to intentionally deviate from what I'm seeing in order to make some aesthetic changes that I think will look better. Remember, the goal of drawing isn't simply to copy as many details as accurately as possible until you run out of things to copy. The goal is that you capture something unique and you share your vision of the subject with an audience, and you're free to take some artistic license here as well. You'll see that I'm beginning to refine all of the shapes of the different flowers. As I'm doing so, I'm allowing my pencil to move a little more fluidly and freely, so that the lines that I'm making might not always be perfectly accurate, but they should appear to have a sense of vitality and dynamism. As always, I want you to notice that as I progress through the drawing and make adjustments and changes, my line quality is slowly getting darker. This way I can tell by looking at the drawing which lines are earlier, less accurate attempts, and which ones are more accurate later attempts. One change you might notice that I'm making in this drawing isn't the tulip on the bottom left. In the photograph, you can see that it's tilted more downward, but in my drawing, I'm tilting, get up a little more. I thought that might make it a little less droopy. Not only am I taking liberties with size and placement of these flowers, I'm also making some pretty big edits from the photograph. You'll notice that I haven't drawn the glass face and I'm not intending to. You should feel free to do whatever you want to do on your piece of paper. You should feel comfortable editing and altering any information you see and to make any changes that you think would improve the drawing. Now I want to be clear, this artistic license isn't permission to just do a sloppy drawing. It's a slippery slope when you begin telling yourself that mistakes and sloppy errors are simply artistic license. It's up to you to decide what level of accuracy you want to draw with. Instead of rationalizing your mistakes away, you should use your freedom intentionally. Have specific reasons for editing or altering the information. During this process, you've seen me continually refine the shapes, carefully crafting all of the intricate curves of the Calla lily. Subdividing the tulips into unique petal shapes. Even when drawing the petals of the tulips, you'll notice that generally speaking, I'm still working big to small. As always, you'll also notice that the drawing is being built up as a whole. I'm not attempting to finish any part of the drawing before moving onto the next part. I'm applying the same steps to the entire drawing. You'll notice that when drawing the stems of the flowers, as well as the leaves, that I'm running lines through one another. At this stage, it's difficult to tell which stems and leaves are in the foreground and which are in the background, because they all appear to be transparent. One of the reasons for this is because I haven't yet decided which ones I want to bring to the foreground, and which ones I want to be covered up in the background. Also, by drawing all of the leaves and stems individually and completely, I avoid having them not match up when they go behind something else and come out the other side. Later on in the drawing, when I add shading, texture, and detail, it will be clear which stems and leaves are in front and which are behind. But for now, I actually find it easier to draw them in this transparent way. If there's one habit I could get beginning students to stop doing immediately, it would be to get students to stop tiptoeing around the contours of the subject using short stubby lines. I often hear students claim that those short lines are their drawing style. But it's unlikely that's the case because that's the way almost all beginners start off drawing. Instead, I would encourage you to find a different mark making. Long fluid and dynamic strokes are always going to seem more compelling and genuine to a viewer, than little short strokes that seem to nervously cling to the edge of your subject. At this stage in the drawing, you can see that I'm beginning to shift to much smaller details. You can see that some of the petals of the tulip now appear to have thin defined edges. Now remember, it's up to you when you draw to decide how much detail you want in your drawing, before moving on to further steps. I'm going to give my drawing a good look to see if there are any small details that I want to include that haven't been drawn yet. In the next phase of the drawing, I'm going to begin adding shading texture in detail. I want to make sure that I'm happy with the size, placement and refinement of all of the flowers so far. I can always go back and refine these shapes later, but I do want to make sure that I've gotten reasonably close to being ready to shade and add detail. The final result of this first phase is a detailed linear drawing of all of the shapes, both big and small, both general and specific of our subject.
11. Botanical Demo Pt 2: Texture & Detail: It's important for you to understand that in this demonstration, you're going to see me do a lot of things that we haven't covered in the basic skills section of the art and science of drawing. The reason I'm including demonstrations that go much further than the basic skills you've already learned, is to make sure you get a sense of the drawing process as a whole, and so that you can see how important the basic skills are when you want to do a more finished drawing. Now, for those of you who are only intending on taking basic skills and not continuing on with the rest of the courses, I want to make sure that you get the most out of this course. I want to make sure that you're being introduced to a wide range of drawing practices. The first thing you're going to see me doing this demonstration, is add some value to the two tulips. To do this, you'll see me use this side of the pencil to lay down a light wash of value using soft, broad strokes. You'll notice that I'm not drawing very dark yet. I'm just giving the tulips a light washer value that I can darken as the drawing goes on. Once I've darkened the tulip, you'll then see me move to the Calla lily. First, I'll establish the shape of the darker area, and then I'll fill it in once again using light, soft, broad strokes with the side of my pencil. Now, you'll see me move around the drawing and begin to darken the leaves. I'll also darken this stems. I'm adding a light washer value to everything that isn't white. You'll notice that for now, the only part of the Calla lily that I'm darkening is the dark purple area in the center. Now, with this initial light washer value drawn in, I'll begin to delineate the shadows. To do this, just like I did with the basic shapes of the tulips, you'll first see me outline the shapes of the shadows. But you'll notice that instead of using a harder darker line, I'm using a very soft edged line. This of course, is because shadows don't have hard edges, they have soft diffused edges, and this should come across in my drawing. Here are those basic skills at work, even in the shading process. Before I draw a shadow, I'm breaking it down into its most basic shape first, before darkening it. At every stage of the drawing process, I like to leave myself opportunities to edit or alter as I go on. Once I'm pleased with the basic shapes of the shadows I've drawn in and the basic values, I can begin to add darker values. You'll notice that I'm switching my grip to the tripod grip. The only time I do this is when I want to bear down on the tip of the pencil to bring the pencil to its darkest values. Throughout the rest of the drawing, you'll see me switch back and forth from the tripod grip to the overhand grip. Again, 90 percent of the drawing I do is going to be done using the overhand grip, but when I need to bear down on the tip of the pencil, I use the tripod grip. Try and pay attention to when and why I switch this grip throughout the rest of this demonstration. One thing to remember is that it's nearly impossible to make soft lines with the tip of the pencil. Anytime you want to make a soft line, you'll want to use the side of the pencil. But I'd also like you to note that many times that I draw a darker, harder edged line, I'm still using the overhand grip. To do this, I'm moving the pencil in the direction of the length of the lead. This allows me to make beautiful, dark, sharp lines. I would encourage you to really spend some time experimenting with the overhand grip so you can experience the wide range of marks that you can make. Now you'll see me move around the drawing and start to add detail. At this stage of the drawing, I don't have to be concerned about whether or not the drawing is in proportion. I've done all of that at the beginning stages. Now, I can simply focus on the details. I'm trying to pay attention to all of the different textures in the flowers. I'm always asking myself would this texture be better drawn with the hard line or a soft line? A light line or a dark line? In this drawing, you'll see me make hard light lines as well as hard dark lines. You'll also see me make soft light lines as well as soft dark lines, and everywhere in between. One thing I'll continually bring up, and that I want you to keep in mind is the drawing is a transparent medium. What that means is that every mark you make will be visible even through all of the other marks you put on top of it. In a drawing, you can build up an astounding amount of detail by layering lines and marks over one another. You'll notice that in some parts of the drawing, I'll probably revisit them and go over them, adding more detail about a dozen times. With each new layer, I'm adding more nuance. As important as it is to watch what comes out of the pencil, I'd also like you to spend some time just watching my hand, how it moves, how it holds the pencil, and where it travels around the drawing. In the tulip on the bottom left, you can now start to see a rough idea of what the details will look like. But again, this will require many more passes. Instead of finishing the tulip, I'm going to move on to the Calla lily. Even though the calla lily is white, it still does have some value. So to begin, you'll see me laying down very light washes of value. Here you'll see me use thin, sharp, light lines to add some of the detail and contouring we find on the surface of the calla lily. Once again, in the darkest areas you'll see me switch back to the tripod grip, so I can bear down on the tip of the pencil. I'd like you to notice, that in many of the areas that I use the tip of the pencil to create dark values, I'll actually go back over them with the side of the pencil, just to soften them up. The calla lily makes for a wonderful central focus, because it has the most dynamic contrast. It contains our darkest darks and some of the lightest lights we see in the entire composition. One thing that it's important to remind yourself as you move forward in a drawing like this, is that it doesn't have to look good until the end. Again, this is something you'll hear me say a lot through these demonstrations. Try not to get frustrated during the drawing process, if something doesn't look right or perfect, you should be solution oriented. Instead of saying something doesn't look right, ask yourself what it needs to look better. Now you'll see me start to add some of the subtle detailing in the curvature of the calla lily. When drawing subjects like this, you'll want to make sure that you're paying very close attention to how these curves lines interact with one another, how they flow into one another, and how they layer one over another. Through careful observation and analysis, you'll be able to capture how the petal curves back and forth. You'll occasionally see me use my eraser to clean up the drawing. Every once in a while the pencil goes where it shouldn't, it doesn't happen often, but it's a very normal part of the drawing process. No artist is perfect. I'll use the eraser to lightly clean up areas that I want to remain light. I want you to notice how delicate the lines are around the edge of the calla lily, as compared to some of the lines I've used in the tulip. The tulip seems a little darker and heavier, while the calla lily seems very light and this is reflected in the kinds of lines I'm using to draw them. Instead of finishing the calla lily, I'm going to move on now to the other tulip. You'll see me go through the same process of adding detail and texture, using a wide range of mark making. One thing you might notice on the surface of the petals of the tulips, are a number of lines that seem to travel from the edge and move inward toward the center of the petal. These add a wonderful sense of texture as well as direction. They help the petal to appear soft and curved. Now we can see that all three of the flowers, start to have a good sense of detail and contrast, but none of them are anywhere near finished. I'm allowing my eye to move over the surface of each of the flowers and to ask myself if there are any small details that I haven't added yet. Now, just because you see a detail doesn't mean you have to add it. But I like to leave myself a lot of opportunities for detail and texture. There's a lot more to do to finish this drawing, but this is a solid start. Around this time, I like to ask myself, what does this drawing need to appear finished? Remember we are not simply copying everything that we see, we want to make decisions. So in the third and final phase of this botanical drawing demonstration, you'll see me at the finishing touches.
12. Botanical Demo Pt 3: Finishing the Drawing: In this third section of the demonstration, you're going to see me mainly focus on two things, refining the details and darkening the contrast. Because of the darkening of the drawing you'll see me use the tripod grip much more in this section. Now that I'm in the final phase of the drawing and thinking about how to finish it, I will only establish my darkest dark. In the basic skills section, you have quite a ways to go before you start thinking about shading. But one thing you can start to think about is that value is relative. You might notice that when I establish the darkest dark in the drawing, the rest of the drawing seems to be pale. It seems to lack contrast. This is perfectly normal and natural. Remember, drawing is a process. It doesn't mean that you've done anything wrong in the preceding stages. This is an opportunity to darken the drawing and continue to add detail and nuance. As I darken up the tulip on the bottom left, I want you to notice how much more dynamic it looks, where the darks have been pushed to their darkest limits. I'm still thinking of the darker details that I'm adding in terms of shape and line. If the details have an obvious shape, that's the way I think about them and draw them. But you'll notice that many of the details I'm adding seem to be linear. The striations in the tulip petal seem to be a series of lines. So for each of them, I'm looking at the direction of the line, as well as its length. I'm also looking at what patterns these lines create together. Once again, I'm not going to finish drawing the tulip on the bottom-left. Instead, I'm going to go and begin darkening the rest of the picture. The curly lily in the center contains some of the darkest darks and the lightest lights, and I want to maintain this contrast in my drawing. Because we're talking about light and dark, there's something I'd like you to consider. In this drawing. I'm using a dark-red pencil. Now you've seen how dark this pencil gets in the center of the curly lily, I'm pushing the pencil to its darkest limits. But it's important to note that every pencil will have its own level of darkness. Because this is a red pencil, It's not going to get as dark as a black pencil, and pencils in the yellow or orange range would not get nearly as dark as the red pencil I'm using here. This is one of the reasons it's important to establish the darkest dark in your drawing and with the particular pencil you're using. You want to have a sense of what the darkest dark in this drawing with this pencil will look like. Only then can you adjust the rest of the values accordingly. In basic skills, you're constantly asked to determine the size, placement, and shapes of the various forms of your subject by comparing and contrasting them to the rest of the shapes. Although there's a lot more to shading that you'll learn later on in the art and science of drawing series, I did want to introduce you to a similar idea here in the Basic Skills section. That is just as size and placement are relative, so is value. Every time I'm adding a value in this drawing, I'm comparing it to the other values of the subject. I'm always asking myself, is this value lighter or darker than the value surrounding it? How does the particular value that I'm currently drawing compared to the darkest, dark in the subject. In addition to comparing the value that I'm currently drawing to the values that are immediately surrounding it, I'm also comparing it to values that are further away in the drawing. I'm letting my eyes glance around the page to see how the value that I'm currently darkening compares to the darkest dark and the tulip on the bottom left. At this stage, you can really see the contrast starting to bring the drawing to life. All too often, students don't explore the darkest registers of their pencil. In these basic skills demos, I've been talking quite a bit about drawing as a transparent medium. I'd like you to take a moment to look around the drawing to see all of the details that you can see through the various layers of the drawing. Every new detail I add, adds depth and complexity to the drawing. You'll notice that I'm not drawing every single detail that's in the photograph, but the details I am drawing I'm often exaggerating, either making them darker or more prominent. Now I'm going to begin to add the same detail in contrast to the stems of the flowers. One thing you may notice in this drawing, particularly in the tulips is that the upper right section of the tulips are lighter than the lower-left sections, this is because the light is coming from the upper right which means that the left sides of the tulips are in shadow. This isn't quite as apparent on the calla lily, because of the twisting and turning planes of the flower. Because the visible section of the calla lily is facing the light it appears to be lit more evenly, but if you notice even on the calla lily, in the very bottom left of the bulbous section you can still see your shadow forming. When drawing shadows on the stems you'll notice that all of the shadow is on the left side. From here, I'll continue to work around the drawing, adding detail as I see it, you'll notice that I've drawn more thin, delicate striations in the bottom of the calla lily. Hopefully you can see the drawing is really starting to take shape now. What began as a collection of simple shapes, is now a detailed, complex drawing with a good amount of texture and with dynamic lights and darks. Now that I'm nearing the end of this drawing, I want to start to ask myself what it needs to appear to be completed. Remember, there's no one right answer to this. Once again, you might notice that I'm changing some of the leaves in the background, I'm drawing some of them more curved than they appear in the reference photo, others I'm editing out entirely. Because I want the flowers to be the main focus of the drawing, I'm not going to put quite as much detail or contrast into the leaves or stems. As I'm completing the shading and detailing process, here are a few ideas I'd like to share. Sometimes I'll take a break of days, weeks, or even months and come back to a drawing before I complete it. During that time, I'll usually set it up somewhere in my studio where I can regularly see it. As the hours, days and weeks go by, it becomes clear what details are missing, what the drawing needs to be more interesting, or which areas appear unresolved. As I'm wrapping up this drawing, I wan to make it clear that in time I may come back and add detail, texture, or entirely new elements. Remember, it's up to you to decide when a drawing is finished but even though this drawing may be different a few months from now, I still think it has a sense of completion to it. I've added a good amount of detail and texture, the flower seem resolved and the leaves and stem seemed to be a little more in the background. You'll notice that the leaves at the bottom of the page I'm drawing softer and lighter than the rest of them, this allows them to fade into the background even more and allow the flowers to take center stage. The final drawing contains a good amount of depth and complexity that comes from the layering of details one over another. There's a variety of different mark making in this drawing, from soft light lines, to dark hard lines, and everywhere in between. Even though there are differences between my drawing at the reference photograph, now that we're only looking at the drawing hopefully you can see that it stands on its own as a completed work of art.
13. Figure Drawing Demo Pt 1: Gesture & Basic Shapes: Welcome to the Figure Drawing demonstration of the basic skills section of the Art and Science of Drawing. The human figure is hands down my favorite subject to draw. It's beautiful, challenging and complex. Figure Drawing is a wonderful combination of both the technical and expressive sides of drawing. To get good at drawing the human figure requires a lot of study and practice. In addition to drawing the figure for many years, I've also studied human anatomy. The reason I'm telling you this is because it's important for you to understand that this is just an introduction to Figure Drawing. My hope is that you're continuing on with your drawing practice after this and will get to the point where you're comfortable and competent drawing the figure. But even if all you ever learned about drawing are the basic skills you've learned in this course, you can still get started drawing the figure. Everything you've learned in this course so far about breaking a subject down into its most basic shapes and drawing those shapes properly on the page in relationship to one another will get you started drawing believable figures. In this demonstration, you're going to see me use a lot of techniques that you haven't yet been introduced to in the basic skills section. But I just wanted to make sure you get a sense of how these skills relate to the drawing process overall. I don't want you to be in a rush to get to Figure Drawing. I want to make sure that you're comfortable and competent at the skills you've learned in this course thus far. But once you're ready, trying to apply these skills to the figure is a great challenge and a great way to really practice what you've learned. Now, just like in the other demonstrations, I'm going to focus on how basic shapes relate to the overall process. You're going to see me use a series of basic shapes to first construct the figure before I begin adding details. But one thing it's important for you to remember is that the figure has a much lower margin of error than other subjects. It's more important that we pay close attention to the proportions of the figure. Now, if you decide to study Figure Drawing seriously, at some point, you should learn the basic proportions of the figure, but you'll be amazed at how far you can get just by using the questions and the processes that you've learned in this course. In fact, most of the time I'm drawing the figure, I don't rely on the basic proportions, because as soon as a pose has any foreshortening in it, all of those basic proportions go out the window anyway. So most of the time I'm using the exact same processes that you've learned in this course to draw the figure in proper proportion on the page. The final thing I wanted to share with you is that the process you're going to see me use here is absolutely a simplification of the Figure Drawing process. The actual process that I use when I draw the figure is much more complex and involves a lot more anatomy and measuring. But, again, I wanted to make sure that you are introduced to the basic concepts behind Figure Drawing and you understand how you can use your basic skills to start drawing the figure. I'm very excited to share these tools and techniques with you, that I use to draw the figure, and I hope you find this demonstration valuable. In this basic skills section of the art and science of drawing, you first learned how to draw basic shapes. Next, you'll learn how to simplify your subjects into these basic shapes. By understanding what shapes your subject is made of, you will know how to draw it. The same basic principle can be used to draw the figure. So before I get into the Figure Drawing demonstration, I first want to show you what kinds of shapes you'll see me draw with today. All of these shapes should look familiar. There's an old saying that there are no straight lines on the human body, and that is for the most part true. So the shapes we are going to be working with the most are variations on circles and ovals. One of the most common shapes you'll see me draw during today's demonstration is this bending oval, an oval that has a curved axis. One way you can think of this shape is if you grabbed an oval by either side and bent it, this is the kind of shape you would arrive at. Here's another common shape you'll see me draw with today. It's related to the bending oval, but it's larger on one side and narrower at the other. Here's another version of this shape. There's an infinite number of variations on any of these shapes that we could use to draw the human figure. Another shape that's often useful is a bending triangle. Before you try and draw the figure, I would recommend practicing these simple shapes. The more comfortable you get drawing these shapes on their own, the more comfortable you'll be using them to draw the figure or any other subject. In Figure Drawing, artists often use a special drawing technique called gesture drawing. In gesture drawing, instead of simply starting to draw the largest shapes of the figure, you'll begin by drawing a series of lines that attempt to capture the direction the forms of the body are going, as well as their lengths and placements relative to one another. At this point, if you're Drawing Education, you should already know that even the best artists don't get it right the first time. So we can expect that this first attempt at the gesture drawing will need to be revised. In these first gesture lines, I'm simply trying to capture the direction the forms are going, how they curve, and how they relate to one another. One of the most common questions I get is, "Where are these lines in the actual figure?" The answer is, "They're not in the actual figure." They're more like diagrams. Or another way to think of them is as axis lines. But in the figure, oftentimes these axis lines can curve. Once I've got a basic gesture line, I can begin drawing the shapes. As always, I'll try and began with a largest shape first, which of course is the shape for the torso. The figure is a highly complex subject. So at first, we want to think about it as simply as possible. This means we're going to ignore all of the details. We're not going to be starting off with any anatomy, any complex contours or any lighter shadow. We simply want to draw the most basic shape of the torso we can come up with. The shape I'm drawing should look familiar to you. It's nothing but a bending oval that is larger on the bottom than it is at the top. Next, I'll draw a similar shape for the leg. It's also a simple bending oval, but this time it's bigger at the top section. It's also not as bent as the shape for the torso. While constructing your figure out of basic shapes, it's okay if these shapes overlap one another or go through one another. As always, when you're drawing, there's no one single right way to break a subject down into basic shapes. At this point, you should be pretty used to the idea that it's up to you to decide what kind of shapes you want to simplify your subjects into and how complex or simple they are. As you watch me break the form down into these basic shapes, ask yourself, "Are these the shapes you would use?" If not, how would your shapes be different? You can see that I'm drawing the foot as a quadrilateral, but unlike a regular quadrilateral, you'll notice that many of the lines are slightly curved. One of the things you've heard me talk a lot about in this course is assessing the margin of error of your subject. This is simply a way of asking yourself how accurate your drawing needs to be. For example, I've noticed that the shape for the torso needs to be bent more at the top. The figure needs to appear as if she is leaning back further. So I'll make that adjustment now. You'll notice now that I've learned the figure back more, the initial gesture drawing of the arm is out of place. This should give you a sense of why it's so important to go through and make these changes when the drawing is this simple. At this stage, moving the arm is easy. I simply need to add a couple of lines. But imagine if I had added detail, if I had drawn dark contours and spent time shading the arm before discovering it was in the wrong place. In many subjects, you don't have to be 100 percent accurate. But when drawing the figure, accuracy is much more important. We, as humans have evolved with an intrinsic sense of the proportions of the body. We tend to be able to tell if a part of the body is drawn too big or too small, or if something is out of place. What this means is that when you're drawing the figure, you need to be as accurate as possible, and you need to spend more time refining your shapes. It's only once you're sure that all of the parts of the body are in proportion to one another, that you should add any details. Good artists make changes in their work. If you've learned anything from this basic skill section, it's that nobody gets it right the first time. Even on the first day, we looked at masters like Michelangelo and Degas and saw all of the mistakes they made in all of the changes they had to make to bring their drawing into proper proportion. Before I move on, I really want to take a look around the drawing to make sure that all of these simple, basic shapes are in the right place and at the right size. To do this, I'm using the exact same tools and strategies that you learned this week. I'm looking back and forth from my subject to the reference drawing and asking myself if I've drawn the right shapes, if they're at the right axis, if they're at the right size, and if they're drawn in the right place in relationship to one another. Once I'm relatively certain they are, I can begin to add some of the smaller shapes. You'll see me draw an egg shape for the head and just a simple line for the neck, as much of it as behind the arm. Once I'm certain that these basic shapes are drawn correctly and are at the proper location in relationship to one another, I can begin refining them. It's important to understand that you'll see this drawing go through many rounds of refinement. In this first pass, I can start to include some of the contour shifts that I didn't draw in the initial basic shapes. As I begin to add more detail and complexity to these shapes, you'll notice that I'm not doing any erasing of my initial light lines. I've tried to draw them light enough so I can draw right over them at this stage. You'll also notice that as I'm going over these basic shapes and adding more detail, my lines are getting darker. But I'm still not drawing with a full force of the pencil yet. Even though the lines I'm drawing with now are darker than the lines I drew with at the very beginning, there's still relatively pretty light and will be easy to erase if needed. You'll notice that I'm now capturing some of the subtle curves of the shape of the torso. I'm also beginning to show some volume by letting some of the contour lines come in front of and overlap others. This is particularly notable in the bend of the back. Now you'll also see me draw the basic shapes for the bathing suit. Even though I'm beginning to capture some of the anatomical details of the figure, I'm still drawing them lightly and simply. Later on in the process, you'll see me go over these lines again, adding darkness in more detail. But just like at the very beginning of the drawing, even though these are more complex shapes, I still want to make sure that I'm drawing them correctly before I dark in them or add anymore details. Now that I'm reasonably sure that all of my primary shapes are at the right size and in the right place, and that they're at the right angles or bending the way they need to be, I can begin adding more and more detail and complexity. The basic shapes have laid the foundation upon which I will build the rest of the drawing. Here you can see me drawing the top section of the bathing suit. Again, notice how the overlaps tell us which parts of the bathing suit are in front and which parts are in the background. In the final drawing, you can see that the back leg appears to be disappearing into the background. It appears this way because it's much less finished than the leg and the front, and has far less detail. Again, notice that I'm moving around the drawing as I add more detail. I'm not finishing one section before moving on to another. This allows the drawing to develop as a whole. As the drawing progresses, you'll notice that I'm moving away from the outer contours and allowing my pencil to find its way inside the form more and more often. As I begin to add more detail to the head and face, I'm still thinking of everything is shapes. The nose I'm thinking of initially as a simple triangle. The bunch of hair on the back of the head, I'm thinking of as a simple oval. The areas that don't have a basic shape, I'm thinking of them as lines and asking myself, which direction is the line going? Is it straight or is it curved? How long does the line need to be? Again, it's critical to remember that when drawing, we are always translating form into shapes and lines. Remember, as soon as you know what shapes something is, you know how to draw it. With each new pass, I'm adding more and more new ones to the contours. Also with each pass, you'll notice that my lines are getting darker and darker. You'll now see me add one of my favorite details, the navel. In figure drawing, adding the navel can give a sense of where the center line of the abdomen is, and helps show which direction the torso is turning. Now watch as I begin to add more detail to the bend in the back of the torso. Initially I just focused on one overlap. But now that I'm sure it's in the right place, I could begin to go and add other overlaps. It's critical that I get all of these right before I start any shading. Students are often surprised how many times I will revisit a section of the drawing as I'm figuring out how to draw it. All too often I see students in the studio become focused and obsessed with one small area attempting to render it all completely before moving onto another section. As a drawing strategy, this rarely works for reasons we've already discussed, that a drawing needs to develop as a whole. If you draw your subject in pieces, generally speaking, the pieces will relate to one another. Drawing your subject as a whole, instead of focusing on small pieces, ensures that all of the parts of the drawing will work together. Here you can see me drawing some of the bones sticking out at the elbow. Each bone sticking out at the elbow, I'm thinking of as a simple semicircle. Every once in a while, you'll see me making small corrections with the eraser. Even though I like to leave most of my process lines, every once in a while they become a little too dense. When that happens, I like to remove just enough pigment so that I can tell which lines are functioning, and which lines were earlier incorrect attempts. Hopefully you can really start to see the drawing coming along at this point. The contour is become more and more detailed, and the figure is truly starting to seem like it is in motion. I'll double-check one more time to make sure that everything is in the right place before beginning to further define the forms.
14. Figure Drawing Demo Pt 2: Defining the Forms: Now students are often surprised to hear this, but it's important to note that none of the lines and marks I've made thus far are actually intended to be seen by a viewer. Now it is important to realize that many of these lines will be seen by a viewer because I don't erase much during the drawing process. I'll begin at the contour. Now is the time where I can start to add all of the subtle tiny details of the contour that are really going to communicate the complexity of the form. Every tiny shift in the contour that communicates some anatomy. Even though we haven't talked about this yet, I do want to point out that I'm changing my line quality depending on what I'm drawing. In the areas of the contour where my pencil is traveling over a bone, such as in the elbows or the rib cage, I'll use darker harder lines. I'll also use darker harder lines when I'm drawing over an area where the muscle is tensed such as in the leg, which is bearing most of the weight of the figure. But other areas of the contour, you'll notice that I'm using softer or lighter lines. It's important when you're darkening up the lines of the contour that you use a wide variety of lines. You don't want the figure to look outlined. But now I'm going to start to transition to drawing with darker lines that I want to be the focus of the drawing. Now that all of the shapes are in the right place, they are at the right size, and at the right proportion and I've started to refine them so I know that they're communicating what I want them to, I can begin to add detail and complexity that is intended to be seen by a viewer. You'll also notice that as the contour develops, I'm relying more on overlaps. An overlap occurs when a contour dives inside the form. When this happens, an outer contour becomes an inner contour. In order to continue the outer contour, we have to start a second line. Overlaps help to bring the viewer's eyes inside the form, which is where most of the interesting parts of the drawing occur anyway. Watch my hand and pencil as I record all of the minute changes in the contour. Try and note each time my pencil dives inside the form, each time the outer contour becomes an inner contour. Notice how these overlaps give a sense of volume, because an overlap not only brings the viewer's eyes inside the form, it tells us what part of the body is in front of another. Again, the most dramatic overlaps can be seen in the bend of the back of the torso, but you can see more subtle overlaps of the contours occurring at the back of the leg and at the front of the knee. I also want you to pay attention to how I re-engage the outer contour. Now we'll still have plenty of opportunities to add more depth and detail to the contour but when I'm ready, I can start the shading process. Shading the figure is a highly complex process and should only be undertaken when one has a good sense of light logic. First, take a look at the light and shadow patterns on the figure. You'll notice that the left side of the figure is in light while the right side is in shadow. This is because the light source was coming from the upper left. One of the most common mistakes I see students make while shading is that they try and put too many values in their drawings and try to have too many variations of shadow. But you'll notice that there's actually a pretty clear division between the lit side of the body and the shadow side. Take a look at the raised arm. We can actually draw a line that marks the exact moment when the arm goes from light to shadow. This is called the line of termination. In fact, we can draw the line of termination down the entire body. That's exactly how you're going to see me start the shading process. Now it's important to note that on curving organic forms, the line of termination is not going to be a hard line. So you'll see me using a soft line to draw the line of termination. Now that I've drawn the line of termination from the elbow to about where the bathing suit is, hopefully you can see how clearly this divides the lit portion of the figure from the shadow side. Even though I'll draw a lot of nuance in detail in the shadows, I want to maintain this clear division between light and shadow. I'll apply the same process to the rest of the figure. First, recording the very detailed and complex line of termination at the bend of the waist and next, following it down the leg. The entire time I'm drawing the line of termination, I'm thinking about the shapes of the shadow as well as the direction of the lines. The line of termination should be drawn with the same amount of care I've used to construct the contour. Once I've drawn the line of termination, you'll see me fill in the shadow side using the side of my pencil to create a wash of value. You'll also see me add some value to the bathing suit, but it's important to note that bathing suit is a dark color. I'm not drawing shadows so much as I am darkening a surface color shift. Because the color of the bathing suit is darker than the color of the model's flesh, I'll darken even the areas of the bathing suit that are in light. The line of termination combined with a wash of value in the shadowed side, gives us a basic idea of the light and shadow patterns of the figure. No matter how much detail and nuance we add to the shadows, we want to make sure we maintain this clear division between light and shadow. Next you'll see me draw what is called the core shadow. To understand what the core shadow is, take a look at the finish drawing on the left. You'll notice that there's a dark band of shadow that runs down the entire figure. This means that the darkest part of the shadow isn't right next to the contour. It's in a little bit and the shadow actually gets lighter as it moves toward the right before it hits the contour of the form. Now it's important to note, this goes well beyond what you've learned in basic skills. But I want to give you a brief introduction into the ideas behind shading. As I'm drawing the core shadow, I'll use it as an opportunity to refine the line of termination. Just like I did when crafting the contour at the earlier stages of this drawing. Each new pass I make over the core shadow, I'll use as an opportunity to continue to refine and add more detail and nuance. As the drawing develops, I'd like you to note that I'm not doing much, if any erasing. Different artists have different ideas about how cleaner pristine they want their drawings to be. But I actually like to leave the process visible on the page. I often think that a drawing that doesn't show any process or that doesn't have any of it's under drawling visible tends to look too clean and a little sterile. I would much prefer to see a drawing that lays its process bear on the page for all to see. Just like the old masters did. Look closely at a Michelangelo drawing, a Rubin's drawing or a Da Vinci drawing and you will see numerous light attempts and get a sense of the process they went through, which makes far much more interest in drawing. But again, as an artist, you have to decide how cleaner pristine you want your drawings to be. If you've watched my other demos in this course, you'll know that in order for a drawing to be finished, it doesn't need to be completed equally throughout the entire drawing. In fact, I actually think the drawing works best when parts of it are left intentionally incomplete. This allows the drawing to have a focus. In this drawing, I want my focus to be on the dramatically bench torso, the raised arm, and the weight-bearing leg down to about the knee. You'll notice that the arm that is furthest away from us and the leg that is furthest away from us are barely drawn in at all. They're just suggested. Even in the finish drawing, they're barely addressed. This helps send them into the background and gives the drawing a deeper sense of space. While darkening the top of the bathing suit, I'll finally arrive at my darkest dark. This is the darkest value my pencil will produce. Now all other values in the drawing must be compared to this darkest dark. Here you'll see me lay some value down in the hair, although I'm not drawing it with a lot of detail. Because I want the head to go into the background. I'm just suggesting it. You'll also see me adding darkness in detail to the lower portion of the bathing suit. Notice that when I'm drawing good, I'm giving the illusion of a wrapping around the curved leg. Details like this will help give the drawing a sense of reality and three-dimensionality. As I'm sure you're noticing, shading, just like every other part of the drawing process requires multiple passes. I'm not attempting to capture every nuance to change in value on my first pass. Next in the third and final section of this demonstration, I'll show you how to add depth and complexity to your shading while still maintaining a clear division between light and shadow.
15. Figure Drawing Demo Pt 3: Shading & Finishing: Before we continue the shading process and add the finishing touches to this drawing, let's take stock of what we've done so far. We began the drawing with a simple gesture line. Next, we broke the figure down into its most basic shapes. We then began to refine these shapes, making any adjustments necessary by comparing it to the reference drawing. We also started to draw overlaps. In this final section of the demonstration, you'll see me continue the shading process, but you'll also see me continue to refine the contour. Just as with the contour, my first pass at the line of termination was simplified. But once I've drawn it, I can add nuance, detail, and refinement. It's important to remember that even though we drew the line of termination as a line, it was a soft line and the shadow should continue to have a soft edge throughout the drawing. In this final section, you'll start to see me add all kinds of tiny details within the shadow. But as many details as I draw, it's important for me to keep the clear delineation between light and shadow. You'll also start to see me add light washes of value on the light side of the line of termination. These technically aren't considered shadows. The best way to think about them, is that there are areas that are not getting quite as much light or aren't getting hit with light directly. But even though they're not the lightest parts of the drawing, there's still not considered shadows. Only the darker areas on the shadow side of the line of termination are considered shadows. When I'm shading, you'll see me almost exclusively use the side of my pencil and create broad strokes. This will help maintain the softness of the shadows. On a constantly curving form like the figure, all of the shadows we're going to see are going to be soft edged. The only exception would be in the cast shadows, but we don't really have many cast shadows to draw with this particular pose. You'll notice how every shadow I draw starts off as a basic shape or a simple line. Even though shadows are soft edged, you can still simplify them into shapes. Just like with the rest of the forms, if you can't figure out what shape it is, sometimes it's easier to think of it as a line. Then you can ask yourself, what direction is this line going? How long is it? Where is it placed? Whether I'm drawing shapes, contours or shadows, you'll see me maintain this idea of big to small, simple to complex and general to specific. Another thing I'd like you to notice, is that as I'm shading, I'm going over the same places. Every time I make another pass with this side of my pencil, it softens the shadows. Because drawing is a transparent medium, everything I've drawn underneath will still be visible. This helps to add an unbelievable sense of depth and complexity to any drawing. It's important for you to realize that in order to be able to draw the figure, I've studied anatomy for many years. Anatomy, is an essential component to figure drawing. That being said, you don't always have to know anatomy in order to start drawing the figure. You can see me drawing using atmospheric perspective with a hand and the leg that are furthest away from us. Notice that they're drawn with incredibly light soft lines, they almost seem out of focus. This helps give the illusion of depth. Compare the two legs together. Hopefully you can see that the leg that is closest to us is drawn with darker sharper lines, it's more defined and it appears to come to the foreground, while the leg in the background is simply implied using softer, lighter lines. This helps give the illusion that it's in the background. As the drawing progresses, hopefully you can see how much detail I'm putting on the insides of the shapes. One of the most common missteps I see by beginners, is that they focus too much on the outer contour of the drawing and ignore the center of the shapes. This makes figures look cartoonish and oversimplified. It's only by addressing all of the detail and complexity inside the contour that you can arrive at a finished drawing. Now, that I'm nearing the end of the drawing, I'm going to start using the eraser. Not so much for mistake correction, but as a drawing tool. You can shape a kneaded eraser like the one you see me using here, into a variety of shapes. You can sculpt it into a flat edge, or you can sculpt it into a point. This helps you keep some control over the areas you're erasing. I'm using the eraser mostly to lift out little bits of light to help define the light and shadow. The result is that all of the individual lumps and bumps on the figure appear to be dimensional. They're lighter on the upper left and darker on the bottom right. By lifting out that little extra bit of pigment on the upper left, it helps them appear more rounded and dynamic. Again, you'll notice that I'm leaving most of the process lines alone. I'm not erasing them. I'm leaving them on the page. I think that a drawing that doesn't show any process looks too sterile, too pristine. I prefer to see some process. I prefer to see the human hand of the artist that made the drawing. Now, that the drawing is starting to work, I can start to add some of the smallest details. You'll see me draw details of the face, as well as the knees. Now, as you've heard me talk about in the other demonstrations, it's around this time that I need to decide what the drawing needs to be finished. As we've talked about before, all of the parts of a drawing don't need to be finished to the same level. A good drawing should have areas of focus. You'll want to add the most detail and dynamic contrast to the areas of the drawing you want the viewer to focus on. Can you tell which parts of my drawing that I want viewers to focus on? The areas that I think are most interesting and want to be the focus of this drawing are the bend in the torso, and the front leg. The rest of the drawing can be left less finished, and that's completely fine. I prefer to make drawings that invite the viewer to help complete the illusion on the page. Drawings that have too much detail or are too realistic tend to shut the viewer out. The viewer can participate in the illusion. But by leaving sections of the drawing unfinished, we remind the viewer that it is a drawing. We show them how the trick is done. Viewers tend to delight in seeing this. They become aware and are delighted by the fact that the drawing is an illusion. Now, that the drawing is coming to a close, I want to check and see if there are any other details that I need to draw. I'll also be looking for any other opportunities to add dark lines and value to the drawing. As I've mentioned before, I'll probably come back later to finish up the drawing. I often come back days or even weeks later and find that certain details I've missed or left out. Finally, at the very end, I'll go around with an eraser and clean up the drawing. Most of the mistakes and process lines are going to be left, but there are just a few smudges that I'd like to remove. Now let's take a look at the final drawing. Even though this figure drawing is pretty basic, hopefully you can see that it appears to be in motion. A good figure drawing should appear dynamic. Although this drawing only took about 40 minutes from start to finish, it still contains a good amount of detail. I'd also like you to notice the clear division between light and shadow. The line of termination where the light terminates and shadow begins, contains all of the darkest values. I'd also once again like to reiterate the idea that all of the process lines almost seem to imply motion in a finished figure drawing. They help give the drawing a sense of dynamism and movement. If I wanted to, with more time, this could become a more detailed drawing. But for now, I think this serves as a great basic introduction into the ideas behind figure drawing, and shows how far you can go, starting with basic shapes and then refining them as the drawing goes on.
16. Orientation and Materials: Hi, my name is Brent Eviston and I'll be your instructor for this course. Now before we get into the lessons, I just wanted to take a few minutes to thank you for enrolling in this course and to introduce myself. I've been fortunate enough to spend most of my career in creative fields. I've worked in fine arts, design, architecture, illustration, and even animation. I've studied nearly every form of drawing, including classical drawing, figure drawing, anatomical drawing, botanical drawing, and even more contemporary forms of experimental drawing, and I've been fortunate enough to have my work shown internationally. Now of course, you've just enrolled in one of my online drawing classes. But before I started teaching online, I actually taught drawing for over 20 years in art studios, art schools, museums, galleries, as well as colleges and universities. Over my teaching career, I've worked face to face with literally thousands of students of all ages and all skill levels. My online drawing courses are the result of those 20 years of teaching experience. Now, my online courses in the art and science of drawing series have tens of thousands of students enrolled in around 150 different countries. These highly rated drawing courses are so popular because they really work. Because I've worked with so many students face to face, I know what works, I know what connects with students. The project strategies and ideas you'll find in these courses have been tested face-to-face and studios with thousands of students. In these courses, I'm thrilled and proud to bring you the most powerful drawing tools and techniques. I promise if you're willing to put in the practice, you will get better at drawing. Well, thank you so much for enrolling in this course. I'm thrilled to have you as a student. So now let's get started with a basic skill section of the art and science of drawing series. This basic skills course that you've just started is the first part of an entire series of drawing courses. This basic skills course is designed for absolute beginners, people who've always wanted to learn to draw, but haven't had the opportunity to get instruction from an experienced instructor. It's going to start off with basics like materials and how to hold the pencil. But by the end of the course, you'll understand how to simplify and draw nearly any subject by first breaking it down into its basic shapes and then slowly adding details. The art and science of drawing series is designed as an eight week program with each week focusing on a different skill set. The idea behind this series is that each day you watch one video lesson and then do the recommended practice. Once you've done the recommended practice, you can come back, watch the next lesson, do the practice, and repeat this until you've gone through the entire eight week series. This basic skills course that you've just enrolled in is the first week of this series. Now if you're brand new to drawing, I would recommend starting here in this basic skills course, which is the first week of the art and science of drawing series. But once you're done, you can work your way through the rest of the courses in the series. But if you already have some drawing experience, feel free to pick and choose the courses that focus on the topics that you're most interested in. Now, even though the art and science of drawing series was originally designed as an eight week program, feel free to go at whatever pace works for you. As long as you're doing the recommended practice before watching the next lesson, you should be just fine. Feel free to go at your own pace. I have hundreds if not thousands of students who have designed this program to work with their schedule. Some of them just watch one lesson a week and then practice that subject for an entire week before coming to the next lesson. Others do it rather sporadically, but as long as you're going through the lessons in order and doing the recommended practice, feel free to set your own pace for the course. Once you've gone through the basic skills section, here's a quick look at other courses in the series. The second course is Dynamic Mark Making that explores expression through drawing. Now the third course in this series is actually Weeks 3 and 4. So you get a lot of bonus content in that one, it's called Form and Space. And it'll teach you how to draw volumetrically, make your objects look believably three-dimensional in space. The fifth week of the course is called Measuring and Proportion, and it'll show you a whole series of technical measuring techniques that will add a new level of accuracy to your drawings. Week 6 is called contours, and it'll show you how to use different line quality to truly give the illusion of depth as well as explore texture. It'll make sure that your drawings have a beautiful sense of line work that goes far beyond just an outline. Week 7 is called Shading Fundamentals. It will introduce you to all of the basic volumetric forms and how they operate in light. This is a critical course for anybody who's interested in the shading more complex subjects. Finally, there's shading Beyond the Basics. This course will teach you how to take those basic shading skills you learned in the shading fundamentals class and apply them to much more complex subjects. Once you've completed the art and science of drawing series, you can move on to the art and science of figure drawing. It's a whole other series of courses that break down the figure drawing process. So now that you have a sense of how the art and science of drawing series works. Let's get into some basic materials. One of the things I absolutely love about drawing is that you can start learning with very, very basic materials. Now before I introduce some basic materials, I want to make sure you understand that you can learn to draw using just about anything. If all you have is a simple number 2 pencil and a lined pad of paper that's completely fine. What we're teaching in this course is fundamentals that will work with nearly any drawing materials. So if you're on a limited budget, that is totally fine, you can learn to draw by using whatever you already have access to. But if you're interested in the materials upgrade, here's a basic overview of the kinds of materials that I would recommend to draw. There are many different kinds of pencils that you can use while learning to draw. The most common and easily accessible are graphite pencils. Graphite pencils come in a variety of grades of hardness's and softness's. Here's how the basic graphite scale works. On most graphite pencils, you'll find a section usually near the bottom of it that gives you its level of hardness or softness. You'll see something like 3B or 4H. Here's what those numbers and letters mean. First, let's talk about the B scale of graphite pencils. The higher the number next to the letter B means the softer that pencil is, and softer pencils are darker pencils. The higher the number next to that letter B means the softer and therefore darker that pencil will be. Now on the H scale, it's actually the opposite. The higher the number next to an H means the harder and therefore lighter that pencil will be. Therefore a 4H will be a harder and lighter pencil than the 2H. If you're looking for a really simple, inexpensive pencils is start off with, a yellow number 2 pencil is a great place to begin. That number 2 essentially is a 2B pencil. It's kind of in the middle of range. When you first begin drawing, you want to pay attention to whether you're heavy handed, or light handed. One of the first skills you're going to learn in the first lesson is how to draw lightly. Now, some students really struggle with this. If that describes you, you're going to probably want to switch to a pencil on the H scale, something that's going to be harder to make, a dark line with. Now, as the series progresses, your lines will need to get much darker. Other students really struggle with making dark lines. If this describes you, you'll want to find a pencil that's higher in the B range, so it'll be easier for you to make dark lines. Now, many students like to mix and match their pencils. They'll use a pencil and the H range when they're at the beginning of the drawing and they want to make light lines, and switch to something in the B range later on when they wanted to do shading or add darker lines. Now, I actually really don't enjoy using graphite, so I draw with a completely different kind of material. What you'll see me using in this course is actually a colored pencil. You'll see me use black, blue, and red colored pencils. Now, the colored pencils that I use to draw are actually oil-based colored pencils. Brands like Lyra, Faber Castell, and Derwent, all make excellent oil-based pencils. For a more specific list with links to where to buy these kinds of products, go to the evolve your art website. In the FAQ section, you'll find a complete list with links of the products that I recommend. But again, you can start off with very simple materials. You shouldn't feel any pressure to upgrade your materials until you're ready. Now, one of the most common questions I get from students is if they can take this course using digital drawing media. The answer is absolutely yes. I have an iPad Pro, and an Apple pencil, and there are numerous drawing programs that work great. There are a lot of them out there and they're constantly changing. So you'll want to figure out which drawing program works best for you. But if you're new to digital drawing, try out something like Procreate. It's a great way to start learning to draw. Of course, if you're working on a tablet, you don't need to deal with other kinds of pencil or paper. Now, if you are taking the drawing course with more traditional drawing materials, the next thing you have to understand is paper. Now, this is a beginning course and you're just learning, which means most of the drawing exercises you do, do not need to be kept. You're not going to be drawing many completed pictures until the end of the course, so that means that most of your practice can simply be discarded or recycled. That means you want paper that's cheap and it does not need to last very long. For this, we want to use newsprint. Now, I would highly recommend using 18 by 24 inch newsprint. Now, a lot of beginners think this is a really big paper size, but it's actually one of the smaller paper sizes that I use. But one of the reasons you want your paper to be big is so you can fit a lot of practice on it, and what you're going to learn in this series is that you're going to be drawing a lot from your shoulder, not from your hand. So you want to make sure you have a lot of space to move your arm, to move from the shoulder, and to get use to those kinds of motions. Now, 18 by 24 inch newsprint will come in both smooth or rough pads. It's really just personal preference, but I prefer the smoother newsprint. Now, one thing to note about newsprint is that it is not archival, which means it'll become yellow and brittle over time. If you want to do a drawing that you want to keep, you do not want to use newsprint. If you want to keep a drawing or if you want it to last a while, you'll want to switch to white drawing paper that has a low or no acid content. You'll want white drawing paper that's archival, that's not going to degrade over time. Now, most white drawing paper is archival. But if you have any questions, you can always ask somebody at your local arts store, or read a product description if you're buying online, it should clearly state whether the paper that you're looking at is archival or not. Of course, once again, if you go to the Evolve Your Art website, I have a complete list of recommended papers with links on where to purchase them. Now, if you're using a big pad of paper as I would recommend, you'll probably want to get a drawing board. Now, drawing boards, just like everything else come in a wide range of sizes and qualities. The first thing is you'll want to make sure you're getting a drawing board that's going to fit with the size of your pad of paper. If you're using an 18 by 24 inch pad of paper, as I would recommend, you'll want to get a drawing board that is that size or larger. Some drawing boards include clips, other drawing boards, you'll have to purchase clips. The drawing boards that I use are actually hollow drawing boards, which means that they're very lightweight, but they don't have clips with them. So you'll want to make sure it gets some clips for your drawing pad. I actually use just basic kitchen clips when I'm drawing. Many students are surprised to find that I actually discourage the use of erasers while you're beginning to learn to draw. The reason is that, most beginning students, if they have easy access to erasers, spend nearly as much time erasing as they do drawing. What you're going to learn in this course is that nobody gets it right the first time and those first attempts actually give you a lot of clues on how to proceed in your drawing. If you erase them, those clues are gone. I'm going to encourage you to use an eraser as little as possible. But if you feel you have to have an eraser, there are two basic kinds. You have a kneaded eraser, which is what I would recommend, and a needed eraser is wonderful. You can shape it, you can use it with a light touch, or you can scrub with it, or you can use a vinyl eraser. A vinyl eraser really takes off a lot more material, but it's a much rougher eraser on the paper. Even if you want to upgrade your materials, the list is still pretty basic. You need some a drawing pencil, a pad of paper, and if your pad of paper is larger as I'm recommending, you'll probably want to get some drawing board and make sure you have clips. Now, at this beginning stage of drawing, setup is really up to you. You want to make sure that your setup in a comfortable place. Now, most students, when they're beginning, while they're watching these videos, will actually set up with their drawing board leaned up against the desk with the computers on. Now you can also, of course, get an easel, either a table top easel or a standing easel, or feel free to lean your drawing board up against a chair that's placed opposite you. There are many different ways you can set up. The important thing is that you're drawing board is perpendicular to your line of sight. So you don't want to draw with your paper flat on a table, and the reason is, if your paper is flat on the table, unless you're directly above that paper looking down, perspective kicks in and your drawings will become distorted. You want to make sure, once again, that you're drawing surface is perpendicular to your line of sight. Or another way to say that, is that you want to make sure that the top of your drawing board is the same distance to your eye as the bottom of the drawing board. You don't want the top of the drawing board to be further away from your eye than the bottom. Now, the final thing I want to address before we get to the first lesson is practice. Drawing is not a talent. Drawing is a teachable and learnable skill. But the only way you're going to improve is if you do the practice. If you just watch these videos without going through the practice, it's nothing more than an art history lesson. But I guarantee, if you consistently and intentionally practice these techniques, you will improve. Now, in this course, you're going to see me giving the minimum amount of practice. But you can always feel free to double, or triple, or even quadruple the amount of practice you're doing. In fact, I have many students going through this course that watch one lesson and then spend an entire week practicing the contents of that lesson before moving on. But again, I want you to feel free to design your own program around your schedule. Once you've completed this basic skills course, I hope you go on and take other courses in this series. Now, many students, how they actually use this program is once they get to the end of the series, they go right back to the beginning and start it over. So what you'll learn in this series are fundamentals, and you never want to stop practicing these no matter how advanced your drawing gets. Hopefully, you have a sense of the art and science of drawing series as a whole, you have a sense of the materials that you're going to use in this basic skills course, and hopefully you have a sense of how to use this course, whether you're going through it in one week and then proceeding with the rest of the series, or you're designing a schedule that fits your needs. Well, now let's head into the studio and get started with our first lesson.
 Brent Eviston, Master Artist & Instructor