Transcripts
1. Form & Space Trailer: Volumetric drawing is a critical shift that you're going to make as an artist. I cannot tell you how many artists don't learn this kind of drawing and their drawings ends up looking flat on the page. But learning how to look at objects, to analyze how they're operating in space, and to put those volumes down on the page is one of the most powerful techniques you can learn that will really help your drawings have the illusion that they are actual three-dimensional objects existing in deep space. The first thing you're going to learn is how to draw simple volumes, you learn how they operate in space, and how to draw them from any angle. This will include an introduction to linear perspective. By the end of the first half of this course, you'll be able to draw spheres, cylinders, and boxes from any angle at any size and proportion and in any arrangement in space. In the second half of this course, you'll learn how to use spheres, boxes, and cylinders as the basic building blocks for more complex form. You'll learn to slice them, sculpt them, and combine them in order to literally draw any form, observable or imaginable. Learning to think and draw volumetrically is a critical step towards learning how to do fully shaded and rendered drawings. It's only by understanding the basic volumes that make up your drawing subjects that you'll be able to understand how and why light works when it hits these volumes. Volume is something that you feel in a drawing. You literally want to imagine your pencil not just moving left and right and up and down the page, but literally moving back and forth. You want to have the sensation that when you're drawing your pencils actually dropping behind objects or coming around front. Remember how you are thinking about your subjects is going to determine how you draw them. If you're not thinking in terms of volume, your drawings are destined to simply lay flat on the page. But if you consistently conceive of your subjects as three-dimensional volumes existing in space, this will absolutely come through your drawings and will allow you to produce drawings that effectively convey the illusion of three-dimensional volumetric objects existing in deep space.
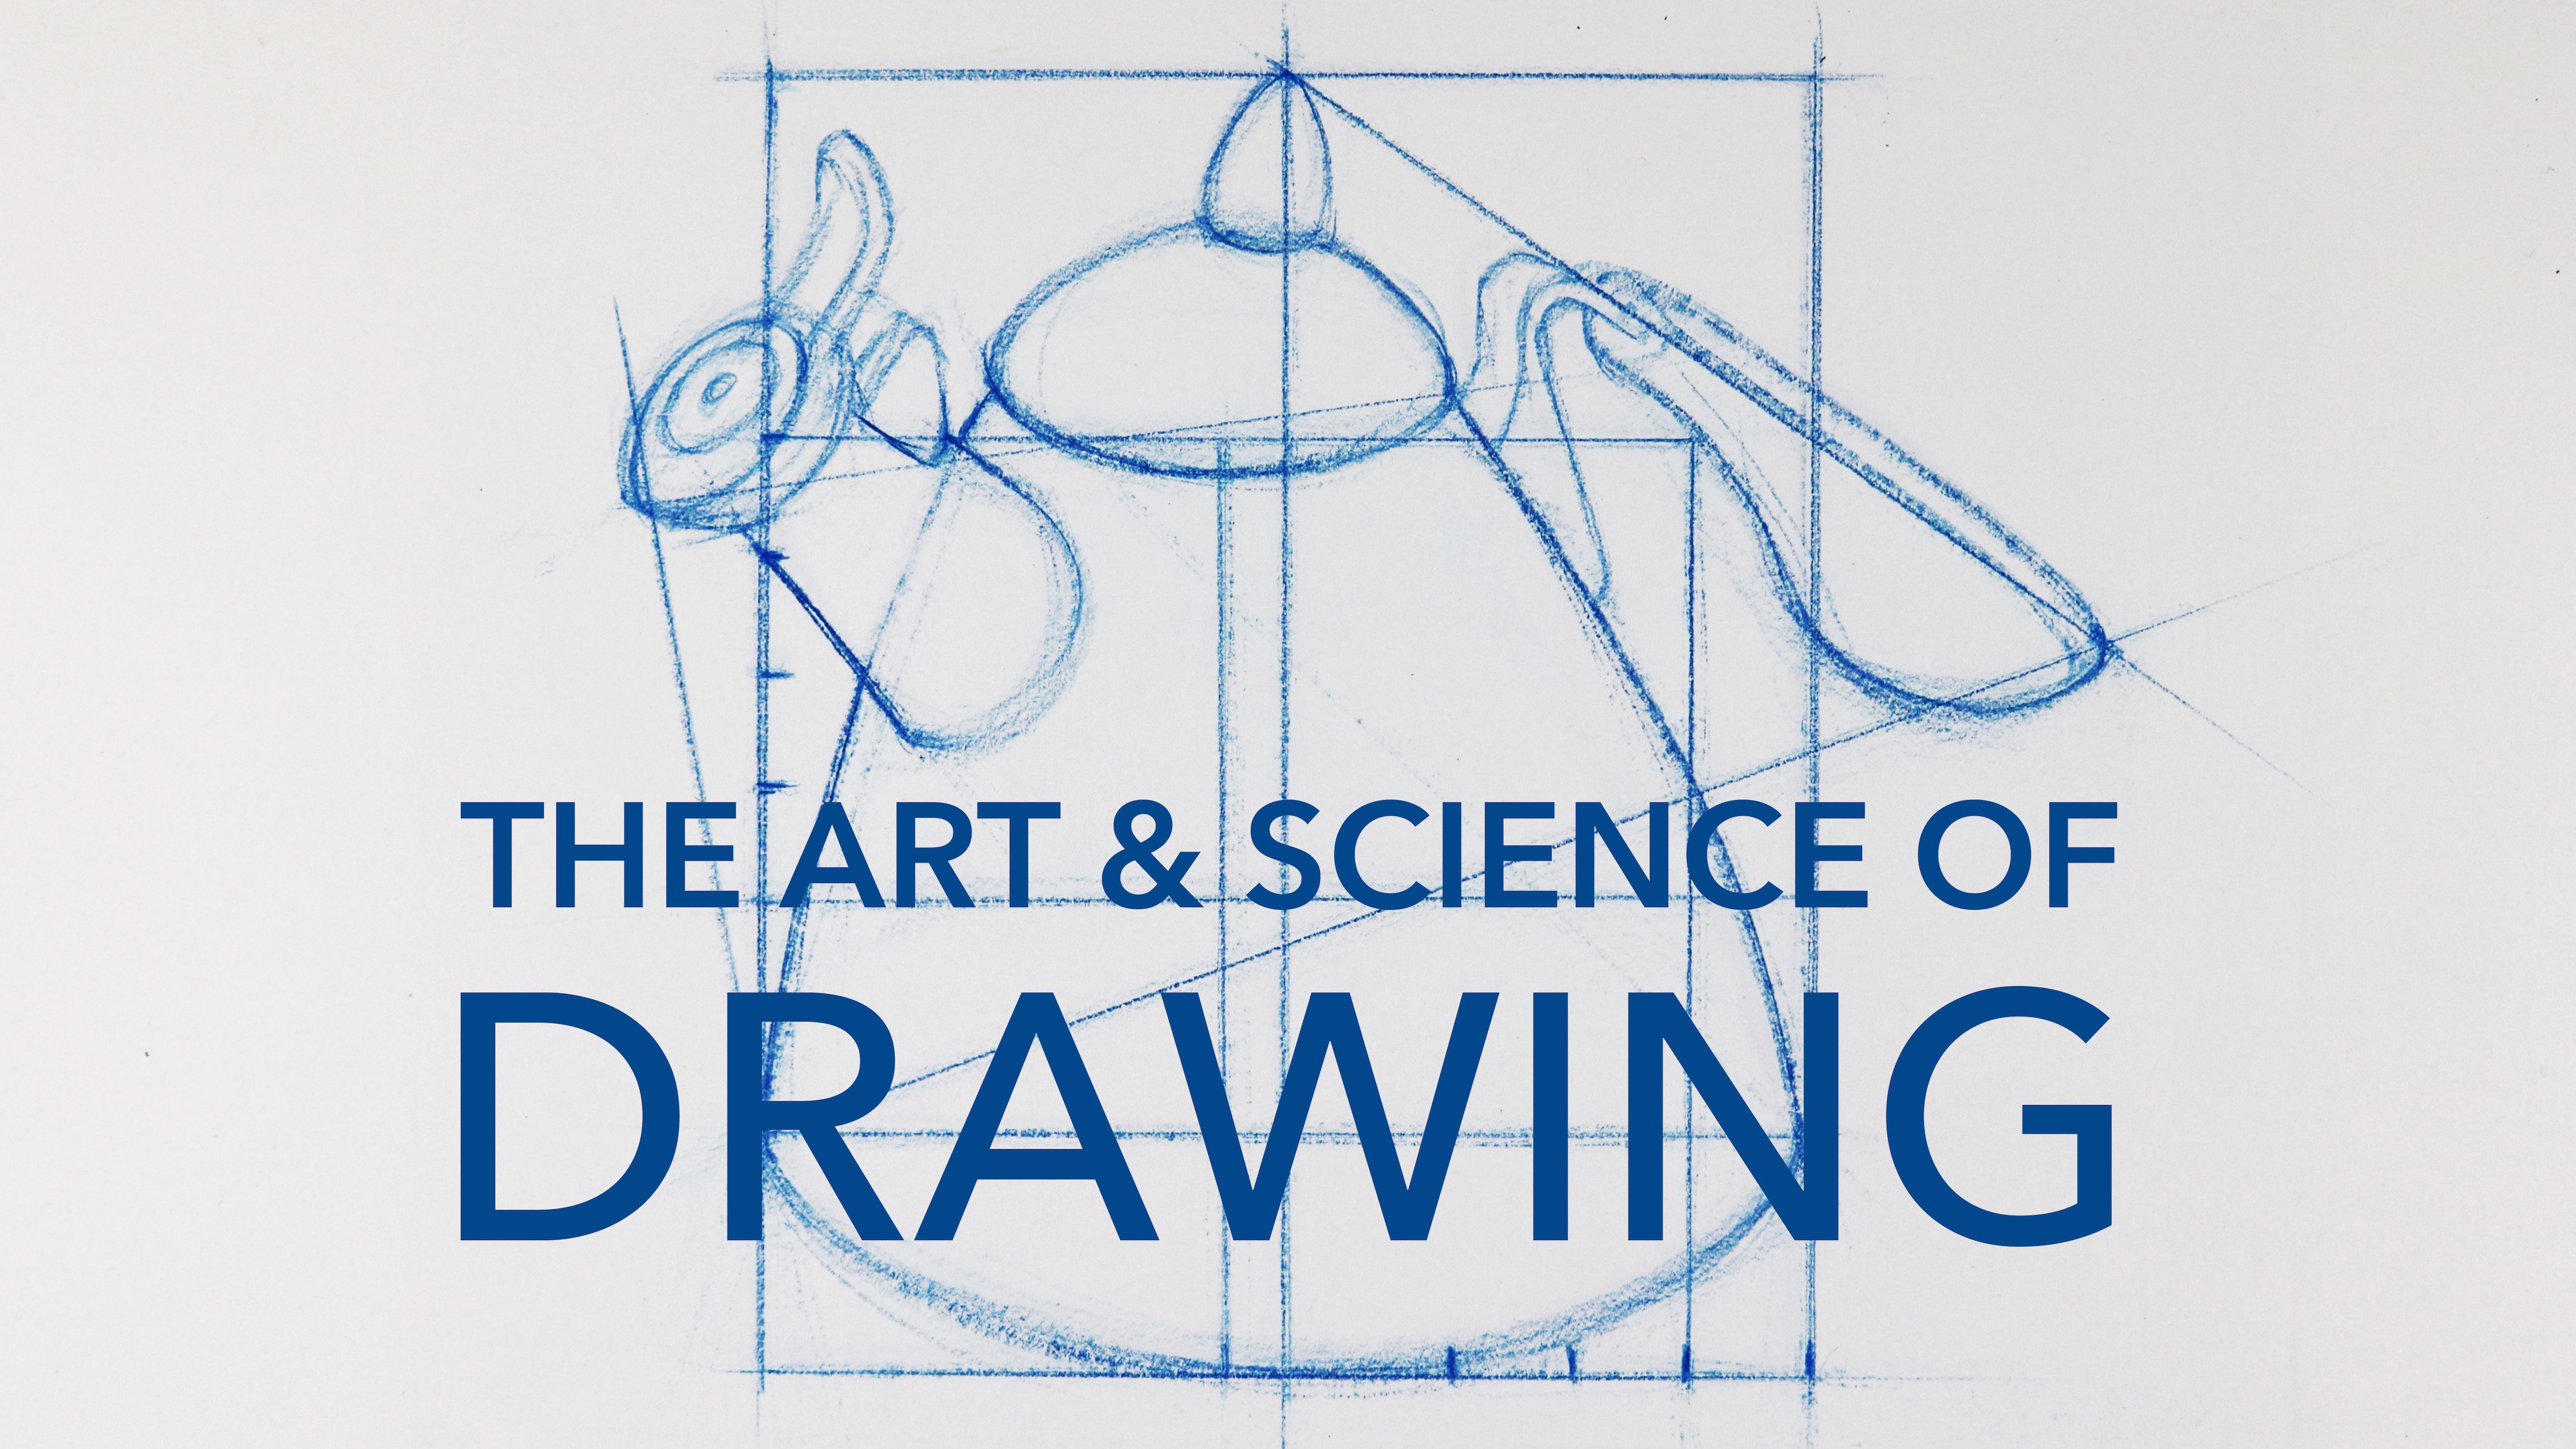
2. Welcome to Form & Space: Welcome to the Form and Space course in the art and science of drawing series. I'm your instructor, Brent Epstein. There are a few things I'd like to share with you before you start the first lesson. The first thing is that I absolutely love working with students. Teaching, drawing is a joy and a privilege that I take very seriously. Before creating the art and science of drawing series, I taught drawing for 20 years in studios, schools, museums and universities. While working with students, I would constantly ask myself, what are the teaching tools and techniques that really connect with students, what tools and techniques show the most improvement in their drawing skills, and how can I teach these techniques in a way that really speeds up their skill development. This course is the answer to those questions. The courses in the art and science of drawing series contains some of the most powerful teaching tools and techniques that are proven to teach students how to draw. Here's how the course works. Each day, you're going to watch one video lesson, and then be given a project to do. Once you've completed that day's project, you're ready to begin the next video lesson. Now, this course was designed so that you can watch one video lesson each day and do one project each day, but you're welcome to adapt to the structure of the course to fit your schedule. If you can only get to one video lesson and project a week, that's fine. Feel free to make this course work for you. Now, this is a project-based course, which means that every lesson is going to come with a specific project that's designed for you to get the most out of the skills you've just learned. The practice that these projects provide is absolutely essential to your learning how to draw. If you're not practicing, if you're not doing these projects, you will not improve. Having an intellectual understanding of these ideas is great, but practice is required to really get good at drawing. Now, one of my great joys as a teacher is to see students evolve and grow over time. I encourage you to share your work. You can share it with family and friends, you can share it on social media, and of course, you can share it right here on skill share. When you share your work on social media, I encourage you to include the hashtag, "evolveyourart." Building a community when you're learning to draw, is a great way to be inspired to practice and get feedback on your work. Now this course is one of seven in the art and science of drawing series. Each course in the series focuses on a different essential drawing skill. Now, if you're a beginning student, I highly recommend going through the series in order. But if you've got some experience drawing, feel freedom, mix and match the courses to suit your own needs and interests. Now, while you're taking the course, I recommend watching it on a larger screen. You're welcome to take the course on your phone if that's what you have available, but by watching it on a larger screen, you'll have a richer experience, you'll be able to see more detail in the drawings. If you'd like any other information on other courses in the art and science of drawing series, drawing resources, or a detailed description of what materials to use, I encourage you to visit the website, evolveyourart.com. It's a great place to go for further drawing resources. Well, thank you so much for joining me. It's an honor and a privilege to have you as a student. Let's get started with our first lesson.
3. Drawing the Sphere: As an artist, making the shape from thinking in terms of flat shapes, into truly volumetric shapes, is one of the most critical shapes you can make. Before we start discussing how to draw volumetrically, there are a few ideas I wanted to introduce. Drawing volumetrically poses some interesting challenges for the artist. I assume you're watching this on a screen, and this screen is flat in the same way that your paper is flat. When we think about a piece of paper, it's difficult to imagine something that is more flat, and yet as artists, it's our job to try and communicate a sense of volume and deep space on this very flat surface. Now a great way to start to talk about some of the challenges of drawing volumetrically, is by taking a simple object. Let's take a look at the pencil. If we want to draw a pencil, moving left to right across the surface of the page, that's a pretty straightforward thing to do. If we want to draw the pencil moving up or down, that's also pretty straightforward and easy to understand. Now it's when the pencils starts to tilt toward you, where it's moving backward and forward in space, that things start to get interesting. As artists, we need to employ a series of allusions, to communicate this form in deep space. However, it's important that we always remember that this is nothing more than a trick of the eye and the mind. In order to give the illusion of three-dimensional volumes occupying deep space, we need to understand how these three-dimensional volumes work. Most people are familiar with the idea of the primary colors, that all color to still sound. Basically just three primaries, some blue, some red and some yellow. If you have a tube of white paint, you can mix literally any color conceivable. However, most people are not aware that three-dimensional forms actually work in the exact same way. All form, no matter how complex, distills down to some combination of a sphere, a cube and a cylinder. Once you understand how to draw these three primary shapes and how to manipulate them in space, you'll be able to draw literally anything you want to existing believably in deep space on the page. The very first volumetric shape we're going to talk about is the sphere. Now before we introduced how to draw the sphere, there are a few ideas that I wanted to talk about. The first is this idea of transparent construction drawing. While you're learning how to draw volumetrically, you'll notice that most of the drawings we're going to do, will have a look of transparency. Drawing volumes transparently, really allows us to think volumetrically, and also to see on the page how the entire volume is operating in space so don't worry about leaving all of these processes and construction lines in your drawings. I'd also like to remind you that we're still going to be drawing very lightly. Again, the idea isn't that we just learned how to draw these volumetric shapes, to draw them, it's so that we can turn them into more complex, recognizable objects. What that means is we're going to start off with these basic shapes, but later on you're going to learn how to add contour lines and shading on top of them. It's important to still draw all of these shapes very lightly because these are still not intended to be seen by a viewer. These three elements, the line, the oval and the circle, should appear familiar to you. None of these elements on their own, communicate any sense of volume. They simply lay flat on the page and do not appear to be coming towards us or going away from us. But today you're going to learn how to combine these three elements in order to turn a flat circle into a volumetric sphere. I'll introduce you to this process first using diagrams, and later on by demonstrating it through drawings. First, let's start off with a simple circle. Next, we're going to bisect this circle with a vertical axis line. Note that the axis line is dashed. That means that it is never intended to be seen by a viewer and is simply a construction line that we're going to use, to help make the drawing easier. This vertical line is an axis line for one of the ellipses, we'll be using later on in this process. Note that the axis line is going right down the center of this circle, acting as a line of symmetry. Each side of the circle should be equal and mirror the other. Next we'll put in a horizontal axis line. Just like the vertical axis line, it should bisect the circled exactly and act as a line of symmetry. Regardless of the size or orientation of the spheres you will draw, these initial axis lines should always have two qualities; The first is that they should always bisect the circle, cutting it right in half, and the second is that these two lines should always be perpendicular to one another at an exact 90 degree angle. You'll see me add an oval using the horizontal axis line. Notice that the horizontal axis line, acts as a line of symmetry, not only to the circle but to the oval. No matter how opened or closed your ovals are, these axis lines will always act as a line of symmetry. I'd also like to point out that the diagram contains three different line weights. In addition to the dashed construction lines that are never intended to be seen by a viewer, you can see two different line weights that are intended to be seen by a viewer. The line used to make the circle is a medium line weight, and the line used to make the lower section of the oval, this section below the axis line, is a heavier line weight. This allows the lower section of the oval to appear to come forward in space and the back section to recede. Hopefully, even in this simple diagram, you're starting to get a sense of volume. Before we move on, it's important that we make a distinction between ovals and ellipses. An oval is a flat shape. Even though ovals and ellipses are drawn the exact same way, we refer to an oval as any ellipse, when we are using it to indicate that as circle has gone into perspective. We'll talk more about ellipses tomorrow, but for now, I just wanted to begin to sensitize you, to be able to see the difference between an oval drawn on its own, which appears flat, and an oval drawn in the context that we are using it, which begins to imply volume. During today's drawing demonstration, you'll see me draw an ellipse, making the full motion of an oval, but drawing one section of it much darker, to help simulate the illusion of volume you're starting to see in this diagram. A great way to think about this ellipse, is as an equator and as a latitude line that runs all the way around the sphere. Next on the vertical axis, we will add the ellipse that essentially stands in as the longitude line. All of the rules we used to construct the ellipse on the horizontal axis, also apply when we draw the vertical ellipse. At this point, this sphere should look and feel volumetric with a specific orientation in space. Note that this sphere seems to be facing down into the left. Let's see what would happen if we had drawn this collection at the exact same shapes, but favored the other side of the ovals, making those darker. Now our sphere appears to be facing up into the right by simply altering the line weights of the exact same shapes, we were able to give the illusion that the sphere was facing a completely different direction. Let's return to our original sphere. The ellipses we've used here are the same level of openness, but we can open or close them to give the illusion of the sphere facing different directions. Watch what happens when we leave the horizontal ellipse as it is, but open the vertical ellipse. Notice how this gives the sphere the illusion of turning more to the left. It's important to note that even though the ellipse we've drawn is wider, the vertical axis line still acts as a line of symmetry. Next, let's open up the ellipse on the horizontal axis. Now the sphere appears to be looking very far down into the left. In addition to being able to open and close each ellipse independently to alter the direction the sphere is facing, you can also tilt the axis lines just as long as they remain perpendicular to one another. Here you can see a number of spheres at different sizes and orientations in space. Each of them only contains the elements you just learned about in the preceding diagrams. Before moving on to the demonstration, there's one more thing I'd like to note. This diagram is technically an accurate depiction of a sphere whose latitude and longitude lines are facing directly at the viewer. However, it fails to communicate any sense of volume. It's critical that the latitude and longitude lines are offset from the center, allowing their curvatures to be seen. This is required for the illusion of roundness of a sphere to be communicated to a viewer. Just as we did in the diagrams, I'll start by drawing a circle. Next, you'll see me draw vertical and horizontal axis lines, making sure that they both bisect the circle perfectly and that they are perfectly perpendicular to one another. Next, using the vertical axis line, you'll see me lightly drawn oval before favoring one side of it, drawing that site darker and making it appear as if it is coming towards us. Next, you'll see me follow the same steps with the horizontal axis. After darkening up the circle itself, the volumetric sphere begins to take shape. Once again, note that the axis lines act as lines of symmetry for each of the ovals. I'd also like you to notice that the sides of the ovals perfectly curve into the contour of the circle. The ovals don't pinch at the corners, but instead are smoothly in constantly curving. Remember these are free hand drawings so the circles and ovals won't be perfect but hopefully you can see the illusion of volume starting to occur. You'll see me repeat this same series of steps over and over again. Drawing volumetric spheres at multiple sizes and orientations in space. How I tilt the axis lines, and where the latitude and longitude lines at the ellipses cross, determine which way the sphere appears to be facing. One of the things I find fascinating about volumetric drawing is that although there are rules and guidelines, the success of a volumetric drawing really depends on tricking the eye and when properly done, there's a sensation of volume that we get when looking at these spheres. They literally feel round and volumetric to us. I'm using skills I taught in the basic skills course of the art and science of drawing series, including pantomiming your lines and shapes before drawing them and using a quick and fluid motion when you actually put pencil to paper. Being able to comfortably draw circles and ovals fluidly and confidently is a prerequisite for drawing volumetric spheres. If for any reason you're struggling with this skill, please revisit the basic skills section of the art and science of drawing series. While you're practicing today, you'll want to make sure that your axis lines are drawn as lightly as you can possibly draw them. That your circles are the medium line weight and that the part of the ellipse that you're favoring and want to come forward. Is it darker and heavier line weight. In this final sphere drawing, watch what happens when I don't dark up one of the sides of the ovals more than the other. You'll note that it's difficult to tell which direction this sphere is oriented and destroys the illusion of volume. While you're practicing today, try and keep all of these elements in mind and remember, if for any reason you need to, I would encourage you to watch and re-watch these videos again and again until you have a thorough understanding of all of the steps and ideas necessary to draw volumetric spheres. Since you've made it this far in the art and science of drawing, I'm going to assume that you're pretty serious about getting good at drawing. I'm actually going to increase the amount of practice. That being said, it's important to remember that if you quadruple the amount of practice, it still won't be practicing too much. You cannot practice these fundamental skills too much and in fact, the more you practice them, the more skills you're going to get. Here's your practice for today. I'm going to ask you before you try and draw a volumetric spheres to continue to practice just getting basic circles down on the page. I'm going to ask you to draw 100 circles. I'm also going to ask you to draw 50 ovals of various sizes at various axes and at various levels of openness and if you want to practice favoring one side of the oval, like you saw me doing the demonstration. That's also great practice. Once you're done with that, I'm going to ask you to draw a minimum of 50 volumetric spheres using the strategy that you've learned today. If you want to draw more than that, that is fantastic. The more you draw, the better you'll get but again, I want you to do a minimum of 50. If for any reason you're new to the art and science of drawing series, I want to communicate how important it is, not just to watch these videos, but to do at least the minimum amount of recommended practice if you're not doing the practice, this is nothing more than an art history course. It's possible to intellectually understand everything we're talking about and not be able to produce it if you're not practicing. An intellectual understanding of these ideas is important. but practice is more important because that'll bridge the gap of understanding and actually having the skill to be able to produce these drawings on the page. In addition to doing the drawing practice, I've recommended, I'm going to ask you to look for spheres in the environments you're occupying. The idea isn't that we're just learning to draw spheres because we want to draw spheres. We want to be able to understand how to use them to construct recognizable forms. What this means is you'll be able to find entire spheres, but also partial spheres in your environment. The more you can find these shapes out in the real world, the more you'll understand how important it is to be able to draw them. Now I will note that spheres aren't quite as common as cube forms or cylindrical forums, but nevertheless there are critical shape to understand. Well, thank you so much for joining me and I look forward to seeing you in the next session.
4. Drawing the Cylinder: Welcome to day two of form and space. Now first I want to congratulate you and getting some experience doing volumetric drawings. I know this isn't easy and I know for many of you this is your first time attempting to think and draw using these kinds of three-dimensional volumes. Now, often, when students realize that drawing volumetrically is a little more challenging than the kinds of drawings they're used to doing, they'll often ask me, "Is it really important to learn how to draw volumetrically?" My answer is always a resounding yes. To prove this point, I'd like to tell you about a study done in 1981 about canonical perspectives. What the canonical perspective is, is our preferred viewpoint of an object. Now we all know that if we take something like a coffee cup, we can view it from multiple different angles, and from every angle it's going to look a little bit different. However, Palmer, Rosch, and Chase did a study in 1981 where they asked participants to draw a coffee cup. What they found is that most people will draw a coffee cup with some very similar features. These are samples of coffee cups drawn by incoming beginning drawing students before they had received any instruction. The students drew almost exactly what the research predicted that they would. Notice that each coffee cup is viewed slightly from above with the handle on the right. You'll also notice that these students attempted to depict a round opening at the top, but flattened out the cup at the bottom, which in reality would actually be more rounded, which you'll learn about today. When asked why they flattened out the bottom, even though it is observability more round, students said that it was because the coffee cup was on a flat surface. Now these studies and others like it, reveal a critical truth about drawing. Until we understand how to draw three-dimensional volumes accurately in space, we will default to our assumptions about what these objects look like. We will default to this canonical perspective. Or more simply put, we all assume that people draw what they see, but in actuality, people draw what they think. People will draw their assumptions about these objects regardless of what they actually observe. These assumptions that people make about the object and draw on the page are more often than not inaccurate. This canonical perspective that is natural to human beings is one of the biggest impediments to good observational drawing. To take this point 1 step further, I have seen over and over in the studio while working with beginning students that they will default to drawing this canonical perspective, even with a real coffee cup in front of them that they've been asked to observe that has different attributes. Most commonly, even if the coffee cup is turned in a way where the handle is not visible, students will still draw it and draw it most of the time on the right, even though it's not actually visible from their point of view. I've introduced this idea that when we draw, what we are doing is we are translating common objects into these basic foundational volumes. This is the best way to sidestep this inclination to view things and draw them from the canonical perspective. If you were to sit down and to draw a coffee cup and you don't translate it into a shape, your mind will naturally default to viewing it and putting down on the page this canonical perspective. But as soon as you ask what shape that coffee cup is, and in this case, it's most likely going to be a cylinder, that allows your mind to think about it differently. It sidesteps the canonical perspective, and it'll give you a different strategy to accurately construct this volume in space. The volume that we're going to talk about today is the cylinder. Now the cylinder is one of the most useful shapes to understand how to draw because they are so common. I would encourage you to take a look around your environment right now and see how many cylinders you can locate in your environment. I actually happen to have a cylindrical coffee cup right here. Now there are a few different attributes that I want to talk about that are essential to understanding the cylinder. You can see from this point of view that the cylinder appears to be very squared off with the top of it and the sides appearing as straight lines. However, when we view a cylinder directly from the top, all we see is a perfect circle. Neither of these points, if you really give us an idea about what the cylinder is all about, it's not until we can see both the top and the side that we really start to get a sense the cylinder circular on the top, but it's edges are straight. Before I demonstrate how to draw the cylinder, let's first take a look at it through diagrams, starting with the ideas that you just saw me demonstrate with the coffee cup. The viewpoint we choose to draw a volumetric shapes from determines how three-dimensional they will look. A cylinder viewed directly from above appears to be nothing more than a flat circle. A cylinder viewed directly from the side does not reveal any indication of the circular top or bottom, and once again, appears flat. For a cylinder to appear volumetric in the drawing, it's critical that we be able to see both the top and the side at once. Each drawing of the cylinder you do will contain three axis lines. The first is a vertical axis line that will act as a line of symmetry for the shaft of the cylinder. You'll also need one horizontal axis for the ellipse of the top of the cylinder, as well as a second horizontal axis for the ellipse at the bottom. Note that these two axes are exactly perpendicular to the vertical axis line. Now, using the horizontal axis line, let's place an ellipse to represent the circle at the top of the cylinder going into perspective. The openness of the ellipse indicates how far above the cylinder we're viewing it from. The further above the cylinder we get, the more this ellipse will open until we're completely above it and only able to see the circle at the top as you saw in the previous diagram. For you to understand the next few steps of how to construct a cylinder, it's important that you get a sense of how your eyes actually view the shape. Here on the left side of the screen is our cylinder. Note that because we are only viewing it from the side, we can be see neither the top or bottom from our perspective, it appears to be nothing more than a rectangle. The image on the right side of the screen represents the eye of the viewer who is slightly above the cylinder and looking down upon it, just as you will be slightly above and looking down upon most of your drawing subjects. The line moving from the pupil at the center of the eye to the top front edge of the cylinder, we will call line A. The line from the pupil to the bottom edge of the cylinder, we will call line B. These lines show the distances from the pupil to the different parts of the cylinder. Now watch what happens when we compare line A to line B side-by-side. You can clearly see that line B is longer than line A, indicating that the bottom edge of the cylinder is literally further away from the pupil than the top. The laws of perspective dictate that as an object moves further away from you in space, the smaller it becomes. We'll talk more about linear perspective later on this week. But an understanding of this basic law should be enough for you to grasp the next few steps of constructing a cylinder. What this all means is when we view the cylinder from slightly above, the top section of the cylinder is literally closer than the bottom. Even though in actuality, the circles at the top and the bottom of the cylinder, or the exact same dimension, the circle at the bottom will literally appear smaller because it is further away. To demonstrate this in our drawing, instead of dropping perfectly vertical lines down from the edge of our ellipse, we're going to slightly bring them in to make sure that because the ellipse at the bottom is further away from us, it will not appear as wide as the ellipse at the top. Now this appearance of the cylinder slightly tapering can be easy to miss if you don't know what to look for, but it's a critical part of drawing cylinders believably in space. This next diagram shows a number of cylinders stacked one on top of another. The further down from our point of view, and therefore, the further away from us the cylinders get, the smaller the width of the cylinders appear. Once again, we can clearly see the appearance of the cylinders tapering as they get further away. But a slightly smaller size isn't the only thing that we should expect to see in the bottom ellipse at the cylinder. You'll also notice that is the width of the ellipsis decrease the further away they get, the ellipses also become more open. This diagram shows that the bottom ellipse of the cylinder which is further away from us than the top, is not as wide as the ellipse at the top, but is more open. This completes the construction of our cylinder. You'll note that the entire ellipse at the top of the cylinder is meant to be visible to a viewer. We only see the bottom half of the ellipse at the bottom of our cylinder. I know that I've communicated a lot of information here, but I would encourage you to re-watch these videos again and again until you feel comfortable with the ideas presented. We'll talk about more extremely foreshortened cylinders in a future installment of The Art and Science of drawing. But for now, I just wanted to introduce you to the tools and concepts used to draw cylinder from this common perspective. The good news is that once you understand how to draw a vertical cylinder, you'll be able to draw a cylinder at any axis. Even though the angle of the axis will change, all other relationships and information remained the same. Now I'll demonstrate through drawing the same concepts we just learned in the diagrams. First, you'll see me start off with a light vertical axis. Next, you'll see me draw two horizontal axes, one at the top and one at the bottom. These two axes established the rough height of our cylinder. Next you'll see me place in the ellipse at the top, establishing the width of our cylinder. Next, drawing the sides, making sure that they're slightly tapering towards the bottom. This will make sure that the bottom ellipse which is further away from us than the top, will appear slightly smaller. After darkening the top and adjusting the sides to make sure that our vertical axis line acts as a line of symmetry, I'm ready to place the ellipse at the bottom, which although is not as wide as the ellipse at the top, is more open. Next, you'll see me change the angle of the axis line for the shaft of our cylinder while drawing the axis lines for the ellipses perpendicular to the axis line for the shaft of the cylinder. Once all of the axis lines are drawn, you'll see me start off drawing the ellipse that is closest to us and that we see the entirety off. Next you'll see me place in the sides making sure that they taper just slightly, but still remaining straight lines. This will ensure that the ellipse that is further away from us is not as wide as the ellipse that is closer. Finally, I'll place the ellipse at the back-end of the cylinder, favoring only one side of it to make sure that only the back edge is seen by a viewer. Also note that although not as wide, this ellipse is more open making the back of the cylinder appear more rounded than the ellipse at the front. Here you'll see me repeating the same steps once again, but altering the axis line so that this cylinder is oriented in a different direction. After going through this series of steps in order to construct cylinders at different axes, you can try altering the order of the steps to see what works best for you. In this drawing, you'll see me skip the axis lines and go straight to the front ellipse and the sides of the cylinder. With enough practice, you'll get comfortable visualizing the axis lines, but not actually having to draw them. However, this takes time and I wouldn't recommend rushing it until you're ready. I would highly encourage you to draw in the axis lines. In this final cylinder, you'll see me changing the order of steps once again, this time drawing the axis lines and then immediately putting in the sides instead of the ellipses. Remember, the goal of learning to draw isn't that you follow an exact order of operations, but that you take these tools and concepts and find out what works best for you. While learning to draw volumetric ally, I think it's important to keep in mind that you are literally teaching your eyes and your mind to process visual information in a new way and it takes time. Keep your expectations realistic. Don't assume that after watching one video and doing some practice, that you're going to be able to draw a perfect spheres or cylinders. The practice I'm going to give you today should just be thought of as a starting point. You will literally draw a hundreds, if not thousands of spheres and cylinders before you start to develop a comfort level with drawing them. Here is your project for today. I'm going to ask you to draw 100 volumetric cylinders using the strategies that we learned today. For today, don't worry about making them look like they're sitting on a surface. You can have pages that appear to just contain dozens of tumbling cylinders. As always try drawing them from different viewpoints and have them occupy different orientations in space. They can be vertical, horizontal, diagonal, or tilting towards you more or away from you more. For the other part of today's project, I'm going to ask you to look around in your environment and find as many cylinders as you can. Now cylinders are much more common than spheres in most environments. This should be a pretty easy task. I'd really like you to start getting into this habit of looking at an object and instead of naming that object, instead ask yourself what shape it is. This habit of mind is going to be one of the most important ways you can break the canonical perspective in really begin to see objects for what they are. Simple volumetric shapes that you will understand how to draw. As always, thank you for joining me in the studio today and I will see you tomorrow when we're going to start to steady cubes.
5. Drawing the Cube: Now for the last couple of days, we've been flirting with the idea of perspective, but today, we're going to delve deeply into linear perspective, and while doing so, we're going to learn how to draw the cube. But I want to assure you that all of the information you've learned thus far is absolutely compatible with the ideas of linear perspective that you're going to learn today, they are all mutually supporting. For today, we're still going to be using diagrams to study linear perspective, but I do want to reassure you that we are working up to being able to draw from observation. But learning from diagrams is one of the best ways to familiarize yourself with the tools and techniques of perspective so that when you're confronted with an actual object in real life that you want to draw, you'll be prepared, and you'll know what to look for. It's also important to note that learning about volumetric drawing through diagrams and being able to do these drawings without actually observing something is the best way to prepare yourself for drawing from your imagination. To make drawings right out of your minds. You can think of something and then know how to draw it. The human eye is an incredible organ, it sees in a complex, stereoscopic curvilinear perspective that we can't even hope to replicate on a flat surface. That being said, the tools and techniques you're going to learn today are going to take you through almost all of the kinds of scenarios using perspective that you will encounter in fine arts. Today, you're going to learn about one-point, two-point, and three-point perspective. Now, there are more complex systems of perspective out there, but three-point perspective will take you through almost every possible scenario that you're going to encounter while drawing objects from observation or out of your imagination. It's up to you as an artist to figure out how much you want to learn about perspective and how much you want to incorporate it into your drawings. But because the human eye sees in such complexity, what I would say is that the more vanishing points that you're comfortable using in your drawings, the more realistic your drawings are going to look. In every drawing you do from here on out, you'll want to consider the eye level. In a drawing or painting, the eye level represents the height of the viewer's eyes. The eye level is also commonly referred to as the horizon line. If the actual horizon is visible in a drawing or painting as it would be in a landscape or other exterior settings, it will always be at eye level. Any objects below the eye level will be below the height of the viewer's eyes, and therefore, the viewer will be looking down upon them and be able to see the tops of these objects. As you can see, objects below the eye level tend to appear as if they are resting on a ground plane. Objects above the eye level are above the height of the viewer's eyes and will appear to hover above the viewer. Notice that the bottoms of these objects are visible. Even in this simple diagram with nothing more than a line representing the eye level, you can clearly see objects below the eye level appearing to be resting on the ground plane, while the objects above appear to be hovering up above them. You can raise or lower the eye level however you like in your drawings and paintings. Here, with the eye level raised, you can see the appearance of more ground and less sky. Regardless of where your eye level is in your drawings and paintings, all of the previous rules you just learned will apply. Here, you can see a sphere resting below eye level. If we wanted to place a second sphere in this image that is the same size as this first sphere, but appears to be further away, two things need to happen. First, of course, this second sphere would need to appear smaller than the first one. Second, the further away the sphere gets, the closer it will get to the eye level. Both of these things are necessary for the illusion to work. To demonstrate why, first, let's look at a diagram where the size of the sphere has been reduced, but it is placed at the same baseline as the first sphere instead of moving closer to the eye level. You can clearly see that instead of a second sphere appearing further away, it just looks like there is a smaller sphere next to our first one. In the second diagram, you can see what happens when we place the second sphere closer to the eye level, but forget to reduce its size. Now it appears as if there is either a slightly larger sphere behind our first or that a sphere of the same size is hovering next to it. Either way, it doesn't give us the desired illusion. Only when the second sphere is smaller and closer to the eye level does it appear to be a sphere of the same size that is simply further away. We can continue this effect by giving the illusion of spheres lined up and going off into the distance. Notice that as each sphere gets further away, it gets smaller and closer to the eye level. As this line of spheres goes further off into the distance, at some point, they would get so small and far way that they would eventually vanish from sight. The point at which this vanishing occurs is, of course, called the vanishing point. You'll note that with the spheres all lined up in a straight path, we can use straight lines to determine their size at any given point. These straight lines are called perspective lines. They will be the primary tool that we will use to draw objects that believably exist in space and properly exhibit the laws of perspective. Using perspective to draw boxes is essential if you can see more than one side of the box. In all of the following perspective demonstrations, we're going to be using a perfect cube, meaning that each face of the box, or what you'll hear me refer to as a plane, is a perfect square. In one-point perspective, the front plane of the box, the one facing the viewer, is going to remain a perfect square. The box you see here is below eye level, meaning we can see the top of it. To construct the top of the cube from the two top corners of our square, we'll extend lines back to the vanishing point. Now because we can see the entirety of the front plane, that means we would be seeing very little of the top plane. This means that the back edge of the cube would be drawn quite close to the front edge. Hopefully, you can see that this gives us the illusion of a volumetric cube in one-point perspective. This cube is drawn below eye level, but we can use the exact same steps to construct a one-point perspective cube above eye level, where we would see the bottom instead of the top. In my opinion, one-point perspective only really works for views of cubes like this, where we can see all of the front, but only a small section of the top. Although it is possible to use one-point perspective to draw cubes with three visible planes, I wouldn't recommend it. Hopefully, you can see that these cubes on the sides look a little more distorted and unnatural. The side planes appear to be stretched out and don't really work with the top and the front. In just a few minutes, you'll learn some better strategies and how to draw cubes with three visible planes. When two side planes of the cube are visible, regardless of whether or not you can see the top or the bottom a minimum of two-point perspective is going to work best. You will note that in this diagram, instead of having one vanishing point to the center of the page, we have two, one at either side of the page, spread out as far as we can get them. The location of vanishing points and drawings will often vary depending on the size of the subject and its placement. But until we have a chance to talk more about that, will push them as far off to the sides as we can. The vertical line at the center of the diagram represents the front edge of our cube from which the two side planes will project. The height of this vertical line and how far it extends above or below eye level determines the height and the placement of the cube. In order to construct the side planes, first will project lines of perspective from the top and the bottom back to the vanishing point on the left. Next, do the same to the vanishing point on the right. Finally, we'll use vertical lines on either side to construct the side planes of the cube and darken up at the top and bottom edges. Hopefully, you can see that this diagram, believably depicts a cube that is turned so that two of its sides are equally visible. It's important to note that this believable perspective is simply not achievable with only one vanishing point. Two-point perspective, works equally well for cubes that are below or above eye level. You'll note that in each of these cubes, a third plane is visible. The queue below eye level has its top plane visible, while the cube above eye level has its bottom plane visible. When a third plane is visible, you'll need two more lines of perspective to construct it. To see how this is done, first, let's remove all of the lines of the cube below eye level, except for the three that go to the vanishing point on the right. It's critical to memorize which lines on a cube go back to which vanishing points. There is a three you see here, going back to the vanishing point on the right. There's an identical set of three lines mirroring this first set of three that goes back to the vanishing point on the left. Finally, of course, there are the three verticals. During your practice today, you'll want to pay particular attention to making sure you're sending the right lines back to the right vanishing points, to accurately construct a cube in two-point perspective. Now that you've got a sense of how two-point perspective works, let's take a look at a couple of common scenarios. Here, once again, we can only see two planes, but the top of the cube is directly at eye level. When this happens, the top of the cube completely flattens out, but the bottom edges still go back to the vanishing points. The same thing happens with the cube whose bottom edge is directly at eye level. Here, the bottom edge of the cube flattens out but the top edges go back to the vanishing points. This is a common view you'll see while drawing buildings from street level. Now, do you remember what happened when we tried to use one-point perspective to draw cubes with three planes visible off to the sides? In one-point perspective, it looks awkward and unbelievable. Now look what happens when we attempt this using two-point perspective. Hopefully, you can see that these cubes are far more believable because they more accurately depict how each plane goes back into perspective differently. Of course, we can use the same sets of ideas and principles to construct cubes above eye level as well. By removing the perspective lines, we can clearly see how believable and volumetric these cubes appear using two-point perspective. Note that in all six of these cubes, the vertical lines remain perfectly vertical, but all other lines go back to a vanishing point. Two-point perspective does a great job giving the illusion of volume. But as I mentioned before, the more vanishing points you're comfortable using, the more believable and accurate your drawings will be. Now, unless you're drawing bird's eye or worm's eye views of objects or buildings, you'll only use three-point perspective in subtle ways in your drawings, but it does add an extra layer of believability to drawings and paintings. Let's begin by constructing the vertical center line of our cube, as well as the top plane using two vanishing points. Now, let's think back to what we learned yesterday; about the top plane of an object that we are viewing slightly from above is closer to us than the bottom plane. This means that the bottom plane will be slightly smaller than the top plane. This means that instead of using perfectly vertical lines to construct the sides, these two lines must appear to converge, at a distant vanishing point far below the object. You'll remember that we introduced this idea while drawing cylinders, although we have not yet talked about vanishing points. Just like with cylinders, this effect is observable on any cube object, although it's easy to miss if you don't know what you're looking for. By including it, it adds a level of believability that more successfully fools the eye then two-point perspective ever could. To understand how far off this bottom vanishing point would be, if we actually drew it, let's pull back. You can see here that even though it's obvious that these two lines would eventually converge at a distant vanishing point, it would be impractical to try and include this in your drawings, but it's a wonderful and subtle effect you can include in your drawings, even without drawing the actual vanishing point. We can use the same principles to draw cube above eye level, but the vanishing point that the size would go to this time would be distantly above the object. I always try to draw objects that are above or below the eye level using three-point perspective. However, a cube that is at eye level can be drawn using only two-point perspective can still be perfectly believable. Using perspective lines in a drawing requires drawing long, straight lines. If this is a challenge for you, I would encourage you to use a ruler like you're seeing me use here. This first horizontal right line is for the eye level. Next, you'll see me place a vanishing point on the left, and then on the right. These vanishing points are as far off to the sides is I can reasonably place them. If your vanishing points are too close together, the shapes your drawing will begin to distort. To start our box near the center of the page and below eye level, I'll start off by making a vertical line. Next, I'll mark the top and the bottom of this front edge of the cube. Next, using my ruler, you'll see me draw perspective lines from the top of this line to each of the vanishing points. After that, I'll repeat the same thing at the bottom. Note how light these lines are is they are just construction lines for our use. They are not intended to be seen by a viewer. Next, you'll see me marking the width of the right side of the cube. Next, you'll see me drop a line down to represent the right side of the cube. Note that instead of going straight up and down in a perfect vertical, it's angling in as if it will eventually converge at a distant vanishing point far down below the cube with the first vertical line that we drew. Just like you saw in the diagram, you'll now see me draw perspective line from the far right corner of the cube back to the vanishing point on the left. I'm going to place the far back corner of the cube directly above the front corner facing us. Note that it is also on the perspective line that we just drew. Next, you'll see me draw perspective line from the vanishing point on the right through the far back corner of the cube and beyond until it hits the next perspective line. This will give us the far left corner of the cube. From the left corner, you'll see me drop another line down. Once again, this line gives the appearance that it will converge with the other two vertical edges of the cube at a distant vanishing point far below. Once the perspective lines have been used to construct all three visible faces of our cube, you'll see me darken the lines, I want seen by a viewer. You'll be using the same set of steps to construct your own cubes and perspective during today's project. Let's talk about today's project. While we're drawing perspective, we're going to need to get comfortable drawing straight lines. Now that being said, if this is really a struggle for you, please feel free to use a ruler. In the demonstration drawing, you saw me use a ruler for the eye level line and the lines of perspective. But when it came to darkening the box, I did that free hand. I would also encourage you to use 18 by 24 inch paper. That's because trying to do perspective with vanishing points on the page is very difficult on a smaller sheet of paper. 18 by 24-inch paper will give you room to move and just room to comfortably draw and explore perspective. In just a moment, you're going to see a diagram come up on the screen and you're going to be asked to pause the video, draw from the diagram and when you're finished to press play again, you'll be drawing from a number of diagrams today and there's no set amount of time that you should shoot for. I want you to feel comfortable working with each diagram as long as you need. Learning the rules of perspective through diagrams like this, is one of the best ways to familiarize yourself with a complex set of ideas that linear perspective brings us. Tomorrow when we actually draw from observation, when we get cubes and cylinders and spheres and actually observe them in real space, you'll be able to see perspective operating. This is the best way to break that canonical perspective because you'll understand what to look for. Pause the video and copy this diagram three times. When you're done, press play. Pause the video again, and copy this diagram three times. When you're done, press play. Pause the video and copy this diagram three times. When you're done, press play. Finally, pause the video and copy this diagram three times. When you're done, press play. Thank you so much for joining me today, and I look forward to seeing you in the next session where we get to draw from observation.
6. Observational Drawing: Welcome back. Today is the fourth day of our form and space week of the art and science of drawing. Today, we're going to make an important shift in your drawing practice. Instead of working from diagrams or photographs, we're going to start observing, analyzing, and drawing objects from life. From here on out, you're going to be asked to find drawing subjects, objects in your environment, set them up in front of you, and actually draw them while being right in front of them. But before we do that, we're going to talk about an often overlooked but essential part of the drawing process, and that is how you set up your drawing station. A good drawing begins with a good drawing setup. Usually this means some drawing board or drawing surface that you can place your paper on, and your relationship to the object that you're trying to draw. This could be a single object or an entire still-life or figurative setup. For the more casual artists, how they set up their drawing station isn't nearly as important. But as we are starting to draw from observation, how we set up our drawing station is going to decide the success or failure of our drawing from these very, very beginning decisions. If you haven't done so already, I would highly encourage you to start using the drawing board. Drawing boards come in many different variations. You can get them in Mesa night with metal clips already attached, or you can get a piece of wood and get clips of your own, like you can see how I've done here. Whatever drawing boards you get, you want to make sure it's appropriate for the size of paper you're using. I often use 18 by 24 inch paper or larger, so you can see that my drawing board is appropriate for those sizes of paper. Most people start off drawing in a surface they're familiar with, like a desk or table. They lay their drawing surface down flat. This setup works out great for writing, but it doesn't work out so well for drawing. For a drawing to be successful, it's critical that our line of sight is perpendicular to the drawing board. If the drawing board is at any angle other than perpendicular to our line of sight, the drawing will become distorted, because one section of the paper will be closer to the eye than another. A line of sight that is perpendicular to the drawing board will minimize this distortion. If you're drawing to the table, like most beginning students, instead of laying the drawing port flat on the table, try resting it on your knees and propping it up against the edge of the table. This is a quick and easy way to get a proper perspective on your drawing surface. Let's take a look at a few other common drawing setups that will give you the proper perspective on your drawing surface. Pictured here from left to right is a drawing horse, a double chair setup, and an easel. First, let's take a look at the double chair setup. This is another easy way to get a proper perspective on your drawing board without making an investment in specialized equipment. By sitting in one chair and placing the drawing board on a chair opposite you, you have plenty of freedom to adjust the drawing board until you achieve a perpendicular line of sight. Drawing courses can be found in most strong studios. You can see that from the side, it looks vaguely like a horse, and just like riding a horse, you straddle this piece of equipment facing the drawing board. I have a drawing horse in both my teaching studio and my home studio. Not everyone likes them, but they are my preferred way of working. Finally, there's the easel. You can either sit or stand at an easel. You just want to make sure that your line of sight is perpendicular to your drawing surface. Most easels are adjustable in multiple ways to ensure that a perpendicular line of sight is possible. Regardless of the setup you choose, there's one last thing to consider; the placement of this subject you're drawing. You want to make sure that the line of sight between your eyes and your drawing subject is as close to the edge of the drawing board as possible. Your drawing subject can be visible either above or to the side of your drawing board. Either way, you want the edge of the drawing board to visibly be as close to the subject as possible without blocking it. You also want to make sure that your subject is close enough to you that you can comfortably observe it without straining your eyes. Once you've selected a solid drawing setup, you're ready to observe, analyze, and draw single, simple objects. Let's start off with a cylinder. Cylinders are incredibly easy to find in almost any environment. This is a canister I had in my studio. Instead of a top plane, it has an opening. Even so, it follows the exact same rules of perspective that we learned on day 2 of this week, when you learned how to draw a cylinder out of your head, by understanding how a volumetric cylinder operates in space. There's an old saying in drawing, that you can hear echoes of from the renaissance all the way up to contemporary drawing teachers. It comes in many variations, but summed up, it goes something like this, if you don't know how to draw something out of your head, you don't know how to draw it. Although a bit hyperbolic, there is some truth to it. Having an accurate mental model of how you expect an object to operate in space, allows you to better observe and analyze the effects of perspective on any object. When we remove the photograph of the cylinder completely, you can clearly see that there is no difference between the cylindrical drawings you did from diagrams on day 2, and what is actually observable from a cylinder that it's right in front of you. However, there is one critical difference between drawing cylinders from out of your head using the methods that you learned on day 2, and drawing them from observation with a cylinder right in front of you. While drawing cylinders from out of your head, you get to invent the proportions. But while you're drawing from observation, it's critical that you capture the observable proportions on the object that is right in front of you. An excellent way to begin analyzing these proportions is to compare width to height relationships. First, let's start off comparing the width and heighth of the ellipse at the top of the cylinder. If we imagine a box around the ellipse, we can get a good sense of the width and heighth of the ellipse at its farthest points. By comparing these proportions, we can get a good sense of the relationship between them. For example, you can clearly see here that it would take a little more than 2.5 units of the height to equal the width of the ellipse. Or to put it another way, the ellipse is a little more than 2.5 times as wide as it is high. In the coming weeks, you'll be introduced to a wide range of measuring tools and techniques. But for now, I just want you to start to make these kinds of evaluations on your own and be aware of them while you're drawing. You can also use this technique to compare the width and height of the entire object. First, let's imagine a box around the entire cylinder. By imagining and focusing on this box all on its own, it's much easier to get a sense of the width and height relationships. Once again, by comparing them side-by-side, we can get a sense of how much higher the cylinder is than it is wide. At this stage, if you're drawing education, it's not critical that you get these proportions down on the page exactly. But it is important that you get in the habit of making these evaluations before you attempt to draw an object. You're much more likely to observe, analyze and draw an accurate cylinder on the page, if you're thinking about the width and height relationships of the cylinder as a whole and of the ellipse. In Lesson 2 of this course, you not only are going to experience drawing cylinders at a vertical axis, but at oblique as well. Once again, understanding the rules of how to draw cylinders out of your head is the best way to prepare yourself to know what to look for when you have an actual cylinder right in front of you. This allows you to merge what you know about the object with what is observable in reality. Although there's a lot more to learn about how objects operate in perspective, what you've learned so far will allow you to break that canonical perspective and draw objects believably in space. For part of your project today, you're going to be asked to observe, analyze and draw a simple cylindrical object from life. While doing so, you're bound to encounter viewpoints of this cylinder that you haven't practiced drawing out of your head. From this viewpoint, you're seeing almost the entire circle of one end of the cylinder. When this happens, the ellipse opens up so much, it almost becomes a perfect circle. However, you can still see that it is an ellipse. You'll also notice that the ellipse at the back actually begins to overlap the ellipse at the front. During your practice today, it's important that you get a sense of how a cylinder operates from every possible perspective and to be able to internalize this information so that you can draw a cylinder comfortably and believably from any viewpoint out of your head and from observation. During today's project, you'll also be drawing a box, just like with the cylinder. You'll find that the laws of perspective that you learned on day three are all observable on an actual box right in front of you. You can clearly see that this box is operating in three-point perspective. While drawing boxes from observation, you'll rarely, if ever, actually draw perspective lines going back to a vanishing point as they would be so far away, it would be impractical. However, whether you draw the vanishing points or not, the edges of your box must appear to be going to three different vanishing points. One to the left, one to the right and one below the box. Of course, not all boxes are perfect cubes. In fact, most of the boxes you draw, will have different lengths, widths and heights. Even so, you can clearly see that they too will be operating in three-point perspective. Although the vanishing point of this diagram would be far off-screen, if you were to see them, they would be no different from the diagrams you drew on Day 3. If you need any review at all on how to draw cylinders or boxes in perspective, please review Lessons 2 & 3 before trying today's project. Today's project has three different parts to it. The first thing I'm going to ask you to do is set up a drawing station that meets the criteria that we talked about earlier on today. You want to make sure that your setup allows your line of sight to be perpendicular to your drawing surface. You also want to make sure that your still-life subject is either directly above your drawing board or if you're using an easel directly to either side. For the second part of today's project, I'm going to ask you to find a cylinder and a box. The majority of households have perfect cylinders in them. If you're having trouble finding one, think about things like paper towel rolls or soup cans. If for any reason you're really struggling to find one, a trip to the $ store or any supermarket should yield and plenty of options for a cylinder. The second object I want you to find is a box. When you're searching for a box, remember, it can be in any dimension that you want, a shoe box, a cardboard box, any kind of box will do. I would recommend using a larger box rather than a smaller box. The reason is that the effects of perspective are much more easily perceived on a larger form than smaller ones. Finally, for the third part of your project, I'm going to ask you to take your cylinder and your box and do three drawings of each of them and make sure they're from different vantage points. I want you to be able to turn these objects in space. Remember, we're simply going for structural drawings. You don't want to include any detail. That means no shading, no surface details or embellishments, just basic cylinders and boxes. The most important thing at this stage of your drawing process is to be able to draw these simple forms accurately in space. That's a total of six drawings, three drawings of an individual cylinder and three drawings of an individual box. Remember to apply the concepts that you've learned this far while you're drawing these cylinders and boxes. The same processes you use while constructing them through the diagram are going to be used when you're actually drawing these things from life. Remember, now that you know the rules of perspective and now that you understand how these objects should be operating in space, you're much more likely to be able to sidestep that canonical perspective and see these objects for what they actually are and what they are actually doing in space. I understand that for some of you, drawing boxes and cylinders might not be the most glamorous or exciting project. But again, these are foundational forms. If you're struggling to observe, analyze and draw a simple cylinder, it will be nearly impossible for you to deal with a more complex cylindrical form like a human leg. We'll get to complexity later on. But for now, it is critical that you were able to understand and really internalize how these basic foundational forms work. Well, thank you so much for joining me and I look forward to seeing you on the next session where we're actually going to draw from a still-life made of multiple objects.
7. A Simple Still Life: Today, we're going to take all of the skills you've learned this week and apply them to a simple still life that you're going to draw from observation. Now, before I do today's demonstration drawing and give you today's project, I'd like to discuss a number of ideas about the drawing process as a whole that is going to make drawing your still life from observation much more manageable. If you're going through the art and science of drawing series in order, as I would highly recommend, many of the ideas I'm about to discuss with you will sound familiar, but you'll notice they take on a new meaning and resonance when we talk about them regarding drawing a still life from observation, it's important to remember that drawing is a process. We talked a lot about the idea of how a drawing evolves over time, and we introduced a few basic concepts. The first is that you want your drawing to go from the biggest shapes down to the smallest shapes, it's critical to get the big shapes in place and working before you attempt to do any details at all in your drawing. But of course now you're going to think about this shapes in terms of three-dimensional volumes. But even so, this idea of getting the big shapes drawn accurately before moving down to details is critical. The second idea we want to talk about is the idea of operating from general information down to specific information and this drawing can tighten up and get more refined as time goes on, the general information can gain some specificity, the more you learn, the more you observe and the more you analyze your drawing subject. Finally, you'll remember that a drawing should go from the light lines to dark lines. I think it's important to make a distinction here, we're not talking about value or shading. Light lines are not intended to be seen by a viewer, they're easier to erase, they're easier to move around on the page. Keeping your process and construction lines light will keep your drawing malleable so you can correct it and move things around as the drawing process goes on. The next idea I'd like you to keep at the forefront of your mind is this idea that we are constantly translating recognizable objects like coffee cups, books, fruit, into basic drawable shapes like boxes, cylinders, and spheres. Earlier this week, you learned about the canonical perspective and you learned that the canonical perspective or our preferred view of an object, is really an impediment to good observational drawing because it makes us assume incorrect things about how that object looks and how it's operating in space. But by translating recognizable objects into basic shapes and volumes, we are much more likely to see what it's actually doing and to be able to translate them into objects that are working in three-dimensional space. This is the best way to sidestep the canonical perspective and to see how the objects that we're drawing are actually operating in space as three-dimensional volumes. We'll have plenty of time later on in this series to do more finished drawings. But for now, the most important thing is for you to get some experience translating recognizable objects like coffee cups, books, and fruit into drawable volumetric shapes like boxes, spheres and cylinders. Now this will require you to do some editing. What this means is that instead of actually attempting to draw a book for today, we're simply going to translate it into a box. Instead of trying to draw a coffee cup with a rim and a handle, you're just going to draw a simple cylinder and the idea here is that it doesn't make any sense to put the kinds of details on these objects that would make them read as book or coffee cup, things like handles or to differentiate a book cover from the pages, it doesn't make any sense to put this information on there if the big shapes aren't working. If your book doesn't look like it's actually a box operating properly in perspective, any detail you put on it by definition will be incorrect. We're really going to focus in on building and constructing these proper volumetric forms on the page and later on, we'll show you how to add details. If you are going through the art and science of drawing series in order, you remember we introduced five questions to really help you along with the drawing process. Those five questions are as follows. 1, what is the biggest shape? 2 what is its axis? 3, How big on the page should it be? 4, where on the page does it need to go? If you remember, you're going to ask those four questions before ever attempting to draw anything. Once those four questions are answered, you make your first very light attempt on the page and after you're going to ask a fifth question and in my opinion, the most important one, what changes can I make? We use those questions to put flat shapes down on the page. But those five questions worked just as well for volumetric shapes. Remember, the idea isn't that you ask these five questions over and over and over again and don't deviate from that. But going through those questions in your mind on a regular basis will keep you on path working from the biggest forms to the smallest forms and to continue to evaluate forms instead of making assumptions about what you're drawing. There is no one right way to draw, but there are better and worse ways and keeping these kinds of thoughts in mind the five questions in operating from big to small is a really important idea. This is a perfect example of a simple still-life made from foundational volumetric shapes. Most people would look at a setup like this and think to themselves, there is a book, a coffee cup, and an orange. But we as artists, need to simplify these forms in order to understand and draw them. One way to simplify the visual information in front of us is to ignore the color. In fact, the study of color as it relates to three-dimensional volumes, should only be undertaken when you have a good solid drawing foundation, as well as a solid foundation of how light and shadow work. These are all things you learn in the art and science of drawing series but until then we can let go of color. We also know that in order to accurately draw these forms, we must translate them into basic volumetric shapes. We have to let go of labels like book, coffee cup and orange and instead begin to view them as a box, a cylinder, and a sphere. One of the important skills that drawing students must develop is knowing what information is useful at different stages of the drawing process and to let everything else go, to literally edit it out your vision. What this means is that in order to simplify these forms and focus only on their simple volumetric shapes, we must ignore things like the handle of the coffee cup, the text on the side of the book, and the differentiation between the book cover and the pages. We must at first ignore every extemporaneous detail until we've simplified the form down to a box, a cylinder, and a sphere that are operating in perspective. Basic volumetric shapes like these will lay the foundation for almost every drawing you do. Once you're able to see complex form in this simplified way, you're ready to draw. In almost every drawing I do, I begin by reminding myself of the fundamental concepts of good drawing. A drawing should begin with the biggest shapes and work its way down to the smallest shapes. A drawing should begin with the most general information and work down to the specifics, and a drawing should begin with the lightest lines and slowly darken them as the process continues. Big to small, general to specific, light to dark. Notice how soft and light these initial lines are. You'll see me first working on the box. Not only is the box for the biggest shape, but the other two shapes will rest upon it. One of the most important things for you to grasp about the drawing process, is that no artist, no matter how skilled, consistently gets it right at the beginning. In the basic skills course, every master drawing we looked at revealed numerous attempts at the form. We can see evidence of the masters making an attempt evaluating it and then changing it in the next attempt in only darkening up lines they want seen by a viewer. The quicker you get something down on the page, even if you know that it's going to be wrong, the quicker you can begin evaluating it and altering it until you arrive at your desired form. This ready fire aim approach to drawing is one of the most powerful processes you can use. Whether you're learning to draw or you're a master. You can see in my drawing how often I'm changing things, moving lines up or down, changing their length or changing their angle. This approach requires, of course, that we're comfortable drawing lightly. The lighter we draw at the beginning, the more iterations are drawing can go through, and the easier it is to get rid of unwanted lines later on in the process. Once I have a rough idea about the size of placement of the box for the book, you'll see me make my first attempts at this sphere for the orange and the cylinder for the coffee cup. Once again, you'll see me making them as lightly as I possibly can, so they can be easily moved or changed as the drawing progresses. So far the drawing has remained general and light, but before we move on, it's important that I make some firm decisions. You'll see me darkening up just a few of the lines. Each new line I begin to darken will be compared back to these initial dark lines. It's essential to remember that whether your subject is simple or complex, every single detail in your drawing subject will have a specific directional relationship in distance from every other point in the drawing subject. The more you evaluate these distances and directions while you're drawing, the more accurate your drawing will be. With each volume that I'm drawing, I'm paying particular attention not only to the width and height of that individual shape, like the cylinder for the coffee cup, but how that shape relates to the larger shape of the box. The further the drawing progresses and the more evaluations I make, the more confident I become that the form is coming together. Now we can begin to pay more attention to the width and height ratio of the ellipse of the cylinder. You'll notice that even though I can't see the bottom of the cylinder, I'm going to draw it as if I can. This is called drawing through the object. By treating all of the objects in the drawing as if they are transparent volumes, we get a much better sense of how these volumes are operating in space. This is the best way to make sure that an ellipse that is only partially visible, like the one at the bottom of the coffee cup is drawn accurately. Now that our volumetric shapes are coming together and the edges are being darkened, you'll see me using the technique that we talked about in week two, the dynamic mark making week of the Art and Science of Drawing. The parts of this still life that I want to appear closer to a viewer, I'm going to use much darker, harder lines. Lines that I want to recede into the background will be lighter and softer. Of course, the construction lines that I use to create the shapes but don't want to be seen by a viewer at all I'm leaving alone and not darkening at all. So far the orange is just a simple circle. To give it some volume in direction, you'll now see me place the latitude and longitude lines. Notice they're intersecting where the stem of the orange would be. The objects are beginning to appear solid and volumetric. Now you'll see me continue to work up the line quality. At this stage of your drawing education, it's less important that you capture every proportion of this still life accurately, and more important that you arrive at shapes that are properly occupying space. In the measuring and proportion cores in the Art and Science of drawing series, you'll learn a number of measuring techniques that will allow you to refine your drawings so you can accurately capture whatever still life subject is in front of you. Hopefully, you can see how well the simple still life communicates volumetric forms existing believably in space. If you'd like an extra challenge, try constructing the box is if it too or transparent. This will further train your mind to see every object as a 3-dimensional volume. Regardless of what your still life subject is, this is about as far as I want you to take your drawing today. Your final drawing should simply consists of a box, a cylinder, and a sphere, drawn transparently, and believably occupying space with your line quality helping to pull some parts of the still life forward and letting others recede. Now I know that a lot of what you've learned this week seems very technical, but I want to reassure you that internalizing these concepts, being able to draw things like boxes, cylinders, and spheres out of your head or comfortably from observation, this is the pathway to more free and more expressive artwork. Remember, drawing is both an Art and a Science. It's only by understanding the science, and really internalizing those rules that we are truly free to do expressive drawings that really showcase who we are as artists. For today's project, I'm going to ask you to find three objects, a cylindrical object, a box-like object, and a spherical object. What you're going to do, is you're going to set those three objects up in a still life just like you've seen me demonstrate today, and I want you to draw using the processes that you've learned this week. This is a great opportunity for you to take everything you've learned as an artist and apply it to the drawing process. Remember, there is no one right way to draw. I want you to feel free to experiment with all of the ideas you've learned to find a drawing process that works for you. Once you've had some success drawing a simple still life from observation, try moving these objects around, put them in different orientations, and see how that changes, how they're operating in space. Remember, no details and no shading. The final drawing that you have should just appear to be a box, a sphere, and a cylinder. Even if the objects that you're working from are more complex than that, you want to be able to edit out that information and simplify the forms down to basic drawable volumes.
8. Compound Forms: I really want to congratulate you for coming this far and sticking with this program, the skills that you have learned are really going to provide a solid foundation that is a real investment in your future as a drawer. We are going to take the skills that you have learned about volumetric drawing and expand on them to really provide you with the skills to draw virtually anything. Today, we are going to start a conversation about how to draw compound form. What compound form is are objects that are composed of two or more of the foundation of volumes that you learned about in the previous week, and for today, we are going to be focusing on compound forms that are made up of spheres and cylinders. You'll notice that at this stage of the Art and Science of Drawing series, you'll be asked to perform many of the skills that you learned in previous weeks. This includes circle drawing, ellipse drawing, straight line drawing, and the ability to observe and analyze form. If you are struggling with any of these skills individually, I would encourage you to continue to practice the basic skills, and remember, these are not so much basic skills as they are fundamental skills. You cannot practice fundamentals too much, I still make it a regular practice to draw circles, ovals and straight lines, just because they are so common in drawing. Over the course of my career, I have literally drawn tens of thousands of ovals, circles and straight lines and will most likely draw tens of thousands more just because they are so important to continue to practice. Before we get to our subject today, I want to remind you that you should be spending 70 percent of your time simply observing and analyzing the subject that you are drawing and only 30 percent of your time with pencil to paper. Remember, it is not an accident that the word observation comes first when we talk about observational drawing. Often times when you are working with compound forms, you'll find that the familiar volumes you are used to, like cylinders and spheres, have been altered in some way. You'll find that cylinders will taper or will sometimes be bent, or instead of finding an entire sphere, you'll find a partial sphere. Nevertheless, we can still approach these subjects with the same strategies we have been using. We just want to make sure that we are being flexible enough to alter the strategies depending on what we find in the subjects that we are drawing. By now, you should be familiar with the idea, that instead of trying to name objects, it's critical that we as artists translate what we see into the most basic volumes. For today, we are going to ignore the handles and focus simply on the largest volumes. You can see here how easily this form simplifies down into a cylinder, a sphere, and a series of ellipses. There's not a single shape here that you don't already have experience drawing. Let's focus on the vertical axis line, notice that the axis line also acts as a line of symmetry for the entire object. When you are constructing symmetric objects, it's critical that you first draw a center line. This will make it much easier for you to evaluate whether or not your drawing is symmetric. In today's demo, it's the first thing you'll see me draw. Next, let's focus on the two largest volumes that make up this object. Let's start with the cylinder at the top, you'll note that this cylinder tapers and gets narrower at the top. While working with compound forms, it's common for there to be more than one way to think about a volume. This type of volume is very common, particularly when you get to figure drawing. You can either think of it as a cylinder that tapers and narrows toward the top, or you can think of it as a cone that's been truncated, either way you arrive at the same volume. Next, let's focus on the sphere that makes up the bottom section of this object. You can see here that this volume is nothing more than a sphere that's been sliced in half, by adding back in the ellipses, we can get a sense of all of the prominent volumes and shapes that make up this form. You'll see me begin by drawing a vertical center line, every time I draw a symmetric object, I begin with this central line as it makes it much easier to evaluate whether or not my drawing is symmetric. Next, you'll see me mark the top and the bottom of the object. After establishing the largest proportion, you'll see me make my first attempt at locating the bottom of the cylinder. Remember, at this point, we are working primarily by sight. I cover measuring tools and techniques in the measuring and proportion course, but until then, I just want you to get used to evaluating and comparing the proportions of the big shapes and volumes. Here you'll see me using light marks to make my first attempt at the width of the ellipse at the top of the cylinder. As the drawing progresses, and I learn more about the object, you'll see me move these proportions around. It's important to remember that that's the whole reason we draw this slightly at the beginning to make sure that we have a lot of flexibility and that we can easily change our drawing. So far in the Art and Science of Drawing series, I have been advocating starting every drawing with the biggest shapes first, then slowly working your way down to the smallest shapes. Although that's the most common method most masters use to draw, it's one of many potential strategies. In this demonstration, after figuring out the largest proportions, you'll see me start with the shapes at the top and work my way down. Remember, there's no one right way to draw, and it's up to you as an artist to figure out a process that works for you. After making my first attempt at the ellipse at the top, which will almost certainly be changed later on at the drawing process, you'll see that I have drawn the ellipse at the bottom of this cylinder, keeping in mind that it's wider than the ellipse at the top. Every time I draw a new shape, I'll compare it back to the shapes that I have already drawn to see how it relates in terms of size, placement, and proportion. The ellipse at the bottom of this cylinder is not only wider than the one at the top, but also more open because it is below. Next, you'll see me trying to find the width of the object at its widest part. You'll notice that I'm comparing it back to the ellipse that I first drew. After checking to make sure that each side is the same distance from the center line, you'll see me make a mark indicating where the largest ellipse in this object is located. This ellipse is by far the widest that we have drawn so far, and because it is also below the other two ellipses, it is once again more open. Now I'm ready to draw the sphere located at the bottom of the object. Beginning students are often surprised to find that although only the bottom of this sphere is present to the object, I'll still draw the entire sphere very lightly. I find that it's much easier to draw a partial sphere by beginning with an entire sphere and only darkening up the visible portion. Finally, you'll see me place the ellipse at the bottom, which will also of course be the most open. You can see now that the form is beginning to take shape and I can begin the process of sculpting these basic volumes into the more complex object that we are working with. Notice that at this stage, the drawing is still light and soft, I can keep the drawing at this vaporous state as long as I need to, continuing to sculpt the form and make adjustments until I'm satisfied that the drawing has believably captured the object we are working with, only then will I began to darken and solidify the drawing. But even as I begin to darken lines and solidify the object, I'm still always looking for opportunities to adjust any part of my drawing to better capture the object. At this stage, I can also begin adding the nuances and details to turn these basic volumes into more complex forms that better describe our subject. I'm paying particular attention to how the cylinder at the top transitions into the larger forms at the bottom of the object. Next, you'll see me start to draw the ellipses that make up the rim at the top of our subject. Keep in mind that for today, we are editing out most of the details and focusing on the basic volumes that make up the object. Later on in this course, you'll learn more about how to draw handles and rims on subjects like this, but until then, try and keep your drawing simple and structural. Once I'm satisfied with the construction of my subject, I'll begin to use line quality to darken the lines I want seen by a viewer. This is a great opportunity to practice some of the tools and techniques that you learned about in dynamic mark making, the second course in the Art and Science of Drawing series. The final drawing of this compound subject consists of a light foundation of basic volumes that I have used as a scaffolding for the darker lines I want seen by a viewer. Being able to do simplified structural drawings of more complex forms is a critical step towards being able to do more finished work. You can see these tools and techniques put to good use in this still life here. Notice that almost every object here is either cylindrical, spherical, or some combination of the two. Now let's focus on the wine bottle, the carafe, and the water glass. Notice that the ellipse at the top of the wine bottle is at eye level, so it simply appears as a straight line across, but all of the ellipses below it, regardless of their widths, become more open the further below eye level they get. The carafe in particular has a remarkably similar structure to the object you saw me demonstrate today. The more you practice these tools and concepts, the more similarities you'll find between different objects. This is why it's so important to not learn to draw a specific subject, but instead learn the tools and techniques that will allow you to draw any subject, by observing and analyzing its form and simplifying it down to basic foundational volumes. For today's project, I'm going to ask you to go find a compound form that is made up of cylindrical shapes or spherical shapes. We are going to learn a lot more about how to deal with boxes later on this week, but for today, let's just stick with spheres and cylinders. My advice is that the compound form that you choose should be pretty simple, one of the most common missteps I see while people are learning to draw is selecting subjects that are way beyond their skill level, and this inevitably creates problems down the road as they are learning to draw, so be patient. We will be at complex forms before you know it, but until then it is much more important that you get comfortable and develop a competence drawing these basic forms. Once you have got your compound form, I'm going to ask you to observe, analyze, and draw this form using all of the strategies that you have learned this far. Remember, it's not important that you capture every single proportion of the object accurately. I'm much more interested in you getting a drawing that looks believable rather than perfectly accurate, you are going to learn a whole series of measuring techniques that are going to allow you to refine these basic drawings to truly capture the specific proportions of an object. But until then, I want you to do drawings of objects that appear to be believably occupying space, so that means you really want to pay attention to the level of openness of the ellipses and to make sure that even though some of the ellipses will be smaller, that they get more open the further down they get. You also want to keep in mind the rules of perspective. I'm going to assume that if you have made it this far in the Art and Science of Drawing series that you are very serious about getting good at drawing. I'm going to encourage you to go beyond the practice that I'm giving you. Remember, I'm only giving you the minimum amount of practice, if you want to get better, faster, increase the amount of practice you are doing. Instead of simply doing the project that I have asked you to do today, practice things from previous weeks. Remember, these are fundamental skills that you cannot practice enough and you can also increase the number of times you are doing the project. Instead of drawing your compound form just ones today, try drawing it three times or six times, and each time ask yourself, what can you do to streamline this process to get a little more accuracy or to better use the strategies that you have learned this far? Remember, knowledge is not enough. To be a good drawer, you have to be willing to put in the hours of practice that it takes to really learn and home these skills.
9. Organic Forms: Today we're going to start our conversation about how to draw organic shapes and volumes. Organic shapes and volumes are associated with the natural world. Although organic form is made up of the same kinds of geometric volumes that we've been working with so far, you will rarely find perfect cylinders, spheres or cubes while drawing organic form. Instead, we find irregular versions of these. They're often bent, stretched, twisted or otherwise distorted. But although you'll rarely find perfect examples of cylinders, spheres and cubes in organic form, we can still use those foundational shapes to construct the basic volumes before starting to sculpt our drawings. What I mean by that is that while you're drawing organic volumes you can still use the same vocabulary of the foundational solids that you've learned this far. You can still construct form using spheres, cylinders and cubes. But unlike human-made forms, your drawings will require a little more sculpting beyond those forms to start to add all of the complexity and irregularity that we find in organic shapes and volumes. Now, before we get to today's demonstration drawing in today's project, I'd like to introduce a couple of ideas that I want you to keep in mind throughout the rest of your drawing career. The first, I've already alluded to, this idea of sculpting form. Now, when we were drawing volumetrically, you'll notice that we often talk about our drawings as if they were sculptures. We talk about volumes that we're putting down and then shaping on the page. Now, this is very similar to how a sculptor might think about their work. So if you can imagine starting off sculpting these forms with clay, the process we're using is very similar. When you're sculpting with clay, you don't immediately start off with details. You get the general shape first and you slowly add details. Now, this idea of sculpting will become much more apparent in our demonstration drawing today. But I wanted you to start to think about this metaphor that what we're really doing when we're doing a volumetric drawing is sculpting on the page. Again, the idea isn't that we immediately capture the perfect form but that when we start with basic forms, we start with basic volumes and slowly sculpt them over time into the more complex organic forms that we're working with. The second idea I want to talk about is how to assess the margin of error in your subject. Here's a good way to think about this; we know from the outside that no drawing is going to be perfect in all of its parts. Even if we were able to do a perfectly photo-realistic drawing, it would fail to look like a drawing and be less interesting to us as a piece of art. So every drawing has some margin of error. Now, in some ways, organic form is more complex than human-made forms in the sense that organic forms tend to be very irregular and we don't always have simple volumes to use to construct them. But there is one thing about organic forms that make them much easier to actually draw and that is the margin of error that they have. Here is a great way you can start to think about the margin of error in your subject. If you're drawing a tree and you accidentally add or subtract a limb on that tree, chances are nobody will notice or care, but if you do the same thing on a figure you're drawing, it's a completely different story. Now, for today's demonstration drawing, I'm going to be working with a butternut squash. Now, if I happen to get one of the large volumes off axis or I draw one of the ellipses off axis, it's highly unlikely that a viewer would ever even notice. It's important to remember that few people if anyone, will ever see your subject and your drawing side by side. The question isn't so much, how accurate is your drawing of the subject. The question is, how believable is it. You really want to keep in mind what kinds of things are going to trigger in the viewer a sense of disbelief. When viewers don't see your actual subject next to the drawing, they are for the most part willing to give you the benefit of the doubt. If you draw a shape that is off axis or you get an ellipse wrong, a viewer is much more likely just to assume that that's what your organic subject looked like rather than think that you made a mistake as a drawer. But your margin of error can shift depending on your subject. Now, I'm not telling you this to encourage sloppiness in your drawing process but really it's just an idea of how much room for expression and creativity you have later on down the road. It also will help you figure out where to put the most energy in your drawing. As with almost anything in art, there are no hard right or wrong answers to this question but it is something important to keep in mind. However, my recommendation will be that if you have any interest in doing figure drawing, portrait drawing, or animal drawing later on in your career, I would really try to get your drawings as accurate as possible, not just believable. Because this will help you prepare for the kind of intense accuracy that figure drawing or animal drawing requires. For today's demonstration, I'll be working with a butternut squash. You'll notice right away that this subject has more complex and irregular forms than any of the subjects that we've drawn previously. Even so, no matter how complex the subject is, we should always begin by simplifying it into its most basic volumes. At first, we need to be able to see through all of the details, the complexity, the light and shadow until all we have are a collection of fundamental volumes. When viewed this way, we can clearly see a partial sphere at the top with its slightly tapering cylinder right underneath. Finally, at the base of this squash, we find a volume that is closely related to a sphere called an ovoid. You can think of an ovoid like a sphere that has been squashed or stretched. A common ovoid that you'll encounter in everyday life and an incredibly useful volume to know how to draw is the egg. Of course these basic volumes don't capture all the complexity of the squash, but they do an excellent job. It's simplifying the basic volumes so that we understand their orientation in space and can easily draw them. Let's take a look at our subject volume by volume, starting with the largest, the ovoid. You can see that this ovoid is wider then it is tall and is at a slightly tilted axis. We'll talk more about all of the segments of the butternut squash during today's demonstration. But for now, let's just think about this form as an ovoid. Next, take a look at the shaft of the squash sitting on top of the large ovoid of the base. Even though you won't find an obvious ellipse, if you look closely, you'll be able to see that an ellipse is implied where the base transitions into the shaft of the squash. This helps us to understand the orientation of the squash in space. This is of course exactly what we should expect to see while viewing an upright squash that is below our eye level. Finally, let's take a look at the partial sphere at the top. This volume helps describe the dome-like top of the squash. Together, these three basic volumes do an excellent job at describing the foundational volumes that our subject is made of and it is these volumes you'll see me start with during today's demonstration. This is the position in view of the squash that I'll be working with during today's demonstration drawing. I've selected a piece of paper that is remarkably close to the color of the squash. Instead of a black or blue pencil, which I've been using so far during this series, this drawing will be done with a dark red pencil. Together, the paper and pencil will help simulate the illusion of color, even though the drawing itself is monochromatic. I teach how to draw using toned and colored paper in the shading section of the Art & Science of Drawing Series. After considering the size and placement of the squash on the page, I'll start off by drawing the largest shape, the oval for the ovoid portion of the squash. Immediately after making my first attempt, you'll see me already making changes and refinement to the size, shape, and placement of the oval. Once I'm satisfied with the initial ovoid shape, I'll draw an axis line for the rest of the squash, and then lightly draw my first attempt at the top portion of the squash. After drawing in the ellipse where the base of this squash meets the shaft, the illusion of volume begins to emerge. Next, you'll see me draw the ellipse where the partial sphere at the top of the squash meets the shaft. Now that the basic volumes of our subjects have been drawn in, we can begin the process of sculpting the form until all of the desired complexity is drawn. I'll begin by refining the large ovoid base of the squash. I'd like you to notice that at this beginning stage of the drawing, my lines are drawn quickly in gesturally. Remember, our drawing will become more refined over time. But at the beginning, your drawing should appear loose and free. Next, you'll see me draw on the ellipse at the base of the stem of the squash. I'll add more complexity to this form later. But first, it's just important to understand the basic volume. Now, you'll see me begin to lightly draw in my first attempts at the placement of the segments of the squash. Notice that these lines help communicate the volume of the squash. They act as longitude lines moving up and around the bulbous ovoid before straightening out at the shaft if the cylinder and finally curving around that dome shape at the top of the squash. Every line in this drawing, this far is designed to communicate the various volumetric shapes that make up our subject. Now that the larger forms are drawn, I can begin to draw some of the smaller forms and volumes. At the base of the stem of the squash, we can find three small spheres. You'll note that despite their small size, I still draw these circles the same way I demonstrated in the first week of the art and science of drawing series. Next, you'll see me darkening up some of the lines and overlaps on the squash to help further communicate the shapes and volumes. This is about as far as I'd like you to bring your drawings during today's project. That being said, I'd like to take today as an opportunity to show you where all of this is heading and to communicate how important these first steps are as you're working your way towards a more finished drawing. Even though you won't be going any further than this during today's project, let's speed up the process to show you how everything you've learned so far fits into the drawing process overall. Once I've established all of the forms in the drawing and I've checked and rechecked it for accuracy, applying a number of different measuring techniques, which you'll learn about in my measuring and proportion course, I can begin the shading process. Another one of the most common missteps I see during the drying process, our students trying to do shading or add other details before they've really resolved the foundational forms. What usually happens is, after a significant amount of time and energy is spent shading, the student realizes that something is drastically out of proportion and a large section of their drawing must be erased. This is why I'm such an advocate for making multiple iterations using very, very light lines and only moving on to adding shading or detail once you're confident that the foundational forms are accurate. This is the best way to avoid costly and time-consuming errors in your drawing process. Conversely, once you've drawn an accurate foundation, adding shading in details is actually much easier than most students think. Because I use such a light lines to make my earlier less accurate iterations, you'll notice that the only time I use an eraser is to clean up the drawing before adding white pencil and not for correcting any mistakes. In fact, if you look closely, you'll still be able to find almost all of the process lines that I started off with. The tools and techniques I'm teaching you in the art and science of drawing are precisely the ones I'm using in almost every drawing I do. They also the same techniques used by master jars, both contemporary and historical. For today's project, I'm going to ask you to find a basic organic form so you can draw it. The produce section of your local grocery store is great for finding organic forms. I drew a squash today, but plenty of other organic forms will work just as well. Things like pears, lemons, bananas, anything that you can understand the underlying volumetric forms. I would also encourage you to make it a compound form. The reason I'm not advocating drawing in orange today is because it's a little too basic for what we're doing. I want you to choose a subject that is challenging, but not so challenging that it's way beyond your current skill level. Now, I really want you to think about this, while you're selecting your subject. One of the most common missteps I see when people are learning to draw is that they choose subjects that are far beyond their skill level. This is how bad drawing habits are formed. Finding subjects that are challenging to you, but not absolutely bewildering is the best way to quickly improving your drawings. Be patient. Remember, we're going to continue to add complexity in our subjects in this series. But if you go to complex form before you're ready, you will most likely developed bad drawing habits. Once you have bad habits in your drawing process, they're very difficult to get rid of. Once you've got your subject, I'm going to ask you to draw it five times from five different vantage points. Now remember, for today, we're not doing any shading. I simply want you to use basic shapes, turn those shapes into believable volumes, and then use line quality to bring your drawings to life.
10. Beyond the Box: Today we're going to be revisiting boxes and cubes. You're going to learn how to take the basic boxes and cubes that you've already learned how to draw and use them in much more complex and sophisticated ways. This is a critical step in your drawing education for two different reasons. The first, of course, is that the box is a foundational form and you're going to find boxes all over the place when you start to draw more complex subjects. The second reason is that when you start to draw more complex compound forms, translating them into a box will help you figure out how to draw them. You're going to learn how to use the box to help you to draw complex compound forms. But as you're drawing, education progresses, particularly when you get to figure drawing or animal drawing, the box is an essential form to understand how to draw. But I want to reassure you that focusing on this board scientific and logical part of the drawing process is the best path forward to truly freeing yourself up to make expressive and dynamic drawings. Once you develop a competence and a comfort level with these more technical aspects to the drawing process, you'll be freed up to focus on the meaning, content, and expression of your work, without the concern of whether or not you have the ability to draw something. But that only happens when you're so comfortable with the technical side of the drawing process that they become intuitive. I know the ideas in the form and space week are very technical and very challenging, but I promise you this is your path forward toward expression. Remember, drawing is both an art and a science, and we are going to be working back and forth from these two perspectives. It's my job to let you know which parts of the drawing process are more scientific and logical and which parts are right before expression. We have a lot to talk about today, let's get to it. So far, we've primarily been working with boxes that are laying flat on a horizontal surface, but, of course, boxes can occupy space in every conceivable angle. One way you can approach drawing a box that is at an oblique angle in space is to imagine the eye level tilted, and to draw the perspective lines going back to the vanishing points in the eye level, just as you would if it were horizontal. Once we remove the perspective lines and the eye level, we are left with a box that is believably occupying space at an oblique. Now let's do the same thing with a box below eye level. We can use this strategy to draw boxes at any proportion and tilted at any orientation in space. Here, you'll see me demonstrate how to draw a page of tumbling boxes, where each box is oriented differently in space. You'll notice in this demonstration that I'm not actually drawing in the eye level or any perspective lines. But even though I'm not drawing them explicitly, I am always keeping the rules of perspective in mind and visualizing where all the perspective lines would be to make sure that my box is drawn believably in space. Once I have lightly drawn in my first attempt at the box, and made some refinements to the angles, you'll see me begin to darken up the lines. Notice that the edges that are farthest away on the box are drawn the lightest. Drawing lines that are closest to us darker is a great way to help the illusion of perspective along, because the darker lines tend to appear closer than the ones that are lighter. While drawing boxes, I usually begin with the longest line that is closest to the viewer. But there isn't one right order in which to draw the lines of the box. I would recommend experimenting with different orders of operation until you find something that works for you. Practicing drawing boxes out of your head in multiple orientations in space is one of the best ways to train your brain to truly understand how boxes work, and remember, the ability to draw something out of your head, makes drawing it from observation much easier. If you're not sure how to draw a box at any particular orientation in space, then get an actual box, hold it up at the angle you're struggling with, and use it as a reference. If you do this enough, you'll be able to draw any box at any proportion and in any orientation in space comfortably out of your head. This is a skill that will pay off when we get to more complex subjects, like the figure. Next, we're going to shift the conversation towards how to modify boxes to turn them into more complex forms, but first, we need to understand how to properly divide them up in perspective. Let's begin with a simple square. If we connect the corners with diagonal lines, this gives us the center of the square. Now we can use a horizontal and vertical line that intersect at the center of the square to divide the square up into equal parts. This will work with a square or rectangle of any size or proportion. We can use this same strategy to find the center of each of the planes of a box and perspective. Next, let's divide the largest visible plane of the box in half using a horizontal line. It's critical to remember that every time you add a line to a plane that is parallel to the edges, this new line must correspond with the rules of perspective and go back to the proper vanishing point. With a little practice, you'll be able to use this strategy to divide any plane of a box and perspective into four equal parts. Now we can begin to modify our boxes by slicing them up to create new shapes. For today, all of the cuts we're going to make into our box will correspond with the divisions that you've just learned how to make. But keep in mind, you can slice up a box in any way you can conceive of, regardless of whether or not it corresponds to any particular division. But working with these more simple divisions will help you understand the logic behind slicing up boxes. Let's imagine that we wanted to slice off a corner of the box. We'll begin by figuring out what this slice will look like in a single plane, but because this slice will occur in three-dimensions, it's important that we figure out how it will impact other planes of our box. By using the divisions that we found, we can be sure that any modifications we make will automatically be in proper perspective. Once we figured out if and how our slice will impact each of the visible planes, we can remove the corner. Now we have a new shape that is properly diminishing in perspective. Now let's do the same thing to the other side. You'll notice that depending on how you decide to slice the box, you might only need to alter one or two planes of the box. Once again, we have a new shape. Attempting to draw a shape like this without using the construction steps that you've just learned, it's extremely difficult. But by taking your time and going through these simple steps, you're much more likely to arrive at this shape drawn properly in perspective. Now let's return to the original box. This time, let's cut a cube out of the box. First, we'll figure out what this slice will look like in the largest, most visible plane. Next, we'll figure out how this slice will impact the other planes. Once again, all of these cuts correspond with a divisions that we've already found. Finally, let's remove the cube. When we slice and remove sections from a box, we often reveal new edges. Keep in mind that every new line must correspond with a proper vanishing points. There's a logic at work in box construction and modification. The more you work with these construction techniques, the more competent and comfortable you'll become, and eventually it will be intuitive. But be patient, it takes time and practice. I'll start this demonstration by lightly drawing two boxes similar to the box you saw on today's diagrams. Of course, I'm making sure that both boxes are drawn properly in perspective. Next, I'll use diagonal lines to connect the corners of each plane in order to find their centers. For those of you going through the art and science of drawing series in order, you learned how to draw straight lines freehand. If you're not yet getting the precision you're hoping for, feel free to use a straight edge or a drafting triangle to draw your straight lines. But keep up your practice on your free hand straight lines, it's an essential drawing skill to have. Next, I'll divide up each plane into its four parts, making sure that each new line I draw appears to go back to the proper vanishing point. For now, both boxes are roughly the same size, shape, and proportion. But I'm about to modify each of them to arrive at the two different shapes that you saw in today's diagrams. As always, these light lines are simply serving as a scaffolding for the more complex forms to come. On the largest visible plane of the box on the left, you'll see me dark at the lines to create the shape of a box with its corners cut off. Now you'll see me complete this shape by darkening the lines of all of the other planes that this slicing his impacted. In the final drawing of our shape on the left, you can still see the light lines we used to construct the initial box, as well as the dark lines making up the new shape we've arrived at. By leaving visible the lines we use during our construction process, we can get a real sense of the logic behind the volumes that we're constructing. Next, you'll see me cut a cube out of the box on the right, just like you saw in today's diagrams. By working out how this slice will impact each plane one at a time, the new shape is constructed. By constructing and modifying boxes, you'll get a real sense of how these volumes operate in space and will develop a comfort and a competence at observing, analyzing, and drawing complex, plainer forms. Before we get to today's project, I want to leave you with just a few more ideas. You can further modify your planar volumes by extending them in one direction or another. This will work with any box based form as long as you're making sure that each line goes back to its proper vanishing point. Today, we began modifying our boxes by first addressing the largest visible plane. But of course, you can begin this process by using any plane you like. Here, we'll start with the plane on the right side before figuring out how this slice will impact the larger plane. Next you'll see me start our slice at the top before figuring out how it impacts the two side planes. There are an infinite number of potential ways to modify any cube form. The more you explore this construction process, the more comfortable and competent you will get at modifying cubes and boxes, and the more skilled you'll get at figuring out how to draw any box based form from observation. Your project today has two parts. For the first part of your project, I'm going to ask you to draw 25 different boxes at various proportions in various orientations in space, just like you saw me doing during today's demonstration. For the second part of your project today, I'm going to ask you to draw five boxes. Then use the strategy you learned today to divide each face or plane of the box into its four quadrants. Remember, each of these divisions must correspond to the perspective you've established in your boxes. It's not important that we actually draw the lines towards vanishing points, it's more important that we construct believable boxes that appear to be diminishing properly in perspective. Once you have your five boxes and once each plane on each box is divided into four quadrants, I'd like you to practice slicing up these boxes, just like you saw me demonstrate today. You're welcome, of course, to slice up your boxes in the same way as you saw we demonstrate today, but I would also encourage you to try some experimentation to see if you can come up with different ways of slicing your boxes. Your goal today is to get comfortable manipulating boxes in numerous different ways. Whether that be drawing them at different proportions and different orientations in space, or to begin slicing up boxes to create more complex forms. I'd like to remind you again that I am giving you the bare minimum amount of practice. If you want to increase the speed at which you're improving, try doubling, tripling, or even quadrupling the amount of practice that you're doing. For today, that would mean drawing 50 or even 100 different boxes at different orientations in space. Maybe drawing 15 or even 20 boxes that you're going to slice up. Remember, drawing is not a talent. Your skill level is going to come down to how much you are willing to practice.
11. Rims & Handles: Today you're going to learn how to draw rims and handles. Cups, mugs, pitchers, and vases are all very common still live subjects that you're bound to run into while you're learning how to draw and paint. You've gotten some experience simplifying these kinds of volumes into their foundational forms. Today, you're going to learn how to start to make these basic volumes appear to be the actual objects you're drawing. By adding rims and handles to your basic cylindrical forms, you'll be able to transform them into a simple volume to an actual recognizable object. Understanding how to draw rims of cups, pitchers, and other similar objects will not only help you solve a very common still life challenge, but it will introduce you to the kinds of thought processes that artists use to investigate and solve how to draw more complex forms of any kind. Although today I'm focusing on how to draw specific forms like rims and handles, my larger goal is to introduce you to the kinds of thought processes involved in investigating any kind of form you want to draw. Learning how to draw isn't about memorizing how to draw specific forms, although that can be a useful tool, It's more about learning the tools and techniques that will allow you to encounter any subject and be able to figure out how to draw it. Every new form you encounter is like a puzzle. Although there isn't just one right solution to figuring out how to draw something, you want to be able to develop strategies that work to get something volumetric down on the page. Today, we're going to pull from skills and strategies that you've learned throughout the entire art and science of drawing series. If you need any reminders on any of these ideas, please go back and revisit them. Remember, the skills presented here are fundamental. You cannot practice them too much. We're going to start today off by looking at the rim of a coffee cup. At this point, you should be pretty familiar with how to draw a cylinder. To learn how to draw the rim of a coffee cup, we only need to focus on the top of the cylinder. So far while drawing cylinders, the front edge of the top ellipse has been emphasized with a dark line. In order to create the illusion of the rim of a coffee cup, the front edge of the top ellipse must be minimized. Just a reminder, when you see a dashed line in these diagrams, this simply means that this line should be drawn lighter while the continuous lines can be drawn darker. While drawing the rim of a coffee cup, the front edge of the top ellipse is minimized because it is not the most prominent line. To give the appearance of an opening at the top of the coffee cup, we need to draw a slightly smaller ellipse inside the first. This smaller ellipse will have its front edge emphasized. Hopefully you can see that this simple diagram, that doesn't have any shading or details, already begins to communicate the illusion of the rim of a coffee cup. It's important to note that the two lines you'll be emphasizing do not touch one another. The line around the edge of the coffee cup should never come in contact with this smaller ellipse representing the rim. Let's take a look at this in a demo. First, you will see me draw the larger ellipse representing the outside edge of the rim of the coffee cup. Next, you will see me emphasize only the top of this ellipse before connecting the sides of the coffee cup to it. Next, you will see me draw a second smaller ellipse inside the first. You'll only see me emphasize the bottom half of this second ellipse. Hopefully you can see even without any shading or detail, this simple drawing demonstration begins to give the illusion of the rim of a coffee cup. Now that you know what to look for, take a look at this image of a real coffee cup. Hopefully you can see that the top of the larger ellipse is clearly visible and connects with the sides of the coffee cup while the bottom of this smaller ellipse takes precedent and gives the illusion of the opening of the rim of the coffee cup. Here's an overlay similar to the diagram we just worked with. Hopefully this will allow you to see exactly what we've just discussed. Now, depending on the lighting conditions, you may not get the exact same emphasis on the ellipsis that we've just talked about but you'll usually get something remarkably close. For example, in this image, you can see that the left side of the smaller eclipse is much more prominent than the right. But hopefully today's diagrams and demonstration, will give you a good starting point of what to look for. By now, you should be pretty familiar with the idea that we draw the largest shapes first and work our way down to the smaller shapes.The cylindrical volume is clearly the largest form in our subject. Now, let's focus on the handle of the coffee cup. The handle is a complex compound form that bends and changes directions multiple times. Our job is to simplify this form into its most basic volume. When presented with this kind of form, a great strategy to understand the form and begin to draw it is to place the entire subject in a box. A number of things that may not have been obvious before begin to make sense once the handle is placed in a box. For example, take a look at the top plane of the box. You'll notice that with the exception of the bends on either side, the top plane of the coffee cup handle fits nicely within the top plane of the box. Now let's take a look at the largest plane of the box. You'll notice that the entire side of our coffee cup handle would come in contact with this plane. That the far left edge of the side of our box is derived from the two locations where the handle attaches to the cup. Now take a look at the top attachment of the handle to the cup. Here, we can observe two things that are essential to our box construction. The first is the angle of the attachment. Notice that it's going the same direction as the rim of the coffee cup directly above it. The second thing we can derive from this angle is the depth of the box. We will use this angle and depth to construct the corresponding four edges of our box. Notice that they are all pointing back to the same vanishing point. When we put all of this information together, we get a clear sense of the box that this handle fits in. Together, this cylindrical volume and the box attached to its side do an excellent job describing the foundational volumes, as well as establishing the perspective that the handle of the cup must correspond to. Now that you've got the theory, let's put it into practice in a demonstration drawing. Cup handles come in an infinite number of variations. For this demonstration drawing, I'll take you through the necessary steps for how to observe, analyze, and draw almost any cup handle. You'll see me begin by lightly constructing a box. This specific proportions of the box should be derived from the information you discover while observing an actual coffee cup handle that you are drawing. Once I've lightly constructed my box and made sure that it appears to be in three-point perspective, you'll see me begin to draw the profile of the coffee cup handle only in this one plane. You can see that although the lightly drawn box appears to be three-dimensional, the profile of the handle appears to be flat on the plane it's being drawn on. Our next step, is to take this flat profile of the handle and give it a width. You'll see me do this by adding a thickness to the flat profile of the handle. You'll notice, that every light line I draw to give our handles some thickness corresponds to both the dimensions of our box as well as the perspective we've established. All of these new lines appear to go back to a vanishing point far off in the distance on our right. Next, I'll complete the illusion of width by drawing the back edge of the handle. I'm being careful to keep the width of the handle consistent, particularly at the curves. Now that the volumetric drawing of the handle has been lightly blocked in, I'll begin making refinements by looking back and forth from the actual handle that I'm working with, to my drawing. Always asking myself the question, what haven't I drawn yet? What changes can I make? How can I make my drawing look more like the subject that I'm drawing from? I often think about drawing like an open book test. All of the answers are right in front of us, as long as we know how to look for them. Once I'm satisfied with my light foundational drawing, I can begin to darken the lines I want seen by a viewer. You'll see a subtle use of atmospheric perspective as I make the lines and edges that are closest to us on the coffee cup handle darker, which lets the lighter lines that are further away recede. Hopefully, you're starting to get a sense of how powerful the illusion of volume can be, even on something as flat as a piece of paper. You'll see me begin by drawing a light center line. This will help me construct this cylinder up the cup. You'll notice that the more information I want to include in a drawing, the lighter I make the construction lines, the more complex the drawing is, the more corrections will need to be made. By starting off with the lightest possible lines, my drawing will be able to go through more iterations. After drawing in the center line, I'll established the top and the bottom of the cup. Next, by carefully observing and analyzing my subject, I'll be able to tell how open the ellipse needs to be. Here, you'll see me lightly indicate the bottom of the ellipse. Next, I'll establish the width of the cup by comparing it to the height to see their proportional relationship. Once the big proportions of the cup have been established, I'll make my first light attempt at the ellipse at the top. With a top ellipse completed, I'll go through the steps you learned earlier in the form and space section to construct the rest of the cylinder. Now, just like you saw I demonstrated earlier today, I'll draw in the smaller ellipse to represent the opening of the cup. With the important information of the cup drawn in, it's now time to connect the box for the handle. It's critical that the box for the handle corresponds with a perspective you've established while drawing the cylinder. This means, that all of the vertical lines must appear to converge at some distant vanishing point far below the cup. You want to pay particular attention to the distance from the edge of the coffee cup to where the vertical lines are placed. Next, we'll give our box a width, just as you saw demonstrated a few minutes ago in our handle demo. You'll want to pay particular attention to the distance from the top of the rim of the coffee mug to the top of the handle, and the distance from the bottom of the coffee mug to the bottom of the handle. Here, you'll see me figuring out the exact angle at which the coffee cup handle should protrude from the cup by drawing a line from the center of the ellipse at the top of the coffee mug to the rim of the coffee cup, directly above where the handle attaches, down the side of the coffee cup to where the handle actually attaches, and finally, projecting the line outward at the same angle that we found from the center of the ellipse at the top of the coffee mug, to the edge of the rim. Now I have enough information to construct and attach the handle of the cup accurately, so that it believably protrudes from the coffee cup itself. From here, you'll see me go through the exact same steps you just saw me do in the handle demo a few minutes ago. Now that all of the foundational forms are lightly blocked in, let's speed up the process. Here, you'll see me lightly sculpting the handle from the box we just created. You'll notice that it's the forms become more specific, I'm using slightly darker lines. This is a great way to differentiate the early light construction lines from the more specific and accurate forms that you actually weren't seen by a viewer. However, I'm still saving the darkest lines for much later in the process. Before finishing the drawing by darkening up the lines I wasn't seen by a viewer, you'll see me make one more pass around the coffee cup, taking one last opportunity to refine the under drawing. Once I'm satisfied, you'll see me darkening up the lines I want seen by a viewer using atmospheric perspective. For your project today, you're going to find a coffee cup or some other form of vessel that has a rim and a handle. You're going to do five different drawings of your subject, and in each one, I want your subject to be in a different position. Now it's important to remember, there are literally an infinite number of variations, even on simple subjects like rims and handles, so, you're almost certainly going to encounter something that we haven't discussed specifically today. This is why it's so important to keep this idea in mind that what you're learning isn't how to draw a specific subject, but how to investigate form and to strategize, to see if you can come up with a solution to capture the volume on the page. I also want you to remember, that we're not doing any shading yet. The goal of today is to accurately lay down a light foundation of volumes to begin to draw in volumetric handles in rims, and then bring it to life for some basic line quality, but you don't want to go too far. All of the skills that you've learned thus far plus many more are prerequisites for beginning to learn how to shade, but until then, be patient and really focus in, on making sure that you master these fundamentals.
12. Volumetric Still Life: Today, you're going to learn how to go through the process of drawing a still life or each of your subjects has different volumetric characteristics. We're going to be working with a box-like subject, we're going to be working with organic form, and we're going to be working with a compound form in the form of a vessel that has a rim and a handle like we studied yesterday. Before we get to today's demonstration, I want to get an idea in your mind that's going to be very critical as you move forward with your drawing process. Whenever you're drawing a still life subject that has multiple objects in it, you're not only want to draw each object individually, make sure it's in proportion to itself but you really need to start paying attention to the relationships between the different objects in terms of how their place, how close they are to each other, if they're overlapping one another. Because we not only want the drawing to work as individual objects, but they need to work as a grouping, and each object is going to have a specific relationship in size and placement to every other object in your still-life subject. Remember, the first step of observational drawing isn't simply just to get your pencil down on the paper, but it is to observe and analyze our still-life subject. We're going to take a look at our subjects today and just talk about them to see what we can learn from them simply by observation. We can develop a strategy to actually get these objects down on the page in the form of the drawing. Here are the three objects that we'll be working with today. On the far left is a marble bookend, in the center is a yellow acorn squash, and on the far right is a coffee pour over. Because we're focusing on form and space right now, let's start our conversation about are still live subjects by figuring out which is the closest and which is the furthest away. It will be clear to most viewers that the marble bookend on the left is the object that is closest to us, and that the yellow acorn squash is the farthest away. But given that we're looking at this flat photographic representation on a flat screen, how do we know this? To answer this, let's first take a look at how each of these objects comes into contact with the surface there sitting upon. When there still life you're working with is below eye level as this still life is and as most of the still lifes you're going to draw will be, we know that the further down an object is on the ground plane, the closer it is to the viewer. Out of our three still-life subjects, you can clearly see that the front edge of the marble bookend is the farthest down on the picture plane, and therefore the closest to us. Now, let's move our eyes up and to the right to the base of the coffee pour over which is the next closest object. Finally, let's move our eyes up and to the left, to the place where the acorn squash meets the ground plane. Hopefully you can see that between our three objects, the acorn squash is placed the farthest away from us. We know this because where it is coming into contact with the ground plane is higher up on the picture plane than the other two objects. Beginning students frequently miss the relative relationships of where the objects meet the ground plane. Remember, while you're drawing, it's only the things you're thinking about and paying attention to that actually make it into your drawings. If you don't notice something, you won't draw it. We can see a more obvious clue of one object being in front of another, where the coffee pour over eclipses a large portion of the yellow acorn squash. Overlapping one object with another is an obvious and useful way to show that one object is in front of another. However, you'll notice that even though the marble bookend is closer to us than the coffee pour over, the marble bookend never eclipses it. This is why it's so important to show the viewer that the marble bookend is closer by where it is coming into contact with the ground plane. Some of the other things you'll want to notice about your still-life before you draw are the relative sizes of the objects. Which one is the biggest? Which one is the smallest? The sizes and shapes of the spaces between the objects, or what we call negative space and the relative heights of each of the objects. In previous sessions of the art and science of drawing series, I provided detailed diagrams of our drawing subjects. But one of my goals for this series is that you begin to visualize the information that I've provided in diagrams in your own mind. While teaching students in the studio, I will often have them put their hands behind their back and simply observe their drawing subjects asking themselves as many questions as they can think of about their size, placement, and relationships before ever attempting to draw. Before today's demonstration, take a minute and just observe the still-life photograph in front of you. Just try and get a sense of the objects. The more observation and analysis you do if your still-life subject before you draw, the more prepared you'll be when you actually put pencil to paper. In previous drawing demonstrations, even though I've started off my drawings using light lines, I've actually started off using much darker lines than I normally would if I were drawing a learning in my studio. The reason is so you the viewer can actually see them, but in today's demonstration, I'm actually going to start off as lightly as I would if I were drawing by myself and not for a class or for students to see. Students often tell me that they can barely see the lines, but that's the point, I can barely see the lines I'm drawing. I'm not suggesting that you should start off your drawings as lightly as I am here, but it's important to remember that all I'm trying to do is establish a faint ghost of the still-life subjects. I don't need to see any details or specific information in order to start changing the placement and sizes of our objects. Because these three still-life subjects are similar in size to one another, it's not as important which one I start with. The strategy of starting with the biggest objects and working our way down to the smallest objects is a general rule. Although I haven't figured out which one of these shapes is absolutely the biggest, I'm still generally starting off with the larger forms and moving my way down to the smaller ones. Smaller shapes and forms like the stem of the squash and the handle on the coffee pour over are best saved until I've laid in the foundation for the larger, more foundational forms. After laying the big simple shapes for all three of the still-life subjects, you'll see me now focusing on the coffee pour over. You'll notice that I've gone over the ellipse multiple times, each time, making a minor adjustment to the size and the width to height relationship of the ellipse. You'll also notice that I've drawn in a center line to help make sure that each side of the object is symmetric to the other. Once I've broken down the coffee pour over into its basic shapes, I'll move over to the marble bookend and begin doing the same thing. One of the critical things to remember while you're drawing multiple objects, is to not only compare each object to itself compare its proportion, size, and placement to every other object you're drawing. There are two primary strategies I'm thinking about while constructing the marble bookend. First, I'm paying very close attention to the exact angle of every line. In the measuring and proportion course will teach you a number of strategies to help refine your angle drawing. But until then, you just want to make sure that you're doing your best to capture the direction the line is going. The second strategy I'm using is the one that you learned in beyond the box. In my mind, I'm thinking about the bookend as a box with a diagonal section of it sliced off. This will help make sure that all of the lines of this shape are going back to the correct vanishing points, and that the finished drawing will appear to exist accurately in perspective. Once the marble bookend has been blocked in, you'll see me go back to the coffee pour over. The reason I'll give more attention to these two objects before moving back to the acorn squash is that both the bookend and the coffee pour over are human-made objects and they will require a higher level of precision than the organic form of the squash. The squash has a lower margin of error. If I draw the squash inaccurately, most viewers will assume that that's just what the squash looked like and won't assume that I made a mistake. However, while drawing the coffee pour over, if I get the ellipse off, most viewers will assume that I've drawn it poorly. At the beginning of drawings, I usually focus more attention on the objects with a higher margin of error to make sure that those are accurately drawn before moving to more organic forms or forms that have a lower margin of error. Once I'm feeling confident that the foundational shapes that make up the pour over are accurate, I'll move on to constructing the box for its handle. It's important to note that because the coffee pour over is an inverted cone, the box for the handle will be tilted to match the angle of the side of the pour over. Once the box for the handle has been lightly ghosted in, you'll see me begin to sculpt the handle itself. I'd like to note that when I'm not drawing in front of a class where students are watching, I rarely draw in preliminary boxes in order to construct forms like handles. However, I've drawn them so many times that I'm able to visualize the box without actually drawing it and this visualized box allows me to draw the handle accurately in perspective. Try not to be in a hurry to abandon useful strategies like this. The more you draw the box in order to construct more complex forms, the more comfortable and confident you'll become constructing complex forms without using the box. You'll notice that the more specific the shapes and forms of my still life objects become, the darker the lines get that I'm using to draw them. But even though they're darker than my initial construction lines, there's still malleable enough to be moved around. Next, you'll see me begin working on the acorn squash. Up until now, it's been nothing more than a simple round shape whose only purpose has been to establish a rough shape, size, and placement on the page. After locating and lightly indicating the location of the stem of this squash, I'll begin lightly drawing in the segments. You'll note that each of these segments is remarkably similar to the longitude lines you learned how to draw while we were studying spheres. I'm paying particular attention to the series of overlaps that occur when one segment disappears behind another. You'll learn much more about drawing descriptive contours in the contours course later on in the Art and Science of drawing series. Once I'm satisfied with the segments, I'll begin to shape the stem of the squash. You'll notice that it's nothing more than a slightly bending, slightly tapering cylinder. Once I'm satisfied, you'll see me began to darken the lines of all of the still life subjects. It's important to note, that during this process, I'm not simply tracing over the lines I've already drawn. I'm still taking the opportunity to edit and alter any forms that could use some refinement. Here, on the final day of the form and space section of the art and science of drawing, I want to leave you with a few closing thoughts. The first and most important is the idea that there is no one right way to draw. Everybody draws a little bit differently. What I've been trying to teach you in this series are the foundational concepts behind good drawing, but it is up to you to decide how you want to apply these ideas. You should never feel that you have to rigorously apply every tool and every process in the order or the way that I have demonstrated in this series. That being said, remember, what you're learning in this series is what most master drawers use most of the time. Everything you're learning in the Art and Science of drawing series has been tested and refined for literally hundreds of years from the Renaissance onto today. Although I don't want you to think that there's a single right way to draw, I do want you to know that the tools and techniques you're learning here really are the best ways to approach drawing, regardless of exactly how you apply them. I would highly encourage you to engage these fundamental drawing skills over and over again. Remember everything and you're learning the Art and Science of drawing series are fundamentals. This means that you cannot practice them too much. Again, these are the things that I practice over, and over, and over to keep up my own skills as a draftsman. The next thing I'd like you to keep in mind is that volumetric drawing is a critical shift that you're going to make as an artist. I cannot tell you how many artists don't learn this kind of drawing and their drawings end up looking flat on the page. But learning how to look at objects, to analyze how they're operating in space, and to put those volumes down on the page is one of the most powerful techniques you can learn that will really help your drawings have the illusion that they are actual three-dimensional objects existing in deep space. Remember, volume is something that you feel in a drawing. You literally want to imagine your pencil not just moving left, and right, and up, and down on the page, but literally moving back and forth. You want to have the sensation that when you're drawing your pencil is actually dropping behind objects or coming around front. Remember, how you are thinking about your subjects is going to determine how you draw them and if you're not thinking in terms of volume, your drawings are destined to simply lay flat on the page. But if you consistently conceive of your subjects as three-dimensional volumes existing in space, this will absolutely come through in your drawings and will allow you to produce drawings that effectively convey the illusion of three-dimensional volumetric objects existing in deep space. Here is your final project. You're going to select three still life subjects and each of them should have a different kind of volumetric characteristic. For example, you want one that's related to a box, you want some kind of organic form, and you can choose a form that is some kind of vessel with a rim and a handle. These can be subjects you've already worked with or you can go find some new subjects to work with if you want to keep your practicing fresh. What I'd like you to do is to try your still-life subjects three different times and in each drawing, I would like you to arrange them differently. Remember, drawing is a skill that requires a huge amount of practice and a lot of repetition, so drawing something once isn't enough to really learn how to do it. You want to draw the same subjects over, and over, and over always asking yourself, how can you do it differently? How can you improve your drawing process from the last time you drew these subjects? Remember, you're going to be using all of the tools and techniques that you've learned, not just in the form and space section of the Art and Science of drawing, but even tools and techniques that you learned during the basic skills week and dynamic mark making. This is a chance to pull everything together to create an effective and compelling drawing of your still-life subjects. I know the last couple weeks have been really challenging, but again, this is one of the most important shifts you can make as an artist, going from thinking in terms of the page as flat to truly seeing the page as containing volume and a space that you can actually put volumetric objects within. Well, thank you so much for joining me during the form and space section of the Art and Science of drawing and I truly hope to see you again, so happy practicing and I hope to see you soon.
 Brent Eviston, Master Artist & Instructor