Transcripts
1. Dynamic Mark Making Trailer: A drawing is made up of hundreds, if not thousands, of individual marks and lines. Each individual line, it's an opportunity to communicate something to the viewer. Just like spoken language, how you're saying something is just as important as what you're saying. In master drawings, we find that even out of context, the individual lines and mark stand on their own as beautiful forms of expression. It's only when we pull back that the lines begin to work together to create the illusion of recognizable form. There's a moment when these abstract marks coalesce into hair, fabric, and skin. By varying the quality of her lines, we can express a wide range of emotions and ideas. You see every line has a minimum of two functions. The first is to communicate some kind of recognizable form. The second is to communicate an idea or an emotion. Every line is an opportunity to express an opinion, belief, philosophy, or feeling about your subject. Let's take a closer look at what students are going to learn in dynamic mark making. On the first day, we'll explore the infinite expressive range of lines and marks the pencil can make. On day two, we'll take a look at how lines and marks can express and communicates specific emotions to a viewer. On day three, you'll learn how to actually use these lines and marks in your drawings in order to express something that goes beyond what you're drawing subject looks like. On day four, you'll learn how to do drawings that communicate tactile sensations to a viewer. Making hard objects look hard and soft objects look soft. Finally, on day five, you'll learn how to use atmospheric perspective to communicate deep space with your drawings.
2. Welcome to Dynamic Mark Making: Welcome to the Dynamic Mark Making course in the art and science of drawing series. I'm your instructor, Brent Eviston. There are a few things I'd like to share with you before you start the first lesson. The first thing is that I absolutely love working with students. Teaching, drawing is a joy and a privilege that I take very seriously. Before creating the art and science of drawing series. I taught drawing for 20 years in studios, schools, museums and universities. While working with students, I would constantly ask myself, what are the teaching tools and techniques that really connect with students? What tools and techniques show the most improvement in their drawing skills? How can I teach these techniques in a way that really speeds up their skill development? This course is the answer to those questions. The courses and the art and science of drawing series contains some of the most powerful teaching tools and techniques, that are proven to teach students how to draw. So here's how the course works; each day, you're going to watch one video lesson and then be given a project to do. Once you've completed that day's project, you're ready to begin the next video lesson. Now this course was designed, so that you can watch one video lesson each day and do one project each day. But, you're welcome to adapt to the structure of the course to fit your schedule. If you can only get to one video lesson in project a week, that's fine. Feel free to make this course, work for you. Now this is a project based course, which means that every lesson is going to come with a specific project, that is designed for you to get the most out of the skills you've just learned. The practice that these projects provide, is absolutely essential to your learning how to draw. If you're not practicing, if you're not doing these projects, you will not improve. Having an intellectual understanding of these ideas is great, but practice IS required to really get good at drawing. Now one of my great joys as a teacher, is to see students evolve and grow over time. So I encourage you to share your work. You can share it with family and friends. You can share it on social media, and of course, you can share it right here on Skill Share. When you share your work on social media, I encourage you to include the hashtag, evolve your art. Building a community when you're learning to draw, is a great way to be inspired to practice and get feedback on your work. Now this course is one of seven in the art and science of drawing series. Each course in the series focuses on a different essential drawing skill. Now if you're a beginning student, I highly recommend going through this series in order. But if you've got some experience drawing, feel free to mix and match the courses to suit your own needs and interests. Now while you're taking the course, I recommend watching it on a larger screen. You're welcome to take the course on your phone if that's what you have available. But by watching it on a larger screen, you'll have a richer experience. You'll be able to see more detail in the drawings. If you'd like any other information on other courses IN the art and science of drawing series, drawing resources, or a detailed description of what kind of materials to use, I encourage you to visit the website, evolveyourart.com. It's a great place to go for further drawing resources. Well, thank you so much for joining me. It's an honor and a privilege to have you as a student. So let's get started with our first lesson.
3. The Psychology of Line: Looking at a drawing up-close, is like looking at a piece of abstract expressionist art. A drawing is made up of hundreds, if not thousands, of individual marks and lines. When we're up this close to the surface of the drawing, it's difficult to tell what subjects and forms these marks and lines will describe. Here the mark making takes on a life of its own, telling a story that goes far beyond representation. Each individual line is an opportunity to communicate something to the viewer. Just like spoken language, how you're saying something is just as important as what you're saying. The masters took every opportunity they could to vary the kinds of lines they were making, they constantly explored and experimented. In master drawings, we find that even out of context, the individual lines and mark stand on their own as beautiful forms of expression. It's only when we pull back, the lines begin to work together to create the illusion of recognizable form. There's a moment when these abstract marks coalesce into hair, fabric and skin. By varying the quality of our lines, we can express a wide range of emotions and ideas. You see every line has a minimum of two functions, the first, is to communicate some recognizable form, the second, is to communicate an idea or an emotion. Every line is an opportunity to express an opinion, belief, philosophy, or feeling about your subject. A good drawing doesn't just tell us what something looks like, it gives us an idea of what something feels like. This feeling could be tactile, like fur or flesh, or it could be something more emotional. Good mark-making can tell us something about the human experience. It can begin to convey the swirling complexity of thoughts and emotions that occur during some of life's most charged moments. I think of every individual line, like a letter. Just like in language, letters come together to form words, words come together to form sentences, sentences form paragraphs, until eventually, we get an idea of what the entire story is. The line is the smallest unit of a drawing, and in fact, a drawing is made up of hundreds, if not thousands, of individual marks and lines. As I mentioned in the introduction, each line you're going to put down is going to serve a minimum of two purposes. The first, is that the line needs describe the form that you're drawing, whatever that subject is, it needs to give you an idea of what the form actually is. But the second thing, is it needs to express something about the subject that you are drawing. This is an opportunity for you to give an opinion, an idea, a belief or an emotion about the subject that you're drawing. What most people don't realize, is that how you're making your lines, says more about you as an artist than what you're drawing, and most people don't give a whole lot of thought into what their lines are saying about them. Remember, your lines are communicating your thoughts and emotions about your subject, whether you are intending them to or not. So what we're going to do this week is really give you a sense of how to communicate with your viewer in a way that really expresses your thoughts and feelings about the subject. So I'm going to start off by giving you a very simple definition of what a line is. I like to define a line as any pathway that the eye can follow. What I like about this definition, is it leaves open a wide range of possibilities and interpretations of what a line is and what it can do. This definition of line is important because it allows us to state lines that are continuous, but it also allows us to imply lines and to be able to pull the viewer's eye around the page. Here's an example of continuous line, that curves along from one side of the page to the other. This gives us an obvious pathway for the eye to follow. Let's explore two other ways to provide this path without a continuous line. Now, at the bottom of the screen, you'll see about a few dozen vertical lines, each vertical line is at a different height. The way the vertical lines are spaced allows us to easily ignore individual lines and instead focus on the same pathway that are continuous line made. This is called an implied line, it gives our eyes the same pathway to follow without the actual continuous line being present. Here's one more variation on the same implied line. Each of these three variations provides our eyes with the same pathway to follow. Now that we have a definition for what a line is, next, we need to talk about how people relate to and interpret lines. Now because every drawing is made up of hundreds, if not thousands, of individual lines, the first thing I want to do is just really simplify this to see how we reacts to a single line, to this single unit that we're going to find over and over and over in our drawings. When we, as humans see a line, we empathize with it, we tend to anthropomorphize it, which means we project our thoughts and emotions onto it and treat it almost as if it were a living thing. So how a line is made, how fast it was made, the quality it has, all tend to give us an idea and a sense of emotion about that line. The emotional states that we are feeling and we are expressing through our line work can be picked up by a viewer, and it's important to remember, you can't help but express something through your line work. So again, what we want to do today is get some control over that, to be aware of what we're broadcasting to a viewer and to see if we can use lines to express the ideas and emotions that we want. A great way to get a sense of how we as humans interpret lines is to ask yourself when you see a line, if this line were a person, what would he or she be doing? Don't overthink it. If this line were a person, the person will be standing. Vertical lines tend to have an upright, assertive quality to them, they're stable, but they're strong. If a horizontal line were a person, this person would be laying down. We tend to feel more stable and calm while looking at horizontal lines, they're balanced and they seem safer and somehow less confrontational than vertical lines. Oblique angles are where things get interesting. Remember, an oblique angle is any angle that isn't a horizontal or vertical. In the studio, when students are asked to what this oblique line would be doing if they were a person, they tend to give very different answers. To some viewers, oblique angles are exciting, dynamic, and engaging. Their welcome change to the rigid and safe quality that horizontals and verticals have. These students tend to give answers like running, flying, leaping, moving, and sliding. For others, the unbalanced nature of obliques are unstable, disturbing, unsettling, and even seem dangerous. These students tend to give answers like falling, keeling over, tripping, and tumbling. While verticals and horizontals suggest order, balance and predictability, obliques add an element of unpredictability, of chaos. But it's this unpredictability, they can add excitement and dynamism to a drawing. Remember, there's no one right way to interpret any of these lines, but we do want to get a sense of how viewers might react to them in our drawings. Now that you have a definition of line, and a sense of how viewers are going to interpret them, let's practice making different kinds of lines. The materials you're going to see me using today are very simple, you'll still see me working with 18 by 24 inch paper, and a black pencil. But remember, I'm not encouraging any particular media, you can use a ballpoint pen, you can use pen and ink, you can use charcoal or Conte Crayon. Remember, the kind of media you're using isn't nearly as important as how you're using it, is the techniques and concepts that you're bringing to the drawing board that's really going to show what you're all about as an artist. The ever-changing line which is going to be part of your project today, will give you an opportunity to explore multiple different lines. The directions are simple. You're going to draw one continuous line that changes every few inches. This line can wind around the page however you like. In this demonstration, you'll see me primarily using the overhand grip. Remember, the overhand grip, which we introduced in week 1, allows us to engage not just the tip, but this side of the pencil as well. Unlike the tripod grip, the overhand grip allows us to make soft hazy marks with a full side of the pencil, but also allows us to immediately shift to razor sharp lines using the tip. During this project, you should try and push your pencil to its limits. See how dark it can go. Get a sense of what it's like to use the full side of the pencil and then see what just using part of the side is like. Push yourself to discover as many new mark making is you can. Experiment with pressure, how hard you're pushing down on the pencil. Experiment with different ways of moving your hand and arm. Even though I've asked you to draw continuous line, don't forget how we're defining line. Any pathway that the eye can follow. This means that you can have individual marks as long as the eye can follow them along the path. Here you'll see me rolling the pencil back and forth between my fingers. Next, you'll see me grinding the tip of the pencil into the paper before softly lifting it up. Notice that my pencil is constantly shifting directions. Remember, there's no wrong way to do this project. You're welcome to copy some of the techniques you see me doing here, but I encourage you to experiment. I've done this project dozens, if not hundreds of times and each and every time I challenge myself to find some new form of mark making. Some of the ways I've experimented include throwing the pencil at the page from a good 10-15 feet away, using my non-dominant hand to make marks and with a pencil in each hand, playing the piece of paper as if it were a drum set, tapping and banging the pencils onto the page. Not everything you try is going to make an interesting line or mark. This experimentation is critical to be able to see what the pencil can actually do. Even though I'm encouraging you to use the overhand grip for most of the drawing process. The tripod grip or any other grip you can think of is certainly not off limits when experimented with line quality. Even though the tripod grip, doesn't allow us to engage the side of the pencil, which makes it challenging to make soft lines. We can still modify the pressure we're pushing down with, the speed at which we're making our lines, as well as hand and arm movements. If you ever need to bear down on the tip of the pencil to truly push it to its darkest limits, nothing beats the tripod grip. While drawing dark, you're much less likely to break the tip of the pencil while using the tripod grip than the overhand grip. That being said, one thing I often tell students in the studio is that if you don't break your pencil at least once during this project, you're not pushing the pencil hard enough. One of the best ways to test any medium is to push it past its limits. You can also try using the tripod grip further back from the pencils tip. This makes it easier to get a lighter lines. During this project, try not to worry about what these lines might be used for an representational drawing. Right now, the goal is to generate as many different lines as possible. To start, think about what these lines might communicate to a viewer. Try and begin to sensitize yourself to how a viewer might interpret these emotionally. Does a particular line seem more confident than another? Do you find a particular line to be more beautiful than another? Are there any that you simply do not like? Every line is open to interpretation. While We'll never be able to fully control the viewers response to a line, we, as artists have far more control over our viewers emotional response to our drawings that we realize. One of my favorite metaphors for line quality is tone of voice. Again, how we say something is often more important than what we're seeing. Ask yourself, what adjectives related to tone of voice could be used to describe these lines? Do some lines seem to yell while others seem to whisper? Do some lines seem softer while others seem more aggressive? The goal of this project is to begin to explore the infinite range of marks your pencil can make, and to realize that every one of these different lines and marks has their own character that communicates something to the viewer. The larger your vocabulary of different lines in marks you have, the more opportunities for expression you'll have in your drawings. Your project today is simple, using 18 by 24 inch paper, I want you to make three different, ever-changing line pages. Remember, you can explore line in as many different ways as you can think of. Don't limit yourself, really play around, and also you can switch up media as well. I'm using black pencil, but you can use anything you have around to make a mark. Once you've done your ever-changing lines, what I'd like you to do is select anywhere between three and six of the lines that you like and you can like them for any reason at all. I'd like you to practice replicating them on a page. How you're seeing me do this is I've taken a page, I've lightly drawn some straight lines that are going to provide the path for the eye to follow, and then over that I've put on the darker line, practicing being able to reproduce a line that I find interesting. Thank you so much for joining me here on the first day of dynamic mark making and I look forward to seeing you again on day 2.
4. The Emotional Line: Welcome to Day 2 of Dynamic Mark Making. In the previous session, we learned that every line and mark you make is going to serve two purposes. The first is to help represent the object you're drawing, but the second is to communicate some an idea or an emotion about your subject or whatever you're feeling at the time, and I also talked about the idea that we cannot help but do this. However your thinking or whatever you're feeling about your subject or whatever you're feeling in general, in some way is going to come through and you're line quality. Today what we're going to do is explore how to take control of this and how to try and communicates specific ideas and emotions through line work. Now it's important to remember that the lines and marks we are going to be drawing today are going to be abstract instead of representational. What that means is if I asked you to draw a particular emotion like anger, I don't want you to draw angry eyes or an angry face because that would be representational. That's drawing that's trying to depict a specific object or image. But we want to draw lines that are abstract. Lines that appear to have characteristics that are angry or happy or sad without trying to draw a particular picture. I'm going to get right into a demonstration today of attempting to communicate a specific emotion through a line. For today's project, we're going to keep the materials very, very simple. You'll see me using an 8.5 by 11 sheet of paper and a plaque pencil. But really any paper or any drawing materials will work. First, we need to select an emotion. For this demonstration, let's use the feeling of nervousness. Before I start drawing, I'll ask myself a series of questions. These questions will help me translate this emotion into line. Remember, people tend to empathize with an anthropomorphize lines. What happens in your body when you feel nervous? We've also learned that the quality of a line can be similar to tone of voice. What happens to your voice when you feel nervous? What adjectives would you use to describe the feeling of nervousness? Now, ask yourself how you can take the answers to all of these questions and translate them into line. Would your nervous line be big on the page or small? Would it be made of light lines or dark lines? Would your nervous line be made of a hard edged line or perhaps a softer hazier line? It's important to remember that there is no one right answer to these questions. Everybody experiences these emotions a little bit differently, and we should expect that everyone will draw them differently. It's also important to remember that the solution you come up with doesn't have to be a single line. It can be an entire collection of lines and marks. After asking myself a series of questions and giving it some thought, i'm now ready to attempt my nervous line. When I get nervous, I don't feel confident or bold, I feel small. Therefore, my line should be small. Depending on how nervous I am, my voice and body can start to shake. Often when I get nervous, I feel a little confused. I'm not quite sure what I should do or say or where I should go. I've attempted to put all of these characteristics into a single line. Of course, you may experience nervousness differently than I do. But this line begins to reflect how I feel when i'm nervous. For the first part in your project today, you're going to leave the video running while I lead you through an exercise. Just as you saw me demonstrate, you're going to hear me give you an emotion and you're going to have a little over a minute to try and draw that motion abstractly through lines and marks. I'm going to ask you to only draw one emotion per page, and that way you can really explore the emotion and also you can consider the placement on the page. Also, I want you to remember that you don't have to limit yourself to a single line. You can have a whole collection of lines and marks. There really no wrong ways to do this project and I really want you to feel comfortable to explore and experiment. First, i'm going to ask you to make an angry line. Before you draw. Try asking yourself the same series of questions I asked myself before I made my nervous line. What does anger feel like in the body? What does anger sound like in your voice? Will your angry line be big on the page or small? Will it be hard edged or softer? Will it have a lightness to it or will it be heavier and dark? What other adjectives would you use to describe the feeling of anger? After giving it some thought, make your mark whenever you're ready. Remember, it doesn't just have to be a single line, It can be a collection of lines and marks if you want. There isn't a single correct solution. There is no wrong way to do this project. I simply want you to explore how a single line can attempt to communicate a specific emotion. Just a little bit longer. If you feel you need more time, feel free to pause this video and resume whenever you're finished. Next, draw a line or a collection of lines that appear to be calm. Remember, i'm giving you a little over a minute, but please feel free to pause the video. If you feel you need more time. Draw whenever you're ready. Next. Draw sad line. My students report that it can be helpful to try and actually feel these emotions before drawing a line. Finally, make an excited line. A line that appears joyous and ecstatic. How does excitement feel in your body? How does this translate to line? Just a little bit longer. In every beginning drawing class I teach, I lead students through this exact same exercise after giving them the same prompts that you've been given in this video. I'm surprised to find that even though everybody experiences these emotions a little differently, and everybody depicts them differently on the page, how many similarities there are between students depiction of these emotions? Now I'm going to show you a series of these emotional lines that students have done in my other classes. I'd like you to pay particular attention to the similarities and the differences between how people depicted these emotions. I'd also like you to compare your own solutions to these emotions to see how yours relate and how they're different. Now, obviously, I'm not there with you and I can't see what you've drawn, but I imagined that you'll be rather surprised at some of the similarities between your work that you just produced and the images I'm about to show you. Lines that depict anger tend to be dark, aggressive, and harsh. While drawing angry lines, it's not uncommon for students to actually break the drawing materials they're using because they're pressing so hard. Angry lines often appear jagged and dangerous. These lines often loomed large on the page. If students choose to use color, they often select either black or red. Although each of these angry lines is unique, they do share some striking similarities with one another. We, as viewers, can often sense the rage coming off the page. When asked to draw calm lines, students tend to take a very different approach. They often draw soft, subtly curving lines that move from one side of the page to the other. Many viewers can sense that these calm lines were drawn more slowly and more delicately. One of the more common elements we see in sad lines is the line descending and dissipating as it falls. Again, each of these lines is unique, but there are some surprising similarities between them. These similarities illustrate that although we can never fully control or predict how the viewer will interpret a line, we have far more control than we often realize. The excited lines are often drawn with a burst of energy. Notice that the page can hardly contain them. They have a speed and spontaneity that is exciting to the eye. After going through this exercise, students will often be convinced that emotions can be communicated through line, but expressed doubt that artists are actually using them for this purpose. But compare these abstract excited lines shown here to Rembrandt's lines in this strong. They demonstrate a remarkable similarity that showcases Rembrandt's absolute love for drawing, as well as his joy and passion for the subject. Now, let's revisit this student example of an angry line and compare it with this master drawing by Tintoretto, whose expressive line work gives an aggressive tension to this thriving figure. For today's project, I'd like you to continue exploring what it means to try and translate an emotion into line. Now there are many ways you can do this. You can go through the same exercise that I led you through today. I would even encourage you to try and bring family or friends into this project to see the similarities and differences with how they go through these emotions. One of the important ideas in art is to continue to push an idea further and further. This is a great opportunity to do that. What I mean is that you can try this exercise again, but see if you can make your angry line look even angrier, your excited line to look even more excited. You can try to show these to family and friends to see how they react to these. See if they can tell a difference between your angry line and you're excited line, there between your sad line and you're calm line. Well, have fun with this project today. Remember this is the creative expressive side of drawing. There really no wrong ways to do this. I want you to feel comfortable being creative with how you're exploring these lines and emotions. Well, have fun with this project, and I will see you again for day three.
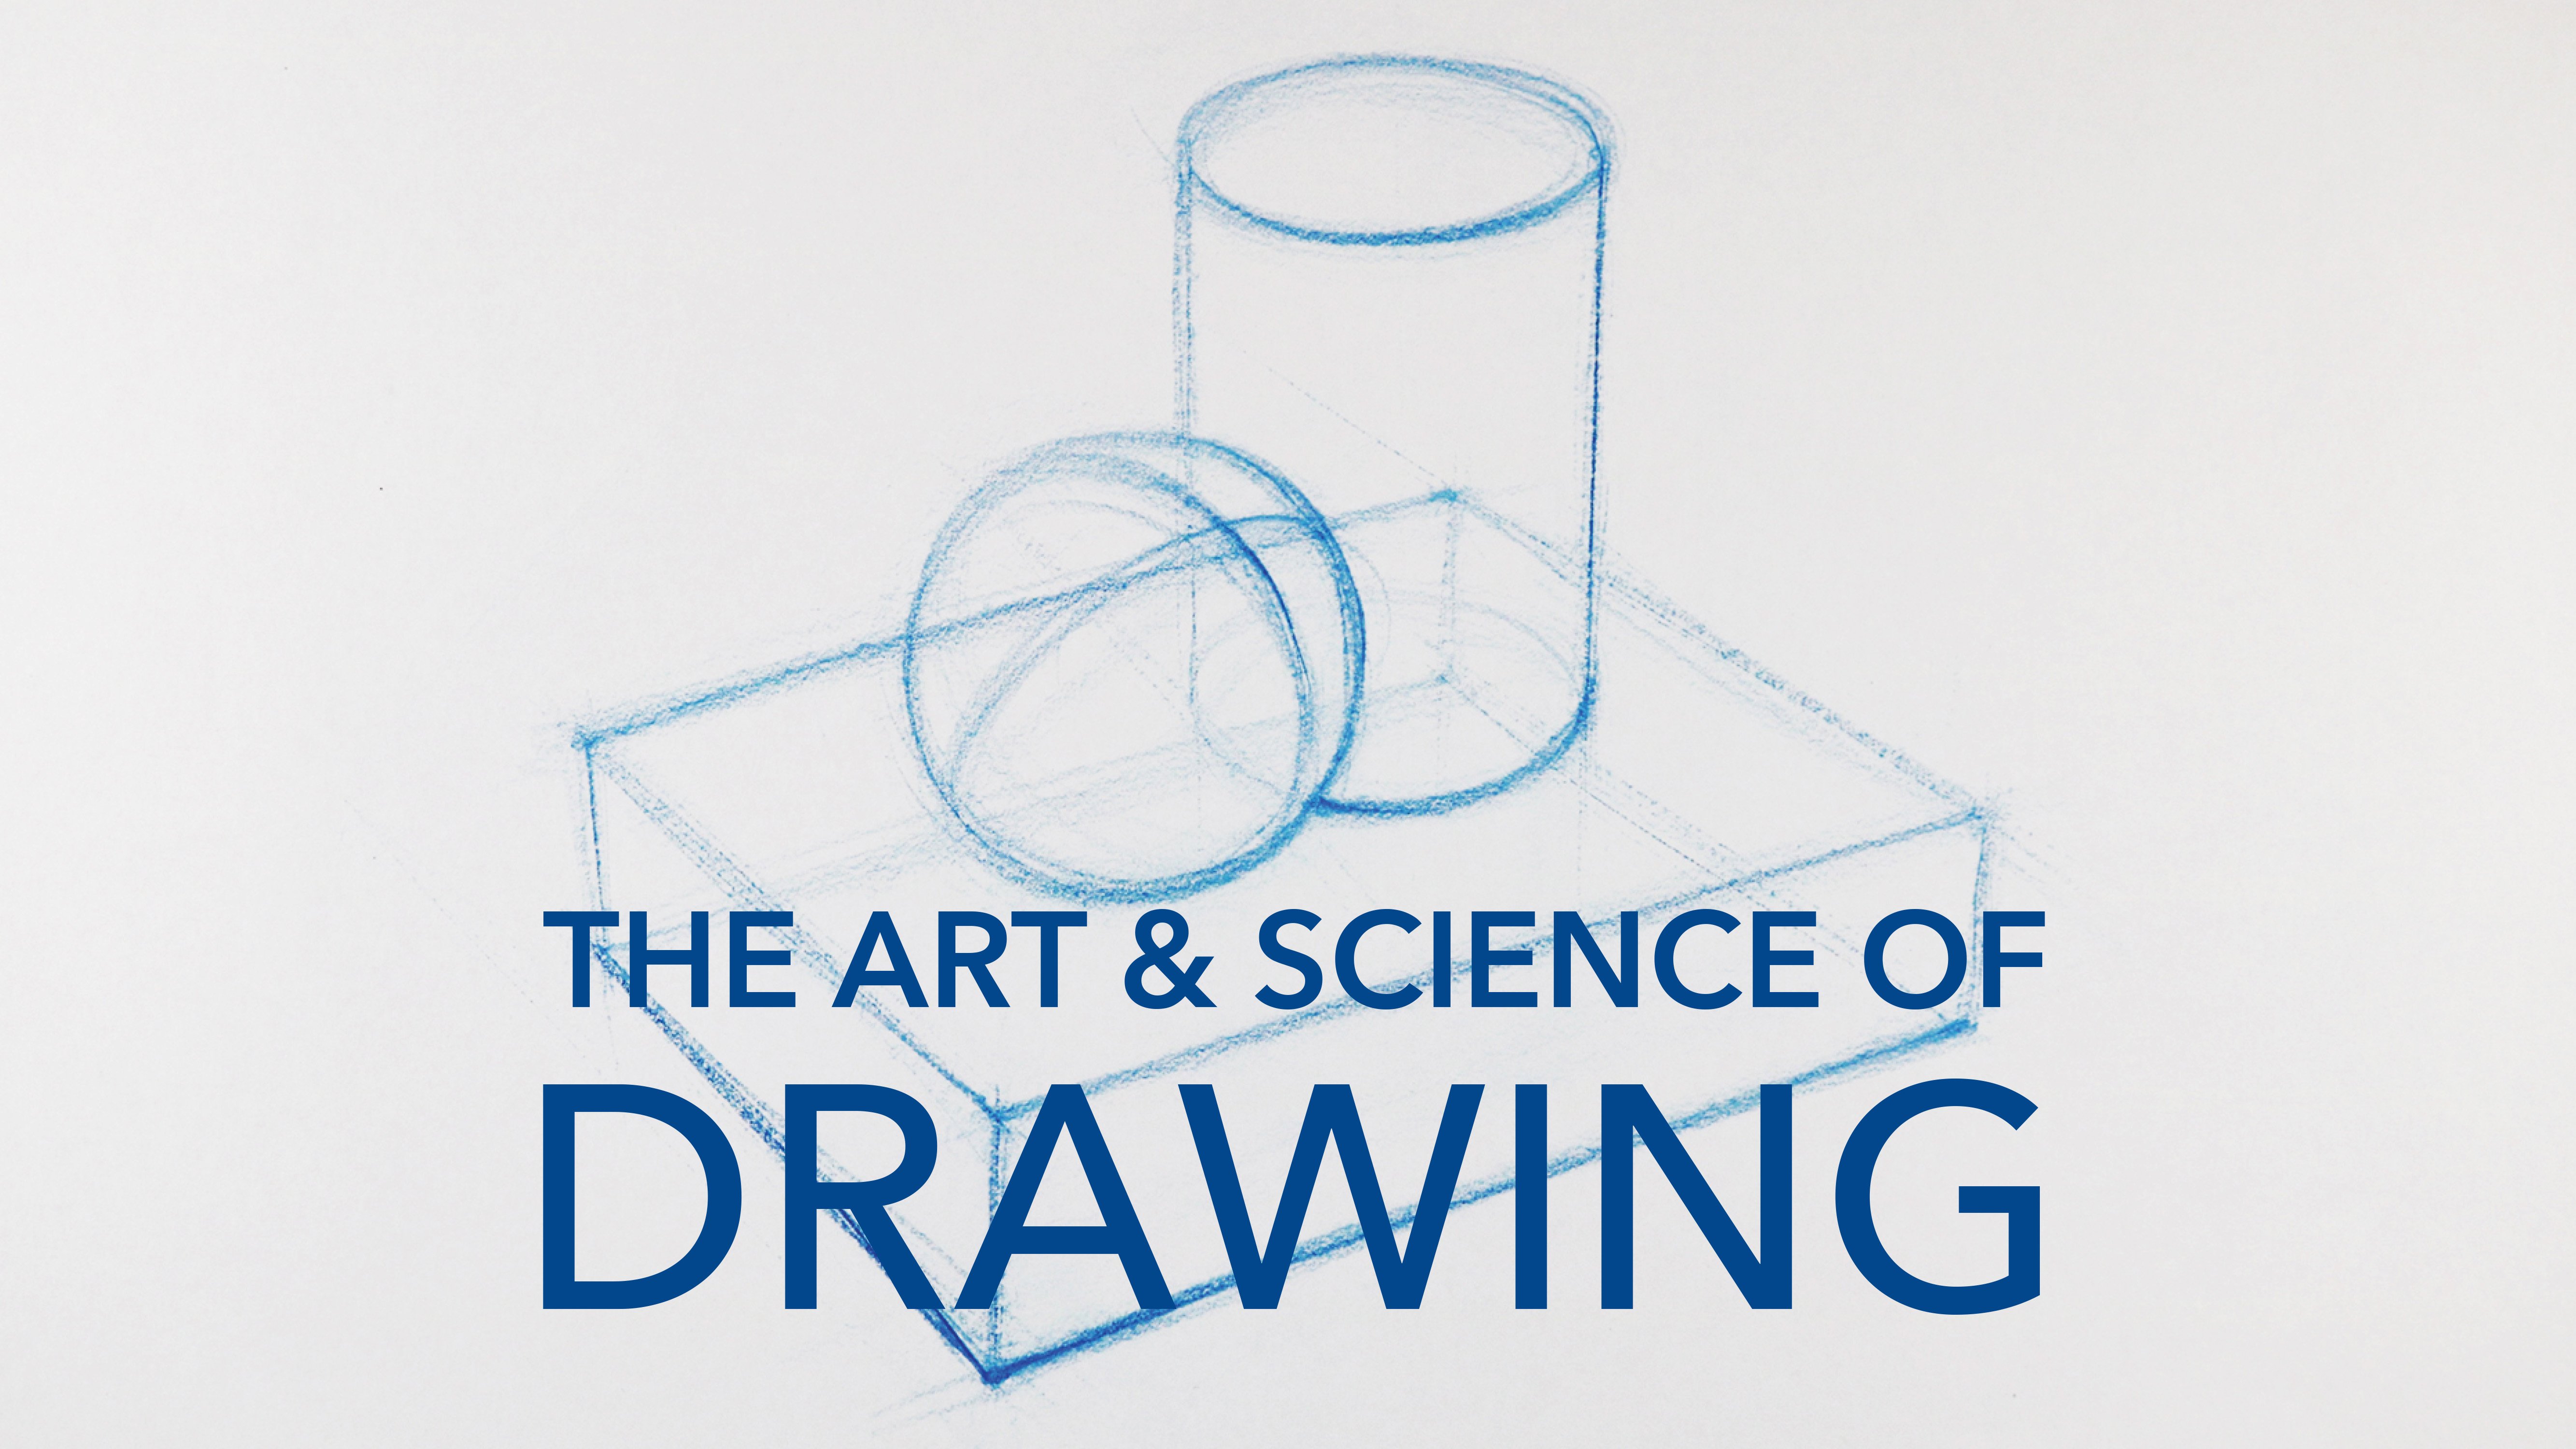
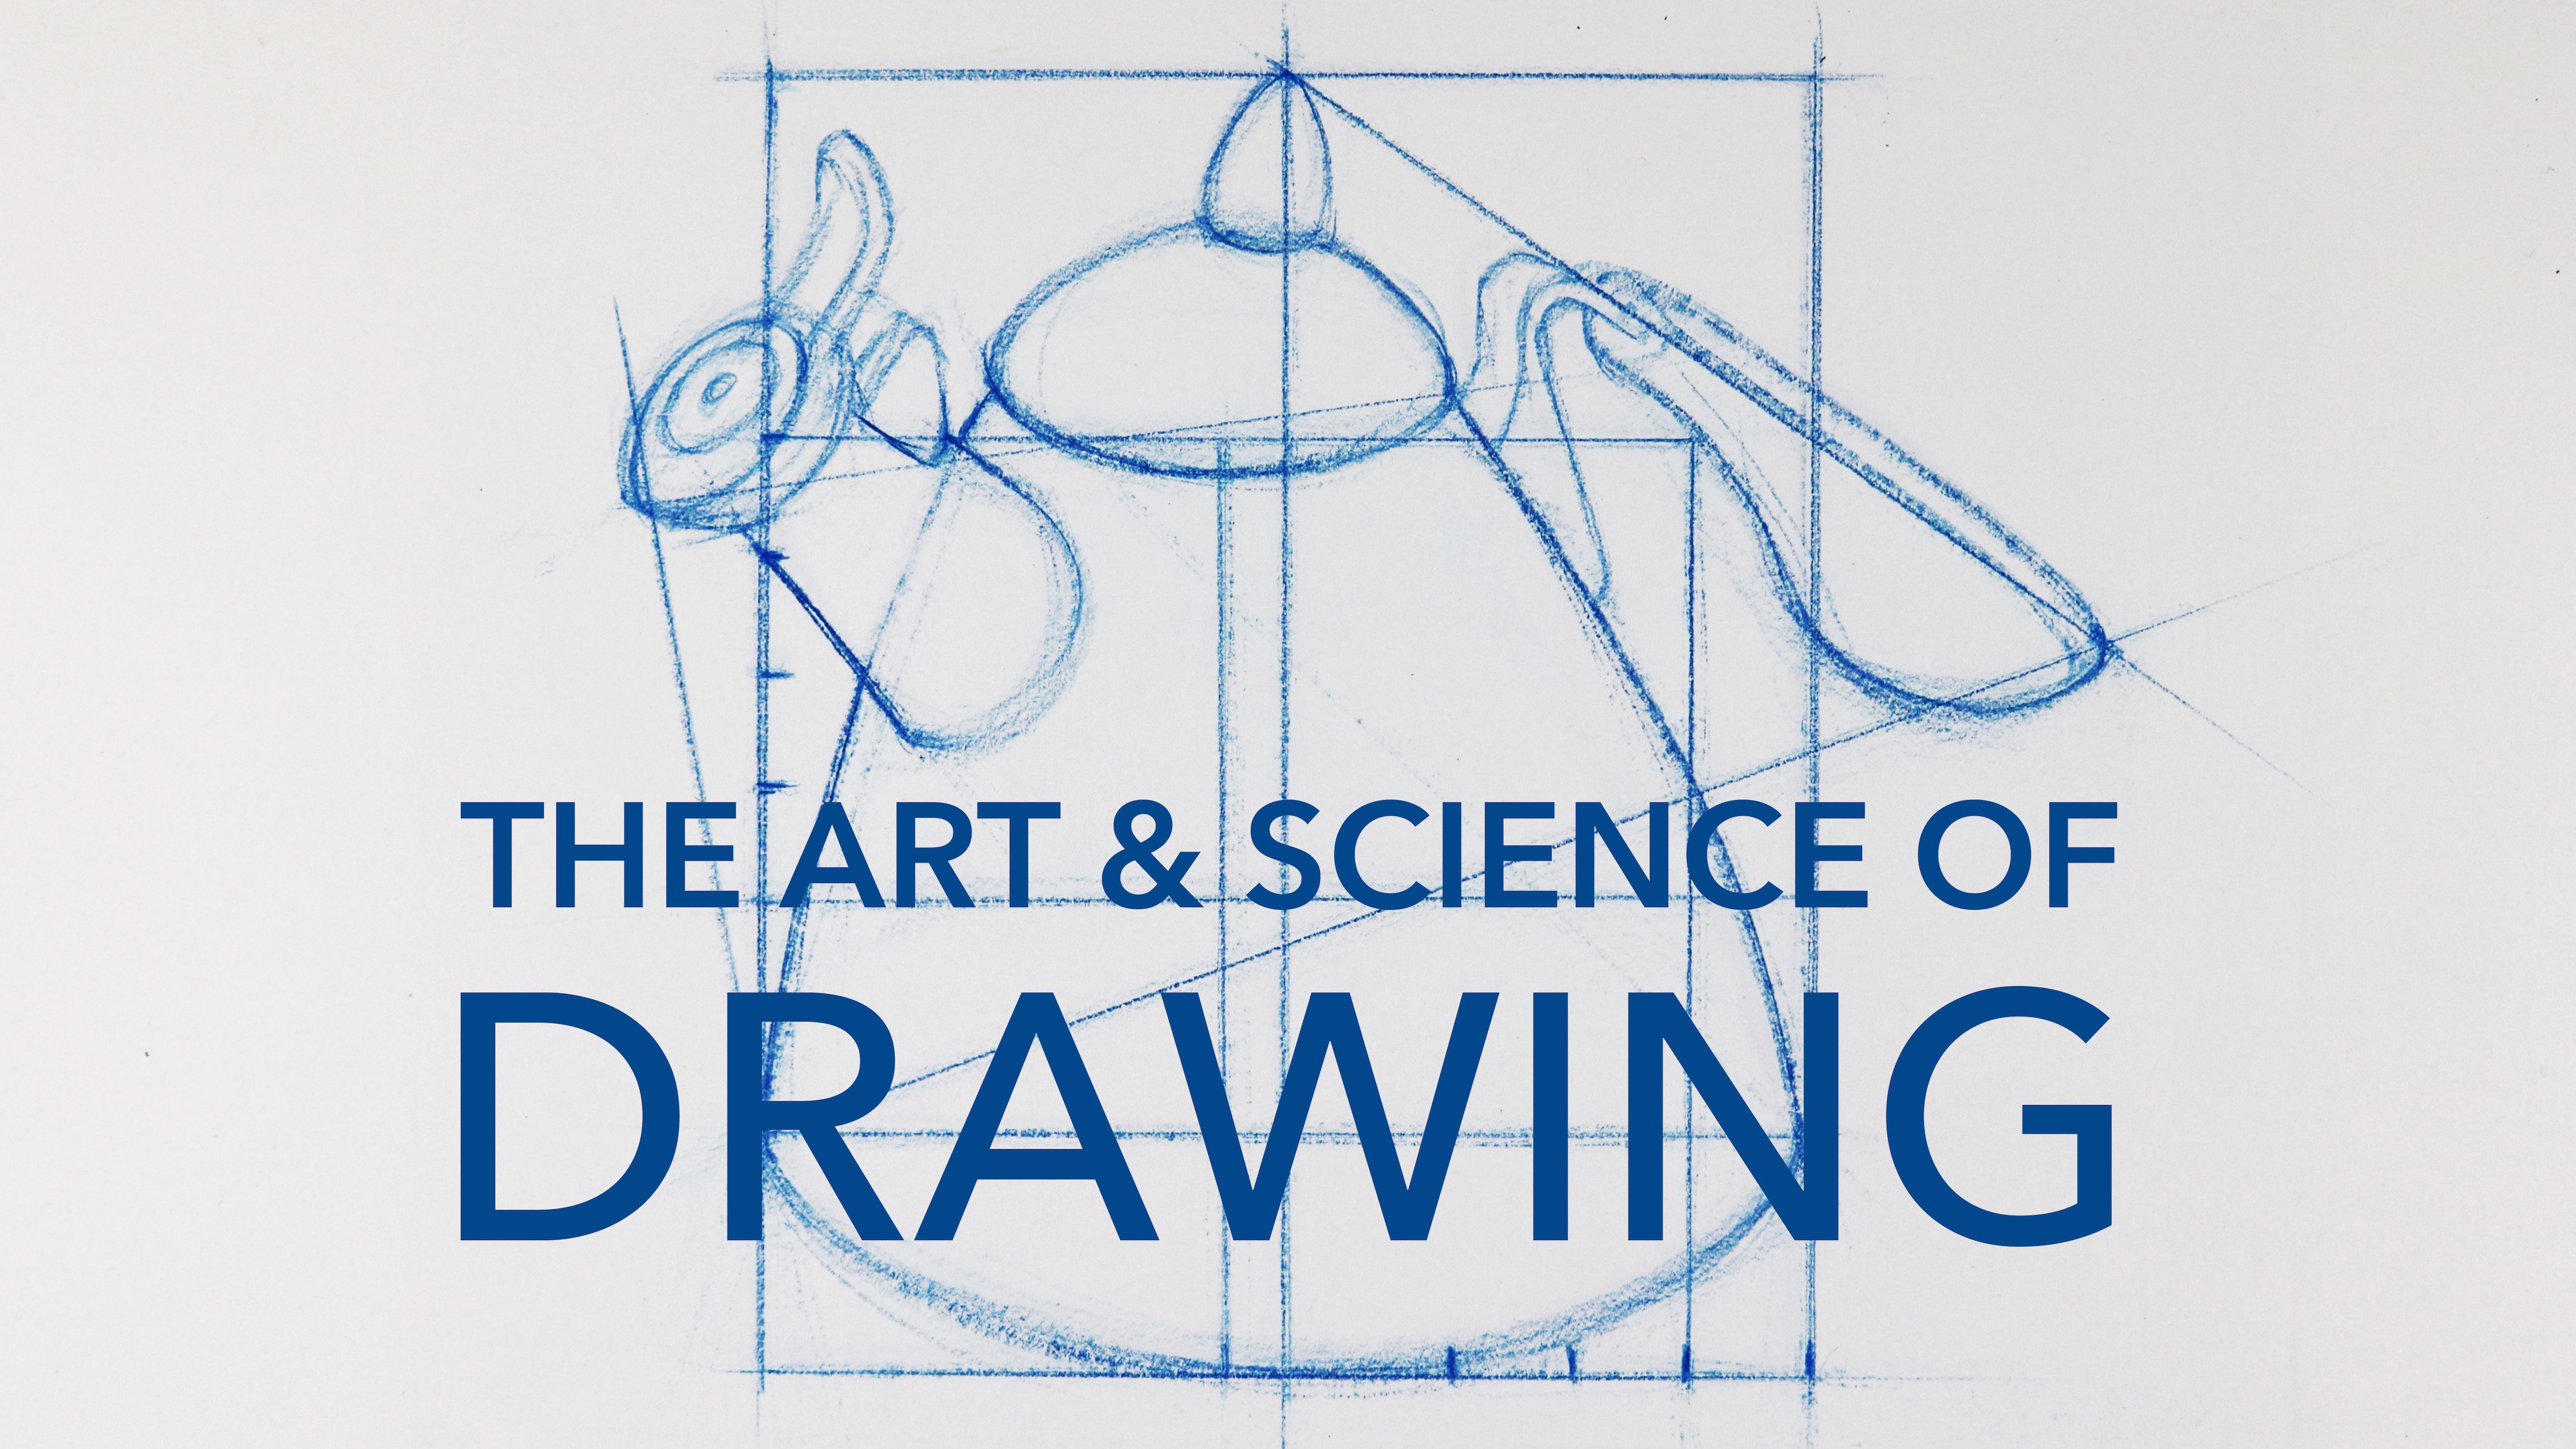
5. Bringing Form to Life: Today we're really going to get into this idea, that every line and mark you make in a drawing is going to serve a minimum of two purposes. Again, the first purpose is that it's going to communicate something about the form that you're drawing, but the second purpose is to communicate some kind of an idea or an emotion about the subject that you're drawing. Now it's important to remember that initial light foundation of basic shapes is never intended to be seen by a viewer. There may be some remnants of it left in your finished drawing, but we want to draw the foundation of basic shapes lightly enough so that when we put our dynamic mark making over it, that foundation almost entirely disappears. If for any reason you haven't gone through the basic skills week of this program, or if you just need some reminders, I'm going to go through and give a basic recap of some of the ideas that we learned that'll help you along with today's project. Now the subject we're going to be working with today is a teacup. Or as hopefully you as drawing students have figured out, it is a large circle and seven ovals at various sizes, various levels of openness in various axes. Remember, we want to get good at translating all forms into basic drawable shapes. For today's project, I'm going to stick with my 18 by 24 inch paper, a black pencil, and you'll see me using a blue pencil for the initial foundation drawing. But I want you to remember whatever size paper you have on hand, whatever drawing materials you have on hand will work. I'm more interested in how you're using the materials rather than what materials you're using. In the Basic Skills section of the art and science of drawing series, I introduced you to five questions that you will repeat over and over until the light foundation of basic shapes is drawn. Here are the five questions. What is the biggest shape? What is its axis? How big should it be? Where on the page should it go? After you've answered these four questions, you're going to make your first light attempt at the shape. Finally, you'll ask yourself, what changes can I make? Despite your best first attempt, it's unlikely that you will have gotten it exactly right. Perhaps the shape needs to be moved or it needs to be made bigger or smaller. Once you're satisfied, you're going to repeat this series of five questions again with one small change to the first question. What is the next biggest shape? You'll repeat these series of five questions over and over again until the basic foundation of your drawing is laid. During today's demonstration, you'll see me use the two ovals that make up the handle of the teacup as a foundation for improvisation. Later on in this series, we'll give you more specific strategies to draw complex compound forms, such as this. In this first demonstration, I've drawn the foundation of basic shapes in blue pencil. It's important to note that I've drawn these light foundational shapes darker than I normally would. This is only for instructional purposes, so you can see how the light foundational shapes relate to the darker lines I'll put on later. Now you'll see me switch to a black pencil for my dynamic mark making experiments. The easiest way to quickly add dynamism to your drawings is to increase the speed that you're drawing. Lines that were drawn quickly and confidently, simply look different than lines that were drawn slowly or timidly. In this demonstration, I'm not really worried about accuracy. I'm allowing my pencil lines to fly past the contours and crane out of control at the curves. Remember, we're not trying to do good drawings of finished drawings today, we're just searching for interesting line work. We'll have plenty of time later on to explore rendering, shading in details. In at least one of your experiments today, try drawing much faster than you're comfortable with. Viewers tends to be more forgiving of a drawing that excites them that isn't entirely accurate than they are of an accurate drawing with line work that bores them. We're trying to avoid doing drawings with uninspired or predictable line work. Increasing the speed of your mark making is one of the quickest and easiest ways to do that. You'll also note that these fast fluid lines are drawn rather dark. Too often beginning students are terrified of making dark lines. Although they are more permanent, they're bold, assertive quality usually makes up for any inaccuracies. For my second line quality experiment, I've chosen to work with a scribbly, chaotic line. I'm lifting my pencil as few times as possible and going back and forth over areas I've already drawn on. The resulting drawing almost looks like a tangle of yarn or string. Instead of simply tracing over my light foundation of shapes. I'm only using it as a loose guide. My darker lines meander over and around it while sometimes ignoring it all together. Even though the quality of the line remains constant, you'll notice that I'm darkening or lightening the pressure that I'm using. This allows me to give the illusion of light and shadow in some of the areas of the teacup. The density of the lines in any given area also help with the illusion of value. The more dense the tangle of line the darker the area appears. Although the style of line making appears messy, I'm able to capture a huge amount of detail and information about the teacup. I'd also like you to notice that this unpredictable, chaotic tangle of lines provides us with more than enough visual information to comfortably perceive the teacup. You may not like the way this drawing looks, and you may not like the way some of your experiments look today either. Just remember, our only goal today is to do something interesting. To break up the monotony of boring line work. The more you experiment with different line quality and mark making, the more likely you are to find a dynamic way of drawing that you love. While experimenting with line, it's important to ask yourself, what do you think of these marks in lines? What do they remind you of? Do they make you feel anything? Do they make you think about anything in particular? Do the lines and mark suggest any ideas or concepts? There are no right or wrong interpretations. But I do want to suggest that viewing a drawing like this is a very different experience than viewing a drawing that is simply rendered to be realistic. For my final line quality experiment, I'm going to attempt to communicate a specific set of ideas. I still have a vivid memory of being 14 years old, and learning for the first time that our human experience of matter being solid is nothing more than an illusion created by the constant buzzing of atoms and particles. I've also had a long-time fascination with the vastness of the universe and the concept of deep time. That our average human lifespans are infinitesimally small on a cosmic timeline. I wanted to experiment and see if I could create a drawing, whose line work began to suggest some of these concepts, to see if I could communicate a sense of the impermanence of objects. To suggest the energy contained in the atoms that make up every object that surrounds us. To hint the mysterious nature of the laws of physics that govern this world that we occupy, and to try and evoke in the viewer a sense of the ethereal beauty that I feel while contemplating even simple objects. Now I'm certainly not claiming that all of these ideas and information come through in this drawing. But I am suggesting that by starting off with the specific and lofty intention of what you want to communicate is a wonderful way to stimulate your imagination and creativity. It will allow you to create drawings that go far beyond representation. The lines and marks that I've used to make this drawing are entirely vertical. They are created by pushing the pencil upward, applying a large amount of pressure at the beginning of the line, but dissipating as it rises, allowing the line to soften and then disappear as it ascends. The ascension of the lines is important. Note that you can tell just by looking that the lines are moving upward and not down. If the lines had been drawn descending, the drawing would take on a look of rain, or some other particulate substance that was succumbing to the force of gravity. However, the ascension of the lines that I've drawn give the viewer a sense of overcoming gravity, as if the individual particles of the object were separating and rising. Now it's important to note that, where we gain an expression, we often lose in detail. It's difficult to capture every nuance of shadow or every subtle change in the contour while applying some of these more expressive lines. However, it can be a worthwhile trade as this dynamic mark making has the power to turn an otherwise mundane still-life subject into a cosmic drama.For today's project, you're going to use the teacup diagram that I've provided for you. I'm going to ask you to draw three different teacups. I'm going to ask you to draw the tea cups have roughly life size on the page. They don't have to be perfect and if they're a little bigger or little smaller, that's okay. But remember, doing a drawing that is too small can feel very claustrophobic, you won't have a lot of room to explore your mark making. On the flip side, doing a drawing that's really big, can feel overwhelming with so much surface of your page to fill. Once you have your three lightly drawn teacup foundations on your page, I'm going to ask you over each one of them to explore some different dynamic mark making. The kinds of lines and marks you're putting over your lightly drawn foundation can be expressive emotionally as we experimented with in day two, or you can try and come up with some an idea or philosophy as you saw me demonstrate. Now, you're welcome to explore one of the kinds of marks that I made, but I would also really encourage you to see if you can invent some mark making that is completely different. I'd also like to remind you that the goal of today's project is not to make good drawings and it's not even to make finished drawings, these are just studies and exercises that are going to allow us to explore experimental and dynamic marks and lines. This is an opportunity for you to be creative and expressive without the concern of doing finished work. Even though these exercises aren't producing work that you can frame or hang on the fridge necessarily. There is still invaluable your development as an artist. They'll allow you to explore what kind of art you want to make, what kind of drawings you want to do, and really who you are as a creative individual. Remember, learning to draw isn't so much about me telling you how you're going to do things. My job is to give you a technical foundation, but your job is to take that technical foundation and do something creative on top of it, and this is exactly what we see demonstrated in most master drawings. Over an incredibly lighted gestural foundation of lines for the figure, we find a flurry of scribbles that suggest a furious waving, which gives the viewer a distinct sense of fabric in motion. We get a similar sense of time and motion with the way the arm of the drummer is drawn, suggesting the back and forth beating of a drum. The entire drum is infused with a sense of motion and excitement. Not so much because of the subjects of the drawings themselves, but because of the way they are drawn. While learning about dynamic mark making, students will often ask about smudging or smearing their lines and marks in order to achieve the appearance of smooth form or a heightened sense of realism. Although I'm not going to actively discourage you from smudging, I will say that most masters rarely use this technique, a closer look even at drawings that appear to be meticulously blended, will usually reveal hundreds if not thousands of individually drawn marks, each distinctly visible on the page. You're unique anatomy, your life experience. How you think and feel and your unique reaction to the drawing materials, will all in some small way be transferred into your lines and marks. Without any effort at all you already have a mark that is uniquely yours. I would encourage you to think twice before obscuring it. Thank you for spending time with me in the studio today, and I will see you for day four.
6. The Tactile Line: To start off today's lesson, I'd like to introduce you to a critical concept, and I'd like you to keep this idea in mind for the rest of your drawing career and certainly for the rest of this program. The need of language of drawing is the line. The line is what the pencil or most drawing materials most easily make, now we can use this line to create value, to create shapes, to create all kinds of texture into tales. But when we distill drawing all the way down, we are working with the line. Now I'd like you to take a look around you for a moment and ask yourself this question. When your eye falls upon any object, do you see a line around this object? Can you see some kind of a dark line, like we've seen in a drawing going around the edges of the object? The answer, of course, is no. What we do see are different colors and values butting up against each other, but we do not see an actual line going around the edge of objects. What this means, is that the line, this tool that we as drawers and artists who rely so heavily upon, doesn't actually exist in reality, at least not in the way we reference it and drawing. Now, I think this is an exciting revelation because it frees us up to do other things with our line quality. While you're drawing, I want you to keep this critical concept in mind. When we draw, we are not simply copying what we see, we're using our subject is a reference point as a jumping off point to communicate something to a viewer. Now, even the most representational drawing, one that is hardly discernible from a photograph is still made up of tiny little lines, and I'm encouraging you to use these lines and marks as an opportunity to go further than just simply representing what the object looks like. Today what we're going to explore is how to draw lines and marks that give the viewer a tactile sense of what an object might feel like to the touch. Now, just like we did earlier this week with emotions, we're going to ask ourselves a series of questions that are going to help us translate the object that we're drawing into tactile marks. Now, I've selected a series of objects to work with today that each have a different tactile sensation, and I'm going to ask myself a series of questions. What the subjects feel like when I touch them? Is my subject hard or soft? Is it heavy or is it light? What other adjectives would I use to describe this subject and how can I use those adjectives to try and communicate something through line? In each of today's demonstrations, you're going to see me start off by simplifying each object into its biggest and most basic shape, in this case, it's the circle. After drawing and the axis of the balloon, you'll see me lightly add on the rest of the shape for the balloon. Next you'll see me lightly draw in the small triangle and the oval that make up the tied off end of the balloon. Notice that even though this oval is very small, I'm still making the entire motion of the oval, just like you saw me demonstrating in week 1. Next, I'll lightly draw the oblique angle for the string. Now the my life foundation is laid, I can start drawing in the darker lines that I want the viewer to actually be able to observe. With every mark I make on this balloon, I want to communicate the idea of lightness and lifting. The only areas that I'm going to add darkness or tension are in the tied off end of the balloon, which has no helium in it and isn't contributing to the lifting, in the string, which is still being pulled down by gravity. Next you'll see me using a bit of shading to imply the roundness of the balloon. We'll talk much more about shading in week 7 and 8, in the art and science of drawing. But until then, remember, the goal of this project isn't to accurately record light and shadow, it's to give the viewer a tactile sense of what this object might feel like to the touch. Every time my pencil moves to a different part of the object, I'm asking myself, how would this part of the object feel? How would it feel different from the rest of the object? How can I communicate that through lines and marks? With the exception of the string and the tied off end of the balloon, there really aren't any dark marks in it. While dark marks look and feel heavy, lighter lines look and feel light, while thicker and chunkier lines imply heft and weight, thinner lines also communicate lightness. The majority of the line to the contour or edge of the balloon are very thin. Although there are some thicker lines in the shadows, they're still used very lightly, there are no dark, thick lines in this drawing. One of the ways I'm attempting to communicate the lift of the helium balloon is by making the lines of the contour of the balloon get lighter as they get near the top. Although none of the line to the contour of the balloon are truly dark, you can see that the ones at the top are barely there. Contrast this with the lines that I've made for the string of the balloon, which are by far the darkest lines in the drawing. Again, this implies that the string of the balloon is being pulled down by gravity while the actual balloon is lifting up. Almost every line of this drawing communicates rising, even most of the light shading lines are drawn vertically, and the majority of the line to the contour of the balloon, were drawn going upwards as well. In this demonstration, I've tried to take as many opportunities as I could to demonstrate a lightness in lifting. Once again, you'll see me start off by drawing a light circle, which is the most basic shape in the water balloon. Next I'll place the axis line. While the helium balloons axis line was at an oblique angle, implying that it was floating upward in a way, the axis line for the water balloon will be going straight up and down because gravity is pulling it toward the ground. Next, I'll complete the overall shape of the water balloon by adding in two lines, they curve upward from the edge of the circle and go toward where the water balloon is hanging. Notice that these lines make a triangle on top of this circle, I have drawn both of these lines moving downward to help imply the gravity pulling down the weight of the water balloon. The first dark lines you'll see me add are at the places that I want to communicate the most tension at the top of the balloon, right underneath where it's tied off, the weight of the water underneath would be tucking downward, pulling the upper section of the balloon tight and tot. Next, you'll see me drawing darker, heavier lines underneath to begin to communicate the weight of the water pulling down and filling the balloon. Inside the edges of the balloon, I'll start to draw dark thick lines again to help communicate the weight in heft of the water pulling down. Hopefully, if I've done my job correctly, this water balloon drawing already looks heavier than the helium balloon, you just saw demonstrated. But I'd like to continue to push the feeling of heaviness of the object to really try and communicate the weight of gravity pulling downward. With each dark thick line that I draw, the balloon is hopefully appearing to become heavier and heavier. The only thin lines I am drawing are near the top of the balloon, where again the tension is pulling the membrane of the balloon tight as well as the tide off end of the balloon where I don't need to communicate heaviness. I'd like you to note, that this drawing hasn't been done by starting off in one area and moving outward, I'm trying to address all of the object at once. This way, no one part of the drawing is more finished than any other, the drawing develops as a whole. This strategy allows me to evaluate whether or not the individual parts of the object are working together as a whole. Instead of rushing in and trying to complete one section before moving on and then trying to complete a separate section of the drawing, I'm developing the entire drawing in stages. Once I'm confident that the drawing is going that direction I wanted to, in this case, communicating heaviness at the bottom and attention near the top, I can decide whether or not I want to do another pass to further push these tactile sensations. The more you evaluate your subjects in terms of their tactile sensations and the more you practice this, the more sensitized to tactile drawing you will become. But hopefully, you can not only see but feel the difference between these two demonstrations. I'd once again like to reiterate that the kinds of lines and marks I've used in this drawing, were not observed on the subject and then copied, I made a conscious decision to communicate something specific to the viewer, in this case, the tactile sensations made to these objects. The large basic shape of the pillow that I'm drawing is essentially a quadrilateral. Before adding any detail, you'll see me block in the basic shape, altering it as needed until I'm happy with the light foundation. Next, you'll see me lightly draw in the secondary and tertiary shapes of the pillow. Again, if you're struggling with this stage of the drawing process, please check out the basic skills week of the art and science of drawing. The overarching tactile sensation I'd like to communicate in this drawing of a pillow, is the sensation of softness. Every line you'll see me make, is intended to reinforce this feeling of how soft the pillow is. The lines I'm using to communicate this, are gently curving with soft edges. Although the line quality I've used at the edges of the pillow is slightly darker than the rest of the lines, I am not using any truly dark, heavy, or hard lines. You'll also see me using slightly darker and firmer lines in the folds of the fabric near the corners of the pillow. These lines and marks allow me to suddenly increase the tension of the folds without making the pillow appear rigid or hard. Again, I'm not drawing the lines this way because I've observed them on the actual subject. I'm using soft lines because of the experience I want to evoke in the viewer. This mark making operates almost on a subliminal level. The lines and marks you've seen me use in today's demo drawings, aren't nearly as overtly expressionistic as the lines and marks we used on days 1, 2, and 3 of this week. They could easily be mistaken for lines that are purely representational. They nevertheless communicate with the viewer in a way that is distinctly different than if I had used hard, sharp, and angular lines. Again, I'd like you to note that instead of focusing on a single area for any real length of time, I'm moving around the drawing quite a bit, in an attempt to have the drawing develop as a whole instead of in bits and pieces. This allows me to make sure that all of the different sections of the drawing are in relationship with one another. After each pass over the full drawing, I can evaluate and decide whether or not the drawing needs to appear softer or whether I can stop. In the spirit of pushing these tactile sensations as far as they can go, I've decided to take more opportunities to soften the subject. You'll see me indicating shadow here. But again, I'd like to remind you that rendering lightened shadow accurately isn't the goal of this week. Our goal is only to push and explore the tactile sensations of our subjects. The further the drawing goes, hopefully, the softer and softer the pillow appears to become. You can see that I've decided to draw a few lines up and over the surface of the pillow from one side to the other to help communicate the puffiness. Again, these lines weren't observed on the subject, but were yet another way I could communicate, softness, puffiness, and roundness. You might have noticed that many of the lines I've used in the pillow are similar to some of the lines I used in the water balloon and the helium balloon. But hopefully you can see that the pillow drawing doesn't have a sensation of weight or heft like the water balloon did. But it also doesn't appear as if it's about to float away. Hopefully, it has just enough heavier lines to ground it. Remember, there isn't just a single way to communicate any particular tactile sensation. This is just one possible variation of how to communicate the softness of a pillow. The subjects in our three previous demonstrations all had some elements of softness. But in this demonstration drawing of a rock, there shouldn't be even a hint of softness. With the exception of the very simple foundation drawing, every mark and line in this demonstration should communicate jaggedness and hardness. Instead of gently curving lines flowing into one another, you'll see me drawing straight, sharp lines coming together in jagged angles to indicate the shadow side of the rock. I'm using a series of parallel straight lines to further reinforce the idea of the rocks hard surfaces. Next, you'll see me pushing the pencil to its darkest limits with a series of small sharp lines, in an attempt to give the viewer an impression of jagged shards. It's important to remember that only using one line in a drawing, no matter how dynamic that line or mark may be, limits the dynamism and expression possible in that drawing. A variety of expressive and engaging marks is critical to keep the viewer visually interested in your drawings. So even though the majority of lines in this drawing are dark and sharp, you'll still find some lines that are lighter and softer edged. Although I've made an attempt to keep all of these lines straight. Now that the drawing is starting to take shape, and the tactile sensations of hard surfaces and jagged edges are starting to be communicated. I can push the drawing further by darkening it and adding more details. I'd like to take a moment here to remind you, that no matter how seductive any detail may be, it's important to hold off on drawing details until the foundational shapes and forms have been successfully drawn in. All of today's demonstration drawings, clearly illustrate the idea that a drawing evolves over time, starting with simple light forms that gain in complexity until the details are drawn. Instead of finishing one area before moving on to finish a separate area of the drawing. You can see the drawing evolving as a whole with each new pass providing more detail and information. Now let's compare this drawing of a hard jagged rock to our earlier demonstration of a soft billowing pillow. In both of these demonstration drawings, I've made an effort to capture not only what the subject looks like, but how it would feel to the touch, trying to evoke a viewer specific tactile sensations. My hope is that you can see that although these drawings are representational, meaning we can recognize them as a rock and a pillow, each of them are going beyond representation in an attempt to give the viewer a richer visual experience. So before I give you your project today, I want to leave you with a few thoughts. Remember, we are not simply copying what we see, we are using our subject as a jumping off point to communicate with the viewer. What we're communicating could be emotional, it could be tactile, or it could be philosophical. But we really want to take advantage of the opportunity that line work gives us to go beyond representation. Again, this is what we see masters do over and over and over again in their drawings. So while you're asking yourselves questions about your subject, about what the tactile sensation would be if you touched it? You should constantly be asking yourself, how to translate those tactile sensations into line? With light lines or dark lines be better? Should your lines be soft edged or hard edged? Should they be straight and angular, or should they have curves to them? Now of course, these are the only questions you could ask. I would encourage you to come up with your own set of questions to ask while you're evaluating subjects. But I just want to offer these as a starting point. What I'd like you to do is to choose a pair of objects that have an opposing tactile sense about them. If one of your objects is hard, the other one should be soft, or if one of your objects is light, perhaps the other one should be heavy. You don't have to choose the opposing tactile sensations that I've addressed here. You can choose any opposing tactile sensations that you want. But the important thing is, that the objects you choose feel completely different to the touch. I'm going to ask you to start each drawing by laying a very light foundation of basic shapes and lines. Once you're confident that your lightly drawn basic shapes and lines are accurate, you can start laying down the dynamic and tactile marks that are really going to bring this subject to life. Remember, every mark that you put down should be answering this question of what does the object feel like? And how can I communicate this to a viewer? Now if you're struggling at all with laying a light foundation of basic shapes for these drawings, I would encourage you to revisit the basic skills week of the art and science of drawing. Again, I'd like to remind you that we are not worried about doing good drawings and we are not worried about doing finished drawings. Our only goal is to explore and experiment with line work that is going to give the viewer a tactile sensation of your subject.
7. Atmospherics: Today, we're going to talk about atmospherics. Now first, I want to talk about this word atmosphere. The word atmosphere actually has two primary meanings. Both of which have implications in drawing. The first definition is related to the Earth's atmosphere. It is literally the collection of gases and particles, including oxygen or humidity that make up the Earth's atmosphere. Now, the second definition of atmosphere we're going to talk about today is related to mood in ambiance, that feeling we get from a particular place. The phrase that people often use while talking about atmosphere in this way is creating an atmosphere. First, let's talk about atmospheric perspective. There are only a few principles of atmospheric perspective that you really need to understand. Here they are: Objects that are closer to us appear higher in contrast, meaning that the darks are darker, and the lights are lighter. They are higher in color saturation, which means the colors will be brighter. They are literally larger because they are closer to us, and they're often in sharper focus, meaning we can see more details. This means that conversely, objects that are farther away from us appear lower in contrast, meaning the darkest is dark and the lightest is light. They have less color saturation, meaning the colors aren't this bright. Of course, objects gets smaller as they get further away from us, and finally, they might have softer edges, and less detail. They might seem a little bit out of focus as the particles in the air obscure the information. Now, we only observe atmospheric perspective over great distances. Often it takes miles to be able to see these effects, but given enough distance, we can expect to see the effects of atmospheric perspective in almost any environment. In this first photograph, you can clearly see the bright greens, that dark shadows, and the shimmering highlights in the foliage in the foreground. But as the coastline recedes into the distance, you can see the color and the contrast disappear. The further the coastline gets, the less color and less contrast it has. Now, take a look at the coastal formations on the right side of this photograph. You can clearly see the contrast sequentially fading away as your eye moves from the closest formation to the most distant. Even the ocean itself seems to have the color sucked out of it, the closer it gets to the horizon. In this last photograph, you can see fog in the distance, which of course is made up of many tiny particles of water suspended in the air. Any increase of particles in the air, whether it be moisture or smoke, tends to amplify the effect of atmospheric perspective. The more dense the fog gets, the less coloring contrast the objects have. Now, let's take a look at how artists use this technique in their drawings. At this point in your art education, we're not yet talking about color, but instead focusing on contrast. Just like we saw in the photographs, we can clearly see the darkest darks being used in the formations nearest the foreground. As the coastline curves farther back into the distance, we lose all sense of contrast in detail. Instead of the sharply drawn subjects we see in the foreground, we find nothing but a light wash of value to indicate the distant coastline. In this drawing, although the most distant mountains do have more detail in them, you can still see that the values remain consistent with what we would expect from atmospheric perspective, and we can still see that all of the darkest darks are massed near the foreground. I'm going to introduce you to a technique today of drawing with the side of the pencil in order to lay down a large mass of value. When we talk about value, we're simply referring to the lightness or darkness of a subject. The goal of this technique is to be able to lay down a transparent, even massive value, similar to wash technique in watercolor, but using the pencil. Now, when done correctly, this kind of drawing obscures individual marks, and literally lets the value takes center stage. It's actually difficult to tell what direction the pencil was moving. This technique is often referred to as graining because it allows the grain or the texture of the papers to come through in the drawing. This technique of washing or graining is going to be incredibly useful in both of the ideas of atmosphere that we're talking about today, and it's one of the most common techniques used among artists. Here's an example of this technique. You can see that with the exception of the edges of this shape, it's very difficult to tell which direction the pencil was going while making these marks. You can also see the texture of the paper coming through the massive value. While watching me demonstrate this technique, notice that my pencil goes back and forth over the same section multiple times. This serves two purposes. The first is to help obscure any individual strokes. The second is to darken value, should I desire it. Next, you'll see me go over the entire mass of value again, but this time, slightly altering the angle of my stroke. This second pass further obscures any individual lines or marks. Remember, the goal of this technique is to get a wash of value that doesn't show any individual strokes. Next, you'll see me demonstrate this technique again, but this time applying only a small amount of pressure. This allows me to create an incredibly light wash of value. Next, you'll see me attempt an even lighter wash. It's important to get comfortable applying this technique in any value, light or dark. It's also important to remember that if you want a darker value, you can always go over it again, but these light values have to be done in a single pass. It's nearly impossible to lighten a wash without destroying the effect. Finally, at the bottom of the page, you'll see me pushing this technique to its darker limits, making a second pass, that darkens it even further. If you want to get good at drawing techniques like this, I would recommend practicing the abstract, just like you see me doing here, without any pressure of using them in a representational drawing. This will allow you to focus solely on your technique, so when you need to use it in an actual drawing, you'll be ready. Once e again, you'll see me start this drawing off by laying a very light foundation of basic shapes. Because I'm inventing a landscape of overlapping mountains, I don't have to be quite as exacting and feel comfortable adding some details to these basic shapes. Next, you'll see me darkening each shape with the darkest values being used nearest the foreground and the lightest values being used for the mountains in the back. This closest section of the mountain is going to be the darkest and the one in which we'll see the most detail. Here you'll see me articulating individual trees. The dark value and level of detail will help to pull this section of the mountains forward. Now, using the side of my pencil, you'll see me lay down a very dark mass of value. You'll also see me going over it multiple times to darken the value and to obscure individual strokes. Next, you'll see me articulating the tree line of the section of mountain behind the one closest to the foreground. You'll notice that I'm not drawing it with the same level of detail. Or the same amount of darkness as you saw on the mountains in the foreground. Once again, you'll see me laying in a value mass using the side of the pencil. Being very careful not to go over the edge of the tree line. Being able to control the shape of your mass of value comes with practice. Any areas of the shape that my first pass might've missed can be gently and carefully filled in. I'm taking particular care not to make any of the strokes individually visible. But instead, trying to get these new strokes to gently blend in with the larger mass. You'll see me repeat this technique over and over again. Each time, decreasing the darkness of the value and the level of detail. It's important to note that the subject of this drawing, forested mountains are a subject that's fairly dark in value. Meaning, that this section closest to the foreground will be the darkest. With each section getting lighter the further back it is. If our subjects had a wider range of values, instead of just being dark like the forested mountains you see me drawing here, we would expect to see the extreme lights getting darker and moving towards a middle value the further away they got. Remember, ultimately, it's the contrast that changes. Meaning, that the further away an object gets, the lower in contrast it is. Meaning, it's darks aren't as dark, and it's lights aren't as light. Working with atmospheric perspective, starting off with a subject with a unified dark value, allows us to explore this technique in its most basic, fundamental format. We'll offer you a wonderful opportunity to practice laying down value with the side of your pencil. We'll have plenty of time later on in this eight-week series to explore more complex subjects. I'd like you to notice that in order to draw extremely light lines and values, I've moved my hand away from the tip of the pencil and toward the back. Although still considered an overhand grip, this variation on it makes it easier to draw it lightly. Putting barely any pressure on the tip of the pencil. Now let's speed up the drawing process. You'll see me making numerous adjustments to values and edges. Carefully making sure that each section of the mountain has a distinct shape and a specific value. To make sure that the relationships between the values in the entire picture are working as a whole. That each section of the mountain is getting sequentially lighter as it goes back. Now that we're nearing the end of this basic atmospheric perspective demonstration. I'd like to talk about a common misconception about the drawing process. Many people assume that a drawing that ends with a high level of detail begins with a high level of detail. This could not be further from the truth. The more you learn about drawing, the more you'll understand that a drawing evolves over time. Even this simple demonstration of limited values could be turned into a highly detailed, highly realistic drawing if I had decided to take it in that direction. In fact, if I had planned from the beginning to turn this into a highly rendered and realistic drawing, there's not much I would have done differently. Don't underestimate the power of the seemingly simple, humble beginnings. Now, let's talk about the other definition of atmosphere. The one that has to do with creating an atmosphere or creating a particular mood or feeling around your drawing. Now there are many ways to think about creating atmosphere. But one of my favorites is the idea of activating the air or the empty space around the subject. Now this is a very common technique used by master artists. Once again, we're in the realm of ideas that aren't observable. We can't see the air activated when we're actually looking at a still-life subject. But it's a drawing technique that allows us to go beyond representation and communicate something to the viewer. Here, you'll see an excellent example of value being laid down using the broad side of a drawing tool. Note how clearly you can see the grain of the paper come through while using this technique. I'd also like you to note that as we pull back in this drawing, it's very difficult to find an individually discernible line or hard edge in the entire drawing. This technique gives the impression that the subject is emerging from a thick fog. Giving the entire drawing a ghostly sense of mystery. This is an excellent example of the artist activating and making known the air and empty space around the subject. In this next drawing, you can see that in addition to the clouds in the background, you can find numerous light lines electrifying the air. It's difficult to say what the artists original intent was with these lines. But whatever their intention, they do add visual excitement and interest to what could have been a more mundane background. There are potentially an infinite number of ways to create different moods and feelings in your drawings. I would encourage you to explore and experiment. To see what kinds of thoughts and experiences you can evoke in a viewer. I often use both of these interpretations of atmosphere in subtle ways even in drawings that seem very representational. One of my favorite things to do with atmospheric perspective is to apply it to subjects that don't occupy space deeply enough. To produce the observable effects of atmospheric perspective. In figure drawing, for example, no one part of the body is ever so far away from another part of the body that we would expect to see the effects of atmospheric perspective. But that shouldn't stop artists for employing this technique to imply depth. While drawing the arm closest to the viewer, I've used a combination of dark values and lines, as well as bright highlights. Giving the arm a sense of high-contrast and a sharp level of detail. Now contrast this arm with the arm furthest from the viewer. You'll notice that the far arm doesn't include much detail. It doesn't have any dark dots or any highlights. It is left sketchy and undefined. This allows the far arm to recede back into space. While the closer arm seems to come forward. You can see the same technique used in the legs. It's not as if I observed the effects of atmospheric perspective on the model, and then copied it into my drawing. I made a conscious decision to use this technique in order to help imply depth. One of my favorite ways of creating an atmosphere by activating the air and space around the subject, is leaving behind evidence of the entire drawing process. All of my initial attempts at the form, including gesture lines, measuring lines, and construction lines are left bare on the page to be seen by the viewer. I do this for two reasons, first, is that it gives the drawing a sense of time and motion. They provide a motion blur that seems to capture the figure in made movement. The second reason is that I believe humanities fascination withdrawing is in part due to the fact that a drawing, unlike a painting, reveals everything the artist was thinking while making the drawing. In a painting, you can cover up all of your mistakes and missteps. But the process is more difficult to obscure in a drawing. Making the experience of viewing a drawing akin to reading the artists diary. Seeing evidence of the artists thought process, along with all of the mistakes and missteps, gives drawing a sense of intimacy and vulnerability. These kinds of process lines are called pentimenti. Pentimenti are lines that show evidence of the drawing process. Including mistakes that are intentionally left visible on the drawing surface. Erasing or otherwise obscuring pentimenti leaves the viewer with a more sterile and less human sense of the artist. I think pentimenti add excitement and dynamism to a drawing. As well as provide a glimpse into the mind of the artist. For your project today, I'm going to ask you to get out into the world and see if you can observe atmospheric perspective in action. You should be able to see the effects of atmospheric perspective regardless of the kind of environment you're in. Whether it's more natural or more of a cityscape. As long as you have enough distance and depth, you should be able to see the effects. Now, if it's possible, I'm going to ask that you actually do a drawing trying to record the effects of atmospheric perspective that you're able to observe. Now remember, we're not doing any detailed drawings today. We'll have plenty of time for that later on. This is an excellent opportunity for you to practice the drawing technique we learned today. By laying down value using the side of the pencil. Now remember, we don't need to include any details today. We're simply looking to get the effects of atmospheric perspective. Once your simplified shapes of value are starting to work as atmospheric perspective, if you want to try and add a couple of details you can. But again, the main idea here, is to capture the simplified effects. Now for a bonus challenge today, you can try and simulate the effects of atmospheric perspective on a still-life. Just like you saw in my drawing, you can use the ideas inherent to atmospheric perspective. The diminishing contrast the out-of-focus edges to give objects in a simple still-life, the effect of depth. Remember, you're not going to be able to observe it in a still-life. But that shouldn't stop you from attempting to employ the illusion of atmospheric perspective.
 Brent Eviston, Master Artist & Instructor