Transcripts
1. Introduction: O. Hi, I'm Elizabeth, and welcome back to the
Artist inspired series. If this is your first
time here, welcome. If you're back for more, and you've checked
out some of my other artist inspired classes, thank you for continuing
on this journey with me. In this class, we are going
to explore Japanese artist Yooikusama and her amazing life and journey and
artistic practice. She is a really
phenomenal artist, and the amount of work
that she has created in her lifetime so far
is just astounding. And I think that we can find
some really amazing ways to apply her approach to art making to our own
artistic style and aesthetic. So in this class, we are
going to be taking a look at YoiKusama's art
and different ways that she approaches art making. The project for this
one is very open ended. You can choose whatever art material you want to use for it. But I'll give you
some guidance as I share how I'm currently exploring the ideas of Yoyo Kusama's work in my
own artistic practice. But you can really
tailor this class to whatever art
materials you have on hand and whatever
inspiration you draw from the work of YoiKusam. Class is intended
for creatives of all skill levels as a really
fun way to get inspired by an amazing artist and
find interesting ways to use that inspiration in
our own artistic practice as we continue to grow, get inspired, get creative, shake up whatever thing
you've currently been doing, find something
exciting that you can layer into what you're
already working on. I hope you'll join me in class. Let's send it over to
the next lesson to talk more about our class
project. See you there.
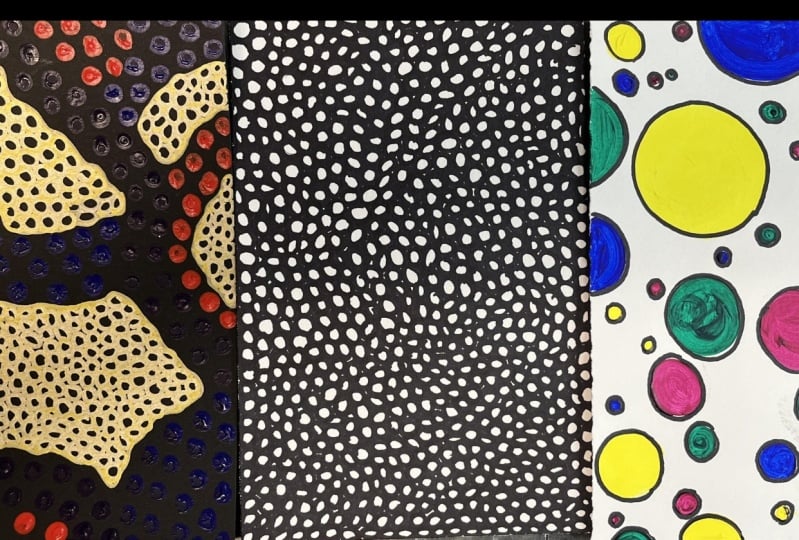
2. Class Project: For our class project, we are going to be looking
at the work of Yoiusama and getting inspired by the ways that she approaches art making. You can go over to the projects
and resources section of class where I have
shared some images created by YoiKusama and some information about
her and her approach to art making as we get inspired by this amazing artist and the
work that she's created. For our class project,
we are going to be taking all of that
inspiration and then layering that into our
own artistic practice or mirroring some of the ways that Yi Kusama uses it in hers. The idea behind mirroring
another artist is that if you step into their shoes
a little bit and their creative process with
that creative code on that we can find new ways to get inspired and
creative ourselves, and it's a really fun
way to approach it. It's also a really
great thing to do. You want to create, but
you're not sure what to do. This falls also in line
with an approach that could easily fall into
my art slump class. But it's really fun to experiment and explore
through the style of another artist to see what new insights and ideas it unlocks in
our own practice. So that is what we're
going to be doing as we look at the
work of Yayoi Kusama. Let's send it over to
the next lesson to talk about what materials
you might want to have on hand for class and the
different ways that we can approach the idea of our
class project. See you there.
3. Materials: The materials for
a class project are pretty straightforward, but they can also kind of go whichever way you
want to do this. Ultimately, you could choose
to use any art supplies that you like to create your Yui same inspire dot art work. For mine, I use mixed media
paper, some acrylic paint. A kind that you have is great,
anywhere from, you know, the lower price craft
paint up to something more like the liquitex
basic acrylics. I've got a variety of brushes. I want to be able
to create the dots. So the rounded pointed end brushes work a
little bit easier for that. But if you're going
to be covering a larger area of your paper, then you might want
some flat brushes just to kind of help you
get some faster coverage. For mine, after I did
the acrylic painting, I then went in with either
a paint pen or a sharpie, some perm marker or both. I think I actually
used both in the end on the first piece that I made in her style to give a pop of crisp outline to the
circles that I had painted. You could also choose to use a fine liner if you wanted
some more delicate lines. If you want to do more of your project with
paint, paint pens any colors would be
great. These are paskas. I've got some other ones that
I love. These are Batum. This is a really fantastic, less expensive brand of acrylic marker that
comes with a dual tip. I've got a nice big end
for filling larger areas. It's also got a fine tip side. The Batum or any kind of more inexpensive
multicolord pack of acrylic markers
are fantastic. Pastas are also great too. So if you have some
paint markers on hand, that is a wonderful
option to play with. You could also do it
with colored pencils. You really want to
be able to create some defined circles or dots. So I would go with
something that can give you a crisp edge. Colored pencils would be great. You could even collage
this and do this with cut out circles in
different colors of paper. An option that you
could do would be to create a
little bit of depth. Because ui Kasama works two dimensionally and she
works three dimensionally. One way I played with
that was by taking the idea of creating
a relief surface. With a hot glue gun, I glued a paper plate to
my paper surface, and then that just gave it
a little bit of a rise. I still painted it
as if it were flat. But the painted surface ends up having a little
bit of depth to it, which is kind of
fun to play with. So that's included in
optional materials, which would be the
paper plate and hot glue gun and glue
sticks to glue it down too. You could also glue
it with liquid glue, but the nice thing
about the hot glue gun is that it dries quickly.
That's completely optional. Otherwise, these are all the supplies that
you need for class. If you're going to
follow my example in the demonstration
video. Otherwise, choose whatever material
speak to you and get you excited to start creating
Joi Kusama style. Let's head it over
to our next lesson to learn a little bit more about the artist YoiKusama as we begin getting
inspired by her work.
4. About Yayoi Kusama: Name. Japanese artist Hoi Kusama was born in 1929 in
Matsumoto, Japan. At 95, she still
makes art every day. During her childhood,
she would spend her time drawing the plants
in her family's yard. Around the time she
was ten, she would also begin having hallucinations where she would
start to think that flowers and pumpkins
talking to her. She turned to art as
a way to kind of work through these challenging times. She has proceeded to do that for the entirety of her life. After World War two, Yayoi
studied Japanese painting, but she found it to be very old fashioned as far as the
style and it bored her. She was kind of seeking
a way to express herself artistically that
felt more genuine to herself. She felt that to
be a true artist, she needed to leave Japan
and kind of explore the world beyond what she
had always known growing up. She discovered the art
of Georgia O'Keefe wrote to Georgia for advice. Georgia O'Keefe encouraged her to pursue her dreams and to follow her passion
and kind of find a way and to keep creating. Ben an artist who has continued to explore different
ideas and concepts, but in such fresh new ways. Everything from painting to installation to
happenings in the 70s, where she was putting dots on people and really
getting involved in anti war protests and peace and love movements to creating immersive
experiences for the viewer by creating infinity rooms where you truly
step into her work of art. And then she's
also had all sorts of different collaborations, such as her collaboration
with Louis Vatin where the ideas of
her process and artistic vision have
been translated into accessories
and clothing and fabrics and she
kind of lives and breathes her art
and finds a way for many in the world
to also do that. So the Pogo dots
were very important. They made her feel connected to the universe
because she kind of had this idea that everything is made up of these
tiny little dots. And by representing that, there was a connection
instead of a disconnection. So even though she
has, you know, these moments of
hallucination and kind of overwhelming
feelings and all sorts of different things that are
plaguing her in a way. The dots are her way of working through that and processing
and coming to terms with it. There's a lot that we can
take away from looking at the great breath
of work that she has created during her lifetime
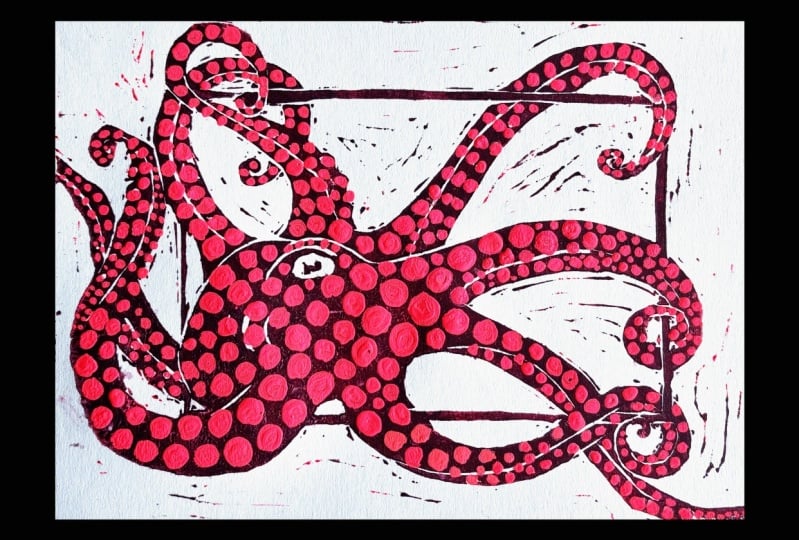
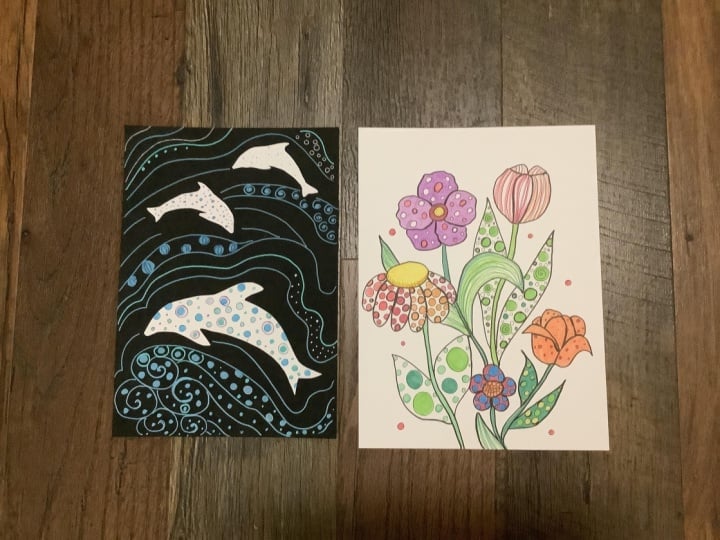
and find a way to use that as inspiration and a springboard for our own artistic expression. Whether you go down the route of extraction and dots or you play with some of the florals or pumpkins or your own imagery, it's going to be really
fun to see how you can get inspired by her artistic journey and her process and her imagery. For colors for compositions. There's so much to explore. So I'm really excited
for us to dive into our class project and see the different ways that we can look to YUI Kusama
for inspiration. So let's head on over to
our next lesson to start seeing some of the
ways that I've explored this in my
art. See you soon.
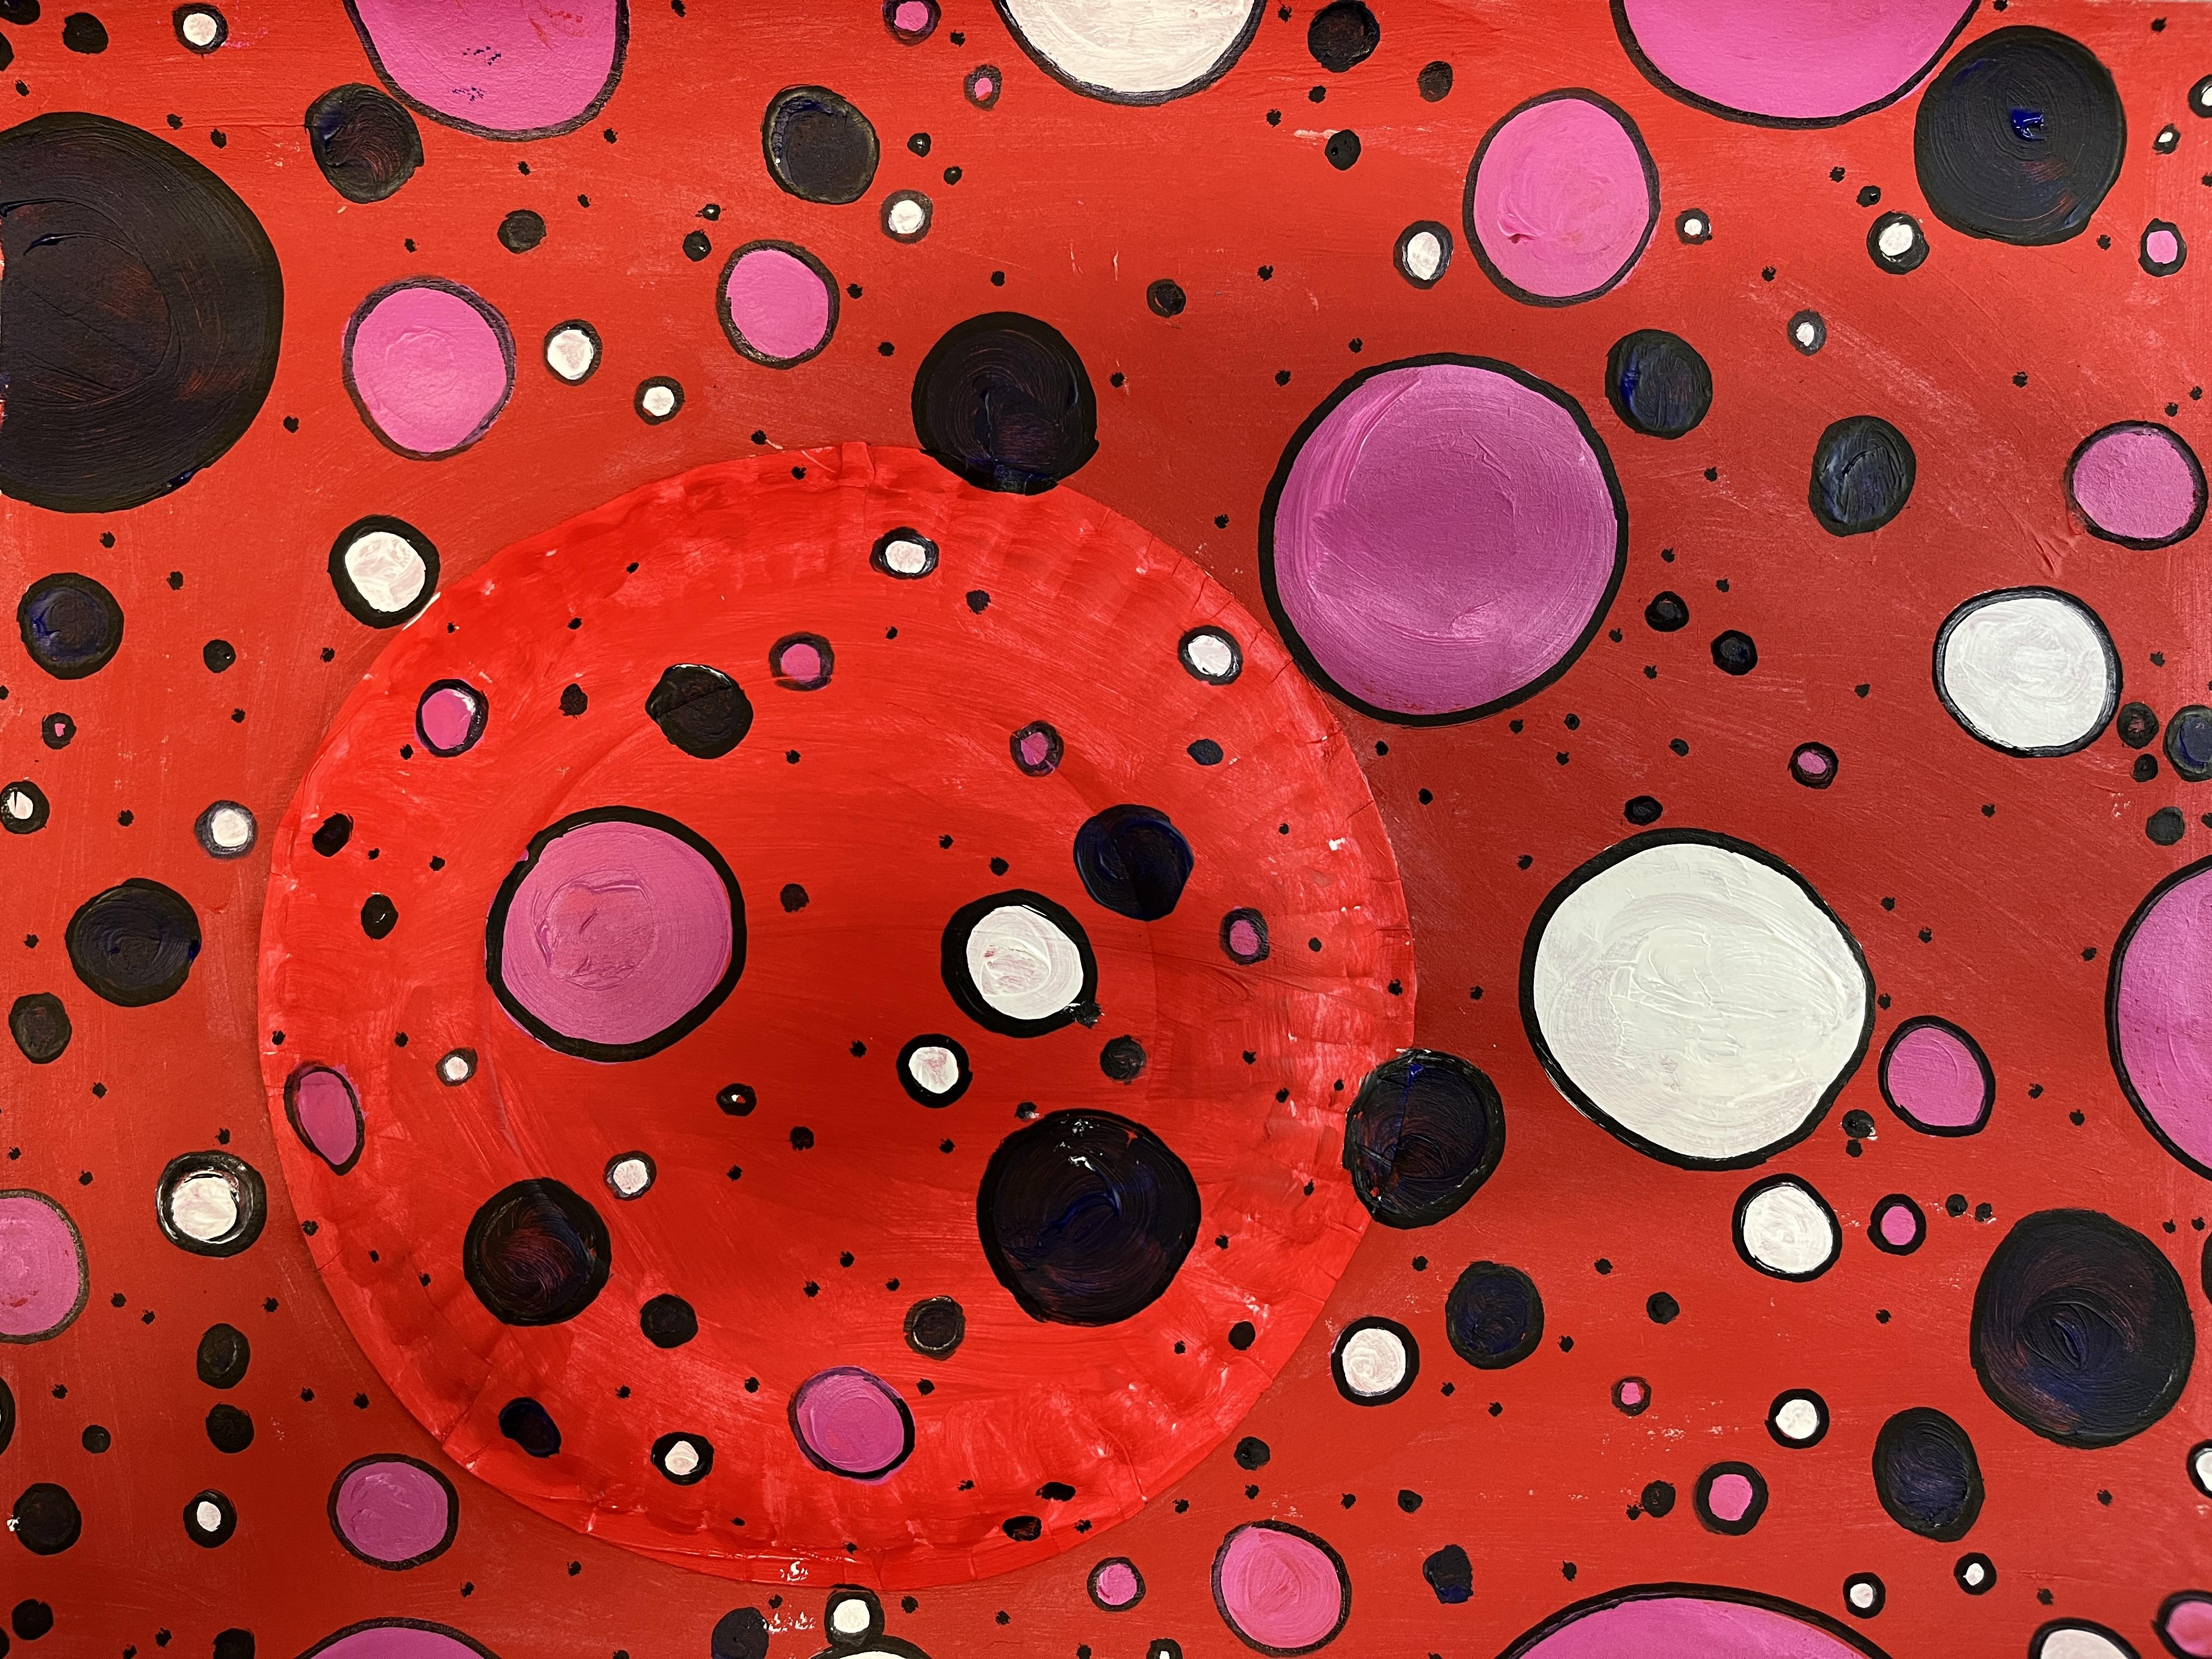
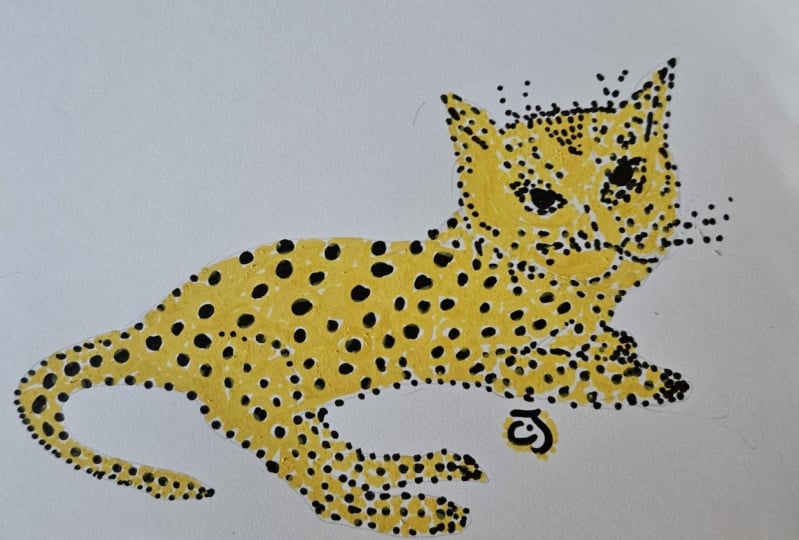
5. Demonstration: There's a lot of different
ways that you can approach your class project using any art supplies that
you have on hand. For this one, I wanted to create a little bit of
depth to my paper, even though I was
working relatively flat in a two D kind of sort of way, glue down a paper plate just to give a little bit of a rise
to my painted surface. You could hunt glue it. Topl would be the
better way to go. For this one, I did it with just liquid glue and it was fine except for it
was scooching a little bit. So I put that around
the rim of my plate, and I glued that to my
construction paper, and then I covered the whole
surface with one base color. I decided I didn't really
want to paint around dots. I wanted to paint the dots on top and kind of build up
the surface that way. If you want to, like, paint your dots and then
paint your background, that's another way
to go about it. I also recommend
using a round brush instead of a flat brush to create your dots if you're
going to paint them on. A flat brush will work too. You just have to work a
little bit harder to kind of get rounder dots or circles. My round brush, I kind of
switch brushes back and forth, depending on it because
for the larger dots, I kind of wanted
it to go quicker, so I wanted to use
the flat brush, but then I wanted
the crisp lines, so I needed the round brush. The goal is to get inspired
by Yokusama's work, but to have a very relaxing, calm art experience
because I find doing repetitive shapes and
markmking to be very relaxing, kind of zen and that's
really the experience that I wanted to have here as I
explored her subject matter. I also wanted to
play with kind of color combinations I
don't normally use. So I don't often
gravitate towards red, but I kind of felt like she has a lot of red in a
lot of her pieces. So I kind of went
with a joy color, and then I kind of
put like a betsy spin on it by doing blue and pink. I love contrast value a
lot. And so does she. So I wanted to really have
kind of a huge range, but I also still
wanted to have a little bit of play at the black. So after I painted all of
the dots that I wanted, I started going in
with Black Sharpie. I do recommend letting your
paint dry all the way. I was a little impatient and
wanted to get to this step. So I got to outlining before
all of my paint was dry, and I had to kind
of switch markers a little bit to get it to
really go around it. Here I'm using a paint marker. I'm using my pasta
just to try to get an even broader
range to my dot sizes, but also to kind of
have the wet paint of the paint marker work more succinctly with the wet
paint that was on my paper. And this is how it turned out. I had so much fun creating this and I ended up exploring
this idea in another piece. So I will get that video
uploaded soon of how I created another take on YoiKusama's work, so you
can see that one too. That one explores floral motif. It still plays with
the 2d3d by using some egg curtain pieces to add a little bit of pop of
depth to the piece. That one's more a
mix of collaging. I used paint for
the pop up parts, but I use paint pen
for the rest of it, which would be another
quick way to go about it is just to get out
your acrylic paint pens. Stay tuned for the bonus video. Let's head on over
to the last lesson to wrap up the
class. See you soon.
6. Final Thoughts: So much for joining
me in this class inspired by the
work of oi Kusama. I hope you have found an artist that you are
really excited about. I really love oi Kusama's work and have found
it to be so inspirational, just learning about
her artistic journey and her creative passion. And I had so much fun not
only creating this class, but incorporating her
art techniques and imagery into my
own art practice. And I hope you are
feeling the same. I would love to see
what you created. So please head on over to the projects and
resources section of class and upload your
project to the student gallery. Share a little bit
about how it went, the materials that you used, how you maybe can see
applying this in the future, and don't forget to check out the work of your
fellow students. It's really inspiring to see
how everyone approaches, especially a project
like this class, where the limits of how we can incorporate
it are limitless. It's just really open ended
as we think about why and how Yayoi Kusama creates art and how we can layer
that into our own work, too. Then I would love it if you took the time
to leave a review. Your feedback is really important to me as I continue
to grow as a teacher, not only in creating
future classes, but adapting and modifying and adding to previous
classes as well. Views are also a great way to reflect back on your process, share that out with the teacher, as well as students who are considering taking the
class in the future. It's a really wonderful
way to kind of share the first hand
experience with those that haven't taken the class yet, but who might be curious. And if you have enjoyed the
artist inspired series, either if this is
your first or you've taken several of the
others and you have other ideas of artists you'd love to see me
cover, let me know. I love sharing this with you. This series has been so
incredibly fun to make. And I've got so many more ideas, but I also would love to teach what my students
want to learn. So if you have an artist
that you want me to dive into and share
with you, let me know. I also love connecting with
you in a variety of ways. So if you don't already, be sure to follow
me on Skillshare so you get notified
about future classes, both from the artist inspired series as well as many others. And I would also love to see
you over on my Instagram. I love sharing what
I'm up to creatively. I love following
other creatives, and it would be a
really great way to connect off the platform and kind of encourage
and support each other outside of class. And then I also share a ton of information and fun art things over on my YouTube channel. I'm really putting
a lot into building that platform and connecting with the creative
world as a whole, but especially with my
students who are from Skillshare and other
ways that we're connected in the
ways that I teach. So YouTube is a great
place for me to share how I'm applying
what I'm teaching in my classes and my
real artistic practice beyond the class project
and demonstration. I also share whatever
I'm up to creatively. I take you on art
Adventures with me. We grab our sketchbooks,
we go out into the wild. We get excited by going
to different art shows. I just share anything
related to creativity, art exploration, and
artistic journey with you on my YouTube channel. And there's a lot of
fun stuff coming up. So I hope that we can
connect over there as well. Thank you so much for
taking this class, spending some time exploring
a really amazing artist, getting a little funky, maybe with the ways that you approach your own art making
through your class project. And I hope to see you in class again real soon till next time.
 Elisabeth Wellfare, Artist, Art Educator