Transcripts
1. Welcome: Hello, and welcome. I'm so glad you're
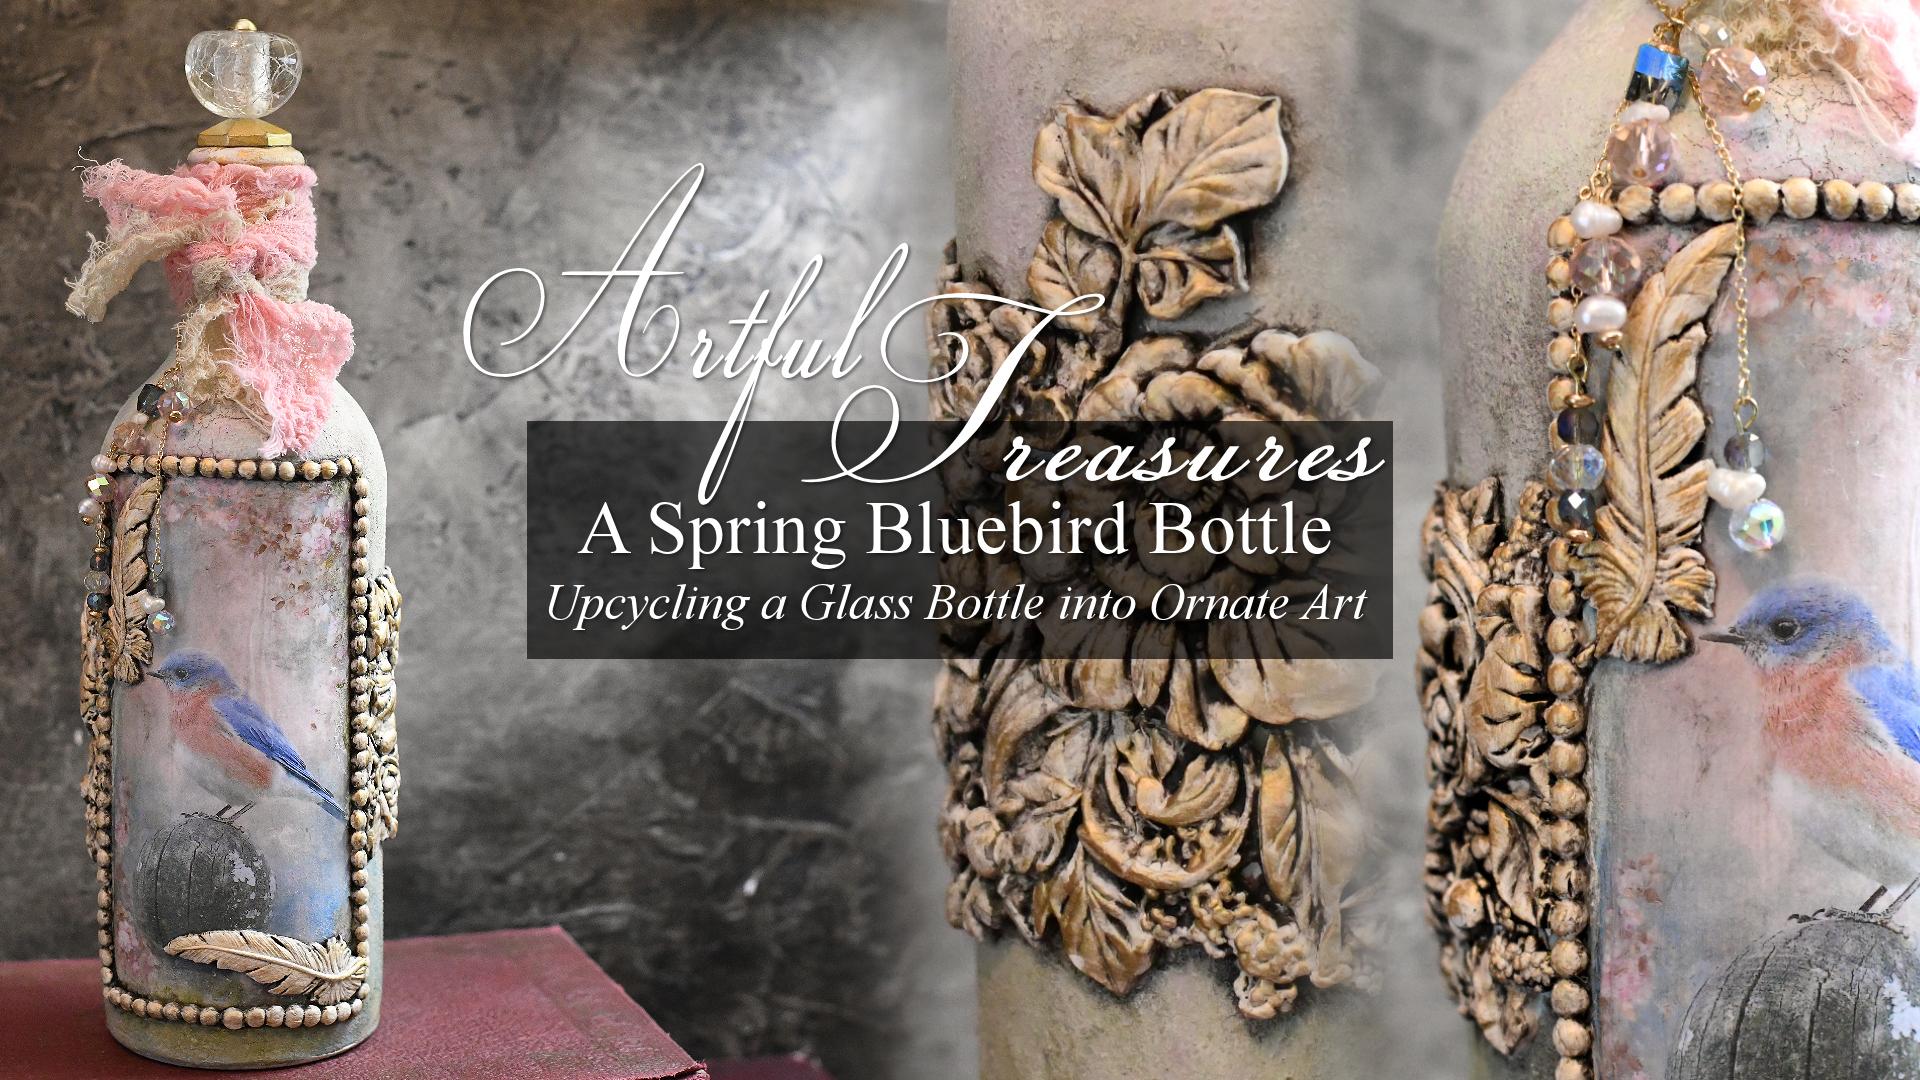
here for this class. Artful Treasures a
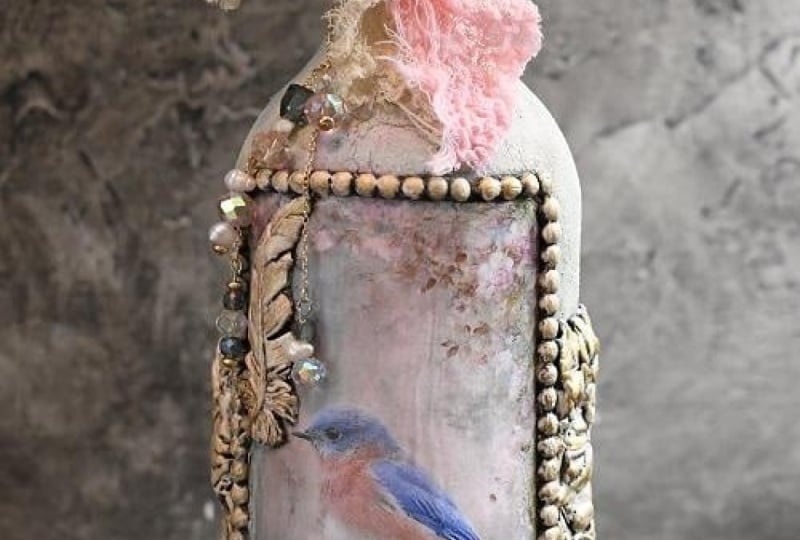
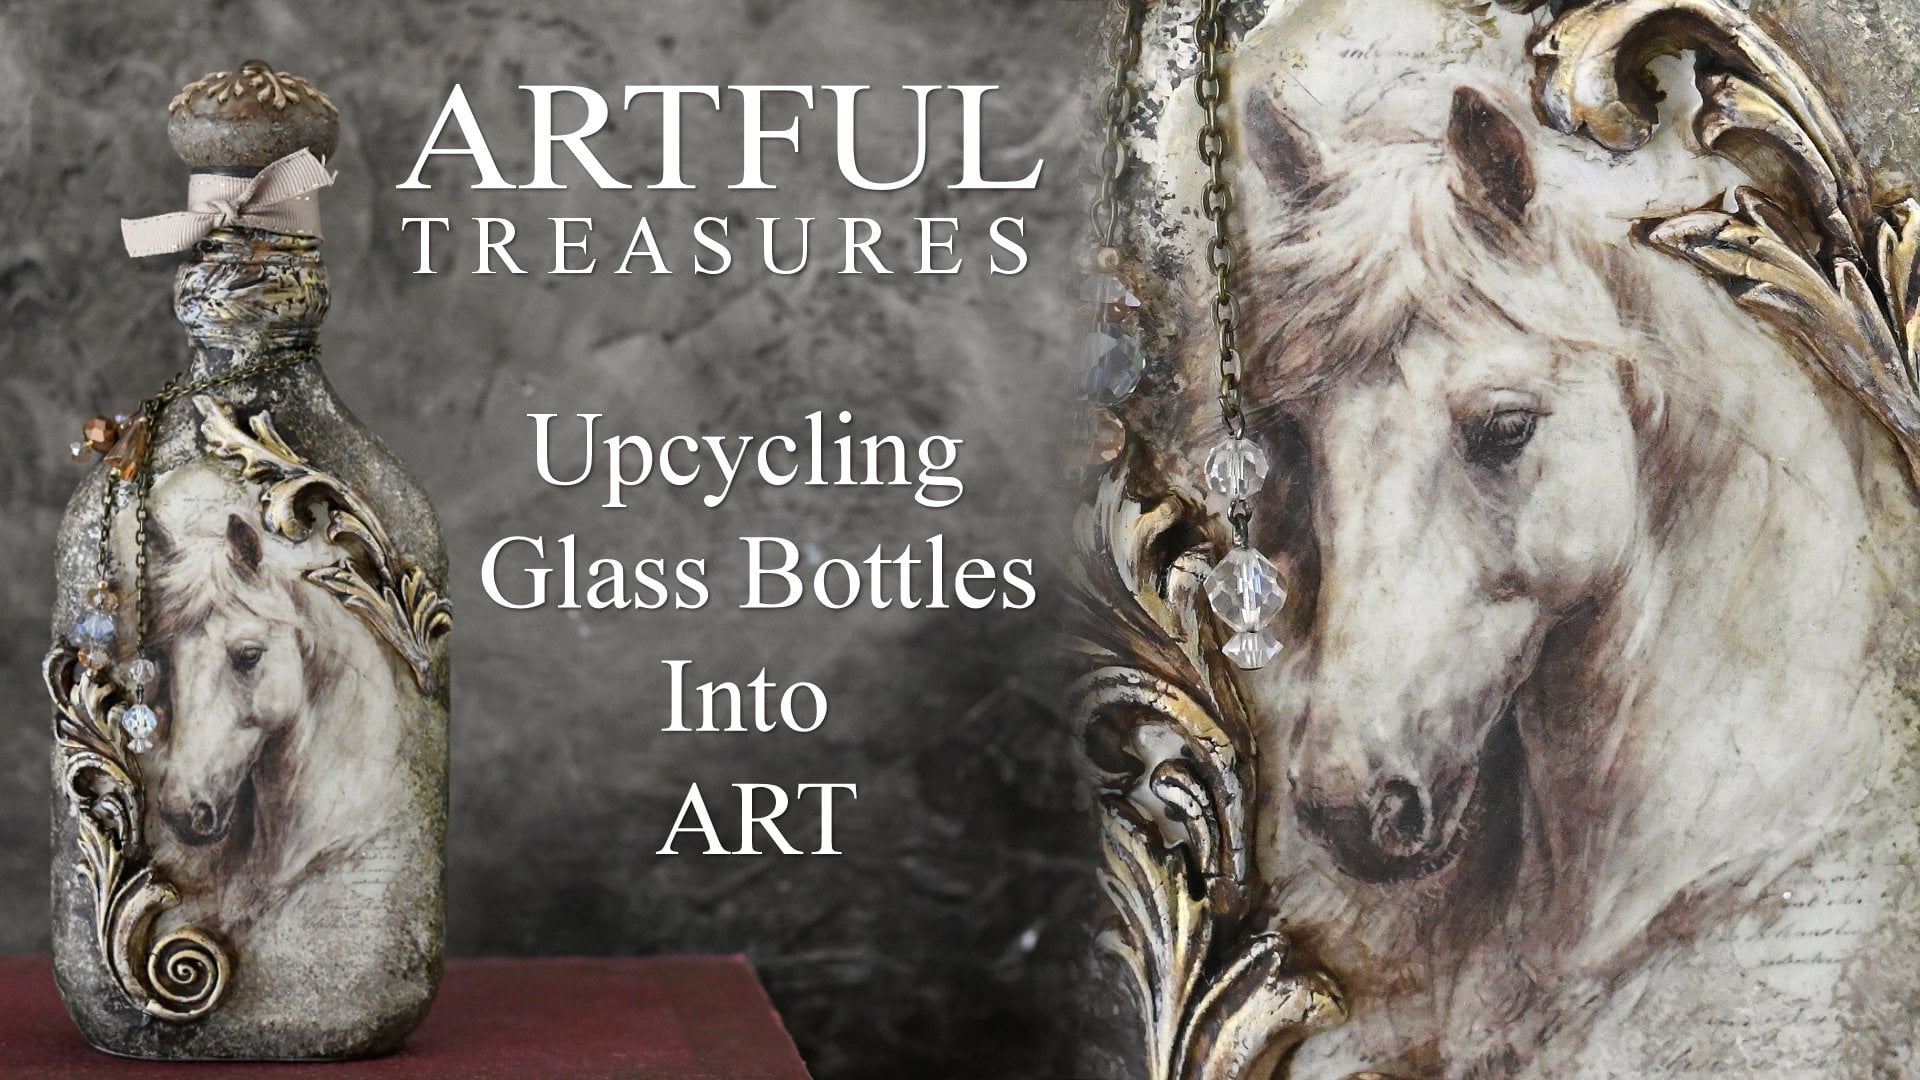
Spring Bluebird Bottle upcycling a glass
bottle into ornate art. In this class,
we're going to take this ordinary glass bottle and transform it into something
beautiful and decorative, a spring inspired art bottle featuring a lovely
bluebird designed. I'll walk you through my
process step by step, starting with how I
prepare the glass so painting embellishments
will adhere properly. Then I'll paint the bottle
with soft spring colors that blend beautifully with the
artwork that I'm using. From there, I'll show
you how to create the dimensional
embellishments using air-dry clay and
decorative molds. These clay details will frame the artwork and
wrap around the bottle, adding texture and
a more ornate feel. Once the clay has cured, I'll paint and glaze those raised elements
and add touches of gold to bring a little richness and elegance to the piece. Finally, I'll finish the bottle
with a decorative topper, vintage ribbon and a few
jewelry elements to give it a final bit of
charm and personality. Now, one thing I want
you to know right from the start is this project
is very flexible. If you prefer a simpler look, you can absolutely stop
after the painting stage and still have a beautiful art
bottle with just the artwork, paint and a nice topper. I'll also be sharing some of my personal techniques
along the way, including the base mixture
which I call my secret sauce. I used to prepare the glass for painting so everything
grips well to the surface. More importantly, I encourage you to make this
project your own. Choose artwork you love, colors which inspire you and
blend with the art you've chosen and embellishments
which fit your personal style. By the end of the class,
you'll have transformed a simple bottle into
something decorative, artistic, and truly unique
to you. Let's get started.
2. Class Project: Now let's talk about the
project for this class. Your project will be to create your own artful treasure by upcycling a glass bottle
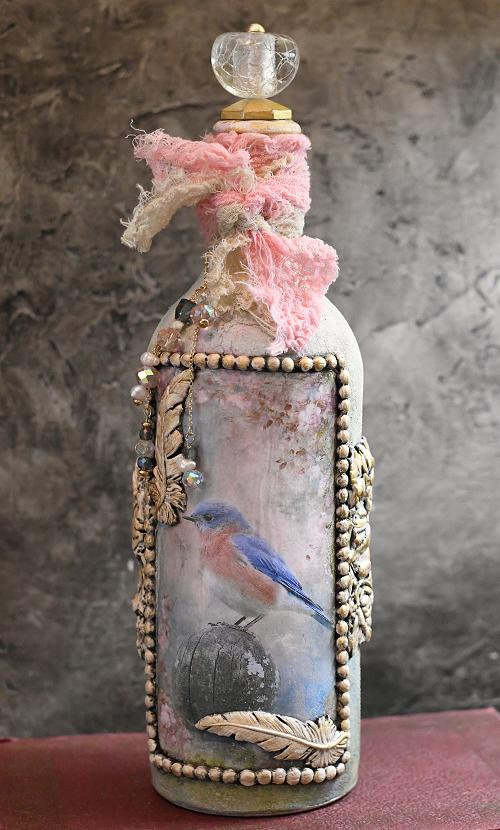
into a decorative art piece. In this class, I create the
Spring Bluebird Bottle using beautiful Bluebird artwork as the inspiration for
my entire design. The pink colors, clay
embellishments and final decorative
elements are all chosen to complement
this one piece of art. You will choose your
own spring artwork, your colors, your
own embellishments, depending on what
supplies you have, and what style you'd
like to create. In the first part of the class, you learn how to
prepare and paint the bottle so it becomes a beautiful base
for your design. From there, you can decide how much detail you want to add. You might choose to stop after the painting stage
after this is done and simply add a pretty topper and some ribbon for a clean
and elegant art bottle. Or you can continue with dimensional clay
embellishments like this, decorative trim and
ribbon and jewelry accents to create something more ornate just as I
have in this class. There's no single
right way to do this. The goal is to use the
techniques in the class to create a piece which feels
cohesive and beautiful to you. When your project is finished, I would love for you to share a photo in the class
project gallery so we can all see the unique, artful treasure you've created. I can't wait to
see what you make.
3. Supplies: Okay, let's get started with
talking about supplies. Now, if you think bottle art to make these
artful treasures is simple, you might be looking
at this mess and saying, Oh, my goodness. Well, it is simple, but it depends all this stuff depends on how much
stuff you wish to use. So I know I'm going to go over the things
you'll definitely need. You'll definitely need
some kind of bottle. This is a wine bottle, an old wine bottle that I picked up at the Goodwill store, and this is made of actual clay. But this is all going
to be covered up. This bottle is clean
and ready to go. So you'll need a
bottle. I'm going to set these aside as
I talk about them. And In this case, I'm gonna do art and sculpture
and jewels on my bottom. So you'll need some art. I have formatted this
particular picture that I made of one
of my bluebirds from out front with one of my Renaissance
Spring backgrounds. I blended the Bluebird
with the background, and I have formatted this image to basically fit on this bottle. So when I cut it, it will fit there nicely on the length of
this bottle and the width. I'm going to cover
the front side. So you'll need a bottle. You'll need some art. Now,
this is back up a minute. I did get a laser
printer recently. I've been using ink jet, and I'm not really had
any problems with it except for occasionally
with certain colors, it might darken or do a color
change slight hue change, which makes me have to change
my paint colors in the end. And if you watched
my previous class, you probably saw that. And I did use a laser
printer to print this one, so nothing will
change on this image. That is the benefit of a laser
printer when it comes to printing your own images for decoupage on
different items. So this is ready to go, and it will not change
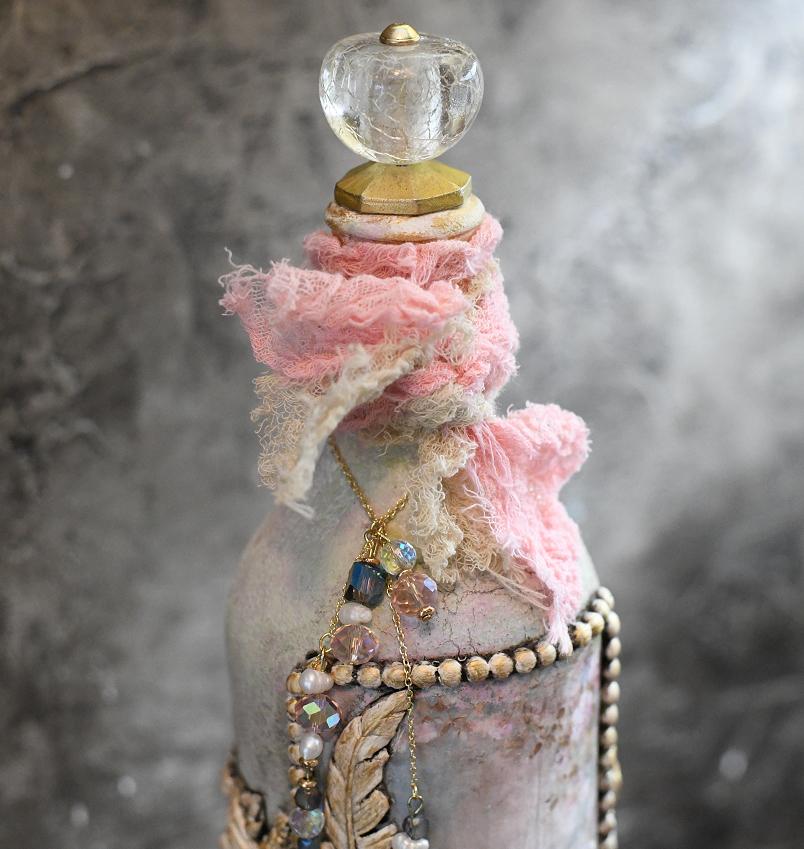
color or it shouldn't. You'll need a top
for your bottle. I have picked out this cabinet
knob from Hobby lobby, which will fit right
on top of my bottle. And I've chosen this one. Everything I've chosen
here is meant to go with the particular
creation I'm doing. This has a very spring feel. It's got a lot of colors in it, so that's why I have a
lot of stuff out here. It would be hard to pick a
solid color cabinet knob. So I had this one that's kind of a cracked crystal
with the gold base to it. So that's why I've
chosen this one because this will go very
nicely with the art. So everything I've
chosen is designed to go with the particular
art I've chosen. So think about that
when you're picking out your supplies you're going
to use for your project. Um, I have picked
out some jewels. This comes at the
end of the project. This is not a must do. This is just something I
do to further decorate. My bottles because I want them to be glitzy and
glamorous and pretty. And I happen to have
these beads here, so I'm probably going to
use a mix of these to attach via some chain and
some pins at the end, which I will pull
those out later. But if you're going
to add jewelry, you can use vintage
jewelry parts and pieces, which I do a lot. You can use new beads. These are fairly new. They started the tags on them. I bought these just recently at Michael's and Hobby Lobby. And so whatever kind of
jewelry you're going to add, if you're going to add jewelry, you might want to get an
idea in the beginning based on the art you're putting on what accessories
you might want. That is always
subject to change. But I set those out
here because they are a supply I will be
using in this class. What else? Okay? Some
of the basic stuff. Mod podge. This will be used to prep the bottle and to attach
the artwork to the bottle. White jo. This I'm
going to mix some of this with the
mod podge to prep the bottle to get a
nice white surface. If it doesn't get white enough, I'll put another
coat of that on. This is the paint color I've
picked out as my base color. It's a chalk paint, and
it's called cottage white. And that'll give me a nice
it's sort of a creamy white. It's not super
bright, cool white. It's a warmer white. So that'll give me a nice
base to work with. But I also have some acrylics out here
because once again, in this art, there's
a lot of colors. And the bottle becomes
more interesting when you integrate the colors that are in the design
you're attaching. So I will attempt
to blend and mix colors as I go along on this project
that go with this image, and there's a lot
of colors in here. So let's see what we've got. We've got a more beige color, so tight and buff acrylic. We've got a tiny bit of
the dark olive green, so I'm going to
keep this handy in case I would like to
add a little of that. And those are two straight
out of the tube acrylics. But I also have a blue
that I have mixed. I mix my acrylic paints when
I do a special mixture, and I store them in
these little jelly jars, and they're really
great for you know, they kind of sticky there,
but look at that pretty blue. I kind of goes
with the bluebird. I may integrate that. It also kind of goes with the sky there. So I tend to mix
a blend of colors around the bottle when I'm
working on this bottle. They're kind of hard
to get open sometimes, but they do keep your paint. When I mix a special color, I write on the top
of my jar with a marker what colors I
use to mix this color. But I like the fact they're in the glass jars because I
can actually see the color. And so I have this blue. There's some pink in here, so I have a pink
that I have mixed. There's a light green, so I have this
tighten green pale. Now, this one is straight
out of the tube. The tube had a problem, and I was not about to waste that paint that
was in that tube. And so I squirted all the paint out of the tube into one of
these jars to keep it. But that green color is kind of in there sort of a
really pale, yellowish green. And that's just
another olive green, which I had in that other
tube, so I don't need that. So these are a couple
of colors that may be integrated with the art. And I go ahead and pick
those out in the beginning. So I have a mix
here of chalk and acrylics and the mod
pod and the gesso. That's what I've got so
far. I pick them out. If they're not gonna
work, if I see they're not gonna work,
I may not use them. If I change my mind,
I may not use them. It's things change
as we go along. So that is those, I will need some glue to
attach my sculpted clay. Now, for my sculpted clay, I have a cornstarch to
dust my clay molds. I have a few molds
here I've pulled out. These are trim molds. These are IOD trim molds. This is going to be my sort of my recipe for
my wrapped frame bottles. In other words, the image will have a little bit of
a frame around it, and there'll be a
frame something to frame out wrapping
around the back side of the bottle to give it some sculptural element that really ties the front
end with the back. I like the back of the bottle to look pretty just like the front. So these are some trim molds that can wrap around a bottle. These that's from IOD. They make grape molds. These are from Michael's. These are fondant. Is that how you say that molds? These are also trim molds, and I'm thinking
about this simple beaded one to go
actually around the art. But I'm also thinking in addition to further
accent that art, maybe across two
of the corners to do a couple of these
little feathers that I have in this mold. I haven't used these yet. And so, you know, since
I'm doing a bird, I thought a feather accent in clay sculpture
would be appropriate. So those are the
molds I've chosen, and this is the clay. And this is D D, air-dry clay. Dos. This is white,
air-dry clay. And that is what I put
in the molds to form the sculpture that'll
be attached to the bottle via the
tight bond glue, which will hold it on
there, like so firm, you'll never get it off. I also have a Valspar
antiquing glaze, which I like to use on the
molded clay parts after they're dry and painted
to bring out the depth. So I may use that.
And I also have this bright metallic
gold. Did you see that? I don't even know if
they still sell this, but any antiquing glaze or
antiquing wax will work. I love this metallics. This particular one
is a vintage brass, but I also have over here. This one, which is a 24 karat
gold, this is an older one. I don't think they
make this anymore. I don't think they call it that. They make it, but it's
called something different. And you can see there's a difference here in the
brightness and the tones. Um, looking at my cabinet knob, I'm thinking the
brighter one might work. Okay, but it could go
with that as well. So I'm not really
sure which gold. Probably start with the brass. And if that does
not do it for me, then I'll bring the
brighter one in. So I'll just put that aside. Put that aside. Put these aside because we've already discussed
the clay and the glue. And then, of course,
I like these are just these are unscented wipes that I use just to
wipe my hands off. That clay gets on my hands
and everything else. And I like to keep things
clean as I go along. So I use a lot of these
just unscented wipes that I get at Walmart, paint brushes to
apply the mod podge. Well, actually, I'll
probably use these. These stamper brushes,
foam stomper brushes. I have a couple of these
in different sizes. These are great for
getting in the cracks and crevices of the clay when it comes time to
paint them and glaze them. And these are stentil brush. They're just really thick
and stiff stentil brushes, but they work really well
for this kind of work. Now, you know, and any other paint brushes I
might grab along the way, other than those,
those are just some examples of what I have. But the main goal is to take this
bottle and turn it into something artsy
and beautiful. Because somebody
just trash this. So we're not going to let it
be trash because I like to upcycle whatever I can
if it's in decent shape. And normally, I work
with a glass bottle. This bottle's quite a bit
heavier than a glass bottle. It's made of clay,
but it still does have a slick, shiny surface. So it acts like a glass bottle. And I thought I had
everything off of there. You would want to
clean your bottle with some alcohol, you know, soap and water and some alcohol before starting work on it, just with a paper towel
and some alcohol. So yeah, paper towels
is another supply. Now, do you have to do all that I'm doing if
you make a bottle? No. You don't have to do the jewelry accent if
you don't want to. You don't have to do
the clay sculpture. If you don't want to, you can still make a pretty bottle with just an image and some paint
with the right techniques. And so don't feel like, you know, you have
to rush out and buy something if
you don't have it. But this is to show you it all pulled
together what you can do to take this bottle and turn it into an artful treasure. That you can keep yourself.
You can give somebody. You could sell if you wanted to. And we're going to
start with the bottle, and we're going to
prep the bottle next.
4. Prepare The Bottle: Okay, to prep the bottle, I'm going to use Mt Md Podge, and I'm gonna mix in a
little bit of white gesso. So when it goes on this bottle, it's just start
covering things up. I'm not sure exactly what
my mixture's gonna be yet. Let me get this gesso open. Now, the reason why
I do this whoa. And this is why I have a wipe to wipe off the edge of that
bottle a little bit. But the reason why
I prep the bottle this way is it will take away the sickness to the point where the paint you put
on here will stick. Right now, if you put
chalk paint on here, it's going to scratch right off. If you put acrylic
paint on here, it's gonna peel right off. So the mod pod paired
with some gesso, I'm hoping paired
with some gesso. See, the mod pod will dry clear. The white gesso will dry white. So I'm just gonna stir this up. I've got a nice
big mixture here. Probably too much of a mixture. But I do have another
bottle behind me. I can prep with some
of this if I want to. But this is to get the bottle
ready for everything you're gonna put on it and to cover
up the bottle completely. So I'm just stirring
this up real good. And we're going to see
if this will work. I probably need to
stand up to do this. I have my bottle laid flat on my rags because in the
last video that I did, you know, I have to
when I'm sitting down, I have to do my
bottles like this, and it was hard
for people to see. So in this class, I'm trying to show you a
little bit better view. So I'm just going to get
some of that mixture on the brush and start applying it. And I'm going to go
all the way over it. Pretty thickly. I'm
not worried about brush marks or anything like that because this is all going to be
covered up some more. Yeah, it's got some nice white in there to start
covering that up. I'm just doing the
top half here. Obviously, when I
go to pick it up, that needs to dry a little
bit before I pick it up. So, I mean, I can pick
it up from here and tilt it or from underneath a little this is why I like
to do them standing up. But while I've got
it laying down, I am going to take this
and swipe it across the bottom really well to get that white on there
and that mod pod on there. I'll put more paint
layers on this as I go. Yeah, I got way too
much of this mixture, but I'm going to go
over it a couple of times since I've got
so much on here. And it's going to have to dry a little bit before
I pick it up. I can kind of do the sides a little I got the rags to keep
the bottle from rolling, and if I get any of
this on the rags, that's okay because these
are my painting rags. I pretty much got that
side pretty good. Now this has to dry before I can do the backside of
the bottle to prep it. But I will prep the
backside of the bottle in the same way as I have prepped
this side of the bottle. And it doesn't take
very long to dry. It'll probably be able
to be picked up here in about 15, 20 minutes, and you can put a fan run a
fan on it if you want to. I tend not to use a
heat gun very often on anything that
can cause cracking. But just a fan will dry
this a little bit quicker. So I'll wait for this to dry. I'll flip it, do the same thing to the other
side that I just did here, and then I may come back
after that sides dry and do another coat on this front because there
was some imagery there. If I don't feel it's
covered up enough, I might want to add a
little more on there. That is how you prep a bottle and you can
make your mixture up and you can prep several
bottles at one time. That way, when you get
ready to do a bottle, you will have
several ready to go. I'm going to prep
a second bottle while this one is sitting here drying and use up some of this mixture because I do not
want this to go to waste. But that is how you prep
the bottle and get it ready for adding the art and
the next steps after that. M
5. Attach Art To The Bottle: All right, I am back and
this bottle is done. I did both sides around the top, got a little drip
there, but that's okay. Missed a little spot
there, but that's okay. And I'm telling you what, I'm excited because I did two
other bottles as well. This bottle here for this class, I went ahead and did
a second coat on the front to really cover up that design that was on
the front of that bottle. There's a little bit
less on the back, but that'll have paint over it. But all have paint, but the
image is going to go here. So I wanted to make sure that
was really covered good, so you couldn't see
that original design. This bottle here, since I
had extra on the plate, I went ahead and coated it. And then I have another
great big bottle. Since I had more
extra on the plate, I went ahead and coated it. And I'll probably
do another coat on these two bottles just to get a more even look
where I must have, you know, got a little
light on a couple spots. But those are gonna be for
another time. They're dry. They've been dry
in a little while. But I'm really happy to have
had my secret sauce work. So what I did to prepare for the next bottles I
do is I used one of my little glass
jars like I do my paint in my paint mixtures, and I mixed up my secret sauce. Can you see that? Secret
sauce for bottle prep. So this is one half mod podge
and one half white gesso. And I stir it up with a popsicle stick or whatever
you got to stir it with. Stir it up. Now,
this is ready to go. For the next bottles, I do. I'll already have it mixed up, so I won't have to mix up so
much on the plate like that. But this right now, I could go ahead and do
several more bottles with what's in here before I'd
have to mix up some more. But I always write the recipe on the jar so I know what's
going to be in there. Or what I've put in there. Now it's time since I've got the original bottle design covered up of the words
that were on there, it is time to get the art, excuse me, get the
art on the bottle. So since this is going to be my frame and wrap technique for the bottle, I
want this image. This image will be framed out. First thing I need to do is get rid of all this excess paper, so I'm going to cut
this image down to size. As close as I can. I'm not very good at cutting. We straight line. So
it might be a tad off. Just get rid of all
this excess paper. And this is just printed. Like I said, it's printed
on a laser printer. So for your spring
bottle art project, pick whatever springy image
you might want to work with. And if it's something
you're printing yourself that's not already
on specific decoupage paper, you can do it on
ink chat printer, and there's a possibility that the colors might shift
or they may darken. You can still make
it work. I did that in my last class
with inkjet print. But if you have a laser printer, use that instead of the inkjet. And if you want a laser print, you can always go to
an office supply shop. Somewhere like that that has a laser printer where
you can have a print made. But I sized my image to fit
this bottle shape and size. So I took my bird image. I made a new image in my digital program that I
believe for this bottle, I did 3.5 by six, I think, for this bottle. And I copied my artwork image, pasted that into that size
I made, resized it down, so it was tight,
you know, close, got as much of the image in
that specific size I could. Then I copied and pasted that onto an 8.5 by 11
blank document. And then I saved that, and
that's what I printed. So it printed close to the correct size on a
piece of 8.5 by 11 paper. And this is just
regular printer paper. This isn't any fancy paper. It's not tissue paper. I've done tissue paper before, but not in a laser printer. Tissue paper I tend to use for more things where I need
a thin application. Which you don't really
need for these. So now I have the
image cut out here. And we're going to see. I want to make sure I'm okay, there is a mark on
the bottle there, so that is definitely the back. So I'm gonna weigh that down, so this would be
the exact front. And this is now ready to
be decoupaged on here. Now, normally, I would
tear the edges of my image around the edges so they will blend better
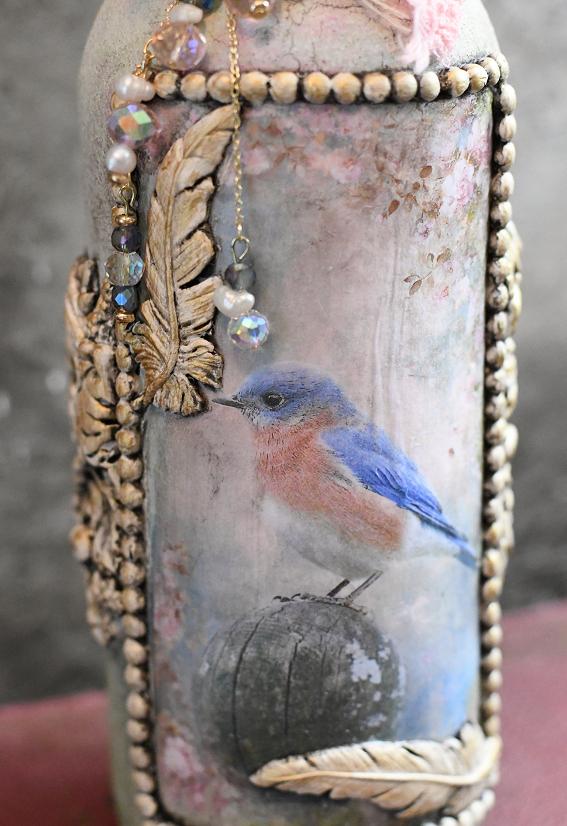
with the painting. In this particular class, I am doing a frame. And I'm going to use I'm
going to do a clay frame, and I'm going to use this
particular mold right here, which is a bead pattern. So the clay will be in this bead pattern and it
will go right down the edge, and I'll make enough molds of that to go all the way around so it'll have a beaded frame all the way around
this particular image. Do you have to use clay? No. You don't have to.
It's just what I like. That's part of what I'm
going to do in this class, I'm going to show
the painting part, and then I'm going to show
the adding the clay part. And dealing with the clay, and then I'm going to show
adding the jewels at the end. So it's basically
three sections. This first section
is the main section to get the art on the bottle
and get the bottle painted. The second section is the clay section to
add the frame and let the clay cure and then paint and glazed clay to blend
in with the design. Third step will be
to add the jewels for accents at the end. But right now, we need to get this decoupage on this bottle. So the best way to do that is, of course, with the mod pod. And I'm going to
open that up here. I'm probably going to stand
up to do this because I can't see when the
bottles laying down, but I know it'll
help you see better. So my goal is to get it
centered as close as possible. I don't want it too
close to the bottom, so I can put the beaded
edge around there. That looks pretty centered. The beaded edge of the
clay will be formed to cover along this
edge of the image to hide that sharp
edge of the image, which is normally when I
tear my images on the edges, that blends in a lot better with paint and I don't have to
worry about hiding it. In this case, because
I'm going to do the frame around the image and wrap around the
back of the bottle, I do want to do the image, sharply marked
like this and with the clay placed along
these exact edges. And the reason I do like to use the clay is because
like say you were to buy a frame that
you want to put on the front of your bottle
to frame out the art, there's no frame that'll
fit this I mean, there might be, but
I've never seen one. And with the clay, I can manipulate
exactly the size I need out of it and sculpt
it the way I want. But right now,
we're going to mod podge this and I'm just going to use a big brush, soft brush. We use this all the
time for the mod podge. And I'm going to wet
the bottle first. Then I'm going to
spray this a little bit with this little
spritzer of water, and then I'm going
to place it down, and spraying it just a little
bit with water will enable me to move this around to make sure it's in
the right position. And then I will put the
mod podge on the top. There might be some wrinkles
happen. That's okay. I like a vintage look and wrinkles and tears
and things like that. Kind of go along with
that. I'm gonna try not to do too much
of that, though. Excuse me. I've got a frog
in my throat, I guess. But we're just going
to put some of this. Now, this has not
got the white gesso. This is the straight mod
podge which dries clear. And I'm going to put
it I'll probably put more on here because I'm
not sure exactly how far Out, it will extend. Just get it on
there pretty good. Then, like I said, I'm going
to spray the back of this with just some fine
mist, a teeny bit. It makes it curve up some, but that'll help it position. I always try to get started
in the middle and work my way out where I want it to go out from the middle
and smooth it down. Now, like I said, there may
be some wrinkles and such. My main goal is to make
sure it's straight. And one way I can
do this is take a ruler and see how far
from the bottom I am there, which is there I think I've eyeball pretty good because it's at this
mark right here, and it's that way all
across the bottom. So I'll probably just need to hold it up here and
look at it straight on. Yeah, that looks pretty good. Now, I have a wrinkle
appearing here, but I'm not too worried
about it because when I put the mod podge on top, it will soak in there and the wrinkles will
smooth out as it dries. They won't totally out all the time, but it will smooth out. I'm coating that
brush pretty good. I like to start in the middle. Uh oh and work my way out I don't like to do too
much brush work on it. Just enough and get it
covered pretty good. Now I'm going to add some
more to do the bottom half. I get it coated on both sides and back to the
middle and just go all the way down like this, using both sides of the brush. I make sure it's
totally covered, and I push down fairly hard to make sure
those edges are down. I try not to overwork it. So I'm just kind of
looking around here and got a little bit too much there. So you can scrape
some gently back off. I do have this
wrinkle right here, and I'm not sure if
that's going to move. I'm trying to push
harder on that. I don't want to do too much working it because
you can tear it. I don't mind a few wrinkles. It adds to the charm. All right. I don't want to overwork this. I made sure all the corners
are down. Really good. And it just needs
to set and dry now, and it should flatten
out more that some of that wrinkles won't
show when it's dry. Takes a little bit to dry. You can put a fan on this. Do not do a heat gun because
it could crack later on. But a fan is okay. And then if any edges
don't look like they're secured enough
after this is dry, I can take a little more
mod podge and put it with a small brush under those
edges and work it again. But right now this
just needs to be left untouched to dry. Before we start doing
the painting process. The next step will be to do the painting with all
these colors I showed you earlier to work the paint all the way
around the bottle, and then after that would be the adding of
the clay sculpture. So we'll just wait on this to dry and we'll come back
to do some painting.
6. Paint The Bottle: Well, it looks like we are dry. Didn't take very long. Maybe about. Um, 20 minutes, 15, 20 minutes. I can touch it now. Wrinkles are still a little bit there. There was a wrinkle right here. I kind of pushed
that down, so Um, there may be still a little
dampness underneath, but you can handle it well enough to go ahead
and start painting. So that's next. I'm
gonna take some of this cottage white
chalk paint and put it on my fancy palette
there, my paper plate. As soon as I can get it open, I guess better shake it first. There we go. And as usual, I'll
probably pour too much, but I'll be using a lot
of this in the design. So let's see if I can get that off of there
with a palette knife. I don't like to waste anything. Alright, that's a little bit. It's probably not enough. Now that I'm looking at it, probably need a little
bit more. There we go. H All right. And I said I was gonna use
all these other colors. So let's see what we've got. I'm gonna go ahead and put
them all on the palette. So I have an ability to just
dip in whatever I want. I'm gonna try to go
from light to darken, and I'm picking colors that
I think I will use the most of and putting more of those
on the tray or on the plate. This olive green, I probably
won't use very much of that. So I'm just gonna put a
little little dab of it. I don't know. I may
use more of it. I don't want to do too
much because then I end up wasting paint, and
paint's expensive. Now, if you have goodness, if I can keep forgetting
it all over me, if you have fluid acrylics,
you can use that. If you have just chalk
paints, you can use that. And I'm going to open
up my little jars here custom colors like
this pretty blue. I'm just gonna get some of that out with the palette knife. I probably won't use
a whole lot of it, but I might use a little bit, so put a little
bit of that there. This green this pale green. I probably use a
good bit of this. I like these wipes,
like I told you, they're really good about cleaning up something
real quick. This is that
tightened green pail. I'm gonna put that over here because it's a
little bit lighter. I don't need too much. So the goal when you have a certain art piece
that you're using is to pick pink colors that will go with what's
in the art piece. This is this pink I mixed up. And it's kind of light. I don't I don't really know
where I want to put that. I just put it down here. I don't know how
much of it I'll use. It's a pretty color, though. Alright, that wipe
is pretty shot. So that's all the paint colors. Get another wipe out
here in case I need it. And I have my sponges
of two sizes. They are dry. I do not wet them. I use them starting from the dry and I do not clean
them between colors. But if this is the larger one, so I'll go with the
neutral colors on this. But as I get to
these other colors, I may just need a
little bit in a spot. So I'll just use the
smaller one then. I've got my paints
over here on my left. I'm ready to start
painting this bottle. And I'm going to try
to hold this where you can see it and
where I can see it. And I'm looking at
the design here. I've got some blue here, and this blue's a little bright for this blue
that's in the design. But I'm also going
to be applying some glaze on the clay after I do the clay
embellishments on here, which will darken everything. So I'm keeping that in mind. That brown glaze will
tend to darken things. And I'll just mix
the colors based on what I see around the
edges to kind of tie in. So as I go, I'll start with the sponge
and adding a color, and then I'll pick
up a little bit of another color
and put that in. And I do not change brushes unless I go
to the not brushes, sponges, unless I go
to the smaller one. Now, you can use a brush
if you don't have these, but brushes are going to
normally leave some brush marks. This leaves kind of
a speckled kind of a sandy rough texture which feels cool when it's
done because it feels like stone when it dries. I really like the
way that feels. And it also helps everything else grip that
you put on top of it. So I'm going to start
with the chalk paint. I'm going to get a
good amount on here. See how that is, but it's goopy. So let me set this down
so I can hold the plate. I tend to pounce a lot of it off and not have it
very goopy on there, and then just start like this. And I'll go right
up to the edges. And if I go over the
edges, that's fine. But this technique of doing
with the sponges also helps to hide those edges a little
bit as you're going around. So I'm going to go
all the way up to the top and of course, I'm holding the bottle now, and as I get to certain areas, I'll have to set this and
let this dry because I mean, I can hold it from the top, but then I have to
hold it straight up, which enables I mean, I may do some of that, but it could be harder
for you to see. See, I'm going right
over the edge there, but that wipe you have will
be handy to wipe that back. I'm going all the way down
around these edges, see. You'll be able to
still see because the edge is sharp and
not torn on these, you'll be able to
still see where your edge is when
it comes time to apply your frame border. And then I got a little bit too much actually on the image, so I'm going to kind
of wipe some of that back right there toward
the edge, gives it up. And if you get really too much, you need to adjust that wipe. Just to take some of that back off a little where I
got a little too much. And now I'm gonna
need don't fall over. Now I've got it all over me. I guess I need to get two or three whites out
when I'm doing this. Okay. So that's just the basic creamy
white chalk paint color. So now I'm going
to start bringing in some of these other colors. And remember, I said,
I'm not going to change sponges unless I
go to the smaller one. I'm not going to wash them, so those two colors are
now mixed together here, and I'll pounce it until it
gets where I kind of like it. And up here where it's kind
of blue on these corners, I'll put a little blue. And then over here, there's
a little more blue. And it doesn't have to be exact. This is an artistic
interpretation, and I am going over the
image a little bit there. There's some blue here. You can bring your paint
right into the image, and if you get a little
too much on there, just take that white really quickly because this is
chalk paint and acrylics, and it dries very fast, and just wipe some
of it back off, but it gets to be too much. That blue's a little strong, so I'll go back into the white and tap some
of that in there. So there's a lot of
back and forth here. But I want these colors diffused
across the whole bottle. I got a little bit too much right here once
again by his tail. His tail is very
close to the edge. So the wipes really
come in handy for cleaning things up,
moving paint around. Let me get I'm going
to bring this blue, just a little bit more
right up into here, into the design itself. Okay. And I like to use the darker colors
toward the bottom. And once again, a
little too much right there there. I'm
doing that mostly. I want it there, but I
didn't really want it there. Let's pick up a little of this green and see about
getting this green in here. See if that might make
things a little interesting. But the goal isn't for me, isn't to match up exactly. It's more to integrate the
colors that are in the design. Into the bottle. And I'm gonna come
right over this little thing he's setting on my little circle thing, and I'm going to just wipe that paint around a little bit, and it just kind of
softens that design. I'm not taking it totally off. It gives a little foggy look. And you use a clean
part of the wipe where you don't want
it. Let's pick up. Let's try it add in
some of this pink. Here's some 'cause
there's the pink flowers. We that pink's pretty strong. So I'm going to add
that in a few spots around where the
flowers are up here. Yeah, that pink's pretty strong. So now I'm gonna get that
tighten buff and a little bit of the chalk paint. Trying to. It's hard to do while
holding the bottle. Well, the plate is I need to be doing this on a firmer
surface, really. I want to tone down
that pink there. And remember, this is
going to be framed out and once again, a little too much on this side. For some reason I'm
having that problem probably because there's a glare from my lights right there. I'm going to pick up
with a little one, a little bit of the
blue and go in here. And I'm gonna pick up some of
the green and come in here. But I got more blue
than I do green. It's just a back and forth. Whatever you feel looks right. Just get some more of that green up here around these flowers. And notice it's got this
little ridge, bumpy texture. I actually want that. Pick up a little pink. To go in here. K a little olive here, a little teeny bit and maybe grab some of those
leaves and pull out some of that part
of the design by basically just adding to it
with paint and pull it out. Let's pick up a
little more pink, and you can roll this
around and pick up different colors
wherever you want it. Let's get a little more
of that pink down here. And then somehow. And if you get too much on
there, just pat it off. Somehow. I got a little bit
too crazy with the blue here. And I might need to use that white and see if I can get
some of that off. There we go. I don't want to totally
cover up my designs, but this is a tough design
because of the corners. Alright, I'm gonna try to get this titan buff down
here a little bit more. And it's hard to
stop with one color and But if you
pounce this all out, like so, it'll
make a nice blend. So you can just keep going once you get one of the
neutrals on there. So that's starting
to look pretty good. Somehow, I've got that
in my pan. Let's see. I think I want to
get a tiny bit of the olive green down here
around this bottom corner. And these edges will
be covered with the little clay frame. So I probably need to stand up to do this so I can see whoops, see
what it's looking like. This needs to be
a little darker. I can tell that. So I'm just gonna work that olive
green in there. Most of my designs, I like them darker at the bottom and lighten as
they go toward the top. And I do want some more My glasses are hitting
the camera. I'm sorry. I do want some more of
the olive up here at this corner just
to add interest. Now, like I said, when I glaze, it'll darken some of this. I'm gonna put some olive all
the way around this bottom. And then I'm going
to grab a little bit of the pink and just tap in
here where those flowers are. And I got too much. There I'm trying to obliterate these bottom flowers and I
don't really want to do that. I'm getting it all over me too. Okay. See, I accidentally
stuck my finger there. So that little bit
of paint I put on there is not doing so well. I have titan buff and the white
on there and go back over that spot where I accidentally rubbed off the paint
that was still wet. And just work it all in. I'm working my way out. I really need to
work on this bottom. And it's hard to do when I
have to hold it a certain way. It's hard for me to angle
it. Let me try this. I don't know if I hope
you can see that. I'm dipping back in
that titan buff. I got a pretty good
bit on there now. Work my way around with that. And then a little bit
more of the white. And then I'm going to
pick up a tiny bit of this olive green and work that in there
with the titan buff and a little bit of the blue. When you get a good mix
of all the colors going, it makes the bottle
really interesting. Oops. And I actually like the bigger pouncer
than the smaller one. I'm gonna bring some of
that pink in there, too. Because I uncover
more ground faster. And all those
colors are in there now mixing around when
I'm doing this, see? They're all showing up. That titan buff is
gonna be the one that Really works to tone
everything back together, though, 'cause it's
nice it's light. And then the olive green
down here on the bottom, mixed with the titan buff, makes a very nice bottom color. I think I need a little more olive green somewhere in here
to mix in with all that. I think I covered up a
little bit too much of this. Alright, let me shift over, try not to spoil what
I've already done. And as I set this on here, it's going to get on
this rag, which is okay. Mm move this little one out
of the way for a minute. And dip in that tighten buff do the tighten buff
at the bottom. And then as I work up, I dip some in this, too. Probably gonna need more
of the tighten buff. Still has some of the
green in there, mixing in. I put a little more
green in there, especially down
toward the bottom. That green that olive
green mixes very nicely with that tightened
buff to make a softer green. It almost looks
like a sage green. And I haven't used
much of this green, so I'm gonna grab some of that. Get some of that in there, too. I want it to look really,
really springy. Uh oh. I'm sticking to the rag. I'm probably gonna have
to retouch up the bottom. Alright, let's get
this lighter green going over some of that. But the goal is just to have a fun mix of spring
colors throughout. Pick up a little blue, come out with some blue. Once I get a color on there, I want to use it everywhere. But I want the I want
it to be all mixed. I don't want it to be any
definitive area, necessarily. Let's pick up some pink in
there. We need some pink. It's a spring design, and
then some of the white. And I know this might
be getting hard to see. Let's go around this side
and dab that extra off. See, it doesn't matter
what you dab off on here because this is
acrylic and chalk paint, and whatever you put on next is gonna cover up
whatever you just did. Get some of this green in there. And let's get some more pink around here and
maybe up to the top. And a little more the white. And some of the dark olive
down here toward the bottom. I'm just using a little
bit of that on the edge. And then pouncing with
whatever colors on there. Work my way up a little
bit with that green. Let's see. Tighten buff. Alright, I'm sticking
to the bottle. I'm gonna have to set this
bottle upright and let it calm down a little bit. Let me see if I can turn it
where we can look at it. It's turning into a
nice spring design. I got a little bit right here. I might want to wipe that back. We got some good mix of
all the colors in there. And I'm trying to decide. I think I got a little
too much pink there. Missed the spot right there. That's gonna require
lighter colors. I'm about out of the
titan buff on here. Let's see here. It's blending with his colors pretty good. I think I need some more
pink in a few spots. I think I'm gonna let
this sit and dry for a couple of minutes over here on my glass pallet so it
won't mess up the bottom. And I'm going to
clean myself up. I am gonna just set these aside. It won't have to dry
for just a few minutes. But I do need some more of the tighten buff
in here, for sure. Not sure about the other colors. But you never know. So I'm I don't really
want those to dry. I think I want to rise
these off real quick and squeeze them out and just start fresh with a clean sponge to put another
layer of color on. And I may not need much. I'll let it dry
for a few minutes, and I may not need a whole lot. When I come back, and
I'm going to move this aside so when I turn
the fan on this, the fan won't dry
out this paint. So when we come back,
we'll add a little bit more and call that part
two of the painting.
7. Paint The Bottle Part 2: All right let's
check our bottle. It's pretty dry,
maybe not totally. Still might be a
few sticky spots. But the colors are
looking really good. What I don't like is these
little circular marks here. I am going to try to fix that. And I've gone all the
way up to the top. And this top edge I can always touch up
later if I need to. And the bottom, of course,
I will paint that. I need to do that
with that chalk paint there because I always sign
the bottom of my bottles. And notice, you can see, even though I've
painted over this, you can see. Let's see. You can see the line
of where the paper is. That's why I like to tear it. But because we're doing a frame on this spring art bottle, that will be covered up with
the frame made of the clay. But I do have some round
circular spots here that I would like to
work on getting rid of. So I am going to
mix you know what? I probably need another plate to be able to do
this. Maybe not. I'm going to get some of
this tighten buff on here, pretty good bit, and
some of the white, kind of mix it in together. And cut it off really strong. And then we're going to see
if I can gently just type over those areas and add in
it's still making that spot. The more gentle you are with it, the less you will see that. And there's also another
solution to that. This just gives more variety, kind of tones everything down, but those colors are still there and they
will peep through. Very softly work that in. And anywhere where
it looks too blocky, just bring a little
color into those areas. I mean, this is all just
whatever you want to do until you get it
looking the way you want. You know, a little
too much there. So I'm gonna pick
up just a tiny bit of that olive green and
work that in there. H just very softly. I'm trying to get that
bottom edge a little darker. And I'm sorry if the
camera's moving, my glasses keep hitting it. And I'm gonna pick
up a little bit of this green that lighter green and bring some
of that in there. But I'm trying not
to I'm holding it up so it's before
when I had it down, I could hit really hard, and I'm holding it up to try to avoid that
hitting so hard. I really like this titan
green, pale acrylic. It's a very soft, springy green. I got a little strip of the lighter color there
that I think I'd want to maybe get some of that
green and titan buff in there. I don't like that line. There we go. So just anything
you see you don't like, just start covering it
up or adding to it. Sometimes it just takes
a dab of another color. We'll go ahead and get
that top while I'm at it. It takes a dab or two of another color to change
the entire look. Okay, that section is
looking pretty good. I'm going to attempt to turn it. Of course, I can't do
it without touching it. The front's looking pretty good. I still see some of those
circular marks right there. So I'm going to do
that again with the titan buff and
this titan green pale. Tap more of that off. And just kind of work some marks over those
circular areas. It works, you won't see the circle of this
little sponge brush. And you can pat it out
like this straight on. And it will help
eliminate that, too. And you can also take
the other brush. Brush. I keep saying brush. These are sponges. There we go. Oh, I put it down a little too
hard there. Getting stuck. So the front looks pretty good. But this area right here needs a little more division of
color, blending of color. Oh, my goodness. Okay, next time I'm using my glass palette
and skipping this part, I'll pick up a little
the light, too. You get several colors on there. You get a fairly good mix. Oh, look at that fun pattern
that that just made. See, the pink will
still show through. I'm gonna add a little
more of that pink back in. Right there. Now I'm going to take
the other one that doesn't have really anything on it and really pounce that out. So working with two of them does help blend
things a little better. Okay. That's better. That blue isn't so harsh there. It's still peeping through. This blues pretty
harsh right here. And I may just take a
tiny bit of the pink, just very tiny and tap a few
in there just a little bit. Like there's a few
extra flowers there. I see that made that
circular mark by using the other sponge dabber I can blend that out
a little bit better. There. I can come right on up in here with
a little bit of this. It won't hurt it. It's all about blending the
paint with the art. That looks pretty
good. Very springy. Turn it all the way around. That pink right here may
be a little bit strong. So let me pick up some more of the titan buff and
the titan pale green. Dab that off a little bit
and dab some on there gently and then I'm going to swap to the other sponge
and pat that down. So it's not so strong. Okay. That's better. So I think we've got a good
bottle there painted with some nice spring colors
that blend with the image. Very nicely. And you actually
if you wanted to, you could actually
stop right here. If you didn't want to do clay, you could actually
stop right here. You could add to cover those harsh lines if you
didn't tear the paper, you could add some ribbon,
some beads beadwork. You can add anything you want
to on your bottle that you can attach to your bottle.
I just like the clay. I like the sculptural aspect.
I like the way it feels. I like the way it looks,
vintage when it's done. I just like I'm just a
clay fan. That's just me. That's why I'm going
to do the next section on forming the
molds to make this. I'm going to put the fan on this for a
few minutes and let it dry so that this front area will be good enough
to apply the clay. But next up, I will be making the clay molds that
we're going to apply on the front of the bottle and around the edge of the
image to frame it out. So that's next.
8. Mold & Attach Clay Designs: Alright, we're ready to
do a little clay work. The bottle is setting aside to dry a little bit
more while I do this. And I'm going to prepare
the pieces that are going to go on the front
of the bottle as the frame around the image. And I'm going to do
some of these feathers. And well, let's see. I may do I really like this
feather and this feathers, so I may do those two feathers. These are the molds
fondant molds. Is that how you say
that from Michaels. And I keep my clay in a plastic bag folded up
so that it won't dry out. And I have a piece
of tape there. It's supposed to be
taping it close, but that hadn't
worked real well. I'm gonna scoot up
here, so to see. Set this out of the way. I have a wipe in case 'cause
I get clay all over me. And we'll do the
frame one first. Now, I need to determine. I know that the
image is 3.5 across, and about six long, I
think is what I did. So this particular one I'm going to do is a
little over seven. So I have a little extra, so I do two of those, one for each side, and
then one more. So probably gonna need
three of these molded out, and then the two feathers. I'm not going to do the back
mold yet because I need the front molds once the clay
mold once it's glued on. I need it to set laying flat
for a little bit because if you stand the bottle up
too soon, it could slide. You can use painter's tape
to tape it in place gently. But being that the paint is still fragile because
I just did it, I don't really want any
tape touching that paint. If I wait until tomorrow,
then I could do that. But the thing is this tight
man glue that glues it on, it dries very quick. 15 minutes. But probably a little
longer than that is better to make sure it's set good before I would
attempt to put the one on the back and flip
it the other direction. Sometimes I'll do clay
around the top edge of the bottle. In this
case, I'm not. I'm going to put this
pretty knob on top, and then I will put some
ribbon around that top edge. I'm not going to put any clay on the top edge of this bottle. So I got two areas
to do clay for, and we're working on
the front area now. And I take a little
bit of cornstarch, which is what's in this jar to dust the mold a little bit, which will help the clay to
come out a little more easy. And this mold is a
little bit of a stiffer. It's not a hard plastic, but it's a stiffer plastic than, say, the IOD molds that I have. And so sometimes it's a little more difficult to get them out. So I like to dust
it fairly good. And then I tap this off in the trash can or
sometimes on my table, tap it off gently so that
the excess falls out. That's pretty good. And
then this is the clay, and it's the Dass white air dry. It looks kind of gray,
but it'll dry white. And I work it a little bit
with my fingers, not too long. And I take little bits
or you can roll a snake. And sometimes that works. If you can get it rolled to the right length of the mold
without it falling apart. Just like that. Just try to get it close
to being long enough. If it's a little
longer, that's okay. I try to get the thick areas
rolled down a little bit. That's pretty close. And then just start pushing it in there, pushing it way deep in there. And there'll be a lot of excess, but that I can use
for the next one. So there's some excess there, so let's just pull that off. I like to get it in
there pretty good. And what I like to
do is you can use a palette knife or another kind of sharp
knife like object. This is a letter opener, and I like this because it
doesn't have a serrated edge. It's a smooth edge, and it's thicker and heavy. It doesn't bend like
a palette knife. My palette knives have
a little sharper edge. Sometimes I push too hard
and it cuts in there, and the palette knife bends a little bit more than
I like. This is firm. And I start in the
middle and just pull towards me very slowly. And put the excess
aside and then go the other direction like this. And I try to just keep
it ratalg the top. And then because I've
used the cornstarch, it should pop right
out very easy. But I do like after
I've done that with the knife or the letter opener, I do like to kind of
smooth it a little bit more on that side right there, on this side before
I pop it out. And then to pop it out, you can see you can start
separating it a little bit. And the best way I found to
do it is to put it down. Don't press hard. Just start at one
end and kind of pull back away from you and ease
that little first part out. And then as you go along, push further back,
and you can kind of push down on it
with your fingers. Like I said, this
particular mold is a little bit stiffer. And do this very slowly. Don't rush the process, but this is a beaded trim that we're molding here
or that I'm molding. So if it breaks, it can easily be put back
together on the bottle itself. But try to keep it down flat and then ease backwards on the mold. And as you get further
away, it gets easier. And just inch it back
while pushing down. And I got hung up in
that very last spot. Okay, so here is
one beaded trim. So I'm going to
set that aside on my glass palette over here
and just let it sit there. And I'm gonna do another one. And I've still got some
cornstarch in there, but I'm just gonna take a little bit more
dust it in there. Just a tiny bit 'cause
it's still got enough in there where it'll I
hope come out easier. So I'm gonna get another
section of clay, knead it around
just a little bit. Don't do it too much.
I'll get too sticky, get too hot and sticky. Let's do the same thing again. Let's do the snake. Just like when we were kids, you know, playing with clay. Das is the brand I like, but I have heard
that the crayola air-dry clay works pretty good. Now I'm about got
too skinny there, so I might need to
stop rolling it. But yeah, I've heard the
crayola. Brand works okay. Yeah, I've kind of
separated that, so just put it back together, put it in there, pinch off that little bit of
excess, stick it over there. Make sure it's down
in there good. And then I'm going to
take my letter opener. And I like to wipe this off because that clay will dry pretty quickly when it's
little bits like that. I'm gonna move this
out of the way 'cause I'm afraid
I'm gonna hit it. And I like to start
in the middle. It just seems to do better if you start in the
middle and go flush to the surface of the mold. If you get some extra in the
other mold, take that out. And then this way, like that. And I'm gonna go
ahead and wipe that off now before it gets dry. And then I just take my finger and kind
of smooth it down some. I'm not really pressing.
I'm just smoothing. And now I'm going to
I'd like to do this to try to free it up from wherever it
might be hanging up. It's hanging up right
here on this side. So I'm going to try
to work on that. I mean, you can pop it out
this way out of the mold. But it seems to do
better if you do like this and get
that first part out. And I'm pressing pretty hard here as I'm trying to
get it to release out. I'm pressing and pulling back
at the same time and just inch your way through it because especially on these long trims, if you get a little
too aggressive, you'll end up breaking it,
which always can be fixed. And you can always do it again. I'm trying to go a
little too fast there. There we go. And be
very gentle with it. So there is trim too,
we need to do one more. Of that one. So let's get
a little more cornstarch, dust it up a little bit. I like the fan brush for
this. It's real delicate. And there's, you know, it's
a real thin brush so you don't it's not like gooping
up on the brush or anything. That's right. I don't
need to tap that. Get a little more
clay. Same thing. I like to put it closest to me, the one I'm working on
instead of the farther away. So just knead it
up a little bit, and then we'll make
the little snake, which works well for
this particular one to do the little snake, we got a ways to go yet. Yeah, reminds me
when I was a kid, though, and working with clay. We still a little ways go, let me turn it this
way and do this end. Well, that's about
right right there. So we'll go ahead
and push that down. Now, if you're
doing any molds and you have trouble getting
them out of your mold, a fun trick is after you've put it in your mold
and trimmed off the excess, put the whole thing in the
freezer for 15 to 20 minutes. I tend to like 15 minutes. I feel 20 freezes
a little too much, at least in my freezer, and that's probably
just my freezer. So that's it'll pop right out. Some of these molds are
difficult to work with, especially the little
tiny delicate ones, and those little delicate
bits will break off. If you put it in the
freezer, it won't do that. This particular mold,
I've worked with before, so I know I don't
have to do that. So let's trim this off. And then this off and
then clean the clay off before it dries
so it won't be on there when you do the next
one and then smooth it out. Don't want to press
too hard when you're smoothing. Run your
finger over it. Just gets those little parts where it looks like it
might crack worked out. If you push too hard, it may stick in there too
much like right there, I probably pushed too hard. Just stick in a little bit. I like to do this first on these and press it from
behind both directions. Makes it come out
a little easier. So this end looks like
it's ready to come out. So we're going to do this and start pushing and
pulling up at the same time. Come on now. And you can use your finger
to kind of guide it. But I've done that
before with this one, and it breaks between the beads. And I don't really
want to do that. Of course, they can easily be put back in place
where they're supposed to go. And I hope the feathers will
see that broke right there. So we're gonna move this out of the way before I end
up making it worse. And it broke again. So we got two ends right there. There. So I got three little
sections here, but these and that one
broke when I picked it up. So that's just the way
this particular one is. Okay. We're going
to put this aside. I always wash these with warm water and get
all the clay out of them when I'm done with
my projects for the day. All right, we're going
to try the feathers. We're going to dust up
this feather really good. And I am going to tap this
one off in the trash. I do have quite a bit on there. But that feather has a very
fine bit of detail in there. So I want to make sure
to get plenty in there. On top this off. All right. Let's see if I can
manage a feather. I got to have two of them. So make two balls of clay, condition them a little
bit, soften them. And I try to elongate
it close to the shape, but you can also
take little bits and push down in there and
then smooth it out later. But if I can get it
close, it'll be fine. Push down really good. I'm gonna do this one, too. I got way more clay than I need. Just push it down
in there, good. Try to I'm trying to get
some of that excess off. Probably don't need to do that. Just push it down good. Then even on these, I do start in the middle, kind of cut down through, and then turn it and keep it flush with
the mold and pull. And hopefully it did
right, which it did not. So we're gonna put
it in there again. Maybe I did it too hard. Or maybe I have
too much on there, which is a good possibility. I do have quite a bit on here. If you try to pull too
much off with that, sometimes it will be
a little bit onore. I'm just trying to pull
some of the excess off so I don't have too much to. And I'm pushing it down at
the same time I'm doing that feeling around those edges. That one's trying to pull out. And I may have it too warm. I may have conditioned
it a little too much. See how that one's
trying to pull out. Just make sure it's down
in there really good. And I also have a lot
of clay on my fingers. So if I take that off with the wipe, that
will help as well. And you can even go
over this if you want to with the wipe and smooth it out a
little more or with the wetness from the
wipe on your fingers, just to give it a little
more push in there. I'm not done these feathers, so I don't know how
they're going to do. I'm hoping
they're gonna work. If they don't work, Well,
then they don't work. I'm gonna try to
do this one first. Well, I'm gonna try
to do this first. I'm just gonna put it along that top edge and
pull toward me. Well, that's a little better. Let me try to do this one. I feel it's pulling.
There we go. Let's try to do the other
side. This one first. And now, this one. I mighty
got it. Now, smooth it out. Dot pushing, smoothing. The oils in your
finger will kind of in your hands, will
kind of blend with it. Make sure it's all the
way to those edges. Just very gently. And I try to push inward from the edges to make sure it's
not going over the edges. I mean, it's one of those things where
each mold is different and your clay will change consistency as you
work with it that day. You know, it might be
getting a little too dry, which is why you can add a
little moisture if needed. Alright, let's see if I can get these out without breaking that little bitty tail
end of the feather. No. Of course, I got a spot there
that's being difficult. I got that little tail end. Uh oh. I can tell right now that one's
gonna be a problem. If I was to put it
in the freezer, it would pop right out without breaking that little
bitty tail end there. I'm gonna try to get it out
without it breaking it. I'm just not sure if
it's gonna do it or not. It might. Alright,
I'm gonna flip it, and there we go. I'm gonna pull this one and
this one at the same time. Very slowly. Got that
little tail end over here. Look at there. I did it. And then if you need a little assistance getting under it, 'cause if you go to pick that
up there, it's gonna break. You can use your knife
to set it aside. They're very fragile
at this point, but they will cure very well. Alright, I'm gonna wrap this back up until we get ready to do the back and put
it back in its bag. And I like to make sure all
the air's out the best I can squeeze this bag closed 'cause if it gets air to
it, it's gonna dry out. And then I like to fold the bag. Oh, it's got a
little air in there, but not too much. And we're gonna put this
back because we're now gonna try to attach these
to the front of the bottle. And I'm gonna clean off my see those little clay bits on there getting dry
already on that. So let's get my little
rags here so I can lay the bottle down so you
can see what I'm doing. Gonna fold them like this. So they'll be the same with
sews paints away. Bottle. Y'all, this bottle is
looking so pretty. See? Those colors are
beautiful. Very springy. I'm gonna try to
just set the ends. Well, this one needs
to be up a little bit. There. I'm trying to get it where you can
see what I'm doing. Now it's time for
this tight bond, and I'm going to go around this. I want to go around the
longer edges first. I'm going to try to get this. You know what? It's easier if I put it on the
back of the clay, but the good thing
about the tight bond, those clay beads
are really thin. But the good thing
about this brand of glue is it goes on white, but it dries clear. I try to get every little spot. Some of this is
going to seep out, but that's when you use
a little wet brush. To get that. I'm going to go
ahead and put one on here. Let's put the first one on because it's going to
be the one that's Oh, no, I just dropped
one part of it. Yeah, this is where
putting it together in pieces is going to be
probably what I do. So just line it up. I need to turn this bottle a little bit because
it's going to slide. And tap it down like so. Try to make sure
it's straight right over the line of that picture
you've mounted on there. Let's get this piece on. That's the nice thing
about the beads. Hey, that work that's
just about perfect. So I ended up taking
off one, two, three, four, five, six, seven, eight little beads off the end to go this full length. The problem is, if I
turn this bottle now, this is probably gonna
slide a little bit. I'm trying to figure
out if it's straight. For some reason. It may not look straight
because of my paint. I just press it down. I'm gonna turn it and see if it'll I don't like
that. I like that. See if it'll stay. If
it slides a little, I'll just have to
push it back in place and hold on to it. Just get it pushed
down the best you can. I'm gonna try to
do the top edge. No. I want to try to do
the long edges first. It doesn't appear to be sliding. I need to turn it a
little more that way. So I'm gonna get this
edge here with this. And if the glue misses spots, you can go back and add
it, which it usually does. Miss a few little spots. Alright, let me
get the other one and see if I can pick it
up without it breaking. I just kind of set it
onterPress in very gently. When you get to the end, just pull that last beat
off on that one. Press it down, tapping
it very gently. I do have quite a bit
of excess glue there. This one seems to be
staying in place. I think the more
excess glue you have, the more potential you
have for it moving. I'm going to take this
little brush here, dampen the brush and just try
to get some of that excess away a little bit here. All right. And like I
said, it won't matter. The glue is going to dry clear. So if it has a little bit too much
excess, it won't matter. This is still staying. So now I'm going to set it like this to do these top edges, and I'm just going to
keep doing like this. I might need one more bead
down here on this bottom. Maybe not once I put the other
ones across. So let's see. Let me I'm gonna have to
piece this together. Okay. And I don't know if I'm at
the top corner over here. I don't think I am.
I do think I need a little bead right there. So one of those that broke, I can use my Exacto knife and just cut one of
those little beads off soon as I can get
it positioned right. And then I can just
put it on there like that and kind of
work it into place. Tap it down. There we go. I do this a little bit. Make sure everything's sticking. Alright, now, we're gonna do
this top edge right here. Over to there. I grab whatever beads I have available that broke off and
kind of put them into place. Basically like putting
together a puzzle. I think I need one more
bead there in that spot. I do not want this
bottle to roll. Now, if you were
doing jewelry beads, you would do the same thing. If you were doing a frame
of jewelry around this, like little beads, the little flat back
beads or rhinstones, you would do the same thing. I like my bottles over the top. So I like to use um I like
to use clay and jewelry. Okay, I think I got enough glue. I keep breaking the beads. Let's see if this one will work. This one might be too long. Yeah, it's a little too long. But if it's too long, Oops, you just cut off
that last one with the exacto knife
and put it aside. Make sure it's straight
the best you can. Kind of take your hands and gently pat them down. Like that. This one's wanting to roll. Probably because that
rag is so thick. I wanted it setting upright a
little so you could see it. So we've got them framed out. And if you really want
to be particular, you could take a ruler and kind of scoot if you need to to make
sure you're straight. I'm not really that
particular about mine because it's going to be so beautiful
when it's done, every little thing
that may be off just a little bit is
going to look charming. All right. Now we
have the feathers. So I'm thinking about putting a feather over this corner and this corner because I don't want to cover up
those pretty flowers. So let's see which feather
would look better where. We could do that one
there or that one there. Does it make any difference? I think they're both I think
they're about the same, or do we need to
do maybe more of a vertical Orientation with the feather and
loop over the top. That might be interesting
that orientation right there. Because if I come over here, I could cover too
much of the flowers. If I get down in
here a little bit, that might be interesting. So I think I'm gonna try that. So on these, I put
the glue on the back. Little dots of it. I like this tighten
has a nice fine tip on it so you don't get
too much glue out. You got to make
sure to get some on the tail end of that feather. Then just take your
finger and rub that glue all the way
around like that, make sure it's totally covered. Then remember those
wipes I talked about, this is when they come in handy. Then take your feather or whatever you're
putting on yours. And press it down and
you can just press this top piece over the beads there and make sure that little tail end is
in order and then tap. I like to tap because
it's very gentle, it doesn't lose the detail. Now, that's one side. I make sure I'm not
sliding here on the slides that everything
is staying where I put it. Now it's time for
the other feather. And do I want to
do this one coming down over the tip like that? Or do I want to do it like this? You know, the ball that he's sitting on
that's not real important. Maybe I'll do one like this. I don't know if I got that if that's gonna
work right there. Looped over that bead. I'm hoping it is. Oh, this
one right here is bugging me. I think I'll do
this one like this. So once again, get
the glue on there. Don't miss that little tail. All your little fine
details definitely make sure you get
your glue on those. And you're gonna
spread this out with your finger so you can
just kind of roll it down the middle and handle
it very gently. Like this. Get to
the edges for sure. Then wipe your finger off
because you don't want to have that on top
when you put it down. And then just position this where you want
it and I'll put that little tail right over
that bead and tap this down. So there that's what we have. Trying to make sure it's tapped down good on all the edges. Not sure about this looping
over the top there. And I don't know if I could
pull that back off at this point without messing
it up and slide it. Yeah, I can. I'm
going to move this. I'm just going to slide
my exacto knife under it and lift it up and move
it down a little bit. And then work it in there. Like I said, the typen
glue dries clear. I think that's a
little too close to his beak now that I've moved it, so that might not have
been the best decision, but I do have an
exacto knife and I can cut here in the middle of this feather and separate
those two sections. You don't have even though
it's molded a certain way, you don't have to accept
the mold as it is. You can alter the
mold with tools. Like this little exacto knife, I like to put little lines
in there. Not too many. And you have a little working
time here where you can smooth things out,
move things around. Another good tool to work with the clay is the Where is it? These these are color shapers, and I use them for pastel, but I also use them for clay. They've got a rubber
tip, and they're really good about getting in a little area and
smoothing something out or pressing something
down a little bit. Like this little
tail right here of the feathers kind of
separated from where it was. But you can kind
of smooth it out. You can also add a tiny brush with a little bit of water on it to brush out anything
you want to change. I don't want to mess with
this too much because I've already messed with
that one too much. And I'm afraid that I won't like it if I
mess with it anymore. So I'm going to let this dry. I do have I'm checking my edges to make
sure nothing's sliding. So there we go. That'll be a nice accent, the feathers being in there. I'm glad I moved it cause I
didn't like it over the top. It was too much of a drape. If there hadn't
been a bead there, which I could have
cut a bead out. Like I said, you have time to work with it
and manipulate it. So if you wanted to do different things like
that, you could. Um, I have some
extra beads here. If I wanted to put some
more beads somewhere else, like if I wanted to put some
up here, I could do that. I don't want to do too
much up here, though. Because I'm gonna have
ribbons and jewelry up there, so I'm just gonna roll up these little extra
beads of clay. They're still pliable
enough, maybe. Now, they feel a little dry. That's a tiny bit too dry, so I'm just gonna
get rid of those. 'cause I don't trust them. When I blend it in
with some other clay, it might improve it,
but it might not. So now this has got to sit here and dry good
without sliding. So I'm going to keep checking it every couple of minutes
for a little bit. But this has to dry good
and not be movable, and then we're going to add the big thick border
around the back. So we'll have a frame and a border border.
A wrapped frame. That's what I'm calling
this because it's like, wrapped around the bottle. And the border will attach
right up against this and go all the way around the back to add sculptural
detail to the back, that'll be pretty, too. But I'm going to let
this sit a few minutes and just keep checking it. And then when it gets
dry enough to where we can do the back mold for the back, we're
going to do that. And I will have to measure because that back mold is very long and it's not going
to take all of that, I don't think, to go around. So I need to know exactly
what I need to go around so I can cut the ends
off and have the exact size. So give this a few
minutes to set up, and then we'll add
the backpiece on.
9. Mold Clay Trim For The Back: Okay, I'm ready to
do the back mold, go to do the same thing
as I did with the others. I'm gonna dust it
with cornstarch. Now, this is one
of the IOD molds. It's a very wide floral trim. And I've measured around the bottle from edge
to edge of the beads, and it really needs 7
" is what I figured. So we're going to dust
this mold real good. Just put a lot in
there I'll just tap off the rest in the trash can. Get this nice and coated not too worried about the end parts because I'm
gonna cut those off because this is
longer than 7 ". There we go. Let
me tap this off. Let's dust it up really good. And get our clay. This mold is a big mold. It's made for furniture. But it also can work well as a wrapping
frame on a bottle. So I'm going to gather a big
bunch of clay this time, but we're gonna put
it in in small parts. Condition it a little bit. Flatten it some. And I know I'm not gonna
need to go end to end. Kind of push it in
there, smooth it out. You might have to get
several small pieces to push in there
in this size mold. It'll probably work better
if I do go end to end. And that way, I
can actually show you the mold too and
what it produces. So let's just work it all and then we'll
trim off the excess. And it's better on
these, like I said, to do small parts at a time
instead of trying to do one great big lump and just
work everything in there. It'll all be smooth
together in the end. Try to get in all those
little fine detail areas. Just keep pushing pieces of it in there until you get
the whole thing filled. Which on a mold this size, that takes a while to get
the whole thing filled. The nice thing about
these molds is they have a nice edge on them that you can kind of know where the edge
is supposed to be. And that's very helpful. And I'm trying to
hurry a little bit since I'm running
out of battery. But I want to get
this part done today because this clay
must cure overnight. Must. No if sands
or buts about it. You cannot paint
it the same day. It's got to cure overnight. It's supposed to cure
like 24 hours, but, um, I have gotten away with
less than 24 hours, but not with not
waiting overnight, so smooth that all in there. Kind of try to level
it out a little. Smooth it in. And see, 'cause of
the edges on these, you can pull right to the edges, and it will form very nicely
where it's supposed to go. So I'm just smoothing
toward the edges, and you can always pull back in as well if you go over too much. And if your hands get too dirty or you get
some excess pieces, just wipe everything off. This actually using the wipe
actually gives your hands a little moisture if the clay
is sticking to it too much, sticking to your hands too
much, which does happen. There's some excess there. But I really like these
the way they have that little edge
around the design, so you can just come
right off that edge and get that excess
clay off of there. Uh around those edges. And I don't like too
many breaks in it. Like in here, this
is why I smooth it out because then you
can have that cracking. And I don't particularly want a whole lot of cracking
a little bits fine. And then you can pull back from the edges to make sure
you're not going over. I don't know if I'm
on camera or not. I'm trying not to let
my bottle fall there. So pull out to the edges, and then you can also pull back from the edges
if you need to. I'm gonna try to make
sure it's fairly level. You know, you don't
want one thick chunk here and a thin area here, and I have a thinner area there. Just get it level
the best you can. I don't know if
my letter openers gonna do the trick or not.
Here, we're gonna find out. Just like the others,
I'm gonna start in the middle and try to it may not be long
enough, this letter opener. Yeah, I'm afraid it's not
gonna be long enough. Get that excess off
the best you can. So we'll have a nice
flat surface to it here. I don't know if those
are supposed to be there or not. I don't
think they are. Then smooth it back out again after you've taken
off some excess. Alright, let's turn it. Yeah, there's a few spots
where it's a little chunky. But I think it might have
took too much off there. And I have a little spot there where there's
an indention. Alright, let's try again. And any excess that
may be on the edges that you didn't get off when
you're doing this process, you can always put see, it's
real thick right there. I'm about to take
some of that off. You can always peel us on those edges away later after
you get it out of the mold. I don't know if those
little bits are supposed to be. I kind
of think they are. So I might still have
too much on here. I knew this one, those bits
are supposed to be there. I know this one was
gonna be a tough one. Yeah, those little bits
are supposed to be there, so we need to turn it
around and dig out a little more here because there were some
down here as well. Too much there. Yeah, anywhere where you feel
a little bits poking up, those are probably
supposed to be there. That allows the paint color
underneath to peep through. All right. Just scraping off
some more excess. This is a large mold, so it takes a little bit
longer to do this one. And I know there's some spots where those little bits
should be peeping through. And there I pull too hard, but there's a spot right
there, right there. So you put it in
mold, take it away. That's probably pretty good. Okay. Now we're gonna
try to roll this out. And it's gonna be a tough one. But the best way to do it is to get these little edges
at one end first, loosen everything up, all
the way down the sides. I need to move this clay out of. Cause I'm gonna have
to move this over here in a minute. Alright. I don't know if I got it loose enough or not, but
we're gonna try. We're gonna turn it upside down. And we're gonna try
to pull this end. Oh, yeah. That's See, this mold here, this brand is a little bit thinner than the
last brand I used. And it's more flexible
for removing the mold. These are wonderful.
They're the most expensive, but they're worth it.
Alright, there we go. We have a beautiful floral
mold that we now need to cut. I'm trying to maneuver
things here so I can get my glass palette
over here to put this on and not drop the bottle. And then get underneath
this with something thin and be very gentle
so you don't break it. Of course, I'm gonna end
up cutting it anyway, but I'm just gonna
scoot it over here. Now, I got this backwards. Turn it this way. I
need 7 " of this. There's a little area
in the middle there. I probably should have had a little more clay right there. That's okay. I need 7 ". So, where's that ruler? So let's do. Let's do from that flower, this flower here to
this section here. And if it's a little
long, I can trim it. I'm just going to use the
edge of my ruler to cut that. Let's move this piece
out of the way, which now, you know, you
have extra pieces like this. If you want to use
them on your design, you can when you do one
that's super long like this. Seven. So just on the other
side of this leaf right here. Like I said, it may
be a little long. But now we have to
get it on the bottle. I'm going to move this
over here and position this bottle because I cannot lay this bottle
down on this clay yet. It could still indent. So I'm gonna put the top. Where's that brown thing. I'm gonna rest the top. I'm gonna rest the bottom on this little lip right
here of this thing. Just so I don't touch the clay. I'm gonna rest the top on here. Make sure I'm not
touching that clay. Now, I need to decide
where to put this. I got to flip it in order
to put glue on the back it. And I got to pull it
up very carefully because it is breaking
a little bit. So I'm going to put glue. I don't know if you can
see this on camera. But I'm putting glue all
over the back of it. Actually, I'm gonna
take the top off of this glue and squeeze it 'cause
it's such a large piece. I'm gonna squeeze
it right out of the bottle onto the piece. And hopefully, I
haven't got too much. And when I close that back, Since I don't really want
that glue all over my hands, I'm just going to use this
wipe to spread it around. Really good. Because the wipes not
really wiping it off. It's just kind of moving it. But it's really gooped on here, super thick on this one end. I do need to wipe some of that off and move it
to the other end. And make sure I get all
the way out to the edges. And I have kind of
just a little bit. Broken that. Kind of just
a little bit broke that. So this is going to be interesting because I can't
put it back together. Oh
10. Attach The Back Clay Trim: Okay. I'm not exactly sure where
that video lost power. But this is the stage I
got to with the big mold. I have placed the
glue on the back of it and wrapped it
around the bottle like so. And now this has to fully dry. All of this before anything else can be
done to this project. Which is the downside of clay, you do have to let it cure. But I'm just tapping
gently around all these edges to make sure that everything
is pressed down. I don't want to mess
up any of my mold, but this is going
to be a beautiful sculptural element
to this bottle. And I'm just working down every little spot that I
can find on these edges. And now here in this area, I may want to take
my color shaper and actually push some of this clay more toward the
beads in a few spots. Right there. I got a little bit up in
the beads, right there. But the beads are almost dry. Well, almost dry enough
where you can't invent them. I'm going to have a
little little spot right there that's popped up. Color shaper is real good
for maneuvering some of these little spots you
might see that need fixing. I'm not worried too much
about the excess glue here, but I am going to take a
little bit of that out. It's not gonna matter because
it's going to dry clear. But I don't want it
to be goopy looking. So that looks like it's all
secured down fairly well. If I find an area
that is not later, I can take a little bit
of glue on a toothpick or a color shaper and dab it
somewhere where it needs to go. There we go. Just kind of nit picking now. Now, it has to sit here and dry, and I don't want this
resting on anything, this front part, even
though it's pretty dry. So I'm going to rest it
on this spool and rest the neck of it here and have
this here so it won't roll. Just to let this have
a good time to cure. One, two, three,
four, five, six. One, two, three, five, six. Good. I've got it
level on both sides. Made sure to try to
get it straight. So I'm gonna rest this on the
bottom edge of the spoil. Oh, I think I am. I'm gonna try to and just
put the top right there. Put that right there
so nothing will roll, and that should stay in place
pretty good right there. Now, this has to dry until
morning or sometime tomorrow. I do have these extra little
bits that broke off of here. If I wanted to add
some of those in here, actually, that one would go
pretty good right there. Don't you think? I'll have
a couple extra ones too. I have a flower here. And you can maneuver, even though these
are from a mold, you can maneuver these
any way you want to. I do think I want to try
to put that on there. Since I've got everything else gonna cure overnight
in this position, it should stay put. So I put some glue on there. And I apologize if any of
that molding this is missing, but my video ran out of power. I want to put that on there. So you can take artistic
license here and do whatever you want to
do to add to the design. So the design broke
just like the beads. But you can work with that. These color shapers are really wonderful for maneuvering clay, and you can also take
a little tiny brush. I mentioned this before
soon as I find it. Here's one. Little tiny brush. Get a little water on it, and you can brush
certain areas to smooth out maybe if it
looks like there's going to be a little crack or if you want to just smooth
it out a little bit, like there might be a spot
there that's bothering you. You can smooth it out. I want to pick up some glue from one place and move
it to another. You can do that.
This little brush is really good for
stuff like that. So now I've got that
little leaf there. What else have I got? I got
this piece that broke off, and then I've got this flower. But for the flour to work right, it's got this straight edge. I would have to cut around
these little petals. And, I mean, it could
fit in there, kind of. I think that's just going
to be a little too much, so there's some
little flour pieces there that mi could fit there. I think this will be fine.
I'm gonna roll those back up and put those back in the clay bag before
they dry out. I'm gonna clean off
my letter knife and get all that dry
clay off of there cause that will inhibit when
you try to use it again. And I clean everything up right away because I don't want any of my tools being ruined and
wash that off a little bit. So just checking this again. Everything appears
to be in order except that little spool does
not want to stay in place. I'm trying I'm trying not
to get it on the clay. There. I just need
to quit touching it. At some point, you just need to stop and say, Don't touch it. Don't touch it till tomorrow. And let me explain what
will happen if you do go ahead and paint this
before this is fully cured. It will trap the moisture the acrylic will trap the moisture in the clay
and it won't fully dry. It won't fully cure. You really want it to fully
cure and it will turn white and it will feel
like when it's wetter, it feels cooler, so it'll
feel warmer to the touch. So I think we're good. I'll just ball up on my extra plate. Keep it in the package, nice and tight and
in that plastic bag. And then tomorrow we will
continue on with this project, and we will paint and glaze these lovely
clay embellishments and add some gold, and then we'll add some jewelry. We're just going to have a big
time with that part of it. But like I said, early on, you could have stopped before the clay stage if you wanted to. It was a beautiful
bottle at that point. You could have put
a topper on and ribbon at the top
and called it a day. But I like my bottles to be ornate and glitzy
and over the top, so I wasn't calling it a day. But now I'm calling it a day because this has
to totally cure. So we'll be back tomorrow and
we'll inspect our bottle.
11. Paint The Cured Clay: Okay, we have waited
overnight and we are checking what's
happening here. Everything looks to be
cured up really good. Really nice. Nothing's moving. Got a little bit of a
glue drip right there, but that'll be covered up. But look how pretty this
bottle is gonna be. This is going to be so pretty. So the next step I'm going
to do is I'm going to take these two colors that I used all over in
the bottle design, and I'm going to paint the
clay elements with these. I'm going to mix
the cottage white chalk with the titan buff just to give it a
little creamy color because this is a vintage piece, and I'm going to paint
all of this with that color before glazing
and then go from there. So for this, I'm not
going to use the sponge. I put the right glasses
on so I can see. Um, I'm not going
to use the sponge. I'm going to use just a brush, and I'm gonna try to be
very careful to mainly keep it on the clay elements. Just checking the overall paint. Looks pretty good. Okay. And I'm just gonna
try to get some of this chalk paint out with the palette knife so I
don't get too much whoops. And I may have got
too much anyway. But I'm gonna mix those
two colors together. Just to give it that more
creamy vintage look. If I need to touch up, that's probably way
too much. Again. This is why I like tube paints, but I do like the
chalk paints, as well. They dry super fast. They give it that nice matte
finish that I'm after. And I'll just have
to experiment with my brushes here and see which ones I like the
best to get in there. I have this little short
stubby angle brush, which is really good as far
as getting in small areas. So I may try it first. Is this palette knife
cleaned off a little bit. Scoop some of that
paint off of there. Put that in my water, and I don't want to
overload the brush. I am going to have to
lay this. Let's see. I'm trying to get this
where you can see. And where I can see. And I still can't see very good there. But it may help a little bit to kind of have it at
an angle like that. I may have to lift it up
some to really get around this beadwork Let me give
myself some more space here. My studio's too small. Anyway, I don't really want
to overload the brush. I want to just try to get gently get some of
this color on there. The clay is white
now instead of gray. It's really only gray
when it's, um super wet. And as it cures, it turns white. And I do have I try to get down in these
crevices of this feather. This little stubby angle brush works pretty
good for that. I do have my handy wipe here. So if I get some on the design where I don't
want it like that, I can just wipe it back off. I just want to coat it fairly
well before glazing it. It takes a lot of dip in
the brush in the paint because this is a very
short stubby brush, so it doesn't hold
a lot of paint. You probably can't see much
of a difference right now because it's very similar
in color to the clay. I'm just going to have a slight little gap there. I don't know what
happened there. Make sure I have
enough on the feather. And I just use the when I
get some on the design, if I get too close, I just use the white
with my fingernail. Let's get over here to the side. And I'm not worried about
really getting down the sides. When I push on the brush, it kind of spreads out and moves over the sides
of this beadwork. The glaze is gonna
take care of that. I will go ahead and get some of this since I'm right here. Yeah, I got way too
much paint out again. I might have to make a jar for this color
because I really like the combination of
these two colors. It's, it's just a real
pretty, creamy white. And once it's glazed, it'll have a very nice
vintage aged look. Try to get all the beadwork
first on the front. And I got a little
section over here. And there I ended up
getting some on the design. But that's not a problem. Just take it with the
fingernail and wipe it away. So the front has a
pretty good coating on it at this point. I'm trying to make
sure I haven't got any areas where it's really dripping or too thick. All right. Now I'm going to turn around to the back and start
working on this. And I'm going to go
from left to right, and I'm going to just hold it. I can't lay it down
because the front is wet. So I'm just going to start from this left side and get
the big mold done. This really big,
gorgeous floral. It makes for a great
wraparound frame situation. I have a little glue spot here, I do want to put it a little thicker on there
and cover that up. Some people use resin for
their molds instead of clay. That also can work. Um I'm not a big fan of resin. I don't know. It feels
too plasticky to me. And the clay, it just feels more like stone and like clay. And that's what I really like
in the way my pieces feel. It adds some weight to it. Some people, and
I've not tried this, and I probably won't, but some people use hot
glue in their molds. It can be done, according to the company that
makes the molds. It can be done. But once again, I feel like
it would feel too to me, it would feel too plastic like. And that's not the feeling I like when you handle my pieces. Yeah, I'm gonna have
to make a jar for this excess paint because
I'm not gonna waste that. That's some good paint. I just trying to get in
all these little crevices. Like so. Get down in there. And it's kind of since it
is very similar in color, it's kind of hard to see where
I may have missed a spot. But the way I like to do my work is I like to
put this layer of paint on dry, which won't take long. Glaze it, wipe the
glaze back off. Then after glazing, if I need to add more,
if it gets too dark, I can add more of
this back on top, dry brushing it on and bring
back some of the lightness. I do a little dance between dark and light
light to dark and then dark to light
just depending on the look that I want
and there'll be some gold brushed
on all of this too. But I don't want it
to be solid gold. I want the gold to
be a nice accent. I have a few gaps in here. The clay does shrink
a little bit. I have a few gaps where some
paint is showing through from the original
bottle paint layer. I'm trying not to get in
those gaps with this paint. I don't mind that
showing through. It shows variation and
depth and character, which is what I want
this to show when it's done with the pretty spring
colors but still have that vintage feel with the
depth and character that I like in my pieces. Now, if you don't want
to have a vintage look, you could skip the
glazing process. In fact, if I do want
to skip the glazing. Sometimes I'll put well, it
depends on what I'm doing. But if I'm doing a
sculptural piece and more so than an art piece, I will put the paint the clay on first before
I even paint the bottle, then it ends up all
the same color. And then I'll dry brush
different colors on top, add different shades to it. You can color your
clay anyway you want. There's no rules here. It's all just based on
what you might like. But I'm wanting a spring look, Spring pretty spring
colors, pastels like this. And then the creamy
look on these, I brush a little bit
extra on those feathers. Cause I don't think I got
enough on that first feather. Okay, that's pretty good. So I'll put the fan on
this and let it dry good. And that won't take very long. I do have a few
goopy areas here. I need to make sure that I don't have the paint on too too thick
where it's gooping up. But I'll let this dry good, which won't take very long.
I'll put the fan on it. And then after it's dry, I'll put the glaze on it and then wipe the glaze back off, and then I'll add more of this color back on top if I need to brighten
it plus the gold. And that will give
it the really, really pretty look
that I'm after. So we're going to put the
fan on this and let it dry. And I'm going to make a jar for this extra paint and maybe
even mix up some more of it, so I have a little jar
of it for the next time. So let's let this dry
and then we'll glaze.
12. Glaze The Clay Elements: I think it's fairly dry. So I've got my glaze here,
which I'm shaking up. And I just that helps
me get some on the lid. So I don't have to
pour any of this out. This stuff will last forever. And I'm going to start
on the front side. Of the bottle. And I got a couple wipes
here to wipe back, and I'm going to be very
delicate with this. Just go to use the
small stencil brush. Tap it off on the plate. I did make a jar of
my vintage white, one half chalk cottage white and one half
titan buff acrylic. So I do have that now. And I'm just gonna
try to stay around the clay area and
not drift too far. And I do a small
amount at a time, this will get on the
actual painted part. And I don't want to do the
whole bottle with the glaze. I don't mind a little
bit being on there. So I'm going to do this top area here. And the feather. And I do try to get
down all around the edges and in all
the crevices with this. Let's see, that's getting on the design now, but that's okay. I'll do this little
bit here at the top. Have to turn it both
ways to make sure I'm getting in those crevices. And on both sides. Then take one of the wipes. And I like to use a damp one
because it'll pull off more. I'll try to go around the
edge of the design first. And the paint side. But it'll pull off more than
a dry cloth would. And you might need to
use your fingernail to get in there a
little bit and even, you know, get a little
corner of the wipe in there. Go along the edges. And if it stops coming off, get to another
section on the wipe. And you can be kind of rough
with it at this point. Go across the top. And I have a little tool
over here somewhere. One of these little tools
like this that if I need to stick that wipe in
a very small section, I can use that
little tool to help poke it in there
and clean that up. And just keep wiping back
until such time as you see that you're satisfied
with the way it looks. A little tools helpful to
get in these crevices. I'm going to just
go to a clean area. Now you might use
a lot of wipes. You could also use a wet
paper towel or damp. You don't need it
to be soaking wet. But look at that
compared to that. It now has that definition, that aged look to it. Let's continue on. You don't need to be real precious with it
because you have some working time on this particular glaze to be
able to wipe it back off. Relatively soon. I think it's like 15 minutes
or something like that. Let me do this section. And like I said, if
it gets too much, if it's not coming off enough
or it's still too dark, switch the angle of the white. And you like I said, you can
get a little rough with it. The clay is cured at this point. So that looks pretty good. We're getting there,
S it's popping now. That's what I want. So
let me go to this side. And let me go ahead and start
up here and like I said, get both sides, both
edges of the trim. So you can get down in all
those cracks real good. And you could really
goop this stuff on. Goop seems to be my favorite
word in this class. And let's just go ahead and
do the feather, as well. You see, you don't need
much of this stuff. That's why I like
working off the lid. Because I don't want to pour out a whole
bunch and waste it. I've literally had
this jar for years. Actually, this is my second jar. I have a few jars of this. When I find something I like, I buy it in bulk so that I'll have it. And I really do like this. I don't know if they
make this anymore. But if they don't
make this exact one, they probably make
something like it. It's starting to get over
there and those flowers. And the rag is getting or the wife is getting
really dark now. Now, I got a few little
tiny spots here. I can't really get
my fingernail in, so I'll use this little tool to dip it in there and get
some of that excess off. And all down the side
of the beadwork. A little tool like this or I don't even know
what this thing is. I don't know the official name. And let me check
around this feather. I think there's a couple spots. A couple crevices here, seeing that little tool
poke through there. So you got to be
careful not to scratch something if you use a
little tool of some sort, but it really helps
get in any crevices. And gives it that dimension. Like that. So now that's not done,
and that is done. See the difference, that
really makes it pop, gives it that extra something, which I like a lot of
extra somethings on my bottles and anything I redo really because I just like to take my time with it
and add to it and add to it, and add to it until I
feel that it suits me. So that looks really nice. Now, if you did want to darken your paint, you could do that. You could actually
put glaze over the whole bottle and
then wipe it back. And I've got a few cracks
showing up in here, and I thought it might be interesting to maybe
try to do that. I'm just going to scrub some up this direction just
to see what happens. And I think I will
put a little on the bottom here underneath it. Now it's Oh, yeah, see, that's showing
those cracks. Now, why those cracks are there? I don't know, but it gives it that antique, aged old look. I did not put a
heat gun on this, but sometimes cracks
just show up. And I don't mind it. It adds to the charm to me. It's flaking it's
not gonna flake off. It's just that particular
section got a lot of cracks. Maybe I had the paint a
little too thick there. And then just gently wipe back. You can wipe it all
back or you can see, I'd like that little shadow
that's made underneath there. It's just slightly darker. You can also put it over
your image, if you want. And like you could
come in here on the corners and maybe even
right there a little bit, and maybe even right
there a little bit. And then you can wipe that back, and it just tints it
just a little bit. You can wash it across
your image like this. Anything to make it feel for me, a little bit more aged. So it's very, very subtle. And then this glaze will
have to dry before I can come back and I'll
dry brush some gold. And if I feel this isn't
bright enough after it dries, I'll re add that mixture of the cottage white
and the titan buff. But now I want to
swap to the backside. So I'm going to
turn this around. And I can actually use
a bigger brush on this than this little brush because I have a lot more
ground to cover. So I'm gonna wash off
the little brush. And I don't know
what I got on there. But that wipe is
pretty much gone. So let me get another one out. In fact, I may need another
one so I'm going to resend it package and grab out
another one just in case. Alright, I'm going
to use this little bit bigger Stencil brush for this area because
it's a bigger area. And really just
work it in there. And I don't mind if some gets on the paint around here because
I want that aged look. But I won't do the whole thing at one time because then I may not be able to
wipe back enough. So I'll do just a portion of it here and really work it down into those crevices
and around those edges. Alright. Mm, take this wipe. And on this, I usually
just start going over very gently over the whole thing to
kind of see where I'm at and how much I
want to wipe back. And I wipe this away. To give some darkness, and then I'll dig in
around those edges. There's no set way to do it. It's just whatever
looks right to you. There's a lot of glaze in there in a couple of
these middle sections. So I'm gonna just dip
my finger on the rag, dip it in those spots
the best I can. Ooh, that's really popping. Now, let's brush
some of this away. See it's darkening
it a little bit. I may need to swap
to another area. I don't mind it
being dark in some, but I don't want it super dark. Make sure to wipe every
area that you have done. Don't miss a spot
because if it dries, it won't be able to wipe back. Now I'm going to
get my little tool and just dip it in some
of these crevice areas. Or it's really, really tight
and hard to get in there, there may be a little
too much glaze. I just keep maneuvering
the tool in some of this wipe to
get it in those spots. Those deeper spots I can't
get to with my finger, I can just put this on here. Oops, put this on
here and just kind of feel my way around just
tucking it in those spots. There's a big couple
sections right here. I feel I need to clean
up a little more. And this particular tool
does poke through the wipe, so I've got to keep
shifting where it's at. I know you can't see it doing anything, which I can't either. So until after I pull it away. All right, see the
difference? Very nice. Very nice. Do you think
I'd like that to be a little darker?
Just a little bit. Darker down close and
then brush some of it up like I did earlier. And you'll see when you
do something like this, how you get that feeling
of the stone effect. It feels like stone. You just don't want
any clumpy dark areas, but it does darken the paint just a little
and give some shadow. You probably need
a little more down here of it in this area. And you could let it sit for a couple of minutes
before you wipe it back. But I usually just do
it very gently and then just go a little bit
harder if you need to. I don't scrub it when
I'm wiping it back. I just gently wipe it. That allows it to pick up some darkness in some of
the little paint areas. Gives it that nice aged look. So we've got the front
that's looking really good. And then we've got this
section here we've done, and now we've got
this section to do. And that wipe is gone. I'm
gonna get another one out. So I'll have one because I'm probably going to do
this in two sections. And it will get all over you. But that's okay, 'cause that's what and Washing is for there. Alright, let's continue on. Let's do this little
section here. I did part of it. Just work it into all those crevices and
down a little bit. If you see any wipe poking through, you don't
have enough on there. Check your edges, too. Alright. Let's take this wipe. I like to get it where I
can go over it kind of smoothly first to
reveal my pattern. And then you can just
kind of rub some of it over the bottle so you don't have to apply it
where the paint is. You got a little spot right
there I can't get into there. Brush it down, darken
that bottom side. It gives it that nice shadow. Get on the edges. And I'm sorry I can't hold
this flat the entire time, but in order for me to see, I have to have it upright some. I'm trying to work in
there with my fingernail, but it's not not really working
very well on some spots. Let me get my little pokey tool. Just to get in those crevices
where it may be too dark. I got some of that there. I got a little spots a
couple of spots there that I need to get into. Okay. And I know you can't see it, but up here at the top
edge of these elements, it's a little dark, so I need to get around the
edge with my little tool, and I have to turn it upright
to be able to do that. Okay. Now, we got this one
little section here left. I'm going to swap wipes. That one's had it. Scrub it in there
really, really good. And then bring some
down on the paint itself, and up a little. Alright, let's go
with a new wipe, which I have to unfold. On the tail end of this now. Then it just has to dry. A little pokey tool. So I can work this in those
areas where it's really deep. This is a beautiful mold. This floral mold from IOD. IOD stands for iron
orchid designs. There's another company
out there I haven't tried yet they're also supposed to
have some really good molds. But they make such great sculptural elements
on the pieces. I get that little top edge right here with my little tool and
a clean part of the wipe. Oh, that's looking really good. We may be done with this
part, so let's take a look. There's the front. It's pretty much almost dry. Not quite. And then this is the
back sculptural element. Isn't that so pretty? I love this look of this clay. So I'm going to put
the fan on this again and let this dry. And then when I come
back, I'm going to decide if I need to
brighten those elements a little more with some
of this or if I can go straight to the gold to
brush some gold on there. I don't want it to be all gold. And sometimes when you're dry brushing something
like this on there, it can get a little strong. So that's when I like to
have this available too. So if I get too strong with the gold and I feel like it
needs a little more white, I can dry brush some
of that on there. So I'm going to clean out
these little stamp brushes, stencil brushes
that I just used. I'm gonna clean
those out real good. Let this dry completely because you don't
want to put any gold or anything on there until that round glaze is set and dry. And that won't take
long with the fan. It'll help it move
along really quick. But it's making the bottle
look really nice and aged, but it still has those
nice springy colors. So when we add the gold on, it should really, really pop. So I'm just gonna set that
aside over there for the fan, wash these brushes out, and when we come back,
we're gonna add the gold.
13. Add Gold Accents To Clay: Alright, it's time to put
a little gold on here. And we're fixing to
have a big storm, so hopefully all
the power stays on. Um, I'm shaking up the
mintage brass gold. I like to shake it up
to get it on the lid, just like I did the glaze. And what I like to do here is take a dry bristly brush
like the stencil brush. Sometimes I do this
with my finger if the brush is too strong, but I dab it off
on the plate and then just gently graze it very, very gently across the
top edges of things. Just to give it
that hint of gold. Don't press hard.
You press too hard, it'll be too much gold, and you don't need much
on the brush either. See, I have very
little on the brush. And I'm just gently using what's on the brush
to brush it across, and I'm turning the brush a little bit so I can
pick up different areas. And then I'll dip back into
that and just kind of drag it across the top so the ridges of the design pick up the gold. You can use any gold you want. This just happens to
be a favorite of mine. And I don't want
the gold overdone. So I tap off a whole lot of it. And then when I first
started applying it, it's a little strong,
but it's not too bad. So I'll apply it
all the way around, so there it is all on the front. And I'll see if there's any other areas I
want to add some to just a little
touch here and there. But a very small brush
is good for this. Don't worry about it
if it gets some on the paint or on the design. That just adds to it. So this has not been touched
with gold and this has, so you can see the
difference there. So now I'm gonna flip
around to the back, and I'm going to have to
hold the bottle like this. I'm going to scoot this out of the way before I
end up spilling it. Dab it, pounce it off, and then very gently, drag and let those edges of
the raised design pick it up. Now, if you're not using clay, if you're using
resin or if you're applying vintage
jewelry findings, you can do this with
those to accent them. Now, here we wanted to get down in the grooves with the glaze, but we don't want to get down in the grooves
with the gold. We want to just stay on top. So try to focus on that and
just be very, very gentle. You can always go back
and add more later, and if you get too much on, you can add some of
your base color paint. This gives it that
richness that I'm after that little
bit of glamour. Oh, you can see the difference here between
this side and this side. It's looking really good. I keep the brush mostly on its side when I'm doing
this rather than straight up and down because it just doesn't go on as harsh if you do
it from the side. If you want it to go on harsher, you can pounce a little bit
in there with the end of it. And then just pounce it off. And this is important to get the excess off or
it'll be too strong. And if you have a
wipe out or rag, you could try to
wipe it back off, but I've learned
with this paint, it doesn't really
wipe it back off. It just smears it
and adds, like, a glittery look to everything, which is fine, too, if you
want that kind of thing. Sometimes when it gets on when I do this on
the actual bottle, I will use the wipe to spread that gold around and give the
whole bottle some glitter. But this is a really good gold that I like this
vintage brass color. It's just gold enough. I showed you earlier on the
bright gold color I have, which is a really old bottle. It's very thick
'cause it's so old. And they don't call it
whatever that was called. I think that was
called 24 carat. I think they just call
it bright gold now. But that brighter gold
might be a little bit too bright for this
because I want the antique vintage look. See, I'm just dragging it sideways and letting
those edges pick that up. To raised areas. To give it that nice shine. And I'll turn the brush to get the other edge because
there's paint there. And I'll do that
a couple of times until I feel like
it's running out. Alright. Let's take a look. So that's the back at this
point. And that's the front. And I honestly think that's enough gold because I'm
going to add the jewelry. And because I'm going
to add the jewelry, that's going to add more glitz and glamour into this bottle. But let's see how it's
going to look with the top. Can you see that? The shadow? I think it'll look
perfect with the top. That was the perfect match. Now that I've had
the top up there, I'm going to glue
the top on here. But I'm thinking I might need a little gold brush
down along these edges. Although I am going to
tie ribbon around here, so you may not see it. But I'm going to
go ahead and just starting under the
ridge right here, kind of dust some on there. I can even do some
on top of the ridge in case any of that gets seen. I could do it across the
whole bottle if I wanted to, but I think that might
be too much cold. I'm just still dragging
it with the edge and letting the roughness of the paint because I applied
it with the sponge brush, it's got a little bit of
a stone like texture, a little bit of roughness. Let's get in this
edge right here. Just brush that
excess gold on there. That gives a little
gold to the top. Now, that could be done
over the whole bottle. And I don't think
I want to do that, though, because I
don't know why. I want it to really
stand out with the clay. But you can definitely it'll create the same kind
of look as it has there on the top if I was to brush it over
the whole bottle. But I'm afraid it would get too strong and I wouldn't like it. And then there's really
nothing I can do to undo that other than repaint. So I think I'm going to
leave it just right where it is the way it is right now
and let that fully dry. Then after this dries, I'm going to put this brush in the water close this up
before I end up spilling it. After this dries and this storm is over outside that
we're having right now, I will spray this outside. Just before I apply
the top and before I apply any jewelry and
ribbon, I will spray it. I'm going to set it over
here to let it dry. And I'm going to show
you these sprays. This is my favorite. This is crylon
matte finish spray. I prefer a matte finish rather
than a super shiny finish. If you want a super shiny
finish, this is the one to use. Triple thick crystal
clear glaze. It does make a definite shine. But I prefer a matte finish. And the only area where I might consider using a shine
on here is where the art is, just to make it
pop a little bit, make it look a little richer. But on the other hand, I do
like the softness of this, and I don't think I want that to be shiny
and the rest not. And it really is a lot of shine. So you really have to like
high gloss to use that one. So if you do like
high gloss and want your bottles real shiny and your art shiny, this
is the one to use. This one also smells
quite a bit stronger. They both smell a little bit. This one, the matte
finish is what I've always used because I just
like the matte finish. It's just a sealant
to protect it without changing the shine
of the final bottle. And in my case, because I am going to
add the jewelry to it, that's where my shine
is going to come in. And I'm going to depend on that to bring in the
shine instead of a finish. So I'm going to use this on my bottle as soon as
the storm is done. I won't be able to show this on camera because I have
to go do this outside. But you understand if you've done any kind of
projects before, when you put a finish on it, you're usually
going to spray that in a well ventilated area, which is outside for me. And it all works the same way. And I'll probably
put one coat on, wait a few minutes, and
then put a second coat on, and then let that dry
before we continue on with adding the top and adding the ribbon and
adding the jewelry.
14. Attach Ribbon & Jewels: Okay, I have sprayed the
bottle with the matte finish. And I went ahead while I was out there doing that and
added the topper. And I wanted to mention
that's real simple. So it's, you know, I just basically
took some E 6,000, which is the glue I used for
toppers to make them stay. I put it around the edge underneath here and
on the top edge of the lip of the bottle and
centered it and pushed it down, and it's on there pretty good. It's still not totally cured, but this is the glue to use for that because if this
knocks against anything, you don't want to
get knocked off. And you don't want somebody
to be able to pull it off. A lot of people use hot glue, and if it's not going
to be handled at all, then or if you're
just doing this for your own enjoyment, that
would probably be fine. But in my case, I put my art bottles at my
booth to sell them. And so I want the
strongest glue possible, and this is what works for me. So I did use that on the topper. Now it's time to
add some ribbon. Now, I have ribbon. I have various ribbons and all different colors and all different widths
and everything. Regular ribbon that comes
on a spool. I have cord. But a friend gave me these
pieces of material years ago. They're almost like a scarf, but I love to use these
for ribbon because they're vintage and they're very stretchy and delicate
and interesting. And I picked out I have
all colors of these, and I picked out a couple that I thought would
go with this bottle. This particular one, it
kind of looks beige, but it also kind of
has a greenish cast. It looks like it
goes really well. With the green on the bottle. And then there's
a sweet pink one, which I didn't know was
in there, but I found it. But it goes perfect
with those pink flowers in the design and little
touches of pink in the paint. So I thought I would cut
a tiny strip of these off to tie around the
top of the bottle. And that's what I
like to do with these is just cut
a little strip. Don't need a whole
lot of ribbon. So I'm not real good with
cutting a straight line. And it'll be kind of messy
and ruffled up anyway. And I cut one strip of
each color is the plan. And if I feel it's
too much ribbon, I can cut this in half. But there I have a little
strip of that one. And now let me get a
little strip of this pink. I think that pink is so pretty, it's gonna look wonderful
with the bottle. And I like to just kind of
work these in together. Usually I just do one ribbon. But when I saw these two colors, oops and how well
they look together, I thought I'd try to do two on this project 'cause I'm
going for the spring look. And what's more spring
than pink flowers? Alright. And it's okay to
have little bits sprayed. That kind of gives it
the interesting look. I'm just going to
take both of them. Here and sort of just
kind of wind them around. I want that top edge of that topper and where I
painted that gold to show. And I know you're only
seeing this from the top, but I'll show you the
side view in a minute. And I just kind of like
to loosely kind of wind it around and maybe tie
either tie them together. This materials real stretchy and makes some interesting ties, either tie together or separate here or tie them separate, and then tie these together
to make a little knot. The ribbon actually just adds a little bit of
softness to the design. It is totally not necessary
to add this any ribbon. But I just happen to like it. And I will adjust it to
where I want this to hang. This is hanging a
little bit low. So I'm going to
trim this one off. Okay. I'm going to trim this
one off a little shorter. It just adds that
little bit of softness, and then I pull it
apart on the ends and kind of refray those ends. But I love the fact
that this was a gift to me from a friend for me to
use for whatever I wanted, and I love the fact it's vintage look how
interesting that looks now. And, you can adjust it. This little piece right here on the end of
this is bugging me, so I'm going to take that off. Then I just fray the
ends wherever I've cut it so it doesn't look
like a straight cut. There we go. It just kind of gives
it a little bit of softness there, like that. And it blends in perfectly
with the design. And let's look at
it from the back. Just really unique to have that on there,
little bits of it. And I save all these little bits 'cause
you never know when I might want to glue these on a bottle and work into a design. So I save all these little
bits in a box down here. Oh, it's thundering outside. I don't know if
all can hear that. Worst time for me
to be doing this, but I'm trying to
finish up this class. So now I got jewels
and I have gold, eye pins, and head pins,
some jewelry tools. And a chain. I make jewelry. I've made jewelry
for many years, so I have tons of chains. I don't like to have the
clasp on there, though, so I take the clasp
off of the chain, and I'll just use the chain to wrap around the
neck of the bottle, and this will be for me
to hang some beads from. I'm just going to there's a little jump ring here
on the end of this. I need my other
glasses on so I can see that's why I don't
make jewelry anymore. It's too difficult for me
to see the small parts. But there is a split
in the jump ring. So you can grab it with this jewelry pliers is flat
with a rough edge there. Really good for doing
stuff like this. I just grab it and hold
one side down with a fingernail and
pull the other side toward me to open
that little ring, pull the clasp off, and then close the
little ring back closed. And I'll save the class in here in case I need it
for something else. Then what I like to do, it's kind of hard to see
with this hanging down. And it might be kind
of hard for you to see this whole thing. I don't know if I can get a better zoomed in angle
or not. Let me try. Let me try to scoot this down. Without it hitting
me in the head, I don't know if
that's gonna work. Alright, let's try
something else. Let's get down here. See if I can do this. You might be able to
see a little better. Let me lower it some more. Sorry about that.
I don't I don't necessarily think
you need to see all my outdoor driveway stuff. I'm trying to get situated here. It's gonna be hard
for me to see. I'm gonna have to zoom out
a little more or zoom up. This isn't gonna work. Just go back up there. It's
a little better. A little more room there.
Okay. I got to see where I am. I've got the chain
here and I take the chain and the wrap
it around the bottle. I like to tie it. This is
a real delicate chain. Tie it and maybe wrap it come around this way
then and tie it again. I could clip some of this
off if it's too long. I'm actually just going
to tie the chain in a knot or I think I am. Soon on chain. There we go. It's in a knot. It's a loose
knot, but it's in a knot. And then I have two long dangles here, which are too long. So you know what? Let's do this another way. Got another idea. Rather
than tie the knot. Now I got to untie the knot. I'm gonna crop clip this chain
off and make it shorter. Then I can use the other part for another piece
in another time. As soon as I get my knot undone. Well, come on now. As you can tell, I'm not real
organized with this stuff. There we go. All right. This piece of the chain, which
is the extension piece of the chain has three
large jump rings, which are a great place
to hang some beads. I'm thinking I could attach
that top jump ring to this at a shorter spot right in there. That's
what I need to do. Grab that pliers. I want to open
this jump ring up, pull it hold one side down with your fingernail or another pliers
pull it towards you. Get it as tight as you
want up near the neck of the bottle and slip it through one of the links in
the longer piece of chain, and then you basically just go the opposite direction
to close that jump ring, which I don't know if you
can see that, probably not. But you just want to
make sure it's closed tight so it's not going
to come open now. Maybe it'd be better to
move this out of the way. I just turned it around. Now we have it
wrapped around there, and we have this place
here for the dangles. I got this one dangle
that's kind of a little bit shorter where I could dangle some beads on that jumping, there on that jumping, and
also where I just hooked that. And this one is a little longer, and I'm thinking
about having to stay a little longer and clipping this off with the wire cutters. Somewhere. I don't want
it to be too long. Somewhere right there,
and I'll save that. And I have another jumpering here that fell off
from somewhere. So that could Go on that
very last loop there. Let me hold this up
so you can see it and then squeeze that
jumper in closed. Make sure it's
closed tight. There. So now we have one
dangle that's a little bit longer than the other one, which is interesting. That's a good place
to add some beads. Now it's a matter of what beads. These are head pins and
these are eye pins. Or vice versa. Bet
y'all need this. So I definitely want a couple of these pink
ones involved somehow. The pearls would be pretty, too. Even though they're
a little bit white. That one is. What
about this one? This one's more creamy. So this one might
go a little better. So I'm gonna cut over the I'm just going to clip
the Those my little scissors. I'm gonna clip the string ser on and get some of these pearls off. There we go. I got a couple
freshwater pearls there, which are kind of interesting. I like to pick out my favorites. I don't want to use too many, so put those back in there. And then these pink ones, I got those out of this
box with these crystals. These crystals are
extremely pretty. But I would love to have
this whole dangle here. But you see how big that is? That's going to go
right over his head. That's gonna be way too much. It could hang from up here. It's still might be a little
too much for this bottle. This I would say
is a large bottle, but I think this might be more appropriate on an
extra large bottle. I could hang it from up
there up under the ribbon, but when the ribbons turned
around, you won't see it. But those sure are pretty. Oh goodness. I'm really
wanting to use one of those. But little these
little beads here, I just noticed they have
silver pins already in them. So silver or gold. I'm not gonna use those.
I'm gonna use the pinks. So let me trim get these tanks to where I can get a few of them off of there. Where that went on
my floor somewhere. Get a few of those out. Don't need to overdo it. But look at this. If
you can see this. That blue with the idscence of the aurora bolus goes
beautifully with that blue bird that picks up that lighter blue and the
darker blue that's in him. So I definitely want
to incorporate some of these this blue here
is two turquoise, so we're not going
to use that one. Got another one that's
iridescent but still turquoise. We have this strand here that has a couple of really pretty crystals with the gold beads in between them. And so I'm thinking with these beads and I wish that wasn't
so turquoise there. I think that turquoise is going to be a Well, it
may not be too much. Well, it probably
will. Decision making. I'm going to cut off
some of these crystals. I want to get out some of them. We get the little gold ones that are in between them as well. So I got a couple of crystals
there, three of them. And then there's the square one, which is very similar to that. Now, that might be interesting in
there and a couple of gold accent beads around it. And then some of these that I already said
match perfectly. That is tied up in I
don't know how many. I may not use all of them. You know, very many of them.
That's enough to start with. I'm gonna move these
out of the way. I got a nice little
selection here. See? Nice little
selection there. To work with. Let's try to keep it
zoomed in a little bit. So now I want to figure out
how I want to align these. This is the longer chain. This is a medium chain, but it's got a loop, a loop, and a loop there to
hook. Different things. Let's just go with some get
a couple of headpins out. The headpins is what
you use on the end. The eye pins is what
you use in between. So what bead might I want on the end right
near the bluebird? Do I want one of these
little blue ones? Do I want a crystal in there? Maybe. I don't want to pearl. Well, do I want to
pearl in there? I might. Maybe just
do a mix here. Let me see how this crystal
looks like that with one of the small
blue ones like that, and maybe a pearl to top it off. That might be kind of pretty. I feel like it might need
something above that. I don't want it to be too. Maybe one of these
little gold ones. No. I'm not sure about
that pearl there. I wonder if the pearl should be between these two, perhaps. Let's see if I can
find the hole on this pearl. There it is. Yeah, I think that might
work a little better. So now, in order to do the headpin to get it
suitable to go on that loop, I am just going to
use my round nose, needle nose, round
nose, jewelry pliers. I grab it right down
here at the end, hold it tight, push
the wire away from me. Roll those pliers right back on top of where I did that and push it back toward me. And that will help
form the loop. See now we have a
little loop and I can cut that right there. And I can finish curving it
with those round nose pliers, but I need to hook
it on here first. Like that. I got to get it in there
good and roll it back around so it's tight like that. And then I just
pulled the loop off, so I did not have that jump ring as tight as it needed to be. So I need to get
that back in there. This is really hard to do
when you can't see very good. Oh, my goodness. I have to open it wide again
to get it in there. There we go. Now close it back. This time, I'm going to make
sure it's nice and tight. I don't think that's coming off. Squeeze it together good. Squeeze it together
that way a little bit. I think we're closed now. So there is the dangle
by the Bluebird's head. And that's got that
little blue bead, the crystal bead,
interesting looking pearl. Now, this one, I've got several places I can
add different things. So let me get another headpin
and let me add these, I think I want to separate
out a little more. I'd like this larger squarer
one to be toward the top. Maybe a pink one in there with that and maybe a pearl
in there with that. Maybe. Let's see if this
is going to stay on. Let's do this pearl here. I love these freshwater pearls because they're so interesting. Then this one, you see that
can hang from up there. I could do another
little cluster of beads coming off of this. I'm going to put one of these
little gold topper ones on there too and I'm going
to do the same thing again. I'm going to grab it there. Hold it tight, push it away
from me to that angle there. Continue holding it tight. I hold it at the tip because
if you go further this way, your loop's going
to be a lot bigger. And I haven't done
this in years, so I'm out of practice on this. And these aren't the
easiest headpins. I got the headpins and
eye pins at Hobby Lobby. And let me cut this drop that little piece back in there. Got that piece back in there. And this I'm gonna
hook up here where this top loop is there. And then I'm going to I probably should have trimmed
that off a little bit more. Turn it to close it. I could wrap them around to really finish
them out nicely. Oops. Sorry about that. Sometimes I do that. But
this one is going to be not as visible
because of the ops. Because of the ribbon
once it's turned around, you won't see that as much, so I'm not worried
about that as much. I would like to put some
on these two loops, that loop and this loop. I might want to
put another one up there. Coming off of that one. Let's do that. Let's do a pink. No. Yeah, let's do a
pink and a crystal. Let's just do a pink. With the gold spacer beads, these little tiny
beads around it. Oops. And then I can
attach this up here. Well, I actually think I do
want the crystal in there. So let me do a crystal
on top of that. I don't think I need a
spacer beat on that. I'm gonna do the same thing. Hold it tight, bend away, hold it tight, bend back
toward me, like that. Clip it off. And I'm going to hook this one
on that same loop. And I know this is
difficult to see, grab that round nose once again and make the loop go closed. If it doesn't seem
to close good, I'll use the flat pliers to
really push it close good. So now I have a little cluster there of a couple
of different ones. Now I have two more
loops here. Let's do. I really don't want a
big pink one there, but I wouldn't mind one there. So how about we do? Um, Let's do a pearl. On that headpin. If I get it to go on there,
it doesn't want to. That one doesn't want
to go all the way down. These freshwater
pearls are a little bit different than
the regular ones. That one doesn't want to go
all the way down either. All right. Let's do
a gold spacer bead. And then this pearl, Okay. So as I can get hold
of it, there we go. I'll go down to the spacer bead, and let's do the pink one. And let's do another pearl. There we go. I will put this
one on this loop right here. Yeah, let's do that. So I'm going to grab this down
as close as I can, push those beads down tight. Push away. Roll this up, bring
back toward me. Go almost all the way to me
to make a loop like that. I'm going to go
ahead and cut this. Then I'm left with this. Can you see that? Like that. I got to find this
other loop here. Now, these don't have to
go on specific loops. This can go through
the actual chain. If needed. I'm going to roll
that loop closed the best I can and tighten it just a little bit with the flat ones just
to make sure it's tight. So now we have that it that's not tight enough.
Well, yeah, it is. We have that little
pink one there, but I have this loop off the
bottom of this right here. I can add one more to have a little bit longer dangle here
to go with this one. I have these beads I
pick that are left. I didn't use any of the iPins. So I need another gold spacer. Okay. I really do like those. I can find some to
get off of here. So let's put a gold spacer. Let's put a blue bead. Let's put this crystal bead. Let's put another blue bead
and the last cold spacer. To have a dangle like that, which will hang
down right there. Yeah. That should work. I want to pull this
down tight, bend away, turn it, bend toward me, almost all the way
around, clip it off. And find that piece of chain that has the
loop, put it on there. Roll it closed the best I can. Always say the
best I can because I've already proven
I messed this up sometimes and then take the flat pliers and
really squeeze it closed. Now I have a nice little
bead dangle display, and this can be adjusted to move off to the
side if you wanted to. But let me move
my ribbon around. L sew and push
that ribbon down a little, kind of resituated. All right. I'm
going to zoom out. I'm going to move back up
so I can hold this up so you can see. Alright. So now, this is what we have. And, of course,
you'll be able to tell more from my pictures, which I take straight on. But now we have those pretty
beads that go with the bird, and they can be off the side. They can be more
toward the front. They can be wherever
you want them to be. But they're not too long where they're interacting
with his face, but there's enough up here
to create some interest. And with the ribbon, it just really adds a
nice soft touch to that. And that is the end of what I
do to create an art bottle. And this is a spring version. Which was a lot of fun and a lot of colors that I
don't normally work with. I normally work with darker, more dramatic bright colors. So this is really
different for me, but I really like the
way this has turned out, and it looks just as pretty from behind as it does
from the sides, and as it does from the front. I like being able to adjust
the beads. I love the ribbon. Might even turn it
more to the side, just a little or pull
it down a little more. And this ribbon will spread
out a little further, too, be a little
fluffy, which I like. But that has turned out to just be a beautiful
spring art bottle. The only thing else that
I do at the end is I will sign my name there on
the bottom in gold ink. And that will make this
one done and ready to go and be added to my booth. But I'm happy with it. I hope you guys have enjoyed
watching this process. I know it's been a
little tedious at times. But like I said, you
could do as much on your bottle or as little
on your bottle as you want. You could stop at
the art stage and paint stage before
you get to the clay. You could go to the clay and skip the jewelry,
do a nice ribbon. That would've been fine. I just happened to like the jewelry. Um, I like to add a lot more
jewelry than this to them. And some of them, I do. But for this class, just to
keep it a little simpler, I'm just adding a few things. So I hope you've enjoyed it. I hope you like the bottle, and I hope you will have fun
creating your own spring themed art bottle with
some of the things you have gained from
watching this class. You guys have a great day.
15. Final Thoughts & Thank You: Congratulations on completing the Spring
art Bottle class. I hope you will
enjoy the process of taking a simple glass bottle and transforming it into something decorative and unique for
this wonderful season. One of the things I love
most about projects like this is the
idea of upcycling, taking something ordinary which
might otherwise be thrown away and turning it into a piece of art that
can be displayed, gifted, or even collected. Every bottle has its own
shape and character. Every artist brings their
own ideas to the design. That means no Artful
Treasures will ever be exactly alike. I encourage you to keep experimenting with
the techniques you've learned in this class. Try different artwork, different colors,
different embellishments. You might create
bottles with birds, florals, vintage images,
or other seasonal themes. Even if you only take away a few helpful ideas
from this class, like preparing the
glass for paint, building a design around artwork or adding
dimensional elements, those techniques
can guide you in creating many more
beautiful pieces. Thank you so much for
taking this class with me.
 Jai Johnson, Painting My Favorite Subjects