Transcripts
1. Introduction : Today we are diving into the relaxing world
of punch needle. It's a simple and satisfying
technique that involves punching yarn through a fabric to create beautiful designs. Hi, I'm Sana Asad. I'm an artist, art educator, and holistic Art
Therapy practitioner. Whether you are a
seasoned crafter or a complete Pigna, this
class is for you. We will cover everything
from choosing the right materials to
mastering the basic stitches. The repetitive
motion of punching the needle can have a
calming effect on the mind. It's a perfect source
of art therapy. Let's begin the class.
2. Material : Before we get started,
let's gather our material. In this video, I will show you the different punch needle, fabric we use for
punch needle, glue, scissor, hot glue gun, what fabric we can use for the backing and the
embroidery frame or hoop. Type of needles. There are many different type of
punch needles available, but we will be using the
adjustable needles with screw. This type of needle allow you to change the size of the hole according to the yarn
you have. Choosing yarn. The type of yarn you use will depend on the effect
you want to achieve. If you want fine small loops, then definitely the thin yarn
will be the perfect choice. If you want a fluffy
or more soft effect, then you can use the
thick or any fluffy yarn. Now on the screen, you can see
there's a small mini chart where you can find
the approximate thickness of your yarn. Choosing fabric, monk cloth, ada cloth or burlaps are all good choices for
punch needle projects. Monkcloth is a
tightly woven fabric that is perfect
for small details. Ada cloth is a more loosely
woven fabric that is good for larger designs and burlap is a coarse fabric that is perfect for the rustic
looking project. I prefer using burlap
when I am doing some abstract or maybe a
Bohemian theme projects. I am using burlap for
today's class project. Cutting your fabric. Once you have
chosen your fabric, you will need to cut it
to the desired size. Make sure to leave a few
inches of extra fabric. Hop or frame. You can use any hoop or any frame,
whatever is available. Just make sure it
is tightly screwed, or you can also use
any canvas and remove the canvas sheet and just
staple your cloth on the frame. This way, you don't
need to invest in expensive frames as the starter and once you get
master in this skill, you can definitely invest in the better quality
of the material. In next video, I
will show you how to design and how to transfer
your design on your fabric. See you in the next class.
3. Class project : Hey, everyone. In this video, I will share how you can use the class resources to practice
and mind map your ideas. You will be able to
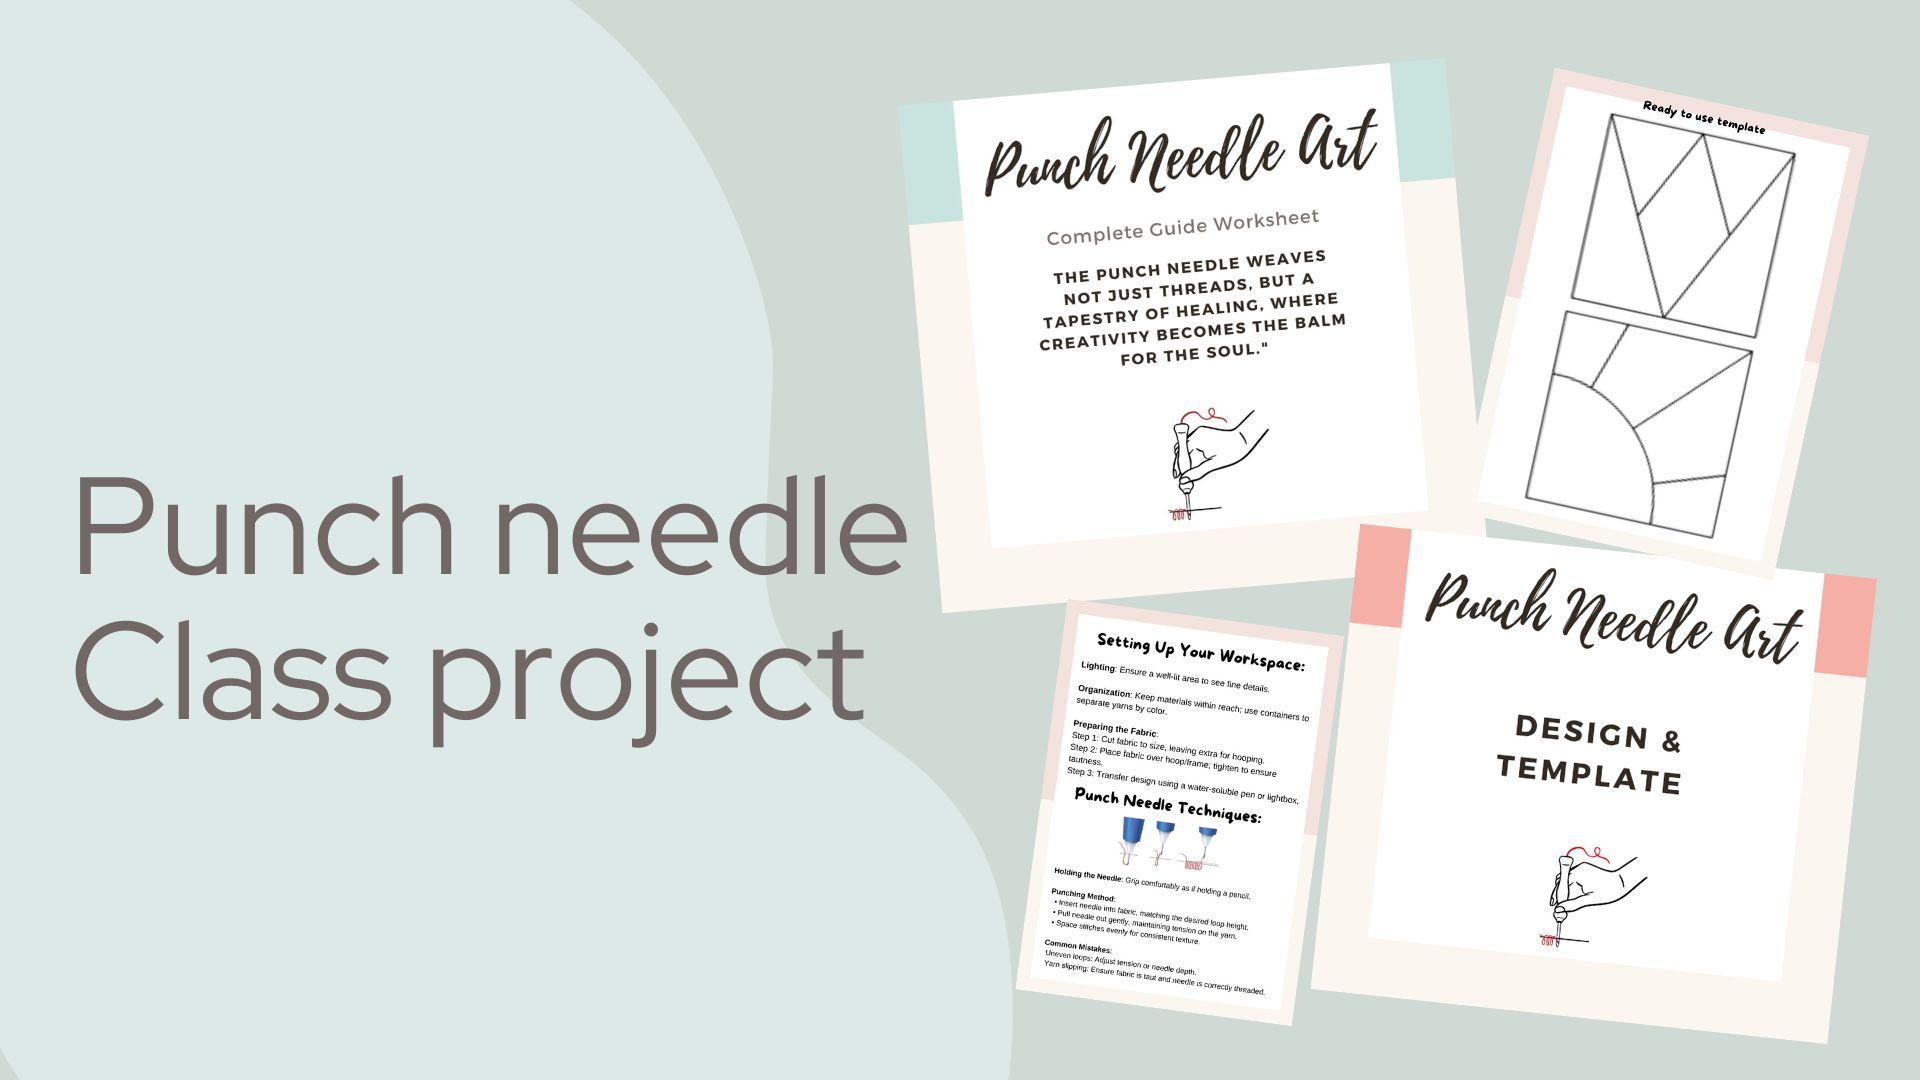
see two different PDF. One will be the basic punch
needle materialist and guide in which you will have all the materials you need
to use for punch needle. In other PDF, you will be
able to get the templates of designs and just
the empty shapes to make your own design. You can print out, take your
time, do your mind map, plan your color scheme, and for color scheme, you can always take help from Pentra. You can write down the colors of your choice and
according to that, Pintrs will be able to give you the references and different color schemes
to choose from. Once you have all
these things ready, start with your punch needle. I can't wait to
see your projects. Don't forget to share as soon as you finish
your projects. See you in the next class.
4. Lets Design : Welcome back to the lesson, and in this video, I will show you how to transfer or how to design on the fabric. I have some printout of
the design and I just use simple carbon
paper using the pencil and giving a heart pressure so the design can be
transferred on my fabric. But for this lesson, I'm not
doing this because I want to come up with a completely
intuitional design. I don't have any reference. I'm using a small notebook and I think I should do it a
small square design. I will use few colors and just going to
make some patterns. As a beginner, you should start with one color or two color, and then you can add more colors because the
more colors you will add, you might get a little confused of where to start
and where to stop. Here you can see I'm just adding random wavy lines in the box. And then let's see where
this design will take me. I have something in my
mind that I might go with a little earthy tones or a natural tones of
brown and beige, but let's see how it goes. One more thing I
want to tell you, I transfer my design
on the back of the hoop instead of doing
the front side because I will be mainly working
from the back and then my main side
will be on the front. Now I will see you in
the next video where I will show you how to
thread your needle.
5. How to thread yarn ?: Hey, everyone. Welcome
back to the lesson. In this video, I will show
you how to thread your yarn according to the size of the
needle hole and your yarn. Start by selecting a needle that matches the
thickness of your yarn. I'm using the adjustable needle, which can be easily changeable with the
different sizes of the hole, and then I can change
the yarn size as well. A larger hole needle
is best suited for thicker yarns while
a smaller needle works well with fineer yards. This ensures smooth stitching
and preventing any snags. Here you can see I can also
adjust the sizes of my loop. So if I need the long loops, I can definitely make the
needle as high as I can. And if I need the smaller loops, I can just make it
and reduce the size. Make sure if you
have this needle, then make sure you are using the flier and tight
the screw thoroughly. Otherwise, you might have
different sizes of the loop. Let's begin to
thread our needle. I'm using the threader and I'm using the back of my needle. As you can see, the backside
is all the way along with a pointy edge and the other
side have the opening. As you can see on the screen that I'm just inserting
and you can see, I started this from
the back of my needle, as you can see the white flap. Make sure you will insert from the back and go all
the way straight. Right now I'm using
the medium size yarn. That's the reason
the hole is also not very big. Just pull it. It might take a
little extra effort, but just keep calm, relax, and don't
forget to breathe. Once you are done
with your threader and threading your needle, you can practice this for
several time and if you have the same needle with
adjustable needle sizes, then definitely you can try different needle size and
different yarns, how it works. Make sure you
practice because in case if you did not
thread properly, your loops will not be form. Practice, pause the video, replay the video as
many times as you can. If you have any
question, don't forget to comment and I will
be happy to explain. I will be using different sizes of my needle and different
sizes of the thread, so you can always keep looking
at the video till the end. And I will put a little
music so you will be having more calming effect
while you are doing this.
6. How to stretch your Fabric : Hey, everyone. In this video, we are learning how
to properly stretch your fabric to ensure
perfect loops every time. Stretching your
fabric is crucial. If it's not tight enough, your loop won't form correctly
and might even unravel. Start by placing your fabric
over the hoop or frame. Make sure it's centered and smooth out any
wrinkles you have. Begin tightening the fabric
evenly around the edges. Always double check that your
fabric is tight and secure. Once satisfied, you are ready to start punching beautiful
loops with ease. With these simple steps, your punch needle project
will be a success. See you in the next lesson.
7. Lesson Part-1 : Hey, everyone. Welcome
back to the lesson. Now let's start with
our final project. Thread your yarn through
the eye of the needle, ensuring it's loose
enough to move smoothly. When you ensure it's loose
enough to move smoothly, this prevent breakage and allow your loop to
form perfectly. Hold your punch needle
like a pen with a slanted edge facing the
direction you are punching. This ensure the loop stays
secure in the fabric. I prefer to start with the
outlining of the design, but it's completely up to you. As a bigner, I would suggest
you to do your outlining, keep checking your loops from the backside and make sure
that loops are all even, not small and long,
long and short. Otherwise, it will look very
untidy once you are done with the project
and it will be very difficult for you to go
back again to fix it. Keep checking in case if
you made any mistake, you will be able to fix it. After completing the outlining, gently pull a needle
away from the fabric, leaving a small loop or just
a half inch of the thread. Take a sharp scissor, cut the edge, and
you can restart. Oh begin from the new line
and follow the pattern, filling in or
outlining as needed and repeat the process of securing and cutting
the yarn as required. By handling the yarn carefully
and securing each section, your punch needle
project will stay intact and maintain
its beautiful texture. For me, sitting in my cozy
corner every night watching my favorite show or listening to the podcast is something
I feel very therapeutic. In this sacred space, worries lose their
grip replaced by the vibrant colors and
texture under my fingertip. Here I am the
architect of my world, crafting beauty from simplicity, finding joy and peace. Sometimes it's more than just a pastime.
It's a sanctuary. Art is something I can
do whenever I have time, or most of the time I
take out time to do art. Beside my lesson planning, I make sure that I will
do something for myself, whether it's painting, crafting, or currently it's punch needle. So here you can
see I'm done with my outlining and this
looks beautiful. Now it's time to
check the loops, make sure all the loops
are at the same size, and then you can
start filling inside. I prefer to do it with
one color at a time, but it's completely up to you. See you in the next video.
8. Lesson Part-2 : Hey, everyone. Welcome back to part two of our main design. Let's fill the empty spaces. As I begin this piece, I'll be working with the fine gold yarn to add a touch of elegance and
sparkle to the design. In each segment, I'll start by outlining with this
shimmering thread, creating a guiding path
for the colors to follow. I will be using a fine nib, I have two punch
needles in front of me. One is filled with gold color, which is a fine thread. You can see the size of the
eye hole is very small. Now let's begin with
the gold outlining. The gold act like
a beacon directing the eye and settling the stage
for a vibrant hue to come. While I'm doing this
gold outlining, please make sure you
will pause the video or replay the video
wherever you see, you don't understand anything. You can always contact me, comment below, and if
you have any questions, I will be happy to explain. Let me share some tips for
perfect punch needle project. First thing is definitely
choosing the right yarn. Whatever is available or
whatever your design is, choosing the right
yarn will make your punch needle
project stunning. Tension is key. Make
sure your fabric is stretched in the hoop or frame to ensure your stitches
stay secure and even. Mind your punch depth. For more texture, vary
the depth of your punch. Deeper punches create loops on the reverse side,
adding dimension. Plan your color palette. Before you begin, lay out your yarns to see how
the colors interact. As mentioned, you
can always take some help or inspiration
from Pinterest. The most important
practice patients. Punch needle art is as much about the process as the result. Take your time, enjoy each punch and let your
creativity guide you. Experiment and explore. Don't be afraid to try new
techniques or pattern. Now, as I'm done with
my punching the design, let's begin the cleaning. All the extra loops,
what you see, which are long loops
while we were punching, we were also punching some
of the loops which came out. I'm just going to
take a sharp scissor, just cut them and
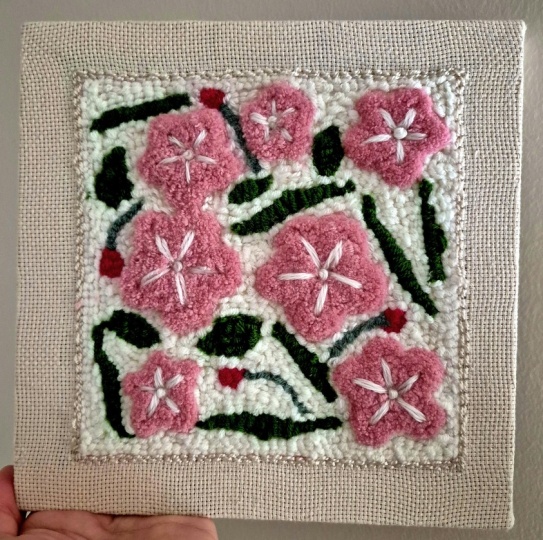
make it all even. As the course come to the end and I just want to share flips, few pictures of my recent
art therapy session, which we did in a rehab and the beneficiaries
were really happy. They never did this before, but the calming effect
and repetition of punching back and forth was something very
soothing for them. Now as in the starting
of this course, I already told you
that this piece is a completely intuitional design. I did not plan anything. I just want to do
as an art therapy and record this for you
and share my skills, what I learn and how
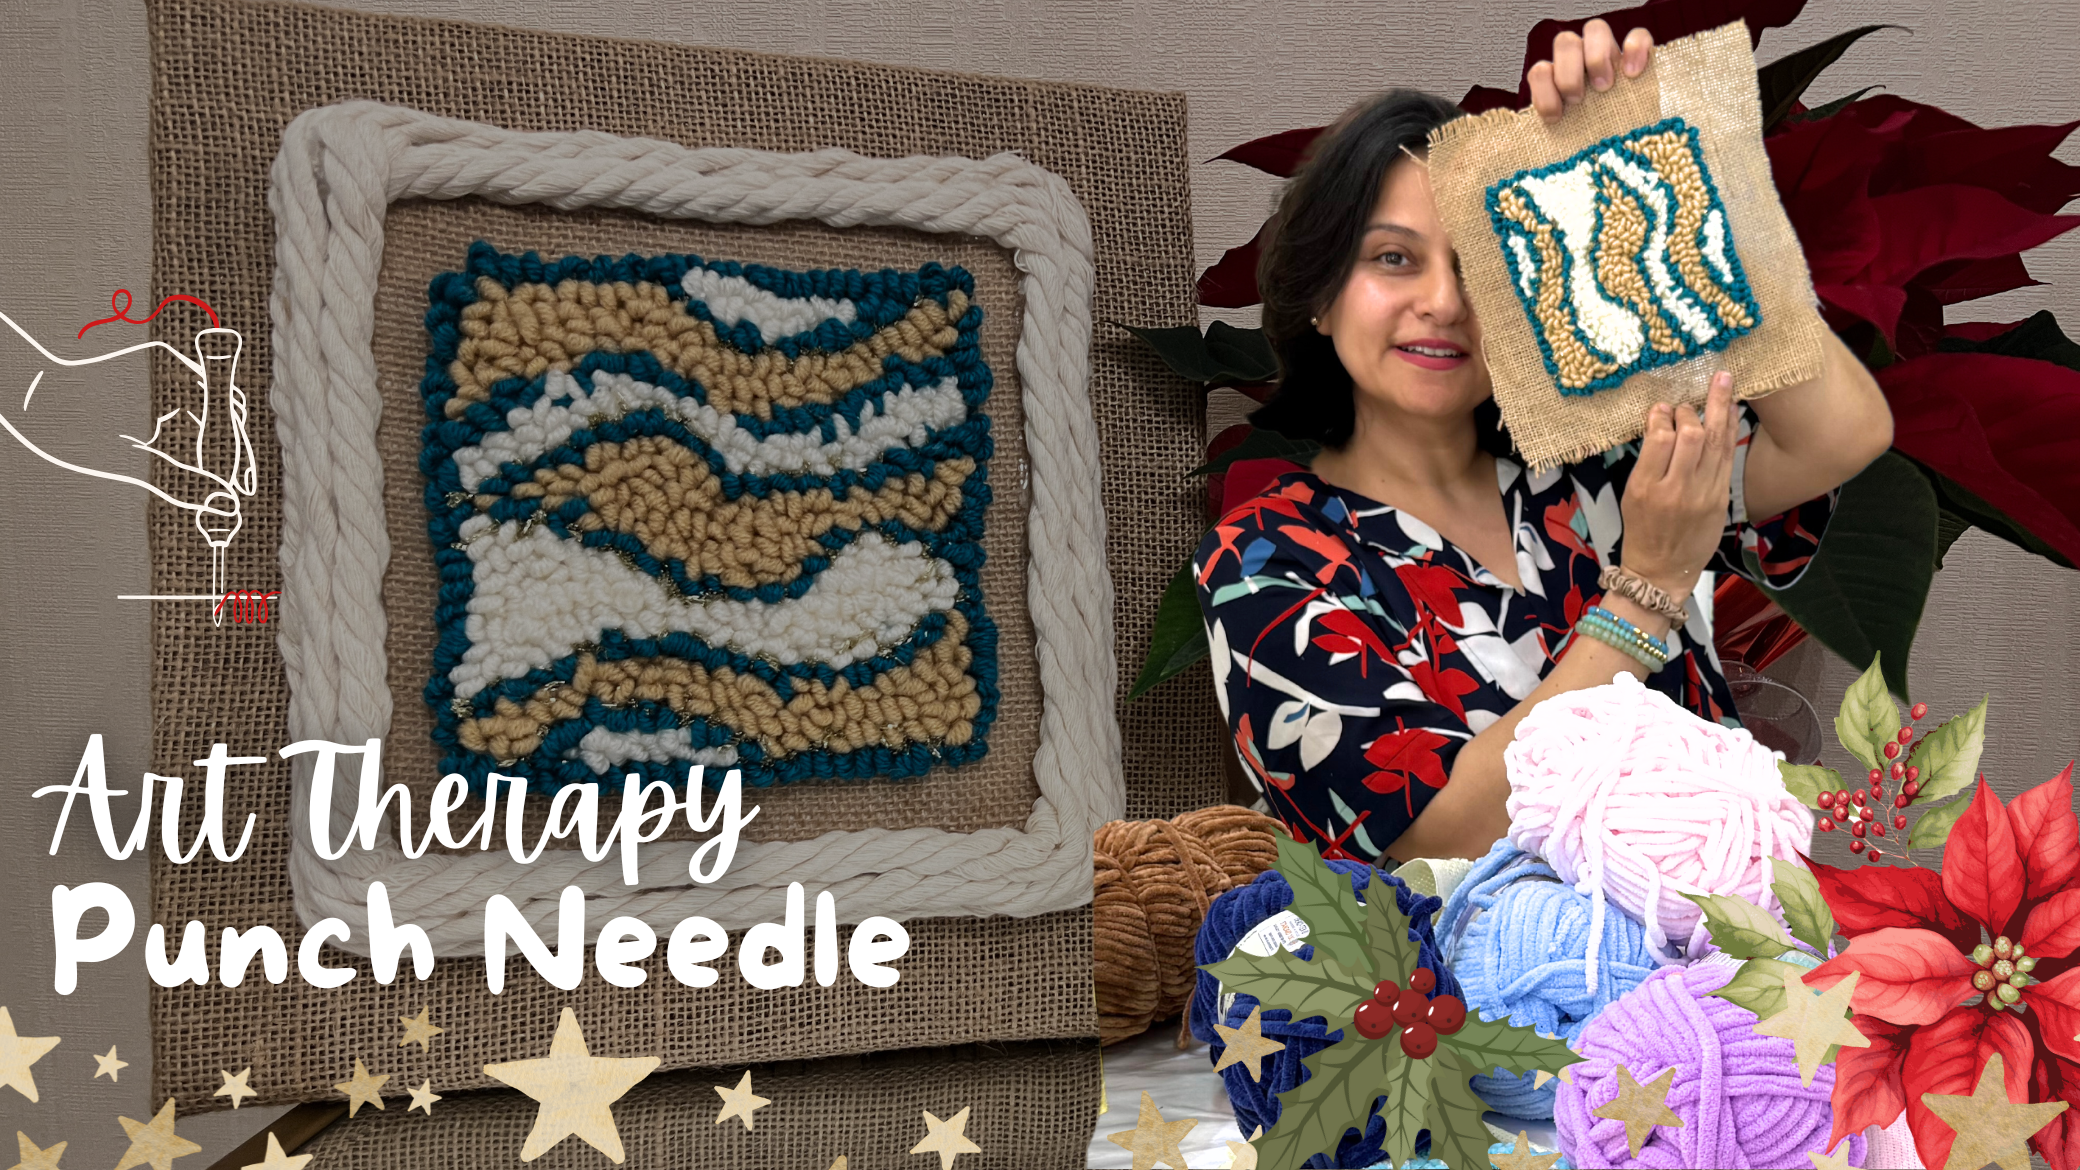
I do punch needle. Now it's all about how I'm
going to present this. Whether I will make
just a coaster. But I have some other idea. I'm planning to make a
small mini Bohemian frame. I'll see you in the next
video with the final touches and giving the finishing and adding the frame. See
you in the next class.
9. Finishing & Framing : Hey, everyone. Welcome back to our last video of this course. Here I'm in the studio and my piece is ready to be framed. I'm using a simple canvas and I will wrap around
with the glue gun. Otherwise, if you
just want to make a coaster or you can do
the packing and all. But for this project, I'm just going to use glue gun and wrap this around my canvas. When I'm in the studio, I always find
something interesting. Here I have this rope, which I feel I I'll add this around the corners
like a border, it might give a very nice
Bohemian theme effect. Let's see how this final
piece will turn out. And you can do it
according to your choice, you can use a simple photo
frame and you can frame it. If you have some
kind of a canvas, you can definitely try
doing the same thing. But the main idea was how
to do the punch needle. After that, there is
a lot of variation how you want to present
your punch needle piece. After completing this, I feel
still this is very small. I wrap another canvas with a burlap to make a
double framing effect. First, I thought,
let me give this to the professional framing people and they can do their job. But then I thought,
why not? I can try. I'm really happy that I
gave a try and this is exactly what I was
thinking of this piece. And here I'm done with my punch needle wall
hanging project, and I'm really, really, really waiting for your
projects to be submitted, and I can see what
other variations you are coming up
with your own ideas. Looking forward to
see your projects.
10. Final Thought- Thank You for joining. : This class come to the end, and I really enjoy teaching you this technique
because for me, my new festive art
project is ready. I hope this can be a new edition for your
home decor this season. Don't forget to share your
comments and your projects. Looking forward to see
you very soon with a new art therapy exercise and projects. Take
care, everyone.
 Sana Asad, Inspiring Self-Discovery Through Art