Transcripts
1. Introduction: The object of art is
to give life a shape. The great artists,
because on one side it took me four years
to paint like Apha, but it took me a lifetime
to paint like a child. So this class is all about
understanding the child, which is there inside you, and how to draw using the shapes and creating them
into a beautiful artwork. So I warmly welcome you all in this new class
in which we are going to use the
shapes and turning out into them a
beautiful artwork. So welcome to anyone can
draw, drawing through shapes. So, let me tell you
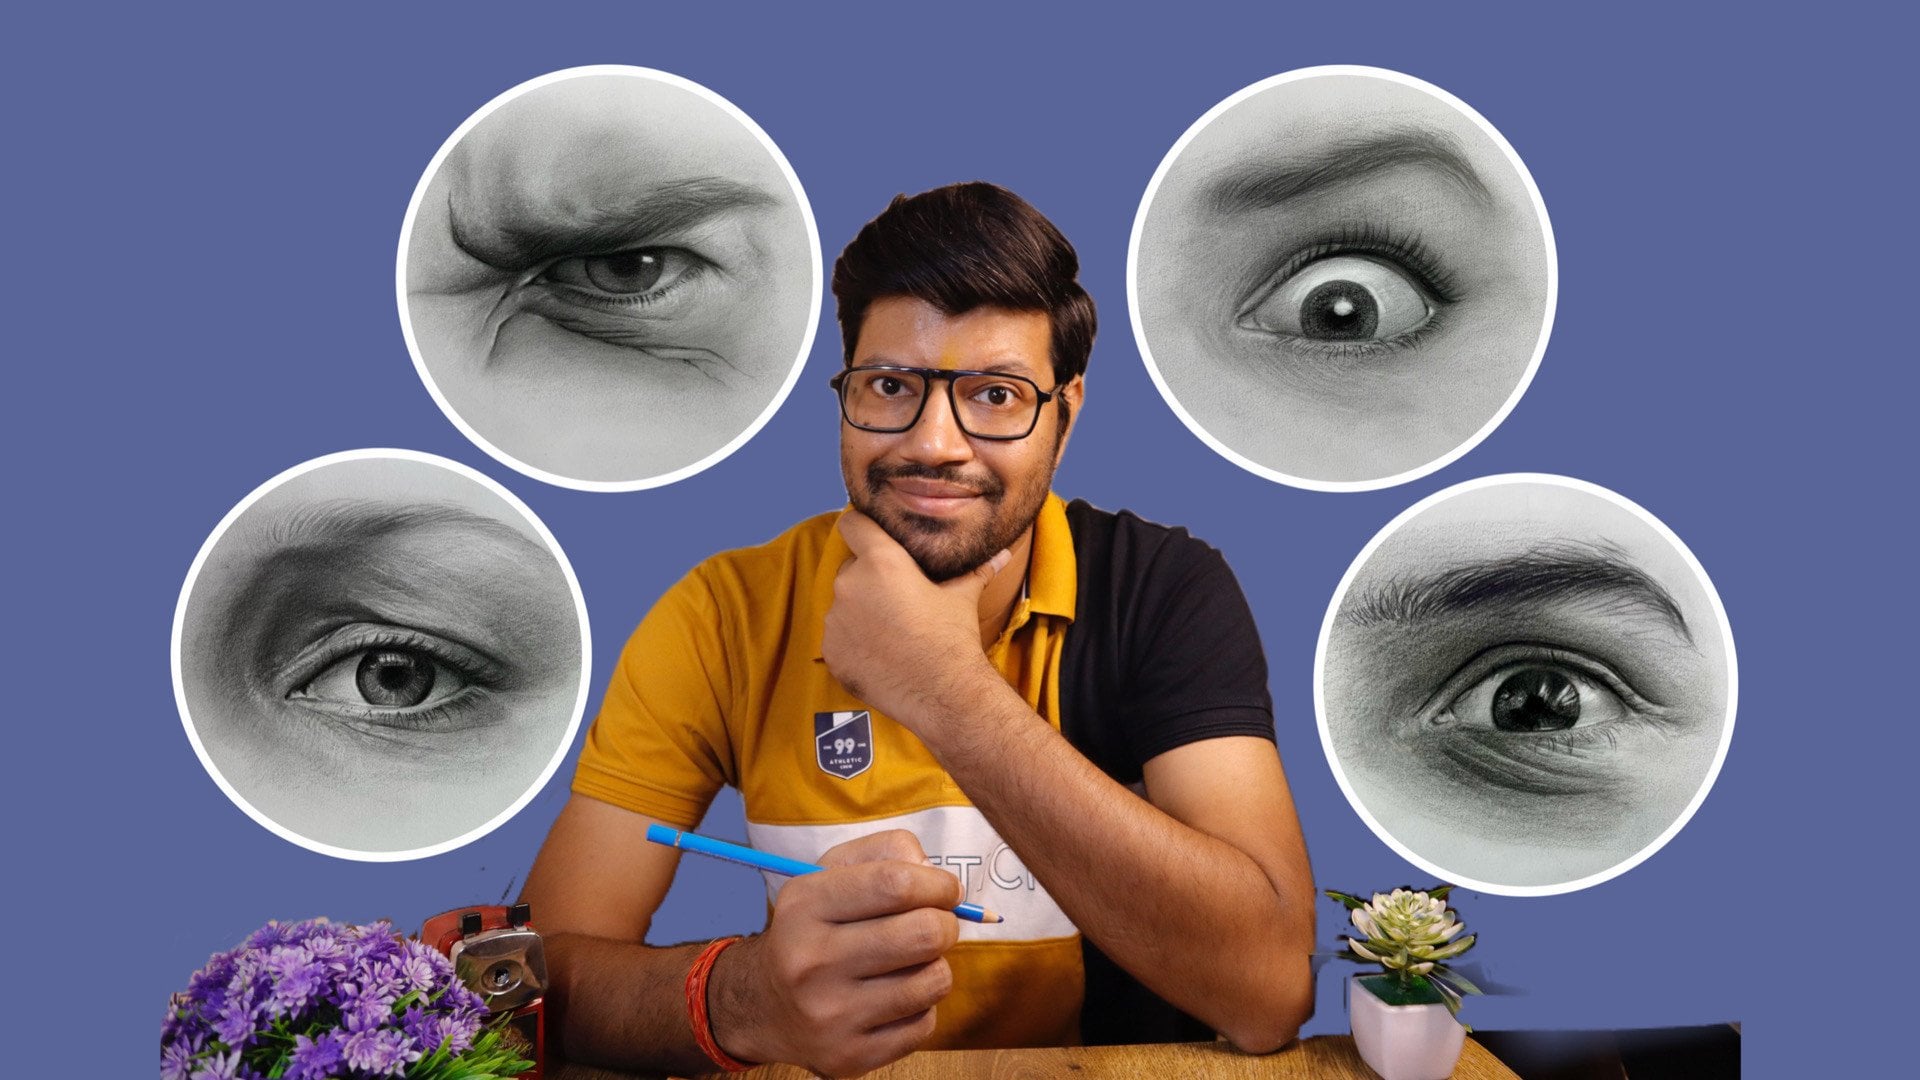
something about myself. I am Anki Smathia. I'm an artist based in India and following my art passion for almost last 15 years to
spread the awareness of art, I am having a
Youtube channel with the name of artists and
Kias Matia and having a subscriber family of 400 K. This is my eighth
class on Skillshare. I have already uploaded so
many classes on Skillshare about drawing shading,
painting software cells. I am basically working
on dry media and this class is also on
dry media techniques. Here, this is the
most unique class, as the theme of this class is very
different from the other, because here we are
going to draw using the shapes and turning the
shapes into the masterpiece. Whether you are a
complete beginner or an amateur artist who really
want to refine their skills, this class is designed
to empower you with a versatile and fundamental
approach of trying. Art is often perceived as
complex and intimidating, but here is a
secret at its core. Art is about simplifying the
world around us by breaking down their complex structure into basic shapes like circle, cone, triangle,
square, and many more. Just by using these objects, you can draw anything
confidently. And precision shapes are
the artists essential tool, the foundation upon which
artwork can be built. In this class, I'm going
to guide you through easy steps that will revelize the way you
approach drawing. Understand basic
shapes, then break down complex structure
into the easy one. Follow step by step drawing
process at depth and detail while using shading
and then evaluate, adjust, and finish the artwork. So these are the steps
in which we are going to break down the complex drawing into the easy one throughout. In this score, you
will not only gain the deeper understanding of fundamental drawing principles, but also build the
confidence to tackle with the complex structures and
the wide range of subject. By the end of this class, I'm sure that you are
going to understand the shapes and how the objects have been
created by the universe. Whether you are a dream of becoming a
professional artist or simply want to enhance
your artistic abilities, this class will provide you with the knowledge and technique
that you need to succeed. So grab your sketchbooks
and let's dive into the wonderful work
of art through shapes. Let's embark on this
creative journey together and discover
the artist within you. I will see you in
the class project.
2. Class Project and Material: First of all, thank you so much for showing your
interest in this class and took a step ahead to learn the super
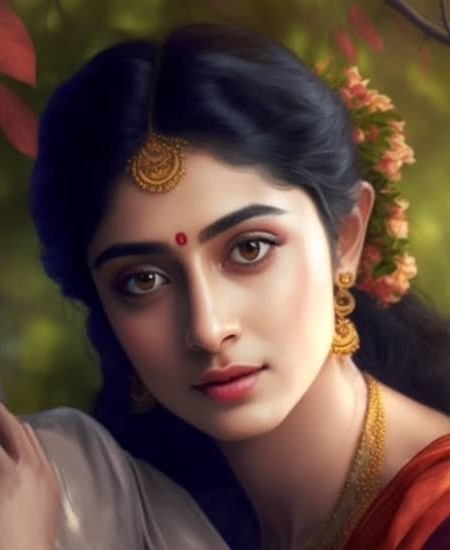
amazing techniques. Our project for this class is to create a portrait
using various shapes. You can take a reference what
I am using in this class, or you can take your own. The reference image is there in the project gallery section. All you need to understand is
to first observe the shape. Here you can observe
the shape of the face and what are the
basic shapes that has been. So we can break down this
phenomena into a simple manner. We have circle, we
have a triangle. And then we have a nose, which is having a
shape of a triangle. We have eyes which
is having a shape of an almond and hexagon. This is how we, breaking
down the shapes, the complex shape
into the simple one. Here are the tools that
you need for this class. Now let us talk about the materials that we
are going to use in this complete class and the material that you require
for completing the project. The pencils, first
of all, the pencils, which is the most essential tool to draw anything for sure, here are the three pencils, what we need to
complete the project. First one is HB pencil, second one is four B, and the third one
is six B pencil. These are the three pencils
which are required. Then next comes the eraser. For eraser, we are going to use this needed eraser which is
very basic needed eraser. You can find it anywhere
in your local market. It is named as needed
eraser or needing eraser. It can change its
shapes and it is flexible and it can
change its shapes and it actually
absorb the dust part. Whatever the erasing
material that comes out after erasing
anything, it absorb everything. Then another tool that we may
use that is pencil eraser. This is a simple pencil eraser. It is used for
refined erasing thing that we are going to use. The last is the sharpener. This is very basic sharpener. Anyone who wants to
have this sharpener can have no such
problem with that. But if you want to
have a good sharpener, you can use this
sharpener as well. This is mechanical sharpener, and there is a
spindle over there. And then you can put
pencil in front of that. I'm just going to elaborate
it in a easier manner. Let me show it to you for
your easy understanding. Let me show it to how
it can actually work. This is something which
came out and by just pressing the black
block over on it, then you can see it here. Very easy to understand. I put inside the
pencil and then I'm just rotating the spindle. Then I just pick my pencil
out so you can see here, it has been sharpened up now. Few more tools you can have
just for shading purpose. If you want to do a
realistic portrait with me that I've uploaded
in the project section, you can use these
brushes as well. It will help you to create amazing shedding and smooth
shedding, smooth rendering. For that, you can
use these brushes. These are makeup brushes which are easily
available in the market. If you don't find these kind of brushes having soft bristles, you can use a watergular
flat brush as well, which also does have
a very soft bristles. Now, last but not the least, the next material
what we are going to talk about is about the papers. What are the paper
that we may use? Just have a small and easy
understanding of the paper. You should use a rough paper. Paper should have a
textured surface, very medium textured surface
paper or a cartridge paper. Whatever is available nearby your local market of
available can be used. Brands like Canson or Fabriano or Strathmore can be used or Camplin
also can be used. If you do not have
that much of material and you are limited to
your material stocks, you can only use SP
pencil and the sharpener, and the eraser, and
the normal paper. That's it. Yes, you
heard it correctly. You only need these
three materials to complete the project. So this is all about
the art supplies about the class project that you need to do for more detail of the tools
that we are going to use. You can watch my
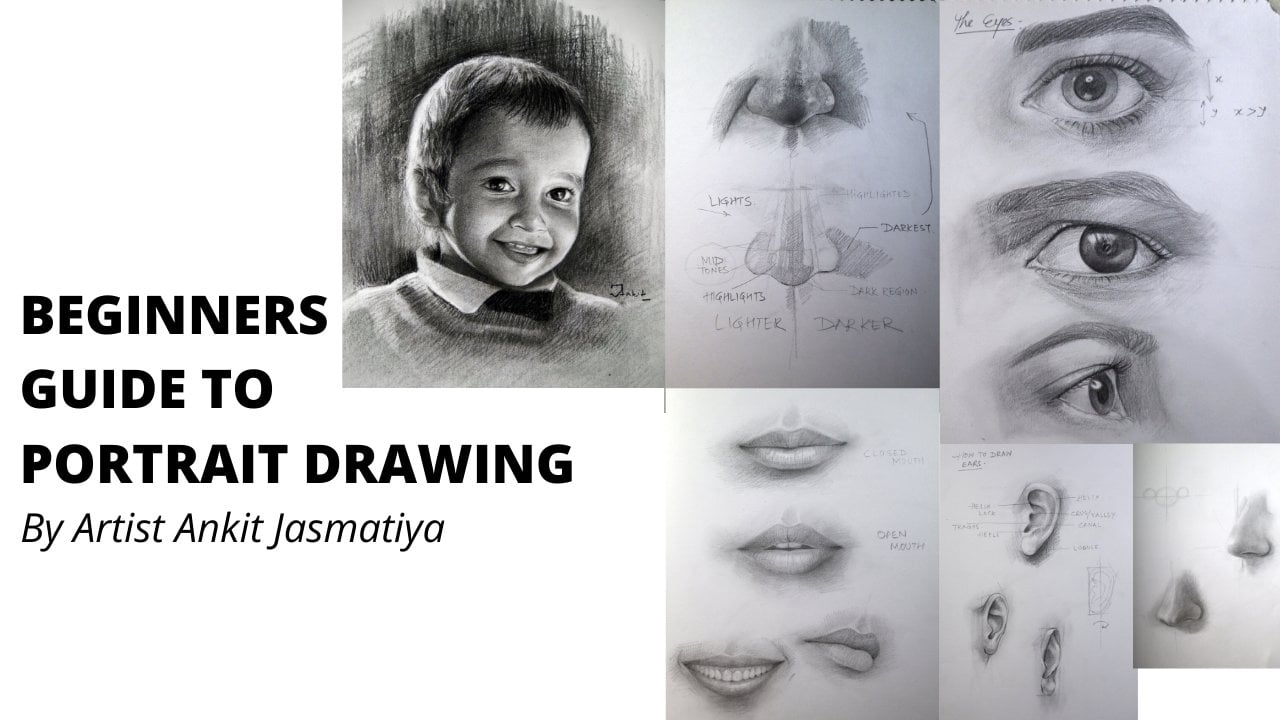
other class as well. That is Beginner's guide
to portrait drawing, and the link has been provided in the
description of this class. I'm so excited to see you
in the next lesson of this class in which we
are going to unveil the process step by step
in a easier manner.
3. Familiarisation to the Basic Shapes: In the first lesson, we're going to talk about the basic shapes and
understand each and every shape and how it can be drawn and how we are
going to use it. The first shape is
the most basic one, that is of course, the circule. How to draw the circle
in a easier manner. I have showed here a few techniques in which
one rotate the rest. Only in the another one we
rotated the whole hand. This is the two method that you may use to
draw any circle. These are the other forms in which we also draw
the axis as well. These are the ways
to draw the circle. Whichever the way you
want, you can create it. The second basic shape that we are going to use in
this class is the triangle. As we all know, triangle
is another basic shape. It is having three
edges and three lines. And it can be an isometric
or an equilateral, or a triangle that may be used in different
forms, in a different manner. These shapes can also be used. The third ship is the hexagon. As we all know, the hexagon
does have six lines, six sides, and six edges. This can also be used
in various aspects. We are going to use it and I'm going to elaborate
it each and every shape and how we
can actually use it in drawing a particular object that we are going to discuss. This is the third shape. Sometimes we may also use
this hexagon as well. This is not, this is
just a shape just like a two papers and we put
it into side by side. Then the last shape, which is another
important shape, that is known as cylinder. Cylinder does have two circles and it can be cojoined
by a simple paper. This cylinder can be used in a vertical or horizontal
shape that I have drawn here. These are the basic
shapes that we're going to use it
another cylinder. You can also see it here. It can vary the depth or the height of the
cylinder as well. These are all few basic
shapes that we're going to use in the upcoming
lessons of this class. See you in the next lesson.
4. Drawing Objects through Shapes: In this lesson, we
are going to talk about drawing through shapes. How we can actually use the shapes that we have discussed
in our previous lesson. Then by using those objects, we're going to create a
shape to create real object. Create a real thing
or still live thing. Let's say I'm adding
three circles at a time. Here I'm adding three
circles and try to create, uh, create an object
using the three circles. How we can do this? Here, I'm going
to draw an apple. I'm using these three circles. What I've showed here,
this is the first, this is the second, and this
is the third circle here. We can also nomenclate
it like this, then just a C, what I've created on the
tangent of this circle. Then I'm going to add a line which is actually meeting all the circles
simultaneously. This is actually the
shape of an apple. This is how actually we
need to think of an object. Object is still life
whenever it came into your mind or whenever it
came in front of your eyes. You just try to find
out the shapes. Now if we add some
shading onto it, like this is the
basic structure, what you are seeing here, you just want to add shape
and make it a real one. I'm just adding a few
crosshtching lines. You can see here,
I'm just trying to, filling it up using
the prosstchings, using the B or to
be pencil for that. It is just claims we are going to discuss in
very detail about this. Also here we are going to do a small demonstration,
a quick demonstration. Let's say light is coming
from another angle. We can also decide about
the light and shades. This portion is much more
darker where I'm adding more layers and now I'm using the four pencil
for darker lines. Just a random thing, I'm just adding a few
more dark layers. Keep on adding just a
tip here is to don't put pressure on onto the
paper or onto the pencil. Just do it in a
very light manner without putting pressure
onto the pencil. And keep on adding layers, layer by layer process. Do not try to do it
in the single layer, rather just adding layers. This is how we are going
to finish this apple. Just a preliminary
shading techniques. Now we can actually create another object by this technique just for another example. Second, we are going to use the circles in
a different manner. Let's say a small
circle, Abi circle. Here I'm going to
draw a peer fruit, another kind of a fruit. And it is a very simple one. This is very basic,
everyone should do it and just try to
see the resultant. It's very quick, just two
circles in the same manner. I'm going to create
an outline outside of the circles and then finishing it using the
crossching technique. This is the way actually you try to find the object using the
shapes, different shapes. These are just small examples. Don't think that this can only be used in
this limited way. Rather, in the upcoming
lessons we are going to see more different and
more complex structure, how actually they can be drawn using this
simple technique. Because foundation and
fundamentals are very simple, it should be simple so that you can actually have an idea on it, and your foundation and fundamentals have to have
a strong understanding. Now I'm going to take
another example here. I'm going to take a
different shapes. Let's say I'm going
to take a circle. And then the next object
should be a cylinder. The next cylinder I'm going to add a cylinder with a circle. You can see here, it's a very simple way to actually create
an object and now I'm inserting the circle
into this cylinder. Any guesses you can
actually made here, what shape it can
actually create. This is something which
is very funny also because when you are
going to do like this, you can create a
beautiful understanding of these objects. And also you can actually see the fundamentals
are always same, the fundamentals of anything. Any object in this nature, it is created by
the simple shapes. This is the beauty, actually. The last object, what
I have created here is just a cup and it's
having spiral shape. The technique is very
similar to the previous one. This is it. It is very simple. When you're going to draw it, you can find it in your own experience that these techniques
are very simple. But itself, it's very effective for drawing
something very quick. You are going to be used
true of these techniques, then you won't take
much of time as well. This is very helpful
for any beginner to actually start drawing
different objects. Here I am adding more shading, make it a little
more realistic one, these are just few
basic shading elements. What I'm adding here, this is the super basic technique,
what you can use. I'm going to see you
in the next lesson of this class in which
we are going in depth with this subject. I can't wait to see you
in the next lesson.
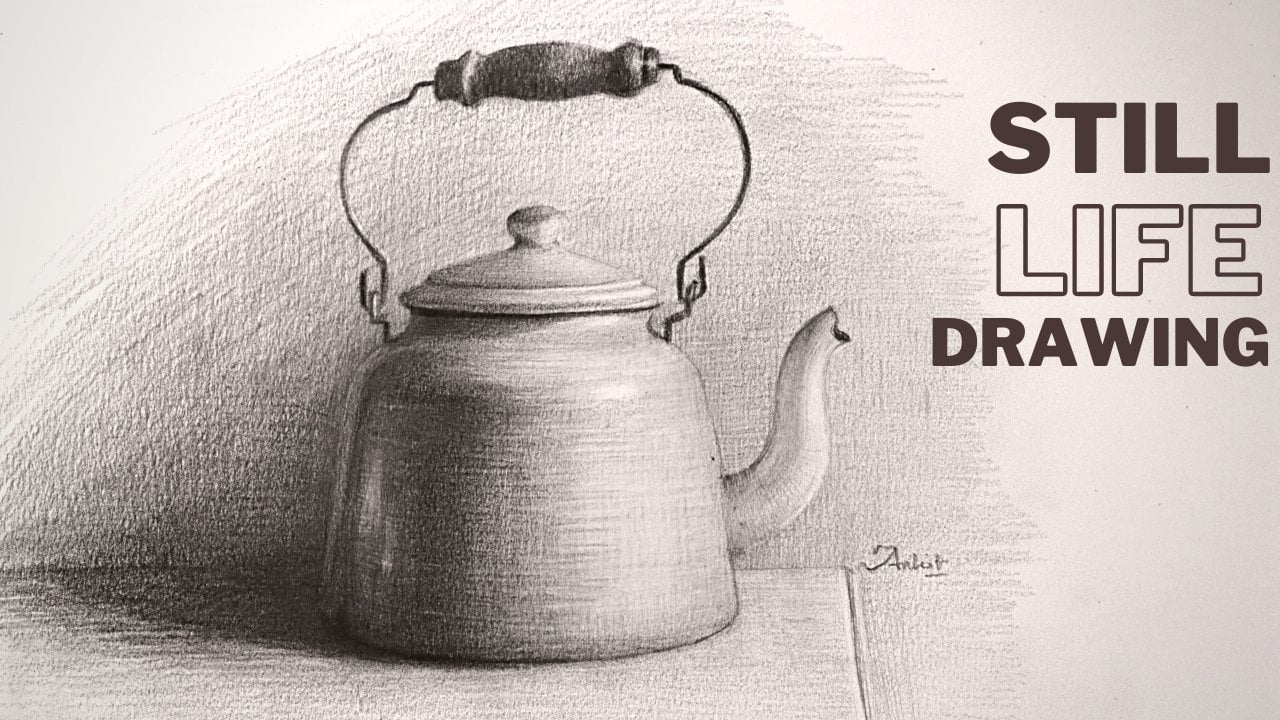
5. Still Life Drawing through Shapes: Now we are going to
talk about how we can actually draw a still
drawing using these shapes. Here is the reference that
I have chosen to draw a kettle and a jug and
then a small vase. These are the pencils that
I'm going to use here. B, B, and four or six pencil, whatever you have.
That would be nice. We are going to
start with a circle. The first object that we require to the jug is the circle. Then we need cylinder, then we use a triangle. These shapes actually you can see how we are going
to use a triangle, because triangle is required
in the shape of the kettle. This triangle, right angled
triangle is required. Okay, first we are going to start with the
jug and I'm going to draw the circle
inside the circle, we can also assume
the cylinder as well. We are going to use these
two object preliminary to draw the outer
peripheral of the ju. You can choose your own images as a reference images as well. To draw any object, the
concept will be same. I am just creating the
outlines of the jug. While drawing these objects, all you need to observe or all you need to keep
in mind that you draw pressure with a
very light pressure on the pencil you should draw. Because if there is any changes, you can actually easily create that change into your drawing without diminishing the paper. I'm going to the cap
of the jug as well. Here we are going to use
the strangle as well. This is how you actually, this is triangle isomeriangt',
any kind of a triangle. It's not about the
mathematics to understand, it's about the
shape that actually involve a shape that is known to us that may be that
it is a triangle, maybe it is a cylinder. That we actually knew in our childhood or in
our learning age. We actually understood
these shapes and we know how to
draw those shapes. When we know how to
draw those shapes, we can easily understand how to draw the object as well
like the jug as well, because that object has been created by using
those basic shapes. Now at the end, I'm going to actually draw the
handle as well. And it's something
which is very simple and don't need any such
explanation onto them. This is how we have
created a jug, a very similar jug
to the original one. Now we're going to draw
another object that is a jar. You can see here
for the cap of it, we used a cylinder. For the bottom thing, we are going to use
the cylinder as well, but it is having
a longer height. Then we are inserting ellipse
shape, not a circle shape, but an ellipse shape to create that aura of the outer
peripheral of that object, you can use a circle as well, but it becomes a little bit more longer as compared
to the original one. This is how we actually
assume the shape of this jar. It is very easy. You can
see I'm just rooming it up. This is very easy to draw. This is a very basic to draw. The third object is our kettle. This is a little
bit complicated, that difficult, but
it is a little bit. I'm going to use
a cylinder first, then a vertical line
actually match the axis. Then again, a small cylinder
for the cap of the kettle. You can see I'm drawing
it very easily. And now I'm using the
triangle shape as well, the three shapes I have
used in this drawing. First a big cylinder, then the small cylinder,
and then the triangle. All these shapes help us to
actually draw the kettle. You may draw it to any shape, any size, even a bigger one. I'm just giving you
a brief about that. When you are able
to draw in a way, in this way you can actually
draw any object so quickly, so randomly, and with a perspective correct
drawing, it's very important. There are many people who
used to draw still life, but their perspective may
be sometimes not correct. But here, when you are
going to assume the shape, assume the object
using various shapes, it's very easy for you to draw it correctly,
perspectively correct. Which is very important for any artist to draw the correct
perspective of any object. So this is how I draw
the handle as well. For that, you don't need
any such explanation. Now the mouthpiece is critical, crucial one, because here you cannot see a
single shape for it. How you can actually
imagine that, that I'm going to let
you understand first. Let me just draw
it in a way that how we actually
did in past, okay? But how to assume
it with the shapes that I'm going to let you
understand right after this. Let's see here. I'm zooming
it up and letting you understand the shape anatomy
of this, the mouthpiece. This is various rectangles that included with each other
and created this shape. This is something that
you can actually, you may draw like this
if the kettle is size, If it is not that big, you can draw it
directly as well. Third part is very important, that is shading here that
we need to understand. All should know this and
why it is so important. Because for understanding
the realism thing, we should imply the
shading part as well. For shading thing, we are going to understand three cross
hatching techniques. That is vertical,
then the curve, and then the diagonal one or
the horizontal one as well. This shading, we are going to implement these
type of techniques. Here you can see I'm using
the vertical hatches. I'm applying the vertical lines to the object so that it can be more realistic one or try to put life into that actual
line drawing thing. Converting the, any object from two dimensional to
three dimensional is known as a shading in the perspective of drawing this definition
as very accurate. Now I'm using the contours
or curve hatchings as well. You can see here
I'm just creating a few lines which
are angular in shape and having a curve within
them similar to the curves. I'm just doing it here as well. And I just doing the
curves here as well. This is the basic one. We are going to understand
this in detail when we are going to draw
the portrait here. You just have to have an idea
of it in a similar manner. I'm going to do here
as well for jug. We may vary our shading from the straight
lines to curve line. Similarly, we can
approach that as well. Again, I'm going to draw vertical lines,
vertical hatches, and try to get it a shape, the curve, because you can
see it's a circular jug. And it is having a curve as well on its
outer peripheral surface. For vertical hatches,
it would be more suitable and just a bend from the center of it
to create a curve shape. This is something that you can experience it
while doing the same. I'm not going to put much effort to create
it more realistic, rather just to let a decent one and let you understand the
shading phenomena of it. Now you can see here I'm just using the horizontal
hatches as well with a slight curve into it so that it can
look more realistic. One, this is all about the shading part when you
are adding into the objects, as this is not the core
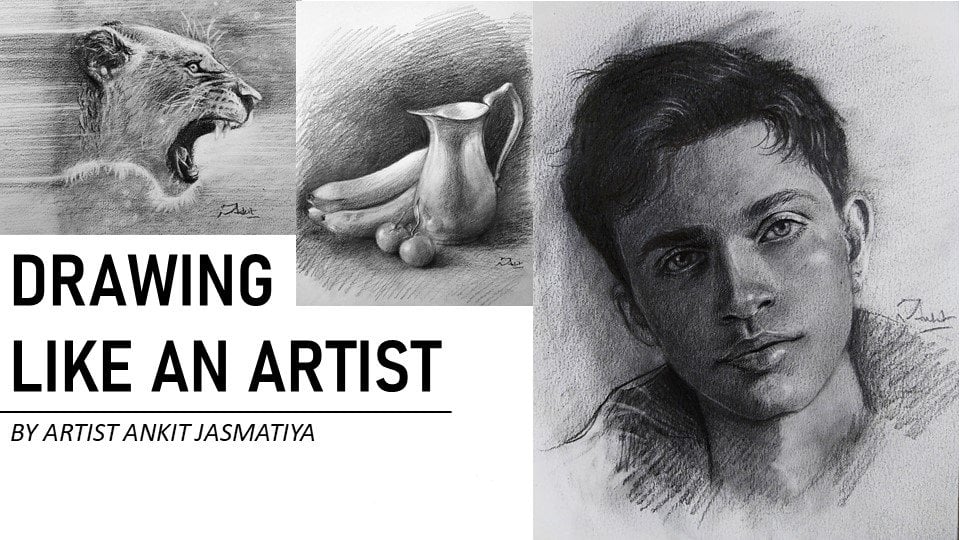
idea of this class, I haven't did it in detail. You can watch my other
skillshare class for that, in which I have explained it in a much deeper manner for
the cross hatching things. I hope you understand
this lesson as well, of drawing the various objects. I'm going to see you
in the next lesson.
6. Drawing Human Head through Shapes: Now we are entering into the portrait drawing techniques
using the shapes segment. This is a very important lesson of this particular class
because here we are going to understand how shapes
can help us to draw a head or a face
using the shapes. Here I'm going to
take few shapes like circle the square,
then the triangle. Maybe let us adding these
shapes to create a head first, the circle, then the square. You can see how I'm
putting the square just below the
circle, center line. Then the triangle I just put just below the square
or a rectangle. This is the shape,
the basic shapes that has been created seems to be like a head or a shape
of the face, frontal, face. This is the core technique. Basically, this is
something which came up from the foundation. Okay, if you understand this, you can draw a face in a very less time and with a very accurate perspectively
corrected face. This is the head shape that we have implemented and that we have
understood here. And then you can add here, or you can actually add
different features as well, just to make it more realistic. One, you can actually
understand how actually shape has been created
by the nature itself. You can see the Almighty God. You can see the
belts, the eye belt, then the nose belt,
then the lips. These shapes, when
you're adding into them, into your head, you can
find a face very easily. This is something
which is known as how you actually
perceive the art. Now you understand the art
in a different manner. Let's take another example. I take a circle, then trapezoid. This may be trapezoid
or a frustum. Or when you are going to cut
a triangle into two pieces, you find trapezoid and
another one is a triangle. This shape can also be
used then the triangle. These three shapes can also
help us to create a head. Because the earlier one is
looking like a bulge shape. The cheeks are being extended. But here you can draw a
very trimmed chimed face. This actually up
with you how and which shape of the
face you want to draw. You can actually change
the shapes as well. Here you can see this is
much more a generic face, which actually we see in
our day to day life having a trimmed cheeks and
the jaw lines as well. Here also, we can actually
assume the eyes belt, then the nose belt
and the lips belt. These are very quick examples. Let you understand about
the fundamental core, fundamental of drawing a
head using the shapes. This is something which I don't think that you
have seen earlier. Also like how we can actually involve various
shapes into the face, we actually easily
draw any shape. This is something which a very small kid can
also understand this type of phenomenon if you
give it a try to your kid, let's see how he or
she is going to use these shapes to draw a very
complex looking face or head. Lastly, let's take
another example in which we are going
to different shapes. Not the different shapes,
same same shapes, but having a different angle. Having a different rotation. The trapezoid have
a different angle. After implementing
it, we can get a three fourth
perspective phase. This is the perspective phase that we are going to draw here. This is three
fourths perspective. If you further elaborate it, it can convert into the realistic three
fourth looking phase. This is how you actually
can change the angle, the rotation of these
objects and create a different angle phase easily. You can get it in the
correct proportion and the correct perspective
of the face as well if you are
using the shapes. This is all about the
understanding of portrait, drawing a portrait
using different shapes. We are going to finish it out in the coming lesson. Let's see.
7. Drawing Eyes Using Shapes: Now here we are going to talk
about the I for the I's, we're going to draw hexagon. Now let's discuss a very
interesting part in hexagon. As we know, hexagon does
have equal x and y. It's mean, the two
portions of the hexagon does equal distance
like this portion and the upper portion does have a same equal values like x and y does have
an equal value but you have to create x is greater than that means the lower
portion of the hexagon should have a lower value as compared to the upper
portion of the hexagon. The line actually help us to get a different dimension of this hexagon and really
changes its shape. This is a practical one. You can use another
shapes as well, like someone use
an almond shape. Someone may use a
circle shape as well. It's basically depending
upon individual, how they can actually
understand how they can actually perceive these shapes
into the reality thing. The almon, you can see here the eye shape using
the blue pencil. I'm using the blue
pencil. That is why. So that you can actually see the real shape and how it has been there inside the hexagon that we have created
a very different one. Rather, this is the
basic shape of the eye. The pupil, the upper lid, the lower lid that I
have created here. It seems very basic one, but when you are going
to add the layers, when you're going to finish it, it will become a realistic one, for sure for making
it realistic. We're going to use a black
colored pencil and you can see how I'm going to convert this eye into a
very realistic eye. The shape, the basic
thing is always the same. This is what you need to
understand by this class. And the whole purpose
of this class is this. Only so that you can
actually understand. Drawing, whatever you draw, whatever you draw, it does
have a basic element into it. And there's nothing
that you cannot learn if you actually
understand the basic of it. If you understand
the foundation, you can actually
understand the mysterious, the superficial part of that
particular thing as well. This is a little bit
theoretical one, but does have a very significant
amount of information. You can see how I am changing
it into the realistic one. I'm just gradually adding the layers and
attaining the values. And I keep on doing this by circulism method and adding
small circles in small, very small side circles into the pupil and the iris as well, just making it realistic. I am using the red pencil as well as this class is not
for colored pencil drawing. It is just a demonstration that how much a realistic drawing you can do using
the same principle. Whether you are into a
colored pencil artist, whether you are into a
watercolor techniques, the shapes eventually
are the basic one. It is required everywhere in soft pistons as well
or any other media. Whatever you'd like to
use in your drawing, you can use this technique and create a super realistic
eye like this. This is one method of drawing
the eye using the hexagon, a different hexagon, another method that can be
used by many of the artists. And I'm also using
this method in which I'm going to draw
horizontal line, vertical line, and then then
another small circle that I have already elaborated in my previous skillshare class, which I have told you about. The various expressions of the same principle you
can use here as well. And draw a very simplistic eye. The vertical, the horizontal
line, then the circle, then another circle, then
the upper lid and lower lid. This circle can go out the lower or the upper lid as well. It's not something
that has to be there inside the eyes
because opening of the eye is vary from one situation
to the other situation. You are going to
draw a normal line, normal position of the eye, normal opening of the eye. And then draw in this
manner and then just erase the portion that is going beyond the
boundaries of lower Led. Similarly, we are going
to finish this as well to the extent and let you understand how you
can draw any I using these two methods
in a very simpler manner. You are not going to fail
by doing this every time. It's something which is
a mathematical thing. Every time you are going
to use the technique, you will be succeeded for sure. Always remember this in mind. After adding few more
layers of dark portion, we have achieved the
details of this I as well. Similarly, if you want
to add more layers, it will become more
realistic one. I'm going to see you
in the next lesson.
8. Drawing Nose Using Shapes: Now let's talk about
features of face and how we can actually draw
using the various shapes. As mentioned in the
previous class, we're going to use the shapes
and going to draw nose, eyes, lips, and understanding the
preliminary structure, the basic structure. First of all, for
understanding the nose, we're going to use a
circle and a triangle. This is very simple
and very fundamental. We used to do a drawing using the shape
in our childhood as well. And this is why this class
is very interesting. You have to implement
those techniques what you were using
since long back here you can see I have drawn a triangle and
then I'm going to draw a circle inside that
triangle in a similar manner, then two small circles as well. Then going to create a line, a circular line, a curve line, which is actually meeting all the peripherals of the
circule in this manner. This is the basic
shape of the nose that you can actually
achieve using this method. This is a very basic structure. You can actually go in detail with that and then create
a realistic nose as well, but the structure is the same. Now comes another
side of the nose. If we are going to draw a
different side of the nose, like we are seeing the
face from the side view, then all you need to do is to
just change the location of the circle like the big circle should have on the same side, a similar side but another
smaller circle can going to merge into the original
circle, the big circle. The, the shape
that we have found here is a little bit different
in the structural manner, but the outcome is a
lot more different. This is the side
view of the nose. This is how you actually change the position of the
circles or the triangle and get the same nose from
the different perspective. In this manner, you
can actually achieve the required goal by by
changing the shapes, by changing the shape, or by changing the location
of the shape as well. This is very important. All you need to understand, where to place those structure, where to place those shapes, which actually help
eventually help you to create different
perspective looking faces, different perspective
looking features. Now I'm adding the shades
and just using the lines, the normal cross hatchings, and adding depth into the nose. When you are doing that, you have to follow that principle. What I have told you
in the previous class, not only the previous class, but in this class as well. In the previous lesson,
I have told you how to actually get that depth
using the cross hatching. And then you can
use your fingers as well to smudge it properly. Then again, come step by step and adding
more dark values. When you are doing like this, it will become
more realistic one and rather just a normal
sketch of a thing. This is how you should add
more and more depth into that. This is all about the nose. In the next lesson, we're going to talk about
the eyes and then the lips. Stay tuned, I'm really excited to see you in the next lesson.
9. Drawing Lips Using Shapes: Now the last part of
features of the phase. Here we are going
to draw the lips. For drawing the lips, again, there are two methods
of doing that. The first method
is the two circles that I've mentioned here. I'm going to draw a horizontal
and the vertical line. And then fixing these circles
in different positions. Two on the lower
portion of this axis. Two should be on the
upper portions like this. Just these four circles
help us to create Lip. This is a little
complicated one, but it helps you to basically draw realistic Lip outlines. And this will also eventually
help you to achieve the realism and the
real lines that are there in drawing the Lip. But this, this method
actually, what should I say? It's not something which
actually connect with you. It's a very complicated one. And drawing four circules, then the position of the circule is again
a subjective one. It seems very uncomfortable for a beginner to
understand a Lip like this. There is another
method in which we are going to take a
from the hexagon. That method will help me or many artists to draw a
Lip in a easier manner. Here I'm going to draw
the hexagon equal oxagon, having a P equal upper
and lower portions. And then inside the xagon, I'm going to easily draw
the lip just by bending the center line and the upper lip line and
the lower lip line. Just it is very simple. I don't think that It seems to me to draw different circles. Positioning in them,
rather creating hexagon and draw the lip
in a simpler manner. My aim is to let you understand drawing
in a very simple manner. Here I can easily say that
using the hexagon for the drawing of the
Lip is much more easier than the previous method. This is how we actually
draw the lip as well. And I've already told you about other features like
eyes and nose. I think this is sufficient
enough information to draw a portrait. And we should go into the final class in
which we are going to talk about the outlines of the pace and how we are
going to fix the portrait, how we're going to
resemble the portrait. One more important thing that
we should understand here, if suppose phase is
three fourth one, the shape of the features can vary just for the
understandings sake. If the face is three fourth one, the hexagon will
also have a change in anatomy in the shape
into their dimensions. Similarly, we are going to change the dimensions
of lips as well. What you're seeing here, it does have a three
fourth perspective lip. It's not from the front
face, front side. Rather it is having
a 34 perspective. Just by changing the dimensions of the shape that we are using, we can actually achieve
the exact prota, perspective of that
particular feature as well. Let me quickly show
you how I can change it realism by adding
the shading portion, Quickly going to add
more layers into them, and then creating
a realistic one just with this feature only I'm adding layers and
then I'm subtracting them by using the eraser as
well, like I'm doing here. Similarly, we are
going to achieve it, a very realistic lip, just from the basic shape. I'm going to see you in the
next lesson of this class.
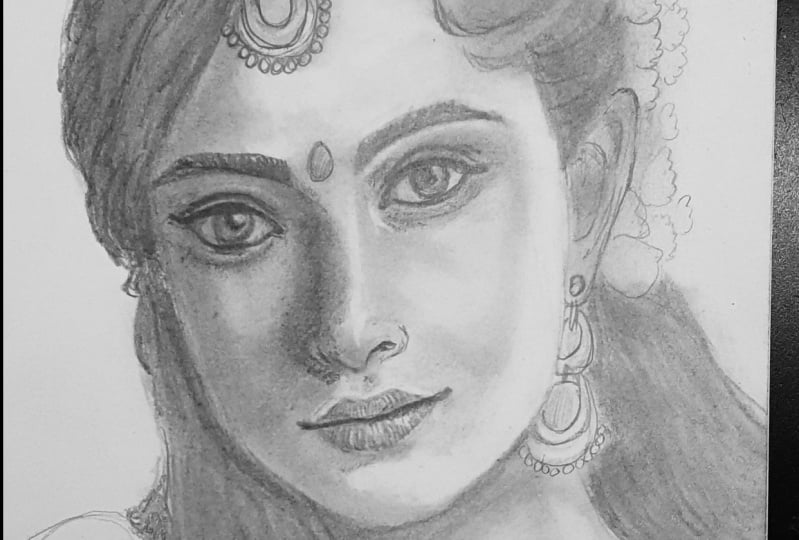
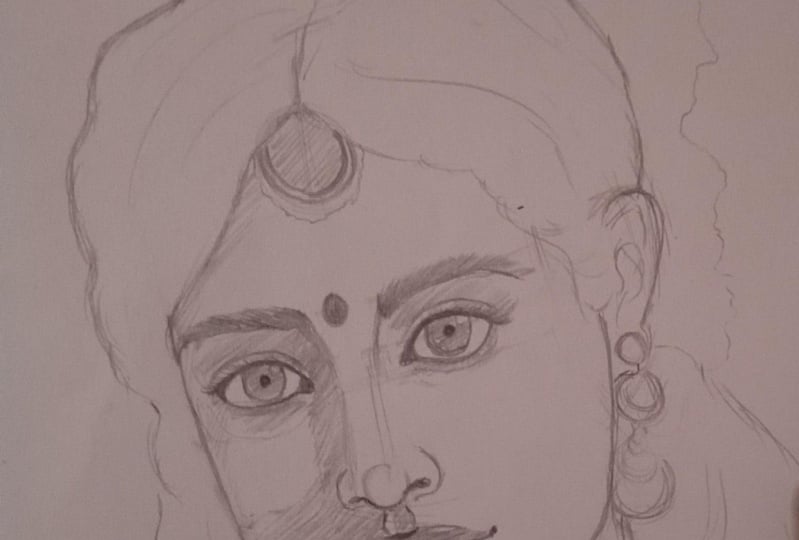
10. Drawing Portrait Outlines: Hey everyone. We are here
again with the next lesson. Here we are going to understand this space rather than
to draw this space. Let's first understand this
space in terms of shapes. How we are going to draw this, as this is the project that we are going to do by
using the shapes. First of all, we are going
to draw a big size circle and just let me write the heading of this
particular class. Then we are going to draw it. Draw this step by step. What are the shapes that
we are going to use here? As I've already mentioned
in the previous lessons, we are going to use circle, then the square shape, or we are going to add a
square and the frustum shape. The shape would be like this. Which are going to be
created by the square and then the frustum or the to
shape we're going to use here. Going to, let's understand this. This is very important because you can draw it very easily. But you have to first
understand what to draw first, the circle thing. I've drawn a circle, a big size circle. And then I am bisecting the circle in two portion
just with the straight line. The straight line help us
to understand like where the features are going to met the center line
of that features, of the features, not the face. Always remember this. Then,
another shape of this, what we have already
included, that shape, we are putting just below the
center line of the circle. It's going to get like this. All you need to understand, the shape does have
a sharp edges, but when we are dealing
with the portrait, we shouldn't have a sharp edges. This is very important
to always remember. You should create
a soft edges or the chamfered one tip for
drawing any portrait. None of the feature is as sharp as the edges of the shape. Similarly, I'm going
to draw here as well. Always remember this thing, that it is a three
fourth perspective face. Not the three fourth one, but the face a little
inclined towards it, right, and having a
downward tendency. It's not the straight face, it's having an inclined one, features are more towards the right side of
this face. Okay. You should always
keep in mind that is why there is a vertical line. What I have drawn here,
inclined vertical line. Then I'm going to find out, finding out the features like eyebrows or this
always comes later. After drawing the main peripheral
features like jaw line, cheeks or other outer areas, then I'm going to draw the internal features
like eyes, lips. And knows just for
understanding of it, how we are going to begin this lesson is all
about to initiate. How to initiate it, just finding out
the outer surfaces, then finding out
the inner values, this phenomena we
are going to use. And how we are going
to use the square, then the trapezoid and the
circle for drawing any phase. This is all about
understanding the head. Now I'm going to see you
in the next lesson and the last lesson in
which we are going to draw this portrait
and finish it. Let's see how we are
going to do this.
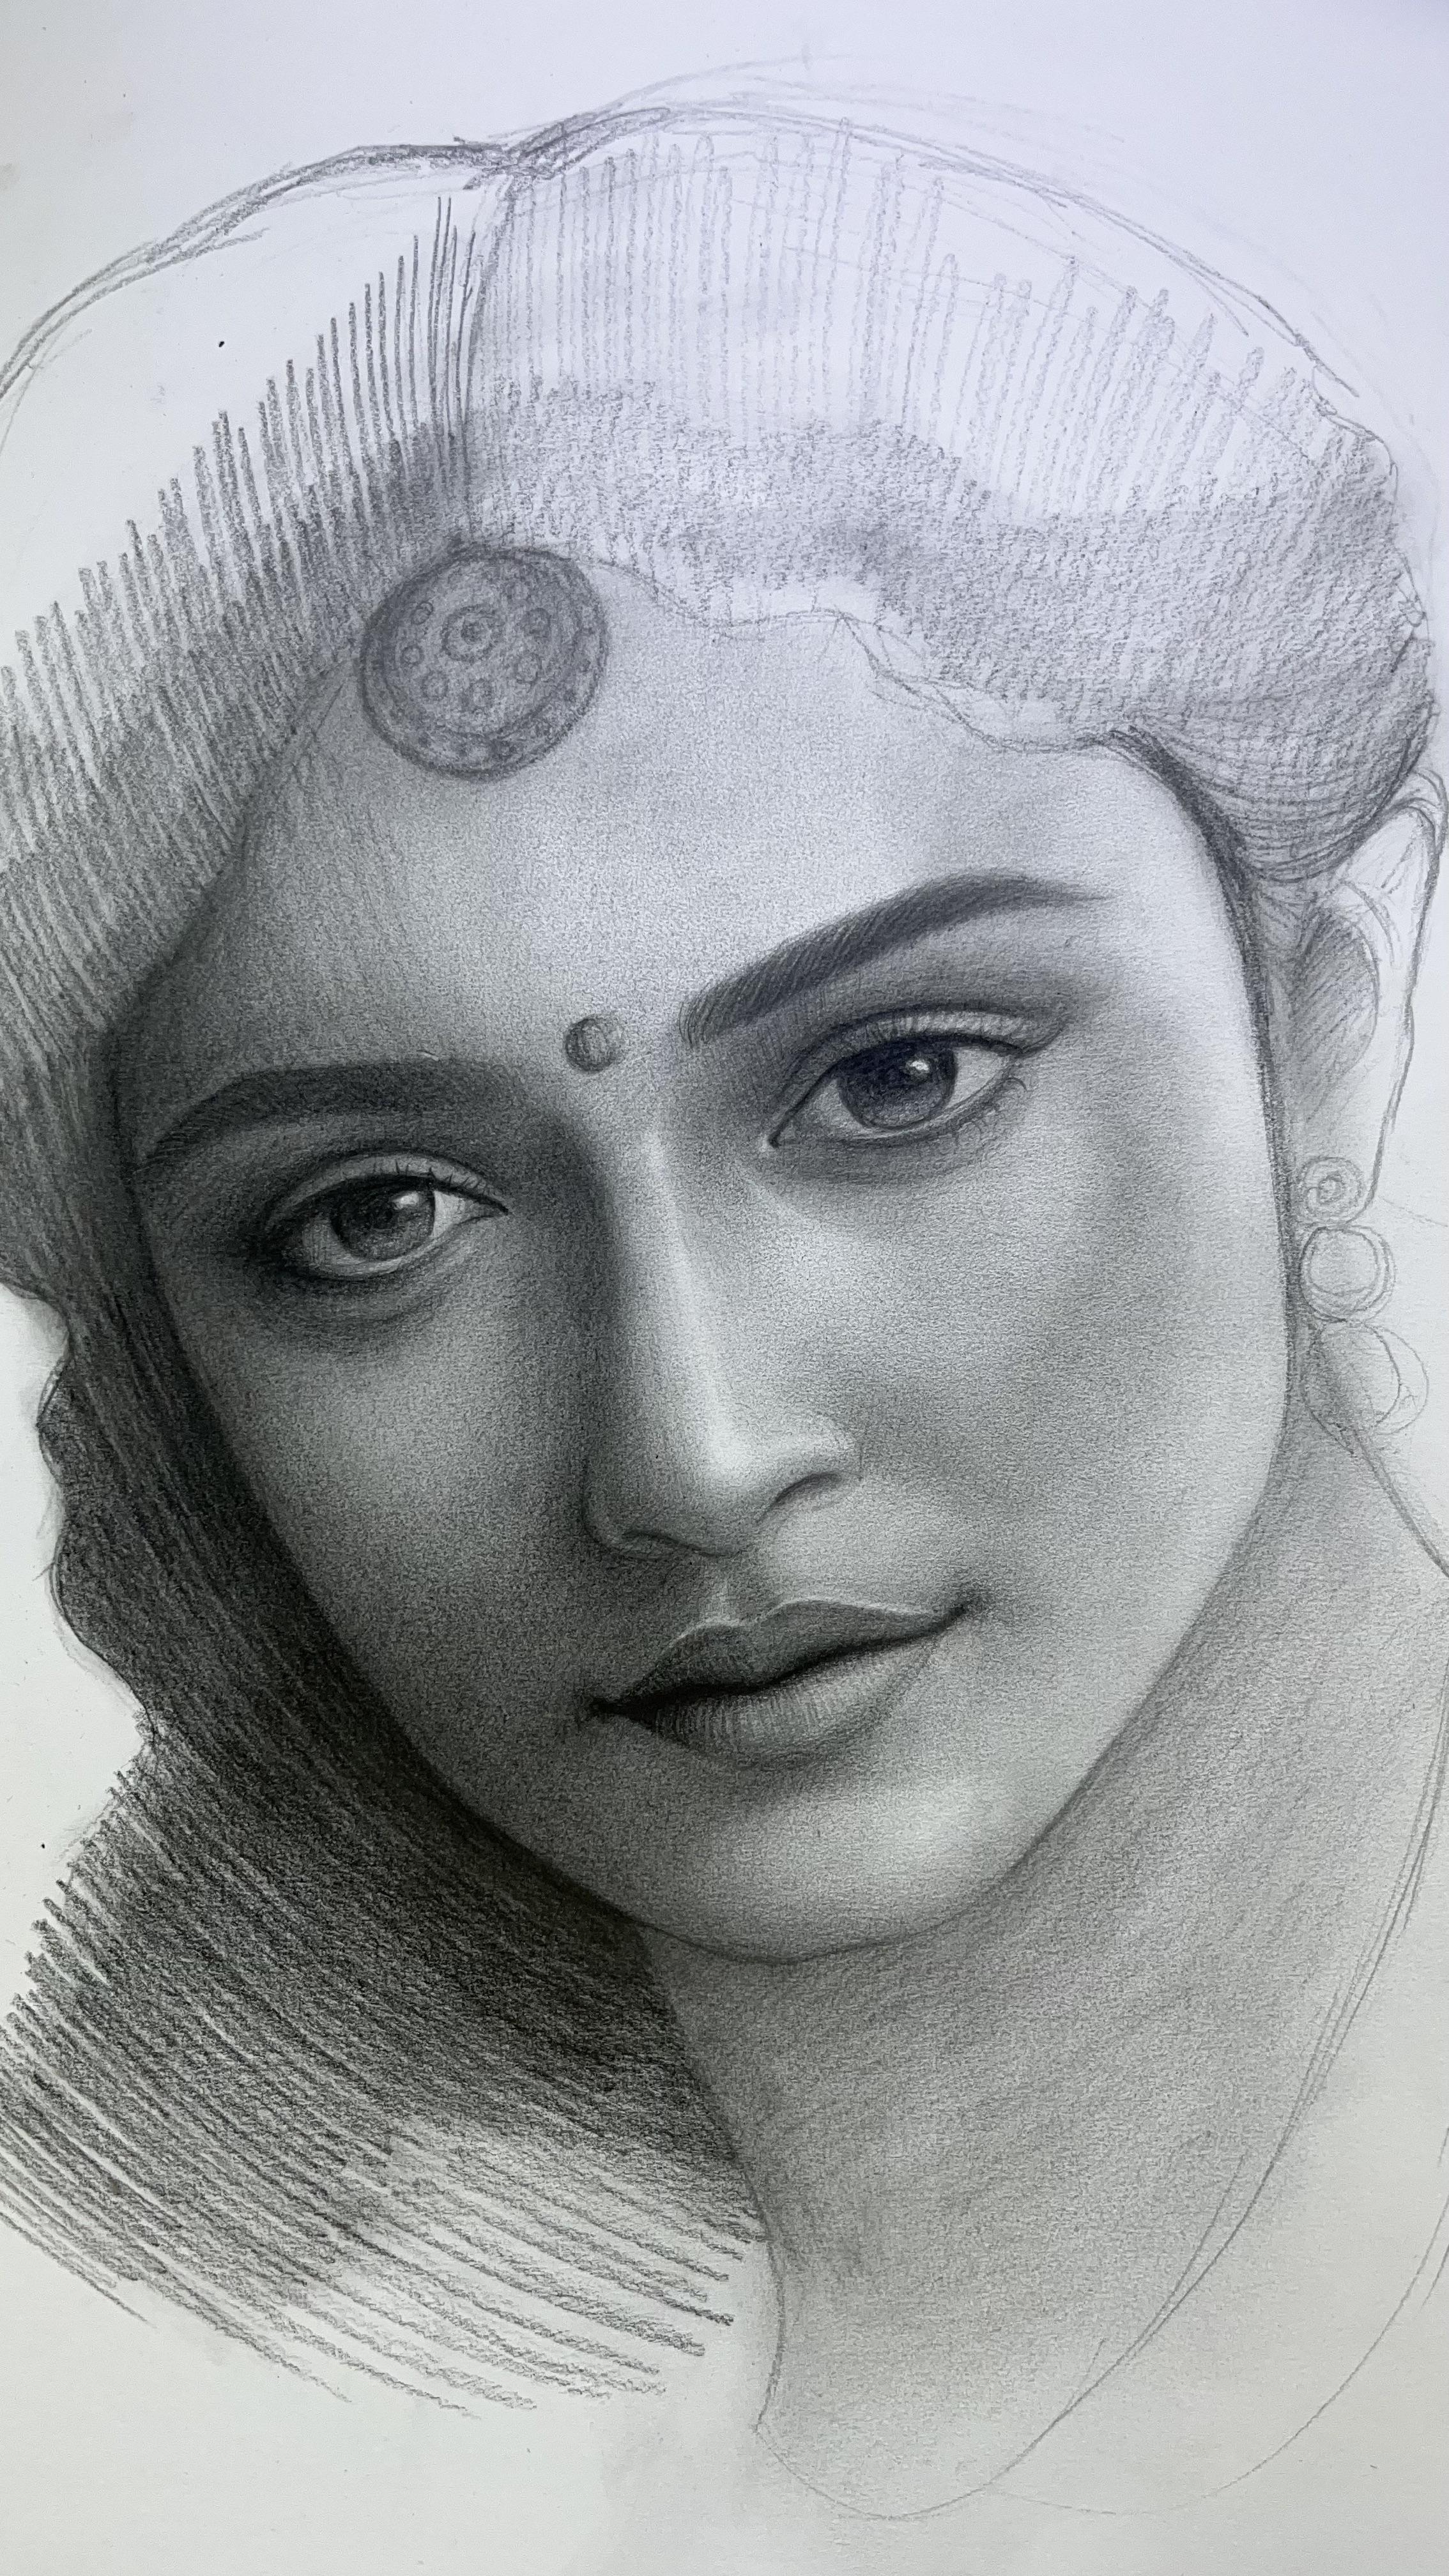
11. Shading & Finishing Portrait: Now we are going to talk about the final portrait that
we are going to draw. As I have already drawn the outlines in the
last lesson here, I'm just going to tell you about adding of details
and how we are going to get the two
dimensional image into that three dimensional image and going to make
a realistic one. Here I am just finishing
few outlines just by observing the jaw lines and a
few other features as well. Because in the last
lesson we have unfinished it and it was just
rough outline here. I just want to confirm those outlines and now
I'm adding depth into it. I'm starting from the
HB pencil and just to darken up a few areas
so that we can actually confirm the values here. I'm doing the same thing. I'm just doing the
cross etchings, vertical hatches and a few
diagonal hatches as well. Here I'm doing the
vertical hatches, and you can see I'm
doing it very lightly. And then I am using my fingers to basically
smudge those values, basically mix those values. Now here also, you can see I'm doing it very lightly with
a very light pressure, and I'm using the HB pencil. You can use darker
pencil as well, that I'm also going to
use in a later stage. But as of now, I am just trying to capture the exact value and the exact
proportion of the face, like the eyes, the laps, all these areas, whether
they are correct or not. So I'm not that sure, that's why I'm doing
it very lightly. Suppose if there are a few changes that
we came to know in a later stage that we can
easily change those values. Now I'm darkening
up the portion, the iris portion, and
the pupil portion. For that I'm using
four pencil directly. This pencil is very dark and the moment you start
using the pencil, you can find out that the darkness basically occupying
the paper very easily. As I already mentioned in the class project
and material lesson, that this paper is
rough in nature, having a little texture,
medium craned paper. It is, whenever you are going
to use a high grade pencil, it smudge in a better way. It is mu very smoothly. You don't need actually
to put a lot of effort to basically do
the smudging thing. Like what I'm doing here, I have started the smudging
process and I am using this make a brush that I've mentioned in the
material section here. I'm going to use it and I'm just going to mix those values. I have done a little speed up the video speed so that I can take you to the
further process here. I am going to use needed eraser and I'm finishing the one I. As I am finishing it, I'm just observing
the original image and I'm trying to get
the exact values, the exact size of the eye. The moment I get
the correct values inside the eye and I
found it satisfactorily, then only I am going further for the other details of the other
portion of the portrait. Why is it so? Because let's say if that feature is not going to match that I is
not going to match. The other features are also
not going to match for sure. You have to confirm that whether you have drawn it
in a correct way or not. For that you have to
finish one portion of any one of the I
and then you further going ahead with the
other features because I is something which actually
take a lot of similarities. What you can actually
achieve when you make a portrait and
if the eyes look similar, it would have created almost 70 to 80% of your
resemblance in the portrait. Other features, if let's say they are matching and
eyes are not matching, then the whole purpose of the
portrait has been vanished. This is very important
that you have to keep in mind that whenever you are
going to draw any portrait, first of all, first
and foremost, it is very important to
resemble the eye if there is. I assembles and the other
features are not that resemble. It is okay for any artist, but if I are not going to match anything
else is matching, it's not going to work for you. This is very important. It's a tip that I
have provided here. It is very important
to keep in mind. Now again, I'm doing the same process that the process I have
done in this earlier. I, I'm doing the same
process here and just adding a few values using four
B pencil for darker dias, HB pencil for lighter dias. Here I'm going very
steadily, very slowly, and not in a rush or hurry to
create the shedding thing. Because the process here is a simpler process for beginners. Suppose if I'm going to
draw it like an artist, like I have done in the
other class of skillshare. In that way, I have just
created the dark areas, just added the dark areas, and then I'm working
on the subtraction. But here the case
is very different. Now you can see I am using the brush to smudge
few values and now I'm working on no part when
I'm going to use nose part. The same process I have
to pursue here as well. I'm going with the
SB pencil with a very light pressure on it and then darkening
a few values, seeing whether the things
are correct or not. If I'm satisfied with
the resemblance, then only I am going
to move forward. Again, I'm using
the needed eraser for assuming the resemblance. This is very important
process here. Again, I'm using thin brush. It is a thin brush and having
very few bristles onto it. Very few brushes have been
installed in the mouth of it. Just try to blend those values which are
there onto the paper. And then I'm coming up
with the darker pencil. This process is very similar and it is very simple for any
beginner to understand. First, I'm going with
a lighter pencil, firming up those values, then I am smudging it up, and then I'm using
another darker pencil. Whenever you do this process, you have to follow
the same process throughout on the portrait. Don't change your process everywhere in the portrait,
in the same portrait. Otherwise, nothing came up
with the final portrait. This is always something
that you keep in mind. Now, I'm working on the lips. When you are working
on the lips, the process is very same. But here for upper lips, I am going upward direction,
the shading portion. The lines should be in
the upward direction. For the lower lip, the line should be come in the
downward direction. This is something that
you keep in mind. Then try to blend it, try to smudge it out. Then finishing it up and
just rolling the pencil, actually, not putting
any pressure, it's a zero pressure thing. Then I'm using the brush, the thick brush and trying to
smug those values as well. Let's suppose if you do not have that brush thing and how
to achieve those smudging, it's not that something which is impossible for any artist, it's just that you have
to work more on pencil and the time for the
portrait may be enhanced. These tools are there to actually reduce the time which you actually
consume in a portrait. That will help you to reduce the time process and it actually gain the darker portion
in a very short time. If you don't have those tools, you can actually use your
pencil and then try to add more and more
layers of gray tones. Now I am just roughing up
the jewelry portion here. I'm not at all going to
finish it up because it's not something which is related
to our project thing. This is not our aim for
this particular class. Here, I have just a rough
sketch of it and not going to finish it up because
the main purpose of this portrait has
been, I think, resolved. I think we have
achieved it because the features are very much
similar to the original image. Since the process
that we have used is completely from
the shape thing, you can see here, the process and how
much actually you can achieve by understanding
the shape of any portrait. Let's say the head and
then the chin line. The cheeks line, the jaw line. All that comes into account. If you are able to find out the shape inside the face,
you can actually draw it. It's very phenomenal
to understand because there are so
many, so many ways, so many different techniques
like let's say alums method, there are so many real
method and Bridgeman method, there are so many
methods are there, but they are quite
difficult to understand. For a biginer, Actually, not for the artist but for
bigner it is very difficult. But here you can see just with the shapes,
just with a square. Just with a circle. We have achieved that much. This is something which
is a remarkable thing. Now I'm going to finish it up, and I'm just adding a few
darker tones with a pencil. The hatching thing is always
visible, you can see here. And then now I am smudging
it using the brush. This is the whole process
that we have completed here. Few more detail we
can actually add, or we can work on it
on so many areas. But the process is same here. We have achieved a lot
and understood a lot. I'm going to see you in the concluding part of
this class. See the.
12. Conclusion: Hey, rock star artists, Can we get a virtual applause? Who is the part of this class? So we have started
with a simple circle. Yes, just a humble circle. And turn it into the canvass of personality expressions
and downright awesomeness. Now you can say that
you are the master of turning those simple shape
into the great masterpieces. Can we take a moment to
appreciate the fact that you have now got the
skills to draw faces, objects still lives, that are
so on point amazing, right? I hope that you have had a
lot of fun in this class. And we can say that this
is not the fantastic, but this is the shape
tastic journey. Remember that art
is like a pizza. There is no wrong way to
do it and it is the best. When shared it with friends, I appreciate you to share your artwork in the project
gallery section so that other your friends can
see that and appreciate you in a manner that you
can enhance your skills. It's time to unleash your
new found superpower in the class gallery and publish them in the project
gallery section, so that the other artists and your friends can also
see those artworks. They can also get
some confidence by your artworks as we wait, adieu to this creative fiesta. I can't wait to
see how you shape the future of your
artistic endeavor. Keep sketching and unleashing
your inner artistic child. The world really need
your artistic presence. Stay wild. Stay creative life is short, but artists forever. I will surely provide you the
feedbacks on your projects and I am eagerly waiting for your artworks to say in the
project gallery section. And then I'm going to give you, provide you my feedback
so that you can again work onto them and enhance
your artistic abilities. My other skillshare
class link has been provided in the description which is related to this class. Goodbye my friend. I
hope to see you in my upcoming Skillshare
class. Tata Bye bye.
 Ankit Jasmatiya, Fine Artist