Transcripts
1. Introduction: You want to be big? You need to lift Bk. I wouldn't understand. Hi, I'm Jake. And this class
will teach you how to create a Telekinesis effect for your social media using
Adobe After Effects, and without using any plugins, I'll share with you a few
free AI and non AI tools for creating three D models, and we will compare
them so you can choose which tool you would want
to use in the future. You don't need any experience working with Adobe
After Effects. You can even download the free trial version to
learn this effect, and it will work fine. You can always write your questions in discussion
section under any of my classes to get help from me while creating cool effects. I think it's the
best way to learn the software while creating
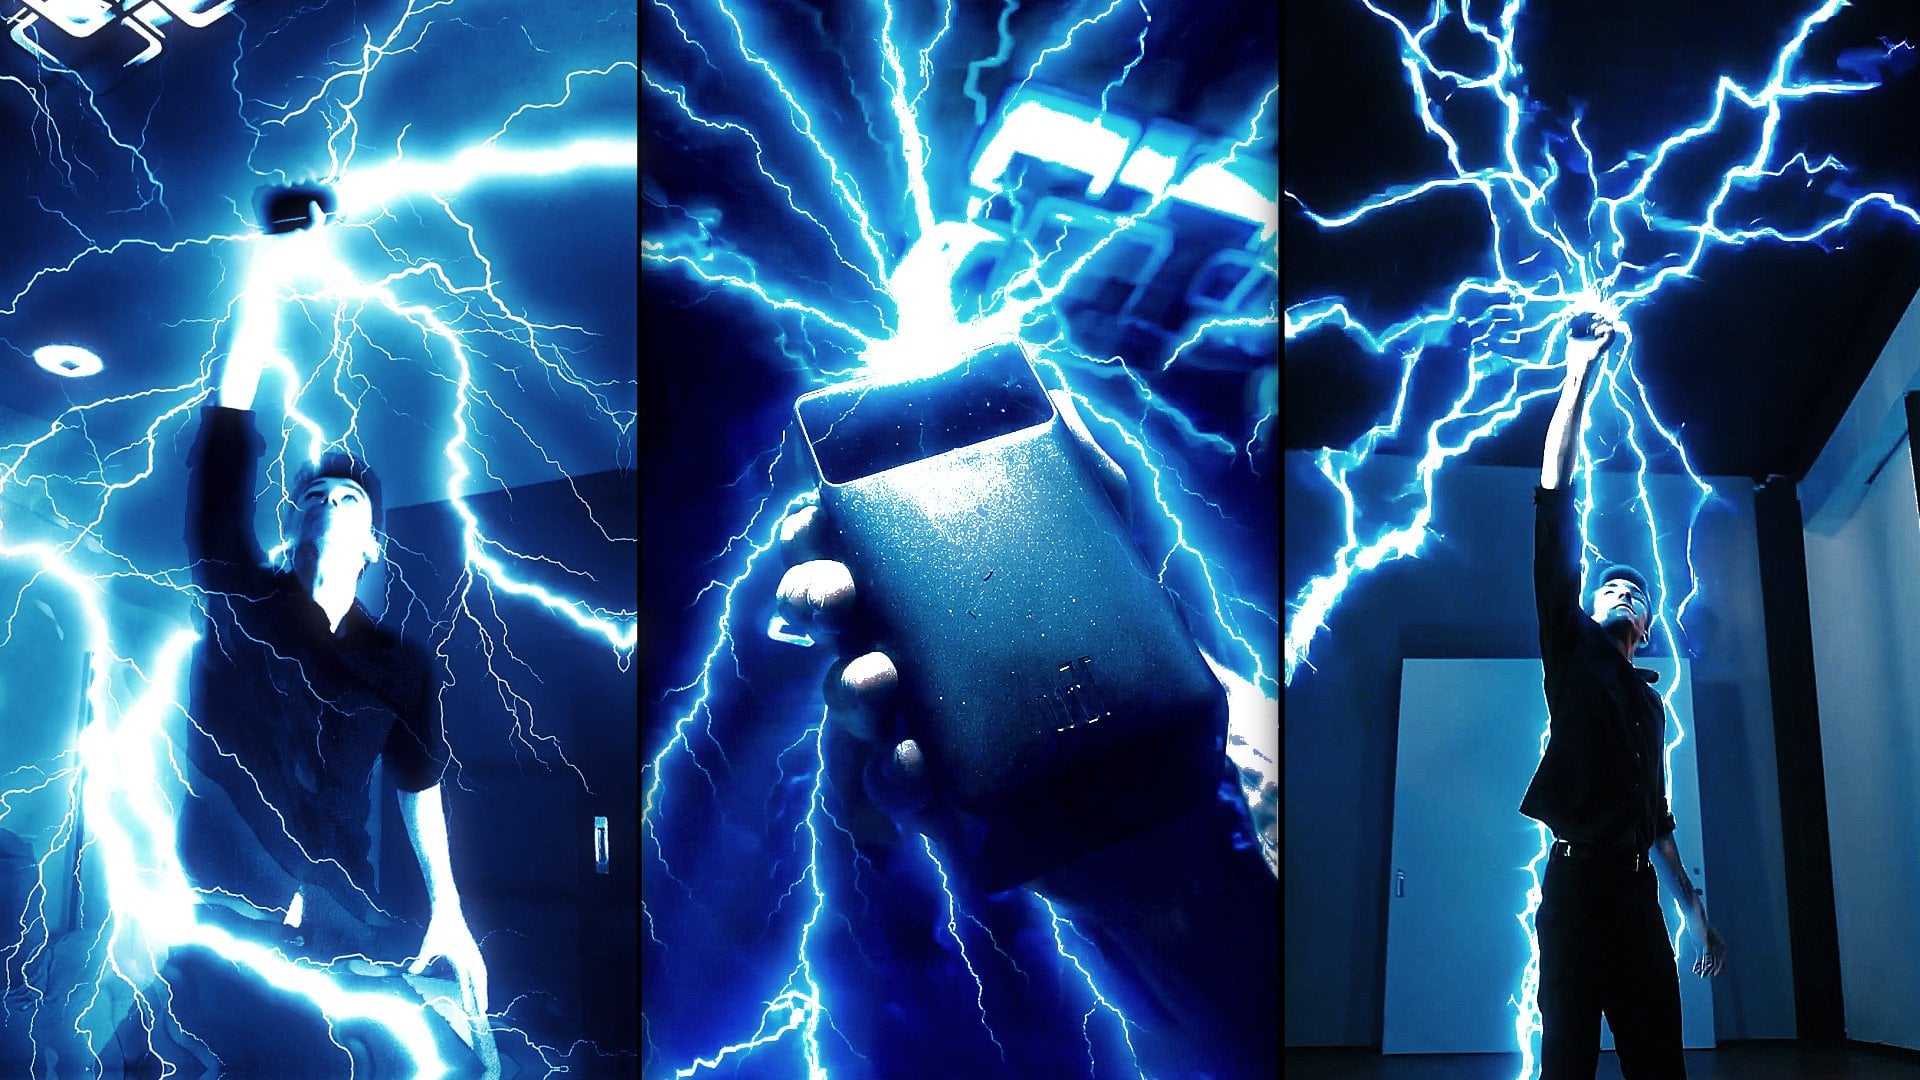
interesting effects for fun. And to complete this class, our goal is to create the school dumbbell
levitating effect for your social media
using Adobe After Effects. I'll be happy to see
it in my class as also your result after
following all the steps. So let's get started.
2. Importing GLB: So you need a Dobaor effects, even free trial version
will work fine. Let's open it, and then let's
go to File Import File. This video will be available in resource step to this class, so you can just go to Resource tap and download
it and then click Import. Then we can just
leftmost click and hold. So let's drop it on this little
icon or here on timeline. Now it created a new composition,
as you can see here. This is our video, and
this is our composition. And we can left
most double click, and it will open
this composition. It has exactly the same
dimensions as the original video, and here we can just check
if everything works fine. And as you can guess, it's
the edited video which I've used for my video
for social media. So in our case, we are
going to take a look at this part because here we are
going to add our dumbbell. As you can see here
we have it and here you can guess we
don't have anything, and we can just act like dumbbell is flying
towards our face. Also, as a bonus, I'm
going to show you how to add a text behind this dumbbell, as you can see in the preview. It will be tracked
to our camera in case if you would want to
know how I did the text, exactly the same
way I did it here. So it's the same technique. But let's start interesting part from this part with
this dumbbell. So to get the three D model of Dumble I basically had a
photo which I've used, so we can just left most
double click here to import footage or just go
to File Import File. In resource step to this class, I also will add this GLB file
which I've made using AI. In the next video, I'm going
to show you my process of searching the best tool to
get this task completed. This GLB file will be
available for you to download. Let's select it
and click Import. As you can see, it created a folder and dropped
our GLB file. Once you try to leftmost click and drag it into
our composition, just leftmost lick and
drag it just on top. It will give you an warning. It will change the
composition settings to support three D object. In our case, as you can see, it's dot GLB. So
let's click Okay. Here we don't need to change anything. We can
just click Okay. And now as you can see we
already have our file here, and we can also select it and press A on keyboard to
see the anchor point, and we can move it this
second value to -275, so it would be around in
the center of our dumbbell. Also, we can press R on keyboard and rotate it
to see how it looks. As you can see, it's
pretty cool model, which is really close to my original real Dumbll which
I've used for this video. The real weight of this dumbbell is 26 kilograms or 57 pounds, so it's not that heavy, but I decided to make
this video anyway. Okay, so in the next video, I'm going to show
you which tools I've tried to get this three D model, and you can choose for
yourself which you think would work the best for you. See you
in the next video.
3. Creating GLB: Okay, so we've
inputed our GLB file, and now we can just go to
File and save our project. So after effects can
crash from time to time. So it's a good idea to save it. Go to file, save us or save and select where you want to
save it on your computer. I'm going to call it
class and click Save. So here I already have a
five tabs open to show you which tools I've tried and on which tool I've landed
to create this model. So first tool which I've tried
is this hyper three D AI, it works by paid subscription, but I've tried to make this class without
spending any money. So basically, I'm
going to show you all free options which I found. It can be used for free, but you will have
very limited tries. So first thing which you
would want to do is to login. You can see I've logged in here, and then I just click on This
plus sign to add my image. So this image which I've used
for my three D generations, I also will provide
a resource step to this class for you to check out or use it for
yourself to try on these sites. So I'm going to open it to show you how I made a
photo basically, I just tried to make a good
perspective on the dumbbell so it could be visible for tools to see that
it has dimension. It has this bar, and
it has gz details. And I was impressed that I just selected
this one dumbbell, just one photo, clicked open, and as you can see, your image is currently being processed. So then once it's uploaded, I just clicked
Generate and gave me some promo that we can just close and wait for this
generation to complete. These parts, I'm going to
cut out from the class, so we would not waste any
time about a minute later, I've got my rough model. As you can see, this
time, I got not that great because here we
have some weird line. This time, when I've
generated this model, I was a bit more lucky because it kind of
looks pretty good. So let's see what
we also have here. We have pretty good
details on this part. And as you can see, this part didn't generate any details. Same issue I had
with this model. So this is something to keep
in mind that you don't want to over rotate your model if
you have some imperfections. So next thing which I did is I wanted to add a
material generation. So I just confirm. As you can see, we have
five credits for free. And now let's spend
another 0.5 my credits. So basically, you have
ten tries on your model, and then you'll have to pay
if you like the service. I'm not affiliated with
any of these tools, so it's up to you which one
you would want to choose. I'm just showing you a free
options which worked for me. Okay, so now let's
click and generate one more time here and
let's see what we got. Okay, so this generation
took me 2 minutes, 2 minutes to create a model, and 2 minutes to
create this material. And as you can see,
it's pretty good. Maybe in some parts, it's
even better that I had here, but I'm happy with
this result, as well. I just like that here we
have more rough material, which represents my
dumbbell even better. But this part is not that great, but maybe you'll be a
bit lucky on your model. Or you can regenerate a few
times because as you know, we have ik ten twice
before it becomes paid. So then what I did,
I just use GLB because GLB file has a
texture and three D model, big ten in one file, which is pretty convenient. And then just click Download if you would want to download. As you can see, it's also asked me to confirm the
material to save it. Then it will take
another generation. You can see it's much faster
this time and then just choose the options which is available in
our case is two K, and here is two types of
GBs and you can also import both types into after effects and choose what
you like the best. Then click Download
and it will pack. It will take just a few seconds. And in my case, I've used PBR
because it looked better, but you can import shaded and PBR version and see
what you like the best. And basically, you can
get these versions. In my case, I'm not
going to save it because we already have the
results from the site. And if I'm going to
click here on mine, you're going to see my
previous generation, which we are using
in this video. So you can see it also has a representation and cool
lighting, which looks great. So if you will import some HGRI maps or in
your three day software, you can get really nice results. As you can see, this
is our three D model which we are going to
use in this class. Okay, so this is
hyper three D AI. Let me copy this link. And here in resource
step to this class, you'll find this text file, which I'm going to create
right now links to AI. So let me paste first one, and then let's check our next
version which I've used. So next site which I've used
is this site called mesh AI. I also logged in with
my Google account, and it also gave me a
few credits for free. So I've tried and basically, I also used a feature image
to three D, select it, select my model and click Open, and I didn't really
pay attention. And I've used this
meshy five model, which is the top
of the line model, and it created a
really nice job. As you can see, here textures
even looks more realistic, which I was really impressed
and it figured out that it should have these
details from other side. So I was really impressed
with this model. I would love to use it, but it will not allow
me to download. If I'm going to
press on Download, as you can see, it
prompts me to purchase. In our case, we
want to use it for free and free
version to download, it will be this Mesh four
version of this model. If I'm going to click
here to generate, it will generate, it will take, as you can see, ten credits, we will not wait
for it to finish because I've got really
not that great models. They look good but some of the
details looked off for me. A stage when it should
create a material, it created these really
not great materials. I wasn't impressed
with this model, which is meshy four, so I decided not
to use the site, but I want to show you
in case if you are willing to pay $10 a month, you can get this option. Once again, I'm not affiliated
with any of these sites, so I've continued my journey
on finding the free options, which you can find on the web. So next really popular
option is to use Polycam. They have application,
I believe, on Android, as well as on IOS. I've tried it, and I
just uploaded a video. So let me show you the
video which I've used. So this is how looked the video. I asked me to record the video up to 3 minutes to
capture all details. As you can see, it's
not that great video. I have a lot of shakiness, and the floor is not
that easy to track. Also, you can see a
lot of reflections, which also may result
in back tracking. But basically, Polygam usually
gives you nice results. I just try to record really beginner
friendly video without any professional moves to see if with this
pretty bad video, it will get a good results. Then I just uploaded this
really amateur video, which is really not
the perfect kind of video to use
for the software. And it did mess up because
my video was really bad. As you could see, I had
a lot of shakiness, and I didn't really
try to make it good. But in case, if you are
interested in the software, I can try for the future classes to make
it a lot better and to get the maximum results from this software
because as you can see, here we have really
nice textures, and if I would pay
attention more, probably I would get
even better results. By the way, my phone
doesn't have dar sensor. So basically, it's just a result from simple
camera from any phone. And what is cool about this
that it's completely free. So this is something
that you can keep in mind for really nice
textures because I know that people
can professionally make really powerful
results with the software. And let me know if
you're interested, so we will dive in and create a much better results
for our next classes. And final thing which I found is this hugging face Trellis
model, which is really cool. You need to log in with
your Google count. Have the ability to try it out. Basically, from my
experience on Hugin face, you can find really
cool AI tools, which you can install on
your computer and use on the resources from your
computer to create images, videos, whichever
tools you're going to find on the
Hugin face website. Let's try this site as well. So here we have two mode
single image, multiple images. So let's try with the
single image leftmost lick, select our image and click Open. As you can see it automatically
removed the background. And next which I've pressed
is generate and extract GLB. So as you can see, we have GPU, which allows us to
create this generation. You'll not get too
many tries for free, but what is cool about this
service that you can every day have refresh your
toe and try once again. As you can see, we got
not bad thing again, as for free model, but we don't have any
depth to our edge here, so it's not perfect,
but it's also free. What is cool about this that you can install it on your computer. I'm going to go to this site. Let me also copy this site
as well to our text file, which will be available in
resource step to this class, then this one as well,
which is Polycam. They also have a tutorials
on YouTube on how to use it. And also I'm going to
give you this website. And here will be another
website on GitHub. So I'm going to place
it here because basically it's Github
page for this software. So you can basically
install on your computer and use all the resources
of your computer, which means that
you're going to get unlimited tries and create unlimited models
from the images. So what you want
to do is to follow this link and then find
the newest version. So last month is pretty new. Can see it's version 40 at the time of this class
will be uploaded, maybe they will come
up with new versions. Basically just find
the newest version which you can have and load on the ZFle anything which is above 40 will be
a newer version. 45, 50, 55, et cetera. I just left most so
once you download it, you going to unzip the file, just write most click and choose Zip and you'll
get this folder. You can just double click on it. And by the way,
just make sure that you need to have NVDA GPU, at least these ones are
newer to be able to run it. And once you download
this and unzip it, you're going to open
your folder and find these run files
which are listed here. I have eight gigabyte VM on
my video card on my laptop, so I'm going to run
this run gradioFP 16, which you can find here. So let me let most double click on it. Will run the model. For first time, it will take 15, maybe even 20 minutes to
download all the models which it requires and all the resources for this software to install. And basically, it will take up. So you'll need at
least nine gigabyte of memory just to have
this on your computer. And now we need to wait
for this server to start. If you will have a
better GPU with more you can run the simple runbdFle
as you can see here. Installation will get you 15 to 20 minutes depending
on your computer, but the running of the software itself will
take you about 2 minutes. As you can see, we are waiting. Finally, it provided this
site, which you need to copy, select it and press
Control C to copy, then open your browser and just Control Vito paste and
it will run the software. Basically, it really resembles this one site which we had here. But now it works only
from your computer. So now I'm going to show
you how it works here. I can just drop my image. It removed our background
and click Generate. So first thing, it will generate the three D asset itself, and then we will be able
to extract the GLB file. In my experience, it could
crash from time to time. So maybe after 15 tries, I had to just lose it
and open it again. I worked good once again. Now as you can see, we
have our rough preview, and then we need to
click on Extract GLB, and it will start processing. So our preview
looks pretty good. It's really similar
to this preview, almost the same as on
the website itself, but we even got more details, which is pretty cool because here we have only two plates, and actual image is three plates and here
is also three plates. So let's see the extracted
file as you can see, it did really good job. We even have a bit
of dimension here. But keep in mind
that the software when we will download the digalBFle let me download
it to our resource tab. I'm going to call
it PC generated. You'll be able to also test it, left most double click
here and import here. First thing you're going to
see it really lets click key. It is darker than
this previous one. This is just something to keep in mind that you'll need to have a light ambient light click k and press T and
increase the brightness. But all in all, it's really powerful result for something that you can generate on your computer for free. But in my example, I've used this one, which I've generated for free using AI from the first site. So I'm going to delete
this PC generated. I just wanted to show you
the last tool which I've used to try to create
my three D models. I'm pretty happy with this
because I can at any moment, try to generate a
bunch of models just from my computer
with unlimited trie. And finally, for this video, I want to show you the
multiple images version. So I have here my Dumble from a bunch of
perspectives like here. And I'm going to click Open. And what I've noticed
that sometimes it just remove my bar,
which is not that great. So let's try to generate. So from my experience,
some models were generated a lot better
just from one image. So this is something that
you can keep in mind that multiple version is more
like a test version. It can mess up the result. But as for a free tool,
it's really cool tool, which I like, and I think that I'm going to use
it in the future. So as you can see
now we've generated from a bunch of images
of the dumbbell let's also click on the extract GLB to see
the GLB file itself. But we can already
see that we lost some details and the
bar itself is black. So it knew it's a dumbbell, but because it removed
background with the line itself, I thought that this
line is black. So my advice will be to just try this single image version, take a picture of your object from different kind
of perspective, and you'll get
different results. So as you can see this is not
usable because it doesn't reassemble regional Dumble
which I have in real life. Okay, so next video, we are going to use this Dumble which I've created
from first website, which is this one. See you in the next video?
4. Movement: So now you know all the
AI tools which I've used to create this
three D model. Now let me delete this slide. Once again, to
import this model, you just need to open
this project panel, leftmost double click
here and just use this basic PBR GLB file. Then you can just drag and drop into our composition
to have it here. Then we can just press A to
see our anchor point and moved our anchor point to the center just
by choosing -275. Now we have our three model. What we want to do is start working on this shot right here. I'm going to use
this preview panel. If you cannot see
this preview panel, you can just go to Window
and enable it from here. Let's go to the
preview and enable it. Basically, I want to find
this moment where we have our dumbbell and next
frame, we don't have it. Then we can just cut to this
moment using this handle, just left mostly and drag
it to this point in time, so we will pre render
this part of the video. If we will press Zero numbed, it will be previewing
only this part. I'm going to shut off the sound because we
don't need to use it and I'm going to change it to auto so it will
render a bit faster. Now we have this
part of this video, and now we just need to place our Dumble
on our skateboard. So for this, we can just use a size tool
or position tool. Let's try to use a size. So I'm going to press SSO
keyboard and reduce the size, and then we can just move
it using these arrows. So the easiest way to match with our original to
have a reference. So what I can do, I can just find the moment
which I like, and then just press this button right here to click a snapshot. I'm going to go to
this frame and press a five on keyboard
to see the snapshot. This really helpful because
now I can select my model, press on keyboard
and just rotate it, not on Z axis, let's rotate it on X axis, as well as on Y, roughly, we want to match
the look of our snapshot. So to see our snapshot, we can also click here or press a five on keyboard
to see the snapshot. We see that our dumbll needs to be smaller and we can
just see here as well. Something like this,
maybe like 19, 20, 21, let's say, it's 20. Now I'm just going
to place it here on my skateboard just so it
would look believable. Then I can just press peon
keyboard and move it over. In my case, I just want to move it further, just a tiny bit. And at this point, I don't want to repeat the
same placement. I just want to look
in this frame, more or less believable. So I can press Control
Shift As you can see, I'm pressing Control Shift H and it will remove all
of the outlines, so it would be easier to
see the dumbbell itself. And for final move is
to select our model, press keyboard,
and just rotate it once again if you would want to make perspective
even better. In my case, I like
how it looks here. Next step will be the movement. So what we can do is to cut
this dumbbell to this moment, so it will not be visible here. Then it will be visible here. The movement will be the
most difficult part. Let's press P on keyboard, and we need to create
our first keyframe just about at the moment where
it needs to start moving. Here it's still, and next frame, you can click here in
this preview panel right here and find
the moment where we don't have any blur this is exactly the moment where we want to create our
first keyframe. So skate is blurred
here and here, the best point to
create a keyframe. Select our three D model, press peon keyboard to see the position and left
mostly on the stopwatch. Now as you can
see, we've created our first keyframe.
So what is keyframe? Keyframe is basically
a point in time, which remembers the value
of certain property. So in our case, this keyframe remembers these values of
the property position. Basically, what it
means that we can just move it over RR keys, it should move really
fast to our face. So let's just move it up by changing the second
value to the right, so it almost will kick
our face just like this. And as you can see, it already
created another keyframe. So what after effects will do, it will remember this
position of the Dumble and this position of the Dumble can see
everything before it, it remembers this
first position. Then it will go
from this position to this position in
time, just like this. As you can see, it moves from this position
to this position. To get the movement right, we need to play around with the speed
because as you can see, our board starts slow and then fast and the same motion we need to repeat
with our dumbbell. The easiest way to do this is to select this keyframe
and press F nine. Basically, it will
do exactly this. It will start slow movement
and then faster and faster. You'll need more precision, you can just go to
this graph editor and left mostly on this icon. I will open this kind of graph. If you cannot see this graph exactly as I'm
seeing on my screen, you just need to change from edit value graph to
edit speed graph, so you'll get this kind of arc. Then if you will
Zeman Blick here, you can see that we can
influence our motion. Basically, this means that it will start slow and then fast. So if I'm going to want
to make it even slower, I can just drag it to the right. As you can see now Dumble really starts slow
and then fast. In our case, I'm going to press Control Z because my
movement looks pretty good. As you can see, it
looks pretty good. On your footage, you
might going to need to jack these handles to
get the movement right. Let's go out from this graph editor and
let's see how it looks. A this moment in time, Okay, so here it clearly hit my head. And this is not
exactly what I want. So to fix this
issue, first of all, I would want to check how
it looks in real time. So for this, what we
can do is to zoom out a bit by clicking here
to see this endpoint, and maybe let's cut
it to this moment, so we will go to
preview only this part. So now we can just press zero on numped and it will
start previewing. So now we can see our
motion in real time. So as you can see the speed of dumbbell is pretty good
because it's pretty fast. Believable, but my
reaction is way too slow to fix this issue
in my original video, I just at this moment where
my skateboard already got up, then I selected
my video and just went to edit split layer. What I want to accomplish, I want to see where my reaction
starts, it's about here. Now I can just set
my time cursor at this moment and go
to edit split layer. Now I can just speed
up this video. I can just write
mouse click on it and go to time time stretch. Instead of stretching,
I can just reduce the stretch factor to lick
20 and then click Okay. So now you can see, I
really stretch this part, and now I can just drag
it to this moment, and if I'm going to
press Shift and hold, it will snap to the keyframe
as well as to this edge, which is perfect for us. So now we can see that my
reaction is a lot faster, which is great because now the dumbbell itself
will not hit my face. So now we can just press zero
amped to see how it looks. You can see now my
reaction is way too fast, it doesn't look normal. So what we can do
is to go to time, time stretch, let's try something
like 55 and click Okay. This way, you can
just manipulate your footage to get
the timing right. When you're going to
act in your video, just make sure to react a lot faster if you're going to
make some movement like this. Let's press on numpd
and now as you can see myFa reaction doesn't
look that bad. It looks a bit more believable. Now when we got this reaction, we have our main motion. We can just start creating
the second motion where I throw our double
into the camera. What we can do, we can just simply create another
keyframe just like here, and then with the acting skills. Now let's just find the
moment where I throw in the Dumbel and just let's
move in this space. Basically, I'm holding
shift to make it faster, set the second value -1,200
and let's move it lower. And just my idea here is to
move it towards the camera. Also, I want to hold Shift and press Ron keyboard
to see the rotation, and I'm going to
create a keyframes for all of these
rotations for all axes. Then I'm going to
move it over here. Basically, I want to save
the original position, so here it will stay the same. A here, I can just try to rotate to see what kind
of rotation I like. I would rotate a bit
like this and then maybe let's try this
kind of rotation. And this rotation we
don't really need, or maybe let's try it just to get a bit of lighting animation. As you can see, now we have
this really cool animation. Next thing which
you can do is just simply adjust the
position itself. With these three values, we can just move it further, and as you can see here,
it starts to clip. So maybe just find how you
want this dumbl to fly. Something like this
should work fine. Now we can also select all of these keyframes and press
F nine on keyboard, so the movement will start slow and then faster
and faster and faster. Let's press zero naped
to see how it looks. Now as you can see we
have this motion where it stopped and then flight
towards the camera. This second motion,
you can always tweak and see what
you like the best. To add a bit of randomness, I like to add slower animation
from one of the rotations. For example, for this one, I can also select it
and press F nine, some of the rotation
will go faster and some of them slower to
add a variation. Also, I would want to
select this Z rotation and go to Graph Editor and
make sure that this rotation, which you can see here
will not start that fast, so we can just
track it like this. It's almost not
rotating and then rotating a lot faster
and here even faster. So something like this
looks pretty good. So let's close it and let's
close this graph editor. So let's press your numpt. And as you can see,
as I've told you, the movement itself is pretty
complicated because we have a clear part which
looks pretty weird. It's this part right here. And to cover this
part right here, I've come up with this idea to get the first movement
like we did in this video and make secondary motion by
selecting our animation, this GLB file and go
into layer precompose. And we can call it color
correction and click Okay. So now we have all of our animation baked in
to this composition. And in the next video, we are
going to color correct it. So it would look closer to this original dumbbell in terms of lighting
and the look itself. Now, if you were going
to press Peon keyboard, you can see that we don't
have any keyframes, which is exactly what we
want because in this case, we can still have this
really fast motion. Here at the beginning and this
really smooth at the end. If I would try to create
some motion in between, it will be really hard
to create on one layer. Secondary motion, I like to have it on this composition
which we just created. Let's press P on keyboard, right here, a bit later, let's just move it
where we want to have it in our shot, just
maybe like here. We have extra motion from
this moment to this moment. And as you can see we have
this secondary motion, and to make it even
more interesting, we can just select it and go to Graph Editor and here let's play around
with these curves. Let's drag it by these
handles, just like this. Let's spread even
this keyframe apart, just like this and here as well. Basically, what we
want to have is smooth transition
between the first motion and this secondary motion. Once again, what you
need to do is just to move around these
keyframes in time just like this and play around
with this curve so it will blend with
this first motion. Let's press zero numpt
to see how it looks. Now as you can see, we already added this secondary motion. Once you're happy with
overall movement, you can just go out from this
graph editor and finally, maybe just tweak the
position of itself, maybe move it here, so it will not hit our face let's once again press zero
numped as you can see, now we have this transition
between these motions. Final thing which we need to address is that we
moved our composition, and now as you can
see it cut off here. So what we can do is just to write most click on
it and make sure that your time cursor is
around here where we have no problem and then go to
transform fit to comp. In this way, it will stay
exactly as it was before. Go to graph editor. We need to play around
with these keyframes so this movement
will not look weird. Just make sure that
this little motion will look good with your video. Just spend more time to
get the movement right. Now as you can see it
looks pretty good, and I don't want to waste too much time on this part
because in the next video, we are going to color
correct our dumbbell, so it will match better with our scene and add
a bit of lighting. I will also match the lighting as well. See
it in the next video.
5. Color and Blur: So now we have our movement, so now we need to add a bit
of magic of compositing, so it would look even better. First thing which I
want to add is to add a bit of lighting which
matches the sliding here. Basically, we need just a bit of light which will
hit from the side, so it will look a bit better. Let's open this color question. Position as maybe Zoom en, and let's go to layer new light. Let's change the ambient light to point light, and
let's click Okay. What we need to do is to find the position
of our dumbbell, which just press peon keyboard and we can see this position. We can just select it and
press Control C to copy, then select our light and
press Control V to paste. Make sure that you are copying the position while your time
cursor is exactly here. You can also select your light, press peon keyboard
to see the position and delete all of these keyframes because
we don't need it. You can just simply copy each of these coordinates each of these values to the
values of the slides. Now we have our light in the same spot as our
dumbl as you can see, and now I'm going
to move it a bit, move it to the left, and move
it with these two values, you can just copy,
which is basically 155, maybe let's move. Even further, just like this. So here I basically just
by eye trying to replicate that edge light which we had here in our conversation,
as you can see here. Simply just by memory, I want to have this
kind of light. Then second thing which
I want to do is to add layer new light, and let's go with the ambient
light and click Okay. Now we have our ambient light. We can just press T on
keyboard and reduce it a bit. Let's close this light. And this light, what
I like to do is to select these both lights and
disable it and enable it. As you can see it
looks a bit closer to our original lighting. So let's go to color correction. And here I would want
to use my point light, press Ton keyboard, and
increase the opacity. So we would have
really nice lighting. Second thing can also do is to select our footage here
and our main composition. We can also write
mostly here and change composition settings and
let's call it main comp. Click and I want to
select our video, press Control C to copy and
go to color correction, press Control V to paste
and place it under, and let's just find the moment with our original dumbbell. We would have something
as a reference. And let's press T
on keyboard and light our dumbbell
as close as we can. Basically, in my case, ambient light, I've set to 90, just select your ambient light, press T on keyboard
and set to 90, and point light, I've set 250. Which is close enough. We can work with this as
our reference point. Now what I want to do
is to delete my video, and here where my dumbbell
will going to fly, I need just to check if it looks right in my
main composition. As you can see, here, our lights doesn't
follow our dumbbell, so it doesn't look
really realistic. The easiest method to fix this, I found is just to simply switch off the lights in the moment of this
first movement. Here. So in the middle
of this movement, I just select both
of these layers of the light ambient
light and point light and just cut
it just like this. So basically, it
will just return back to these kinds
of default lights, which looks a lot better,
as you can see here. So I would like to use them instead of these lights
which we just created. So let's go to our main
composition and see how it looks. Now as you can see,
it looks a lot closer to our Dumble rate here, and we will add additional
details a bit later. But for now, it looks
really similar. And now when this really
fast movement will happen, we can even switch off
in this moment in time because it's the peak
fast movement like here. Let's make sure that we will switch off just
in this moment. A here, let's cut it off. So now it will switch off in
this really fast movement. And here we will use these lights because
it looks pretty good. So next thing which we would
want to do is to make sure that this dumbel would look
even closer to our Dumble. And what I like to use is to
go to ex and precess panel. So we can just go to Window
and enable it from here. Effect and press panel, wait for it to load up. And let's type here
curves and select it and drag and drop onto
our color correction layer. So let's make it a
bit brighter and maybe here even drag by
this point a bit up. So it would resemble our
original with the light. So something like this. Now you can see it resembles even more. And here we can clearly
see that it has a bit of bluish tint and our Dumble
is more like a grayish. So this we need to fix. Basically, we can even
add another curves and go to blue color and just add a bit of blue,
just a tiny bit. Now we've added a
bit of blue color, and now inol it looks
pretty similar. Now, as you can see, it's
really perfect looking, and here we have a lot of noise. Let's add some noise here
on the noise and gray. Let's choose this
noise and drop it onto our color correction
composition and introduce some noise and make sure
to not use color noise. Just uncheck this box. Maybe let's increase
it to nine and also let's go to effects and presets and type here Gasimblur. So I'm going to move this a bit. So maybe I'm going to
change to standard layout. So we have a bit more room on our effects and
presets panel. So now I'm going to
type here gasimblur, select it and dragon job
onto our color correction. So we've added our noise, and now we can just
blur it a bit and blur the image itself and maybe
reduce the noise a tiny bit, so it resemble our footage. So next thing which
helps to blend our three model and
this wishing point where we have this kind
of lighting and then totally different
kind of lighting like here is to add
some motion blur. So for this, we're going to
need to go to effects and presets and type here
horse motion blur. Selected and jag and drop
on this color correction. And now, as you can see,
we've added our motion blur. And with these
motion blur samples, we can increase amount of samples to not get
too many lines. So something like 12 or 15
could work really well. As you can see, 12
already works well. And 15 works perfectly. But make sure to
not use too much because it will really
slow down the render. 15 could be a good
solution for you. To control the
motion blur itself, you can just change this
value as high as you will go, the more motion
blower you'll get. In our case, this
looks pretty good. Let's press zero nupt to
see how it looks in motion. Now as you can see it will take a bit more time to render. Just make sure to change here to auto or maybe even
to lower resolution. You render will be faster. In my case, I can
see on my hands a lot more motion blur
than on my dumbbell. To fix this, we can just
simply pick the moment in time and try to match this kind
of blur on our dumbbell. So let's set to 250
to make it even more. So now it looks more
closer to our hands, and maybe 300 could
work even better. One thing we should notice that here where we don't
have any motion, it completely disappear
because as you can remember, we have here motion and
it completely stopped. So let's go to main
composition and see if we can fix this issue
in this composition. What we can do, we
can enable here motion blower as well and
enable on this layer also. Let's see if it
transitions well here. Here we have our motion blur and here it stops pretty abruptly. Didn't really help. What we can do is just simply shut it off, select our CC force motion blur and press Control X to cut it. Then just select our color
correction and go to layer, precompose, and let's call it motion blur and click
all attributes. Basically color
correction will go inside of this composition
with our secondary motion. This is important because
now our motion blur will be calculated with two
movements which we've created. Let's click Okay, and
now we can just press Consul V to paste our
CC motion blur and now it will create a
motion blur here as we did and also on this
little motion as well. Now it will look even better. By the way, you can always go to the new adjustment layer and cut just about here where
it hits the camera and basically add a effect here and effects and presets
type here transform. Select it and drop it onto
our adjustment layer. You can press Enter
to rename it. Let's call it camera shake. What we can do is to hold
Alt key on keyboard, as you can see I'm
holding Alt and leftmost ly on the
position keyframe. It will allow us to
type expression. We can just type here wiggle, open square bracket, type
five, its frequency, how often it will wiggle and we can set second value to 55, its amplitude, how much it will wiggle and now have this wiggle. As you can see, we have edges
which we don't want to see. In these cases, we want to add a motion tile effect and drag it just before this
transform effect. Then click on mirror
edges and increase this output height and
output width to 200. This will mirror the edges. This is how you can add this
camera shake at the end. In the next video, I'm going
to show you how you can stick your text onto the
couch just like this, add some shadows and
a little stylizing. Our text will match
our camera movement, as well as we will have it behind our dumbbell.
See you next video.
6. 3D Text: So now let's add this really nice text behind our dumbbell, and it will match
our camera movement. Okay, so let's find this moment where we have our dumbbells. So this movement,
let's go to Edit, split layer. Let's go further. So here we need to split to
this moment of next video. Let's go to Edit split layer. And now let's work
with this video. We can also go to file and save, and in effects and presets, let's type here camera and
select this camera tracker, three D camera tracker, select it and drag and
drop onto our video. It will automatically try
to analyze our video, and the best footage to track
our camera movement will be the footage which I've provided in research
at this class. Basically, what you
need to keep in mind, you don't want to have a
moving objects in your scene. You don't want to have a reflective objects
in your scene, and you don't want to have
a lot of motion blurr, so it will be easier for camera tracker to track the
footage which you have here. The progress you're
going to see here, as you can see, it's
already at 90%. Then it will start
to solve the camera. If you will follow all of the
tips which I've mentioned, you'll get a good video
just like this one, and as you can see, we have
no problem with the tracking. If you have some problems, you can also go to Advanced and click here on Detail Analysis. Sometimes it may help
with your footage. What I want to do,
I want to drag my cursor on top
of these points. If you cannot see your points, you just need to
select your video and select the camera checker
and you should be able to see it also make sure
that you're going to press Control Shift H to
make sure that you have the view when you
can see your points. And you can also change the point size if your points is too
small, just like here. What I want to do is to find a surface which really represents the
surface of my couch. In my case, this
one is really good. I'm going to left most l in it, and then we most l in it
and create text and camera. Now as you can see
my text placed exactly at this
point in my video. Now I'm going to drag
and drop so it will look nicely here and
cut it here as well. Then I want to
press RN keyboard, and I don't want to
have any rotations, so I'm going to set
these values to zero because I see that it
already looks pretty good. Then I can press S on keyboard and change the size
to bigger one. Also, I can find the
character panel. You can go to Window and enable it from here character panel and just make it scale this a
lot bigger and move it over. So let's just say
that you would want to have your text right here. So maybe let's type something. Big like I did in
my original video. You can use any
font which you like and make adjustments to
your liking as well. So I'm going to make
it even bigger and just use this selection tool
to move it just like this. Make sure to move only by these arrows because if you
will move just by text, it will mess up the tracking. So use only these
arrows to make sure that you are moving in
correct dimensions. Avoid moving in this space. Move in this Y
space and X space, just horizontal and vertical. If you need, you can
press R on keyboard. And rotate it a bit. In my case, I'm going to move maybe rotate just a tiny bit, so it will fit a bit better. So my case, I'm
going to set to 0.2. It looks for me a bit better. As you can see here,
I would want to have this dumbll
and this part of the dumbll on top
of my text or if I would move my text to
the right right here. And move it lower, I would want to
have this part of the Dumble on top of my text. This is really easy process. You can just simply
select your video, press Control D to
duplicate, move it on top. We can just select our three D camera tracker and delete it. Make sure to save your project because art effects can
crash from time to time and then just select this
video which we've placed on top and press
Enter and keyboard. Let's call it MT because we will use this layer as a mask. Let's let most
double click on it. It will open the layer mode, and in this mode, we can
select this Rota brush tool. Basically what we want to do
is to tell the software that we want to have this
part on top of our text. Just draw over it. If you don't want to
include some of the parts, you can just hold old
Keon keyboard and it will turn to red and you can just dissect some of the
parts, just like this. I'm going to press Control
Z because it's fine for me here and
then we can just go to Preview panel and just scrub through and see if
it tracked nicely. I tracked good here. You go back here. So let's jack it here, and now we want to include this part of this
dumbbell as well. So let's make sure that
we are tracking as well. So just adding frame by frame, then it remembers and starts to track this part
of the Dubell as well. And now we can just
scrub through and make sure that we would want to include this part of
dumbbell as well. Also, we can just step by
step track frame by frame, B clicking here in
the preview panel and looks pretty good.
Can just scrub through. And as you can see this
process is pretty fast. And once we get this all
green line under our part, you can just simply click
on the freeze because only this button will
actually save our progress. And only after this
freezing process, you can go to file and
save your project, and it will remember
our progress. In other case, if you will
close the after effects, it will not remember
this tracking. So make sure to freeze your process if you would
want to save this data. So now we can just
save our project, go to composition in
composition here as well, and we can just close here and we can already
see that we have our Dumble on top of
our text here and here, which looks pretty cool. Next thing we can do
is to make sure that these edges looks a bit smoother because now
it's pretty rough. You can just increase
the feather, just a tiny bit, maybe up to 20. Let's check it here as
well. It looks pretty good. You can just play around
with this feather to make sure that your
edges looks clean. Next thing which we can
do is to select the text itself and to add a
bit of textures to it, so it would look much
more interesting. So what we can do is to go
to effects and presets and type here ramp and
add a gradient ramp. As you can see, we have
this kind of warning, which means that we need
to click a K and select our composition and go
to composition settings. It doesn't allow us to use
grader ramp because we need to change the three D
render to classic three D, just like this. Then click. Now we can just select our text, maybe change the position of it a bit and now we can just select this granit ramp and drag
and drop onto our text. Then I would want to
use a radial ramp, which basically means
that it will start from this point and go
in radio fashion, and then we can just
swap the colors. We would have this
highlight somewhere here and this dark
spot right here. Second color, I would want to have something like light gray. Second thing which
I would want to do is to add some
drop shadow effect. But before it, we can also add a CC light sweep to add a
bit of edge onto our text. Let's drop it above
of our drop shadow. Let's make sure that we can see our light sweep and let's
angle it right way, just like this, just to see this kind of edge
which is glowing. So to see our edge,
we can just adjust the thickness increase it
a bunch to see the edge, and let's sweep
intensity set to zero. So we will see only the edges
on which we are working. And we can just simply go around and just like this place it
where we want to have it. Then I want to change the width. So I want to have this really large of edge and the thickness, we can reduce it now
to really small value. We would have this
really nice edge light, which gives a bit
more dimension. You can just play
around and see how much of this edge light
you would want to add. Then with this drop
shadow effect, we can just increase
the softness, a tiny bit, then select
your drop shadow effect. Maybe let's angle it. We would have shadows to the side from this
light side to the side. You can also change
the distance tiny bit, we'd have bit more
shadow to the left. Then you can just select
your drop shadow effect and press Control D to duplicate
and with the second copier, we can even increase the
distance a bit more and spread the softness even more
to get even more shadow. Now it would look
like it's sitting on our bed and we can
just move it over. As we like, just
remember that you need to move only by
these two arrows, so it will not mess
up the tracking. Now when this camera flies by, we have this really
nice and big text. Let's take a look going
to cut to this moment, so we will preview
only this part and press Z lumped
to see how it looks. Maybe I'm going to
go to full screen, fit up to 100%, and below escape button, you can find Tilda button which will open on the
entire screen and press your numpad to see how
it looks and maybe let's make it a bit darker so
it would look more cool. This is how you can add
this really nice text which is embedded to your video. Sure to follow me
here on Skillshare. I have a lot of classes on VFX. Using Adobot effects,
you can just click here on CMR to see
even more effects, which I post pretty
much every week. Here is a new classes section. Here is logo animation. You can always click here on CMR to see even more classes, text animation fundamentals
of Edoatr effects, complex VFX, free AI tools, the Venture resolve
classes, and even more. Thank you for taking time
watching my classes. Feel free to share
your class project, and I'll give you my
feedback if you want. Follow me here on Skillshare, and I'll be happy to see you in my next class. Thank
you for watching.
 M Jake, Lets Create VFX & Cool Stuff Together