Transcripts
1. Introduction: B, D. Do. Hi, I'm Jake. And this class will
teach you how to create a face words effect for social media using
Adobe After Effects and without using any plugins. You don't need any experience working with Adobe
After effects. You can even download
the free trial version to learn this effect
and it will work fine. You can always write
your questions in discussion section under any of my classes to
get help from me, while creating cool effects. I think it's the
best way to learn the software while creating
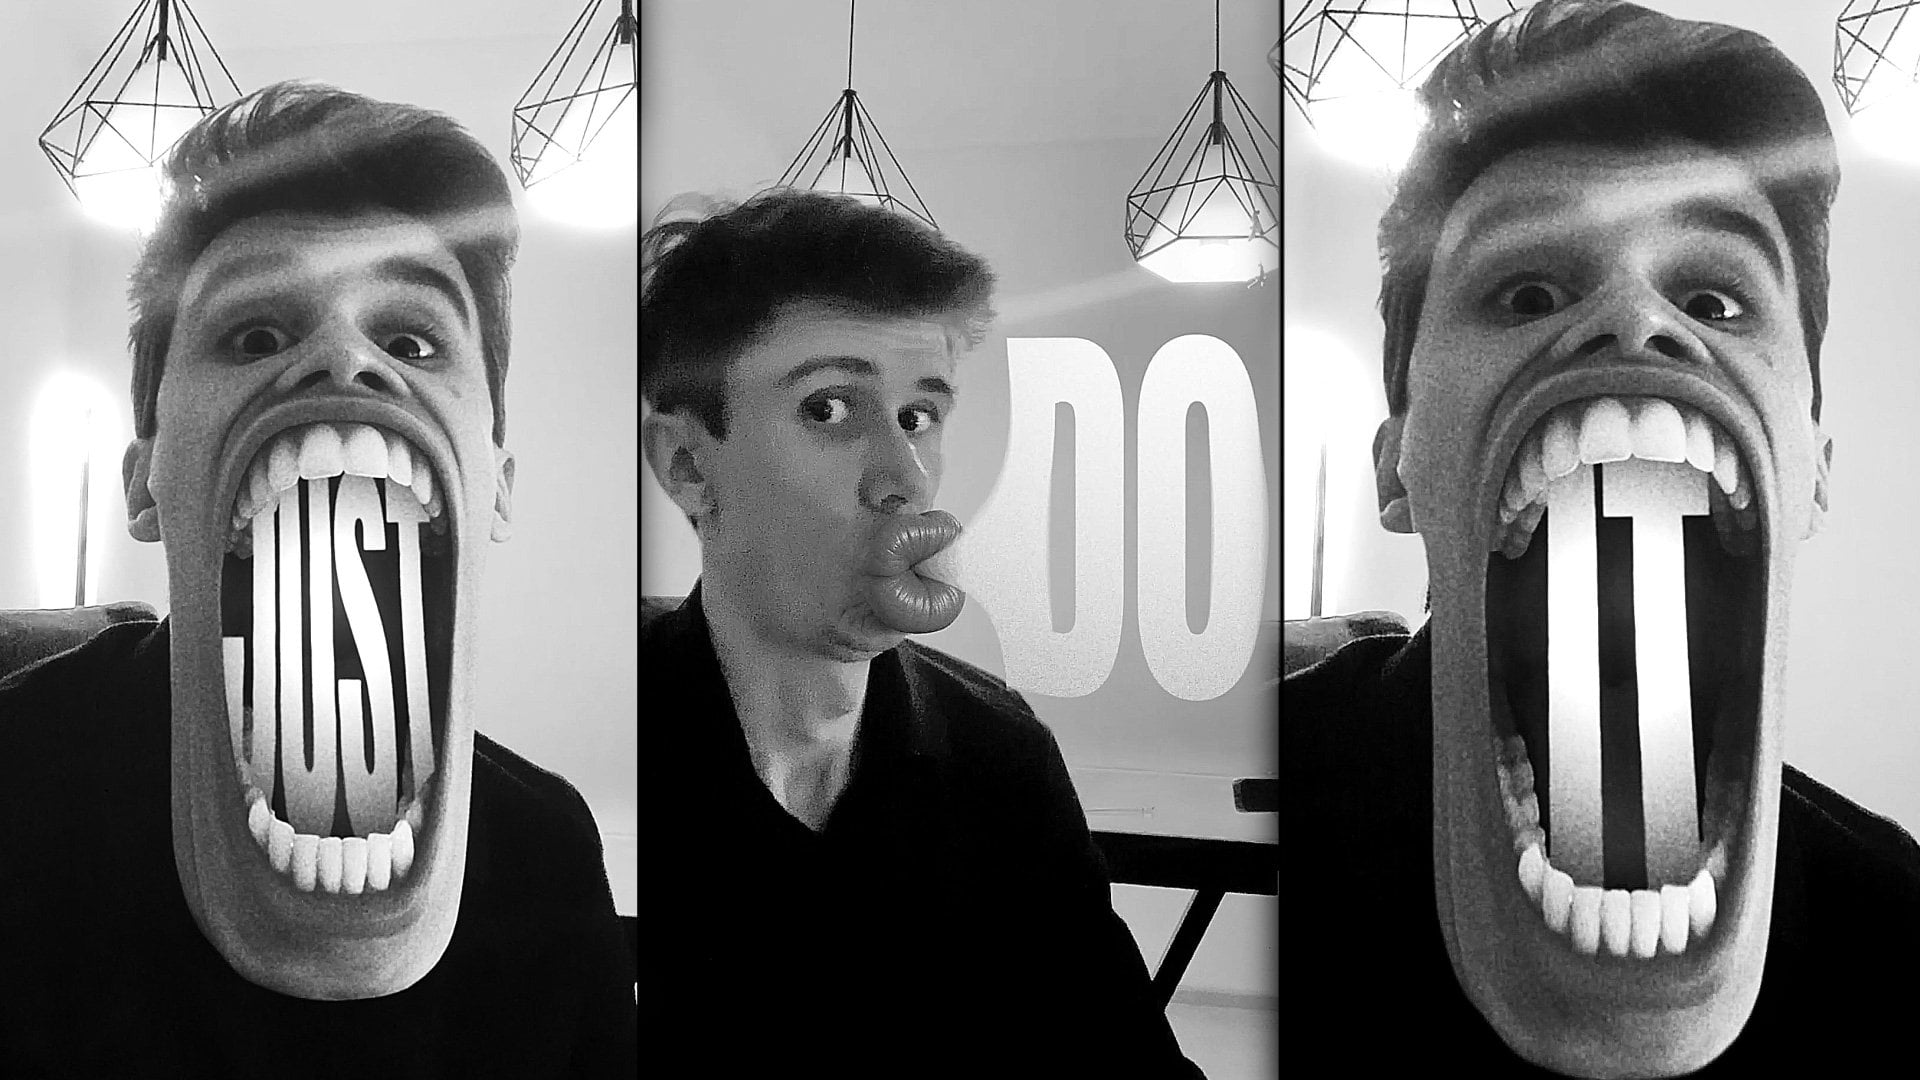
interesting effects for fun. To complete this class, our goal is to create
the school face words effect for your social media
using Adobe Auto effects. I'll be happy to
see in my class as also your result after
following all the steps. So, let's get started.
2. Preparing Footage: Okay, so I'm using Adobe
After Effects 2024, but you can pretty much
use any version of Adobe After Effects.
It will work fine. So first thing which you
need to do is to go to File Import File or just leftmost double click
here to import our video. These videos will
be available to download and resource
step to this class, so you can just find this
video and click Import. Then we need just to select it and drag and drop on
this huge button, new composition to
create new composition with exact same
dimensions of this video. So this is a full raw
video of this effect, and by the way, here
I made a dolly zoom, which basically means
that camera goes out and use them in
or another direction. Camera goes in and use them out to get this
kind of effect. For this class, I want to cut
this video to this moment because we are going to add
these effects to our face. So we can cut it to this moment and then right mouse click in it and go to trim come to
work area just like this. So we would see only
this part where we can just place some
words on our face. So first thing which
we need to do is to find the moment which
we are going to use. Let's use this face
because if you have a bit more
rotation in your head, the deeper words you
can place on your face. So on this kind of flat face, without any rotation, it
will be not that deep. It had GPT from my experience doesn't know how
to make a deep cut or maybe it's restricted
by the settings of itself. So let's start with
this more fun part where I turn my
head to the side. Basically, the effect
is exactly the same for every phase
here, here and here. So technique will be
exactly the same. I'm going to show you
only on this phase, and you can repeat
exactly the same process on other pauses of your head. Much more fun to
use your own video. So basically, you can
just film yourself doing some movements from
side to side, just like this. Just make sure to not
over rotate your head because it will be pretty
difficult to comp in. So this kind of rotation of
the head will be excellent. And let's just find the moment
which we like the best. So for example, this one, where everything is in focus
and nothing is blurred. So then we can just cut to this Second, in my case, is exactly 1 second, and let's go to composition
add to render Q because we need just one screenshot for
free version of Cha GPT. I'm going to click here on Output Module leftmost lick
and then set the sidings to JPEG format options
I leave as it is to maximum quality at eight
and click Okay and Okay. Then you need just
to specify where you want to save your photo. In my case, I'm going to
save this screenshot. I'm going to name it screenshot, and I'm going to upload to resource step to
this class as well. So I'm going to save and render. Now we have rendered our screenshot and now
we can go to Chi GPT. Exactly this, we will do in the next video. See
you in the next video.
3. Creating Image in ChatGPT: Okay, so now we have
our screenshot ready, and I'm going to use H browser because here I didn't login
into any of my accounts. So I just can go
to HIGPTs website. So you just can type here hGPT or in Google
and go to HIGPD. Here you'll need to
login with your account. It will not require
you to pay anything. You can use a free version. So what you need to do
is to click on this plus sign and go to AD
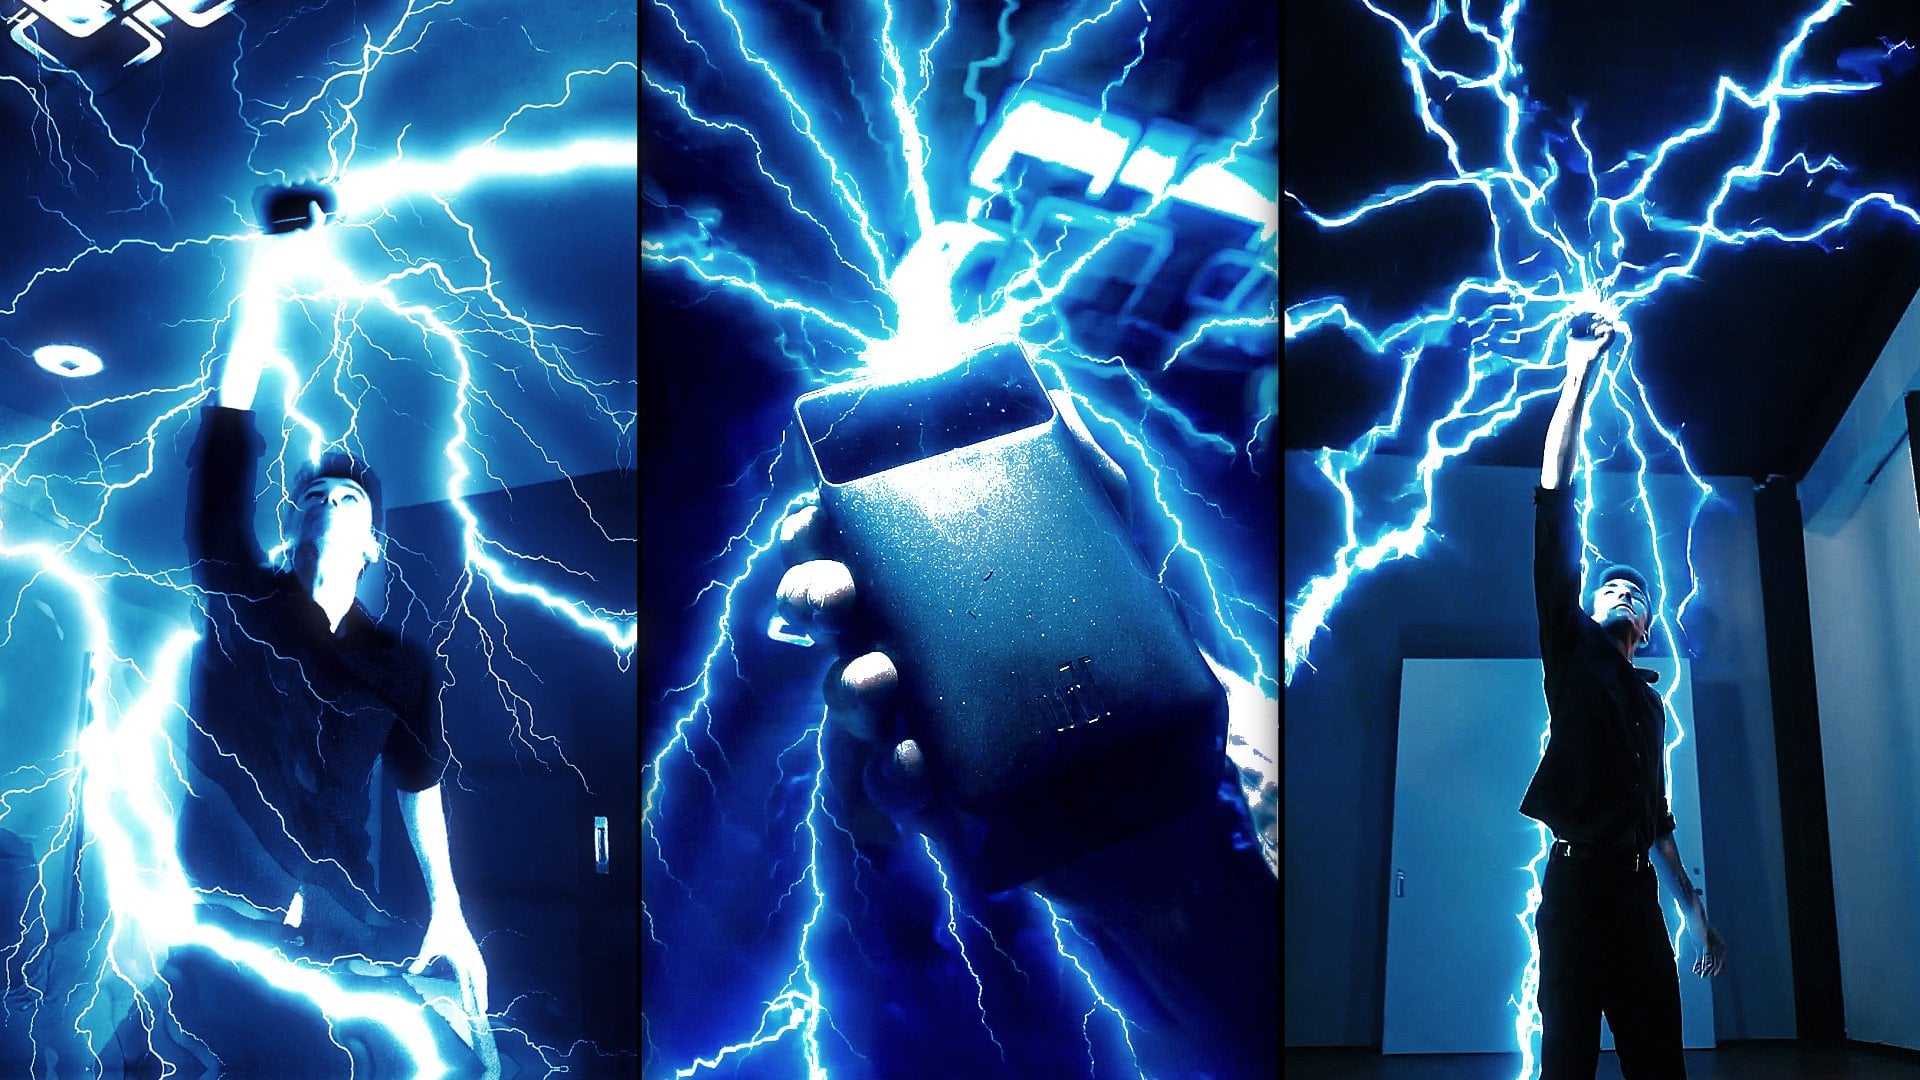
Photos and files. By the way, from
my previous class, we did a lightning,
which was pretty fun. Just make sure to check
my other classes on Skillshare and you'll find this lightning class,
which was really fun. So let's import our photo, which is provided to
resource to this class. You need to find this
one and download it. It's called prompt
because we are going to use this image as a prompt. So first thing we
want to do is to select this image which
we have as a screenshot. So let's click Open, and then let's click
on plus sign at Photos and Files and
click on this one, which we are going to use
as a prompt and click Open. So now we have two images. Here is pretty easy. You just need to describe
what you want to get in simple English or
in your native language. So in my case, I'm
going to write something like take
my first photo that I've uploaded
and place word do. I wrote the word on all caps
and in the quotation marks. So it will know that it
needs to write the word do. Exactly as on second
photo that I provided, it should cover entire face, no eyes, no lips, no mouth, no nose. Sometimes it's good to say about this because it may leave
some parts of your face. So I'm going to describe
it just like this. And make sure the
word do will be from forehead to bottom of
my face as on second photo. Let's try and send it to see what we've get
on the free version, it sometimes takes a lot of
time to create an image, but this time we could be lucky and get it just
in a few minutes. I'm going to cut out
this moment so we would not waste the
time of this glass. So now as you can see,
we've got our photo which resembles me and
this photo as well. And basically, we've
got all we need to have is this kind of effect. And as you can guess, you can
write any other word here. So maybe let me show
you other word, or maybe I just I'm
going to say, now, change the word due to don't. And let's send it. Okay,
so now as you can see, we got our word don't it's not like a hole punch
hole in our face, but more like a word
just on top of our face. In some cases, it
might be what we want, and in other cases, you can just keep refining this look and also
write something like make word don't to look
like a hole in the face. Just like we did with
Word do and send it. Now as you can see with
just one refinement, we got what we wanted. The word don't, which is
a punch hole in our face. So you can just play
around and change to any other words which
you would want to use. Make sure to use simple
prompts. It will work fine. In my case, I would use this one because I like the easy
readability of this one, so I'm going to click
here to download it and I also will save this photo in
resource step this class. I'm going to call it chat GPT. Once you get all of your photos with all the
words which you need, you can just go back to After
Effects and click here, Leftmost double click here and import the photos which
you would want to use. So my case, is this
one and click Import. The next video, I'm going to
show you how you can track your face and attach
this image to your face and do the
color adjustments so it will fit a lot
better. See you next video.
4. Attaching Graphics: Okay, so now we have our face and we need to check
it on our video. So the best solution which
I found for myself is to go to select my video and go to Effects
and Presets panel. If you cannot see this panel, you can just go to Window, just left Most lick
here on Window and enable it from here
effects and presets. And here we can just type Mocha. If you have a pro version, it would be even better, but for our purposes, simple mocha, which comes with Idobep effects will
work fine as well. So just left Most lick
and drag onto your video. Then left Most lick on the moko logo to
launch the software. Okay, so what we need to
do is to create a mask so the mocha software would know what needs to be tracked. So let's left most lick on
this plain layer tool and just create a rough mask just
like this around your face, so it will know what
needs to be tracked. I'm just left most licking
and going around my face. And once I'm finished my mask, I just write most lick, so it will complete the mask. And here I want to
click on this button, which is perspective so it will check in transformation
scale rotation, skew and perspective as well. Your mocha looks different, just make sure to click here
and set it to essential. It will be super simple looking just like you can see
on my screen right now, and then we can just track. So I'm going to left mostly
here to track backwards, and as you can see,
it's tracking my face. And I can stop because
at this point, we would need to
track one more time and not use one mask
for all the faces. So this is why I've moved
my head so fast to have a transition point in case if my tracking will be not
perfect on each face. So let's go from this moment
and track forwards as well. Until next move and click Stop because there we would need to create another
mask and also track it to this side and
to this site as well. Basically, to make this effect, I just created a bunch of
tracking data for first phase, and then second phase, like
we just did and third phase. This process you'll repeat
with the other phases. Now once we have
this kind animation, what we need to do is to
click here to see our grid. It will represent our face as can see here it
looks pretty good, and here it will mess
up the track and this is why we will go into cut some of the moments
of the tracking. But for this part,
as you can see, it track pretty well, and this
is exactly what you want. A next important thing
which you need to click is this button. It will allow us
to attach any kind of graphic on top of our
face without any problem. Let's let M click on
it, and as you can see, it's spread out on
all entire frame, which is exactly what we want. If we will deselect this
one and click this one, you can see that it's spread
it to entire our frame. In a few seconds it
will make sense. Keep in mind that
you need to click on this Expand, the
planar surface. Then what we need
to do is to go to File and Save and just
simply close this software. Next thing which I want to do is to select my video and press Con SLD to duplicate it and go to layer and precompose it. This one, I'm going
to call it phase. I'm going to move
all attributes, which basically means
that this effect will be on this layer inside
of this precomposition which we are going to create
this checkbox means that it will be exactly the same
duration as our composition. Let's click here and here
to have this checkbox. Name it face and click Okay. Now if we will let most
double clicking it, you can see that we
have a composition which we've created
from our video here, we jumped to this composition. Inside, we have the same video. Here we can just delete this effect because
we don't need here. And what we can do is to
go to this frame and go to Project panel and select our image and dragon
drop into this video. Basically, we will
going to attach this pace to this moment in time because from
this moment in time, it was a perfect tracking,
as you remember. So how to attach this face? We can just press
T on keyboard and reduce this opacity to 50%. So once again,
select this layer, press T on keyboard, and change the opacity to 50%. Now it's much easier to place this phase on
top of our face. Next thing we should press is select this layer and
press R rotate it, it will match our face
even better and we can also press S on keyboard
to reduce the scale. We need to just roughly
match our face. Now we can just
press T on keyboard and set opacity to 100% and use this span tool to cut the mask around this do graphic
which we have here. So just left most lick in it. You can use scroll on
the mouse to zoom in. Also, you can metal click and hold to move
around your image. Now just basically
let's cut our face. If you start drawing
a shape layer, it means that you not
select your image. Let's select this shape layer
and press Delete to delete. Make sure that
you've selected ha GPT PNG image, which
you've created, and then just left
Moslik hold and drag to create these Bezier
curves around our face. Just leftmost lick and drag. You can even press Space Bar and while you're
holding spacebar, you can move the point. You can create a
points just like this. If you're struggling
to see your mask, you can just simply open here and change to whichever
color you would want. Let's try a black one. Now we can see it much better. Let's press on less point
wish I had and create a mask and here we can just
left most lick on our study point to
close the mask. Now we can see it a lot better. And what we want to do
is to feather the edges. We can just left mostly here and hold and choose this
mask feather tool. Then we can just left
mostly on the edge of the mask around here because here I want
to feather it out, so it will blend with my
original skin, just like this. Don't want to feather
it. So it's pretty easy. You can just click on this line, leftmost lick hold and drag it to the edge just like this. And here we can just also click and make sure
that here is feathering and where you clicked on these edges and moved to
the edge of original mask, there will not be
any feathering. So with this
combination, you can get a feathered points and
not feathered points. This is really cool tool to control your feather at
any point of your mask, and it allows you very
easily to blend image. So once it's done, what you can do is to select your image. Then let's go to Selection tool and let's click on this button, which allows us to not see the mask and see our image beta. Now it looks pretty good, but the colors are off. So what you can do is to
go to effects and presets. Once again, if you
cannot see the panel, go to Window and
enable it from here, effects and presets and also
you can just click here. Maybe it's in this list. Let's click on effacing presets, go to Affect and presets
and type your curve. Selected and drag and drop
onto our image just like this. With this curse effect,
we can just make it brighter and let's add
another curse effect. And with this curse effect, I would want to change
only the colors. Basically, what I'm seeing
here is that my face has a lot of red and a
bit of pinkish look. Basically, if you
have yellow colors, you need to choose
the opposite color. Yellow is warm, blue is cold. So to make it colder, you just need to select here
to blue color and make it colder you can see it already blends with
our face a lot better. Just don't go overboard. Something like this
should work fine. So what I can see here, I can see that the colors are getting a lot closer
to what we need, but I would want to
use a tint effect. So just go to effects and
presets and type here tint. So color correction, select
it and drop it here. So this effect, we can
control the situation. And just reduce the
amount of saturation, so it would be
closer to our skin. Another beginner friendly
effect is hue and saturation. Let's type here
hue and saturation and also drop it onto our image. When you have only one color, so let me disable
all of the effects. You can see that our image
basically has only one color. In these cases, it's super easy to use human
saturation because you can just shift the colors with one master hue slider
just like this. So you can see, as I'm shifting, we can get closer
to our skin colors. By the way, we can use it even the saturation
instead of tint. Let's select tint
and disable it. Instead, we can just reduce
the saturation here in master saturation until it
will look closer to our skin. In my case, I have a problem because here we have one tonic of the color of
the skin and here we have orangish other one. These cases, I would
recommend to go with the color which is
more dominant on your face. In my case, that we can see this color a lot
more than this one. Let's match with
this kind of shade. I'm going to use this master hue and match it a bit better with these colors and also
desaturate by playing around, you can see that we're
getting a lot closer. Next thing which we can do
is to select it and click on this toggle mask and shape
to be able to see our mask. Now we can just simply move
it until we see our face. Then maybe, let's even drag it this one to make this
feathering a lot more. We can also use
this feather tool, left most leg and hold to choose this mask feather
tool and create another and move
around these points just to get more transition. It would be a smooth
transition between the original and this fake face. Now as you can see it blends a lot better and you can spend more time if you would want
to refine it to a perfection. It's a good idea
to use this marker to know where we made our face. Let's left mostly
here and jrag it just on top of this frame
on which we worked. Because if you will jag through, and see that it's not
yet stays on our face, we would know exactly
where we worked. I'm going to select my layer
and press R On keyboard. I just want to add a
bit of rotation and maybe toggle off the
mask to see it better. I can also select my image and using arrow keys
on the keyboard, just move around, so it
would look more believable. Maybe something like this
would work even better. Sometimes I like to go
to effects and presets and use another curls
effect and drop it here just to add a bit more
contrast so it will be as contrast as our
darkest parts of our image to introduce more
depth into this effect. As you can see it fits with all overall
colors a bit better. You can always tweak a bit
more to get even better look. The next video, I'm
going to show you how to make this stick to our face with the tracking data which we got from our mocha. See
you in the next video.
5. Finalizing VFX Shot: So now we are pretty happy with our placement and blending. We can go to Video, which is our original
composition. And let's go to video
footage and select it. And here we can see
our Moka AE effect. Let's go to tracking data, and let's click on this
bottom Create Track data. And we have only one layer on which we worked
and click Okay, and let's also click Okay. And now we can just
press on keyboard to see all the tracking
data which we got here. So next step, select the layer which we want to
export this data too. So basically, we need
to select this phase, this composition
which we created, and click Apply and
also click Okay. As you can see it moved a little, but it's
not the problem, we need just to go to our
face session and just disable this video below
because we want to see only this part which we
are adding to our face. Let's go back to our video, as you can see it's almost an exact place which
we want to use. But now we can just simply
select it and move it to make sure that it is exactly
where we want it to be. Remember, we had it on the first second and we know
how it looks and we can just go to video and make
sure that it stays the same as now if you
will scroll through, you can see that it's
stuck to our face, which is perfect for us. The next thing I
would want to do is simply to apply a motion blur. We can just click here to enable the motion blur and
then I'm going to go to Toggle Switches until I see the button motion blurr.
Let's click here. And now we can see
the motion blur icon for each of these layers, and we can just select
our face and click here to enable motion
blur on our face. Now as you can see
we have a problem because motion blur didn't work. Let's fix this. Basically,
what we can do, we can just select this
corner pen and delete it. We need to set our composition
in the place where it was. Basically just write mouse
clicking it and go to Transform and fit
to composition, which is also Control Alt F. Now we reset it the position, and now let's go to video and instead of using Corner Pen, let's select here in
our MEE track data. We need to select corner
Pen, support, motion blurr. Select it, make sure to select phase and once again,
let's apply Export. Click Okay. Now
as you can see it already has a motion
blur and it supports, and what we need to
do is once again go to our first second. Let's press Pon keyboard
because as you can see it has a motion tracking
data on position as well, and what we can do here is to select this position
word and just simply move it once again so it fit our
face as we did before. Now, as you can see, we have our tracking data. Once again, it's
stuck to our face. It's even stretching with
my mouth a bit and just make sure that it stays where
where we want it to have. In some places, I like to
remove the tracking data. Basically, I'm going to select this pace and press P
to see the position, then hold Shift and press R
to see the rotation as well. And I want to delete all of
this data which comes next. As you can see, it freaks out. So about from this moment, I would like to select all of these keyframes
and press delete. A, let's do the same
here at the beginning. So somewhere here
where it looks good, I can just select all
of these keyframes and press delete as well. And what we can
do is to press on keyboard to see all of this
tracking data as well. Also delete it because it can mess up the animation
here as well. Now these few frames, we can just simply move and
rotate by the hand and it's not that important
because the next phase which you're going to create
and as you can see here, it's not the right timing. Let's move it over. Here we can just adjust it. And make sure that
it looks good. So it looks pretty good. And here as well,
we can just move it a few frames and rotate it. And here where we
have our motion blur, we can just simply cut it to this moment where we can
still see the motion blur. And same, I would want to have it here and cut it
to this moment. And now here I would start
this process all over again. I would just disable
this effect. And add another mocha or just simply reset
and start over or just delete and apply new one and start
tracking the next phase. This is how you can work
with the next phase. And here, as you can see, we have a motion blur. So in these parts, we will have a transition point. So when it happens pretty fast, the viewer will not be able
to see the transition moment. Trick which I've added in my original example
I went to layer new adjustment layer
and just apply a tint effect as
also a curse effect. This is a little trick, how to hide all
the imperfections in your color correction
with the face. Because now, as you can see, it hides all imperfections
in our colors on our face. This is a little cheat code. You can just basically
add a tint effect, curse effect, add a little contrast curves and
get this kind of look. Sometimes it's more fun if you will add a
transform effect on this adjustment layer and here we can just create a keyframe
for position and scale, press U to see the keyframes. Keyframes are
basically a point in time which remembers the
value softer property. In our case, these
keyframes remembers these values of property,
position and scale. Here, you can just
change the scale to a little zoom and
move it like this. You can see with
this little zoom, the transition point will
be even less noticeable. You can select these keyframes
and press F nine to make a smooth beginning point then fast movement
and slow at the end. You can just select
these keyframes, press Cl C and show
to pace it later. Basically here, we can just
write most click in it. Make sure to select
them, write most click, go to keyframe assistant
and time reverse keyframes. It will go back on this next transition point to hide this
transition even more. These little tricks will help you to make this effect
even more interesting. Follow me here on Skillshare, I have a lot of classes on VFXs. Using Edobiatu effects,
you can click here on S More to see even more effects, which I made earlier. Also, here I have a section
new class this month. I have fundamentals
of Adobot effects, which includes logo animation and beginner friendly effects. I have logo animation. You can click C More to see even more effects,
which you can learn. Also, I have a classes
on Free AA tools, which you can use Complex VFX, DaventureRsult
classes, and even also click here on Project
and Resource tab and click on Submit Project. I watch all of them and give
you feedback if you want. Also, you can leave your suggestions in
discussion section. I also read all of them and take inspiration
for my next lasses. Thank you for taking
time to watch my class and make sure to
follow me here on Skillshare. I'll see you in my next class.
Thank you for watching.
 M Jake, Lets Create VFX & Cool Stuff Together