Transcripts
1. Introduction: Have you ever looked at your
illustrations and thought? Hm. Wouldn't it be amazing
to see them come to life? Well, let me introduce
you to procreate dreams. This game changing up
that is perfect for anyone looking to work with animation in a fun and easy way. I've always loved
watching animations, but the learning curve always seemed too steep to
start making my own. Now, thanks to procreate dreams, I'm creating animations
that I never dreamed of making and that both I and my fathers in
social media love. Hi, there. I'm Sylvia Spina, and I'm a mult
disciplinary artist and designer living in the
sunny City of Parcell. I have been working with
Procrit for many years. And my illustrations
have been used as repeating patterns
for fabrics, digital designs and even
giant murals on buildings. And now with Procrit dreams, I'm being able to reuse all of this work to create
amazing animations. In this class, we'll animate three simple mini projects to gradually grow
your competence. Moving through each one,
you will get to learn the three ways of animating
in Procreate dreams. Key framing, frame by frame
animation, and performing. This last one is
just so much fun. In performing mode, you can
just move your paint around your canvas and procreate dreams records everything that you do. Towards the end of the class, we will combine all
these three animations, allowing each element to interact with each
other and create a complex project
that will make you feel like a master
emotion graphics. I will provide all the
illustrations for this class so that you can jump straight
into learning animation. But just in case you want
to personalize this, I will also show you around
the draw paint mode. Oh, hello. I thought you were
going to come a bit later. All right. You were too
excited to wait. Yeah, me too. This class is open to
absolute beginners, as well as those curious to explore a new approach
to animation. All you need to embark on this admission
journey is an iPad, an apple pencil
or your finger if you prefer and procreate
dreams installed. So if you're ready
to bring life into your static illustrations and learn the full potential
of procreate dreams, join me in the next lesson, where we're going to
talk about your project for this class. Okay.
2. Your Class Project: Now, let's talk about your
project for this class. Throughout this class, you
will be completing a series of simple animation
gradually learning the various ways of animating
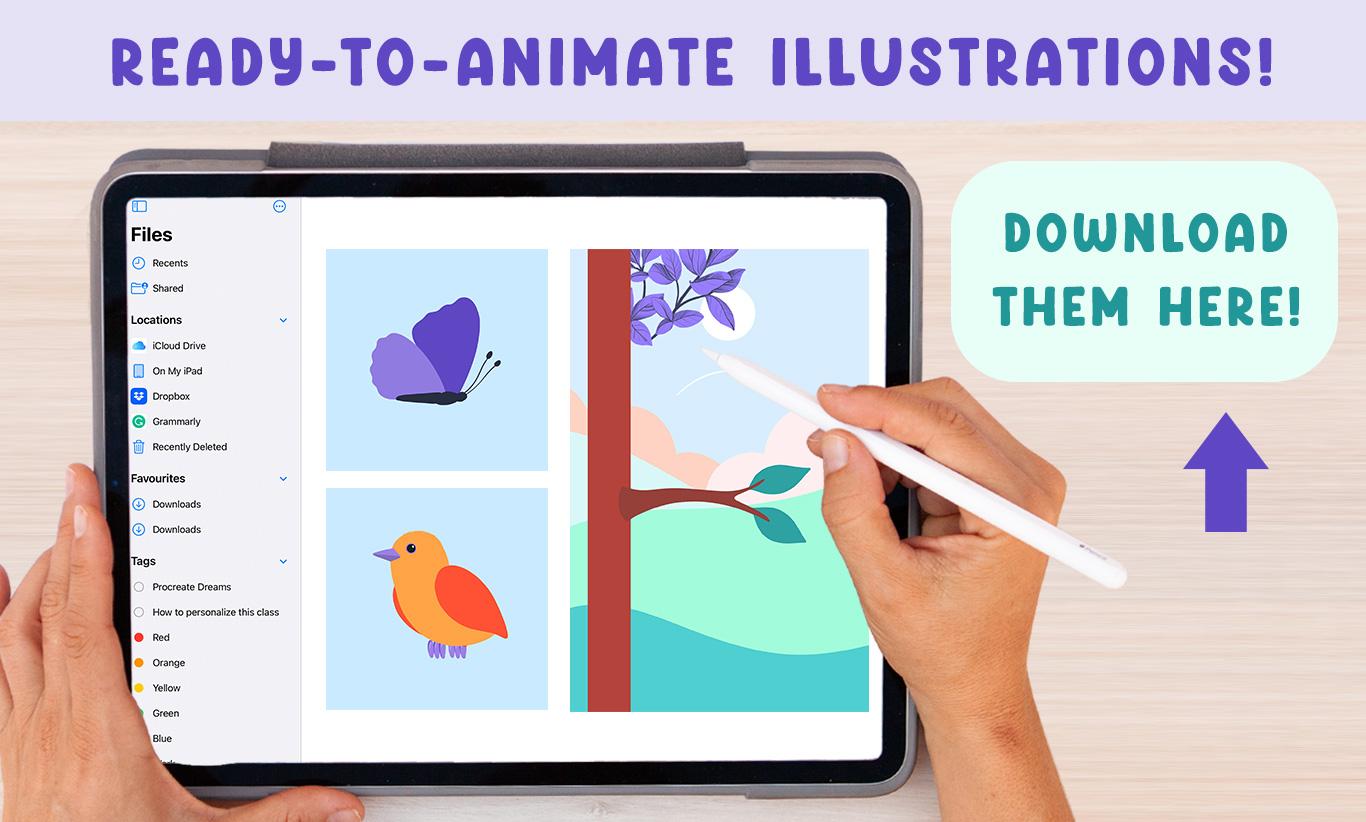
in Procreate dreams. To complete the
project exercises, you will need to download
the illustrations that I provided in the project
section of this class. I'm going to prompt
you to customize each scene and make it yours. After all, Procreate
dreams shares procreate drawing
and painting tools, so why not use them. Just in case you want
to bring your own, I will dedicate a full lesson
to show you how to organize your procreate files
and import them into procreate dreams making
them animation friendly. Now, let's talk about the
scenes that you're going to need to animate to complete
your class project. After introducing you to
the interface and how to import procreate files
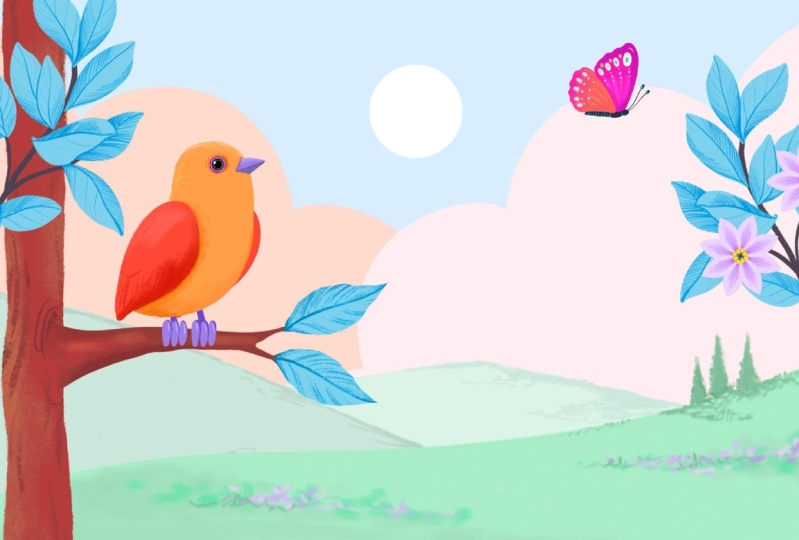
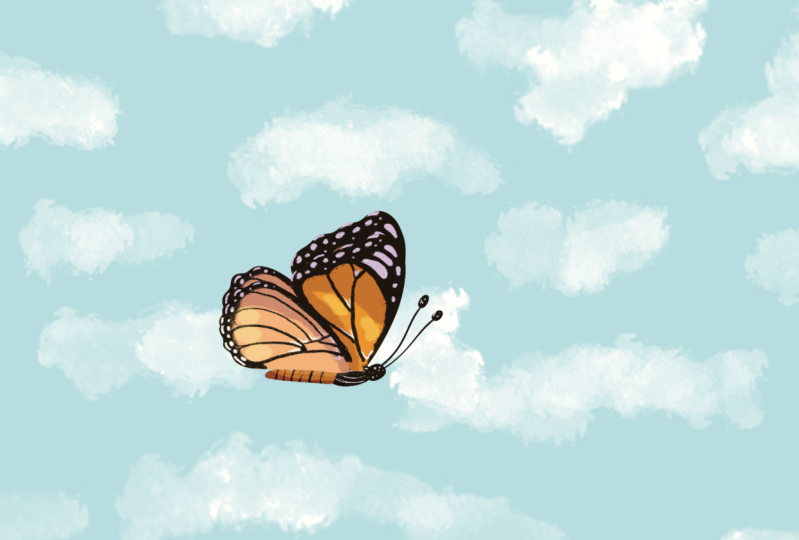
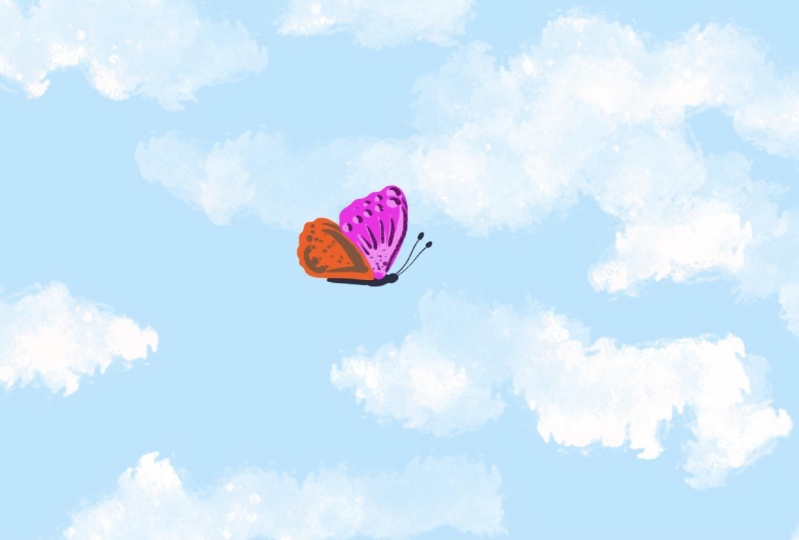
into procreate dreams, we'll kick things off by
animating a butterfly. We'll focus on using keyframes
and you'll be amazed at how easy it can be to bring life into a
static illustration. The second scene is going to
be animating a landscape. You're going to keep
on learning how to use keyframes
to change color, use layers on blending modes, and I'm going to introduce
you to the frame by frame animation to
animate a shooting star. The third scene is going
to be a bird animation and you'll learn how to break up and build animation using groups. Once more, I will prompt you to personalize your cute
bird to make it yours. Throughout the process, I will encourage you to export
your animations and share them in the project and resources stab of
this class as gifs. And as you know, you
can start sharing these animations straightaway
into social media. Now, if you do, please tag
me at Sylvia's Pina Art. I can't wait to see
what you create. And that way, I can share what you're making with
my followers as well. Once every element is animated, the real magic will happen. Towards the end of the class, I will show you how to combine all these scenes
together to create a mesmerizing animated
landscape full of life where all of the elements will be
interacting with each other. This way of working will elevate your final animation
to a cohesive scene. And during the process, you
will master the timeline and understand how to manage complex files in an
approachable way. I have a favor to ask you. If after watching the class, you've enjoyed it and
learned something new. Please review this class. Your feedback is very
important for me as a teacher. It helps me understand
what I'm doing well, what can be improved. And also, I get to know
who my students are. So please if you enjoy
this class, review it. Now, if you love this
class and want to be the first one to hear
about my upcoming classes, or you just want
to stay in touch. Don't forget to hit that follow button that
appears on my profile, and I think below this screen. The next lesson, I'm
going to show you around the interface so that you start feeling at home as
soon as possible.
3. Interface Tour Settings: Let me give you a quick introduction
to the Procreate reams interface so that you fell in control from the
very beginning. When you open Procreate, you will find a window called the theater where all of
your files will be stored. Each of these thumbnails or
files is an animation itself, and we're going to
call them movies. You can hold your
pen down on a movie to access this menu
where you can rename, duplicate, share copy to Cloud, or delete your file. If you tap on this icon on the top left of your screen
by the Procreate dreams word, you will see two locations. You can store your files on the iCloud drive
or on your iPad. I usually store my
files on my iPad. However, if you have two iPads, you can share files
across the two by saving them on the cloud,
which is pretty cool. For now, let's tap
on my iPad and close this menu by
tapping back on the icon. On the right side
of your screen, you have this select button, which allows you to
select various movies simultaneously and put
them inside a folder, delete them or duplicate them. You can exit this mode by
tapping on the x up here. Let's create a new movie by
tapping on the plus icon. When doing so, you will find a few templates that
come by the fault. Let's scroll down until you find the square template as this is the size that we'll use
for our first animation. If you tap on the four k, you can select a
different resolution, and for all of the
exercises in this class, we're going to be using the
HT one 80 per one 80 pixels. If you tap on these
three dots up here, you can personalize the frames
per second and duration. When I tap on the
frames per second, Procreate gives me
different options suited for different
various animation styles. All the animations
that we'll create in this class are going to be
in 12 frames per second. Go ahead and select that option, and we're going to make this
first movie 6 seconds long. You can change all of these
things once you're inside, and I'm going to show you
how to do this in a second. Let's go ahead and tap on empty. Welcome to the movie
where you will create your beautiful
animations. Before I introduce
you to the interface, I want to go through
the settings and preferences with you. If you tap on the file
name in this case, dream 13 here on the middle bar, you will access this window. Under properties,
you will be able to change the frames
per second duration, width, and height of your movie. If you tap on the timeline tab, you will be able to decide how your movie is
going to be played. Loop means that every
time that movie ends, it will start again
from the beginning. Ping Pong will reverse
your movie once it ends, and one shot means that your
movie will play just once. I like considering these
options whilst making my animations as they can influence the way I
think about my movie. We'll see the shared tab when it comes to exporting
our movies. For now, let's stop
on preferences as there are a few things
that I want you to check. Under gestures, it is
better to turn off the option to enable
painting with your finger. Unless you don't
have an apple pencil and wish to paint with it. Procreate dreams involves
a lot of finger gestures. And turning this option
off will prevent you from making accidental
marks with your finger. Accidental marks,
even if they're tiny, will affect the way in which
you can animate your assets, so it's better to keep it off. Under history, you have
the rapid undue delay, which is usually
set to around 30%, but I like to increase it to around the middle 50% or above. There are various gestures
that involve two fingers, like rotating your paper
and zooming in and out. By increasing the bar, you will prevent rapid undo
when you till and meant to. Under stored undo steps, you can increase the number of stored und steps to
have more and do. One cool thing about
procreate dreams is that even if
you close a movie, you can enter it and access your undo steps,
which is awesome. In the next lesson,
I will show you around the main movie spaces, stage, tool bar and timeline.
4. Stage & Timeline: So there are three main parts in Procreate reams interface. The stage where you draw
paint, and perform. In the middle area, you'll
find this tool bar. And then in the bottom, there is a timeline
where you can compose keyframe
and edit content. To exit a movie and go
back to the theater, you have to tap on this
multi squared icon in here. We're going to leave
the file that we have just created for a second, and I'm going to open one of the files that come
by default with Procrit just to show you
properly how these spaces work. I'm going to open the
Spark beautiful animation, but I want to duplicate
the file first just in case I make any
accidental changes. I know that the
original animation is saved on my theater. I'm going to long hold on the
movie and tap on duplicate. I'm going to open on
the Spark one file as I know that that is the copy. Let's take a moment to admire this absolutely stunning
animation full of patterns, bright colors, textures,
and different animations. I love seeing these animations that come by default as they serve as an example of what this incredible program can do. It's amazing the
potential that it has. Okay. Let's start by exploring this stage
which is up here. Here's where you'll
get to play back your animations as you edit and create them
in the time line. It is also the canvas where
you'll get to sketch, draw and paint whilst being in the drawn paint mode and move and scale the content
in your time line. Now, the white rectangle
is called the stage and everything else that surrounds it is called the backstage. Un Procreate where everything
that's moved outside of the canvas gets scropped
off and discarded. In Procreate dreams,
you can paint and animate outside of the
stage, which is awesome. Let me show you what I mean. If I tap on the squiggle icon and enter the drawn paint mode, you can see this huge start
that surpasses the canvas. When I exit this mode by tapping on the
squiggle icon again, you can see that Watson
stage is fully opaque, and then the rest is very
dark but still visible. This is great because
you have a lot of extra space to hold
animations and graphics. If you enter full screen mode, which you do by tapping four
fingers on your Canvas, you will only see Watson stage. When exporting your animation, only the animation on
stage will be saved. Everything else
will be discarded. You can act this mode by tapping four fingers
on your screen again. If you tap on the timeline, these numbers here on the
bottom left of your stage, you will display
the stage options. We will explore the
show onion skin and edit onion skins
options later. But for now, you should
know that you can change the background color in here
or even make it transparent. In this case, we
can't see your screen because there are so many
graphics covering it, but you will see how this
works in a few lessons. To close this stuff tap
anywhere else in your screen. Let's move on to
the middle toolbar. This multi squared icon will return you to the theater
as we already saw. By tapping on the file name, you'll access the properties and settings which we already saw. Let's move to the right
hand side of this toolbar. If you hit play, you will
start your animation, and then if you hit
pos, you will stop it. It's important to know that only the timeline
which appears on your screen will
be played in loop. This can be great
when you're working on a specific part
of your animation. You can see this little
line going in loop to the start and only these
patterns are being displayed. If I pinch my
fingers to zoom out, then I can play my whole movie. The circle icon is called
the perform button, and when this option is on, Procreate dreams
records everything that you do on your stage, which is just fantastic. Whenever this mode is on, the word ready appears on
the top left of your screen, which means that you can start performing whenever you want, and when you want
to stop this mode, you just have to tap
on the stop button. You will see this button
in action when it comes to animating a butterfly
in the following lessons. These two overlapping rectangles allow you to edit your timeline. When doing so, you
will see the words timeline edit on the top left
hand corner of the stage, and on the right, you can
change these options. This is set to
content by default, but you can also switch
to selecting tracks. Let's leave this on
content for now. Now, let me show
you how this works. When this option is on, if I pass my pen on
top of my tracks, this shiny line appear and the tracks will appear
highlighted in red when selected. You can circle or
draw lines on top of the tracks to select them and draw again
to dis select them. You can also tap
on the clear word up here to discard
the selection. It is important to exit this mode by tapping
on the icon again. I can't tell you the number of times that I have
tried modifying things on my timeline with no success because
this mode was on. Always after editing
your timeline, remember to exit the
timeline edit mode by tapping on the overlapping
squares icon again. Then there is the
draw and paint mode, which turns the
stage into a canvas for sketching,
drawing and painting. When this mode is on
the words draw and paint appears in the top left
hand corner of the stage. These top side menus contain the drawing
and painting tools, and they work very similarly
to Procreate and I'll dedicate one full lesson
to explain how they work. If you have never used
procreate, don't worry, as I will teach you
how to draw paint with these tools to
customize your scenes. Lastly, you have the Add button which is used to
create new tracks, and add videos, photos, text, or files to your timeline. Then there is this ruler dividing the toolbar
and the timeline. It displays the time information and how long your movie is. Now let's move on
to the timeline. Down here is the timeline
which contains the tracks. There are all these lines
that you can see in here. Some of these tracks are
holding videos, illustrations, texts or groups, and we're going to call them
content tracks. You can move these tracks along your timeline and you can
make them visible and invisible with this
little checkbox located on the side of the name. The same way we have the
stage and the backstage. There's also content
that can be within the duration of your
movie or outside of it. You have your timeline length
visible under this ruler, and only what's on that part of the timeline can be
played or exported. But the content of your
tracks can surpass the limit both at the
start and at the end. Whenever you start
creating an animation, you will see a thinner line appear below your content track, and that one, we're going
to call the keyframe track. I will explain this in depth
in the following lessons. This bright pink icon
with a needle is the playhead and you can
navigate the timeline with it. You can slide it left and right, or you can tap on the area
that you want to focus on. If you double tap on it, you will zoom on your timeline. And here is a fan trick. If you quickly flick the
playhead to the left, your movie will play
from the start. In the next lesson, we'll
uncover the finger gestures that you will need to navigate
each of these spaces.
5. Navigating Spaces with Finger Gestures: In this lesson, I'm
going to show you how to use finger gestures to navigate each space for what I'm going to open another
file of mind for now. There are some basic gestures that work throughout the entire up while some of them are unique to the timeline
and the stage. Let's start with the
gestures that you can use across the
whole interface. If you tap and hold two fingers and sli
them on all directions, you can see that this works both on the timeline
and the stage. On the timeline, you can also pan with just a single finger. If you pinch two fingers, you can zoom in and out of
the stage and the timeline. You should bring your
fingers together to zoom in and move them
apart to zoom out. On the canvas, you
can also rotate your hand to rotate the
canvas as you zoom. If you quick pinch your fingers, you will fit all
of the content of the timeline or the
stage on the screen. Now let's see how
to redo and undo. To do the previous actions, you can tap the screen with two fingers on the
timeline or on the stage. A notification will appear
at the top of the stage, letting you know which
action was undone. If you hold two fingers
down on your screen, you will do a series of
actions sequentially. To stop it, you have to lift
your fingers off the screen. Now, to redo an action, you need to tap your
screen with three fingers. And if you tap and hold
three fingers down, you will rapidly redo
a series of actions. To stop it, lift your
fingers off the screen. Something which is
really cool is that procreate retains
your undue history, even if you close
your files or the up. Unlike Procreate, where every
time that you close the up, all your undue history is gone. Now, let's see the gestures which are unique to the stage. You can quickly
preview your movie in full screen mode by tapping anywhere on the stage
with four fingers. When you're in this
mode, you can use the video controls
to play your movie, or you can use a single finger to play your movie
from side to side. You can tap four fingers on your screen to exit this mode. Now let's see the gestures which are unique
to the timeline. I already show you that you
can quick flick the playhead towards the left of the timeline to play your movie
from the start. If you slide three
fingers up and down, you can expand the
vertical scale of your content and keyframes
on the timeline. If you slide up, you
will increase the scale, and if you slide down,
you will decrease it. And if you slide your fingers
to the left and right, you can decide how much time the timeline shows
on the screen. If you slide to the right, you're going to zoom
on your timeline, and if you slide to the
left, you will compact it. As you already know,
only the portion of the timeline that appears
on screen will be played. These are the main
finger gestures that you need to know for now. As the class moves along, we'll probably find new ones. But for now, this
is absolutely fine. For this class, I have left
a few procreate files in the project and
resources gallery of the class that
you should download.
6. From Procreate into Procreate Dreams: Okay. Before we start, let me just check that you downloaded the files
for this class. They're under the project and resources gallery of the class. So if you haven't done so, please stop this video
and download them now. These are the files that we will use throughout the class, and of course, you can make
your own if you prefer. Whilst Procreate dreams shares a similar drawing
interface with Procreate, it does miss out on some key features like
smart shapes, Alpha log, selection tools, c and paste, and layer adjustments, not
to mention the brush studio. And even though I'm
finding myself using procreate dreams more and more
to fine tune my drawings, I still prefer
procreate drawing on painting tools to create
my initial illustrations. What I usually do is create my artworks in
procreate and then seamlessly import them into procreate dreams to
breathe life into them. Before I dive into showing
you how to import a file, let me walk you through a few
key considerations that you should have in mind
when it comes to saving your files for animation. I'm going to open Procreate and I'm going to open the
part of fly file. First of all, it's
crucial to have the elements you want to
animate in separate layers. Unlike Procreate,
there's no crop copy or paste feature in
Procreate dreams. That's why each of
the wings need to be on a separate
layer from the body. Let's open another file. If I open this bird illustration
and pull the layers, you will notice that
all the body parts are neatly separated in layers. I want to have the possibility
of animating the head, maybe make the bird
look to the other side. Maybe it can stand
up a little bit or move its wing and
all those things. I'm going to return
to the gallery and show you another thing. If you find yourself
with a bunch of textured layers scattered
around in your file, it's a good idea to merge
them into the main items. Your file will be much more organized and easy to animate. But before you start
merging layers, it's good to go back to the gallery and
duplicate the file. This way, you have already animation file and one containing all the
separate layers. To be able to open your file in Procreate dreams and convert
all the layers into tracks, you have to tap on
the range icon and save these files in
apcriate format. You can save it
somewhere on your iPad and then open it from
Procreate dreams. Just tap on safety files, make a folder for this class and start saving your
illustrations in there. Okay, I'm going to go back
to Procreate dreams and open the squared file that we
created a few lessons ago. Now let's see how to import a Procreate file into
Procreate dreams. To do this, you have to tap
on the plus icon located on the toolbar and tap on files and search for the Sylviapena
Procreate dreams class. The first animation that we're going to create
is the butterfly. Select that file tap on open, and la your creation is
now on Procreate dreams. Butterfly now appears on my
timeline as a flat image. But if I tap on
the squiggle icon to enter the draw
and paint mode, and tap on the layers
icon up in here, you can see that all the
layers have been imported. But what we really need
is to have them into individual tracks
on the timeline so that we can animate
each part separately. Thankfully, it's easy pas. Long press on your track, at convert layers to tracks. And where are the layers? Well, you can't see them because your flat track has been
converted into a group. If I expand my group and
up on this arrow in here, I can see that not
only my layers have been converted into tracks, but they have
preserved their names. You can really take your time
organizing your files in Procreate and you'll know that that time will be valued
in procreate dreams. Now let's see how to import
brushes and color palettes. In Procreate dreams,
you can find all of the brushes that you can find
by default in Procreate. But what happens with
all those brushes that you have bought from the
Internet or made yourself. Well, we're going to seamlessly import them from one
app to the other. First of all, we need to split our screen between the two apps. You can do this by tapping on those three dots up at the top, tap on split view and
then select procreate, or the way I prefer to do it, which is simply sliding your
finger up from the bottom of your screen and hover the procreate up
onto the other side. Let's open the brush
library in Procreate and import one of these brushes
into Procreate dreams. I have been working on a
set of acrylic brushes, so I'm going to go
ahead and import one of these ones into
Procreate dreams. I'm going to tap and hold on this soft round hole and slide
it into Procreate dreams. Now, if I tap on the brush icon and scroll down on
the brush libraries, I can see this new
collection called imported. When I tap on it, I can see my new brush has been
imported in here. All the individual
brushes that you import will always be stored
in this library. You can also import a
whole set of brushes, and I would advise
you to organize the brushes that you
want to animate with in a new library and
then just like slide that library from procreate
Itoprocrate dreams, and you will see it appear
in here under imported. It is super easy. Now let's see how to import those beautiful color
palettes that you have in procreate into
procreate dreams. Basically, you have to
follow the same process. You can tap on the active color, tap on the palettes
icon down here, and drag the palette that you want to import from
one side to the other. If I tap on the active color and procreate dreams
and go to palettes, scroll down the library. Now my palette appears in here. There might be times
when you want to import a single layer
into Procreate, either because you created a perfect circle or because you forgot to pass one or an item
that you want to animate. This is, again, as simple as importing brushes and
color palettes you just have to tap on the
layer that you want to import and drag it
onto procrd dreams. V, you've got yourself an instant individual track
ready for animation. In the next lesson,
we're going to start exploring fully the draw and
paint mode incre dreams.
7. Navigating the Draw & Paint Mode: I know that many of you are probably already
familiar with procreate. But just in case there's
anyone here that has no idea on how the drawing
and painting tools work, I'm going to give you
a full introduction. Whilst the class is centered on learning the three
ways of animating, I also want you to feel comfortable using the
draw and paint mode. I'm going to prompt you to customize the illustrations
that I have provided. They're super simple,
so adding details, changing their colors, adding textures is all going
to be super easy. Starting on a blank
canvas can be dating, so I wanted to provide
a starting point. Let's center the draw on paint mode by tapping
on the squiggle icon. If you want to make
this area larger, you can tap on this middle
line and slide it down. You will see the
flip book box below, which is used on the
frame by frame animation. We will cover this in
the following lessons. To exit the draw on paint mode, you have to tap on top of the flip book box and tap
on this x icon in here. See how you've
returned to the movie. Let's move this box aside as we're not going to
be using it right now. As we saw in the
previous lessons, if you tap on the timeline, you will be able to change
the background color in here. Let's stop on the brush icon to display the brush library. You can change the brush size by moving up and down
the bar on the side, and the bottom bar is to
change the brush opacity. These bars also affect this
match and the eraser tool. If you slide your
pen on the left, you'll be able to explore different libraries
and on the right, you can select the brushes. Something that I find
very useful is having this recent collection of
brushes here at the top. When I work on a project, I usually end up using the
same brushes all over again. Instead of having
to search for them every time on the
different collections, I know that they will be
saved under this recent tap, which is very useful and
it saves me a lot of time. Then you have this match tool, which is used to smear pigment around your canvas
and with the eraser, you can remove things
from your canvas. If when creating
your animations, you want to erase with the
same brush that you're using. All you have to do is long
hold on the eraser and you see this erase with current
brush message appear up here. This means that you're
era with the same brush. Erasing with the same brush that you're painting
with will help you maintain a cohesive style throughout your
whole illustration. Now, let's open the layer panel. Using the plus icon, you can create as many
layers as you want. And if you want to remove them, you just have to slide them to the left and tap on delete. You can also duplicate a
layer using this menu. Now let's see how to turn
a layer into a mask. I'm going to create a new
layer on top and quickly paint some texture on top
to show you how this works. If I tap on my layer, I can select clipping mask. Now the top content is only visible where there is an
object on the layer below. This, as you can see, is
great for creating textures, shadows and lights,
and I'll use this in the next lesson when it comes to customizing my butterfly. If you tap on the N layer, you can lower the
layer's opacity, and you can also select
the blending mode which determines how the layer on
top affects the one below. Okay. Feel free to experiment with these options as
the class progresses, as you might find
some really cool ways to decorate each scene. Now let's stop on
the active color to display the color panel. This panel is exactly
the same as procreate. You can long hold on it to
detach it from the top bar. And you can tap on the x
on the side to close it. The first option down here is the disc mode where you can
select your colors using the outer ring and
how light saturated or dark you want your color
to be in the inner circle. If you want to
select a pure tone, you just have to double tap on the circle and you'll see how you can
select a pure white, a pure color, or a pure black. You have the classic mode
of selecting colors, and this might be a little bit easier to select pure tones. These other options
I barely use, and lastly, you have
the palettes icon. To create a new color palette, you have to tap on this
plus icon in here, if you go back to the disc
mode or the classic mode, you will see the empty palette at the bottom of this panel. Whenever you want
to save a color, you just have to select
it and tap on any of these empty squares
to save your colors. If you want to
delete these colors, you have to tap and hold on top of them and tap on delete. You can reorganize them by holding down and moving
them around your palette. If you want to select
an exact color from the canvas, this purple, for example, you
have to tap and hold your finger down to
display the color picker. Then you can hover your finger over the colors that
you want to select. The last thing I want to
show you is the color drop, which you can use to
fill up shapes quickly. Now, let's see how this works. I'm going to create a new layer and select the
clipping mask option. I'll open the library and select a textured brush
and draw a circle. To fill it up with
a solid color, I can just drag the active color into the center of the shape. Now, this is not
looking very neat. As you can see this
white line in between the filling color and the
line has been left out. This is because all these little pixels that you can
see at the border of the line form a gradient of lighter tones that are
not exactly white, so they're not included in the selection where
I dropped my color. I'm going to zoom out
and under this step. Now, if I drop the color, keep my pen down and start
moving it to the right. You can see this
color threshold bar appearing here with a
percentage on the side. This is basically telling me the percentage of tones that can be included in the area which is being filled
with a new color. If I move my pen to the left, only the pure white
pixels will be included, and if I move my
pen to the right, then it also includes
the variations of the textured tones on the
area which is being filled. Let's see how this would
work on the butterfly. I'm going to tap on
the active color and use the color drop to
recolor my butterfly. See how the threshold affects
the two wings or just one. When moving my pen to the
left and the right to decide how many colors are
included in the selection, I have reached my limit, and I haven't been able to feel the threshold all
the way through, mainly because there's
no more space where I can just keep moving
my pen to the right. To fix this, I can just go back and the threshold
will start where I left it and I will be able to reach the limit all
the way to the right. In the next lesson, I'm going
to show you how I customize my butterfly and put all
these concepts into practice.
8. Draw & Paint: Customizing Your Butterfly: Now, I'm going to take some
time enjoying customizing this butterfly only using procreate dreams drawing
on painting tools. You're welcome to follow along
and customize it your way. But if you can't wait
to start animating, you can also skip the
lesson and move ahead where we'll start animating this
butterfly. It's your choice. I'm going to start
by highlighting this group with a color. To do so, you have to
long hold on your track, tap on highlight, and choose
a color for this group. I'm going to use a pink color because I want my
butterfly to be pink. Highlighting groups
can be very useful, especially when you have loads of tracks on your timeline. You will get to see this
a little bit later. I'm going to tap on the
butterfly group, open it, find the layer which
contains the top wing and enter the drawn paint mode by tapping on the squiggle chen. I'm also going to
make more space by tapping on the middle
bar and sliding it down. I'm going to put this
flip book apart for now, and remember that if you want to close this draw paint mode, you'll have to tap on the x
on the side of the flip book. If I open my layer panel, I can see my wing in here. I'm going to select
a pink color for the top wing adjust
the threshold, and select a bright orange
for the bottom wing. If I make this layer invisible, I can see the purple behind. This is because the
below track contains the exact copy of this
wink and it's visible. So that is why. I'm going to go ahead and enter
this mode again, tap on the layer panel, and I'm going to create a new layer to start decorating
my butterfly in there. I'm going to pick a
brush from the library. I love the dry ink pen from
the inking collection. You can follow with this
one or use a different one. Using the color picker, I'm going to select
this exact pink. Go to the classic mode
and make it lighter. You can decorate this
butterfly however you want. You can keep it simple or spend some time and enjoy
getting creative. I'm going to speed up my video. Otherwise, this would last
like 40 minutes long. Yes, that's how long more or less it took me to
decorate my butterfly. But since I love this process, then time has flown by. If you're new to
painting in Procreate, you will see how by
customizing this part of life, you'll get to practice
and internalize all the tools that I have shown you in the previous lesson. I'm going to be writing down all the brushes that I'm
using as I go along, just in case you want to
explore them and slowing down the video and
describing what I'm doing when I'm putting
a concept into action. The benefit of using layers is that if I don't
like this decoration, I can just make my
layer invisible and try a new one without
damaging the main shapes. Now I'm going to use a mask to give a bit of shadow
to this wing. I'm going to create a new layer and put it right at the top of the wing as I want the texture to be
applied to this layer. Using the vine charcoal brush from the charcoals collection, selecting a slightly
darker tone of this pink and making
my brush larger, I will paint some shadows towards the outer part
of the butterfly. I'll tap and hold my pen on my layer and select clipping
mask from the menu. Now, this layer is taking
in account the content of the layer below to the
limitate its visibility. By tapping on the end letter, I can explore different
blending modes. I'm going to leave
it in dark and color and add some light
areas to a new layer. If you want to learn how to
use these tools in depth, I have an amazing
class for beginners called beginners guide
to Master in Procreate. I highly recommend it for those of you who are just
starting with Procreate. I'm going to go ahead and decorate the body
of my butterfly. So I'm going to go
back to my movie, select the layer which
contains the body and enter the drawn paint
mode again to decorate it. I'm going to prompt you to decorate each scene
before animating it. This way, you will have
your own illustrations animated when
finishing the class. Nice. I hope that you've enjoyed decorating
your butterfly.
9. Duplicating Layers & Troubleshooting: Now I'm going to show you how to duplicate layers within groups, and we will solve a challenge that you might encounter
when doing so. I'm going to close this
mode by tapping on the flip book mode,
X and weight. I still have another
wing to customize. Well, that would be
quite consuming, and it wouldn't make much sense. So I'll just make a
copy of this one. I'm going to delete the
purple wing first by long holding the pen on my layer and tapping
on delete content. Only the content
track was erased, but not the track itself. I don't like having unnecessary
track lying around, so I'll remove it
by leaving my pen down on top of it and
selecting delete track. Now I'm going to
long hold my pen on the wing layer and
tap on duplicate. Hang on, where's my layer. I did see something moved, but I can't see it anywhere. I'm going to slide three fingers down and to the left to
compress my timeline, and I still can see it anywhere. All these layers are
placed within a group. I'm going to pull the length of my group and expand
it to one side by tapping on the side until the edge appears
highlighted in red, and then expand it to
the right. There it is. Let's see what
happened. When you duplicate a layer in here, the copy is placed on the side. Since these layers are within a group and the group
has a certain length, the copy was hidden,
so I couldn't see it. I had to expand my group
to reach the copy. This might be a challenge
that you find while animating elements in your
timeline when they're grouped. Whenever this happens, remember this moment and expand your
group to find solutions. I could just move
this layer on top, but I want to show
you how to duplicate layers on top and
not on the side. I'm going to delete this, push my group back to what it was. This time, I'm going
to long hold on the top wing and instead of
tapping on duplicate in here, I'm going to go to track options and tap on
duplicate in here. Now, the layer has been
duplicated on top. So remember, when you want to duplicate a
layer on the side, you have to tap on
duplicate in here, and when you want it
to appear on top, you have to go to track options
and then do it in here. In the next lesson,
we're going to start animating this butterfly
by scaling its wings.
10. Butterfly: Move & Scale Keyframes: There are three ways to
animate in procreate dreams. You can use keyframes performing and the frame
by frame animation. In this lesson, we're
going to start exploring keyframe animation and bring
this butterfly to life. Let's begin by
expanding this group, tapping on the on the side, and re arranging the layers. I want the top wing
to be above the body, so I'll tap and hold on this layer and slide
it to the top. When I move this layer, this empty track was left, so I'm going to tap on it
and select delete track. I like to make an effort to
keep my timeline organized. Whether you customize
your butterfly or not, you should have three layers, the body and two wings. We're going to start by
animating the top wing. For what I'll make
the bottom one invisible as it might get
confusing having it active. See how when I tap on it, this bounding box appears
surrounding the wing. I can tap and hold one of the
corners to make it smaller. If I tap on one of the corners, this little round line
appears, and by tapping on it, I can rotate it, and by
tapping on the edges, I can scale my element
vertically and horizontally. Making sure that the playhead
is at the beginning of my timeline and placed on
top of the wing track. I'm going to tap on it. Tap on move and select
move and scale. See that when
selecting this option, this new thinner track
appear below my drawing, and the playhead change into a keyframe that shows
a move and scale icon. The top track contains
my illustration, and I'm going to call
it the content track, and the bottom one is the keyframe track which
contains my animation. See that when I
change the playhead from track to track,
the icon changes. If I place it on
the content track, I can tap on it again and
select a different options. For example, under filter, you have the options
to modify the color, opacity, and other properties
that we'll see later on. If I move the playhead
to the keyframe track, it highlights my move and
scale keyframe in white. Let's move the playhead to
1 second and tap on it. See how now it appears white, which means that I have created a new move and scale keyframe. I want my animation to be 1
second long and to be exact. Once it's finished, I'll
be able to duplicate it six times until I feel the
whole duration of my movie. Now, we're not going
to move the butterfly. Instead, we're going to scale its wings vertically so that
when they go up and down, it looks like the
butterfly is flying. I'm going to tap on the edge of the bounding box
and bring it down. See how if I bring my play head to the beginning
and tap on the play button, it moves, but not as I wanted. Let's raise this animation
and start over again. To erase a keyframe, you have to long hold on it
and tap on delete keyframe. If I would have a lot
of keyframes here, erasing each of them would
be quite time consuming. When I have loads
of keyframes and want to get rid of all
of the keyframe track, I have to tap in between two keyframes and select
delete move and scale. Let's just erase the keyframe. Before animating my wing, I'm actually going
to think about how I want the
animation to look like. I want this wing to animate in loop so that every time
that it goes down, it goes back exactly
to the same place. That is why I'm going to create a keyframe below the 1
second mark on the ruler. Halfway through,
I'm going to create another key frame where
the wing will scale down. This way, when the
animation reach then, the wing will go back up. The other thing is that
I want this wing to scale from the bottom,
not from the middle. If I tap on these three
dots that appear on the top right side of my bounding box and tap
on Edit Anchor Point, my bounding box will turn into a solid line with a little
cross in the middle. This cross marks the point where my object will be
rotated or scale. Let's place it on the bottom and tap on done up here
to exit this mode. Now I'm going to create
my animation again. Making sure that my playhead is in the middle of
the two keyframes. If I tap on the top edge of
my wing and bring it down, now it's killing
from the bottom. See how if I move
it up and down, it already looks like
the refla is lying. I do this a lot before
making an animation. This way, I can imagine how it would look just by
moving the item. This helps me decide if I want, for example, in this case, the wing to go halfway
through or if I want it to surpass the body
and go all the way down, which in this case, I prefer. I'm going to leave it
there. This animation is only a second long, but you can play it
on loop by making sure that the first
keyframe is placed at the left edge of your screen and that the third one is
touching the right side. Let's stop and play.
Beautiful. In the next lesson, I'm going to show you how to control your animation further by modifying the information contained in each
of these keyframes.
11. Butterfly: Advanced Keyframes: In this lesson, we're going to make this wing
move a bit faster, and you're going to learn how
to move keyframes and how to access and modify the information that
each of them holds. So I'm going to create
this up and down animation two times within my second and see how it looks. I'm going to start by
moving my key frames. You do this by holding
your pen down on them until they turn white,
and then you can move them. I'm going to move this
one to around 25%. Now, long hold on the third one and move it halfway
through the 1 second. I want this wing to
scale down twice, up, down, up, it should
go down in here, and then go up in here. I will start by creating
the last keyframe to ensure that the wing comes up to
the same place when it's up. Now, all I have to do is
create a fourth keyframe and bring the wing down by changing
the vertical scale again. Let's stop on the play button. Cool. I definitely like it
with the wing moving faster. I'm going to show you how to control your animation further by modifying the information contained in each
of these keyframes. Now, the same way that the wing returns to the same
place when it's up, I wanted to go down to the
same place when it's down. I could start doing this by e y, and I'm sure it would work fine, but let me show you
how to do this so that it comes to the
exact same position. When I tap on an
individual keyframe, I can display all
this information with all the properties, and I can modify
them individually. X and y show where the object is moving
across the screen. Scale x and y show us the scaling transformation
and then the rotation. We have only modified
the vertical y scale, so let's focus on that number. See how if I tap on
the two keyframes, this number is different. If I tap on this
box individually, I can write exactly the
same number and make the transformation look exactly the same on the two keyframes. If your number is negative, you have to put the
minus at the end. Now that we're
talking about this, let's address a
problem that you might have when animating
loads of keyframes. Let's say that you have
moved this wing by mistake, and rotated as well, and that you want to
go back to the start. You could just start opening this menu and copying
all these numbers here, but that would be
so time consuming. And when you have
loads of keyframes, that might not even be possible. If I long hold any
of these keyframes, I can tap on expand,
move, and scale. This will open up
an individual track for each of those properties, and I can modify any of these keyframes individually
by tapping on them. I can also erase the properties which I don't want to use. And in this case, I'm only interested in transforming
the vertical scale, so I can hold my pen down
in all the other tracks to erase the properties
that I didn't intend to modify or that
I'm not happy with. To collapse this menu, you can tap and hold on any of these keyframes and tap on
collapse move and scale. In the next lesson, we're
going to see how to duplicate this track to
create the second wing.
12. Second Wing: Duplicating Content: I want to show you how to duplicate tracks within a group. I can go ahead and animate
the bottom wing, but instead, I'm going to create
an exact copy of the top one and then modify
it a little bit. I will start by erasing
the bottom wing by long holding its track and
tapping on delete content. When doing this, an
empty dark gray track has been left at the bottom. I like to keep my
time line organized, so I'm going to erase it. Now, let's duplicate
the top wing. Remember that when you want to duplicate content on the side, you have to tap on
duplicate in here. But if you want
the content to be duplicate on top of
what you already have, you have to long hold on it, go to track options, and tap on duplicate in here. Now my wing has been
duplicated on top. I'm going to move this
wing to the bottom of the body so that it looks
like it is at the back. I'm going to zoom in on my timeline to play
this animation in loop. When I play the animation, I can't really see the
difference between the top and the bottom wing because
they're exactly the same. I will have to change the
bottom one a little bit. I will start by modifying the scale when the wing is down. I'm going to tap on
the second frame and modify the vertical scale
until I like how it looks. I can slowly play the
animation by moving my playhead through the
timeline with my pen. I think I like it in here. Now, instead of moving
the fourth keyframe by i, I'm going to tap and
hold on the second one, memorize the number
that appears on the y scale and copy it
on the fourth keyframe. Now, let's see how
this looks. Beautiful. When I zoom out on my timeline
and play my animation, I can see that the wing goes down twice and then it stops. As you can imagine repeating the process that we've
just done and creating all these key frames throughout the whole timeline would be
incredibly time consuming. Instead, we're going to cut this group and
duplicate it six times. I'm going to place my
playhead under 1 second and making sure that it is
placed on top of the group, which holds the two
wings and the body. I'm going to tap and hold
on it and select edit. I'm going to tap on split, and you can see that now my group has been
split into two parts. I'm not interested in the
part which has no animation, so I'm going to tap on holding it and select delete content. I'm going to collapse
my group and zoom out and start
duplicating this group. This time, I want to duplicate
my group on the side, so I'm going to tap and hold
on it and duplicate up here. I'm going to repeat
this process until I feel the whole timeline
and tap on play. Great. My butterfly is now flying all the way
through the timeline, and I love how it looks. In the next lesson, I'm going
to show you how to move the butterfly from one side
to the other of the canvas, and we're going to explore an animation principle
called easing.
13. Easing Explained: Now we're going to give
a bit of context to this butterfly and make it fly from one side to
another of the screen. We're going to start by
moving the butterfly using keyframes and exploring an animation concept
called easing, which alters the loc and feel of an animation by affecting
its speed and timing. Let's start by duplicating this file just in case
anything goes wrong, we have the original
static butterfly. I'm going to return
to the theater, tap and hold on the
butterfly thumbnail and tap on duplicate. I'm going to name
one of my files butterfly moving and the
other one butterfly static. This way, I will
know which is which. Let's open one of the
butterflies and start changing the ratio of the
movie to make it rectangular. Remember that we can change the movie properties by
tapping on the title. Under properties, you
can change the size. I will tap on width and
change the number to 1920. I'm going to tap on done, and now my movie is rectangular. Until now my butterfly
looks like it's flying because its wings
are moving up and down. But I want it to move from one side to the
other of the screen. The first thing I have to do is put all of these groups
within another group, so I can apply another animation
to the whole butterfly. I'm going to tap on the
two overlapping squares to enter the timeline it. Draw a line over the six groups, hold my pin down on any of
the groups and tap on group. Now, if I tap on the group, I can change the
scale and position of my butterfly without affecting
the wings animation. Let's make the
butterfly smaller. Okay. Now, let's create a sky for this butterfly
to give it some context. To begin, I will change my
background color of the movie. By tapping on the timeline, I will select a light
blue background color. Let's create a new track and paint some
clouds on the sky. I'm going to tap on the
plus icon and tap on track. I'm going to tap and
hold on this track and move it below
the butterfly group, which, by the way, I'm
going to name butterfly. I'm simply going to tap
and hold on my group, tap on rename, write down butterfly and highlight
it in a pink color. Making sure that my playhead
is on the empty track. Now I'm going to tap on this squiggle icon to enter
the draw and paint mode. I'm going to open the library and select a textured brush. I'm going to go to the artistic library and
select the Tarach brush. You can select any other
brush, by the way. Using a white color. I'm going to start
painting some clouds here and there with this brush, which is very organic. I'm also going to create some
clouds on the backstage, which is everything
outside of the stage. Okay, this looks lovely, so I'm going to exit the drum paint mode by tapping
on the squiggle en again. You can see that one
single frame has been created on my timeline,
containing the clouds. If I move my playhead out of
it, the clouds disappear. We need these frames
to be seconds long. You can zoom on
your timeline and tap on each side of the frame to start pulling it and making
it longer on both sides, or you can go the short way, which is to place the frame at the beginning
of your timeline, long holding on it. And selecting field duration
from the drop down menu. By doing so, my frame is now feeling the whole
duration of the movie. Now, let's go back to the butterfly track by
moving the playhead above. See that when I tap
on my timeline, the bounding box
appears and I can move or transform my object
before even animating it. Let's move the butterfly out of the backstage to the
left side of the screen. I'm going to tap on
the playhead and create a new move
and scale frame. Then I'm going to move
the play head to the end of the timeline and
create another key frame. I'm going to move
my butterfly to the backstage towards the
right and tap on play. Now you can see that there
are two animations going on, the wings which are
going up and down, and then the other animation that affects the
group as a whole. Now let's stop the
animation for a moment as I'm going to show you the
concept called easing. If I tap in the middle
of two keyframes, I can see this set
all easings menu. Let's stop on it and
start with ease. If I tap on is in
and tap on play, you can see that this type
of easing makes my butterfly go very slow at the beginning and then end up the
animation much faster. Now what happens with is out? If I tap on play, my butterfly starts very fast and
then slows down. Let's see what happens
with is in and out. With this type of animation, my object starts very slow, then it accelerates and
then it slows down again. I like to play with these
options organically. Sometimes this effect can give a more natural and organic
movement to my animations and although I tend to
use it quite a lot in some cases like this butterfly,
it might not always work. Knowing that this
exists, though, I advise you to try it out when creating your animations
to see if you like it. This butterfly animation
is looking amazing, but it could definitely improve and look
much more natural. In the next lesson,
we're going to create the animation by hand
using the performing mode.
14. Performing the Butterfly: In this lesson,
we're going to start exploring the performing mode, and I can be more excited. When using performing,
you can record keyframes in real time using just
your fingers or your pen, and any action that you perform
in between two points in your timeline will
be recorded and will appear underneath
your content track. You can perform an
object and move it from one side to the
other of the screen. You can change its colors, and you can even
suppose effects. So first of all,
I'm going to get rid of the keyframe
track by tapping in between two keyframes and tapping on delete
move and scale. Making sure that my playhead is at the beginning
of my timeline, I'm going to tap on
the performing button, which is the circled
icon in here. See that when I tap on it, the word ready appears at
the top left of my screen. This means that procreate
rems is ready when I'm ready. I'm going to start moving
my butterfly from left to right and up and down
in an organic move. If I lift my pen, it stops, and if I continue to move my
pen, then it starts again. See how the playhead is moving on its own whilst
I've moved my pen. As you can see, a new keyframe
track has been created below my content track
with lots of keyframes. To be honest, I like
this type of animation, much more on this butterfly. This probably wouldn't be the same case if I was animating a car or a plane which moves much more smoothly
in one direction. But in this case, I think
this works so much better. Whilst my animation is playing, I want to show you something. See that when I'm
on performing mode, this menu appears
on the top right. If I top on modify, I can access this
motion filtering bar. When moving the bar to the left, loads of keyframes appear
below my keyframe truck. This means that the
movement that I made when moving my pen
will be more exact. That's why more
keyframes are created. If I move the bar to the right, the movement is going to be smoothened and the number
of keyframes reduced. In this case, I really like the movement of my butterfly
to be very organic, so I'll leave the
bar to the left. It's worth noticing
that you can only modify this bar before
exiting this mode. If I tap on done and
then go back into recording mode and try moving the motion filtering bar,
then nothing happens. Remember that you
can only access this straight after
creating your animation. When doing the performing mode, it is very likely
that you'll have to create your animations
more than one time. Have fun and give it a go as many times as needed
until you like it. Now let's animate the clouds. I will start by
placing my playhead at the start of my movie
and top on the circle. I'm going to move the clouds
very slightly from right to left in the opposite direction from where the
butterfly is flying. Now, when I animated
my butterfly, I left the motion
filtering bar it quite low and and it has
been left like that. This is making my clouds
look a bit chunky. So if I increase the bar
all the way to the right, the movement is going
to smoothen a lot, which in this case of the
clouds works so much better. I still think they're
moving too fast. So I'm going to do this animation and give
it a go one more time. This time, I'm going
to try to have a steady, very slow movement. Let's play it again. Now, it
is also worth checking that the easing effect is on
linear. Yeah, much better. Now, if I'd like to make this animation even
smoother and softer, I think I would use
keyframes to animate it. I'm going to erase the
performing track and tap on move and then create a
move and scale keyframe. Since the clouds are very far, the movement is
almost imperceptible. I'll create another
keyframe at the end and move the clouds until I'm
happy with how they look. This movement looks softer and, in my opinion,
much more natural. As you can see, sometimes
performing works better, and sometimes creating
the keyframes one by one helps you to have more
control over your animation. As you move forward in
your animation journey, I'm sure that you will find
which one to use and when. And when in doubt, try both
and see what looks better.
15. Superposing Performing: Filters & Scaling: In procreate dreams,
you can perform more than one action over
a single piece of content. In this lesson,
we'll try performing a scale action over the
one that we already made. I'm also going to show
you how to animate with filters and you'll
see how cool this can be. Let's move the play head to the beginning and tap on
performing mode again. This time, we're going to
scale the butterfly up and down while it moves
from left to right. So I'm going to start by
tapping on one side of the bounding box and start
moving my pen up and down to make my butterfly bigger and smaller once it moves
from left to right. This could make the
butterfly look like it's getting nearer and
further from the camera. Let's stop on play
and see how it looks. This butterfly is not
scaling as expected, and that's because the
motion filtering bar is at its maximum. By sliding the bar to the left, the animation movement
will closely match the original motion which I
created in the first place. If you encounter this issue, remember to adjust the
motion filtering bar before exiting the
performing mode. Now, let's try using a filter. As you saw, when you create a movement or scale your items, you don't necessarily need to create a keyframe
track previously. But when you want to
use a filter, you do. Making sure that the playhead
is over the content track, tap on it, tap on filters, and let's select the HSB option. These bars allow you to
change the color saturation, and brightness of your objects. Tap on the performing button
and start moving the hue bar to the left and to the right and see how
the color changes. If I tap on the play button, I can see that Procreate Dreams
has recorded my actions, which is just amazing. Let's try using another filter. This time, I'm going to
tap on the Gaussian blur, which will make
my butterfly look blurry when I move
the bar to the right. I'm going to tap
and hold the bar and start moving it to the
right once in a while. Have in mind that
you can also use the motion filtering
bar in these cases. I don't really like
how this filter looks, so I'm going to tap
on the blue effect keyframe track and tap
on delete blue amount. I'm also going to get
rid of the hue bar. I also want to get rid
of the scale effect. Now, erasing the scale effect is a little bit more tricky. When creating this animation, there was no keyframe
track for this action. Because remember that each of these move scale keyframes
has a lot of information. If I tap on one of them, you can see all of
these numbers in here. If I tap and hold
the keyframe down, I can expand the move
and scale keyframes. This allows me to erase the vertical and
horizontal scale tracks. And if I want to try and
create the movement again, I can tap on the
performing button and start recording
my actions again. In the next esson,
I'm going to show you how to export your
animation and turn it into a gift so that
you can start sharing your animations in the project and resources gallery
of this class.
16. Export & Share Your Project: Now I'm going to show you how to export this video and turn it into a gift so that you can share it into
this class gallery. And if you're excited to share your animations
over social media, please I would appreciate
if you can tag me at Sylvipind Art so that I can see your progress and share
it with my followers as well. You can also tag Skillshare
and procreate dreams as well. I can't wait to see
what you create. Tap on the name of your
file. Go to share. And in here, you can just tap on video to start exporting. Tap save video, and it will
be saved into your gallery. Now we're going to turn
this video into a gift. Sharing videos in the Skillshare gallery is not yet possible, so we're going to turn
this into a gift first. Return to the home
page of your iPad, slide a finger down
anywhere on your screen, and this box will appear. Tap the word shortcuts. And tap on this icon
when you see it. Now go to the search
bar and tap on gift. You will see this make gift
shortcut appear. Tap on it. Select your video.
And tap on D. Now, if you go back to the
gallery of your iPad, a new video in much smaller resolution
will appear in here. It's going to be a little bit blurry, but it doesn't matter. I'm very interested to see
what you did when creating your animation and how you
customize your bad off. This will give me an idea
of what you've achieved. Towards the end of the class, I have dedicated a full
lesson called upload your project to show you how to add gifts to your
project for this class. If when uploading your gifts, you experience any problems or your videos upload as
images instead of videos, I advise you to go and
check that lesson as I have found a trick to upload
my videos successfully. In the next lesson,
we're going to start our landscape animation.
17. Landscape: Day to Night Transition: In this lesson, we're going to animate a landscape
using key frames, and we're going to keep exploing the possibilities that this
type of animation can bring. Tap on the plus icon and
go to the social template. Just so you know,
this template has a measurement of
one 80 per 1920, so it's perfect to create
Instagram stories, or reels. This option should
be in HD and not in K. Put it on
HD. Tap on empty. Tap on the files name, Go properties and make
sure that this movie is 12 frames per second
and 12 seconds long. Then tap on done. Tap
on the plus icon, go files, and this time, we're going to import
the landscape scene. I will select it
and tap on open. You might want to adjust your landscape if you
see that it is smaller. If you open the drawn paint
mode and go two layers, you can see that there are
lots of layers in here. We're going to convert
them into tracks. Remember that you do this
by tapping and holding on your track and convert
layer into tracks. My track has now been
converted into a group, and now I can see all
the layers in here. I'm going to start by
renaming this group. Tap and hold, rename, and I'm going to
write landscape. I'm also going to highlight
this group in green. This will remind me that
this is the landscape. If I expand this landscape
and contract my tracks, You can see that
now I can recognize this group because it
appears as a green line. This is very useful when you
have loads of groups lying around because you're able to recognize which
ones are grouped. Then if you remember the
colors, for example, pink for butterfly,
green for landscape, then that's even better. As you can see,
we're going to be managing a higher number
of tracks in this lesson. This is great for
you to keep getting used to not just the
finger gestures, but how to manage your tracks
when you have many of them. The first layers are a
branch and two leaves, and since they're part
of the same structure, I might want to animate
them later on together. So I'm going to put
them inside a group. To do this, you'll
have to tap on these two overlapping
rectangles and draw a line on top
of the three layers. Long hold your pen on top
of them and tap on group. You can see that this has left a couple of empty
tracks lying around. So I'm going to long
hold on each of these tracks and tap
on delete track, straightaway to keep
my timeline organized. I'm also going to
rename this group to branch and highlight
it on an orange color. Now you can see
that if I compress my layers by sliding
three fingers down, I can recognize that
this is a full group, and this is the branch group. I'm going to move my tree to the side a little bit
and the branch as well. Remember that you can customize any of these individual objects. If you want to do so though, I advise you to do it before you start
animating your items. Since this class is
focused on animation, I'm going to leave my
landscape as it is. If you go down your track stack, you should find a layer
called shooting star. Make it invisible for now as we're going to use it
in the next lesson. Let's start with the
moon and sun layer. Make sure that the
full length of your timeline is
displayed on your screen. I want the moon and the sun to rotate and simulate
the day and night. The sun comes first. Then the moon, and then I want the sun to
appear again in loop, just as in real life. This means that everything
that is at the beginning of my timeline has to be repeated exactly the
same at the end. I'm going to place
my playhead at the beginning of my
moon and sun track, tap on it, and create a
move and scale frame. This time we're going
to rotate this element. I'll create a new
keyframe at the end and another one in the
middle at around 6 seconds. In this middle keyframe, tap on one of the corners, and then this curvy
line will appear. I'm going to rotate this
so that the moon appears. I'm going to make this
branch layer invisible for now to see the
moon and sun clearly. I'm going to play this
and see how it looks. As you can see, now, it's going backwards
when really, I want it to rotate
all the way through. The problem at the moment is a third keyframe, so
I will select it, tap on the corner, and then
rotate it 360 degrees. Let's see how it looks. By the way, I'm accelerating
this part of the video so that this lesson goes
a little bit faster. Nice. Now we're going to
make the sky go darker at night and lighter throughout the day using filter keyframes. Making sure that I
am on the sky layer, I'm going to tap at
the beginning of my timeline and tap on filter. This time, I'm going
to tap on the HSB. I'm going to create
a new keyframe at the end and one
in the middle. In this middle one,
I'm going to move all the bars until I
achieve a Navy blue. It is looking very nice, but I want to see how these keyframe tracks
looks if I use easing. I'm going to tap on both layers and select ease in and out. I'm going to tap on
play and I feel that this looks a little bit
softer and I like it more. Now, I would like the
night to be a bit longer and the transitioning between the sun and the moon faster. I want the day and night to
last for at least 2 seconds, and then the rest to
be the transition. I'm going to move
the middle key frame of the moon and sun
to around 5 seconds, and then I'm going to tap
another one at 7 seconds. I'm going to expand these
keyframes and make sure that both of them are
at one 80 minus. Notice that I have taped
this minus at the end. If you tap it at the beginning, it's not going to work and this number has to be negative. Let's see how this looks. Great. Now my night
lasts for 2 seconds. I'm going to collapse
the move and scale keyframe and move the
keyframes on each side, 1 second in so that the
day also for 2 seconds. The es is also giving me a bit more of time
in the day and the night and it's making the rotation faster
which I prefer. Now I'm going to move to
the color keyframes and place the middle ones
under the top ones. I'm going to move
one to 5 seconds and create another one at seven. Now, this time, I want
the color to be exact. I need to tap on the keyframe and almost memorize
these numbers. One, 87, 82, and 17. I will tap on the other keyframe and tap these exact numbers. And lastly, I'm going to move the keyframes on the
side 1 second in. Let's see how this looks. Beautiful. I really love this. It would be very nice if this moon has some
stars lying around. I'm going to select the track which contains the
moon and the sun. Place my playhead
when the moon is up. Enter the drawing
and painting mode, open the layer panel,
create a new layer, and draw some stars. You can use any brush that
you want and any color. I'm going to select
the ink bleed brush from the inking collection, lower the size, and draw a
few dots here and there. Don't draw on any of these space as we're
going to animate a shooting star in there using the frame by
frame animation. Love it. Lastly, I'm going to show you another way of
using filter keyframes. I'm going to add a layer on top, which is going to darken the whole scene when
the night comes. You can decide if leaving
this effect or not, but I want to show
you how this works. I'm going to collapse my landscape and
create a track on top. I'm going to tap on the plus
icon and select new track. I will enter the
drawn paint mode, select a Navy blue and use the color drop to fill the
stage with this solid color. You can see that this
has been only added in one frame and I needed to
fill the whole time line. Let's exit the draw
and paint mode, and I'm going to long hold on this frame and tap on field
duration from the menu. Now it's covering
the whole timeline, except from the beginning, so I can just pull this side of the track until
it snaps to the start. I'm going to make this rectangle transparent by tapping
on the playhead. Tap on filter and
tap on opacity. Here I can lower this part
to see the landscape below. You can see the effect of this basically darkening
the whole scene. For some reason, there's
another keyframe here, which is completely opaque, so I can just get
rid of it so that the whole timeline has the same opacity all
the way through. Before I animate this track, I'm going to alter
the blending mode. If I long hold on it, I can tap on blend
mode and go up and down these options on this
menu to see different effects. Some of them are pretty cool. I quite like the hard light because it darkens
the whole thing, but it maintains the saturation. Finally, we're going
to animate this layer. At the beginning, I want
the opacity to be zero. Then at 5 seconds. I wanted to go darker, so I'm going to
move this keyframe. I can actually tap
on the keyframe and write 50 so that the
number is exact. Then I'm going to
create another keyframe at 7 seconds and
write 50 as well, and then one at the end
that goes back to zero. I'll move the keyframe
on the side 1 second in and set the easing to in and out so that it matches the animation of
the other tracks. I'm going to enter
the full screen mode and play the animation with my finger so that it
goes faster. Cool. I love it. In the next lesson,
we're going to animate a shooting star and
learn how to animate using the frame by
frame animation. Okay.
18. Shooting Star: Frame by Frame Animation: In this lesson, we're going
to explore the frame by frame animation by animating a shooting star that
will go in here. I'm going to start by making this top layer invisible as I won't need it
for the moment, and I want to see what
I'm drawing properly. Let's expand this group, pan two fingers down to
scroll to the bottom, make the clouds layer invisible. And the shooting
star layer visible. I feel that this star
could be a bit lower, so I'm going to Zoom on my stage and place it
a little bit lower. Now, this layer is going to
serve me as a template so that I know where to draw all the frames when
animating the shooting star. I don't want it to be visible, so I'll tap on my
playhead, tap on filter, tap on Opacity, and lower the bar enough so
that I can see it, but it's not too visible. To create the animation, I have to create a new track
on top of the template one. I'm going to select the
shooting star track, see how it appears
highlighted in red, tap on the plus icon
and tap on track. See how this empty track
has been created on top. If when creating a
track, you can't see it, it might be because no layer was selected in the first place. I'm going to select
the group and repeat this action,
where is my track? Like I saw something
moved, but I can't see it. If I compress my tracks,
I can see it up here. It appears as a dark thick
layer on top of my group. So I'm going to delete this, select my shooting star layer and add a track so that
it appears on top. I'm going to move my playhead to around 5 seconds as I want the shooting star
to appear at night. The night is around 2
seconds and a bit long. I think that making the shooting star last for
1 second will look great. I'm going to zoom on my timeline until I display 1 second 5-6. I'm going to put my playhead at the beginning of my empty track. And enter the
drawing paint mode. I'll grab the middle
bar and slide it down to display the flip book. This flip book will allow us to create our frame by
frame animation. Each of these squares
is one frame so we can draw something
different on each one. I'm going to zoom on my shooting start template
to see it clearly. I will be drawing
different marks across this template until my
shooting start ends. I will use a white color and select the Inca brush
from the brush library. You can use whichever
brush that you want. I'm going to adjust the
size and see if I like it. The idea here is
to start drawing little lines on top
of this template, one on each frame. This way, when we
play it through, it looks like the
star is moving. Before we start, let's stop on the timeline to display
the stage options. For this lesson, you
should make sure that the option hide onion skin
appears highlighted in red. Now tap on edit onion skin. Since our background
is navy blue, we want to select a color
that creates some contrast. Tap on backwards, select an orange or yellow color
and increase the opacity. I'm going to draw a first line and see how this
onion skin looks. When I move to the second frame, this yellow line has appeared. Procyms is showing me the drawing which is
on the frame before. The effect is drawing on
top of tracing paper. Knowing this, you can go back
and edit the onion skin. If you cannot see
this mark is because probably the color is way too
similar to the background. I'm going to choose a
yellow so that is very visible and you can choose how opaque you want your mark to be. You can also choose how
many frames you want to see moving backwards
and moving forwards. I'm going to select
another color in the steps forward,
red, for example, so that I can see the
difference and see what happens when I start
flipping this book. I'm going to draw the
second line before the first one ends so
that they look connected. Now, look what happens
if I go back one frame. I'm now able to see the
previous frame in yellow, and the one ahead in red. If I move to the third frame, I'm able to see the
three frames below, and you can change these two. If I set it to one, then I will only see
one, two, or three. I'll keep on moving
through my frames, making the lines longer
as I move to the top. I am also counting
the frames as I want this to last for
around 1 second. One, two, three, four, five, and I can keep on moving. And in this last one, I'm
going to start making this star expand from
a dot to a whole star, starting it very small and
making it larger as it lens. And then maybe some lines. I'll make one shorter, then just a dot, and that's it. This lasts for about 12 frames, which will make a second. Remember that we have 12 frames
per second in this movie. I'm going to make the
template layer invisible, Zoom on my stage, and I'm going to zoom on
my timeline so that I have a few seconds
before and some after. Let's enter the full
screen mode and see this shooting star within the context of the
day and the night. Now I want to show you a
trick to pull and push frames around your timelines
so that you can expand them, contract them and move
them altogether easily. When you want to make
these frames longer, instead of doing it one by one, which would take edges, you can pull them all
at the same time. You do this by selecting them all and while being on
the timeline edit mode, you have to hold
your pen down on the side of either
of these frames, tap the screen with a finger
from your other hand, and then pull the frame. See that now I can make all of them longer
at the same time. Now, let's say that I only want to make this middle
frame longer. If I try pulling it, I can't. But if I tap and hold my pen on its side and touch the screen with a finger
from my other hand, then I can elongate this one and the other ones will follow as well as if they had a magnet. See that they stay together when I pull and when I push my frame. If I don't touch the
screen with a finger from my other hand, then
this doesn't happen. It's a really good trick
to have when it comes to pulling and pushing frames that you want to
elongate or shorten. To keep this organized, I'm going to tap on the
two overlapping squares to enter the time
line edit mode, draw a line on top of all of these keyframes
to select them, tap and hold on one
of the key frames, and tap on group. I'm going to exit this mode. Tap and hold on my group, rename it to shooting star, and highlight it straightaway
with a gray color. Now, if I collapse
all my layers, I can recognize where
the shooting star is. In the next lesson, we're
going to keep bringing this landscape to life by moving the clouds
and the mountains.
19. Landscape: Clouds & Mountains: Open the group and make
the clouds layer visible. Now the idea is to use key frames to animate
the mountains and the clouds so that
they move out of the frame when the shooting
star appears at night. Let's start by experimenting
with different lengths and scale of the mountains to see if they
could look better. You can try this as well. I'll begin by tapping
these three dots here and selecting edit anchor. Since I want them to
scale from the bottom, I'll put this cross at the bottom of the
stage and tap on. Then I will scale
them vertically from the bottom and adjust the
scale to see how this looks. I only want to
animate them subtly. Let's make the
clouds invisible for a moment to focus
on the mountains. I think it's really
good transforming the elements before animating
them to take decisions. I want the mountains to start higher and go lower at night. I'll move my playhead
to the beginning and adjust the scale to make
it a little bit higher. I will create a move and scale
frame at the beginning and one on the end of the timeline so that the animation
can work in a loop. I'll move the playhead
to the middle and lower my mountains
a little bit. Let's see how this looks. Yep, I quite like it. Now let's move on to
animating the clouds. I want them to exit the frame and shrink as the
shooting star appears. I quite like this
look at the start. I'm going to create a
move and scale keyframe, then one at the end
so that it ends in the same place and
then one in the middle. I'm going to take
the cloud out of frame and make it a bit smaller. Love it. Now the other cloud. One frame at the start, another one at the end, and the one in the
middle where I'll move the cloud aside
and make it smaller. Next, I want to
change the color of the clouds when
the moon appears. I'm going to group them first to modify them at the same time. I'm going to enter
timeline edit, highlight both layers.
And tap on group. I'm going to have to tap on the overlapping squares
again to exit, and then I can highlight my
group on a purple color, and I'm going to
rename it to Clouds. Straightaway, I'm
going to get rid of the top and the bottom tracks
which were left empty. Making sure that my playhead
is on the clouds group, I'm going to create
an HSB filter. Same as the start
and at the end, and towards the middle, I'll start modifying
the color and brightness and see
how this looks. Love it. I will do the
same for the mountains, adjusting the color to
complement the sky. Since I already have a
keyframe track in here, I have to make sure
that my playhead is on the content track to be able to create a
new filter track. I'll tap on HSB and after
creating a filter at the start. At the end, I'll modify
the color in the middle. See how now if I
contract my layers, it is starting to
be very easy to see where each
element or group is. All the groups are
highlighted in colors, which I can remember,
so it's great. In the next lesson, I'm going
to show you how to import PNG images with a
transparent background to start decorating
your landscape.
20. Landscape: Wrap & Distort Keyframes: In this lesson, we're
going to explore the distort and wrap keyframes, which allow us to
have more control over how we transform
or deform our acids. We're going to use a few
extra images that I have left for you in the folder that you
downloaded for this class. There's simple PNG images
with transparent backgrounds. This means that if
you want to bring your own illustrations to decorate these
scenes even better. In simple acts with transparent
backgrounds can easily be imported into
procreate dreams. We're going to start by creating a track outside of the group. You can create it within, but since we're going to
perform some of these images, I'd rather do this outside of the group to avoid modifying it. Tap on the plus icon, go to files and open
the folder that says extra images and
import the grass. I'm going to place it on the
bottom edge of the scene, make it smaller, and make sure that the track covers the whole
length of my movie. You can compose this grass
however you want, by the way. The first thing
I'm going to do is place the anchor
point on the bottom, as that is where I want
the grass to deform. This time, we're
going to perform another moving keyframe, which is called rap. I'm going to place my playhead at the beginning of the track, tap on it, and move, I'm going to select
the rap option. This option displayed
this grite where you can move all of these
points individually. This gives you a lot of control over how you
deform your assets, and it is always a good idea to play a bit with it before
creating the animation. This top third
point, for example, looks good because it follows the direction of
the illustration. But if I pull the second one, it doesn't look that good. I'm going to move the third one. Since I want this
graph to start in the same place and play on loop, I'm going to create another
keyframe at the end of the track so that the starting and ending
point are identical. In between, I can play. I'm going to tough on
the performing button and start pulling these
points a little bit. I am keeping an eye on the playhead whilst it's
moving through the timeline, and I'm going to make sure to stop before it reaches the end. This way, you will ensure that it comes to the same point. Remember that you can modify the motion filtering bar to smoothing the movement
if you prefer. And remember also that you
have to do this before exiting the performing mode
or repeating another action. I'm going to leave it in here. Now, the cool thing about
this grid is that you can perform various actions pulling different points each time. I'm going to grab this
lower one this time and make sure that I stop
before reaching the end. Now, let's see how it
looks. That's really cool. It moves very naturally. Now, let's go ahead and
superpose a filter to this animation so that the grass gets darker as the night comes. As always, I will create the same keyframe at the
start and at the end. I will tap on perform and start moving the brightness
a little bit to make the grass darker
when the night comes and make it lighter
as the sun comes up. Remembering to stop before the playhead reaches
the end of my timeline. I'm going to modify the
motion filtering bar, and you can also
start checking how it looks and modify the
frames individually. If you want, you can
import another grass and practice this again,
changing it a bit. You can even flip it
to the other side and modify its color and scale
to make it a bit different. Let's import the branch image. I'm going to place it up here, making sure that
it doesn't cover the moon and the sun
when they come up and pulling the content
track so that it covers the full length
of my timeline. Now, I want to go to preferences and show you something
which is happening. Every time that I want to
create a keyframe of any type, there's one keyframe which is appearing at the beginning
of my time line. And if I modify something
towards the middle, I'm already creating an
animation. See how it changes. This is because there
is an option which is active within my preferences. If you tap on the title of
your file and go to timeline, there is this tagle
to add a keyframe at the start every time that you want to create an animation. It could be useful
in some cases, but at this point in my project, it's starting to bother me, so I'm going to switch it off. Now, if I delete the hue and saturation and
create it again, no keyframe is created
at the beginning, which means that I can modify the color without
creating an animation. I'm going to make this
branch look a bit greener. You can choose any
color that you want. Let's explore the
distort keyframes. You can modify these
four corners separately, which gives you more control over how you deform your assets. It doesn't give you
as much freedom as the one that you have
when you use the wrap tool, but this is still great. I'm going to create a distort
keyframe this time and make sure that I also create this keyframe at the
end of the timeline. This way, my branch will come
exactly to the same point. I'm going to tap on
the performing button and start moving one of
the corners very slightly, always observing the playhead. I need to make sure
that I release it before it reaches the end so that it comes
to the same place. Once you finish, you can check the move motion filtering bar to smoothen the
animation if you want. I'm also going to make
the branch darker towards the night
using an HSB filter. I forgot to create a
keyframe towards the end. To rectify this, I'm going
to access this menu, check these numbers, and copy them into the
last keyframe. 1105050. This will make the
animation look seamless when it's
played in a loop. Cool. Let's continue having fun and enhancing our animation. Let's make a new track and
import the flower image. Yours is going to be much
smaller, by the way. You can place your flower
wherever you want. For example, here in the
grass or on the tree. Let's zoom in to focus on this area of the
animation for now. I want the flower to
scale from zero to its current size and then go back to zero towards the
end of the timeline. I'll start by creating a move and scale keyframe
somewhere around here where I want my flower to be as big as it is right now. Then I'll move the keyframe to the back and shrink it to zero. Next, I'll move my playhead towards the end of the timeline. Create a keyframe at
100% of its size, and then shrink it back to zero. Let's see how this looks. Nice. Now, I want to create
another flower up here. We're going to address a
problem that you might encounter when
creating animations and wanting to move them. I'll start by duplicating
my flower and remember to do this under track options
to duplicate it on top. Now let's see what happens if I want to move this
flower up here. Nope, it's not allowing me. Is it because I have the
playhead on the content track? Maybe. Let's see what happens if I move my playhead to
the keyframe track. Now I can, but wait. I have created a
weird animation where my flower is moving from one point to another
when really, I just wanted to
scale up and down. Now, let's see what happened. All these keyframes
hold information and probably because I moved the
flower when importing it, it has registered the x and y coordinates within the stage. Since I'm only interested in
keeping the scaling effects, I can get rid of the x y and even rotation
keyframe tracks. Now I can move my flower up here and the scaling
effect will be maintained. I can even rotate it a little
bit to create some variety. I'm going to collapse
this movement scale and show you something else. I want this flower to start a bit later than the first one. So instead of creating
the animation again, I can just move the track
outside of my timeline. At the start, it works,
but towards the end, the flower is disappearing because it's going
from all to nothing. To fix this, I can
split this track into two parts and move what's been
left outside to the start. It is important to check
that the track is reaching the end and that the other is starting at
the very beginning. You can always move
these keyframes a bit to adjust when it starts. Now, even if you
split this group, if you expand it, you will see that the keyframes
have been kept. So when splitting,
it's more like you've created a
copy of the track. Every time you
split an animation is almost like creating a copy. I'm going to group these
two flowers and create a filter to make them darker
when the night comes. You can do this by
using keyframes or by performing the
color animation. Now you can keep decorating this scene by duplicating
these flowers. Maybe you can put them
on the grass or even on this side along a copy of the branch so that the flowers don't start
at the same time, you can use the trick
of splitting and moving these tracks
outside of the timeline. Since they're within a group, you will have to pull the group first to be able to see them. Close the group and now you
have more variety because all of your flowers are
starting at different points. Feel free to export
your landscape, converted into a gift and upload your animation to
the gallery of this class. Now, if you find any
difficulties along the way, please go to the Upload your project lesson
where I provide a workaround to help you successfully upload
your animations.
21. Blinking Bird: Blinking Bird: Frame-by-Frame Animation: In this new segment
of the class, we're going to bring
this key little bird to life using frame by
frame and key frames. You're going to learn and see the benefits of
grouping certain parts of the body to make the animation more
manageable and enjoyable. To begin, open a
new squared file, ensuring it is set to HD and has 12 frames per second and is 12 seconds long.
Tap on empty. Import the bird file by
tapping on the plus icon, navigating to the files, and selecting the bird file. Remember, you can customize this scene by changing the
bird's characteristics, colors, adding textures,
or altering the eyes. If you want to give
it a try though, I advise you to do it before we start animating each
part of the bird. Once again, we're
going to convert all these layers from the
drawn paint mode into tracks. Tap and hold the track, then select convert
layers into tracks. Now your layers should have been converted into
all these tracks. To keep things organized, let's go ahead and name this group with bird
or whatever you want, and I'm going to highlight
it using a yellow color. We'll kick things off
by animating this bird, making it blink, which will give it a more
lively appearance. To do this, we're going to
create a new track on top of the eye and use a frame by frame animation to
close its eyelid. This type of animation would be pretty difficult with keyframes. Switching to the frame by frame animation
makes more sense. Let's see different
approach that you could have to making
this eye blink. One option would be to enter the flip book mode and start
tracing the eye to animated. The challenge here
is that you cannot create smart shapes
in procreate dreams. You can't just draw a
circle and use a trick of touching the screen
with a finger from your other hand
to make it perfect. Another option would
be to just start painting the eyelid using
the same purple color. I can paint half of the eye on one frame and then pass over to the next
one and paint it all. Although it works, let me show you the third
and better option. I'm going to tap the
bottom track and split one frame that I'll then
copy onto the layer on top. I have to hold my playhead down, tap on edit, and
split one frame. I need to move my
playhead until it allows me to split
the timeline again. I'm going to long hold
this frame tap on copy and pasted on
the layer on top. If I compress my timeline, you can see that this
is a single frame that has been copied on
the layer on top, and I can use it as a starting point to create
my frame by frame animation. Now I'm going to enter the drawn paint mode to
access the flip book. I'm going to duplicate this
frame by long pressing on it. See that you can copy, duplicate cut and clearer
frame using this menu. I'm going to tap on duplicate and then start
closing it halfway. You can see the onion
skin in blue in here. In this case, we
don't really need the onion skin because we're
duplicating each frame. We're not tracing anything. We're just modifying
an existing frame, which is another way to
animate frame by frame. Once I'm done, I'm going to copy the second frame after
the eye is closed. Lastly, make a copy of the
open eye towards the end. Let's see how this looks. I think it looks great. Super easy to do, and it has brought a lot of
life to this bird. I'm going to enter the
timeline edit tool and put all of these
frames into a group. Then exit the timeline edit mode and highlight and
name your group. I'm going to
highlight my group on a purple color and
name it blink. Now, let's see the benefit
of making the eye blink by creating the frames
on a layer on top and putting them
within a group. By doing so, I have
the freedom to just duplicate the blink on top
as many times as I want. I can move these groups where the eye blinks and
even discard them. When it comes to placing the
bird within the landscape, this will be very
useful as the bird will blink and go to sleep in the
different times of the day. In the next lesson, we're going to practice pushing and pulling frames within a group and make this cute bird go to sleep.
22. Sleeping Bird: Push & Pull Content: In this lesson, we're going
to make this bird go to sleep by pulling
and pushing frames. I'm going to enter the
draw and paint mode and select all my frames. I'm going to make
these frames longer so that the eye takes
longer to blink. Remember that you
pull the frames by tapping on the side
of either of them, and then when you
enter the edit mode, you touch the screen with a finger from your
other hand and pull. Now, these frames
are within a group, so they've been left outside. Let me pull the group
so we can all see them. Okay, so the blink
is now slower, but it is not really
falling asleep and it's not what I'm looking for.
I'm going to go back. I only want the frame which contains the eye
close to be longer. This will give the impression
that the bird is sleeping, and the rest can stay as it is. I'm going to start by pulling
the group to the side. This middle frame
where the eye is close is going to remain
visible for a bit. I'm going to select it, enter the draw and
paint mode and draw a little shadow
towards the bottom of the eye so that
it has more volume. Since I want the eye to
remain closed for a while, I'm going to expand
this group quite a bit. Now to expand only one frame, you have to tap and hold your pen on that
frame on its side, and when you enter
the edit mode, which you will recognize because a vertical line
appears on the side, you can tap your screen
with a finger from your other hand and then
pull it as much as you want. We're not going
to create lots of blinks or make them too perfect. We're going to refine
when the eye closes, once we pass this burden to the landscapes and the bird
is going to fall asleep during the night and
blink a few times during the day. Okay.
23. Head & Body: Group Rotations: Now that a bird is sleeping, we're going to start
rotating his head so that he can look any way that
you want him to look. Now let's see the logic behind animating the bird's
head and body. I tested this animation before and encounter
a challenge that you might have depending on the size and capacity
of your yepad. There is a limited
number of groups that you can hold
within a group, and I only discovered this
while testing this animation. I started by grouping the
blinking eye and eye together. Then I grouped the eye
and beq together as that felt natural and would
give me some extra rotation. Then I grouped the
eye and be with the head as this would
give me head rotation. And then when I tried grouping the wings head and body together to move the
bird up and down, I got a warning message up here saying maximum number
of subgroups exceed it. This is something basically
important to have in mind. It's good to not exaggerate with how many groups you create and being mindful when
creating them. I'm not sure how many
groups each iPad can hold. But if you ever
experienced this problem, know that it's normal and see which items you can engroup. Okay. Having said this, we're going to try to restrain the number of groups
that we create. Let's start by grouping the
beak and head together. They're part of the same block, so we will move them as a whole. Enter the timeline edit mode. Trow align on top of these
layers and tap on group. Now, remember to exit this mode straightaway to be able to rename your
group to head, and I'm going to highlight
it on an orange color. I'm also going to get rid of all these empty tracks that have been left when
grouping my layers. Before animating this group, it's important to check where the anchor point is located. I'm going to tap on the
three dots and edit the anchor point so that it
starts where the neck is. I'm going to tap done and collapse my group to
start animating it. I'm going to create a new move and scale frame
at the beginning, since I want this bird
to animate on loop, I'm going to create
a new keyframe towards the end of the track. This way, I will make sure that the head comes back
to the same place. From there, I can just
create as many key frames as I want and start rotating
the head up and down. See that even after
editing the angorpoint, I still have to reposition the head a little
bit, but that's fine. So cute. It is
really cool to bring this bird to life in such
an easy and enjoyable way. Now we're going to make
this little birdie look to the other side. You might think that the
best way of doing this is by creating keyframes
and flipping the head around
either manually or by tapping the three dots and
flipping horizontal in here. Have in mind that
you can only use the flip horizontal option in here when you have created
a keyframe previously. Let's see how this looks. Terrible. Now let's see the
proper way of doing this. The best way to do this
is actually by splitting this group into three parts and flip the head
in the middle one. First of all, to avoid
having any problems, I'm going to get rid
of the keyframe track. And then split my group
into three parts. By maintaining the first and
the third group, the same, the bird animation will look seamless when played in a loop. In the middle part,
I can just tap on these three dots and
tap on flip horizontal. Since birds move their
head quite quickly, this movement looks
very natural. Now I can go ahead and create a keyframe track
below each group. To make sure that the movie
works well in a loop, I'll make a keyframe at the
start of the first group and one at the end
of the third group that I am not going to move. This way, the bird will look good when it's
played in a loop. Then from there, I can
just start creating more keyframes and having fun
animating the bird's head. Now I don't want to put a lot of effort into creating a
final animation because I want this bird to interact with the butterfly once I pass it
into the landscape scene. For now, I'm just going
to leave it like this. Now, see how by creating the keyframe at the start
and at the end of the track, my bird works perfectly well when played in a loop,
which is awesome. Now, let's see how
to animate the body. The same way in which we
grouped the eye, head, and beak together, it makes
sense to group the head, wings, and body together. This way we have
even more rotation and the bird can go up and down. Let's start by tapping
the overlapping squares and drawing a circle
over all these tracks. See how I'm leaving the
feet and legs outside. I'm going to tap on hold
and then tap on group. As always, I'm going
to exit this mode, rename it to body, highlighted in orange and erase all the tracks
that were left empty. I'm going to start by
making this bird stand up. I'll create a move
and scale keyframe at the beginning and at the
end of the timeline, and then I'll have fun adding keyframes in the middle and
moving the bird around. Once more, I don't
want to create a polished animation
of this bird. I want him to interact with the butterfly once it's
on the landscape scene, so I'm going to
leave it like this. Now it's time to
export your bird, turn it into a gift
and share it on the project and resources
gallery of this class. If you want to add
some context to your bird illustration
before exporting it, it's super fun and easy. Let me walk you through the
steps I took to do this. I started by entering the
draw and paint mode and draw a branch on a new track
using the Inca brash. Then on a track below, I painted some bushes using the dry ink brush
on a large scale, adding some lights and
shadows as needed. Now, towards the end, I decided to tweak
the movie ratio and reposition the
bushes, and that's it. If you're eager to learn how to upload your gifts to the
gallery of this class, head over to the upload your project lesson towards
the end of the class, I can't wait to see
what you create. In the next lesson,
we're going to bring all these
animations together.
24. Final Scene: Bird & Night Interaction: Okay, so up until now, we have created three scenes, and it's time to bring
them all together. We're going to go
ahead and bring the butterfly and bird
to this landscape scene. Let's start by importing
the butterfly moving. I'm going to open this file. Long hold on top of
the butterfly track. Select copy from the top menu, and then I'm going to return
to the landscape scene, move the playhead to the start, create a track on
top of everything. Long hold on it
and tap on paste. I'm going to bring
it to the start and snap it to the beginning
of the timeline. Now, this animation is
only 6 seconds long, and I need it to cover the
whole length of my movie. I'm going to start by erasing the move and scale
keyframe track. I'm going to duplicate
the group so that the animation goes through
all of the timeline. Then I can ngroup
the two groups and make sure that the butterflies reach the end of the timeline. Now I'm going to group all
of these 12 groups together. With the timeline it, I'm going to draw a line on
top of them and on group. Now I can adjust the size of my butterfly and place it
somewhere else in the scene. I'm going to rename
this group to Pterfly I'm also going to highlight
it in pink straightaway. Now that I have a higher
number of layers, it's important to keep renaming and
highlighting my tracks. This will make the whole
timeline easier to navigate. Now let's import the bird. Tap hold the group. Tap. Go back to the landscape, create a new track on top. Long hold your track
and tap on paste. Now, make sure to snap the bird to the
beginning of the track. I will erase this empty track, which was left in here and check that it covers
the whole time line. Now, I can see that
for some reason, the bird doesn't really covers the whole length of my timeline. I'm going to have to
expand the groups and start pulling all the tracks
until they reach the end. Okay, now that we have all
the elements in this scene, we're going to start timing the animation with
the moon and the sun. I want my bird to be asleep during the night and
awaken during the day. It makes more sense
that when it sleeps, it looks to the
trunk and then when it's awake is facing the opener. I'm going to flip my
bird by tapping on these three dots and
tapping on flip horizontal. I'm going to position my bird and I'm going to go
to the properties, go to timeline and check
that this option of having a keyframe at the
start is switched off. I also want to make sure that the loop option is selected
under the playback mode. We're going to develop this
animation step by step, and I'm going to start by timing the blink with the night. To be able to focus on the bird, I'm going to make the
butterfly layer invisible and position the bird to
where I want it to be. Since I'm going to
focus on the bird, I'm going to expand
this group to get rid of the animation that
I created previously, both on the body and
the head groups. I want to have the freedom
to do this differently, making the bird interact
with the butterfly. First, I'm going to
focus on the bird going to sleep while
the night comes, which happens in
this middle group where the bird is looking
to the other side. At the moment, the bird
is sleeping for a bit, but I want this to last longer. I'm going to start by pulling the group to the side
to gain more space. Now, for some reason, I
have this empty space, so I'll adjust it, and now I'm going to pull this
frame to the side. Remember that you do
this by holding your pen down on the side of
one of these frames, touching your screen
with a finger from your other hand
and pulling it. Let's see how this looks. Cute. Now I want this
bird to sleep for longer. I'm going to contract
this group and expand this one to have more space
to expand the sleeping eye. Now, the bird is sleeping all
the way through the night. Lovely. It could be also nice to make it
blink a few times before and after sleeping
so that it looks like he's getting sleepy
and struggling to wake up. I'm going to expand the
first group and grab one of these blinking groups
and pass it to the other group right before
the eye goes to sleep. The benefits of having
these blinks in small groups is that I can move them easily without
affecting the eye. Since they're all
within the head group, you can move the whole bird and the blinking eye will stay in the same place
in relation to the eye. Now, I notice something
odd when looping my animation and is that the bird head is
moving a tiny bit. I could fix this by eye, but since I haven't animated
anything in this group, it makes more sense to erase the third group and copy the
first one again at the end. Cool. Now the end and
the start are identical. In the next lesson,
we're going to animate the butterfly using
the performing mode.
25. Final Scene: Performing the Butterfly: Okay, so until now, the bird is interacting with the night and I'm going
to leave it aside. I'm going to make
the butterfly group visible and leave the
bird aside for a moment. You can practice your animation
before even creating it. I want this butterfly
to start out of the scene towards the
bottom left of the stage. Then it is going to rest on this leaf whilst
the night passes. Then it's going to start
moving again towards the top right of the stage
until it gets out of frame. Okay. Since I'm going to start and end this animation
in different places, it doesn't matter if the start and ending point are different. Making sure that my playhead is in the beginning
of the track, I'm going to tap on
the perform button and always keeping an
eye on the playhead, I'm going to start moving
this butterfly around. After moving my butterfly, I'm losing all the organic
movement that I did. It's because the motion
filtering bar is way too high. Before I perform any other
action or exit this mode, I can modify it to bring
the keyframes back. Then I'm going to leave the
butterfly on the leaf and move my play head to where
the moon starts rotating. Then I can start performing
my butterfly again. Now let's see how this looks. So it enters, stops,
and then it keeps on. Now, I also want the butterfly to interact with
the night and day. Butterflies need to rest. I'm going to exit
the performing mode and zoom on the butterfly
when it stops in the leaf. I'm going to expand
this group and make the wings slow or stop
when the moon is up. You remember that I created four or five key frames where
the wings go up and down. So I'm going to start by raising the fourth and
fifth keyframes on both wings and
repositioning the other two so that the
wings move slower. On the middle group.
I'm also going to erase the fourth and
fifth key frame, and it is important
to make sure that the key frames are
aligned on both wings. Now on this middle one,
I'm going to reduce the wing movement in
the middle keyframe. I still want it to move
but not that noticeable. Now, I'm going to adjust the key frames of
the third group and see how this looks in the context of the
day and the night. You know what, I actually
want the butterfly to stop completely and
slow down on the sides. I'll keep adjusting the key
frames until I'm happy. Cute. Now I can contract these groups. I think that it
would be so nice if this butterfly changes
its color at night, like a magic butterfly. I'm going to create a filter, so I want it to start
and end in pink. Then in the middle adjust the
color so that it changes. I can adjust these
numbers and even create a variation
towards the middle, and then it should return
to the pink color faster. I love it. Finally,
in the next lesson, we're going to make
the butterfly interact with the bird and the night.
26. Final Scene: Bird & Butterfly Interaction: And now we're going to focus on the bird again and make it
interact with the butterfly. So we're going to start by
moving the bird's head. See how useful it is to
have this in groups. We have the body, the bird, and the head, which is
divided into three parts. Now I want this bird to come back to exactly the same place. I'm going to start by creating a move and scale keyframe at the start and one at the end to ensure that the head
comes to the same place. Then I can do whatever
I want in the middle. When the butterfly
comes into the scene, I want the bird's head to
rotate and start looking at it. I'd rather create
this animation with keyframes as it gives
me more control. I'm also going to
create a move and scale keyframe here and
at the end of this group. Now on the second group, I'm going to create
a keyframe where the head is going to rotate
and get under the wing. Then in here, when the
butterfly goes up, I'm going to make
this bird's head follow the butterfly until
it leaves the stage. The head goes down. It follows the butterfly and then it stops. I feel like the head is
rotating too quickly, so I'm going to adjust
the keyframes and groups so that the head
flips a second later. Then it comes back and looks
at the butterfly again. This bird is looking so cute, but wait until we move the body and it's
going to get even cut. I'm going to start by
positioning the bird's body. I want it to be resting. Then I can create the
move and scale keyframes, one at the start
and one at the end. Now, when the butterfly appears, I want him to rise up
a little and rotate. Let's see how this looks. Then I'm going to start playing with the bird going up and down to make him look more
relaxed or more awake. During the night, I
want it to be resting. Then when the sun comes up, it awakens and then rotates to start at the butterfly as
it moves out of the scene. Oh, my God, so got. Look how many elements we have in the scenes
which are moving. From here, you can start
polishing your animation even more by creating more tracks
and importing more images. You can import your
own procreate images or import these ones that
I have left for you. Be playful and use
your creativity. Now we're going to add
music to this animation and make it even better.
27. Adding Sound to Your Animation: Adding music to animation can be awesome because it brings the whole thing to
life even more. Music also has the power to
set a mood for your movie. So an animation can feel epic, emotional, funny, or sad,
depending on the tune. Plus, adding sound can make the whole thing much more engaging and enjoyable to watch. I have left for you
a 12 second audio in the folder that you
downloaded for this class. I've created this audio myself. To add music to your scene, you have to first
create a new track. We're going to place
this track towards the bottom of the timeline
to keep it organized. Place your playhead towards the beginning of your timeline, tap on the plus icon, tap on files, go to
the folder that you downloaded for this class and open the bird song
that appears in there. Just like that your animation
now has a soundtrack. Music can give a lot
to your animations, and there's a lot of
copyright free music on the Internet now and days. If you share this
video on social media, you'll find a lot of nice songs that can go
along with this animation. If you export this video, go to your gallery and open it, you will see that the animation has been exported with music.
28. Upload Your Project: Let me show you how to upload your project for this class. Under the project
and resources tab, you have to tap on
the submit project. Here's a trick to
AA cover image. Open any of your animations and enter the full screen mode. Make a screenshot by pressing the lateral buttons
simultaneously, the button to block the screen
and to turn the volume up. I like to go to my
gallery and edit the screenshot so that
the ratio is correct. It is super easy to do so. Tap on edit, tap on the
crop button in here, and then on this
multi squared icon. Select the 19 nine from this
bottom menu and tap on done. Now you can return
to your project and add the cover image. Add a title, and
then tap on image and start selecting the gifts from your photo
gallery to upload. This process might take a
while just so you know. And if it doesn't work,
I have a hack for you. I have had some difficulties
uploading my gifts, but I have found
a way around it. I have sent the
gifts to my computer using my e mail or using arrop. Now, it might seem a bit weird, but by changing the word
gift in capital letters. To give in a lower case, I have been able to
upload my videos into my project
from my computer. Hopefully, this works
for you because I can't wait to see
what you create. In the next lesson,
I'm going to share some final thoughts and
say goodbye to you.
29. Final Thoughts: So thank you so much to all of you who made it
until this point. Learning a new program
requires time and commitment, so well done
forgetting this part. I hope that you have enjoyed the journey of learning
procreate dreams, and I hope that you keep exploring animation
beyond this class. I am genuinely excited
to see what you all create and what you're going
to use procreate dreams for. I have a favor to ask you. Please review this class. Your feedback is very
important for me as a teacher. It helps me understand
what I'm doing well, what can be improved. And also, I get to know who my students are. So please, if you enjoy this
class, review it. Now, if you love this
class and want to be the first one to hear
about my upcoming classes, or you just want
to stay in touch. Don't forget to hit that flow button that
appears on my profile, and I think below this screen. I like to get in touch
with my followers once in a while to announce a
skill share membership, giveaway, share exciting news, new classes I'm working
on. I'm just like say hi to my followers. So if you don't
want to miss out, just hit that follow button. You can also find me on
Instagram at Sylvia spina Art. I like to share short
tutorials behind the scenes, other projects I'm working on, C videos, and all those things. So if you want to
connect with me, there you go, follow me
at Sylvia spina Art. Thank you once again for
joining me on this journey. I hope that you keep exploring animation beyond this last, and I hope to see
you again soon. Bye.
 Silvia Ospina, Artist and Graphic Designer