Transcripts
1. Intro full course: I totally understand you because I was that
there one day, you'll learn the
tools of Photoshop. You've mastered this. But whenever you see some commercials like this
in the hands or Pinterest, you start trying to
do something similar, but you don't know how you
already know that tools, but you don't know how to use it to create something like this. And the reason my friend
is that these kinds of designs have been made
using Photo Manipulation. And Photo manipulation
itself is a skill. To master this skill you
need to learn a lot of things beyond the
basics of Photoshop. For example, you need
to learn how to cut complex shapes like
glass and plants. You need to understand
the values of lighting to create
depth in your visuals, you need to know how to adjust the saturation and how
to match colors of each element and how to add depth using atmospheric
perspective. Then we will talk about some basic concepts like
adjusting composition, painting, light and shadow, adding atmospheric perspective. And finally how to put
all these together and create a color grading
for the whole visual. And that is exactly what
we're going to learn today. You will find all the materials
they use, stock images, the PSD file, and the brushes used without wasting
any more time. Let's start our
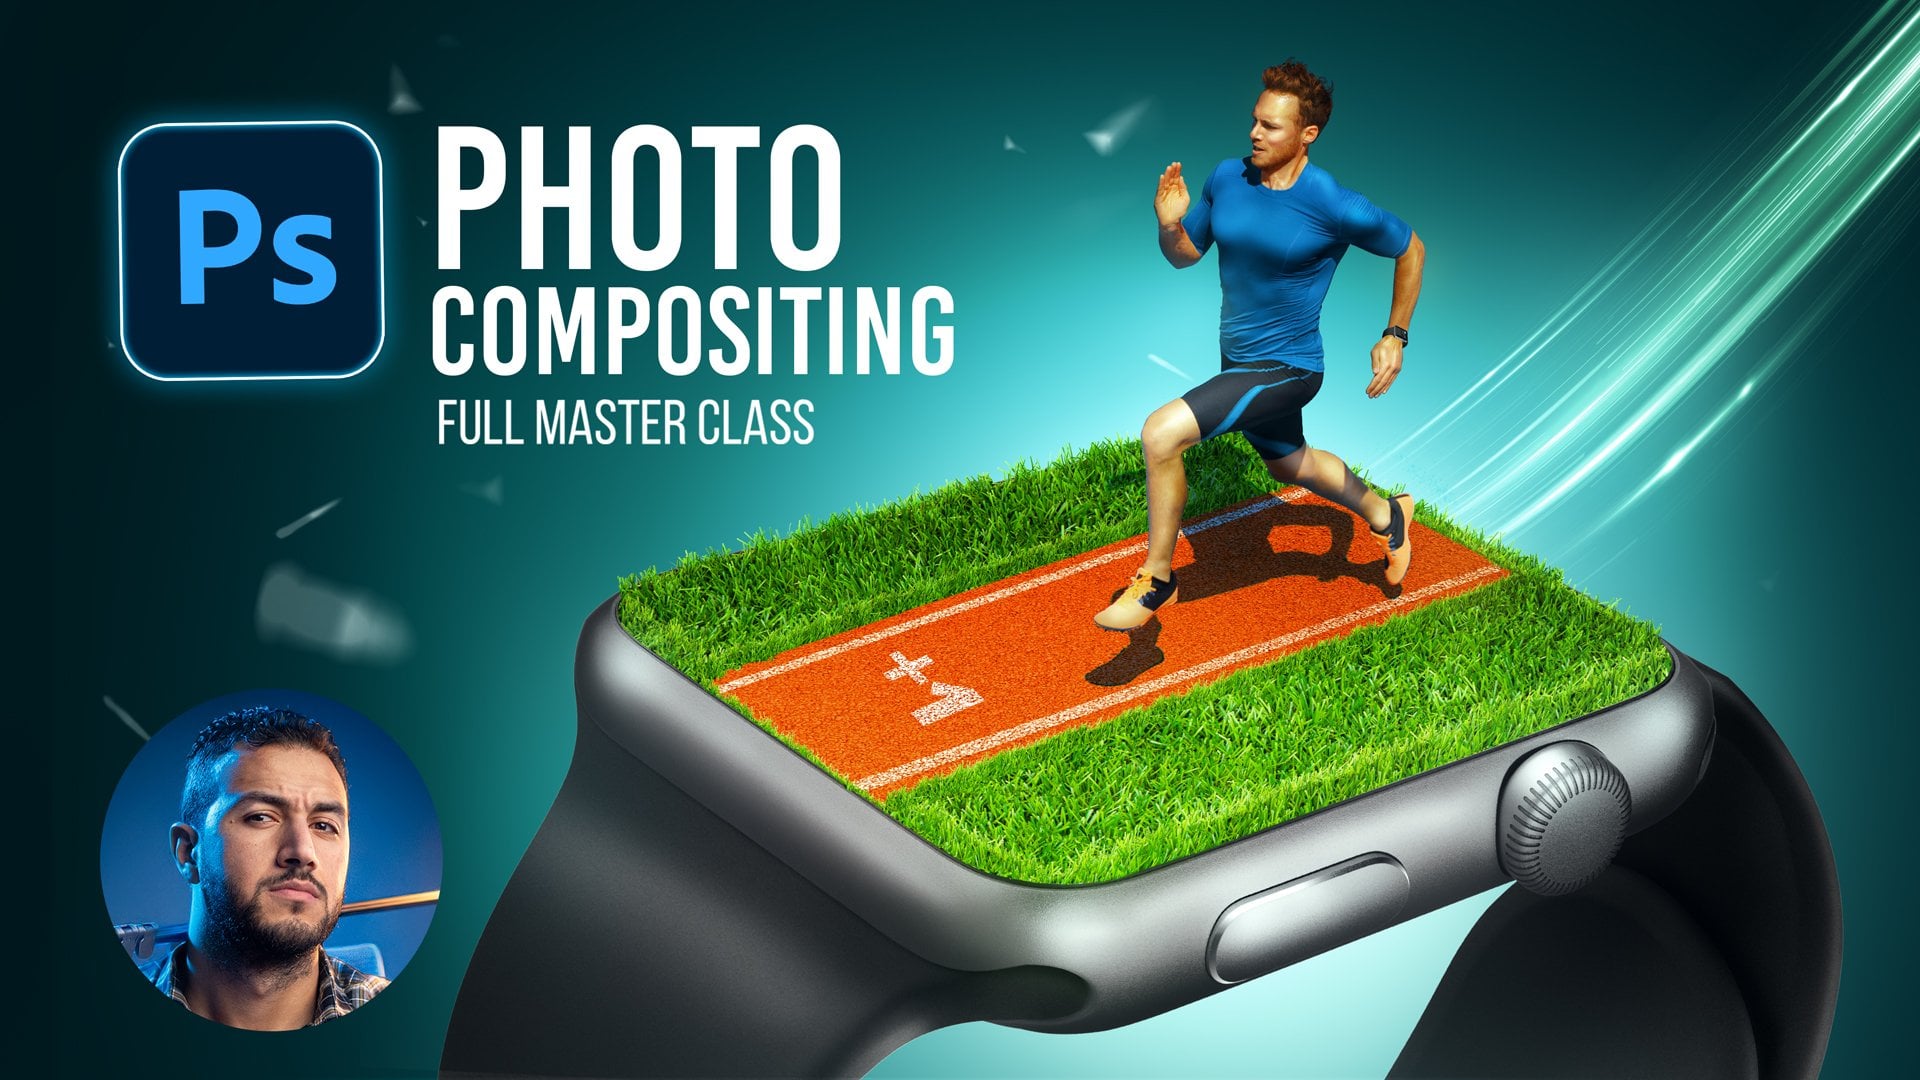
2. 1 The Idea: Alright guys, before we start
to execution the visual, we need to understand something. Firstly, I want to say
that this is a commercial for a product and for
Product visuals like this, you need to put in consideration marketing
objective behind creating this image
or this visual. So for example, here
in this design, we needed to grab attention
to the product itself. So this is the focal point. This is what we are
selling in this visual. So all that attention needs to go there to the product itself. And another thing is that
you don't have to go super realistic in creating
marketing materials like this. So for example here the size
of the Cup is very big. And it's okay because
it is the focal point. That is something we
need the viewer to see. Another thing here is
the coffee beans is very big because we want
the viewer to see it. Of course, its natural size
is not as big as this, but we exaggerated because we want the viewer to see it most. I hope you understand
this point. I encourage you at the first to download all the
images and follow up with me step-by-step so that you get the best use
of this tutorial
3. 2 The Sky: So let's start by
creating a new canvas. I prefer to create
these aspect ratio, the full HD 1920s by ten
ATP and then press Create. But let's change the color
mode here to 16 bad, this gives me more
control in the colors. But if your PC is
not powerful enough, you can just leave it as
eight bit and then press Create to give me flexibility in zooming
in and zooming out, I prefer to change the
canvas size two for K. I press Alt Control I, and then activate this
because I want to expand the canvas but with
the same aspect ratio. So I just change This number two for K and at the same time, the hate will be changed. Then press Okay, alright, The first thing I like
to start with our Lewis, I like to start with Putting the hole or the overall
mood of the image at first. So I would thinking about
the golden hour time, this gives me relaxing and
peaceful vibes in the visual. So I thought about this guy, and this is the first
thing I put in the visual, and this is the first thing
I think about the mood, the whole mood of the image. Okay, so I brought
this image of the sky. I just search it, it like this, or make it
smaller and then press Enter. Now let's start by enhancing the image of the sky
because I believed that this contrast between the
blue and the orange is very high and it's
getting your attention. So I want to get
rid of this blue. So let's get into
color balance and create a new adjustment layer. And let's create a clipping
mask from this button. And then let's
change some colors. I like to add some reddish
tone and some green, which will decrease the magenta. Again, the green is the
opposite of magenta. So if you want to
reduce the amount of the magenta color,
you add green. Okay? So here I'm
adding some green. And at the same thing, if you want to decrease
the amount of blue, you will add yellow. But be careful because this
will increase the vibrance or saturation of the
image and we don't want it to be very saturated. Let's go to the shadows
and let's add some red, some green, and
maybe some yellow. Really cool. Go to the highlights. At some yellow, some orange
or red, and some green. And by the way, if
you don't understand what is highlight
shadows, mid tones. Basically every image, if we turn this into
black and white, for example, this
image has dark spots. So let's remove
this for a moment. So for example, this image
has dark spots like this. This is a dark spot and
bright spot like this. And some intermediate
spots maybe like this. Okay? So this is the shadows and
these are the highlights, and these are the mid tones. So if we have a spectrum between black and
white for this, we can call these values of
lightness as high lights. And these dark values
to be the shadows. And these are the values
of the mid tones. I hope you understand
this point. So this is before,
this is after. Really nice. There are some other
blue colors here. We can get rid of them
using hue saturation. So I'm going to create
hue saturation layer, create a clipping
mask by pressing Alt and pressing
between the two layers. Then go to the maybe the blues
and reduce the saturation. And also to go to the cyan and reduce the
saturation as well. So as you can see, the green colors are
now less saturated. So let's see before and after. Very nice, very nice.
4. 3 Blending the mountains: Now let's go to
the next element, which, which will
be the mountains. So let's bring this image here
and make, and press Enter. And the first thing
we want to select this guy to separate it
from the mountains here. So I will do this
simply by pressing Select from the select menu
and go to Sky. Simple. As this end, Adobe AI will select the sky for
me. Very nice. Then I would create a mask and then press Control
I to invert the mask. I've noticed that there
is one pixel here, so we can remove it
using the brush. You simply press B to bring
the brush and with the mask, with the dark, with
the black color, you can remove this. Very nice. Let's put it down. Maybe here. That's very cool. Before doing anything and
correcting the colors, I think we need to
expand this area. So we will do this simply
by selecting this area. Using the selection tool. I use shortcuts always. And you will find every
shortcut I'm using here, as you can see right now, by pressing V C or any button, you will see it right here, just in case I
forgot to tell you. So selecting the layer itself and creating
this selection, I will press control
C and then press Control Shift V to create a duplicate from the selection
but in the same place. Okay? And then I will
press Control, Shift Alt. See, this will give me
the transform tool, but with some intelligence, it will not expand it as
the regular transform tool. Okay? So then press Enter and as you can see right
now, it's now expanded. Good way. Very nice. Now let's just select these two layers and
let's just merge them. Pressing Control E to merge the two layers because we don't want a lot of layers here. We can then convert it into
a Smart Object. Very cool. Now let's care about merging or blending these
two images together. So let's analyze it at first. There are a huge difference between this image
and the background. So the first thing
we need to notice, what are these differences? The first thing is in
this mountains image, the sky was blue
and very bright. So it casted a very
bright blue color here. But here the sky is
somehow orangey and dark. So we need to match these two color tones and we need to match
the lightness values. So the first thing I'd
like to start with is correcting the
lightning is values. And I do this using curves. So it's create a curves
adjustment layer, press Alt and create
clipping mask. And then let's correct
the lightness values. What I like to do here is to create a black and white layer above everything
and see what are the differences
in the lightness. Okay, so let's start by darkening this
image a little bad. So not so much because we don't want a lot of difference
between these two parts. That's cool. So now let's care about
correcting the colors of these green plants or grass. We will do this by maybe selective color
or Color Balanced. Let's see. Let's try the selective color. Okay, so let's start
with the whites, which is the
highlights of course. And let's try to
correct It's colors. I will add some orange or reddish tone when we
decrease the science, we are now kinda adding orange
tone in the highlights. But of course we need to
create a clipping mask so that we only Effect this layer. So I will add some reddish tone. And let's firstly
darken this area. So I will darken it like this. And let's add also some green. By adding, removing magenta, we are adding green. So I think we can add magenta
and not in green here. And as the same thing, we can add some yellows. So let's see the
highlights in these areas. Here's before and here is After, very nice. This is for the highlights. Let's go to the mid
tones or the neutrals. We will darken it somehow
and we'll do the same thing. We will add reddish tone, and now we're getting
something and maybe add some magenta and add some
yellow. It's very nice. Very nice. Now let's go to the blacks. Let's see. Add some reddish tone, maybe some magenta,
and some yellow. Maybe we can brighten it
out. That's very nice. Let's see. Here is before and
here is after. I've done a very good job here. Now let's care about this area because I don't
like how it looks here. Needs some manual adjustments or some specific adjustments
for this area specifically. So I will do this by creating a new layer and using
the soft round brush. I will simply select
this color from the sky and then decrease
the flow of the brush. Start and start to paint
some colors right here. Don't forget to create
a clipping mask, pressing Alt and pressing
between the two layers. And now let's simply pick Color, make the brush bigger. And let's just add some touches. The same thing here. Pick the color at some
atmosphere Effect. The same thing here. Pick this. And here is very
nice because we want the same colors in the
atmosphere or the horizon line. We can then add
an overall color, Creating a new layer. Do the same clipping
mask and Creating over all hazing effect
like this bodies. But this is too much. Let's choose a darker color. This. And let's just
add some color. Maybe we can change
this into color. Yeah, that's very nice. We can then create a new layer. Be behind the mountains and do the same effect so that we
get a smooth transition. So we can create like
soft lighting like this. Pick this color and
paint some lights here. Very nice, very nice. I think we can decrease
the opacity of this layer because
it's very high. So we need to
decrease the opacity. And we can decrease the
opacity over this one. All's fair, nice. Let's see. Here's before and here is after. It's now blended
in a better way. Now when we blend it, it, the Sun Glows has
been disappeared. So let's create a new
solid color to create the sun glow and then create, change the blending mode
into screen and press Control I to invert the mask and using the same
software on the brush, we can add some glow
or Effect below here. Very nice. Now it seems like
it's blended better
5. 4 Blending the Table: Very nice. Let's go to the next element,
which will be the Table. So I have brought this image of some tables and let's open
it into a new project. Let's select one of them. I think this one will be the best in terms of the
angle that we need it. So let's simply
select this using polygonal lasso tool or pen tool wherever
the tool you want. Selecting it like this. I use the polygonal
lasso tool because it gives me sharp edges and
that is what is exactly want. Okay, then control C, control V, right-click Convert to Smart
Object because we want it not to be affected
when increasing its size. I don't want it to be pixelated. Okay, so let's put
it right here. Control T, make it bigger. Let's see. Let's
increase the size. And I think that's good. I think now we need to put this higher alphabet,
the background. So let's select everything and using the Shift key, I will just displace it
a little bit to the top. Like so. They're nice. Then we can press
Control T to the sky and then just make it like this. Per cent. Very nice. I think this glow effect
is very much, too much. So, oops. Let's Effect need
to decrease it. Then we will add some
Glows at the end. But for now, I think this is better and also the
background needs to be lower the opacity, we need to lower
the opacity of this Effect. Okay? Now we need to
expand this area again. So simply I'll do this by
selecting all these area, the background, the first layer, and then press Shift
plus the second layer, which will select all
the layers inbetween and press Control J to
duplicate them, Control E to merge them
into one new layer. And finally, I'll press
Alt Control Shift C to expand it the same
way we did before, but this time I will only
keep this lower part. So I will create a mask and press Control
I to invert the mask. And then I will paint over here. Simple as this. I hope you understand
this point. I just duplicated this
area of the background and then expanded its size
and make a mask to that. I only keep this part. Okay, We are nice. Let's put everything here into a group so that we
can be organized. So I'll put everything
here into a group and let's name it mountains. And let's name this, put this into another group,
and let's name it Sky. Very nice. Okay, Now let's
get back to our lovely table. I think we need to
lower this down alphabet and let's
expand sky again. Okay, let's get back
to our lovely table. I will put it right here.
And the first thing is we need to enhance
the image of this table. So I'll go to the filters
and go to Camera Raw Filter. We need to sharpen it a little bit, increase the contrast, and basically do some basic
enhancements into the image. So let's start by
increasing the contrast, increasing the texture
and clarity I wanted to pop and maybe decrease the highlights
a little bit and maybe increase the shadows. Basically, I'm now trying
to change every slider I can until I get
the best results. Maybe decrease saturation. That's maybe go to the
details, increases At some sharpening
and all as well. Press Okay. Let's see, Yeah,
great enhancement. Now let's care about the
lightness values of this table. So let's start by creating
curves adjustment layer, and let's dark in the
Table Edit little bit. Let's create a clipping mask. And let's try
darkening the Table. Maybe we can change the Blending Mode of
this curves layer to Luminosity because
we want only to Effect the lightness values, not the color or the saturation. I think we need to dark in this age because it
is in the shadows. So let's create another curves. Create a clipping mask, darken it like this, and then press Control
I to invert the mask. And using the brush, we will darken this edge. Let's increase the flow
of the brush to 100%. And let's paint over
this area I press Shift so that I paint
straight lines. Okay, Very nice. Let's see, before and after the added depth into the Table, we need to add more depth in
the surface of the table. So let's create another curves. Darken it like this
grid I clipping mask. I think you understand
the process now. Press Control I to
invert the mask. And now we can use the soft round brush to put
some shadows in these areas. Let's decrease the flow. Let's draw some shadows. These dark areas. Very nice. Let's keep
this area bright. And we can even make it
brighter by creating another Curves Layer and
create a clipping mask force. And maybe you can shift
the colors toward or saturated color because
it's coming out of the sun. So it should be
some golden hour, golden color reflected in
the table, but subtle. And then we can use blend F to only affect the highlights. So I will remove the
effect from the shadows. And we can smoothen
this transition, pressing alt and the
cursor to split it. Like so. Very nice. Then press Okay, and then press Control I to
invert the mask. And now we can use the
software and pressure again to create some
highlights in this area. Very cool. Feel free to always zoom in and zoom out to see
the whole picture. Okay, Let's see before
adjustments here as before. And here is after. Very nice. Now it's blended in
a good way actually, but I think we needed to separate the Table
from the background. There are several
things to do for this. We can simply create a curves adjustment
layer and make this area darker, like so. And then press Control I. And we can paint over this
area because it will not, the light will not
reach this area because the angle of
the sun is very low. So we can darken this area. This will separate
between the two layers. And next week can create
an atmosphere Effect. We can do this by simply increase or open up the
shadows a little bit. And then we can shift the colors towards the color
of the whole image. So here we should have an
orangey magenta atmospheres. So I increase the orange or
the red tone in the shadows. And the same thing we
can increase the magenta but just a touch
don't oversaturated. And then add some. May be yellow. Then press Okay, and then press Control I
to invert the mask. And now we can paint manually this Effect into
these dark areas. Maybe you can increase
the flow of the brush. And that is very nice. Okay, Let's see. Here's before and here is after. Oops, here is after. I feel that this area needs
to be darker actually. So we can feel
free to always get back to the project because
it's not onetime process. You can always go back and forth until you get
the best results. So here I will simply put
a point here and here, here and only will affect the highlights because
I want it to be darker. These highlights is very bright. I want them to be dark. Let's see. Still not the best results. So let's put another point here. And lower sports. Let's see. Not bad. It's decrease the
opacity of this. And we can get back to it later. But I think the sky you'd
layer needs to be shifted. So let's shifted and it needs to be shifted
to the bottom. And then press Control T and
stretch it again. Very nice. Maybe we can manually
add some colors here. So I will pick this color. And let's paint
some colors here. Maybe you can create a
new layer and we will paint it like this. Pick the color. Paint here. The same thing, but let's decrease the
flow of the brush. Feel free to take your time
to get the best results. It's always depending on
the time that you have. So if you have a lot of time for the project to put all
the effort, you can. You should. But
sometimes you don't, you don't have the
luxury of time. So you can simply do your best within the time
limits you have. Okay. Let's not that we can
get back to it later
6. 5 Blending the Product: Now let's focus on
the product itself. So we have finished everything. Let's go to the Product. This is the image of the
product that I found. Of course, it is a real project. You should take the
picture of the products yourself so that you
get the best results. For example, here this image
is not the best because it has some drawbacks. For example, the, the
lens, the focal lens, aperture of the lens specifically
is very low aperture. This gives me not sharp edges, as you can see now, the focus is in here, the depth of field effect is not the best for
such images like this. So if I am the one who
is taking this picture, I will increase the
aperture of the care of the camera so that I get
the best sharp image. But anyway, we will just use this image that I
found in Shutterstock. And I'll open it
into a new project. And let's select it
using the best tool, which is the pen tool. I assume that you know
everything about the pen tool. You know the basics, Photoshop, of course, if you are
watching this tutorial. So I will speed
up the process of this selection and
get back to you soon. Alright guys, here is the
image after selection. Then we will convert
this into smart objects. So right-click Convert
to Smart Object and then let's bring
it into our project. Let's press yes. Very cool. Let's put it above everything. Now let's care about the
placement of the Product. Where is the best place for
us to put this product on? There is something called
the rule of thirds. This is basically, you are dividing your project
into three sections, so horizontally and vertically. So it should be like this, sorry, the lines
are not straight, but you've got the point and the main focal
points should be here. The main reason of this rule of thirds composition
rule is to show the Product himself and to show his relationship
with the environment. So I'm not only focusing
on the product, I'm also focusing
on the environment surrounding the
Product, but secondary. So the environment is a
secondary focal point. I hope you understand the point. I think we can put
it right here. This is a good place
here because we will put the coffee bean to the right. And now let's care about the transparency
of this product. So how can we
remove these areas, these white areas from the glass that we
can get transparent? Selection. My take on this
is I will put everything, put this layer into a group
and let's name it Product. And let's just
duplicate this one and hide the top one
and the bottom one. We will change its blending
mode into multiply. This multiply
blending mode is only keeping the dark pixels. So now I can see only the dark pixels and I can see some transparency here. Can you see it? So now this, these parts
are somehow transparent. So this is the first part. The second part will
be the top layer. We will try to select
the bright pixels. How can we select it? Simply by going to
select and color range. From this, we will only
select these bright spots. We can increase the fuzziness a little bit and
then press Okay. Now with these bright
spots are selected. So before selection we should have done a mask, but It's okay, we can press Control D to hide the selection and
then create a new mask, and then press Control Shift D to retrieve our, our
selection again. Now we want to erase with the software
and erase some parts of this glass because
transparency is just some reflections
and some shadows. So if you put a glass of
water behind any environment, you will see some reflections, some bright reflections,
and also some shadows. And you will see
the the background So let's just increase or make the flow around
20% or something. And let's use the black color to delete or to erase
some parts like so. Let's keep the outer
edges and let's try to erase some
parts like this. I'm keeping the outer edges
because it's the main thing that gives us the
illusion of glass. Okay, Let's erase
some of these areas. The bottom, maybe here, maybe here
also, but not so much. You need to keep
some reflections. Maybe you can press
Control H to hide the selection while
we are erasing. So we can get some
parts back again and we can use the selection
but without bothering us. Okay, Let's see. Here is before and here
is after, before, after. Very nice. Now, the next thing we're
going to do is to correct the colors and the luminosity or the brightness of
the Product himself. So I think needs to be
a little bit darker, but not so much dark because
we want it, the product. We want it to bring
our attention. So it needs to be a
little bit bright. So let's create a clipping mask. So let's firstly unhide the
selection and then press Control D. And then let's create a curves
adjustment layer. And then we can apply
any adjustment we're doing to the group
of this product. Okay, So I'm now putting the glass or the Product
in a group and now Creating clipping mask for the group. So let's make it a little
bit dark, like so. And I think that's enough. Very cool. Now let's
go to coloring. If course it needs
some yellow two tones. So let's go to the
Color Balance and let's create a clipping
mask and let's add some orange color, some bread in the mid
tones, and maybe let's try some greens little bit
and some not so much. Let's see before to after
subtle but effective. It's focus in these areas.
After, before, after. Let's go to the highlights. Let's add some yellow,
orange, or red, excuse me, and
maybe some magenta. It's a process of
trial and error. Let's go to the shadows. Let's try to add some warm
red and maybe some green. What about some yellow? Not so much, plus
one, Very cool. Now let's see, I think the yellow color is too much, so let's add red to make
it a little bit orangey. Let's go to the
shadows. I think. Yeah. I think that, that is better. Let's see, before,
after, before and after. That's very nice. Now we can create the
shadows for the product. So the first thing we
need to care about is the shadow in the
Product himself. So we will do this Creating
curves adjustment layer, make it dark and create
a clipping mask. And now press
Control I to invert the mask and using the
soft rounded Prakash, I will increase the size and
maybe decrease the flow. And let's paint over this area
because this area will not have so much lights because it's in the opposite direction
of the light source. Okay? Maybe you can change its
blending mode to Luminosity. Let's see. I think luminosity is cool. Now let's create the shadow
casted on the table. So in general, we have
two types of shadows. We have the contact shadow,
which is the shadow that is resulted from the contact between the Product
and the Table. So we will do this
by creating a new empty layer and using the
software and that price, we will change its
size from here to make it like so. Maybe we
can make its size small And then using any dark
color from the Table, which is supposed to be
the shadows of the table. So for example,
this color is dark. We can paint the shadows. So let's paint the
contact shadow, carefully painted
between only the surface of the product and the Table. I think this color
needs to be darker. So let's just delete this layer and let's
create a new one. Sorry about that. And let's select a darker color like this one and
make it dark leg. So we will then we can decrease the opacity
if it's too dark. So here let's be careful
Creating the contact chat. So let's paint over this area, the contact between the
Product and the Table, and then make it bigger
and paint right here. Make it bigger. Painting this area. And here, here. In this area, we
need to make brush smaller to create
realistic shadows. Very cool. Now let's make the brush bigger and let's
us most in the edges. Like this. Very nice. This is called the
contact shadow. Let's see before. Now, it looks
floating in the air. And after it looks settled
down into the Table, maybe you can erase some parts. Here using the soft
rounded brush. I will erase some of
these areas. Okay? So this is the contact channel. The second thing is the we say we call
it the cast shadow, that is cast it from the
light source directly. So here we have the Sun, which is the direct
source of light. And we have also indirect
source of light, which is the clouds or the sky. The sun hits this. The sky and the sky
create ambient light, which creates ambient shadow. But we have also the
main source of light, which is the Sun, should cast sharper shadow. The shadow should be in this direction because
the Sun is here. The shadow should be
in this direction. Okay, so let's try to
paint it together. So we will draw with a cast shadow using the
polygonal lasso tool. Firstly, we will analyze
the direction of the light. So the sun should be here and the shadow should be
in this direction. Of course, will not reach
this area because it is the edge of the table. Okay, so I suppose that this
is the shape is going to be, and let's create a new layer. And let's choose the
software ended Prakash, and let's make it bigger. And using this
brush was low flow. We can draw this cast
shadow like this Control D. And of course it is very sharp. So let's go to Filter bluer
and maybe Gaussian blur. Just to Laura to listen bit. Very nice. Very nice. Then press Okay. Okay, everything's going well. But this area is very bright. We need to make it
a little bit dark. So let's just create a
new layer and create a clipping mask and using the same software and
brush with the same color, we can just make this area
darker just to touch. Okay. Let's see. Before, after I think
this is better. Very nice, very nice. Maybe you can change
the orientation of this shadow later, but let's just
expanded like this. Maybe we can open it here. Feel free to take all
the time in the world to make it right, to be satisfied
with the results. Very nice. We can edit it
later if we don't like it. Alright, now let's paint some shadows here and
some highlights here because the sun will create a rim light into this,
the product itself. So we can do this using
any way we could use. We can use solid color curves,
use saturation, whatever. So in this time, I will use hue saturation, create a clipping mask. And let's press colorize
to give it specific Color. And let's choose some
orangey yellowish color, increase the saturation. And maybe increase
the brightness. Very nice. Maybe increase the brightness, decreases saturation Alphabet, make it more, more yellowish. Yeah, I'm trying to match
the light source color. Okay, then change the
blending mode to screen, and now we're ready to
paint the highlights. Press Control I to
invert the mask. But before doing this, we need to change the tool
to any tool and then press Control I to invert this mask. And then we need to
draw the lights. So for drawing the lights, we need to analyze the
shape of the Product. For example here, that this is polygonal side
of the products, so it needs to have sharp edges. So I will not just simply using the
software and with brush, I'll just draw light like this. This will not be realistic. We need to draw light depending on the
form of the object. So for example, this area should have harsh reflections
like this. And then we can draw
a shape in this part. And then we can draw
light like this. Maybe make a brush beggar and just give it a
touch. So let's see. Yeah, This is good. Maybe we have small edge
that needs to be fixed here. Very nice. This one is
to be rounded like this. Very nice. Now let's care
about the other edges. The other edges are not as
sharp as the above ones. So we will try to analyze and
see how can we draw eight. Okay, so softly and gently, we analyze the shape and the form and try
to follow the form. So if this is a cylinder, needs to be in a specific way, a cube needs to, needs to draw light in
other way and this stuff. Hope you understand this point. Make it bigger. Of course, digital painting and it's a very important topic or skill. You need to practice on it if you are into
Photo Manipulation. Anything related to
Digital Art, very nice. Not bad. Let's see
before and after. Here's the before
and here is after. We will add some Glows later. But for now, that's something
I would like to do, is to add some bluish
tone into the shadows. This, this gives a
contrast in colors. So for example, here are the
highlights have orange than the shadows should
have some bluish two. So we can make it simply
using Color Balance. We will just add
some blues, I'm Sam, and maybe some magenta
to go to the shadows, do the same thing. And then press Control. I annelids paint. Press Control in, let's
paint in the shadows, gives us a very good
dynamic coloring. Because the shadows should have some light from the ambient
light from the sky. And the sky gives us
more bluish color. Let's see. Before, after. Very nice
7. 6 Blending the Cup: Now let's care about the
other supporting element into the project. So here we have this Cup. Let's bring it and open
it into a new project. I will firstly, before anything,
before doing anything, I will just select this cup
of coffee using the pen tool. Okay, this is the first
thing I'm going to do. So I will speed the process of this part and then
get back to you. So after selecting the Cup,
let's press, right-click. Make selection, then press Okay. Then let's create. Now we have the Cup selected, but we have a problem that we need to remove this
white background. How can we remove it? Okay, let's firstly bring
it to our projects. So I will change or convert
the layer into smart objects. Let's drag it and put
it into our project. Press. Yes. And let's put it
into good possession. So for me, this is good, of course, as I've
already told you, it will not be 100%
realistic in terms of the size for marketing purposes. Okay? So let's firstly put all these elements into a
group and let's name it pro. And the same thing. Let's put all of these
inter-group and let's name it. Table. Very good. Here we have the Cup. We need to be organized here. Okay, So the problem here is
how to remove this white. First thing, I will create a new duplicate by
pressing Control J. And then let's change
the Blending Mode of the underlying
layer to multiply. Let's see. You can see here it now we have removed
the bright pixels and the top one has
the pride pixels. So how can we reduce the
amount of these white pixels? I prefer here to use the mix between blend F
and select Color Range. So I'll double-click
into the layer and go to the current
layer slider. And let's remove the
whites from this layer. So basically what
I'm doing now is to remove any white
pixels from this layer. But of course, we don't want it to remove it harshly as this. So I will press all to split the cursor and then remove it. In a gentle way like this. We wanted to look transparent. Maybe like this. Still harsh. But I think we can using the color range
slider, we can fix it. See purse. Okay, so I will get back some of the bright pixels by
duplicating this layer. And then right-click
clear layer style because Blend If
is kind of styles. And then create a mask and press Control I
to invert the mask. Now I can paint manually in some areas the reflections
that lie want. So for example, here
we have sharp edge. So we need to refine this edge. Maybe make the brush bigger
and put some highlights here. And we can also go here
and draw some lights. Back. Very cool. And if we want to remove some of these
reflections, of course, we can create a mask in the
underlying layer and start to gradually erase some
of these parts. To increase the transparency. Very nice. Back to this area. Maybe we can increase
transparency here. I'm not afraid to
erase with the brush because we have this multiply
layer at the bottom, which give us the shadows Okay, So let's see. Maybe we can erase
some parts from here. Okay. I think we will we can judge it after correcting the colors and saturation and all
the other elements, but for now, Can
not 100% judge it. I'm not sure if it's going
to look good or not, but for now, it's okay. Now let's care about
correcting the, the lightness values and
all the other stuff. So let's just create curves, adjustment layer, make
it darker a little bit, create a clipping
mask for the group. And then let's
correct the colors. You now know the
process how it works. So the second thing I'm
going to fix is the colors. I'm going to create. Color Balance and then
add the colors that I wanted in highlights,
midtones, and shadows. So let's start with
the highlights. I will add some bread, maybe some green
and some yellow. Let's go. Maybe you can
increase their bread. Then let's go to the mid tones. Do the same thing. Now let's go to the shadows. I think here we can
increase the blues. The shadows. No, I don't like it. So let's get back to our plan. Feel free to experience or experiment with different
styles of coloring. Okay, So let's see
before, after. Alright. Now let's care
about the shadows. So the first thing I'm going to darken this area because
it is very bright. So let's create a
curves adjustment layer and let's darken this area. Let's create clipping mask, change a blending mode into luminosity because
we want only to affect the hue over
the lightness values. Then press Control I
to invert the mask. Just Control Y, and then
make the brush bigger using the why color I
will paint in this area. And also this bottom one. A very nice, Let's see. Looks school, but we need to get some reflections back
because it's now very dark. So now we can go to the reflections layer and
add some reflections. Here, for example. Yeah, looks cool. See. Okay, maybe we need to open up the shadows
a little bit like this. And also we need to get rid of this white rim light manually. So I will create solid color or just simple empty Color and then I will draw or
paint with this color, increase the flow of the brush. And let's paint over this area. Simple as this. Oops. Here we need to use sharp edges. Brush, make it small, very small on the zoom in. And let's, Getting attention to details is very important. So go to this area. And let's remove this
white bright spot. See, still we have
bright color here. And here also. Be lord. Okay, Very nice. Let's see. Four after. Very cool. Now let's care about
the other shadows. So we need to create some
shadow in this area. I will create a new layer,
create a clipping mask, the same thing we did
in the Product image. So let's make the brush bigger. Let's choose this color, for example, this is very dark. Decrease the flow of
the brush. And let's Simply paint here, see, maybe we can decrease
the opacity. That's cool. Now let's care about the
contact and the cast shadow. So I'll do this Creating
a new layer and using the software and brush the same brush we use
in the Product image. And I will change
its shape to this. Let's pick this color
on the shadows. Let's paint a shadow. Here. We can increase the flow, excuse me if I am fast
in this section because we have done the same process
into the Product image. So I don't want to waste
more time explaining it. You can simply get back to the video of the products if you don't
understand something. So here I'm simply paint
the contact shadow. And then I will paint
the cast shadow. Let's see. If we can make
this brush beggar. Give it some touches like this. Yeah, it's C before. Laughed. A very nice. Now let's paint the cast shadow. I think. Maybe we can
just copy this one. Can we maybe we
can copy this one and put it right here and
just make it smaller. Troll T. And it's try to make it smaller and see if
it's going to work. This will save a lot of time. Yeah, it's working. I guess. Maybe it needs to
be darker here. So let's just select it and
let's try to make it darker. Let's see me make it
darker here also. See not bad, but not the best. So let's go to Filter here. I want to soften the edges
with a different method. So I will use field the
blur to create a transition between sharp and
soft edges shadow. So in this area, I will make the
shadow very sharp. And here I will make it soft, will create some transition. Here. Maybe you can make it sharp. And here we can make it soft. That's a good way. Maybe here we can
increase the sharpness or softness and press. Okay, Let's see. Yeah, this is
better seen before. This is better. Select it and paint
over this area. Yeah. Feel free to take all the time and the
world to get it. Right. But for now, I think
it looks nice. We can just paint some dark areas here
and we're ready to go. So let's paint some
dark areas here. So this is very hard. Let's decrease the
flow of the brush. And let's see. Here we have our spot. That's bothering me. Yeah, It's spots
doesn't look good. Right. Now. We can duplicate this layer, the layer that we used
to create where it is, here it is, yeah, to
create bluish shadows. So we can duplicate this by
pressing Alt and dragging it, Putting it above everything. Grid a clipping mask to the Cup, press Control a, then Backspace to remove
everything from it. And using the software
on that brush, I will just paint in
the shadow areas. Will give the shadows
some bluish tone, which is, which looks cool. Now let's paint the highlights the same way we painted
the highlights here. I will simply drag this
hue saturation layer and Clip it into this
layer, press Control, a backspace to
remove everything. Control I to invert the mask. And let's paint the light here. Here are the light
is somehow tricky. So it needs, we need to
be careful drawing it. So I'll use the
polygonal lasso tool. So let's start with this edge. Somehow tricky one, so you
need to be more precise. I think we need to use
the pen tool here. So let's just select this area, the edge, using the pen tool. And then it back
with the pass here. And I some times I don't feel myself while
working, so it's okay. I believed that happens with all of the artists out there. So excuse me. If sometimes I missed
explaining some parts. Okay. I've just selected the area in which I am going to
paint the highlights. This will be rim
light from the sun. So using the wide brush, I will just paint two
or press Control D. This is the first reflection. Let's see before and
after. They're a nice. Now let's create some
other reflections here using also the pen tool. And I can get out of the selection because it's already a clipping
mask, so it's okay. Think we can select this area. Right-click, make
selection, press. Okay, and then using
the software on the, I'll simply paint
lights like this. See, we can then erase some. Okay, now let's paint some lights into the
side of the cube. Will be here. And it should be somehow
sharp reflections because this is glass and
glass gives us sharp flexors. So it should be like this. C, Yeah. C, ears before and here is
after, before and after. Maybe we can create some lights
reflections in this area. Press Shift to create
a straight line. And then we can erase the edges. Like so. That's very nice. I like it. I like it. Maybe you can go back
to the Color Balance, the shadow, the bluish
shadow, color balance. And maybe we can
increase Effect here. And these are very
nice, very nice.
8. 7 Blending the Cofee seeds: Now, let's care about the beans. And I think it will be easy because it's a
straightforward one. We can simply put it, try it here, and
let's make it small. Right here. Of course, as
I've already told you, it will not be 100% realistic
in terms of the size. But it's okay because this
is not something realistic. This marketing material, it has specific message that
it needs to deliver, which is the coffee and the
product itself, Nescafe. So using Quick Selection, I have just created selection. Maybe I should have
opened it into a new project to create
a better selection. So using the Quick
Selection here, because I am having more pixels, now I'm getting a
better results. See right-click Convert
to Smart Objects and let's get it back to
our project again. Cs. Then Control T, make it smaller. Let's put it right
here. Very nice. Let's put it above everything. Create a clipping mask. Before we blend
the coffee beans, I forgot something, which is the refracted light
coming out of the Sun. There should be some
refracted light because of the
translucency of the glass. So some lights will get through the Cup and
be in this area. How can we do this? I'll simply try to do
this using the curves. So let's try to make a pride spotlight this and
maybe we can change the color, shifted to more orangey color. And then press Control I. And let's try to paint this. I think it's called specular
lights or something. I don't know what's
specific name, but you can see it. I'll, I'll attach
an example here to show you in real life
how it looks like. So here we need to decrease
the flow of the brush. Let's erase parts. This very nice. Try to make a same thing
for the product itself. That's nice. Okay. So that's very nice. Let's see before, after,
That's more realistic. Maybe these shadows
are very dark. Some shadows are very dark. I think. Yeah, this one decrease. Okay, let's care about
Blending lists layer. The first thing I'm going
to start with is to create a group and name
it coffee beans. Gay. And let's create a
Curves Adjustment Layer, create Clipping Mask,
and let's make it dark. That's firstly. And then I think that this
green color is very saturated. So let's go to the saturation, create a clipping mask. Analysts decrease
the saturation, a little bit absorbed, decreasing the saturation
of the beans itself. So let's go to maybe greens
and let's try to decrease the saturation and maybe shift the colors toward
more magenta color. That's nice. Then let's put some shadows. But before putting shadows, we can fix the colors
of the overall beans. We can shift the colors towards more reddish, yellowish tone. It will not take so much
effort because it's already having the same
tones that we want it. So basic, simple
correction would be okay. Now let's care
about the shadows. I will simply create
a new empty layer, and I'll pick the same color
of the shadows from here. And let's paint. First thing which is the contact shadow,
afloat little bit. And let's paint right here. And right here, the
contact shadows should be at its highest values in
the areas of contact. And it gets lower values In areas where is no
contact, not bad. Here I think we don't need to draw cast shadow
or are we showed. Let's try to duplicate the
shadow of the Cup layer or the Product and let's
try to put it here. No, I think we don't need it. I think we don't need it. We can't, we should
paint some shadows in the beans itself and
that should be okay. So let's create an empty
layer and let's pick some colors from here and there using the
software ended brush. And maybe 15 or 14%
opacity or flow. I will paint these areas
to make it darker. See yeah. Looks nice. Brush bigger. And shouldn't be okay. That should be okay. Maybe you can remove the head
or decrease the opacity. Yeah. Nice. We can duplicate this layer
of the blue tone effect. Can duplicate it
and put it above. The beans. Also control a control, a backspace, and control I. And then paint
over some shadows. Gives us consistency. Because all the shadows have
having some bluish tone. Very nice
9. 8 Putting foreground trees: Now we have pot, the Product and the main
elements in somehow decent way. So we need to care more about
the composition because I think it needs to
have a better framing. So how can we frame
the composition here? We can bring some plants into the foreground to
re-frame our image. So before doing this, we will put all these
layers into a group. And let's name it the Cup. And let's go and
bring this image, open it into a new project. And this is the image from which we are going to
take these plants. Okay, so how can we extract this plants image
from the background? We will do this using channels. So let's go to the channels, and from the channels, Let's try to find which
channel has the best contrast between the background
and the element itself. So here the blues has the most contrast
between the background and the element because
it's kinda black and white and that's what
we will try to make. To split it from each other. I will duplicate this
channel and then press Okay. And in the duplicate layer, I'll press Control L
to bring the levels and then try to make the
element or the object that I'm trying to
select completely black and keep the
background completely white. But we need to be careful because we don't want
to have some fringes. So for example, let's press Control L to
bring the levels. So for example, we
don't want to have fringes surrounding this
area or white fringes. I will get to the limit that the element is completely
separate from the background. And that's it. Don't exceed this
limit because I don't want a white pixel
surrounding the plants. You know what I mean? Then press Okay. And then to select it, simply press Control and
press into the channel. And then let's get back to
the layer, create a mask. And simple as this press
Control I to invert the mask. Now we have the plant. Select it. Right-click Convert
to Smart Object. And let's get it into
our main project, CS. And let's put it right here. Let's put it into a
group and name it. Land left, because we will have plenty left and
another one to the right. So for this, I will press Control T, right-click,
Flip Horizontal. And I'll use it to be here. Just to put a frame for
our project is make it beggar. Very cool. Choose, I'm trying to
choose the best place. So maybe this is, this isn't good. Press. Okay. Now let's correct
the colors of this. I think if we created
Curves Adjustment Layer, and create a clipping mask, make a dark as ****. Because when you get
closer to the camera, elements become darker and at the same time we don't
want it to catch our eyes, so we don't want to
show details on it. Then we can create a hue saturation
adjustment layer and we can shift the colors towards
more yellowish green. So and then press Okay. And this is this looks nice. Maybe we can make it bigger. Yeah, this is very, very nice. We can create some glow
effects around this area. We simply do this by creating solid color
or an empty layer, sorry, and let's change the
blending mode into screen. And I will choose this layer and simply draw some
touches like this. Simple as this. Okay, now let's duplicate
this section of the plants into the right to make
the framing that we set. So let's select this
group and let's press Alt and drag it and
put it right here. And the reason why I
am using this side of the plants layer is that I don't want it to look
like it's a duplicate. So I'm now using a different
side of the image. Press Control T to
make it smaller. And maybe let's just
put it right here. Presenter. Maybe we can change the
placement of the product. They Cup and the
coffee beans into this area just a little
bit to the left. And let's rotate this
press Control T and rotate it because we don't want the coffee beans to be visible. Very nice, very nice.
10. 9 Sun Effect and Glows: Now everything seems
like it's in possession, but we need some touches, some final touches to finalize everything, despise the image. So let's start with the sun, the sky part here that we should have some lens
flares for the Sun. So I brought this image, overlay image of the sun. And let's put it right here. Let's make it big. And let's put a triad here. And percent. Then let's change its blending mode into screen. So go to Blending Modes
and change it into screen. And to get rid of these borders, I will press Control L and then move the blacks
slider to the right. Like so, I'm now getting
rid of the these edges. Sounds cool. Then press Okay. And these edges, we can get
rid of them using mask. So I will create a mask and
using software and the brush, Let's make it bigger. And let's erase these edges. Simple as this,
decrease the flow. And let's erase the edges. Very nice. Let's see. Maybe we can move
it to this part. I think. Yeah. It looks nicer. Looks cool already because it has the effect that we want it. But I think the sky, the sun is very bright. So let's get back to
the levels and let's decrease the lightness so
the Sun then press Okay. Let's see. It's subtle. When we decreased the
lightness of this area, it lost its flare. So I will get it back
using this overlay layer. So let's bring it here and
let's make it very big. I like this lens
flare Effect and it's always add realism
to your visuals. So let's press Enter, but try to keep it subtle
because we always tend to overdo it and change the blending mode to screen
and do the same process, press Control L, and
reduce its brightness leg. This may be in this situation. We can only keep it to this percent and then
refine the edges or erase the edges
using a brush. So let's keep it as is. And then let's create a mask and using software and brush, I will erase these sharp edges. So and let's see
before and after. Let's erase this area
also to keep it subtle. Four, after. Very nice. One last thing, I
think we need to reduce its brightness
a little bit more. So let's reduce it
to this degree. Then press Okay, I
think it looks school. We can edit it later
if we don't like it. Next thing, I'm going to add
some glow effects around the edges of the glass because
it's always looking good. And at the same time the glass
autos give us reflections, especially if we have
direct light like this Sun. So I'll do this using solid
color adjustment layer. And let's choose some very saturated or
reddish orange purse. Ok, and let's change its
blending mode into screen. And then press Control
I to invert the mask. And Let's try to add
some glow spots. Of course, we need to decrease
the flow of the brush. And let's try to add some
glow here and there. Here. Maybe try to keep it subtle. Maybe here. Also. And in this area is
very high, just like this. And maybe some Glows here. So let's see, before,
after, before, after I think it looks nice. Okay, so now we created
over all glow effect. Let's create localized
glow effect to specific areas of this glass
and Cup and the Product. So we will do this using
another solid color, but this time we will
use a more bright color. So let's choose this one. Press Okay, and let's change its blending mode into
maybe screen, yeah. And press Control I
to invert the mask. And let's create using
the software and brush. Decrease the flow
and make it big. And the squid some glow effect. Make the brush smaller. Couple of clicks,
make it smaller. Another couple of clicks. And last clicks. Let's see. Oops, let's see here as before. Because after, I think it's
very bright, let's move it. This area. Yeah,
this looks nice. Let's make another one here. But this time we will change
the shape of the brush. So we'll make it flat like this. And let's make the brush a
little bit bigger. Let's see. Increase the flow. Brush bigger and let's see. Yeah, looks nice. Maybe we need to make
it flatter like this. And let's give it a touch here. Another one in the edge. Here, I'm now changing the orientation of the
brush using the arrow keys. Or if I want a bigger sections, I will press Shift and
then the arrow keys. Okay. So this angle is good. Let's make it bigger and
let's put another one and another Final bigger one here. See, maybe we need to
make the brush flatter. Let's try it. Yeah, that's really nice. Stripe, couple of
ones here, one here. And let's put another one here. Maybe we can make it
smaller and make like an X-shaped like this one here. This X shape. It's kind of sharp reflection. So we need to increase the
flow and put this X shape. Something like this. That's very nice. Here. Needs to, we need
to erase this part. Yeah. It's very cool. And you'll see this.
I like how it looks. So we can make another one, maybe into the Sun. Let's try it. Hopes here. And then like this, Let's see. No, this is too much it back. And maybe we can create
one final, Final one here. You can even create a
brush with this effect. But for me that's okay. It's very nice. Very nice. We are in the final
stage right now. So let's just put some
colored glow here. I like how it looks. This is in the other layer. And maybe we can
decrease the flow again and make
some touches here. It looks dark here. I think if we added
this smoke overlay, this will add to the image. So let's make it big. Press Enter and let's change its blending with intro screen. Let's put it into the
plan, the Cup group. Now let's see how
it would look like. Whoops. Try here. Yeah, looks very nice. Very nice. Made the coffee look delicious. Have K
11. 10 Final Color grading: The final thing we
can do right now is to put some color
grading effects at the top of everything. So let's make this using some, a couple of adjustment layers. So let's firstly put all this into a group and then
let's name it Sun. And let's create another group
and let's name it grading. So let's start with
the color grading with a simple curves layer. And we can shift into
the tones, the values, and into the colors
of the highlights, the shadows, the mid tones. So let's start with an S curve to increase the
contrast a little bit. And at the same time, Let's decrease the
brightness of this part, which is the highlights. So let's decrease it like this. And see, see before. After. Here is after
here as before. Looks more crisp. Let's make it
decrease the opacity. Okay? Now I feel like
this area is dark, but this one is bright. So let's get back to the curves layer in which we create this vignetting
effect here, here. And let's try to make
this area darker. So let's pane here. And at the same time, Let's make this
brighter. Very nice. Next we can create
another curves. And let's change the colors to add dynamic
mode to the image. So let's start by adding
some color to the shadows. So I will add some British
tones to the shadows, but very subtle effect,
like three points. And let's try to see if we added read or cyan tone
to the highlights. I think we can add
a little bit of cyan to the highlights. This will make it look nicer. Let's see. After
very subtle effect, I can barely see it. So, but it will
build up at the end. So let's go to the maybe blues, and let's add some yellows
to the highlights. Now we are talking in this yellow touched to the
highlight looks really nice. And through the shadows
we can add bluish tone. Makes contrast between
the hot and cold colors. See before, after,
before and after. Very subtle effect. The colors, of course. I hope you can see it. You can see it clearly here. Before and after,
before, after for heft. Okay. The next thing, we're
going to create new layer M21 and press Alt Control Shift E to merge
everything into a new layer. And right-click Convert
to Smart Object. I'm doing all this
because I want to create a camera raw filter to create
some final adjustments. So let's go to Filter
camera Raw Filter. And let's see, I'm
basically here trying to change
every Slider Can I, until I get the best results. So let's start with the basics. The basics, I think the color temperatures pretty nice so we don't need
to play with it. Let's go to the next element, which is the exposure. It's try to make it
brighter and see. Okay, let's keep it ten or all pint one and increase the
contrast a little bit. Decrease the highlights. This area is very bright and maybe open up the
shadows alphabet. Increase the whites Now let's go to the blacks. Increase the blacks. Well, the texture,
I will increase the texture a little bit. Maybe some clarity. No, I don't like how it looks. So let's keep it as is. And for the hazing, maybe we can add a little bit
of the hazing Effect. Okay? Before, after, before, after. Okay, nice. But maybe we can hit the shadows back and the
highlights Back calls. Okay, because I felt
like it's now losing its dynamic range
or the contrast. So this looks better for me. Increase the highlights
as a very nice, Let's go to Details, add some details sharpening. And let's go to Color
Mixer because I think that the yellow color
is very saturated here. So let's go to
yellows and decrease. It was a very small, like three or four per cent. Of course, coloring
needs a lot of eyeballing or
back-and-forth tries. But at the end, when you get good results, it will, of course pay off. Very cool. One last thing is that I'm going to add some grain effect. Whenever I add these
green effects, I zoom in to see the effect. So let's see. Yeah,
this is nice. I don't want more than this. This is very nice. And maybe we can
shift the colors. Calibration. Let's try now to increase or
decrease saturation. Maybe increase the saturation
was a very small amount. And let's do the same thing in the other sliders know so much. Let's see, before,
after, before, after. Maybe we increased the texture. So let's get back to the
texture and make it zero. And finally, we can add some manual adjustments
like creating a mask with the brush. And let's select this
area and this area. And then let's try to make
some adjustment for it. Firstly, we need to darken it and then maybe
decrease its contrast. Maybe the highlights
a little bit, the shadows make it darker. And let's go to temperature. Maybe we can make it colder. And the saturation needs
to be less. I think. No, keep it does this. Maybe we need to
darken it a bit more. Press Alt if you want to remove the effect from specific areas. And after all this here is before and here
is after press. Okay, Let's see. The final adjustment here is
before and here is after. Camera Raw Filter.
That was intense, that was really intense. As I'm saying guys, this will be the perfect
visual from the first time. It will take some practice, will take some effort. And as I'm always saying, Photo Manipulation is a
skill like any other skill, it will not improve
until you practice it. So practices daily, learned from your mistakes and try
having FUN wild working. All right, guys, See you
soon in the next classes. Piece
 Nour Art, Digital artist, Youtuber