Transcripts
1. 0 Intro: Welcome to the masterclass
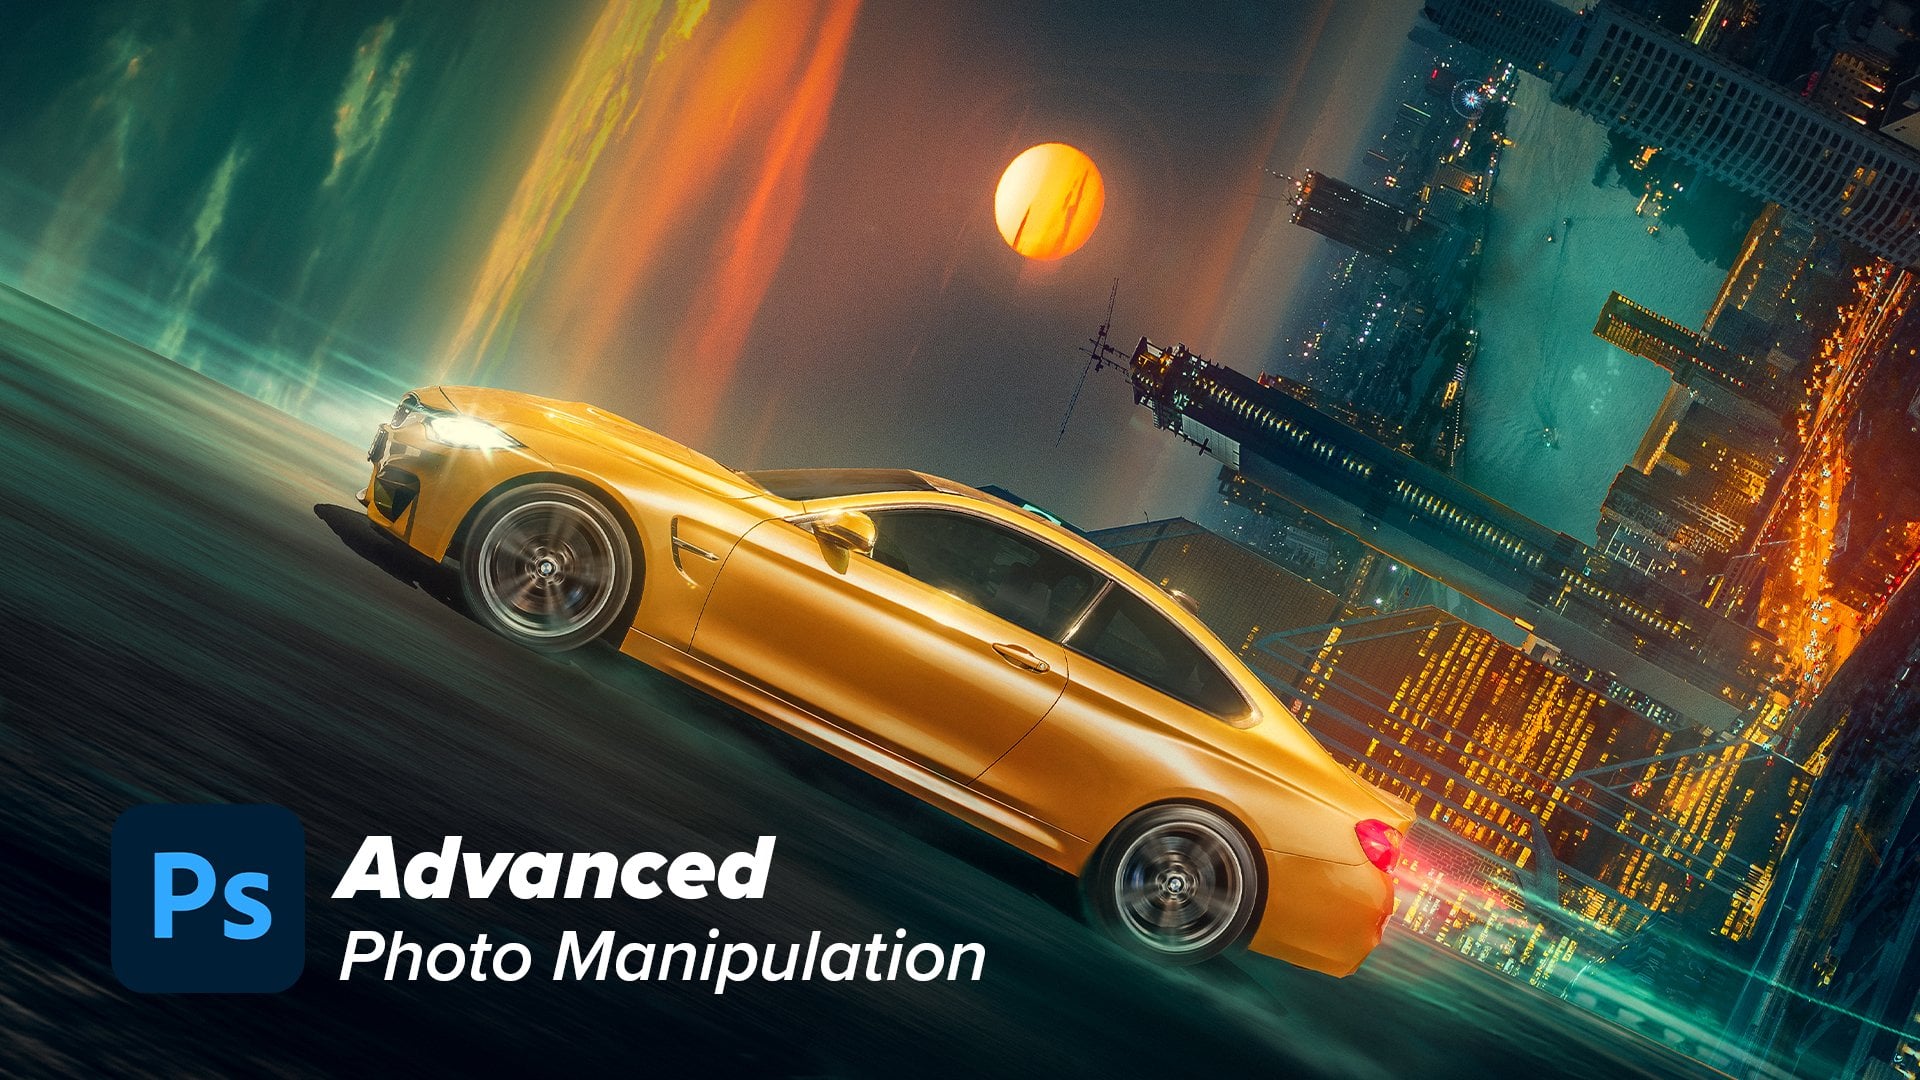
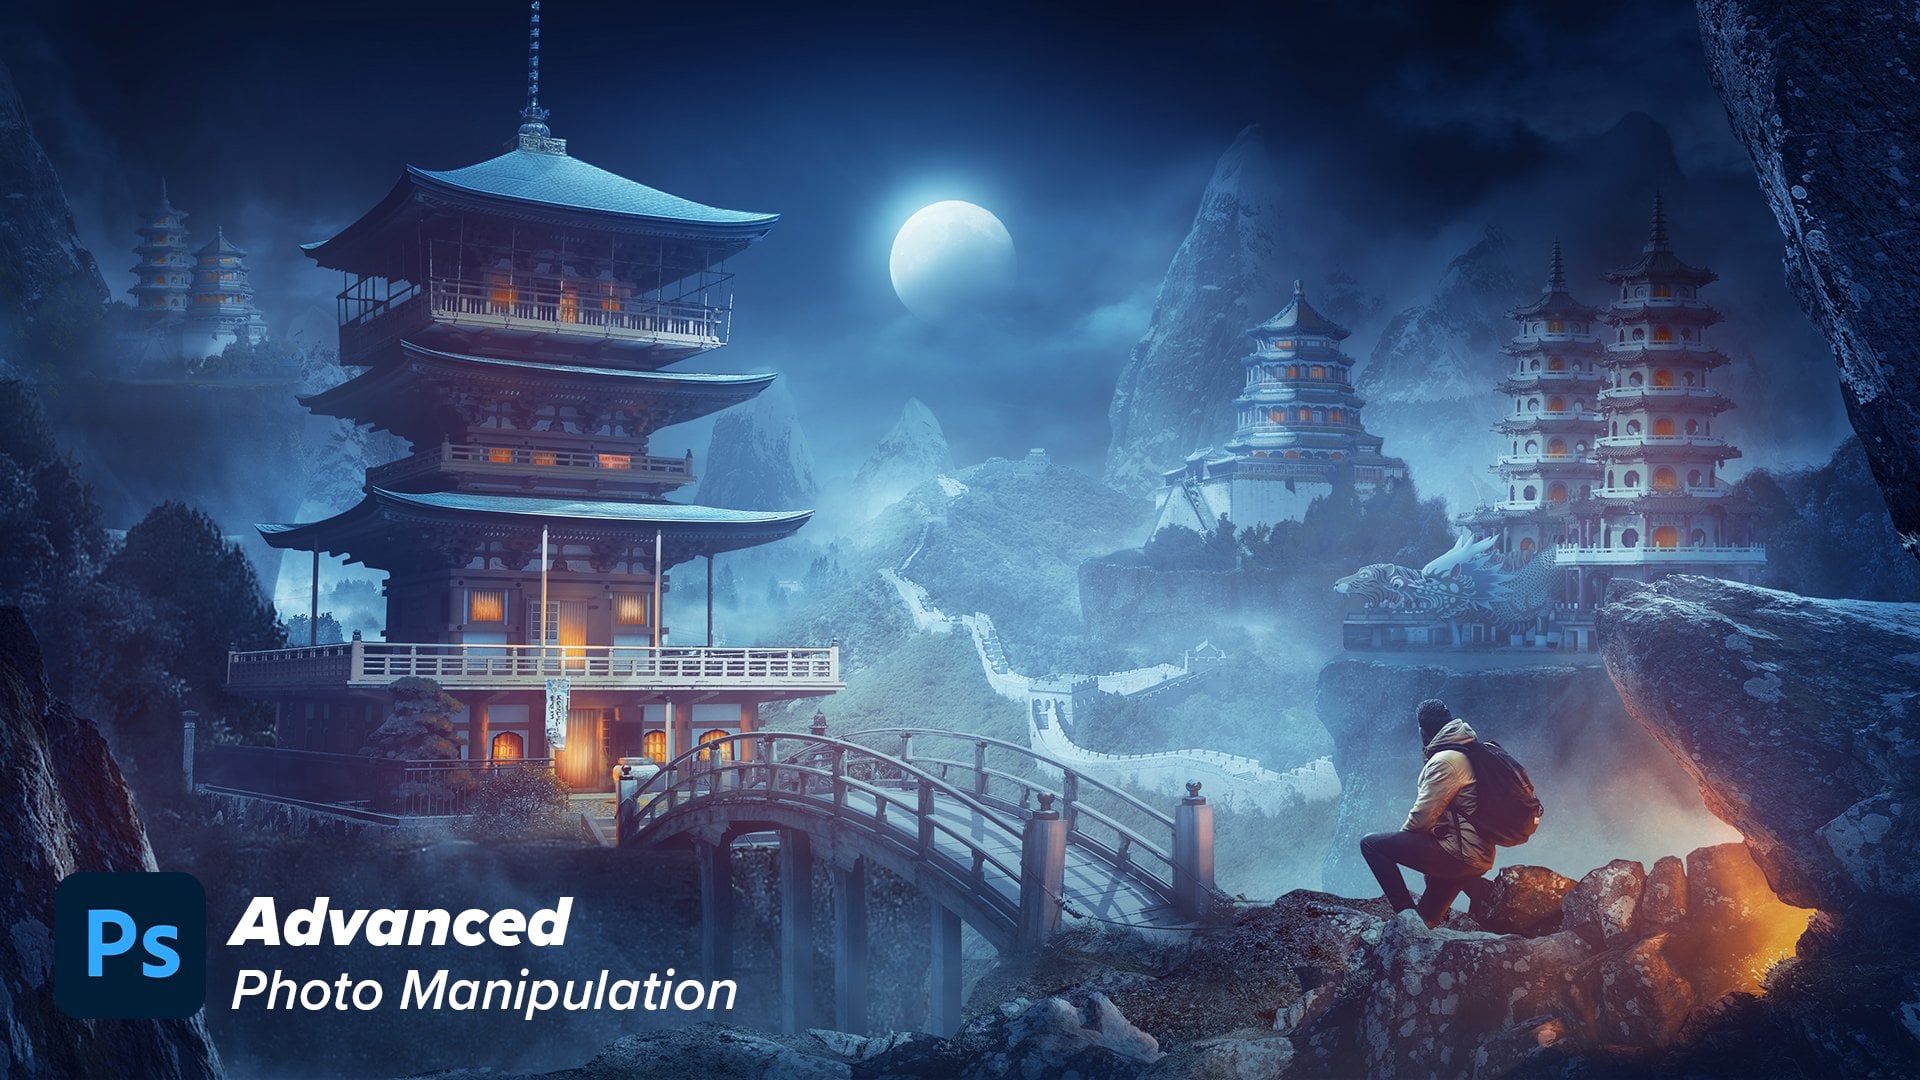
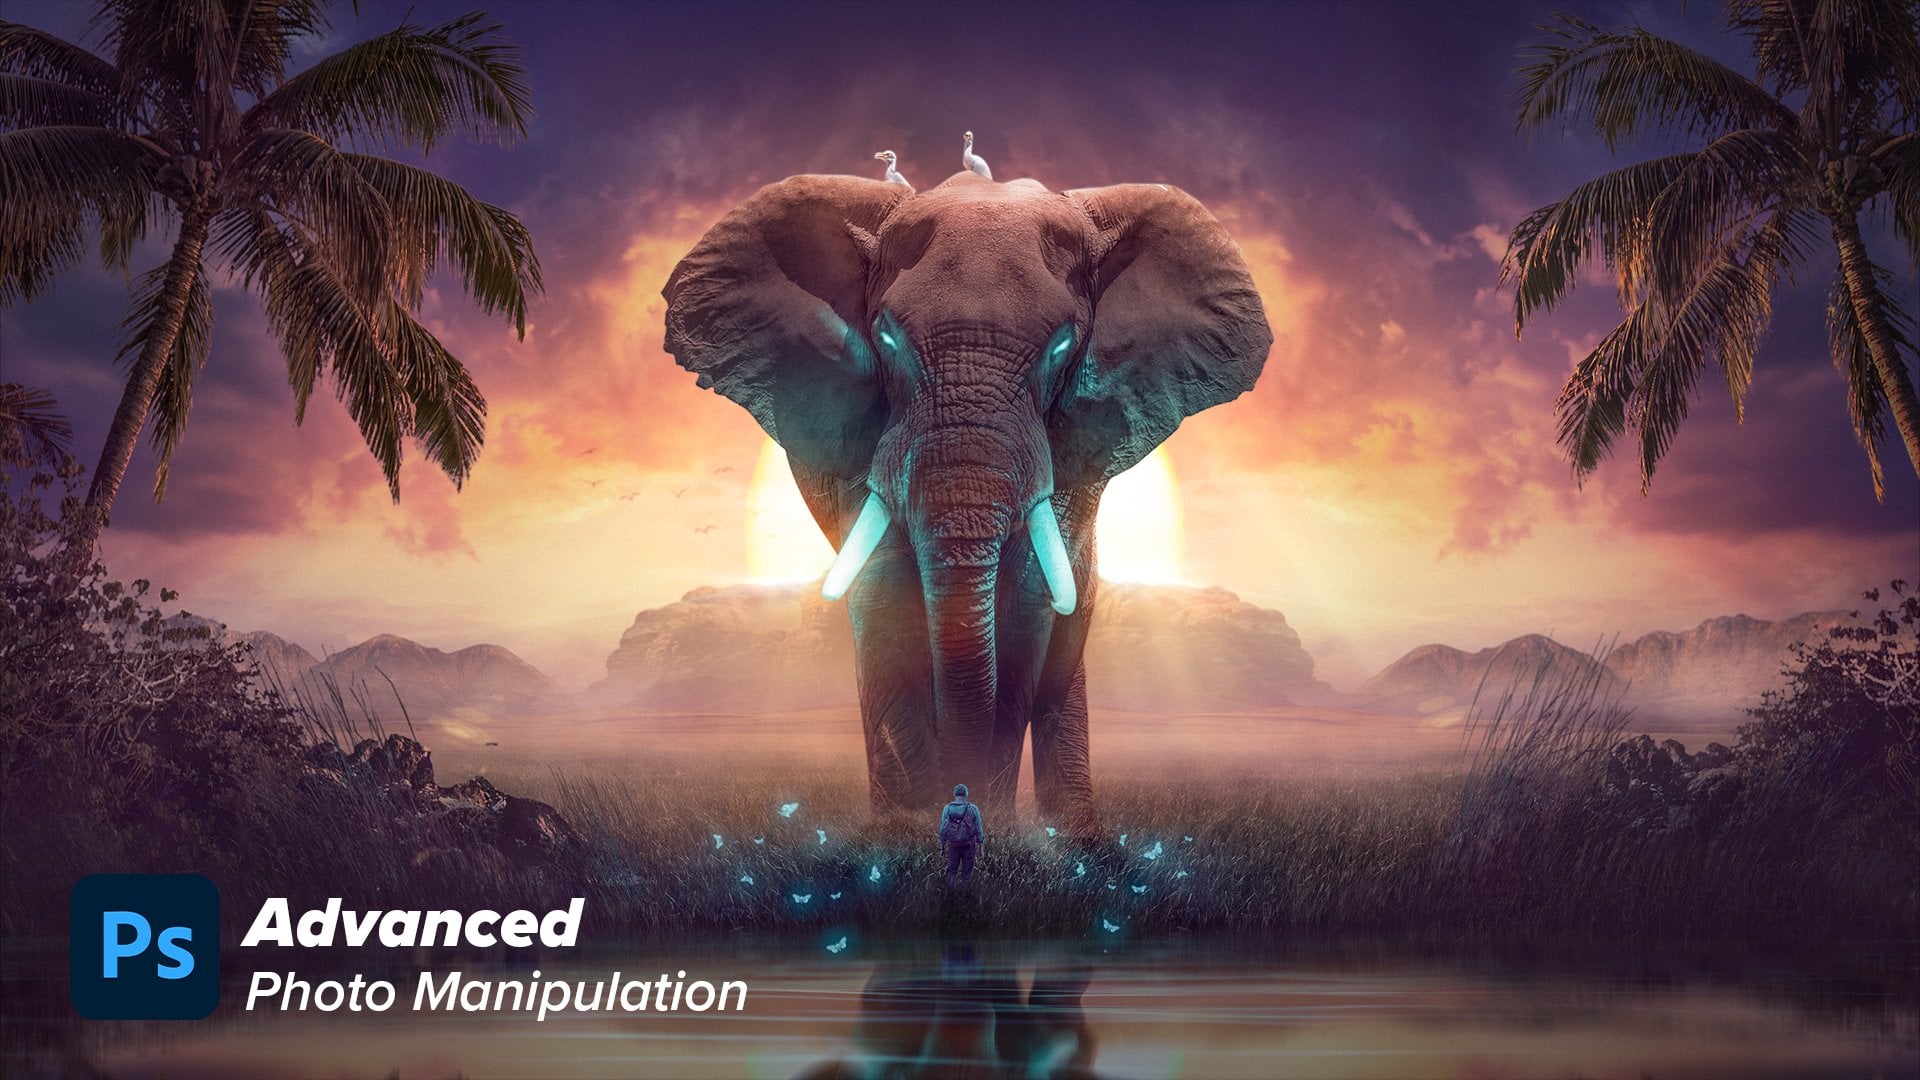
in photo manipulation. In this class, we will
learn how to create this artwork using advanced photo
manipulation techniques. So this class will go
beyond the basics. We will learn how to cut images and put them together properly. How to adjust the light
values to create depth. Also how to correct the
color and the saturation of each element to blend
the image together, we will learn also
how to draw light and shadow and how to distribute light from the light source into all the elements,
into our artwork. And finally, how to
put the final look and final grading
into the image. I'm so excited to
start with you guys. So let the fun begins.
2. 1 Blending sky and ground: Alright guys, firstly, I encourage you to
follow up with me step-by-step to make the
best use of this tutorial, you will find all
the images along with the PSD file
in the description. Alright guys, let's start
by creating a new canvas with full HD size, 1920 by 1080. And then press Create from here. I love to start with
the sky image because it's semi-open source of
light for the whole visual. So I will start by
using this image. It's somehow dramatic sky and have the look and
feel that we want. So I will start by making it a little
bit bigger, like so, and put it above like
this and then press, Okay, I'll start by creating a new group by pressing
Control G on the keyboard. The first thing, I will create a curves adjustment
layer from here. And let's make the sky
a little bit darker from here and just
drag it to this point. Because we want the
sky to be a little bit darker and then we will
create a source of light. Later. Next, I will create a color balance
adjustment layer to shift the tones and the
color of the sky into cyan bluish color. Because I want it to be more towards the green and
cyan in the mid tones. I will just move this slider, but not so much because we don't want this guy saturation
to be so high. So I will do the same
thing in the shadows. I will increase the science, the greens and the yellows. I guess Here's before
and here's after. I guess this is cool. Next, I will add
the ground layer. This layer, I will
just need it to make some sort of
surface and the ground. So I will put the image here, rotate it a little bit, and then I will put it into a separate group
by pressing Control G. And let's name it ground. Alright, let's create
a mask down here, and let's erase these ports. Only what I need is a ground. Erase this part. Perfect. Now what I'm going
to do is to correct the lightness values
and the colors. So firstly, I will use curves, adjustment layer like so, and let's decrease
it a little bit. We need to create a
clipping mask, soil burst, this pattern to create a
clipping mask for that, they affect only
affects on the ground. So I'll make it, make
it a little bit darker. I will create a black and
white adjustment layer so that I exclude the
color form our equation. So now what we're seeing
is only lightens values. This will help us to make
the lightness values better. So let's make it a
little bit darker. I guess this is cool. So now let's correct the colors by a color
balance adjustment layer. And let's add the cyan
and green and yellow, or I guess yellow
little bit of cyan in the mid tones and shadows
also will do the same thing. I will just increase the cyan, but not too much. Increase the greens
and increase the, I guess we need to increase
the yellows or the blues. It only depends on
the main image. So I will just try to
tweak the sliders so that I get to the point in which both images are
matching together. Alright, I guess this
is looking cool. Now the two images are matching. So I think we can create hazing layer here to blend
the two images better. So I will just
create a new layer and let's pick some
color from here where the brush and just draw this and then
bring the opacity down. This is creating a
hazing layer which blends elements together
in a better way. As you can see here. This is looking so nice.
3. 2 Blending the woods: Now let's bring the
woods and this image is already having the
depth that we wanted. As you can see here, the hazing effect is
affecting on the trees. So what do we will need is just erasing some parts
from the background. So I put it here
and try to match the colors and the lightness
values with the background. But firstly, we will
need to get rid of these background of the words. So how can I get rid of it? We can do this by
double-clicking into the layer and using
the blend F slider, then we can erase the white parts in the
background as you can see here. If I move this slider, you can see the white or the bright pixels
will not be visible. So I will also refine
this selection by pressing Alt on
the keyboard and try to split the cursor to make the selection
smoother, like so. Perfect. And then press Okay, by removing the
pixels with blend F, we're just making a style into the layer does not completely
deleted these pixels, as you can see here, it's showing this icon
of a style into a layer. So if we want to add any
effect, so for example, if I double-click into the layer and add the color overlay, you can see here the effect
is affecting the whole layer, not only the visible pixels. So how can we fix this is simply by creating
a smart object. So press right-click and then
convert to smart object. This will make pixels
not visible anymore. And then I will create a group. And let's name it woods. And now we can start correcting the lightness valleys,
and the colors. So the first thing
I will start with is the saturation because
as you can see here, we have a lot of green color. So I will create a hue
saturation adjustment layer. And let's create
a clipping mask. And let's press on
this little icon. And let's choose or pick specific color and try to
move the cursor to the left, like so Pickett and try
to move it to the left. This will decrease the
saturation of a specific color. Now we are targeting the
reds and the yellows. So the image saturation is
now a little bit lower. Next, we need to
correct the values, but let's first erase
this part by creating a mask and putting
the image right here. And let's erase this part by the soft round is self
soft round brush. Like so. And let's put
it a little bit lower. Next, we will correct the
light by creating curves, adjustment layer, and
create a clipping mask. Press Alt and press
between the two layers. And let's turn on the black and white layer to see the values of these
woods better. So what I'm going to
do now is try to match the lightness values by
opening up the darks, like so. When you open up the
darks more and let's decrease the lightness of
the light parts like so. And then we will create color balance adjustment
layer to correct the colors. So I will add cyan and magenta, some yellows or some
blues and the shadows. I will do the same thing. We try here to match
everything together. This will be done
with your eyes. It has no rules. You just need to match the image color with
the background. So if your image has a lot
of Fred, then let's add. Some cyan to match it
with the background. I will just create
a clipping mask. And perfect. Now I guess needs some matching. The colors now are pretty good, but I'm not fully
satisfied with it. So what I'm going to
do next is to create a solid color adjustment layer to match the colors better. And let's choose this color. Create Clipping
Mask and then press Control I to invert the mask. It's press Control I. And then let's draw some
colors into our woods. This will match the
colors in a better way. Like so, let's draw
some colors here. Perfect. Now I guess we're matching
it in a better way. Let's erase it from some parts. And that's very good. Okay, Let's get back to the
sky to add a source of light, a main source of light, by creating a solid
color adjustment layer. And let's choose
some cyan ish lights and is color like so. I guess this is good. And we tend to go to the
less saturated colors here. And then press, Okay, Let's change the
blending mode to screen. And let's press Control I
into the mask to invert the mask and decrease
the flow to 2%, I guess. And let's draw the
main source of light to be here. Like so. Joe, It should be some
kind of sunlight, but it should be very soft because we have a lot of clouds. Let's make the color a
little bit less saturated. And let's draw it like so. Perfect. Next, I guess we need to
darken the edges of the woods. So I will create soccer
adjustment layer and let's decrease the darkness
like this cyan color. And then let's press Control I and drove into the
edges like so. Let's increase Flow and
let's draw in the edges. Calls. It shouldn't
have so much light. I guess we can also add some
lights with this color. And let's break, Create, Create Clipping Mask, and press Control I
to invert the mask. And let's add some
colors into this part. Because it should diffuse color from the main
source of light, which is the sky. Perfect.
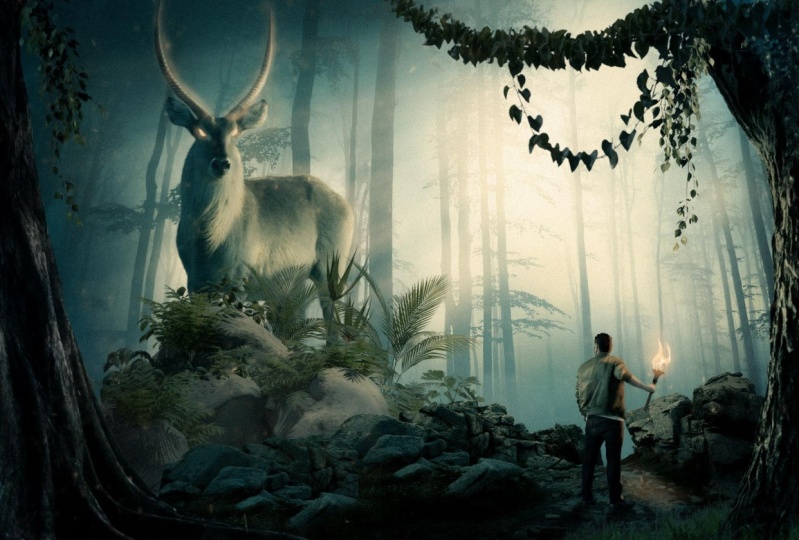
4. 3 Blending the right tree: Now we need to add
depth into our design. We need to know
that if you want to create depth in your
photo manipulations, you need to create three
layers of brightness. So the foreground,
the parts should be a very dark and
very contrasty. The midground ports should have a little bit less a lightness. And Let's contrast. And the background should have very low contrast and it
should be very bright. So what we're going
to start with here is the foreground parts. So I will start with
the three parts. I will start by picking this
tree image and put it here. And let's just get rid
of all the elements. Control T, right-click
and flip horizontal. And let's make it bigger. Put it here, make it a
little bit more bigger. And that's a good, let's just stretch it like this and let's warp their
parts to match. We only need the trunk. So we will get rid of these
upper elements like so. I will just press
Control and put a point and tweak it
to match what I want. Now we need to get rid
of the background, so I will just use the object
selection tool from here. And let's select the trunk. Perfect. And we will add this
grass part also. I guess they didn't
give us a great job, so we will fix this later. So after selecting it, I will create a mask. And we have some parts here. We need to erase
them with the brush. So I will just use the
brush with the black color. And let's erase it. And let's get back some of these grass parts
with a grass brush. Can find a lot of brushes
in brush easy.com. This is grass brush. I will just draw here to
restore some of the grass. Very good. Now let's correct the colors and match the lightness values. So I'm going to activate
this black and white layer. And then let's create a
curves adjustment layer. To start fixing the
lightness values, we need to make it a lot darker because this is
a foreground element. As I've already told you, the foreground
elements should be darker and more contrasty. So I will create
an gentle S curve, will increase the contrast
and we'll make it darker. Perfect. Now, let's hide this
black and white here we have a lot of
yellow color and the trunk. So we need to get rid of this by creating a hue saturation
adjustment layer from here. And let's create a clipping mask and let's decrease
the saturation. I will just pick
this tool and pick this yellow color and just
decrease saturation like so. And also the yellows. And let's choose also by reds. And let's decrease the
saturation of the reds. Like so. Very good. Next, we will create a color
balance adjustment layer. And you know, the process, we will try to match it, the trunk to the other elements. Let's not forget
creating clipping mask. And let's increase the greens and the yellows and the shadows. We will increase the
cyan so a little bit. And let's just increase
the greens and blues also. And in the highlights, I will increase the moles. Very good. Feel free to tweak
the sliders to match the images better. Next, I will bring these plants layer and
put it right here. And let's make it a little
bit smaller and put it here. Perfect. So I will firstly create a curves adjustment layer to
correct the values of light. And let's create clipping mask. Here. As you can see, the layer
itself has a lot of contrast. The plants has a lot of contrast between the bright pixels
and the dark pixels. So we need to lower it
a little bit like so. And let's make the shadows
a little bit brighter and darkening the pride pixels. Like so, I guess we need to
darken the shadows also. Maybe we can make it
darker like this. Very good. Now let's create a hue
saturation adjustment layer and lower the saturation
of the layer. Don't forget to create
a clipping mask. Let's put it behind the curves. And now let's decrease the saturation of the plants because it has a lot of greens. So we need to get rid of this. And next I will use the color balance to
change the colors, add some cyan, and add some green and maybe some
blues in the shadows. I will add also some
cyan ish color. Maybe also some blue and some
magenta or green, I guess. Some magenta like so. And this is very good. Now, let's add another
layer of plants. I will bring this into
a new project because I will want to select these plants from the
background using the channels. So I'm going to the
Channels Panel and toggle between the channels
to see which channel has the best contrast or has
the highest contrast between the private and the bright pixels
and the dark pixels. So as you can see here, the blue channel has
the highest contrast. So I will duplicate
it by pressing right-click and press Duplicate. Let's hide the original one and let's work until the scope, press Control L to
bring the levels. And here I will try to make the plants pixels as
black as possible. And the background to be as bright as possible was levels. Then press Okay, and then
press Control and press into the channel itself and
then create a mask. Then you can press
Control I to invert the mask and right-click
and to the layer Convert to Smart Object
because we don't want to lose the quality and let's bring
it into our main project. It's part here, secluded
from the clipping mask. And let's put it here. As you can see here, we have a problem. We have these white borders
around the plants pixels. We need to get rid of this. We will go back to the plants project and let's
refine this selection. I will press Alt and press into the mask to show the mask. And then I will bring the brush. And let's make the blending
mode of the brush overlay. And let's draw with white. Because we, we made the blending mode of
the brush as overlay. Then when we paint
with the black, it will only affect
these gray pixels. So what we're doing
now is making the pixels brighter and making
the dark pixels darker. This will get rid of
the outer white edges. So let's paint it here with the black brush and with
the overlay blending mode. So let's paint here. As you can see, the edges
are now refined here. And let's make this
for the whole image. I will make the brush
bigger and it will not affect the bright pixels
or the white pixels. Very good. Now our selection is refined. So I'll right-click Convert
to Smart Object and get a layer to our main project. Let's make it a
little bit smaller. I guess we still have
some white edges, but it will not be visible when we make it
smaller, like this. Very good. Okay, Now I will edit
the shape of the plants, but from the Edit menu I
will use the Puppet Warp. I plot some points and I will just change
the plants shape. I want it to look
somehow dynamic. So let's plot this point here. And this point, and let's
create another point here. Put it lower. And that's it. Very good. Now we want to correct
the colors and values. What I'm going to do now
is just copy the curves and the hue saturation and the color balance of
the other plants layer. I will just select these
layers and press Alt and drag it to put into
the new plants later. It's Create Clipping Mask, press Alt and press
between the two layers. And there we go. We don't have to
do a lot of fork. We just need to correct
the values by the curves. I will darkening this part. And there we go. Very good.
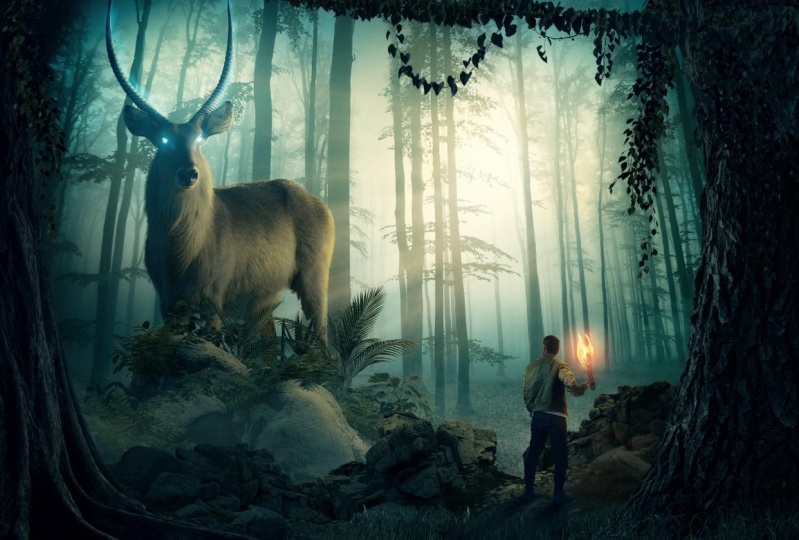
5. 4 Blending the left tree: Next we'll do the same
thing into the left trunk. I will bring this tree
image and put it here. Let's make it bigger because
we only want the trunk, we don't want the leaves. I will select the trunk by using the object selection tool. So I'll go to Object
Selection tool and just select it like
so. And that's it. Then let's invert the mask
by pressing Shift Control I and then Alt
Backspace to erase it. I think the mask
needs to be refined. There are some edges here. Let's paint over it with
the black into the mask and the sports paint here. And here. Keeping an eye to details should be a habit for you if you're
working into digital art. So I'm going to correct
the lightness values. I will just create a
curves adjustment layer, make it a little bit darker. And of course, don't forget
to create clipping mask. I will create a color
balance adjustment layer. And, and let's tweak the
sliders and the mid-tones. I will add some cyan
and some greens, some yellows, I guess. Maybe, maybe I should add
some blue and add some green. And cyan. The shadows. I'll add some blue
and some magenta, know, some green I guess, and some cyan color. It's very good. Next, I will just duplicate these plants layer with all
the adjustments we did. So I will select these plants with all
the adjustments and just press Alt and drag it to put into the left tree group. That's it. Maybe we can flip
it Control T flip horizontal because we don't
want to make it identical. And let's rotate it a
little bit on. That's it. Very good. Let's create some shadows for the plants because there
should be some shadows here. Do this by creating a
Curves Adjustment Layer, and let's darkening the pixels. And then let's create
clipping mask. And let's change the blending
mode into the velocity because we want the shadow
to have some color. And it will just keep the
color of the background, which is the trunk, the left trunk, we need
to keep its color. And then press Control
I to invert the mask. Press Control I. And with their soft
rounded brush, I'll bring the software on that brush and draw
some shadows here, of course, with white or erase some parts because we
want it to be smooth. And there were maybe we can
make it a little bit darker. I guess here is before
and here is after. Very good. We'll do the same
thing into the right tree. So I will just duplicate
the curves layer and put it into the right trunk. And let's get rid
of these pixels. And let's paint it the shadow
over with the white color. I will paint some shadows here. Very good. I guess the colors of the trunk needs to be
a little bit adjusted. So let's adjust
firstly, the values. We can get rid of
these two points. And let's make it a
little bit darker. I guess. This is
something very normal. When you proceed
into your visual, you will notice some
parts that needs editing and that's
totally normal. It's okay.
6. 5 Putting the midground: Next I will add the
midground ports, which will contain the deer and these rocks that
will firstly bring these trucks and put
it into a new project because we want to
select it in a good way. And I will use channels the same way we did
before for plants. I will see which channel
has a lot of contrast, I guess the blue
one, duplicate it, and then press Control
L. And let's try to make this part as
black as possible. Exon, but then press okay. And we will use the same
technique we used before making the blend mode of the brush as overlay and with
the white color, I will just draw
around the subject. This will get rid of the
fringes and the white edges and then press Control
and press into the layer and then create a mask Control I to
invert the mask. Let's convert to smart object and put it into
our main project. It's put it here, and let's make it smaller. Press Control T here. Maybe we can flip
it horizontally to match the same direction of
the lighting of our scene. And let's rotate
it a little bit. Very good. Now we can create a group
and let's name it midground. And what rocks are
layered into it. And let's bring it down
behind the trees. Very good. What I'm going to do now
is that I'm going to bring all the elements
of the midground. And then I will fix the values, the colors that saturation
for them at what's. Next, I will bring the deer
image and put it here, and let's select it by the
object selection tool. Let's select the deer part. So I will create a mask
and with the brush, I will just draw in. These ports will not be visible. So it's okay to miss
some parts into our selection in the legs. And I guess this is good. Now we have here a problem. The edges of the deer
is not refined well, so I will use the grasp rush. This grass brush, you can
download it from Brush easy or any grass brush
or four brush. And I will start to paint
into the edges like so. Let's increase the flow. And let's paint into
the edges using the left and right arrows
into your keyboard. You can change the
direction of the brush. I'll paint here. This will give me texture
of the floor. Here. This part. It's rotate
the brush and paint here. Maybe I can speed the process. You got the point. You will just use this brush to refine all
the edges of the deer. Alright, here is our dear after selection and after tweaking. Some parts, here
is our selection. As you can see, it's very defined and very accurate
selection. Very good. Let's make a little bit
smaller and put it here. And there we go. Let's put it behind the rocks. Let's name it in parlor. And put it behind the
rocks layer. Very good. I guess this part of the
plant needs to be erased. So using a mask, I will erase this part. And this part also. Very good. It's a change, the d or possession. And now I'm trying to
tweak the possession of each element to create a very good looking composition. Next, I will bring
these rocks apart. I'll put it here and let's
flip it horizontally. But here make it smaller. And it's plotted here. Create a new group,
name it route, then press Control T
and try to rotate it, make it a bit smaller. I'm now trying to make
a good composition. Let's make it the very small, very good, make it
change its shape. Perspective. You know, matching
perspective is the hardest thing in photo
manipulation, I guess. So you need to make it good
because it looks very bad. If you cannot adjust
the perspective. Well. It's here. Let's create another version of the rocks by pressing
into the layer, press Alt and drag it. And I'll just need these
rocks apart into the left. So I will create a mask
and with the brush, I'll just delete these parts. Very good. We can
tweak it later. But for now it's it's okay.
7. 6 Manipulating the man images: Next we will go
for the man layer. So I will bring this image, as you can see here, we need to get rid of a lot of stuff. So firstly, I will use the object selection tool
and I will select the man, as you can see here, and then create a mask. And of course, the mask
needs to be refined. So I will firstly
refine the hair by pressing the Properties panel and select and mask
with the Refine tool. I will just to refine
these parts of the hair. And also the beard part
needs to be refined. Also this part. Let's press Okay. And then I will delete
some parts from here with the mask,
that black brush. Let's erase this part. And this part. Here. You go. You need to be precise here, or you can make it
with the pen tool. Of course. This part. Very good. Of course this part
needs to be redrawn. So we need to firstly
draw this part like this. This will be the shirt
with his shirt or jacket. And Let's get this,
the pixels back. And then I will draw
with some colors. I will pick this color
into the layer itself. I will draw these parts. Let's turn off the
pressure sensitivity and make the flow 17%. And I will draw with some colors of the
jacket, the shadows. So let's make the
flow like to present. And let's draw and drop some brushes to
make some texture. Here. Here that's big. Cholera, it gets for
percentage good. Now we can draw some
lights and some shadows. Molar this part also. Try to blend it. Well. Here. And here. I'm trying to blend it now with the main jacket. And of course it
will be very small. The man will be small, so these details
will not be shown. Let's get this pixel
is back. Very good. Erase some parts. And you know, knowing some digital painting will
help you in these situations. Very good. Next I will create solid color
in the background because I want to see the
edges, the white edges. So I will paint over
it to get rid of it. Paint over these white pixels. Here, this part. And here, take your time. Process. Takes time, but it's really fun. These parts. These parts in his pants. Married, Good, Very good. I'll right-click convert the
layer into a Smart Object. And from edit menu, I will use Puppet Warp
because I want to change the possession or
the pose of these men. So I will put some points into hip hinge joints
here and here, here. And this hand. Let's change shape into the leg we want because
we want to fix it. And his hands should be like so maybe you can
press Alt and rotate these points like
this because we want to make him holding the fire. So let's make it a bit lower. This point. Add some points
here and there to adjust the shape of
his body. Very good. Then let's just move this
a little bit to the right. And this part for his leg
that's open them up because we want him to have a square
stand, shoulders down. I guess. This is good. Then press OK. And now we're good to go. Now we have to draw the fire stick that he should be holding. So I will just draw it using, create a new layer
and using the brush, I will draw the stick itself. Using some brownish, dark color. You can, you can search
for the stick or a chunk. We're a tree trunk. But now I can just to draw it, there'll be very small
and the details are not very important in this part. So I'll just put some highlights here and put some shadows there. And it's create darker one. And paint over this part. And that's it. We can now erase these parts. 100% flow and erase the sports. We want the edges to be somehow. Jackie, edge is not smooth ones. So myths make the
edges like this. Year. Very good. I'll put it behind the
man and let's rotate it. I will double-click
into the Puppet Warp, and let's warp it
around the stick. Like this. We will also paint some
pixels for the hand. Let's firstly make it
smaller and put it here. And now, rotated a
little bit right here. Good. Let's paint some shadows
behind his hand. This gives some real realism. And I guess we're good to go. We need, we need to
paint some pixels. So I will create a new layer. And let's paint some pixels. Here. Let's make the flow
100 per cent and lets, his hands should be like this. It's just paint his hand
like this. And that's it. That's it, I guess. Now, obviously the
man needs some legs. So I will bring these
legs from another image. I will make this image bigger. But firstly, let's select the man was the object
selection tool. And let's create a mask. And we can get his, his legs back with a
brush because we have, we don't have a lot
of contrast here. We can just paint his
leg simple as that. You can also use the
pen tool if you want, but I think it is much easier. Very good. Let's make the man bigger. I'll make him bigger. And let's try to find the best, the best part to
match the two images. I guess we can put the
same waste for both men, put them above each other, and then let's erase this part. Now, we need to
match the legs part. I'll just use the Puppet Warp, put some points and adjust
the leg possession. Like so. Point here and here. Very good. Another one here. Another one here. So what we need to do now, we need to erase some parts
and also to match the colors. So I will create a mask and
with a soft turn that brush, I will erase all this
part because what we need is only the legs or the feet. Now we need to match the colors
and the lightness, both. So I will, from the
image adjustments and press onto the
color balance, I will change the colors. I will add some yellow
and add some green. And that's it, I guess. Very good. Also, we can press
Control M and start to darkening these pixels and
increase the bright pixels. Very good. Here we need to create a curves adjustment layer and make it a bit darker. And let's create
a clipping mask. And now we can draw
some dark parts here. This will make them
matching better. Very good. I guess that's
enough for the man. Also ready to talk
a lot of time. So next I will select
all these layers and press Control G and right-click
Convert to Smart Object. And then praying the man
into our sea of Donald. Lot of work here. But two, we have done
this because we don't have the images that we want. I put it into a group and
let's make him very small. I want to make him very small. Because we want to make the deer look giant,
are very big. And it's good.
8. 7 Matching the color and the lightness of the midground: Okay, now all the elements
are in its place. So what we're going to do
next is that we are going to correct everything
as we did before. We will correct the values. We will correct the colors
and the saturation. So we will start with
the lightness values. So I will create a curves adjustment layer
for the rocks layer. And let's create
a clipping mask. And let's darken
it a little bit. It shouldn't be
dark as the trees, but it should be darker
than the background. So it should be something
in the middle. That's good. Okay, Next we will correct the saturation because we
have a lot of color here. So I'll just create
a hue saturation and just decrease the overall
saturation of the layer. And then I will go for the color balance to
adjust the colors. Adding cyan, Let's
create a clipping mask, adding and adding some greens, some yellows, and gas. And let's do the
same in the shadows, adding some blue or yellow, I guess some blue and some greens and some
say cyan colors. And then the highlights, Let's add some blue, some yellow in the highlights, and some san decreases
the yellows. I guess we need to add blue. Yeah, we added some
blue and some sad. Very good. Now let's match it
with our scene. Let's go to the
Impala or the deer. I will start with the
lightness values. I assume you already
know the process. So we are now adjusting
the brightness values, opening up the shadows
a little bit like so. And I guess that's it. For the saturation. I guess we need to decrease the saturation because
it has a lot of color. Let's create a clipping
mask and let's decrease the saturation of the deer because it has a
lot of red color. And then adding color balance and create clipping
mask, adding cyan, adding some green and some
yellow and the shadows. Let's add some blues, some cyan and magenta know, I guess we need to
add some green row, leave it as it is. Try to fix this. And in the highlights, Let's add some blue. Add some cyan. Maybe in the mid tones, we need to fix this. You need to fix this and add
some cyan and the mid tones. I guess it's now
pretty match it. Now we'll go for the
root and the man. So I will start with the rocks. That's correct. Let's merge these two layers, convert to smart
object and then create a curves adjustment layer and try to adjust
it accordingly. Need it to be a
little bit darker. And not so much contrast here, but a little bit more contrasty
than that deer Group. And demand, of course, needs to be darker like so. Because as you can see here, we have like four layers
of lightness values. The darkest part will be there, both trees, the
right and the left. Number two in the darkness should be the man and the root. Number three in the
darkness should be the deer and the rocks. Number for the background. I'm now trying to
make them in a little bit darker, like so. And open the shadows
a little bit. Very good. There we go. I need to correct the
colors and the saturation. So let's start with
the color balance. For the route. Add some cyan and
create clipping mask. Always forget this. Add cyan, green and maybe
you can add some yellow. I guess. And then the shadows, Let's add some blue
and add some green, add some cyan color. It's already looking nice. Let's go to the highlights. Add some yellows. I guess the highlights are
not affected that much. So let's just try to add some cyan magenta.
And that's it. I guess. I guess it's now already
somehow match it, but it needs to be corrected
in terms of the values. I guess it needs to be a
little bit darker, maybe. And let's make the trees darker. Very good. Let's go to the man. It start with the color
balance, create clipping mask. And let's add some
cyan to the man. Some green. Add some blue and the
red tones and shadows. Let's add some yellows, I guess, some cyan and maybe some green. I guess this is good. The highlights adding maybe blues and some red. I guess. I'm now just tweaking
the sliders and see if this is matching with
my c. That's it. Alright? Now I guess everything is matching because it's
not 100% match it. But it's a good point for us to start painting light and
other stuff affects. My guess is that man should
be a little bit more darker. It's also the midground
needs to be fixed. Those a bit, add some cyan. And maybe you can make
it a little bit darker. It's very faded. Maybe that's good. Very good, as you can
see here is before and here is after all. So these plants
needs to be fixed. So in this part, I'm trying to fix everything. Trying to look to our
visual into a fresh, with a fresh eye, and trying to edit everything. Here. The plants, the
colors are not matched. So I'm now adding some cyan because it
has a lot of threads. And also here until the
other plants the shadows, Let's try to add some green. Maybe it's now match better.
9. 8 Drawing the flame light: Alright, now we will
start to add the flame, the fire in his hands. So I will bring this overlay
layer and put it here. Let's try to warp it and
shape it to match our vision. Like so. Let's try to make it have the same
shape of this thick. Very good. Create. And change the blending
mode to screen. And we're good to go. We need to fix
these edges around. So I'll press Control L and
try to increase the contrast. And that's it. This is the flame itself. It needs to have
some glow around it. So I will create a new layer
with screen blending mode. And with a soft rounded brush, I will just create
this glow around it. So I will create this
glow. It's changed. Choose some dark orange
color like phase one, and then put it like this. Very good, and
it's looking fake. So I'll use the
smudge tool to shape it properly to make
it look somehow real. Because the glow will
be somehow random, will not be so accurate. Like tools, I guess it's
something like this. Now we need to start drawing the lights of the
flame into our guy. So I'll do this by creating hue saturation adjustment
layer from here, and Create Clipping Mask
and press colorize, choose orangey color and open up the lightness and saturation and change the blending
mode into screen. Now press Control I to invert the mask with our
hard edges brush, I will decrease the flow, the brush flow to 1% or 2%. 2%, I guess, or for
something very low. And I will start
to draw the lights with hard edges pressure,
not the software. Because the hard edges one gives me some texture into painting, which is a very good looking, I think. Very good. I'm now trying to follow
the form of the man. So I'm trying to follow the jacket shape and his
handshape and blend the edges. It's drew lights here. In this part. I guess that's it. The intensity of
the color should be very high in parts that are near to the flame and very low end parts that are
far away from the flea. So we can also, with the soft brush, increase the flow and we can just put a touch of
light like this. This is just like
a touch flight. Very good. You need
to zoom out and zoom in more to see the big picture. Now we need to create
shadow because we have a source of light, then we should have a shadow. So I'll create a curves
adjustment layer and change the
blending mode into luminosity and press Control
I to invert the mask. And let's try to
draw the shadow. Should be something like this. Not something big. It should be something
very subtle. Let's increase the
flow of the brush. Use the hard edge brush and
then we can erase from it. So I will draw light
like this and like this. Because here we have
two sources of light. We have that skylight and
we have the flame lay. Just erase these parts. Let's decrease the flow and
erase these sharp edges. And we can edit the shadows
later if we don't like it. But for now I guess
we're good to go. Alright, let's try to
draw some reflected light from the dust around demand
because as you can see here, we are in a foggy seen. So we should have some
fog around demand and this fog should reflect
some of the flame lights. So we will create a new layer. And with the soft round brush, change the blending
mode to screen, and let's choose
a Fargate brush. This one, you can Find all the brushes into
brush easy.com. So this is a good one. I will increase the flow
with a bit like so. As you can see, it's
a very good price. So I will just draw some light. This is very intense, I know, but we will edit
this. Of course. I'll create a new mask, decrease the flow of the brush, and try to erase most of it. This part, this part. And this part. Maybe it's very high, so we need to decrease it. Erase this part. And I guess that's it. Maybe you can
decrease the opacity. Yeah. I know it's very subtle, but it adds realism
into our design.
10. 9 Drawing the Sky light on every element: Now we will start to make
the main source of light, which is the sky. Here I wanted to make a new one. I wanted to make a new
color for the sky. It will be some
bright yellow color. Let's create solid
color adjustment layer. And let's choose some
very bright yellow color like this one, I guess. And then press Okay, change the blending
mode into screen, I guess where it
needs to be adjusted, make it more yellow. Then press Control I and
let's start the lights. I will use the soft round
brush and this should be the main point of lights here. So I will just, this should be the sun, but it's not clear because
we have here a hazy weather. So I will use this foggy brush and let's try some
for gear lights into the woods like so this, all these are behind the words. The words will not be affected. So what I'm trying to do now
is replicating the effect of the light reflecting into the dust or the fog
into the atmosphere. And then try to add some parts, erase some parts until
you are satisfied. Very good. Now let's duplicate this layer, press Alt and drag it above
the woods layer here, and let's erase everything. Press Control a and Alt
Backspace or Control Backspace. And then let's add the light's color diffusing
through the woods. So the woods are now
affected like this. So what we have done is
creating two layers of light. One behind the woods and the other is in
front of the woods. This will create some
depth into the lighting. Now I can bring this light's
rays and let's put it here. This will add a
very good effect. And to our lighting. It's make it bigger
and put it here. Change the blending
mode to screen. And of course we will
change its color. Press Control U,
and let's colorize and choose some color like this. Let's make it more yellowish
and then press Okay. I guess it's so intense. So we need first
to edit the color, make it a bit to the yellow, and maybe we can
decrease the saturation. I guess that's good. Let's create a mask and
let's erase the edges. This part and this part. I guess the shape
needs to be edited to press Control T and start to edit the shape of
the arrays. Like this. To be in a good rhythm. I guess it says Good. Yeah, so intense. So let's erase some
parts from here. And this part also
needs to be raised. Okay? Now we need to add these slides
reflecting into the deer. So I'm going to bring this
solid color adjustment layer. I'm going to duplicate it
and put it into the deer. And now let's double-click into the layer to apply blend
F effect because we want, we want the colors
not affecting. Shadows. This will make the lighting more professional
and more accurate. Very good. Then press OK and press Control. I and let's start
painting the light. I will start painting the
lights into two layers. The first layer, which
I'm now painting on, will be just the soft lights. Like this. Just soft lights reflected maybe in this part. And his legs. And the front legs, of course. You need to follow the form
and the shape of the deer. While drawing and
knowing some painting, digital painting basics
will be very helpful if you are working on
photo manipulations. So in this part, and the ears, at the edges of the ears
here also, of course, here. And this part. Very good. These are the soft lights, the main soft lights. I guess it's very strong. So we need to change the saturation to lower it a little bit and
then press Okay, and let's decrease the opacity. This is the first
layer of the lighting. We will do the same thing, but with another layer
and it will be intense. We, we will duplicate the
layer and erase everything. And now we will draw with the brush because we want to give the
lighting some texture. So we will bring this for price that we already
used in selection. We will use it. Let's
edit it a little bit. The dynamics is pacing, and let's draw the lights according to the shape
of the deer, the form. So let's start
drawing like this. The effect should
be very intense. Let's increase the opacity. And let's draw in the four. I guess we need to decrease
the spacing a little bit. And let's increase
the scattering. This is better. So let's start
drawing this part. As you can see here. Because I'm drawing
with the four brush, giving it some texture. And there was a
lighting which make our lighting dynamic and
not flat lighting. Maybe in this part,
I am now changing the brush shape by
pressing the left and right arrow keys
here in this direction. And this direction
also, of course, you need to follow the
shape here and here. And as you know, the deer is a focal point
into our visual, so it needs more and
intention than anything else. This part. Also the nose. This one. Ears. Very good. Very good. So this is
before and this is after. This is better. Maybe we can decrease the
opacity a little bit. Yeah. Very good. Now we need to apply the
VCE lighting into the rock. So I will duplicate the same layer and remove
everything from it. And now I will draw some
soft lights into the rocks. I will follow the
shape of the rocks. So let's see which plan
is facing the lights. So as you can see here, this plane is facing the light. And some plants. This part and maybe
this part of the rock. But let's be careful. Decrease the flow. And let's draw some lights
here and erase some parts, replicating the
shadows of the plant. Like so. You're also very good to erase it from here and add some soft lights in this part. Very subtle. Very good particles. Great. Decrease the opacity
a little bit. And here we go. Here's before and here's after. Four and after. Now we need to add the lighting into the rocks or the root. So I will duplicate
the same layer. I'm doing the same stuff, but drawing in each element. So I'm now drawing
into the rocks. This part. Let's choose a softer
rounded brush, increase the flow and opacity. And let's draw here
some soft lights. I guess we need to
change the blend F because in this layer we
have a lot of dark pixels. So we need to change
the blend if sliders. And now we're good to go. Adding some soft
light here and there. Maybe in this part also, but not so much. Very good year. And here, let's erase it from this part. And let's add some lights here. Okay, Now let's duplicate the
same layer and put it into the man and lead to draw some lights into
the man's shoulder. Of course. He will have some
lights from the Sun. So I will just choose
the hard edges brush. And with one per cent
flow or maybe 2%, 1 percent is good,
maybe two per cent. Yeah, I will just
draw some lights reflected into his jacket,
into his shoulders. Let's erase some parts. Draw some parts. Very good. Should
be very subtle. Mao, okay. Draw it here. This part. Sometimes you need to just
try to make it look good. Not so realistic,
but just looks good. That's enough. Maybe we should decrease
the blend if sliders this. And I guess Here's a before. Here's after. I guess we're good
to go. Very good. Now we need to add some of
these sun rays into the trees, the right and left trees. Because it will have a
very soft subtle lights. So I will duplicate
the same layer and put it into the rocks, grew into the trees group. And let's erase some parts, press Control, idle, and
let's draw some, some lights. Here. I want to draw not
continuous lights. I will just draw some
rays of light like this. Some breeze, Soft
trays or flight. Because of course,
these are the jungles. And it should have a lot
of plants here and there. Light should, will
not be continuous. There, there should
be some spots, flights and some spots, some spots of shadow. So I will do the same thing into the other tree and
to the right tree, do the same thing, and also into the plants. So let's draw some soft
light to the plants. Increase. The opacity shouldn't
be very subtle. And let's duplicate
the same layer and put it into the left tree. And it's Create Clipping Mask, erase everything from the layer. And let's draw some
soft spots of lights. Soft edge, brush like so
that's what I'm talking about. Here we go. Ready looking very nice. And of course we need to
follow the shape of the tree. So this part needs to be erased. And here also. So the parts that are
facing lights should reflect light and
the other parts should be in the shadows. So I guess this is good and
decreasing the opacity, this will give us the
effect that we like. Very good. Now we will add some fog effect into the rocks part and
into demands part. So I will bring this fog layer and let's put it
into the mid ground. Because we have a
lot of groups here. We should be organized. Let's change the
blending mode to screen and press Control you
colorize to change the color. And let's choose some cyan color and decrease its lightness
and then press Okay, maybe we can decrease
the saturation. Them press, pause it here. Press Control T
change its shape, make it a lot bigger. This were a bit, little bit because now
it's very defined. We need to change
its shape. Okay? Uh, there. And decrease the opacity. Very good. Let's make it up there. Maybe we can create a mask and
start to paint some parts. Start to remove some parts
with the folk price. Yeah, that's looking better. So next, we will add some
colors into the eyes, because as you can see
here in the man's port, we have some orange color and
the visual is not balanced. It, we need to add some orange
color into the left side. This is a composition of tip. So firstly, I want to create
some vignetting effect because the edges of the
woods needs to be edited. I don't like it as it is. So I will start creating maybe a Curves Adjustment Layer and decrease the darkness. And this curves adjustment layer should be behind the trees. We wanted the effect to
not affecting the trees. So I will decrease the lightness like this
and then press Control I. And let's start to
paint around the edges. A soft turn that brush. I will start to paint
around the edges. Like so. This part, I guess
this is better. It's giving some contrast. And it's looking better. I guess. Let's erase it from the sports. You know, maybe we can duplicate this race effect and put
it in front of the Dear. Put it here. Yeah, this is
better because now we have some rays reflected or
interfering into the deer. That's better, erase some parts and that's better, I guess.
11. 10 Drawing the Deer lights (eyes & corn): Now we will start to add
some lights into the ear, into the eyes of the deer. Because it's, it's the main focal point and it should grab
our attention. So I will create a hue saturation adjustment
layer and press colorize, increase the saturation,
increase the brightness. And let's choose some orange
color and press Control I. And let's start painting
some lights into the eyes. Here and here. I guess we need to change
the blending mode to screen. Let's draw some lights here. Maybe we can make the lightness high like this and to
increase the saturation. And let's change the shape. Let's erase some parts. The eyes to be sharp here. So let's draw it
from the beginning. I guess that's better. All right. It's drop the opacity or I
guess let's leave it as it is. Now let's duplicate this
hue saturation layer and press Control a, and then remove everything
from the hue saturation. And with the soft rounded brush, I will just draw some
glow effect around this. I like this. Very cool. I'll do the same
thing into the corns. So I'll draw in the
hue saturation layer. I will do draw some
glow effect like this. And with the smudge tool, let's define the shape more. Let's increase this trends. Now. I will try to
define the shape or XOR. It should be something random,
not something specific. Make the brush bigger. And this is, this is
something our test stick. This has no rules, so feel free to make
it as you want. And let's increase
the saturation. Maybe we can decrease
the lightness of it. Yeah, that's very good. I think we can create some
glow effect around the deer. So I will just duplicate
this hue saturation layer and remove everything from it. And let's change the color into some more yellowish color. And with the soft, rounded brush, Let's paint, decrease the flow and let's
paint around the body. This is curating some glow
effect around the deer, which will grab our attention into the main focal point
to achieve the deer. So this is very good. I guess the main lighting
needs to be edited, so let's get a color and
let's erase some parts. Let's erase some parts took to make the colors more dynamic. So I will just use
the hard edges brush and I will erase Sports. Race, this draw here. Trying to be more accurate
here with the lights. I guess that's better,
That's way better. Next, I will bring these particles overlay
and put it here. And let's change the
blending mode to screen. And of course, we will change
the lights by pressing Control U to open the Hue and
Saturation press Control U. And let's change the
color plus press colorize and choose some yellow
color saturated, like this. And then press Okay, and let's put the particles
here, for example. And I guess we can increase
the intensity by the levels, press Control L to change the intensity
of these particles. So I guess this is good. Press. Okay, and then
let's put it here, create a mask and
let's press Control I and let's paint some
parts particles back. And this part, maybe we can
increase the flow to 100%. And let's draw some particles. This is some thing very subtle. And it adds more to or visual. So I'll duplicate this layer and try to decrease
the intensity of it. So and then control and
then erase some parts. So maybe we can duplicate it and put some parts
here, here and there. You can just follow some breadth them and see what is
working and what's not. I'm now adding some particles until the lights
the light parts. And I guess that's
that's enough. I guess.
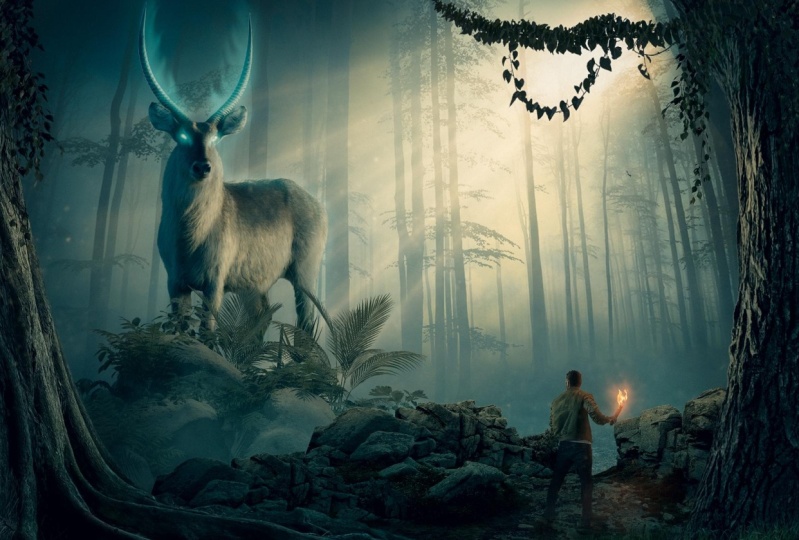
12. 11 Final touches and color gradding: Okay, next I will
create a new layer to add the final grading. I'll create a new layer and
press Alt Control Shift E to merge all the visible
layers into one layer. And right-click Convert
to Smart Object. And from Filter, go
to Camera Raw Filter, and start to change every slider you could until
you get the best results. So firstly, I will increase
the temperature a little bit. I want it to be a
little bit more warm. And maybe we can
change that tent. Magenta. Decrease the contrast, decrease the highlights,
which causes very high, and open up the
shadows a little bit. Maybe we can increase
the blacks and whites. Maybe we can decrease it. Yeah. Texture. Decreasing the texture. I want it to look hazy. And the hazing. Maybe we can leave it as it is. And in the vibrance, maybe we can just add
some color, the curves. Let's add split tone, adding some yellowish color into the highlights and blue color
into the shadows there. And let's go to the details,
adding some sharpening. And maybe in the Color Mixer
we can change some colors. Yeah. Yes, we need to
change the acquis, this and the greens. Maybe it should be towards
the yellow, The Blues. And that's it. Let's go to the color grading. I will add some some blue into the shadows and some orangey
color into the lights. Let's increase the
intensity a little bit and let's go to the Effects. Adding some grain to your new
phi everything and adding some vignetting effect
around the whole scene. And maybe we can play
around with these sliders. Calibration. Maybe we can increase the vibrance
a little bit more. And let's go to the masking. I will mask the outer
edges like these parts. And I will make, make it more bluish. Because I want the
shadows to have some bluish tint and the
highlights to have some warm. So I will just increase the
blue, the blue nucleus, the temperature here,
here and there, these parts, this is, so, this is too much. So I will erase it
from some parts. Let's erase it from here. And there. Very good. Okay. I guess that's good enough. So I guess that's it. As you can see here. Maybe we can edit
some parts here later or tweak it a little bit. But overall, that say
tears before camera roll and here's after I'm done,
know which is better. Tell me in the comments. And feel free to apply the project with
your imagination and with your own colors. You should not stick to the
colors in the tutorial. Make your best. And that's it. Thanks guys. See you guys. Thanks for watching. I hope you benefited. And most importantly, have fun. I encourage you
to apply all what you have learned
into a new art work with your vision and show us in the comments, your
amazing artworks. Thank you guys and see
you in next classes. Piece.
 Nour Art, Digital artist, Youtuber