Transcripts
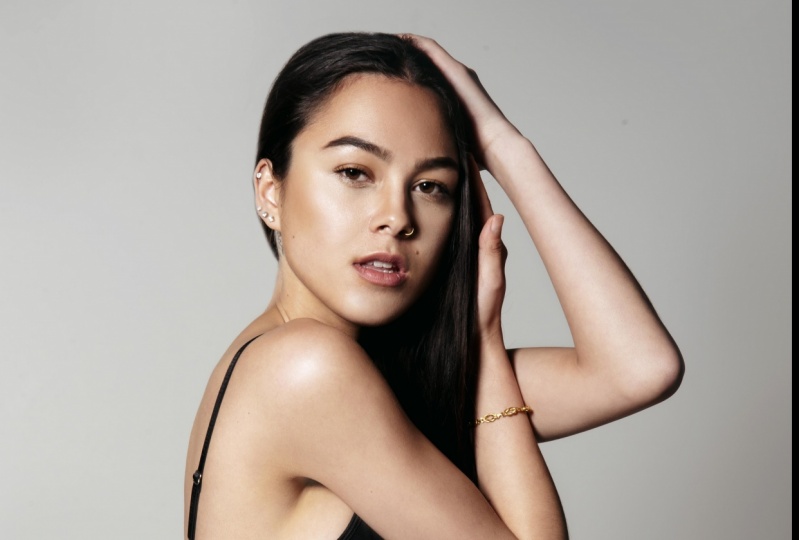
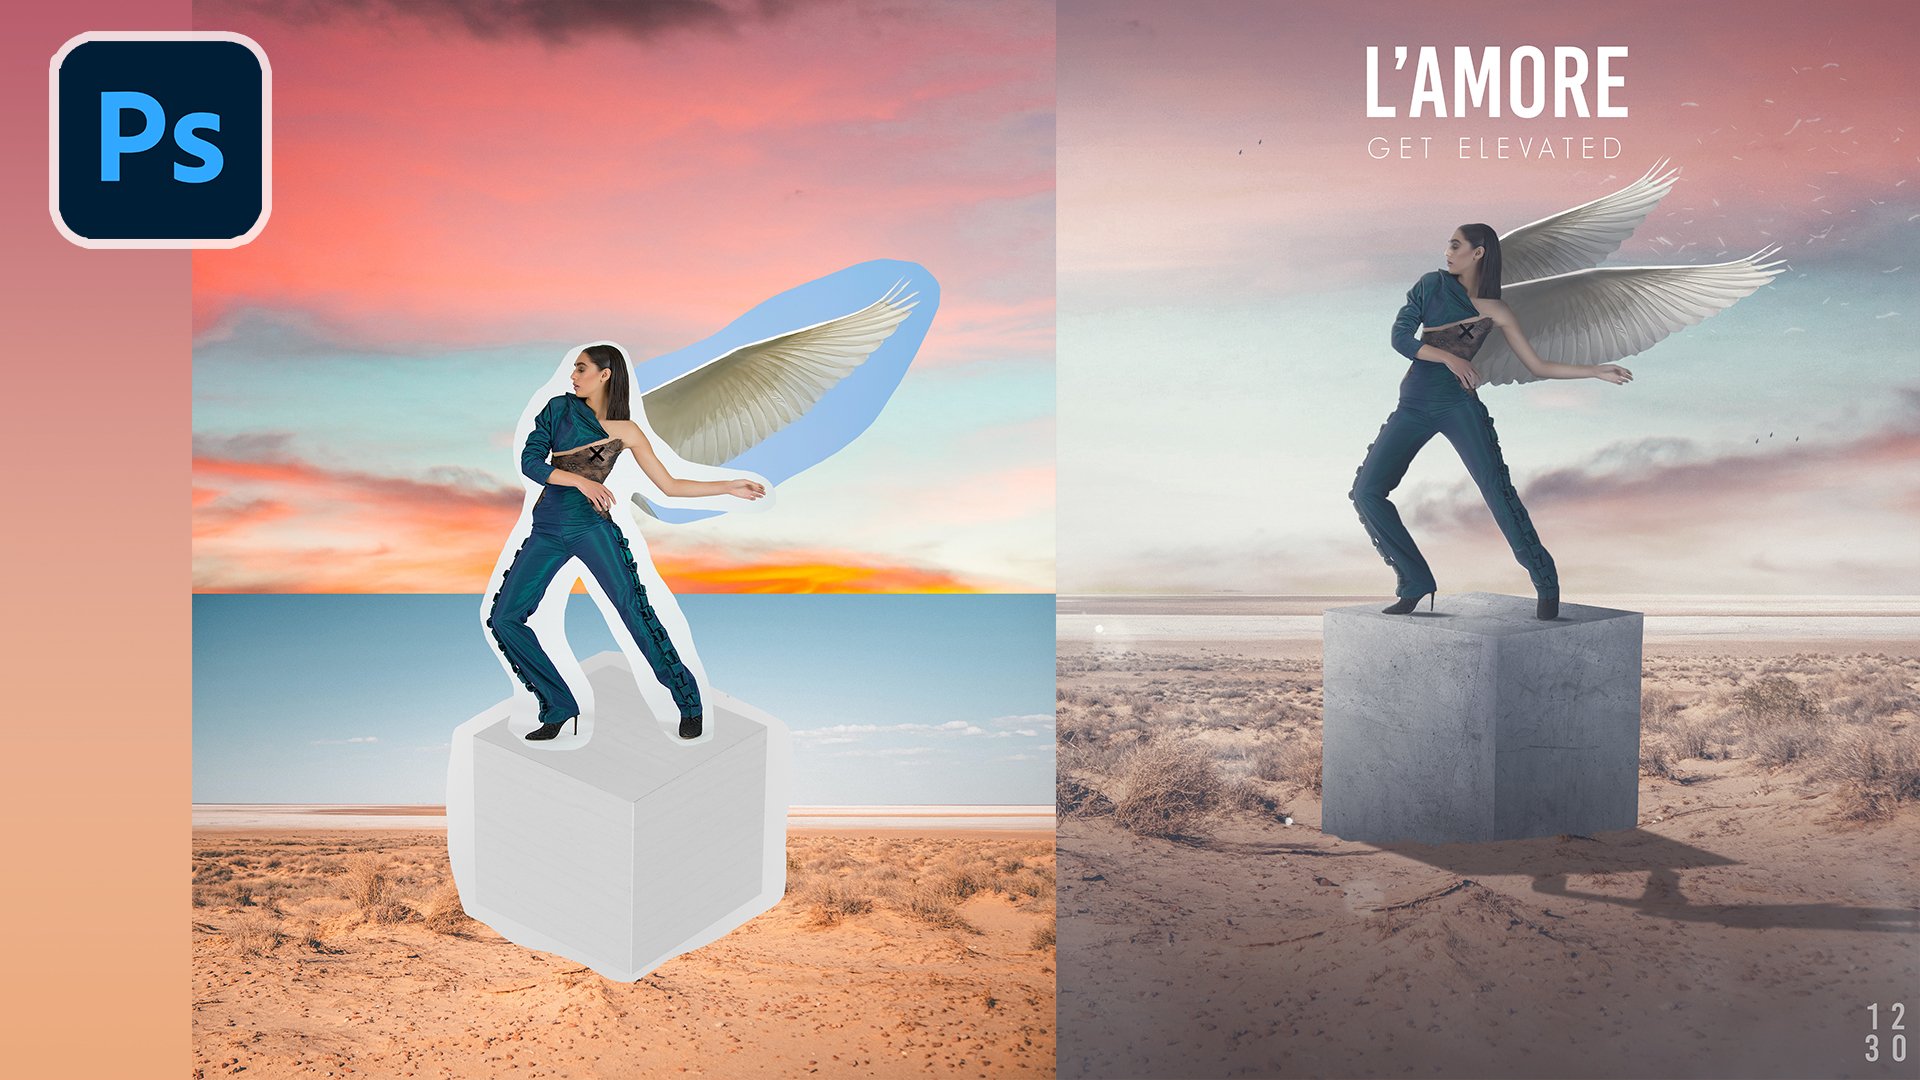
1. Introduction: Putting a filter over photo is one thing, but being able to really read touch an image tells exactly how you imagine it is super important and is a skill that is a professional photographer you have to have, especially when it comes to portrait photography, you must know how to reach the skin and sculpt it too. And that is exactly what I will teach you today. I want to welcome you to my course, Adobe Photoshop, high-end skin retouching. My name is Tom Chi and I've been a photographer and graphic designer for almost 12 years now and from the United States and I traveled around shooting photos and designing for various clients and companies, specializing and fashion lifestyle and commercial photography. To see my work head over to my website at www dot the real-time kind.com. Look me up on Instagram at the real time kind. There was regular retouching and then there's high-end retouching. The kind you see in magazines on adds anything to do with fashion and all kinds of portraits that you see of your favorite celebrities. All of these, I can guarantee, have had high-end retouching done to it. I know many young photographers want to get into the industry shooting for the biggest fashion brands and magazines out there. But they fail to learn some crucial skills and retouching because like I said, it's not just about applying a preset to a photo and calling it a day. It's much more than that. It is about creating a look to an image and then edit that aligns to the company for which you are shooting for. Today, we're going to have so much fun. We'll be doing a high-end edit together today on this image and turning it into this. I'm going to walk you through the entire process from start to finish. And most importantly, I will teach you how to do frequency separation, which is one of the key components of high-end scan retouching and sculpting. We will also do a whole lot more. I will show it all to you. This course is for anyone who wants to learn how to do high-end retouching and Photoshop to take your photos to the next level that you may see involved magazine, Gucci, or any other high-end company you may look up to you whether you want to do this professionally to make money or just as a hobby to express your creativity. This course is for you, and I'm super excited to share with the, all that I know. I hope that you decide to enroll in this course. And if you do, I will be seeing you in the very next video.
2. Import + Initial Edit: Alright, we have loaded up Photoshop and we're ready to import our image. So let's go ahead and do that. So all we're gonna do is we're going to click Open. And if you haven't already, make sure you've downloaded the image and everything that we'll be using for this course. You download it and have it ready to go. And we're gonna import our image here. We haven't, it's titled Portrait for high-end retouching. Just click that once and let's click open. Let's hope not the image and because it's a raw image and it's going to open it up in this camera raw editing window here. So you can do all the edits pretty much that you would be able to do in Lightroom. So we're gonna do some basic edits to this before we import it into Photoshop. Now you can also edit in Lightroom and then right-click on your image and click edit in Photoshop. But this kind of just cuts out Lightroom from the whole process and make things a little bit simpler for you. So let's go ahead and do a few little edits to this image. I might bring the exposure up ever so slightly contrast. I would like it to be a little more contrasting. And again, a little bit goes a long way here. So be very subtle with it, be very intentional. Pay attention to the histogram in the top here as you see, we're very close to peaking on the white side here. So just be careful of that. I might bring that and down ever so slightly. And we'll do more changes to all of these later on. But we just want to do a little bit of a light edit. Might want to bring the blacks and down. There we go. Texture and clarity. I'll bring the clarity up ever so slightly, despite five here. I'm going to leave everything else the way it is. I just wanted to do a little bit of an edit here just to make sure everything is exposed properly. And same with the temperature here. Some pretty happy with that might make the temperature ever so slightly warmer. Just a little bit. And there we go. We have our initial edit done. If you want to see the before and after of the edit that you've done here. You can click on here to cycle between the before and after views, or you can hit q on your keyboard. Just click that as you see, it's a very subtle edit for the before and after just adding a little bit of pop to the image. And that's all that we really want to do. So let's go ahead and click Open, and it's going to open up our image. So that's good. Photoshop as second here, very nice. And we have our image ready to go. In the next video, we're gonna get started with removing some blemishes.
3. Blemish Removal: And we're ready to actually get started editing our photos. So first thing that we really want to do is we want to remove all the blemishes that we see on the skin. So if we zoom in here to our model, as you see, there are some blemishes on the skin. You know, we wanna get rid of that. We don't want that in our final image. So we're gonna do this very, very simply. So first things first, let's create a new layer on top of everything. Very nice. And then let's go ahead and call this blemishes. We want to make sure we're editing non-destructive way. So we're going to use new layers. We're gonna use smart objects, and that is how we're going to edit this. So now how are we going to remove the certain many ways that you can do this? You can use the clone stamp tool. But what we're gonna do today, we're going to use the Healing Brush Tool. Normally you can just hit j on your keyboard. But we're going to hold down here because by default it's going to go to the spot healing brush tool, but we want the Healing Brush Tool. So make sure you have that selected. And then let's zoom in. We want to get really in there so that we can see all of the little blemishes. So again, j on your keyboard. And then you want to make the brush a little bit bigger. And you can always soften the brush if you go up here. So I'm going to suffer mine all the way down to about 15%. And you want to make sure you have current and below selected. All are Option. Click on an area that you wanted to sample from. And then you can slowly start to paint away all the blemishes that you see in your image. Now if you're having trouble seeing where all of the blemishes are and can make them actually pop out a lot more. So how are we going to do this? We're going to actually put an Adjustment Layer to all of this. The adjustment layer that we're actually going to add to this is the black and white Adjustment layer. And that is right here. It's in the very middle of all your adjustments. So let's click that. Missing our image has turned black and white. So what are we going to do? We're gonna mess around with the reds and yellows. So if we bring the reds down as you see, a lot more detail is coming out of our image. So we're going to put that all the way down. And you can also just the yellow's a little bit if you don't see all of the blemishes coming through. Now we go back to the blemished layer and using the same settings, you want to make sure we're still sampling current and below, we don't want to sample any of the gray color here. And I can continue going and getting rid of our blemishes. So this is indeed a very time-consuming process, but it's a process that you should do. And I personally, I enjoy it. It's very satisfying to clear up all these blemishes. And yeah, it's because I'm payoff if you spend your time and actually do this properly. So as you see, I'm also getting rid of some of these these wrinkles, these lines in her forehead. That's also something you might want to get rid of depending on the age of your subject. If you have an elderly person, you're not going to be removing all of their wrinkles is just not going to look for real, it's not going to look accurate. She wanna keep that in mind. I'm going to remove some, not all of these wrinkles that I see here. I'm just gonna keep going. We're moving all of this. Very nice. She want to do this until you have as a blemish free of skin as possible. And you see I've only been doing the forehead for now. This does take time, and it does take time. That's how the process goes for high end editing, high-end retouching. So spend the time to do this properly. They see I've moved down here now and you see there's some hair going across here. So we definitely wanted to remove some of these straggling hairs from our image. Because that also comes with fixing blemishes. You often want to remove some of the, some hair sometimes. Especially if it's in the sake of cleaning up our image. So want to make sure that we're doing that. I'm not going to get rid of all the Herod's nearly impossible in this image. There's a lot of struggling here. We're going to try and remove a big chunk of it. And again, will this take your time, take the proper samples from the proper colored areas. And there we go. And you don't want to leave just a random bit of hair. For example, if I were to remove this up here, you don't want to leave just some floating hair in the middle there. You wanna make sure you cover your back, you fix everything that you started. There we go. And just take your time with its put on some music, relax. And then go ahead and remove all the hair, all the blemishes. This is one of the most time-consuming parts of the whole process. But that is how you get that in extremely clean look. And those high-end images, those high-end edits, they've seen all those magazines and adds. I can guarantee there was someone spending a lot of time behind the scenes making that happen. There we go. A little bit more over on this side. And don't be afraid to zoom out to see what you're doing. No harm in that. And I want to get a little bit of the 1s on her chin on the human. And I'm gonna make my brush on very small here just to make sure that I'm doing this properly. And you might find this tedious, that is totally fine. But you do this once and then you're done. That is the beauty of this. And you'll see it doesn't look like we're doing that many changes, does it? But we're actually done quite a significant change to our image. So as you see, I'm also getting rid of a few of the hairs that are going over her chin. Lovely. Not gonna get rid of that one on. I'm happy with that. Let's look up here. We have a little bit over on this side. Let me choose to remove here. And don't forget, sometimes you might think something is a blemish, but it could just be part of the skins texture. In practice and in time, you'll be able to differentiate between all of this. And there we go. So let's zoom out here. And if you wanna see what your actual image looks like, just turn off the black and white Adjustment layer. And as we see, the skin looks a lot clearer, doesn't it? So let's talk all the blemishes on and off. You've now you can really see the changes that we've made just by removing the blemishes. And I'm noticing up here, I'm not happy too much with this. There's like a little bit of a darker line here. So let's turn on the vacuum white again. We see it a little bit better. And then let's just remove that, shall we? I'm gonna make my brush a little bit bigger just to smooth out any blurriness in the skin. There we go. Very, very nice. Now one other thing when it comes to blemishes, like I mentioned, is hair. And one place where we see a lot of strangling hair is over here on the left, on the right where the hair is coming out. So how do we fix this lesson to black and white off? As we see, the background is just a solid color. So what I'm going to do is make another layer. And I'm going to name this hair. Very simple, just hair. So I know what I'm fixing right now. This is all fixing blemishes, fixing hair. That's what we're doing. And we don't need to have the black and white layer on for this, we can just hit j on our keyboard again. So we get our healing brush out. And again, you're gonna sample part of the background. The good thing when this image is the background is almost a solid color. And you see that didn't do such a good job there, did it. So you want to take your time again? Do it very slowly. And we're going to remove as much as we can. Now I'm actually going to increase the hardness of our brush to fairly significant amount, about 74%. And that's because we don't want such a soft edge on our hair. We want it to look a lot crisper, a lot cleaner. And what I'm actually going to do is I'm gonna switch over to the clone tool. So if hit us on your keyboard or automatically in our clone stamp tool. And again, I'm going to make the hardness me felt, let's say 83%. And then we're gonna go in, that's a little bit too hard of a brush. Let me go down to about 40. There we go. That's a lot better than a lot nicer. And take your time of this neutron, a soft edge to the hair. And there we go. And again, take your time with this and does take time, it is a whole process, but it's worth it. And there we go. And you can go ahead and erase part of this if you want. That's the, that's the beauty of it being on another layer. And now here it's going to be a little bit more unique here. So I'm going to do is I'm going to use my last hole tool just to get a rough guideline for our, for where I want to be Mosque out. Let's sample something here. Can fill in all of this. Some of this blushing is here. And again, I'm not removing all the hair. I'm removing a lot of the straggling hairs that's going to be distracting to our image. So take your time with this and it's fine to undo things, go back over areas. This is all on its own layer. So if I want to just undo everything, it's undone. Agnes hide the layer and get back to where I was. So if we zoom out and we look at the left side here, it's a lot cleaner. And if I want to, I can go back clean up the edge on the left here, which I might actually do here. So again, let's go back to our clone stamp tool. And I'm going to do a little bit finer edge. Here. We go. Again, fixing some of these stragglers here. And yes, it is going to be softened and background because of the lens that is used in this particular photo. But that doesn't mean that you should ignore some of these edges. Let's go ahead and fix some of that. Very nice. So if we zoom out and we toggle the before and after on the hair, you see we fix some of that, goes straggling hairs there and I might end up painting some of that back. It is very simple to do. So don't be afraid of that. You can just go with an eraser and erase the hair back if you would like. It is not a problem. You can also create a mask on that layer, fill it entirely with your bucket to fill entirely with black. And then what you can do, this just paint away where you want it to be hidden. So with a high opacity brush, you see I'm painting that away. I can keep some of the hair, which I might actually do, paint with black to paints it back a little bit. So I'm gonna paint back some of the straggling hair, not all of it. And there we go. Especially down here, I want it to be a little bit cleaner. I do want to keep that little loop of hairs there. Now if I want to continue editing on the right-hand side, if I were to come here with my clone stamp tool for example, and I wanted to try and Martin Moscow south, it's not working. You see, that's because we have the mask already on. So how can we continue to edit the hair witnesses here? Simply right-click and disable Layer Mask. And now, as if by magic, we can use this again. So that is one way you can continue to do this. And right now the mask is just disabled. It's still there. Don't worry about that. It's still there. There we go. And what I'm actually going to do is I'm going to enable the Layer Mask. And now you see that it would just made has gone, simply just go to the layer with the mask. The mask and then with your brush, paint in white, and you'll paint that edit back. Now I'm gonna go back down to the blemishes layer. Exactly. We want to remove some of the hair as you see as crossing over doesn't look very good, does it? So let's go ahead and use our healing versatile flux at John are keyboard. And I'm going to soften this brush up again and use all their options, sample and area. And again, take your time of this. This is very important to do this properly so that it does not look bad. Very nice, very nice. So just take her time of this. I'm keeping some of the hair as you see. So definitely does take a lot of thinking to make sure that you're keeping what you intend to keep in this and you have to be very intentional with what you do. So let's go back up to the hair layer. We're going to again disabled the Layer Mask. And what we're going to do is using the clone stamp tool. I want to get very close to the finger to remove as much of the hair there as possible. Very nice enabled layer mask. And then on that layer we're just painted in white to make sure that it's all gone. Lovely. So if we zoom out now, you can always check on the hand and everything. There really aren't many blemishes on the hand, so I'm not doing anything there. But if we zoom out and now we toggle this on and off, that's the before and the after. As you see, it's a lot more cleaner and it's a lot nicer to work with. So there we go. We have the initial removal of the blemishes. I think that's really cool. I'm happy with how that is looking for. What we're gonna do now is we can get rid of our black and white layer. We don't need that, so you can just drag that to the rubbish bin down here on the bottom right. And then what we're going to do is we're going to hit Control Shift E, ignore Take Command Option Shift E. And that's going to form all of the layers that we have here into one. So if we turn this off, we just have every edit that we've created on one layer. We can still hide that and then adjust our hair, our blemishes separately and then do that again. But for now, we made this into one layer and we're going to be using that going forward. So in the next part we're going to actually get into frequency separation. I'm gonna talk to you all about it, what it is, how to do, what am I gonna do that to our image? So let's keep going.
4. Frequency Separation: Alright, so now I want to get into some frequency separation. Now what is frequency separation? Frequency separation is one of the industry standards used in editing portraits. What does it do? You separate the low and high frequency information in your image. What does that? So that means we separate the color from the texture. That means we can edit the color of our skin without affecting the texture of our skin, and vice versa. We can edit the texture of our skin here without affecting the color below it. And this is a fantastic tool to have and to know. And I'm gonna show you right now how to do that. So first things first we've made a layer here. We're gonna duplicate that, so I'll just hit Control or Command J. We want two layers here. We're going to call one of these color. And we're going to call the other one here texture. Very simple, right? And we can go ahead and hide all the layers below it if you would like. If not, that's totally fine. We can just keep it the way we have it. And we're going to go first to our color layer. So you wanna make sure you are on your color layer. We're gonna go to Filter Blur, Gaussian Blur. Now what we want to do is we want to click on an area here to sample. And let's go all the way down to 0.1. We want to get rid of all the texture in our image. So I'm going to put the radius up until we see that there is no texture. There's still a little bit, there's still a little bit. About 4.4. Let's click somewhere else. Still a little bit of texture there. Let's go to about five. Let's check on her forehead. Stole a little bit. I think I'm happy with that. Let's shake her nose north to worry about the lips. We're just looking at the skin on its own. Yeah, so you'll want to primarily look at where there is more wrinkles, more information in the Texas. Let's, I think five pixels will do it for this particular image. Let's hit OK. And we don't really see what we have here, but let's turn off our texture layer. And this is what we have. As you see, this, this is the color information of our image and now we need the texture back, don't we? So how are we going to do this? So let's turn on our texture layer and let's make sure we're on our texture layer. And we're going to go to image up here, apply image. And what are we going to do here exactly? We're going to use our color layer and we're going to subtract it. So you simply going to go to the subtract lending mon. Very nice. And we're going to change the scale to be two. And offset we want that to be 128. So this is going to be the texture information of our image. So let's go ahead and click OK. And we're going to change the blending mode of this two linear light. So if we go down here, linear light, now this looks like our original photo, doesn't it? So let me go ahead and combine all the layers below this. Okay? So if we hit control command G, I'm gonna show you how this image is exactly the same as one as our original. So if we turn this off, its exact same isn't a lot. We have our color and our texture on a different layer. This is our texture and this is our color. And when we apply it the texture to the color, it looks like our original image SON. Now we can edit the color separately. We can adjust the texture separately, and that is going to be vital as we go forward. So in our next video, we're going to sculpt this. We're going to sculpt this image. We're going to use some colors. We're going to sculpt the skin of this image to make it look nicer, salt. Let's keep going and let's do some sculpting with light.
5. Color Sculpting: So now we're gonna get to one of my favorite parts and that is color sculpting. I absolutely love this part of the process. It does take a lot of time, but it is super, super cool and super worth it. So we're going to actually do this. I mean, let me show you a little demo of what we're gonna do and then we'll do it in a, in a more subtle way. So let's go ahead and I'm gonna make a layer on top of everything. What we're going to do is essentially we are going to paint in the color of the skin that we want there to exist. So for example, we'll be sampling colors and then will be just painting all across our image to make sure that the colors are even throughout the whole thing. So we'll have color going across her nose. And this is where we're gonna get that straight line will get rid of any bumps or any, any imperfections when it comes to the structure of the face, will be following the shape of the face, the contours. And it's not going to look at this bad, don't worry about that. But this is essentially what we're going to be doing. We're going to be getting the colors in of our skin that we want there to be. So let's get rid of this layer. Let's just hit Delete on that layer. And what we're gonna do is gonna make a layer above our color layer. It's making you layer there. And essentially turn off the texture layer for this, it's actually going to help us to see where the colors are. And you don't have be to zoom then you don't have to be like we were when we were getting rid of the blemishes. You want to be a little bit more zoomed out. And let me get our brush. I want it to be a fairly soft brush. And I'm going to have the flow of this very low, maybe about 3, 4%. So that when I'm painting, it's a very low amount that I'm actually painting. As you see. You have to keep going over it multiple times to get the coloring. So essentially, we can get oversight that. Now when we sample our color, as you see right now, it's going to pick one particular color. What we want to do, let's click our eyedropper tool and the sample size, we want it to be an 11 by 11 average. So it's going to sample an 11 by 11 pixel area and get us the average color of that area. That's what we want. That's exactly what we want. So now we can go back to our brush. So I'll just hit the brush over here. And now when we sample a color, this is the average of an 11 pixel area, 11 by 11 pixels area. So you can start painting in, says you see we're getting rid of some of the texture in the skin where some of the imperfection of color and the blood shininess and birth marks and all that stuff. And make them a little bit bigger. And there we go. I'm just gonna do the forehead real quick so that I can show you a quick before and after of what we're actually doing here. Very nice. And this is a very, very time consuming process. But this is it, this is the whole point of this kind of editing. So if we do the before and after of this, before, after, we've really smoothed out the tone of the skin up there. And if we turn on the texture and do the before and after, we see it's a lot smoother. So that is essentially what we are going to be doing for all of this. So let's keep going showing I'm going to move onto her nose here. And then you can change the size of your brush. And there we go. You don't in the brush to be too small. So for these fine areas here, it is fine to have a smaller brush, but for the most part you want to have a larger brush. And keep in mind where you want light to be so we see she hadn't little bit of I don't know, I bag or some kind of line over here, some painting with light to get rid of that. So this is how you can really easily get rid of dark circles in your images and get rid of all of that. Smooth out everything for modelling here, get very smooth and even skin tone going across our image. Lovely. And a little bit over in this area. So there's like a big highlight on her nose. I kinda want a little bit more of that highlight on her forehead. Squint to make the brush and bigger get a little bit more of that highlight in there like that. And I want more of the dark here on the right. And that a little bit goes a long way, so don't go too crazy with this. There we go. You happy with that? I'm not really going to do anything with her arm. Not to worth in maybe just a little bit of smoothing across it. But the color tone. But there's really not too much information in her arm. And there we go. So now let's zoom out a little bit and let's turn on our texture layer. So if we look at the before and after offer face, before our color, sculpting before. After. So much cleaner, very much nicer looking. Now we see a list of some little bit of detail under her ice here that I want to get rid of. So let's do that real quick. Shallowing. Like I said, it's a lot of going back and forth to make sure that you have this and looking as good as you'd like it. There we go, you see we are getting rid of that area. So now if we turn on the texture, you see it's looking a little bit better. I want to fix a little bit of the color above her eyebrow here. Just a little bit of this highlight to it. There we go. That is essentially doing the color sculpting on her face. Let's take a quick look at the before and after and one more time, before and after. And so a lot cleaner, a lot smoother and look, we didn't sacrifice the skin texture. We have the skin texture right here. And that is exactly what we want to do when we do high-frequency separation, as well as color sculpting, combining these two techniques, this is what we get, this is what we want. So next, we're gonna do a little bit of dodging and burning to our image, just to give it a little bit more extra entering a little bit more detail out of her eyes, out of her lifts, and add a little bit more shadows back to our image. So let's keep going and let's just, I'm dodging and burning.
6. Dodge + Burn: Alright, we're ready to do some dodging and burning. And there are many different ways you can actually do this. One of the ways is with the built-in dodging and burning tool that we have over here. We have the Dodge and if you want to down we have the burn more. What I'm going to do is I'm actually going to do it a little bit differently. When I'm going to do is I'm going to use curves layers. So I'm gonna create a curve layer. And I'm going to create one curve here until I have my shadows, how I would like it, something like that. Might bring it up ever so slightly. And then all you do is you fill in this layer with black and movements gone. So how are we going to actually burn this? So first I'm going to do burn and then I might do some dodging later on. But all you do is you paint white paint brush. That's how simple it is. And all you do is you paint in where you want the Dodge and Burn to come in. In this case the burn. And this is how you can really sculpt parts of your image. So if I want to define the cheap lines a little bit more, and this image, you can't see it too much, but we have a little bit of detail that we can use the Burn tool here, especially up here on the right of her forehead. So if we toggle that before and after, that's all we're adding a little bit of detail in like so. And you can turn opacity of this down if you'd like, which I'll do it a little bit like so. And you can do the same thing for dodging. So again, if you want to bring some highlights into your image, let's go like so. And again, he filled this in completely what black. And then you can paint in with a white paint brush. And then you're painting in some dodging to your image. So I want to add a little bit to the lips, and I want to add quite a bit to the eyes actually. So let me zoom in here so I can see the eyes. So I really want the eyes to pop in this. So I'm gonna do this quiet a bit on her eyes. There we go. And if we see the before and after, there we go, we're really bringing some of that color and detail out of her eyes. And there we go. So as you see, we have a lot more pop and her eyes. You don't wanna go too unrealistic with eyes. But it definitely goes a long way and I might do a separate layer just for eyes. So let me go ahead and create another Curves Layer. And this one, I'm going to specifically look at her eyes. I'm not going to care what this does to her skin. So let's pull the highlights up and no more down a little bit. Again, I'm only looking at her eyes. And I'm gonna create a slight S curve to this. There we go. So again, we're going to fill this end completely with black. And I'm going to zoom in and we're gonna paint with white. And I'm gonna put the flow of this up to about 30%. Now might even paint a little bit on the whites of her eyes. But I'm going to focus again on her iris here. And you might think that's a little bit too much. And if you do, just go ahead, put opacity of that down. I'm not sure we're going to bring that down to about 50%. Now another thing I want to do is I want to actually painting a little bit more color onto her eyes, but unsettled painting color, I'm going to actually use the hue saturation adjustment layer. So let's go ahead and let's increase the saturation. And again, I'm only looking at the iss. Sine increases saturation a little bit. I want to look at specifically the blues. And I see the blues increasing in her eyes. Makes a lightness and a little bit higher. Nominal. So just a science because there's quite a bit of cyan and her eyes as well. And there we go. So I'm going to fill this in with black. And then painting with white. And again, all these edits are very sort of buy UCI. I'm adding a little bit of blue into her eye. That's all I really want from this particular layer. So if you told you this before and after, you see there's slightly more blue and her eye giving it a little bit more of a pop. Very nice. And you can do a lot more different edits if you want. You can add more color to her lips, which I'm going to do really quickly. So let's make another hue saturation layer. And I'm going to focus on her lips. So I'm going to adjust the reds, increase the saturation as well as the brightness just a little bit. And you can change the color of her lips. I might actually make them a little bit more to the magenta kind of colors. That isn't just the magenta is now increased the saturation of that. You don't go crazy with saturation ever because it can make your image look horrible. So anywhere between ten, maximum, 15 or 20 in either direction is all you ever really want to go with their image. So keep that in mind. So now let's go ahead and fill the layer in with black. And we're going to paint what the white over her lips with a bigger brush. So as you see writing a little bit of pop of color in her lips. And again, if you think that is too much, you can go ahead, reduce the opacity. I'll reduce it down to about 5770%. And like before and after, just a little bit of extra color and her lips. And that's all that we really want to do with the dodging and burning x. I'm going to go over some liquefy techniques that you can apply to your image. So let's keep going.
7. Liquify: So now we want to add a little bit of a liquefy to our image. But before we do that, let's combine all of these layers that we created in the previous few videos into one layer. So like we've done before, we're gonna hit control all shift E or Command Option Shift e on your keyboard. And we have now all of our edits put into one layer. Now before we go ahead and do our look of five, it'll be the smart thing to make this layer into a smart layer. So you can do this two ways. You can right-click and just be Convert to Smart Object. Or it can come up to here to filter and convert for smart filters, as you see, is just converting into a Smart Object either way. And that's what we want to do. We want to have the smart object. So I'll just go ahead and let's do filter liquefy. And you're going to have this dialogue auction come up with all these different options here. So now what if we want to edit our image? Now you never want to make your brush bigger or smaller than the area that you want to adjust. So if I want to adjust her eye, I'm never gonna use a brush that's this small, nor am I going to use a brush that's this big. I'm going to use a brush that's about the size of her eye and that's what I want to use, the same for everything else. Now for this particular image, I kind of want to adjust her nose here and a little bit. So let me zoom in a little bit and you have a few different options here. You have Forward Warp reconstruct smooth. For now we're just going to use a Forward Warp tool. And I'm gonna make my brush about the size of her nose. And I just want to do small subtle edits. You never want to go and do a big edit like that. That's never gonna look good. You always want to do just ever so slightly small and subtle edit. So I'm gonna just some of the things here. There we go. We can adjust her lips and little bit. I'm gonna bring this side n may cover ever so slightly smaller can be about the size of her lips. And then we go. There we go. I like that how that's looking. It's very subtle edit, but I'm trying to fix those a little bit of a bump or curve in her nose. And when it comes to this type of editing, you want to get rid of that as much as possible. Some happy with that, I'm going to go with that. And then you can just hit OK. And there's our edit. So because we made this as a smart filter, we can turn that, liquefy it on and off very simply. So we can click this to turn it off. That's before. And it has to do the Smart Filter again, has to render it, and that is after. So you can toggle it off and on. Very simply, just like that. That's the change that we made. It's very subtle. But as you see, it's just these little tweaks that you can make using the liquefied tool. And like I said, a little bit goes a long way, don't go anything too crazy with the lips and nose, eyes, anything like that. You do not want to do that. So in the next video, we're gonna do some final color adjustments to this image and finish it up, finish up our edit.
8. Color Grading: All right, and now we're ready to do some final color grading on our image, which is honestly one of my favorite parts because this is where your image finally gets its final look. And I'm really excited for this. So let's get started. I'm only gonna do three adjustment layers to this image. To finish up, I'm going to go very light on the editing. I wanted to really focus on the retouching aspect in this, in this course. I really wanted to focus on the retouching aspect in this course. Well, let's do a little bit of final color grading. So first things first, what I'm going to do is I'm going to do a color lookup. That's Adjustment layer I'm going to use. And it's going to apply a lot of 3D left to your image. And these are essentially a type of presets that you can apply to your images. So what I'm going to use for today is one that is called Fuji F12, 52395. This is all made by Adobe. And what I'm going to do is I'm just going to lower the opacity of this down to about 40%. I don't want it to be too crazy. Just 40% is fine. And the next layer that I'm going to apply is a Levels Adjustment Layer. So I'm just going to bring the blacks a little bit up to about 11. Yeah, don't go too crazy. Level up to 13. And they'll want to bring this in midpoint down to about 1.01.26, gets some of that detail back. And I'm not going to touch this point over here. And the last thing that I'm going to do is I'm gonna apply a selective color adjustment layer. This is one my favorites because you can selectively adjust the colors in your image. So specifically what I'm going to adjust is going to be the blacks in our image. So you can choose from this drop down. We're gonna select blacks and all we're gonna do is we're going to adjust the cyan and magenta off the black. We want to bring the science up to about, let's go plus 20. You can go to the left as you see the ads read into R blacks. If we go right, it adds some cyan into our Blacks. So we want to go to about 20. And now if we adjust the magenta, this adds green or it has to magenta to your image and it's going to balance out the cyan green that we just added. So I'm gonna go up to about plus 15 tube up there. And that's like a before and after we've made our edit. So this is before and this is after. Its very simple with just a little edit to our images to make it look a little bit better. And that is our final edit. Let's go back and look at our before and after of everything that we've done today. Okay. So let's go ahead. I'm going to group everything together. Just select everything, group it together. And I'm just doing this to show you the before and after. So this is the image that we started with today. As you see, all the blemishes included. No editing, no nothing. And we finished with this lot smoother skin, no blemishes, completely clean, clean edges, clean color, everything, no blocks, genus, no blemishes, null nothing. We cleaned up the hair and he did it a little bit of color grading to our image. And that is our final edit. Again, the before and after, it takes time, but the results are very effective. You can see this type of edit being on the cover of a magazine and an ad, and any kind of promotional material for any kind of luxury brand. You will see this everywhere. So in the next video, we're going to just go over some final thoughts moving forward from this course.
9. Final Thoughts: And there you have it. You've made it through my course, Adobe Photoshop, high-end skin retouching. I hope that you've learned a lot today, tips and tricks that you can apply to your own high-end retouching edits. I highly encourage you to create your own retouching edit using what I taught and drop the before and after down to the students submitted project section. I'd really love to see what you've created. I would like to mention that I'm selling Lightroom presets right now for a special introductory price or from my website. So head over to www dot the real Tom Chi.com forward slash presets to get your presets today. And these are perfect to use in Lightroom to apply cool styles to your photography or edits that you do. These aren't perfect for the final color grading part of retouching or any edit that you make, you can just throw your photo into Lightroom and apply one of my many presets to give it that final high-quality color graded look. If you've enjoyed this course, I encourage you to leave a review on rating as that helps me out a lot. And feel free to check on my teacher page to check out other Lightroom and Photoshop courses that I've made, ranging from beginner courses all the way to mesh three level courses. And it's been a pleasure teaching you today and I hope to see you again in a future course. Take it easy.
 Tom Kai, Senior Graphic Designer & Art Director