Transcripts
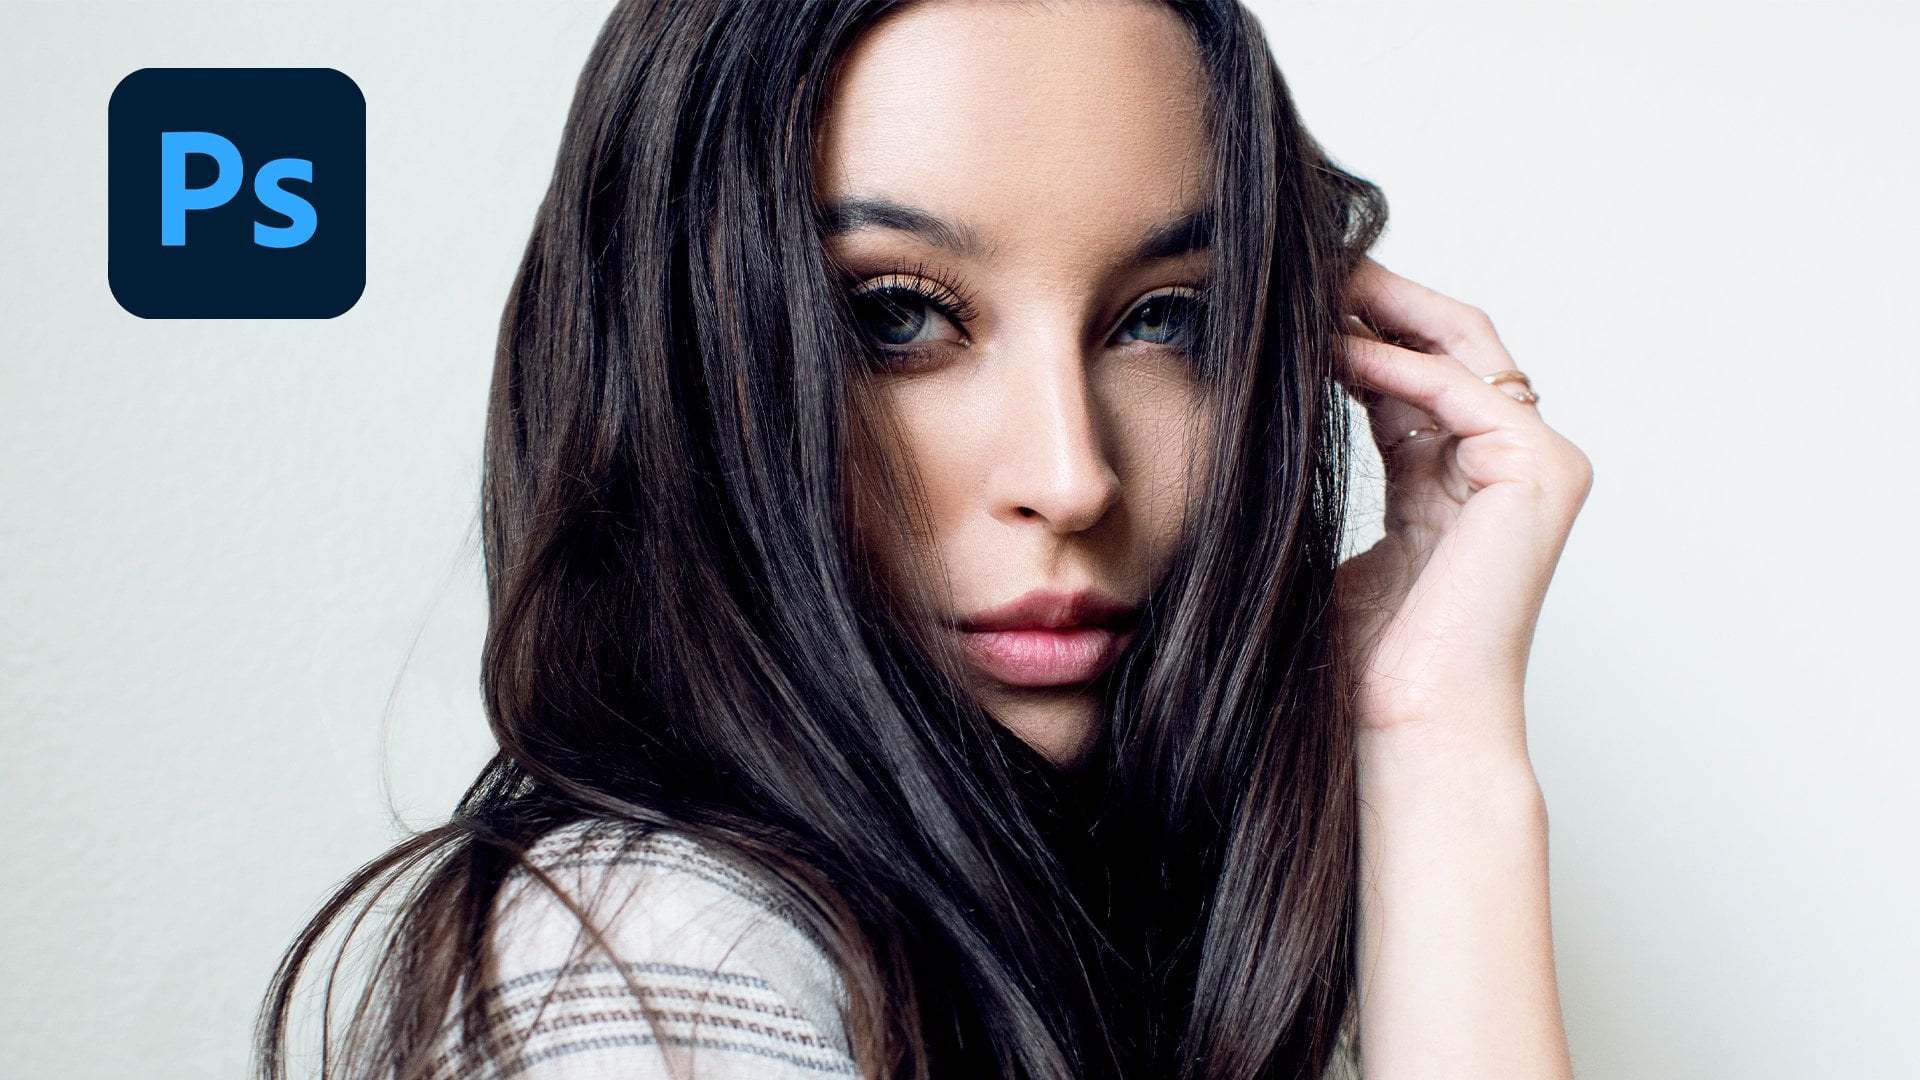
1. Introduction: One of the most advanced techniques and Photoshopped compositing is creating convincingly realistic reflections in water. Having a good reflection can completely change an image. It may seem easy in its theory to create a reflection. What, how do you account for all the bumps in the water and waves? What about all the light and distortions that happened in naturally occurring reflections? It can seem like quite a difficult thing to recreate. And it can be if you don't know what you are doing, lucky for you. I am here today to show you in a quick and concise way, three different methods in which you can create reflections in your edits and Photoshop composites. So with that said, welcome to my next course in my Photoshop masterclass series, photoshop composite masterclass, water reflections. My name is Tom Chi and I've been a photographer and graphic designer for almost 12 years now and from United States and I travel around shooting photos and designing from various clients and companies. But I mainly specializing fashion rationale and commercial photography and design. It's honestly the best job because I'm able to be creative every single day. You'll see a few examples of my work on, on the screen now. But if you want to see more, you can check out my website at www dot the real Tom Chi.com or look me up on Instagram at the real Tang Chi, He can maybe even legal follow, just see what I'm up to. I'm actually really excited to bring you this course today because I remember just how excited I was when I first learned the proper techniques and ways in which to create reflections in water. You can bet that my edits on the next couple of weeks had a lot of reflections. And it, speaking professionally though, this is a skill and technique that can really set you apart from those just starting out or whose skills may seem more mediocre. This is an expert level skill when done right, and can elevate your work to that higher level. And that's a creative want to be seen as an expert. I know I take much pride in what I know and I want you to have that as well. Their creative field can be a very daunting and cutthroat 11 in which if you don't know certain skill, you can literally lose out on clients and money. And I don't want that to happen to you. I can tell you from experience that I've had to specific ad campaigns, one free jeweler and one for perfume company. That hadn't me create reflections of their products floating above from water. So it's absolutely true that this combining some really cool work. I value my time a lot, but more importantly, I value yours because I sat where you are. I've been at the point of learning new skills, just getting started and wanting to really craft. I ended up being frustrated when I had to go through four to five, sometimes even more courses in tutorials just to learn one single skill. Michael is to make this to only Photoshop course you will ever need to learn how to create stunning water reflections for your edit SQL. This course is for anyone who'll Sadie highly refined and high level skill to their repertoire of design tools? Or did you create just for fun as a hobby or you want to lend proper clients and you create a work for others. This course is for you. So enough of this introduction, I want to get started. So I surely hope that you decide to enroll in this course is going to be a really information dense form. So if you do decide to enroll, I'll be seeing you in the very next video. Let's go.
2. Where To Find Free Photos: All right, if you hear them until you've decided to enroll in this course, and that is fantastic. But before we even hop into Photoshop, I'm going to show you where we can actually find free images to work with. I know some of you might be starting out and you might not know all the resources that are really available for you to get stunning images to work with. So I'm going to show you three websites where I get my images from that you can definitely use and get great free resources. So the first one you see right on my screen here is pixels.com. Pixels.com has a very, very high-quality arsenal of photos. I can just scroll through and look through. They have so much anything you want, you search it and they have it. They also have some videos if you do video work, but you can search anything, for example, found to look for a lion as do Lyon. I just searched lion and then I have all the photos that I want we see up here. We have almost 600 photos, 572 photos of alliance. So out of all of these unsure, you'll be able to find something for your composite. This one here can be very easily cut out and used for something very good. Now another website that I use quite often is actually pixabay.com. Now, Pixabay boast that it has almost 2 million stock images for you to use. And the good thing with Pixabay is they don't just have photos and they have illustrations, vectors, videos, and music. So no matter what kind of project you do, you can find something here. And one of the good sides about pixabay is Anson truly unique the types of images? What do I mean when I say unique? Things like UFOs, things like aliens. If you want to get like a sci-fi edit going or even a fantasy at it. You can search different monsters on find something really cool. Let me show you. So for example, let's say I want to get a fantasy edit. So let me just go ahead and let me just type in fantasy. And then we'll see all the things that can come up. We see different statutes here. We can see some kind of a Pegasus horse here. So you can find some really unique images. You can see other composites that people have already made, but you can find some really quirky images to use from this website. So I found some really cool images from this site. Now my personal favorite website where I get the majority of my photo, Islam is an splashing.com. I've found personally the An's Match.com is probably the highest quality out there. When it comes to free photos, you can scroll down again and see what they're offering. But the good thing with on splashes if all these categories up top. So if there's something that you have in mind for your composite, you can really have a good starting point. Now, I do a lot of stuff with fashion, with model. So I can go up here to the fashion and I can find some really interesting things to use. And this could be very interesting to use in a composite. Alright, so you can just look through here and you can find some really high-quality, good images. Now one thing to keep in mind went on splash and other websites as well, is if you find an image that you want to download, let's find one here. Let's find this sky Here, for example. Don't just click download free. You can, it's not necessarily going to be the highest quality. What you want to do is click this drop down here right next to that. And you see we have a few different sizes here with small, medium, large, and original size. And as you see, the original size is even bigger than the large. So we always want to download the original size. So you just click that, it's going to download it automatically. We also want to download the original size because that's going to give us the most amount of information to work with in our images and our edits. Okay, let me just exciter here. I'm going to be including all the photos that I used for this course in the download section for this course. So make sure you download it, extract the zip file, and be ready to go. Because in the very next video, we're going to be setting up a photoshop interface and diving right into our first method of creating a water reflection. So let's keep going.
3. Let's Setup Photoshop: All right, we're finally in Photoshop and almost ready to get started with our first method of creating a water reflection. But first we need to actually get our whole photoshop interface set up. So when you open up Photoshop for the first time, you will most likely find a screen that looks like this. So what I want to do is just click Create New. We're gonna create a new canvas. Now you can create any size canvas that you want. But for this particular piece, I'm going to have mine be an eight by ten inch at 300 pixels per inch. I'm making this with the intent of a gone onto my Instagram. And there we want a four to five ratio. So we are going with an eight by ten inch for this very first piece. Okay, so let's just click Create. Photoshop is going to take a second here. Locally. Your interface here might look different than mine. Yours might look something like this. Let me go ahead and reset my workspace. It might look like this when you first open it up. So let's go ahead and change it to what I have minus, because that's gonna make your workflow so much easier going forward for this course. Alright, so first thing I do as I drag this Properties panel just off there and up to this little sidebar over here. And instead of having my library's open here, I just have my adjustments. And then I drag this up so I can see as much of my layer panel as possible. Alright. Now you notice I have some brushes over here on the left. Now why do I have my brushes out like that? Well, let's just imagine that I'm working on my piece and I need to do some shading. So I'd go over here to my brush. I'd have to hold down my chairman, the brush tool. I'd find my proper brush here. I need a soft brush, changed the hardness, changed the size. And then I start painting is quite tedious because now I'm like, okay, I need to change my brush. Okay, let me go find this other brush. I want this brush, little less hardness, make it smaller. This is very time-consuming, as you can see going back and forth. So let me delete this and let me show you why I have the brushes out here. So let's go to window and let's just click brushes. And now it's going to open it here on the right. We don't want it there. We want to click and drag it off of that. And I'm going to drag it to the left until we see a blue line going across this left sidebar and then you just like go. So now we have all our brushes open here, which is fantastic. So now if I want to do the same thing I did before, let's make a new layer. I can pick my brush, change the size, and I'm painting. And then I decide, oh, I want a heart of rush. Quick, harder brush, make a little bit bigger and I'm continuing. Okay, so this really makes your workflow so much faster having all these different brushes readily available for you to just go through. Okay, and especially for composite work, this is super handy because you end up going between shadows, highlights different colors a lot. So this is going to be very handy. You pick your brush, you pick a color, and you continue. Okay, so I'm just going to go ahead and delete this layer. And we essentially have our whole workspace setup. So in the next video, we're going to do our very first method. It's going to be the simple method of creating a water Reflection to make sure you download all the material again, that is provided for this course on set the file with the images. And we're gonna get started. Let's go.
4. Simple Method: And we're finally ready to get started with our very first method of creating a water reflection ends can be a very simple 11 that you might already know how to do, but I'm going to tweak it a little bit just to make it a little bit more interesting. Okay, let me show you what I mean. Okay, let's go to file and place embedded. That's always how we want to insert our images here because it's gonna make it into a Smart Object and that's important. So let's go ahead and choose the simple method sample image that's included with the downloads. And let's just go ahead for now. Let's just stretch it to be as wide as our canvas here. Okay? Just hit Enter. And I'm going to find a position where I want this to be at. Now, I'm envisioning this is that this cliff is more of an outcropping or an island in this water. So how am I going to do that? Very simply, let me go ahead and duplicate this layer. Lets us do Control or Command J. And now that's duplicated. Now let's go ahead and go to edit, transform and flip vertical snowflake down. So you can now drag this down and you see we have kind of a reflection going on. Now. First things first before we do anything else, I'm gonna do control Clemente and we're going to hold down shift. So I wanted to compress this just a little bit. Okay, just about that much. That's an enter. And now let's turn the opacity of this layer down to about 58%, just so we can see both layers here. And now we're going to drag this to a point where I'm happy with where it's going to meet the water. Okay? Now I do recommend you keep in mind rule of thirds. So if we drag down our ruler here, we're gonna have one up here where this man is. And I want the other one to be where my waterline is going to be. So somewhere in this area is where I want that to be. Okay. So I see this here is a fairly decent spot, like so. So now what I'm going to do is very simple. I'm gonna get my mark ketone, just hit em on your keyboard. And we're going to drag a rectangle over the part that we want to keep. Alright, make sure on your, on, make sure that you're on the reflection layer and which is going to mask that out. We can now put del pesto this backup. And if we hide these rulers, you can just do Control or Command and semicolon on your keyboard. And you see now we have somewhat of a reflection going on. It's not too bad, right? But we can make this even better. Okay? So first thing I'm gonna do is I'm going to give it a little bit more interest. Water is wavy, it ripples, and this is two flat to-to mirrored. Okay, so how are we going to deal with this? Very simply? First things first, I'm going to just make sure I'm on this layer. I'm gonna go to Filter and liquefy it. You're going to be met with the liquefied dialogue box and you might not see the backdrop. You might just see this. I recommend you turn on the backdrop so you see what part you should actually be altering. And now let me zoom in here so that you can actually see what's going to happen. And I'm going to use this first tool here, the forward work tool, but along to make it a lot smaller. There we go. And you can also change the density and pressure. Am I put the pressure down to about 80? And all you're gonna do is just click a little bit and drag, click dragon hold. I might make my brush a little bit bigger. Something like 200 should be fine for the brush. I'm just gonna click and drag. And you don't see too much of what you're doing now here. But you can toggle off the backdrop and then you see the little warp that you're doing to this actual image. So I'm just trying to add a little bit of this detail and interest to the reflection. Be mindful up the edges here that you don't pull in more of the white from our artwork, from the background. There we go. Learning things a little bit. Ticket time of this doesn't have to be perfect by any means. So if we toggle the backdrop off, you see it's kind of swirled and moved around now and then just hit. Okay. And you see now this bottom area here is all fraud and looks a lot better in my opinion, but we're not done yet. Reflections can tend to be a little bit darker than the actual area above it. So how are we going to do that? Very simple, just so simple brightness contrast layer. We're going to bring the brightness down just a little bit, not too much, just minus 15. But we want to blend it out from this edge here. Because the way I have this imagined is this water is coming and wrapping around this little outcropping. So how are we going to deal with this? We're going to put a mask that we already have here. We're going to paint on this mask width, a black brush. So just a D on your keyboard is gonna make the default color black and white. Light will be on top and just hit X to get your black brush. And I'm just going to slowly paint this edge away just so that it looks a little bit more natural. There we go. So that's the blended a little bit better. So look before and after. All right, and now I want to add a little bit of a shadow that would be cast by this island because we see our son. Let me just draw over here with my brush. Our sun lives somewhere over here, okay? And the light is coming to the back of this cliff in this imaginary scenario. So that means this is going to cast a shadow in this area here. Okay, so that's what we want to recreate. Let's just hit Delete on that. We can make another layer above this and we can get our brush out. Let's make it bigger. Something like this. And I'm going to sample one of the darkest colors in the shadowy area here. It's like a dark brown. There we go. And I'm going to start to paint just in this area. Just like this. Doesn't look too good, does it? Let's go ahead, change the Blending Mode down to multiply. And we're going to bring opacity of this all the way down. This is the very subtle shadow. Down to about 30 twenty nine thirty eight twenty nine percent should do just line see before and after. And we can clean up some of this edge. We can just get our eraser groups. We can just say E, get our eraser. And we can clean up some of these edges here, like so. And at this point you can go ahead and do some finishing touches to this piece. So what would I do to finish up this piece? Well, I would add a little bit of a gradient and going from the bottom. So let's hit G And make sure when our gradient tool, I like to use this preset here because this one uses a your top color here and gradate set out to nothing. Okay? So I'm gonna keep that same dark brown color and I'm going to drag it to cover just a little bit above where we have our water line. Just like that. And I'm just going to lower the opacity of this down to about maybe 18%, something like that. And then for the top, let's sample this. It's nice blue color. I want to make that a little bit richer. Suffering the Saturation up a little bit, something like that. And we'll do the same thing for the sky, just make a little richer and offering no passage of that down. So before the gradients and after, okay, we're adding in a little bit more depth to our image. And then I'll probably finish this off with some kind of a color lookup. I'm going to go with a foggy night. These are just presets you can apply to your edits, your images. Let's call it foggy nights. We can close this dialogue box here. And I'm going to have this very low capacity may be at, let's say, 56%. And then I will do an overall brightness adjust for our whole imaged, get it up to a nice point, something like this. There we have a very simple method in which you can create a reflection that looks fairly decent. It's not just as simple as copying the first image, reflecting it over. You see we did a little bit more edition down here swirling it. And you can take more time to go into detail with that little brush and get more wavy effects going on. Okay, by single-sided the shadow, who added a gradient to really make it a little bit better than just like I said, doing a simple transform. Now in the next video we're gonna go over a more intermediate level of creating a water reflection. And that is going to be by using a displacement map. And it's going to be very fun, very interesting. Summation. We're ready, we're gonna hop right into that. Let's go.
5. Displacement Map Method: Alright, so we finished the simple method. Now we're getting ready to get a little more intermediate here and do a displacement map method. I remember when I first learned this, it was such a cool method to learn and I'm excited to teach you today. So first of all, make sure that you've saved this previous method that we've done as a Photoshop file. So just do control command S And it should auto save it as a Photoshop file. If you haven't saved it yet, you'll have a dialog box that's going to ask you to save it as a Photoshop file mix you have to save. And for now let's go ahead and let's just do File New. And we're going to create ourselves a new canvas. We're going to be creating one with a width of 10000350 and our height is going to be 2400. Okay, so I'm making this with the intent of it glom onto an Instagram story, for example. So it's going to be a lot narrower, but it's going to still look really cool. Resolution, I will bring that down to about 240. Because first thing that we're going to do is to create a displacement map. We're not even going to touch our image for the first couple of minutes of the section. Salt mixture with a 1350 height, 20400. And then let's just click Create. So now we have ourselves a new art board here to work with. So let's get started by going to filter. We're going to go down to noise, add noise. And we're going to drag this anon up all the way to 400. We're gonna change the distribution from uniform to Gaussian. It's going to change that a little bit and we're going to keep this app monochromatic. So let's hit OK. And as you notice, we're doing this on the background layer. Ok, so just keep that in mind. And now we want to blur this a little bit. Let's go to filter blur. We're gonna go to Gaussian blur, my favorite type of blur. And we're only going to do a small blur, maybe two to three pixels. Do right in the middle, 2.5 pixel blur. And let's hit OK on that. Alright, and the next step is we want to go over to our channels and make sure we're adjusting all of them right now we're on the RGB. So we have everything showing here. And we're simply going to go to Filter, stylize, and then we're going to click em boss. Now don't be too overwhelmed by this. I'm gonna walk you through all of this. We're going to have the angle for this first one be 90 degrees. The height is going to be just one pixel. Just fairly subtle. And the amount is going to be 500% or going to max that out. Okay? So I just hit OK. And now we're done. Now we want to do a similar thing but only to the red channel salt. Make sure you click the red. It's going to turn everything else off. And we're going to do the same filter and go to Filter, stylized and boss. And instead of 90 degrees, we're going to have this be 150 degrees. You might need to type it in. Every guy got 150 degrees. Again, just one pixel height and 500% for the amount. That said, okay, lovely. Next we want to do same thing for green. So let's click green. I'm gonna go to filter. We're going to go to stylize and boss. We're adding more texture and detail to our different color channels. Okay. We want this to be 90 degrees. We're taking this channel right there. I'm going to type it in and it's going to be easier that way. Height or keeping that at one pixel and amount 500%. That's it. Okay, and now we're going to turn all of these on. As you see now we have some colors in here. How cool is that? So now we're going to want to zoom out and zoom out. And you're going to hit Control or Command T on your background layer. But before you do that, you're going to have to click this little lock button here. It's going to unlock that layer. Should just do Control or Command T. And we're going to drag out these corners until the width is about 2% thousand. He can just go ahead and type it in here. But we only want it to be applied to the bottom side of this image. Okay, so let's go ahead and do that. So the easiest way to do that, you just gonna go to edit, transform perspective. We want to deal with the perspective of this. So now you see if I drag these handles here and it's going to drag it in a prospective manner. So let's drag this until our width goes to about 2% thousand. And if you need to, you might have to zoom out a little bit. So I'm just gonna hit this button here to cancel that, I'm going to zoom out a little bit more. So again, this edit transform prospective, and we're going to bring this till the width is about 2 thousand, doesn't have to be exactly 2 thousand, but let's do that and then just hit Enter or click this check mark up here. I'm going to hit enter on my keyboard and I can zoom in again. And as you see, this is starting to look kind of like some water. Isn't it? Very cool. So now we're essentially done with our displacement map here. Okay, next thing that we do, we have to save this as a Photoshop file. So just File, Save As make sure you know, we're saving it. And I'm going to call this displacement map maker. It's Photoshop file and save. Perfect just said, okay, and at this point you can close this out. So loved previous one up here, but let's go ahead and do File New. And we're going to create a document in the same size that we just had said This time it'll be 300 pixels per inch. And let's click Create. And now we can essentially do what we did in the previous video and get our image placed in here. So File Place Embedded, we're going to place our displacement map method sample image. So select that click Place and just drag it to a point where you think it would look nice. Note I get a little bit higher. Something like, so it's going to hit enter were very nice. And at this point, I want to get the section that I'm gonna be reflecting here. So I'm just going to duplicate this layer Control or Command J duplicated. And now is when I'm actually going to be applying my displacement map to this. So now I'm going to do is control command t.test. Go to edit, transform flip vertical. So now it's going to be a mirrored image over the vertical axis here. There we go. And now at Santa, actually apply our displacement maps. So make sure you're on this layer here. We're gonna go to filter. Then we're gonna go down to distort and displace. Now for horizontal scale, we'll have it via five. Vertical scale can be ten. And we're going to keep everything else the way it is stretched to fit. Pete edge pixels. Nothing to change there. Let's hit OK. And you'll have a dialog box. This is where you're going to select your displacement maps. So find it, click it and click Open. And as you see, we have now applied that map to this. If I drag this up, you can see this is all distorted and warp, which is exactly what we want. Now another thing I will do is I'm going to hit controller Command T on this. Smart filters will be turned off. That's totally fine. And I'm gonna hold down shift and ungenerous, going to squish this together a little bit and hit Enter. It's going to apply the displacement again. And I can bring this down to where I want it. Now I want this to start right at the edge of the bottom here. So that's what I'm going to cut this edge off here. So I'm gonna create a mask on this, on our displacement reflection here. And using the Marquee Tool, I'll get OK, make sure we have everything properly subdominant. Pull this up and what the marquee tool, I'm going to select it to the point where I want it just underneath the stairs. And whatnot selection since I already have a mask on here and it's going to paint outside it. So Control or Command Shift, I don't invert that. And with a black, should we have black brush, full opacity to paint that straight edge there for now. That's a controller Command D to Deselect. And now we can bring that down to about there. But bringing it up just a smudge. Like so. So now this is like this temple is gone right into this little lake or pond that's right in front of it, which is a very cool looking. But this edge here is now two straight onto, soften it up. So it's going to be very simple on this layer with the mask. Get your brush out again, going to make it smaller. And now what if I paint them black on be painting it away? If I paint in white, Let me just undo them. If I paint in white, you can hit X to ship colors. I'm gonna be adding back into that. Alright, so keep that in mind. Now what I want to do is I want to paint in black, but I'm going to do it very simply. I'm going to click here, hold down shift, and I'm going to click on the other side. You see that, that, uh, nice little gradient across their straight-line, Straight Edge. And that's looking a lot better. And a little bit more realistic than having just a straight edge. And ten softening up edges generally helps when it comes to compositing. It makes it images look a lot better. Now we can go ahead and do similar technique that we did before, darkening this down a little bit, et cetera. So let's go ahead and let's add a brightness contrast layer to this mixture. We clip it them. So when I say clip it down, I'm using this button or I can click Alt Option and click between these layers. And what clipping down does, it means that it's going to apply this layer. The layer below it. So if I change the brightness here, that's Amika, incredibly dark. It's only affecting the layer that it's clipped to. Okay. It's not affecting everything. If I unclicked it and it's going to apply it to the whole image. So we clip it down because we want to apply that certain adjustment to a specific layer. And I've had a few questions about what I mean when I say clipping and that's what I mean when I say clipping and the button is right here, you can also clip. And it says this adjustment clips to the layer, clip to effect all layers below. Okay. So I'm gonna click this down to the reflection layer. And for the Brightness, I'm only going to bring it down slightly, maybe to about 30 on this slider. Very nice. And I might as well add a little bit of a gradient and again, clip this new layer down at G, going to have our gradient tool here. And I'm gonna sample that dark color we have here. And I'm going to pull this up to about this much. And then pull the opacity of that all the way down. Bring it to about 40%, whatever it looks as natural as possible, reflections tend to be a little bit darker than the actual thing it's reflecting because there's stuff underneath the water. So you can imagine that there is there underneath this, or this is a manmade pond that we're imagining here that might be a pond liner, the bottom of that might be black. So in this scenario, we have a black bottom lining to this, to this little pond here. So that's why it's known to be a little bit darker. Alright, so we have that done. And at this point you can go ahead and do your finishing touches to this image. So again, I'm gonna do another color lookup. Let's go ahead and choose. Let's look through these really quickly, see if there's anything that stands out in particular. Now we'll catch our eyes. My favorite is always the foggy nights, but I don't want to use that all the time. Let's go ahead with this. Fuji EteRNA 250 d Kodak 2-3, 95. Okay, so let's see patristic bleak. Let's just futuristic bleak. So we're gonna put opacity all the way down and then just slowly edge it up or adding a little bit of this green, green tint to our image. And there we go. We have now done a water reflection using a displacement map. And as you see if we look here, we zoom in, we see the ripples in here that we've created. And that looks really, really cool. I like that. And as you see, it gets a little lighter here by the edge here because there's a little more light being reflected off of the trees, off of these steps. And that looks a very nice, I'm really happy with how this came out. So make sure you save this as a Photoshop file. Just hit command S, control command S And you'll be saving it. And in the next video, we're going to go over the hardest method to create a water reflection, but probably the most convincing looking out on all of these are going to be using the 3D function right here. 3d function of Photoshop is going to be very interesting, very in-depth, and I'm really excited to show it to you. So let's keep going.
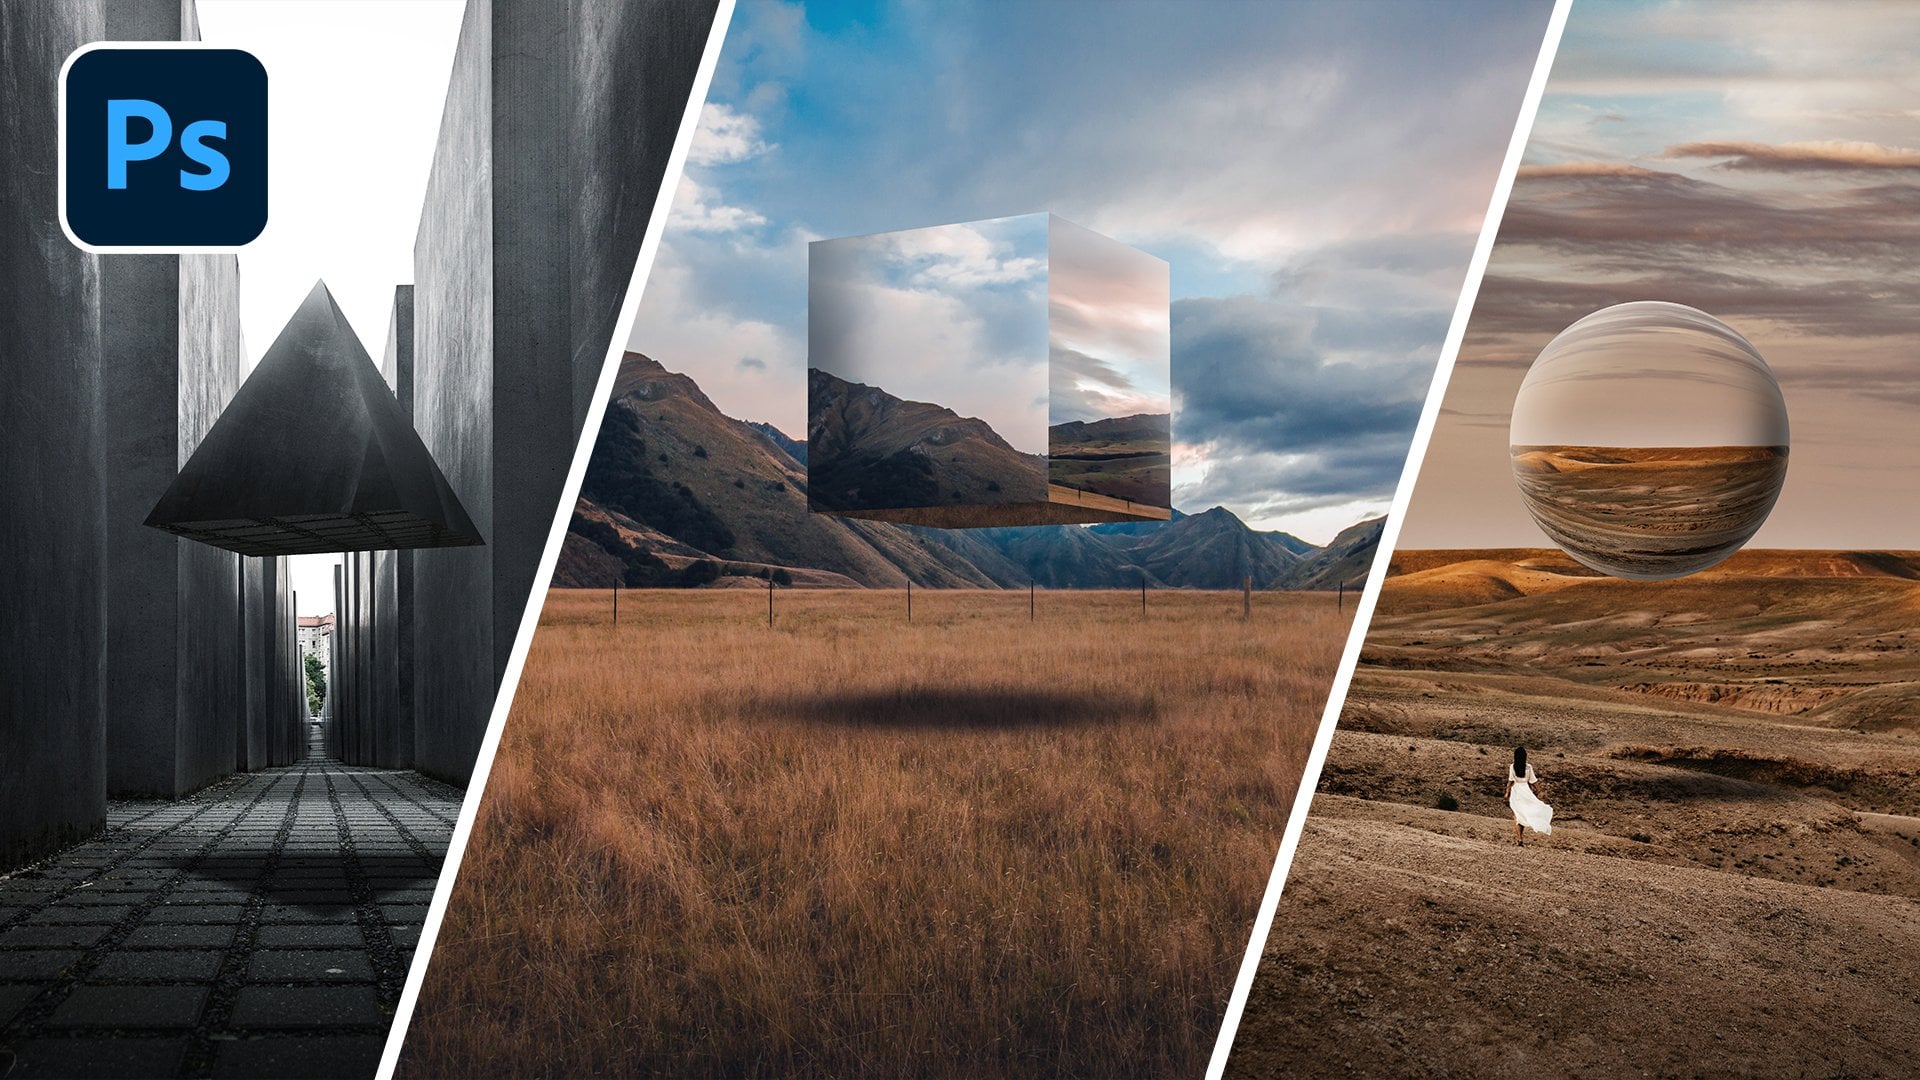
6. 3D Method: And we've gone to our third and final method for today of creating water fluxions. And that is going to be the 3d method that's ever going to be using the 3D functions built right into Photoshop to create a stunning reflection and our edit. What first of all, let's go ahead and create a new document first work with, so let's go to File New. And for this one I wanted to be a four by five ratio. And I wanted to be horizontal. Don't want it to be vertical, horizontal. So width of five inches, height of four inches, and the resolution is going to be 300 pixels per inch. So let's go ahead and click Create, and we now have our new document. Cool. So let's go ahead and place in the image will be working with soldiers File, Place Embedded. Navigate to the 3D method sample image. And let's click Place. And there we go. I'm going to pull this up to this point here. And you do want to make sure that before we continue from this step, you have your final image edited to as much as you want if you want to change the sky, now's the time to do it. If you want to add any other elements, now is the time. So for example, if I wanted to have someone floating in the sky here or an orb, I would have thought that now because once I start with the 3d process, I can't exactly go back and make any other changes to our background image. Right? So with that done, and with that said, let's go ahead and let's create a new layer. And we're going to fill this in with black. So if you have black as your foreground color here, just go ahead and click Alt backspace. Or if you're on a Mac, it's optionally and it'll fill in this layer with black. All right, and now it's time for us to go into our 3D workspace. Want to make both of these layers into 3D layers. So first, let's go ahead and rename this. I'll have this be called background. And then I have to black layer B called the water. That's black layer can really be whatever color you want because we'll be changing the color, the everything later on. But for now can be just a black layer. It's called water. So let's go up here to 3D. We're gonna go down to New mesh from layer and postcard. Photoshop will take a second. It's going to ask if you want to switch fade 3D workspace. I'm not going to because I'm recording right now and that wouldn't miss a few things up. But if you want to switch to a 3D workspace, by all means, you're welcome to do so. But for this tutorial, for this course, I'm not going to be switching to the 3D workspace today. So I'm just gonna go ahead, click no, and then take a second to convert it over and you see things are a little bit different. Let's go ahead and do the same thing for our background layer. Ok, so background 3D, new mesh from layer and postcard. Again, just click no. And you can exactly see what we've done. But if you use this orbiting Tool, which is this one that looks kind of like a UFO. You can click and drag and go around the whole canvas here. Alright, she can move around. And as you see if we turn this layer, we can see things are a little bit moved around. Now if I want to get back to my original view, I'm going to go to Window 3D. And then on the current view, double-click that. And I want it to be the default view. Okay, so if I hide this, I go back to the background. I can make that be the default view as well. It's going to fix that to where it was in the original art board. Okay. So now we can get started with everything, but let's go ahead and let's just put a grey background because it might get a little bit complicated having this y here, it'll be a little bit distracting. So let's just create a new layer, but we'll everything else. I'm going to select the nice gray color here. And what my paint bucket tool just kinda fill that. And now if this background color of Photoshop is too dark for you can just right-click outside here and make it into a medium grey or light gray. I tend to work with the dark gray, but it might default to a black for you depending what your setup is like. So let's keep going. And now that we have our gray back on added, we're going to actually merge our water and our background layers together. So with these two layers selected, we're going to do Control or Command E. So Control Command E. And these are now one layer. We see we have the water and we have the background. Ok? So now that we have our newly group layers won't actually rotate. The water layer. Waters on exactly vertical, is it? It's horizontal. So let's go ahead and do that. So with our Uli group background layer here, we're gonna go to our water mesh over here. And as you see we can, we can move it around now. And you're just going to double-click on that. And you're gonna go over here to coordinates. And what we're going to do is we're just going to rotate the water by 90 degrees on the x-axis. So let's go ahead on the x. I'm going to rotate it by 90 degrees. Now we can't exactly see it, can we? That's fine. We're gonna move it down as well. So now that we have that done, perfect. Gonna move on the z axis. So as you see, as we move it down, it's creating a little plain here that we can actually move. And you want to move this to where you want the water to begin. Ok, so I want my water to be at around this spot here. Okay? Now we have a little bit of an issue. Don't wait. And that is we have this space down here because this black, this is going to be the water. So how are we going to fix of this section down here? It's actually going to be very simple. So with our background selection here, on backend layer selected, I'm gonna go to your 3D panel and here is the camera. It's on current view, such as double-click that. And if we go over here to this tab here we see the properties of our camera can be just a field of view and depth of field, all kinds of things. But now we have to play around with a few sliders. So I'm going to do is I'm gonna bring the SLB all the way down. Let's start with the 17. And now I'm going to use this tool up here. And this is going to be the slide that 3D camera. We're gonna slide everything closer to the camera or a camera closer to our subject here. So if you hold down shift, click and then you start dragging towards yourself. We're going to be bringing this closer to the camera. And I want to bring this to the point where everything is being filled in. So you see from a little further and now our screen is filled in, okay, so we don't want any white gaps here and now we're done. So that's pretty cool. Now we can get started with our water mesh layer here. Okay, so under the 3D section here. Want to double-click on our water mesh layer here, not the water mesh group by more of the layer here with the water. So let's just double-click that. Lovely. Now we want to actually adjust the material of our water here. Okay, so the first thing that we want to do is we want to go over here to the drop-down here. And so it's something that's going to be close enough to water. So we're gonna go with this one here because this is super reflective are, so he's just going to click that. And as you see, it's already changed the texture down here. But it doesn't look too good right now, does it. So what we have to remove the actual texture of this. So I'm going to close up this section here and scroll down. And here you see an environment. Click that. And I'll, we're going to do is we're going to remove texture. And there we go, the texture has been removed. And now we can actually go ahead and render our image by clicking this here. So let's click Render. And you can cancel a render by hitting escape on your keyboard. And I'm just going to let it do its thing. Let's hit escape at this point. If you cancel it, it'll keep what you've done up until that point and you can kind of get a sense of how things are looking. We see here it's not looking too good right now let's do a few little changes to the soccer. So I want to do is entrepot the glow all the way down to 0. We don't want there to be any Guo coming off of the water. It's being completely reflective. And another thing that we want to change, the base color to be black, that's going to be the most reflective by default. It's this dark gray but want to make it black. So let's hit OK. And now we can render it again. And this is essentially going to be an exact mirrored image of what we have up here. Alright, so let's just hit Escape. And as you see, this is essentially just a mirror of what's above it. So now we actually want to add some ripples to the water. And all the ripples will be adjusted here and the height section. Okay, so what are we going to base that off? We're essentially going to be making a displacement map for our height within the 3D panel here. So just click the folder over here and we're going to create a new texture. Ok, you can name this whatever you want. I'm just going to keep it as a water height. And you want this to be the exact same size of your document. So we have a width of five inches, height of five inches, and the same resolution. And at this point, you're just gonna go ahead and click OK. You hit OK. It's going to open up a new window for you here. And this is where we're going to be adjusting and creating our texture to use. Okay. Now we're going to be rendering out fibers. But when you render out fibers and Photoshop at renders them out and vertically. Okay, let me show you what that looks like. So you go to Filter Render fibers. By default that's going to be vertical and we want this to be horizontal. So we're gonna trick photoshop a little bit by rotating our canvas. So it's very simply just go to image and go down to image rotation. And we're going to do 90 degrees clockwise. Phrase simple. And now we can go ahead and go back into Filter, Render and fibers. And you're going to be met with this dialog box. And I want to change the variance. Let's bring that down to about ten. I might go nine. Let's go nine. And strength, we can keep that up for. You can randomize this until this pattern looks like something that you'd like. Shaking, just hit randomize. I'm going to keep this one. Looks pretty nice actually, I'm gonna keep this one. Let's hit OK. And now we have this surrendered. But now we want to rotate it back, fill just image, image rotation 90 degrees counterclockwise. And there we go. And that's how you can get horizontal fibres rendered out in Photoshop. But now I want actually blur this a little bit. So I'm gonna go up to filter. I'm going to go to blur. And for the first round of blurring, I'm going to do two, but for the first one it's going to be a motion blur. And I want this to be 0 degrees because we're working with water here. It's going to be horizontal. And you can type in 0 if you would like. And for the distance, I don't want it to be a 106 pixels. We're not going to crazy here. Let's go to about 32 pixels. Nice. And I wanted to add just a little bit more of a blur to this, like an overall blur. So let's go Filter Blur, Gaussian Blur and maybe just the two pixel blur 1.9. I said, okay, well, lovely, and let's go ahead and save it. Control or Command S. It saved us. And you can keep this open if you want. But now here it's going to be applying that as the height map that's going to be used for this image. So we can render this out again. Hit Render, and as you see, we now have ripples in our water, how cold is up. So I'm just going to hit escape because we're not ready to do the complete render just yet. Now, we just want to do a little bit more with our materials would have the heights. So we'll go over here to the height. We can adjust how much ripples we have an owl, how high they are, and we have a 10% height to this. But if we click this, this little folder over here, we can do edit UV properties. Alright, and what we're going to do is we're going to actually adjust the y scale here to be about about 200%. And you'll see the difference here. Let's go to about 200%. Let's hit OK. And now if we render it again, it's a little more wavy. Ok? And now you see we have a little bit of detail here on the left and right that is white, and that is because our image ends here. Okay, so it's bringing in detail from here where there is nothing, it's just white if we think of the Photoshop art board, white here. So it's bringing that in here because there's no other information, but we'll deal with this in just the second. Ok. Now another thing you might have noticed that might be a little bit too dark once we're rendering it out, it's quite dark down here. So how are we going to adjust that? Very easily? We're going to go over to our 3D panel. We're gonna go over tar light tab here. We have our environmental light. And it's very simple. You just bring the intensity of this light up. So point where you'd like it. Because working with 3D and phototropic tends to darken it down quite a bit. Okay, so now that we have this done, we're ready to do our final render. And after we do our final render, we're going to fix that white not white feathering issue that we have done here. So let's go ahead and let's hit render. This might take a minute or two depending on your computer. So just sit back and wait, and I'm gonna come back once mine has finished rendering. And there we have our final render took a couple of minutes here, but let's go ahead and let's do some final touches because I want to get rid of this little white haloing effect here. So there's a few ways we can go about this. But first, let's go ahead and put this into a new layer on its own so we can hit Control Command J. Now that we have that duplicated, we can just right-click Convert to Smart Object. And they're going to have one image to work with and can turn off everything else for now. But we have one image. So just a few ways you can do with this. You can crop in and crop that L, or it means a clone stamp method and just constant that out or use LSL tool and do some content aware. Before we go ahead and fix that, we're going to turn this into a rasterized objects. We're just going to right-click Rasterize Layer. And with our lasso tool selected, we're going to carefully go around the edge here. And we're going to select all the areas which we would like to fix. Okay, so I have the area selected. I'm just gonna go to edit content to wear fill. It's gonna take a second for Photoshop to do its thing. And I don't want it to sample from anything other than the water. So I'm going to erase everything else. So don't wanted to sample from the mountains or the sky, just wanted to sample from the water around it. We can see the preview over here. And as you see, it's doing a fairly decent job. We can adjust some of these quotation. Let's do a low rotation of the option. Color adoption. Let's do high cholera adaptation. Okay, let's go ahead. I'll portray New Layer and make sure we have that. Let's hit OK. So now that's now on a new layer. And we can fix up some of these edges and why it looks like it's been duplicated a lot. By making another layer, we can hit S to get our clone stamp tool. And you can just sample by doing alter option click somewhere. And then we just bring that over. We can fix a few of these little issues here go. So it doesn't look like it's being repeated too much enough. So that I think is going to do it. One last thing I'm going to do is I'm going to crop this a bottom edge in just a little bit. So let's go ahead and make sure when our crop tool just see on your keyboard only bring this up just a little bit. Hit the check mark. Lovely. And there we have it. We've created a very natural looking 3D rendered water reflection. It looks like a nice river moving fast here, and it looks really, really cool. I really like it. So in the next video, I'm gonna show you really quickly how to properly export and save all of these edits that we've made today. So let's keep going.
7. How To Export + Your Assignment: Alright, we've made it through all three methods of creating water reflections in Photoshop. And now it's actually time to save because I'm guessing you want to show off what you create it today. I know I would. So I'm gonna show you a few different ways in which you can and you should be saving your edits here. Now if you haven't already make sure you been saving along the whole time as a Photoshop file. If you haven't been doing it now for everything. And we're gonna go into the default methods that you might think of. So first method you might think of as a JPEG. So let's go ahead, let's do File Save As navigate to a folder where you want to save this is going to save this into a new folder here called final images. And I'm going to call this simple method. And I'm going to save this as a J peg motion going include JPEG in the title. So it's easier for me to find my images. So I'm gonna call it simple method.jpeg lets save. And then you see this is going to be 3.1 megabytes. Let's just hit OK. But if you want to put this onto our website, for example, into our portfolio, three megabytes is a little bit too big for a website. We generally want what's light images to be around the 500 kilobyte range? No more than one megabytes. So how are we going to do that? Very simply just go to file and go to export and safe for Web Legacy. You're going to be met with this dialogue box and we can zoom out to see our full image here. And you see it's already 952 kilobytes just by running it through this exporter. So I'm going to change the size here to 80% of its size. You can see the width and height here. Let's hit enter on that and ready down to 665 kilobytes. I like that. So let's just hit Save and you'll wanna save it into the same folder. Sum here, my final images folder. I'm gonna name it simple method JPEG, but I'm gonna name it JPEG for web. At-a-glance, I'll be able to know which one I've saved for web. So let's hit Save. So now that is a smaller file size. I'm going to go to this other image here. And I'm gonna show you another way to save it, because if you want to put it to Instagram, now might be a better way to do it. Now, the best file format that I used before Instagram is actually a PNG. So let me just go over here to the final images. And in this drop-down, I'm going to select P&G. Now, I've found that PNG images retain more of the detail and the color and the sharpness. And I prefer to use PNG when I'm uploading to social media. So we have this sname at displacement method PNG and just hit save, just hit enter. And we said OK for that. Now what if you want to actually go and print this out? So here we have our 3D rendered reflection. What if we want to go ahead and print this out? Now, most print shops are going to ask you for a TIF file TIFFs. And that is because that's what they use for their printing service that keeps the most amount of information. And in many cases, tif files end up being larger than the Photoshop files. So let's go ahead and save this last image as a TIF file. Let's just go to File Save As. And we're going to go in this drop down, down to TIF. It's all the way at the bottom. I'm just gonna call this 3D method tiff, and now you're ready to send it off to be printed. Just hit OK here. It's going to include all the layers. That's totally fine. Most print shops are going to want you to include as much of the layers as you can. Alright, and there you have it, a sites on the Photoshop file. Those are the most common ways that you're going to be needing to save your images. Now, I also want to give you an assignment for this course. That's right. We've gone through three methods of creating water reflections, but I want you to go and do one on your own and not one of the examples I did in class. I want to see what you can do. Find an image online. I showed you where you can find free photos to use and use one of these methods I would recommend you either use the displacement map method or the 3D method, or do three images, go through each one of these methods, increasing in difficulty. And when you're done with that, drop your final images down to the student submitted projects section of this course. I really want to see what you can do with these skills that I've taught you. How good of reflection and can you make? Show me I wanna see it. Alright, in the next video, I'm going to wrap things up with some final thoughts. So let's go right into that.
8. Let's Wrap Things Up: Look at that. You've completed my course, Photoshop, composite masterclass, water reflections, and in the process, have created three her own edits, creating some cool-looking water reflections. Now we aren't done just yet. I do want to see what you can do with the assignment for this course. So refer back to the previous video for the details on that. But I would recommend that you go through and watch the course again as you do your own edits for the assignment, as it will really help you out applying the same techniques to your own project. Now if you want to add a little extra finish and polish to your edits and photos. You can throw them into Adobe Lightroom and apply a nice preset to it. And what better preset to use than mine? Shameless plug, I know but head over to my website at www dot and the real Tom Chi.com forward slash presets and pick up your presets today, I've made them incredibly cheap for you, cheaper than a cup of coffee and fat. And that's because I want to make it as accessible as possible for you to have the highest quality resources at your disposal for your edits. I truly hope that you've learned a lot today and that you'll apply these skills in your future edits. Because like you saw, it can really enhance and take her image to the next level just by adding these reflections. If you've enjoyed this course, I encourage you to leave a review and rating as I helped me out a lot and feel free to check out my teacher page to see other Lightroom and Photoshop courses that I've made, ranging from beginner level courses all the way up to mastery level courses. Also, if you have any suggestions or requests for courses that you would like to see me cover, leave it in the comments for the course and I will try my best to cover any topic that you suggest. It's been a pleasure teaching you today and I hope to see you again in a future course. Take it easy.
 Tom Kai, Senior Graphic Designer & Art Director