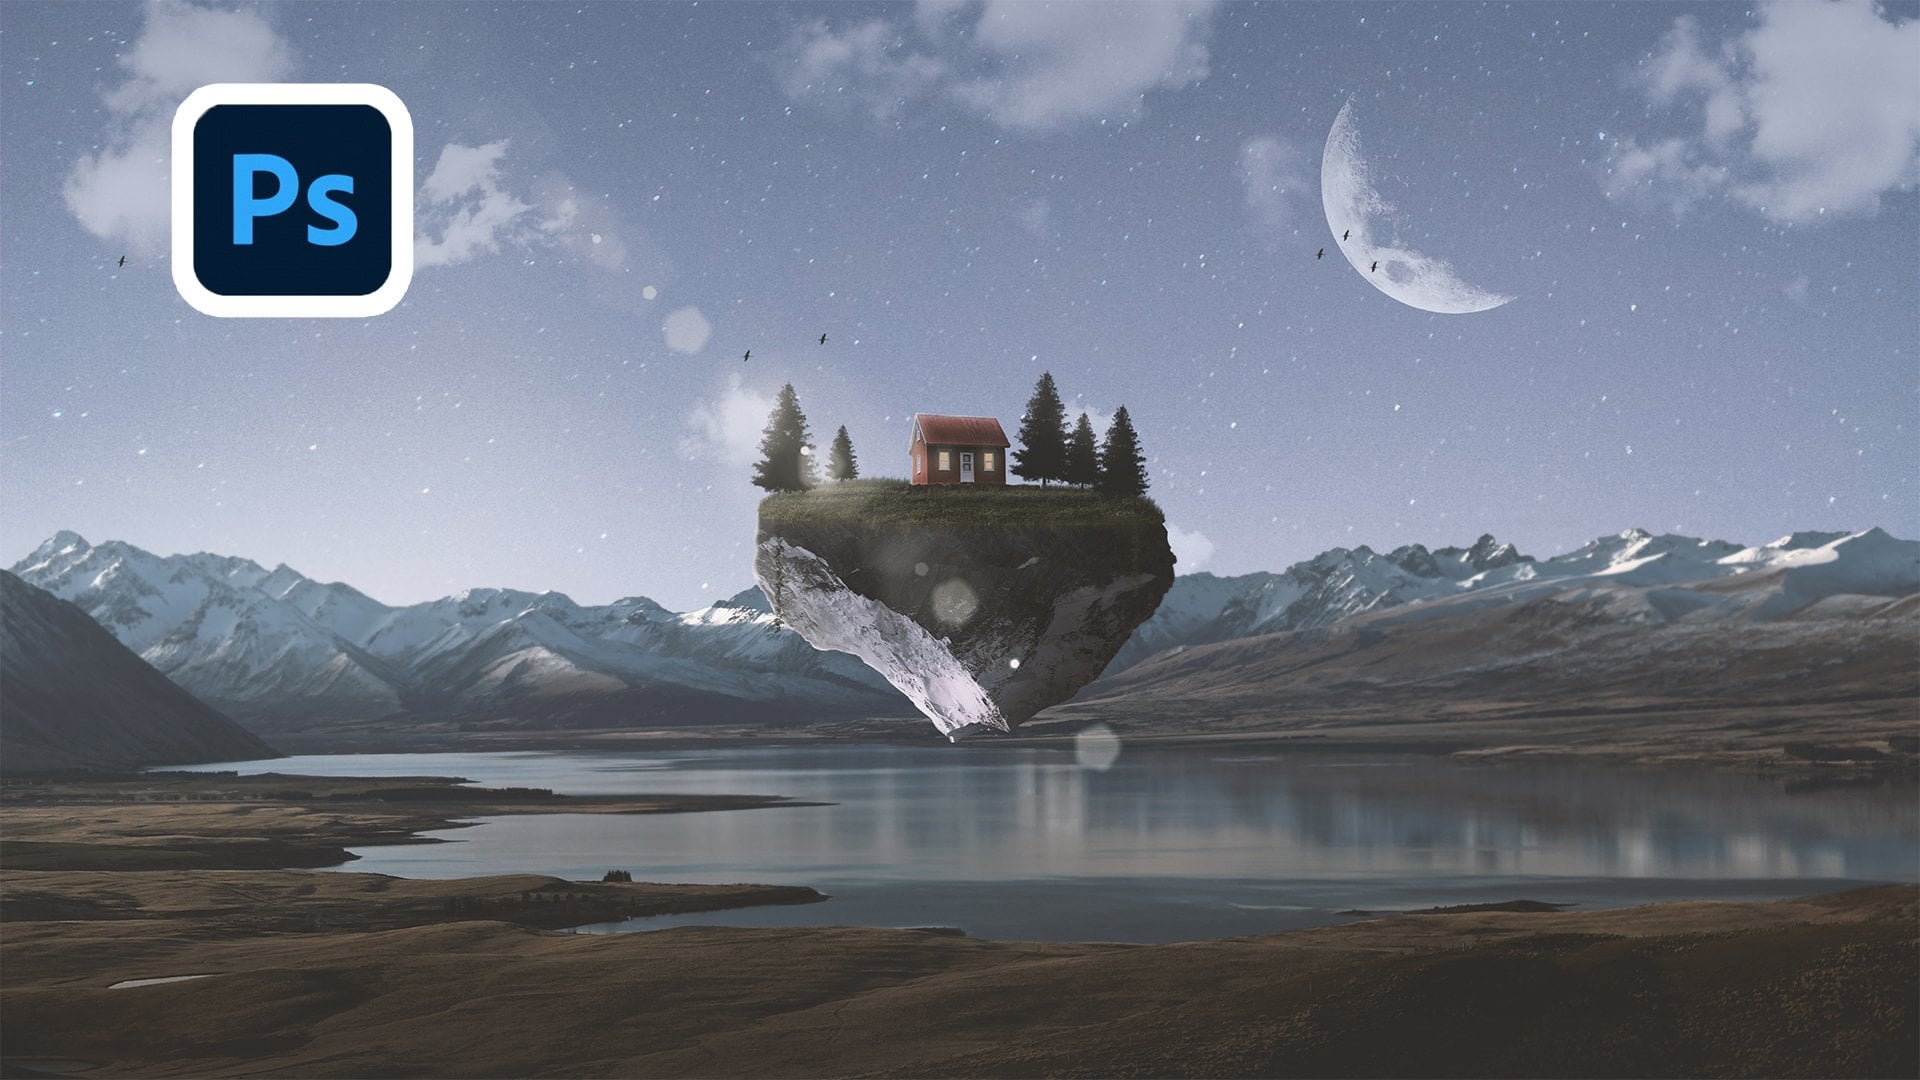
Transcripts
1. Introduction: Photoshop is an industry standard creative tool for many graphic designers and photographers. With the amount of features and creative possibilities, it's absolutely essential for everyone in the creative field. When the 20-20 one of data Photoshop, many new features have been given, all of which helped improve the quality and Sweden, which you can get creative projects done. One of the main areas that these new updates effect has to do with Photoshop compositing. Use photoshop composites all over the place, from advertisements to magazines, album covers, movie posters, you name it. And I can guarantee that Photoshop compositing is behind it. And today I'm going to show you how you can create a stunning Photoshop composite in my course, photoshop compositing and Adobe Photoshop CC 2021. My name is Tom Chi and I've been a photographer and graphic designer for almost 12 years now and from the United States and I traveled around shooting photos and designing for various clients and accompanies specializing in fashion lifestyle and commercial photography. It's honestly the best job. You'll see a few examples of my work going on the screen now. But if you want to see more, you can check out my website at www dot the real-time chi.com or looking up on Instagram at the real Tom Chi, maybe even leave a follow two. I am so excited to bring you this course today because I believe that knowing how to create Photoshop composites is an incredibly powerful skill to have. It allows you to create things that may not be able to be captured in camera or even created in real life. Not only that, it will set you apart from those graphic designers, I'm photographers who do not have the skill. And ultimately it will land you projects and gigs you may not have otherwise gotten. Now, my time is valuable and more importantly, your time is valuable. I remember the frustration I had over a decade ago when I was first learning everything and gone tutorial, Tutorial, trying to learn everything. I always wished that though was one course that could teach exactly what I wanted it to. And that is my goal here. I want this to be the only Photoshop compositing course that you will ever need. After this course, you'll be fully prepared to go out and create to your heart's content. In this course is for anyone who wants to add one of the most relevant and highly sought after Photoshop skill to their toolbelt. Whether you create just for fun as a hobby or you want to make money doing this type of creative work. This course is for you. I don't know about you, but I think that this introduction has gone on long enough. I'm eager to just dive in and teach you some amazing things. So I hope that you decide to enroll in this course. And if you do, I'll be seeing you in the very next video.
2. Finding Resources: So before we even get started in making our Photoshop composite, we actually need our resources, we need our images, read our brushes are textures, even some fonts depending on what kind of a composite you're making. So where exactly are we going to find these? While I'm gonna show you a couple of websites where you can get completely free to use for commercial use. Resources that you can use in your composite. So lets hop over into my web browser. Okay, and here we are on the very first resource, and that is for fonts. Now, my favorite website to use for fonts is the font.com. They have so many options. It is ridiculous. You can spend hours just going through all these different options. You can get any kind of look that you want, no matter what type of project you're working on, you can definitely find something to use. One thing to be very wary of is the type of font that you download. So let's just go to any selection here. Let's just do old school. You want to make sure that you look at the more options tab over here and make sure that it is public domain and 100% free. Because by default it's going to show you every font that they have if it's free for personal use. And that means you cannot use it for commercial purposes to make sure that it is public domain and 100% free. Because if you plan to make money doing this and you're pushing it in a public place, you're going to want to make sure that you can actually legally use it. So let's just click submit and it's going to filter out some of the ones that we cannot use. And now we have many, many different fonts that we can use. And we'll be using one of the fonts today and there'll be included in the downloads. So next, once we have our fonts, let's say we also want to have some textures. Textures are fantastic for finishing up your composite. So I like to use texture palace.com. They have a couple of thousand different free textures. They have over 3 thousand. Now we go, it says it right there, but they have different texas cracked walls, amazing paper texture. And if you go over here and the dropdown, you can sort by color, different texture types. Concrete grunge ink. Book is one of my favorites that I use quite a lot, as well as the concrete, and we will be using some textures today. So you can go here, find any kind of texture that you want. It really adds a lot to your final piece. It really brings in all the different elements and brings them into one unified look. Now we also need some brushes because brushes can really enhance your composite. Don't, Where are we going to get that? Well, my favorite resource is a brushy Z.com. And when you load it up, we're right here. We're looking at the top here. But if you just click on Rashi's E.com here we have all kinds of different brushes that they have. So let's see what kind of categories they had. Let's do browse by category. And for example, let's say I want to have some kind of an abstract thing, or let's say kind of a flower brush. So let's see what they have in terms of flowers. They have a lot of different vines as well. I've used some fine brushes in some previous composite videos, but I can get some really nice additions here. For example, butterflies, you can just paint in a few butterflies, adds some nice effects to your edit, to your composite. Very nice. But now we actually need our actual photos. That's most important part of a composite. You cannot have a composite without photos. So if you are unable to take our own photos, where are you going to get good photos? Well, let me show you, I'm gonna show you three websites that I use. So first we have pixels.com. I uses quite a lot because they very high-quality professionally shot images. And you can scroll through here and look at all that they have to offer. You can even just search for anything that you have in mind. So for example, if I wanted to have a lion, I can just search Lyon and I might find an image that will work very well depending on the composite. This would be a very nice imaged, uses very nice clean lines, nice contrast. So that is one of the websites I like to use. Next, I use Pixabay as well. And they have almost 2 million images. That's a ridiculous amount of images, pretty much anything you can think of, they will have here. But one of the benefits of Pixabay over other image source websites is you can search it ridiculous things like aliens. And they're actually going to have things like UFOs, different illustrations and 3D renders that people have made that you can use in your composites. You can get some really unique types of images from here. So if you're a composite is more fantasy themed or sci-fi theme, you can definitely get images for that from here. So how does one really good reason for you to use Pixabay? Now my favorite out of all of these images are flip sides is on slash and slash is by far, for me, the highest quality free images that I've ever found. And again, they have many, many photos you can spend hours just searching through here. But for example, if I just want a picture of a shoe, there we go, you can create a really nice poster. This, using this shoe, you can cut it out, plus some nice text on it, some nice effects. And there you go. You have an advertisement right there to really get to add to your portfolio. So again, you can get really high-quality photography, professional photography, great images from on Splash.com. And there you have. It needed some great resources to get all kinds of things from images to brushes, textures to fonts, everything that you need to create, a spening composite. In the next video, I'm going to go over the basic photoshop interface and how I'll have everything setup for today's composite. So let's get going.
3. Photoshop Interface Overview: All right, and we're finally in Photoshop. So let me show you exactly how we're going to have our art board loaded up today. So first of all, let's go ahead and click Create New. We're going to want to have a new blank canvas to work with today. And I'm going to have this be in a portrait orientation for today's particular edit. So I tend to work most of the time in inches depending on what the project is calling for. If it's for a magazine, for some kind of a billboard or anything like that. I usually get a project brief which tells me the size that they're going to need. So for example, let's say this is going to be for a magazine cover. So most of the time it's going to be an eight by ten or something along those lines. So let's have a v, eight inches wide by ten inches high. And now this file is going to be fairly large and we want it to be largely it has the most possible detail. So I'm going to eight inches wide, ten inches high, 300 pixels per inch resolution. And we're gonna keep the color mode and everything else here. Exactly the same flux is go ahead and click Create. Take a second and Lotus of our project right here with a blank canvas and very nice. Now your interface here might look different from mine because I've already set might not from my own personal workflow. When you load this up for the first time at might look like this. So there we go. I've reset the essentials, and I am working in the Essentials workspace. So when you first load it up and might look something like this. Now first thing that I do is I always take the Properties tab here on the right, and I just drag it over here, keep it hidden. If I ever need it, I can click it and use it. But I don't want it to be really in the way. We have the adjustments and libraries here. And I always make sure I have my adjustments on show first. That's what I use more. And then I drag the subway, see as much of my layers here as possible. I like to be able to see as much as I can. Now ask for up here, you have a few different options for how you see your colors. If you click this box here over the multiple lines there different options, you can have a brightness cube color wheel, RGB sliders. My personal favorite is the color wheel, because you can choose a hue, a saturation, and a black level. So this is not necessarily brightness because you're not adding white per se to the image or adding black to the color that you have. So if I have a green here, very desaturated, and then I bring it closer to black. You can see the circle here, it just moves closer to black. That's all you're doing. So you can get really customized with the color that you use and get some very interesting results. And now you might have noticed that here on the left, I hadn't my brushes out here. Now why do I have that? Well, when you create a composite, you want to be able to easily go back and forth between different brushes are hard brush, a soft brush, some kind of a smudging type of brush or a bird brush, anything like that? You want it to be easy and simple if I don't, and I just, let's say, for example, come here, let me just get a new layer. For whatever reason, I'm doing some shading on a piece and now I want a soft brush. I have to go in here, pick a soft brush, change the size and everything. And now I can come here and continue with the subtable 3-SAT takes too much time. What I do is I click window, I click brushes, and it pops up here on the right-hand side, but I want to on the left. So I'm just gonna click and drag it detaches. And I drag it over until I see blue line appear on the left bar there. And now it's clipped to the left. And you can change the width of this to show just one or two or even three brushes. I usually have mindset to just two. And now if I'm painting here with the same truck, Russia can easily just come over here the size and continue. It takes it takes out a couple of seconds from your workflow, but it does add up over time and it makes things far easier. So let me go ahead and delete this. And we're going to be using this quite a lot in today's composite. Now how do you exactly go about adding new brushes here? Because some people have had confusion of that, but it's very simple. And I'm gonna do it with you right here. I downloaded a sample brush just to show you an example. We're not going to use this brush in today's composite, but I just want to show you how we're going to do this. So if you want to add a new brush here, you just click this box over here. And then all you just import brushes and you're going to have a dialog box come up. You then want to navigate to the folder where you have your brush. And it's going to be an ABR file format that as a Photoshop brush file format, here we have a watercolor butterfly Photoshop brushes are never really going to use this. Reynolds. I'm Mike, but this is just for the example to show you how to actually import it. You make sure that brush a selected, you click load, and now it's going to be at the bottom here. So now's the openness. We have a few different brushes that are available to us, easy as that. So I will include any brushes used in this composite for download for you. So make sure you download everything that I've included. And that is the basic photoshop interface overview for this particular composite that we'll be doing today. As I go through with the composite unconditionally, a few different tools and different functions that we have in the new 20-20 one version of Photoshop. So just make sure you follow along. I'm gonna show you everything as I go trying to explain it as best as I possibly can. So without further ado, let's get started. In the next video, I'm going to bring in our images. I'm gonna start laying them out, selecting, masking everything out, and getting started with our composite. So make sure you download all that included files in the download section, I have some images for you, some texture, some brushes, even a font. Thanks. You download everything and be ready to continue with the composite. Let's go.
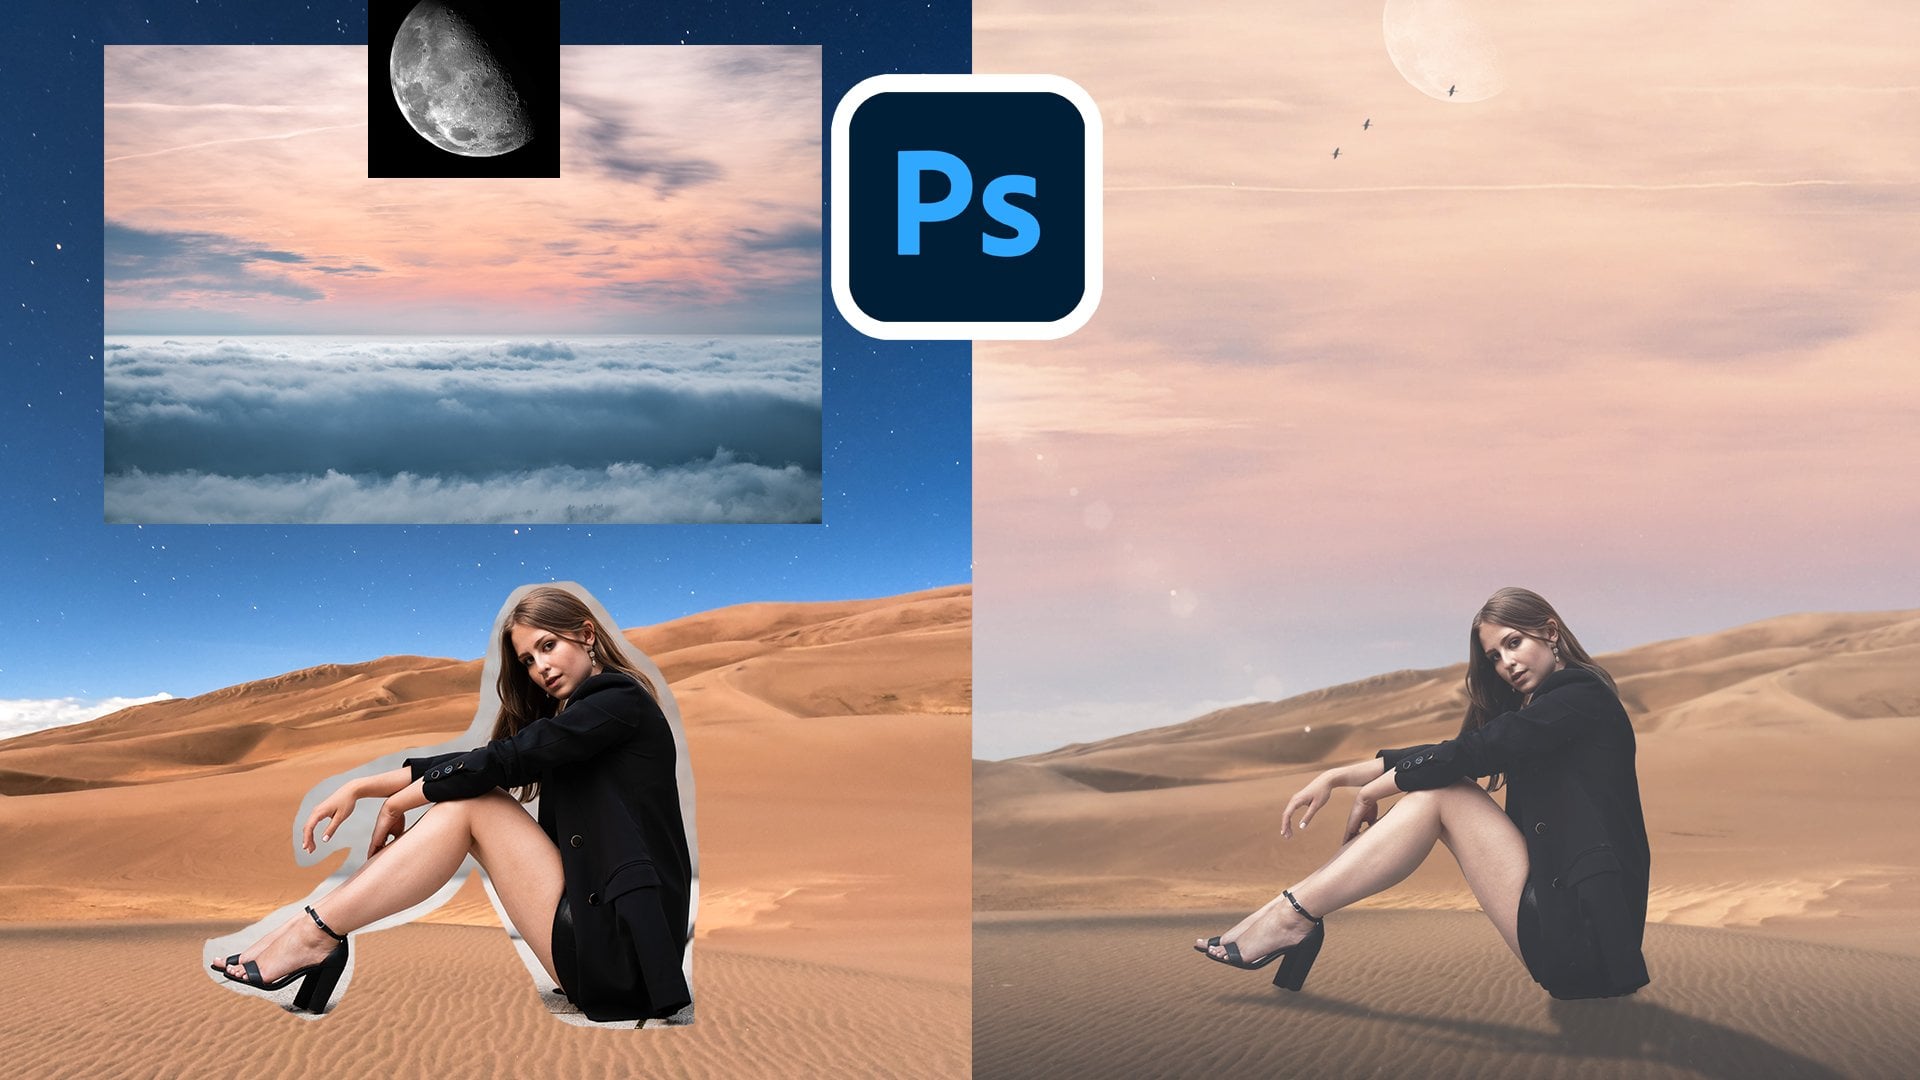
4. Selecting, Cutting & Layout: Alright, so now we're ready to actually bring in the images that we'll be using in today's composites. So let's go ahead and now, the way that I put my images in here, I always play some as an embedded image. And this makes sure that when they are placed, that they are smart objects. And we want to make sure that we work with smart objects all the time. It does make our file size is much bigger. It is going to give us more freedom and flexibility to do what we want. So let's go ahead and let me show you exactly how I do this. So let's go to File Place imbedded. I want to make sure you download all the images will be using today. And these are those images. So make sure you download them and extract them from the zip file. Make sure you're good to go. And let's get started with landscape. Let's just hit place. And it places it just like the inner image. Let's hit Enter on our keyboard. And now we have it there. This little icon here on the thumbnail FDA layer means that it is a smart object and that's exactly what we want. So let's go ahead and let's do the same thing for the rest of our images here. I'm gonna go and order actually. So let's do the bird. Hit enter. And we're just going to continue. We're actually going to do everything except for the sky images. We're going to be tackling the sky in a different way. And I'll show you how we're going to do that very soon. So we have r cube here, very nice File Place Embedded. And now we want our model. We've already placed our landscapes. So I last one replacing now is our model. Very nice. So now we want to actually start laying this out exactly how we want it to me. So I tend to turn everything off except for the landscape layer shown to make sure you have the landscape layer selected. And now you can start moving things around. You're gonna hit Control Command T to re-size that to the point that I want it to be something like that. And don't worry, we won't have actual sky in here. We'll add that later on. Now let's go ahead and get r cubed down here. Because my idea for this is I want like a queue kind of protruding out from the desert here, like a concrete kind of Q. And that is where a model is going to be on top of, and she's going to have wings as well. It's going to look pretty cool. So let's go ahead and enable our cube layer. And what I'd like to do is I do a basic selection of my object. And then you can click this button down here to mask everything out. Very nice. Let's say Control Command T on that so you can transform it. And I'm going to rotate it around like so. And I'm actually going to just squish this down. If you hold down Control, you'd have a few more options when it comes to this. Now, essentially just want this for this side and this side. I don't care too much about the top side of this because I'm going to make this different. I'm going to estimate kind of where I want this to be. This is going to live somewhere here. And we're going to basically cut this off. I'm gonna show you an example of how I'm going to want it to be. I'm going to have this be like So instead of where it is right now. So I don't know if that explains it to, well, let me show you on another layer really quickly, make a new layer. And then with our brush, what I'm going to do is we're going to have it be a flatter top. And this bottom area here is going to be flatter as well. So hopefully that explains a little bit better. This is essentially the shape we're going to have. It's going to be a flatter cube. But I do want to have some sort of a reference there for us to use. From now on this layer, we're going to have our model. Let's bring her down. And for now, I'm going to do a very loose less all around her. Now it does help if you have a drawing tablet, I'm using a drawing tablet. But if you don't have one, you can definitely do the same exact composite using just a mouse. I've plenty of composites that I made using just a trackpad on a laptop. For now that we have this basic selection, we're going to mask it out and Control Command T So we can resize to live somewhere around. Here. They get a little bit bigger, something like that. And we can change the size of everything later. It's still not that big of an issue. This was just to get a basic layout. Now let's turn on our bird layer. I'm going to want to have one wing. I can always duplicate the link if I want to open. And I'm going to mask that out. And this is going to be behind our model. Floods track that down. And you can see the shape is starting to actually happened here. So we're going to have this and I'm actually going to have a duplicate of this and later on not going to have it right now, but I'm gonna show you exactly how I'm going to have this. I am going to have two wings. One like this, one like that. And this other one is going to be a little bit smaller because it's going to be behind the big one, so it's going to be something like that. But for now I'm actually going to get rid of this smaller one. So I'm gonna duplicate it once I made the selection, only to make the selection twice when I can just do it once and duplicate it, you know, gotta make your life easier. And then we have our concrete texture, which we're going to be applying to the cube. So we can just pull that down here and hide it for now cuz we're gonna use duplicates of this for each particular site. And that is a basic layout. Well now let's actually make this looks somewhat nice. Okay, so I'm going to finish up the selections and make it look good. So now let's go back. Let's hide everything except for the cube. Let's go ahead and look at our cube here. I'm gonna get my pencil just hit P on your keyboard. And I want to mask the 4x cubed here. But really this is easy because they're very straight edges. Once you have your selection just to Control or Command Enter, He's marching ants. And now when you want to do is control the Command Shift I. And that changes the selection. You see now I have dotted lines here on the outside as well. That means that this is the selection. It's not the cube, it's everything outside and that's what we want. Because we want to pay in black on our mask layer to get rid of our mask. Okay, so I'd like to get a nice and big brush here. Very nice. And this is just going to be a reference shape. Okay, let's hit Control Command D to D select. But now I want to actually flatten this down a little bit. So I'm gonna do a very similar thing. And I'm going to eyeball a lot of this. Along the top of this to be fairly flat. Like so. Let's hit Enter Control Command Enter on your keyboard. Then again, we're going to hit Control or Command Shift. I get an Inverse selection. Because now can paint away this outside area. Now you do want to be careful because you might paint away an area you do not want to. So I recommend just zooming in. Maybe making your brush a little bit smaller. Just so we make sure that you're painting away what you want and nothing more. And we go and now let's do the other side here. Lovely. See, we painted away a little bit more than we wanted to hear. So if we hit X would make why are foreground color and we can paint that back. That's a Control or Command D. Very nice and even still paint things back after the fact. And very nice. Now this looks a little bit skewed, doesn't then what? We're going to actually have this line here come all the way up. So let's go ahead and let's just visualize that. Okay, so what I'm going to do is what a marquee tool going to hit em if you have the elliptical one, just hold down on the section up here and click rectangular. And on the layer above this, I'm going to draw a square, just a plain square. Using G for our paint bucket tool, if you don't have a selected and might be down here with these three lines. And I'm just going to select any random color. I'll just choose a square so you can actually see it. Now let's deselect that. And now let's go ahead and hit Control or Command T. So we get our transformation capabilities in here. And I'm going to line it up as best as I can. And now I can bring these corners up to wherever I want them to be. So this corner has to be up here. This corner has to be over here. But now if I want the top to be flatter, I simply just bring this up to somewhere like so. And I want to bring this bottom corner down here. Let's hit Enter. So now we've made the shape like that. Okay, so I wanted to do a very similar thing for this left side over here. So lets just hold down shift. There's gonna make sure you get a perfect square on the marquee tool. Again, n is the shortcut for the marquee. We're gonna fill that but with a different color this time, let me go with a lighter gray, something like that. Let's de-select it. What Control Command D. And let's want to control command t to transform that. Lovely. So we want to get these three corners. Let me just move this, this 123, we aren't those three corners would be exactly what they already are. Hold down Control or Command. You can move these nodes separately. Very nice. And now if we bring this up, like so, there we go. So if I hit Enter this top corner up here is not perfectly fine. So you can hit. So you're going to hit control command t to get into the transform again. And just move it until it's where you want. So again, this is just a reference points for later on. But now we have somewhat of a better rectangle at this law area here is going to be buried. So don't worry that the perspective of this area down here does not look good. Because eventually all of this is going to be under the ground. So this is going to be flattened out here. Okay? So this is the basic shape of our pedestal here. So what I'm going to do is I'm going to actually group all of this together. So you want to make sure you select all of these layers. You can hold down Shift as you click this and hit controller command G to group them into one. And I'm going to rename this to pedestal. You can name it anything you want, but make sure that you haven't named. And now if we do controller command t, we can move this whole thing around separately. Now might want to actually make this a little bit skinnier and bring it down just a little bit lower. Like so, let's say enter. And if we zoom out, we have our shape. So again, this is just to have the shape as a reference. We're going to be applying the concrete texture over this and it's going to look a lot better later on. But now I did mention I want to flatten out this bottom area. How are we going to do that? Very simple with just a mass, it is incredibly easy to do. So let's go ahead and get a softer brush. And what I'm going to do is in this stuff down here, I'm gonna make the hardness be about 80%. Okay? And then all you do is your gonna paint and BLAT. So make sure you have black as your foreground color. And pretty much you just going to want to paint away this bottom corner because we want it to be somewhat buried and sticking out of the ground. And the more unnatural that it looks, the more natural and it's going to look if that makes sense. She wanted to talk as random as possible. I want to have a little bit more of this little grass Tufte over here. There we go. So now if we zoom out, it looks a little bit more buried and it will look more varied once we have the concrete texture and we add some shading to this. Okay, so that's looking good. I'm happy with that. So now let's go ahead and refine our selection on our model. Let's go up here, Tom Potter layer and you see we will have to resize her move around. That's totally fine as part of compositing and that's why we made it smart objects. So the more we resize it, we're not going to lose any of that quality if this'll be rasterized image, meaning it's not a smart object, then we will lose quality everytime we resize our image. So that's why we use smart objects. Let's go ahead. Let's say Control Command T, salt. Let's make sure we're on our monolayer and hit Control Command T So we can resize her. And we're going to make her fitting just about on our pedestal here, something like that. We'll be able to position her better once we have HER mask out better. And now we want to get a good selection around town and luckily, does a very good edge between her and the background and the original image. So that's going to make our lives so much easier. So you have a few different options for masking this out. We have objects selection tool, which is one of my favorites. Those have the Quick Selection Tool and a magic wand tool. For now let's use the Quick Selection Tool. That's going to be essentially a brush that you can use. So you can just paint on your selection as you would like it. And this can be a hit or miss. I can do a really good job. Work can be a very bad job. See what kind of a job is doing here is doing an okay job. Let's set Alt or Option to take away from our selection. Let's see how good of a job this does lecture Control or Command shifts I to invert our selection and on our mass willing to paint with black. And we'll see how good of a job this does. We can always undo it and try another method. Because sometimes you do have to do that. And I already see we are going to have to refine some of these edges are specially around her fingers. But that is completely fine. However, we do want to have as less correction as possible that we have to do. So let's hit Control Command D to Deselect another fairly decent job around most of our image, especially around her outfit here. It's done a fairly good job now we can't see exactly around her hair and the head how good of a job it's done. But for now, let's just zoom in here. And let's get our brush, make it nice and small. And then you pretty much just want to paint away the whites between her fingers. That's going to be very distracting and it's going to look a lot better and more convincing of an edit once you get rid of these, this white haloing effect that happens when you mask. They can definitely go and refine the edge. That's something I do quite often, is I refine the edge of my selection, especially if this hair or for involved, because that tends to improve the selection. But sometimes it tends to eat away too much of the selection because you can have it feathered by a pixel or two. But depending how smaller images here, one or two pixels is quite a significant amount. We're zoomed in quite a bit right now and you can see almost individual pixels. I know I can see them. So getting rid of one or two pixels for the feather can actually be quite significant, especially on the arm. It will make it quite a bit skinnier. So I do want to maintain as much of the natural look as possible. So that seems to be a decent selection around per alpha here. Which is very good. I'm imagining these as little hoops. So I'm going to Moscow, the intersection of that. Now we go. And the good thing is the AI in Photoshop, especially in 2021 update, has really improved for selections. Back in the 20-20 update of the Creative Cloud version of Photoshop, it did do a pretty good job, but I can definitely say with certainty that it's improved. Now, just temporarily, I do want to see what the selection is like around her face. So I'm gonna make a temporary layer below her and I'm going to fill it in with some colors similar to the sky here. And there we go. We can see there's definitely some haloing going on around her face. So let's just go ahead and fix that. Very nice. There we go, and this is going to look more natural. You do not want to have any of that haloing effect. If you ever look at a movie poster, went a little bit to further. If you ever look at a movie poster or magazine, you're never going to see this haloing effect because they have their editors really spend their time going in, zooming in and making sure that getting rid of all of this haloing effect. And now that we've added this blue background, we can actually see a little bit more well, just hailing effect on her arm. So I'm not sure we're going to refine this a little bit more. Just like that. Very nice. Now I'm going to leave this as it is. I'm going to see how it's gonna look once I have my other Sky in here. And we see it didn't miss a spy over here. Very nice. Let's hide this background layer. Lovely. So now we have her somewhat in place. Pretty nice nun looking at this landscape. Now just want to make sure the scale is accurate so you can go in that hit Control Command T, we can scale this up or down. My skill this ever so slightly up. So a little bit lower. Now something to keep in mind the rule of thirds. So we have the rule of thirds. We're going to have a roughly three quadrants here where your eye is going to fall. So this is one quadrant is around her eye level. One quadrant is going to be around the cube level. Now these aren't perfect thirds, but you want to make sure you have somewhat of third setup. And now again, if you have your image centered, this is somewhat the center here is going to give more of a focal point. So I'm not going to have her be often the bottom-right corner, especially if it's not relevant to this particular composite. Ok, so you can really use your rulers like this, just drag them down and you can really use them like that. And if you want to hide them, just hit Control or Command colon on your keyboard and you can hide them or reveal them if you ever want to reference those. Okay, now let's go ahead and let's delete that layer of this background that we created. This, make sure you select it and hit delete. Now let's look at our wings that we have here. So I'm going to want to hide our model just so we can see the wing here. And let's zoom in. And this should be a fairly nice selection here, but I'm gonna do it a little bit differently. And that's only going to use my pen tool. So let's assume in a very nicely here with our pen tool just key on the keyboard. I'm going to click and drag. And make sure we get a very nice selection on this. And again, you can hold down Control or Command on any of these nodes to pull them around. Okay? And it's, anytime you want to move forward with it, just continue and it's going to catch up to where you are. Now the reason that I'm using the pen tool is because I want to get really nice sharp edges here on the tips of the feathers and I can just click and click and that's a very sharp point. Saint or the inside of the feather here. So definitely take your time. Don't rush this part. So you do want your selections to look nice. And there we go. Now selection doesn't have to be 100% perfect. It just has to be perfect enough that it looks convincing to go to look at it, that that's how it's meant to be. So as you see here, I missed a bit of the feather. But you're going to see that that's going to look convincing enough that that's all that I need for that selection. So let's continue down here. This part of our wing. Let me go. Definitely take your time of this. Feel free to pause the video or go back. If I finished before you and just follow along. Some really great skill to have. Because even for other types of selection's not just for composites, whether you're editing a photo or anything, using the pen tool gives you so much more freedom and flexibility and much cleaner edges. Then let's say the selection wander any of those selection tools will give you. And your selection will end up looking a little bit more professional. So we're coming down here, finishing up here in just a second. So I'm pretty happy with the selection. And you can always go back and fix anything that you need to. If you ever don't like one of these lines that you draw, you can hold down Control or Command on one of these handles and you can adjust those by, let's see, I only want to adjust this one. You see I'm adjusting the other one as well. You can hold down Alt or option on that and now I'm adjusting that one node instead. So ever mess up, you can really have so much flexibility with this. It's going to really make your life a lot easier and a lot better. Okay, so for this part, I'm just going to finish this up in a random way because that part is going to be hidden. So now we have our selection. Very nice. What's at Control or Command Enter to turn that path into a selection. And now we're gonna do Control or Command Shift I to invert that again. And with our brush, I'm gonna go for a nice big brush and have a nice hard brush as well, and make it a little bit smaller. And now we're gonna paint with black on our mask layer. And you're gonna see we're gonna paint away the previous background. Very nice. Let's say controller command D. That's a very nice selection. I'm happy with that. Let's re-enable our model layer. And now we can actually move this a wing around. So on this to be a little bit more flat like so. Let's make it slightly smaller. We're going to have part of a hidden behind her or something like that. Let's hit Enter. Now we can duplicate this. Let's hit Control or Command J. Now we have a duplicate of that, but let's do the one that's below. Plus a Control or Command T. And now we just want to make this one a little bit smaller. We can kind of see it in the background there. And we're gonna angle it up ever so slightly like so. I'm going to hit Enter, but now I want to hide this part over here. So on the mask is gonna get your brush and that's in black. And let's paint that away. Very now. So now we're getting somewhere with our composite. Okay? I'm liking how this is coming along. So now we have our basic layout here. And I'm pretty happy with how it's gone. But now, let's go ahead and in our next video, we're going to actually start with the sky. I'm going to use what are the new features and Adobe Photoshop CC 2021. And that is going to be an artificial intelligence powered sky replacement tool. So let's hop into the very next video and let's start with our sky replacement before we get started, later on with our color correction. So let's hop to it.
5. AI Sky Replacement: Okay, so now we're ready to actually do an AI powered sky replacement. This is one of my favorite new features of Photoshop 2021. So how are we going to actually do this? Well, before we use the AI powered sky replacement tool, we actually need to have this guy be filled in because let's go ahead and use it and I'll show you why we're not going to use it right now. If you use Sky replacement, it's only going to affect this part of our image. We see this top part has nothing applied to an hour exactly. Are we going to do this? Well, let's hit cancel here and I'm going to show you, let's make a new layer above this. And let's hit em on our keyboard to get our rectangular marking tool. And we're going to drag a rectangle over the area we want to fill in. Okay? Now you're just going to go to edit content aware, Phil. And we're going to use the AI of Photoshop to actually do it for us. Now here we see a preview, but we see it's selecting part of the wing here and pulling in some of that white cream color and we don't want that. So all we're going to do is we're going to draw with a brush over the wings so that it's not sampling that at all. It's going to take a second to update. And now that looks a lot better. Huckel zap. And if we want to add more to our selection here, we can just paint in a little bit more of the sky and let's see what that does a better job at, did clean it up a little bit. I have a few different options here. We can choose the opacity and we can also have it, have more recolor adaptation, rotation adaptation. So you can play around with this and see if it does a better job. Let's do high color adaptation. That does a better job at blended the colors. A little bit nicer for us. And rotation, let's go low on a rotation adaptation. Note that the not-so-good job, let's go medium. So feel free to play around with this until you get a really good setting. So I might not show a turn off this back to none. So look better before. There we go. So we see it is cutting off part of the wing here. So we'll have to make sure that we don't cut that off. We can paint it back, uh, later on. So I'm fairly happy with this for now. Might want to paint in a little bit more here. So very nice. And I'm gonna make sure that I paint back part of our sky here. Let me try and put the color of denotation back to default. And I'm going to keep that on high. Okay, so for now let's hit OK. It's going to output that to a new layer. So let's say Control Command D to the selected. And as you see now, it's not a problem with the wings that essentially resolves itself. But we can toggle on and off, which is very cool. So the reason that we can actually see the wings because that's on a layer above and it's mascot properly. So that's why that's not an issue. There we go. We now have a good sky to work with. We can now get rid of this empty layer that we used. So let's just hit Delete on that. And now we want to select these two layers. And let's hit controller command G to group them together, and then control or command to blend them into one. So now this is one image with a full sky, but we don't want this to be smart object. So let's right-click on this layer. And let's click Convert to Smart Object. And also let's rename that back can landscape so we know what all of our layers are. Ok. Now, we can use our sky replacement tool. So now with our landscape layer selected, I want to go to edit sky replacement. We're going to be met with this and dialog box. How cool is that? So this looks a little bit overwhelming, but I'm going to show you exactly what to do. So now every important, all of the skies that we're using in today's course. But if you want to do this, just click plus. And you're going to navigate to all of the skies that we've downloaded. And one by one, you're gonna click one and click open. I'm gonna do it again for this one. It's going to ask you what to rename it. I'm just going to rename this what it was except the two after that. I'm going to click OK. And it's going to be put right in line with all the others. So for now, I'm going to actually delete that Skype because I already have it. But I have already gone. And important all the five skies that I provided for the download. So photoshop does come with it's own. It has some blue skies that could be effective. We start with a blue sky, so maybe a blue sky would work. What I want to have something with a little bit more interests. They have some spectacular Skies which could work. Some of these are very cool, but they're also a little bit too busy, especially for my liking for this particular image. Next day of sun sunsets. And that is basically what Photoshop has. This Skype AC is from one of my previous courses where I show you some of the new features of Adobe Photoshop CC 2021. And this was a Skype hack that I provided MOFERT today. Let's look at the five images that I've provided. So let's go through these one by one. So this is the first image I've provided and I actually really like this. Very good. So we might end up using that. I do like the colors on it. Let's go to the next one. You have a nighttime image. This is a little bit too pixelated, too grainy from this image, but it is so nice background image to have. Then we have this nice gradient going from a nice science field to an orange sunset. And then we have a darker sunset and redder, deeper sunset. And then we have this one fun, torn between this particular sunset. This one I think let's start with this one and see what we can do with our image. So you can just click out of this very simply like that. And now let's play around with a few of these sliders because it can be a little bit overwhelming, but you can do so much of this. So first of all, here we have our Move tool, which allows us to move the sky. So that's on its own layer C, There's the bottom edge and there's the top edge. So I do want to have as much of this bottom edge is possible. And it can also move it left and right quite a bit because this is a large image. So let's have a somewhat like this. Let's have a position like so. But now we also have a brush so Skype or should use extent or reduce the sky area. So the sky area stops around here. It's smart enough to know where the horizon line is, what you can paint away if you would like. Sometimes in your landscape you might have a building in there. So you can paint around that and make sure it does a very good, good job for you. So now we have a zoom tool and a move to a folder Xun allows you to zoom in. And the handle here allows you to just move around your canvas. Open outlets just stay zoomed out. And hence, now we have shipped edge. So essentially this is going to shift the edge where the image is being blended. So if we pull this over way to the right, you can see the shifting edge is going down. It's going more into our image. Now if we shift the edge in the negative direction, is going to shift more of our original image into the background. So you see, the more we bring that down and the more we have this coming into our new image. So I do want to have this fairly centered, Actually, I'm going to keep that at around 0. But then we have fade edge here as well. So if we pull this all the way back to 0, it's going to have the edge here that's being faded. Be very harsh. And we want this to be a subtle fade. So I usually keep that full 100. And I might actually move this down just a little bit. There we go. And now we can also adjust the sky itself so we can change the brightness, temperature, and the scale. We can also flip it around. So as brightness implies, we can increase the brightness of the sky, which I might do just a little bit like so. And then we can change the temperature. So i made image here, it's fairly warm. So I add just a little bit of a warm to the sky. Michael, that now scale is what implies it's the scale of the background, bigger or smaller. So if we make the scale 200%, It's going to be twice as big. Now that's zoomed in, we can make it smaller, 87%, and you can see it's smaller. So I'm just gonna go ahead and type in 100. I liked it where it was. And there we go. We're back to about 100 to 100. There we go. I'm just move as just a little bit and we can still justice later on. And my add another atmospheric haze in the background here later on. But for now, we can keep as it is. And you can also flip it. So it's going to flip it horizontally and never go. Might actually have it be flipped horizontally because it looks like the light is coming from the left here. And this will look better. Something like that. I do like that better. So now with the foreground adjustment, that's gonna deal with the actual landscape here. So we have multiply, it works screen depending on what your images and these can have a different effect in this particular image. They have no real significant change. I'm going to keep that on multiply. Now lighting adjustment is going to attempt to match the lighting of the background on your foregrounds off it's dark and it's going to dark in your foreground and vice surfaces. So if it's a lighter in the backends going to lighten the foreground. So if we pull this up to 100, we can see it's trying to darken the background there. I might keep this where that was a sex. Now for the color adjustment is going to attempt to apply the color of the sky to your foreground. So if you have a nice orange sunset, it's gonna make your foreground have a little bit of an orange tint and you can adjust how much of that is being affected. So if I have this full 100, you should see a little bit more intense of an orange peach color. And if we put that down to 0 and should take all of that away. But since our forgone is already very close to the sky, it's not going to make too much of a difference. So I'm gonna keep that or round where it was. Right? And now we have this area here, output. So we can output the string new layer or duplicate layer, and we definitely want to stop tweet it to a new layer. We won't edit non-destructively. And we want to be able to go back to our original if we ever want to. Lets a new layer and let's click OK. Very nice. So now we have our sky replacement in a group right there. So everything that you made is in here. So we have our SKY brightness, we can toggle it on and off on a sky temperature and you can go in and edit this. If I want to change the brightness, I just double-click that and I can adjust that over here. And we have our actual sky, and we have our foreground lighting, which is pretty much non-existent because we didn't change anything. It's very similar to the actual sky. Same with the foreground color. But we have the here, it's non-destructive. We can come back to that whenever we want. Now in the next video, I'm actually going to go over some initial color correction because this isn't blending together very nicely, isn't, it looks a very place. It doesn't look all that good. I want to fix that. So in the next video, I'm going to go over some very basic initial color correction. So let's keep going.
6. Initial Color Correction: Alright, now that we have our sky made, we actually need to start color correcting our image, because right now none of this is really working. It looks very place, does not look like an actual image, won't miss tactually look good. So how are we going to do this? Won't, let's get started. Okay? So for now I'm actually going to group the sky and the landscape together. A scoop that, and we're just going to name this background. Just so we have everything organized in a nice way and actually want to get started with our background. So let's hide everything else for now. So does this look how I want it to look? Let's make sure our background looks how we want it, because that's the basis which I base my whole edit on. So let's go ahead and let's add a brightness contrast layer to that. Might bring that down ever so slightly. I'll bring a hue saturation over that. Bring the saturation down just a bit. About minus 20. Very nice. And now one of my favorite tools is the Curve tool. I love to create many s-curves in my edits. Very nice. And I'm going to bring the black point here up just a little bit. There we go. Now we can toggle that off and on. There we go. And another thing that I'm probably going to do is add a color layer to this. So let's get one layer above this, clip it down. And I'm going to fill this in completely with a particular color. You can also do a solid color fill as one of the layers. It's down here, solid color. But I like to just make a new layer, find a nice color that I want to have to pick a nice blue here, something like this. And now I'm going to create a blending mode. Now I tend to use either Overlay, Soft flight or hard light. Sometimes some of these others do a fairly decent job. Well, let's stick to soft light or overlay. I'm gonna go with stuff like for now. And bringing opacity of that down adds a little bit of coolness to our image. We will do a final color grading and near the end of the course. But for now it's a nice basis to go off of. Okay, so for now, this is the basic color profile we are going to be going off. Okay, so now let's get started with our pedestal. Now we need to add the concrete to our actual pedestal. And now looking at this, I do see that part of the mascara did not do a good job. So let's go ahead. Let's hit be really quickly. So we get our brush and I just want to quickly fix that. Will just take a time. I always wanna make sure I have nice clean edges. So if you ever spot anything like that, just go ahead and do that. So now I want to apply this concrete texture that I have here to each side of this. So what I'm going to do is I'm going to create three layers of concrete texture. So let's just duplicate this twice. That's gonna give us three layers to work with. Now, let's get started with this right side over here. So what I'm going to do is very simple and will do have my concrete texture here. Control Command T on that concrete texture to resize it. And for now, let's just bring it. Over here, so it's a similar size. And what I'm going to do is bring it down here. I'm going to hide it for now. And what I'm going to do. So I'm going to create a Mosque for it. So I'm gonna use my pen tool. Selected this edge over here or this side. I mean, as best as you can get it, again, you can hold Control, a command to move these nodes around. That's very nice as bottom edge doesn't matter too much. Let's hit Enter on that. We now have a selection. So now let's re-enable our concrete layer. Okay, and now we can apply a Layer Mask and look at that. It's almost what we want it to be, right? But it's not perfect at first. Let's clip it down. And now that's gotten rid of that bottom edge. And now I also want to change a bit of the perspective of this. So let's go ahead and go to our concrete layer. So if we zoom out and hit control or Command T on that, it allows us to transform that. But as you see, we're moving it around with our mosque. We don't want that. So all you're going to do is so unlinked Control Command T, we can move this around. So now the reason I did this on to make this smaller, and I want to get the same perspective in my concrete here. So I'm going to have a similar angle going on here, something like that. And let's hit Enter. And there we go. We have one side of our concrete pedestal here. Done. So now let's close up our pedestal layer. Now we want to do that for all of our sides. Okay, so let's select this other concrete layer. I'll say Control Command T on this new layer. Now let's resize that again to be a similar size for at least somewhat workable size and just like that. Okay, let's bring that down and let's hide it. Perfect. Now we're going to use again our pen tool. And we're going to go ahead get every single corner of our image, making sure that we cover everything here in the bottom section. And again, I would use the controller command button to move these notes around. Matches as best as possible. There we go and say Control or Command Enter, turned it into a selection. Re-enable that layer, zoom out. And let's apply the Layer Mask. Very nice. Slowly getting somewhere right. Now, we want to click this down against a hold Alt or option and click right between the layers there. And now I want to make sure this is fitting the perspective as well. So let's unlink thes. And now on our concrete layer we're going to hit Control Command T. And now we can move this around, lost having the mask enabled as well. So all we're going to do is we're going to hold shift and skew this a little bit and then command. And we're gonna angle that up just like so. I'm gonna pull it so we have a little bit different texture than on this side. Let's just hit Enter. And now we have another face of our concrete pedestal here. Okay? Now I want to do it for our third and final layer, and that's going to be for the top. Okay, let's go ahead and enable that. And again, going to make sure that we are on that concrete layer Control Command T. Resize that. And we're going to bring that to about where this top layer is. So let's hide that. And we can essentially do a simpler thing for this layer. We can bring that to the very bottom layer. And if we enable that, we see it's already applied to everything that's below it. We don't need to mask anything. It's going to fill in all the rest of the gaps. And that's exactly what we want. Okay? So I'm gonna actually rename this, this texture here is the left. So I'm gonna do concrete left. This one here will then be concrete, right? I highly recommend you name all your layers is going to be very helpful. And when the specimen is going to be concrete talking. Okay, well, for this concrete top, I actually want to resize that a little bit because it has to be a little bit more compressed. So let's just compress that. Let's hit Enter. Look that we now have a nice concrete cube coming out of the ground here. And it's not perfect yet. We're going to add different lighting and shading and the next part, but for now, let's work on the color. So what we're going to do for now, we're going to group everything that's in our concrete pedestal layer into one. And we're going to name this pedestal. Okay? And now we're going to change the color and everything of this layer here. Okay, so let's go ahead and start with a hue saturation. I like to D saturate the layer because it's going to make it easier for us to work with. Now I want to add one color layer on, and I'm actually going to sample part of this orange color. That's a very nice. And we wanna make sure it's clipped down to r cube here. And in our adjustment layers here, let's see what's going to look on. Soft light is doing a pretty good job. But we wanted to be just a subtle orange hue to everything. So let's go down to about 14, 15% a little bit goes a long way. So you just want a little touch of that color in there. So that is looking far, far better. Okay, so now we want to actually do that for our model and bowings as well, just to give it that nice little warm orange tone, PG tone. So let's keep going. Okay. So now let's start with our model here. Okay? And we're gonna do a very similar thing on her mature one, our model layer hue saturation. And maybe saturate her ever so slightly. It's gonna make her more accepting to the other colors. And I'm going to put on top of her my people the lightness up just a little bit. Maybe just like three. Okay. So this is the before and after are just desaturated it. And we're gonna do another solid fill color. We should still have the same color. Include and select anything else. So I'd like to keep the same color consistent. And again, we can see a soft light or overlay York's butter soft light. And again, we're gonna bring the all the way down. Maybe just 10% on this one. And you can see it's a very subtle orange being added to the image of my bringing it up to 12%. So now we have hurt with a little bit of an orange ten going on. So right now we're just color matching are not adding any shading, any lighting. That's gonna come in the next video. And that's really going to be what brings this whole thing together. Okay? Now let's deal with our wings. Okay? So we have our two wings here, and I'm going to rename these final what I'm working with and have this be wings front. And this one will be called wings back. This one we know what we're working with. And I do want to actually change the wings in the back ever so slightly. So Controller Comanche on that. And I'm gonna control click on this. And I'm going to skew this a little bit up and left, just to give it a little bit more depth. And on the mask and black and a pain to leave that little bit there just to give it a little bit more depth as if the wings are actually opening up behind her. Okay. But for the wings, I'm actually gonna do color correction with both of them. So let's group these two together. And some call them wings. Okay? Now let's be hue saturation. Now these by dv will have a little bit of a yellowish tint to it and I'm not a big fan of that. So let's D saturate that almost complete. Let's go minus 51 on that. Ok. Let's go brightness contrast on that particular layer. Again, make sure you are clipping all these down. From that. I've just byte three. And again, the same color that we applied before. I want on this as well. Try soft light. Soft light looks very good. And let's bring that down to about 21%. So now if we zoom out, we see everything has a similar orange color to it and that's exactly what we want. It's gonna give us a really good basis for a shadows and highlights which we'll be covering in the next part of our course. So if you haven't already make sure that you're saving your project as you go along. Save it as a Photoshop file at PSD fall. And it's very simple. You just go to File, Save As, and save it as a PSD file. Make sure you're doing that between each part of this course. Okay, so with that said, let's continue and let's do some shadows and highlights.
7. Adding Shadows & Highlights: All right, so we're finally getting to some of the most interesting part of this composite and that is adding shadows and highlights. This is really going to start adding more lifetime image and make it seem less flat. So let's get started and let's actually start with r cube here. So before we do that, let's make sure everything is grouped where it needs to be. So I'm going to group our model up here. It's going to call it model. Staying organized is absolutely vital because you can easily get lost with all the layers. I am going to call this a wings. And then we have our pedestal and a stall, and then we have our background. It's always nice working with simple things like this. Because if you want to go to the model or just the wings, boom there we have the wings of the wind. You have the edits we've made to go in and just link separately and go on. Ok, so let's get started with our shadows. Okay? Now if we look at this image, if we zoom in, in a background, we can see on the rocks at there's a shadow being cast on the right, which means our light source is coming from the left. Same with the bushes. We can see that. So we want to keep that consistent in our whole edit. That's one reason why I have on my model turn this way. So it looked up a nice edge like going on the left side of her and we see it hitting the wings already a little bit on the left. So that's why we have everything set up the way that we do. So I'm going to keep that in mind as we do our shadows and highlights. So I'm going to start with the shadows. Okay? Well on our pedestal layer, let's make a new layer above that. And I'm going to clip it down. Very simple. Now I want to open up the pedestal and everything else that we have here. And I want to work with just the right layer here. Okay? So I'm going to Control or Command click on the mask. And now we have a perfect selection of that side. So we want to make sure we're still on this leg and this is where we're going to be doing shadows. Okay? So what I do is I find it beyond my keyboard to get my brush and to make it bigger. And I want to have a soft brush. Shuttles are fairly soft all the time, specially in composite works. So let's have a nice soft brush, right? Nice. And let's sample a color of our concrete here. And we're gonna make it darker than it needs to be. We're going to bring an opacity down to about 30%. And now if you see when we start painting for painting shadows in ok. So this is essentially what we're going to be done. I bring this down to about 20%. So this side of r cubed is going to be almost entirely in a shadow and more so on the bottom. So it's a Control Command D to Deselect. And we can lower the opacity of that if we find it's a little bit too much, narrowing that down to about 70. That looks a lot nicer. So now I have a little bit of an edge at the top here button. Not necessarily. So now let's go ahead and tackle this left side salt concrete, left control command. Click on the mosque there. I'm gonna do another layer here. Okay, I like to keep all my shadow separate. If I ever have to edit this on the right, I don't have to worry about anything here. So now part of this will be in a shadow. But this is going to be far more subtle. We're going to have more of a highlight over on this side. So it's a de-select that. And we see we have a nice edge coming in here being formed. Remembering that down to about 80%. See before and after just adding a little bit more depth into our image. Now we're going to add the cast shadow of our model on the cube after we finished the shadows on her. And you're going to add the cast shadow of this whole, entire thing on the landscape here after as well. Okay. So for now, I will do another layer, flip it down. And I'm actually going to select, let's find a good selection for the top. If we select this and paint is going to affect everything. But nice, the way that we can fix this is we can go within the pedestal layer and see if you can get a better selection. Looking at this, it doesn't look like we can get a better selection. So we're going to have to manually get a selection here. Okay, let us write using this. Got the pencil one corner to another corner. It's incredibly simple. Control cannot enter. And now we have our selection, okay? And I'm gonna add just a little bit on the shadow here on the right. Let's deselect that. Okay, so now you can go ahead and rename all of this. So I can say shadow top layer eight here its shadow left. And I know can seem a little bit tedious and repetitive to name all your layers. But imagine you send this off to a client and they say they don't particularly like the shadows on the right. They want you to change it. Imagine sorting through all sorts of layers that are unnamed, unorganized. I can take a long time to find the things that you need to, for any changes you need to make mineral here, you can see this, okay, I need to go to the pedestal, shuttles on, right. Need to change it, done. So that is why I'm so adamant about you naming all your layers. Okay? So let's go ahead and close up our pedestal layers here. Suppose this and this and this. So we have the shadows on that done fairly nicely. I like that. Starting to edit a little bit more depth our image. Lovely. So let's go ahead and let's go on to our model. Okay. So we're going to do very similar thing, new layer above. Clip that down. So now we want, whenever we paint what any kind of brush, it's going to be affected, just the model. So I'm going to sample one of the darkest colors on her, which is nearly pure black. Actually. I'm gonna make this brush smaller and I'm going to zoom in. So this takes a little bit of time. You definitely do want to spend the time on this to make sure that you do a good job. Okay. Keep in mind where the light is coming from, where it's actually hitting. At a little bit of a shadow here. Now we see here on her arm and doesn't really look good, the color that we've chosen to go get the eraser tool. Next we have the brush all the way and up with the opacity. You can definitely full freedom, mix-and-match and different colors for the brush. So let's say I want like a dark brown going on her army. And this is going to look a little bit more natural. So you can go ahead and let's get back to our dark color here. For the most of my shadows, Asia dark gray. So this area here will be in the shadow is well, there we go. So if you look at it before and after adding a little bit more depth to her now, okay. Slowly but surely. Okay. Let's go ahead. And now, another way that you can add shadows to her is you can do a brightness contrast layer. But that down. We can bring the brightness and down. Okay? And we can fill in this whole layer with black. And now if we paint with a white, okay, with a lowpass sunny, we'd dark in that whole area. So I do want to dark and pretty much all of the right side of her. Especially more on her face here and this arm here. So if we talk about this before and after, very nice. So we have that shadow done. I'm going to do all the shuttles first and then the highlights. Ok, so now let's move onto the wings new layer. Click up, down, leveling. And let's sample one of the darkest colors here. And we're gonna go darker and then that. Now a lot of the wings interior here is going to be dark. Let's stay mindful of the direction of the light. Now this might be a little bit to gray, might want it to be darker. And can always lower the opacity. And you can also play around with blending modes. For example, darken and multiply. Multiply does a really good job at this. So for this one school multiply and let's run an opacity of that down. Some before and after we've added a little bit of shadow to that. And you can layer your shadows out. And there's no harm in that. Combat went out a little bit more on the interior here. And I want this to be pure black. Got nice. But I'm dark going to narrow, lower the opacity of that 22%. So we have a little bit of extra shadow there. So look at that. That's added quite a bit of depth to our image here. Okay? And now let's add some highlights. Ok, that's going to start adding more to our image. So let's go back to our pedestal. Okay, let's open up all the layers for the pedestal. So I can you layer here, clip it down. And let's start with concrete, right? And we're going to start with a concrete, right? So maybe a little bit of an edge light here. Select brush, and let's pick a color here. From our sky as our highlight. Some I have an ever slight edge over here. So if we deselect, we can see the very little edge. Let's keep that. They're okay. Let's do another new layer. The sign, this is going to be concrete left. Okay. Now this is where we're going to start seeing more of this lighting coming in. And the reason we sample from the original image is because we got the exact color that we want. So let's dislike look that we're bringing in the colors from the image into what we're creating here. It's going to make it look far nicer. So let's another new layer. This is for the top. And again, we're going to do a custom selection here with our pencil. There, there and there. That's a Control Command. Enter MCI into selection. And we're ready to paint. Paint a little bit on the top here because that's gonna get quite a bit of the sunlight here. Let's lease select that and look at that. We've added so much depth to this cube that we've created out of nothing. How cool is that? Ok, so we have our highlights here. So let's rename this. I'm just gonna do HL for highlight, right? And then we have H L, and we have H L. Okay? Now let's do it on our model because that's our main focus here, right? So let's go to our model new layer. Flip it down. And let's start with our brush. Let's make it a bit smaller. Can already start painting in all of that. From my sample. This color here. Go and take your time on this. So this is going to create a kind of like a surreal highlight glow effect. And let's play around with this. If we want to change any of the hardness or not, I'm happy with partners being a 0. But what I might do is just bring this size down just a little bit. My brain opacity. So I'm not doing as many passes. And feel free to zoom in and get more refined with your, with your highlight here. And again, if you go too far, you can definitely erase. And I'm going to do another pass of a highlight. Okay? And I'm gonna show you exactly why that zoom in more. Get our brush, make it small. Now I'm gonna go nearly white, but this ok. And the purpose of this is to get a very distinct SQLite. And this takes a lot more time because you might even come in. Two parts of your model here. So I'll just take your time here. There we go. And especially when it comes to clothing increases, you really want to bring the highlights into the creases. What I mean by that, this is what I mean. Because in reality the light would hit all the creases in this piece of clothing. So you want to bring that in here as well. And again, a little bit goes a long way, so don't go too crazy with this. You see I am just working with a 24% opacity brush here. And I'm just doing a little touch here and they're bringing that in. One nice little edge light in here. Now a little bit of that light might catch a part of her hand here. This is where the benefit of having a drawing tablet comes in because with the pressure sensitivity, I can get just the edge of her fingers here. And also coming with my eraser with a lowpass study must all like 14%. Then I can go ahead and paint away some of that highlight that I painted in. And it'll look a little bit more natural. Ok, so if I toggle that before and after, you see there's still a little bit of a highlight. Okay, now let's continue with our brush here. And I might actually make this a little bit harder, look well 23% on the hardness. And let's continue going down. This is probably where the most time goes. And compositing is getting the lighting and shading, correct? Because if you don't do it right, your images is just going to look wrong. It's not going to look very good. It's going to look to placed not matched up. Well. Go little bit of a highlight on her shoe there. Little bit on her other leg here. And again, let's not forget about the creases on. Her pants are travels here as well. Here we have this this level Edge layer and lovely not third or other shoe. And see exactly what we've done. Schema added quite a bit of highlight. Let's talk on a before and after. Okay, so this is going to be what adds the it factor to your image. And again, I'm coming here, it will my eraser soften up some of these. Very nice. Sophie told them before and after. So a little bit more natural, OK. Now this site here in reality isn't going to get any of that highlighted because it's blocked by her body and the wings on the back. So I'm not going to worry about adding any highlights. A bear. Okay. Well, we will worry about adding some two or wings. Okay. So let's go down to the wings layer. New layer above that. Clip it down, zoom back in and brush. That's bringing that up. And let's actually find a nice color I like in this peachy color. So let's human. Twenty-four percent is fine for the capacity. And then we're just going to paint that highlight here. So it's going to specifically capture the tops of these. Now I want to only affect this 11 wing here. So I'm gonna click this drop down and let's be willing front. Select that. And now I can continue with my highlight. So that's exactly what I want. I just want to affect this front wing. So let's select the following Monday. Stuck with a before and after. Some nice little effect. Now this still isn't a 100% perfect, totally get that. But let's go ahead and add in the place shadows. Okay, so let's get started with that. First of all, I want to create the shadow of her on this QM. Okay, so let's go ahead and let's combine all of our modal layers until one, or call this a model to do that for everything. Okay? Control command G to group out together. This is wings. Let's close up our pedestal and had a star. Okay. Now I want to combine the model and wings into one flesh. Duplicate these control convention. And let's group them together. And then Control Command E to plan that they were doing this just to get this selection. And that is the only reason we're doing this. So let's go down to the pedestal layer, new layer above that. And let's fill it in with black. Okay? So we don't see much difference here, but let's go ahead and delete this group one layer. We don't need that anymore. But now let's go down to this layer that we just created as a controller command t. And now we have a shuttle here, which is the exact outlines of everything that we have so far. And you can hold controller command on this, bring the shadow down. So go ahead and move us around. We're going to have this and go off in this direction. So play around with this and drag these nodes around as well. From this, like trying to get these to match up where her feet are. It can be a little bit finicky, Something like that. Let's enter. So it doesn't look too good right now, doesn't rotate left, just a touch like that. Perfect. So this doesn't look too good right now. Let's go to filter blur and Gaussian Blur. We want to give this a little bit of a blur. Let's go just maybe three pixels. Let's see how that looks. That looks fine. Let's it okay. Let's still doesn't look at those in. I'm going to create a mosque on that. And painting in Black, full opacity. Or going to paint away the shadow. Because in reality, this would only go until this top edge. Let's bring that like so. You can definitely use the selections, but you can also just eyeball this, something like that. Okay. You can also go ahead and lower the opacity of that, even turn it into a multiply blending mode for darken. Both work well, let's zoom in so you see what we're doing here. We can lower the opacity of that. Something like 60, 60% of 1850. Let's go to 50 here. So that's one way you can do a shadow and another way, which I like to do many times. And soon another layer here. And be on our keyboard to get our brush. And with a perfectly soft brush, I paint a nice circle like that. Then I do controller command T. And I flatten that completely. And I lined that up too. The heel would be now there would probably be a slight angle. And we can move this around to the point where you enter. And I tend to just copy that and duplicate it. Control command J. And I bring that over here. Maybe tweak the size of that because it doesn't have to be that particular size. And again, keeping in mind the directionality of this. So let us prove that together. Let's do multiply and lower that down to about 50%. So these are two different ways in which you can actually do shadow. So I'm using that here to show you the difference between these two. So we have, this is one. And then we have to check and see which one you like best for this particular one, I'm going to use this method here with the painted circle, but for the cast shadow here, I'm going to use the full outline method. So let's go ahead and do that for cancel. So we're going to want to have our pedestal, our wings on our model, all in one. So let's select all of these. Let's duplicate those three. What's Control Command J, that's grouping together with control command G. And then we'll control command E. We flattened. So now we have one selection which is everything, which is exactly what we want. So again, on a layer above the background, we're gonna hit G, fill that in with black, and you're not gonna see much difference now, but let's delete this group to layer that we just have up here. And we see here we have a shadow layer. So that's a controller command t. And now if we drag this, we have a full on shadow of our entire piece. So I'm going to line this up as best as I can. And I'm going to try and match the shadows in our image. Is going to be more to the right here. Screaming this corner over something like here. And then this corner can match up like so like that. And now let's go ahead and blurry. I didn't like the three-pixel blur, so it's still here. The previously used filter will be right up here. So I'm gonna just click that. So it's going to apply a three-pixel blurred two lists. Right, nice. Now let's make this be a multiplied blending mode. And let's lower the opacity of that down also to about 50%. We zoom out, we now have a perfect shadow of that applied to our image. Hackles up. I'm really happy with that. So now that we have our basic shadows and highlights made, let's go ahead and do some more special effects. In the next video, we're going to add some other shadows and the special effects to this image to try and bring more elements into it, trying united more and make it look better. So let's continue and let's do some more special effects and really make this piece up.
8. Special Effects: Okay, so now that we have the basic shadows and highlights applied to our image, let's go ahead and add some more effect, special effects. That's really going to add a lot to our image and start to make it look more like one piece. Okay, so let's start with a little bit of some gradient work. Okay? So I tend to put this on the most top layer. So just click a layer up here. And gradient tool is over here. I can just put g on your keyboard. And by default we're going to want to use it this preset here, which is going to use your foreground color and go to transparent. So whatever color resample, it's going to use that color and go to transparent. Okay? So no matter what color. So for this bottom area here, let's pick one of our shadow colors here. And let's go a bit darker than that. And we're going to bring up a little bit of a gradient. And we can change the Blending Mode and the change this to multiply. In fact, I might actually have the speed dark and this time, let's go 80% on that. And for the topless sample, one of the colors up there. Let's go for a darker, richer read. I'm gonna do the another layer. And we're actually going to lower the opacity and was quite a bit. So I just want to add a little bit more in depth, our image focused the eyes and more in the center. Okay, so that's a little bit of gradient work to add. And very nice. And that's, I don't want to add a bit of a lens layer here. So now I have included brushes for you and I could show you how to install them. So make sure you add all of them. Will be using some bird brushes, some fire brushes, and some lens flare pressures. Okay? So let's start with our lens flare. You have a couple of different options here. Ok? So my favorites actually, the first to hear, they're really good. By default, they're absolutely massive. You can see that 4 thousand worth 1000 pixels. So you're going to want to make them a lot smaller so you can actually see it. Let's see here now we can actually see it here. So let's go ahead and make another new layer. And let's sample some of our highlights here. Okay? And let's go ahead and bring the size of this up just a little more. So if we paint here, you can see the size there. I'm thinking maybe something like this size. Now this is one my signatures that I do in a lot of my edits as I add lens flares and special effects, because it really adds quite a bit to your image. So the sun would be around here in the horizon line. So realistically speaking, and that's where your lens flare would come in. Sit and play around with this. Something like that looks pretty nice. You can even make this even bigger. Let's go ahead. I wouldn't go any bigger than 2 thousand. Is the flare on? Let's see. Another one of these might look better. Microphone white so we can actually see what we're doing here. Ok. Okay, so let's go ahead with a white brush where we have a little bit of a lens flare can change the blending mode of that. Lovely. So now I want to add a little bit of an atmospheric haze. So what does that mean? Well, there would be a little bit of a haze going from the background onto the sky charts. And we're going to do this within the Background layer. And we're going to go down all the way until we have our sky replacement and our landscape. So are going to do is we're going to add a layer above Oscar placement and clip it down to the sky replacement. So anything that we paint and just got a very basic brush here. So anything that we paint, this going to affect only our sky, okay? We don't want it to affect our actual foreground. So it's going to a softer brush. Make it nice and big. Probably around 1000 pixels or so. And opacity, we want this to be very low. Okay? Am I going to pay with not an entirely white, but a nice gray here? Goes a little lighter. And we're painting in a bit of an atmospheric haze. Ok, show before and after. And you can reduce the opacity of that. Because in reality the atmosphere will have a little bit of a haste to it. Okay? And we're gonna do a similar thing to our actual landscape. So if we click this down, turn landscape and we start painting, it's going to be affecting our landscape. So I'm gonna do just a slight one over vessels blending the two together, trying to make the sky and landscape look more unified, okay? Because essentially what we're looking to do here, okay? So now another thing that I really like to do is I like to add a little bit of a smoke effect to my image. Just random little smoke. So that is where our fire brushes pack is going to come in handy because we have some smoke here. We'll sell some particles which we'll use as well. But let's look at our smoke brushes. And let's go on to our very top layer here. Make our brush nice and big. And whenever you paint me this, I'm going to put the opacity up. She can actually see what we're doing here. And you see it's going to paint smoke. So you want this, but on a smaller scale, let's make sure we're around 500 pixels. And what, let's actually bring that up to 1000 pixels as we created to Decca thousand pixels. And then I'm just going to paint a little bit down here in the foreground. And we're going to layer this up. Okay? So we have one layer here. And let's go to, let's just do a little blur on that. Blur, Gaussian Blur, 18 pixel where it looks and very nice to me. And we're just still passing of left, right? So now let's layer that up. And it another layer. And this is going to go and generally in front of everything. A little bit of haze over here on the right from the left. Little bit on the wings here, setting a little bit of a smoky atmosphere to our image. So let's go ahead and let's blur all of that away. And let's lower the opacity of that. So we're just adding a little bit of like a smoky haze to our image. Okay, so now let's go ahead and look at some of these particles. Is going make a new layer. I love to use particles and not so much to your image. So here we have one of these particles. This is another one. And then this is the third one. She can play around with these. And then we want to add some particles flowing off the wing tips here. Okay. So let's do that. And I'm gonna hit controlled 90, just so we can rotate these a little bit. Like so. And then you can go ahead and erase what you don't want to zoom in with the erase tool, full opacity. Paint away what you do not want. And again, you can lower the opacity layer this up as much and you want probably gonna do two layers for this. Let's make another layer. I'm going to use this first set of particles. So just go ahead and keep that in controlling humanity and let's bring that in to the right area. Might actually want this to be smaller house and smaller particles in their lovely and it E. And you can erase some of this. Very nice. So now we have some particles coming off of her wings. Okay, so that looks very cool. And now one of my signature things that I like to add to all of my images are some birds. So I have this bird pack of brushes for you to have. So I just got to brush off one of the birds, pick one of the darkest colors in my image. And whenever I painted, it's gonna be right there. So let's sample one of the sky colors here. And let's make our brush and very small. And have some birds over there. Maybe a few in the background here. Maybe a group of three over here. So now having a triad here is actually we don't want to help your image signal play around with us. You can include it or not, it's totally up to you. I might actually get rid of some of these. And actually I'm going to redo this. And some birds there. And some there. Keep it simpler. Very, very nice. I like of UPS looking. And again, all these special effects are completely up to your discretion. You can choose to not only of the smoke effect and none of the particles as totally up to you. And if you're finding that any of that is too much, you can go ahead and just come in here and turn them off or the slower the opacity. To undo that flux, select our particle layers here. Bring those down. And I'm gonna bring this atmospheric haze things smoke down a little bit as well. And there we go. We have the special effects that we want. And usually depending on the image and up don't another gradient over the top and bottom. Usually in black. Once I've done my edit. And slow the opacity of that. And then let's make that be a multiplied blending moan. And let's do one on the top as well. If you held down shift, you'll get a straight edge. Something good to tunnel. Let's make this multiplier as well. And a capacity for this is going to be just read a little, maybe 17%, okay? Maybe even less sunlight just do 5% southern sun. Lovely. So that's the special effects that I want to do for this particular image. But as you see, it doesn't look completely right. Am I right? And that is where the final color grading is going to come into effect. So in the next video, I'm gonna go over how to do a very simple color grading to your edit. And I'm also going to add a little bit of text to this to make it look more like an ad. Okay, so let's keep going and let's finish up our piece and the next video with some final touches.
9. Finishing Touches: Okay, so we finished with our special effects now need to do some final touches. And what are these final touches? Will I wanted to do a color grade over our final edit? Because now as we look at this, we see the colors aren't still 100% there. The highlights aren't all matching up, the shadows aren't all matching on. But that is where it, color grading comes into play and it can do so much. So first of all, let's clean up our layers because we have a lot going on here. Okay? So what I tend to do is by the time I finish, I group everything into one just like that. And I named that final edit. Ok. So if you haven't already, make sure you hit Control Command S Just to save your Photoshop file so you can come back to this at any point. Alright, and let's get started with a final color grade. Okay? So first, what I'd like to do is I like to go to color lookup. This is essentially like presets are two Lightroom, so they have different colors sets here that you can use. You have to strip look three strip located and go through all of these, is going to apply a different look to your image. The one that we'll be using today is actually going to be the lone called fogging night. It's one my favorites. I use it all the time. It gives a really nice color tone to your image. But this is way too dark. So let's bring the opacity of this down. And let's be very subtle with this. Okay? Let's bring this down to about 60%, but this is still way too dark, right? Let's bring our brightness and contrast layer here. And as you see, we're not clipping this down. We're playing this globally to our edit. So let's bring our brightness up. 27. We're going to also want to bring my shuttled off. So I'm going to use the curves layer for this. And I'm going to bring this edge up here to raise our black level. There we go. So now what this has done is we've brought all the black levels to be at the same level in our image, some of the highlights, and we've applied the same color to both the shadows and the highlights with the color lookup. Ok, so that's why this piece now looks a lot more unified. And that's essentially our goal, right? We have this. We can still go ahead and add in a slightest curve if we want to bring that down. So before our color grade, we had this. And after the colour grade, that all looks more unified, Which is exactly what we want to have. Ok, so next, what are we going to do? Well, I want to add a little bit of text. So I'm imagining this as almost like a perfume ad. Okay? So make sure that you've downloaded the font files that I've provided. There are two that I provided. You just double-click the font files installing into your computer and it's going to show up here. Okay, so lets say t and our keyboard are gonna come up with this text tool. And we're going to choose our very first font, which is embed this chi. Okay? And let's come up with a name for this person right. Now. I don't know if this perfume name and it does exist or not, but I'm just going to call this law more, okay? Very simple. And you can not make this bold. This is just a regular type of font. We're going to have it be white. And I'm going to bring this somewhere. I think it would look good. We can play around with placement later on. But I also want some subtext to this. Okay? So I'm gonna have to fly high. Well, you know what, let's do get elevated. That's a nicer tagline. Because in reward situation, this is probably where you're going to use this type of compositing technique. So let's center. This is well, control command teacher resize this. Let's do this and I want a little bit more spacing between these letters. So let's select that. And now we want a paragraph panel here. So let's do window. And let's go ahead and click paragraph. And I'm gonna go over to character. And here we want to change some of the spacings. Specifically, this would be an a. You see, it's spreading out the letters, which is exactly what we wanted. And now let's center this again. Something like this. The more I get elevated. And then let's add some kind of some kind of a date to this. Ok. Again in, by this chi font. Let's say it's going to release on December. Let's do December. I don't know. Any bays fine hair. December 30th. Okay. So for this, I don't want this to be centered. Okay? And then we're just simply going to have this be somewhere here in the bottom right. So that people had seen this ad will know when it's being released. December 12th, December 30th, sorry. And let's lower the opacity of that one down there. Yeah, 47. That's very nice. So the more get elevated. And there we go. We have a very nice finished composite. I think it looks really, really cool. I'd be happy to send this to a client to have them advertised whatever product they have going on, whether it's some kind of perfume or anything. It can even see this being on a magazine cover. And again, you can play around with this. Have different centering. Okay, well that's a perfect central right image. You can have a beat to center down here. So this one, I'll have it be perfectly centered and can always bring in your guideline. And we'll see that that is the exact middle line here. Let's go ahead and hide that. And there we go. We have our finished edit here. And I think that looks really, really cool. So not when the next video, I'm going to show you how to say this because what if you want to print in this? What if you want to put this to your website, to Instagram? There's a few different ways I need to save it. And it's really important to know as a graphic designer, as a photographer. So I'm going to really go over that very quickly and show you exactly how to do that. Let's go.
10. How To Save Properly: Alright, so we are finally done with our edit, but now we need to save it. So depending on where you want to see that for, you're going to save it in different ways. So the main way you definitely want to be saving your PSD file the whole time. You're not going to topple a bet anywhere. The default format to upload to the intranet is going to be a J peg. So let's go ahead and do that. Lets do File Save As. And you're going to navigate to where you have your images. And I'm going to save this in a new folder. Let's go ahead and name this final images. And within that, let's do JPEG. And I'm just going to call this. Furthermore, JPEG, I always have the file extension in the filename because it's really easy to just navigate, take a quick glance and find what you're looking for. So let's hit Save. And we see this is going to be 3.4 megabytes. That's not good if we want to put that to our website. My recommendation is whenever you want to put an image to your website, to your portfolio, has to be between 500 kilobytes and one megabyte. Because if you have many large file sizes, it's going to really slow down your website. It's going to take forever to load all your pieces. So how are we going to deal with this very easily? Can go to File Export and say for whether it's right here. And we're going to be met with this dialogue panel. We can zoom out. And currently this image is 3.69 megabytes, ok. You have some presets here, but I want to call it t to be maximum. And all I'm going to do is change the image size. Okay? So go ahead, make this B has to 60%. See what that does for us. 40 down to 1.399 megabytes. Let's go to 50. That's about one megabyte. That's exactly what we want, okay? And you can zoom in here. You see the quality is still good stuff. I'm gonna be good enough for your website. Okay? So you're gonna save, gonna navigate to where you have your images. All right, and I'm gonna name this law more JPEG for web. Save. Now that file is way smaller. But what if you want to upload to Instagram? And my personal recommendation? And the way I do it is I upload a PNG file to Instagram. For me, it's kept the most quality and the sharpness and the color, and I find it to be the nicest looking. It might look different for you, but definitely try it out, see what works best for you. So let's go ahead and save this as a PNG file. Save as, let's go to final images folder. And we're going to save this as a P and G. And again, we're going to name this law more PNG. Save keeps us, us the large file size and hit OK. Now we're going, now what if we want to print this though? Because if you go to a print shop, they're not gonna accept jpegs and not gonna accept PNGs. Most of the time, they're only going to 18 tiff file TIFFs. Now the downside of this is tif files are absolutely massive. You're never going to want to put those to your website. But when it comes to printing most prone shuffle asked for a TIF file. So let's go ahead and say this is a TIF file. Again File, Save As Tears Go to final images. And we're going to see this as the more tiff. And clients are going to ask you for a sample of what you create and they might want you to print out the poster, the movie poster magazine cover, anything juncture we Sheldon. And you're gonna want to print it with a TIF file. So I generally keep all these options with the default. And just click OK. It's going to include all the layers, which is totally fine. And there we go. And now really quickly I'm gonna tell you all the different file sizes just so you know, just so that, you know, the original JPEG that we saved was 3.5 megabytes. The one that we saved for web went down to under one megabyte, 0.98 megabytes. Different for you, but this is what this particular piece is. Now, the PNG file is 8.6 and megabytes. And that is the reason why I upload PNGs to Instagram. I have more information to work with, and Instagram does its own compression. So having a bigger file to start with, we'll end up resulting in a better final piece. Now the TIF file that I mentioned, how big it is, it's a 299 megabyte file. It's absolutely massive. And in fact, it's bigger than the Photoshop file that I'm working with. The Photoshop file is 297 megabytes. So the TIF file is ever so slightly larger than that. How crazy is that? So there you have it, and that is how you save your image for various different applications. Now in the next video, I want to give you an assignment owns, see what you can do. So hang around. In the next video, I'm going to tell you what your assignment is. Let's go.
11. Your Assignment: And we're now finally at actually my favorite part of the entire course and that is where you get involved. This is what I'm going to give you your assignment. What I want you to do is essentially create your very own Photoshop composite. I want you to use at least three images. So you can be a landscape, a sky, and one subject. But at least three. Maximum can be as many as you want. Okay? I want you to follow through the course. Again, waltz, you do your assignment. When each video live, a Skills and steps that we do in each video from the selecting the cutting skier replacement, everything as we go through the course to your own edit, OK, make your own composite, and then submit it to the students submitted projects section of the course. Okay, give creative, I really want to see what you can do. I think you can do some really cool and interesting things. As you can see, my style is very much related to fashion, to magazine style stuff, commercial lifestyle types of edits. But you, you might be more fantasy driven and maybe more sci-fi driven or maybe just more portrait driven. So they around, put yourself into your own spin to this course, I really want to see what you can do happen with it. And I look forward to seeing what you can do. In the next video, I'm going to conclude this course.
12. Conclusion: When you look at that, you've completed my course, Photoshop compositing and Adobe Photoshop CC 2021. And believe me, that's no small feat. That's a huge accomplishment because not only have you created your very own composite throughout the course, but you have also learned the skills that you need to go on and create as many composites as you want. I also want to reiterate the importance of the assignment for this course. If you haven't already watched the previous video again, to see the assignment brief, but I'm so excited to see what you come up with. I would like to mention that I'm sewing Lightroom presets right now phrase special introductory price or from my website. So head over to www dot the real-time chi.com slash presets to get your presets today, these are perfect to use in Lightroom to apply a preset color grade to your photos and edit, as we saw in today's course. And one of the final steps, we added the colour grade to your image. How easy would it be to just roll that into Lightroom, applying one of my color grades, my presets to the edit, and you'd be good to go. Now these I've made and tested over many years of practice and use. But you know the best part, both of these preset packs are cheaper than a cup of coffee. I really want to give you the means to get great results in your edits and photos. I really hope that you've learned a lot about creating Photoshop and position. Just hung useful deacon beat and how many places actually use them. If you've enjoyed this course, I encourage you to leave a review and rating as I helped me out and feel free to check out my teacher page to see other Lightroom and fellowship courses that I've made, ranging from beginner courses all the way up to mastery level courses. Also, if you have any suggestions or requests for courses that you would like to see me cover, leave it in the comments for the course and I will try my best to cover any topic that you suggest. It's been a pleasure teaching you today and I hope to see you again in a future course. Take it easy.
 Tom Kai, Senior Graphic Designer & Art Director