Transcripts
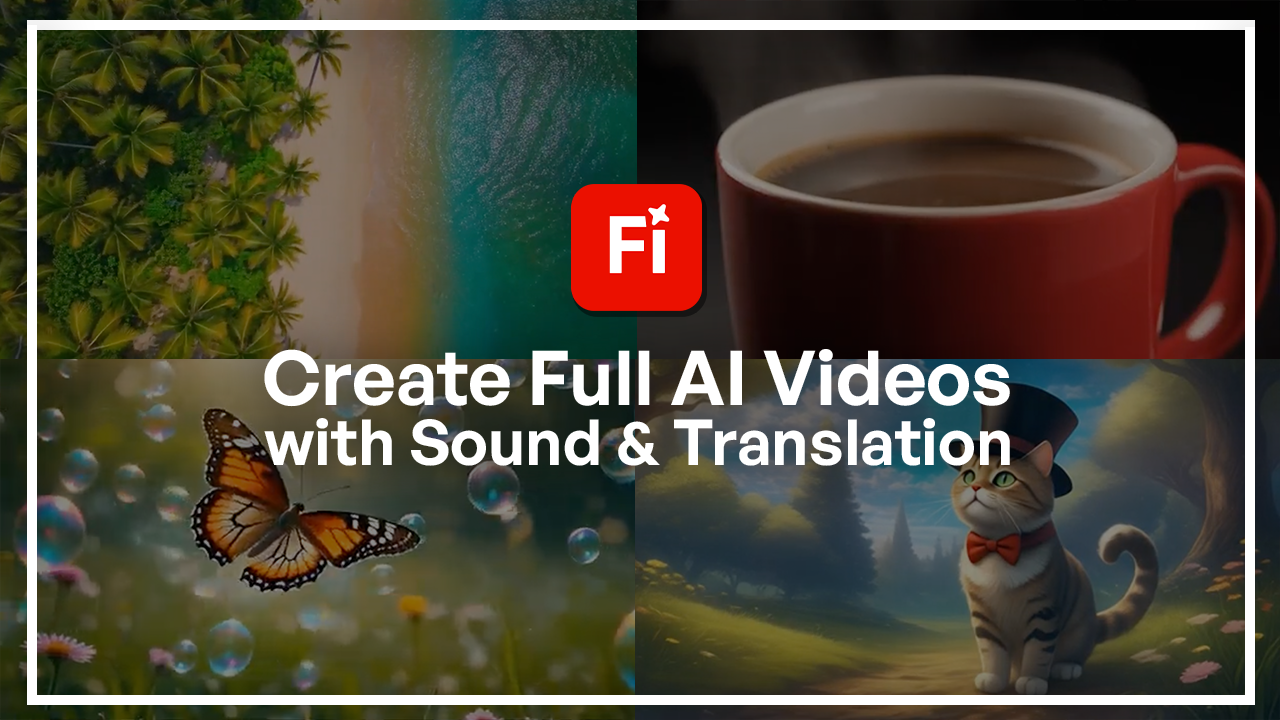
1. Welcome to the Adobe Firefly Video Tools Course: Every great story deserves
to move to have sound, rhythm, and a voice. And with Adobe Firefis new
sound and video tools, you can bring your
imagination fully to life. Firefly isn't just an
image generator anymore. It's now a full creative studio
capable of making videos, sound effects, text effects, translations, and
even transitions. So in this course, we're
going to learn how to make a short AI video using all of these new tools and
explore how you can make your concepts into
various types of motion. Hi, I'm Hosta kahui a digital designer and
instructor at Skidmia. In this class, we're
going to learn how to make videos using text prompts. Most importantly,
what you should put in those prompts
for better outputs. In addition to the video, we're going to learn how
to make music with AI. Whether that's a
background noise, suspense music, or some
dramatic sound effects, you can use that to upscale
the video that you've made and turn it into a
full cinematic experience. Through done building the video, we're also going to learn how to export and fine tune the footage so that you're
going to be walking away with something that
you made all by yourself, and it's ready for you to
share it with the world. All you need for this course is an Adobe account with
access to Adobe Firefly. Now, bear in mind that in addition to the regular firefly, you're going to need
a special credit for the video generations.
So make sure you get that. But other than that,
you don't really need any prior experience
working with prompts, AI, or just videos in general, because I'll be guiding
you through every step, and we're going to get to
the final results together. Now, let's go ahead and turn
those ideas into motion.
2. Exploring Firefly Video Tools: Before creating with Firefly, we first have to see what sort of tools we're dealing with. So this lesson is going to be all about the different parts of the video feature and how we can go about
starting a video, adding styles, and then
editing it later on. So we're here in the
Firefly at adobe.com, and this main box that
you see right here, I have Sunset typed into it. This is essentially
where you get to quickly begin making that video. There is a button right
here for image or video. By default, it's on image, but you just switch it to video and then you have your model. For this, of course,
I'm going to stick with the Firefly model, but there's tons of more
partner models as you can see. Firefly video, this
is the aspect ratio. 16 to nine is the landscape, we have a square, and then
we have a vertical video. You can also decide
on the first frame, so maybe upload
an image that you made with either Firefly
or something else. Once you upload that first
frame, we have an end frame. Down here, we have
the more option. I just clicked on it,
and this is what I got when I typed in a
sunset so very basic. So it's just, you
know, regular sunset. But let's look at the
options on the left side. So we already chose these. These were from the first
interface, so model resolution. Well, we only had
model aspect ratio, and I think that's it actually. So now we have something
called resolution. That's the quality
of this video. The more you choose it, the higher the number
you choose it, the longer it's going to
take to build that video. So I'm going to keep
mine at 5:40 for now. We'll come back to this later. Next, we have frames per second. This has to do with the
quality of your video. So how many singular frames are within each
second of your video? The more there is, the smoother it's going to be with the
motions and all of that. Especially if you want to
do a slow motion video, you want to make sure
you have a high FPS or frames per second. Then of course,
we have duration. This is set to 5 seconds, but you could build
upon your first video or just go for a ten second
video to begin with. Next up, we have composition. This is going to be similar to the reference images that we have with the firefly images. Let's say you want to make
a video of a certain room, you can upload a picture of
that room so that firefly can work on adding motion to
that particular environment. That could be your bedroom. Here we're getting a little description that it needs to be five to 20 seconds
long under this much, you can just film it with
your phone or something. In the room example, you just have the
angle that you want, good lighting and all of that uploaded here
and that's going to be added upon whatever you
are trying to build here. Next up, we have camera. This is motion reference. If you want to do a particular
movement with the video, you can replicate that
with your actual camera. For example, I have
a doll in front of me and I want to go for
a very slow zoom in. Instead of trying to
perfect that in my prompt, I could upload a
video where I'm doing that same zoom in
with a random object. This reference is
only going to look at the motion and not
so much the subject. You just upload it here.
Again, five to 20 seconds should be less than
200 megabytes. These two are
optional, by the way. You don't have to
put references, but it helps when you're trying to make something
more complicated. Next step is the shot size. This is regarding the shot. So we have extreme
close up if you want to go for a really
highly detailed shot, let's say of someone's eyes, just a regular close up, so a flower maybe. We have long shots, which
means that it's very distant from the subject. This sunset, for example, you can see we have some
stuff the background over there and relative to where we are as a
camera right now, that's a really big
distance between these two. Then we have some more
motions down here. If you go over each one, you get a little preview, zoom in, Zoom out, tilt down, handheld, and this
could go on top of those references that you uploaded or you could just
put them in on their own. Next up, we have style. You can go for a
three D animation, play motion, stop
motion, line art. If you don't want
any of these styles, you can just leave it empty
for some realistic videos. Next up, we have some
advanced settings. The first one is
transparent background, meaning that you're going to get that checkered background and then you can overlay
it on top of another clip. Um, and then SD is basically the unique code regarding
a certain style. You can get different seeds from the Adobe community or
other platforms online. Let's say there's this
one AI video that uses this special
type of texture, it's a really unique texture. If you want to replicate that, it would be harder to do
it with the prompt alone. A lot of times people
will just put in the SED number from that style. Next up, we have our prompt box. This is where you ask
Firefly to make your video. Make a video of a
rabbit doing X, Y, and Z in this style in this
setting, and so on, forth. This is our first and last frame from the initial interface. You get to upload
it here as a image. If you go on this little eye, it tells you a little bit more
about the specifications. Then these are essentially
your different shots. I have my Sunset video, which is 5 seconds long
and if I go over here, I could save it to my favorite. If I build another
one, it's going to show up here and then
continue on like that. We also have generation history. So if I turn this off, that sunset box disappears. We have premium features, so this is regarding
your credit. If you are on the Adobe plan, you do get certain
number of credits. I believe for this case at
the start of each month, but you still are able
to buy more credits. So it's not like limited
to what Adobe gives you. Then when you're done,
you hit Generate. Now, up here, you have the
play button for your video. You get to look
at the time here. You can download it,
make it full screen, and then we have some
options up here. Everything that you make with Video and Firefly is
commercially safe, meaning that you are able to distribute it and use
it for your own videos, and you are also
able to sell it on Adobe stock if that's
something you want to do. And it does flag
everything that you download from here as
AI generated content. It's really important
that you guys follow the guidelines that
the platform asks you to do. For example, on Adobe, you do have to mark an AI generated media as
AI generated because they do have different categories and not marking it may
result in some issues. But with Firefly, it
does that automatically, so you don't need to worry
about whether or not it'll be caught onto the fact
that this video is with AI. Can also edit this. You can generate sound effects for this, open it in Firefly Video editor or in Premiere Pro Desktop. Now, for this
course, we're going to stick to Firefly only. But if you have
used Premiere Pro, then you know how useful it is and how much
you can do with it. You could just edit it
directly from here. Then we can just submit
it to Gallery where we could keep it in our
Adobe Cloud storage. Then you can just go to
the gallery right here. These are works of other
people I could draw inspiration from
like them, view it. If I hit View, I get the prompt, maybe I get to edit a few
things and then generate self. There's also an
enhanced prompt button. When you type
something, let's say my initial thing was a sunset. That's a very short prompt, but I could have
Firefly help me out with extending it and
making it more detailed. More detailed your prompts are, the better the result
is going to be. Those are the tools that you're
going to be working with. It's pretty straightforward.
And in the next lesson, we're going to actually use them to make some
videos together. So for now, get comfortable with all of these things that I
talked to you guys about, know where the tools are,
where the styles are, that's going to
come in handy as we continue on making stuff. So let's move on to the
next lesson. Alright.
3. Creating a Concept and Writing Prompts: Alright. Every good video
starts with a good prompt, and the prompt essentially
comes from an idea. So in this lesson,
we're going to formulate an idea
and then put it in the proper prompt
format so that we could make our different
scenes in the next lesson. So we're just going to open up a Google Doc or Microsoft Word, whatever you're
comfortable with, and just start typing things in. I'm just going to
use my text editor just because it's really fast, but you can use whatever
or to you want to do. First, let's think about what this video is going to be about. We have various options. You can make something
about food, a travel ad, product ad, or just a
little short story. I'm going to go with a travel ad so I could show
different environments. We'll do a city environment, a nature area, maybe
the beach or something. Then someone with a suitcase. First start with your idea. Zoom in, start with the idea. Minus travel at showing different places you
can go with my airline. With my airline, I'm not
going to give it a name, but the scene one, it's good to know what exactly
you want in that scene. So for me, I'm going
to start with, like, a palm trees at the beach,
that sort of thing. So palm trees at the beach, coma sunny day, blue water. And then, let's see,
like lush green trees. So those are the
things that I want. If you want to put
a human in there, you can also describe the human. So like a middle
aged man black hair, blue eyes, whatever
you're trying to do. And then that just helps you to figure out what's there for
you to fit into your prompt. Now, the general prompt
structure goes as follows. So we always have the
subject, then the object, the subject or the
object, actually, plus the action,
plus environment. And we do like a camera
angle here as well, environment, style, and then
maybe some technical terms. So these are the things
that you should consider. You don't necessarily need to fill in every one
of these boxes, but the most important thing, I will say is the subject, the action and the environment. The others you could put
in to make a better video, but these three things
are something you do need to have or else you're
going to get hallucinations. So given that I know what
my subject slash Object is, it's just a landscape, really. So I have just the beach action. I could say the trees moving
in the wind environment. It's like, sunny. The style, I'm going to go for a
really realistic video. Technical terms could
be slow motion, the aspect ratio and something regarding the structure of the video itself and the format. So let's start putting this in. Long shot of the shore with lush palm trees
surrounding the area. The water at the beach. Oops, let me do it this way. The water at the beach is glistening with the
sun shining bright. The style we could do
hyperrealistic video, coma vibrant colors,
highly detailed. We're going to say
drone shot maybe. I'll do, like, a
long aerial shot. Okay, so this is an
example of a prompt. We could add more stuff in, but just to go over the formula, we have the camera angle or
just the camera movement. So angle slash movement actually be a better
way toward this. So camera movement Angle. That's This is like
the section that correlates to that
subject or the object. Mine is a landscape. It's the shore with
the following action. It's just the water
glistening maybe environment. It's the beach. Just turn into the beach. Style we said a hyperrealistic
video, vibrant colors. And in the technical terms, highly detailed
drone shot could do a 16 by nine aspect ratio.
That's our scene one. Scene two, I'm going to
repeat the same thing, but this time we
could be in the city. So I'll do scene two, and then we could do
the city streets. It's still a sunny day, just to keep the mood up, large crowds, maybe, and
then cobblestone roads. So we could do handheld shot of a crowded urban city with
cars driving on Cobblestone. Road, the city is busy
busy with people. Sunny day. And I could
just copy this part. Except the drone, I'll
remove the drone. So that's our scene two. Scene three, we could try to do a completely
different scenario. So maybe we could do close up. Well, I want to focus on, like, a coffee mug. So, like, after they
went through the beach, the city, they're just, like, relaxing
with their coffee. Coffee mug, steam coming from
the cup or mug. Red mug. So just some details. And then we could do close
up shot with slow zoom onto a red ceramic mug that has
coffee or hot coffee in it. The steam moves slowly
as camera pans inwards. Once again, I could just copy the hyperrealistic
parts, remove the drone. These are my three
different prompts. You feel like you want
to expand on these. Once again, Firefly does
have that prompt enhancer, so I'm just going to
copy one of these. Let's go with the first one, and I'm going to put it in here. Right away, you can see that
I get this thing enabled. I'm just going to turn
it into one sentence. I'm just going to click on this. You can see it's loading
and it's going to add in some more details
that's going to help Firefly make your video. I'm going to just
compare it to what we had before. Do it like that. So it added the word vibrant, creating a lush green canopy. We didn't have that bright sun reflecting a spectrum of vivid colors. We didn't
have that either. Camera maintains a steady
wide angle perspective, providing a 16 to nine
aspect ratio that emphasizes the expansive
beauty of the scene, so that we didn't have either. So now that the
prompt is enhanced, I'm just going to copy
it onto our first one and replace our old prompt. Let's repeat the same thing with the other two
scenes so that everything is ready for when we want to
generate the videos. Sometimes you may have to delete the prompt so that
it enhances again. Okay. Now we have
another enhanced prompt. You could just compare what we have down here with
what's up here. Obviously, the one below
has more description, which is perfect for
AI video generation. Last up is our third scene, which is the most
straightforward. Going to delete this, put this in again, and then enhance it. Now I started from an idea. I planned out my scenes, and then I had Firefly kind
of put it all together, add a few words in there to
make it more descriptive. You could turn to other chat bots like Gemini,
Chat GBT Desk, whatever you're
comfortable with to have your idea turn into more
professional prompts. But the good thing
about Firefly is that it all in one place. So that's exactly what we did. And now we're ready to
go to actually build these videos using the styles
we saw on the left side, and hopefully we could get three clean cuts from this idea and then put it
all together after modifying them. All right.
4. Generating Video with Firefly: Now, let's see how Firefly is going to bring our
ideas to life. So in the last
lesson, we crafted three prompts for three
different scenes, ultimately leading
to our travel ad. So I'm going to start
with our first prompt, which I'll just bring back here. This is after we had
Firefly enhance our prompt. So I'm just going to
copy that in place it with the prompt that we had
and going on the right side, I'm just going to make sure that everything is up to my liking. I'll keep the resolution
low on purpose so that things can get
generated a lot quicker, but feel free to ramp it
up and get better results. Since I did say 16 to
nine aspect ratio, I have to mirror that
here. Frames per second. I'm going to leave it like that. Let's not do any references, and let's do some
camera instead. We're doing a long shot so camera maintains a steady
wide angle perspective. I think we could
do the static one, and I'll remove the seed what's
kept in from this video. When we're done,
we could just hit generate and let's see
what Firefly has to offer. Now you can see that I got this random number
kept in the seat box. That is that unique ID that
I was telling you about. So if I like this video
and the way it looks, I could just copy the sad and put it for the
other two scenes. So this is my video. You can see it is indeed a aerial
shot like a drone shot. We have the water glistening, the lush trees, the
shore, and it's perfect. So now I'm just going to copy this to use it
for other things. If you want, you could always
just edit your prompt. Let's say you don't
want palm trees at all, remove the word palm
trees and replace it with something else or just
remove that part completely. So let's do our second video, which is the city landscape. Gonna copy that, replace it, and the seed number is still
the same. So that's perfect. This guy, I'm just
going to switch over to handheld because that's
what we asked for here. When we're done, we could hit generate the old video
just goes to your gallery, so it's not like you lost it. If I just do this, we can see the video is
right over here. I'm just going to save it to favorites so that I
could have access to it, and this is our city video. It's definitely handheld. It is a busy street. The Cobblestone Road
is very much visible. It's actually the
center of the frame. We have people, filled
with people moving in various directions
and sunny bright day. Perfect. So that's
our second scene. Once again, I'm going
to favorite it. Next up is our final
coffee mug scene. Just going to grab it all here. And then the seed number
is still the same. For this guy, we're going
to do a close up shot. So I'll do like a zoom in or maybe a
static one, actually. Static shot, let's generate
our final steam for this travel ad and
then move on to the next lesson
where we're going to edit and fine tune all of these. There's my coffee mug. Definitely a lot of steam. I chose static, but
let's just look over how you could edit something
that Firefly gives you. Let's say I changed my mind
about the static part, I could just switch
over to one of these, do a slow Zoom in
because that's what I mentioned here and then
we have an actual zoom in. You can see all
the details here, it's looking pretty good. Just by changing one thing, I'm able to get the exact
same mug, exact same shot. The only difference here is that the first one had
a white inside, and this one has
all of it is red. If that's a problem for you, you could dedicate a part of the prompt for describing
the way the mug looks. So maybe it has a
certain pattern on it. It's blue. It's like, cracked or anything
you want to do. Just specify it inside
your prompt box. Where do we find these videos? Because if you go
to the gallery, you'll see a bunch of
random things and you may panic thinking that
you lost all your videos, but that's not the case. If I go to the
Firefly homepage and then go to your stuff
generation history, everything is listed
right over here. Want to just look at the videos, do a little search like that. As you recall, we favorited these two videos,
not the third one, so I could just go over here, switch over to video, and then see the ones
that I liked the most. Then over here, we have some more options
regarding the videos. You could open
them in a new tab, make a board with
them, download them, share it with a public link. You can add it to
a different folder or even use it in
the video editor, which we're going to
use further lessons. But regarding the folders, just so you know how to keep
everything nice and tidy, let's add everything
to a new folder. That's for our, let's
say, travel ad Video. So now I could just put
it inside this folder, and I'll do the same thing
with the other video, and we had one
more with the cup. It was this one, actually. Add it to travel Video. Now if you go to projects, you'll have your
travel ad Video. And inside is going to have
all those three videos. You can add more either by creating another folder inside or moving one of the files. You can share this folder
with someone if you want. You can shuffle through the types of things that you have, but for me, it's just a video. You can also look at the
things you've deleted, things that other
people shared with you. And then, of course, we have all the other
stuff on the left side. Now that our base
footage is ready, it's now time to refine
and edit them so that it's ready to be put together
into one final video.
5. Editing and Refining Scenes: Let's clean up our clips that we made in the
previous lesson. These are the three
things we made. We had overhead
shot of this beach. We had the Busy city
with the people, and then finally, a
closeup of our coffee mug. So the first thing you
want to do is just go over to one of your videos, and I'm just going to hit open. So now over here
with the Edit tab, I could just click
on it and then go into Firefly Video Editor. This is still in Beta, but overtime it's
going to get better. If for some reason it
doesn't work well for you, just remember that it's in Beta, but you can also just put it
into Premiere Pro Dk stop, which should be in your plan, or you could download it
and use another program. Over here, just a quick
tour of what's happening, we have our project name.
This is what we have. You can rename this video
we'll call it scene one. And then on the left side, we have our media, which currently is
just the video. But you could upload
from your computer. You could also create
a new timeline. But this is all we
have right now. Seen If you've
used Premiere Pro, it's similar to a sequence. So they call a sequence
a timeline here, but it's essentially one of these this right here
is one timeline, so you could do another timeline which is just for another video. We're not going to get into that for this particular
thing because we're trying to make one
outcome from these three clips. You were to do
three outcomes from three clips and that would be
three timelines. All right. We have our generation history. So if you don't have
everything uploaded, you could also access
your videos like this. You can generate new here
by clicking the button. We can scroll through the
different types of media, sort them, show the favorites, and then we can
add in some text. We have some cool
titles and signs. You can also make
your own custom ones, which we'll get into later. We also have some
keyboard shortcuts, a list for you to look at you can look over what would
work best for you. If you're going to trim a lot, it's good to know that you
could just maybe split with the letter S on
your keyboard instead of right clicking or clicking
the scissor button. These are very helpful.
Speaking of the scissor button, that's our split tool, so it basically takes your video and cuts
it in half or in multiple parts for
you to either add a transition or put
in another video. This right here
is the move tool. It allows you to move things. And when I'm going
over the video, that allows me to preview what I'm dealing with
going back and forth. This right here is the playhead. If you stop at this
moment and you split it, it's going to split
exactly on this frame. So you can use this as well. If you right click, you can cut, copy or edit the properties. Over here is your preview box. You video, you can play it, skip forward, skip backwards,
see how long it is. Then on the top right, we have a aspect ratio, so you could switch it over to a square, TikTok, anything else. We are going to keep
it on 16 to nine just because I want it to be an
advertisement for YouTube. You can zoom in and
out of your timeline. So we have the skimmer
and Snap mode. Essentially, the skimmer
allows you to preview things. So skimmer is basically
when you get to see a preview of the video
just by hovering over it, you can see the playhead
is right over there. But with my regular move tool, I could see what's
happening inside the video. If I don't want this to happen, I just turn off skimmer, and now you can see
that's not happening. I would have to actually
move my playhead. Then speaking of playheads, we have something
called snap mode. When I have a turn on, when I grab this close
to the end of the video, you see that it snaps to
right where the video ends. But if I don't want
that to happen, I could just turn
that off and you can see it's not snapping anymore. And then here we have an
indication of the seconds. So this is 0.3 seconds
and it goes on. You can look at the generation properties
for this particular video, we're seeing the prompt, the model that we used, the cell that we use, and basically what we're seeing in the previous interface. You also have some properties over here so you can work with the position on DX
axis, the Y axis, the scale, the rotation, you can also type in something
like 90 degrees opacity. How visible is this video
and then the speed, super fast, super slow. Be mindful of your
frames per second or else you're going to get
a very pixelated video. Bring it back to 100. Then we have some stuff up here, so fit to frame, it's going to zoom it until
the entire frame is covered. We have a fill frame, which means that it can go beyond the frame,
stretch it out. Let's say I have
something like this. Fit to frame, flips it so
that it's perfectly fit. No part of the video is
being hidden right now. But if I do that again, fill
frame is going to zoom it in until it's fully filling the frame. That's
the difference. Then we have some
flip horizontal, flip vertical, rotate it, and then we have some position. You can align it to let
me make this smaller, align it to the
left of the canvas, the middle, right, top,
middle, and below. These are also the
specifics of the video, we're seeing the
frames per second, the resolution, the
duration, and the name. The next thing is
text based editing. So if there's some
sort of audio in here, let's say you did a voiceover, transcriptions will be visible
from there so you can make captions or try to cut out
something from the voice over, but we don't have
anything like that, so that's why it's empty. We're just going to go
back here bit to frame, and this is basically
where we all started. I'm just making sure that
my opacity and speed is at 100 and I'm going to
scale this to 100, actually. Let's scale it up. We have our video. For me, there isn't much to refine just because it's
a pretty static thing. But let's say there was a
hallucination and over here, a bird attempted to pop in, I could just cut that out
by using the scissor tool. So now I have a scissor, click and then I could
get rid of this part. I could right click or just hit the backspace
on my keyboard. Commander control Z
to bring it back. You can also grab the end and squeeze it in and the same
thing goes with the beginning. You are able to use the
shortcuts. S was for split. So if I want to make
a split here as a, you can see I'm
making various cuts I do with Command or Control Z. All right, so let's bring
in our other videos. I'm going to go to
generation history and look for the city scene, drag it in right after my
beach video. There it is. It may take some time. And then finally, our coffee video. I'm just using the Zoom and Zoom out so I can see all three. So now what we have is
three videos put into one. But when I download this, it's going to be
115 minute video. So, that's what we have. If you want, you could
right click and edit the properties the same
way you would from here. But that's pretty
much all you could do inside the video
editor for Firefly. This was just a quick tour. For my case, I'm just
going to go over each one. But there's nothing
I want to cut out, but if you guys had something to cut out
with your videos, you know which tools to use now. So in the next lesson,
we're going to take this to the next
level by adding in some sound effects and some text just to make it
closer to a travel ad. I'll see you guys in the
next lesson. Alright.
6. Adding AI Sound and Effects: Sound is half the story. And in this lesson,
we're going to add on some AI sound effects and voiceovers onto this video that we made in the
previous lesson. So I'm back in our video editor, and we had three clips that
we made for the Travel ad. So this is exactly
what they look like. And now regarding sound
and the sound effects, Firefly does have
built in tools for you to start making
things like that. So let's go ahead and open a new tab and we're just going to go down to
the Generate tab. It's right below Create, and this is where you get
to make the soundtrack. You can also scroll
down for more things, text to sound effects,
generate speech, toward the voiceovers, and
then we can do music as well. So we're going to do all three just to show you how
all of them work. First one is going to
be generate soundtrack. I'm just going to
click on it, and this is the window that you're
going to be dealing. Here we do get some credits. Right now, for me, it's 20 with video and audio because it
takes a lot longer to make it, you may have to
buy more credits, which you can do up here. You can upload a video to
get the prompt suggestion. That's something we can do
when we export our travel ad, which is something
I'll do right now. Let's just go down to
the Video project. Then click on Download. I'll do medium quality, but you guys can
alter it as you want, and then you get to see how
long it's taking to export. Now, while that's exporting, let's go back here and I'll just show you what
we're dealing with. The first thing is our prompt. But here, the difference
is that it's a lot less detailed because with
sound with music tracks, you really need a few
words to define it. So we have bold, you can do soft or mellow,
whatever word you want. Confident song with
rock guitar style, and then here it's
saying for this. For my case, it would
be for a travel ad. I'll just switch
this and let's see. We can do bold confident. I'll keep guitar, and then we can scroll down
to choose more keywords. Here is the vibe. For vibe, we have
bold and confident, but you can again take any
of these out and let's say, I'll do warm and peaceful.
We have the style. Right now, we only
have guitar selected, but you could add
things on here. Let's say, a little
bit of low fi purpose, I'm just going to
keep travel ad, but you can also
combine these things. Next up is energy, low, medium, high tempo. I'll keep everything at medium then finally, the duration. So here it's in seconds. I'm going to keep it at 60. Our original clip is 15 seconds. You can always check
it in right over here, and I'm just going
to hit generate. This is without me uploading
the video and then I'll upload the video
in another attempt to show you the difference. Here we got four
tracks to test out. Let's see. That's track one. Track two. Track three. And track four. Wow. So all of them have
that guitar element. They're all very peaceful, warm and some ofi
elements in there, although I don't hear it a lot. But if I want ofi to
be the main thing, I will just remove guitar and have this be the
star of the show. Now, out of these four,
I prefer number three. So what you could do
is just hit Download, and that's going to get
the soundtrack for you. Now, at the same time,
you can upload a video. So our sequence in the other
tab, just download it. I'm just going to click on
this and upload it here. So it's going to generate a
prompt based on the video. It may take a little longer depending on how
long your video is. Um, there we go. It's
right over there, and you can see that
it changed my prompt. So now we're getting a
calm reflective song with fi chill hop style
for lifestyle travel. Like the purpose is
lifestyle and travel. These are like these selections. Energy is low this time. Tempo is medium, and you
can see here it adjusted the duration to 16 seconds because my original
video was 15. So with that in mind, I'm
just going to hit Generate. And this will take me five
credits. So let's hear it. It even has the
video for us to see. That's track number
one. Let's try two. Number three. And number four. Okay, so I'll do number one. So all you need to
do is download. Since we have video here, you can decide if the music is connected to
the video or not. Since I want to do some
adjustments in the video editor, I'm going to just do audio
only, so the second option. And then back in
the video editor, I could upload the
two sound effects. So I could just upload my
sound effects by clicking this button and then I'll
decide which one I want to use. That's regarding sound
tracks, actually. You can see that this
is also in Beta. There isn't much to do here other than the stuff
that I've shown you, but in the future, they may add new things. Now let's go back to
Firefly, the homepage, generate, and we'll look at
the other sound features. We also have text to sound
effect. Let's try that. So over here, we're going
to start with our prompt, but here we're describing
the sound effect only. So instead of doing make a
sound effect for X Y and Z, we're just going to say
something like birds chirping. So very straightforward. And then you can also upload
your video here so you can see what's on the canvas and then try to
put it into words. That's what I'm going to do
for demonstration purposes. So upload the media, upload your sequence that we
downloaded earlier. Here's my scene one. You can see that it's right over here, I have my playhead and
it's 15 seconds long. Now, seeing this scene, I could try to describe
it into words. Let's say Segels
in the distance. You can decide on the duration, I'll keep it eight and we
can then hit generate. You can also do
something with timing. Let's say you get a SQL sound
effect that's too fast, there's too many Segels. You can record your
voice imitating that sound and then Firefly will try to replace
your sound with the Segels. I'm just going to do this and then we'll see how that sounds. So here we're getting
four variations. Let's give them a listen. That's number one, number two. Number three. And number four. So out of the four, I like the number three. So I just clicked on
it once and you can see it popped right
beneath my scene one. Now this is integrated and seeing how I go from
the beach to the city, I could actually cut
this audio short or maybe just made 5 seconds to begin with instead of eight. But there's no worries
because we can just trim it down like that. You can decide on
the volume, mute it, change the prompt,
maybe reset it, download it, delete it,
and all that stuff. And if you want to do
multiple sound effects in one audio, put all of them here and
then download it this way. But if you want singular audios, you just click on it once on that audio and then
download it like that. All right, so let's go
to our second sound, which is like a busy city. Let's do crowded city. And knowing that
this is 5 seconds, I'm just going to
type it in 5 seconds. Let's give them all listen. Again, number three,
that's what I like. I'm going to put it over here, and now I have two
sound effects. For the last one, I
don't think we need a sound effect just because
there isn't much going on. It's just the steam. It doesn't really
sound like anything. Once I'm done, I could hit Download and it's going to
give it a little processing, and then I have my audio. I'm also going to download them separately so that we have more flexibility
when we're putting them all together in
the video editor. Also add another audio track. So it just adds it here if you want to do overlapping sounds, and then we can clear everything
and start from scratch. That's regarding sound effects. The last thing is voiceovers. Let's go to generate, scroll down, Generate speech. Now with this one, you're
going to need to have a text for these
bots to ward out. We have the different models. There is 11 labs model here. It's a very well known tool. We do have an entire course
dedicated to that as well, and then we have fireflies you can choose whichever you prefer. Here are the voices that
you get to choose from. Each firefly speech voice has over Each firefly speech voice. Each firefly speech? You can also find
more from here. We can group them
based on their gender. Recently used age groups, and you can even favorite
some of the voices so you get to use them, you
know, numerous times. Each firefly speech voice has
I'm gonna go with H group, and you can see
that there's, like, a tag for middle aged, senior, and then probably,
like, young adult. Each firefly speech. Each Firefly Each each
firefly speech voice has over each
Firefly speech form. So I really prefer Pamela, so I'm going to
click on that once, and now we have that checkmark. I could add it to favorites
by clicking on the star, and then I could easily
find it the next time. So we have selected
her for our purpose. Scrolling down, you get
to choose the language. The default is English, but there's tons
of others as well. I'll do English US, the speed. I'll keep it as
it is, the pitch. You can reset the values, and then you can give
her sample a listen. So for my case,
I'll try to put in a few sentences for
our travel ad, maybe, like, travel anywhere
with the best companions. Then we have the city
scene get lost in the experience and see it all. And then the last scene, relax with the right accommodations. My line, we can give
it a title here, so I'll call it travel ad. You can add more
text by importing. You can do TXT and Docs
files. You can add a pause. So that's something
I'm going to do. That way, the AI doesn't
go over it in a quick way. She pauses after each period. So I'm going to add a pause
here and then one after this. O line per scene. There's also some tips, and then you can also decide on how long the pause
is going to be. I think I'll do 2
seconds for mine. We can see our
generation history, get some prompt
text suggestions, and then when you're done,
you can hit generate. It's going to take one credit. I can see my credits over here. So there is my voice. You can see that the
pause is for 2 seconds. Let's give it a listen. Travel anywhere with
the best Companions. Get lost in the experience
and see it all. Relax with the right
accommodation. So that is my audio. When I'm done, I could just
download it right up here, and now it's there
for me to use. So we have all of the
audios right now, and what we can do is put it all together in
our video editor. So now we have all of our audios that we generated
within Firefly. I downloaded all of them, and then in the next lesson, we can put it all together
in the video editor. So I'll see you guys
in the next part.
7. Putting it Together: Alright. Let's polish your video and have it be ready
for publishing. So this is where we left off. I just have my video here and I'm going to
quickly upload all of the sound effects and soundtracks that we made
in the previous lesson. So I have everything uploaded. So let's start by adding
in our sound track, which is the, you
know, big thing. We had this one, and then we had this Let's actually
do the first one, Track one, drag it in, and I'm going to move it so it's right underneath our video. So this was the 15
second one that we made. That's why it's
perfectly aligned. If let's say I did this one and it was a little bit longer, all I have to do is
just click on it, and then using the split tool, just give it a little cut, get rid of the excess. So if that was the case for you, that's how you can fit it. And then we can start putting in our voice effect, the speech. That's the untitled project,
drag it underneath. And then let's hear
how it sounds. Relax with the right
accommodation. You can see that I did
one sentence per clip, but they're not exactly aligned. This is where we get to use the split tool to make our cuts. Just do cuts like that,
I'll get rid of what's in the middle and then put
this somewhere in between. And then we have
our sound effects. Not sure which one this was. So let's put it up there. This is the crowded city, and then we had whoops, the beach, which
I'm going to trim down so it's fitted
to the duration. And now we have
all of our audios. So if I play this,
this is what we have. Travel anywhere with
the best companion it was my experience. You can see it all. The audio is there, but it's
just way too disorganized. We can barely hear the speech. The audio is too loud, the sound effect is too loud, and then the Segel,
which is everywhere. So what you can do with audio is just select it like this. Go to this Properties panel
and just reduce the volume. So we have to make sure that we need to decide on what's the
most important thing. For my case, that's the audio. The lady saying that
travel anywhere, and I just want to make
sure that people can actually get convinced
for my travel ad. So the Segel is way too loud. I'm just going to click on
it and then lower that. Let's do 30. Let's see
what that sounds like. Travel anywhere. With the
best companions, okay? And then we have the audio. I'm gonna lower that, as well. The main music, I mean,
see what that sounds like. Travel anywhere. With
the best companions. Get lost. The seagull is
still a little too loud. And then the crowded city
is too loud, as well. Travel anywhere with
the best companions. Get lost in the experience
and see it all. Relax with the right
accommodation. So there's my different audios, just playing well together
for my travel ad. You could do some more
adjustments regarding the speed, the videos as we saw in
the previous lesson. But for me, I think
that's where I'm going to stop with the audios. You can also right click
to mute something. Let's say I changed my mind
about this part of the audio, I could mute it and it gets
great out. I hit Play. It doesn't play. You
can click and unmute. You can also connect
this to something. So it's connected to this, and that way I don't
accidentally move. All right so we have our audio. Let's add in some simple
text using the text tool. So right over here, I'm going
to go to the beginning, sort of, and then
look for a title. Let's view all, take a
look at what we have. Let's do this version. I'll click on it once and
let's type something in. If you don't want
to use the presets, you can also add your own title. So I just click on this once, and I'll do Airline. We'll be like travel AD I guess. Command or Control A, we have some properties
on the right side. First of all, we have the font, the size, the classic things. So I'll do mine like black, and then we'll give it a nice fill color and put
it in the middle. Let's give it a shadow so it's easier to
read. There we go. And we can decide
on the position, rotation, opacity,
make it italic, if you want, underline it, and then you can
do text spacing, the layout, and
then the alignment. You can also add some
background colors, like a background box for
it, and then an outline. For me, that's going
to have to do. Then I'll cut it
short a little bit. So let's play this. Travel anywhere with
the best companions. Get lost in the experience
and see it all. Travel. Relax. And then I'll do another
one, which is, like, a ending text. Enjoy your drink. And I'll do this one italicized, not old, and let's do, like, a fancy font, I guess. Something like that. And
I'll add shadows for this, as well, so it's easy to read. Relax with the right
accommodation. So we have all of our
parts for this video. The only downside for the
Firefly video editor, which they may fix in
the future is that you can't really do
transitions or blending. So as you heard, the music
just ends out of nowhere. And then I can't really fade out the sound effects to
make this more natural. Relax just stops. That's something that hopefully will get resolved in the future. Same thing with the text. They just travel pop and you can't really
do much with them. But for now, you can see how they're attempting
to put everything in one place so you don't
really have to leave Firefly. When you're done
with your project, you can just download it, and then you can decide on
the resolution, the quality. And when you're done,
you hit Download. It's going to export it, and then you can have
it on your computer. That's how you can use the video editor and just make something very simple
like our travel ad. In the next lesson,
we're going to go for our class project. But that time, I'm going to use a different type of media. We have the semi
realistic videos here for an actual travel ad. We'll attempt to do an
animation in the next lesson, something that's going to be
a lot more like cartoonish, which therefore will
need more sound effects, specific ones, and that's going to be a fun
experiment as well. So make sure you're done with this project so that you're
ready for the next one.
8. Project Walkthrough: Making a Full AI Video: Now I'm going to show you an entire workflow
from start to finish, which is going to
be something you'd have to do for your
class project. So we're going to be building
a two D animation this time just to make it a little different from what
we've been doing so far, but it will have the
main components, which is the base videos,
the sound effects. We could add some text in there, some music and just
see where it goes. So we're back in the
homepage for Firefly, and I'm going to start as
always with my base videos. So let's go ahead and go to Generate where we can do
the videos right over here. Alright. So let's talk a
little bit about our idea. I'm just going to switch to Firefly so we can see all
the different styles. From the styles, I
think I would like to do the clay motion. That
looks very interesting. It's not exactly too deep, but it will have a
cartoonish element, which will let me explore more
in terms of sound effects. Maybe I could give some
characters like a voice. And we can start first by
choosing our general settings. So I'll do a lower one for
now, five second duration. Don't need any composition. I'll go with a static
just because I want that cartoonish
look shot size. We could do I guess a
medium shot camera angle. We can keep everything
normal, so none, and then style, clay motion, let's try to describe what
our cartoon is about. Let's choose a character can do a friendly cat
sitting in a forest, looking up at the sky. He is wearing a bow tie
and maybe a red bow tie. So they have the top hat. I'm trying to imagine
the environment. So sunny day, green trees and grass,
everywhere. Blue sky. So very simple straightforward. Let's generate our first scene. And you can see I got
my unique seat number, so I'm just going to copy that. But by default, it should be in that place as you build
upon this animation. In case it, like, disappears, just make sure you
have it written down. Alright, so this is
our first scene. So there's my clay motion. It's indeed, like,
I believe, okay, I like, shows up, like
inflates, in a way. I couldn't do another one, so let me see what
I could change. Maybe we could do
walking in the forest instead of sitting.
Let's generate that. But other than that, you could
see how it maintained the, you know, red bow tie
and the black top hat. It is clay motion as well,
at least the cat part. Could also try the
different things over here. The stop motion
looks interesting, but let's see what
this gives us. So we have the same forest, and now our cat has genes. It's kind of like vibrating. So I'll remove any
sort of action. I think the second one
looks the most normal. I'm just going to
add it to favorite. And then we can move on to a different style just
to try things out. I'm going to remove clay motion, and we could try stop motion. So let's try that out, and then we could decide
on which one's better. So here, stop motion. Okay, that looks a
little bit creepier. I'm not a fan of this. Let's try, like a three D
one or maybe a fantasy. Get all the variations. Okay, so this is a lot
more children storybook. So I'll keep this for
sure. Let's save this. So once I have all of
my videos generated, it's now time to go on
for the sound effects, soundtrack, and then
some text to speech. We'll start with the soundtrack. So let's go to Generate
Generate soundtrack. And we're going to basically make like a
children's storybook, so that's gonna have to
be a little playful. Um, maybe fun and
that sort of thing. I'm going to just
clear the prompt. Go down here, we'll do playful. We'll do the style. We could do like
children's storybook style for let's say, storytelling. And then we'll do a low
energy medium tempo and I'll do 20 seconds
just to be certain. Then we're going to hit generate.
Let's see what we have. So I like track
number four the best, so we're just going to
give it a download. That's our first
checklist all done. Now we need some sound effects. You could do what
we did last class, which is to download the video
from the video editor and then upload it as your reference when you're making
the sound effect. But I know exactly what
sound effects I need, so I'm going to just skip that. Going to generate, you can go down to text
to sound effect. I'm going to need
a cat meow sound, and I know all my clips
are 5 seconds long, so I'm just going
to type in five. Let's generate, and then we'll see which one's
the best one. Who. Wow. Wow. I'm going to
download the one I like, and then we have the next thing, which is the cat
walking in the forest. We can say walking on
leaves, again, 5 seconds. I'm going to generate
that. That's going to be our second sound effect. We do have a butterfly
flying around bubbles. I do want bubble sounds and then maybe some mystical sounds. If that makes sense,
we'll see what we can do. So those are some variations. And next up, we can do. These are all going to go in my generation
history, by the way. So bubble sounds,
bubbles generate that. So I think the first
one was better, and then we have magic
sounds, I guess. I'm gonna go for that I'm looking for that shimmery sound, but I'm not sure how
to word it here. So, yeah, these
are not gonna do. And then we have I think
that's it, really. So the cat is walking. There's the magic sounds. For the magic sounds,
let's do like whimsical, try to describe something
close to what we need. No. Okay, that's not it. Glitter. You could
also try Summer. Just because our butterfly is in a very sunny environment, so maybe this could
work instead. Gonna download that, and
that's our sound effects. So let's move on
to text to speech, which is the last component that we're going to
need generate speech. And so I wrote something that's going to act like a
narration for our story. From the voices, I chose Jackie. Each Firefly speech
voice has over. So that's in the
young adult category, and I made sure that
her pitch was higher, so I just increased
this a little bit, and then we lowered the speed to match that children's
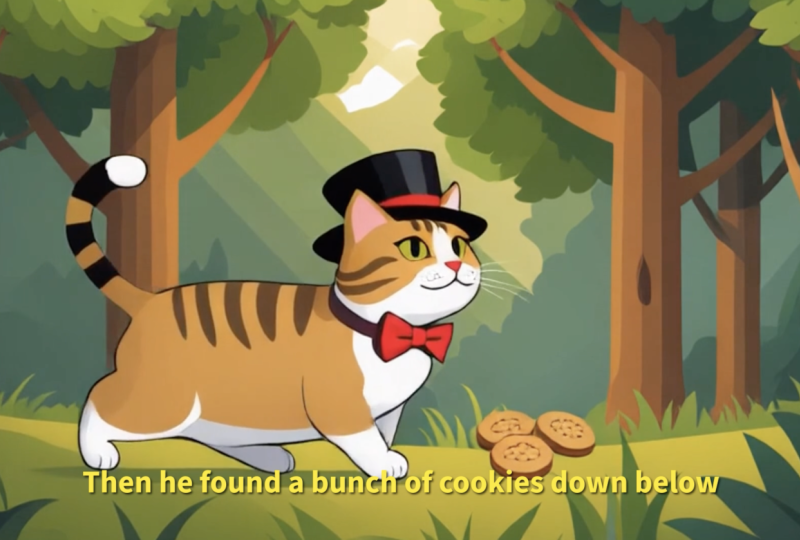
storybook style. Then when it was done, it sounded like this. Bob the top hat cat was
roaming the forest all alone. Then he found a bunch
of cookies down below. The butterfly flew far and free. It looked like Bob
could use a company. So that's going to
work perfectly with our little goofy
music in the back, and I could set the mood
with the sound effects. So now I have every
component that I need. I got the video, sound effects, sound track, and
then the speech. So let's go to the
Adobe Firefly homepage and Edit Video is
right over here. So I'm just gonna click on it. We're going to make
a new project called this Children's Story Book. An aspect ratio,
I'll do 16 to nine. That's the ratio that
we chose earlier. All right. So now we need to actually drag in
all our components. You can either
access them through your generation history or
through your uploaded medium. Just click on Upload and then import them
from your computer. So let's go to
generation history and get our videos first. So I have this first clip of the cat walking. I'm
going to drop that in. And then we have
the second scene where the cat finds the cookies, and then you can see
how that composition reference really did well here. Next, we have the butterfly just floating between bubbles, and just because I have
four lines of audio, I'm going to bring in the first clip and put
it at the end. So I have four clips in total. Now for the uploaded content, I'm going to bring in my
storytelling animation sound. So that's one that I generated, and I just saved it, then
uploaded it to my project. Next, we have speaker. Then you found a bunch
of cookies down below. So now we're going to bring in our different sound effects. We have a few. Just gonna put them in.
Okay? We have the bubbles. So you could also, move them in different levels
to overlay them. But we first have
this cat coming in. This is the bubbles. We have the magical sound
over here, walking on leaves. And then I'm going
to copy this for the second scene where the cat is walking
on leaves again. So Commander Control C, Commander Control V. Same
thing with the meow. So let's put it
here. There we go. Then we also have
this summer sound. I'm going to put this
one level above. And yeah, so we have all
of our sound effects. Regarding the speech, I'm
going to cut it down with a split tool so that I could match it to what's
happening in the video. So this is the last sentence
going with clip four, clip three, Clip two,
and then clip one. Okay, let's listen and see
what we're dealing with. Roaming before all the log. So there's a lot of volume adjustments
that we need to do. First of all, the sound effects
should be the least loud. So I'm thinking maybe
maybe 18 would work. So I'll do 18 for each one, and then we could always
come back and adjust it. 18. Gonna have to listen
to the summer sounds because I don't think those were loud
enough to begin with. But the bubbles is very loud, so I'll do 15 for this. And then the main
soundtrack is pretty loud. I think we could do like 45%. Let's see. Bob, the top hat
cat was roaming the forest, so it's still a little loud. I'll do 35. Bob, the top hat cat was
roaming the forest all alone. Then he found a
bunch of cookies. Maybe we could do 30. Cookies down below. The
butterfly flew far in. So yeah, the magic
sounds are really loud. I'll do maybe 20 for the
summer sound, and the magic. We'll do like ten 'cause
it was really loud. The butterfly flew far and free. It looked like Bob
could use a company. Okay, the sound is
still really loud. Let's do 20%. The butterfly flew far and free. It looked like Bob
could use a company. Okay, that's a lot better. And one more thing that
I'm noticing is that some of the sound effects
need to be trimmed. For example, the cat walks
but stops at this point, but we're still
getting that walking on leaf sound effect. So right over here, I'm
going to trim this and then delete the same
thing on this end. So around here, the
cat stops walking. And then this way, it's
gonna be more matched. Bob, the top hat cat was
roaming the forest all alone. Then he found a bunch
of cookies down below. The butterfly flew far and free. It looked like Bob
could use a company. Okay, so we have a bunch of, you know, sound effects
with our video. The last component I want to
add on is maybe captions. And that's pretty simple to do. You just go to text, and I'm just going to use
the regular text box. Go to align it to the middle with that purple
line that showed up and basically put in
what the story was about. So I think it was like
we could actually open a new tab and see what
we wrote exactly. So Firefly, let's go to your
stuff, generation history. Then find one of the bob ones. Since the text was the same, it doesn't matter
which one. All right. Now I could just copy
this and put it here. Command A. I'll do
like a 15 maybe. Okay. Hold this up. And I'll make this
like that yellow, which makes it easy to read, and then some shadow. So now we have some caption. Bob, the top hat. Cat was wrong. And one more thing
that you could do is change the tone of a line. So if I just do that, you can see we have an add tone, and there's a bunch of
stuff that you could do. So for the last
line, for example, I didn't want it to be a
little bit more upbeat. Let's go to Expressive, cartoonish, and I'll do all
of that cartoonish, actually. And then we could just compare and see if that's
what we want to do. Bob, this Ep hat cat was
RummugsFst all all on. Lun how fund a bunch
of schkus done Blah. So, it's having some trouble. I'm just going to
reset the values here. Maybe that's the reason. But if it doesn't work out well, because it's still in Beta, that's something we
have to be mindful of, we could just stick to
our original sound. Bob, the top hat cat was
roaming the forest all alone. Then he found a bunch
of cookies down below. The butterfly flew far and free. It looked like Bob
could use a company. That's a lot better, I
just turn the values to the default and I'm
going to try putting this in into our video
and just compare it. Let's right click on our
current audio and just mute it, then go here and upload. While that's loading in, I'm going to continue
with the captions. Let's just copy and paste
this three more times. Match it with each clip. Then we're just going to
copy paste the lines. Just make sure your playhead
is on that caption, so I have to do this again. So put the playhead there, grab that caption,
and then paste. Okay? And then the last
one paste that in. Okay. So now let's try
it with the new audio. Gonna go to the beginning. And actually, first,
I have to split it like we did before four lines, and then maybe hoops we
muted the music by accident. So this is the old one. Gonna just mute it as we go, and I'll just match these
with the old audio. Bob the top hat cat was
roaming the forest all alone. Then he found a bunch
of cookies down below. The butterfly blew far and free. It looked like Bob
could use a company. Okay, I think that's
a lot better. So I'm just gonna
delete the old audio, since it did uplift the mood. And we do have a children's
book, so that's good. I'm then gonna just remove the punctuation
from the captions, like we don't need a period. I think that was
automatically added. Okay. And once you're done,
you just hit Download. We have the same options. I will do a medium, and we'll just keep the
original resolution. So that's going to
download over there, and then when it's done,
it's on your computer. So that's the end of
our class project. We started with an idea, and then we explore
different styles before finalizing
our base videos. Then we combine the videos in our video editor alongside
generated sound effects, sound track, and a speech. Them all together here
with some captions, we're able to get this cute
and really short storybook about our top hat cat. Now in the next lesson, you guys are going
to have to build your own class projects
using the same workflow. When you're done,
you can upload it to the class Project
Gallery where I will be looking at them
from time to time and will give you
personalized feedback. I hope you guys
are ready and feel confident enough to use the
Video Tools within Firefly. As mentioned, they're
all improving. So check in from
time to time and see what other updates
Firefly has for you. And hopefully by
the time you check, it's out of the Beta version and it's a lot more improved. I'll see you guys
in the next lesson.
9. Congratulations! What’s next?: That's a wrap, literally. You just learned how to make
your own AI generated video without any cameras, studios, assistants
or anything else. You just use your laptop. Now it's your turn
to tell a story. For the class project, I
want you guys to build a ten to 22nd video using all of the tools
that we explore. Start with a concept, build the video footage,
add voiceovers, sounds, combine them
with transitions, and then refine them
before exporting. When you're done, you can upload your work into the
class project gallery where I will be looking
at it from time to time to see how well you
guys have progressed. Make sure to share your
original prompt and the translation language
so that I could see how well you've done and give you some
personal feedback. Thank you for joining me in this Adobe Firefly
video journey.
 Skillademia Academy, Creative Skills for the Future