Transcripts
1. Welcome to the Canva Video Editing Course: Video has become one of the most important forms
of communication today, whether you're creating
content for social media, building a personal brand, promoting a product, or
sharing your story online. And while video editing used
to require complex software, Canva now makes the entire
process incredibly accessible, even if you're just
getting started. Hi. I'm Kenti Boska, a designer and a creative
instructor at Skillademia. I have spent years working with editing tools for brands,
creators, and businesses. And one thing I love about
Canva is how quickly it allows you to create polished videos without needing
technical experience. Throughout this class,
we will go step by step through
Canva Video Editor. We'll begin by exploring the workspace and
setting up your project. Then we'll trim our footage, make precise cuts, and build
the structure of the video. You will learn how to apply global color adjustments to give your edit a
consistent look, how to bring in B roll and stock footage to add
visual interest and how to use Canvas effect tools to highlight important moments. Next we'll dive into
creating text elements, including grouping, layering, animation, and advanced timing. Finally, we'll add music, refined sound design, and export the finished video in
the correct format. By the end of this
class, you will have a complete edited video and confidence to apply this workflow to
your own projects. No advanced skills are required. If you can drag and drop, you can edit in Canva. All footage and
resources used in this class will be
available for download. If you're ready to
turn raw footage into a polished video using Canvas powerful and beginner friendly editor,
let's get started.
2. Canva Video Editor Workspace and Quick Setup: To start your video
editing process, go on to the homepage
of cama.com. Next thing you want to do is click on this video button right here where you get to choose
the size of your video. So all of these different sizes work for different
kinds of platforms. For example, you
have the landscape, which is for YouTube. Then you have the
Vertical mobile video, which is good for TikTok, Instagram reels, Facebook reels, even YouTube shorts, and any kind of video that
comes in a vertical form. Besides that, you have
so many other kind of sizes to choose from. But for now, let's
focus on the landscape. So I'm going to click on
that, and here I am in the canvas area where we're going to be
working the magic. Before we start, I
want to give you a quick little overview of what we have here
in front of us, just so we all can be familiar and prepared when
it comes to video editing. So first things first, you have a Yor menu bar here on the left side of the screen. Or up here, you can actually choose different kinds of
templates for your video. So if you click on it,
you can either search for your template or you can just scroll through and
see what fits best. And these templates are
really easy to work with. You can, for example, you like this one.
Let's click on it. And here you can adjust the
text, replace this video, adjust the color, and even
add different kinds of elements that would
fit your aesthetic. So these templates are
really, really handy. Besides that, you have
your elements section where you get all of
your little graphics. From here, you can
select also music and all kinds of
stickers and frames. Then this is where we're going to be getting
our text from. Then you have your branding, your uploaded videos,
photos, and other things, tools, and also there is music and the video section where
you can get your Brol from. There are so many other
things to go through, but for this video, I'm just going to be focusing on the things that we're
going to be using. So mainly video uploads,
text and elements. Up here, you have a
couple of other things, but mainly these are
very useful because if, let's say, make a
mistake, for example, you add something that
you didn't want and oh, man, I just wanted the rain but, oh no, how do I get rid of this? You can just click on the B
button and it will go back. So that's a really quick
way to fix a mistake. Other than that, you can also, if you have a mac
on your keyboard, hold down the command
button and press shift. That's another
very useful short. Next thing you
should be familiar with is the actual work area. So this is where your
video is going to go. And down here, you
have your timeline where you'll see all of the
elements of your video, which then you will
cut and adjust and slide back and
forth and so on. Then you have the Zoom
in Zoom out slider, which is also very handy. But if you press on
this little button, you can switch between zooming in onto the page
to the timeline. So I now switched it, and now I'm zooming
into the timeline. So if there's something more detailed here that
needs adjusting, this is very crucial to know. Besides that, you can adjust
your view and then press on the full screen
if you want to watch your video on full. And last thing I want to
point out is that up here, you'll see this manubar
changed quite a bit. So this is another great place to work with when you
are editing a video, but this will change depending on what kind of element
you're working with. So whether it's audio, video, or even elements like
graphics and things. That we are familiar
with the Canvas, let's start with
the video process. If you want to edit a video that you have filmed yourself, then you're going to want
to upload that on Canva. You can do that by
clicking on Upload here. And then you click on videos, and this is where you
can upload your files. So if you click on this, you can upload either
from your computer, or you can upload from
other sources like Dropbox, Google Drive, and so on. I have a couple of
videos uploaded here, so I'm just going to
select the one that I want to work with, which
is going to be this one. And you can either drag
and drop onto the Canvas, onto the timeline, or you can just click on
it and it will appear. You can make the video fit
into the screen completely by either right clicking
on the video itself and select set
Video as background, or you can just select
the video and drag the corners to fit. Okay.
3. Importing and Initial Video Trimming: So now we're going
to start the magic. Right now I have this clip, which I would like to polish before I start working with it. So I noticed that
in the beginning, I'm like, thinking and blinking. And if you get this white
screen, don't be scared. It's okay. It's rendering. It happens every now and then. You can just hit the play
button and it will come back. So I have clicked on the video file itself just so I can see what
I'm working with, and now I'm just going to scroll through and see when
I start talking. So I'm dragging this little
line over the video itself, and I see that I start
talking around here. And what I'm going to do
is I can go two ways, either right click here on the timeline and
click on Split Page, which then I would delete this. Or what I can do, I
can just slide from this end here when the
little arrow appears, pointing to the right side. I'm just going to slide
it and crop it that way. There we go. And that's
where I started talking. I let go, and now
it has cropped up the beginning silence
that I was doing. Same thing I'm going to do with the other end of the video. Actually, it ends on
a really good note. I don't think there
needs to be cropping. But if you do have the
ending to crop as well, just make sure that
you click on it when this little tab appears at
that line and you hold it down and you slide it to
wherever it is you need to crop.
4. Applying Consistent Global Color Adjustments: So now we have the beginning, starting at the right
time and ending. Next thing I
personally like to do. I know some people do it later
in their editing process, but I like to adjust the colors of my video
right off the bat, just because later, when you
start splitting the video, it might just become
a little difficult to have the same settings
for every single clip. So what I'm going to do
is just make sure that this is selected
all in one piece, and I'm going to go up
here and click Edit. And this is what I was talking about when this
menu bar changes. You'll see how it
becomes different when I start working with text. So but for now, I'm
going to click on Edit. And here we have a couple
of filters we can use. Usually for recordings, I don't use these just because they
can be a little bit strong, but you can, of course, adjust the intensity of it. But still, I just don't like the way they look
for recorded videos. These are, in my opinion,
very good for Bro. If you're trying to have
your ro match and colors, you can totally use these. Besides that, you also
have magic studio where you can remove background, and you can also have
AI edit your videos, which is great, but it's
better to know how to do it yourself first before you start utilizing this option. It comes to just very minimal
basic color adjustments, I go here and I click adjust. This is where I would do all
the basic little editing. So here I can bring up the
warmth or bring it down, make the video look a little bit cooler and bring
that back to zero. Here, I would just the tint, which is actually very
sensitive for my liking. But you can definitely
play with it. Down here, we have
the brightness, which I can bring it up or down. For this, actually, I think
the video is lit pretty well. Maybe I can bring it
up just a little bit. Also fairly sensitive.
I'll bring it up to three. Then you have contrast, which I think used can
definitely improve. I'll bring it to nine.
You have your highlights. I'll keep them at negative
nine and your shadows. We'll do nine and
your fade effect, then you got your vibrant. You can really make
those colors pop, your saturation or desaturation. Then you have your process, which I don't really use. This is also very sensitive
and your vignette effect.
5. Making Cuts and Adding Visual Emphasis: Now that we have all of the entire video adjusted
to the same color settings, I can move on and I can
start cutting the video, just so it all looks
consistent with the color. So I'm going to zoom into
my timeline and start seeing what could I do here and where cuts
could come in handy. So when it comes to
cutting the video, I'm going to cut
areas of the video where I'll also be adding
other elements like text and Broll just because
since Canva is more focused on graphic
design, on video editing. The way you would
layer your videos is not as straightforward
as it would be, for example, in Final Cut Pro. So that's why I would be cutting sections where I'll be
adding other elements. You'll see me make some cuts that might look a
little different. But besides that,
let's start cutting. So I'm going to play
this video a little bit and see where cuts
would be handy. Okay, so I'm going
to make a cut here. So right click and
split page next. Again, I'm going to make
another cut, maybe. I go to drag a couple of
seconds back or milliseconds. Again, right click and split. You can edit videos like a Pro, no fancy software needed. Alright, I'm going
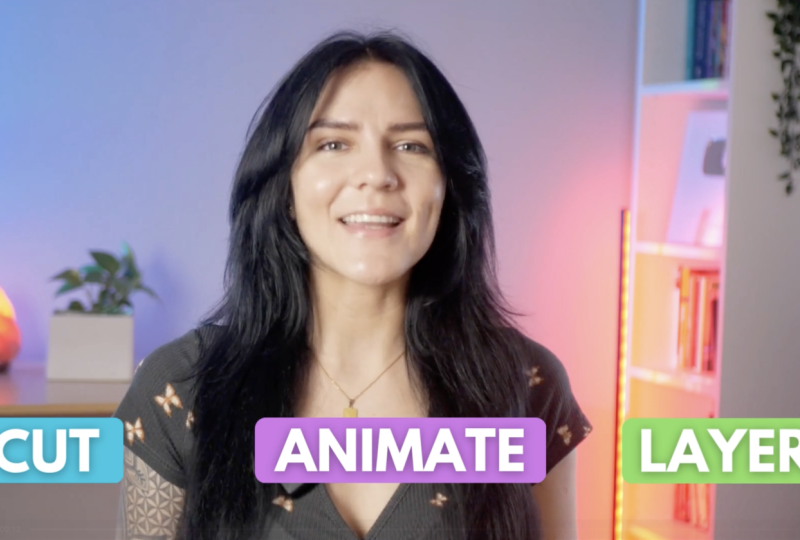
to make a cut here. In this tutorial, I will show
you how to cut, animate, and lay your videos in Canva to make them look more
polished and professional. So what are Alright. Another cut. So what are your
creating content for you? And here is actually a section
within the video where I'm going to take something out because I just think
there's too much talking. Social media or business. And this is where I would make another cut just
because I want to take out. This section, I think
it is just too much. I think it's quite
obvious that people will be making videos for
all kinds of purposes. So now I have this
section cut out. I'm going to make
sure that it is selected by clicking on it, and I'm going to delete it by either hitting Delete button on my keyboard or right click and delete page, and now it's gone. And now we have this
kind of like a jump cut. It's going to look way better when we export the
video, I promise you. That's why I timed it so well, and I was watching
it back to make sure that I cut out the correct
portion at the right time. So now we have the
video all cut. When it comes to these cuts, this is where you
can start utilizing the portioned video. For example, I say
something like think again, and that's something that
I would like to emphasize. I could do it with text. I can do it with some facts. But since I don't
want this video to be a little bit too flashy, what I'm going to do
is show you how you can either emphasize
a point or it can be a really cool
transition into the next clip. So I'm going to make sure
that this is selected. I'm going to go to the Canva
portion. Double click this. And here I have the
corners that I can drag and zoom myself
in a little bit. So I like to use this method to emphasize a
point of what I'm saying. So here, as you can
see this became like another element on top of
the video in the timeline. So now I'm talking and like, Oh, blah, blah,
blah, blah, blah. Think again. And now
it dooms back out. And by cutting your
video like so by going through it and then
splitting each clip, you can actually get rid
of any mistakes that you might make in your
dialogue while you're talking. For example, let's say that I said something wrong here
in the beginning of this. I would make this
split just like I did with right
clicking and split. And then I could just chop off, for example, the
beginning of this. That way, I could get a
bit of a cleaner video. But also isolating your clip and deleting it together is
another really good method.
6. Integrating B-Roll (Stock Footage) and Applying Visual Effects: Now, I'm going to be adding
some roll to my video. So in this clip, I'm saying that you can edit videos like a Pro,
no software needed. I can actually add some
videos to add more of a visual interest and to make the video a
bit more engaging. So I have this video isolated. I'm going to go to the
video section right here. And here I can search
for whatever I need. I'm going to go for and here we have a bunch of different stock footage
we can choose from. You can scroll through
and choose your favorite, and you can actually
preview the video by just hovering over the video, and it's going to show you in this small little thumbnail
of what it looks like. So I'm looking at this one. This one looks kind of cool. So first, if I like this clip, I'm just going to click on
it, and it's going to drop it onto my canvas
on top of my video. I can make it smaller
and put it next to my face if it's something
that I'm talking about. And I would still like to
be on screen when speaking, or I can just drag out the corners and make it
fit the entire screen. And now we have the B roll in. So what happened
here in the timeline is something that I was
talking about earlier, how it's not very intuitive when it comes to laying videos. So what has happened
here is you have the B roll on top of my video while I'm still
speaking under it. However, since this clip is much longer than the clip
that I just put it on, my videos on the loop
in the background, which is a little bit weird, but it is easy to fix. So what I'm going to do
is I'm just going to listen to when I want
the video to stop. I'm going to pause and I'm
going to cut off the rest. You can edit videos like a Pro, no fancy software needed. There we go. So this
is where I would stop. I'm going to right
click split page. I'm going to select this, the rest of the clip, and I'm just going to delete it. So now think again. You can edit videos like a Pro, no fancy software needed. And this Okay, so
that's not bad. But I also would like to
add another clip on top of this one because I do say that divideos like a
P, no software needed. I think it deserves
another piece of B roll. So what I'm going to do is I'm going to
listen to it again. You know the videos like a P, no fancy software needed. Okay, and this is where I want my other piece
of VRL to go. So I'm going to put
the line right here. Wait, hold on.
That's a little bit. I moved. No fancy
software needed. No fancy software needed. So this is where I'm going
to split the video again just to put on a different
kind of video on top of it. So, right, click, split page, and here I'm going to just
going to drop the other video. I saw this one's kind of
good. Let me check it out. I'm just going to
click on it, see. Okay, I think that's
actually pretty good. Okay. So I'm going to
do the same thing. I'm going to make it
fit the entire screen. No fancy software needed. Right, click. This is where
I want the video to end. Split page, click on that and press the link
on my keyboard. There we go. So now we have two videos back to back
as I'm talking over them. Think again. You can
edit videos like a Pro, no fancy software needed. Okay, so it's a little
bit, as I said, it looks a little bit rocky, but it will look better
once we export it. Now, to add any kind of
effect for this video, particularly, make sure you have this clip selected on the timeline and
click on the screen. Now you have the
upper menu open. What you can do is, of course, edit it in different
kinds of ways like add filters and do
the basic editing, like I did before, or you
can adjust the transparency. You can flip it, crop
it, add borders. Really, anything you can
also trim it like this. But this isn't really my
favorite thing to work with. However, if you find
it handy, go for it. So you would just be
dragging these sides of each of the end to make the video be
trimmed to your liking. So I'm just going to hit
Command Z on my keyboard, go back to what I
was doing before. But I'm going to
press on animate, and this is where you can
add all kinds of effects. So I actually really
like this effect itself, so I'm going to click on it. And now it's applied to
this video, particularly. Besides that, I can also
adjust how it animates, so both on entry and exit, only when it enters
and only on exit and also the kinds of
ways it reveals. So you have the curve, then wild, swirl and dip. I think the curve might be cool. Now I have that applied, and you can really get really
creative with all of these, but this is just an example. And most of these effects have these adjustments
also available. So now you have a cool effect added to your year old clip. I'm going to have it only
to the effect on Enter. So I'm going to go
back to animate and go to Enter, select that. And now we have
this cool effect, and then it's just going to go into the other clip,
like a rough cut. I'm not going to add any kind of effect on this just
because it has a Zoom, which I think is
already doing along.
7. Creating, Grouping, and Animating Text Elements: Next thing I would like
to show you is how to add text elements
with also animations. You could just add text
where it just appears. There's nothing wrong with
that. And it's super simple, but I think moving elements really make the
video more engaging. I am naming things, which I think is a really
good spot to add text. In this tutorial, I will
show you how to cut, animate, and layer
your videos in Canva. So this is where I'm
going to do a split just because this is where I would like for the text to appear. This is what I'm talking
about when it comes to splitting up your video into different sections because it's a really good workaround
when it comes to layering your elements. So I'm going to
go to Split Page, and this clip is where the text is going to
be coming on. Going off. So I'm going to go onto
the text right here, and I'm going to be
clicking on add a heading. Of course, you can also
select some of these pre made fonts and also two different fonts
working together in, like, a design form. This is a really
good way if some of these reflect the
aesthetic you're going for. So let's click on add a heading. Here I'm going to be
writing the first word that I say, which is cut. I'm going to make sure I
have the cap slock on. Now double clicking on the text. I'm going to be adjusting
a couple of things. For example, the color. Let's go for white. Now I'm going to be
adjusting the font itself, which is up here. You click on it, and here you have all the fonts available. I'm going to go with this
one just because it's nice and bold and it
fits most things. So next step, I would
like to add some effects. So I'm going to go up to
effects and select a shadow. You have so many different ways to make this text look cooler. And you can customize
most of these. But I'm going to go
with this, adjust the intensity to about here. That will probably
change because I'm going to be putting
a box behind it. So this text looks good. Let's add a box behind it just to make it
stand out a little bit. So I'm going to go to element. And here, you can
either search for it or I just saw it down here, scroll down, you have shapes. I'm going to select this
one with curved end, and I'm going to resize
it by dragging the side. Let's see. I'm going to make these corners a little
bit less rounded. Like, so I'm going
to take my text, and by dragging it over the
box, I'm going to center it. There we go. So the box
is a little bit too big. I'm going to just size a
little bit more. There we go. And now we're just
going to change the color by clicking up here, and we have some lovely
colors down here. So let's go with the
blue one for now. Now we have this text
elements like ready. But to start working with it
when it comes to animation, I'm going to go up here
to position and layers, and I'm going to select
both of these together, which will be holding
the command key on my keyboard and
clicking on both. So both of them are selected, and now I'm going
to click on Group. So now when I work with this, it is all one piece and I don't have to scatter for
both of them to fit. So I can change the size,
I can move it around. It all moves together. So I'm going to put
it here for now. But I'm going to duplicate
this entire thing just so I could have the next
thing that I'm naming, which I believe
was animate to be about the same size
and same overall look. So again, having
this duplicated, I'm going to ungroup it
and start adjusting. So double click on the text, and change the text here, animate, just like that. When you saw it was kind of like the letters were not
fitting the box. What I did was just
drag the side of it, and this is how you can fix
that if that ever happens. So that text looks good. I'm just going to adjust the size and overall
look of the box. So dragging this
side, I'm going to make this fit. There we go. I'm going to change the
color of the box because we want this to look a
little different since it's a whole different thing. I'm going to make
it look purple. Like this better. Okay. I'm going to go
back to positions and we have the
layers already here. I'm going to click on animate, hold Command key, and click
on the box, and group it. And now we have the middle one. I think it's not
centered proper. Let me make sure it is. Now, if it needs
minimal adjusting, you can use the arrow buttons on your keyboard. I like that. Let's go back and
group it again. So Command click and group. Okay, I think that looks good. I'm going to center in
the middle of my screen. G to line this now
let's duplicate this. I'm going to click on here in the layers and select
the duplicate button. And what was the
third thing I said? Layer. Layer. Okay, Ungroup. Okay. And the group
and double click. Layer layer. Hope I spell that right. And now again, adjusting
the box behind it. Change the color maybe green. Yep, I'm going to
center the text a little better in the
box. There we go. Again, back to positions, and let's just group
these together. Hold on before I do that. Actually, I did a
little mistake here, which here you see I have some empty space around
the text, which isn't bad, but it's just not very
handy when it comes to centering your objects
and your elements. Now, it looks much
better. Okay, cool. So I'm going to try to
adjust these accordingly. So now they're all aligned. Now what I'm going to do
is add some animation. So how are they going to appear? So go up to positions and select the element that
you want to animate. I'm going to start with cut, and I'm going to go
to animate here. And now it's going to show how the animation looks with
both of the elements. Group together. I really
like this one baseline. And here, again, I'm going to
click on it, I applied it, and I think I'm going to
have it on both for now, and I can even change the
direction it will appear. I think appearing from
the bottom is the best. So I'm going to keep it
that. Now, that's done. I'm just going to
do that for all of the rest of these words. Animate, have it on
both from the bottom, back to positions, layer, animate baseline. Okay, cool, right? And now we have these elements are all doing the same thing, but let's time them correctly. So what I'm going to do now is make sure that
this is visible. I'm going to click on it, and now this shows on the timeline. So depending on what you have selected is what is going
to show the timing, right? So I'm going to have
to select the animate. And now I'm just going
to make sure where when I say it, that's when
it's going to appear. So like here, in this tutorial, I will show you how
to cut, animate. Okay, so here. Click on it, and now I'm just going to drag this side all the way
here by this line. This is when it's going
to appear, right? And now we're going to do
the same thing for layer. Okay. There we go. Show you how to cut, animate, and lay your videos in Canva to make them look more
polished and professional. Okay, one of them disappeared
a little bit too soon. I'm gonna check out
why. So hold on. I'm gonna select this,
go to positions. And now on both. So now I'm just scrubbing
through to see how it looks. It all looks really cool to me. You can also make this kind of animated text effect on the
beginning of your video. For example, if you want
to have your name plate, so let's quickly make something. So I'm going to add my own, which it wouldn't really
fit in this video, but for the sake of
an example, why not? I'm gonna change the color here. Let's change the
font real quick to something that would
fit. Let's go with this. So now I would also
add a text box, for example, in the back. Just like so just a couple of things and I lower the text a little bit and change the
color to something like this. I could also have like
an element like a logo, for example, come out with it. So let's go find something
in the elements. Let's see sun. So for example, let's pick something like this. Let's say that it is a logo
of some kind next to my name. So I can also make
them be a little bit more cohesive, like that. Gonna change this, fit in there. I'll drag my mouse over all of these elements just
to select them all. And I'm going to increase the size altogether,
just like that. This is just an example. So back to timeline,
click on it, see when it will
appear. There we go. That's good. I'll keep it here. And now I'm going to go
and select both of these. I'm going to drag my mouse
over these two elements. So the box and the name. I'm going to group
them together. And now I would like them to appear after the sun appears. Make sure that it
is behind the sun, so I'll go to positions
and change it. Going back here,
I'm going to add an animation to my
name the same way. Just make sure you have
the correct things selected before you
start applying things. So maybe something like
this. Okay, that's not bad. And go back to both. And now, it should be working. So going to make sure
it's reverse on exit. And now, there we go. And we're going to do the
same thing on the text. So I'm gonna reverse it. This should go back in. Now, the sun appears,
reveals the text. The text goes back and
the sun disappears. There we go. That's
how you do it. So that is a demonstration
of how you could present any kind of
information in a fun way. I'm going to take it off
of this video for now. But overall, these
would be like, the visual things that can be very visually
engaging for a video and very simple for a beginner
in video editing to make.
8. Adding Music, Sound Design, and Exporting: So going on to music, you have a huge library
available to you. These ones with the
crown means that they are only for pro users. So if you have a
subscription with Canva, whether it is P or
Teams, you can use this. But you also have things
like, for example, sound effects, which can be
very fun to use in videos. If you scroll far enough, you also do get
royalty free songs. Not many but they do exist. So, for example,
happy intro music, you can definitely spice up your video with
music from Canada. And how you would be
adding it is super simple. You just click on it, and it drops here
in your timeline. And this is where you
would be adjusting. So by dragging it back and forth would be where you
would want it to start. You could also just drag
either ends to crop it. Then you have other
things you can do by clicking up here. Hold on. So by clicking adjust, you can also make it start like way in or just
start in the beginning, you can adjust your volume. You definitely don't ever want to make your
background music. If it's for background, you don't want to make it too loud. And also not too quiet. So somewhere between
about, I want to say, like 20 and 25 on the conservative
side is a safe space. Then you have fade options, so fade in, fade out. And also you have the
option to sink to the beat. So with talking videos where you are
explaining something, this is probably not a
great option to use. However, for something like product ads or montages,
that could be a very, very fun thing to
use because it's much more fun to watch videos
that are sync to the beat, especially if the music's good. So now we have our video
pretty much ready. Let me watch the ending because the front
is quite edited. I'm going to watch
the ending real quick and see if there's
anything we can add. I will break down the muston features to speed
up your workflow. Let's dive in. Okay. I want
to zoom in on Let's dive in. There we go. Pause it here. Right click, split
page, and bam. Now, I'm just going
to double click on my screen here. There we go. And that is how you would
edit a video on Canva. The interface is very
mostly intuitive, very beginner friendly, and all of the tools
are laid out for you. This is a really great way to make quick edits, quick videos, and for someone
who has little to no experience with video editing because everything is
very straightforward. You have a bunch of
templates available. You have all kinds of graphics, all kinds of effects and animations that you
can really spice up your video without knowing how to operate a very
serious software. I hope you take this
knowledge and you go and make something amazing. And the last step would
be exporting the video, which you can do by clicking on Share, clicking on Download. And here you can
adjust your quality. You can do HD or even four
K. But ten ADPs very good. Then of course, you have the option to deselect
some of the pages, but you just spend so much
time editing your video, putting so much work, and
creativity in it. Why do that? But if you do want to,
this is where you can do. You can also download your
video in separate pages. I barely ever use this option, maybe when I need clips,
but that's very rare. And just hit Download
and you're ready to go.
9. Congratulations! What’s next?: Just like that, your
video is complete. You have gone from
raw footage to a fully edited, color corrected, animated, sound designed final video all inside
Canvas simple Editor. You now know how to navigate the workspace and set
up your timeline, trim, cut, and organize your clips, apply color adjustments
for a cohesive look. Add role and staff footage to enhance your story,
animate text, refine your timing and pacing, add music and sound effects, and finally export your
project in high quality. These skills open up
endless possibilities for creating content,
whether for YouTube, Instagram, Tik Tok,
business presentations, product demos or
personal storytelling. For your class project, create a short edited video using
the techniques you learned. Upload the finished videos to the class project gallery and feel free to share
your creative choices. I'll be checking your projects
and leaving feedback. Thank you so much for
joining me in this class. Keep exploring and keep
telling stories through video. I'll see you in the next class.
 Skillademia Academy, Creative Skills for the Future