Transcripts
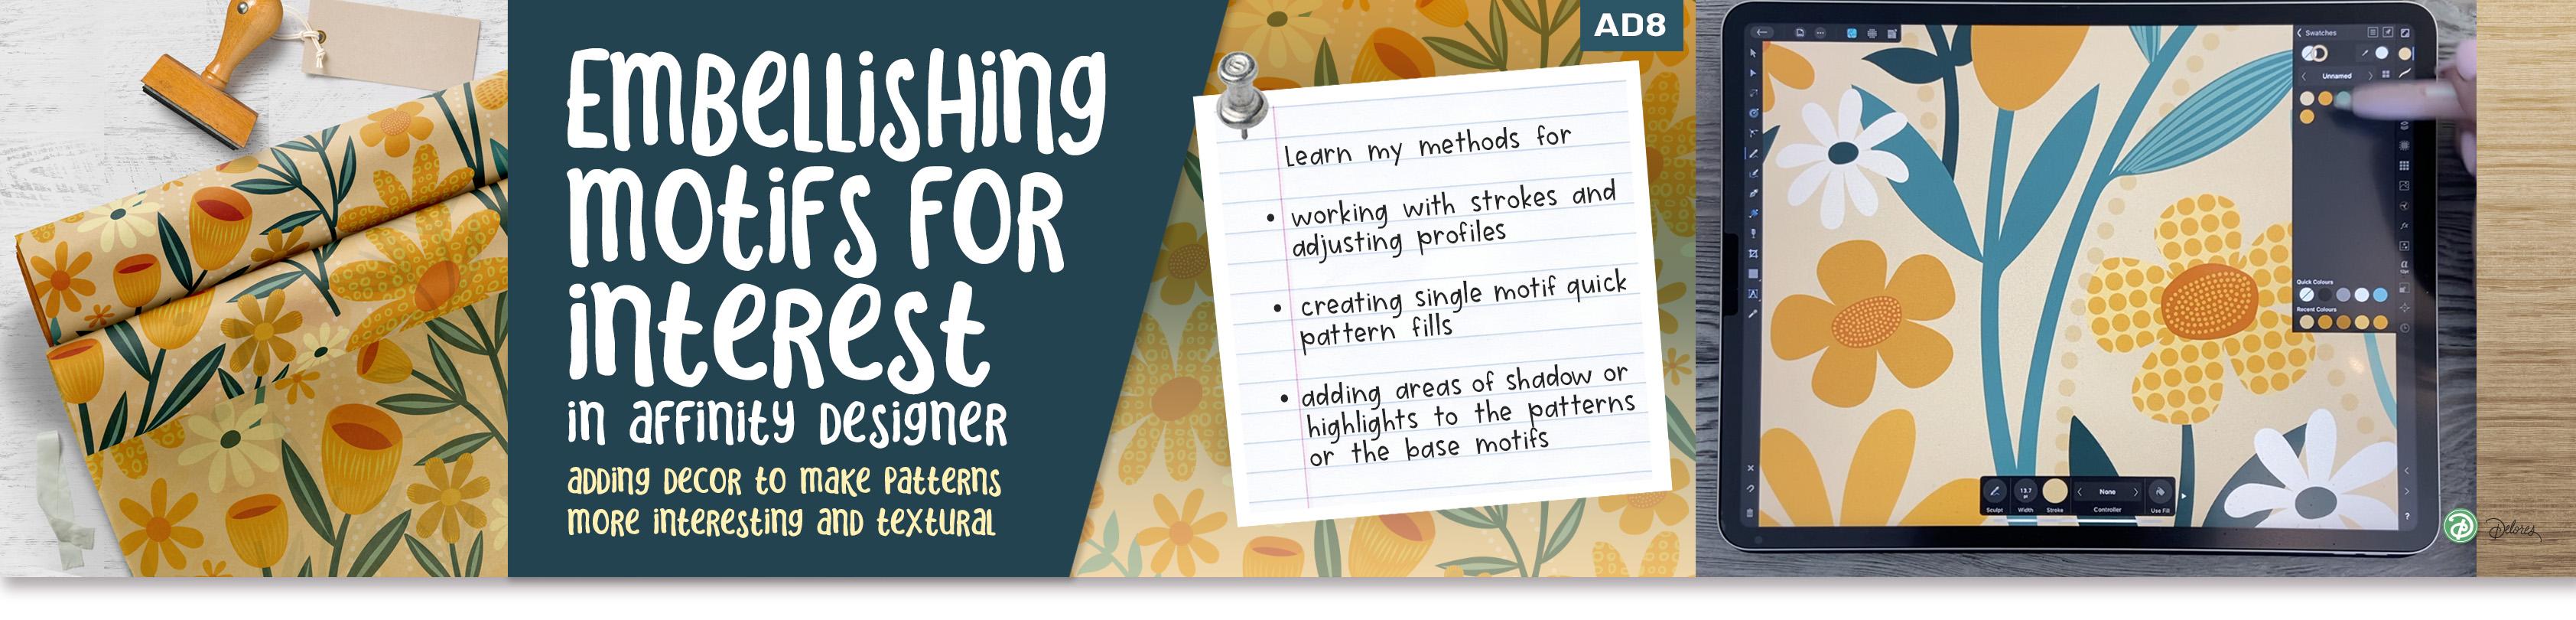
1. Intro to Embellishing Patterns in Affinity Designer : Hey there and welcome. My name is Dolores nascar
inch and I'm coming to you from Brandon,
Manitoba, Canada. We have lovely
weather here today. I can't wait to
get back outside. I've got a bunch of different things I want to do out there, but I wanted to get this
class recorded today. And that's because I'm
super excited about it. This case, I'm
really pumped about the possibilities that I have discovered as I
explore this program, what I've been using Affinity Designer on the
iPad here for awhile, but I've never used it
on a day-to-day basis. I forced myself in this
last few weeks to be really focused on using only
Affinity Designer to do my vector work. As you know, I've always
been a diehard Adobe fan, but suddenly using
Affinity Designer here, I'm finding that it's amazing
when it comes to the iPad. I can't believe how
many functions it has in comparison to Adobe
Illustrator on the iPad. So I think it's going to
become my go-to program. I have been working on Christmas surface
pattern repeat designs for next year, so 2023. And I've got a lot to show you. The last series we did
with the butterfly. We focused on adding texture
to a lot of our motifs. We're not going to be doing
that at all in this class. In this class we're going to be creating all kinds of different sort of
textural finishes. But we're gonna be doing
those mainly using lines, lines, and small patterns. I've given you a little
bit of a sneak peek at that at the end
of the last class. But today we're really
going to dive deep. I want you to draw a lot of inspiration from the
work of Helen dark. She's one of my favorite
illustrators and I'm gonna be referring to her
quite a bit in this class. Her work is just so prolific. There is so much to look at, so many ideas that we
can draw from her. So the first thing
we're gonna do is use lines to adorn some
of our motifs. And then we're gonna
move into small pattern. I've got lots of
stuff in this class is jam packed full
of information. I'll also suggest that you check out my
boards on Pinterest. The paint detailed patterns in my surface pattern design board is probably where you're
going to see most of the examples that I am
drawing from today. So are you ready to get into it? Alright, let's get started.
2. Lesson 1 Inspiration and Ideas: Hi guys, welcome to lesson one. I wasn't going to
do this, but then I changed my mind is last minute. And I've created this kind
of an inspiration lesson. So we can take a look at some of the work right from the get-go. Let's get to it. I know in the last class we talked about
inspiration already, but I think we could just take a quick look again at
Helen diuretics work. What I do when I'm searching, I thought her name here. I also go into tools that's
usually collapsed like that. But when you hit tools, you'll be able to choose large. And why I do that is so that
the actual image that I am targeting shows me the
largest possible version of that art work. And I love doing
that because you tend to lose a lot
in the translation. In other words, you take a look at one of those really
small images and it's hard to see all of this kind of detail that Helen
puts into her work. So I want to just kinda draw attention to the
fact that a lot of these things that she is feeling we're adding to her designs
may be in the background. A lot of those are individually little
motifs of their own. So like e.g. on this trim of the horse's
saddle or subtle blanket, you see little flowers. And that's one of the
things that I find so fascinating about her work because I've chosen
large up here. Most of the examples
that come up float to the top here are going
to be larger copies. So you can really take a look at some of those little things
that she's got in there. Like how clever is this to
have the cheeks of the tiger? And I say tiger, but he's
kinda got zebra stripes. But look at his
cheeks or flowers. I think that's adorable. As something like
this is not done in a software program if you've ever seen anything
to do with her, and if you can definitely
try to find some, these little things are all hand painted and a lot of
them in watercolor. Look at this one like,
wow, this is a puzzle. I looked this one
up yesterday and I could buy this OP yesterday, it came up but
today's not going to. But this is so beautiful
because she's also got all of this stuff painted in watercolor
in the background. So inspiration doesn't
necessarily stop. The first time you take a
look at an artist's work, go back and take a
look at other things. Now here is an absolutely
fantastic example of what it is I'm
trying to show you. I can show you from here. I'll enlarge this
in my software. But can you see that
every single fill on these particular
items are little motifs. So she's got little
flowers here. There's little felt, mostly flowers, but
then she's got these. They're almost fern like
stems with leaves on them. Everything here has some kind of an interesting detail to it. So I wanted to
revisit this with you because I want to show you a
bunch of different fields, little techniques I've either
touched on or suggested, but not really shows you
exactly how to do though. I definitely want to take
some time to do that today. So a lot of the things I'm
gonna be showing you how to add things like
these lines in here. How to add a second
tone in a motif. So this flower here, e.g. has the inside dark tone. This one as well has
two tones to it. So I'm gonna be showing you
how to do some of that stuff. We're also going to be creating and we only touched
on it briefly, a little bit of a pattern using the pattern feel
for the fill tool. So instead of making a gradient, we're going to be
creating things like these little flowers
that fill an area. So these are little things
that I just wanted to point out in a little bit of
an inspiration lesson here. So if you're looking for ideas, you can go to
something like this. And instead of a flower, maybe you want to work out a
little heart or something. But these, of course, because she's had painted them, can be in all different
directions and stuff. The pattern that you're
creating will be a grid repeat, but it will be
useless to us anyhow. I'm also going to be showing
you something that will help you to create a fill
like this with dots, believe it or not, just
with a single line. So I'm going to be
showing you that as well. And this little motif here makes me think this is something I haven't
even thought of. And I may try to
incorporate what you have a motif to then outwardly trace and also create a large fill area in
behind that motif. So that's something I would like to touch on, show you how to do. I haven't done myself in this program and this
particular documents, so I'll be happy to add that in. And I think that the fun part of doing
all of this is that it's going to help us to find coordinates that are going to work with this type of print. So just for the fun of it here
I'm going to add the word coordinates and see if we
can find anything else. Just to get a few ideas. This is the kind of thing we
could do if these are motifs are parts of the bigger
pattern that she's created, this could give us
inspiration for creating the coordinates
that would go with our set. Remember, our ultimate goal is to create a complete
coordinate set. So we're going to be
looking for ideas like this that would work well with the designs
that we create. So that would go great
with something like that. This would go great with
something like this. So just keep that in the back of your mind as you're
learning and as you're doing some of these fills and some of the
decoration that you're going to use to adorn your hero print and just
check this one out. I always come across
these and they're so great and I'm
definitely going to be going back and putting
this into my paint detailed patterns on my surface pattern design
board because wow, look at all of the detail
in this one and then look at all that delicious
detail in the background. That is your inspirational
lesson for today. Now we're gonna get into the actual methods for creating all of these
really amazing. I click this two
tone, look at that. All those amazing
stuff we're going to try to cover in
today's lesson. Alright, So I will meet
you in lesson one.
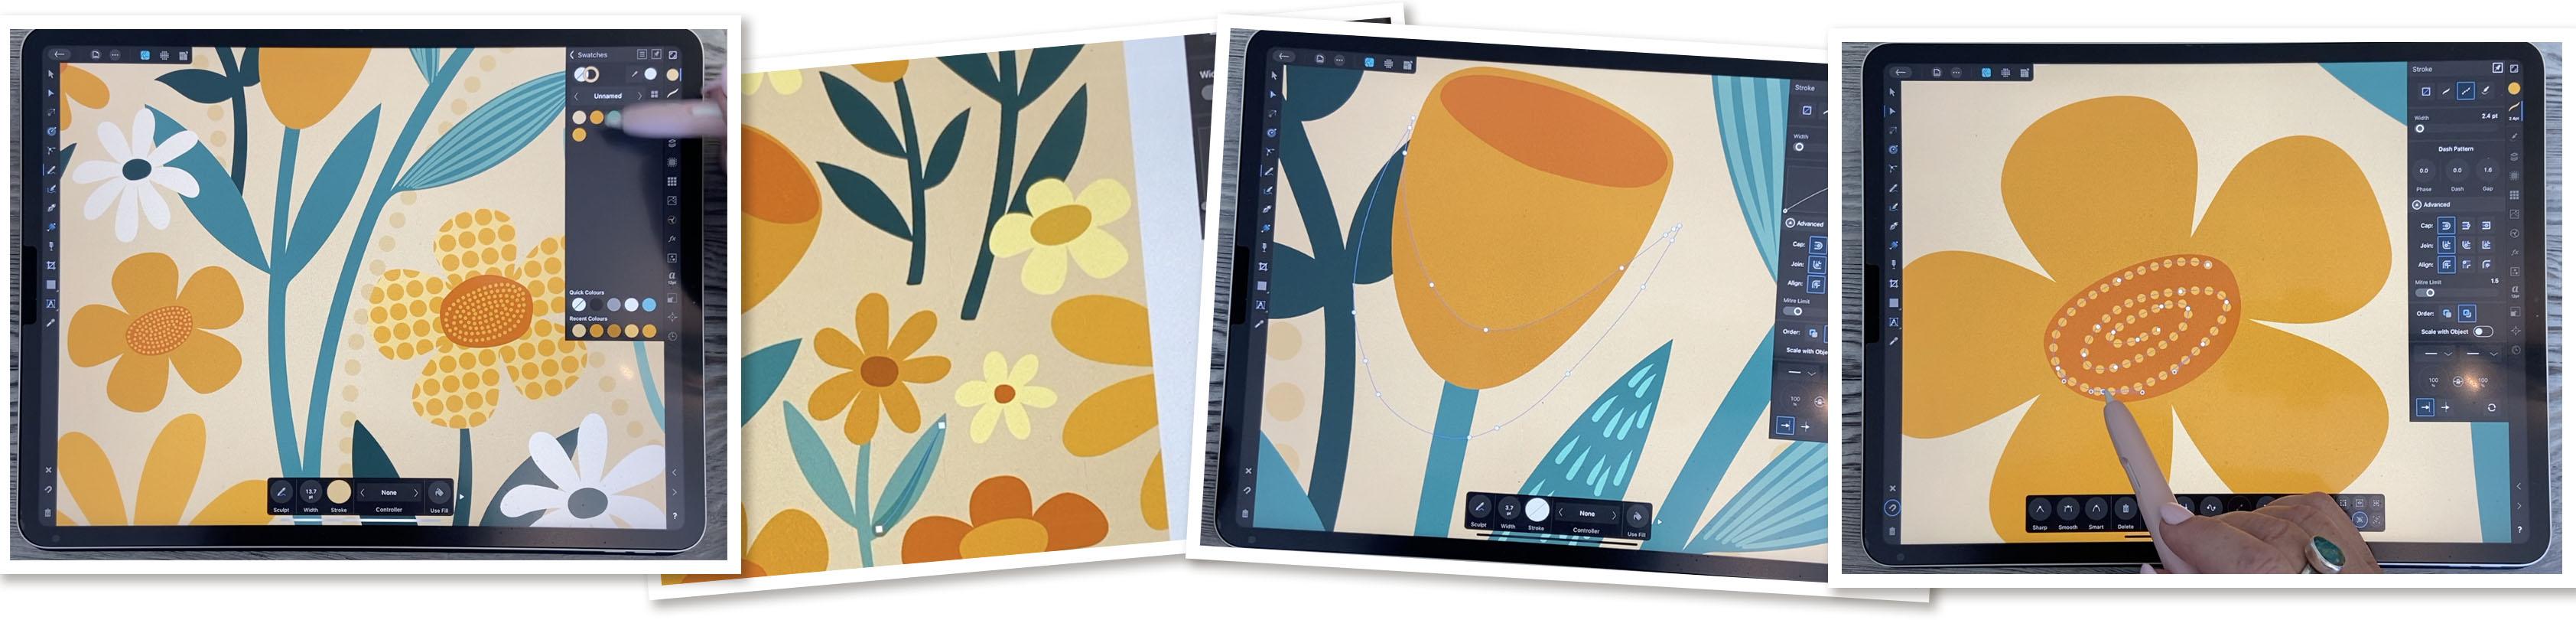
3. Lesson 2 Lines to Add Detail to Petals: Hi guys, welcome to lesson two. Unless it to here, I'm going to start with adding detail onto the petals with lines.
Let's get started. I loved this one on my
screen because I just wanted to point out
that in this lesson we're going to be
doing a bunch of lines to create that sort of effect that she has
with her petals. This is probably the easiest way I'm going to show you today because it's gonna be a lot of stuff that comes up that's a little bit
more complicated, but I thought let's
start out with that very first idea
or possibility. So I'm gonna go to
my patterns here and I'm going to show you one that I did with a bunch of details. So you can see here that I've
got lines on a lot of them. And if you're really stopped
to take a look at it, these lines all have
very different profiles. This one has a
point at both ends. This one gets bigger at one end, point to you on the other end. Then I've got some that are
really short and stubby. So we're going to look
at how we can do that. And of course, all
these leaves too, they all are the same sort of idea with a line
that starts span, goes thick in the
middle and then thin again on the other end. So these are the things that
we're going to be doing. I know my second
version of this, the one that I'm doing
with you today is going to turn out differently. So back to there we go. I want it to be just my bowl
solid shapes at this point. So where do you start
with something like this? How do you get started? It's like a blank slate here
and I don't know about you, but for me I need a
little bit of a warm up. It always takes me a little
bit of time to be like, Okay, this is what I'm gonna do. So I'm thinking the
easiest thing to start with would be the
leaves at this point, I did that really
simple single line in the middle of the leaves and I'll do that on some of
them and then on some of them maybe we'll do something a
little bit more detailed. So let's just start
with this plant here. So in order to create the effect that I showed you in
the other sample there, I simply pulled a line. I'm using just the pencil tool and I'm in the
middle of the leaf. What I wanna do here is go into my swatches and choose a color. Needs to be on the stroke. I have chosen that color, which I'm not sure if
it's going to be darker. And right now my line is way too thin to tell and it is darker, but you can see I'm
behind my motif here. That's because I had been
working on this one here. So I need to actually
pull that to where it'll be above the leaf
that I'm working on. So that's probably
this one here, of course, because I
started down here. So let me just get that one. We can drag it up here. And you've probably already
noticed that you can do that. Go to the top or the bottom. It'll move to,
it'll move the list for you so that you can just kinda do that to
get it to the top. So I can see that
the color is there, but it is a little bit dull. So let's go in here. First of all, I'm
going to check that my palette has a darker green. And this palette has changed
quite a bit since we relaxed working in here because
I've been using it for a whole bunch of other Christmas stuff that
I've been doing. If you wanted to go
back to your plane, the palette for this one here, you could export this
and then bring it back in as a JPEG and
then pull your colors, or you could do it right here. So I can either go back
and add a new palette. An application palette is
what I like to work with than I could go in
with my eyedropper, just pull it into where I'm
wanting to sample from. Tap on this to make
sure it comes up here and then force it, changed it here because
it was selected and then add the current
field to the palette. It's a fill, but I mean
it's on the stroke, but it'll still come in here. No problem. So let's just sample. I'll just start
with just a couple. So that's the exact green there. So what we could do here is
just go into our swatch or are colored disk and let's just darken it
just a little bit. You know, something that's
going to complement that nicely than we
might as well go back to the swatches and add
that to the swatches. So we have that permanently
in our color group. And this color group
will end up going with any document because I made
it an Application Palette. Okay, so let's get
down to business here. We want to change that to
be tapered on both ends. So what we need to do
is make adjustments here if we pull it all the way down to the end or thereabouts. So I'm gonna go maybe a
tiny little bit higher, so it still has a bit of
width at the bottom there. I'm going to add a
point in the middle and that's going to
be the thickness. And then now we can make adjustments to this
line accordingly so we can decide how big we want that on all of the leaves. So I think that works well. And you can see when
I pull the line, it adjust to whatever length I put down here so I can make adjustments to its
tail because they are this is still a path, right? So anything I do to it, I can do anything I want to it that it could
normally do with it. Now, I'm going to
turn off all of this snapping so that it's a little bit easier for me to position that exactly
the way I want it. And I actually really
liked that on the leaves. That's a small leaf there. I would probably just leave the one line just
to be different. But why don't we
try something with additional lines on
these bigger leaves. So that color might be okay here because it's going to be
different than this one here. So as we're going
through though, Let's try to be organized and throw whatever we do
into the correct folder. So now we know that those
lines are within that. And I think these of course, we want to think
this is the one. Yes, I want to make sure that I end up with them
in this folder. So let's try just
selecting one of the parts to see
if now as I draw, anything I put in should
come in above here. Switch back to your pencil tool. Yes, it did. So we know that for sure we can close that off. And obviously that color
is not going to work, but why don't we try the color that is in the background here. And I want to make this
one considerably thinner. So I'm gonna go into my controls here and I'm
wondering about maybe changing this sort of
profile on this so that it has a little
bit thicker of an end. So I'm pulling it up a
little bit from the corners. See the more I pull it up, the more you're going to
get a rounded end to it. And you can still have it quite contrasted by pulling
this all the way up. I like that. I am going to even closer
to the edges here. And I liked that. It's produced this whole line
with just the one.in the middle because that sure
makes it easier for me when I'm moving these around, Let's just start adding more. And as I'm adding them, I'm going to slowly
change direction so that I can fill the
shape that's there. Now, I don't know
if any of you use a little glove that you can have for working on a glass surface because
it's summertime. We have a bit of
humidity here right now. And I feel like my hand is
actually kind of sticking, but I just hate
wearing those gloves. I've tried them and they're just I find them just
really distracting. So I have avoided
really getting into it. So did you see what
I did there too? I went through and if you have, let's, let's select
all these lines just for the heck of it here. And if you have extra points in the middle
that you want to get rid of, you could just do a selection to select as many of
them as you can and delete them and
see if that could give you better control
on these lines. So whether or not you think that's worth the time it takes, or if you were happy
with your lines in the first place,
you might not care. It might not be necessary, but that's just something
to keep in mind. I'm just wondering if I were
to select all of these, whether or not I
would be able to then select just the top points and whether I could go into alignment options
here, align them all. And yes, you can. So you notice what I did there. I put a horizontal alignment
and a vertical alignment there that put all my thoughts absolutely directly
on top of each other. And now I can move these
into position like this. So that might be something
that could help you might be interested in trying out at least
once just to see, in this case, what it's done is it's going to make
me have to go back and change all of the
centers on these lines. And this might not be worth it. So let's just leave it and
hope that the organic, that's a word of
leaving our lines a little bit loose
looking whether that would work and be a good
look for our artwork. So if you do want them aligned, then you can start just
basically right on top of the first one for one previous
and just go from there. And I think that's okay. I mean, nobody's gonna
be looking at it with a fine tooth comb. It's up to you. You definitely have
to be the judge here and decide whether or not you want to go to any of
that kind of extra travel. And sometimes I go
through the whole thing. I do all my sort of
decoration and then I go back and make adjustments as something to
fill my evenings. So that's two ideas for leaves. I'll go ahead and probably
finish all those later on, but I want to move on and do all the different little ideas and give them to you first that you can go through
and practice with those and decide which ones that you really do want to use. Some of them are not going
to be useful for you. Some of them are not the
look that you're going for. I'm gonna be just
showing you all kinds of different methods
so that you have everything you need to
just kinda get through this stage of
adding your detail. Okay, so in the next lesson, what we'll do is another
version of the lines, but I want to show
you how to split a set of lines that
you have put in, let's say on something like
the Copt flowers here. Okay, So let's get into that next lesson
and I'll show you that.
4. Lesson 3 Splitting the Lines on the Petals: Guys, welcome to lesson three. Showed you how to
do those lines. So if I want to
show you a way to split those lines
so that you can create highlights and
shadows on the lines as well. Let's get to it. Alrighty. So the next
one I want to work on is this kind of cup
shaped to happy hour. I smooth out the
edge here because I had a little bit of a bump out. It was kinda like
this. So I took out the extra point
and just did this. So I have a really
nice smooth shape to work with and really
nice and COPD. Let's go back for
a second to take a look here at Helens flower. This is the one I'm thinking of. And you see how much
detail there is in here. And it's interesting
how she's done this. Actually, this one, she
didn't necessarily bring all the lines evenly
down to the base. You see how she's kind of I
don't know how to explain it, but she's got inconsistencies in how she's pulling the line. So we're on that leaf, we did it so
consistently spaced. Maybe this is something
we can do that's a little bit different
on this one. I'm also going to be dividing it halfway through so that we can get two different colors or two different
shades of the color. So we'll do that
as we go through. But for now we're basically
doing the same idea. We're going to be this is the shape here, or
is it this one? No, that's not it. This is it here. So I'm
going to select that. We'll see if the
lines I draw now, we'll end up in this folder. And what I did is I made
sure that I added this, which is the darker
shade of yellow in and the lighter shade is this one
here which we already had. So we'll see if we can use this as the color for our line. So let me just deselect. Now, I will select this
as my stroke color, and let's go in and
draw our first-line. So the thickness of this
line looks pretty good. I don't mind that
you could adjust if you would rather have
it bigger or smaller. I think I'm going to stick to something like this
because I do want to really fill this area when
you're drawing the line. You might also consider having
a bit of a hook at the top like this and going past the end of the
flower at the end, I'll show you why. In this case, doing that little cup at
the top is going to suggest that this curls
around the top of the flower. I wasn't super steady there, so I can see that there's
an extra point or two. So I could go in
here and delete. Let's say these two as well, just to get a smoother
line in here, at least for my first one. So I'm going to
continue in that way. I'm going to make that
little hook at the top. Then I'm going to swing
down right off the end. That one I was a little bit wobbly on
again, but I don't know. I find it's easier to
correct them as I go. I definitely do go back after and make adjustments
if necessary, but it is really quite nice to not have to worry about that. And I'm going to try to do
a little bit of what she's doing here by changing, started changing the way i
shape this a little bit. So this is pretty
much dead center. So that's the one-line
that'd be almost straight. And then we start curving
in this direction. Remember that little
hook at the top to make that look like it's contouring
around the top as well. And you see I'm
pulling it way down off the bottom of the flower. And I bet you can guess why. I want to put all these together and you can see it didn't
put it where I wanted it to. So I'm going to select
that first one, then two finger tap at the bottom with the hope
that it selects them all. Sometimes that works for
me, sometimes it doesn't. I need to now take
this whole group down to where it's
supposed to be. And I said, yeah,
that's the one. So this is the curve I
want to put it into. I can take that whole group
and flip it to that curve. And that's why I was
going off the end because that is just so much easier
for getting that really nice, clean and at the bottom. So if I de-select, you can
see how smooth that looks. And I know I was trying to do something with
these lines here. I don't know if
that truly worked, so I might want to go in
and make some adjustments, fix these lines
up. I don't know. It's little things like that. You do experiment. Maybe sometimes it works. Sometimes it doesn't. This one didn't really
work batch, whatever. It's still, it's still nice. I like it. I like the fact that
this flower now has just so much more life to it compared to the
other ones here. But I also wanted to show
you how you could divide it. And there's a lot of different reasons why you
would want to maybe divide it. I'm thinking that'd be
nice to have some of these lines at the top
a little bit lighter to make it look like
highlights and then maybe darker at the bottom here. Still staying with
that same yellow but just making
adjustments to it. So let's try something here. So now, in order to be
able to divide these, like I want to,
what we need to do is expand all of these strokes. So one thing you
want to do is be sure that you've got
everything the way you wanted here because
these are not going to be editable after we're done, at least not in this way. You won't be able to just take and adjust your lines, e.g. because these are going to be
completely outlined shapes. So we'll do that by
selecting them all again. So we're gonna go
to the top one, double-tap on the bottom one so that they're
all selected. Then we're gonna go into this. Operations menu and
click on Expand strokes. And you can see
now what we've got is shapes that are filled or you can use your smooth to get
rid of some of the points. But there are definitely
a lot of points here and look at
this mess down here. So one of the things I'm
gonna do is I'm going to bring them into one shape. So I've just used the add command and now
they're all one solid shape. So here there was a
little bit of overlap. So that's why it looks
like it does there. But now you can see that these
are all outlined shapes. So now we can use that
divide operations. So we're going to take
a pencil and we're going to draw where
we want to divide it. So I wanted to do
something like that. Now this shape here
doesn't have to have any amount of stroke
to it or anything. In fact, it's a problem
if it is stroked because that double stroke or that
stroke is going to then try to apply to the
outside of all of these. So we only need it to do
that operation of dividing. So let's go into this color palette and remove
the stroke completely. So there's, the line is there, but it's going to be invisible
as soon as I de-select. So I want to make sure that I've got it
in position and I do. So here's the curve that
I'm going to be dividing, and here's the line that I'm going to use to divide it with. So I'm going to
select them both. And then I'm going
to go into this menu and do the divide function. Okay, so that looks like
it worked at this point. We need to, or could get rid
of this line completely. Now, you see what happened here. It took on the appearance
of this line that we used. So that's why all of this now looks like it's disappeared. So let's go back a step here. And I wonder if we fill this, fill this and not stroke it, but go and take the stroke off. We're going to actually slide that over so that the stroke has nothing but the shape is
filled with the same color. And now we'll try
that operation again. So because this is
one single curve, it makes it so much easier. We don't have to do a
bunch of selecting, just select the two of them. That's all we need. And we can go in here. And you don't want
one step further, why don't we fill this with a lighter
version of the color, which will then give
us that highlights. So now we've got
these two selected. I hope this works because
this would be great. We'll hit divide and
now I think we can, It looks like we've got
all of these correct. You see are the lighter color and we can just get rid of this. Folks. I did that happened. I had no idea that would work. But what we did is we created
the highlight in one step by selecting and are creating a shape and filling it with a
color that we wanted. So the desired color, and we've now got
our highlights. So let's just quickly do
that with our shadows too. So I'm going to draw
the shape that I want. It's gonna be
something like that, like little happy face. And then let's go into
our swatches here. This is the color
of the background, so that part there, so we want to go a little
bit darker than that. So we're going to just grab that and just darken
high pulling down. Then we're going to
select both of these. We're gonna do that divide
function and then we're going to go in and just
get rid of this weight. That's not the one we
want to get rid of. We want to get rid
of its big shape in the background where the
hiding, Where's the hiding? Delete this. Now this one wasn't
quite as foolproof. So it looks like we
would have to go in and delete all of
the in-between vets. But I mean, it worked. So you can just go through and we can pull that away for a second if it's if it's helpful, and then we can just
get these out of here. Well, it looks like it selects the next one in the sequence. So we'll get rid of that
one that selects on. Yeah, Perfect. So just one little
guy here and wait, where did I did I get
rid of that curious. Move that back into position. And we've created
that shaded part of our cup flour so we could go back to a color
that's a little bit closer to what we've
got going on there. So it's not so much
of a contrast, but I think that's
turned out pretty neat. I like the look of that and that's giving you another idea. So I would say take
some time now to do all the ones that you want to have with just the striping. And then let's go and create
one of these other looks. In the next lesson.
I'll meet you there.
5. Lesson 4 Creating and Using Bitmap Fills: Hi guys, welcome to lesson four. Less than four here, I want to go back and
explore that fill tool to do some
fields with bitmaps. Let's get started. This flower is the next one we're going to take a look at. And you will recall
that I showed you in a previous class how to use the pattern fill tool
here to import a bitmap. And that's exactly
what I've done. I've imported a single dot
to create this pattern. So I'm gonna be showing
you how to do that. I've got a separate little
document here and it's small, it's only 3 " by 3 ". So when you go to create
your new documents, you're gonna do a new document, you're gonna go, Let's change
this to inches to three. This to three. You could experiment,
you've probably could even do it smaller. So we could do this
in 2 " instead. So to go back to this 1.2, and I like keeping the pixels per inch
high because after all, even though we're drawing it as a vector is still going to come in to that fill
as a bitmap feel. So keep your PPI
pixels per inch high. Here's my blank document and I did mine just with
a simple circle. I mean, who doesn't
love a polka dot? You could do a really
simple ellipse. Hold your finger down, you could fill the space, use your snapping to make sure
that you are centering it. So up and down and side to side. So red shows the horizontal, green shows the vertical, and fill this with
whatever color you want. I know you can affect it
in the other document. You can change it
to whatever you want so you can leave it as a gray or you could choose one of the
colors that you know, you're going to be using. I had done the polka dot
and then when I went to do the fill in the other
document, bitmap pill. So let me just backtrack here and I'm gonna go and
click on my tools so that I can get the context menu here to allow
me to go with two bitmap. That yellow dot is the
first one that I made. I forgot to save
that second one, but you get the idea. I'm gonna go back actually and changes since I
already have a dot, I want to get rid of
this one and I'm going to use one of the flower tools. So let's do cloud, just like we did in the first few lessons when we were creating
these random flowers. And I know you must be
getting sick of flowers. I love doing flowers. That's why we do
a lot of flowers. I easy to work with, but I will I swear. Show you some different
stuff at some point. Okay, so we've got
our flower here. We could still edited by grabbing the little
handles here, changing the amount of bubbles. I'm going to convert it
to curves and that you can then go through and make
other changes if you want. So you could go through and select all of these endpoints. Hit the smooth tool here. And then of course you can go through and
make your changes. But let's not go through all
that trouble because this is perfectly fine for the
demonstration I'm showing you. Now we want to export. I'm saving it as a PNG. On the last one I had
changed the mat to a color, but it doesn't really
matter because it's going to come in transparent
anyways, because it's a PNG. So I'm gonna hit okay,
here I've got a folder in my Affinity assets called
single motifs for pattern fill. I'll call this one flower one. And I know I can hear your minds working already and you're thinking to yourself, Hey, I can easily feel
this just with my assets. And of course you can. So you could take this away, go into your assets, find one of the flowers that
you created that you really liked was the collection I
had made for this project. You could drag in any of the flowers that you
had already done. So I could insert this one. And of course it's ginormous. Let's make sure that
we have it centered. You can have a bigger, it's not that necessary
at this point. I'm going to export still on
the settings I had before. Affinity assets, what I'm
going to call it flour three, it done and it's saved. And now let's go back into the document
that we were working on and we're gonna go to the
pattern fill here again, keep going until you hit Bitmap. Bitmap, or you're single. This is that second
flower that I created. And you can see here that now I can reduce it down to like, get it to the position
and size that I want. Remember that you can
curve or turn it around if you want the pattern to
be at a particular angle. And just like that, you've filled with
flowers and you can get the size of the
flower a little bit. It looks like it's not
really changing the spacing. So that would be
another case for having me a shape that
almost completely fills that original document
because you can see here how much height or the
spacing is between my motifs. So think about that
as you're creating those other single
shapes to be used here. And remember that you can still go in and
affect the color, go into the effects here and
you can go to color overlay. And remember to click on the word here and it
changes everything here. So then you can
use a blend mode. Let's say like,
let's try overlay. I think we're going to
have to do something like multiply that gives us that
color in the background. So let's try. Getting more of a yellow. So that's kind of
an orangey yellow. So there's a way that you can change what you've
got going on there. Or remember that you can go
in and duplicate this one. So I've got it highlighted. I'm going to hit Duplicate
on this second one here. I'm going to go back to the
fill and just put no fill on it or I guess I could put a solid fill on it right
now it's on white, but I could do yellow and then I could go to the blending
modes for the layer. You can see now it's above
the one that has the pattern. So I can now affect this
color layer by going into the layer options
here and figuring out which blending
mode is going to work. And you don't have
to be full strength. You can go down a little
bit in strength and make sure you do go through and experimental little
bit, kinda like that. So that's one of the ways
that you can change at a pattern and also
change the color. I can't wait to see all the
different ideas that you come up with for
this and share with the group because it's always awesome to see the way someone else has applied some
kind of an idea. Remember that this document
here that you've created, you can use over and over again. So I would probably go back and make sure that this
completely fills it. Then save it again so that I could use it with
tighter spacing. That would give me more
control over the spacing. And this is just one of the
crazy things that you can do. You can leave this document as is and just keep
adding to it so you could hide the layer and then add
something different. So remember that you
can do things like create something with
a shape like this. Let's stroke it so that we
know it's going to be visible. Export it. I'm going to keep all
of these settings. And I don't know if I
pointed out before, but I've got the pixel
dimensions at 600 pixels. So this is a really
high resolution raster, even if it becomes a raster that you're positioning or a bitmap, at least we know it's a good
quality wines, so we'll hit, okay, here, go to
my Affinity assets. Single motif, call it circles, scribbles or whatever,
you'll recognize it, save, go back to this document. Let's pick another one
before I even start. I'm going to
duplicate that shape. So got it selected, duplicate. Now I'll go to the fill tool, bitmap, get my scribble
circles in there. And that could be a really
interesting fill as well. So we could have
done thicker lines because we've got the pattern so small and we could have spaced it a
little bit differently. I don't mind the
spacing. I think that it would have
been better to have more space between the scribbles and maybe fill it
a little bit more. But that would be a really fun little pattern to
have in there too. So I've given you
a few ideas here. I want you to take some time
to experiment with that. So now we've got three
different things going on. We've got pattern fields, we've got the single
line adornments, and then we've got this beautiful engraved luck
with the multiple lines. Alright, so time
for the next idea. I'll meet you in
the next lesson.
6. Lesson 5 Dotted Lines for Texture and Interest: Hi guys, welcome to lesson five. And less than five.
Here I'm going to show you how you can use a dashed line to create polka dots for the
middle of a flower. And also use that same
technique for adding some texture into the background
of our entire pattern. Let's get started. Alright, so the one thing
I didn't show you here was how to change the
colors and whatnot. So remember that we can
change the color here. So I'm going to slide it a
little bit over to the yellow and make sure that there's
a lot of light here. Now, in this case, I've
got the patterns flower above the curve that
was already colored. So I wanted to just show
it to you in this order. It's a little bit different
than we did that one. Remember we had, the
pattern is here. You can have the color below. So this is the pattern,
the pattern one. At the moment you
can't see the pattern because I don't
have a blend mode. I'm going to go
through here until I have colored those circles. So lighter color
or screen works. So that is kind of nice. I'm going to leave it at that. So that's just to have the color applied to
the circles themselves. But now you can go over
here and into this layer, your options, and you can affect the entire layer and how it blends with the
layer below it. So the below one
was that orange. Here we can experiment until we find a blending mode for
the layer that we like. And I think that
this category here, so dark and light and multiply, those are the best for this
particular application. So I think multiply
looks pretty good. And then we can go in and make changes if we want to
this color underneath. So we could go back to the color wheel and experiment
with what's underneath. So you see how that's
changing everything here. So depending on the look that
you're going for a course, you're going to make
your own adjustments here and the circles don't
show up that great here, but then sometimes
subtle is nice. So there's another idea and
another way to execute that. This particular
lesson, what I wanted to show you was a method to add the circle or the
dotted fills like this. And I want to show you how
to do that really easily. That's the same method that
I've actually used to do these dots in the background
as a bit of an accent. So let's have a go
at doing that one. So I'm going to which
flowery we want to work on. How about if we work
on this one over here? So now it's hit or miss. It seems to be for
me when it comes to selecting the group that
I want to work within. Sometimes it's still
ends up popping the design that I'm
creating way up on top. But I'm going to give
this a shot anyway. So I'm going to de-select. Maybe that's why
when I de-select, then I'm out of the layer. I don't know, but now I
want to just draw a spiral. So you're not going
to really see it at the moment because of
its color and whatnot. But what we'll do is go
in and first of all, add a lighter color stroke. We've increased the width of it. And the one thing we need
to do is we need to reset this so that it's just an
even pressure all around. Okay, So at the moment, I am making it a bit smaller. So it's about
three-and-a-half points depending on the size of your
flowers, this could change. You could do it a different way. We can make adjustments after because it's still
remains a line, even though we end up making it into what's technically
a dashed line. So I chose this option here, and then these controls come up. So you can see already
this looks like a bunch of little
sausages connected. What we need to do is we
need to increase the size of the gap and the size of the dash has to
be really reduced. So I've currently got the dash at zero and the gap
at three-and-a-half. So depending on how tight
you want those gods, you're going to
adjust the gap here. I'm actually not sure
what phase does. I think maybe it looks like
it moves it along the lines. So if you didn't like where the dash was starting
and stopping, in this case, it doesn't
really affect our design. Maybe at this point, not important to
us really at all, but just keep that in mind. That is something
you may want to use if you're doing an actual
dashed line somewhere. You can also go into
these advanced controls. And I guess just because
this is what I had it set at last time, it has stayed on. But the important thing here is that you have rounded caps. You can experiment. Of course, if this is what
you're thinking of, use it. Yeah, for sure. Just in my case, the circle is what I wanted. At the moment. These other controls
don't matter to me or affect what I'm doing, so I'm just going
to ignore them. But now that you have those
dots the way you like them, then of course, you can go
through and adjust your line. You can do anything
that you normally do. So if I want to take away that point so that I
have just the one here. I can, and I could really work on the positioning or
the shape of this line. And remember that the
less points you have, the easier it is
to control the way the line looks or
how it lays down. How are you guys
finding these handles and things to work with? Is this something that
you're finding difficult or Now that you're getting
the hang of it, it's not as bad as
it seemed at first. I know that this was always a struggle for
my students in high school learning how to
work with the handles. But that's because
we didn't even have the Pencil Tool way back
when in Adobe Illustrator, you used to have
to literally draw with the pen tool for absolutely everything
that you needed. So my line is too short here
and I want to continue it. So what I would do here is just find that endpoint
and add to it. It's not going to connect
the two lines unless you go through do that yourself. It's not necessary. You can if you want to. I'm going to make slight
adjustments here so that the last row of them there
is not quite so crowded. But that's how I went
through and did it. In a case like this, when you have two that are
overlapping is generally because you have not quite
enough width on your line. And of course, if you want to be a real perfectionist with it, you're going to need
to adjust some of the other lines in order to make enough room for this one. So this line might
have to move up a bit, which might mean that this one has to move
up a little bit. Now if you did want
to join these two, you would have to select both of the endpoints on
both of the lines. And it's tricky. What I would do is
go into the layers and you see it didn't place
it where I wanted it to go. I'm going to drag it down here. I'm going to select
them both like that. So I've got the two
single nodes selected, and then I'm going
to hit Join here. And now it's made it into
one continuous line. And sometimes that's better
when you're trying to do that really intricate fill or
positioning at the end. Now you also know that
if you needed to, you could then expand
the stroke on this. I wouldn't recommend it
to you completely done. But if you are completely
done, you're happy with it. You could expand the
stroke and you're gonna get individual
circles like this. What that might help you
do is in a case like this, I'm going to select this guy. Now you see that
I tried to go to my move tool and as soon as I did it selected
all of the circles. So what I might
need to do here is, you can see here in the layers that it's identified as a curve. So you might have to go in
here and separate the curves. That's gonna make them
all separate like this, then you should
be able to select just that individual one if you needed to do
something to it. So in this case, what I want to do is to
move it in a little bit and then duplicate it and then
have an additional one here. I'll take my snapping off. I'm going to duplicate it again. And that just kinda helps me to fill that little bit that
looked like it was empty. So just remember that these
are now all separate curves. So you might want to go
here to your layers palette and you're like look
at all the holy cow. Your two-finger tap from
having the top one selected, going down to the
very bottom here, two finger tap so that they're all selected and group them. And now it's a complete group. I personally want to add this
to my assets and assets. It's a group, so it comes
in as a perfect group. And the cool thing about
that is if we needed it, we could use it for probably
even this flower here. I mean, at this
point it's selected. We could duplicate it and we can just drag it over and put it in. Still might need
some work to have it perfectly sized
and positioned, but you know, now
how to do that. So we're getting a few
of them decorated. If thing I did with
my dotted line to was that I used it in the background as
a bit of a filler so I better de-select this. But I could take my dotted line. I think it's still going
to be dotted here. And I'm going to take my
pencil tool and I could use it to just draw a line here. And maybe what I
would do is select this age or soft
yellow background that I have for my
rectangle is selected. Now it shows up here. I can add. So that means I can use
it to colorize this one. Fill but the stroke, so it's there and I
would just darken it, maybe just a touch by
dragging down here. And of course, I would need
to move that into my symbol, but also within my symbol. I would want this to be just above the rectangle that
makes up the background. So then you could think
about ways to use that, that might be interesting. Could fill in a hole area, or you could use it to just put accent lines
within your pattern. So that's one of the
things you could do. And I'm going to take you
back to **** and Arctic and these little things that she's got going on
in the background. So you might want
to experiment with the shapes of those
lines, those dots. In a case like this where
it's a background texture, you might want to experiment
with the different shapes. Maybe this would be a case where little squares might look
just as interesting, something like that at all. It's totally up to you. Okay, So we've got a couple
other things to cover. Let's do that in
that next lesson.
7. Lesson 6 Ideas for Finalizing Your Pattern: Hi guys, welcome to lesson six. Less than six here is all
about doing some final ideas, final textures on
our background. Let's get started. I pulled up this example of Helens because I thought
that it'd be fun too. Now, work with some of the
stuff in the background here. So once you scroll beneath that, you'll get a lot of other
suggestions here and a lot of really
great examples of different things
that she has done to really make her
motifs interesting. So this kind of an effect
where she's got tons and tons of little lines going on does in the background
a lot as well. So on this one she's done
it in the background. I can just imagine
wiling away 100 h, just adding all of this really cool stuff
going on in the background. I mean, so talented, like look at this, this is just a completely
different thing. And yet so much of
the same look there. And I'm sure that's why she's such an incredible and popular
and successful artists is because of all these
different things. And here's something
so completely different where she's got just monochromatic elements
with all of that texture. Just two colors, light
blue, dark blue. This one here, I actually saw her painting one of
these hand painting, one of these in watercolor. Amazed at that talent, level of ability that she has. This next lesson here is
going to be on showing you how to do that addition
of those little elements. And then I also want to
show you how you can make two tone elements. So let's hop into that
lesson real quick because this class is getting very long and there's so much to cover. So let's think about doing these little shapes
in the background. So I showed you how
to do the polka dots, but now I want to show
you how to do some of the little shapes that we could possibly use to fill in areas. So what I did here is I selected a color that's
just a little bit darker. In fact, it's the same color
as those polka dots there. You could go
completely different if you wanted to do something, let's say completely white. You could do that and, or you could choose
one of the colors that's within your illustration. To add those little details, I'll do the white so that
it really shows up for you. But you can see
here that I've got my pressure points
changed and in this case, I didn't go all the way
down to the bottom. So they're not gonna be a point. They're going to be a little
bit sort of snub-nosed. So I wanted to a lot
of contrast though, so that when I draw the shape, you can see there that
it's thick in the middle and then it's got tapered ends. But if I de-select it, you can see that those
ends our cutoff. So think about the
shape that you want to create and then just
create that profile. And you can use this to fill
in a lot of the background. Now, you could also try
a different one here, draw the line first, and then you could make
your changes here. So this will be the leading or the first
part of the line. So I've got that
to a full point. And this one, you could do
completely differently. You could have it come
up and really flat. And then here you can see
that I've got the flat end, which is what I wanted for this, but now I could make
it into a rounded. So I've got a teardrop shape to be a fully teardrop shape, I guess you'd have to
do something like this, but I want it to have a little bit of thickness
in the middle too. And you can add more
pressure points. By the way, you can make these really weirdly shaped
if you wanted to be, that might be kinda neat because
it's like you're putting in a double shape every
time you're doing it. So think about that. Experiment with your colors. I think it would
be nice for you to give a little bit of variety like she does where
she's got to find that first one where she's
got certain color areas. So between some of the
flowers like all around this leaf and flower
combination, she did yellow. So you might
consider doing that. I mean, your design is
going to be fully your own. You're going to be customizing
it to whatever you like. This is one of the ways
that you can do it. So you could definitely go
into your color scheme here. And I should go back
to that other palette. I just don't remember
which one it was. Some of these retro
colors might work nicely. So I could do something like
this and do a whole section. You can click on the node if you want to get rid
of it and hit delete. So we could go back to that
other shape that I had. And you can see that you
could fill in an area quite quickly if you wanted to. Of course, that
doesn't have to be reserved just for
the background. You could definitely
go in and do something on the
leaves or flowers. So we could go maybe
smaller in a case like that and just fill in and have sort of really
textural look to what are your leaves
or one of your flowers. Now, the other thing
I wanted to show you, and I'll show you with
this flower here, is how to add dimension with
additional areas of color. So let's go into
our layers here. You see I selected this curve. What I wanna do
here is above it, I want to draw another shape. And right now it's still
has that outline on it, which is fine because
we're just going to go. Rid of the outline
and change the fill. You can see I'm way
over the edges here. But now for once
it actually did it above the shape exactly
where I wanted it to. Now I can take this shape
and I can pull it into the curve to give it a clipped edge so that
matches perfectly. And there we can also go in
and remember that trick in one of our Procreate
classes where we had the color, the exact same. I'm going to go back to that. I wonder if that was my palette. That sure looks like
it, doesn't it? Yes. So that's the
exact same color. If I've named it, I could
have found it more easily. Note to Self named
color palettes. I should make it big sticky note and have a here somewhere. I would end up with all
these different sticky note, so and then that never works. Okay, so here, instead of changing the
color to be darker, remember that you can just go
to something like multiply. And even though it's
the exact same color, it creates that shadow, which is super
neat. I love that. Remember too that you can then use some of your texturing like what we've just
been working on. Let's make some lines now right? At this point, it's not in
a color that you can see, but let's just make it a
color that we can see. We want it to be the stroke. You can see how it's getting
thicker at the bottom. Maybe in this case, I would
do it the opposite way. So I would draw them
in this direction and get rid of this one. Draw another one here, then I could take all of these. So let's go into the layers and take all of these together. Try the double-tap. It worked. I'm going to group it first or do anything
else, Force Group. Then I'm gonna go
in here and I'm going to expand the stroke. So what we've got
here is didn't work on I individually have to
select them and Expand Stroke. Now we've got these strokes. We can actually combine
them into one curve. So I'm going to hit
convert to curves and I'm going to make
them into one shape. So I've got that
shape and this shape. So I can take the two
of them and select them and then use that
Boolean operation. In this case, I think
I'm going to do the subtract and you see
what I've done there. I have eliminated, I'll make this a little bit
darker for you to see. I have taken out those
strokes in there. So you can see that I'm going to just bring
that opacity up, but you can see how it has
cut it out completely. So that was basically the
last of the different ideas that I was going to give you in this class so that you're
armed and dangerous. I, and you can go and do all of that stuff
that we've been talking about and affect all
of these different motifs. And then also don't forget, don't forget this.
Very important. You can take any of these
that are now filled. In fact, something like this. Let's go in and make sure that it's got this correct
set of dots in it. So I'm going to move
it out of here. I think it's this
one here, right? Yeah. So I'm gonna move that into this group was completely group. Let's turn it off on
just double-check and that we can go in and add into our asset gallery
and look at how we're improving
our asset gallery. And that's gonna be really
important in our next class. In the next class is going
to be where we're going to create coordinates to go
with this hero prints. So your task for this
class itself is to go through and do
all of this stuff. Makes sure that anything
that you do is in that first symbol so that
it repeats over here. You can see that flower
has repeated, well, at this point, only on
this one version of it. We'll figure that out. I have a lot of
cleaning up to do here because I've added
all this extra stuff. But in the last lesson, what I'll show you is my
finished pattern here, and I'll put it in a
mock-up or something. And then we'll talk
about the preparations that you can make for the
last class in this series. And that's going to be the class where we create the coordinates. Alright, so I've got a
couple of surprises for you when we get to that class. Some gifts that I
want you to have. And then we will have created
our first collection. And from that collection, we're gonna do things like
upload to Spoonflower. Possibly that's your
call, of course. And I want to also
show you how to create a sell sheet
for your patterns so that you also have enhanced something that you
can take and send out or publish in your portfolio or used for possibly getting
some sort of a contract. We all have to dream, right? Alright, so I guess that's
it for today's class. I will meet you in the wrap-up
and we'll go from there. See you there.
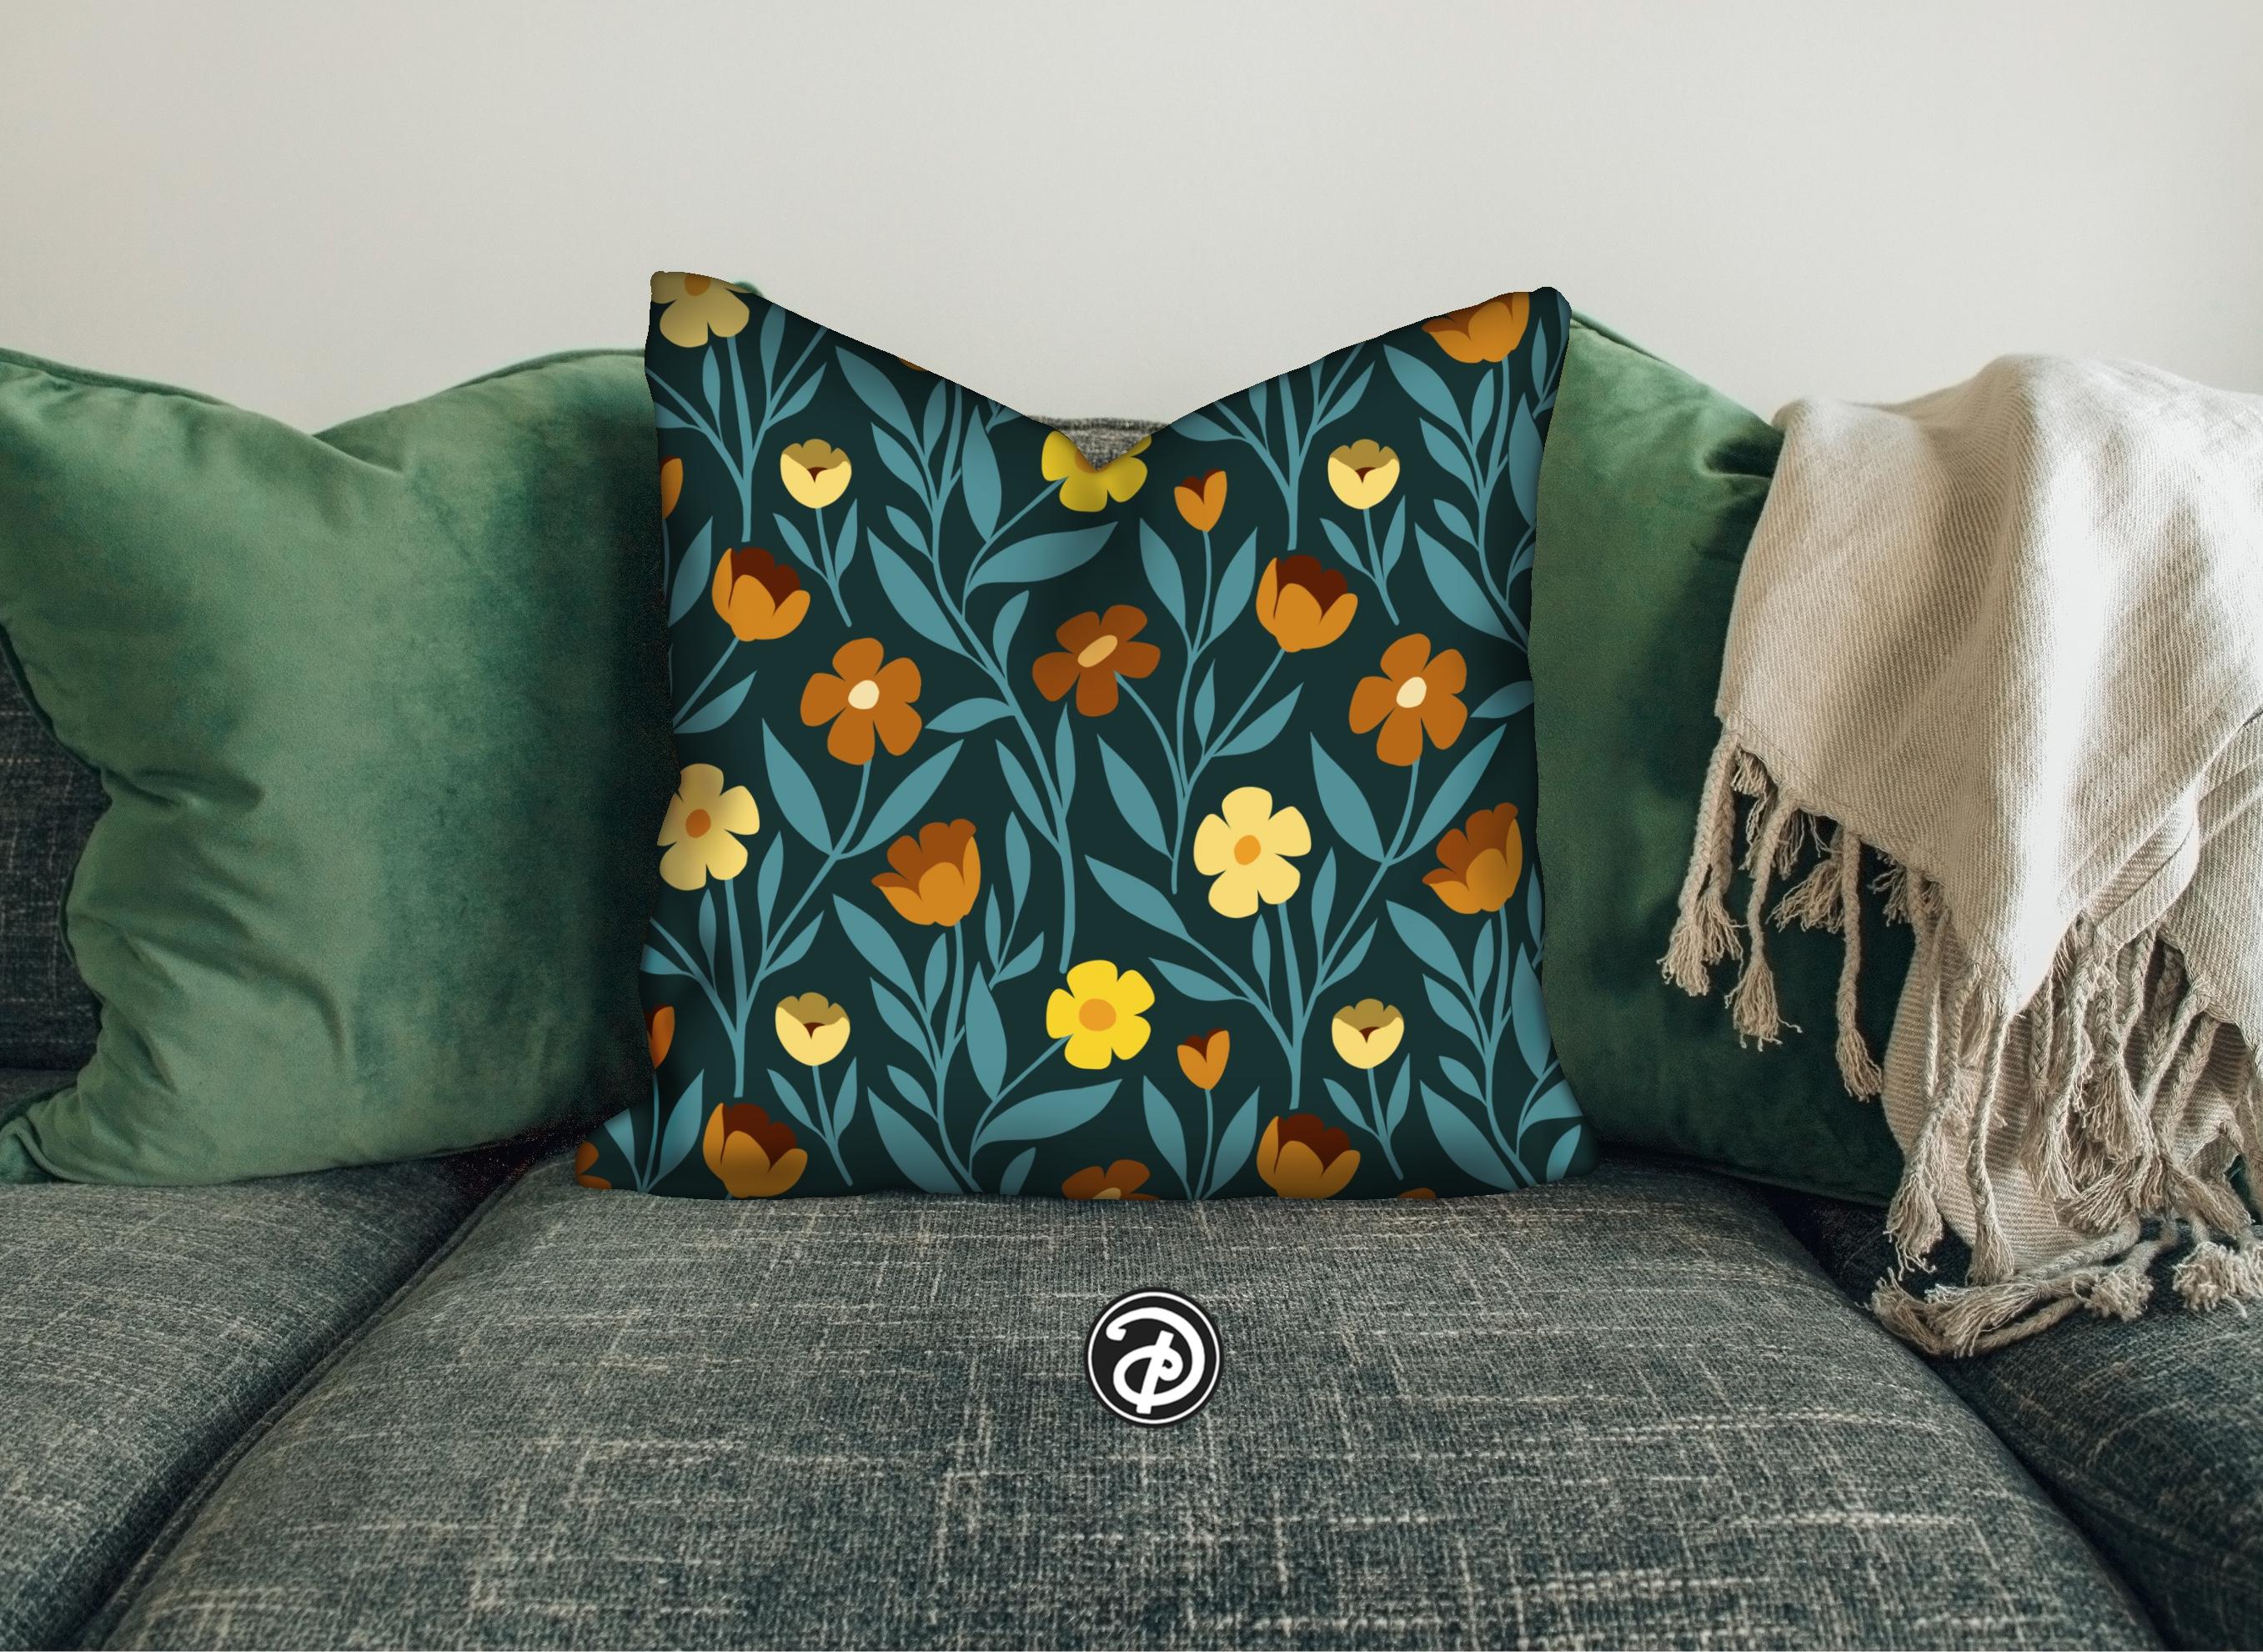
8. Lesson 7 Conclusion and Wrap Up : Hey guys, welcome
to lesson seven. Less than seven
here I promised I'd show you a couple of mock-ups. These are the two
that I've created, I thought for now we
can use this pattern as a standalone without its coordinates that we're gonna be creating in the next class. Of course, at that point, we're gonna be doing
some different things with our mockups. But I think that if you apply this to your single
mock-ups at this point, you'll get a really good idea of some of the things that you
could do for coordinates. So that's why I've done it
in this way. Some fun class. I think that what you've
learned in this class is stuff that you're
gonna be able to use over and over again. And don't forget, save all of those little assets that you've created into your asset library. That's going to help us when we get to creating the coordinates. So it's really
important that you take the time to do that step. Remember to group your
items first before you add them into your
asset library. Otherwise, they come
in all separate. All the parts come in separate. So you want to make sure
that you group them. And I would suggest
that you start your own Pinterest board with paint detailed patterns at any patterns you see
they're done in this way. Also, anything that you can
think of that you can add to that board for helping you create different patterns
and different multi-use. It's always great to
have your own reference. So I would really suggest
that you do that. So I guess that's it
for today's class. And I hope you join me with the last class where
we're going to be creating a full coordinate set. And we'll talk about creating sell sheets for your
patterns. I'll see you there. Bye for now.
 Delores Naskrent, Creative Explorer