Transcripts
1. Intro to AD20 Stroke Profiles in Affinity Designer: Hi guys and welcome. My
name is Dolores Nascrint. I'm coming to you from
sunny Manitoba, Canada. The class I'm
bringing you today is my 20th class that I'm recording
for affinity designer. I'm pretty excited about this
one because I'm going to be showing you something that you may just never
have thought of. I know I hadn't thought of it. And then when I started
experimenting with it was actually
blown away by what I could create by adjusting stroke profiles.
Yeah, that's right. We're going to go in
and we're going to change the profile of a stroke to create some really cool things
like fancy swirls, borders, and even
leaves and petals. You're not going to
believe how fast this is. That's one of the benefits
of doing it this way, as opposed to actually individually drawing elements
like leaves and petals. The cool thing about it is
that we can actually expand those strokes afterwards and
make additional adjustments. I know it sounds like a lot, but wait till you see this. You're going to be surprised
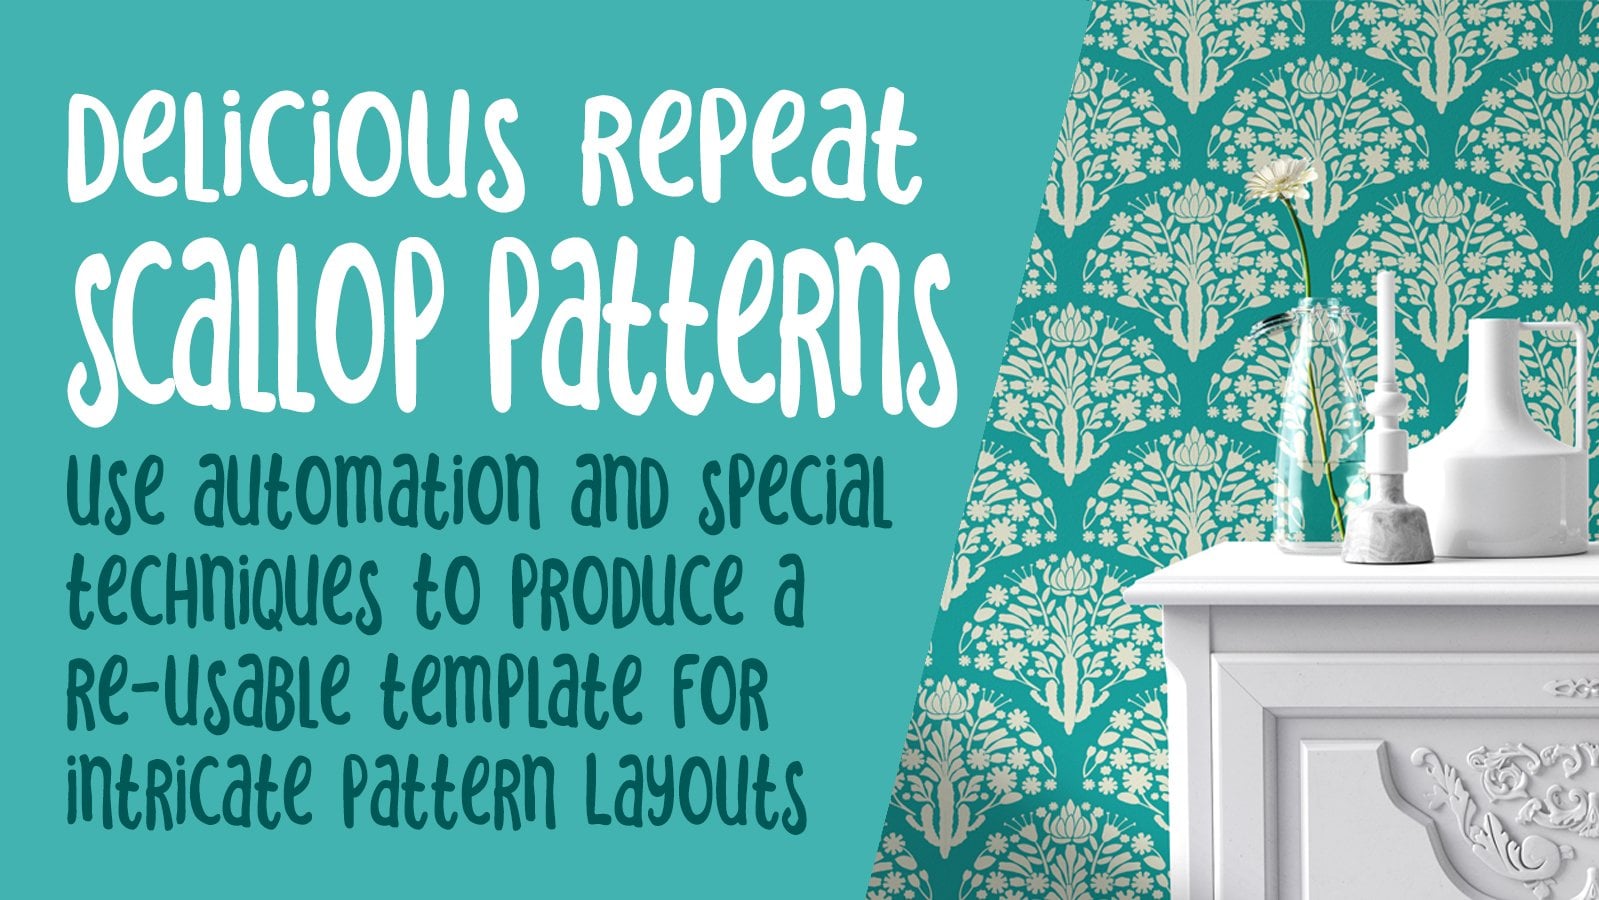
at how sweet it really is. The pattern that I'm going
to be creating today is going to work with one of
our templates as well. You'll get some really
in depth exposure to the use of the half
drop with reflection, showing you how I work
with it really in depth, I think will really
help you out. Maybe you can create a
pattern like this yourself. It's like an Ogi pattern
but it drops down. I don't know how to
really describe it, but it ends up being really swirly a stripe. Too
much information. You're just going
to have to take this class to find out more. Now if you are watching
this class on skill share, I would recommend that you hit that follow button up there. That way you'll be informed
anytime I post a class. I would also suggest you
get over to my website at the Lesar and add yourself
to my mailing list there. From that mailing list, I
send out my newsletter and of course my free brush sets and anything else
that I feature. Are you ready to dig into these profile changes
in affinity designer? All right, let's get going.
I'll meet you in lesson one.
2. Lesson 1 Overview and Stroke Profile Examples : Hi guys, welcome to
lesson one lesson. I want to show you
some inspiration for creating this type of pattern
in affinity designer. This will use our half drop
with reflection template. Then I'm also going to show you just some really quick
adjustments to some strokes. I think you're going to
really learn a lot just from this lesson alone.
Let's get into it. I am going to show you
a few things here on my surface pattern
design OG inspired shapes that I think would be
pretty good inspiration for. The one that I'm
going to be showing you is a little bit more complex because it's got a lot of extra things like flowers added. But I want you to just take
a look at these to think about what you
might want to do in the way of profile
changes on a stroke. Take a look at this
one for example. You can see that the
lines vary in thickness. We've got pretty thin
areas on some of the lines that then grow
to be bulbous at the end. There are short strokes, There are long strokes. I want you to think about the possibilities for something like this. Take a look at this. As we are going
through the class, you're going to start
to really understand what I'm doing in teaching you
this particular technique. Now this one is a
perfect example. What I love about it
is that there are tons of things here that I
could draw with just a stroke, just a line, the
profile of a line. I could change those lines to
make them into leaf shapes. I could layer them like
these have been done. There's a thinner or
smaller version of, let's say one of
these leaf shapes that is superimposed
over a thicker one. There are plenty of changes everywhere that you
see the actual lines. That's a really good example. I personally am
going to be showing you a half drop with reflection. It's a little bit
more complex than I would do in my template club, just showing you
those quick versions of what you can do
with a template. There are very few here that are going to
show the half drop, which is what I'm going
to be showing you. That's something that
we'll do in the class. But you honestly could do such simple things that
could be so effective. Take a look at this
one, for example. This is a grid repeat or
possibly a diamond repeat. It is simple strokes with
different profiles, super, super easy to do with the technique that I'm
going to be showing you, there was one here at
the top that I thought would be really doable
to this one here. But really if you look at this, it is just lines that get thinner and thicker and
overlap and interlock. These are things that
after this class, you're going to be able to do
really quickly and easily. Imagine all the patterns that
you could create and how quickly you could create
them using this technique. I know that point in the class, you're just going to have
that Aha moment and be super motivated to go and try some other things as we go through working with
different templates. In class, we're going to be creating all kinds of
different repeats. J repeats like this. We're going to do S curves, we're going to do all
kinds of different things. But this particular class
is going to focus on just using strokes to create all
kinds of beautiful motives. All right, let's get into affinity designer now and
I'm going to show you some examples of what can be
done with stroke profiles. I have created this
document to show you some of the different stroke profiles that I make use of a lot. This is just a regular stroke, and if you take a
look at it over here, there's absolutely
nothing adjusted here in the stroke pressure
profile chart, you can see that if I
move around these nodes, I am creating
different profiles. For example, this profile here. If I were to click on this line, you can see that that's how
I've got that one shaped. You can go to full extremes. You can go to like an absolute sharp point or you
could have a dull. And you can so still make adjustments to
the size of the stroke. As I'm showing you these
different stroke profiles, I want you to imagine, just think about some of the ways that you might
want to use these. I'm going to obviously show
you a ton of examples, but I just want you to
take a look at this. I think if I can, I will make you a chart
just to give you the idea. But honestly, just
experimenting at first is the best way to figure out what the different settings
on your profile can do. Let's take a look at this one. In order to get that shape, I added a point. Onto the line with a little
bit of a dip in the middle. Again, this line can be
thickened or made thinner if you ever wanted to change
the way the profile is. You can also just click
on one of the nodes, like hold down on one of the nodes and you can
go to reset pressure. Then adding a node is just as simple as clicking
on the line. And you can see that
it can be really quick to make your new profile. And this are actually
really similar. What I did with this one though, it was I went to extremes and I added an additional
jump in that line. This one I do, it reminds me of something
that you could use, let's say, to make some
really interesting stripes. One of the coolest things
that I figured out, and I was so excited when I did, was how to make
something like this, which I think looks like
an anther for a flower. Check out this profile. Now you can see that
this is what controls the thinness of the
bottom part of the line. You can adjust to
make things smaller. So you could easily pull
those nodes closer together if you wanted to have
just a little bit of a jump at the tip. Remember again that you can
still change the size of it by just adjusting the
width of the stroke, but you can see how much
flexibility you really have. In that case there I've got
an actual straight line. It's just mind boggling that
this be done in this way. Obviously, this and
this were similar, if you looked at the way
the nodes were positioned. Again, if you wanted to have something that had a wider top, you can go with a
thicker line here. And then just make adjustments, make it either
thinner or thicker. At the bottom, you can get
a nice a square edge there. This reminds me of a bull rush, so you can see the profile
that I've done for that one. Just another shape that
you could work with. Once you do have the line
specified and you draw it, you can see that it'd be really
easy to make duplicates. Now in this case, I
had a square end, that was the very last one
I was experimenting with, was something with a
really square end. You can specify that as well. I forgot to mention
that earlier on. But you have the rounded end, which would give you
something like this. You could make your adjustments, make the line thinner
if you wanted to, but you can also
choose to do a square. I have used that not very often. Occasionally I've used this and I think this would be a good one for when you're trying to
make a really cool profile. Now I would definitely put on a much better stabilization. But imagine the line that
you could make there. I've actually done
a few examples here that I'm going to show you. Because I want you to
think also in terms of what you could do for
things like layering. For this one. What
I've done is drawn the line and then I've duplicated it right
on top of itself. So let me just delete this one. But if I had this stroke here, I could just do a duplicate. You can see it's directly
on top of the original. But if I go in now and
I make changes to it, like change the color and
change the thickness, I'm building up a really
cool layered sort of a look. I'll show you some
examples as we go through the class of how
I would have used this. This profile doesn't
have to remain the same. You could definitely
do something really different like this where you've got thick and thin
going through. Just think about that as we're working our way
through the class. Now, the most exciting
thing to me was being able to create
leaves and things. With this, it was super simple. Draw your stroke and
let's make it green. In this case, the profile
would be really simple. I would reset this to start
out with reset the pressure. Then I would bring it to a point by dragging
both ends down. And this is what will make
it thicker in the middle. And again, as you increase the size of the
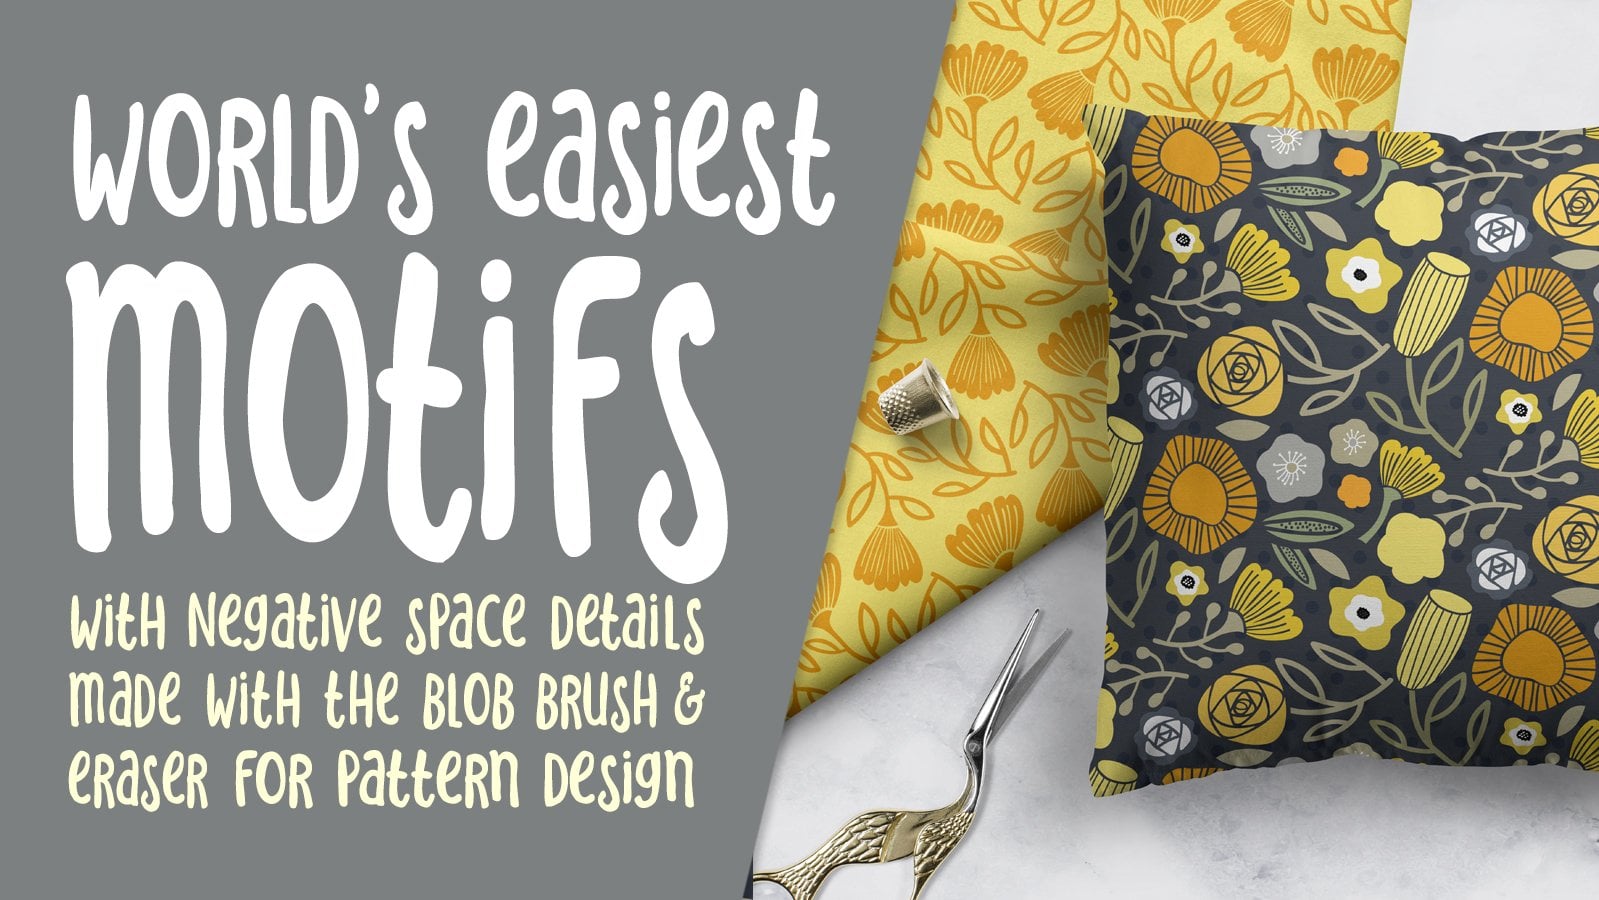
stroke you're making leaves. The fun part about this
is how easy it is to then draw beautiful and
perfect leaves like I did on this vine. I have also been experimenting with using it to make flowers. You can see the profile
for this particular petal, and because it's a stroke, it's so much easier to make adjustments on the
shape of your petals. You can see here that these are now expanded to
be actual shapes. And further adjustments can then be baited like
you could change, you could add texture
to it or whatever, because it's an actual shape. What I would do
here is make sure that the petals are exactly
the way I want them. And then I would go to expand, stroke, and now it's made
into an actual curve. I usually leave that to the end. You don't have to
even expand it, but sometimes I
want to do things, like I said, adding
texture or whatever. You don't have to, you can
literally leave it like this and you'd have the
perfect flower petal. One of the things as
I'm going through the class I'm also
going to show you is on how to save the petal shape into your appearance panel so that you could use that
over and over again. As we're going through,
I will show you how to add this particular
exact shape, color, and profile so that
you could use it again. Okay, in the next lesson, what we're going to do is start laying out our pattern and we're going to be using one of the template club templates. I'll see you in the next lesson.
3. Lesson 2 Ogee Inspired Design Planning: Hi guys, Welcome to lesson two. With something as
complex as this design, I think that it's best that
we start out with a sketch. I'm going to be showing
you my planning and then we're also going
to put our first set of lines down and I'm going to show you the comparison of how
hard something might be if you did it just with drawing it out as opposed to
using the stroke profile. Let's get out it. Okay, Let's just start out by
taking a look at one of the patterns that I have created using mainly
those techniques. I did add a couple of flowers
just from my asset gallery, but a lot of these
different things were done just making changes with
the profiles of the lines. For example, let's take
a look at this one here. If we go into the stroke and
take a look at the profile, you can see that I've got
it going from thin to thick so that we get this variety in the
thickness of our lines. If you look at this line here, you can see that I've got it going all the way down to here. Very thin at this end because that was what I wanted
so that I could show like this line attaching and going
from thin to thick. That makes sense. I also used it to do things like
create those little leaves. I think I've already
expanded this, but I'll show you exactly
what I did there. I also have used it. You'll see this in a
lot of my designs. Now, I've adopted this method to show dimension in my flowers. I think I've expanded
them. Yeah, I have. But they originally were
just single strokes with a change in the profile that
helps and makes it super, super fast to do this shading or how I
started this one actually was to create a
sketch and I'll show you a rough idea of what I would have
done for the sketch. This one's different just so
that I can possibly end up with another pattern that I could sell or list
on spoon flower. Right. I've changed a
little bit like this is not quite as slim as
on the other one. I've changed some of the
profile shapes of the lines. I have different,
completely different flowers and a completely
different central motif here. What I think is
really cool about this one is that this is
the half drop repeat. Instead, this repeating
side by side, you can see that it drops down. So this goes down
by half over here. It's a little tricky at times, there were some
really tricky things for me to wrap my head around
when I was doing this, you know, because the
interlocking branches and things dropped, right. So I had to figure out some
stuff as I went along. And I'm hoping that as I work
my way through this one, I can actually show you
some of those things. Now, before I do a lot
of work on this one, I want to show you
this is what it would look like if it
was the full drop. The pattern would repeat right beside itself instead
of dropping down. That is super fun
and valuable way of creating patterns because I just check these
out, for example, like how fun is this super
simple repeat straight across, nothing interlocking, lots of overlapping on stroke
thicknesses and so on. So you can see the strokes, they overlap with each other
to get different effects. But this one is super fun. This is another one
of the templates that I've been working on. Let's see, what else
have I got here? It's another type of
design that, again, uses just stroke profile changes to create all of the motifs. It's just super fun and I think you're going to
really enjoy this. I guess this would be another, an example of the grid
repeat or the full drop. It drops by the full square, This is the square here, and then this is the square
here, it drops down. This is considered a full drop. Or in Illustrator terms, it's considered a grid repeat. Just think about
all those things. I know I'm throwing
a lot at you here, but I think that you're going to be really
surprised at how quickly you can put a design like this together.
Just think about it. At this point, all I had to really work on to
draw was this here. Now with the pixel persona, you can't have anything that repeats over
the outside of that, which if you were using the vector persona
which I'm on now, you'll see that I can draw a
line beyond the edge, right? So I could throw that
into the symbol. And it's continuous, it'll
go past the edge there. That's just something
to keep in mind. You can do your sketch also in procreate or anywhere else that you're more
comfortable doing, Just pencil sketching
or drawing. I'm going to get
rid of that line. I think we can just
literally start, I'm going to keep my
pixel sketch here. I think I would
reduce the opacity of a little bit so that
it's not too glaring. Oh yeah. I wanted to also point out here in my layers that You remember, with
this template, this is a full
square that repeats. And that's what drops down. And then within
that are the syle, like the sides of
the reflection. Okay, that's going to
be important when we do this particular motif here in the middle because
it isn't reflecting. It isn't symmetrical. It's a little bit off center, or I guess you'd say
just individually repeating in the
half drop that is, and will be in the
big main symbol. So you've got the big main
symbol, which is the square. And then you've got
the individual symbols which are the reflections
on both sides. I think I'm going to start
with that because I want to do long continuous line
to start out with. I'm going to work with these are my favorite
colors that I use often, I'm using this palette, you may want to use a
smaller number of colors. In fact, maybe what we should do is go to a limited palette. That's a pretty big one. Maybe I'll work with
this color scheme. I may add and subtract some
of the things from it, but I've got greens, which is what I want
for the vining, and I can use yellows
again for the flowers. Remember that we can change this background to be
whatever color we want. I would just maybe choose a neutral color to
start out with. I'm going to go back to symbol, which is on this side and I'm going to start drawing
my first set of lines. Make sure that you're
on the pencil tool. You can choose to
have a stabilizer. Let's see, I've got
the rope stabilizer, you can choose to do
the window stabilizer. I'll give maybe the window
stabilizer a shot here. And I'm going to draw
my first line here. I'm pulling along the
line of my sketch. It's pretty shallow. A curve at the moment
has no color on it, so I'm going to give it a stroke in the green color that
I want to use for that. Now it's already
got a stroke file, likely the very last
stroke that I drew. That's what it's preset at. We can reset by remember, holding down or
clicking on one of the nodes and doing a
reset for the pressure. Now in this case, I
designed this to have a blunt square end just so that I could use
different profiles. As I'm working my
way through here, I'm going to put the
square end on it. It looks really weird right now, but we're going to also make adjustments to the
thickness of the line. If you ever have this kind
of a thing happening, it's usually because you've
got too many points. You want to go in here
and delete a point or two so that you are
creating that blunt end. If that's what you
choose to use. Hey, there's my first line. You can see it's
repeating properly. I could add intermediate
adjustments. I could do something like this. I could have it so that it's literally just on the very ends. And I could also
make it so that it doesn't have a pure
point at this end. I could bring it
up a little bit. Again here I think I've got this extra point
that I want to eliminate because
it's going to just make my line smoother
all the way along. Maybe I would actually, I don't think I need
to add a point, but I could if I wanted to, I could just click on the
line and add a point, maybe in a more
appropriate spot. Okay, there's my first
line and I think I'm going to use that same
shape for this one here. I'm basically just
starting there and pulling up and you can see that it's just keeping that same profile. And now you can see that it's repeated all the way along here. Now one of the things
that is happening is that the reflection
isn't working here. That means that I need to be sure that I've got
those two lines. Not just in this square, but also in the reflections. That would be this
rectangle here. I have to grab
those two lines and then bring them down
into this symbol, and now you see
that it's repeated. This is a really good way to ask yourself whether or not that's the way you want
your repeat to work. Do I want this line showing
all the way across? For example, even
though it is actually this line and has
moved down over here, just because of the
placement of it, it creates a line across here. If I didn't want that, then I could go in and
make adjustments. For example, pull this
line up a little bit. I guess it doesn't
matter because whatever I'm doing here, I guess I could go that
high or something. And then now I've got
a little bit more of an interesting thing happening with the way those lines join. I know that's a lot
already that I've just thrown at you in. The next thing I would
do is these swirls here. Now I'll just keep that profile, but I think I may end up
doing a rounded end on that. So I would go back into
the stroke palette here. I think I'm going
to make it thicker. I'm going to make
a round end on it. Take a look at that.
Isn't that just magical? So we've created a bulbous
kind of an end on it, that's really common
that you see in patterns, especially
vintage patterns. I think overall it's
a little thick, so I'm going to bring it
down a little bit and remember that you can still go in and change this profile. You could have it so that the
line doesn't get that bulb. Delete this extra node. If ever you have an extra node, you can actually just
delete the node. You don't have to
start from scratch. I think I would do
something like this because I really
like the contrast of the thin going
to really thick. I think that's
super interesting. Let's do the other one here. Don't you just love that it's so easy and then we can
just make adjustments? I want you to just
think about how hard this would be to adjust. It was a shape that
you had drawn. I'll show you what I mean. Look how quick and easy this is to make the
adjustments right now. Okay, Now imagine if you
had drawn this shape, and I'll do that by expanding. Imagine you have
drawn this shape. You have all of these points. And you realize, oh, I
don't really like it. I'm going to have to change this side and look
what I'd have to do out each of these points
and move it separately. And even if I wanted
to, I could simplify. Yes. But already I've spent so much more time than
if it was just a stroke. If it was just a stroke, it would be one little
thing I'd have to move. That's what I want
you to think about. And this is how you can see just how valuable this
new technique is. I've never seen
this anywhere else, and I'm not bragging
or anything, but I remember doing this
in Adobe Illustrator. And I thought of
it just one day. I was looking at one
of my older classes and I remembered that, oh yeah, I used to do a lot of stuff with profile changes. I wonder if I can do that in affinity designer and sure
enough I could do it. I'm super excited about it as you can tell by the
sound of my voice. Let's move on to the next lesson where I'm going to show you a few of the things to do with
like leaves and the petals, All right. See you there.
4. Lesson 3 Creating Leaves, Stems and Petals: Hi guys, welcome
to lesson three. Now this is really
the goods here. In this lesson, I'm going to
be showing you how to use this stroke profile changes to create leaves and
petals for my flowers. I'm going to be following
the sketch that I created. You'll be blown away at
how quickly I can do this. Let's get into it. All right? I think the next thing
I want to work on is the flowing leafy
branch that I have here. I guess it's the stock
for this flower. I think I might switch colors. But first, let's just
draw the initial line. I'm going to start way
off the side here. And in this case, I am going
to reset the pressure. And I'm going to just give it a little bit of a
variation in the middle. I may end up doing it
wider at the bottom, but let's just do this for now. I'll go teeny bit
thinner just so it contrasts from
that line there. I'm going to get rid of
that last point there. Bring it up so that the
flour can be in here. Now, let's do the leaves. I'm going to grab
the pencil tool, pull my first leaf, obviously not a good leaf shape there. I want to bring both of these nodes right
to the very bottom. That's going to give us the
thickness in the middle. Now adjusting in this way
is what's going to give us, I guess the size, the thickness of the
main part of the line. You may want to or
find that you get a little bit of weirdness
if you have extra points. Sometimes I just
go through and I take a point out
if it's necessary. But now check out
how fast this is. Oh, yeah. I was going to do this in slightly different
color. Hang on. I'm going to select those two, and with the stroke, I'm going to do
it in this color. Now that stroke is
recorded there, all I need to do is this. Oh my gosh, imagine how exciting this is when you
really think about it. Something like that.
That was a smaller leaf. I could go in and just simply make it a tiny bit
smaller in this way. But have you ever drawn
leaves faster than this? Wow, look how quickly my
pattern is filling out here. I just love this technique. Now it looks like I had thrown a couple of leaves
on this one here. I could use the same profile, and that was in the
original color. So we can do this
while I'm at it. I think I'm going to
throw a couple in here anywhere that I
kind of think that it could use a little bit of additional detail to kind
of fill in a little bit. Wow, so quick. I just love this. Now if you wanted to, you could save this profile
and color in everything. If you went into the effects and then you went
into the styles, I think I was pointing at
the wrong one before now. I'm not sure why the preview looks so awful because they
all kind of look the same. These are all different
profiles that I've saved. If I were to go through
here, you could see some. I must have been using this for another project, I
don't even remember. But what you could do is, okay, I'm going to do, get
back to that leaf. I could save this profile now. So here I could go to add
style from selection. It's going to do a weird
looking thing here, but I know that that's a leaf. I'm going to find out more and maybe I'm doing something
wrong here with this. But I know now that I've
got that leaf saved. So if later on I decide, oh, yeah, I could use
this here or there, I get in this middle section, then I can just go to this
to get back to my profile. Whether or not that
saves you time, I'm not sure, but I just wanted to let you
know about that. Okay, so let's go back
to the layers here and let's think about the flower that we're
going to put here. Okay? So I'm thinking for this one, it would be nice to use
one of those yellows. And I'm going to
go with a fairly soft one to start out with. Whoops, I had that selected. So let's just draw a line
here, which we know is wrong. We're going to color it and we can go again into
the stroke profile. And in this case,
what we want to do is get rid of one of
the points, right? Because we want
it to be thick on the end that I would probably get a few of
these points out of there. Maybe just one in the
middle would be enough. I'll get rid of that one
at the end, pretty much. I've got only just there's
a little extra one there. I've got three points
and the middle. And the tip here. We could enlarge it to be
the size that we want. We could make adjustments
to the curve. The cool thing about
this is now I can draw petals at different angles, but the profile is there, right? Think about that. How
much time does that save? Just think about drawing these and all of the little
nuances of having points. One I expanded, you can see how many
points that would be. Now, this one, I must have
had a hook on the end of it. But now if you think about it, if I had to make
changes to this, how much more work it is, then actually just
moving the points, let's get rid of that one and let's just go bigger with this. Just so easy in
comparison, right? And again, remember you
can always go in and individually change the
profile or the thickness, so I think that's fantastic. Now, you may still want
to do the expansion and later on I'm going to
show you why you'd want this expansion and how
that could work for you. What I would do here is
just select them all. Probably the fastest
way would be to go into, that's the one I did. Let's just select the ones that aren't expanded.
I would expand. I've got all of the flour there. I'll select that first one and you can see how they overlap
and everything there. If you go onto the
main move tool and you hit Add in the
bullion operations, now you've got a single shape and sometimes that's good
for doing things like correcting or you may want to make another
slight adjustment. The most important
thing though is that now that this is
one single curve, makes it a lot easier
to add texture to. I'll show you that
in later lessons for the finishing
of this flower, I would like you could
really quickly add a shape. You could do it with
the ellipse tool and you can see it's
applying right now, that stroke profile
and everything. I'm going to take
the stroke right off so that it's just a solid shape. And then I would colorize it the way that I want
to now with circles, sometimes I find them just
a little bit too perfect. So I go in and
convert to curves, and then that way I can make slight adjustments to the shape so it doesn't look too perfect. But there we have our
completed flower. I spoke about this in another class with
my template club. I explain what to do if you have a situation
like this where you've got your complete image drawn
but it's not showing up. It's just a glitch
with the program. And what I do in a case like
that is I select them both. Let's just group them for now. I select and I cut. I'm going to get rid
of this one here. This is just a glitch. I don't know what the
problem is with it, but I had selected and
copied that original one. So I can do three
finger swipe it, pastes it exactly where
I originally had it. And now you can see it's
working with my reflection. Now, there are issues sometimes with this kind of a thing
where you've got the overlap. Not exactly where you want it, make sure you get it to the top. And what you may need to do is actually move that one
to the opposite side, or make other adjustments for it to work so that
it's on top of the leaves. That's just a thing that I've noticed with this
type of repeat. It happens every
once in a while. I just do a copy and
paste and it works. I don't know how I figured
that out in the first place. I'm really loving this already. It's been so fast. I really, in 10 minutes, we have produced at least
50% of our pattern. I think I might want
to add a leaf here. This would be a really good
time for me to use my style. And you can see it created a leaf exactly as
I saved it here. In this case, of course,
I have to change the colors and maybe just
make it tiny bit thicker. But there's the
leaf that I needed to fill that pattern
out a little bit more. Now I see that that's
also not repeating. Let's just check out yes, it's not in my rectangle,
my repeating rectangle. So I'm going to move it in here. I'm also going to take all of
these parts and group them. And that just makes
it easier to, it just keeps my layers panel a little bit
more organized. I think I would
do the same thing with all of these things. Makes up that line. I think this two and I'm
going to group those, and then this is grouped. The flower, this is my sketch. Still this curve, Who knows, I accidentally drew it, I'm
going to get rid of it. This is also a
really good way to check for things like that. That's probably what
this one is too. A little mistake that I made. My style has hit the artwork, and I think I just had a
tiny little line there. But now this is a
lot more organized. Now, this has to go
in with this one. We've basically simplified it to the three main components. The flower, one, leafy stem, and then the other,
a border stem thing. Um, I just noticed too that this leaf here that I drew last, this one I had attached
to the repeat of that, it really should be down here
and it really should be in this direction to be
part of that main stem. Okay? All right, so we've done such a huge amount already. I want to show you
now how I would deal with this particular
kind of situation. The important thing here
is you can see it is not reflecting,
it's asymmetrical. So, in the next
lesson, we're going to deal with that asymmetry. Okay, see you there.
5. Lesson 4 The Assymetrical Central Elements: When I was doing my sketch, I talked to you a
little bit about that asymmetrical element
that's in the middle. This isn't part of the
actionable reflection. This is separate, and I
want to show you how you would achieve that.
Let's get to it. All right, now we
are ready to work on our asymmetrical
element in the middle. This is where you are
going to be ignoring those two symbols that we created that does
the reflection. And we're going to be working in this main rectangle
which is or square, which is what is repeating all the way around
on the outside. I know it sounds confusing, but let's just get started and I think it's
going to make sense to you. I am just selecting
the pixel layer, just simply because
it's within the symbol. And I'm thinking that
when I start drawing, it should be within the
symbol that I want. I'm not quite sure why
I have this layer. This must have been
where my logo was, so I'm just going
to get rid of it. And we'll go back
to this and let's just start with
that central stem. You can see that
it's not reflecting and it's positioned where we need it to be, which
is in the center. Okay, I'm going to make adjustments to it
because I don't want it to be sharp at the end. I'm going to delete that node. I just want to pull this node
up and pull this one down. I've got just a very slight
change in profile here, which I think works
well for this. It's a larger flower for a single stem. I
think it works great. I'm going to use that to do
these two or three stems. Maybe I'll go a little
bit smaller for these other stems that
are on the outside. I can sure see how
shaky I was when I was doing that pixel sketch. I was just doing it real fast, so I didn't put any
stabilization or anything on it, but okay, there we go. We've got that drawn. It's repeating perfectly. Should we change the color of this one? What
have I got here? Why don't we, you know what, I'm going to do this color, but I want to make it darker. Because I'm making it darker, I want to also save that into this palette so I have it now. I want to do the
leaves. I showed you a pointed leaf before, and that's kind of
what I've drawn here. But I'm the designer, right? I can change my mind. I think I just want to show you a different kind of a profile
you can do for leaves. I mean, I'm not sure that this is going to be what
I end up with, but let's try
something like this. I mean, that looks
a lot like a petal. I don't know, maybe I should
do something like this. The leaf still comes to a point, but it's a tiny
bit more round it. Let me just bring this
up from the very corner, and that gives me just a
slightly different leaf. I know it's not
much of a change, but I just want you to be aware of all the
different things you can do. I've drawn leaves
like this before too, where I'm going
to take that node out where I've got basically just a really rounded
leaf like this. And that can be really
cute, especially if you do them really small. You can get one of those
bernie kind of a look to it. You could decide to
do that for sure. I'm just wanted to show you all the
different possibilities. And remember we also had
saved this in our effects. And that could make that leaf, of course, not in the
right color at the moment. But we saved it. So
it's going to make it easy for us to select it, and I would go a
little bit darker. I'm probably adding a few
leaves here as I go along. Okay. Did you notice that it's not taking that shape and making it a shape
for the next one? Maybe in this case, using the effects,
the saved Skyles, Not necessarily an advantage. So I think I'll go back
here and just do my leaf. I mean, it's super simple. Anyways, the other
thing you can do, I guess I should show you this, because one of the
things you can do here is to do
something like that, where you've got that
extra little bit so that you get almost like a
little stem with your leaf. I think I like that. That's
what I'm going to do. Maybe a little bit thicker. I'm going to bring this
up and bring this up. But you see the different
effect that that gives to get rid of these two so that I
can use that profile. I just love the
fact that you can pull so differently
to get your shapes. You can really curve them, can do a curve in the
opposite direction. Are you as excited
about this as I am? Anything that saves me
time is such a bonus. Imagine you're sitting on the couch in the
evening watching TV, and you can produce five
patterns like this. It would be super awesome. Now I'm thinking how fun that little shape would be for some little flowers.
So let's try this. I'm going to make that a different color and maybe I'll add more than the five petals. And look how I can make it shorter to show the
foreshortening, like the perspective of
the flower if I want to. With this one, I think I would select those last
few that I created. In this case make the stroke
a little bit smaller. You can definitely
make adjustments so much faster if this
was an actual shape. Now I'm wondering if
I should actually stick in the reflection
because I think that would, let me just group that
one. Group that one. Because I think
in this case they could be repeated like that. Right? Let's take these two, group them together again. I'm going to take them out of this symbol to make this
a little bit faster. I'll also group all
of this stuff so that it's just easier for me to
see these symbols here. And I want to add it to the right side because
that's where I drew it. So I would go in and drag it in, and he now we have the
reflected flowers there. They may end up like that. I have to adjust to have
to be smaller or whatever. But the other thing I could
do is grab one of these, let's get the smaller one
here, and duplicate it. And then I can use
that one here. Maybe what I would do here is slip it, rotated
a little bit, and make it smaller
so it doesn't look identical to that one there. And I think that the thickness of the lines might
be a bit much. Let's just colect them all. Go back into the strokes
and just make it smaller. Should have done the center of these flowers before
reflecting them, But I can do that off camera. And of course, I'll
show you all of that once I am complete. I'm thinking, here we
need a nice flower. I'm thinking maybe we could
go into this peach tone. Let's make our first. I'm in the reflection.
Do you see that? I go to draw, and
it's reflecting. I've got to go back
to my main symbol. And here I will draw
the first petal. Go in and reset all my pressure. Bring one to a point. Extend the length or the
thickness of the petal, and let's make it this color. Oh yeah, that's pretty, I
think that's going to work. Let's get rid of this. Make a couple of
little adjustments. Could maybe go a little
tiny bit thicker. I got to do that, palm
rejection or whatever. Or wear my special glove. I actually don't
wear that glove. Do you guys wear that glove? But here we go. We've
got that one drawn. I think I could go thicker
with all of those for sure. So let's just grab all of them and go into the rope palette. Make it bigger, maybe overall. Now I would make the flower
a little bit smaller. And remember that you can
experiment with the profile, the ends of each of the petals. Now, I don't think it's going to work for this particular one. I'd have to go through
and make sure that I don't have any little
hooks or extra points. I'll go back to
this rounded petal here and there is a
little problem here. And it's just because
that's curved, so you sometimes have to make
these kind of adjustments. I think I would just take
out this point completely. You can still
adjust it that way. This one has way
too many points. Let's just take those out. Whenever you see some
weirdness happening like that, it's because you haven't got this handle pulling in the right direction or it's because you have an extra point. I just take them out. Remember that we
are also going to be expanding these so that
we can put texture on them. I'll show you that
in the next lesson. Meantime, I'm going to draw
those other two flowers. I'm completely ready
to go for adding textures and overall making
our pattern more interesting.
6. Lesson 5 Layering with Texture for Interest: Welcome to lesson five. I want to show you a whole
bunch of things that I did, especially use of layering to add interest. Let's get started. Well folks, it looks like we're pretty much on the home stretch. I changed this flower slightly. I added an extra petal, and then I've duplicated
it to put it down here. But I wanted to show
you the whole process. Because what I did here, let's just make sure that I'm
in the right one to this. I selected with all of
the curves for this flow. Then I went to expand stroke to the main selection
tool here so that I can do this bullion operation. I've add there, there's a little bit of junk I
have to get rid of here. I probably could have fixed before creating the
outlines, but it's all good. I wanted to just show you this because there are many occasions where I end up making
alterations to the petal shapes. I'm absolutely sure that I've got everything
positioned the way I want before I do this, an expansion, and then I can
go in and just clean it up. But also I can use
the opportunity to perhaps change the shape
of my petals a little bit. Still faster than just
hand drawing this. But these are the kind
things that I can do to just perfect the pattern and
overall make it look better. You can do things
like adding points and changing the overall
look of your petals. Something like this
makes a nice petal. I just go through and add the point on each of the petals. I've got to add two there. Then I just simply pull in
the two outside points. I need an extra one there that makes it look
even more realistic. That's one of the
things you can do. Now, you can see here that in my repeat,
it's not working. Something happened.
It's that screen glitch that it's just something
that's part of the program. I don't know why I'm
going to get rid of this little extra petal, but now I'm going to
just select this one, cut it, and paste it, and it fixes it. Don't ask me about that.
That's just some problem that the software developers hopefully will address
at some point. Maybe they don't
even know. This is one of the reasons why
you would go on a forum would be to report
something like this so that the
software can be fixed. But anyways, let's move on. What I want to do is two or
three different things here. I want to work with this
curve and add some texture. So I've got all those
vector textures that I've saved and I'll go into my collection
here I might, you can go through
and create your own. I will be teaching
a class on that. But let's just say we want to add this a poca dot texture, so I'm going to
hit insert guess. Not really dots, it's more
of like little lines. I'm resizing it to be
roughly what I need. You can see that it's on
the inside of the flower, but the outside as well. Let's select it and
colorize it so I'm going to make it the same color and maybe just like
slightly darken it. The other thing I want to
do is drag onto that curve, make sure I have the
right one selected here. I'm going to drag it
onto this curve here. Make sure you're not
just on the group, but you go into
the actual curve. This can in fact be taken out that would empty that
group. We can delete it. You'd have this flower
grab the curve and just simply highlight the word
curve and drop it in. And you can see that it's now clipped to that shape.
That's really cute. I like that you can
make adjustments to. It can lighten whatever
you want to do. You could draw a nice
center for the flower, or you could use your
ellipse to create that. You can adjust these
like you can't grab individual points here unless you have converted
it to a curve. Now you can either add points or just move the
points that are there. I think it would
darken that center. You could add texture
to that one as well. That's one of the things you
can do with clipping mask. Essentially what you've
done here is you've used the flower as the way to create the mask,
for the texture. Another thing that
I've done quite often is to go in with leaves. Let's see which leaves
we are going to affect. First of all, I want to change
this stem profile of it. I want it to come to more of
a point on this end of it. So that isn't a big bump
there. Move it a bit. Let's just take these two points out, make a slight adjustment. I can also adjust this
leaf that it blends in better there then if I'm
100% happy with this one, I would select all
of the parts of it. Highlight the first one and then two finger tap
on the last one. And you can see everything
here is selected. Now I can expand stroke. So you can see that these
are all separate shapes now. And then I could do the boolean operation
to add those together. Now they are one single shape you can go through
and double check. I see a little booboo here, That's just I think a bunch
of extra points there. I probably had like
a little hook. And I could take this point here and just bring it to a point
like the other leaves. Now with this one,
I could also add a texture which I have been
doing a lot of, believe me. Just think about the
overall design of it. Now, this, for some
reason, was turned off. When I made that
original vector pattern. I had it turned off for
some mysterious reason. I usually do these in layers. Like I create a ton of patterns, it'll be 20 layers. Then I'll make them into the vector patterns that's
subject for another class. Obviously, this is the leaves, this is the pattern, We're going to
drag it right onto that curve. Now it's clipped. I can select that same color. And again, just either
make it lighter or darker. Imagine what you could do here. You could do so many
textures to me, this one maybe seems a bit big. I would duplicate it and I'm going to put the
snapping on because it'll make it easier for me
to snap that to get together. And again, I could select both and even make further
adjustments to it. Obviously, that's fun, definitely makes that
really stand out. Now you're noticing, as I'm getting more complicated here, that I'm getting these
little screen glitchy things happening where it's not
showing me my entire pattern. Again, remember that this is the only one that
you really need. But if you want to still be able to see your whole pattern, I would take and select it. That particular motif,
which is this one here, actually, I'm going to
drag it out of the curve, out of the group, and just
get rid of this group. So this is now the
motif and oh, you see, I took it out of the
group and now it's showing the other technique
was the one I showed you before where I would just three finger swipe and cut and then three fingers swipe and
paste and then it shows up. So that's another little
thing to remember, one of those little quirky
things about this program. I also have been doing a lot of adding patterns into the
background of my repeat. I have created these
backgrounds imperfect repeats. Some of them are half drops, some of them are full drops. I'm just going to
guess, or I'm going to take one of these that it
doesn't matter too much. If the pattern shifts down, I'm going to insert it
and I'm centering it. Now you can see that it
is on top of everything. If I wanted to be able
to see the whole repeat, then of course I'm going to
drop it into the main symbol. Now, it has missed the group,
but now it's in the group. You can barely see it here.
Let me just darken it, but now you can see it
in the background here. Actually, at this point, I'm
going to get rid of all of my sketches so that we can get a better look at how that
background is working out. Now I've just got kind of a pale Beijing color
in the background. You saw that layer when
we were first starting out and that's
this great big one down at the very bottom. You can recolor it, darken it, or lighten it, do whatever it is that
you need to do. And one of the other
things that I've done before is to get total changes within my
repeats by creating a section. And this is the
asymmetrical portion, which is this part here. I'm going to add a layer here. And this is where I'm
going to use the pen tool. Actually, I would draw a
shape I can adjust later. I'm doing the super quick, You can do this with
the pencil tool. I just prefer the pen tool when I'm just doing a
few points like that, I'm going to make that
into a perfect corner. I've got the snapping still on, so it's allowing me to snap
right to the edges perfectly. You can see the changes to red When I've got it
perfectly aligned, I can add points
wherever necessary. I'm going to take the
snapping off for a second, then I can make my adjustments. And you can see it's all hidden behind this main
set of lines here. This one here, I could now
fill with an alternate color. I could, let's say, choose to have a pale, pale green behind that section. And you can see how dramatically that changes the look
of the pattern, right? These are just all kinds of little finishing things that you can do with your pattern. There's still a lot left
for me to finish on here, but it would just be a repeat of what I have
already showing you. One of the things
that I didn't do throughout this whole class was to use any of my floral assets. These are flowers that
I've created and actually colorized before putting
them into my assets here. But now you could really easily go into things that you've
created, insert them, and decide whether or not they need to be part
of the reflected repeat, or whether you want
them to be part of this asymmetrical layer. I would just move it up a
little bit if it's part of this layer and resize them according to
what you need here, duplicate, you might
want different sizes. The asymmetrical layer is nice because you can
do things like this, where you've got a single flower on one side and a
double on the other, or just some, a variation. I would also think
about adding one of those vector textures to just this area here.
What can I add? Maybe this is a basket
weave, it's pretty small. I'm going to put my snapping on. Snap it right across here. Maybe I'll go pretty much
exactly halfway, which is that. Duplicate it so that I
can join those two up, line up with the snapping. And now I would
select those two. First of all, make
sure that yeah, it's there where it
needs to be going to drag it onto the word
curve of that shape. I want to do almost
the same color, let's just use the
eye dropper to get the blue color and make
it just a bit darker. And now we've got a great little pattern
that we've created. You can see here
that right now that background pattern is on top of my left and
right symbols. This has happened to me before. I find that the best
way to deal with this, now that we know we've got
our pattern perfected, we're really happy
with everything here. I usually just close that folder and drag
this out because I know that this is the part of the document that
I will be exporting. It doesn't matter that
it's not repeating. I did see it in full repeat. I know it's all good. What I'm going to do
is take some time off camera to
finish this all up, and I will show it to you
in that concluding lesson.
7. Lesson 6 Adjusting Pattern Components: Hi guys, Welcome to lesson six. In lesson six here,
I want to show you a whole bunch of
things that I did, especially use of
layering to add interest. Let's get started. Well, this is what happens when I'm given a little bit of time
off camera to work on a project and to work
on perfecting something. I decided after
some deliberation, I did a bunch of work on it
and I ended up deciding that I didn't really like that
color scheme very much. I kept the leaves and all of the flowers in this
column here the same. But mainly what I changed is
the, that central element. I changed the color to blue. And I also neutralize
this center section. I feel like this is now really cohesive and this
is really cohesive. I did a bunch of other
little things that I want to point out to remember. We talked about having a
double layer on some lines. I took the time to do that. Literally was a copy of
whatever the line was. This line here was actually a direct copy
of the one below. I made it quite a bit thinner, quite a bit lighter, and just moved the tips in a little bit. Then I went to some of
these leaves here and added these would be if I were to take out
that element there, you see how it's just a
big section of color. And then I dropped it into the curve like a clipping mask. That's the way that I
gave it the two tone a look I went through and did that on quite a few of those. On that particular,
let's call it a vine. I also went through and added darker sections in this flower just to show a little
bit more depth. We talked about this at the very beginning of class
and then I didn't do it. I just want to show
you what I did here. These are also simple strokes. I wouldn't say simple.
There's strokes and you can see
the grouping here, and I'll show you the
profile for the stroke. It's come to a real point
here at the bottom. You can change that if you
don't want an actual point. Let me put this closer. This is what creates that little cupped
section at the top. Essentially what happens
here when you line these up perfectly parallel to each other is that the thickness of the line
that you've chosen here, If you've put it at ten point, that bulb is ten points, it's got the rounded end. Then what this does
is it squares it off. Okay. Then I just
added a few circles. The bottom part of that I went through and did something similar
here for this flower. Now, one of the things I had not showed you and I wanted to show you was shading
within the flower. Let's just start
with this one here, since it's really plain
what I do for these. Sometimes this is just one of
the strategies that I use. Let me just go to fix
this one. There we go. One of the strategies
I use is by also using strokes to create
depth within here. I'll just go for it and
show you what I mean. I would create a stroke here. Right now, it's filling
with this color. I don't want it to
fill with that color. I want to have I want the
stroke to have color. I want it to be this is
the color. Wait, hang on. You got to get rid of this one. It close the shapes
so I don't want that. I'm going to turn
those two things off. Oops, I can't have anything
selected when I do that. Right now, those two are off. If I had this depressed, it would be darker
and that would be for closing a path
when I'm drawing it. And this would be for filling
it with whatever color. I'm going to turn
those two things off because what I want is
just a straight stroke. I'm going to draw my
first stroke here, and it's taking that profile that we were just playing with. I'm going to change
the stroke to be the same color and then just
darken it a little bit. And of course we're going
to change the profile. What I want to do here
is reset the profile. All the pressure nodes are off. I want to have it
come to a point from here and then be
really thick at the bottom. And I think I'm going
to lighten this for the first level of shading. Then what I do is I
go through like this, following the contour of the
petal that I'm working on. I know it looks weird right now, but we're going to do
two or three things here to really make this work. I'm pretty much just
following the stroke or the outside shape
of the petals. It's generally,
it's taking one on both sides and then
two in the middle. Okay. Now what I need
to do with those, it's going to be a whole
string of them here. So I'm going to select
that top 12 finger. Tap on the bottom one. I'm going to go
to expand stroke. And it is very crazy and lots
and lots of anchor points. As you can see, I'll switch
to my move tool and then I can go into the
bullion operations and just add all
of them together, which really simplifies
it as you can see. And then that I'm going to
drag right into the flour so that it is perfectly
cropped to the flour. Now, I usually go back now
and do a second level. I do those about
half of the length. I go about halfway down
that and then bring it down to the center and I go darker. I also go smaller. As I pull the stroke, you can see what's happening. It's just darkening
the lower part. It's creating depth in the
middle by being darker. As you can see, this
is quite quick to do. Imagine if you were trying
to draw all of these with the pen tool or even
with the pencil tool, but just like
drawing the contours around those spikes or whatever you want to call them, it would take you forever. Now I follow the same steps. Go back into my layers panel. Use two finger tap to
select all of them. Go to the node tool so
that I can expand stroke, then go to the move tool so
that I can add them together. Because I had
selected this layer when I started making the lines. That other layer that
I just created was then within my curve,
it's already clipped. The only thing I can see that I would now have an issue with is that this one is not quite
dark enough, in my opinion. I'm choosing the
center bit here, going to go to the color, and I'm going to
darken it considerably instead of being
light with spots. Now it's going to be dark with light spots. I'm good with that. Just compare that flower to
these other ones and you can see how much that really added to the interest
on that flower. Now I know we filled these
with a bit of a pattern, but you could still
go through and do some additional things
to each of the flowers. If I were to choose this
flower, for example, what I could do, you see this is the color that's
currently selected. What I could do is
things I could. I could just go around
the central circle. I'm going to take the
stroke off of that and I'm going to fill with
a darker blue here. Click on that and it's filled. And click on that and
get rid of it now that I could drag right into the flower and adjust it until it's just a
little bit darker. So that also gives that feeling of some
depth in the center. I think I'll play around
with that a little bit. I'm not sure that that's the
exact color that I want. I think probably the
best thing would be to actually sample this color, which is the identical color and then go a little bit darker. I'm going to drag that also
underneath the texture. Okay, so you can see that
that looks pretty good. You could also about it as
you're working on this, you might want to grab your node tool and just
add nodes here and there. And maybe pull it in a
little bit in some spots. Let's just do
something like that. They're pulling
down in the middle, but they're up in
between the petals. Now you've got that
darker little bit there. You could go around and do the same thing
with highlights. I'm going to go back
to somewhere in here and I'm going to draw. I could do this all
the way around. I could do this with
strokes as well. I'm going to do it first of all, this side with shapes. I could have had these
closing and filling, but since I haven't, I'll just select them again. So maybe that's the color. No, I will sample that blue. In this case. I'm going
to lighten again. I can add those together and I'm going to drag
it into the curve. And now you see what
we've done here is we've got highlights at the
end of the petals. I would make sure that I drag it underneath
the texture as well. The texture is still there, but now I've got a little
bit of contour on my flower. There are little things
here and there that I've changed this pattern that
I had in the background. It was filling the background and now I've got it
in a quarter of it. I duplicated it and then use the snapping to make sure that I lined it up
absolutely perfect. I probably could still
go in and do some work, obviously on the leaves, dividing them in half
or doing whatever. And same with this technique. I would go through and do it
on all the other flowers. Another possibility, something
that might look really good would be to go
into this back way, way down to the background. It's I think, yellow right
now. Let's just check. But if I darken it, you see how now it's quite distinctly yellow going down
for that particular stripe. That's something to consider. Then the one last
thing I want to show you is a little
problem that's happening here, that
central background. I tried to move these
lines around to see if I could get them to come to the foreground and they
can't, it didn't work. What I would do here is make sure that
we're in the correct. Now I've got all of my
add all these open, so I'm going to close that
so I don't get confused. But in the same way that
we did that background, we pulled that background
to be just on that square. But behind everything, we can do the same
thing with this. I'm going to just drag that
out and put it in here. We're not going
to see the repeat of it everywhere anymore. See, it's disappeared
from there. But now this is correct. And remember that all we actually need is
this right here. In order to have
something to export for spoon flour or
another POD shop. I think I've showed
you everything that I did that was
of any importance. After the fact, I am still going to probably
do some work on this. I'm going to be
still showing you mock ups in that
concluding lesson, but I just wanted to show
you those few things that I remembered once I was
working on it last evening. Okay, so I will meet you in that concluding lesson five now.
8. Lesson 7 Closing Thoughts and Mockups: Well guys, what do you think? Did this blow your mind? When I first did
this, I was just so surprised at the things
that I could achieve. Of course, I went crazy experimenting and that's one
of the best ways to learn. I would love to see what you create with these techniques. I actually entered
one of the spoon flower challenges with
one of these patterns, and I was really surprised
to end up in the top 20% I went on to create this
pattern that you saw today, and I want to show it
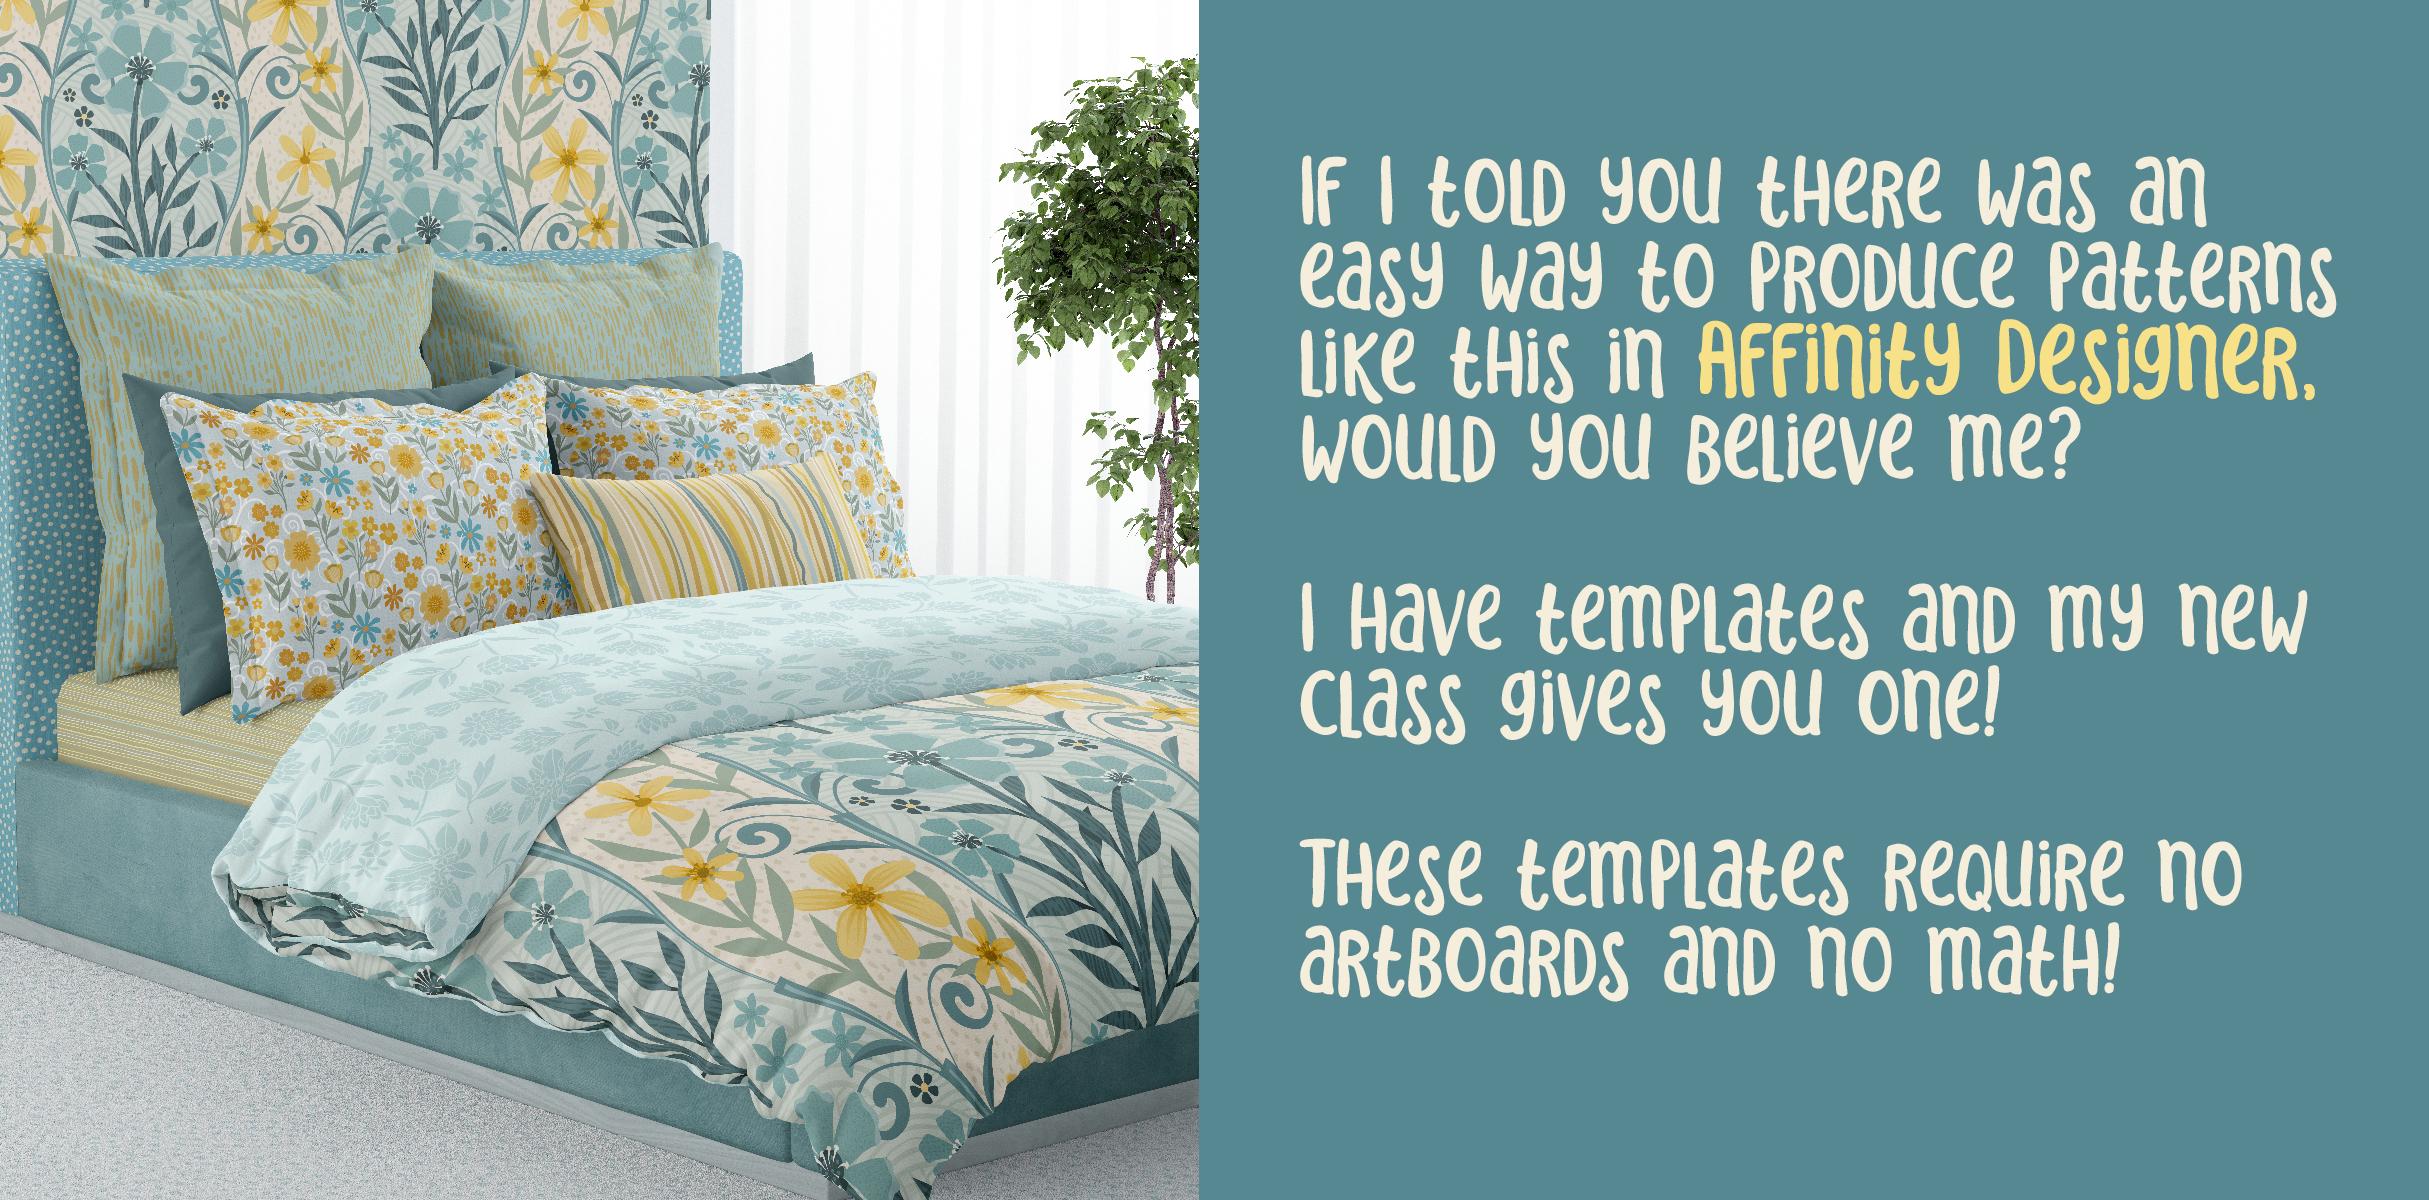
to you now on mock ups. I always find that
using mock ups really helps me to understand things like the scale
of the pattern, especially with wallpaper
and the duvet cover. I think that really
solidified for me the kind of scales
that I might want to upload to the
spoonflower site. I have so many plans
for this, a technique, and I've been using it already more than I could
have ever imagined. I especially love it
for creating leaves. My next experiment
will be creating leaves with ruffled edges
and more complex petals. Now remember, if
you didn't do so at the beginning of
class and you're watching this on Skillshare, make sure you hit
that follow link up there so that
you're informed. Anytime I post more classes, make sure you get on
over to my website at Lost Art and add your
name to my mailing list. Like I said, from there
I send my newsletter and I'll often post things
like free brush sets. As a matter of fact, if you get into my artists resources there, help yourself to all the
resources you can get. Thanks again for hanging
out with me today. So glad you're here for now.
 Delores Naskrent, Creative Explorer