Transcripts
1. Introduction: [MUSIC] Doing an initial sketch could be one of the most
daunting things for any artist when
starting a picture. In this class, I will show you a system that you
can use even as a complete beginner
to be able to get a highly accurate representation when working from photographs. This system works
by transferring key points over from a
reference photograph. This allows you to
build the picture up with a drawing becoming more
refined with each step. The advantage of this
method is as you develop as an artist
and gain experience, you start to rely on
it less and less with future drawings then being
tackled with more confidence. I am Jamie and I've been a professional
wildlife artist here in the UK for around 20 years. Many of my works
have been exhibited in galleries and exhibitions, as well as also being published as limited edition prints. I've taught my pencil
drawing techniques for a number of years, as well as regularly being
one of the artists in residence in Nature
in Art in Gloucester. I also have a number
of magazine articles that have been published
through the years and in 2020 decided to start a YouTube channel to
showcase my work. This class is aimed at
complete beginners as well as more experienced artists who struggle with getting an
accurate initial drawing. It is also ideal
for anybody looking to improve their
base drawing skills. The advantage of taking this
class is that it not only provide you with a system that
can be adapted over time, but it also shows
you the benefits of studying a reference
photograph thoroughly. If this is something
that you think you would be interested in, then why not sign up? I will see you in class. [MUSIC]
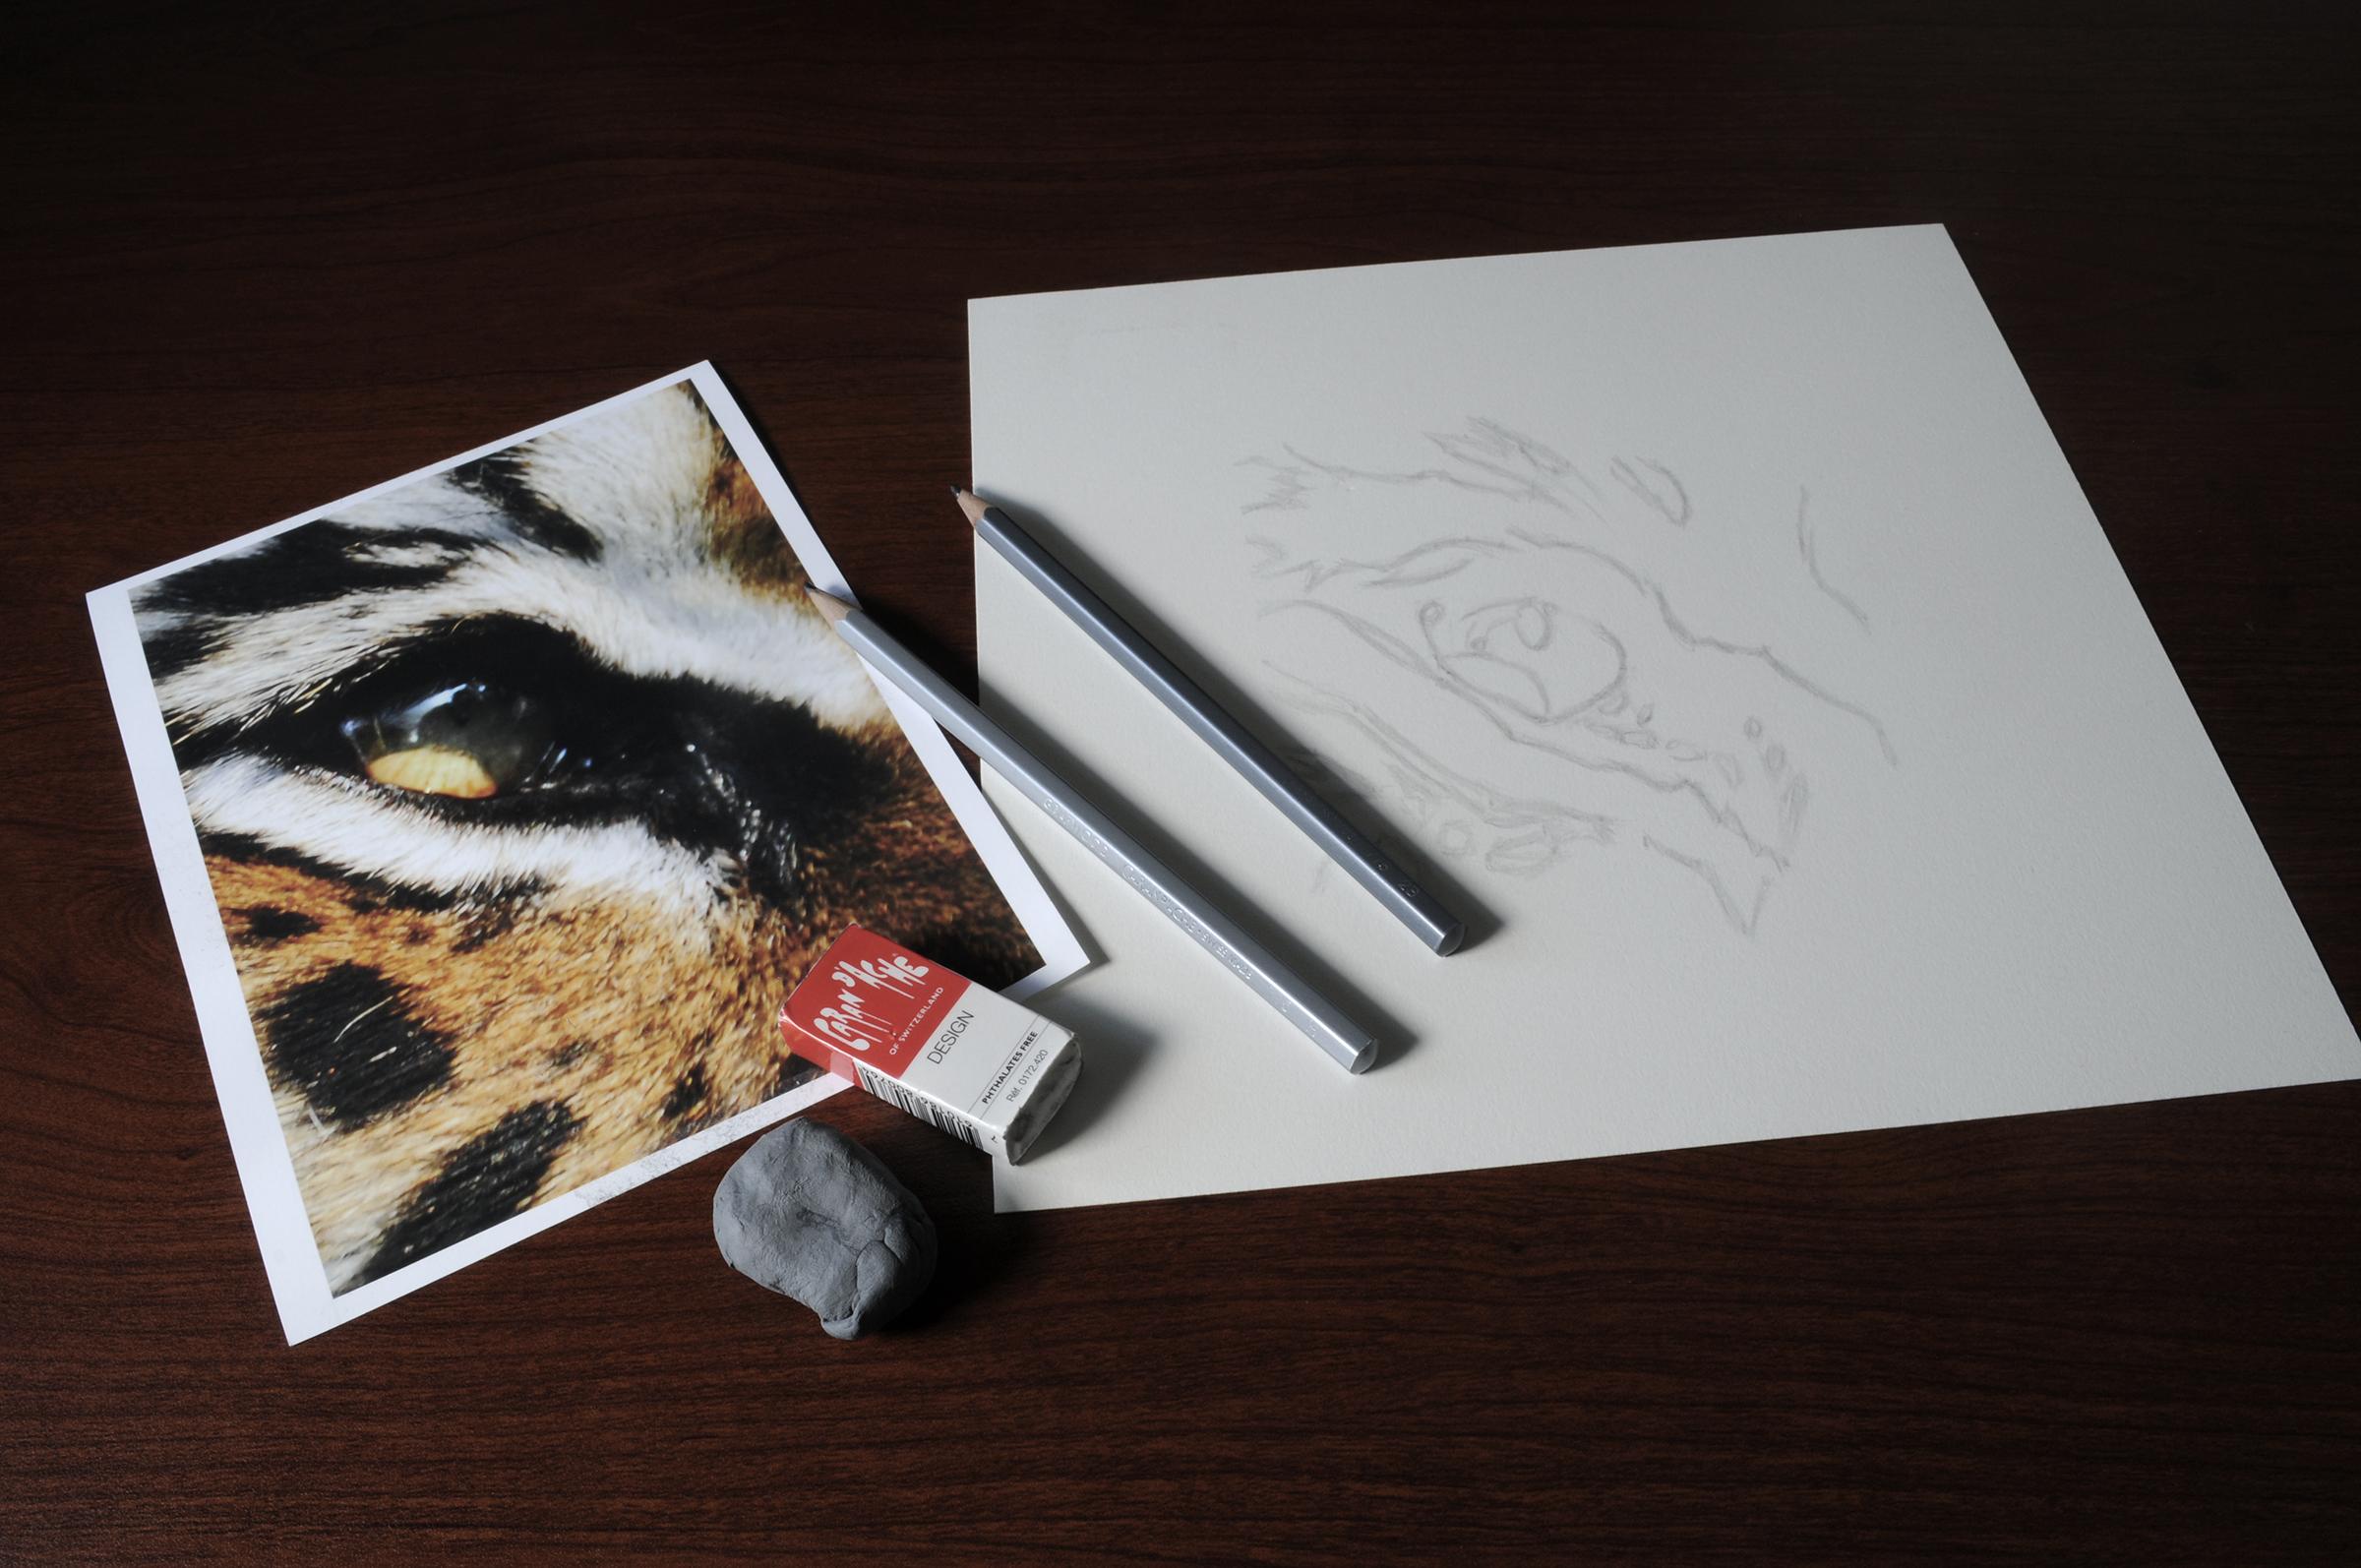
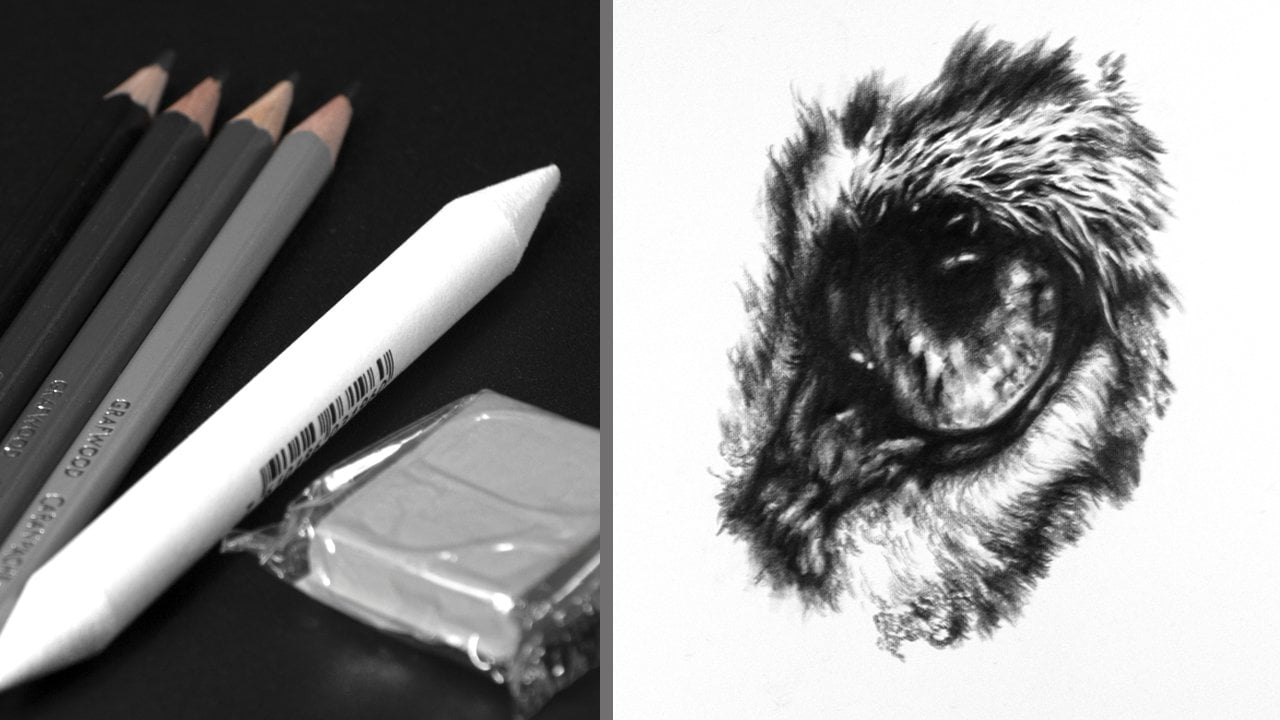
2. Project - Overview & Materials: [MUSIC] This class is purely
about how to create an accurate initial drawing when working from
photographic reference. What I'll do is I'll
show you a system that you can use to be
able to do that. It does require an initial
little bit of setup, but after that it's
relatively straightforward. All you need to do is just
take your time to do it. Now, I'll have
supplied a few bits of reference that you
can use for this. I'm going to be working on
a picture of a tiger's eye. Alternatively, you could just use your own image to work from. Remember as well,
you're not solely restricted to just doing
animals with this, you can use it for
pretty much anything. After you've chosen
the reference that you want to use the project for today's class is to create an accurate
representation of that. The only thing I would say, particularly if you're just
beginning with drawing, make sure to choose something relatively straightforward
and simple, you don't want to
go for anything too complicated at this stage. I've chosen this
project because it not only gives you a way to
create an accurate drawing, but you can also learn from that and as you become
more experienced, you will start to rely
on it less and less. The materials you're
going to require for this are two rulers, and these are key for
the initial setup. You're also going to
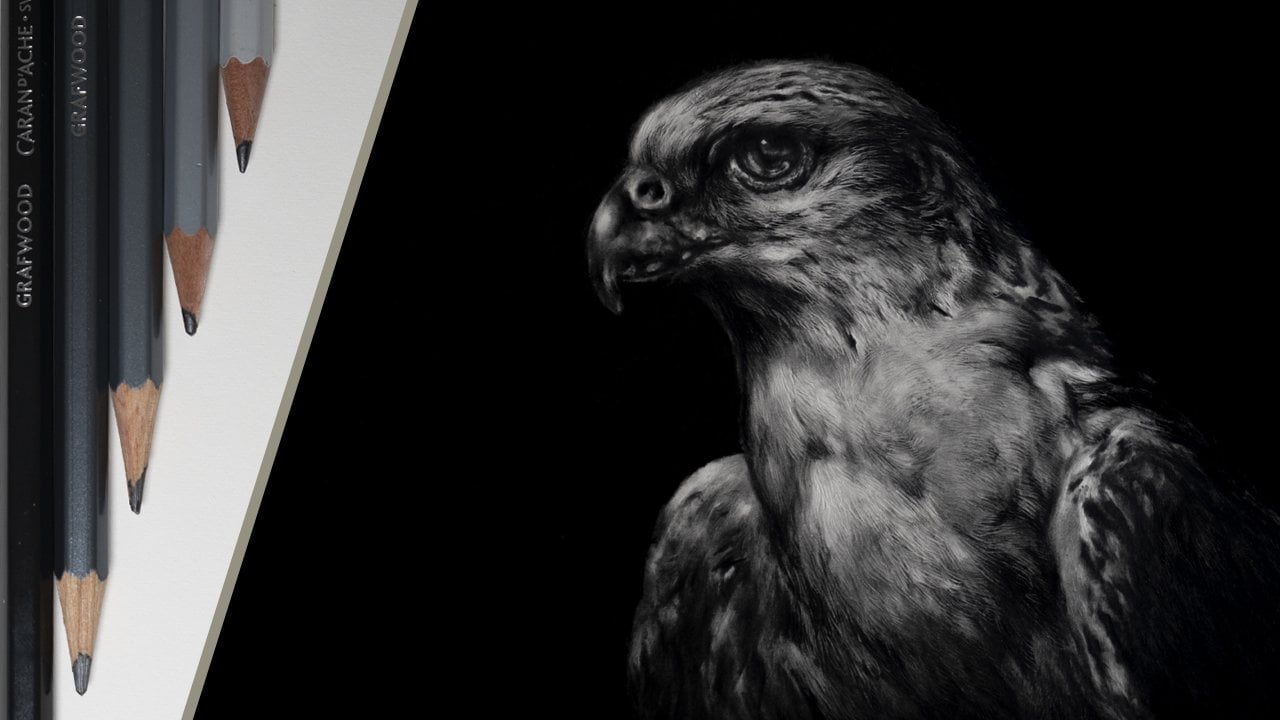
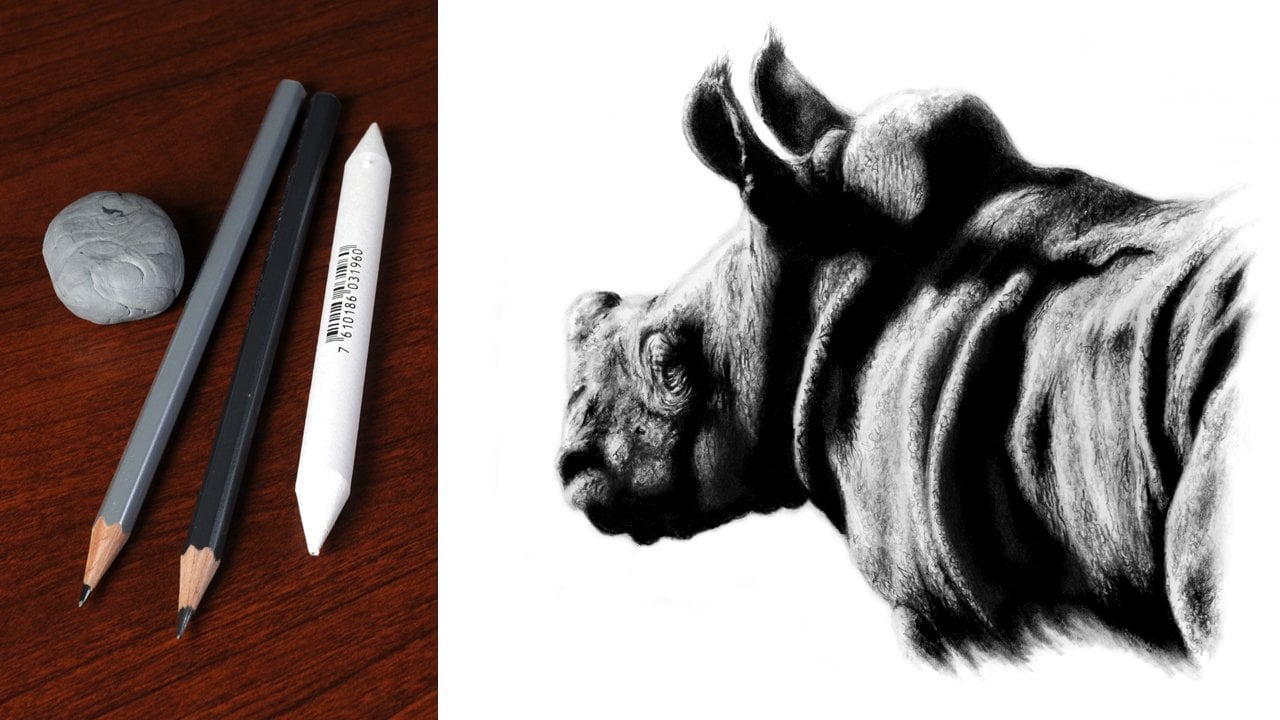
need two pencils. Now, I'm going to be
using an H and 2B but you should be fine with
any grade around this. The main thing
though with this is, these pencils want to be blunt as when doing
an initial drawing, the one thing you
want to avoid is damaging the surface
of the paper. I'm using some cuspids, Saunders Waterford 300 gram hot press watercolor
paper for this. If you're just practicing
the drawing stage, you could pretty
much use anything. If you're going to carry this onto a complete your
picture though, I would definitely recommend the good-quality drawing paper. You're also as well
going to need a piece of scrap paper and this wants to be either the same size or slightly bigger than the
reference photograph. Two erasers, a kneadable
one and a normal eraser. The normal eraser is just being
used to remove marks from a piece of scrap paper so
anyone can do for that. The kneadable eraser, I'm going to be using
a Caran d'Ache. The other ones I would
recommend would be a Factis K-20 or
a Faber-Castell. Alternatively, you
could just use blue tack or sticky tack
if that's all you've got. Then the only other thing
is you're going to need are masking tape and I would recommend a low tack one for
this as you're going to be attaching it to
paper and of course, your reference
photograph to work from. Now you can download
one of mine from the resources section if
you want or alternatively, like I said, you can always
use one of your own. Now we've got our materials, we can get started. In the next lesson, I'll go through setting
up the workspace. Also as well remember you can
always upload your work to the project gallery and I look forward to
seeing you there.
3. Preparation - Setting Up : In this lesson, I will show you how to set up the workspace. By doing this, it will give you a good foundation to then start
to build your drawing on. Before we start,
we're going to need our piece of paper to work on, our reference photograph,
masking tape, and I would recommend the
low tack one for this, and finally, two rulers. [NOISE] Now, I have got two
different colors of tape. The reason for this is because the yellow one I
will use purely as a reference point and that
way it'll be much easier for me to then just point certain things out
as we go through. To create a reference point, cut a small piece of tape and then attach it
to the bottom of one of the rulers and then repeat
this for the second one. [NOISE] We now want to attach one of the
rulers to the photograph. So to do this, we first want to
turn the photograph over and then attach
two pieces of tape to the back making
sure that the tape protrudes out the side as this is what we'll
attach it to the ruler. The ruler is then lined
up along the edge of the image with the tape
in line with the bottom. Then it can be firmly
pressed down attaching it. [NOISE] The ruler will
act as a hard edge to work against
when transferring reference points over
from the photograph. The second ruler can
now be attached to the drawing paper with
two more pieces of tape. This is what will
allow us to transfer our reference points from the
photograph to the drawing. The picture will effectively be drawn to the right
of the second ruler. [MUSIC] That's our workspace setup and in the next lesson, what we'll do is go through
the process of plotting the picture out and then
sketching in guidelines. [MUSIC]
4. Plotting Out - Sketching In Guidelines: [MUSIC] In this lesson, we can now start to
transfer our drawing over. To start with, we're going
to need a few things. Firstly, [NOISE] a
couple of pencils. Now, I'm going to be
using a 2B and an H, a normal eraser, and a piece of scrap paper. This one will be
roughly the same size as the reference image. To get the basic
shape of the eye, the first thing we need
to do is to transfer some points from the reference
photograph to the drawing. Now I've chosen
several points to use but you can use as many
or as few as you like. Now to transfer our
points to the drawing, we're going to need a
piece of scrap paper as well as a blunt 2B pencil. Now the reason why the pencil is blunt is because this reduces the chance of its scratching or indenting the surface
of the paper. Line, the piece of scrap
paper up along the edge of the first ruler
and then slide it up until it is level with the first point that
you want to transfer. Then using the 2B
pencil, place a mark. Place another mark in line with the top of the piece
of yellow tape. This mark can then
be lined up with the corresponding piece of
tape on the other ruler. Then using the same 2B pencil, the point can be
transferred over. The marks are then
removed from the piece of scrap paper using
the normal eraser. This is important
to do as you don't want to get distracted
by previous marks. We can now continue
to plot the rest of the points using
the same process. Now for any of the
points that are a little bit more
difficult to see, just flip the scrap paperback a couple of times before
placing the mark. Then just do this
again to double-check. Place the bottom mark and then transfer the point
to the drawing. Always remember
after doing this, remove the marks from the
scrap paper with the eraser. Now with whatever Patriot
is that you're working on, always remember to study
it carefully and choose the points that you want to
transfer before starting. Now the top of the eye
is in strong shadow. So I'm going to use the main
highlight for my last point. Plotting a picture out like this does take a
little bit of time. But the last thing that you
want to do is to rush in. That's all the points for the basic shape of the
eye transferred over. And now we're ready
to sketch in. For any sketching, I always
use a blunt H pencil. I'll make sure to only press lightly so as not to
indent the paper. What we're basically doing
at this time is sketching in-between the points
that we've just plotted. This will give us our
basic shape of the eye. Now, these lines are only
there for reference. They will be altered as
the drawing develops. That's the first part of the
drawing transferred over. The key things to remember are to first study the
reference photograph closely and decide what points it is that you
want to transfer. Then when you transfer them and also sketch in any guidelines, use the pencils lightly to
avoid damaging the paper. Then finally, always remember after transferring any points, remove the marks from the
piece of scrap paper. [MUSIC] In the next lesson, we can start to
transfer over some of the features and build up
the rest of the picture. [MUSIC]
5. Adding Features: [MUSIC] In this lesson, we can concentrate on
adding the features that go into making up
the rest of the picture. Now again, before starting, you want to study a
reference photograph and work out which points it
is that you want to plot. Remember, keep
them to a minimum, and also try, and make things
as simple as possible. It's very easy with
areas like this where you can see the
fur breaks up the edges, and particularly on this area here where the fur overhangs, it can be very distracting. We want to simplify that
as much as possible. First of all, I'm going
to add a point here, another one down here, another one here, and
then another one up here. We're going to do this. We
want to use our 2B pencil, and our piece of scrap paper. This is basically the same
process as we did for the eye. Lining the scrap paper up
along the edge of the ruler, and then placing the marks for the points that you
want to transfer. Remember, it's important
that when you've transferred any points
to the drawing, to then remove the marks from the scrap paper with the eraser. Once the four points that I want to use have
been transferred, I can then lightly sketch
him with the blunt H pencil. These lines are on your guide, and will actually be
quite easy to remove later as the picture
builds it up. The last two points
are plotted and then sketched in to finish off
the skin area below the eye. Then it's just a
case of continuing this to build up the
rest of the drawing. This is quite a
methodical process, and the one thing you don't
want to do is transfer too many points
before sketching in. As if you have too many points, it can just become that
little bit too confusing. Also as well, if
you do think you may have a point in
the wrong place, you can always just go back
and double-check here. As each part is added, the picture slowly
starts to build up. Now, with some parts
I've left gaps. Like here, it just
creates a bit of a separation between
these two areas, and it's relatively
easy to then sketch in. The same for this
part just here. It just creates that
little bit of separation. It's a relatively
easy job when you get into it to sketch in. Now, like I said, you can use as few
or as many marks as you like when building
a picture up. Other things like with these
areas up through here, you can see you could add extra marks or you could
just freehand them in. Same with this
part through here. Now just a couple
more bits to add. First of all, this
bit through here. The main part is this here, and that's what I'm
going to do next. I'll show you how to do that. Also as well, in
terms of composition, when you work on a picture, you need to decide
what you're going to put in and what you're
going to leave out, and how you're going
to compose the piece. For me, the picture is
going to work around here, and around here,
but alternatively, you could do the whole thing. It depends how you want to go
on and create the picture. The next thing to add are just some rough guidelines for the fur that hangs down
over the top of the eye. For this, I've just
chosen three points to transfer to give
the basic shape. The same principle
is then applied to draw in the
upper line of fur. The key with areas such as this is to remember to
simplify it as much as possible because details can be added as the
picture develops. When adding the features, the key things to
remember are to simplify the picture
as much as possible. Don't get distracted by minor details that
can be added later. [MUSIC] For more complex
areas you want to use less marks before sketching in as this will avoid confusion. In the next lesson, we can
start to refine the sketch, and smooth out the jagged
construction lines. [MUSIC]
6. Refining Sketch: [MUSIC] In this lesson, we can now start to
refine the sketch and reshape the construction
lines that we've put in. Now, by building the
picture up this way, we've ended up with some
quite jagged lines. What we're going to do
now is go back in with the HB pencil and
just refine that. This is a relatively
simple job to just round off these corners. Then we can move
on from there to start to work on these parts, but we don't want to erase
these lines just yet. We just want to work back
over the top of them. I start by working
inside the lines to round off the top left-hand
corner of the eye. This will also eventually
become part of a highlight. Now, in this part of the eye, I can see there's a very
slight downward curve here and I'll put
curve just here. Now, what I'm going
to do is just exaggerate that just a little bit in the drawing
because I think it just adds to it a
little bit more. This here is
relatively straight, whereas this is a nice
sweeping curve around here. By working back over the lines, it has the effect of just
reshaping them a little bit. Now, it doesn't
actually do this, but this line becomes more
prominent and stands out. The other line is still there, it's just slightly
more difficult to see. Because the pencil is
used lightly and bland, these lines can quite easily be removed later with
a kneadable eraser. The reference points
that we put in earlier can still
come in useful. For example, this
one and this one, the line that we sketched
in-between them is straight. But as you can see on the reference
photograph, it's curved. Now, you could just
simply sketch this in. But alternatively, if you're
not quite so confident, just simply line the piece of scrap paper up along the
edge of the reference, and then you can see
exactly how much of a curve it is before
sketching in. There is also a
second lower line, and this can now also be put in. It's then just a case of continuing working
over the picture, rounding off corners,
and reshaping lines. It is surprising how effective
this is, particularly, if you consider the fact that nothing has had to
be erased here. It is also worth
considering that the alterations that are
being made are only very sly, but they do have a
significant effect. Now, some bits are more
complicated than others. Always remember to
constantly refer to the reference photograph before attempting to sketch
in any alterations. Alternatively, if you
need to you could always transfer more points across from the reference
to the drawing. You can see that as I
work across the picture, it takes on a more fluid,
less angular appearance. Now, they're all just a
few more facial markings to add to this palm, but these should be
relatively straightforward. For example, these
lines, just here. Again, we could transfer
points across for these, but if you look
at the reference, you can see this point
here lines up there, and this one here,
lines up here. It is a relatively simple
task to just sketch these in with the last line just running parallel to the other two. Subtle curves like this, the great for breaking up
the shape of the markings. Also, an area is like this. Don't be afraid to use this
degree of artistic license. The only thing you
need to be conscious of is the direction
of the vertex. With the areas, such as this don't be afraid to be a bit looser
with the strokes. As you can see, we're just
a few minor alterations, they can really
make a difference. Looking at this dark marking
that runs below the eye, it's wider in this part and this part and then
narrows in the middle. Heading from here, I want to tape with a line down
to its narrowest point, which is roughly about here. Now, with areas like this, don't be afraid to slowly
exaggerate some of the shapes because this can
end up enhancing the picture. When using a
reference photograph, it's worth remembering that
it is just that reference. It is very rare to have a
perfect image to work from. As you get more confident, you will find that you start to make more and more changes. I now want to loosely
sketch in a reference line roughly halfway between
these two markings, and then this can be used as a guide to position
the next two. With the last marking then being positioned just above it. With all the facial
markings now shaped, it's time to move on to the reference lines
above the eye. Remember, these are purely
there for reference to show the position for
the overhanging fur. You can see on this lower part, I just work over the top
carving the lines slightly. I now want to create a slightly more jagged
appearance to this upper area. You can see the picture that we started with that
was ready angular in shape is now
completely transformed. Try to think of it as
working in layers. We started with a basic layer, and now we've just added the more detailed
one over the top. When refining the sketch, the key things to remember
this time are to work over the lines slightly as this will have the effect of
reshaping them. You can use the piece of
scrap paper by positioning on the reference photograph to
check things like angles, as well as curvatures
before sketching in. Don't be afraid to
use the degree of artistic license [MUSIC] if this is going to
enhance the picture. In the next lesson, we can start to add in what will
be some of them are highlighted areas that there are within the eye and skin
area in front of it.
7. Finer Detail - Adding Highlights: [MUSIC] This lesson is
mainly about progression, using less points and trying to also incorporate some
freehand elements. With your eye, we're going to transfer
some more points over. But the only thing we really
want to concentrate with this eye is just prominent
features within the eye. For example, this
shape through here, the highlight here, and then
the position for the pupil. Using the same
process as was done previously to build up
the rest of the picture, I now transferred two points for the lower more
highlighted area. Always remember when
doing this to use a dark soft blunt
pencil like a 2B. Also, make sure to not apply too much pressure
when doing this, as these points will
need to be erased later. Now you could always
transfer more points, but why not now try using less. Also as well, instead of just sketching lines across
between the points, why not just try checking the angles and curves
with a piece of scrap paper for us on the reference photograph
before sketching in. The lower highlighted
area is now drawn in with a blunt H pencil. Two of the points
which were transferred originally to help build
the shape of the eye, also show the position
for the lower highlight. With a small highlight then being added just
above this point, and then I can move on to
the main highlight above it. The highlights in this
picture work well. But sometimes you do have
to get quite creative. You can use other reference. Or alternatively, if
you know the subject, you can just create them. Now there is quite a lot
of detail in an eye. But the main thing
to do when doing an initial drawing is to only
stick to the key features. The last two highlights
are quite simple to add, as this one is right in
the corner of the eye, and this one is just in
front of the main highlight. They are actually quite easy to position and then sketch in. To finish the eye, I just want to transfer one last point for the
bottom of the pupil. Again, you do always
have the option to transfer more points
across if you need to, before eventually drawing
the shape of the pupil in. The only thing remaining to
be added now are just some of these highlights in front of
the eye in the skin area. Now these can look
quite daunting, but the thing to do
is to just break it down and make it as
simple as possible. Now we could just
transfer some points over from the reference to the
drawing as we've done before. But alternatively, if
you're feeling confident, why not try to sketch this in? For example, here,
I'm looking at a triangular shape and it's
exactly the same here. Another triangular shape. If I have a look, I can see the top of this highlight starts
roughly about here. That's just about
here on the drawing. Also as well, if I draw a
line down through here, that'll give me
that first point. I can then see what the
distance is between here and then sketch another
line in along here. Now going from the corners, I've got this marking
here, which you go there. This one, which will go there, and this one, which
will go there. Now it's just a case of
sketching the highlights in using the corners of the
triangle as reference points. Also as well, you can use a fair degree of artistic
license with this. They can always be altered
later as the picture develops. I now want to add
this last highlight, and it goes just
above this top line. The same principle is applied
for the lower points. First picking a start point
and then sketching a line. The next thing to do then is to decide where the next
point is going to be. So I line that up, and then place a mark where
I want the tip to be. I can then sketch in the
rest of the triangle. For the lower line, I just add a slight curve to
the bottom of the stroke. Then I can add the
first highlight towards the tip of the triangle. A long highlight is added
towards the bottom, and then it's just a
simple task to add one more halfway
between the two. To finish, I just want to sketch in two more lighter areas. One is just above here, and the other just above here. Now these are not too critical. But what they do is
just show what will be a slightly lighter
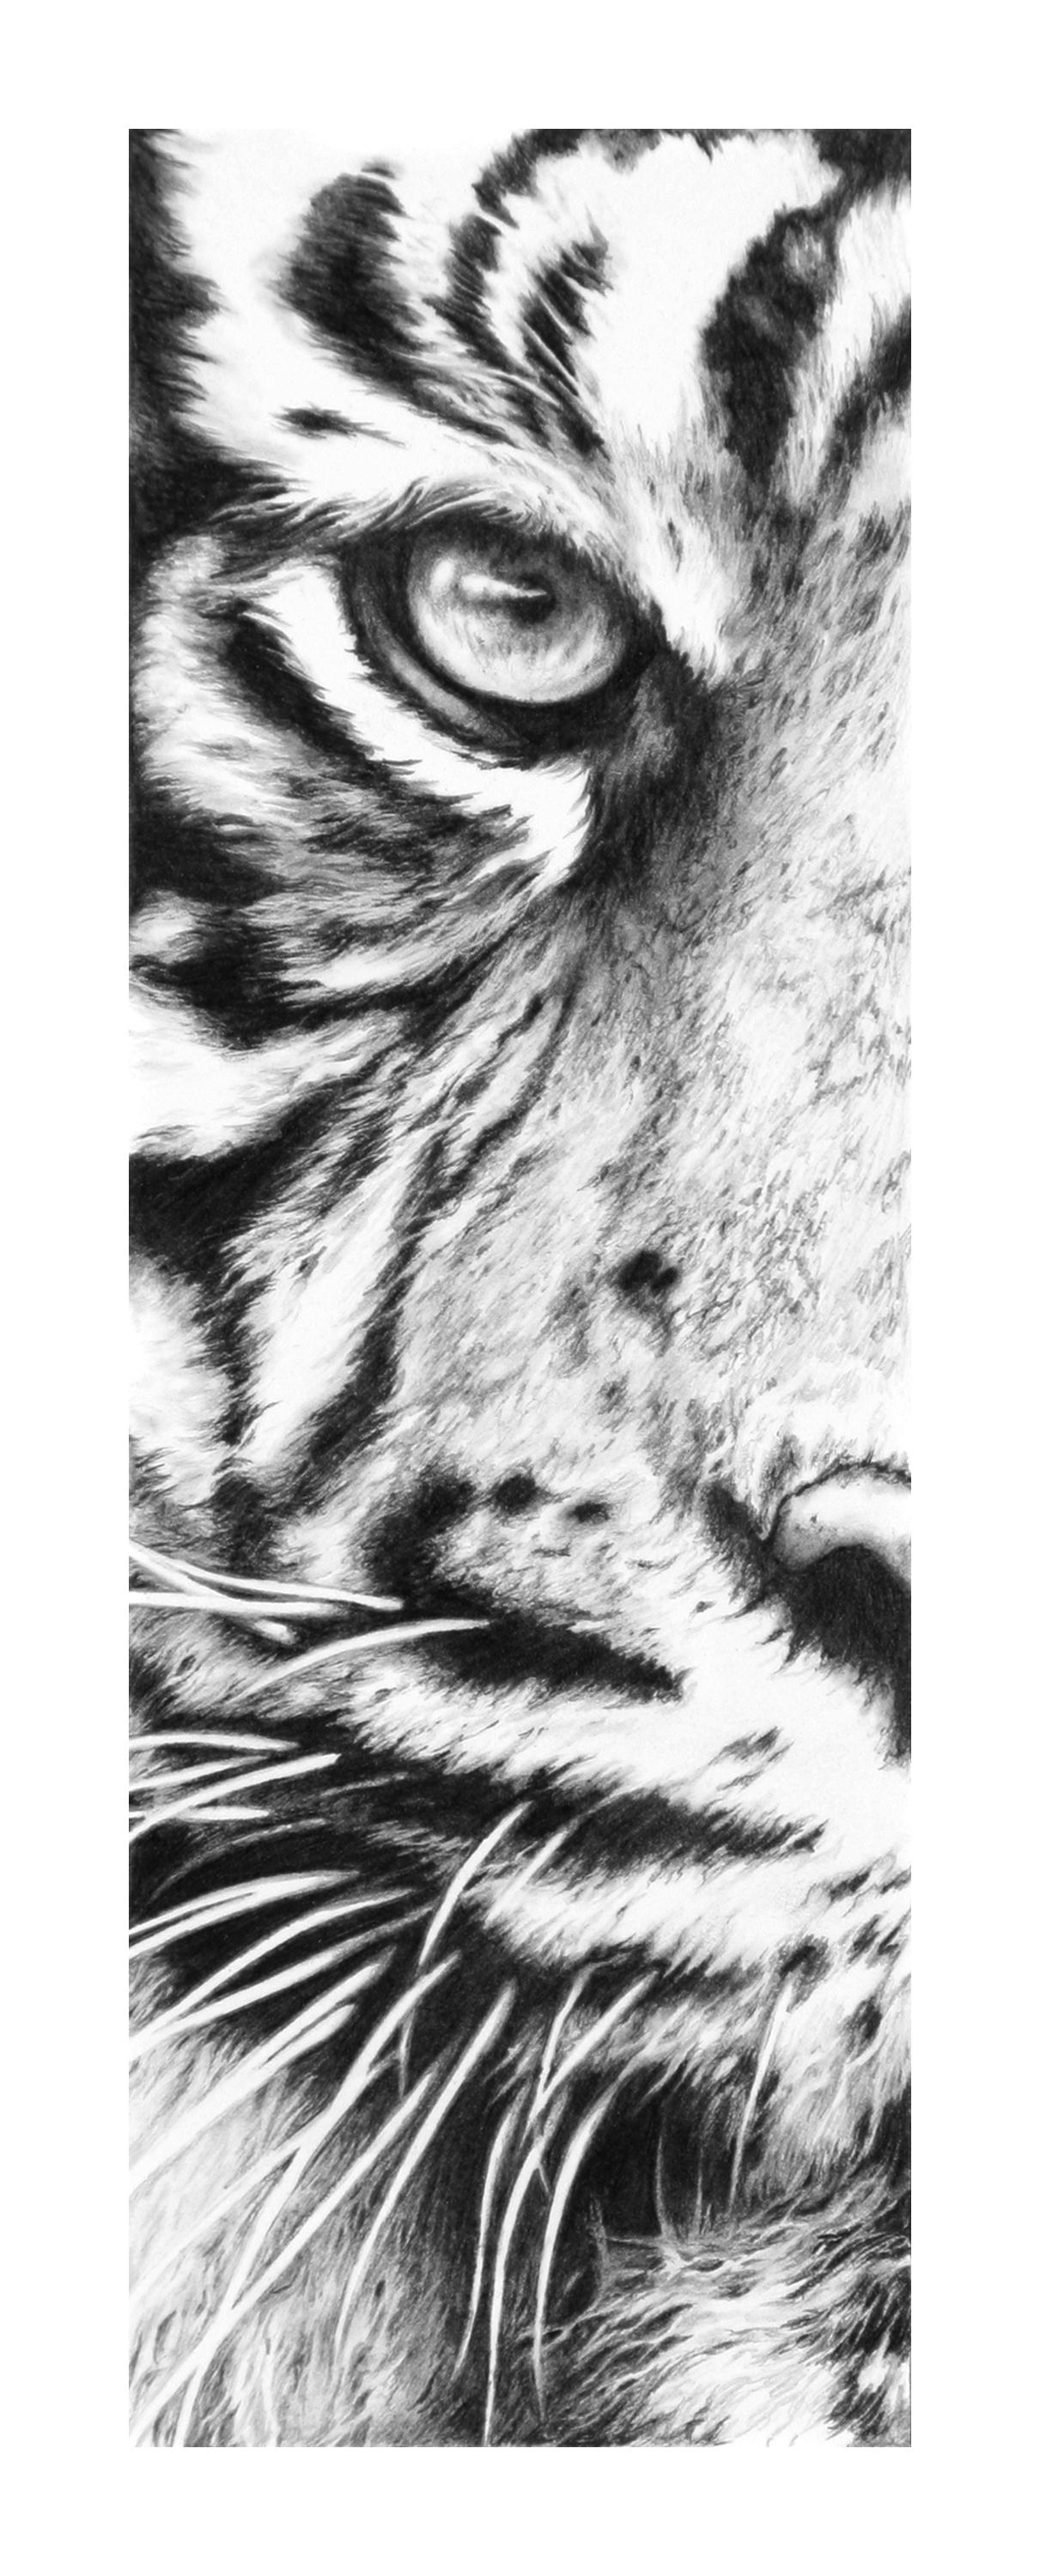
area or the picture. That's it. The initial
sketch is finished. What we have to do now is
just tidy the picture up. Don't be afraid to
work a bit looser in some areas as you
gain confidence. The key thing is to
remember this time are, try to use less points, sketching shapes to help with the positioning
of some features. Also as well, remember, you can use visual
reference points within the drawing to help
position minor details. [MUSIC] In the next lesson, we can now start to
tidy the picture up or remove some of those
unwanted lines and marks. [MUSIC]
8. Finishing Touches - Conclusion: [MUSIC] In this lesson, we can now clean up our
drawing and you can also make any last minute alterations that you think may
need to be made. So the first thing
to do when you think you've finished
is to have a look at the reference photograph
and the picture and just make sure that you've got everything in that you want. Then the next thing to do then
is to remove these rulers. It is worth being
careful when doing this to avoid any chance of damaging
the surface of the paper. The points that were
originally transferred to help build up the picture
can now be removed. Ideally to do this, you want to use a
kneadable eraser. But alternatively, if
you don't have one, you could just use either
sticky tack or blue tack. By rolling the eraser between
my thumb and index finger, I can make a point. This is ideal for
removing these marks. You can see that each time I press the point of
the eraser down, it removes a little
bit more graphite. Now the eraser will get
dirty quite quickly. To clean it, just
knead it and this will disperse the
graphite within it. Then all you have to do
after that is just make another point and then continue. After doing this, you may find that you need
to go back over some of the lines with the H
pencil to re-establish them. The top of the eye is in shadow. So the original guidelines
can now be removed. Because they were
originally sketched in lightly with a blunt H pencil, any alterations like this are
relatively straightforward. Working between the kneadable
eraser and the H pencil, the original angular
guidelines are removed. Some lines may need to be re-established and
smoothed down. If you find that
there are any lines which look harsh or too dark, then you can simply
just knock these back. The way to do this
is to pinch the end of the eraser and this
will make a blade. Then you can use that to
just brush tone away, effectively lightening
the look of the picture. You can also use this to
clean up round the edges. There we have it. The
initial drawing is complete. When cleaning up
an initial sketch, the key points that
you want to remember this time are firstly, to remove the
rulers carefully so as not to damage the
surface of the paper. Regularly clean the
eraser by kneading it, and re-establish any lines that may have been removed
unnecessarily. [MUSIC] So in conclusion, the main thing really
is to take your time, plan out the drawing, and then take your time
to create that drawing. The advantage of using the
pencil's blunt to do this, is that it makes it
relatively simple to make any alterations or
changes that you need to. As you gain confidence, you can start to rely on using less points to build a picture up with the ultimate goal
eventually becoming free hand. Alternatively as well, you
can always use this system as well to double-check
the accuracy of your work. So anyway, I hope you
found this video useful. Also as well, remember
to upload your work to the project gallery as it
would be really nice to see. Hopefully I'll see
you in another video.
 Jamie Boots, Wildlife Artist, Teacher