Transcripts
1. Introduction: What Makes a Watercolor Floral Abstract: Welcome to class. I am
so glad you're here. We are going to be working on a really fun abstract today. This is going to be
a different style from what we typically work on. What we typically do is make a flower here and a flower
there and a flower there, and we pull them together with stems or leaves and make them into a bouquet or a
wreath or something. But today, we are going
to work in the abstract. We're going to be
working in the shapes of flowers and
leaves and petals, but we're not going
to be precise. We're not looking
for an exact replica of a certain flower or anything. We are going to
limit ourselves to about three colors so that
our painting becomes very, very cohesive, and
then we're going to be able to map them and frame
them at the end in the class. I can't wait to show
you all about that. We're going to get
started right away and talk about all the supplies, and then we are going to
put our brush right to paper right from the
beginning and see where our intuition and just our emotions go
and see what happens. And we're going to play
around with water and paint and just play and experiment and have a
great time doing it. I can't wait to see you
in the next lesson.
2. Supplies for Abstract Watercolor Florals: Let's just jump right in
and talk about paper and paint and brushes and all the different supplies
you're going to need. Now, this is a watercolor class, and you've probably done some
watercolor painting before. This time is going
to be a little bit more on an abstract style, but we're going to
quickly talk about the paints and then
we're going to jump right into painting. I am going to be
using my palette. These are paints that
came out of tubes, and I squeeze them into here,
and then I let them dry. And then I just go ahead and rewet it any day that
I want to paint, and I just spray this and re wet the whole palette, and
then it's ready to go. If you have a can, like a palette that
comes in a tin, that is a great way to
get started as well. I have a lot of different
palettes like that, and that will work as well. The exact color of your
paints doesn't really matter. You are going to choose
the colors that you like, and we're going to talk
a little bit about that in the next lesson. I am also going to be painting on cotton watercolor paper. I have done a couple practices on just some cheaper paper, and I'm going to be
moving over to a cotton to get my final piece when
I paint along with you. But you use whatever watercolor
paper that you have. Of course, I'm also
going to have water. These are just some mason jars that I have fresh water in, I always like to have a
paper towel too or cloth napkin or something around
that I can dab off on. Tday we are going to be using
these two paint brushes. This one here is a Princeton Newton and
it is a dagger brush. You can see here that
it comes to a point. It's a very, very
floppy paint brush. It is not something that is going to be used
for detail work. Um, you don't always
know exactly what the paint brush is going to use and do when you use a
paint brush like this. This dagger is a
three eighths inch. It does come in multiple
different sizes. This is the one I'm
going to be using. You can get a dagger brush in
a lot of different brands. This is my preferred. Then I am also going to
be using this liner brush could also be used as a
detail brush or raker brush. It is also floppy and really, really long and bendable. If you don't have these
brushes, that's okay. I want you to go ahead and keep going and do this
class anyway because you can do the exact same work
just using a round brush. I would just recommend
that you use a larger brush like a size ten. This round brush will work
perfectly and you can do this exact same project
using a round brush. But either way, regardless of
which paint brush you use, if you could practice
holding your paint brush on the second half of the paintbrush handle
instead of down here, I want you to be holding your paintbrush all
the way up here. The reason I'm suggesting
that and it doesn't matter, even if you're using
this round brush, hold it all the
way near the top. The reason I'm
suggesting that is that it keeps you from
being too precise. When you are down here
holding onto a paintbrush, it's more like writing
or script work, and when it's up here, it's more organic and flows and you don't
have as much control, which is exactly what
we're looking for today is a lack of control, and that is such a
fun way to paint. Regardless of your supplies, join me in the next lesson, and we're going to start talking about choosing our colors.
3. How to Choose Colors That Blend Naturally: In this class, we're going to
be talking about color and choices for the colors for your painting that you're
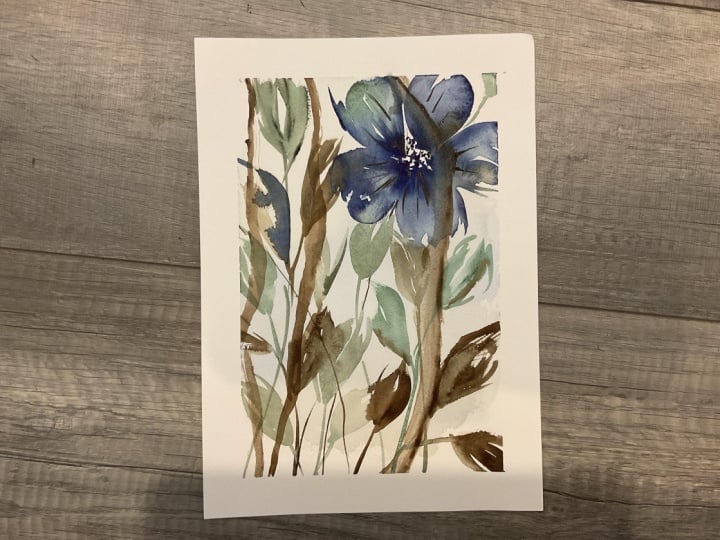
going to be working on. In mine, I did
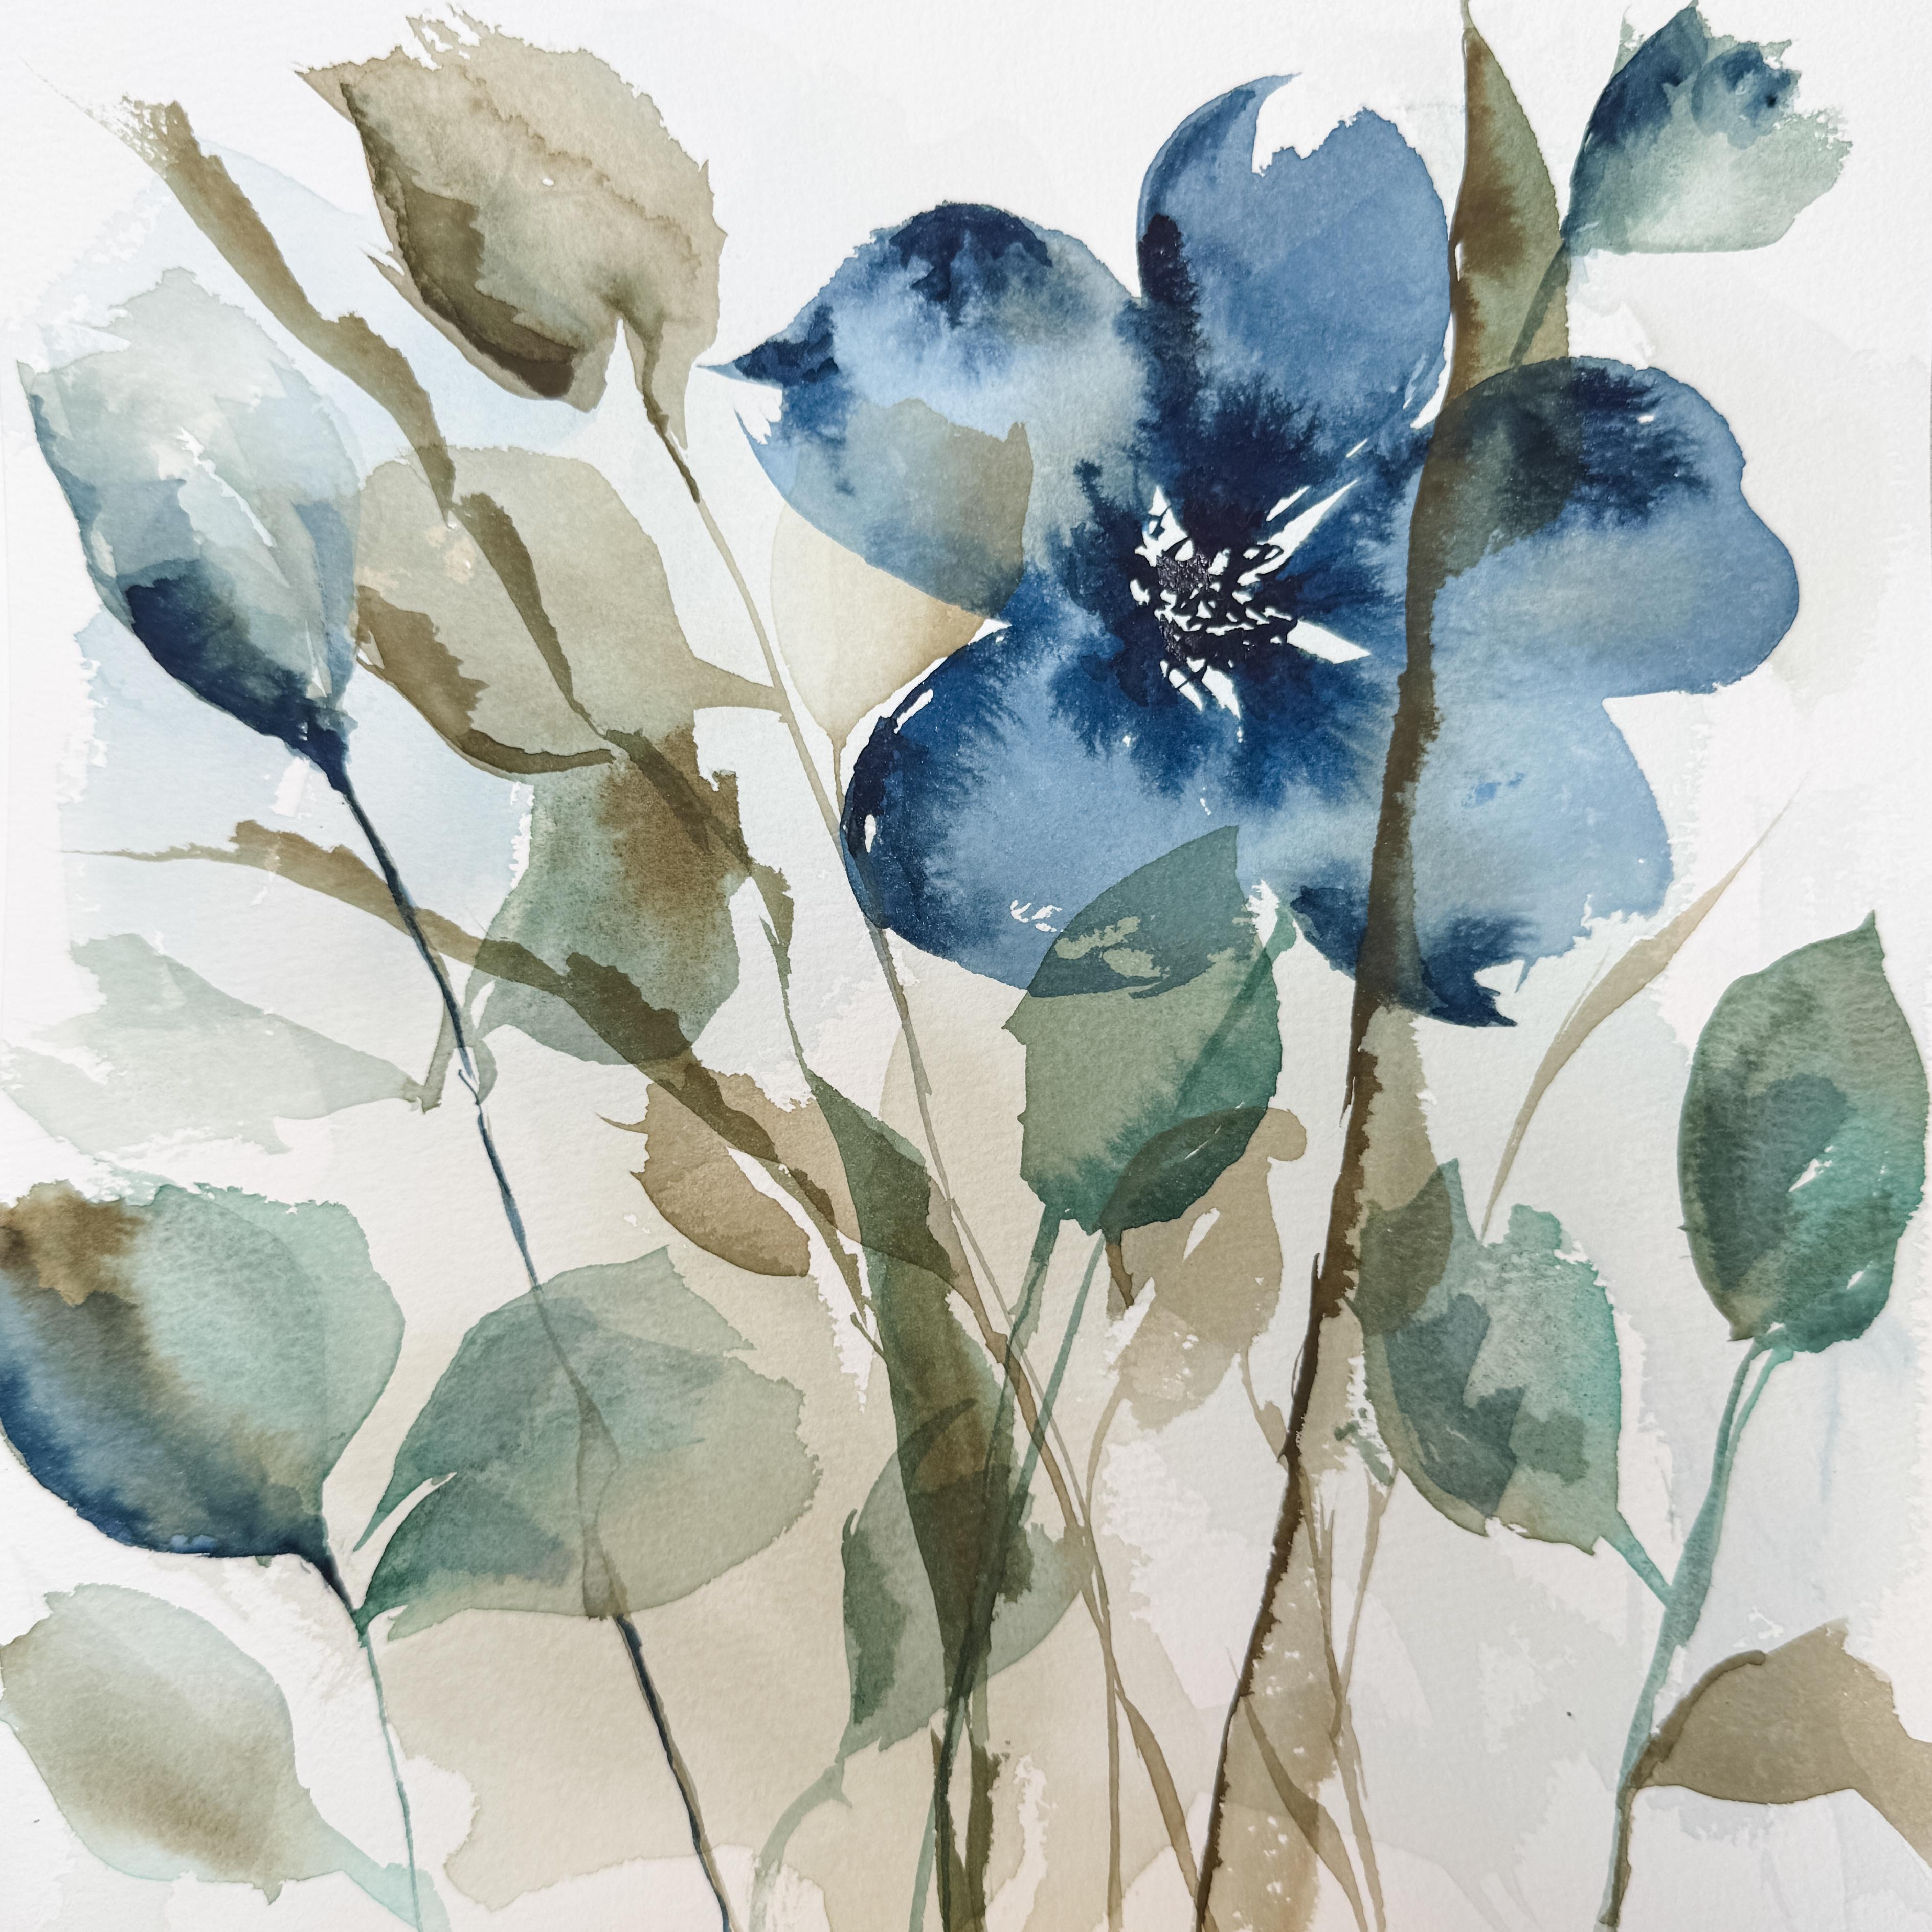
almost a navy blue and a teal and
then a soft brown. I really limited myself
to those three colors. They did get blended
and mixed together. So you might feel like
there's more colors in there, but that is really what I limited myself to three
different colors. I want to show you over
here how I did that. So wetting down, I'm
just going to use this round paint brush
here and wetting that down and going into this almost like a
denim navy color, I can show you that color there's such a beautiful color,
rinsing that off. And then I am going to
mix a little bit of this green along with a little
bit of that same blue. Add just a little
bit more water to it and look how we get this
really beautiful teal color, which is this color
that's down in here. Rinsing off my
paint brush again. You might not be able to see
this might be off camera, but here I have a soft brown and I'm just going to be
using this soft brown. Those are the three colors
that are in the final work. Those are the colors that
we're going to be working on. But I want to show you
how they are all going to blend together because we're going to be working
on a wet on wet. If I take my blue, this
is the same color. Let's say I add
in more water and less paint by dipping it in. Look at how faint
I can get that. And so already, I have
a lot of variation. Then if I want to add
in a little bit more, I can just dip it in. To the darker paint, which means that it has
less water and more paint, and I can drop that in to here, which is how I'm
going to be getting these different colors
and darkness and light in my petals is by
starting out really light and then dropping in
some darker value paint. I can even do that in here. Even though this
is already dark, look how much darker I can make. And then if you're going
to be blending them, starting with a blue, I can then start, let's say, I add another petal
or a leaf over here, and then they start to just
get all blended together. And then with my brown, if I have a brown swash, and then I come in
and grab some of that teal and just kind
of drop that in there. See how that kind of
makes like another color, I really adjusts how
that's going to look. You can come in with another blue and just touch
into that brown. So I have been very careful to select my different colors so that when they
blend together, they don't get muddy and
they stay individual, but then they also
can blend together. I hope that makes sense. Drop in some of
that darker color. I want you to choose three colors that you're
going to work with. I would love for you to limit it down to three, maybe four. We're going to do
one more here and see if we can't choose
another color way. So if I used like almost a red amber orangey
color, it's beautiful. And I just add more water, pretty much softer
and lighter it is. And then I could
even dip that back in and go ahead and
add in that color. And then if I had a yellow, Then let's do another brown. I like that idea of
a brown with this. Then if I go ahead and use that brown and maybe I dip into that orange that's
really pretty. What if I have that yellow over here and add just a
touch of that brown. Can you even add in a
little bit of that orange? So I want you to
play around with three or four colors and select different
colors that really kind of go together that look
pretty next to each other that you maybe feel would work well in your home or as a gift and select the different colors that
you want to work together. I'm going to stay
in this color way, but you can select any
colors that you want.
4. Building Layers Part 1: Blocking In Large Abstract Shapes: We're going to go ahead and
get started on our painting, and we're going to
break this down into different lessons
so that we can talk about abstract painting and
why I did what I did here. So as you can see,
I have a mat on it. What I actually did is I painted it edge to
edge on my paper. And then after I painted it, I knew that I wanted to
be able to use this mat. And so then I looked
around inside this mat to find the area
that I would want to mat it. And by doing that,
I can then go ahead and cut this painting down to size so that the area that I want shown
is within the frame. I like to do that where I am painting all the way
out to the edges, and then I go ahead and mat the part that
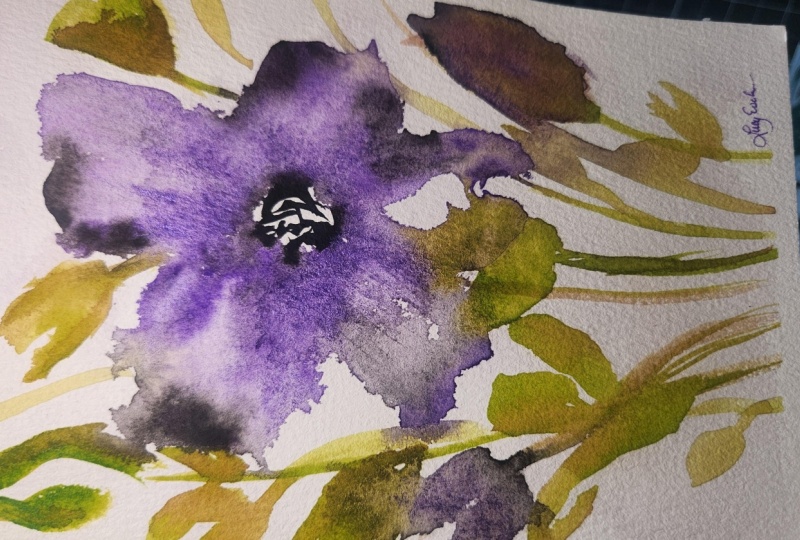
feels best for me. I painted this exact same
piece multiple times over and over and over again
until I got a technique that I really liked and that I felt was something
that I could show you. So I want you to not feel like you need to
just paint this one time. You can watch the same
video over and over again until you have locked in on a painting
that you really like. It might take you four or five times until you've come
up with your final piece, and that is perfectly fine, especially when we're
working in abstract. Because when we
work in abstract, I like to just kind of
let my mind go blank. And not really think
or preplan too much. I sometimes have a general idea. I know I want to
have my big flower up here in the
right hand corner. I know I want to put some
leaves down in here. But where all the other pieces go and where the
exact colors are, it's going to change
from piece to piece. Sometimes I go, Oh, this
got a little too busy. I don't care for the extra
pieces that I put on top, or I really like to have
the more white space. And then I go back and I
just paint it again and again and again until
I blocked it in. So for this next
part, I am going to be using my Academy
watercolor paper. So, this is the one
that I recommend, but you go ahead and use
whatever paper you have. I'm going to be making this into a square because of the piece of the frame that I have that I want to be able
to frame this in is square, and so I'm going to
be painting it here. But I am going to leave this
one over here so that I can have something for you
to see where I'm kind of heading while I'm painting. I'm going to go ahead and use my paintbrushes and the colors, and I'm going to stick
in this color way. So the first thing
we're going to remember when we are painting in an abstract is that this
is not about precision. This is not about being right. This is not about
making mistakes. This is about being
free and just letting our mind go blank and our brush flow freely
across the page. This is about discovery and not anticipating
the next move. It is actually a really, really relaxing way to
paint if you take away the stress of being right or the stress of making sure
you don't make mistakes. When you paint in an abstract, this is your work. This is your painting. You're not trying to copy it. Maybe your flower is a
different shape or a color or maybe you want to have
it over here or at the bottom and have other
leaves coming up here. This is what's
coming out of you. It's your emotions, it's your
feelings, it's your art. It's your expression. I want to make sure that you understand how
important that is that yours is going to look
very different from mine, and that is perfect. It's exactly the way
I want it to be. So for this very first thing
that we're going to do is, I am going to be doing
it very similar to this, where I'm going to have a flower up here and I'm going to have some branches and some different
shaped leaves coming up, and then I'm going to be
putting in some wood or some organic pieces that are going to be
coming in and out. That is my basic concept of what I'm going
to be painting. I want you to make yours the
way you want to make it. It does not have to be this way. Now, if you're not sure how you should paint it and you
would like to copy this. You are welcome to copy it and get as close to
this as possible. So what I'm going
to do first is, again, I'm using
my dagger brush. This is my Princeton
Newton dagger brush, and it's a three eighth inch, and I wet it down. It's going to be
nice and floppy. For the most part,
I am going to be holding my paintbrush
up at the top as we discussed over in
the um last lesson where we talked about the
colors and the supplies. On my palette, I already
have some of these colors. I'm just going to dip into
those and what I'm doing is fully making sure my paint
brush is completely saturated. As you can see, this
paint is not real thick. This is a very thin paint, mostly water with
just a little bit of pigment that's on purpose
because what I'm going to be doing is adding in some of the background swashes where it's just going to
add just a little bit of depth to your painting. Now when you put your
paint brush down, we're not planning it. We're just putting it down. So I have my paint brushes full and I'm just going to
be putting some paint there. I'm going to dip
back into my water, and then I'm going
to add some more. Just add a little bit more
water here and there, and then I'm going
to come over and grab some of that teal color, make it really watery and add some splashes of
color here as well. Then maybe I even
want some of that brown and I'm going to put some brown I go add some more water so that
it gets moved around. I might even bring that
brown up into some of these other areas and go
ahead and get that area wet. Being very generous
with the water, the paper that I have is on a board and so it's
not going to warp. If your paper is
loose like this, you probably want to tape
it down with something. Maybe you have some artist tape like this or some masking tape. Probably would be best to tape it down because we will be using a lot of water in this
particular abstract. So like you can see, I'm not really planning it. I'm just kind of putting down
some color here and there, leaving lots of white space. I am not filling this up. I'm not trying to fill
the entire thing, but I am trying to have some areas darker and
some areas lighter. So I'm going to go ahead and just be finished with
that first layer. And I'm going to
use a a heat tool, you can use a heat
tool like this, or you can use a hair dryer. And I'm just going to go
ahead and let that dry using this tool so that it's completely dry when I go
back to do the next layer.
5. Building Layers Part 2: Creating a Strong Focal Bloom: Okay. So this is mostly dry. You can see that there's not
really any shiny spots left. I didn't completely dry it, but it's mostly dry. Now I'm going to go ahead
and get my colors ready. I'm going to dip into my blue, and I'm going to
make a little pile of that blue right there. And I am fully saturating
my paintbrush. You can see I'm laying the
paint brush all the way down in and fully saturating
that paint brush. And now I'm going to start
making some flowers, and I'm going to start with the first flower right
up here in this corner. Putting my paintbrush, I am going to make one
petal at a time, and I want my first one to
kind of flow like this. You can see it's not finished. I'm not trying to
make this perfect. I might even dip back into my water and not even
add more paint and just use a really
watery paint brush here for the next petal. Maybe I'll do it again. Just dip that paint brush right into the water and make
a third petal. You're going to have to do
it the way you need to based on how much paint is in your water and how
much paint is on your brush. So there I have a basic flower. I left lots of white space. I left a white center, and now I'm going to go
ahead and dip back into my blue and get a really
strong blue at the end. This is all really a deeper, lots of pigment in here. I'm going to, while
this is still wet, go ahead and let my paint
brush drop off some of that really dark blue that has
less water and more paint. It's a thicker heavier,
darker pigment. I'm just going to put it
here into the center and let that let that really flow. I'm going to go ahead and
get a little bit more. And before this dries, I'm going to be just dropping in some more so that I can get this darker parts
added to the edges. Not to all the edges,
just to some of them. You bring some of them out
into the outside here. You can put some out
on the tips, whatever. Again, this is just
your intuition. This is what is speaking to you. Just going to outline
that a little bit. I don't really want this
dark here in the center. I'm holding my paintbrush
all the way up here. That way I can't be precise. I have to be loose. Rinse out my paintbrush
and go over here and start some of these
the leaves and things and create a loose leaf there and maybe bring
a little stem down. Maybe bring another leaf up. While that is still very wet, I'm going to go grab
some of that brown and I'm just going to drop some brown right
in on top of it, even going outside the
line a little bit. It softens that color. Might even just drop
a little brown in here where it's still wet. And then I think I'm
going to bring one. See, I'm just allowing the paint brush to go
wherever it wants to go. Never a straight line. Always add a little brown to my teal darken that
up a little bit. A little bit more water. I don't know what the
paintbrush is going to do. I don't know what the
final look is going to be. I'm not pre planning this. I am just allowing my paintbrush to move
across the paper. Trying to look for
things that maybe need to be expressed. I go to go ahead and
get some more brown. I'm just dropping it
right onto my palette, almost even letting it mix in with some of the blues
and everything else. I want to have some brown
up here towards the top. Go ahead and let it
go right over top of the other petals. I'm not really planning. I'm not going to let this dry. I'm just going to keep
adding in different things. Really intuitive, letting
everything just flow. Maybe this is a little too dark. Add more water. Maybe
lift some of that up. Just kind of adding
some more water to it. Right here on the page even. I think I'm going to add a
little bit brown on top of that wasn't quite sure
about that color. But I think I add just
a touch more brown, I think that's going
to solve that problem. While these are
still semi wet, now, this one's very wet,
but these are starting to dry. I'm going to go back in. I'm going to use my
little rigger brush and I'm going to just add in some extra little color here and there just to
give it some depth. I'm going to just let it
flow around like that. If you get a hard line
and you don't like that, you can always just
get water just water on your brush and
smooth it out a little bit. Let's see what happens
with this brown. Come back to the next lesson
and we're going to continue this and get into
the next layer.
6. Building Layers Part 3: Adding Depth and Knowing When to Stop: Okay, so this is still very wet. I didn't really let
any time go by. This is starting to get dry. So what I'm going to do is using my little rigor brush is I'm going to start
making these centers. I put a lot of really rich thick paint on
the end of this, and I'm just going
to go ahead and make these little jagged
centers of the flour. Even bringing them
all the way up into the flour itself
with a little swish. Swish. Swish, swish,
swish, swish. Does that make sense? So I'm gonna let that go ahead and dry. See if it needs anything. Add a little bit
more here and there. Especially where it's still wet. If it isn't wet,
right up in here, I know that this is dry, but for an experiment
to show you, I can just lay this down and
then I can come back in with just a wet paint brushlet and
just soften off the edges. I really like this
brown strike piece. I also noticed that this
stem isn't continuing, so I'm going to go ahead and
just follow that stem down, pick it up about here, and
bring it all the way over. Something like that.
I'm going to go ahead. Actually, I need to wait for
this to dry a little bit. I can see that this is still shiny and I want to be able
to put this branch in, but not when this
is quite that wet. I'm going to wait. I might even bring in another
branch over here somewhere. I think I'll wait
for that as well. But I can start
getting that ready. See how I'm just dabbing
it into my brown, see if I can get
that on my camera. I have it in my brown, but then I even come
over and I just pick up a little bit of that blue. And so when I put it
down on my paper, I have almost a mix
of color. See that? I'm putting it in my brown, swiping it into my green, and then I have a mix right
there on my paintbrush. I'm going to go
ahead and just dry this slightly so that
I can move forward. Okay. I don't mind that
it's still wet there. I just didn't need it
really, really wet. So I want to create this line. And so I'm just going to put
my paintbrush down and just drag it across like that. See it's all jagged. Love it. It's exactly
what I was looking for. Now going in and putting
on really thick brown, I want to create
this extra edge. So creating that extra
edge while this is still wet along the edge. It's even okay if
it goes outside. Something like that. One over here. It's not really a thing. I just is and just adding it. Maybe I want to put a little extra blue
on here a little bit, just to add a second layer. I do like to add some
layers to my paintings. Once they start to dry, just
add just a little bit more. Be careful that you don't add too much because this
is where I can get in trouble because I
sometimes overdo it. And I really need to make
sure that I edit and not overdo my paintings.
Don't overwork them. But adding a little bit
does create some depth, and so I do like to create a little bit of depth
on my paintings. And by doing that,
you're adding in a little bit darker
value here and there. Maybe it's just an edge. Maybe it's a thicker line. Maybe it's adding in
brown on top of the blue. One of the things that I
don't really care about it, what I'm looking at right
now is that on this one, I really like this blue that was anchoring this big flower. I have this teal
leaf and this one is missing that and I feel like this flower
is just floating. It's not anchored,
so I'm going to go ahead and hopefully
not mess it up. This is where it gets scary. I'm going to go ahead and
add on something right on top of this to try to anchor this flower so that it looks like it's in the arrangement and
not just floating. I see how I put that
just right up on top. I might even put
another one debating. Sometimes what I do is I
pretend like I'm gonna do it so that my eye can
see it happen and say, Did you like what you just
pretended like you did there? So I'm going to just keep
playing around with it. Whoops, use the wrong green. Lakes a little bit
more. Brown. Okay. So I go back in while it's still wet and just add in
a little bit extra. A little bit extra color, a little bit extra depth there. How do you feel
about yours so far? Are you practicing along with me or are you going to come back and do this one once
we are finished? What did you decide to do? I feel like that flower is now embedded in and I don't
need to do anything else. I'm just scanning. I'm taking my time before I
go and put more paint down, before I put another
flower or leaf. I don't want to be adding
extra if it's not necessary. I feel like I need a
little bit more of this blue to carry through
because it's the only place. Maybe I will come back in and add Some of that
blue over here. It's a little added
extra accent. It doesn't have to be
a big bold blue thing. I just needed to bring some
of that blue color over. So your eye has
somewhere to move. Before it just felt like
it was just plopped there, and now I'm starting to
feel like the eye can move over here to find
other blue spots. Do you see how the background that we put on first it's there, but it's not real bold. It's because it was mostly water with just a
little bit of pigment, but it adds this extra layer of dimension because
without that, this would have been
all white paper and adding that extra
little color back there really adds a lot of
intention and value. I'm very happy with that
blue getting pulled across. I think that is really nice. Um I'm gonna rinse off my brush and lay it
down because otherwise, I'm gonna get myself in
trouble by overdoing it. I'm gonna let this dry, and then I'll be back and we
will talk about framing it.
7. Class Project: Create Your Own Abstract Floral Painting: That you finished
all the lessons and you watched me paint this one and you saw the different layers and
how we built that up. That's what I want you to
do in your class project. I want you to first
find your colors, select the colors that
work well for you, whether it's for a gift
or for your decor, or just colors that
make you happy. Find ones that you can
really let blend together. See how these colors
all blended together? I made sure that once they got blended, that
they looked okay. Sometimes when you
choose your colors, you're going to get
really muddy colors, for example, if you
use red and green, those two colors are going to blend together and
really get muddy. Choose your colors, play without on a scrap
piece of paper like this where you can play around with your colors
before you get started. Then go ahead and do
your class project. Take your time, use the better paper if
you're ready to do that. You can watch this class over and over if you
would like to and paint your practices
over and over again. Just like I did, where I
painted them over and over trying to figure out what style I liked, what things I liked. Then once you have decided what you want to do for
your class project, go ahead and do
that on your own. You've practiced it with me. Now for your project,
turn everything off. Play some music in the
background if you want to. But don't watch me do it. I want you to just express. I want you to just let
your paint brush go. And see what happens. If you would like to go ahead
and upload that picture, I would love to see
what that looks like. Your project, you can
paint it in any size. I chose to put it into a square because I'm
going to frame it. But you paint it
whatever size you want in whatever
colors you want. I can't wait to see what you've accomplished and
what you've done and what you've let
your heart flow out of you to create
something so beautiful. So make sure you show it to me. Come back to the next class. We're going to get this
framed so that you can see what my artwork
looks like finished.
8. Outro: Final Thoughts and Next Steps: Welcome back, and I'm so
glad you've been here today. I can't wait for you to show me. Please upload your art piece and let me know exactly
what it looks like. Talk to me about your struggles. Where did you have
a difficult time? What pieces did you
get surprised at? Were you surprised at how
easy it was or were you surprised at how
difficult it was to paint in this
kind of a style? My painting is on a board, and so that means
that it is taped down is glued down
on all four sides. There is a spot up
here at the top, and I'm just going to use this boning knife and
just slip that in there. You could use a butter knife or any other tool like a palette
knife. To separate it. It does easily come
across, come done, but you do need to take
your time and be careful because you could rip your painting if
you're not careful. So just slide it along the edge, and then that comes off freely. Because I waited until
this was completely dry, it did dry flat. If I had taken this off when it was wet or if you had taped it down to your desk because you don't have a
board, that's fine. If you had taped it down here. It's best to let
your painting dry completely before you
remove that tape. But here's a tip. If you painted it and
it was not taped down or you did not let it dry completely before you
took off the tape, now you go and you
used a heat gun on it or you let it
just dry naturally, and it curls as it is curling
as you are drying it. I I'm drying it on the front and it's starting to
curl up like this, I just flip it over, make sure that your
desk is clean. I just flip it over
and I blow dry the backside of it and
it flattens in fact, sometimes it flattens and it starts to curl
the other direction. And then I flip it
over and I blow try it again on this
side until it flattens. I keep flipping it over, back and forth, back and forth, back and forth until it
is nice and playing flat. That is a little bit of a tip for something that you can do. I have a paper cutter,
it's really convenient. It will create a nice
straight edge when it cuts. This is the cutting
edge right here. I line it up here. Make sure it's flat
against the top. And then that's cut right off. To do the same thing over here. I lay my art inside. There you go. It is framed
and ready to go on my wall. And I can't wait to see what
that looks like on my wall. Thank you so much
for joining me. I hope you had a lot of fun and that you learned
something new about yourself and maybe
something new about watercolor. I really had a good time making this painting with
you and for you. And if you'd be so kind, please give me a review. Follow my account. Go ahead and upload a photo of your artwork that you just
did for your project. I would really like
to celebrate you. I have some really
fun things planned, and I can't wait to
work on them with you and see you in
the next class. Have a great day
and happy painting, get those paints out and just see what happens
when you let go.
 Brenda Jones, Watercolor Artist & Teacher