Transcripts
1. Introduction: Are you looking for
new ways to explore collage art making techniques
in your artistic practice? Have you been wanting to expand your approach to
abstract art making? Hi. My name is
Elizabeth Welfare, and welcome to my class, Abstract Galage in three ways. I am a professionally trained
artist and art educator, as well as a published
author illustrator. In 2020, I began teaching
classes on Skillshare, where I explore and share different artistic approaches
that I am learning, as well as ones that
are tried and true in my past teaching practice
and artistic practice. And I also love exploring creativity and
inspiration and warm ups. And creative practices
that help inspire students on their journey in the creative
art making world. In this class, we are
going to be exploring three approaches to abstract
collage art making. I'm going to share three
techniques with you that use very basic
materials that you'll have on hand or ones that you
could create to enhance your collage materials
as you approach abstract collage art maaking throughout the
course of the class. This class is intended for
creatives of all skill levels. These can be creative warm ups. These can be the foundation for a new art project
that you can create. They can also just be a regular artistic
practice to keep you creating through
those really busy times. By the end of this class,
you will have explored the new ways to work with collage with an
abstract approach, but you could also
definitely incorporate some representational and imagery
art making in there as well. You will have created
three abstract collages, and you will have
grown as an artist in found a new way to
get yourself warmed up, get the creative juices flowing, and create, no matter how little or as much time as
you may have available. I hope you'll join me in
this really fun class as we explore abstract
collage in three ways.
2. Class Project: For our class project,
we are going to be using various collage
materials to explore three different approaches
to abstract collage making. These can be done very
small or very large, depending on how you want
to approach the project. But the materials are pretty
straightforward and basic, but you could definitely
check out some of the other classes
that relate to making collage materials
of own if you're curious about expanding your
collage material stash. The end of the
class, you will have created three abstract collages, using three different approaches
to collage art making. It's always so fun to see what
everyone creates in class. So as you create your
three abstract collages, or when you're done
creating all three, be sure to head on over to the projects and
resources section of class and upload photos of the collages
that you created. Now, let's go head and over to the next lesson to talk about what materials we're
going to want to have on hand for class. See you there.
3. Materials: Welcome back. Now,
let's talk about what art supplies we're going to want to have on hand for class. For this class, we're
going to be creating three different
abstract collages using similar
collage techniques. You're going to want
to have paper to glue your three collage
techniques down onto. You're going to use loose
sheets like this or you can work into a sketch book
completely up to you. Then you're going to want
to have a glue stick as well as white liquid glue, depending on the thickness of the collage papers that
you're cluing down. For the thinner ones, I'm going to use a glue stick
for the thicker ones, I'm going to paint down
the glue with this, I need white liquid glue as
well as an old paint brush. Then I've got a
scrap of copy paper here so that I can
have a surface where I do my gluing to
keep my art table from getting covered
in dried glue. Then I've also got a cloth. I'm going to have half of
it damp and half of it dry so that I can wipe
off sticky fingers and then dry them
off and keep going without having to keep
running to the sink to clean off the sticky fingers that will happen with
all three steps of the product with all three types of abstract collage making. Then for our collage materials, one of our lessons
is going to be using strips of tissue paper. I've got a bunch of
different bright colors of tissue paper that I'm going to cut down and tear
down into strips. Another one is going to
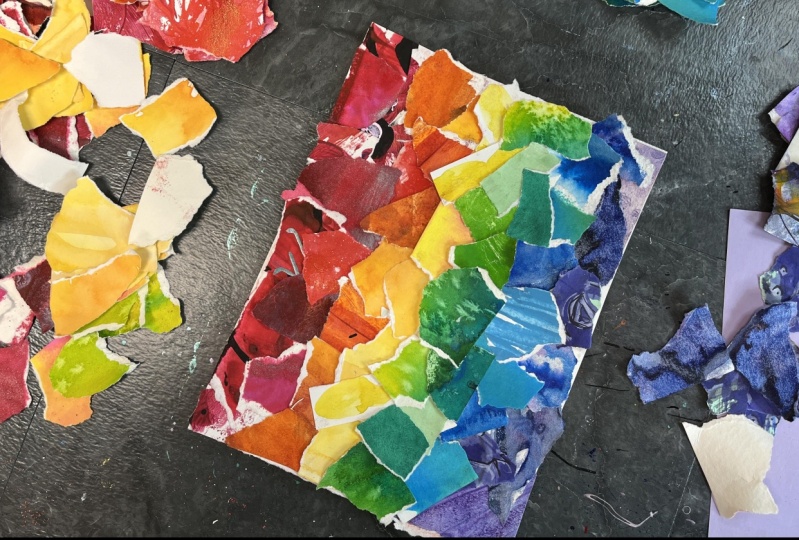
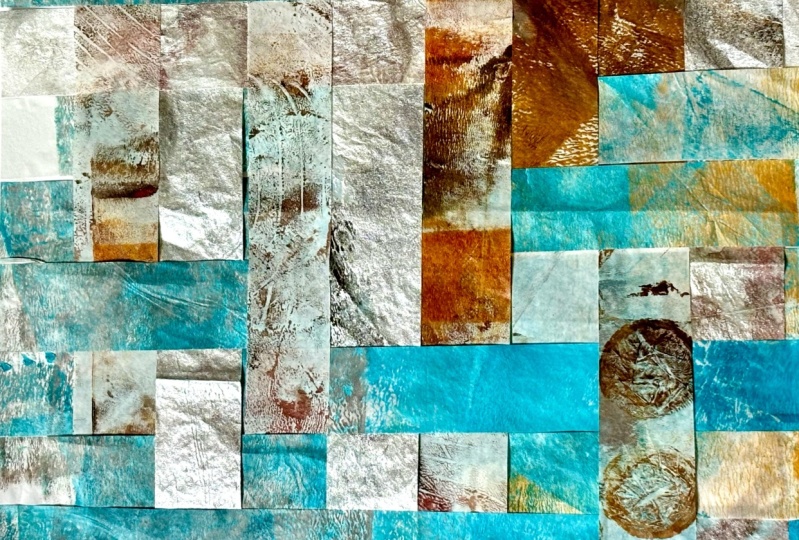
involve torn decorative paper. I'm going to be using paper
that I have created with different watercolor
techniques with from liquid watercolor
to watercolor. This was liquid watercolor
and shaving cream marbling. So really any
decorative papers you have or that you've created
would work great for this. Then for the third technique, I'm going to be using
scraps that I have collected from different
construction paper collages. If you don't have any, you can make some by just cutting out some interesting shapes and
saving all of the bits of it, or if you have some
collage scraps that you've saved, you
can use those too. But you can adjust any of
the collaging materials, any which way that you want
to to work best for you. Definitely watch
the three videos for the demonstration and then figure out what materials from your personal supply
will work best for you. Let's take some
time to gather up our supplies for
our class project, and I will see you soon
in our next lesson.
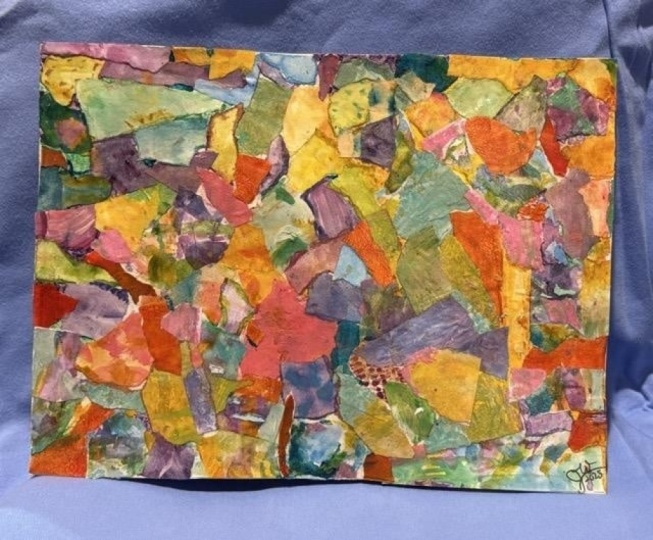
4. Collage 1: Now let's dive into our
first collage technique. So for this first
collage technique, I have taken some
decorative papers that I've created over the years and
scraps that I have saved, and I've torn them up into
just different organic shapes, just kind of breaking it
down into smaller bits. And then I store those
in tepperware container. And then for this one, I'm just randomly
gluing them down. I'm using white liquid glue, and I've got a scrap
paper on top of my gluing area so that I don't get glue all
over the place. And I'm using an
old acrylic brush. And I'm just randomly pulling
pieces out of the box. And just putting them down
wherever it makes sense. So as I work through
this technique, there is a little bit of intuition kind of
playing with that and kind of gut reactions and
whatever color I pick up, then I'm trying to
kind of in the moment, figure out where
it's going to go. I did start in the center, and I'm kind of jumping around, so you could start in the center and you
could spiral out. If you're someone that likes
a little bit more control and Rym and reason to it, you could even sort
your papers by colors and do this in more of a rainbow format
if you wanted to. I've done that before
for St. Patrick's Day background for a mixed
media piece that I did. So this time, I
wanted to play with a little bit more randomization, ale bit more playfulness
and just kind of letting things evolve as they kind of do as
you pull things out. Your fingers do get very sticky. So for all three techniques, it's a really good idea to
have a damp cloth on hand and a dry cloth so that you can kind of get your
fingers cleaned up again, but also dry so you can
go back in and not have all of the torn collage
bets stick to your fingers. And if you don't have
decorative papers or scraps of papers on
hand that you've made, you could do the same thing
with construction paper, you could do it with bits that you've torn
out of magazines. I love searching
through magazines for textures and
patterns and prints and colors and variations on all of those things as more
collage resource materials. So I'm just kind
of going through. I did kind of decide to, like, block in some
colors and kind of, like, as I pulled
up more oranges, kind of build up the oranges
along the left and kind of put the greens down
together in some spots. But for the most part, it's a fairly randomized
collage process. This is very relaxing, and very enjoyable, and you put on some good music
and just enjoy it. And then I folded
up the scrap paper, and I'm kind of
pressing it down over the collage paper so that I kind of get everything to
stick really well. And then I will leave
that out to dry. So after this is dry,
you can leave it as is, or you could go back
into it with Penn. Well, that collage dries, I'm going to head on over to
our next lesson so we can explore our second abstract
collage technique. See you there.
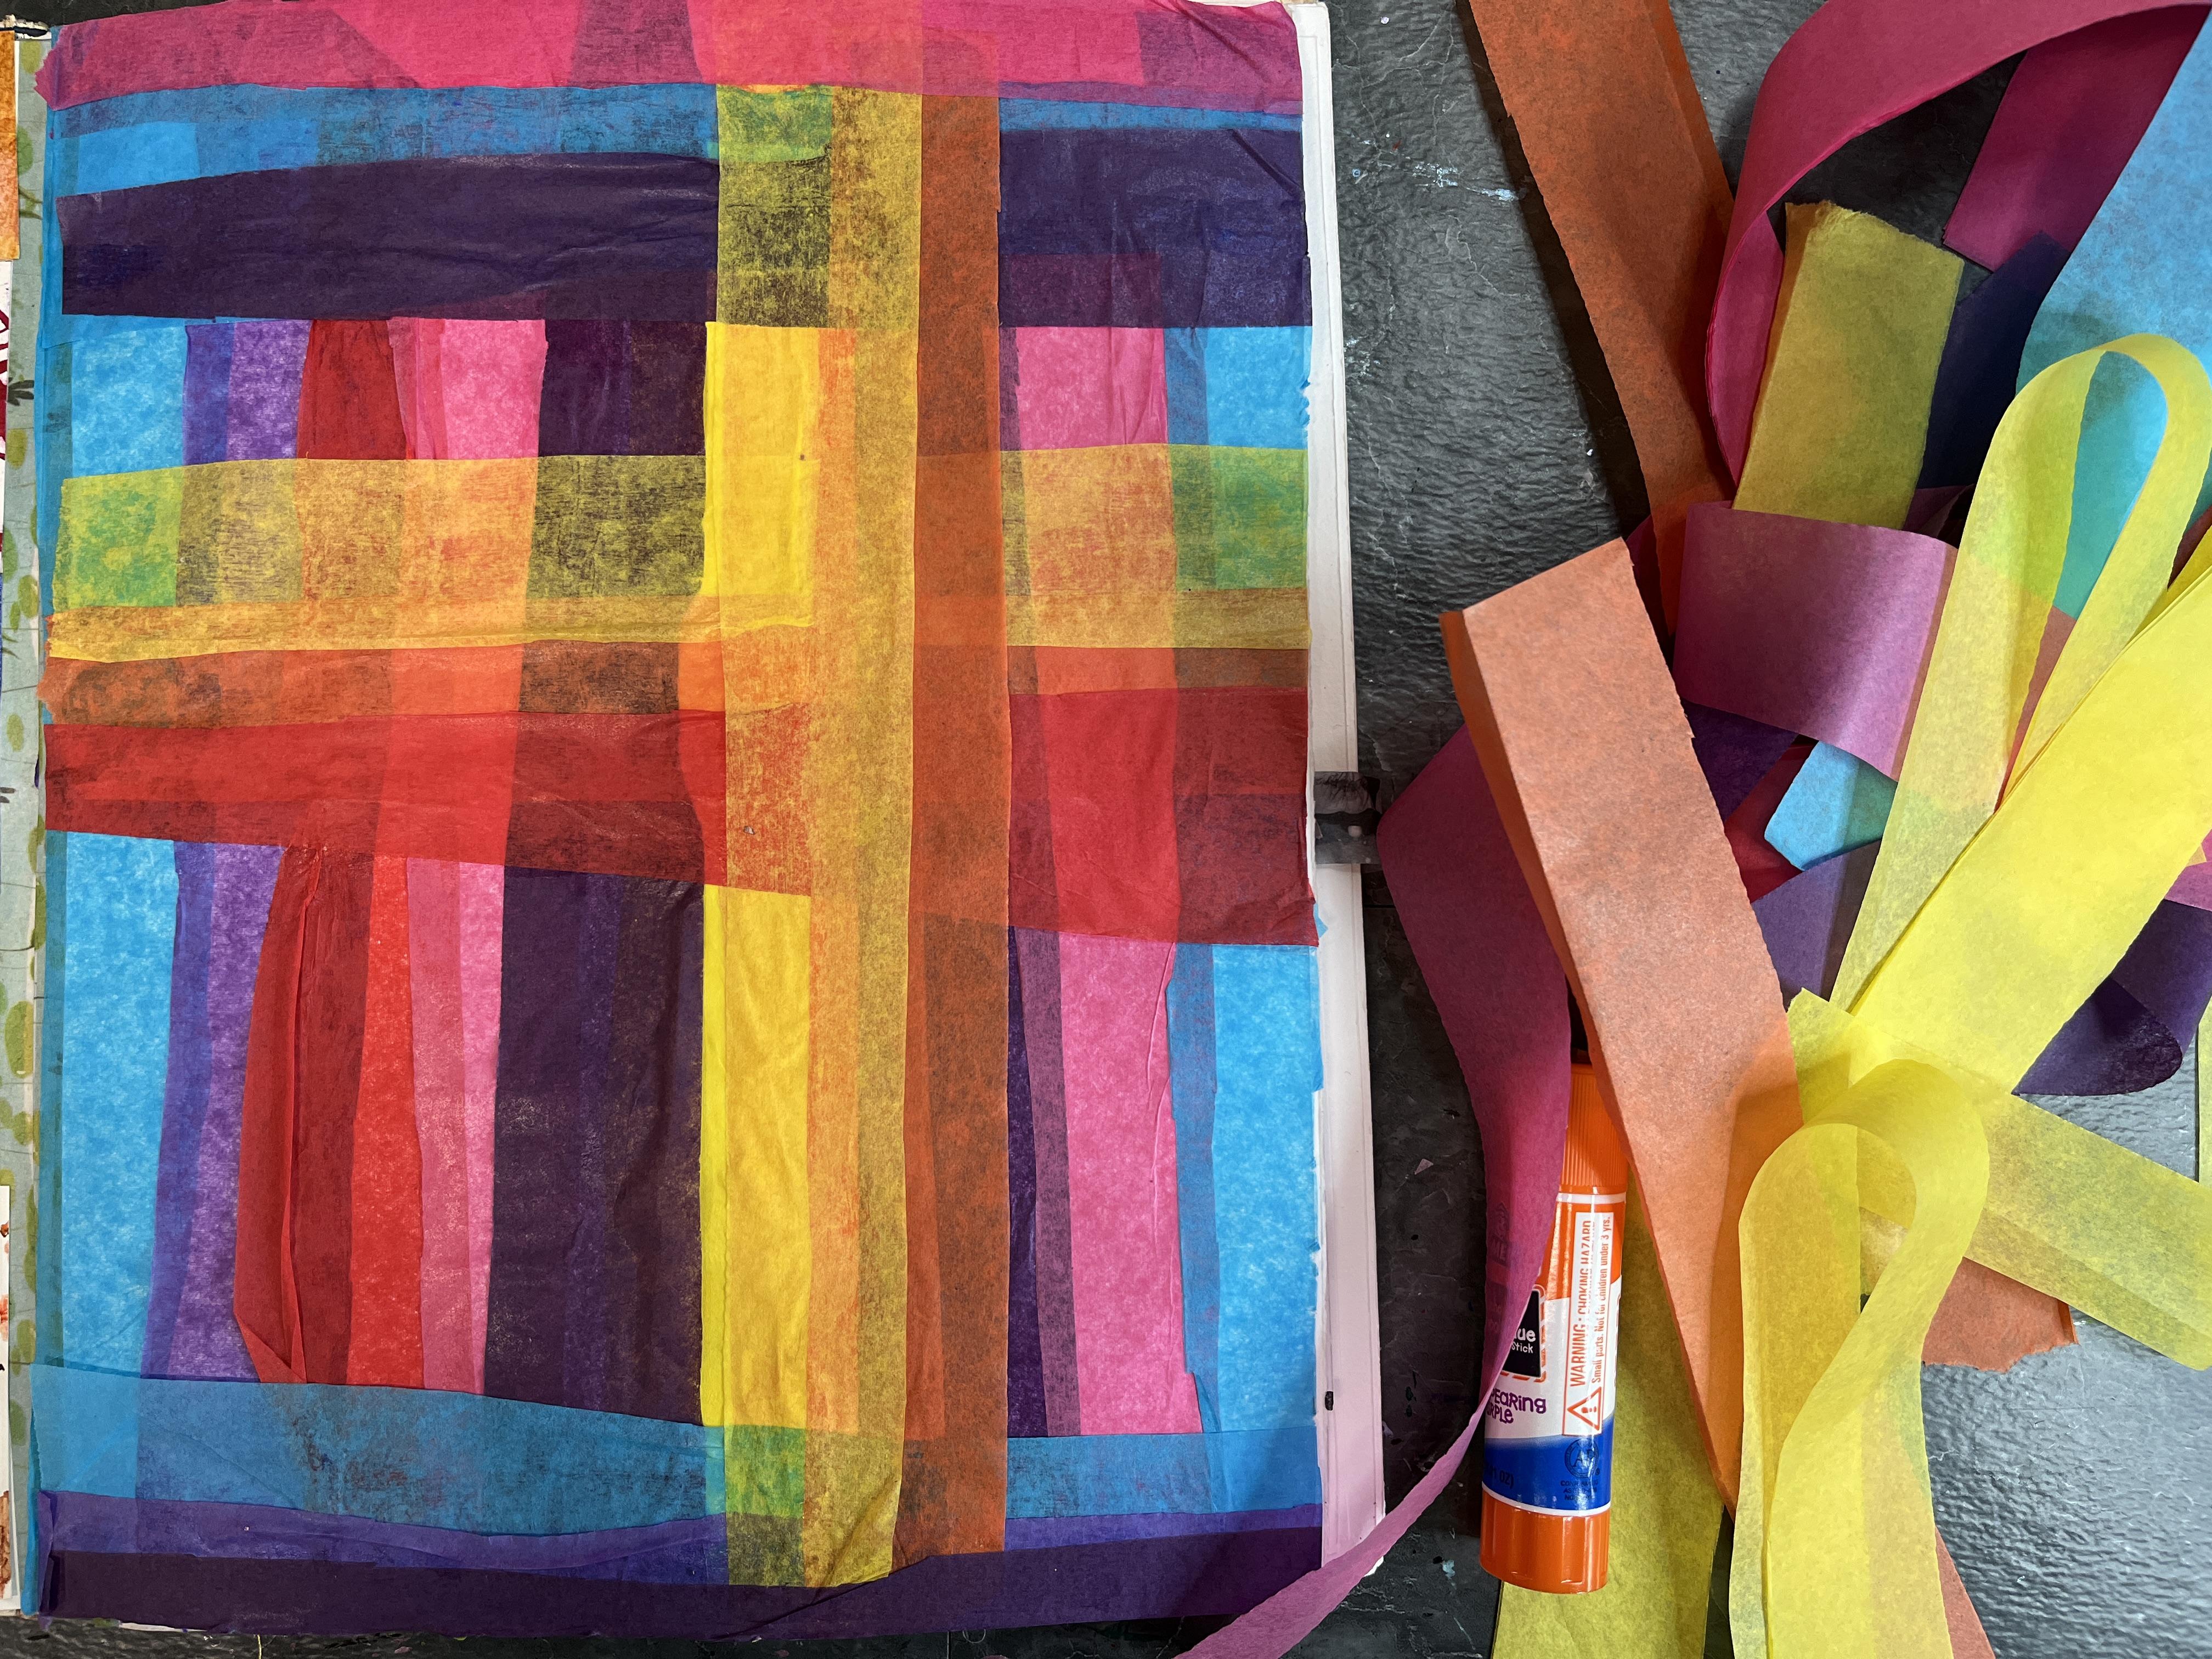
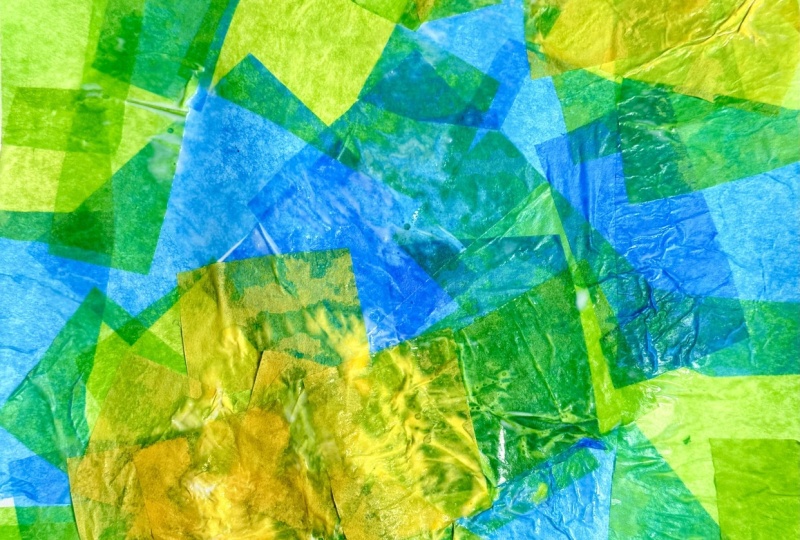
5. Collage 2: Now it's time for collage
technique number two. For the second
collage technique, I'm going to be working with
strips of tissue paper. You wouldn't have to use
tissue paper for this, but this is a really wonderful
medium to work with for abstract collage
because it offers a transparency element
that's really great. So these are strips of brightly colored
tissue papers that I have left over from a different
project that I was doing. But I loved that I could
see the potential for this. So I'm just using a glue stick
in my travel sketchbook, and I'm just laying down a strip of glue and then
putting down a piece of color and then laying down a strip of glue and putting
down a piece of color, and kind of building
it up, playing with overlap and creating a
vertical orientation. Then, my strips
weren't quite long enough to fill the
entire sketchbook page. So that led to an
intuitive decision to start going horizontally
and to kind of play with a woven plaid
like vibe to this. So I started putting down
some horizontal strips, and depending on the opacity of the tissue paper and
the boldness of the color, different colors below
them show through, which I thought was pretty cool. Then just continuing to
play with layering up and breaking up that vertical with the different
horizontal aspects, and then going back in with
some vertical pieces, too. I really builds on the overlap and gives
it some interest to it. You could work with
different styles of paper or tissue
paper for this process. I highly encourage you to play with laying down strips of paper to see what you can do with different vertical lines
versus horizontal lines. You could even have some
diagonal lines in there. You could play with thin strips versus thick strips and
anywhere in between. Then because the strips
were longer in some aspects than the different aspects of the page, I'm just
trimming that up. And cleaning up my sketchbook so that everything
fits nice and neat. And I'm just kind of
pressing down a little bit, kind of getting anything
that's a little bit loose. So this is a really
fun way to play with color and line orientation. While this collage dries, I'm going to go and
head on over to our next lesson for our third and final
collage technique. See you there.
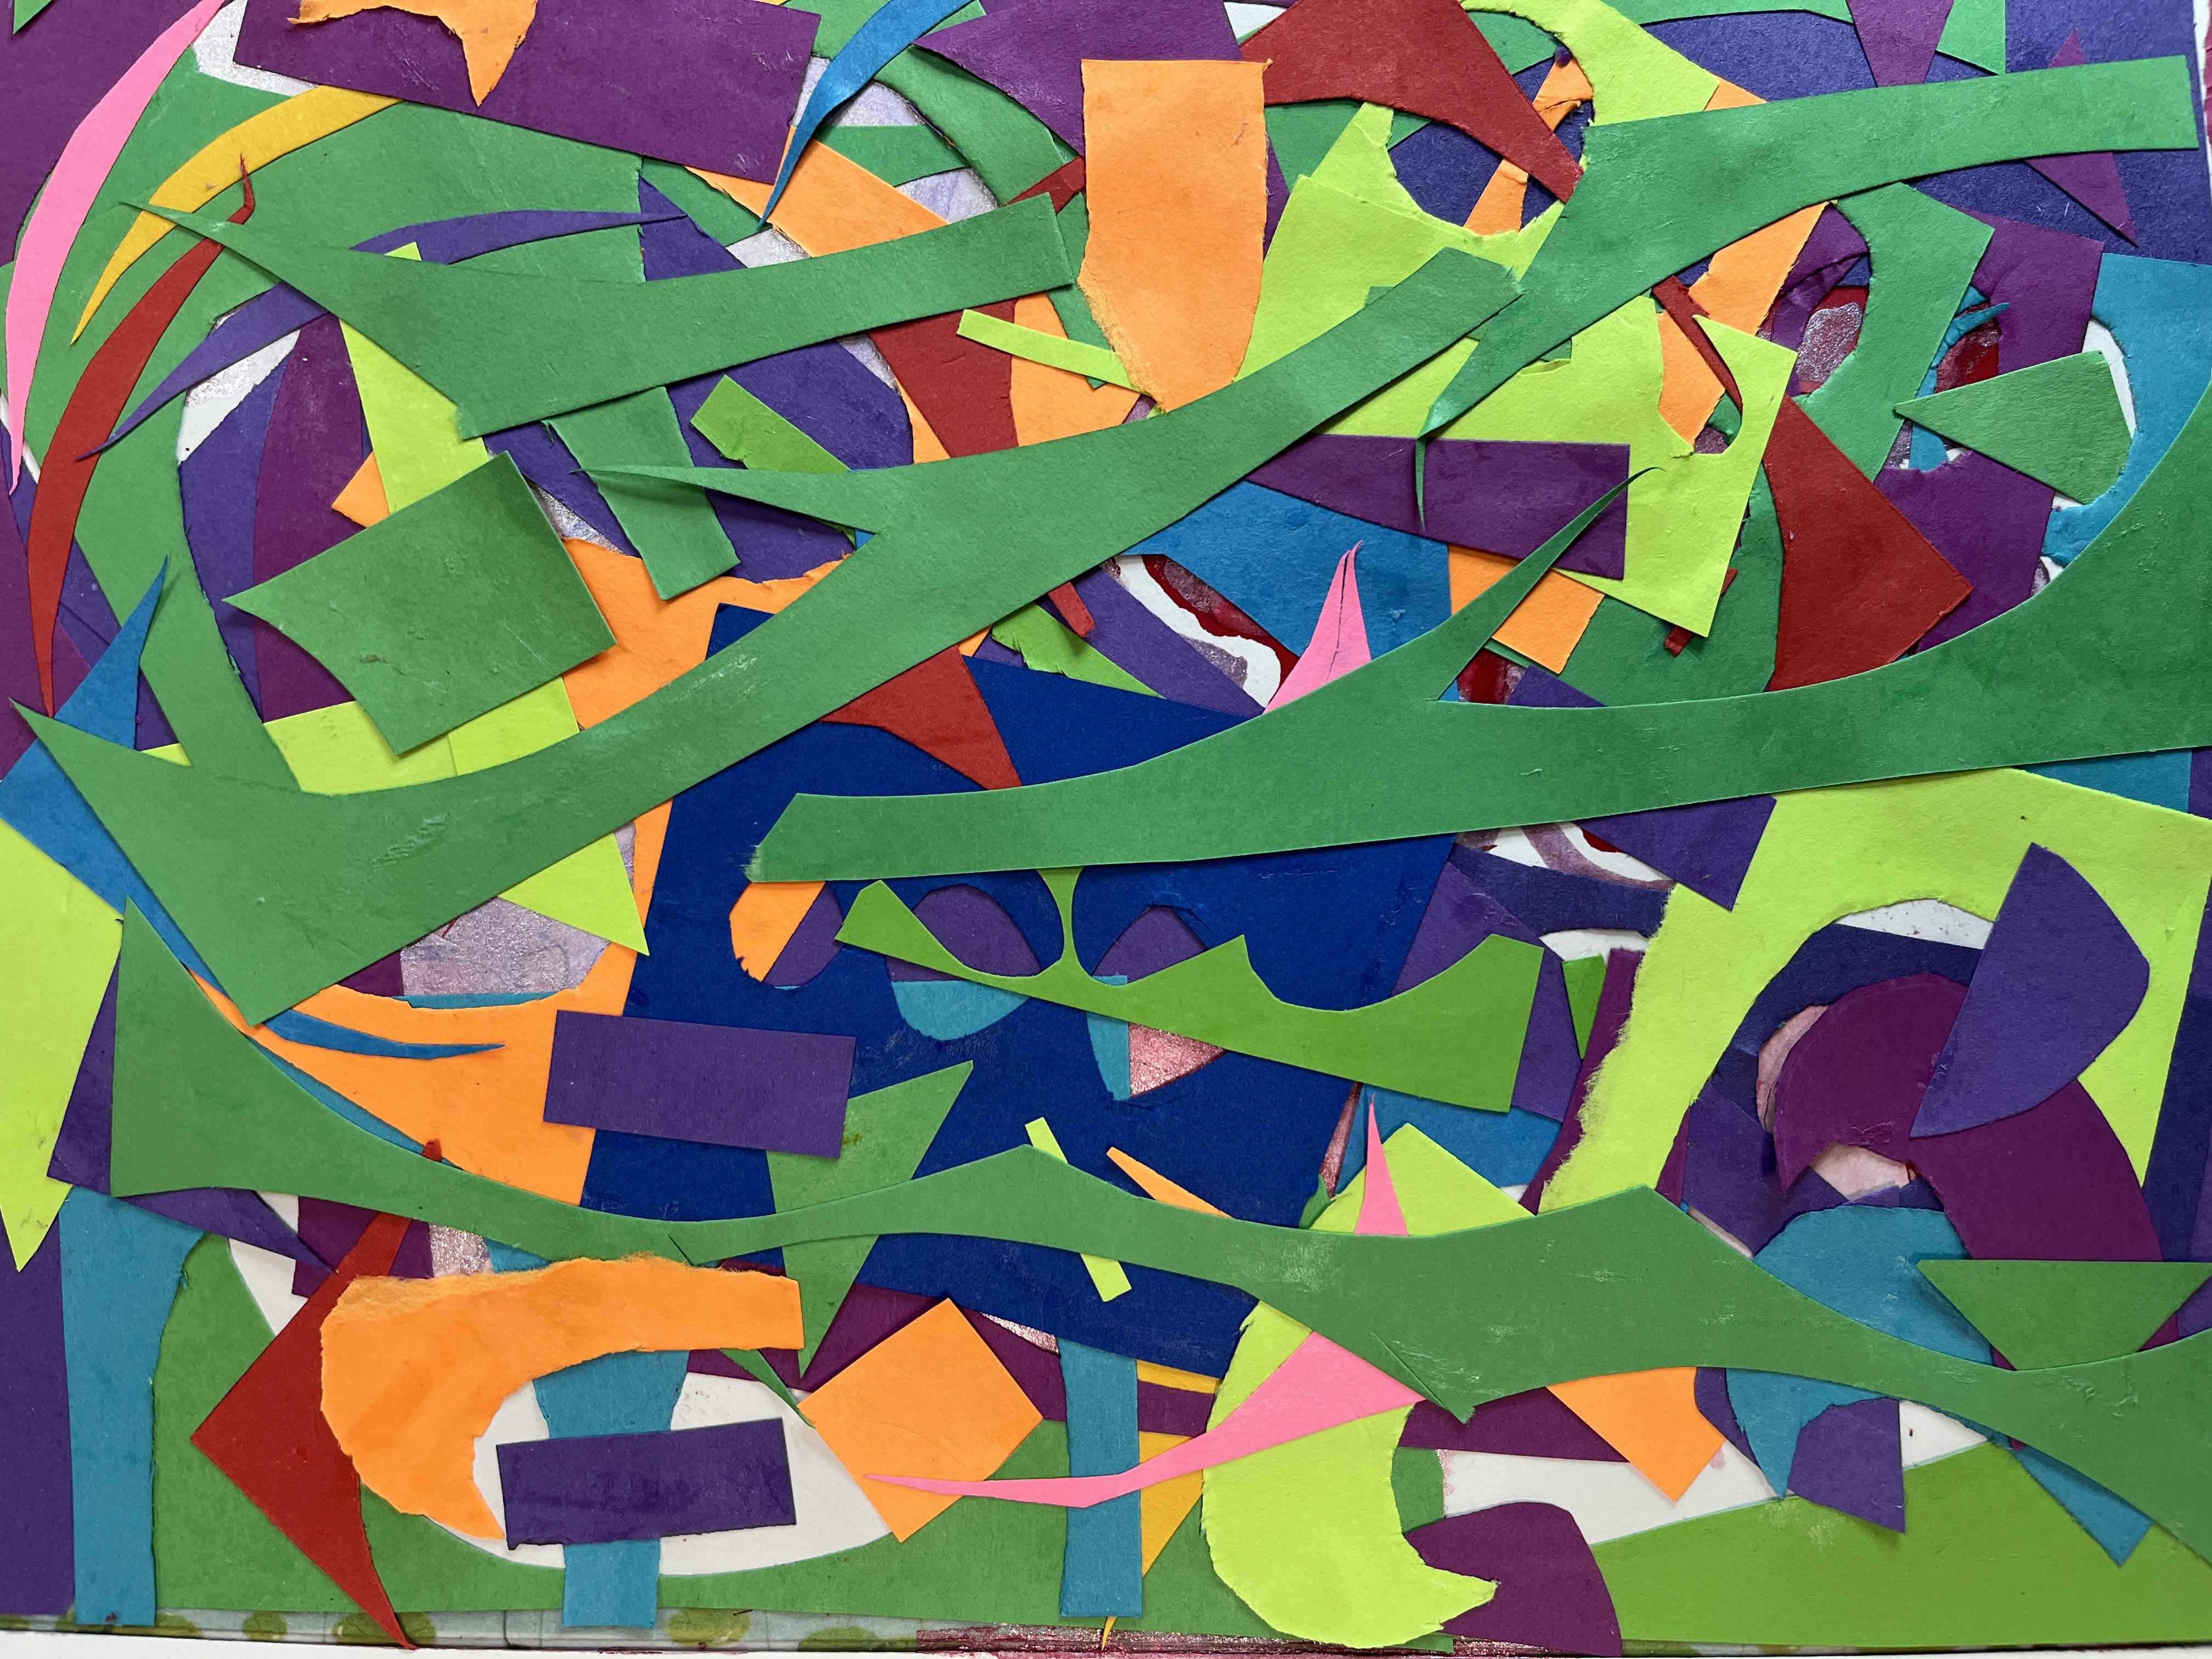
6. Collage 3: It's time for our third and final abstract
collage technique. So for this third
collage technique, we are turning to our collage
scraps for inspiration. I have all sorts of
different scrap pieces of construction paper that I've accumulated over the course of doing a couple of
different collage projects. And I really started
seeing some interest in the positive and negative
spaces that they create both when you put them down and
in their own right. So I'm just randomly starting to collage those
down into my sketchbook. I'm doing this over a page
that I had experimented on, and it's kind of a failed technique experimentation thing, so I'm kind of
reclaiming that page as something of
interest and color. So this is a great way to
do these techniques, right? They could all go
on different pages of your sketchbook,
and, you know, if you've worked
on other stuff or you've got some practice pages, you can kind of turn
those into something new and fresh and get some
use out of that paper. So a lot of these
collage scraps, I was doing I was cutting
out repeated shapes. So I ended up having
repeated collage scraps of, like, similar shapes, but they're all in a
variety of colors. So for this section, I'm
glued down some of those. I have some long strips,
some small strips, and I just started grabbing
pieces from the pile. And layering them up to kind
of fill in the white space. It's ultimately trying to break up the page and break up the different
sections of scrap paper and kind of start to
intuitively consider where I'm placing shapes and colors to start bringing the picture
together at this point. It's going to be
extremely random. It's going to just be, you know, kind of a relaxing
exercise of just, choose glue, you
know, put it down, and then building it
up until you feel it's done or until you
run out of scraps. Whatever happens first. So
this is a really fun one. It could make a
great background. You could scan this
sin and use it, as part of a digital collage, or it can just be a colorful abstract collage
in its own right. And if you don't happen to
have scraps lying around, this is a great
chance to just start randomly cutting up
paper to create some. Now that we're done with all three abstract
collage techniques, let's head over to
the final lesson to wrap up the class.
See you there.
7. Final Thoughts: I had so much fun sharing these abstract collage
techniques with you. I hope that you are feeling
inspired, energized, that you are seeing that you can dive into abstract
collage making, with minimal supplies with any little or large amount of
time that you have on hand, and that you are excited to incorporate this into
your artistic practice. I would love to see
what you created. Don't forget to pop on
over to the projects and resources section
of class and upload some photos of your
abstract collages, and be sure to stick
around so that you can check out the class
projects of other students, and be sure to give each
other some feedback as we all grow as abstract
collage creatives. I also would really
appreciate it if you took the time
to leave a review. Your feedback is the most important way
for a teacher to grow. This teacher is a very
reflective teacher who loves to hear
from her students. So any feedback that you have about what you
enjoyed about the class, suggestions for ways
that I could enhance it. Idas for future classes can
also be shared there as well. So thank you so much in advance for taking the
time to leave review and sharing your experience with the class with others
and myself to help others who are thinking
about taking the class join our abstract
collage making fun. We can also stay connected
through future skills classes. If you click the follow button, that will notify you of any new classes that
I add in the future, and I have a lot in mind
that I am working on in the background
that I am super excited to share with
you down the road, and we can connect outside
of Skillshare as well. On Instagram, you can find me at at Elizabeth Under
Square Welfare. If you share your projects
over there, be sure to tag me, I would love to continue connecting on social
media in that way, and you could also continue our learning journey on YouTube, where over on YouTube channel, I share our techniques, I share art making approaches, I share tours of what
I'm up to creatively. An art adventures that I go on, I film and share
with my audience, and it's just really fun to keep connecting beyond our
class time together. So thank you so much
for joining me in abstract collage
making three ways, and I'll see you next time.
 Elisabeth Wellfare, Artist, Art Educator