Transcripts
1. Introduction : Abstract art that
does not attempt to represent an accurate
depiction of reality, but instead uses shapes, Carlos, forms, and gestural
marks to achieve its effect. Vogelstein, this
free-spirited is to take that mixes
different cultures and artistic expression
into an electric style with an emphasis on organic
elements in nature. We will be combining these
two together that is more hostile to make this
beautiful paintings. Hello. This is RBI, Silvana, or teacher
and an artist. Judy. We will be painting
these full gorgeous paintings. Along with that,
we will be looking into the materials
required and how to paint this main things and doing truly happy learning
and happy creating. Join me now and
let's get started.
2. Materials Required : Now we will be looking into
the materials required. As you all know, I love this beginner
friendly watercolor paper. That is Canson 300 GSM, cold press watercolor paper. I'll be dividing this
A5 size people into two halves in a vertical manner so that it can be
used as a bookmark. You can exactly cut out the paper according
to your choice. I just don't want
to eat the people. Looking into the
other materials, we will be using a masking
tape of 1 " along with that Sharpie Black Marco, Marco. And also our black 0.5 psi spin. If you have these markers, you can always print them
using a pointed tip brush. You can also use a black pen instead of exact
foreign A5 size spend. The next element is
the mixing palette. To dispense the Carlos
and use the colors. I'll be using your
peasant artist grade Brewster wash paints. You can use acrylic
and watercolors to D3, Carlos, I'll be using
for the first set of printing as
fleshed out in pain. And I really black. The next three colors, I'll be using ropes,
kylo, saddling blue. And deal with these materials. I'll be using two jars of clear water and or
tissue or accordance. And also, I'll be
using a flat brush, round brush of size ten. I believe these materials will be available with you guys. So grab your supplies
and let's begin.
3. Aesthetic painting : Let's begin with
our first painting. Let me just step down the
people with the masking tape. You can use caused by tape. Make sure you tape it down in a straight manner
so that when you remove the frame doesn't
look like asymmetrical. If the tape is too sticky, make sure you use it on plot
before applying it on paper. One to apply the tape, make sure you go
back and forth like that so that the paint doesn't
come beyond the point. Now let me just dispense the
paint and mixing Berlin. Firstly, I'll be using fleshed and next, I'll be using hot thing. Now using these two colors, I'll be painting the background using a flattened
brush of size ten. And it'd be mixing
flesh and blood, some water droplets, and making random shapes
on the people. Abstract art means
use of hello shapes, random designs, rather than actual design or shape,
which represent something. So let's make some shape. The brush at the tip and making design corner
of the paper. I have painted an S-shape and filling out the inside part. You can go ahead and make
any shape square, rectangle. So cool, triangle, any shape. Once this is done on the corner, I'll go ahead and make
the center of the people. Make sure you do
it in a thick mat. Know if you're using
watercolors and one in the background
to be transmitted, then go ahead with it. Or use acrylic or gouache. If you don't know
exactly how to make the shapes in paintbrush, then use benzyl and then go ahead and paint
and not designed. Now, I'll go ahead
and make a U-shape. And then Philip, as you can see, I have made only halfway you
and that to an inverted one. I'm going ahead and
filling the scene being in that you can just go ahead and make
outline of U-shape also. Now I'll just go ahead and read that model and then
make it into a circle. You can go ahead and make
whatever shapes you like. Now, let me just shift
them to the hot pink. It means it's being called an inverted P. And
that will have fun. I will go ahead and
fill in the space, at least make sure
that the paint isn't ticked consistency to add
the dad or trans fat. And one, as you might
have known that Bosch can act as accurate
as well as watercolor. It can be transplanted
as well as opaque. So I need the opaque form meal
in an inverted bell shape. Now once that is done, I'll go ahead and make
one more you that was an interim left side and ending Indian
in the left side. As you can see. That U-shape also. I'm trying to make the edges
smoothed that then rough. As you know, this is
a cold press paper so there'll be a texture. But I'm trying to make smooth, as much smooth as possible. Now on this randomly, some lines using a flat brush, I'll go head from bottom
to top, just like that. No things might
not look good now, but and then it
might look better. So whatever you like this
duster process and then keep going on the square also, I go ahead and try to
make it a bit broader. Morning dose to not
take consistency when everything is dry and let me just spend
some black color. I'll go ahead and make
leaves. The borehole. Art means making some
organic, natural things. You can go ahead and
add Florida too, but here I'm using black
color to paint the leaves. Then Florence, we will
paint flowers too. But right now leaves for me. Leaves firstly, I use
already pointed brush. And slowly without that and without probing
much pleasure, I'm dragging then so that
there is a line form. And as you can see how
I'm making a lever slowly dragging and then
pressing hard so that the crystals spread. And then I'm dragging out
and lifting it slowly. If you don't know how
to paint the leaves, make sure you practice onto the prostate and
then do it on this. See how easy it does. Firstly, small dragging
and then spreading the Bristol and then
slowly lifting it. Similar to the last
leaf like Natalie, I'll go ahead and
make one more from the top without any pressure, homemade a line and
then slowly blood pressure and then spreading the Bristol and
slowly lifting it. See how easy it is. If you're feeling difficult
to do it on the left side, make sure you're done
though, cardboard, and then you go ahead and do it. Left center, it
still looks empty, so I'll go ahead and make some more leaves
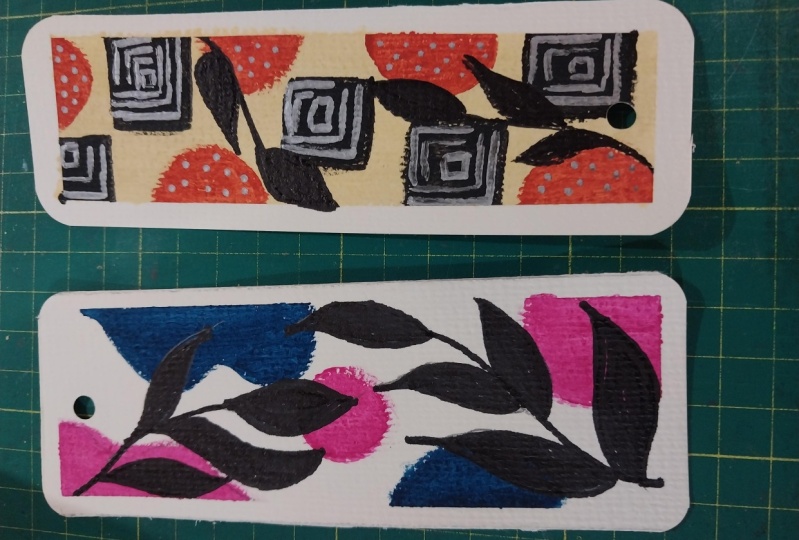
patterns in that time. And we are finally done
with this painting. As you can see,
it's minimalistic, but it does smoking so good. Now, remove the tape in a slant manner so that there's no ripping
off of the paper. As you can see, there
is of the same form. Since we have
submitted to leave, please. The masking tape. Isn't it looking so
we're all different. That's it. Yeah. And then
this minimalistic painting.
4. Minimalistic Painting : Let's begin the
painting number two, without wasting the masking
tape and go ahead and they blindly use masking
tape around the people. And also the other
side of the day. I'll be using number one, which is already used. Once this is done, I'll be using the
same combination of colors that is fleshed them. Thin and black. You can go ahead and spends
more color as required. We can also use the
fresh masking tape. It's not necessary
that you do use it. I'm just using it
because it wasn't used. And you can actually use it without spoiling
Liping thing. So I have I'll be
using flesh tint and we'll go ahead and
light on the background. As you saw that I ensured
the masking tape is really stick to the paper
rather than there is buckling. Go ahead and apply the
flesh and the people. Once it is bullied. I mean to say that it is, a mixture is applied. Then I'll go ahead and shift
forward to the bladder. And then before that I'll
make sure the edges up into n the paper is not completely dry. Sent me Dr. and I
didn't go ahead and add black color and squishy. As you can see. Give me a piece to black
shade of gray but not clean. You can make it into black
or any shape for any Carlo. I'm going with the same
color combination. You can apply it
wherever you want. It's a beast in black. Cautious reactivating the
previous South being mixture. So that's why it's
giving that Kylo. I'll go ahead and make
some squares all over. As you have notice, I have used flatten brush. You can go ahead and
use round brush and make it as well as you know, or have used minimalistic
brush set that is ramped up and flatten brush. If you don't have
anyone on these, you can even need to. Now, I'll shift to the round
brush and the paint Carlo. With this, I'll
go ahead and make some sell goods in
between the squares. If you don't know how to
exactly make this open, make sure you're
Dwight and the pencil and then fill it
out with the paint. I see is three. So quizzes
are worth more than ten. Already looks so good. Make sure those shapes adding in all trans fat and
form and it's big. Now I'll be using this. You need to go white, go, and make some moving on
to the black squares. We can go ahead
and make any type of where I'm going
with the lines. L-shape. Now when that's done, I'll shift over
to our black pen. That is 0.5 psi is you can go ahead and use water
type of brand new one. And I'll go ahead and
make leaves with it. As you can see, make sure the paint doesn't dry
before you do it, one of the leaf has
ruined with this lonely, shy it, dry completely
and then use it. I'll go ahead and make one
in the left Central as well. You can make any type
of leaf, banana leaf, or euros when I leave, anytime I'm going
on the symbol one. And now from the unbound, but I'll go ahead
and make one more. Since my pen go join with the
wet paint and shift or with the Sharpie marker and then
draw the rest of the leaf. Seemed. So looking good. If you want to do
it with Sharpie, go ahead and make them mature. I feel that's looking good. Let's go ahead and
remove the masking tape. Make sure you remote in a slant so that the
paper doesn't drip off. And since the papers since the tape is already used, it on, the sticky as the fresh
day will be smooth. Looking beautiful. Our second minimalistic
abstract painting is done.
5. Leaves Design Painting : Okay, We are finally
done with two paintings. Let's start with the third one. I'll be using a new
combination that is, now I'll be using rose color. You can go ahead and use a pink color also
are reddish pink. I'm using a proper
rose color from blue stroke, wash, rinse. And along with that, I'll go with the two blues
that is surrealism blue, and also arterials Carlo. You can go ahead and choose whatever combination
you require. And also you can choose monochromatic colors
like light purple, dark purple, and
the most darkest. To. Amusing these three
colors right now. The tubes actually blow out sometimes and cause the pain
to leak out from backside. So make sure you press
from behind to that the pain comes out and there's no blotting of the
tube and there's no stage. This is what I have learned from this stock off rostral Gua Sha means that it will automatically bloats
and then it leaks out. And while you press
the pain from behind, it causes less off
such leakages. Now I'll put the tape
around the paper. Again, make sure you put it
in a symmetrical fashion. Now I'll be using
a round brush and then are similar to
the first painting. I'll go ahead and
make some leaves. As you can see how
I'm making a leaf, take the most point
is around rash and then fill it out completely, slowly or drag with
light pressure. And then put some
pressure and then drag it again and fill it out on the other side of the crystals aren't
spreading that much. I'll go ahead and
make some leaves. Are the people. You can make as
much as you want. That's the other way
of painting to talk. You can always draw it
first and then fill it up to our goal
by parts and buds, just like what I did. Whatever shapes you want, you can just go ahead and do it. Right now. I'm filling
this with leaves, pink are the leaves. Now once that is done, I'll wash the brush thoroughly and shift to settle in blue. Make sure you add water in limited quantity and
don't make it too watery. So it would look
like watercolors. Let it be like, Oh
gosh, I'm making here. Good. You can make how many ever so close to 11 in the corner. I'll go ahead. No, go ahead with the color
and make up your shape. You can see you can go ahead
and make any type of shape. This looks so perfect for me. So I can go ahead and fill up. I'll make one more. I think one more Can
want to be put up. So I'll go ahead and
add that as well. Make sure though are
defined rather than smudge. Fill up the space with Telco. You can slowly go ahead
and follow the edges. So it gives us more
texture rather than one. As I told, make
sure you go ahead and pick consistency rather than what you have done watery mixture to
go over it again. Now let's shift
into the markers. I'm using a sharpie marker
and then I'll try to make one branch leaves. Conditions, checkout blends. Before you actually do it. You can go ahead and
try whatever you want. I'm going ahead and making
too many leaves. The marker. Try to define in our leaf D in detail in an alternate. I know. I have also highlighted
the alternate leaves. And now I'll shift
into the white marker and doodle on to the shapes
misfolding in this painting. I'm going ahead with just
dots using white monk. Go onto the bell-shaped. That's it for the painting. I don't want it to
look even more clumsy. It's already looking for. So I'll just go ahead and
remove the masking tape. And also if you find
any undefined edges, make sure you define it. And yeah, that's it
for this painting.
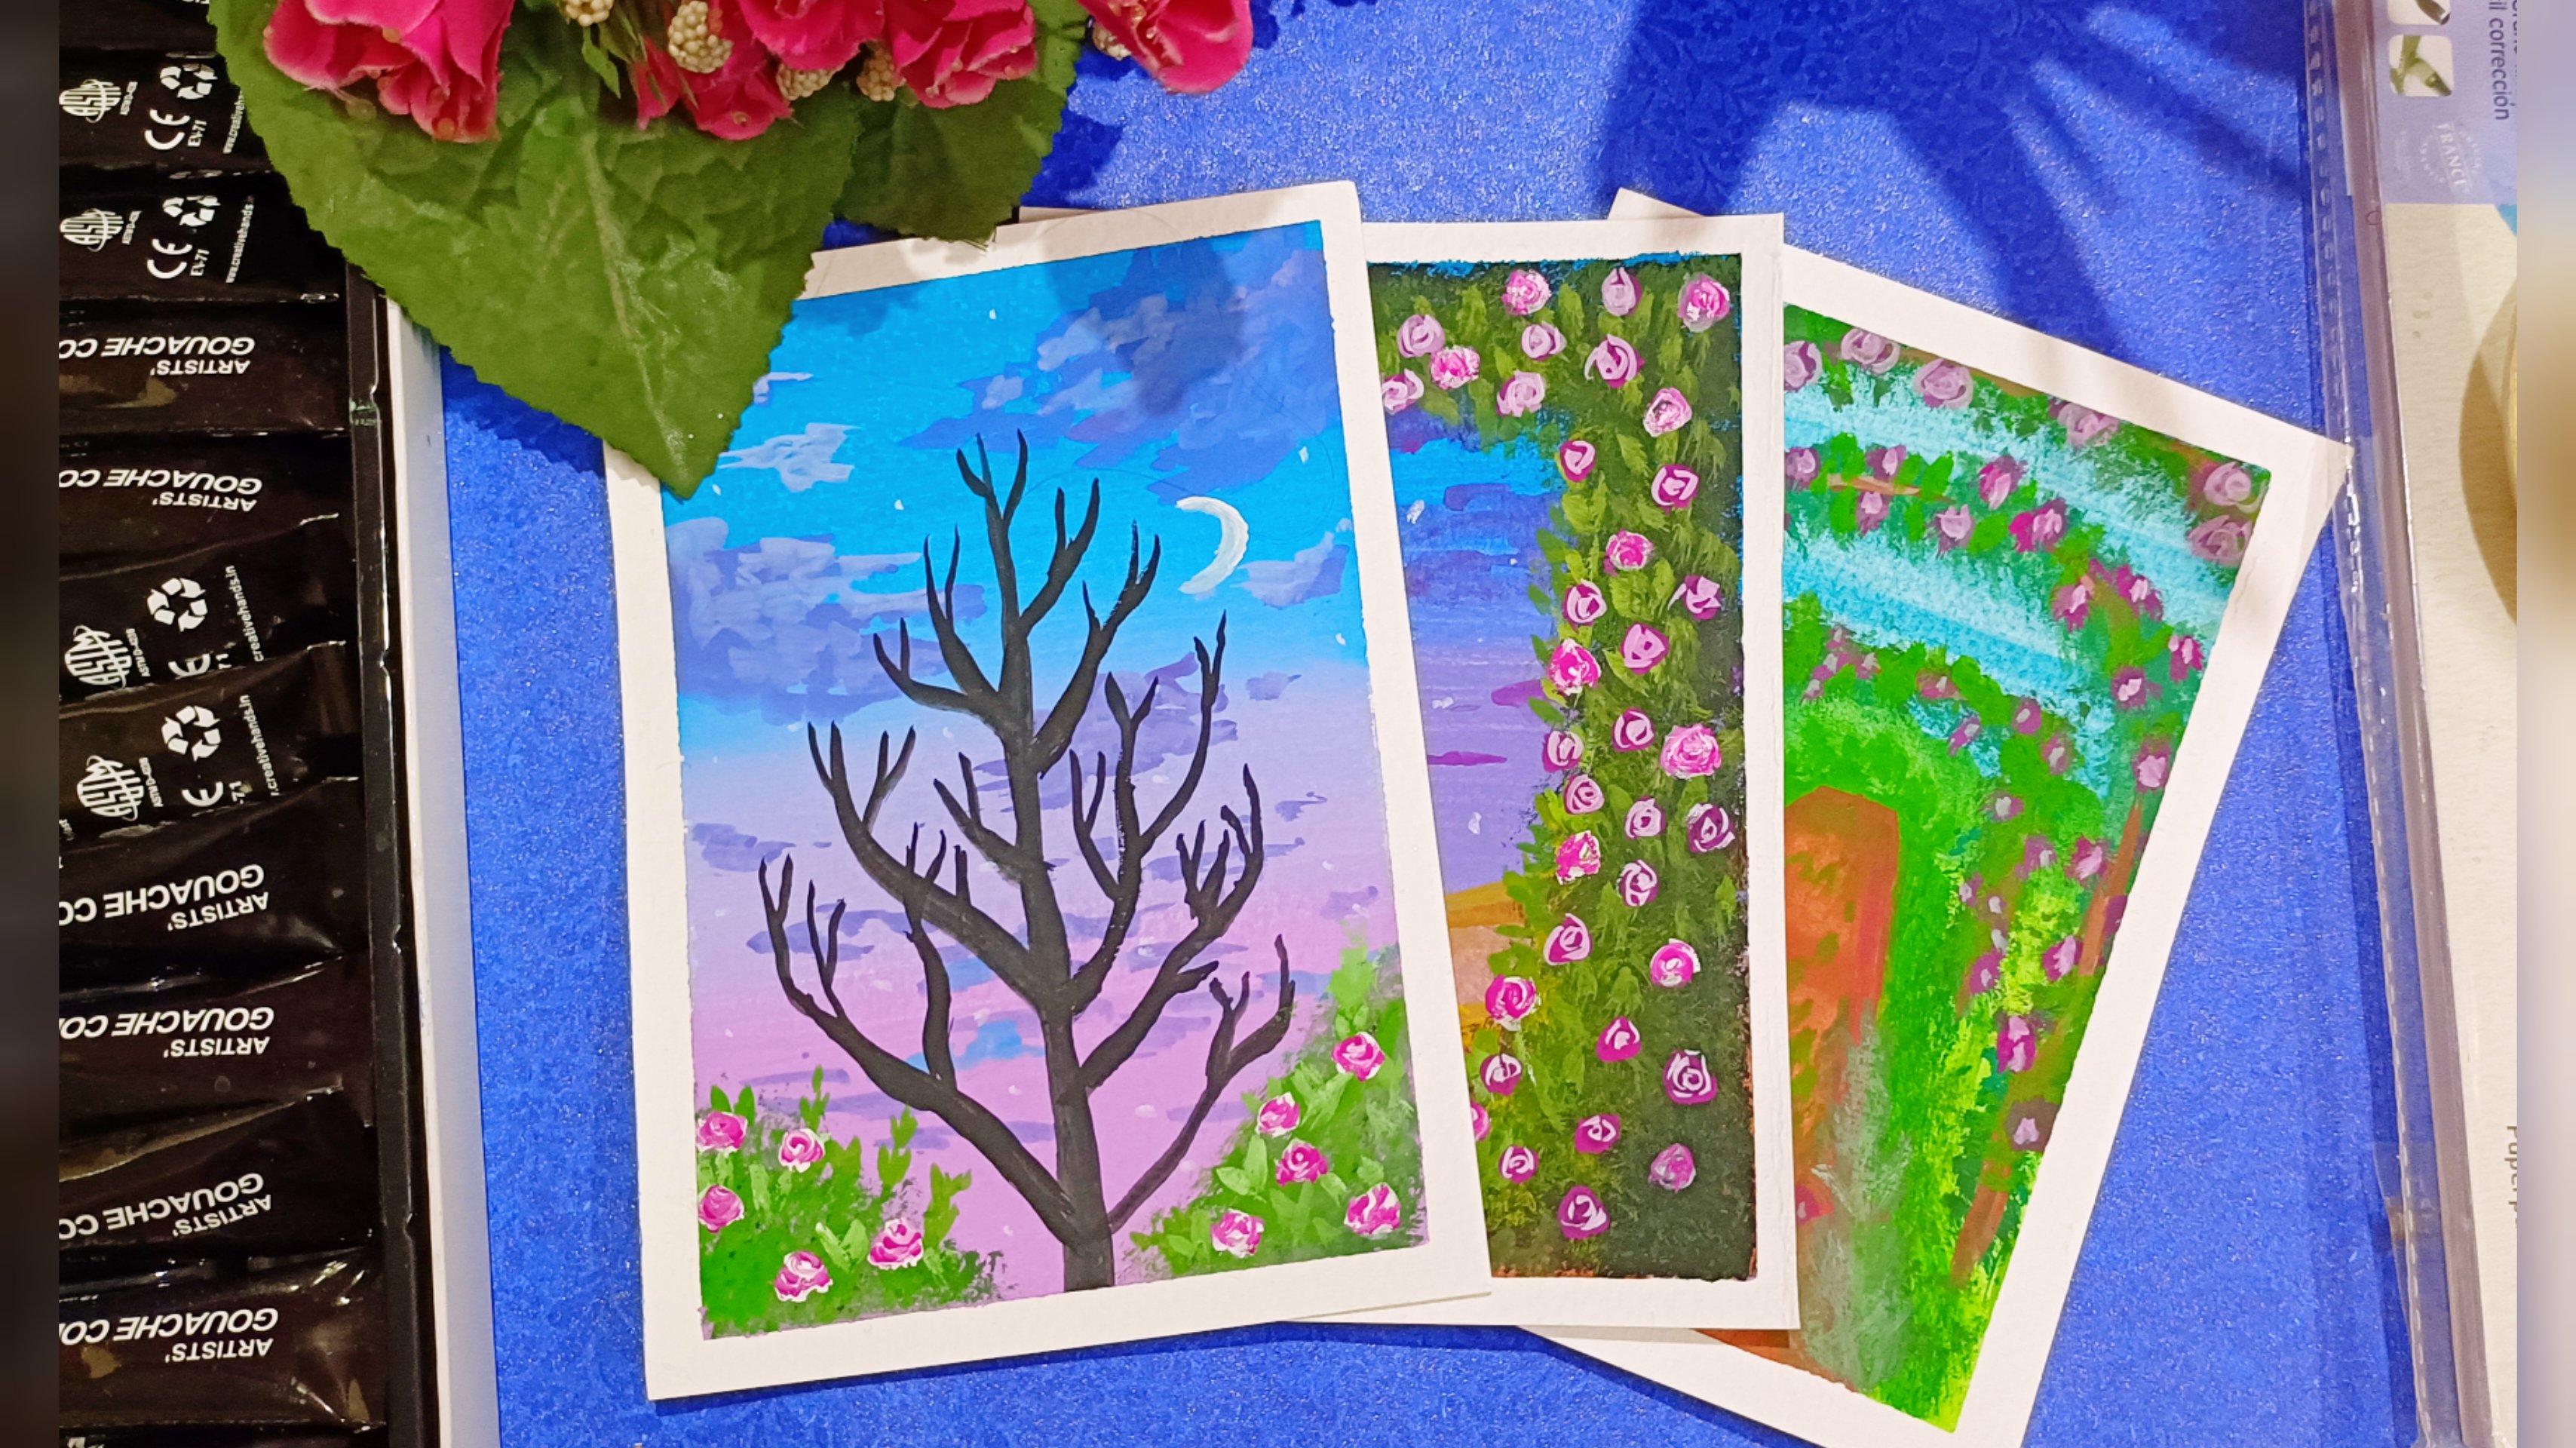
6. Floral Design painting : Moving on with our
final painting, I have decided to
use the same three, Carlos, but I'll be painting the above half differently
and below half differently. So let's tape down to people. The full painting. Ensure that the tape has talked to
the people properly. Now, moving on with
the painting part, I'll go ahead and paint with candle and do the one
half of the people. Don't. The only thing that this abstract painting
is so relaxing, you can paint anything
and give up life, do it by painting on natural element to it like
leaves, flowers, etc. Yes, For this last painting, we'll be painting
some flowers as well. We are not actually
painting the flowers, but we will be depicting
there's a flat element into it. So once I have properly
painted the teal color, I'll go ahead and
add it on images. Let me just go on with a rose color and
with a round brush. I'll go ahead and make a floral
like five petaled flower, which is not exactly
flat but shadow or type of solute type fly. You can follow the Fibonacci
series of flower petals, or you can just
randomly make any flat. The lower half of the
flower looks transparent. So let's make it opaque by painting one
more layer onto it. Now, this looks all empty. So I'll go ahead
with this Adam Lynn blue and make lines,
diagonal lines. As you can see. This is a good hand
practice as well. And be slow and patient
and just draw our lines. Make sure you draw ten lines
rather than take line. So be very careful, gentle pressure lists
and go with it. It's okay if you make
mistakes, it happens. So just try doing it. Whatever you make it as a masterpiece or class
because it's made by you. So practice makes
you a good painter. So once those diagonal
lines are done, we will move on to
the teal background. Using the same color. I'll go ahead and put
a natural element, another natural, and it
meant I could say Sun. So I'll just make a little blue, so good and fill it over. The best part about Bosch
and layering makes it. When multiple fake
and it doesn't let the low Carlo be more than
one retreat applying. So it's always good ones. This painting patterns
done and dried. Let's move on with the markers. I will try making or Florida or teal part of
it, the black marker. You can just notice
my drawing first and then go ahead by practicing it on the
practice people. And then we'll go
ahead and paint over it and draw over the painting. Just see I have just done the three-step process
for the flower. And one more step, then your filaments rate. It's so easy to do around and make
something which is cool enough to make things be
more than minimalism. Some leaves and stem. Now a black man uncle, I'll just go ahead and
bolder painting and then also add some
shadows and shading. Some bark. This leg back. One the shading but even just go
ahead with the alkaline. But I like those
lines, field lines. It's not actual
shading, but yeah. So once the deal is done, Let's move on with
the pink flower. That is rows flag. All we'll go ahead
with the outlines. I'm just adding some
folded petals everywhere. You can notice how I do it. And then cover up
from the side and M shape and the first and then
coverage from background. I'm not doing exact M, but at times I'm doing it. Intend to go ahead
with some not so good. And also here I'll try
making some shavings. Lines. Wow, that looks so good. Now let's go ahead and
make that San Marco, the sun rays with white marker. One longer line and
one shorter line. Doesn't this look
like we are in UK, the class where we used to
draw sun, stars, moons, etc. But it's looking
beautiful, isn't it? I'll add some white dots onto
the flower in the center. This looks so beautiful. But let me just add some
more elements into this. Since it's not a minimalistic
painting anymore. We'll go ahead and fill
up this whole painting. I'll go ahead and add
our dots everywhere. But onto the team will go on. Certainly in blue,
mostly. Let's see. Now, the low part is
looking beautiful right? Now, let's go ahead and make some Sarah Lynn blue dots
onto the teal as well. That's it. Let's remove the
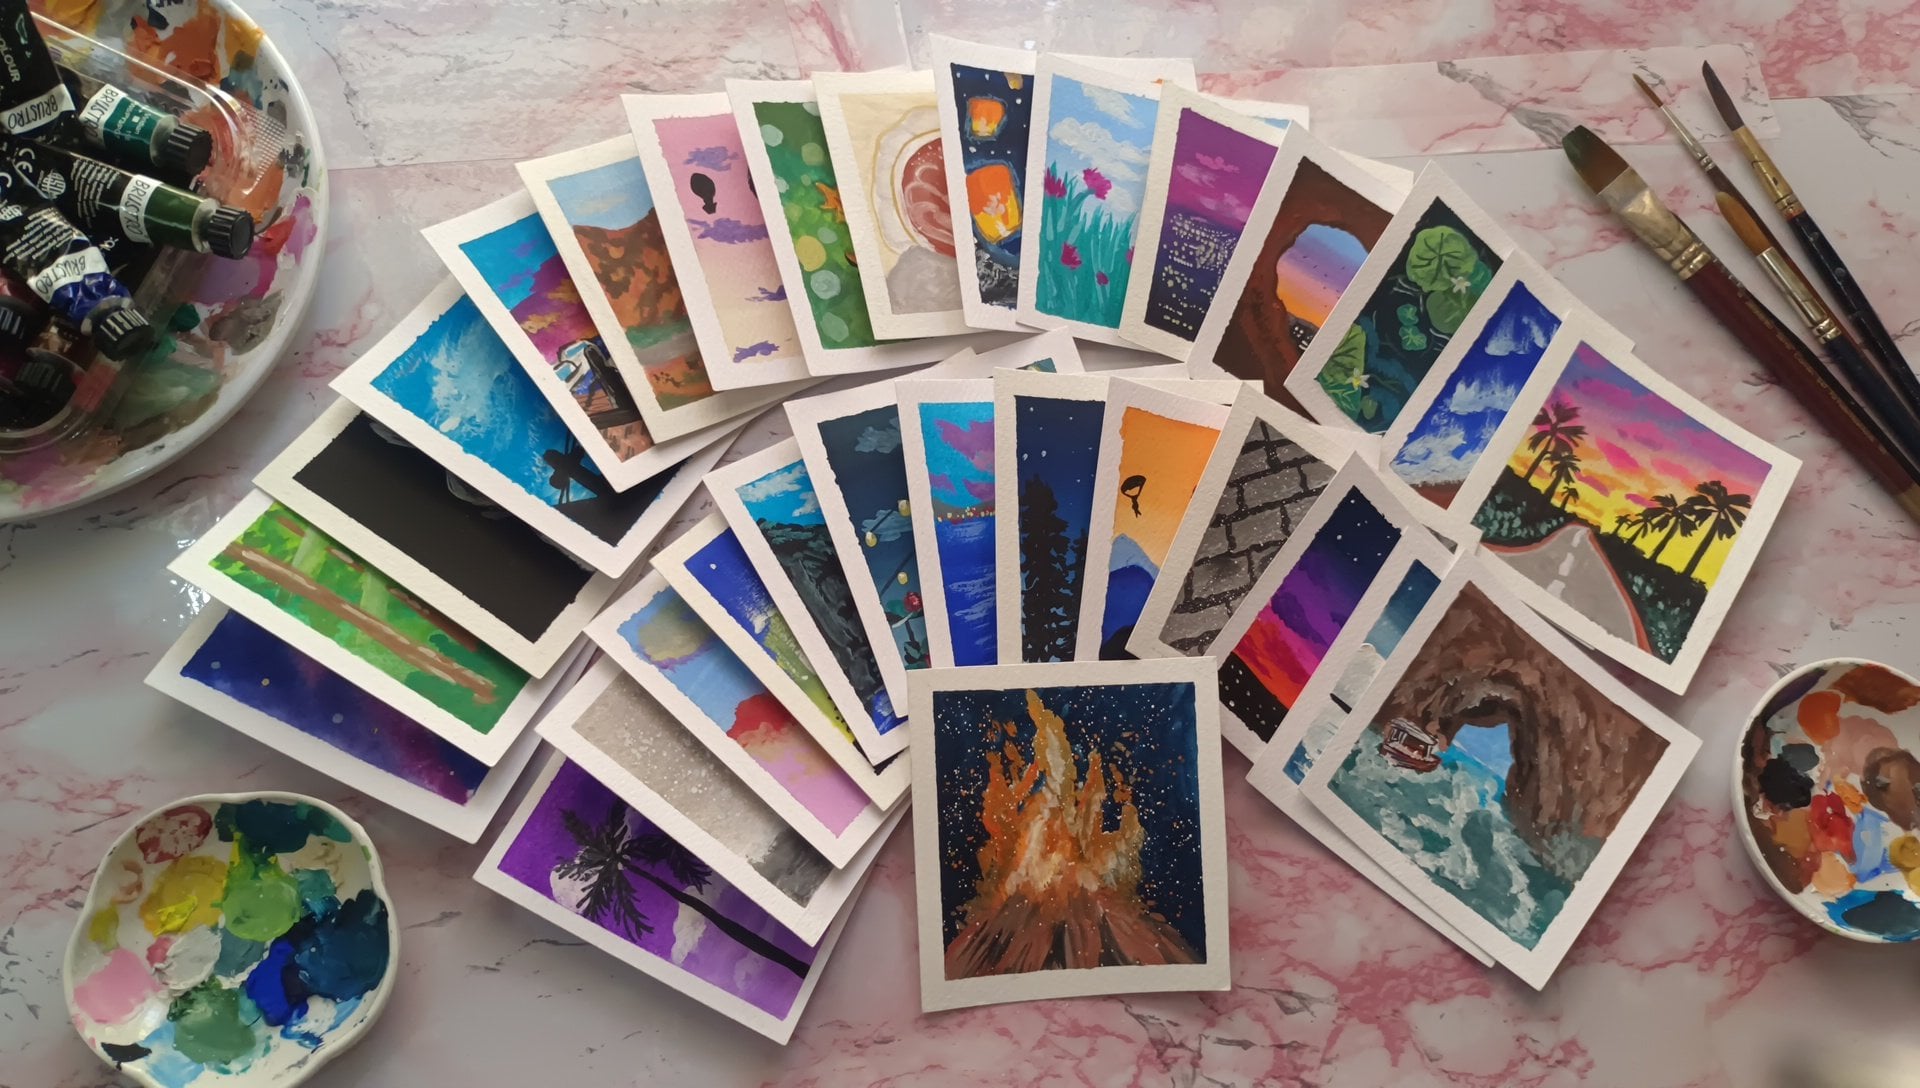
masking tape and finish off this painting by bringing the other paintings together
and keeping them beside. We are finally done with
all the full paintings. This look, how does
it look for you guys? So awesome. Share your paintings as well. I would love to see
them and also the reviews and discussion box.
7. Thankyou : Thank you for
completing this class. If you have any questions or queries coming down
and I'll let you know. I'll be very happy to discuss
about it and also share your paintings and
reuse for the class and follow for more
upcoming classes. And keep creating,
keep learning, and keep painting. Thank you, buh-bye.
 Arbia Sultana, Art Educator