Transcripts
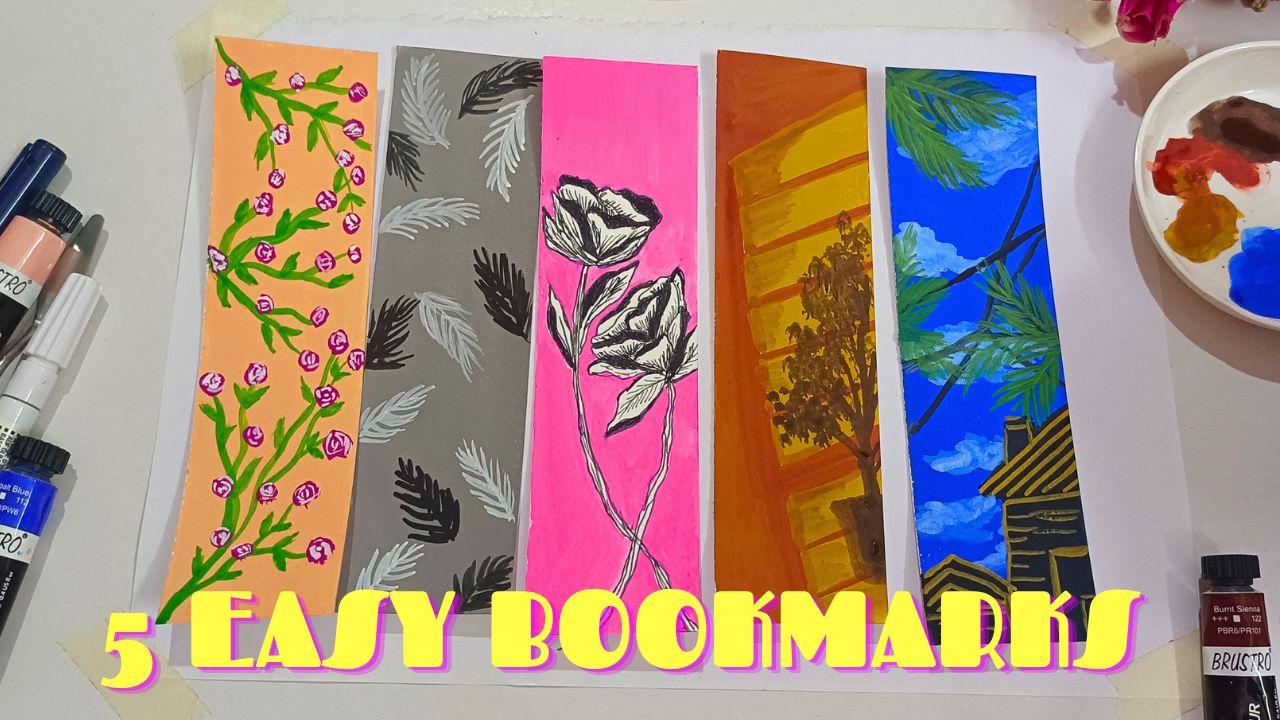
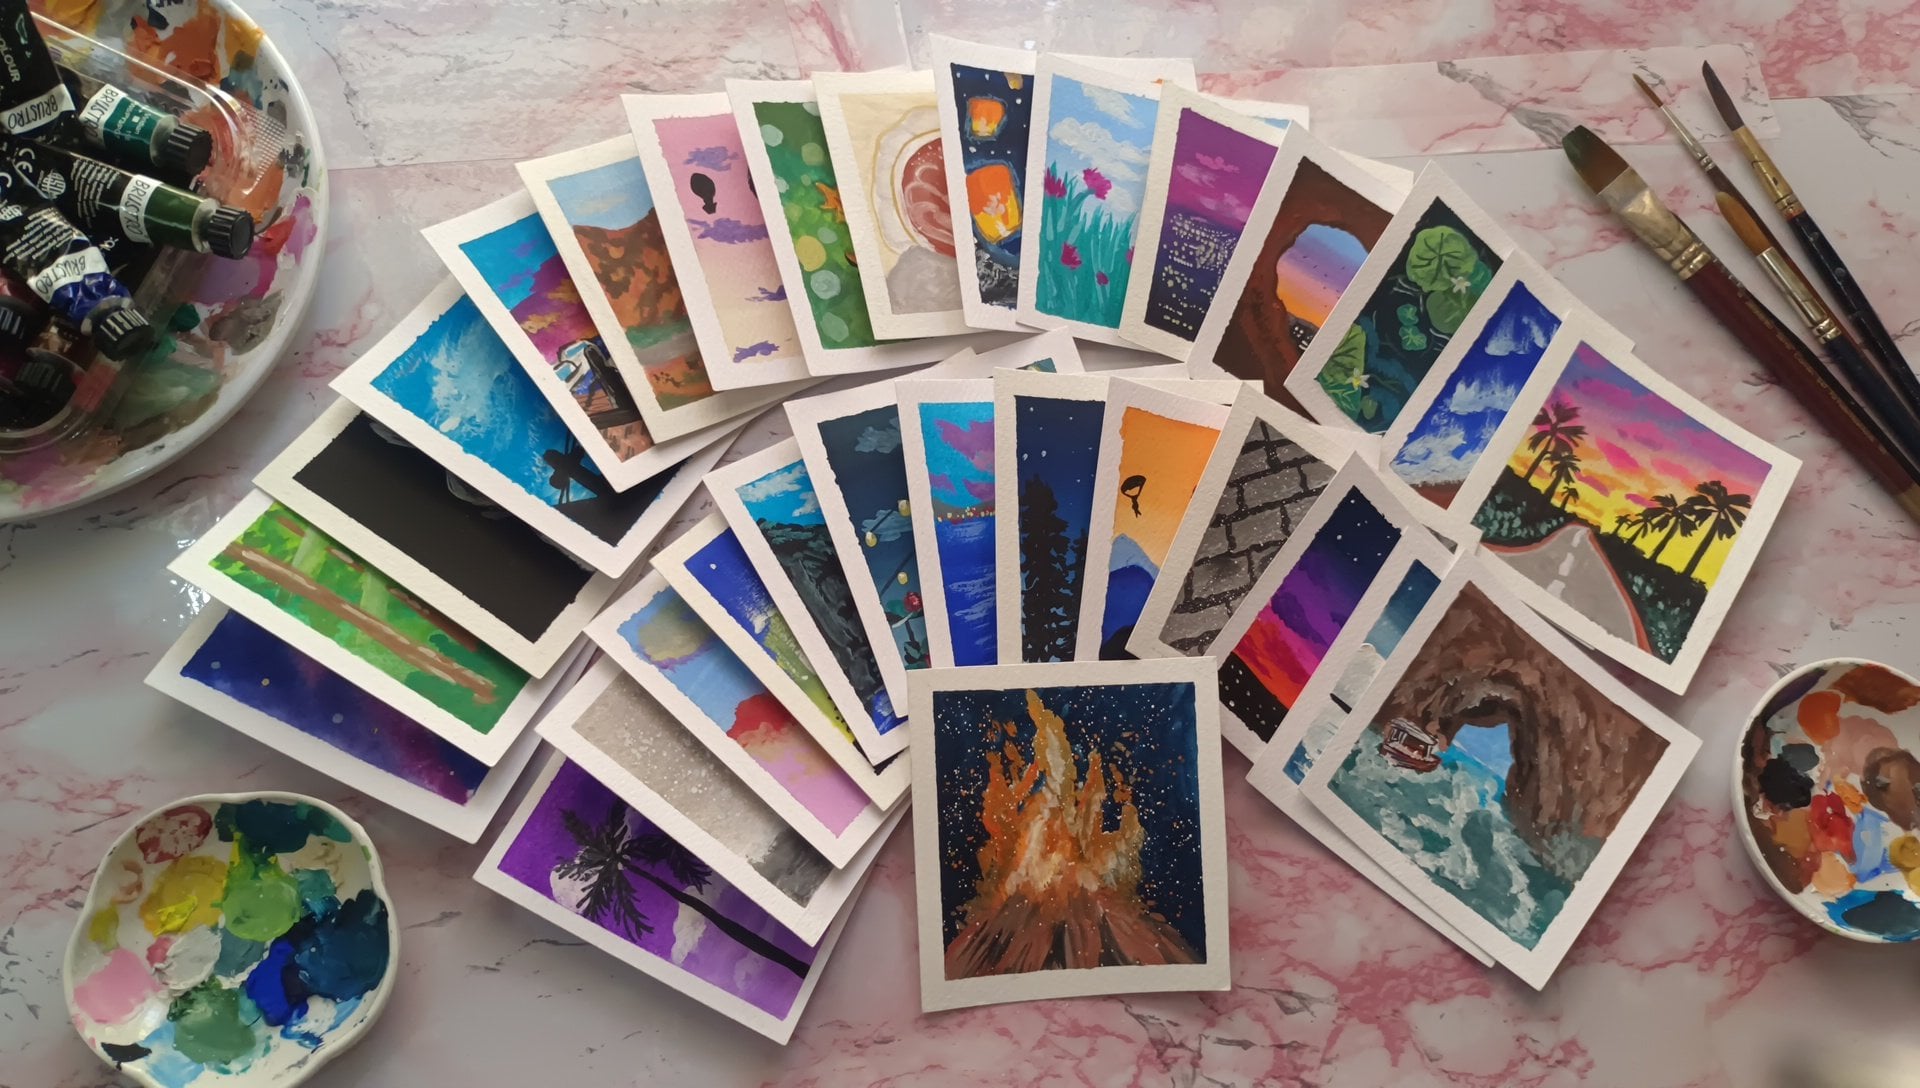
1. Introduction: In the month of July, we artists celebrate
World Watercolor Medium. Wash is a water
based medium and Gas comes in the form of watercolor
and in acrylic form. Considering the family of watercolor here I
present you with a new course on five easy
bookmark paintings. Using Gosh. Bosch is an opaque watercolor, that is perfect for creating vibrant and
colorful paintings, and a versatile medium that can be used to create a variety of effects from nopome paintings to an intricate illustration. Hello artist. This
is Arba Sultana, an artist and an artist
eucator based in India. I started teaching paintings
when the COVID hit the wall, and I'm so glad that I started. Many of the beginner artists
find my classes helpful, and I'm so happy to see
you all join my class. In today's course, I'll be
showing you how to create five different types of wash paintings that are
perfect for bookmarks. The first painting is a black and white leaf painting using black and white mixture, we will be making incredibly beautiful and
expressive paintings. The second type of painting
is an ink illustration. Ink illustrations are
a great way to add details and interest
to your bookmarks. I'll be showing you how to create an ink illustration using gosh and black ball
pink marker and how to use different strokes to create Burgess illustration. The third type of
painting is a floral one. Floral paintings are perfect for bookmarks as they are
beautiful and colorful. I'll be showing
you how to create a floral painting
using wash and how to use different brushes to create different
texture and effects. The fourth type of painting
is a landscape painting. Landscape paintings are
a great way to create a sense of depth and
perspective in your paintings. I'll be showing you how
to create a landscape. Painting using Gauche
and how to use different techniques to
create different effects. The fifth and final type of painting is a
shadow painting. Shadow painting are
a great way to add deep and interest
to your paintings. I'll be showing
you how to create a shadow painting using Gauche and how to use
different techniques or stones to create
different effects. Before we start painting, I'll be taking you over
to the supplies required. And then throughout this course, I'll be sharing you tips
and tricks to help you get started and get most of
your gauche paintings. I'll be showing you
how to mix colors, how to use different
brush strokes and how to create
different effects. By the end of this course, you will be having five
beautiful gauche paintings that can be used to
decorate bookmark. Grab your supplies and
let's get started.
2. Materials Required: Let's begin with this
applies your am using gouache readily available
Bookmark people of 300 GSM. If you don't have
this bookmark paper, you can use in bite-size, can cut the A5 size into half
so vertically and music. And also you can take
goddess with Masking tape. You can go ahead and
news anything in between from 165 DSM to 300 GSM people. You're also using an
Artist grade book. And Artist grade is
a wonderful thing. It gives you amazing
wife and Kylo. And it's very soft and moist. So you can even every
bad Masking tape is an optional supply. Am using on the thing
Palette for Jar of Water and now coming to the
brushes and other stuff, amusing Paul
flatten, brush size. You can use any
Flat end brush you have is just for the background. For now, I'm using
a Round tip brush. Investing in this
Brushes, very essential. I have this three very
important brushes. That is a flattened
brush around tip brush, and a Liner brush, which is very, very important. And Liner brush here I'm using a Trump stationarity
and it's 2.4 brush. And apart from this, I'll be using a black marker. You can also use a black
ball pen and white gel pen. This is again optional. If you have any music, if you don't, how it's optional. And then Benton, apart from this you require
or tissue or Cotton Club, that's it for the supplies. And grab your supplies
and let's get started.
3. Leaf Painting: Before joining this course, Let's begin with, of course, painting your am using or jelly, which is of great Carlo. For this, we need a
special equipment to dispense the pain. That is Palette Knife. As you can see, I'm using of fresh brush without any
Carlo directly dispensing it and it's not coming
out of Palette Knife is essential for removing or
dispensing the Palette Knife. Why? Because events from fungus formation increments
from Mixing up both Carlos, it prevents from
unnecessary damage to the rest of the pain. Yeah. You're I have this pen, some paint onto the Mixing
Palette using Palette Knife. If you don't have the
shade, that is great, you can go ahead and
make black and white together to form gray mixture and applied to the background. You can always use a coupon. Coupon is very good because it prevents from
fungus formation is driven from mixing of colors and prevents from drying up of pain. So yeah. Do you observe good. Then jelly cups. So you're am using Flat end brush and go
oriented and adding few drops of water to make
it gouache consistency. And then going ahead
and laying out a flat wash. As you can see, distributing the color evenly
and covering up the edges. You can always go ahead
and add it into brush. And Tiana, we want. If you add too much of Bordeaux, it becomes transparent
until me tell you, I'm reading if you can add
equal amount of water, any amount of porsche, it depends on how dry the
gouache paint, then use it. The before and then
in this phase, your enemy, because
I want OK go. I'm feeling some box and then so I go ahead and
no one will leave. Once the corners or borders have done an evenly spread, the paint It looks lossy when it's wet. And once it is dried, it looks so gouache
dries faster. So let's wait for few minutes, are evenly spread the
paint, as you can see, I've gone ahead and
added two layers and have equally
distributed the paint without leaving some spaces. So for further detailing, you can use white
or black monkey. But I'll go ahead and
use a Liner brush called painting. The details. If you don't know how
to use a Liner brush, you can always go
ahead and use Marcos. See, live in a few minutes. This has completely dry and
it gives you a matte finish. Now I'm using a wide gouache
and the Liner brush. I'm making it into a
consistency of Bosch, which is lower, but
not so flowable. It's a bit but not too
transparent as well. Removing excess water once I have lifted up and the brush, I'm drawing a line for the leaf. And then you can see I'm
drawing towards few lines, like before you go ahead and add leaves of white and black color. If you haven't noticed, I'm not pressurizing
the brush very tightly. As you can see the
brush and very loose and I'm going ahead
and adding loose. Very likely. Not so pressed. It's giving me very
light strokes and very small thin
lines like this one. Go ahead and add leaves. It's not necessarily
that you have to paint the leaves
in one direction, that is from top to
bottom or bottom to top. You can go ahead and add
leaves in any direction, left or right, right to left, top to bottom, bottom to top. And Jose enough cold one, as you can see, will hurt and explore the strokes and
enjoyed the Painting. You are done with
white. Let's go ahead. Again. Add some water droplets into this and making
to absorb and consistency not and don't make it transmitting. Be afraid. That's all for this painting. Wasn't that easy. You can add more black
color or white color leaves wherever you warn or even
exaggerate the painting. As you can see, I'm trying to figure
out where to add. But once you're done, you feel okay, this is good
to go. Then that's it. We are done with the Painting. Don't add too many leaves
and make it crowded. Far better. Leaves are fine. So yeah, that's it
for this painting. Let's remove the good
part of this gouache, but it does variable and
it's very easy to remove, as you can see, this
removing it from my fingers. It looks so gorgeous. See you in the next Painting?
4. Floral Illustration: Hello, Artist, welcome
to the second painting. For this, I'll be using only
one color that has hot pink. You can go ahead and choose
whichever color you like, but let it BY print enough. So for this I'll be
using or drawing, it's going to be a line drawing. It, you can see it
as Illustration, ink illustration or Ben
Illustration, anything. But here it is gonna
be a line drawing. I'm drawing of. It is a Paeony. You can go and row or
rows or some clock and seeing this on Pinterest and then going
ahead and draw it. You can use any difference
image and draw. You can go ahead and pause this video and go
ahead and slowly draw. And I'll also be adding
all stem and leaves. And do this slowly
because after this, if you do with Ben, be okay. If you're directly, then
you might make a mistake which is not reasonable. I could say one of the pencil drawing is done. Let's go ahead and
praise out with a black marker or
Black Ball open. It just makes sure Water
will mark or you choose, it should be fulminant
and ensure naught. Come out the internode
be like a gel pen. Because when you erase
the pencil marks, it should and it should flow in the ancient flu
or make the paypal dot. I hope you understand
what I'm trying to tell. Once we start tracing out, we will also be adding some full linked to the flower,
as you can see. So for Link to do leaf and
also a vein to do leaf. And now I'll go ahead and
add the patterns for this. Also. I'll be adding some
urine therefore links. And simultaneously, I'll go ahead and do
the shading part. It's gotten snot
going to be shading, It's going to be lined, will just be adding line to lot, be doing the hatching technique or shading technique here. Just go ahead and
use the simple, basic knowledge
that line drawing. Once I trace out, I'll just tell you
what I'm gonna do. So here, again, I'll
be adding the links. As you can see. I'm just going ahead and adding
a curved lines. Urine in there at the corners. Feel for all these four links
will go ahead and paint. The paint not be shading and complete dark will go ahead and fill out that
space in black pen. The LU, the same thing
with the next flower Now coming to the
line, but you're, I'll go ahead and do some
lines as you can see, I'll go ahead and
with the sheep. Lines have to be directed. I'll go ahead and add them. As you can see, is
gonna be aligned but directed in the shape
of the leaf or a large. And for the stem, I'll go ahead and add lines. As you can see, I'm just adding lines urine and connecting
it the corners. So it's not a complete
line from top to bottom. And some they're connecting and some where it's losing
out the connection. Now, I haven't done
with this stuff. Now let me erase this. So the video was shaking, so I haven't just
remove that part. Yeah. Now coming to fly, as you can see what I'm doing, I'm just adding lines in
the direction of the petals where it was the
fault of petals are, I'm going ahead and
filling it with black ink. Let it be around motion
or straight-line motion, anything we're not going to use a stream or shading techniques such as
hatching or anything. They're just going to fill
it up wherever the fault. And for the rest of the petal, we're going to add some lines in the direction of
the vacuum moves. We're not filling it out. The only bottom part will be darker and about part
will be lighter. And as you can see, I'm going ahead
and filling it up. You foresee the painting
or drawing, how I do it. And then go ahead and do it. For any flower, you
should do the same. The center part will be darker. So the lines should
be concentrated. As you go far and far. It should be like broader. The line should be
separated with space. And more of white-space
should be seen on the periphery at the corners. The full link. I'll go
ahead and pull it up. Take your time and do it How gorgeous It's looking. Now, let's spend some hot pink and I'll go ahead
and paint. For this. Again. I'll be using Round
tip brush and Liner brush. But before we paint will make this into global consistency. Sure, I'm adding a bit of
white to the hot pink mixture. This is domain the
librarian TO bit lighter. You can go ahead and
directly put hot pink. I'll be adding this mixture onto the paper with
Round tip brush. Wherever though broader
surface of writers seen, I'll go ahead and
use this brush and wherever there is detail in fat, low ahead and use a Liner
brush so that doesn't mix up. And drawing is not true. And as you can see, You have to do it
very carefully. Take your time and do it and be gentle and don't
lose your patients. And lead to pain being a flowable consistency and
unpaid but not too thick Variable, you feel the paint has gone into its transparent shade. There you can go ahead with
one more layer and do it. But at the edges of the drawing, be careful so that the ink
doesn't mix up the dough. Painting. In this looking so
I Brinton gorgeous. That's it for this painting
and let's remove it. And you can use
this one anytime. You can go ahead and keep it
as a deck copies as well. Thank you all for
joining this class. I'll see you in
the next Painting.
5. Floral Painting: Welcome to the third painting. For this painting,
the inspiration is from the nature and
also from the flower, which is on my people
that those rules. So for this painting,
for the background, I'll go ahead and
add flesh Jin Carlo. If you don't have the Scholar, just mix some orange with
a bit of yellow and white. You can always go ahead
and mix some Carlos and make your own Carlo and
experiment with it. And then go ahead and use
the backdrop for this. I'll go ahead and
use a lighter shade. So I have chosen our flesh Jin Carnap and using
a flatten brush, I'll go ahead and clean. Firstly, you would follow. Again, the consistency
should be in OB consistency. It should neither be too
thick or 23 can be flowable. And simultaneously the brush
strokes should be even. What up the edges and
there is any transparency. Go ahead and add one more layer and let
it dry for few minutes. And then we'll go ahead and
add the detailing pump. That is we'll start with
branches and not for that, we'll be using some sap green. The background is dry and it's giving the
Mac finished look. I'll go ahead and add the sap green to the people or this, I'll be using a Liner brush. As you can see, I've
just drawn a line. And then as I have started, I have started with the our line for which I have pressurize the brush and as I go to the
tip and this losing it off, like picking up the brush
up and simultaneously giving less pressure to the brush so that it
gives me a thin line. And if you notice two
to three brush strokes, you can see that the first one, the first time as
the thicker one, as I go to the tip and
just lifting it off for which the pressure is reduced and it's giving me a thin line. And for the places
where I have started, I'll just go ahead and add all pickle line and the depth and it will
be attending line. So add as many
branches as you want and do it very slowly
and add curvy lines. That shouldn't be perfect. It's okay for it is not
perfect because nature is always beautiful
with imperfections Flowers and you'll be
using our rules, Kylo, you can go ahead and
use a red color or an orange or whatever
color you like. And you can do any
flower for this. I'll be doing for this, I'll be using arose cargo, which is shade in the
Brustro Artist grade paint. You can use a pink
color as well. Using a Liner brush. Same, I'll go ahead and add
rounds of goods everywhere. Branch I'll add two to three
or as many as possible, basically, but just
in around shape. I'm not adding like Coco,
telophase or anything. I'm just going ahead. Inner arm motion, randomly, name as many so-called Task
Force on the branches. Little's law is trying, I'll go ahead and dispense and white Carlo and
using a Liner brush and I'll go ahead and add
some lines into that Jiangxi. As you can see, false boom. And then for this, I'm keeping the brush
in a bullpen diploma. No, I'm just adding a
C-shape like one dot. And then to see shapes are the coordinators and remove the excess of water
before you do it. And then go ahead and again Now the flowers are done
and the branches are done. So let's go ahead
and add some leaves. For this again, I'll
be using some sap green and using a
Liner brush itself. I'll go ahead and make
some leaves for this. As you can see, I'm
just pressing down the Bristol and then just
dragging out for a pointed tip. You can notice few
practice and then go ahead and pay this dabbing at first and then dragging
and lifting up slowly to give me a pointed end. I'll go ahead and fill
up as many as possible. And yeah, that's all for the
patient enough and do it. Because at the end it's gonna
be a gorgeous painting. Your own views. The knee monster strokes. It's oil wet on wet and
wet on dry technique. So go ahead and do it slowly. If you wish to add detail in, go ahead and do
as many leaves as possibly until you're
satisfied it in pain. But just don't make it crowding. And that's all for
this painting. Let's remove the papal
care really and neon. That's all for this gorgeous,
simple, easy painting. And it's more hand
with the photon. And I'll see you
in the next one. On. So make sure you're
shadow paintings. And project section or in you can also tag
me on Instagram. I leave the handle and the end. So make sure you check that
out and thank you so much. And joining in and
seeing the next one
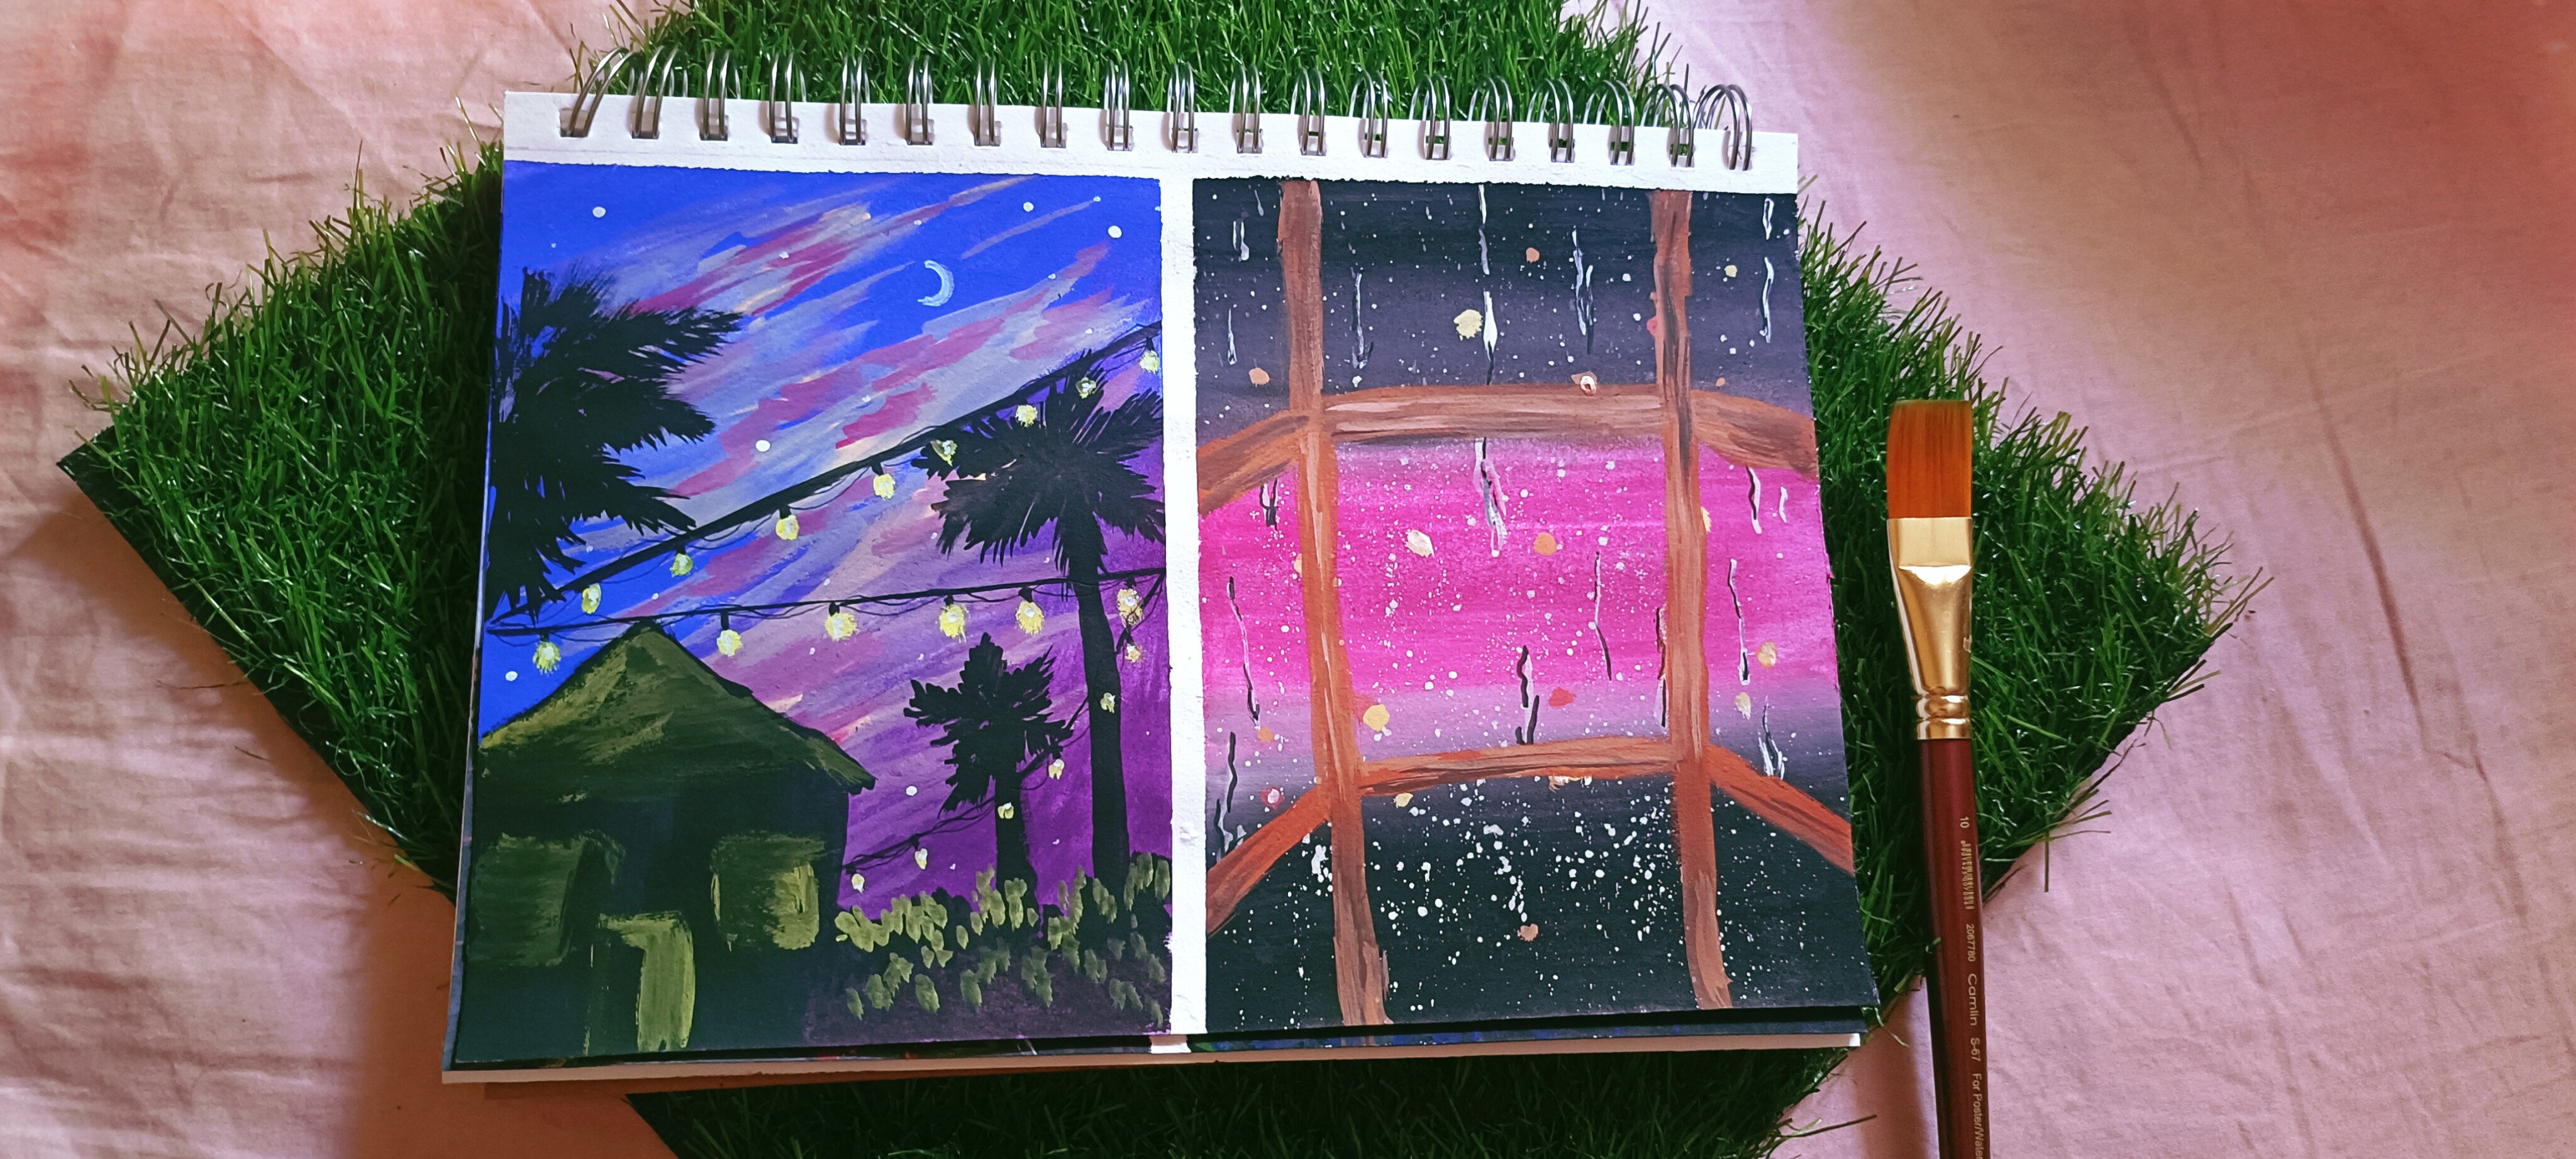
6. Landscape Painting: Hello, Welcome to
the fourth painting. For this painting, well, the knowing all
landscape painter. Landscape has a
different depth and also the perspective keeping in
mind offered will go ahead. And before we go
ahead and paint, Let's clear out some methods
on the desk and and do it. And for those I'll be using of cobalt blue Flat Flat
shoes and all flattened brush and gobbling up the edges monthly and in an obese man, no. Ahead and paint. Before the background rise, I'll go ahead and add life. Using a round brush
in a dabbing motion. As you can see, it's
giving texture of some bubble type and
simultaneously of cloud shape. And you can see it's a shade or flight and blue mix together. So this has to be
done when the paper and draw out this market dried. For the smaller clouds. I'll go ahead and give
left to right strokes. As you can see, I'm lifting up up and sounds that I'm
just giving lions. And the cloud color has
become complete blue. I'll just go ahead and add
some light onto the Cloud. This gives the sense of
depth into the painting. Into the Cloud. You
might have noticed, I'm not covering them in
the background to be seen. Am using a left to right job
and odor dabbing motion. You can see I'm
just adding white. The clouds are dry. I'll go ahead and add a
house with a black pain. This is gonna be a silhouette. Not all the clouds are. All right. So I just go
ahead and been added. Secondly, electron is
gonna be a house here Next, using it
onto brush itself, I'll go ahead and add lines. You can use a Liner
brush as well. I'm going to add
the button lines. As you can see, industry to, might have noticed
how many wires are lying on top of the houses. In the same way we
are depicting here. And you can also use markers. Are Liner brush here I'm
using my round brush. Round brush has a great, so I'll be using this. And if you're using
around brush, make sure you use
it very lightly. And only the, the, the brush
is covered up the edges. Make sure the edges are covered. They just play an
important role. The brush to the Liner brush. Your, I'll be using sap green
and show for the base layer of similar to the local
or false painting. The corners. And about that, I'll go ahead with us at premature or if I'm
painting with light, you can see an alignment that
going and make some lines. You can do this and the edges, depth of coconut tree. Since the leaves have
gone darker, sap green, and go ahead and paint over it and also add
some more leaves. Yeah. Begin length flow. Now to add depth into the house, I'll be using a
low bar and join, lying and making it
look I love good. I'm slant line,
horizontally aligned, just making it as
colorful as possible. Looking good, just, and
That's it for this painting. We have added that. We have added pulse
backfill for this. And see you in the
last painting. I hope you-all enjoyed this
painting as much as I did.
7. Shadow Painting: Hello, Welcome to the last
painting of this series. For this painting, we'll
be painting a shadow. The shadow painting if you
haven't noticed or ventral, there are various painting. It gives so much of
an offence and also the time day and so
much of the base layer, I'll be using yellow ocher and painting a flat wash. Dislike other paintings we
have painting will be going ahead and painting
an opaque layer. And they shouldn't be any transparency and covering
up the edges evenly. Go ahead and paint. The base layer has dried. Go ahead and add burnt
sienna for this bond here. Now we're going to use
it for the Windows. I'll be shifting my
brush, Round tip, brush in, go ahead and draw the outline on the
drawing of the window. But I'm doing it directly. So first notice and then paint. You can also refer
Pinterest for a more ideas. If you might have
noticed that for a line am using her very light
strokes and four, because such stroke and pressing the Bristol
of the brush against the papal very hard leaf
so that it covers up the space as much as possible. For the line you see I'm just
going into a light stroke, but for covering though, I'm just dragging and dabbing it very hardly so
that it covers up. You can also use a Flat
end brush for this and see how I'm doing it
and then go ahead and paint Once we're done with the window, we'll mix some black into the burnt sienna and
then go ahead and make a box and add some leaves and branches and oil
because I'm Lars. Once I'm done with
the basic structure, I'll go ahead and dab onto the branches so that it
gives and Honeywell layer. And it gives sense of
depth or to the Painting. No list open here, but then I'll go ahead and add more depth
into the Painting. I have using a
lighter shade of T9. And going ahead and painted the part of it on the left side, as you can see, there's
a two different shade. And now I'll also
give some depth on to the windows and all
for making it via am using yellow ocher and
burnt sienna and going ahead and do the windows at the edges. And also you can use dry
brush to poor coming from left to right shared
value when to do it. This is where you can do or try brush stroke
from left to right. Or you can see, I'm dragging the
brush from left to right, my living space. You can see disliked
normal lines, but this is very transparent Carlo for you can tell
the cell glazing, glazing technique that is covering up one layer with
another simultaneously, both the colors seen. And that's it for this painting. I hope you-all enjoyed
this painting series. Let me know so that I can
make photo class on it. And also the fellow
artists can join. And thank you-all for joining.
8. Final Thoughts: Artisan dark, until
it's created. Thank you all for joining
in your book Five, Easy bookmark or Susan Walsh. I hope you got to learn some new things and you're
satisfied with your paintings. I hope you have
enjoyed your time. Like I did when I was painting. And I would love to
see your painting. So make sure you share your paintings in
the project section. Or you can tag me on Instagram. I leave the handle here. And also you can
use to that though, fellow artists who is interested to learn and we're
headed with this course, can either speed this by courses where very
basic, big enough. And so I just want you
to learn as well as practice and going through
it and having a good time. Thank you once again
to join this course. I hope you all
enjoyed it and share your thoughts and see
you in the next course. And then keep practicing, creating and keep painting
 Arbia Sultana, Art Educator