Transcripts
1. Intro: Hello and welcome to this class. My name is Jaime, and I will guide you through the whole process of creating beautiful pumpkins and then creating a composition
with them. We are going to start
with a blank canvas. And then at the
end of the class, you will be able to be painting this
beautiful composition. You are going to be learning
about the four elements. You are going to be
painting with me the most easiest, I'm kings. And you would be amazed
how easy it is for you. We're creating together
the color palettes and do will also learn
how to use the outline. And you can download this composition in the resources
section for this class. I will show you how to paint
this beautiful composition using only your brush with our sketching,
without outlining. And you will see how easy it is. And then I would tell you how to use a outlines to make
the same composition. You have Both idea
in both styles. You can choose which
one you prefer. I can't wait to
see you in class. And remember, you can follow me here and it's going to
tell you don't miss any updates and any glass
that I shared with you. You can also always talk to me. In the comments section for this class or the discussion
section for this class. I will love to hear from you. So don't hesitate
to contact them. Get them ready to
start the class. And I was I doing
the next video.
2. The Materials: Welcome to the class. Let's take a look
at all the supplies that we are going to be
using during the class. This is an overview
of all the materials. I have. My watercolor paper. You always need
that good-quality watercolor paper brushes. This is not the one that I am using the ingested
into the brushes. We are going to be talking
specifics during the class. In the next videos. I have, I cleaned our ankle, my color palette on
watercolors that we are going to be using
for this pumpkin paintings. I had white paint, a pallet with left over
colors that I always use and have had clean
water and always, always have washi tapes. Fine line. There is another type of
paper to make your class, Georgia, but in that you have everything you
need on your desk. I will see you in
the next video.
3. The Color Palette: Now it's time to start
playing with colors, but fears, let's activate them. Uploading one drop of water
on these little bands. So the color becomes easy
to use on our papers. I have here are the shapes
that we need started from a cold colors going
into the warmer ones. And as I was telling you, I have always my left over colors on my pan because
I use all of them. I don't discard any
leftover watercolor and they are so much fun to use, to practice and to make little touches of
colors on your painting. So don't throw
watercolors. Use them. All. I going to be starting with this pilot and then
going with all of them. So we can see the value of
these tones of this chase. And we're starting
with a darker value and going to the
most lighter one. This is a black
from Connecticut. And I really like how these pigments are so
easy to work with. The final result is
always super beautiful. I then, then they
lifted the value here. I'm just adding more
water and then you have a deep color or a light Kotler. Now I will use the
raw umber deep. This is also from cuda, could attack at this
Japanese brand. And very nice and beautiful
to use what you are painting. And the colors really are
vibrant and beautiful. Now, I will use this burnt sienna from
could attack as well. And you can see that the pigment works really nice on the paper. Now I will change. This is a burnt sienna. But from Winsor and Newton, you can see the difference
in the pigment. A little bit more lighter. This is a ocher yellow from
Winsor and Newton as well. This is a cadmium yellow
from Winsor and Newton. And this one is cadmium yellow. But from Kodak, these colors
are really beautiful. And do the worms here. This is another cadmium, yellow or yellow ocher, yellow from Holbein and
other Japanese pronouns. And I am really loving
how this works. And I almost know all
this color because I use this color on my paintings. So I am used to this
behavior from the pigments. And this other one is
cadmium yellow as well. And this is the lemon
jello from Holbein, the D3 last color,
or from watercolors. I have been using all
these colors for many, many times, so I know
how they react as well. This is my favorite thing. And this is the olive
green from Holbein. And this gives a
really nice color to the paintings. I
really like this. These are firm, could attack it. That's, this one is this sap. Green. This other
one is Bellamy. Who you, this is
the viridian hue. Number one, don't make
their cell of a program. If you don't have
all the same colors, you can use whatever
you have at hand. Don't complicate
yourself too much. Just try to use the similar colors as Eigen
testing here with you. And I just want to
show you that it is very important that you
get to know your colors. Because depending on the brands, the pigments of the watercolors
can differ very much. And I cannot tell you. Use the sap green and then
you have another brand and it will not be the
same as I have here. So don't complicate yourself. Just played with me and played with your materials,
winter supplies, and get to know them so you can get the whole advantage
for injured palette. Now we're going on the
warmer side with these, all these reds, cadmium, red, red, orange, and rose mother. Those beautiful shades that we can find in
autumn and pumpkin, or a autumn fruit or vegetable that we enjoy on
this season of the year. We can mix all these scholars
and get another chain and make them deep
pigment if we want. So that is why we are doing
these kind of exercises. So we get to know or
need to do the same with the colors that you have at hand and with your
favorite, favorite ones. And it will help you to get the better resource
in your paintings. So yeah, they are dry. And you can see the vibrancy of this pigment and water colors. And this is the difference. When you are using
high-quality watercolors as, when you are using very
cheap and affordable ones. So this is the difference. There is nothing, nothing but having these
cheap watercolor. But if you are more
quality than they need to invest a little
bit more for now, use whatever you have and try
to get the best out of it. I will see you in
the next video.
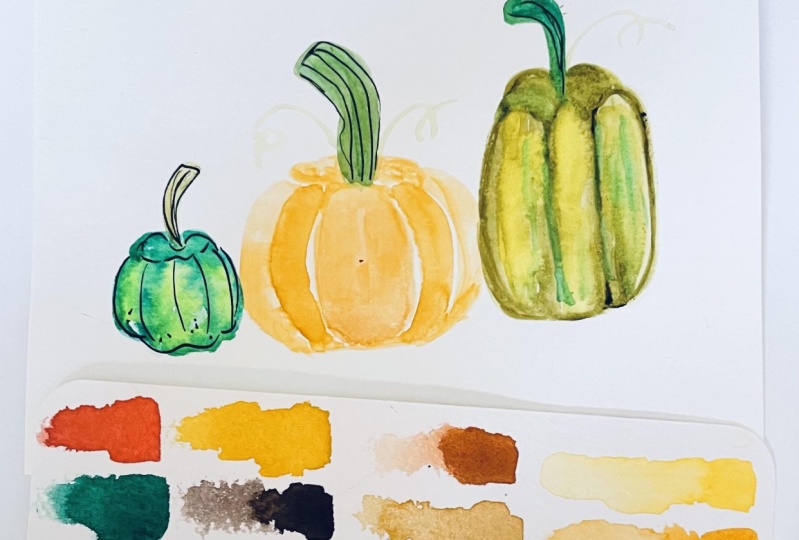
4. How To Paint the Pumpkins : Or colors are
selected and they are dry and you can see the
vibrancy on the pigments. And now we're ready to make some practices before we start
painting our final pieces. So I will be playing with all these colored
and I have fear, different sizes and
types of brushes. We are going to be working with flat brushes and
with round brushes. I have medius, big size, medium size, and a small size. Do can choose from your brushes. I have my watercolor
paper to work on, and this is my workbook. And this is a very, very affordable type of paper. This is not the best quality, but it is perfect
to make practices. And during the class we
are going to be using a better quality
watercolor paper, which is from cancer. You can use whatever paper
you have, any style, any type, any quality. But for now we are
going to be working on these beautiful
workbook where we are going to be practicing how to paint or pump kings before
we do the real job. So I have my left over
palette here with my left, our colors from my palette
for this painting. And some are just to
play with a little bit. I hope you have fun with me and that you have your
paper ready angel, different sizes of brushes. I will start with a flat brush. This is a small size. I think this is a number four, but it depends on the
brand that you have. The sizes are always
interchanging. I can not tell you exactly. Use this number because
maybe the brand that you have is bigger or smaller. And we're going to start by tracing the middle part of
the pumpkin with our brush. If you have a referendum
picture or a real pointing. Besides, it will help you
to make this shape and just tracing with my flat brush
a oval shape in the middle. Then with my smallest brush, I will trace like shapes on both thighs size of these
fish shape that I painted. Using a very light
wash of color. To start painting these. Then we are going to add
another C-shape a little bit above of the
ones that I painted. And then I will start to join those end part below my pumpkin. Then we are going
to be painting like small C shapes on the
back from the pumpkin. And then we are going
to be adding or the stem from our pumpkin like this. Doing this could've shape from our stamp. And then we are going to
be adding a little bit of pigment to create more
structure on art punk. Making sure that we leave
all those white space, white spaces on the pumpkin. And training to emulate the
shape of the real pumpkin. As you can see, I didn't
sketch the pumpkin before, but this is my preference. If you are not comfortable, comfortable painting
with your brushes, then you can trace the sketch
before you start painting. I left that up to you, but this is my way of
doing the paintings. Normally I enjoy
doing it this way. But if you feel more comfortable
doing the sketch before, then you're very
welcome to do it. Asked you prefer. I didn't just playing
here with the chase and the values of my colors and adding some
shades on the pumping to give it a little bit
more of extraction. We are not painting this pumpkin here to the
perfection with all the data. We're just getting to know
how it is easier for us, the brain, the pumpkins. And as you can see, you, they just needed
four steps to paint this beautiful
small pumpkin with this small size brushes. And I use the additional
colors for pumpkin, which are in the colors
are orange and reds. So we are getting warm up to
make or beautiful paintings. So this is the fiercest demo on how you can
paint your pumpkin. Let's see the second one, and we're using bigger brushes. This is a number ten, flood brush, number
six, round brush. Let's see how are
bunking will turn out. So we can work. Beautiful. Pumpkin for this one, I am using a green color in a
very light, light it swash. So we have the first
layer of our pumpkin. I'm doing the same. Just this time the
brush is a bigger, a oval shape to start
with in the middle. And then just shaping
these with my brush. Then with my round brush. Number six, here, I will paint the C shapes on the
sides of my fears shape. So easy it is. We're just creating the
shape because we don't have the sketch pumpkin
underneath or watercolor. And then adding the
second C-shape. So we have five C-shaped on
the front of our pumpkin, then joining in the ends below the bunking and
then going on the bug. Just making it more
try three-dimensional. Using this like a small
seed shapes, the buck. And then we can
paint the stem using the deep brown and making the stamp this way, filling up the space. So it looks like coming
from the pumpkin. As we asked, they
are in real life. Now, I will add some the dark color using the
same che, sap green. And just get the, getting an idea on how
my pumpkin with Luke. Remember we are not making here or the bumpkins
with all the details. We're just having a taste on how we can play
it with our colors. And as you can
see, it's so easy. Solely the steps you
need to paint pumpkins. We are just shaping. And then with shadows and
more pigment than we can create a beautiful shape for
our new n is the same color. So you can play with whimsical colors as we are going to be doing in the next video. And I will see you
in the next video.
5. Painting Pumpkins Different Sizes: Now I will use a flat brush number
five in a bigger brush, number ten to paint
the next pumpkin. Using these two brushes, I will start with
the flat brush, and I will use the colored
blue and Prussian blue. And I will start as
we have been doing. And I want this to be
a elongated pumpkin. Denote this tape of
pumpkin that are more long than the typical pumpkin. Using this beautiful shape. With my brush, with
my round brush, I will proceed to paint
the shapes on the size, making it very long. The last one, a
little bit behind. On the shapes. You're going to always correct shape with your watercolor. When they are still wet. I am making it the shape. And then I will add some
more pigment to make the color more
three-dimensional. Now we're painting the
stem as we have been doing during the
class using sap, green 0 PD,
believing, believing. In this case, how easy it is. Just a oval shape on the medium and then C shapes on the sides and you
have your pumpkin. So now I will add some shadows and more pigment to make
the bunking more beautiful. I didn't like how this
blue bumpkins looks like. And maybe for another class, I will use more whimsical
colors for the pumpkins. Let me know in the comments
section for the class, if you will love to see this, we can make whimsical pumpkins
or something like that. And they will turn
out very beautiful. Happy. How easy
it is Bond kings. And I hope you get the
point here on how to make with your brushes UP
default shapes of kings. And I can't wait to
see what you create. Now that we have
our three pumpkins, let's paint some autumn
and four elements. Just to practice and just to use the colors that we
have on autopilot. And for this I will be
using a round brush. And I will show you how
I paint some leaves. This is not
perfection of course. But you can try. I do a line and then I paint
some perpendicular lines. And then I am using a very, very light wash of
this olive green. And then I will go around
and grab those lines with other lines to make the
shape of a autumn leaves. And it is very easy. And you have to leave. Here, it's a bit bigger. Leaves. This is not
a perfect leaf, but you get the idea
on how to paint these leaves in a more
easy and loose way. Then I will add some colors
inside to see how they are, how they look on the paper. Using that technique,
wet on wet. So I'm just wetting my paper and now I will start adding
the ocher yellow. Because we are painting
this autumnal leaves. When the leaves us
are starting to turn into the new costume
of what Tom. We're just playing
with the color. We're not making
any perfect leaves. So just go with the flow
and paint as you wish. You can use other colors. The mercury in the mortal
reds and browns on ochre. Just try to use
your watercolors. Adding some thought just
off black or deep brown to make these imperfections that the autumn leaves normally half. Just to get an idea. My bank that is so wet that I
cannot make it the details. I will let this dry and then
we can add some details. Are a little bit of green here, but it looked a
little bit muddy. So maybe it's not a good
idea. But let's see. When it's dry, maybe
it will be better. And this is the whole
point of these practices. So you see how the colors react and how they
look together, and how you can improve them
or get the best out of it. So I will continue planning and I will see
you in the next video.
6. Doodles: The Fall Elements: While the yellow
leaves is drying, let's paint the
most iconic list. For autumn. I released my brush
as my fine liner, and I will start with a very
light wash, wash of color. I will trace a line. This is the stem. And then I will find a point around the
middle of the lifts. And then I will trace a
perpendicular line going up in another small
one going to the site. And I will do the same
on the other side. From the exact same point I found in the
first line I trace. Then with my brush, I will adjust
abrupt those lines. Simulating beliefs check. So this way you can paint
in these beautiful leaves. That is the most, the most iconic one. During autumn. The maple leaf. Now you have it under
beautiful maple leaves. Now we are going to
be adding colors to this just to see how it looks. And I understand deal
with this commune dread. And then doing some demos with all the shades
for the leaves. Normally when this, when
this elif or changing colors they are red and yellow, ocher and Angie and even
getting in some part. And then when they are complete
than they are fully read. The process of changing
colors on the trees happens. So fast. One day you go around
and the trees are green, and then the other day
they are turning colors. And this is like overnight, they start changing the colors. And very, very fast. They will start to
fall on the ground. It is a beautiful season
and it is very quick. So if you have the
opportunity to have Autumn inter-country or where
you live, enjoy the season. Don't miss a dose changes. Because of those. Changes on nature signifies the changes in yourself and
in the world and around you. So pay attention and
be a witness for that magical phenomena that we have the fortune
to experiment. I didn't just adding colors, just to see how they react. This is just me playing
with my colors and I do to this rigid watercolors. You will get to know
your beautiful tools. Then adding some awkward
yellow mixed with the red. And moving the color around. So it makes and blend. Go around the whole leaf. And you will get a sense on how you will want to
paint your leaves. When we are working
on the final piece. Adding more pigment. So the color shines. And seeing how they
react. On the paper. The watercolor is wet. You can move them or
change the value. So be aware of the
situation on your paper. You can see that I can shape
the shapes of the leaves, making it more
pointy or elongated. This is the magic of using watercolors to create
your paintings. And it is best if you know them, you know how to treat them. So they get the best
of its qualities. I think it is enough for now. And now we can paint
another elements of autumn, which ad some berries because they make beautiful
contrast on the paper. Now the leave is that I
will try to paint the stem. Justice to look how this color
looks onto the jello base. That's it. Nothing fancy, nothing. Perfect. Now we can proceed to paint. All the elements are paper. And I will use the brown here, the deep brown to
make some acorn. And this is another
very easy element. Just using the brush
as a fine liner. And trying to make the shape of an egg is pretty easy to paint. Then letting it dry
and see how the colors making some texture. And then proceeding. I'm painting some basics. Now we're painting using the burnt sienna to
make the branch. So I can paint some
little berries. For varies. These are the most
decorative elements you can use for your paintings. Just a branch in some dots. The deeps. And it is so easy. And they're so beautiful. And you can use
whatever colors you want to make it more decorative. So for now I think it
is all the elements that we can Use painting. And I will see you
in the next video.
7. Doodle: Fall Elements and Outlining: Let's add some leaves on
this side just to practice, remember we're just doubling
here, some fall elements. And I am making the stem
using the brown deep. And then I will paint some
leaves using the greens. See how they look. You can add any elements
that you prefer. These are just ideas and we're
just the other link here. To see what we can use for our final composition that we are going to be working
during this class. These are, these around
getting a terminal green leaves that
defined even in winter. They are very beautiful
and decorative. Just add in some
light swash of this green and looking and trying to make them look harmonious with the whole composition
that we have here, with all our banking thin and the other four
elements that we have painted. This is looking very nice. I will let this dry. And now we are going to
be trying some outlines. In this class I, and not
focusing on outline, I weren't a more loose and
just watercolor painting and it has my fine liner. And I will just add the
outline, very light. This is a very fine, fine liner, 0.5 because I don't want
the lines to be too big. Because when you use
a thicker lines, then endure painting with
local more like a cartoon. We want to make this
banking more delicate. And in cute. Normally you will
start by outlining is your subject before
adding the colors. But I wanted to show you first how it look
without the outlining. And it is looking pretty
nice, pretty cute. I really like this as well. And I will also add some outline to the leaves
that we painted here. And see how they. You can combine as well
these two methods. And see if your composition
looks really nice. For the class. I will show you the
whole composition only using watercolors without
outlining or sketching. Then I will show you the same composition
using the outline. And then you can
decide which one you want to create
for the class, for your class project, which I cannot wait to
see what you create. Just adding some stems inside the leaves to get them a little
bit more of X structure. I think we are letting these
here to come play further. Make all the style of bonk
kings or other elements. But for now, I think
the modeling is done. Now you have the basics and we can proceed
to the next PBL. And I started
painting paintings.
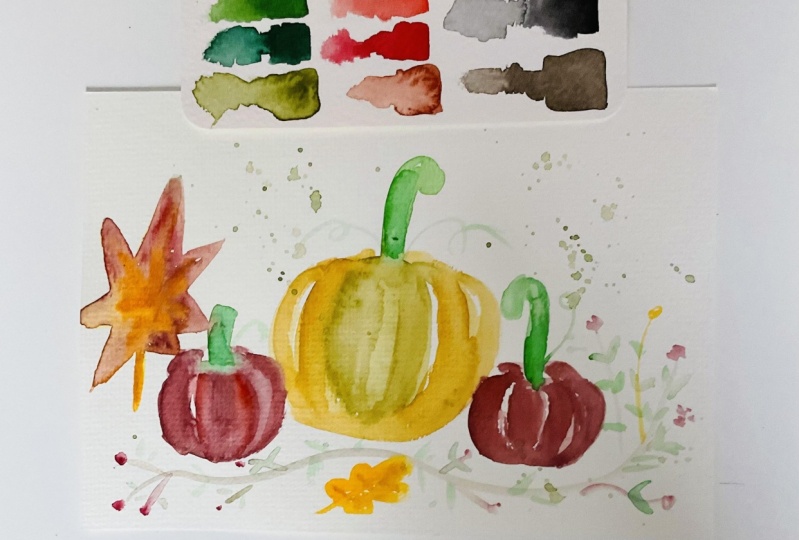
8. Tracing The Pumpkins First Layer: Now it's time to start painting
or bumpkins composition. I have here my paper
fixed on the solid phase. And I have all the other
things that I need, the brushes taking down
what are the other colors? And my mixing palette. With the less left
over scholars. I went to have an
idea, first of all, where I want to start this composition and why
would I want to finish? Did you remember we painted the, all the types of pumpkins. What I want to make, the bigger on the
center and the other small pumpkin swan on the sides. And then add the fall elements. Let's start with a bigger brush, flat brush, using a very
light swash of color. And then using the ocher one to make the sketch with
our watercolor. And we'll start by painting
with a brush, a oven, bigger, oval on the medium, and then shaping
it as a pumpkin. This need to be very
light in color. So afterwards, we are going to be adding the more pigment. And now I have my bigger
brush, round brush, and I would see shapes on
the size of the fish shape. I painted here,
the orbital shape. I would do this elongating the CEJ
because I want these to be the biggest pumpkin. You can always reshape. And the good thing
is that you are using a very light color here. So we paint as we
did in the practice in the back of the pumpkin. We shape or banking as we want. This is a big pumpkin, so we are using the
big brushes we have. Now I will sketch the stem using a very light
wash of the brown, filling up the spaces. So it looks very realistic. We're not adding detail yet. We're just start to
create or composition. This is the fierce bunking, the big one, the
one in the middle. Now I have a medium
size flat brush and we are going to be
painting the second medium, pumpkin on the set. On the right side. In this case, I am using a very
light wash of olive green to paint this pumpkin. In using a medium-size round
brush to complete the shape. Adding the C-shaped
on the sides. I want this to be touching my biggest, my biggest pumpkin. So I will make
sure that they do. And then on the other side, the C-shape and then
joining on the below, joining with my center shape, and then the backside
of my pumpkin. So I have a guide line when I proceed to paint that yet
at the things and so on. Now, I am doing a very long stem using a very light
switch off, deep brown. Now I'm using the smallest
flood brush to paint the small pumpkin on the left
side of my biggest pumpkin. Doing the same steps. Starting in the middle,
doing the oven, and then adding the shapes until I have this pumpkin shape. Then added the back
part of the bunking. And finally we can add the stem. You can see how easy it is to create its shape only
using your watercolors. This is what I want to show you in this part of the class, that you can easily make
Derby different composition, only using your watercolors. And now we paint the stem using a very light color
shade of getting. I have this center part or
the basic for my composition. Now, I will add little bit of the four elements using a very fine brush
to make my sketch. Using a deep brown swatch. Not too dark because we just
want to trace the outline. Then we are going to be adding the color and
it will be super easy. So I didn't adding here
like a wine style. And then I will add some
branches to paint the berries. And then I will paint
a leaf. And then name. This is just to have
an idea of placement. And here we can
paint a autumn leaf, as we did in the practices. A line and then
adding some stems. This is not the maple leaf. This is the other
one, the yellow one. And then we brought up or lead the lines with more lines to
create this beautiful shape. So now we're set to
start adding the colors and then decide how big
will add more elements. I will see you in
the next video.
9. Painting The Big Pumpkin : It's time to start
adding the second layer. And I want to use my
bigger brush to paint, starting with a big pumpkin. And we're just adding a
layer of clean water. So we have a wet surface where we're going to start
adding our second layer. This is our big pumpkin. This is the centerpiece
of our composition. So we're going to start adding the second layer using
this orange color. Not too dark just yet, because we are
going to be adding many layers to this piece. So the pumpkin gain, a structure and a very
beautiful effect. Going to be using fears,
this orange color. Then we are going to be adding another chance to
make the shadows. And to bring this to a
very appealing effect. Adding the color
in lasers help us to make the color vibrant. Or the piece. In this case, the pumpkin, doesn't look flat on the paper. But more like dry dimensional
or three-dimensional. We're keeping these layers of color in a very light way. Making the lines as
I am doing here. And then moving them
with the brush. On. That round brush
retains a lot of water. This is the reason
why the colors run. When you go through the
painting with a brush. And if you keep
adding the ledgers, when injured painting
is still wet, it is easier for
you to accomplish the perfect shade that do really want to achieve
in your painting. We're keeping adding pigment
here and then moving them through the pumpkin with
our brush. Be very gentle. Doesn't need to
press your brush. Just just let the
color goes that way, didn't meet the goals. And when you're
painting is still wet, the color we go there. If you notice that your
painting is getting dry, just add a little
bit of water into a brush and continue moving. The color. This is like a dense. So you need to let your partner. Here is the watercolor and dirt. But other parent is the brush. But the main partner
is still hand. Maintain your hand very loose. And you will see that the
colors in the painting, the way to what we are, continue adding more
pigment it corner. And the painting at this
moment is eight per cent dry. And it is a very important part. Because then the pigment
with we will not fade. It will keep it vibrancy. This goes drying. And we want this color
to be very bright because this orange pumpkins, Hokkaido pumpkins, I know
that is called here. And the ones that
people use for, for Halloween, pumpkins, that color
we're looking for here. Now, you can see
that the pigment is becoming more and more bright. It is because the
underlayer getting dry or color stays on the
paper and then fade away. And that is what we want. And we are continually,
continuously adding colors. And you can see that IN letting some spaces and more light, it does is because
I want to create some light effects, effects. So it is a continuous waiting. In this process, I will let the painting a little bit dry. So I will continue with
the stems using my deep, but it will start
adding the lines and the second layer to
create the stem. No worry, we are going to be
adding many layers to this. And I am using a
smaller round brush, as you can notice here. So it is easy for me
to go to those places. Throughout. The color. This time is always
more directed at the bottom and knighted at the, at the, we're off the stem. Maintain this ratio on
the values of colors. Very gentle and very, very low. You don't need to rush. This is a meditative
process and they need to allow the colors to
do their own magic. Now, with my smaller brush, I will continue adding the
theory of four layered now. And trying to make these
sections of the pumpkin. This lines symbolizes
the section of this of the face
of the bunking. As you can see in
the real pumpkins, They have like sections. And that is what we're
looking for here. So I need my brush
to be almost dry. The color, the color as well. So we are just defining this section here with these lines in a
more darker pigment. It orange. In, at this time, at this moment of the
process of painting, it is important that you let
time to dry a little bit, not completely, but almost dry. So the pigment to fix
sense to the paper. And as you can compare, when we started, now, it is looking very Brett. So I will continue now
with this second pumpkin. I will see you in
the next video.
10. Painting The Medium Pumpkin: Now it's time to paint
and then medium pumpkin. And we're using for
this, the olive green. And we add a stepped
into the second layer. I then using the
medium round brush. And I'm just going
through all the lines. The phases as we're making
the sections of the pumpkin. Like tracing the
outline with our brush. Barely gentle. We want this to be
more easy to see and then add the colors pink of this process as if you
are out of alignment. Do pumpkin with your brush, and then go through the sections with a little
bit of color and water. Assent to weighting those
lines, making them darker. So it started to
gain mod, structure. Our biodiversity on
colors for banking. So don't hesitate to use another color or shape
for the rankings. Remember, this is just a
suggestion for a painting. But the idea is that you use
your creativity and that you create unique,
beautiful paintings. You can reshape just bunking anytime while the paper is wet. But if the paper is too wet, then the color will
just dilute and faith. So you need to give a little
bit of water control here. So didn't damage the
paper for going too many times with the brush
onto the same space. That is where you need to wait. Sometimes longer than others. And it depends on the
quality of the paper. When the paper, the water, then the color is
starting to show up more. There we are adding
the third layer on a bunking to give it a more structure. Pradesh is to your
best friend here. So gentle with it and go
very gentle on your paper. These processes only
to add more pigment and make those sections of
debunking more visible. It takes time, but
then the returns are always a pleasure. To the eye. You're going to use another
color if you prefer. But for these, I
choose the olive green because it resembles some things that I saw
in the supermarket. We are almost finished with
the third layer of color. I love the account, but do need to go with the flow and see how the colors are looking
like counting the leg it. So enjoy the process. But I am thinking that this is a good point to
start considering, stopping with the lenders
and let the painting dry a little bit so we
can then continue later. Adding in, making the
corrections are making the painting not too flat, two-dimensional
or three-dimensional. And then we can proceed. The paint, the stem. While painting is rising. As you will see, the colors
are mixing very well. And we have this section. What do we want?
At the same time, you can see are bigger pumpkin, how the colors are
becoming more brighter. And then we're going
back to them for the details and
correcting the colors. I'm using for this ten, a very dark green be DVM, who is the name? And I am making this line, so I have this
section on the stem. Then just with water, I will move, I will
move the colored. So some places are
darker than the others. When we start adding the
details do we'll see how this transform realistic stem is. You have the opportunity
to go to a pumpkin patch. Go because this is a
beautiful experience. And I hope you have a nice
weather when you decide to go. If you can, just watch some
videos and you will have the same feeling or in the
supermarket and you can go and see the
beautiful paintings. I then add in some
shadows here to make the stem structure. But we will adding
more details to this later when it
is more the dye. For now we're going to let
this dry and we are moving on on painting this
minus pumpkin. And I will see you
in the next video.
11. Painting The Small Pumpkin: For the smallest item
using the smallest brush. And I'm using the
red color for this. So I get more deepness
on this corner. My painting is wet. I painted it with water before. And now I can just add in this section lines
and going through afterwards with my
brush damper in water to move the color Juno
distance situation here. I want this to be
a very cute clip, pumpkin, reddish
orange, pumpkin. I will mix these colors to make the pigment that they weren't
adding some yellow here. And making this model the
reddish orange color. This is the wonderful
things of color. You can mix them and
obtain a new shape. Some lead in these white
spaces that symbolizes the section on the bunking
and make the light effects. We want this to
be pretty bright. So we will let this dry a little bit before adding more
red on the section lines. And going with the flow on
that mixing of this course. The blending is that they
have is always so beautiful. Okay, For this other layer, we are going to be using a smallest Burdash and we're going to be
using cadmium red. This is a very deep dread. And we are going very
slowly on the lines, only on the lines
with these colors. So we create this more
elevated structure on our painting is
like adding shadows. So the pumpkin really show up in this beautiful
shade of red. This marks the
section of pumpkin. As you can see, goes
in another dimension. Really fascinating how
just using your brush or their painting in
a different way can make a big difference
in how your painting. It looks like. We're having this beautiful shades and going very slowly embedded
gentle on the paper. Now we're going to be painting the stem with permanent green. This is saying John, pumpkin. So the colors are
more like new colors. Going through the whole S then with our color, permanent green. And then in the next videos, we are going to be
adding details. So let this dry.
12. Adding Details To The Pumpkins: Okay, or painting is dry
and we're ready to add the structures,
details or paint. Starting with green pumpkin,
the medium pumpkin, I will start adding some
structure and texture to the, to the section lines
with my smaller brush. Using this technique,
like adding point with my dry brush
and my dry paint. So they pop up on the paper. We'll charge you more close. So just see what motion using
to paint in these dots. It really gets gifts. Another level of texture to
the pumpkin and doesn't, and it doesn't look so flat as it was
looking like before. Now you see as soon as this dry and then more dots that I
add to this little pumpkin, it will be totally, totally different
and more beautiful. I am using the olive green. And you see that
it is super dark. And this is a good combination
for our structure. Bunking. When you look at this real
pumpkins and real life, they had lead bumps. And like I mentioned, and three-dimensional
really looks like that. This is what we are
going or we are trying to create
here or bunking. It looks more
texturize. So easy. Just maintain a read them. So don't get fast and do
start to paint too big dots. If you feel tired than just
rest and come back later. Because this can be a
little bit time-consuming. So don't rush into this, just let it be. And do we have a
really nice texture? Try to make some clusters
and you are going up, then tried to separate the dot. That is the only rule that
you need to follow here. And take your time, because this can be
a very long process depending on the size
of your pumpkin. This is a medium-size
on this paper. But if you are working
in a bigger size, then it will take a lot of time. You can be smart. Paint this on this more or less. Parking. Been normally when you see
this in the supermarket, the ones that have these bumps
at the beginning ones are, they're getting white ones. So this is why I
wanted to charge you with this one,
with this pumpkin. Do as many bumps or dots as two. See it is needed and then go and start painting some
details on the stem. Just tracing the lines following the direction of the of the
stem and then go backwards. Because to make this effect
of that is like Darn. And you will see that
Egypt pumpkin will be, will look like this. But actually it's very small. It's an doubled zero, but it depends on the
brand that you use. I can continue with
the same brush. And now we are
going to be adding some details on the big pumpkin using a very deep
concentration of orange. Going through the section lines to create this shadow that will allow us to form the
beautiful shape of our pumpkin. You can use a bigger
brush if you prefer. I am mixing a little bit of red, so the orange becomes
more brighter. For this effect. I will go through all the lines, the section lines, trying to have my brush
as dry as possible. But if I need water, then just take a little bit with your brush and
go through the lines. So you see n log n. The
effect is a really beautiful. This is our biggest,
biggest, biggest pumpkin. So it takes more time
for the finish effect. But you can see
that it is ligands, the defendant as
when we started. And this is the magic
of watercolors. Adding more and
more and more legs. And going through all
this section, lines, mixing red with orange to gain more deepness
on the color. We're just creating the base. And then we are going to be going with the brush
through the hard bunking. So these hard lines
that you're seeing now will be self-study. And the colors will
blend perfectly. As you know, I always
left my glasses on. Glia die either
SP that diabetes. Because I want you
to really have the feeling that you
are painting with me, the mod seven and you can't
really learn while doing. So. I hope you are doing
your class project. And I can't wait to
see what you create. It is always a pleasure
to see your work. And it makes me really happy
to get to know what to do. And how to do is we want
to create a little bit of channels on some places of our pumpkin because they give
the bunking more structure. And it looks more realistic. I think now we are
ready with this. And I will let, let this dry and continue with you
in the next BPO.
13. The Fall Elements: We are going to be starting
with the yellow leaf. And I didn't using ocher, dilute the paint this leaf. Starting just with
my wet brush on dry. Paper. Wet on dry. Is this technique. The corner move really easily and the paper
in a second notice I'm leaving a white space because I want to
add another color. So the blending give me
a more beautiful tone, a little bit of olive green. This to be more darker
because some of these lists have these imperfections and thus is what I want to
create with this leaf. We are not going on the
perfection of these leaves. Because this class is about
pumpkins, not leaves. Just to have some
elements on the painting. Going through all the
lines with the color. And I will add a little
bit more of this ocher, yellow that it is a
little bit more darker. To make more dramatic effect on this left butt He Ci
is completely dead. Now we are going to
be painting berries. And for the Dionysian, they're red. The red berries. And a symbol of autumn
and winter season. You can find them everywhere. Even in degradations
for the home. By two can choose another
color for the berries, blackberries or violet
berries, orange berries. Whatever, Egypt different. It is completely okay. And now we're
adding some leaves, getting ones and yellow ones. So old painting looks super colorful because this is
a very conifer season. This season of autumn and fold
is so beautiful in colors. In it is like preparing us for the winter when there
is no color, almost. So they give us a very
bright, vibrant colors. And then they always goes. And adding all the leaves. Two or little line here
below the pumpkin. So we create a more frame. Painting and Gibbs,
also more perspective. Now the bumpkins look like
they are behind it binds. And Margot has, if it looks
the composition until now, the colors are so beautiful. And you can find
greens and ocher, and yellows and reds and orange
pronouns, and then that. And then all of a sudden, you don't see anything because all the trees lose their leaves. And the winter begins. But for now we're enjoying
the beautiful colors in, right into the
present with them. As long as a day last week, let them show us and teaches us beautiful lessons about life. Your campaign, this another
way, if you prefer, you can make these green or red. It all depends on the contrast
that you want to create. I will add some
details to the park in some veins to them. Some veins like this. So they look more the
collective or decorated. But let's say using the green che and painting them on all
of our bunk kings. Using my smallest brush, this model is that to
have two can use as well. So we're ready to
add more details. And I will see you
in the next video.
14. Fall Elemets Details: Time to paying our mapping. Here on the upper side. On the left. We are going to be starting
as we did in the practice. Aa, BB, tracing a line, this is the stem of the leaf and then finding
a point in front, they're tracing the other lines parallel to the middle one and then two that are perpendicular. And two smaller ones
at the lower part of. And then we're going
to be starting, do need to have 1234567 lines. And we're going to
use that to put wrapping all these little lines. And so we have our
beautiful maple leaf. How easy it is. You can also have a leaf
and then paint from there. But for this, we can
paint this leaf this way, is it's super easy
and super fast. And then we are
going to be adding the color inside or leaf. And for this we are going
to be using that reads the color red and maybe the yellow to create a
little bit of contrast. We want this color to be
very bright, very deep. So we are recently, we're starting on the point of orderly and trying to shape them as pointy as they
are. With our brush. I'm using a medium-size
round brush. You can use any size of
brush that you have. Because we're just
adding the color. Whatever is easier
for you to use that. We want this to be pretty dark. So we are trying to have control on how they
want that amount. Going. See embedded,
Embedded slow. So we don't go too
much with the color. And we are letting
a piece space on y so we can add a
second color. I. Then making this a
little bit longer. As you can see, it is
not a perfect leaf. And that is okay because
nature is not perfect, the nature of imperfections. Now we can add the dealer
deep and meets with. The blending is beautiful and the colors is very
beautiful as well. We're just adding more
clad to make them blend. Mode. Shape. The
point of the leaves. The yet very pointy. So it is a good idea to
not round on the point. So we don't lose the shape. It is looking like a maple leaf. Now. With its seven bind now or composition we
send most ready to. We're just looking
at it and finding those spots where we want
to add more details. You can leave it here, add some splashes
and that is it. But I want to add some leaves. And some Marbury's starting here adding some green leaves. On the side of my, of my green pumpkin. Two threes. On this side. And then looking
where I can add, I know that they are
another element. Then using the olive green
for these shaping my leaf. Now I will add some
leaves on the left side, on the side of the small
pumpkin. The same way. Just to give more
cohesiveness to my painting and to give
time to use or elements. Now I think we can add
other elements over here. Maybe some berries using the kidney and tracing some branches to
make the batteries using the color. But he liked. And then adding some
gentle Belize to make contrast on this side of our painting before bed. And now we can add some leaves
on the branches of order. Barely branch. So it looks more
full and cohesive. For the leaves, I'm
using the color green, permanent and my smallest brush. Because these are tiny leaves. I am really liking how
these are looking like. My composition is very cohesive. Now, I think we need some other leaves and
a couple of batteries, and then we're done with
this composition for now. We just need to add them some details on the
leaves. And we're done. Here. I will add the other
berries using the ocher, yellow, and the berries are red. And other leaves over here, using the olive green leaves would be enough. The second leaf and then the
lines inside the leaves. And then we can let it a little bit dry and then
add a color inside. I will add some
shadows underneath the punk kings to
give them a surface. You see the brown deep and a very light shade and going underneath
the punk kings. So it looks like they add onto a surface and not
floating on the air. Just like that. Lung it too much. Betty, betty light going
through there, three pumpkins. And does this ordinate to
go into the leaves as well, creating some shadows,
give deepness. But anybody right? Now we are ready to add a little bit Model T
that's inside the leaf. Using a small brush. Going inside the
width or olive green. You can also use black or
brown by the for this, because the stain
is in this column, I would use this code. Going for the point. Betty gentle. And here I have too much paint. The stems a little
bit imperfect, but it doesn't matter. So this is looking
begging, nice. Now we can add some dots. So it looks more natural and
just elongate in the lines. So it looks more structure. Now, the dots n We add. Done. I will see you
in the next video.
15. Final Details and Reveal: Let's add the final details. And then we're done. Here on the leaves. I'm going through the
light with my green. To make these leaves
more structure. Just with the stems. I will do the same
with all the leaves that we need to
finish the piece. Going through the whole
shape of these leaves. So they look more structured. I didn't listen. They're very small. Brush again because this is easier and it works
like a fine liner. I did some shadows here
around the leaves. This leaves the inside stamps. This lines to define
the shape of the leaf as well on this side. Just making this mod finish. The last one is adding lungs
inside this model lives. Just to give them
some structure. Not too much detail here. You can do the details
if you prefer. I am just making very simple. And lastly, feeling with the color with my brush is wet and Diane just moving
the color of these ones. No need to add more color. Now, finishing up this
step of my small pumpkin, now that it is completely dry, you can see how they look, changes when we
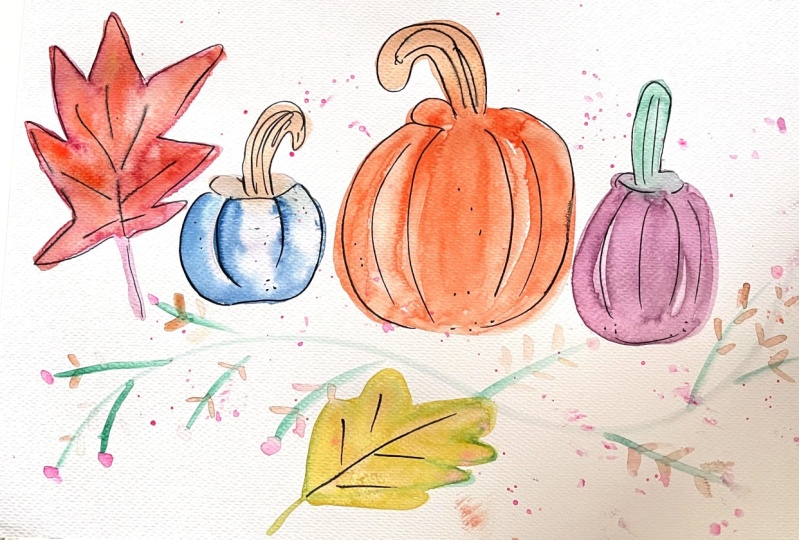
add some details. Martin, beautiful. Now we're complete. And this is the final piece of the whole pumpkin
composition using watercolors, no sketching and no
outlining or elements. I hope you enjoyed
this process as much as I did chatting with you, and I will see you in
the next. Be there.
16. Outlined Pumpkin Composition: Here you have an
outline it composition. It is the same as P painted
in the previous video, are only using watercolors. And in this, you are
going to be downloading these resorts in the class projects and resources
section for this class, just click this link
and you will be able to download this
sames composition so you can work with me and you will
have the same final piece, but with the outlined. It will be more easy for
you and you just need a fine liner to trace a composition in your
watercolor paper. I did that already. And you can use a
pencil if you prefer. And then do the outline
with the fine liner. And it is very easy. You just need to download
this printers and then transfer to your
watercolor paper before you start painting
with watercolors, it is very important
that they use, just use watercolor paper. So the colors and the
water doesn't damage. If you use another paper. I will see you in
the next video.
17. Watercoloring The Outlined Pumpkin Composition: So I have here my
outline it, composition. And I will start painting
from left to right, starting with the leaf
and then going with it, are the elements that I have in my composition as we
have just painted, or complete composition
with watercolors. In this video, I will
be speeding up in some part of the process because you have
seen how it works. And for this ion is
in the color red using the technique wet on wet. I have already go through my whole live with my wet brush. And now I can add a
fifth layer of color. This is a very dark, one of the cadmium
red to be specific. But you can use any type of
thread and you will be adding more layers thing getting the deepness in the
current that do what? Now I am adding some
ocher in the center to make a beautiful blend. And as you can see,
the outline is showing up on the colors. Now, let's proceed to paint
the leaves on the left, and then the pumpkin,
the small pumpkin. And for the color I
didn't using occur. Because these are the
colors of autumn. We are going to be
keeping this palette. Just adding color using the
technique wet on wet again, and using my small round brush. Now, I would repainting
the pumpkin. And in this pumpkin, I will be using the color BD. Then this green is
very beautiful. Then I then starting
with the outline, just going through my color. In using the
technique wet on dry, my paper is completely dry. And when I finished
all the lines, I will add jello, this permanent yellow, because I want this to be a
more light in color. Pumpkin. Young also painting this term, a fifth line it, using the brown
sienna, burnt sienna. Now with our big pumpkin and then changing the brush because I want a bigger brush, round brush, and I'm starting to paint with the orange color. And I will do this
process until I have a very bright and
beautiful orange. And then I will add some red
and cadmium red on the lines to define the sections on my pumpkin using
now that red one. Unless you see it, you can
see the video is speed up. Because we had done the whole process in real
time during the class. Now you can see how
I am adding that led to make the shadows. So my section on the pumpkin look better,
define and beautiful. Then going with my brush
and moving the color. So the color doesn't
make heart the lines. This is a very nice
and beautiful process and you can see the
colors are very vibrant. Now, let's paint the leaves. And I will be using my permanent
green, very light green. And I will go through
the leaves and the stem of my pumpkin. Again, just changing
a slightly the colors that we use in the
previous painting. But it is the same process. Now I'm adding some
olive green to make the stem a little
bit more darker. And as you can see, I use
a very fine, fine liner. So the lines on my
pumpkins are not so thick and they delegate. But two can use a thicker line. If you prefer. This is just
a matter of preference. Now let's paint the
medium pumpkin in, IN it using the ocher, yellow just to make a, another type of pumpkins, the ones that has these colors. And I will add some darker
spots around the lines. So my section of
the bunking looks defined and get them more
structure to my painting. We are getting the beauty
of food, j of ocher. And now I will paint the
stem using the deep brown, making it darker on the bottom
and lighter at the top. Again, adding just a
little bit here to make this imperfection
on the bunks. Now, let's continue
with their lives. Ins and red. To make contrast with the color dye that I
already had on my paper. Now we're painting the
little berries and the leaves using the same
and the same cadmium red. And I will try to
paint all of them, making correction or
adding more colors, but I think they need e.g. in these leaves.
Maintaining had money in the whole composition and the colors that do are using. So I will see you
in the next video.
18. Last Details and Reveal: Now I will paint
the last leaf using burnt sienna, ocher yellow. To make a contrast
in these colors. You can use the same
terms as I am using, or you can use the
same as we did in the previous composition. I am just showing you how
it will look is if you use fine liner or outlining
in your painting. And as well as this, it is more easy to paint. And then adding the
yellow in the leaves, because remember, it's autumn. And Adams had this beautiful color palette
interchanging with olive green and making the
beautiful contrast in all these beautiful colors. Continue with the
other leaves of my branches and finishing up some details on the other
elements that I have here. I am using this occurred to paint these leaves
and make contrast. The whole composition. This
is olive green and yellow. They make very beautiful
and autumn like color. So now I will add some shadows underneath the
backings to give a little bit of structure in perspective
and making them. And you can see how they outline giant through the corners. And it looks very different
than the other one back. Beautiful as well. It is just a matter of preference on how
to paint paintings. I am going through the elements, I think a little bit of shadow. And now with my fine
liner number 0.5, I will add some details on the stems to make them look
more like the real ones. And this gives
another dimension, the painting going around with the lines on the
stem and add-ins. Other details there where
I think we need to add some details to
decorate or parkings. Entered painting. I will at some point, some
dot in this little pumpkin. And I will remark
the lines here. And that's on imperfections. Password in the big
banking, some dots. These are just
highlighting the pumpkin. Those little dots
here and there. Near the lines. Retracing some lines. Because the watercolor
sometimes covers it to match. So retrace them. I'm very likely not
too dark or deep. Just go again with fine liner. The same with the leaves here. Adding some imperfections are these little marks
that the real lives. And they pop up pretty nicely. This is it. Our outer lining. Painting of packings is done. And you can notice
the difference. And really clearly. And I will charge you
that both of them. So I will see you
in the next video.
19. The Class Project: So if you're seeing this video is because
you have completed the hot glass and I congratulate you for making the effort. Now for your class project
is super, super easy. You just need to take with us the class project
section for this class. Your final pieces,
working progress, John materials, or outlining, or the color palette. Just click here in the resources and predict
session for the class. And you will be able to
create a class project. I always share with you a
sample project so you can easily have a better idea on
how to create your projects. I can't wait to see what
you create and I am so happy to have to in this class, I will see you in
the next video.
20. Thank You So Much: Thank you so much for taking my class and congratulations
for taking it. And I hope you learn
something new. And I can't wait to see your beautiful class project in the class project
section for this class. And don't hesitate. If you have any question
or any suggestion, please let me know and I will gladly do in wherever
it is in my hands. I invite you to follow
me here and so you can always be on point
when I chaired a new class or a new discussion. You can also follow me on Instagram if you have
one and if you check your products that then
tag me and I will gladly comment on your post
creation in my stories. I hope to have fun
with this class and remember to always
communicate with me. He had in the
discussion section. I will be super happy to
see your beautiful work. So don't hesitate on upload them to the class project
section for this class. I wish you a very
fun than creating NIK when they say do in
my next classes, Bye bye.
 Artjourneywithme Heidi, ARTIST AND FACILITATOR