Transcripts
1. Intro: Really cool videos and animations
start with storyboards. Storyboarding is
the process used to brainstorm and plan
out video content. It's used for everything from commercials and
film to animation. And at the end of this class, you will learn the
techniques to develop great storyboards
to help you plan out videos and sell
clients on your ideas. Hi, I'm Isaiah card Dona, and I'm a Senior
Art Director and Skillshare teacher with
several years of experience working at agencies that create video projects
ranging from animated explainer videos to social content and
broadcast commercials. I have worked in every
phase of the process, from concepting
and storyboarding video ideas to art directing motion designers and animators and even animating
content myself. And because of all
of that experience, I have designed the class
project of storyboarding your dream vacation to help demystify the full
creative process. For designers, art directors, are this animators
and video editors. Whether you plan to
animate a video yourself or you want to work with
emotion graphics professional, this class will be
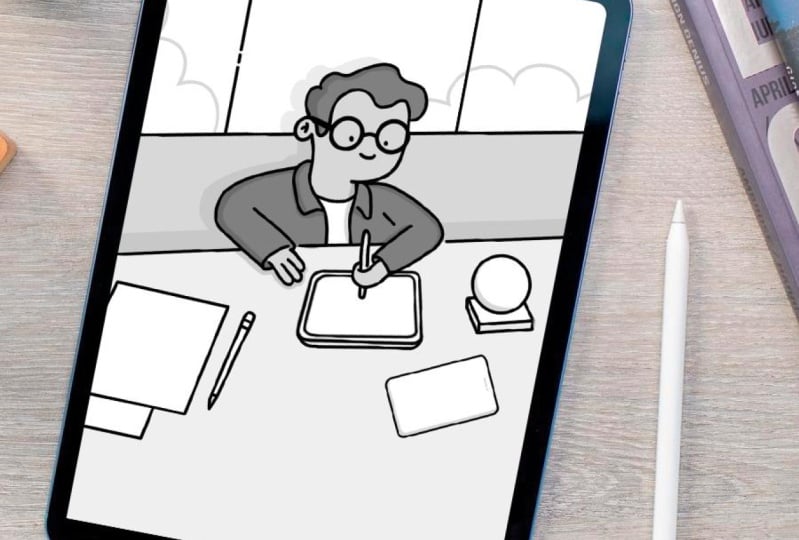
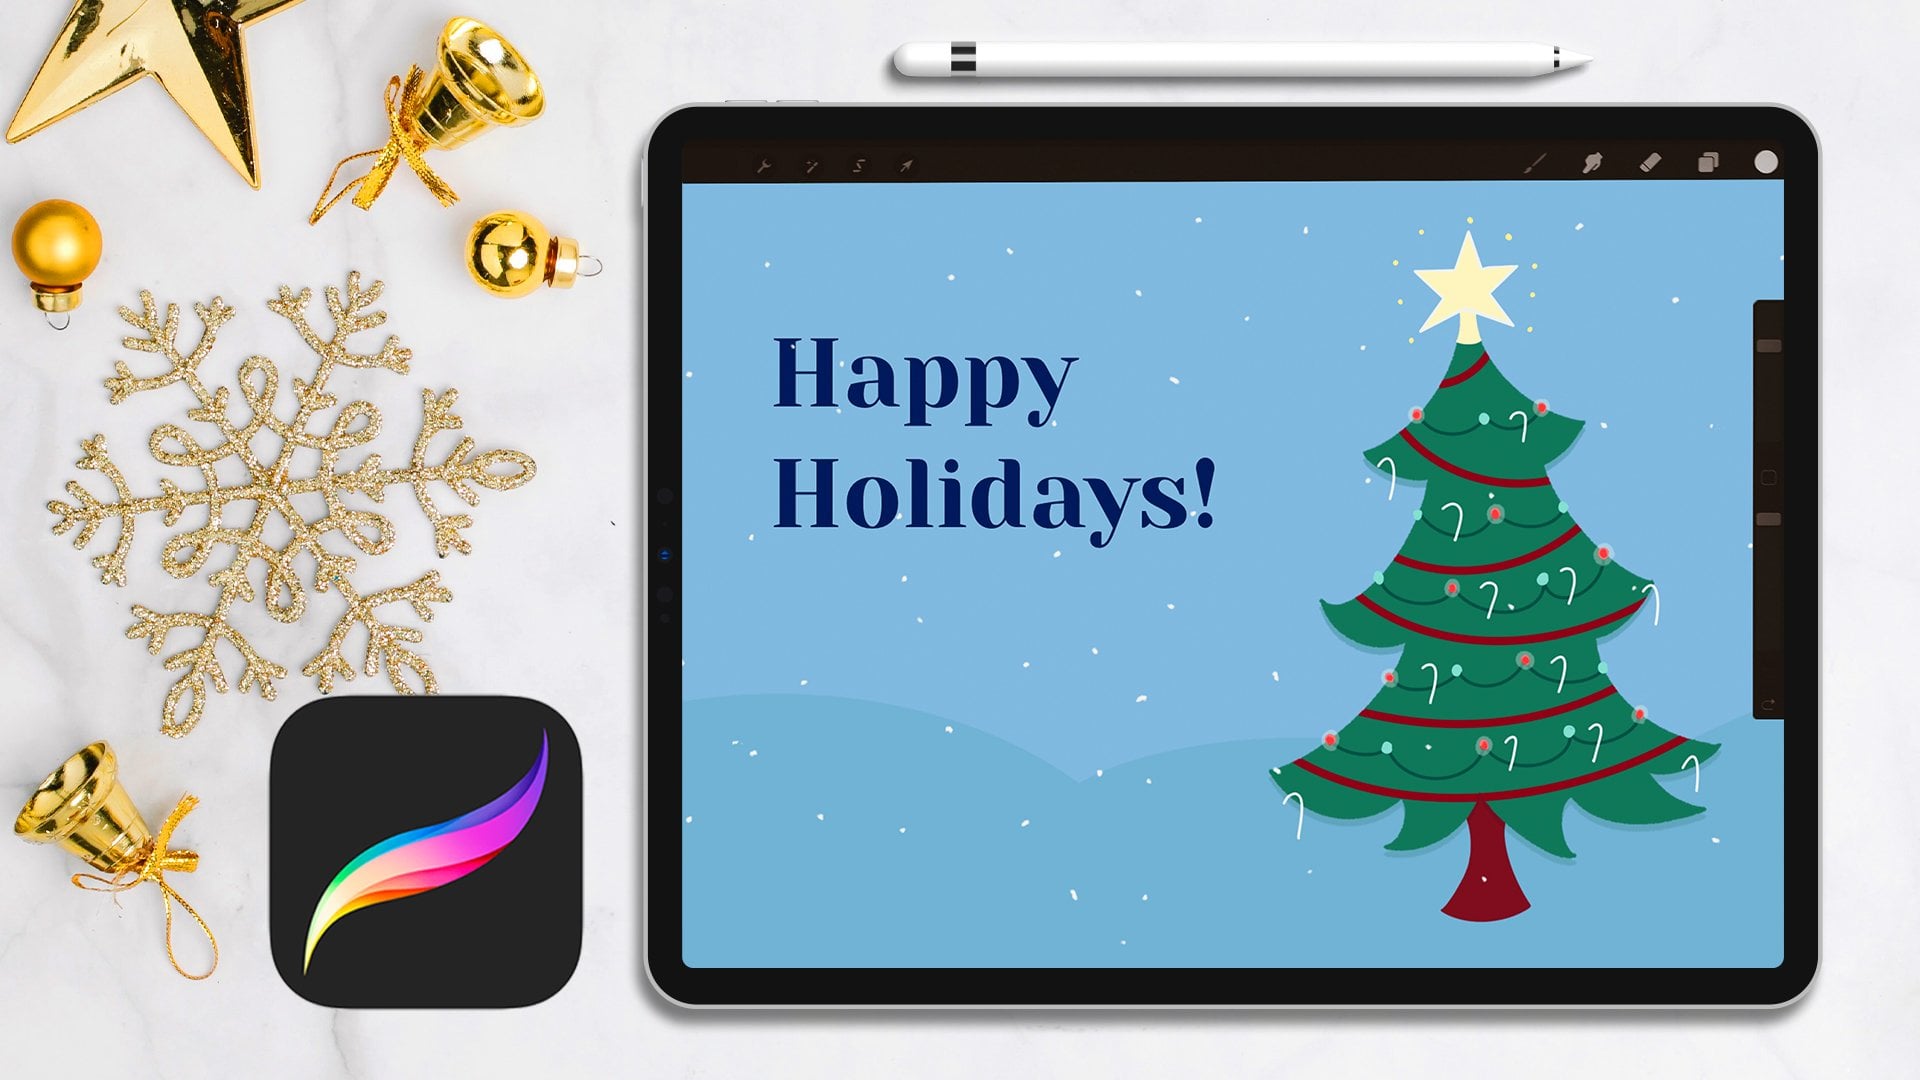
very beneficial. All you need for this class is your iPad with procreate
and a video idea. Procreate, this is super
useful drawing tool and I will walk you
through how you can use the new features
and Procreate to craft each part of the
storyboarding process. If you don't have
Procreate, no worries. You can also use another program or keep it traditional with paper and pens. Wherever you feel most
comfortable with, drawing is going to be perfect. Let's get started.
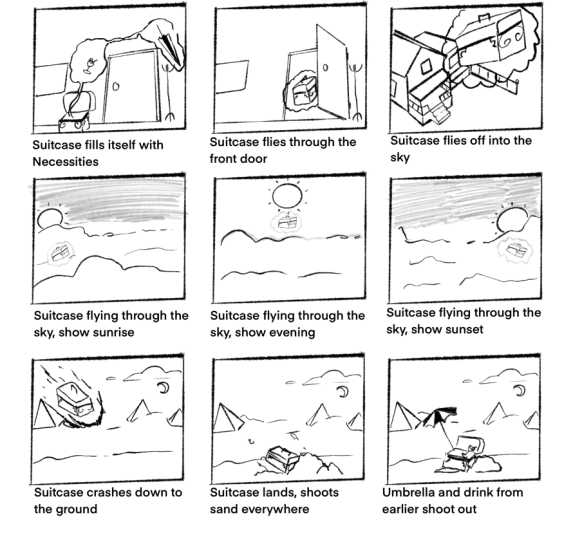
2. Project Overview: For the class project, you will create storyboards
for your dream getaway. The storyboards will cover
the full travel experience, starting with packing
for your trip, traveling, and ending at
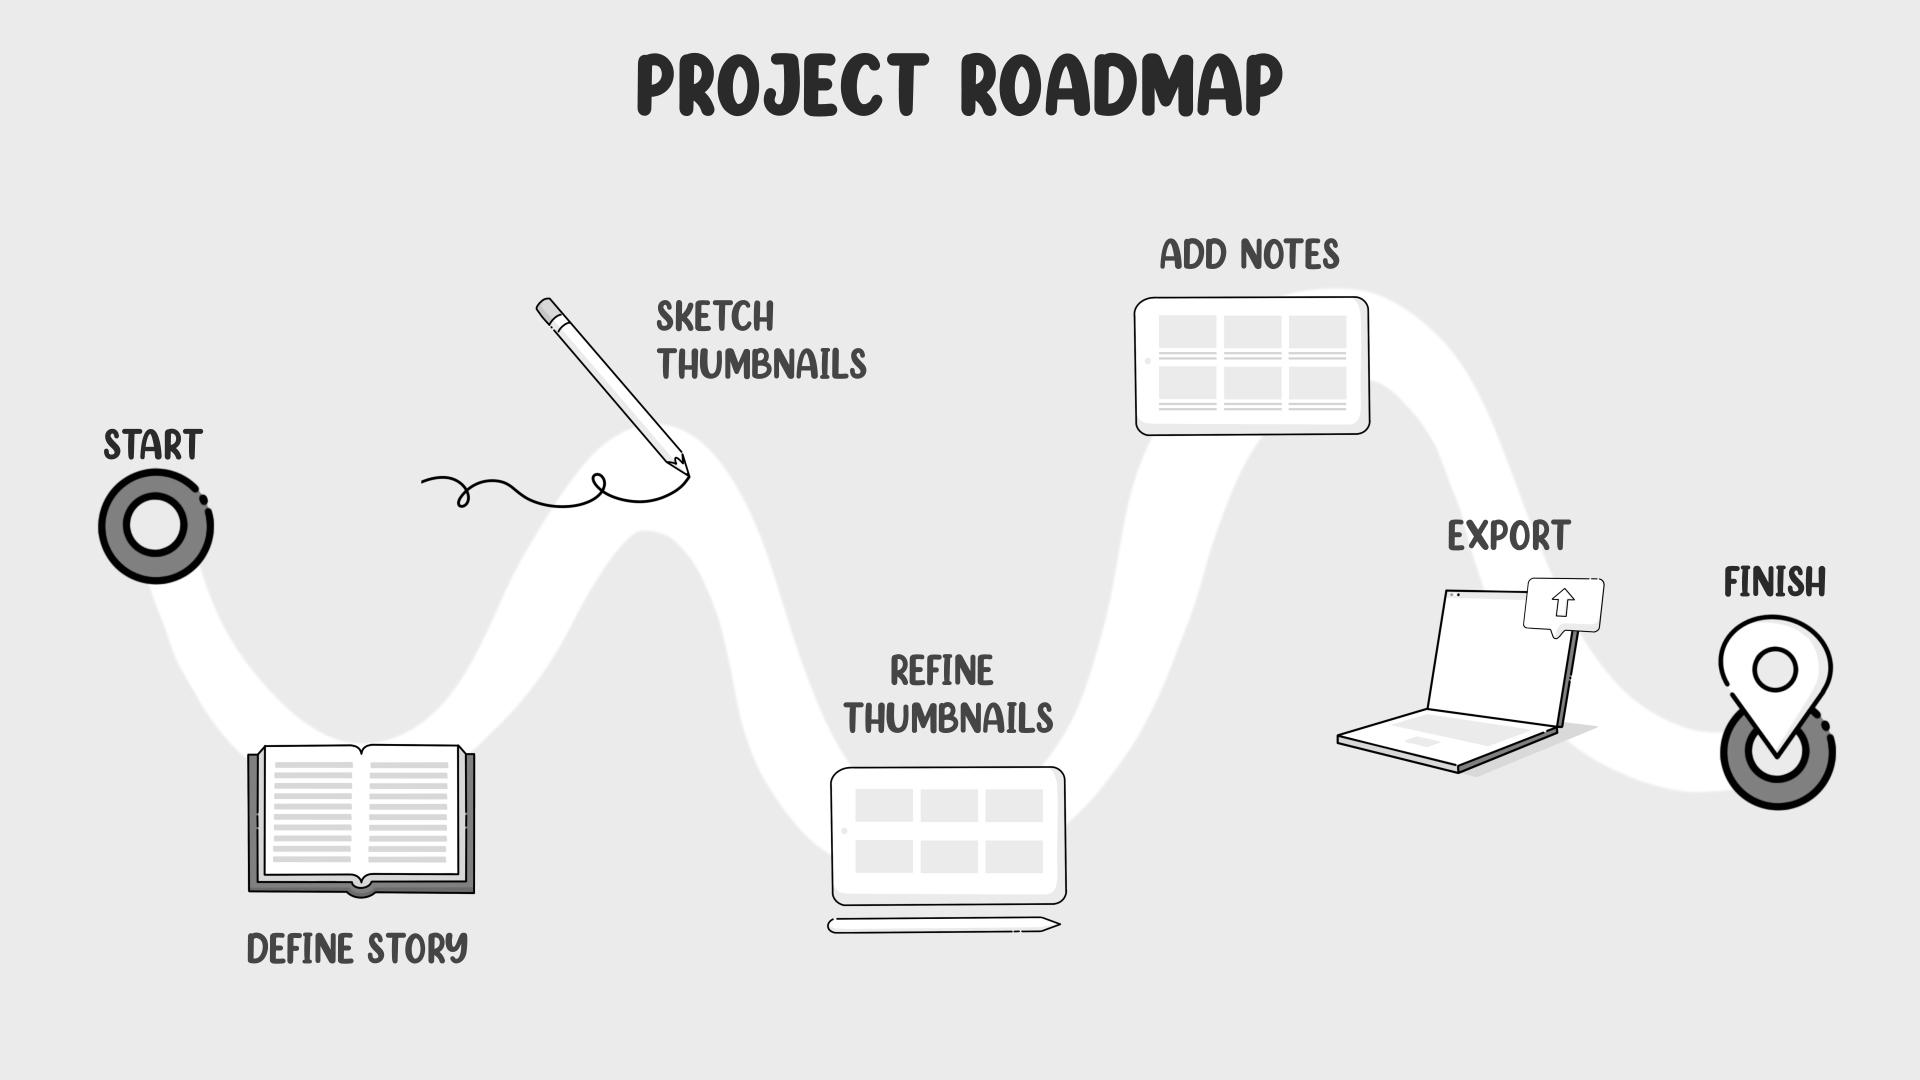
your dream destination. In order to create your project, you will define your
story elements. Sketch thumbnails,
refine those thumbnails, add animation notes and
export your storyboards. For each lesson, I'll explain
exactly what to do and how each step is going
to help you in developing your visual
storytelling skills. Once you've completed
your project, you can upload it by going to the project section and click
the Create Project button. And here's where you can add a thumbnail
for your project. And here is where you can
give your project a tidal. And below that in the project description box is where all your project
visuals and text. We'll go to add an image, click Image icon, and select the image
you want to upload. And then click Publish button at the top to help set
you up for success. I've included resources
in the project and resources section of this
class that you can download, including drawing templates and the procreate brushes
I used to get started, download the class resources. I will see you in
the next class.
3. Activating Story: In this lesson, I
will walk you through my process for getting
started with a new project. When starting a new project, I like to take time to
review the story, our story, we'll cover a full
travel experience, starting with packing
for your trip, traveling in, ending at
your dream destination. While reviewing the story, I like to take note a
several factors that will be important when I start
visualizing the story, which are the timeline, the setting in the subjects. The first thing I'm going
to look at when looking at the story is the timeline
of events in the story. The story will begin
with packing for trip, then traveling to a destination. And then we'll end showing the destination why it matters. This will help me by giving me a starting place for the
number of storyboards I will need to sketch out initially
as I want to capture all events and then the order
they appear in the story. Next, I'm going to consider
the subjects of the story. These will be the
objects are people that will be featured
in each storyboard. Here are a few prominent
subjects for my project, which are a suitcase
that will be used during packing
seen our car, which will convey
traveling on the road and a character and beach towel to reflect relaxing
on the beach. This is going to be important as it's going to help you
figure out what are those important
elements that you'll want to focus on in each frame? Glass. I'm going to want to note
the setting of the story, which is where the
events are taking place. Here's an example of settings
based on my project. First setting will be
packing inside my home, which is shown with a
suitcase on the floor. Next setting is on the road, which is shown with
a car on the road with mountains and scenery
in the background. The last setting will be
my final destination, which is shown with the
beach and the ocean. Thinking through these is going to help me when
I start sketching more details and start ideating for the background of
each of the storyboards. To recap, we just discussed
several factors to think through before you move
into the concepting phase, including timeline,
Setting and subject. Now it's your turn. Take a moment to take note of these different factors
for your personal project. And then once you've
defined your story ideas, we can discuss sketching
them in the next lesson.
4. Finding References: [MUSIC] When starting out, it can be hard to start
sketching ideas from scratch. That's why in this lesson, I'll be showing you
my process for using reference images
to guide ideation, letter of reference visuals. Reference visuals
are images that you gathered to help
inspire your drawings. This helps speed up your
process as you don't have to try to imagine all the
elements you want to draw. I like to use a site like Pinterest to make my
reference bores as it has live images I can quickly search through and
gathering to a board. You can also take your
own reference images. For my project, I
have gathered images reflecting the different
elements of my story, such as images of a beach, different angles and shots
of cars on the road, and images of suitcases. I like to try to
find find images, whether it's a cool angle or a unique composition of
elements in the photo. Gathering references before
starting the sketching phase helps inspire unique
visual approaches that you may not have
even thought of. Referencing images also is helpful for beginners
at drawing, as you don't have to spend
time trying to think of how something looks and you can just reference your visuals. Now it's your turn. Take a few moments to
gather inspiration that reflects the different
story elements and in the next lesson, we'll dive into
sketching out our ideas.
5. Sketching Thumbnails: [MUSIC] Creating your
initial sketches for your bio idea can
be really daunting. In this lesson, I
will be giving you my strategies to
thumbnail like a pro. What's thumbnailing? Thumbnailing is a quick, rough sketching
stage where you just want to try and get your
ideas down on paper. I like to use thumbnail templates
to speed up my process. I provided you with a PDF template that you
can import into Procreate. This template provides
you with frames, which is essential for
your thumbnailing process. As the frames
helped me visualize the screen and how elements can enter into view and how I can
crop into subject matter. I also like to pull up my
reference board and story notes I created earlier in the class to reference
as I'm sketching. A pro tip, it's important to think about the thumbnail
sage as a draft, you should be thinking about the story elements
and not the design. That's for your
worry about later. Because of this, I like
to limit myself by using the native pencil
brush that comes with Procreate for my sketching,
drawing the timeline. As I start sketching, I'm going to sketch out the different key scenes from the timeline I developed
in my story notes, then fill in frames
between those scenes with how I want to
transition between scenes. I take this approach as it helps me to figure
out the sequence of storyboards first and then
go back and flesh out the rest of the composition
once a sequence makes sense. Starting out, I definitely would spend time on
individual thumbnails. Then I would later realize
that I wanted to make a big high-level change then validated all that
work I did before. Which is why I like to focus on the larger picture of
the storyboards first. Don't forget to play around and try some different
quick options. This is the stage to explore
different directions. As you draw your thumbnails, you really want to
play around and experiment while
you're sketching, it's always quicker to
redraw something than it is to fix it in the animation
or post-production. I have found from
personal experience, that's best to really
challenge myself by sketching out
different approaches for telling the story and using
the layers in Procreate to rearrange thumbnails to really
see all the possibilities. Once I'm satisfied with
the order of events, I'm going to think
through the pacing or the speed of action, which is determined by
the number of boards reflecting points and
the overall story. Here's a way to think of pacing. A project you're seeing that's supposed to convey intensity or confusion will be planned and constructed
with lots of shots, lots of cuts and
lots of movement. Whereas a project or
seeing that supposed to be more thoughtful, emotional, might lend itself to
having long shots, slow movements, and fewer cuts. I find it helpful to consider what pacing
is needed and then focus on it early and often
as I outlined my projects. In my project example, I'm going to first look
at the major events I'm depicting which are packing, traveling in the car,
and vacation scene. I think, which scenes do I
want to move through quicker and what moments do
I want to slow down? In my head, I'm thinking
that the packing should be slower thematically as it's
a more mundane activity. I'm going to only devote
two frames to it. I'm not going to employ
any crazy angles as it's just packing and not
an intense action scene. For the traveling scene, I want it to be
faster pace to get across the filling of
movement and traveling. I'm going to add more frames and show more angles for the scene. Then the vacation scene, I want this to come
across as very relaxing. I'm actually going to slow down the pace and show
just two frames. To get across that, I'm reaching the destination and seeing the beauty
of the location, and then showing my
character relaxing. Now, let's play with
the composition. Composition refers to how
things such as setting, characters and objects are shown or placed
in the thumbnail. The last step and
thumbnailing is to flush out that composition
of each thumbnail with details to
establish the setting. During this step, I typically
referenced my notes I took on the setting and
subjects of my story. These elements will make up the composition of each frame. Pro tip, give
yourself time to go away and come back
to your thumbnails. This allows you to return to thumbnailing with
a new perspective. Sometimes I like to sleep on it. Key takeaway to
remember as you sketch thumbnails is to keep it
simple and experiment. The more options
you think through, the better the final
product will be. Now, it's your turn to grab your iPad and start sketching. In the next lesson, I will share my strategies for refining the thumbnails
into storyboards.
6. Refining Thumbnails: [MUSIC] In this lesson, I will walk you through refining your
thumbnails and share some considerations
for evaluating the effectiveness of
your storyboards. First, I want to
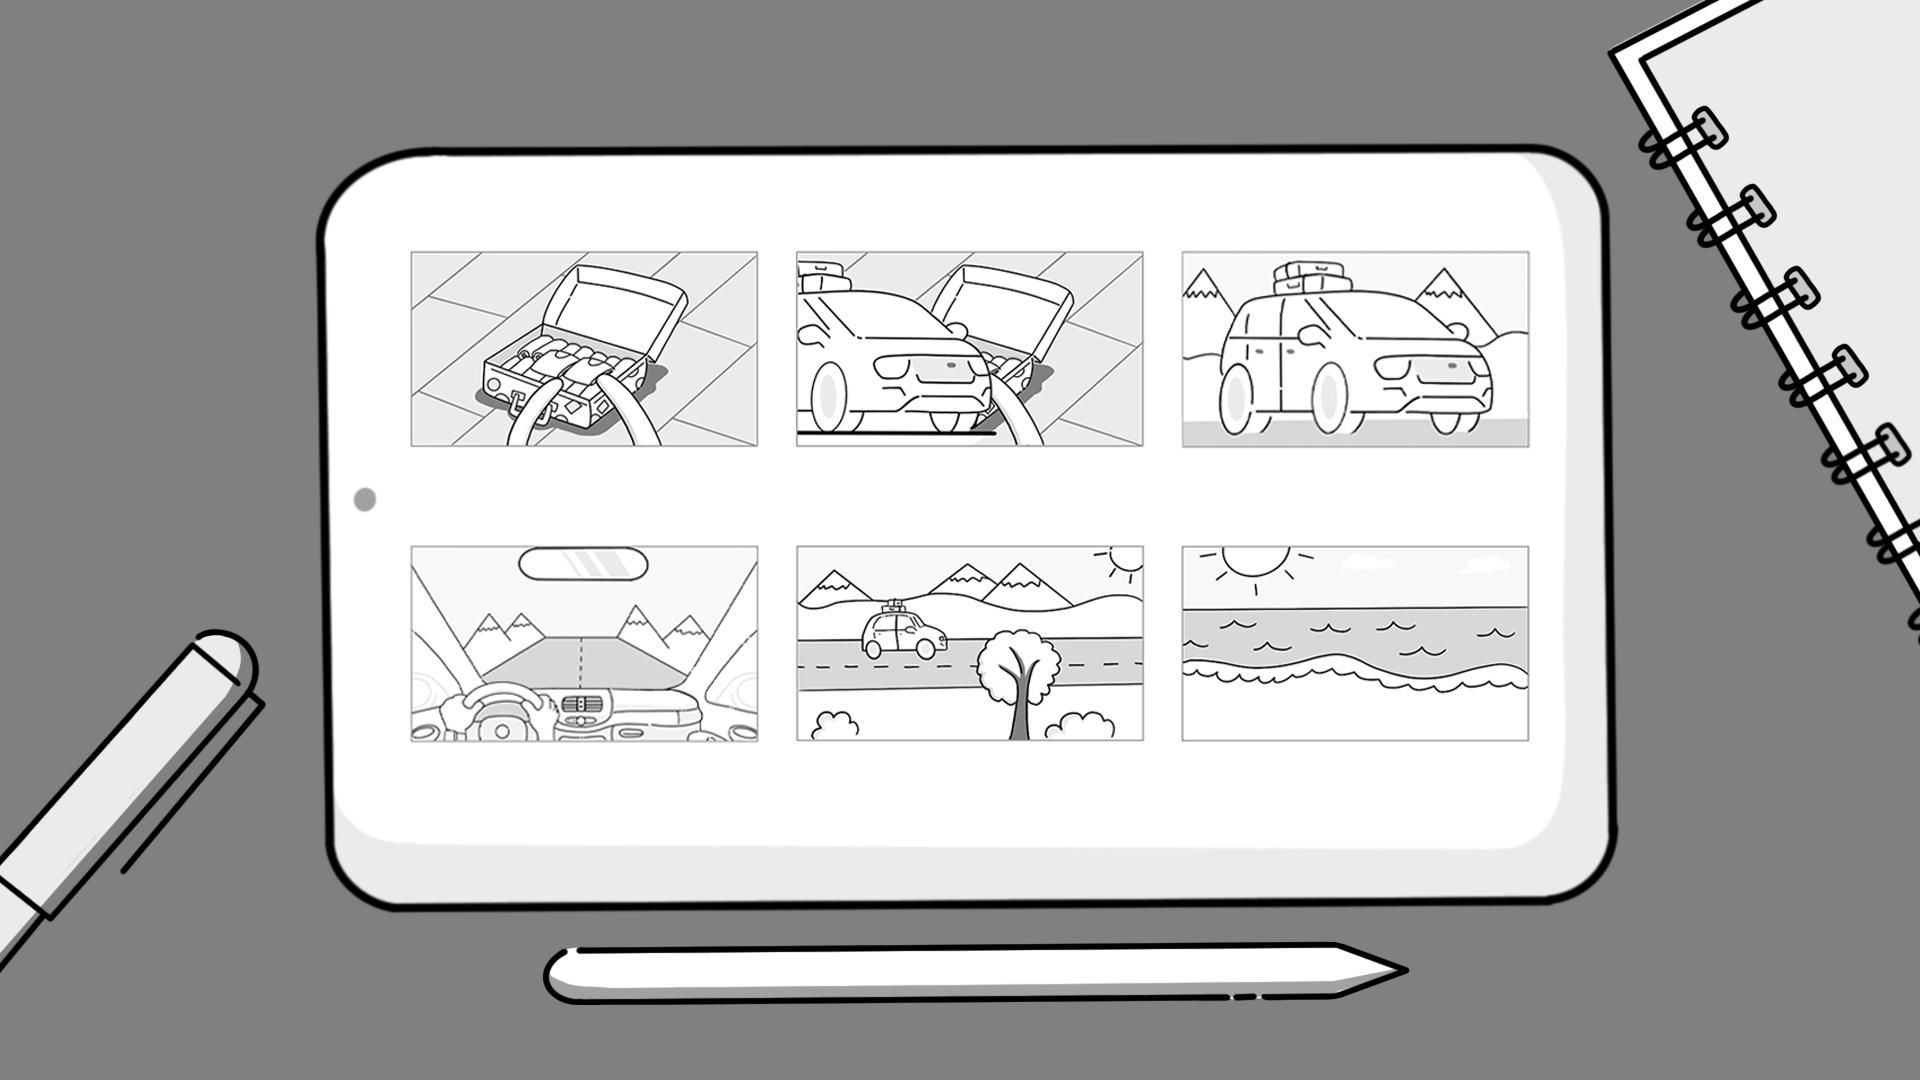
walk you through the goal of refining thumbnails. As you can see in this example, I have taken my sketches
and refined them into more detailed storyboards. These refined
storyboards express more than my original sketches, and are more presentable
while not overdoing it, which, in my job, gives the client
enough information to understand and buy off
on the story idea. To help you get your
final storyboards, I'm going to share
two considerations I use in my refining process. The first consideration
is to ask myself, is the storytelling clear? Clear storytelling
means that when a person views your storyboards, they understand what's happening and what characters are feeling, and basically know
what the story is in your story sequences. I remember when I first started
storyboarding projects, I often would be lacking storyboards to help
describe the action, or it was tough to understand what I was
trying to express, which lead to confusion
when I would have a creative director
review my storyboards. Lucky for me, my
storyboards always went through internal review before
they went to the client. From that experience, I recommend that if
you're starting out to have another person
review your storyboards and to make sure the
storytelling makes sense. Pro tip, don't forget, you can always post
in-progress work to the class's project
gallery to help you double-check the
clarity of your story. The second
consideration is making sure you have enough details. In order to communicate as much as possible
to the client, I try to be detailed with
my storyboards and make my black and white
storyboard drawings closer to the final design. I have found that clients
can get lost when a visual doesn't fully
communicate what you intended. For example, when I worked
at an agency that would do big shoots that needed to be filmed at specific locations, it was so important
to take time to illustrate the setting and
background in the storyboards. The client and my team
understood what we wanted to achieve during that
each part of that shoot. The worst thing would be
for the client to project an idea of the setting or subject before you
gave them an option. This can lead to
the client seeing the final version and
being unsatisfied with it because they got attached
to a visual in their head because you didn't specify
it in your storyboard. If there is an important aspect of the video or animation, then you need to capture
that in your storyboard. A key takeaway for
storyboarding is to make sure your refined
storyboards are detailed and illustrate
all the key elements as close to the final
design or production, so what a client sees after a storyboard presentation
aligns with their expectations. Now, it's your turn to redraw your final thumbnails
as refined storyboards. In the next lesson, I will walk you through adding animation notes to
your storyboards.
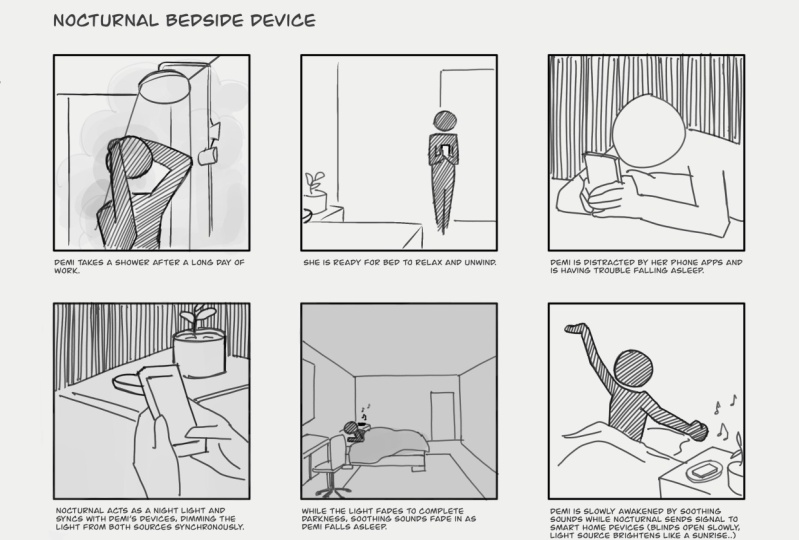
7. Adding Animation Notes: You have your storyboards drawn. So what's next? In this lesson,
you'll learn about animation notes and
how to write them. The goal of animation or
action notes are to describe the animation in each frame in a concise manner to show
you how this works, I'm going to walk you through my animation notes
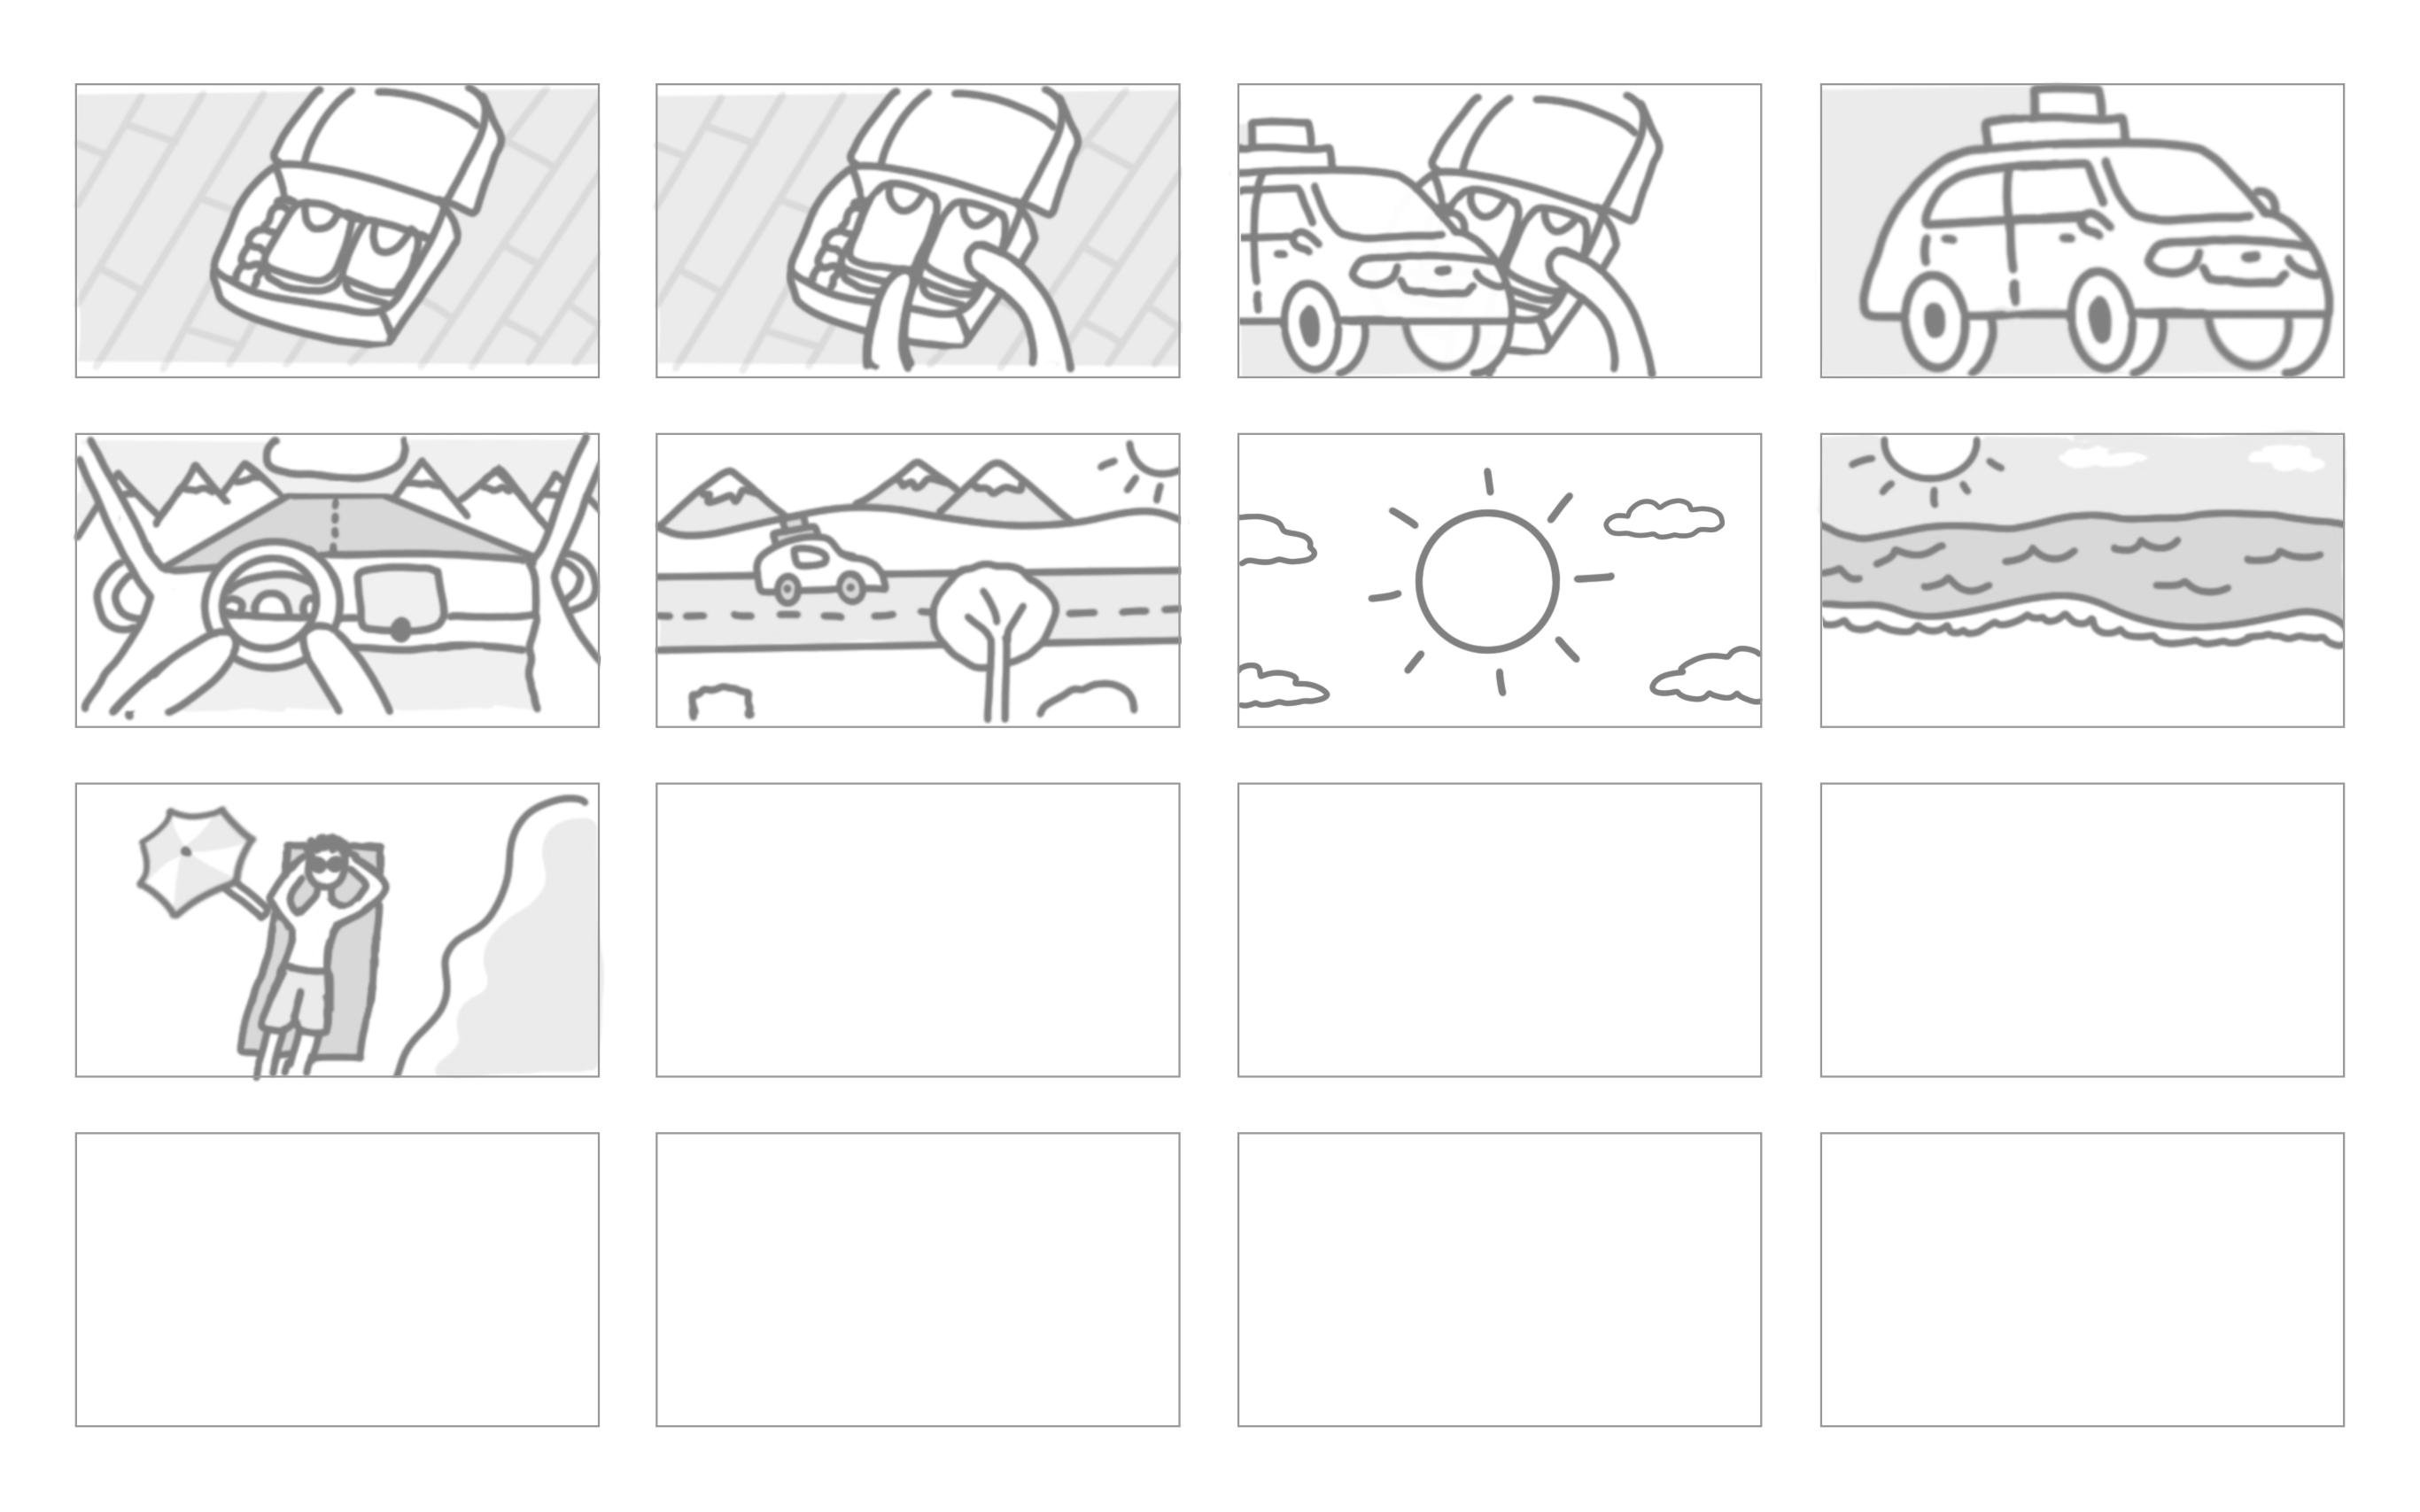
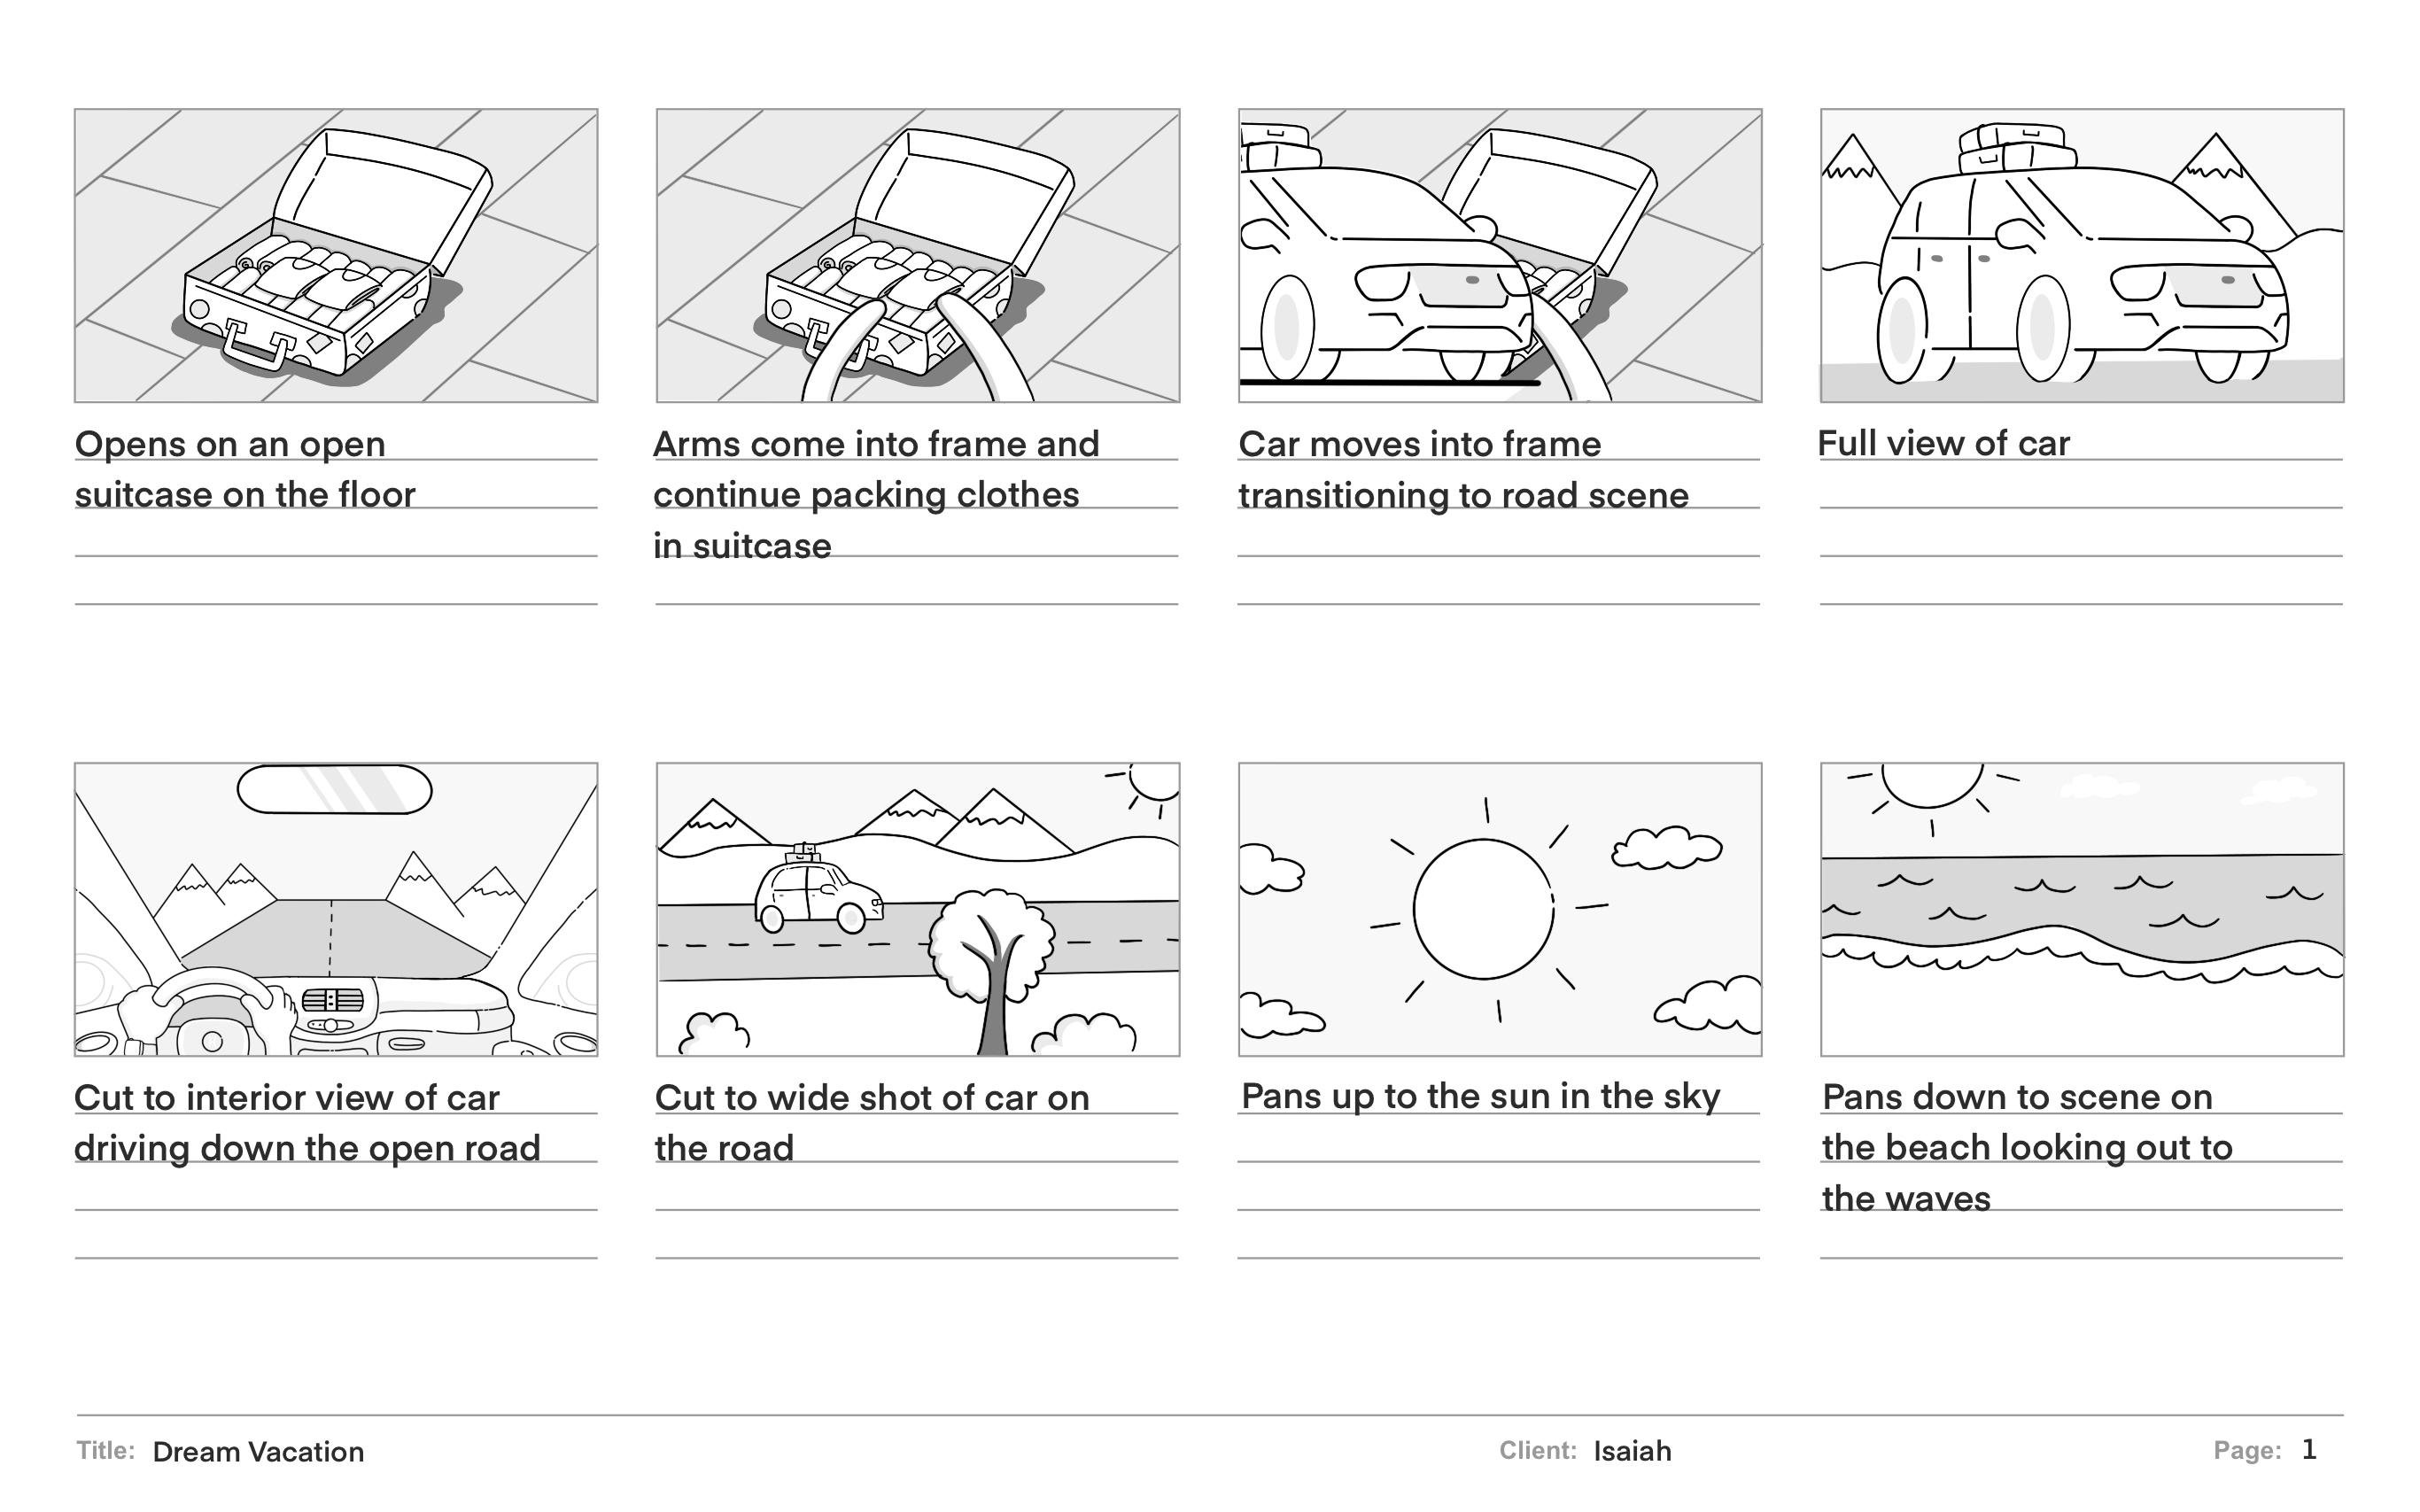
for my project. So starting with
the first frame, I wanted to open up on it a shot of the open suitcase
on the floor. Then I want arms to come into frame and continue packing
clothes and the suitcase. I want it to depict the whole actual packing so that you're not just
seeing a suitcase, but you're actually seeing
the actual activity of someone's putting clothes
into the suitcase. And then between
the suitcase image and the image of the car, I want it to have
a fun transition. So in the third frame, you'll see that I want
the car to move into frame and then have that
come over the footage, the suitcase on the floor. So you're transitioning
to the road scene, which then in the
fourth view of car, you're see the full view of car. And then in our fifth
frame down here, we will cut to an interior view of the car driving
down the road. And then for the six
frames, the next one, I'm going to cut to a wide
shot of a car on the road. And so basically with
these animation notes, I'm just wanting to really describe the activity
that's going on in each frame and
make sure that I'm explaining it well enough so that if something
isn't clear, I think a great example was
that third frame up here where you're seeing
that that could be confusing if you
only saw the image. So you need the
text underneath to explain how this
car is going to be shown driving in front
of the suitcase visual, which will help it transition
to the roads seem. So now let's get back to
it and the next frame, I'm going to describe how the camera will pan up
to the sun and the sky. So we'll be starting where basically the second
frame on the bottom was. And then we'll have it then move on to the third frame so
you're seeing where we are and then how we
will then pan down to the next frame which shows the beach looking
out on the waves. And so having that description
is going to be really important as what setting up is, how you will transition
between those frames. So it's explaining
that it won't just be a quick cut to the sun and
the clouds to cut two. Now we're at the beach, but that there will
actually be a note for whether we're panning up with a camera or we're animating it. Then move up in the frame and focus in on the sun and
then come back down. And now we're in a new location. And then our last
frame is going to be just a simple cut to
an overhead shot of the character relaxing
on the beach. That's where it's really
important to have nice detailed notes as
that's going to help you be able
understand better how each frame is going to
transition to the next one. You can either write
out your notes using the Apple
pencil or use texts. I'm going to show
you how to add text. To do that, I'm going to tap the wrench icon up here
under where it says Add. You're going to tap Add text
to change the font size. You just select all texts and then you get
these texts options. On the left side, you have all your
available fonts. And then over here you
have the font size setting as well as other modifications
you can make to the text. And on the right side you have the alignment options allowing you as center or
left align the text. To recap, we just
discussed the purpose of animation notes and how to
write them in procreate. A key takeaway is to
remember that you may not always be around to
explain your storyboards. So it's important
to take time to write notes to help explain the action and animation that will happen throughout
your video. Now it's your turn to
take a moment to think through the animation
and fill out your notes. And then the next lesson, I will walk you through
exporting your storyboards.
8. Exporting Storyboards: [MUSIC] In this lesson, I will show you how to
export your storyboards. There are two main export
formats for storyboards, one is to export all your
storyboards as a PDF, which is great for sharing
and presenting to clients. The second way is to export
each page as an image. For the class project, you will want to export each
page or your storyboard as an image as Skillshare
doesn't allow you to upload a PDF
to your project. Next, I'm going to
show you how to export your storyboards as a
PDF and as an image. To export your PDF, go to the "Actions" button, which looks like a
wrench and tap it. Next, go to share
and down to PDF. Then in the following
dialogue box, you'll choose your
desired quality from good, better, and best. Lastly, you will select a
destination for your file. To export as an image, you will tap the
"Actions" button again and then go down to share, and then this time
you'll tap "JPEG", and then in the
following dialog box, you can select the location
to save your JPEG. Procreate gives you even more
options for image formats, but I recommend using JPEGs
as they are versatile and a smaller file which is helpful for adding to
your class projects, and Skillshare has
a max file size. To summarize, I showed
you two ways of exporting your storyboards
from Procreate and talk about their pros and cons. Now, it's your turn to export your storyboards and upload them to the project
gallery of the class. If you run into
any problems with exporting or uploading your
project to the gallery, then feel free to post it to the class discussion and
I'll be happy to help. In the final lesson, we will wrap up this class.
9. Wrap Up: [MUSIC] Congratulations on
finishing this course. I really appreciate you taking the time
to take my class, and I hope that the
discussions and exercises that we
worked through have opened up some new
ideas for you to integrate into your video
concept in practice. Through these lessons,
we have discussed how to define story elements. I walked you through my process for sketching and ideating thumbnails and how to refine
your thumbnails for clarity. We also walked through how
to thoughtfully describe action and storyboard
using animation notes. Then lastly, I showed you how to export your storyboards
and procreate. All of this together gives you the techniques and
strategies to approach concepting and presenting
your video project ideas which you can use in all
future motion projects. I'm very excited to see what
you've created so be sure to post your work to the project
section of this class. Sharing your project with
the Skillshare community is a great way to help inspire each other
and continue growing. If you would like
more classes from me, then follow me on Skillshare
and check out some of my other classes on motion
design and animation. Thanks again for
taking this class, and I really
appreciate you taking the time to learn
the skills with me, and I hope to see you
in a future class soon. Bye for now. [MUSIC]
 Isaiah Creates, Art Director & Motion Designer