Transcripts
1. Welcome: Hi everyone, This
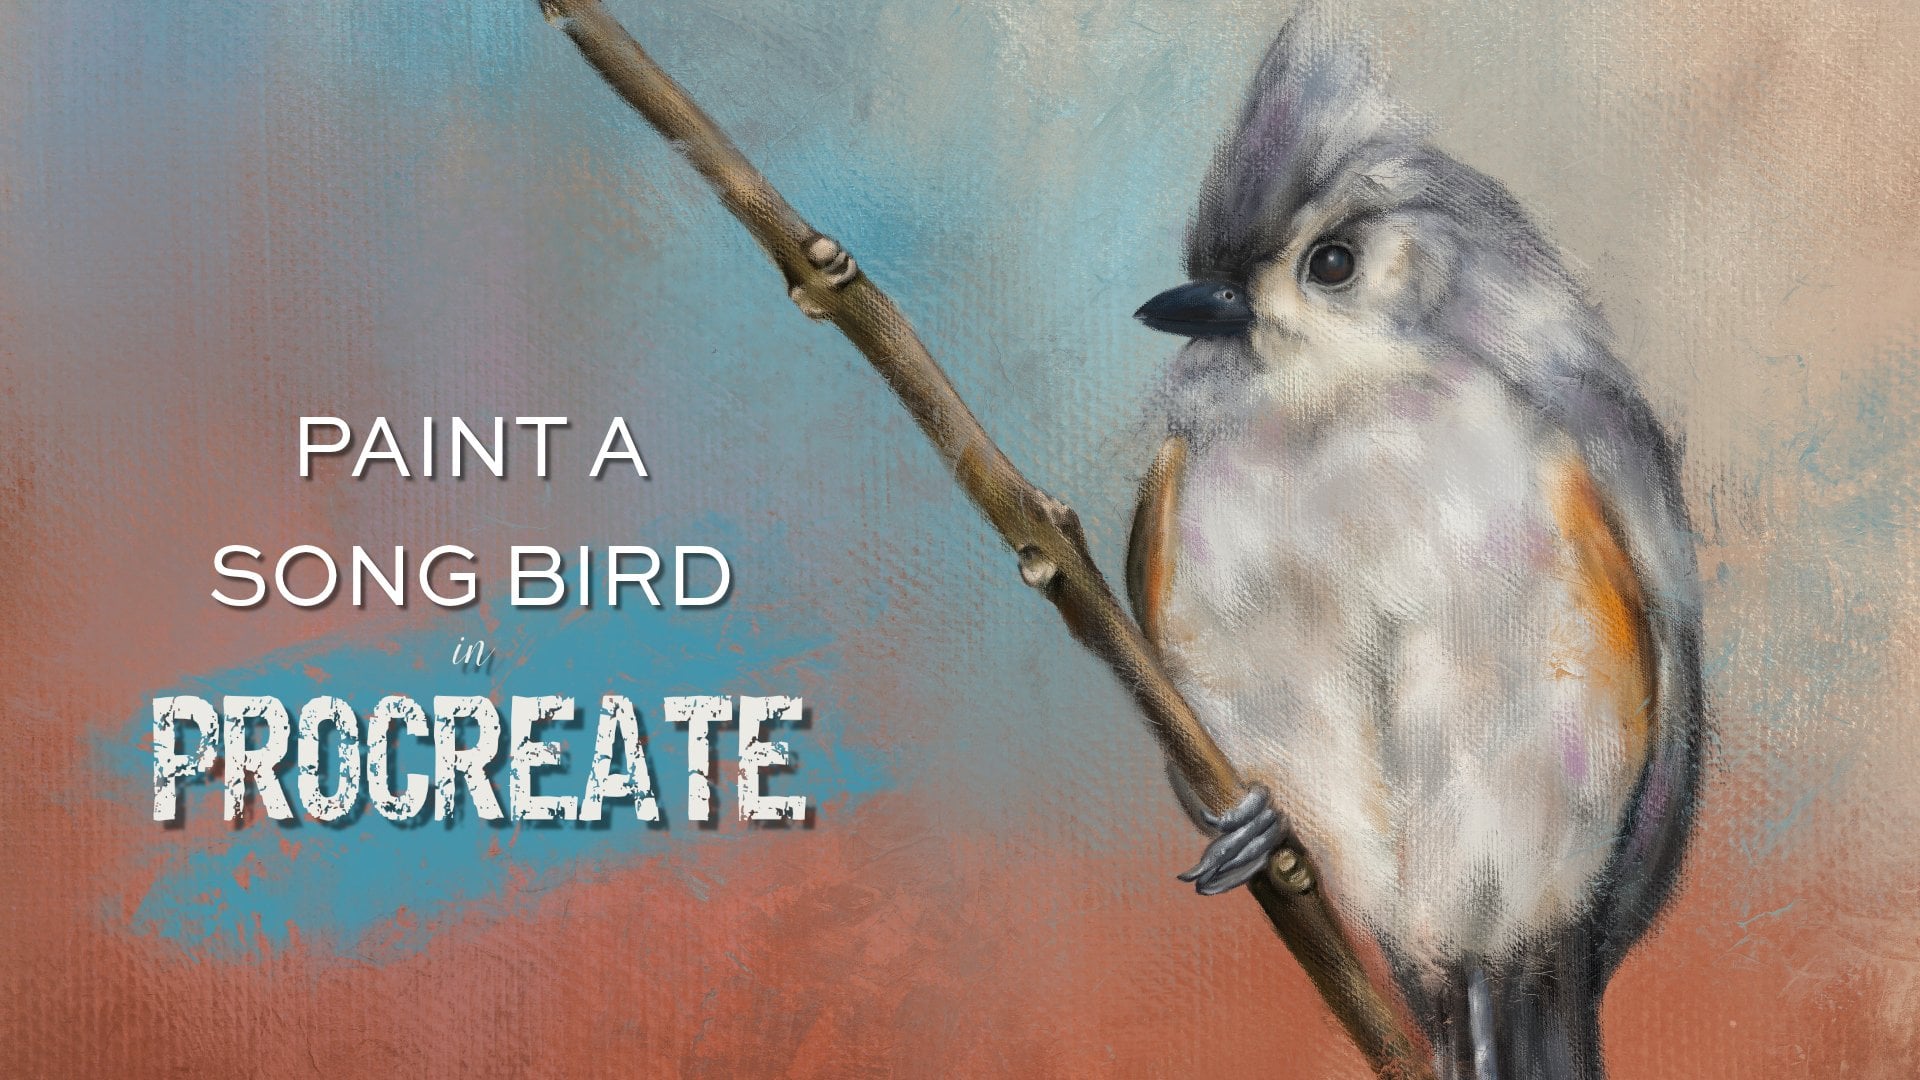
is Jay Johnson, and I'm here today to show
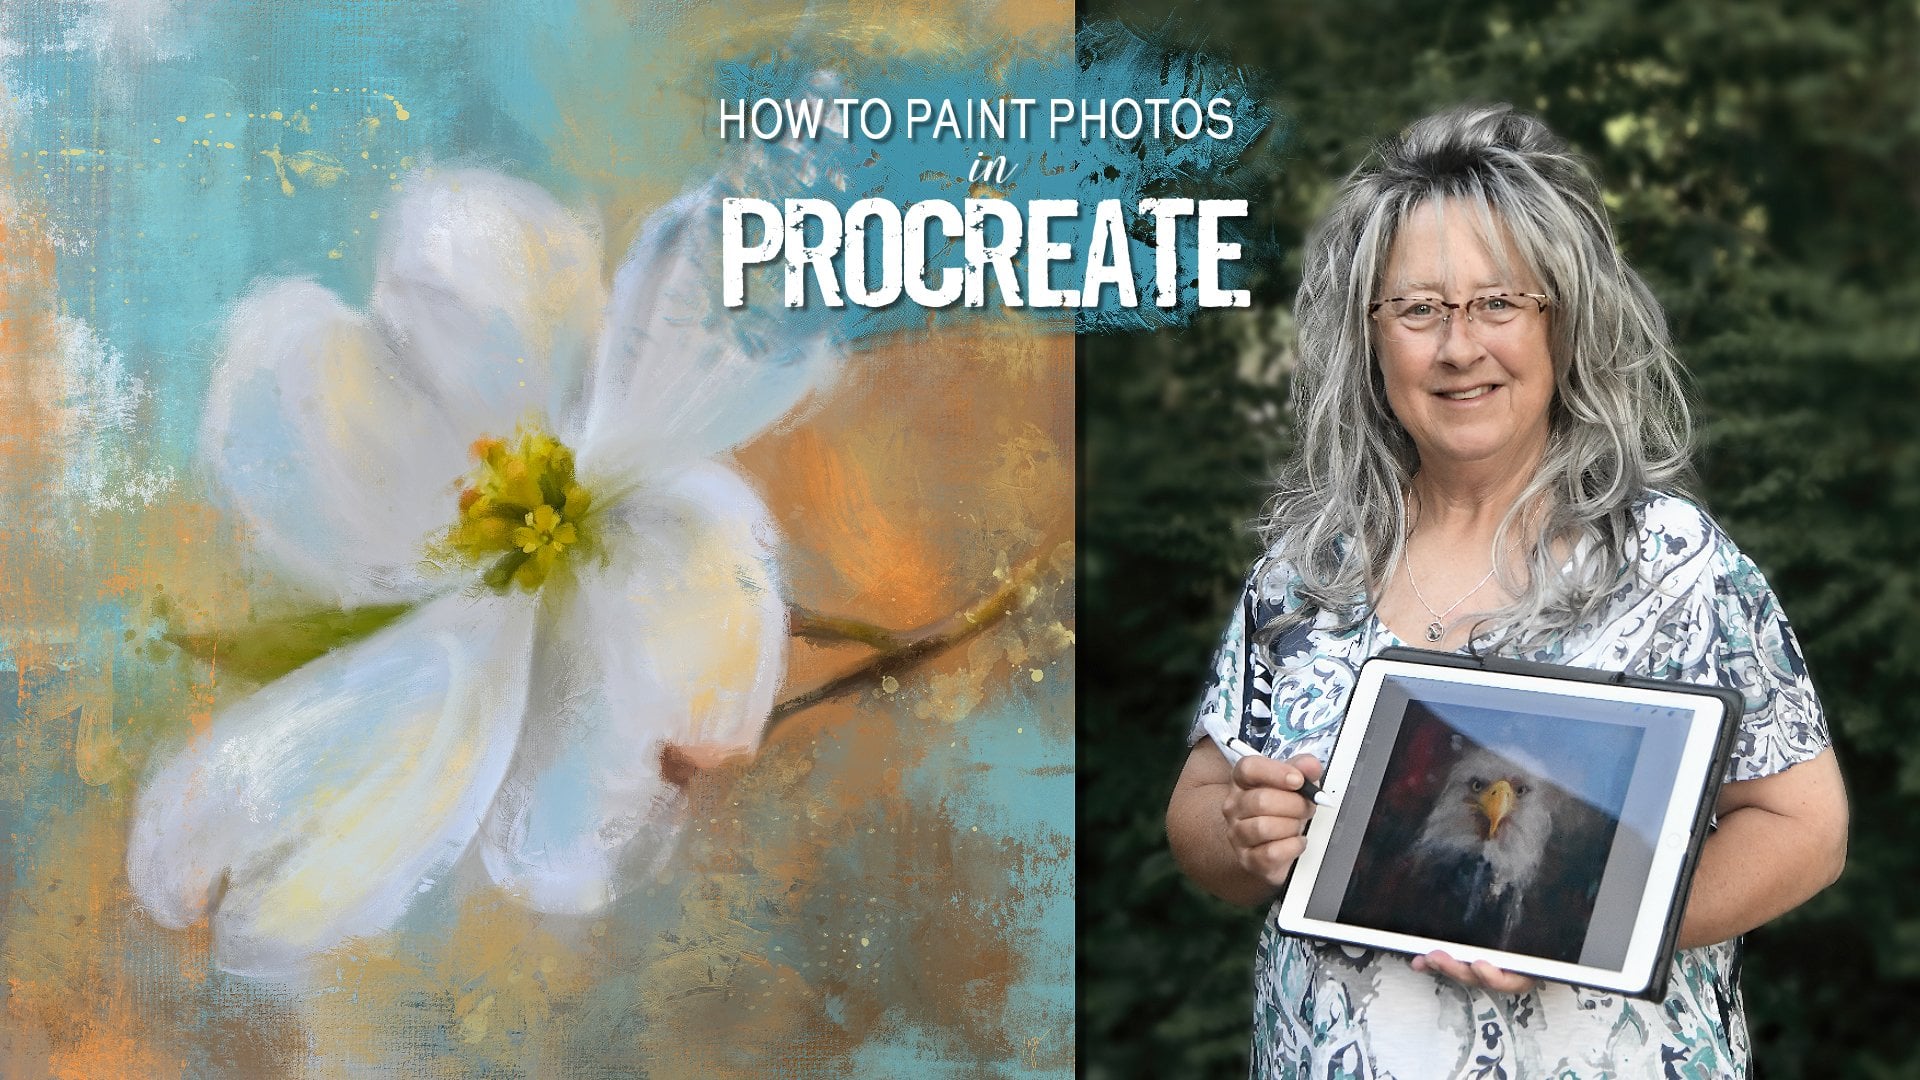
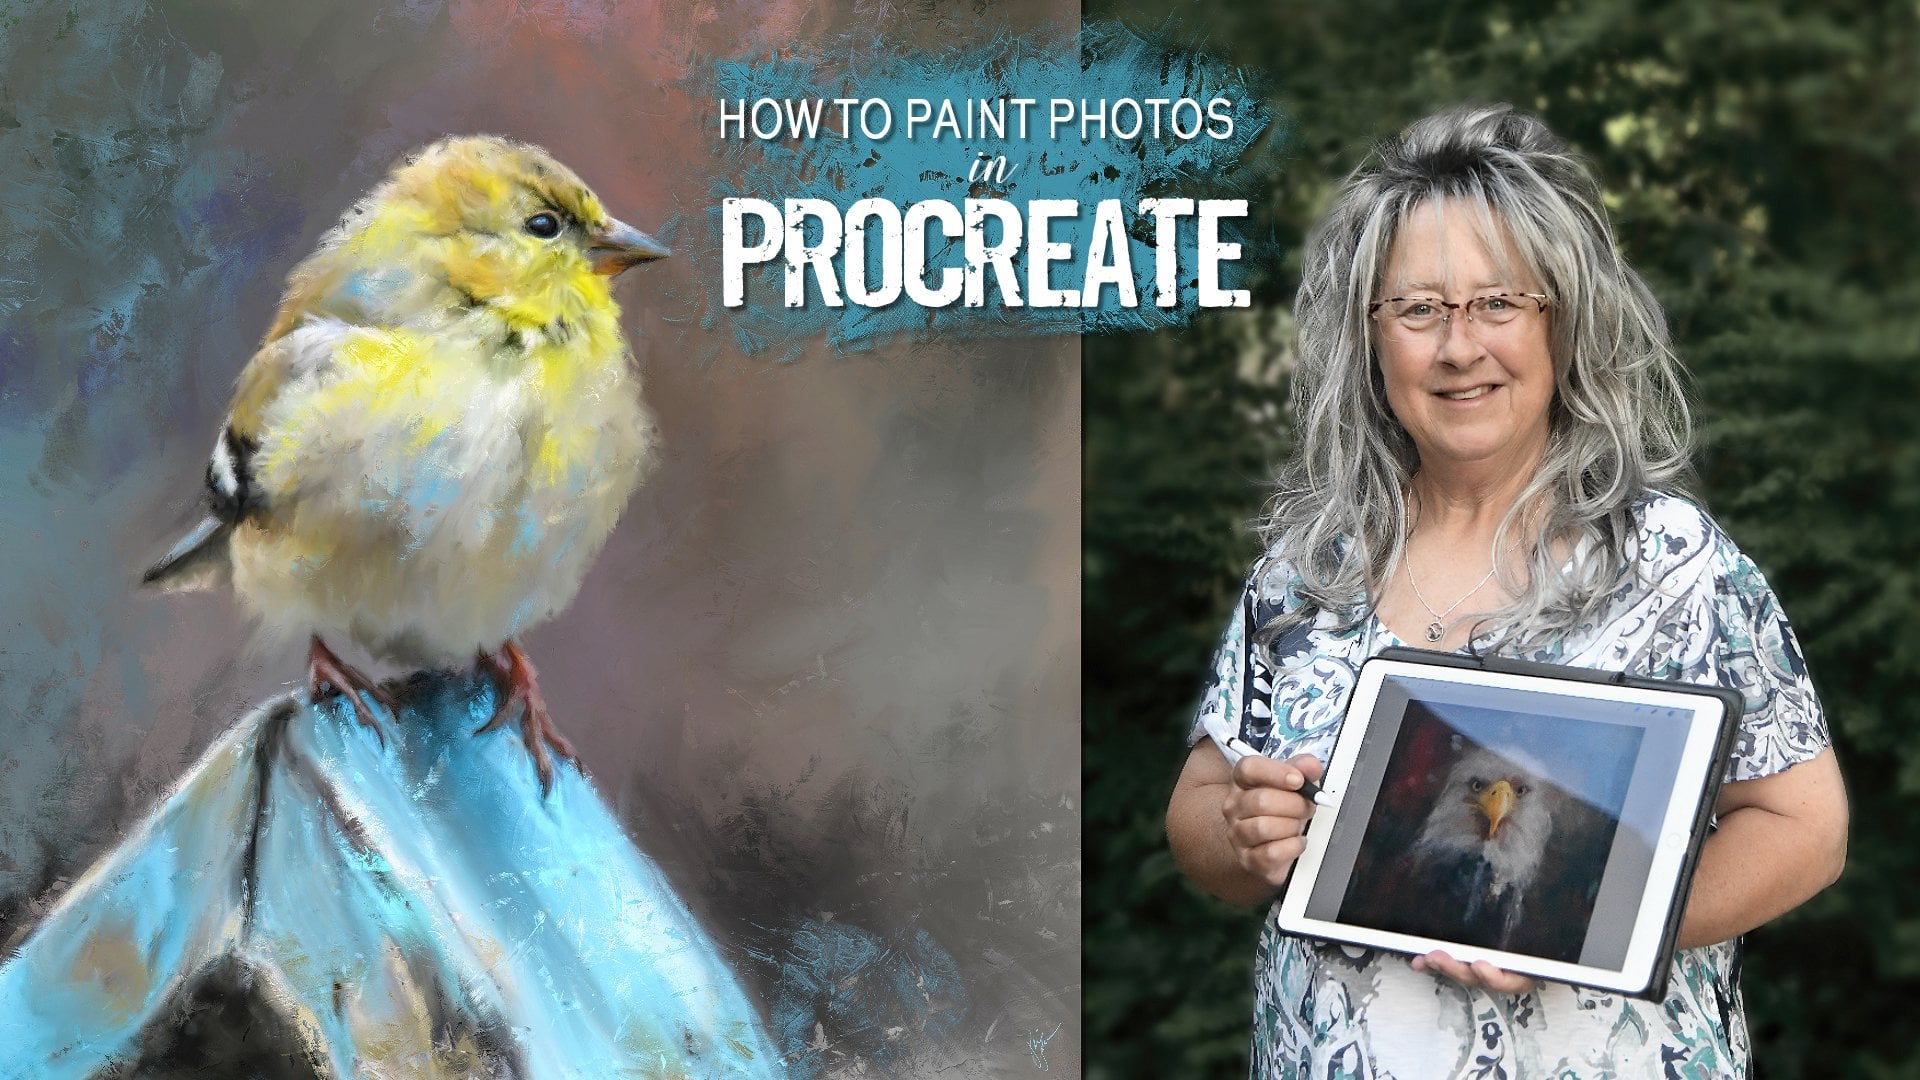
you how to paint breakfast. In procreate. Painting your photos is a fun and unique
way to create art. In Procreate. I've taught the basics of how
to paint your photos using the Procreate app on the iPad and several
of my other classes, I am beginning a daily
painting project. And in this class I demonstrate my first
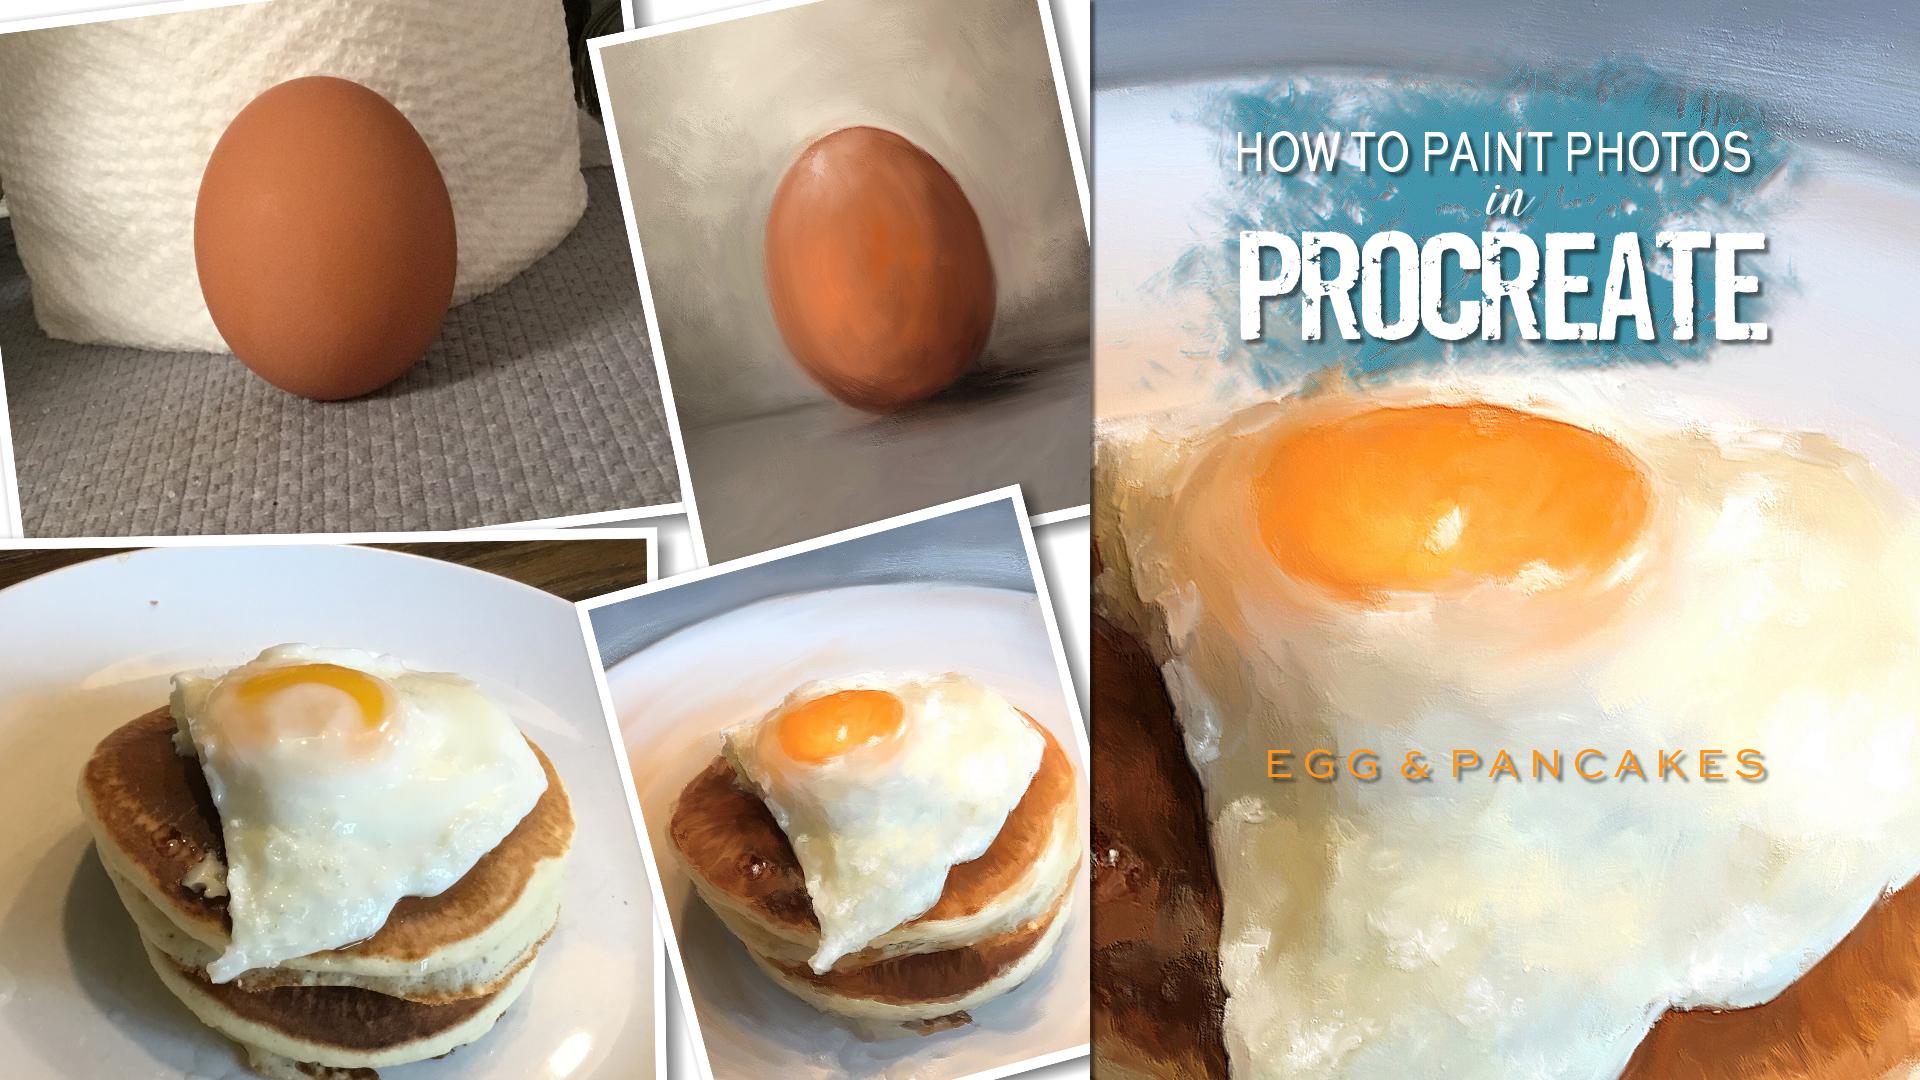
two daily paintings. I've chosen breakfast
as my first theme in this class begins with painting
a simple photo of an egg. And I create these paintings
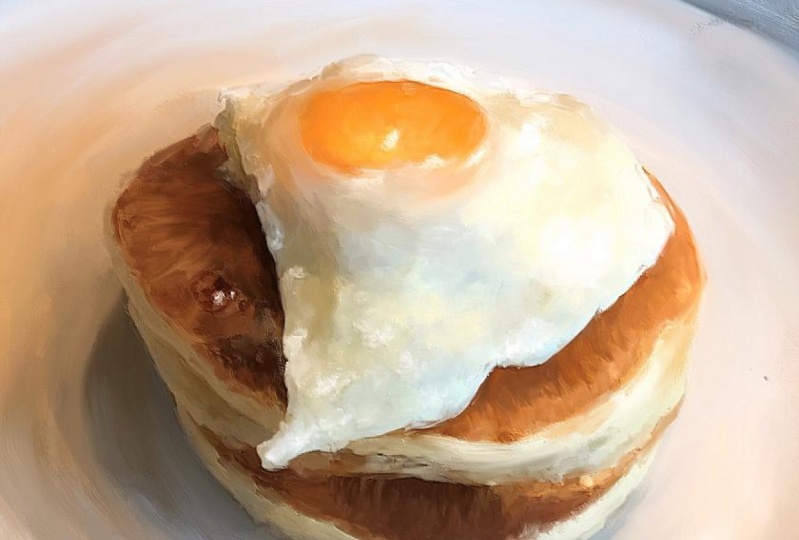
with only one brush. For my second painting
demonstration, you'll watch me create
the entire meal featuring one egg on top of
pancakes on a plate. You'll see me make
painted adjustments to my egg to make it look better than it did in the
original photo. And you'll watch me transform the dark table background into
a softer blue background. In this class, you'll learn
how I set up my Canvas, how I position my photo, how I paint the background, how I paint and blend
with the brushes. How I enhanced the painting with additional color highlights
and brush strokes. And finally, how I finished
out the painting using a simple tool in I call aroma. In order to complete
paintings like this, you will need an iPad
with procreate installed. You may also wish to install the eye color aroma app in order to add the
secret final step, I show you to bring your
final painting to life. You will need an Apple pencil. You will need to have a
basic understanding of using Procreate and
installing brushes. And you will need to
understand how to take photos with your iPad or transfer photos onto your iPad before
starting this class. Provided with the class
is my rich oil brush. I also provide you with a PDF file featuring
ten tips you can use if you choose to immerse yourself in a daily
painting process as well. So if you're ready to
learn how to paint simple snapshot photos into fun art and embark on a fun photo painting
process using Procreate. Please join me. I also invite you to
consider beginning a daily painting process
as well as it's very fun, rewarding, and it will
enhance your skills as a painter in ways you
can only imagine. Thanks for joining me.
2. Set Up Canvas & Brush Test: Hello, Hello everyone. Today we are going to
paint something yummy. We're going to
paint my breakfast, or at least the portion
of the breakfast. I thought it would be fun
to do a food painting. And my husband and daughter make these
fabulous breakfast. And when they do that, it's just something I
always want to remember. And I thought it might be
fun to do a painting or paintings of this
breakfast process. I'm going to use two
programs or two apps. They call them on the iPad. One is procreate, one
is eye color aroma. Now the eye color aroma is just a little bonus thing
that we will use at the end. And I wasn't going to show you a really neat trick you can do using a function in that app to really bring
your painting to life. But right now we're gonna go to procreate and we're going
to create a new canvas. Now, I call her grandma. I usually do 6,000 by 6,000
canvases, eye color, aroma, the biggest size they will let you export is like 4,096
or something like that. And that's okay. I can do a 4,000 by 4,000. So I mean, it's no big
deal because up sizing it from the 4,000 to 6,000 isn't
going to make that much of a difference with editing and sharpening
and all of that. But I'm going to just go
ahead and do it at 4,000. That way the two programs will, pictures will match up. So I'm gonna hit the plus button in Procreate up here in
the top-right corner. And I'm going to touch on the black plus box by
the word new canvas. And I'm going to put
in my width 4,000. And then click in height 4,000. I just like to do
square paintings. So this is what I
plan to do today. I'm going to hit Done
and then Create. Once it created, it
automatically opens it for you. And when you go back to your gallery and you go to
create a new canvas again, you'll notice down here at
the bottom that size is already there in your list. You can rename it
if you want to. I don't ever do that. But you can do that. So I've already got
this one created, so we're going to
work on this one. I'm going to just tap it. And I'm going to squeeze
this down a little bit. And I wanted to talk to
you for a minute about the one brush we're
going to use here. That's right. One brush. I know you-all are used to me
giving you lots of brushes. And I have lots of
brushes and I've, there's lots of brushes
in my other classes. But you can do a painting
with only one brush. And I pick this one because
it's called rich oil. And it is very oily, very slick looking and
blends really nicely. Or whatever secret gear
getting this one brush. Do this class with. And let me just show you what
you can do with this brush. So say I've got a color here, I've got a red selected. Let me go over to a
blue, blue mode here. I'm going to raise it all
the way up and just do just, I'm holding it down
and going up and down. Look at that rich color,
rich thick color. And then if you put
it about midway, it's a square brush. But notice it's picking
up some of the white. It's blending with what's
underneath as it's painting. And then let's go down
to very small size. We'll get there. If you want to do sketchy stuff, this brush will do it all. This one brush, different sizes. But look at how it picks up that white from the underneath
layer and blend. Now let's put a different
color on there. Let's go over here
and get some orange. And let me just do some
orange across here. So there's what it looks when
it's on top of one color, on top of another color. And it has a kind of a
rough edge on this brush. And you can do real
light strokes, very light pressure like
this to get a scratchy look. It's just so versatile. And now watch this
when I get in here in the blue and I'm pressing
hard and not letting up. Now on this next one, I'm just doing very
light strokes. Look at that, how it looks like. It's layering it over the top with very light strokes allowing the blue
to show through. If you want a solid look, press real hard and scrub. And if you want to just put another color on top
of a previous color, just gently make your
strokes like this. So some of that bottom
color shows through. Now let's go to
this as a blender. And see what it does. All right, I'm gonna go about midway on size and I'm
just gonna get right here. And oh, that's really strong. That is a really strong blend. See that? Just turned some circles there. It really does blend strongly. So a lot of times when I blend, I tend to bring the opacity down when I'm using
it as a blender. It just depends. Let me make this a little
smaller for this section. You just might have to play with that opacity to get
the blend you like. And I am at about, let's see, about 70% opacity. That's usually where I
like to be on blending, but it gets those colors
blended together very nicely. And whatever color you start on, it will pull into
the other color. And as you scrub back and forth while not letting
up on the pencil, it will blend them. And then if I wanted to
blend the orange out, I would pull the orange first. If I wanted to blend the
blue into the orange, I start on the blue
and pull it like so she can get some
really nice blend. And then if you really
want to stir some pain up, go around in some circles
while not letting up. And then you can do
very soft strokes to make some streaky
blend like this. Just very lightly touching it and moving this up and down. But it's a really fun
brush to work with. And you can also use
it as an eraser. And erase off. Now that's at full opacity. Lower that opacity
and do that again. Say it's a little more streaky. If you erase it off at a like a midway opacity than if you
did it here at full opacity. So just, you know, whatever kind of look
you want to get it, play with that opacity and
play with your pressure. If you push real hard, it's gonna get solid. That's a solid erased
section there. And if you scrub real hard, it's going to be solid. So that is revealing
the plain white layer underneath at about 50% on that. So I've got the
blender at about 70%, and I've got the opacity of
the brush itself at 100%. But you could always, if you wanted to
lighten that up, see the difference,
and made it midway. It made it much more
lighter in pastel. Just depends on the look. You want to create. That solid. And then make it
midway much softer. And this brush has some
nice little feathery ends. So when you do light strokes, this is really good for, for C, those feathery ends. When you press harder. Move that back up. When you press harder, it makes that nice square
edge, kind of blocky. Which I happen to like, especially when doing loose
and expressive paintings. And you can see
the lines in it to the actual lines
of the oil paint. You can see that in the brush. It's just a really fun brush. And there's one way to
really learn a brush. And that's to do a
whole painting with that one brush and nothing else. So that's what we're gonna do. So that's my little tests
there with that brush and I encourage you
to do a little tests and kind of get used
to the feel of it on a layer above your
background color there. And once you feel like
you've, you're used to it. And you can also
like when you're ready to sign your
painting, reduce the size. Pretty small, and sign your painting like
so at the bottom. So you can use this for very fine line work at
1% or go really big. Really like fill in a whole
background really quickly. And when you hold it down, it'll just cover
everything completely. And if you just do short
strokes like this, it'll pick up some of those other colors and
allow them to blend in. But it's really fun for doing
a quick background here, which I've just basically done. And then you can
go to the blender and get a hold of that and blend it out
and smooth it out. Like so. So if you wanted to start with a colorful background,
started painting, or just make a
colorful background of the colors of your
choosing for your subject. You could do that. And you could add
more colors in there. Let's see. Let me get a little darker. And then blend to
create some shading. Like in your corners. Reduce your size. You can scrub it. Short strokes, lifting
up on the pencil. Just play with it
and experiment. We're gonna be doing
some blending. We're going to be painting photo here of this breakfast food. So we're gonna be
using it as a blender. So practice with that. I'm just a layer like this. Just put a color
down and then add a little few sections of other
color in there, like so. Just short little taps and
then blend it around and get used to it before you start
working on the actual photo. And you can just
hold down and scrub and do a really smooth
blend like this, which that gives you a
feel of how to do that. And you could do
the short choppy. A short strokes like
I tend to like to do. And a lot of my work
because that gives it that bit more abstract feel, Impressionistic feel that
I happen to really like. Because it really gives
it that painterly look. I'm just kinda darkening
this corner a little bit. So say that I'm happy with
where these colors are, but I want a larger,
smoother look. I'll make the brush
really big and just gently drag it back-and-forth. Like so just to tone some of these marks down a little bit. Remember wherever you start as the color it's going to pull. And then you can go up and down. Got almost looking like
a good Canvas here. Now. That's just a really quick
background and a lighter, you press the lighter
marks it will do. But you could also
reduce the opacity. Yeah, that almost
looks like a canvas. Because I'm pressing so light. It's getting those fine lines
in there and you can reduce the size and make those lines
even finer and smaller. I didn't intend on
seeing here doing this, but this is what I mean with
playing with the brush. Just play with it
at first and get a feel for it and how it works. And this layer is going
to be deleted anyway. I'm just going back
and forth across now for I was going up and down. You go up and down. He got one look as you go
across and you get another, end up with a almost a woven Canvas look when you're
pressing real light. And I could sit here
and do this all day. It's very meditative. Just sit here and do this. A lot of times when I don
t know what I wanna do. And I just want to play, I will pick one brush
and sit here and do exactly what I'm doing
here with this one. I'll try it as a paintbrush, as a blender, as an eraser. And I'll try
different opacities. And I'll try a different
pressure on the brush and different movements
across the canvas. And just see what I
can get out of it. Different sizes. And just see what I can
get out of the brush. That's pretty cool looking
right there and you can always turn it around. You can go the other direction. You can, if you
get something you like when you're
playing like this, like I, I kinda like that. You can save it. And then you'll have
a background that you can use with a
future painting. If you want to. Blend with the photo, mask away the photos
background. There you go. You got a nice soft
blue background. There was some little
color variation and some brush marks in there, even though there
may be hard for you to see, I can see them. And then you can always
add a texture on top of this and
change layer modes and get a really nice
background out of it. It's just a real
simple way to do that. But for this exercise, this was just to get
a feel for the brush. And I think I've done that now and I'm ready to
start with painting. So in the next video, we'll get started on
choosing the photo. I want to paint.
3. Painting The Egg: Alright, now it's
time to pick a photo. We're going to clear
this layer that I did with the brushes. And we're gonna go
to the wrench tab and click Insert a photo. And I'll show you
what I've done here. I took pictures of the
breakfast process this morning. And I would like to pick one
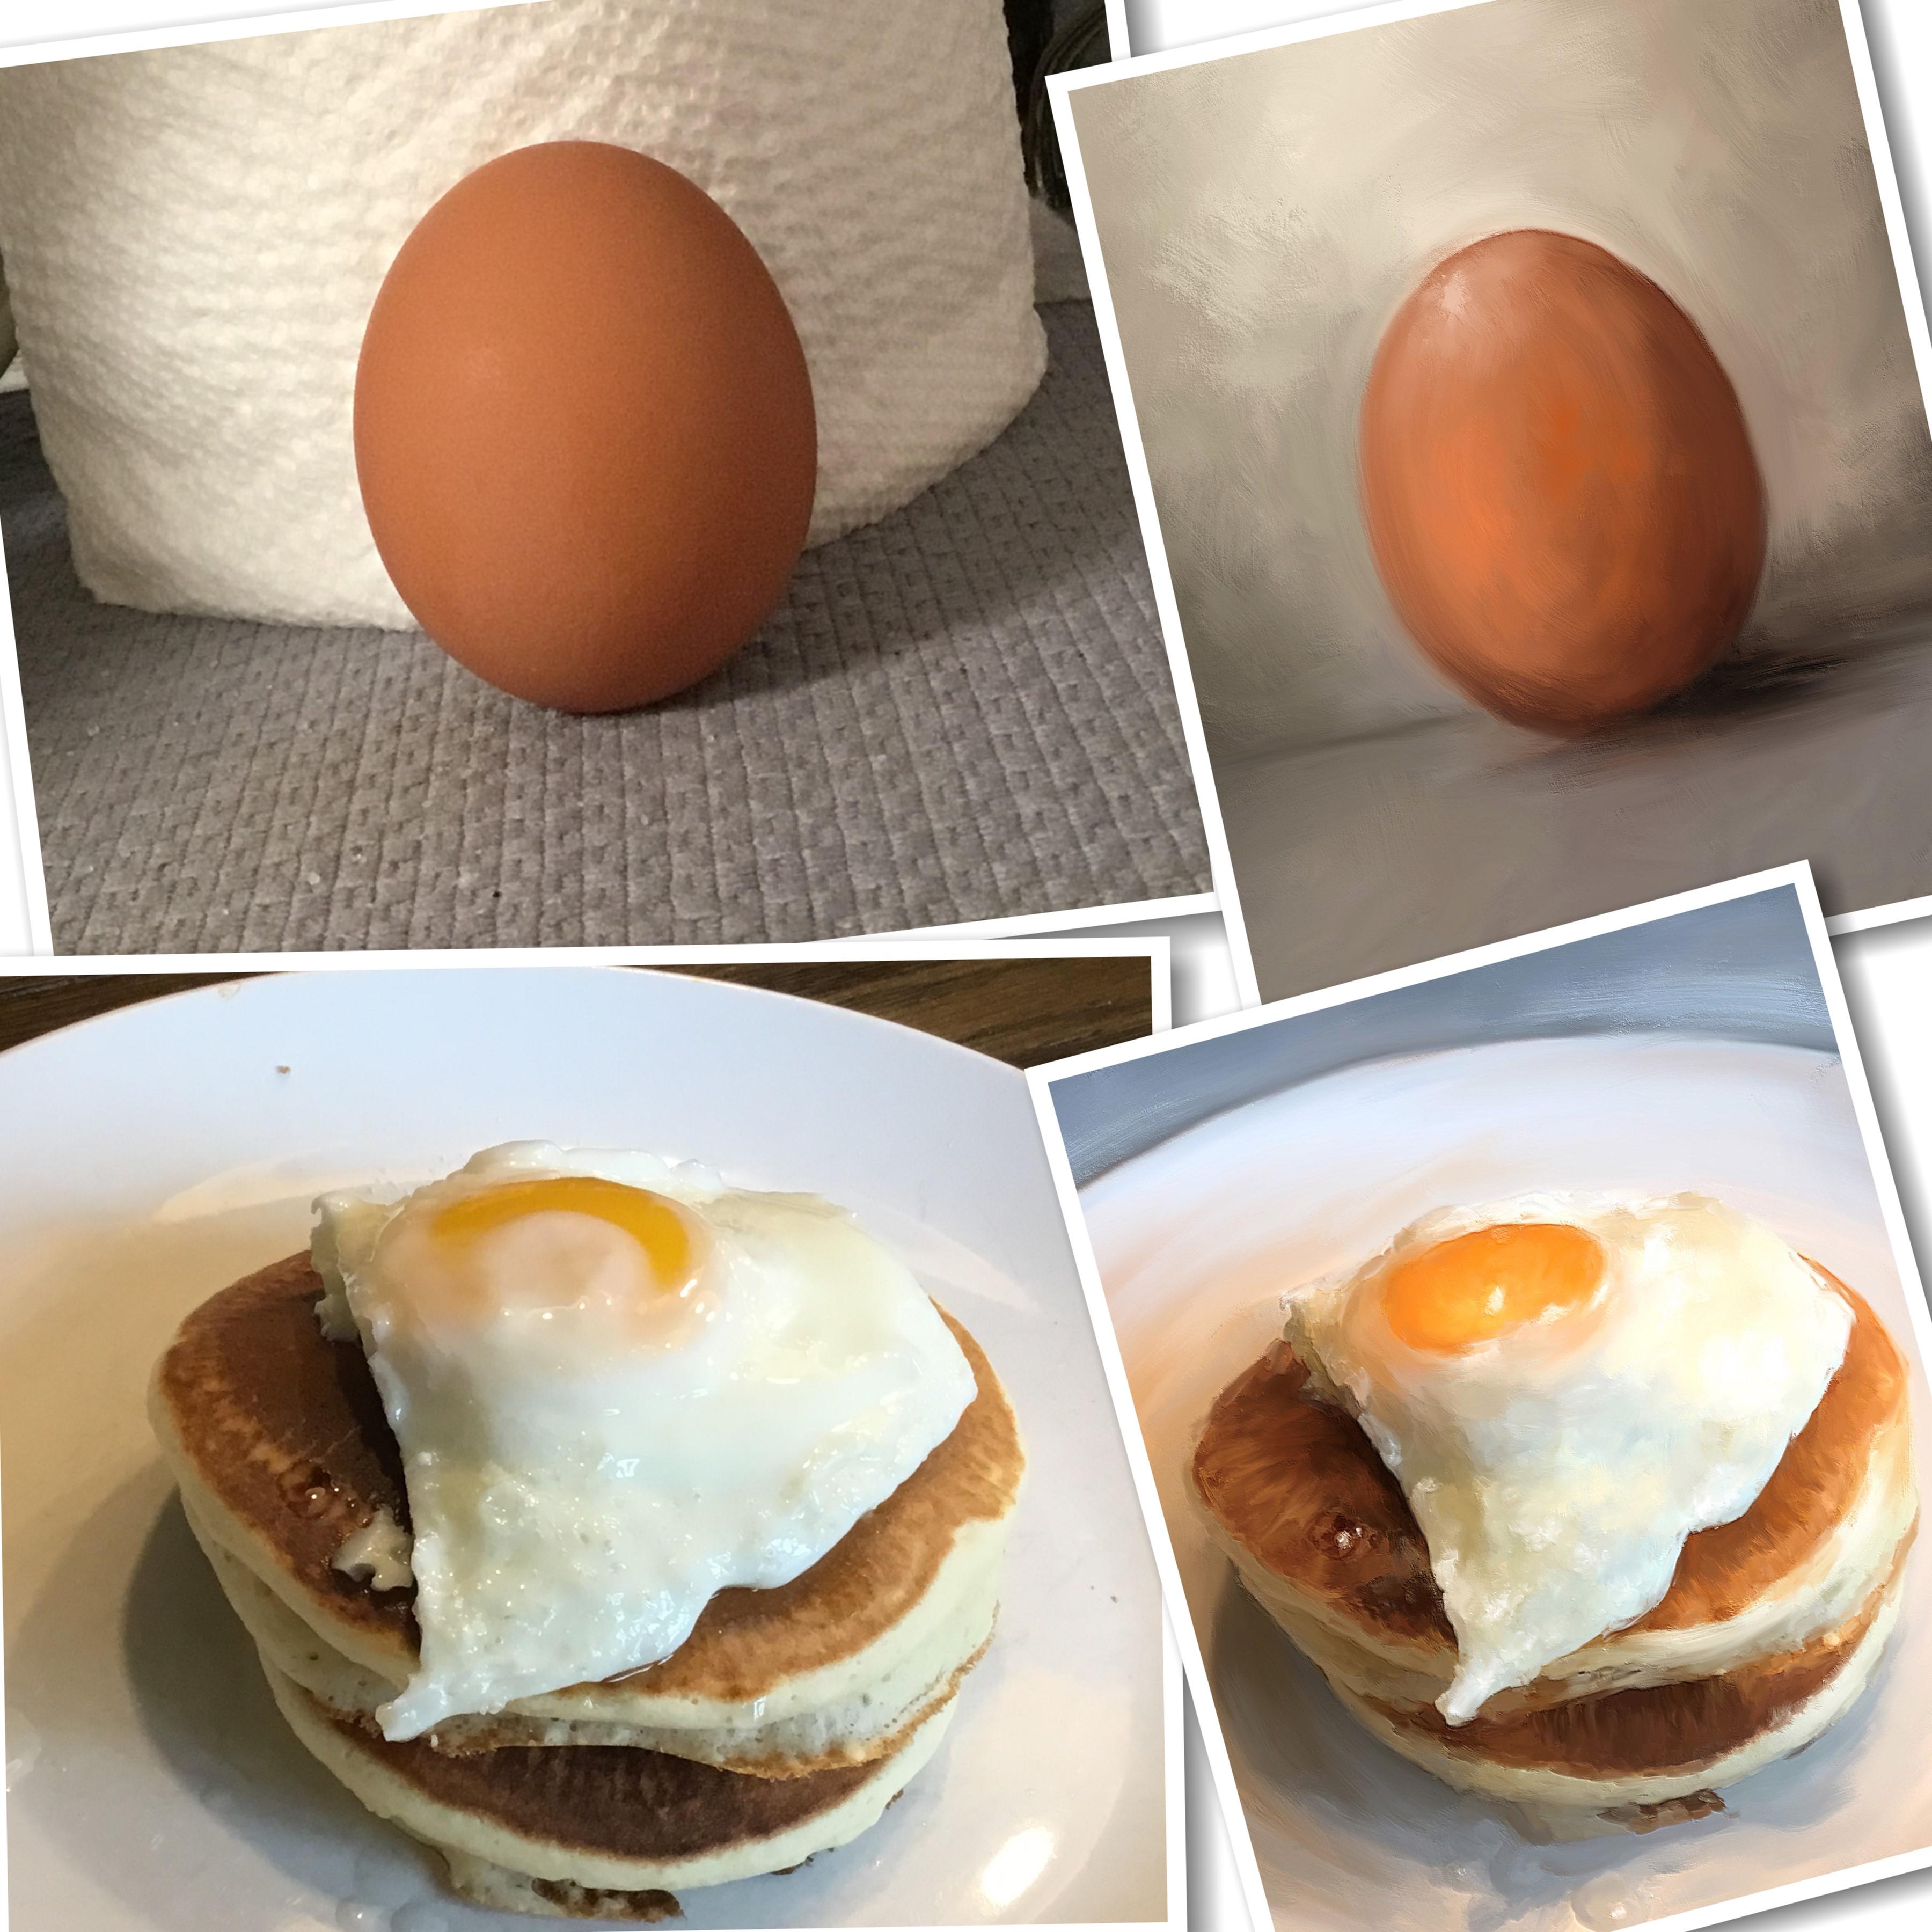
of these pictures to paint. Now, I have down here by
the little deer head. You'll notice I
have a single egg. Couple of pictures of that. And then I have the pan
with the egg starting to cook different angles of that. And then as they
proceeded to cook, a couple more photos, shot all of these with the iPad. As a really quick way to go ahead and find something
to do a painting of. And then of course, the
egg on the pancakes. And I'm looking at all of these pictures trying to decide
which one I really like. This one here on
the top far-right, with the egg on the pancakes. I really like on
that one, my angle, you could see the edge of the
pancakes a little better. So I think that's the one I'm
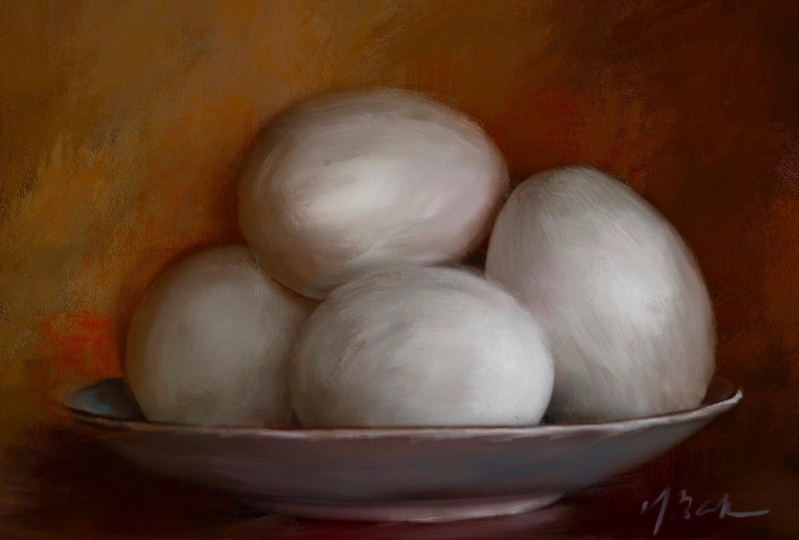
eventually going to paint. I do like these in the pan
here in the second row. If I wanted to paint
a bunch of eggs, I think I would like
to do one of those. I'm not thrilled with the
first couple of the eggs and the pan down here on the
bottom row, the third row. I just don't like
looking at them undone. There. Just look slimy to me. I mean, I love
eggs, but come on. Then we've got the
two single eggs in their shell for it was cracked. I took one standing up against
a roll of paper towels and then I took one just laying
on a napkin on our table. And I think to get a little
practice going this first one against the paper towels of
his standing up looks kinda cool to maybe practice and work with the brush
and see what we can do. So I'm going to click that
one and bring in the photo, and I'm going to resize the
photo to fit the square. Decide about how
big the position I want the egg right
there in the middle. It looks like I've tilted it. What have I done? I've
hit the button twice. Okay, Let's redo this. We go back, Insert a Photo egg. I'm squeezing it up with
my fingers and trying to position it where I want it. That looks like it
might be pretty good. Now, of course, you can do whatever photos of
whatever subject you want. I suggest to start with picky
simple object like this, like an egg or just
a piece of candy. I mean, people do careers out
of painting simple objects. You'll, you've seen
the daily painters. One of my very favorites
is doing Kaiser. He does, a lot of, he does daily paintings. He, he kinda made that famous. He's like the father of it. And I have followed
him for years ever since he started
selling on eBay. And he would paint
like a peanut butter and jelly sandwich
or a fried egg, or a piece of candy or a cocktail drink or something
like that. Every day. Of course, he was doing
his with oil paint, but that's the vision
I have in my mind. And I'm just going to tap
that to set that in place. I want to show you what
I'm talking about. Let's go over here to Google. And here's some egg
paintings I was looking at. Let me go type in Duan Kaiser and hit search. And I'm under images on Google. But these are the kinds
of things He's painted. They have a very rich
old masters kinda look. All of these may not be his, but a lot of these are his. He's done several
eggs, pieces of bread. Here's the here's the peanut
butter and jelly sandwich. I just loved this. I mean, just simple
objects, fruits. I even did a blog post
on, as you'll see, the daily texture blog there, that I did a blog post on
simple things you could paint. Um, and simple things
you could photograph. And just to give people
ideas of what they could do, you don't have to do anything. Just like super exciting. I mean, this guy got famous
doing stuff like this. And I think it's fabulous. And if you wanted to do a
daily painting kind of thing, this is a great way to do it
by painting simple objects. So let's go back
to our procreate. So here's my egg. And when I paint, I'm actually painting the photo. I'm not painting like
from a blank page here. I'm actually going to paint
the photo like I've taught in all my other classes are
most of my other classes. I am going to
duplicate this layer. So swipe to the left
and hit Duplicate. And then I'm gonna
go to that blender, brush, the rich oil. And I already have it set
on the 70% that I like. Now I've got a really
big brush selected. I'm going to use that
at first just to kinda sweep over this background and just smooth out
this paper towel roll. I don't want to
show that there's a roll of paper towels there. But I do like the colors
that are in this piece. From the roll of paper
towels being there, the lighter whites
and browns and grays. So I'm just tapping
and making strokes on the actual photo with
this brush as a blender. And as I get closer to the egg, I've made the brush
a little smaller. And you don't want to sweep this bright white way over here. That won't look right.
Do short strokes. And then from this side, the right side come back from that direction and get a
nice little blend going on. Since you've practiced
with the brush, you've got a feel
for how blends. And I highly advise
doing that first before trying to paint anything. Now I'd like this gray
color under the egg. So I'd like to keep that. I'm going to start working
that area a little bit. And just short strokes and I'm going different directions
with my strokes. Left to right, right to left, up and down, kind
of caddy corner. Short strokes working around the subject with not
too big of a brush. You can hear the tapping
the pixels in the photo. When I'm using this as a
blender are my paint colors. These colors in this
gray matter that this egg is sitting on
is now my paint colors. That's my palette. This is why I like to do
I love to paint photos. I mean, I use the auto
painting programs. You may have seen. Let me
go back to my desktop here. Ipad top, whatever you call
it, you see impressed. So pro pastel yellow and
this watercolor Pro, these are by a company
called Dixie picks. Zip AIX. You do have to pay for these. I believe there's
like $20 a piece well worth it if you wanted
to do an automatic painting and you didn't want to sit
here and do this and you just wanted to stick your photo in there and do
an auto painting? I do that sometimes with some of my pieces that I don't
have a lot of time, but I want to create
something artistic. I'll take a photo, I'll use one of their programs
and create a look. And then I'll bring
it in, Procreate. And then using my
brushes and my choice, I will then blend it
some more fine tune it, add more brush marks
to make it my own. A little bit more. I liked the hand touch of it by doing it
yourself like this. But sometimes you just need a little help in the beginning. So if you're ever looking
for something like that, I highly recommend
their software. They make desktop versions
and iPad versions. I have the desktop
versions of all three. I don't use the watercolor one a lot simply because I'm not, other than painting some
backgrounds here and there. I'm not really a
watercolor painter. I do like to play
with it sometimes, but I use the impressive
Pro and the pastel, which is pencil and pastel. I use those the most want
to use their software. But I use them a lot. And they're quite fun. And I they've been
pretty stable for me. They'd been around a long time. And I saw I use them on
my desktop and the iPad. Okay, we've got a good
background going on here. I don't want to
lose this shadow. So I'm going to make
the brush a little smaller here and
get under this egg and drag the shadow
out where I want it. And around the bottom
side of this a, I want to keep that shadow there so I don't want
to eliminate that. By brushing too hard
or too big of a brush. Keep that in there with
some small strokes and kinda gently sweep
it out to the right. And then of course he gets
a little smaller down here. So I'm gonna go a
little smaller. Brush, get right up
under that egg where that shadow is. Not
want to lose it. Here we go. Just to make sure I don't
keep my egg-shaped bright. I'm going to go around the
egg in these other areas. On the outside of the egg
with the small brush as well. Just short strokes. And I can do some larger strokes later if I need
to look at there, we've got a nice painterly
look going on already. And I make the brush
a little bit bigger. I started working around
the upper edges of the egg. Short strokes,
different directions. If I pick up some of the
egg edge, that's fine. Because we're
getting there next. But I like to paint the
background out first. So basically I've obliterated the paper towels
in the background, but I have used the colors from the paper towels and
the gray matte to basically create a different
type of background just by using this brush and the pixel colors
that are there. But doing something
simple like the egg. And this is what
I want you to do. I want to, for one
of your projects, I wish I I wish
they had a way to upload more than
one project here. But a lot of people
are doing that in the discussions area,
and that's fine. So go to your refrigerator, get an egg out to shoot a
picture of it on something, standing up or lying down to shoot the picture with
your iPad like I did. And do something like this. Work on this shadow area a little bit more on kind
of pull down on that, pulling dark downward and then smoothing it
out to the right. Just to kind of extend that
shadow out a little bit. Now I'm ready to start
painting the actual a. So I'm gonna go a little
bit bigger brush. I'm going to be very careful on the edges because I don't want my egg to get
misshapen like I just did there. And I can double-tap and
undo a couple of those, maybe get a little smaller brush while I work on the edge. And if he gets a
little misshapen, you can come in
from the background over it and kind of trim it up. This brush is really slick. And I'm trying not to push
real hard when I do this, I'm just doing some
sweeping strokes in the direction around
the edge of the egg. Getting down here near
the shadow area now, so I want to be very careful
to not mess up my shadow. I'm going up and
down back-and-forth, letting up on the brush just
very, very light strokes. And then I'm turning the
picture as I'm working on it. Because everybody has
a direction there. They like to move their hand. And I want to keep keep that going here by just turning it and working around this edge. Just keep turning it
with two fingers. Once I get the edge done
where I feel like it's pretty well in shape and
painted like so. Now I'm back to the top so
I can turn my painting all the way back around as
it was and I've gotten, I've gone around
the whole edge now. Now I can go with a
little bit larger brush and work my way around this egg. Now I don't want to
drag too much of the lighter colors into the
darker sides of the egg. So I'm going back and forth. And if I see I'm
dragging too much light, I'll come from the
dark and pull upward. And I'm doing very, very light pressure here. Getting a feel for this brush. Obviously, you could
see the pixels here on the left and the smoother
paint on the right. When you zoom in real
big like this, you can. See where you may
have missed painting. And just kind of working
around that egg was short strokes and
working those colors. And you could start scrubbing in here if you wanted to
hold down and scrub. But you know, an egg is very
smooth Other than this, a little bit of it's got a little rough
texture to the shell, but it's usually pretty smooth. So I don't want it to look
too rough with texture. So I'm trying to keep the
strokes fairly smooth. I mean, I will move around and go a different
direction with the brush just to get
some paint variety marks, variety in there that I liked, that mark that just
made on the bottom. That's really nice. Now I have a lot of speckled
shown here from the original photo because it was taken in
my kitchen light, which is not the greatest. While a yellow overcast
light in the kitchen. If you go out over the
edge a little and it looks a little rough,
That's alright. This is a painting. You just don't want to
miss shape the edge. You don't want to get
a big lumping it, which wouldn't make sense. All right. So there the egg is
initially painted. So when you zoom out, you can kinda see what you
like, what you don't like. I think I need to pull
a little bit more of the dark from the bottom up around on this right side to give it a little
bit more shape. So I'm gently making some right-to-left
sweeping motion there. And I messed up. I don't want to
mess up that one, mark, I did that I really liked. Kinda go back over this again
when you're zoomed out, you can kinda see
a little better. And I got a little nice
streak of white when it picked up from the
background and grabbed in there
actually like that. Okay. That's pretty good. I do not like this super bright white on this
left side of the egg. So I'm going to make the
brush a little bigger and I'm getting this background and pull some of that gray up
around there a little bit, even go over the edge
of the egg a little bit in a few spots just
to tone this down, pulling the grace
toward the leg. That's that roll
of paper towels. It's putting that
bright white there. And I don't really care for
that being quite so bright. So by putting a little
pulling some of that gray in there helps
that eliminate that. Pulling it toward the white area and blending that in some. Still got a little white rim
around the side of the egg. Like to darken that up a little. Let me go a little smaller brush picking up some
of the egg color. Interesting. And
you can do that. You can bring some of the actual egg color into
the background as well. Still looks awful right
there on that left side. So here's what I'm gonna do. I'm gonna go to the main
brush, not the blender. And I'm going to pick up some
of this gray right there. And I'm actually going to that's a lot and that's
not dark enough. Let's go over here,
bringing some of this in. There. Left side, I still
got that white rim. Might need to make a small brush and come along the
side of the egg. Right along the
edge of it there. I don't mind. I'm looking at the
light is coming from here toward the egg, coming from this direction. So I don't mind. I'm just going to make a
few little marks in here. I don't mind the bright
light at the top. I just didn't like it so much down the edge now that I've made a few marks with that
darker shade of gray, let me blend some
of this in with some short strokes and just
kinda mix it altogether. This, when you vary your
strokes on brush size, um, you create interest. And then if there's too
much little strokes, they're just get a bigger brush. And you can gently move that brush cross
there like we did in that first brush video. And soften those up, just really gently
stroking across. They're trying not to pull too much of that white
back down in there. And pull some of this
over this darker. Shade over and down a little
and kind of scrub it. It makes some nice
scratchy marks. When you do that. Really light strokes. Okay, and we're
getting somewhere now. I'm starting to like it. So take a picture of an egg, get a guy refrigerator, everybody's got an egg, right? Unless you just allergic
to eggs and I mean, I understand food allergies. Don't even get me
started on that, but I'm something get a picture of something with your iPad, just
something simple. And put it on some kind
of plain background. And work the
background like I've done here and work
around your subject. You can actually
paint your subject. That edge of that angle. Oops, that's too much. The undo button is fantastic. I still have this
rim around this egg. I don't like, I'm going to
come right over the edge of that egg, would that color, and then I'm gonna come
back with egg color, sweeping it, trying not to
get my egg out of shape here. Okay. That's looking better. A little bit of scrubbing here. Lightly. Lighter is better. The lighter touch. You scrub real hard. You're going to get
really harsh marks. And I mean, that's fine if that's what you like,
but I don't like it. I'm just kinda work
in that background. When you zoom out, you can
really see if there's a line somewhere or a part that you want blended a little better. You can really see that. Like where the shadow is off
on the right now I would like to work on that a little. Well, I messed up
that side of the egg. Okay, and let's go a
little smaller brush. Bring some of that lighter color down and then go
out to the right. Kind of work that around
very gentle smile, short strokes in there. Then we have the shadow area. I'd like to sweep that
out a little bit bigger. I'm gonna get on
the dark part and pull with a very light touch. Right? I might even pull down a little pull down and
then pull over across it. That gives it that nice
streaky canvas blended look. If you get too much that way, pull back it too much down here, pull up from the bottom and
then sweep left and right. Oh, okay. I messed that up. A little dark under there. There we go. Just maneuver that dark tone
where you want it. Looking pretty good. I still not liking
something right here. I think it needs to be messed
up the edge of my eggs. So I'm going to
sweep that back up, pull those pixels around. I'm messing up the
whole edge of my eggs. I'm going to do a
bunch of undoes there. There's a little
section here on my egg. And then like, there we go. I'll pull this over here. You're going to
mess up on things. That's why I say do something
like this first before you start the actual food picture, just do something That's
related to the food. And then if you
like both of them, you might end up
having a pair of pictures that you can
print and hanging your kitchen or in a restaurant or put it on a greeting
card or whatever. Okay. Looking pretty good. I think what I need here is a table line behind
the egg a little bit. So I'm gonna hold down on here
and pick this dark color. And I'm gonna go with
a really small size of the brush and just kind of gently scratch in a little bit of a line there, see what that looks like, and then pick it up over
here to a little bit. And then you can go back
to the blender with a small brush and work that
in blend some of that. Yeah. You could have done
that on a new layer, by the way, which I
probably should have done. We doesn't mess up what
you've already done. She adds a little strong. How about we go the bigger
brush and blending that out? Let's pull some of this
color from the top down over it to lighten it because
it is a little strong. I just want a hint of
a shadowy line there. There we go. Let's settled it down a little. Maybe you can go bigger, brush, pull down some more. Well, I don't know if
I've screwed it up. There. There we go. I mean, you'll you'll
know as you're doing something like this, you know what you like
and what you don't like and where you
need to trim up. And I messed up my
edge of my egg there. I'm going to have to
go back and fix that. But first I wanted to get
this other shadow table, shadow area and pulling down color over top of it
to soften it a little. And then sweeping
it to the right. Sweeping that shadow
out some more. And if the shadows too much
you can sweep back from the very edge. Pull back in. I'm getting off track
here on the side. I tend to get kinda messy. Short dabs on a messy. But that makes it
look interesting. Okay, let me fix
this over here where I've done the egg
kinda out of whack. Pull that edge. This is all done
with blending here. We'll look a little better. I'm still out of whack. I need to pull that blue tone, gray blue over into it. Trim, trim and my gap. There were given egg a haircut. That's kinda what
I'm doing here. That's a little better.
But now it looks like it's sitting on a table and instead of where we were before, which was that we're
getting somewhere. So at this point, once
everything's painted out and I kind of have
a good feel for it. Take a break and I
step away from it. And then when I come back, I look at it from a
distance like this and I figure out what's, what else is needed here. What do we need to do to really intensify this and pump this up. So when I come back, that's
what we're gonna do.
4. Enhancing The Egg: Alright, I've took a little
break, I've come back. And the first thing I
notice is there's a lot of bright light coming down
toward the top of the egg. But the egg itself needs
a little brightness on the top to pick up
some of that light. So here I'm gonna
do a new layer. And I'm gonna go to the
paintbrush this time. I'm going to pick the color
that's on the egg at the top, which is this orangey
peaches brownish color. And I'm gonna move it up a little bit on the color wheel and over to the
left a little bit, just to get a lighter
shade of that. And I'm going to
pick a brush size. If it's not right, I undo it. I'm going to make a
mark here at the top. Who that looks nice. Looks pretty good. Let me blend that
just a little bit. Go back to the blender brush and blend some of that
in word downward. I mean, sort of blend it out. It gives it a little bit
of a nice touch there. Let's go a little lighter. So go up and to the
left, little bit more. And let's make another
mark there at the top. Right there on this top side. And let's blend that. Gently short strokes,
very light touch. Blend that in a little
bit, just a little bit. And this is on its own layer. So you're not messing with the original egg or whatever it is you've
chosen to paint. So you look at the light source, Let's go with a little
bit bigger blending brush is sweep that
out a little more. So you're looking at the light source and you're seeing if that needs to be adjusted, That's what we're doing here. I'm going to pull
it down some more. And out toward that
left edge a little bit. Doing a little shading. You can turn this layer off and on and you
see where we're at. And you can adjust the
opacity of that layer. If you want to. I like
it at full opacity. I would like a little bit
brighter texture at the top. So we're gonna go up some more and over to the
left a little more. Make sure we're on
the right layer. And let's do a little
mark or two in here. Just little dab of
it right there. And with a smaller brush. Let's zoom in a little and
blend some of this little dab. And I really liked the
painterly stroke there. So I don't want to blend
this out too much. Like I did that
first little bit. Maybe a little bit
bigger on that. I want to keep some of
that painterly stroke. I don't want to, I'm going to undo a
couple of strokes there. It looks too choppy. Just little short,
very light touch. Just work it until it
looks right at a distance. Look at it from a distance. It looks too sparkly. We're going to have to
sweep it a little bit more. Because I used a small brush, so it looks a little
too speculative. I might do this a lot to
get a nice highlight in its graduated and not so strong. But now I've lost my
little painterly mark I like so well. The little bigger sweep
a little bit more across that top and
down this front side. Alright, back to the paintbrush. Let's do another little
short mark right there. Now. Just one mark. Zoom in so I can see it go the small brush and
just gently go on the edges of that mark in
a few spots to soften it. I want it to look like that's
an actual paint stroke. There. There we go.
That's pretty good. Now, another thing I like to do is add a little
bit more color, a little more
saturated color here. So I'll pick the
color in the middle. And this time I'll pull to
the right a little bit. I'm not going up because they don't really want to lighten. So I'm just pulled it a
little bit to the right. Make sure I'm on paintbrush. And go the little bit
larger brush and do a stroke or two in here. And do that one that may not
be lighting or saturated. Now, go over to the
right a little more. There we go. You don't need much of this. And I'm going to blend that just to create some color
variation in there. And I am blending
this quite a bit because I don't want my
egg to look too textured. That's pretty good. Now, let's go back
to the paintbrush. Go a little bit bigger. And like writing here. Still very light sweep. And then back to the blender
and soften that up just a little. Like so. And like I said, you can
turn that layer off and on. And you could do these
on separate layers. But notice my color is
boosting up a little bit. Now I want to go to this side and I want to boost this color. I'm going to pull that
a little bit more to the right and do a couple
little strokes in there. And this is very
subtle at this point. And then when I get one
that's real strong, blended in, a little bit
better over that orange area. Might wanna go a little bit lighter and
brighter with this. So once again, over to the
right and then let's go up this time to really bright
orange and put a little, oh, that's too bright. We need to go more toward white. Pull it across the
top of the color, we'll make a mark. There we go. That looks better. It's a little bit brighter
and a little bit lighter. And kind of work that
in with the colors that are underneath by doing
a little blending. Now remember you're only
blending what's on this layer. You're not blending the egg
underneath at this point. That stress and up
my egg a little bit. See, looking a little
bit more exciting now. And then down here on this side, grab this dark color, hold down, grab it. Okay, Let's go
downward a little bit. Grab a little bit darker shade
and whoa, that's too dark. I mean, two big sweep
some of that in here, just a little bit of it
on that bottom edge. And then back to the blender. Softly. Work this in. Let's turn it off and on. Okay, let's give it
a little interest. Now the shadow area,
let me get that. It's a dark gray. See it's not black. Will pull it down
closer to black. And then we'll make a couple
of little marks in there. Right up against the
bottom of the egg. Right there. Whoops. Now it's on its own layer, so it's not messing with
my eggs and I'm going to blend that in a little bit. Just a little bit.
Sweep and blend. I I like some of
that scratchy look. The brush made off
to the right there. So we'll leave that, just darken that a little bit. So now my egg color wise is starting to pop a
little bit more. So now what do I want to do? This little exercise with this one simple object is really giving me a good
feel for the brush. I wonder how it
would look if we put a little bit of a
color in the base. I'm like this. Maybe just go find a shade here. How dark I want to go. Maybe that shade. And makes sure on paintbrush. Let me just make a few
little marks here. I don't know about that. Maybe a little bit. Just very light touch. Oh, no. Zoom in so I can see better. I'm just trying to gently get a little that egg
color in the base. And it may or may not work. I'm going to blend it out Some. Remember it's on its own layer. So it's not hard to blend it. You can blend it completely out. It just gives a little hint of that egg color down in there. This is all just
experimentation. There we go. Very, very light. And if you turn it off and on, you can see it's
just a little hint of that color in
there in that base. I'm pretty happy with that. Now that I'm looking at it. At this point, I'm
gonna go ahead at this point and merge this
layer down with the egg layer. Merge down. Now I can blend some more actually on
this layer if I want to. And I'm just looking to
see if there's any areas that I want to blend out
in the picture as a whole. Because before I was just
blending out the highlight and color and all that on the top. Now I'm actually blending with the color of the egg
a little better. Just touching it up around
there to get it looking like I want making some additional
strokes around the egg. I'm actually quite
happy with that. Except for down
here at the bottom, it looks like the egg
may be a little skewed. Pull the base color
towards the a. C, an egg is a real good thing to practice on because it's an oval and you don't want
to mess up its shape. It gives you, I mean, unless you're painting
hyper-realistic, least not gonna be
perfect anyway. Messing with that dark
down there on the bottom. See, I've got this little lump
here hanging off the egg, and I don't want that. So I'm going to sort of
pull this lighter color towards it and blend it in
the direction of the egg, if that makes any sense. Smooth edge. I don't know if I'm doing
more harm than good here. I won't know until I get back myself out of it a little bit so I
can see it at a distance. I do think that might
be a little better. There we go. Okay.
I better stop. With that while I'm head. Now. This is just a, a
warm-up painting, a little simple painting, so I can see how the brush
works with the actual subject. Got this shadow in there down
here on the bottom right, and may even pull some more
smaller lines of that out. Just a little bit. Right there. I've got a shadow,
I've got to highlight. I've got some painterly strokes. The backgrounds mixed
up pretty good. If I want to soften that
background a little more, I can lower the opacity
of the background brush and smooth this out
with a bigger brush. I'm not going to
lower the opacity, but I do want to do a couple
of oh, I like that Mark. See, sometimes you'll
just make a mark and it'll make this really
neat look and texture. And I really liked
the way that looks. See the egg doesn't really
need a lot of texture, but the background can
have some texture. I want, I liked that one
market just made right there. Where it's lighter. It, that really looks fun to me. I'm going to check this. Check your corners
when you're painting a photo because a lot of times you'll be so focused
on what the subject is, you'll miss the edges
and the corners. So I go around and check
everything and just kinda make sure see this
bottom corner, there's a little blurred area right there That's
from the actual photo. So we need to sort of blend
that in a little better. So check your edges, check your, here's another part is from
the actual photo right here. Check your edges, check
your corners and make sure that everything is painted. That you're not seeing the
noise and the speckles and marks from the
original photo. And edges and corners
are where those tend to be showing up just all on this bottom edge
is showing up and I'm getting actually
off the edge and pulling up toward the
painting when I'm making these strokes
to blend this. And then I'll go sideways too. Just to blend that in a
little better. There we go. And then I'm going to
check my left edge, which I believe since I usually
start on the left side, I'm usually pretty
strong on the left. And I usually get most of it. The one about the time I get down to this bottom
right corner, I'm usually like tired
of the background and wanting to do
something different. And I tend to miss this bottom edge and
bottom corners sometimes. So, you know, check those
all around your painting. Before you call it finished. Now, I do like this for a warm-up, simple
warm-up painting. If I was doing a daily painting, this could be one of
my daily paintings of a simple object. And I'm gonna go
ahead and sign this. And I'm gonna make a
really small brush, like maybe down to a two. And you'd like to sign
the bottom right corner. Maybe even down to a one. And you can sign on a new layer or right on the painting layer. I'm just going to
leave that signed on the painting layer. There's where we started. There's where we've ended up. Let's look at it as if we're looking at it across the room. There's where we started, there's where we ended up. Now, at this point, since all, all the layers I did were, are already merged together, you can make adjustments
like hue and saturation, color balanced curves,
things like that. You could do that. You can use another program to do that
after you save this out. So I'm going to save this out. I'm going to share it as a JPEG from procreate
and hit Save Image. And so now this
image is saved down. And I can open this in another. I keep saying program. I know they're called apps. I'm old school desktop kind
of person, this iPad stuff. I've only been doing this maybe four or five
years with the iPad. And I'm still calling these things programs
and they're called apps. I mean, it's the same thing. Really. It does an operation
that you wanted to do. Anyway, it's saved out. So now I can open it in
another app if I wanted to and make other
things happened to it, which is what we're
gonna do with this fun little thing I
found and I colored grandma. If I'm pronouncing that
right When we come back.
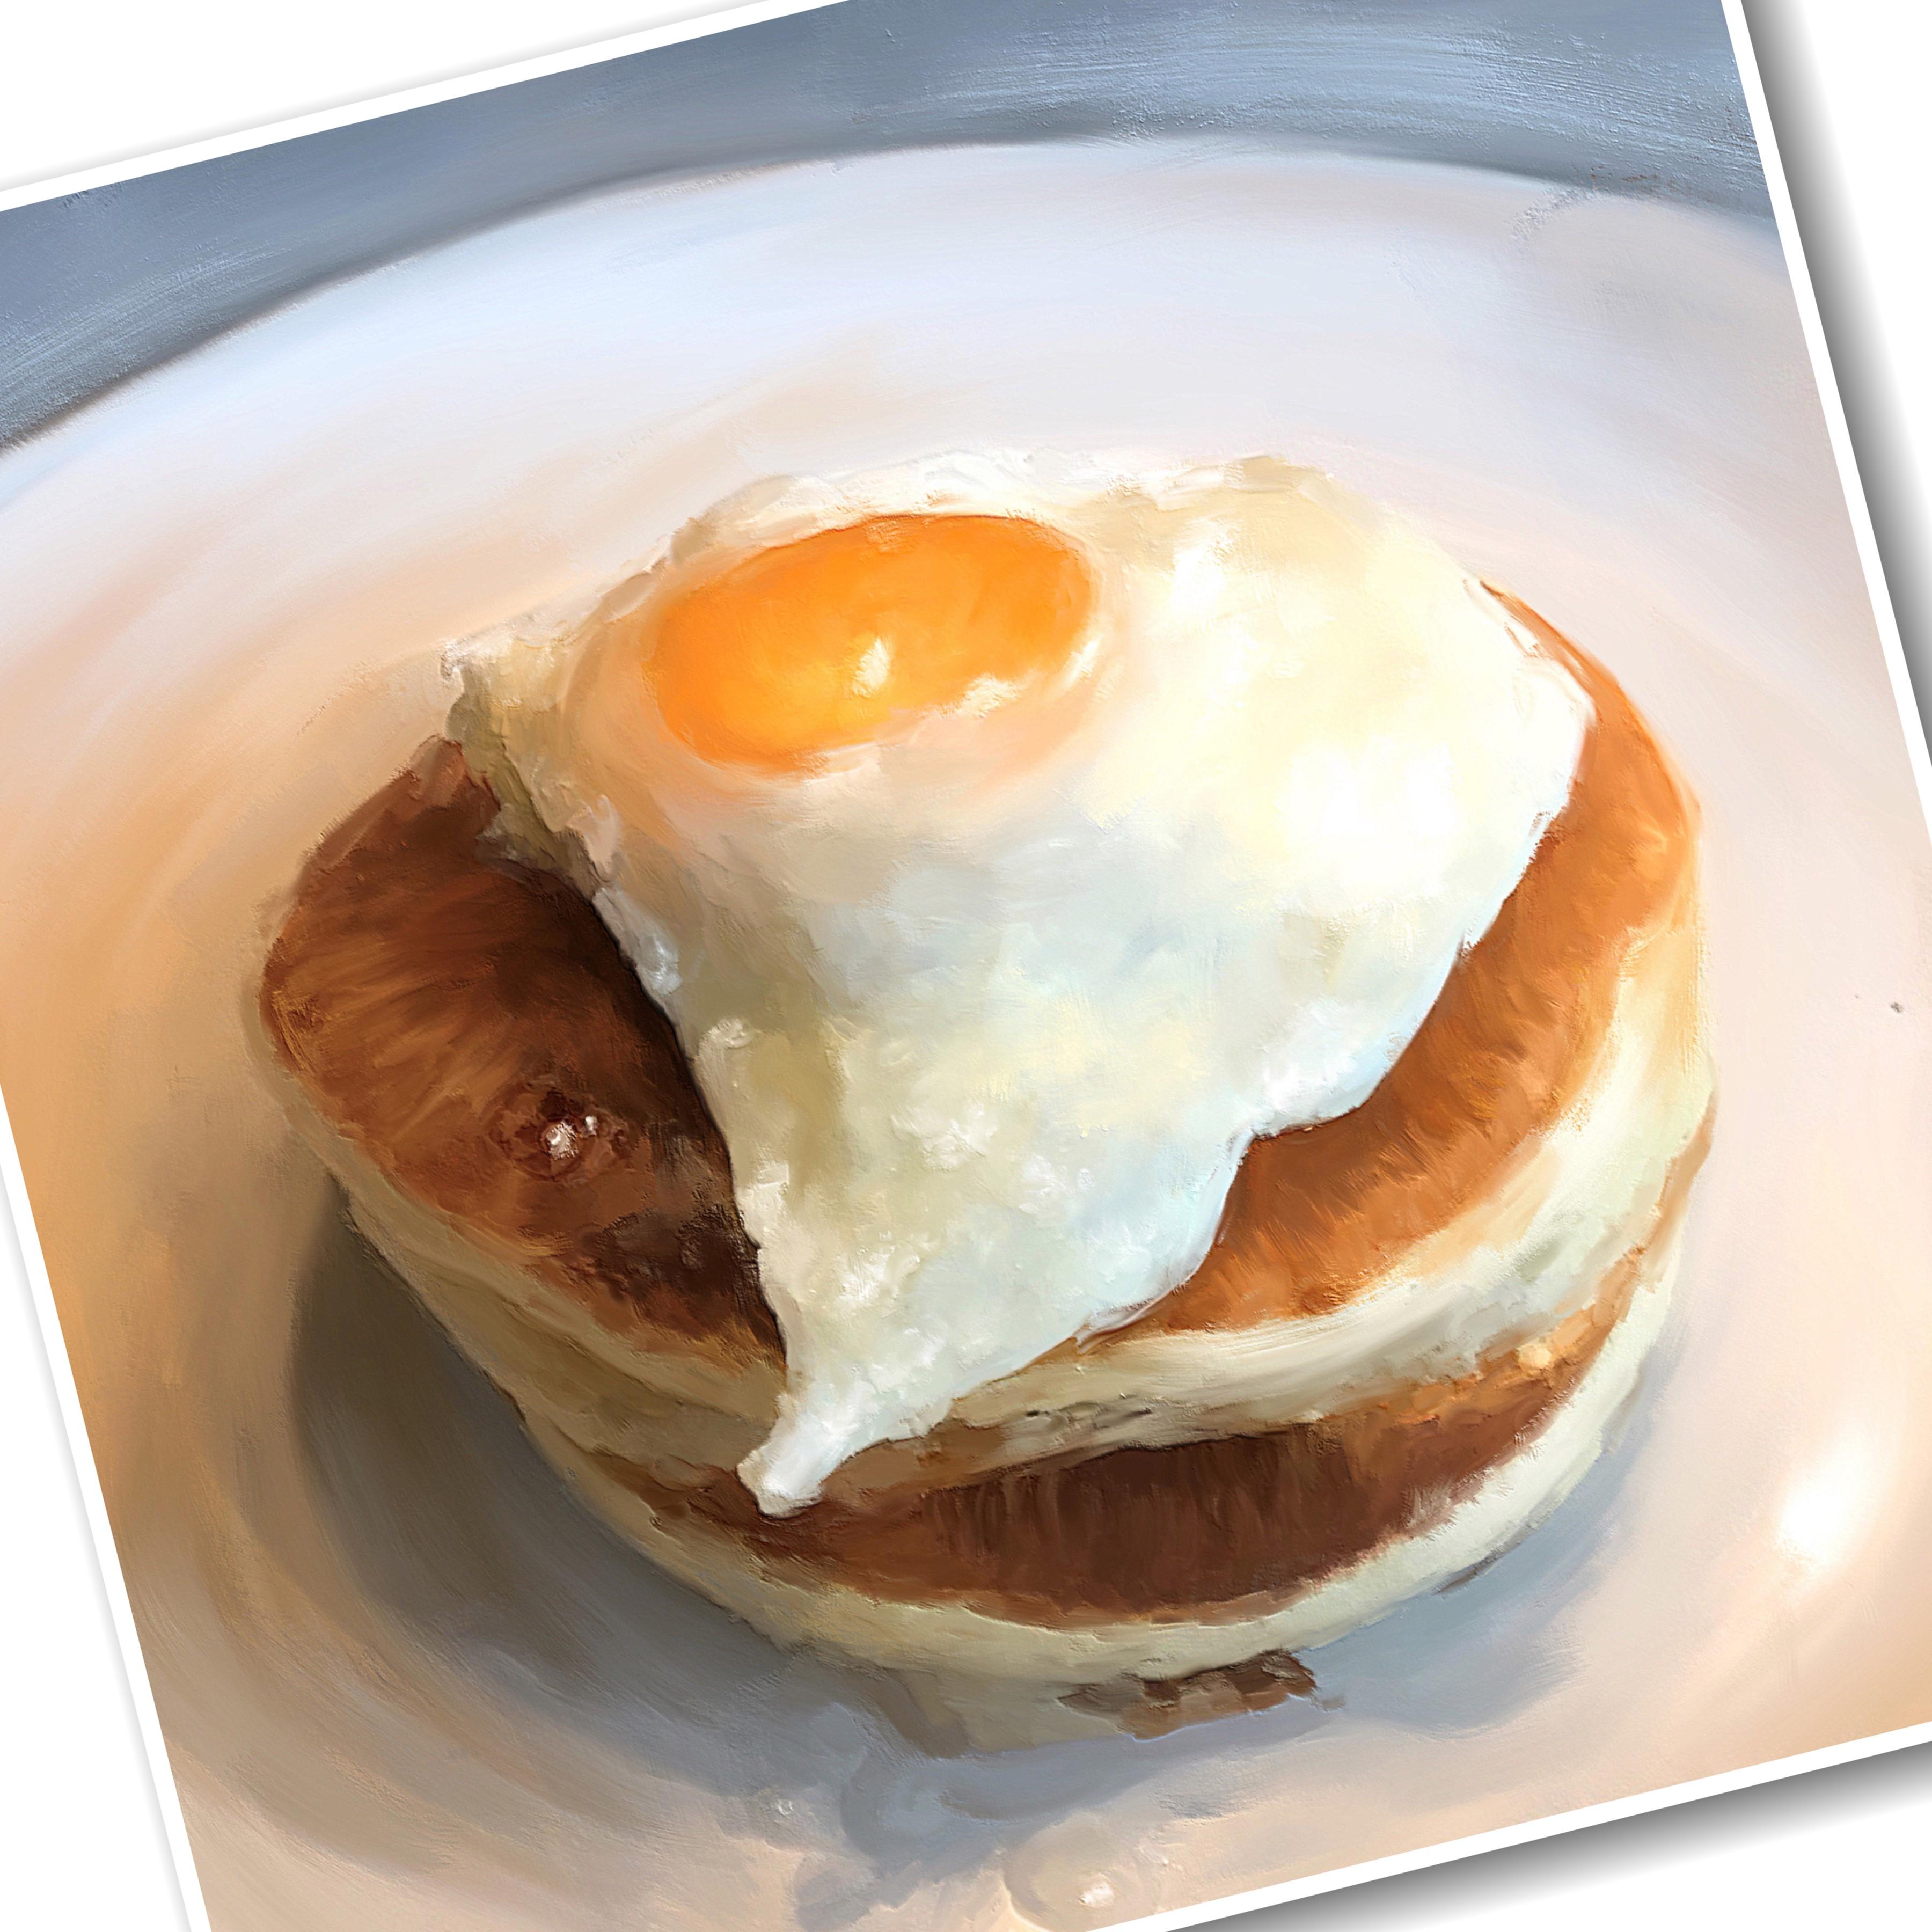
6. Painting Breakfast Part 1: Okay, now I've gotten to
what I really want to paint, which is the egg on
the pancakes out all the pictures I took of
the egg on the pancakes. This is the one I liked the
best because it shows more of the edge of the
pancakes together. Instead of a top view, It's more of a side view. Before I paint, I'm
gonna do two things. I'm going to resize the photo to fit the
canvas the way I want. And this is a 4,000 by 4,000, just like the last
one with the egg. And then I'm going
to go over into, I call it Rama, and work with some color tones because I really want to
boost these color tones up. And I like to do that
before I start painting. You can definitely just
pick color tones as you go. But I want to try to just
choose some before I start. So I don't have to do that. Because these are meant, these paintings I'm
doing here are meant to be just quick paintings, quick exercises, not a lot
of thinking, just painting, getting used to the brush, getting the feel of things, getting in the mood to paint. First thing I'm going
to do is resize this. So I'm going to click
this arrow to top. Make sure it's on uniform. And I'm going to use my two
fingers and squeeze it up. And I don't care if the
plate goes off the edge. The focus here is the
eggs on the pancakes. And I'm just gonna go, I'm just going to leave
a little bit of the plate showing
at the back and kind of skewed it where I want it skewed it
here, about like that. And then click on
the layers panel. And then I'm gonna go ahead
and save this Share JPEG. So it will be saved
in the size I want. There we go. Now I'm gonna go to I called her grandma and open that
saved photo right here. 4,000 by 4,000. Okay. Now, I want to I want to try that match color I showed you in the last video. So I'm going to click on
tone, click on match, and click on photo down
here on the bottom right to pull up my photos. And I'm gonna go find
that one picture, that painting I saved
that has all the colors I like right here. And so now if I click before, hold down on it, that's
my colors before. And if I lead up,
that's my colors. Now, you can kinda zoom
out to see before. Now, it's very
slight difference. It tones down. The egg had some blue tones in the white area
before, bluish green. And now it's warmed
it up a little bit. And that's what I like. That's what I like
about her painting. That's why I saved it. Because of the nice warm tones. And I think I'm going to
save that now. As a JPEG. I could have chosen one
of their color presets, you know, gone through here and found something
that I liked. But I really liked the
one that I matched. It's just very subtle changes. And I don't like to go too
strong on my color changes. So I'm going to get out of
that and go back to procreate. And then I'm going to add a
new layer on top and open up the one I just saved on top. And if I click them off and on, you can kinda see
the difference. It's just a little bit
That's before. That's now. It's just a little bit warmer. It takes some of that
green tones down. And I like that now I can also adjust in Procreate
if I wanted to. I could do hue saturation layer and then bring up the
saturation a little bit. If I really wanted to
boost the colors up, play with brightness, you know, that kind of thing
over here as well. But I think I'm just going
to leave it like that. Like I said, it's real subtle, but it's enough for me. So now I'm ready
to start painting, but I'm going to duplicate this layer because I don't want to paint
on the original one. And I'm going to get
the rich oil brush. And I've still got
it set about 70%. And I'm going to start painting. I'm going to paint the
background out first. Like so. Around the edge of that plate. I'm not worried about
showing the wood grain. The focus is not the table here. It is the egg and the pancakes. I'm trying to keep the
edge of that plate intact. Just turn it around my
fingers. As I go around. And of course I'm
messing up the edge. Go over the edge just
a little bit here. Very slightly. Turn it around, go back the other way, go over that edge. I'm doing that in one stroke. So I maintain a good edge. So I've got the
table painted and the back edge of
the pipe painted. Now I'm going to go ahead
and paint the rest of this back edge. Behind the egg. Short strokes. I'm going in the
direction of the plate. In a circular sweeping motion
around the back of that. Got a little highlight
there on the plate. Makes sure to keep
that kind of work my way around these pancakes. But these, these kinds of
paintings are just fun little exercises
to get you going. And like I said, you could
do one of these every day. I have been for
years wanting to do a daily painting challenge and just paint
something every day. Um, it doesn't have
to be elaborate, like an eagle or elk are the
things I normally paint. I'm going to keep
this shadow under the pancakes. The best I can. Still working on the plate, working my way around. Not even getting
to the shadow yet. Make sure to get these corners. Over here on this side. We've got I play
it, highlight it, this bottom corner. Highlight right there. I don't want to wipe
it out too much. I don't want to try to keep
that under the shadow. And we've got a little
oil bubble there. I can lower the brush size and try to lower it a little more. Try to keep this bubble in place by painting it exactly
like it is with the little highlight their work my way around that bubble. And here's another little bubble here with a little highlight. Here we go. Now
I'm ready to paint that shadow under the egg. Don't want to do
too big of a brush. And I wanna keep
along that edge very nicely of the pancakes there. I'll go ahead and
do that edge first. Paint that. Then work on the
shadow area itself. The shadow has got
some nice blue in it. It's also got this
greenish brown, which I may adjust by adding some more blue on top of that, will just take, do this first
and then take a look at it. There's another little
bubble right there. Lower the brush size. I want to try to keep
a little bubbles. That makes it interesting. Color variations in the
shadow make it interesting. So I want to try to keep
those work in a way around the edge of the bottom of the
pancake and the bubbles. I'm just working on
that shadow area. Right now. Try not to really touched the
pancake too much. Make sure I've got this. Add some smaller brushstrokes around there just for interest. Here we got out of the shadow where the green meets the brown. That looks a little choppy. I'm gonna go with a
bigger brush and sweep that not worthy green or
the blue meets the brown. Sweep that bluish tone up into
that greenish brown tone, tone down some of
those choppy strokes because the shadow
would be smooth. Then around this side. Here we go. Okay, so that's looking
pretty good at this point. So I'm going to take a
little break from it and then come back and start painting the egg
on the pancakes. And then see where
to go from there.
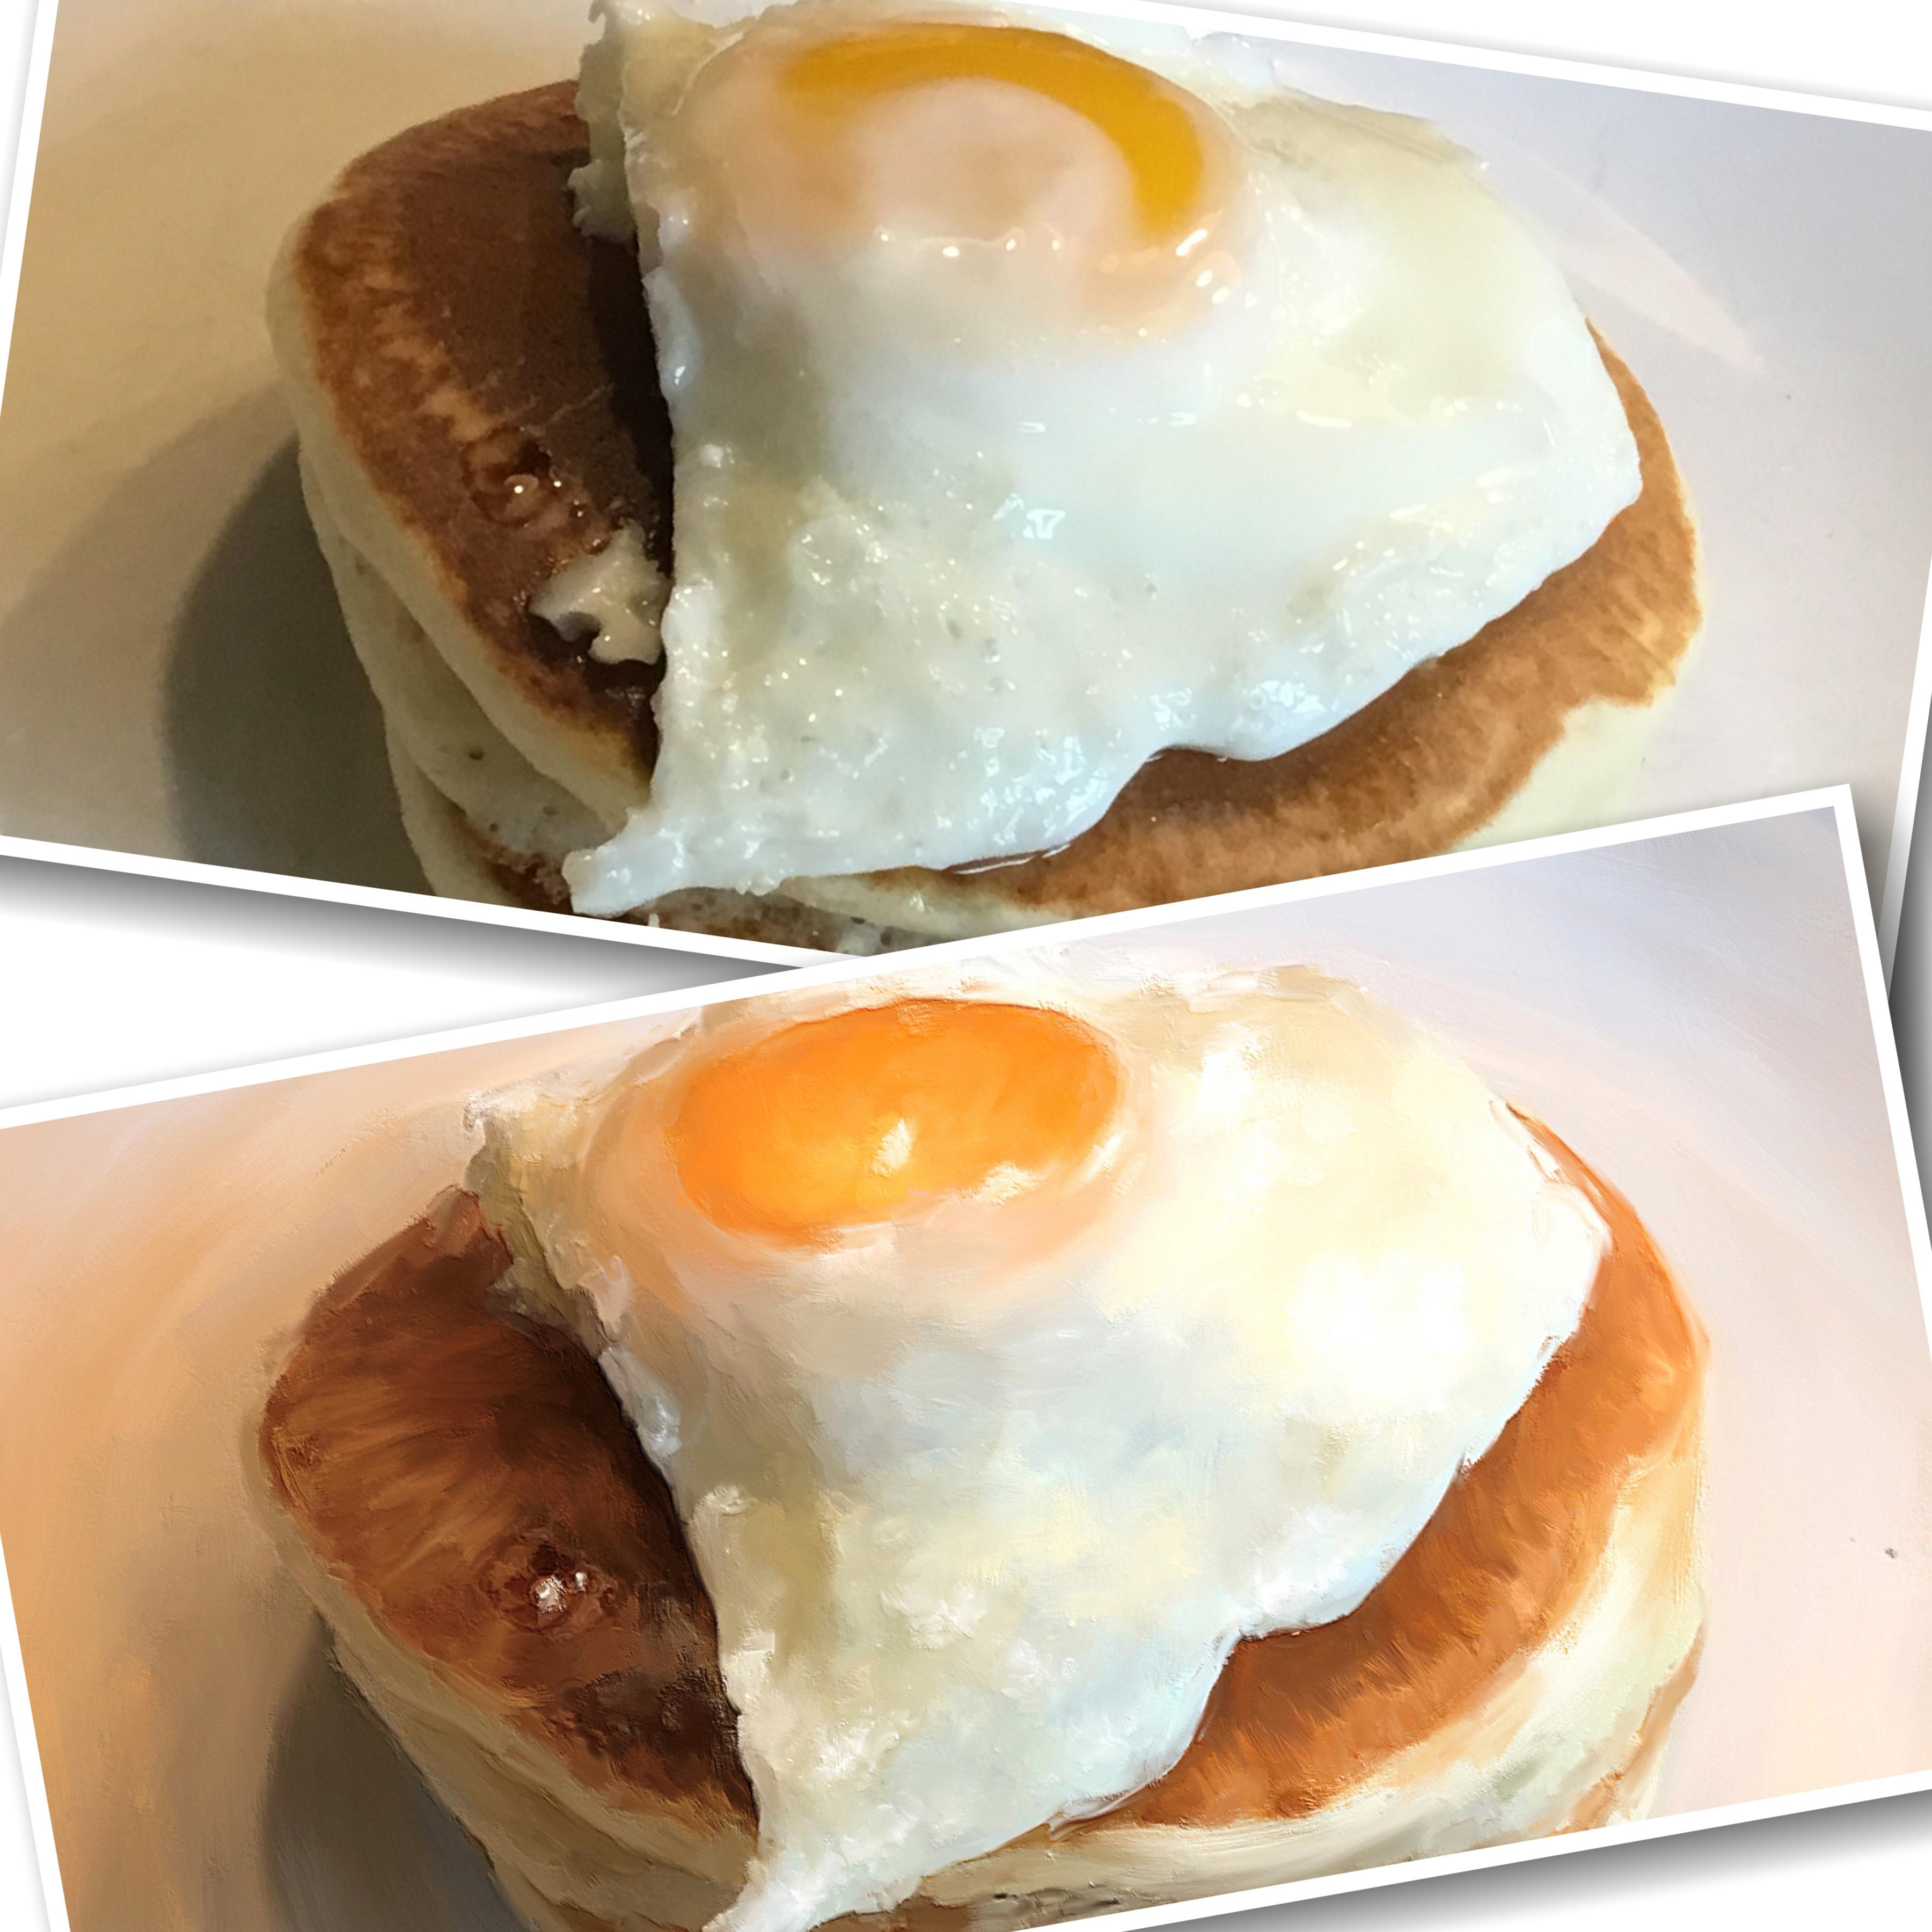
7. Painting Breakfast Part 2: Alright, I've painted
the plate, the table. Now it's time to paint the egg. And I can tell you right now that the top of this egg here, more of the white
has gone over it. I don't like that. So I'm going to paint
that in as yellow. I'm going to go ahead and
do that on this layer. I'm going to pick a nearby
yellow color right there. Make sure I'm on the
brush correctly. And I'm just going to paint that color in right there. And maybe get a
little bit lighter. In the center. There might be a
little too light, so bring some of
this yellow back in. Just doing short little strokes and I'll blend this in a minute and get some of the darker
color to come around it. And then let us get the
light yellow again, but let's go a little brighter
with an actual yellow. And put some of that in there in that brighter area and there probably would
be a highlight there. I'm going to do a
little dot of white in there because there's
some highlights along the edge there. So now I've painted a way that white spot and
I can blend that in. And I did it right
on this layer. So I'll go to the
blending brush and I'll start with the yellow area. Don't wanna get too
big of a brush. And work my way around, working my way into
the middle area. Like I said, these are
meant to be fast, quick. I don't want to spend
too much time on these. These are exercises to get you used to painting
simple subjects. Let me get a little
bigger brush there. Get some of this blend in their work. My way toward that
highlight I put it in, get a little smaller
brush to capture the, keep the highlight
and I want to keep the highlight pretty much. Then I can start working around the edge and keep some
of these highlights that are in here working around the outside edge. But now let's say that yellow, it looks better now that
it's got the yellow there. Might need a little
more blending of it. Just kinda smooth that
color out because this is the top of the
egg is real smooth. That yellow area, okay, smaller brush and work around. Now getting into the
white of the egg, but I want to keep the color,
variations and highlights. So I'm using a
pretty small brush, so I don't obliterate those. I'm just working around
that yellow area, working my way out. You can even drag some of
this white over there. Little short strokes trying to keep these color
variations in here. And as I get to a larger area, I will, I missed
that side up there. There we go. I will go
with a larger brush. So let's go a little
bit larger here in this area right here, there's some little white
highlights in there. I'm kinda wiping out. I can put them back in. If I want to go smaller brush and keep
them there to start with. Either way. Alright, let's get this back
corner of the egg. Here. While I've got a
smaller brush selected, I want to keep these
color variations so we're going to stick with the small brush and get this
little piece right here. The sort of hanging over and get around the edge of that pancake. Sum up some of my
brush strokes here. I'm just scrubbing.
Others, I'm doing short little choppy strokes
or just sweeping it. Were this is touching
the pancake here. I want to try to use pretty
small strokes in this area. Actually start getting into the pancake around
the edge of the egg. So smaller brush and smaller
strokes for smaller areas. Larger brush for larger areas. And if you lose a highlight, you can always add it back in. I'm trying to keep
them and work around them as best I can. And you can get a little
scribbling and messy. The whole point of
this is loosening up. Having fun, getting
used to the brush. Get this dark area down
that pancake around there. Now this area, the egg, get a little larger. Brush right there. And I'm kinda just work my
way around. There we go. Let's see. I think I want to finish the egg before I
start on the pancake. Now this little piece egg
out here, off to the side. I could leave that, I could wipe it out. I'm
going to leave it. I think it gives it
interesting character. Kind of work my way around
that on the actual pancake. Now, smaller brush and go
along the edge of this part of the egg down here to where
it drips down a little bit. I'm just follow
all the way around the edge while I've got
this small brush going. Some of these highlights, because I'm going to switch to a larger brush simply because I'm trying
to do these fast. And I don't want to take
a lot of time on these. Keep that small brush there
at the edge where the pancake is an actually go on
the pancake as well. When I'm going around that edge. And then if I wipe out
some of the highlights, I can always add them back in. But if you do short, choppy strokes, some of them
will still be in there. As just little dots. You can sit there and
do a small brush and paint each individual
little highlight. But I tend to like, I know there's highlights there. So I can always go back. Was small brush and dock them in rather than paint all
the way around them. They don't need to be exact. I'm just short strokes here. I'm dotting stuff in
with this larger brush. So it still looks kinda lumpy. I've lost some of my
highlights, but that's okay. Let's go back to the
paintbrush and let's go to white with a small brush and just maybe a little
bigger than that. I know they're, they're
just dot them in. Then back to the blending brush. Really small. And blend in what
I just dotted in. Now they're back, but
they're painterly. And I can go back and
go little smaller and not in a couple of
more gray on top of that. Back to the blender. And just kinda touch on those to blend them
in a little more. Artistic license here. Getting around that into the
pancake now on the edge, those highlights are
a little strong. When you zoom out, you can kinda see where you need to
make some changes. So I'm going to blend them
down a little bit more. Just soften them
up, touch on them. Just a little short. Taps will help to blend
them in. Now zoom out. This one up here that
looks a little strong. That one there. That looks a little better. They're not quite as strong. Now, make sure I have all this painted
and do believe I do. Now, it is time to
paint the pancake. And you can always turn
off the layer and look at your egg or your object, whatever it is,
looking at it from far away to see if it's
looking like you want. I mean, it's getting there. I think once you get the
pancake part painted, it will all come together
quite a bit better. So in the next video, I'm going on to the pancakes.
8. Painting Breakfast Part 3: Alright, I've got the ink
painted plate painted. Let's do the pancakes. Make sure I'm on
the right layer. To make sure I'm
on lending brush. And I'm going to start with a smaller brush working around the outside edge
of the pancakes. Now pancakes are a
little bit fluffy, so I can get a little messy. With these. They don't have
to be as smooth as the egg. Just going to work with a small brush around
these edges first. Little short strokes and scrubbing and kinda work
in these color edges. Keep them intact, the edges. And try not to mess up my egg. Around this edge on the bottom. I'm just kinda one all
around these edges. Trying to maintain them. The brush could
probably be smaller, but I'm just leaving
it the size. I can get up around
the edge of the egg. Here a little bit. If you start to blend in, one color is coming in
and you don't like it, stop and go the other
direction with the brush. I probably do need to go to a little bit smaller
brush down here. Get this little
piece all painted. I will tell you when you do this and you paint your photos. And the more and more
and more you do it, the more you realize are the more you learn about painting
and how the brush works, and how you can just
paint with it naturally. Without painting a picture. It gets you sort of
trained to like shapes, I guess is what
I'm trying to say. Somehow gotten a streak over
that side of the pancake. There's a nice highlight there. I'd like to leave that they
use a small brush on that. I'm just working very fast. The faster you work. Looser it will be. And that's that's all
around that edge. There's a droplet here
on top of this pancake. I want to maintain that. So I'm gonna go
ahead and paint them as dot the little highlight. Oops, I've switched
to paintbrush. Let me undo that.
Alright, back to Blender. There. I'm zoomed in really close, but I'm working
this little droplet with the small brush because
I'd like to maintain that. And you'll see when I zoom out, it's their dark edges
around the droplet. Little highlight here in there. Because the droplet is showing
the pancake underneath. So it's kind of reflective. Droplet and transparent
at the same time. See when I zoom out,
it's still looks like a droplet, but yet it's painted. Now. Here's a couple of
highlights over here. I kind of obliterated them. That's okay. Alright. I'm looking to see
if there's any other areas. I really need to use
this small brush, maybe a little bit bigger
brush right in here. In this section. Where the area is a
little bit skinnier, little short strokes in through there and
through here because I want to keep that
gray color variations that are appearing there. You don't want to paint
it one solid color, it won't look right. Work my way around here. Then as you zoom out, you can see where you
need to paint some more. Okay, Let's get this top
part of the pancake here. And it's got these little colors here that are lighter,
like little streaks. I'm going to try to keep those, but I'm gonna go with a
little bit bigger brush for this top part, little
short strokes. And then as I get to the
little streaky areas, I'm gonna go with a smaller
brush and pull upward sort of into the area I just
did with the larger brush. Trying to maintain my droplet
there and work around that. Let's zoom out. I could pull my
little lighter areas back toward the darker
areas a little bit more to keep those streaky areas in their different color. There we go. If you turn it off and on, you can see the
difference there. Maybe a few more little
streaky areas in there or ground the bottom of this part of the egg. Then we've got this
side with same type of situation with the
streaky areas. I'm going to go with a
little bigger brush on the dark and just
kinda blend that out. And then little smaller and
pull not quite that small. And pull upward. And I'll pull the
dark downward to, to create some variation. Some of that down, pull this back up. This is certainly teaching you that the pancake has quite
a bit of texture in it. It's not just one solid color. Right now Let's get that
rim underneath there. A little better. Which I've pretty much
done that anywhere. It looks a little
choppy, too choppy. You can sweep that brush
and a longer stroke. We've got this dark area
under here, under that rim. So I'm going to pull down downward and then
I'll come back and pull upward from the
bottom into the dark. Pulled down, pull up, get that color variation, and then across the bottom
is just kinda respectfully. So I'm just going
to tap the brush in there multiple times. We've shown a tap, it picks up a different color and moves it. Like I said,
pancakes are fluffy. So if you get a little
messy edge, that's okay. Then you can zoom out and
see where you might want to smooth something out or move something else around this edge. I think we've got the
pancake pretty well painted and look at that water or oil droplet right there. When you look at it up close, it looks totally ridiculous. You thinking that's that doesn't look like a water droplet
or oil droplet at all. But when you zoom out, it does. Alright, let's turn
it off and on. Zoom out some more, off and on. So it's still pretty
realistic looking, but it's definitely pulling in. Now. The next step now is to
bring in some more color. And I'd like to make this piece a little bit more fun by boosting the
color a little bit. And I'm looking at the
brown table underneath it, and I'm thinking about
changing the color of that background area to a blue. I actually have a
little blue table here that I photograph a lot of objects on that I
just love the color blue. I don't take it's in my studio. I don't take my food down
there and photograph it, but the color is
pretty strong in my mind because I do photograph on that table quite a bit. So I'm thinking
about changing that. And so when I come back, I'm going to add a new layer. And I'm going to start adding
some additional colors into this piece and
blending them in.
9. Enhancing The Painting: Okay, it's time to
add a new layer. And let's work on
this table first. I'm going to choose a blue. Now my table downstairs is sort of this color blue
and this color blue. I'm gonna choose this
darker one first. And I'm just going to get a
fairly large sized brush. Go around, leaving a little the brown showing
I'm going to blend this. So the brown we'll give it that darkness it needs
around that edge. And then I'm going to
choose the lighter blue and make a few strokes
of that in there. A little bit smaller. Right around the
edge of the plate. A little bit. Just a few little marks. Alright, let's go to
the blending brush. Let me work on blending this in and this is
on its own layer. So I'm not going to mess
up the egg or the plate. I just think a
different color in the back would be
interesting to try. This is all about experimenting and having some fun with color, learning what you can do. And like I said, I'm, I'm
not messing with the plate. It looks like I am, but I'm not because I'm on a new layer. Go a little bigger
blending brush here. Smooth that out a little more. I want the focus to be on
the plate and the egg. So the background
is just extra here. Alright, let me go back
to that darker blue and puts more of
those marks in there. Maybe even go a little darker on the color wheel. There we go. Now let's go back to
the lighter blue. Put a couple of those marks in there and blend some of that. Pull down, go across. Just working it in there. Comes over the
edge of the plate. I'm not worried about that because I can get rid
of it if I need to. That's creating a
different background. For sure. Now I'm going to make a couple
more strokes of color. It's right along that edge. And then go to the
little darker shade around on top of that. Go different directions and then pull down and go
a little darker, long that back edge and corner. So I just keep
doing this until it gets to looking like I want. Make a smaller blending brush
and blend some of that end. And let's tidy up the edge of this plate and blend some of that blue that whenever the plate blend it back
out by pushing it, probably need a dark blue shadow around the edge of the plate. So I'm gonna go a
little darker on the blue smaller brush because it doesn't
look right having that brown shadow there. Now that I've done the blue. So go with a little darker and then the blending
brush a little smaller and kind of work that dark shade in
scrubbing it a little bit. Working across it very quickly. I can go a little bigger
brush and actually pull some of that upward. And then come back down with a smaller brush and go on
the edge of the plate. That looks a little
better now that it's got that blue tone in that
shadow behind the plate. Off on zinc. See see where it is. I don't think I need to
blend the background. A little bit more. Zooming out will help you see where you might want
to blend a little more. Whoops. I came right on into the plate. That's okay. I'll just blend
it down in there. Let me go back to that
lighter shade of blue. I want to put a
couple marks in here. Not too strong. Whoops, what am I doing here? With my palm? Just very light loops. You do a mark, you don't
like pull back on it. I mean, undo it. Just very light strokes
in there to get some streaky paint marks. Here we go. That looks
kinda interesting. A little bit right here
I like to blend down. Okay? Still not satisfied
with this right here. Blend this down a little bit. Being picky now. Alright, I'm gonna leave
that part alone for now, but that same blue, I'm looking down here at
the shadow area under the egg and thinking it'd be good to bring
some of that blue in there from the background
so I can hold down there. I'm finding the darkest let
me find the darkest spot. Probably right there,
sort of a blue-gray. Select that. And I'm
still on its own layer. I'm going to bring some
of that color down here, maybe a little bright. Let's pull it down, darken it some more
where it's dark. Okay, now let's go back to
that other shade. Pole. Shades from the background
to put in here. Makes it kinda interesting. Now let's go to lighter shade and pull
some of those in there. Now let's blend. Because this is
on its own layer. It's just going to blend
with what's underneath, just trying to get my brush
the right size there. And I'm just lightly
sweeping across that shadow area and
scrubbing a little bit. Even going outside
the shadow area. Kind of really making it soft. So it really does blend
with what's underneath. Just a lot of fast
lending through. There may be a little strong. Now because this is, I should have done
that on its own layer, but because this
is on this layer, I could adjust the opacity
down if I wanted to. Or I could mask
some of that back off that I just put down there because
it's a little strong. Or I could just
keep blending it. And if you keep blending it
and it will tone it down. Go with a bigger brush and
blend a little better, see as toning it down. Now the more I blend. If someone, if it comes off onto the plate out of the
edge, It's okay. Bring some of that
color in there. So now let's look at it before. After. Okay, I like that. I want to pump up the yellow
on the egg a little bit. Now. I'm going to
do that on another, its own new layer. I'm going to grab this
yellow color here. And I'm gonna go to
the left and up a little bit to get a little
brighter shade in there. And where that is right there. That lighter color, yellow. I'm going to put some
of that in there. And I'm going go to
straight white dot that highlight again, some of these highlights
around the edge loops. And then this yellow
here and grab that. It's more of an orange. I'm going to go up a
little brighter on that. Just to get some color
variation in there. Now I'm going to blend all of that different directions on the blending to create interest. Remember, like I said,
the more you blend, the more it'll soften up. And then because it's
on its own layer, I can reduce the opacity
about where I want it. I tend to do about 70 to
80% on my opacity layers. And you can also, because that's on its own layer, if it's not saturated enough, go to hue saturation
layer and pull the saturation up really
high if you want to. Which I like it up a
little bit higher. But once I've got it
up a little higher, it needs to be blended
a little more. So go back to the
blending brush, turn it off and on to
see where you might need to blend some more. Just very subtle. But it kinda brightens
up the top of that egg. There's a little blue
shadowing here under that. So I think I'm gonna
get that light blue and do a couple of
streaks in here of that. Couple little marks. Just looking at where
that blue might want to be and then blend it. We're still working on that
like 70% opacity layer. So it's not totally too strong, but it gets some of
that blue tone in there to boost that egg
color a little bit. And if it's too much, just keep blending and it'll blend its way out down to a lower amount. Turn it off on, you can see the
difference in there. Now I might want to get
this and go a little brighter and put some
of those marks in there and blend
some of those out. Just keep adding color. Now, what about this pancake? Should we brighten up the
colors of it a little bit? Let's see if we can. Let's get this rich color here
and go a little brighter. Dot some of that in there. And then let's get
the streaky color right there and go
brighter on it. Kinda work in a way around it. Let's go to a little
more yellow tone on the color wheel and pull up and get a little bit
of that in there too. Now the light is more
coming from the top. So all of this is
kind of in shadow. So I don't want to
brighten it too much. Let me blend that before
I go any further. Just kinda work that in kind of gives it a little
color variation on C. Just making little
more interesting. My dot on my oil droplet looks a little too sharp
for the rest of this. Let's see what I want to do. Alright, add another new layer. And that little dot there. I don't know if I
blended that real well. I'm going to do a small
brush and just do a little mark there. Oops, that's too
big of a blender. And sort of blend
that little mark in. These two little
marks I just made. Blend it in. It looks a little more painterly then zoom out so you can see, I still want a little
bit of a sharper. I mean, a more painterly stroke there on that
highlight there. No. Blend it. Okay. I'm not going
to fuss with it too much. And do you want to put a few
more highlights in here? In a couple of spots? So
let me go around the egg. I guess it would help
if I got on white. Remember this is
on its own layer, so I get a little too much. Let me blend some of that. I like to blend as
I go on this stuff. Alright. Let me go back to the there's this yellowish
color right here, but it's sort of a
yellowish green. I want to brighten
it a little bit, pull that over to a
brighter tone and just kinda do a sweep right there. Maybe a little strong,
just very lightly. That's too strong right there. And sort of blend that in the edge of this pancake right here. This get this color. Can go a little brighter. And do all those loops. That's too strong.
I press too hard, do a little light stroke. I don't want to go more towards the yellowish color there. I'm just starting to
fuss with it now. Let's blend that a little bit. This a little more
shadowing, they're off on. This needs blended more
back here. A little strong. Okay. Off On. Step back a little more. Off on. Actually is
looking pretty good. But I do not like
absolutely do not like is this little bit
of egg right there. Don't like that. So
on the same layer, I'm just going to go
ahead and add some paint. That's the colors that are
around that and get rid of it. Well, I thought I was
keep touching and adding those colors and then blend it a little bit. There. It's gone now. Gone. Because that to me
was taken away from the just adding something that my I was going
to I didn't like. So he can paint anything out by either blending it
out or painting over it. And now I want to merge
654.2 here together. So I'm going to squeeze
those layers altogether. So turn it off. There's my before,
There's my after. Zoom way out. Before. After. Yeah, I'm liking it a
whole lot better now. I'm going to duplicate this. And just on a, just
to see what it does, I'm going to try to raise
the saturation overall. Give a little more color. Because I'm, I'm kinda
picturing a fun image here. And to me when it's, when it's lower saturation, it looks more elegant, I guess. And then as you raise
the saturation, it becomes more fun. I'm doing this on its own layer. And I'll play with
brightness a little bit too. Just a little bit. So that's on its own layer. So I can turn that
off and on and you could see what it has done. An a, I like that color boost. And if it puts a little
bit too much somewhere, you can always do a mask, which I think it did
put a little bit too much on this left
side of the pancake. I do like the darker
tone underneath the egg. The egg and plate to be
brighter and more saturated. So, okay, on that I'm
going to do a mask. Click on the layer click Mask. Make sure you choose black
paint and the paint brush. And on this left
side of the pancake, I'm just going to
brush that down. Dark, which will darken
that little section backup. You can see the
little mass there. So now turn it off and on. And the shadow area too, I think I need to on that side, I think I need to darken
that by putting that mask on that shadow area to maybe that
whole section right there. Okay. On. Zoom out. Off on. Okay. I'm happy with that. Now. At this point I want to save this out
and I'm going to take it over to I co Rama and use that special little button I found over there to really
enhance this painting. So we're going to
click the wrench, Share save as a JPEG. Save.
10. Finishing Detail in iColorama: Alright, I'm in eye color aroma. I'm going to get that photo. I just saved of the
painting, 4,000 by 4,000. And now at this point, if you don't, don't feel like you're stuck
with color tones. If you wanted to
change color tones here, you could do so. You could go here and play
with the different ones. And if you come up
with another one, you like better what you did. Then you can use it. Feel free. And you can always click the before button here at the top. Hold down on it and see what it looks like
before and after. You can even run
your match again. If you've done that, picking a favorite picture or a painting with color
tones that you like. And let it match
the colors again. Now say, when it matched your
colors at tone them down. Because I brighten them up. This is before, see how
bright that egg yolk is and then this is after
the color match. So I like what I did
with brightening it up. So I'm not gonna do any
of this color stuff, so I'm not going to save that. Alright, let's go to effects. And click on raise over
here on the right. Now click the presets and
it's chosen number one, which is pretty strong. And then there's number two. If you click before, Let's zoom in a little. Hold down before let up, you can see the difference. So two is definitely
a lighter rays look, or one is a stronger rays look. But you can reduce the size of the rays look and the opacity
down to where you want. And I like to zoom out when I do this because I don't want
it like super-strong. Before I did like 0.28. And the opacity,
I can't remember what I had it at in the egg. I'm just kind of
moving this slider around to see where I want it. And then I'll click hold down on before, after, before, after. Zoom in and take a look before. After. That raise may still
be a little strong. Pull the opacity down
just a little bit more. I don't want it to be too much. So before, after, but it does give it a nice
thicker painted look, which I really do like. Especially up here
where I put the streak, where I painted the blue, look at them before, after, see how it
raises that up. I really liked this function. And you squeeze
down on this with two fingers and then use one finger to move it
around by the way. So I like the way this looks. And I'm going to
click save as JPEG. And it has saved it. And now let's go
back to procreate. And let's see. I'm just going to add that
on top and a new layer. Add Insert Photo,
which is going to insert the eye
color ram a photo. And then I can click
it off and on. So you can see the difference. And you could also
adjust opacity here a little bit more
if you wanted to. I did already
adjusted it enough, I think and I call aroma, so I'm going to leave
the opacity like it is. I really liked the
way that looks. I can see that I did not blend the corners totally
like I should have. I could put a mark on there now and sort of sweep that out. We'll get this corner over here. I did that one. Okay. Alright. I'm ready to sign it now. So I'm going to pick my brush, make it quite a bit smaller. I think it was one or two. And I'm going to pick
a color to sign with. And I like to pick a
color that's close to the bottom area of the painting. I like the blue. I'm going to try it and zoom in real close so I
can see what I'm doing. Loops. Maybe a little thick. Let's go down to
one. There we go. There. There we go. Now I could have signed that on a new layer and adjusted
the size of my signature. But I actually liked
the way that looks. So I'm going to save
this out as a JPEG save. Now. I'm going to turn off
everything underneath except for the original photo. There's the original photo. There's the painting. See how fun that is to just
paint a simple object. Cool. Alright, that's it for
the egg on the pancakes.
11. Your Class Project: Okay, so let's talk
about your project. Now. I am starting a daily
painting project for myself. My goal is to start
it at the first of the year since we're
in November right now, I thought I'd go ahead and get started now and kinda
get in the habit of it. And I picked breakfast
to paint for a couple of my daily painting simply because it was easy and accessible. And you don't have
to pick breakfast, but I think food is
a good choice to pick a because food has
multiple components. Like here. You saw me do the egg, which is a component
of the meal. If you were doing a
pie, for instance, like say a strawberry pie, you could take a photo
with your iPad of one strawberry and paint
it like I did the one egg. And then you could take a
photo of the finished Pi and do that as your
full painting. By painting one
component of the meal. It kind of gets you
in the, in the mode. And it's in, it kinda goes fast. When you're painting
only one component. It goes a little faster. So it kinda gets you in
the field of how to do it, which is why I set this up
this way to do two things. The component of the meal
and then the actual meal. So your project is to
do something similar. If you don't want to do food, you don't have to do food. You could do something
else that you may do. Like do a flower, like just a simple flower. And then maybe you put that
flower in an arrangement in a vase and you paint that
as your full painting. You'll paint one component of
it and then the full thing, it's a good way to get
integrated into painting. And if you want to do a daily painting
project like I'm doing, you might find my daily
painting tips useful. I have uploaded a
PDF of my tips, ten tips into the resources
section of this class. So be sure to download
the one brush that I used for this so you can
practice with that brush. And be sure to download the daily painting tips
if you're interested in doing a daily planning project where you pick a photo
each day to paint. You might find those helpful. As always, thanks
for being with me, thanks for watching my class. I look forward to
seeing your projects. And remember, if there's only one project allowed to be
uploaded per class, but you can always go to the discussion tab and upload
your picture in there. I will see them. And if you have any questions, be sure to ask those in the
discussion area as well. But I look forward to seeing
everything you create. And thanks for being with me. You guys have a great day.
 Jai Johnson, Painting My Favorite Subjects