Transcripts
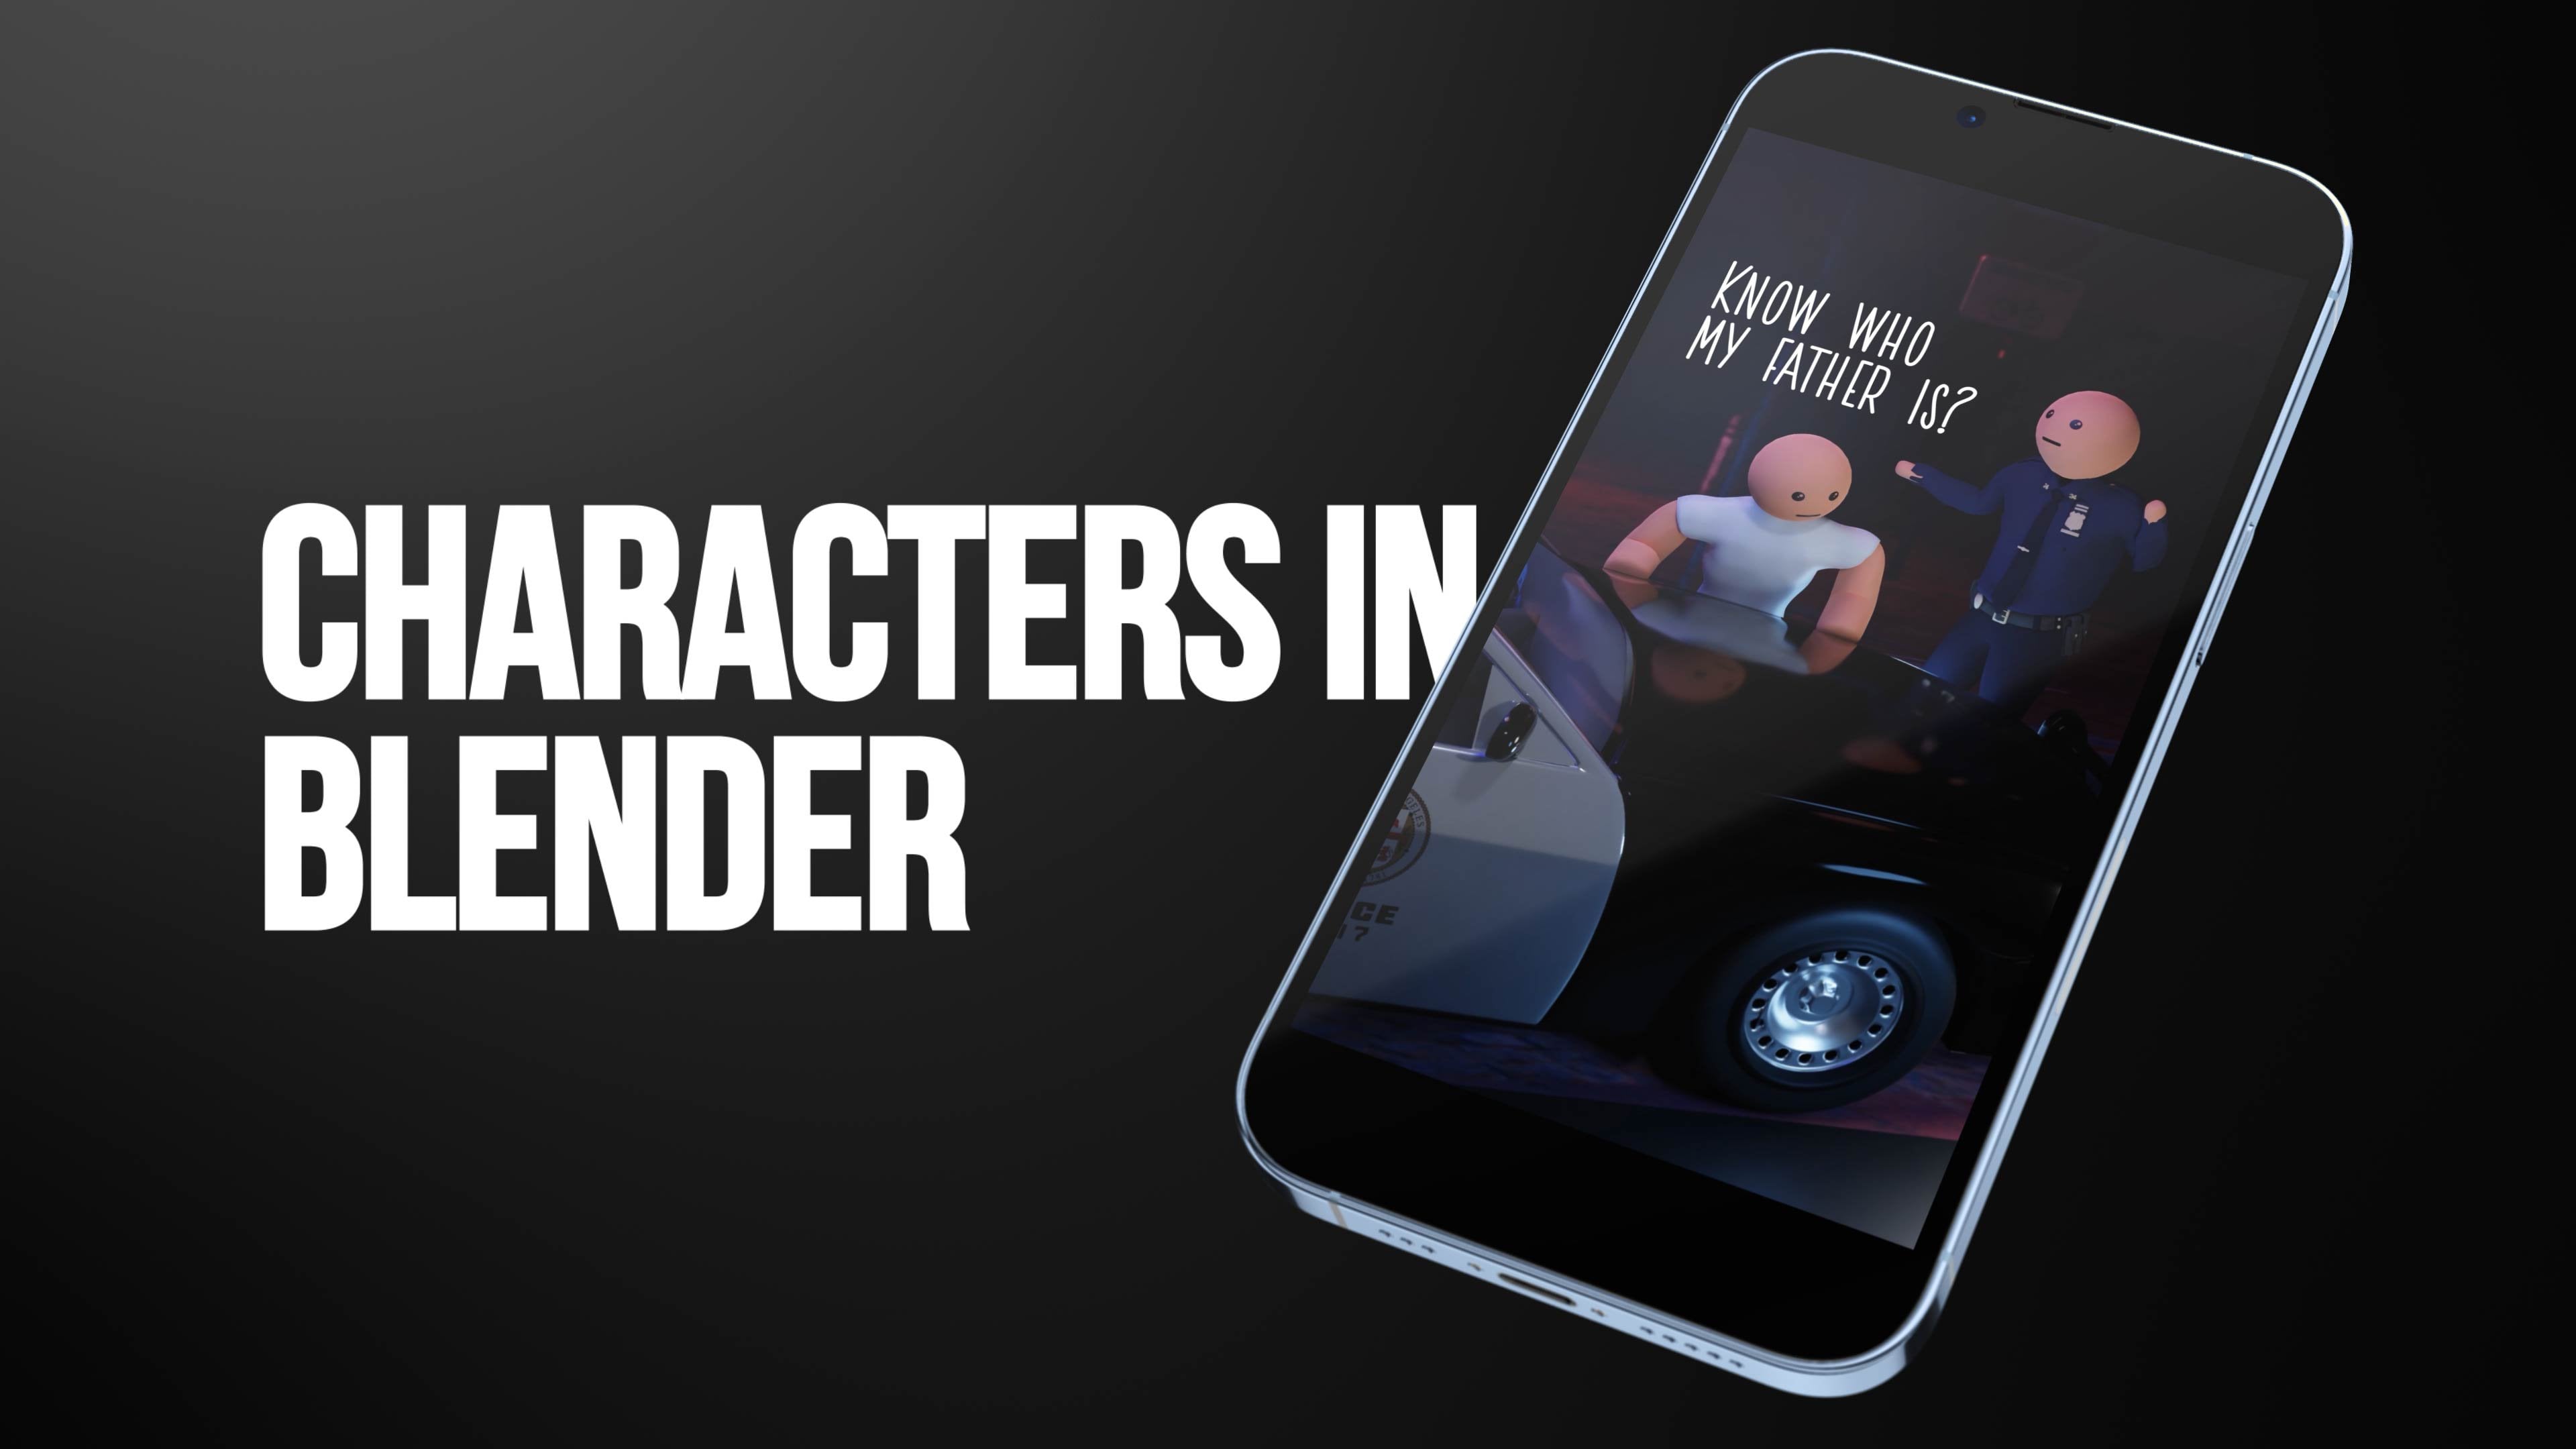
1. Intro: Hi. I'm gets, but you
probably know me as SBLG. I create both short animated
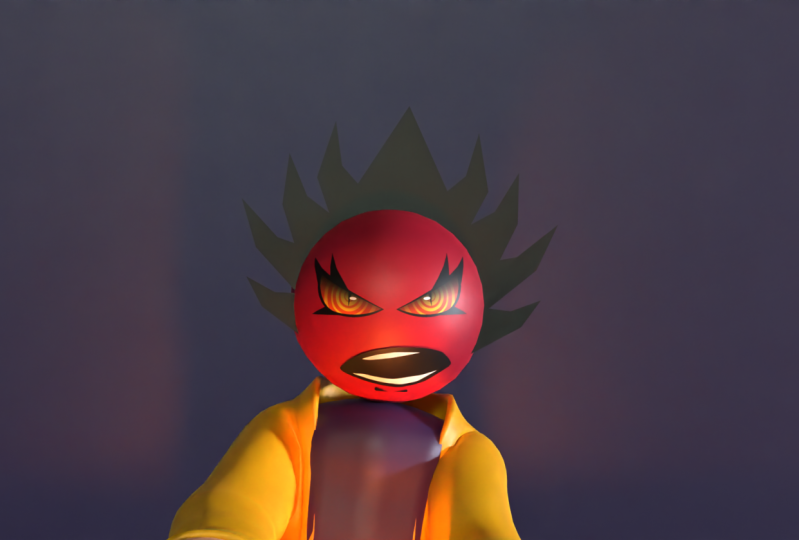
videos on social media. I need a raise. Tell me any reason why I should
give you a raise, and I will consider it. My wife is thinking
of leaving me because of my
obsession with poker. If I don't find another way
to start a campfire tonight, I'll freeze to death. In this course, we will
learn how to create and animate those
face animations. I use pretty unique methods because I'm working in
three D environment, but I am using two D faces. So we will work in
blender and I will show you how I create my lip
syncing animations. So, are you ready? Let's
jump into the first class.
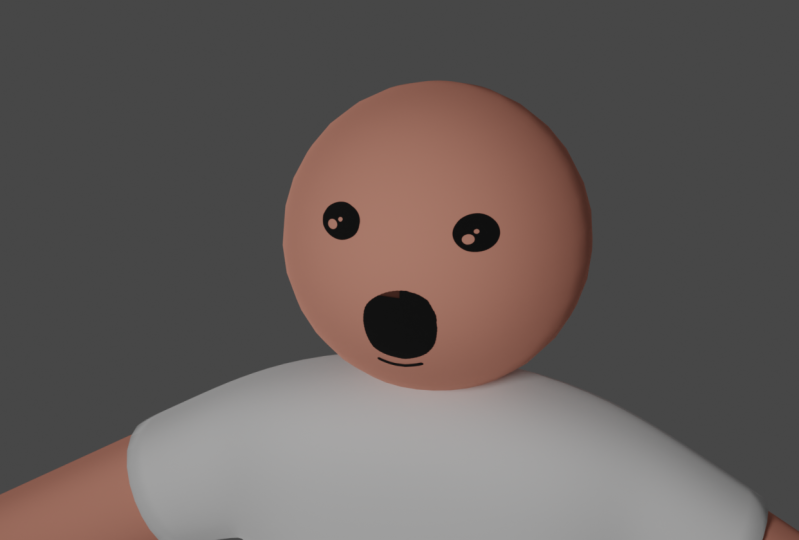
2. Creating the Head: So in this video, I will show you how to
create this 2D mouth and eyes for the character in the blender in
the 3D environment. I create this character exactly this character in
the previous video. In the character creation video, I also showed how to create
both eyes and mouth, but I will repeat
this process in this video and I will explain
everything in detail. We also will have a
look on how to animate both and what problems we
could face with this method. You see the attached
file to this video, and when you open it, you should see
something like that. If you don't see the
eyes and the mouth, not worry, we will delete
those in a second. And and yeah, so
let's delete those. Let's select the head, mouth, and eyes and just press Delete. I create the head
from the UV sphere. Let's go into wireframe
mode to see it better. We have this shape and I will leave it as it
is in the default, where 32 segments and 16 rings, we can decrease the radius. Here we are. We can just go into edit
mode and scale down. We can also more of it
up in the object mode. So G and Z, I think it's too big, so scale it down a little bit more G and Z to remove
it and replace. So we have it like that. And to remove both
rectangular shapes, we can just shade it smooth. And now we have a smooth head. For example, if you animating
some close-up shots, you can see that even
if we smooth it out, I will get back to shape flat. We see those corners. We just don't see
both hard sheets. So if you don't
like those angles, just add a subdivision
surface modifier from Modifiers tab, or you can press Control two, and you can add it
with the shortcut. Now the head is very smooth. We don't see both edges that we saw before. I
will delete this. It will be easier to
work without this one. Okay, so we have head, I think this size is quite
good for our character. We can make it smaller,
but let's make it smaller. I will go into the edit mode and I will scale down a little
bit and I'll move it down. Something like fat should
work. I think is good. Okay. I will go into the
front view with numbered one. I will select the
head of my character and I will press Tab
to go into edit mode. And now I have to decide
the area for my eyes. It's a good idea to have a little bit wider area
in case you need it. So I will select
something like that. Probably. Makes
sure that you have an even space in the
right and the left side. I will select most tool. I'll just click shift
and select both. And I think that's quite
good area for the eyes. I will duplicate this in the edit mode while as
selective VO space. So I'll just duplicate
those spaces. So Shift D and you can see
I have a separate phases. I will cancel the action with the right mouse
button and they will jump back into the
place where they, where basically we have
thesis one onto an ANOVA. But I will separate both while I didn't select
anything else. So I'll press P and
separate selection. And now I have two
objects, fear and fear. One sphere should be ahead. I will go into object mode
and I will rename those head. And here should be easy-peasy. Okay, So here is
going to be our eyes. I will go into this viewport
shading mode where I can see my textures and let's add
the texture for the head. You can go to the shading tab. But I like to work
in the layout page. We're not going to animate. Now. We're going to animate, but we don't need this
timeline at the moment. So I will change it
into the shader editor. Here. I can see my shader editor. Of course, we can go into here, and that's gonna be the same, but we will need the
shader editor very soon. So I will add a new material and I will select the
skin for the head. Added with material
in the wrong place. I add it to the
mouth, to the eyes. So I'll repeat this to my head. Here we have the same
material for the head, the skin material,
basically this one, which is in the body. And for the eyes, I will create another
new material. I'll zoom in. And now you
need this shader editor. Now we need to add a texture. And we can do that by shift
a search for image texture. And we can add it. Or there is an easier way. If you enabled the Node Wrangler
add-ons search for node. It is. It's an add-on from
the blender which you which is
disabled by default. And I'm not really sure why, because it's super useful. You can enable it and now
you will have more options. So if you select this principle, be SDF, then press Control T. It will automatically
add the image texture. So now we can open our
image or image sequence. I also attached
both to the course. So I here in my eyes folder. And I have only two
images for the ice. Phase one and phase two. You can create more. You can create two
different kinds of ice. Usually I need only bows to
open eyes and close the eyes. But you can just jump into Photoshop and create
way, way, way more. In the past they had
something like seven, but I never use both. So I kept it simple and
I have only those two. The important thing
is the naming. Make sure that it
goes like a sequence. For example, phase one, phase two, phase
three, phase four. Because if you will named
bows for example, open eyes, closed eyes, and et cetera, happy eyes, something like that. It won't work because we
need an image sequence here. So make sure that you
have award and renaming should be the board and the number starting
with one and going on. Maybe it's not, it doesn't
need to start with one. It could be it could
start with any number, but it needs to be a sequence. And you got, so let's select
those and press Open Image. And now we imported
the sequence. But before we go
into both settings, I think we need to
change some things. We need to add the two attached to the
Alpha two plus Alpha. And now this should
be transparent. For example, if we will
go into them cycles, it should be transparent. Let's change the world
settings a little bit. Let's make the world a brighter
and it does transparent. Our texture is huge. We need to go to UV Editing. Here. Let's open face one, this one. Or you can open it here. Press vis, navigate
to your face. And, and like that, this is a different one. Interface creation,
project files to eyes. Let's keep this phase. As you can see. I also
can go to the cycles. You can see that it
looks a little bit strange and we
need to adjust it. If I press a in the edit
mode in this window, you can see that we have
the same UVs in here. And if I press a here, I can select those
and I can move those. And if I moved here, I have a different image here. So let's adjust. That I have this image here. So if I move both, you can see that
I have over here. So I need to place it in the middle and scale
it up a little bit. So we will adjust those
a little bit later. It's a little bit hard
to work in cycles, so I'll just jump back to EV. And you can see now we
have a different one. Okay, It doesn't matter. We have this one. Then Evie we have is black thing and beds. The settings of the materials
we can go into is material, I wanna name is ice. And somewhere here in the
settings probably know not. Viewport display. Yeah, viewport display settings we have is blend mode,
which is opaque. We need to change
this to alpha blend. And now it's perfect. Now it's transparent. And we can see the eyes
for our character. So I'll get back to layout. Here. As you can see, I have my eyes. So I will show you
the principle, the basic principle,
how it works. So we have an image sequence and I will reduce the
frames to one and start frame from 0 and will
enable out or refresh. Now if I change the
offset between 01, my eyes is changing. So I can have closed
eyes, open eyes. And I can add a keyframe here. I will. Now, I will need a timeline. So I can add a keyframe. For example, for the offset, I can hover above the
odd offset and press I. And I have a keyframe. I will move couple
frames forward. I will change the
offset, add a keyframe, and I'll go couple
frames forward, and I will do this again. So I have this blink. Probably wouldn't
be a bad idea to have different kind of blink. Something like that. Open eyes, closed eyes
and men open eyes. Yeah. That makes a little
bit more sense. Gets easy to animate it
like that. And it works. One thing that we need to change is to change the
keyframe interpolation. So we can select the keyframes
to do interpolation mode. And let's change
that to constant. That's kind of important. That's not important
in the eyes, but it will be important
in beer. In the mouth. It would be important
in the eyes if you would have a
bigger sequence, more than two images, I think we can move to the mouth and let's go
into the front view again. It looks so weird
in the front view. Overviews, it looks okay. It doesn't matter.
Okay, so I will go into the edit mode again while
I had selected, go ahead. And I will select the
area for the mouth. I will select quite a big area, maybe something like that. I will deselect both. So I'll press Control
and deselect both. Need this one. Come on. And while holding shift, I will select box just to
make sure that you have the same amount of basis in
the right and the left side. We can do the same shift D, right mouse click, be
separate selection. And we have another mesh
which is going to be Mao. Now we can go into the material. We have the same skin material here because we duplicated it. We can press on this and
let's make it a single user. I will rename it tomorrow. I'll present principle
be SDF, press Control T. Why me gave me
both nodes so low. I will open The MAO folder. Here I have way more
images in the sequence. Again, you can create more, you can create less, refute on need Bose. I'll just change the
sorting by rename. It will be easier. So let's select all
of those open image. And again, we have
the same problem. Let's go into the intuitively to make
them material settings. We did that couple moments ago. And viewport display probably
blend mode, alpha blend. Again, we need to adjust the
let's make the frames one. We do not connect
it alpha to alpha. And when I change the offset. Now, it is animating
in, into working. Again in the UV editing
you can adjust the size. For example, you can, we have this big mouth. We can navigate to the folder of our mouth where we have
projects folders mouth, and we can select any of those, press a and Change
be UVs to fit, to put it in the
way that we want. Something like that. If
we want a small amount, we can scale those UV thesis. Let's get back to Layout mode. And again, we can animate
those by changing the offset.
3. Fixing Possible Problems: Now we have the
mouth and the eyes. We can change the mouth. We can insert the keyframes
and it will change. Do you remember when
I said that we need to add content keyframe
interpolation. Where is because if we don't, you can see that offset
is changing, for example, for victory from the keyframe
to do keyframe six n, it is changing based
on the interpolation, beds grade for the
movement of the arms, legs, or, you know, just basic character movement. But when you need to
change the mouth poses, especially 2D poses, you
want constant interpolation. And now it is changing only when we have
another keyframe. I think we can delete those key frames for my
mouth and for the eyes. And let's fix some
potential bugs in EV, It looks good, but we
jump into a cycle. So this looks a
little bit strange. We have a different color. Let me change this a little bit. Let's change to GPU
compute and Newport 32. And now it will be a
little bit faster. So in the view port we have
this different color and that basically because both
textures is overlapping. So if we press F3
in besides view, we can press G and move
this a little bit to the front so this texture is not overlapping
with the head. And you can see that this
already fixed the problem. So let's do the same with AdMob G and move
it a little bit. And now it looks perfect. Maybe one thing, it gets the shadow and
now it gets through shadow on the bulk EV
and cycles in the EV, we can disable the shadow in the similar way that we change the blend mode to alpha blend. Here is the shadow mode. Let's change that to none. Let's select the mouth
and do the same. And in cycles we can
select, for example, eyes. In cycles we need to
go to both properties. Visibility I guess, and shadow. And let's do the
same with a mouth. Let's go to re visibility
and disable the shadows.
4. Setup For Lip Sync: Let's adjust our viewport
again a little bit. Let's change this
to video sequencer. And we will add an audio
track for our lip-sync. I will give you this audio
track for the for practice, you can just drag
and drop into here. And we have some four
seconds of audio. We don't see the audio, and I like to see audio waves. So you can press this arrow and that will
enable this viewport. Or you can press N. And that will open this sidebar. And you can press
display a waveform. And that will display
in the waveform. Basically. I'll press N again and I will expand it
a little bit more. Now, when I move on
on my timeframe, I don't hear anything, but here I have some settings. I would like to enable
this audio scrubbing. When I enable this, would you like some chips?
Please don't forget. Either need to play it. I can just prove a timeline
and I hear what is going on. Well, I would like to change one more
thing here on the sink. By default, it's play every
frame which is not ideal. I almost always change
that to frame dropping. And another thing, it's a good idea to change
the frame rate. Right now. I always animate my videos and
it's 24 frames per second. And that's basically it. We have set up this one. We have our timeline. The last thing that we need, we need to be shader editor. Now, we're ready to animate.
5. Lip Sync Process: Okay, so let's try
to add a lip sync for this short audio. Would you like some chips? Please don't take it,
please don't take it. I will say it end at 107 frames. So that's the length of
my sequence basically. So I'm going to select the mouth and I will open up
my reference file. I'm going to move this
into another screen. I will start by adding
the keyframe when neutral keyframe,
the smile keyframe. So that's going to be this. And I will press, I, I will select this
keyframe and I will change the keyframe interpolation
mode to constant. And from now on, all the keyframes going to
be in the constant mode. So would you like some
chips, which would you like? Let's start with this word July. And in our reference file we
don't have this wolf sound. But I found vet be clearer. Closest sound to this is this. So I will add that
offset six. Offset six. And I'll press I to insert. It should be six. Num Lock is not working. Okay. Six items. Would you like some.
What did you do? For d sound? I will make this
small offset one. Again, I for insert. Or here is the trick. You can change this
to auto keying. If you enable this, when you change something
here, it will insert. But I used to that. I click to insert a keyframe. It is easier for me so you can work in the way
that you are more comfortable. And wet slacks and chips, we have this sounds
so offset it. I will add a closed mouth here. So I added the basic keyframes, which are really clear
where they should be. And I will probably need to add some
additional keyframes. But we will see, Would
you like some chips? Would you like some
chips is good. I think interpolation mode, but I might be off, so I
will set constant again. Would you like some chips? Please? Hey, please don't take it. Please. Please don't take it. Please don't take it
because it's repeating. Please don't take it, please. On ticket, I will try to copy
those keyframes through to here and just adjust the timing and see
how it looks like it, please, the outtake tag. Use the outtake. The outtake it. Would you like some chips? Please don't take it.
Please don't take it. Would you like some chips? Please don't take it.
Please don't take it. And that's basically it. It's not perfect. I know, but it's good enough
for my videos. And that's the workflow
on how I do both. So in this course, I wanted to show you how
I drew this lip-sync.
6. Outro: Congratulations for making
till the end of the course. Hopefully you will
be able to create your own face
animations right now. And you are a little bit
more fluent in blender. If you created something
during this class, feel free to share that
in the class projects. Or if you post it
on social media, please tag me as LG. I'd love to see my
students work online. Thank you for taking the course and see you in the next one.
 Gytis A., Motion designer