Transcripts
1. Intro: I have a passion for
line art drawing and it's something that I do
to relax and unwind. It all started when I was just doodling with bubbles and then I discovered the world of
zen tangle. From there I moved on to drawing flowers and other
nature-inspired designs. I find that drawing intricates
lines and details is a wonderful way
to separate my eyes from the computer screen and let my mind focus on something creative. It's become a hobby
that I truly enjoy. And I'm always looking for new inspiration and
techniques to try out Hi! I'm Phuong Lempinen I'm a surface pattern designer and illustrator based in Finland. And I'm thrilled to be your
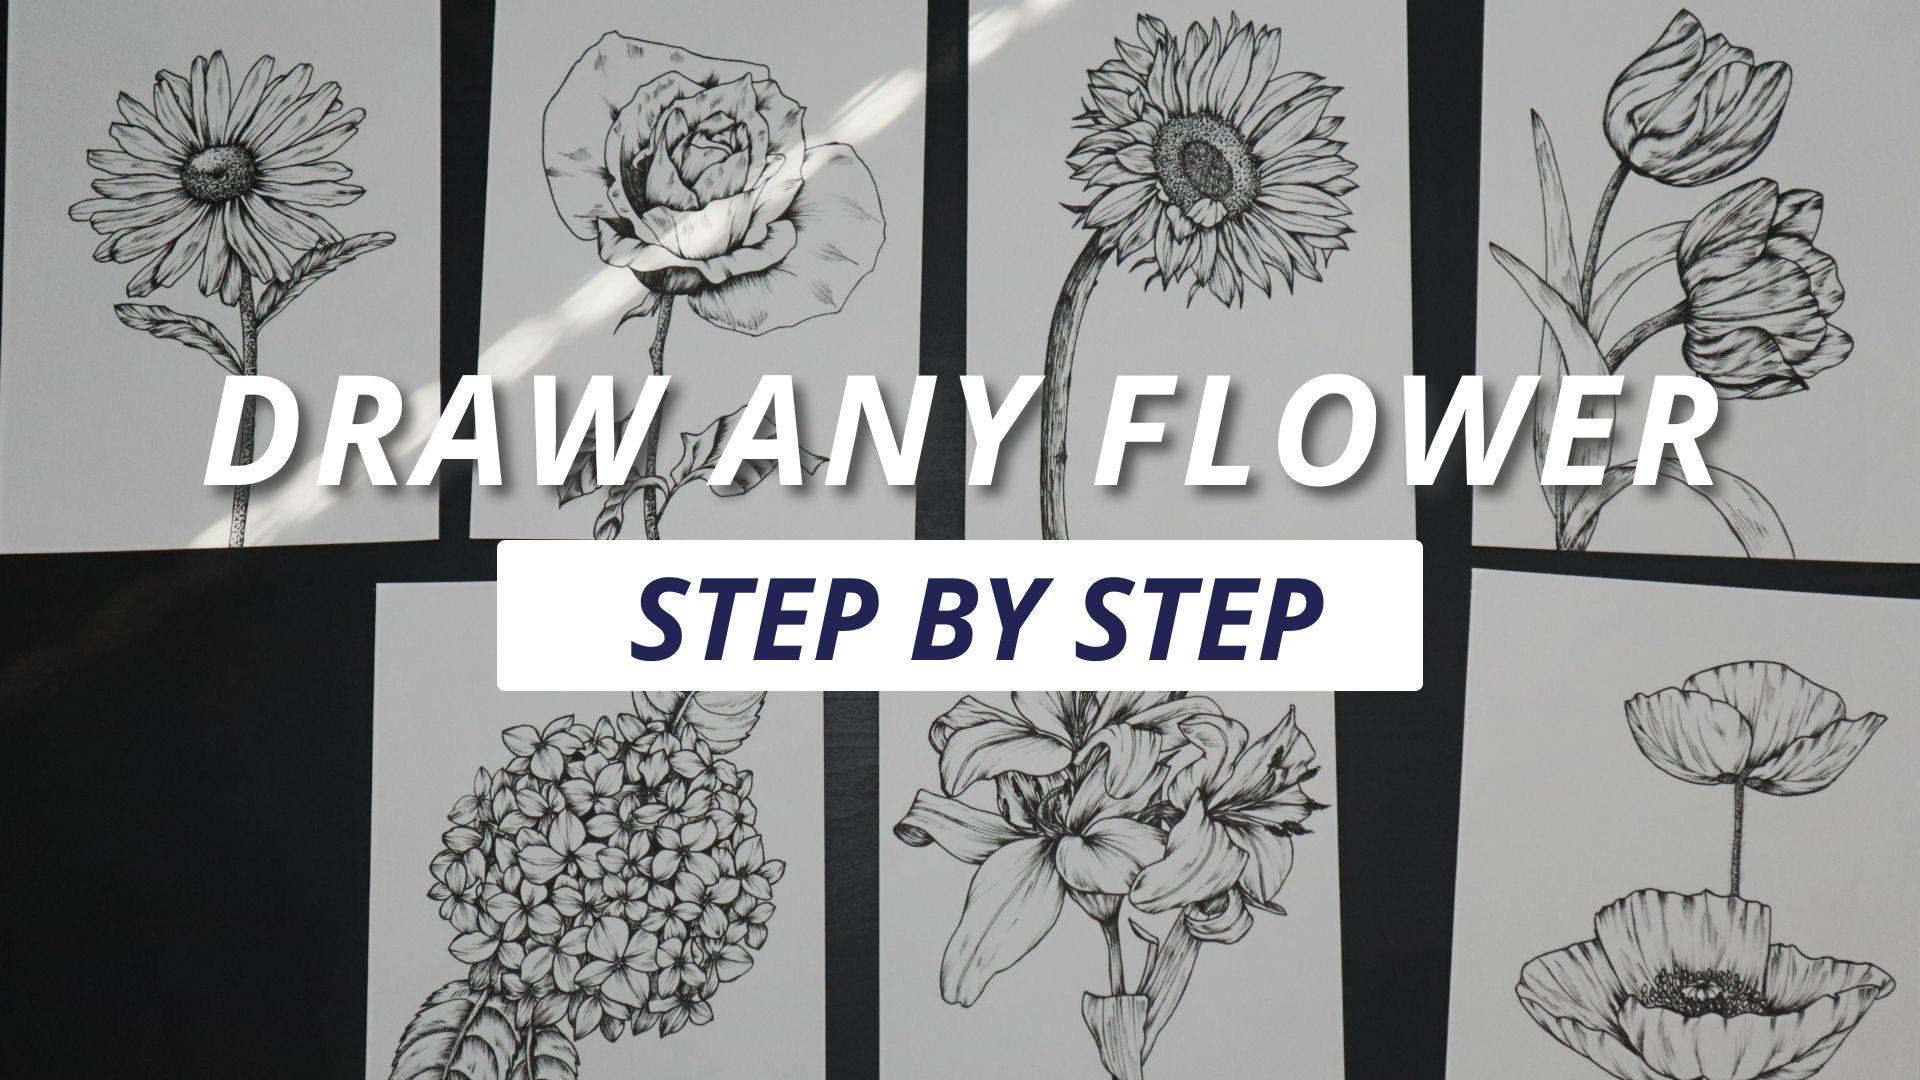
instructor for this class. In this class, you will learn the step-by-step process of creating beautiful line
drawings of flowers. Whether you are a beginner
or an experienced artist, This class is designed
to help you develop your skills and create
stunning floral composition. Over the next seven days, we will cover a range of powers, including grosses, lilies,
sunflowers, and more. Each lesson is designed to
be short and focused so you can easily fit them
into your daily routine. By the end of this class, you will have the skills and confidence to draw
any flower you chose. I will provide you
with tips, techniques, and demonstrations that will help you create
your line drawings. And I'll be available to answer any questions you may have
throughout the class. We also have a class project at the end where
you get to apply what you've learned in share your beautiful floral
creations with the class. So whether you are looking to enhance your drawing skills, exploring new creative hobby, or simply relax and enjoy
the process of making art. This class is for you. I'm excited to get started and see your progress over
the next seven days. So let's dive in.
2. Class project: For the class project, I
invite you to choose your favorite flower and
create a line drawing using tips and technique we have
learned throughout the class. You can use any type of paper, pencil, and pens you like. Once you complete your drawing, take a picture of it
and then upload it to the project section
of this class. This is a fantastic opportunity
to showcase your work and share your progress with the class. By sharing
your project, you'll also be able to inspire
and learn from others. You can provide your feedback
and support your classmates and see how they interpreted the techniques we've
covered in this class. Remember this
class is all about the process of learning
and improving. So don't worry about perfection. Embrace your unique style
and enjoy the process. of creating something
beautiful I'm looking forward to seeing
your beautiful floral drawings in the project section. So let's go to the class.
3. Materials: In this class, we will be using simple materials to create beautiful line
drawings of flowers. You don't need any fancy
or expensive supplies. A few basic tools. First, you need paper. Any paper will do, but I recommend using a
smooth white paper that is at least has the size of A5 paper. You can use printer paper, sketchbook paper, or even
watercolor paper. Next, you need a pencil. Any pencil you have will work. Here is mine You also need an eraser. Just any eraser
you have at home. Then the pens from
Micon or Micron. Or you actually can use any
character pens you have. As I have
another brand here, and I use both of these brands. And these sizes of light
I often use in my work. That's it These simple supplies are
all you need to create. beautiful line
drawings of flowers, so gather your materials
and let's get started.
4. Make time for art: Taking time for your art, essential for your
growth as an artist, it's easy to get caught up in our busy lives and put our
passions on the back-burner. But by dedicating a little
bit of time every day, we can make significant
progress and achieve our artistic goals. For the next seven days, I encourage you to set aside at least 15 to 30 min each day to work on your
lighter when project and make it a part of
your daily routine, whether it in the morning, during your lunch break
or before you go to bed, turn off your phone, disconnect from
distractions and give yourself space and
time to create. Remember, this class is designed to be completed in seven days. And by taking a small but
consistent steps every day, you can achieve
remarkable results. Don't worry about perfection
or finishing everything in one sitting is the focus on the process and enjoy the journey of creating
something new. So let's commit to taking
our time every day for the next seven days and see where this journey takes us. I can't wait to
see your progress and your beautiful
line drawings. Let's get started.
5. Techniques: In this lesson, we will be talking about the
techniques that we will be using to create beautiful
line art of flowers. One of the techniques we will be using is called Broken hatching. This technique
involves using short, broken lines to create
texture and depth. By varying the length and
direction of the lines, we can create illusion of shadows and highlights
on our flower. Another technique we will
be using a stippling. Stippling is the use
of dots to create texture and value by
varying the size, spacing, and density of the dots, we can create a range
of tons and values of our flower. To create
a beautiful line drawing of flowers
we will be combining the two techniques
by using Broken hatching to create texture
and stippling to add value, we can create a realistic
and beautiful rendering of any flower. So let's get started
and learn how to use the techniques to create
stunning line art of flowers.
6. Observation: Observation is one of the most important skills you
can have that as an artist. This lesson, I'll
show you how you can observe a flower with reference to create a more
accurate and detailed drawing. First, find a reference image of flower that
you want to draw. It can be from a photograph or a real flower
in front of you. Next, take a few minutes
to study the flower. Shapes, lines, and textures
that make up the flower. Pay attention to the details like the pedals
stem and leaves. Once, you have a good
understanding of the flower. Try to sketch it out
largely using basic shapes like circles and triangles. This will help you get the proportions right before you add in the details. Here you start to add details. Keep looking back your
reference image to make sure you are capturing the
right shapes and lines. Pay attention to the
way the petals overlap. The texture of the leaves and
the curve of the stem. Remember to take your time
to be patient with yourself. The more you practice, the better you get at observing
and drawing what you see. So take a moment to find a reference image or
flower you want to draw. And let's get started.
7. Day 1 : DAISY: Welcome to day one of our
7-day flower drawing class. Today we will be starting with the beautiful and dedicate daisy I'm excited to show you
how to create a stunning , line art of this flower using the techniques we've covered
in the previous lesson. By the end of this lesson, you will have a good grasp
of the basic shapes, forms, and techniques used
to create a realistic daisy. So let's get started. So this is the reference photo of Daisy that I have
chosen for this lesson. Before we begin, it's
important to take time to observe our reference photo. So you can see this daisy has a circular shape and nearly straight stem with the center also is
a circular form. So to start, let's draw circle in the center
of our paper. Don't worry about
making it perfect. Next, we'll divide
our circle into smaller species by
following along with me. This step will help us create a better representation
of the daisy Now, let's add the petals. Start from the outside
of the small circle in the center and draw the
first layer of the pedals Pay attention to the
pedals that overlap. At more pedals. unnder the first layers, you can use the
reference photo to add more variation to the
second layers of petals. After finishing the pedals we can add the stem and
the shape of the leaves. I use this pen 03 for
the outline of the artwork. And they medium
01 for all details ink the pistil
using small curves for the outline and stippling
method to add details. Remember that the light source
comes from the top left. As I actually use
the top-left light for all my artworks. So we use fewer dots on
that side of the pistil. Take your time
for this step and feel free to pause the lesson as
you work on your own drawing. We use the stippling method to add tails to the stem And the medium 01, we will use the broken
hatching method and add more detail
to the petals, starting with the lies
that are often seen on the petals in the photos. And then add more lines to
create shadow and value. And broken hatching
method for the leafs. Follow along with me as we add these finishing
touches to our daisy. I'm adding the shadow and value
to the leaves like this. With the leaves, I often use different style and it really
depends on the artwork. So for this daisy, I chose this style, for this type of leaves. Here is my final Daisy and am so excited to see your
final daisy too remember that you can
also download the guide from the class resources
in the project section. Let's go to the next lesson. We're going to draw a rose.
8. Day 2: ROSE: Welcome back to our
line art drawing class. Yesterday we drew
a beautiful daisy using techniques
we've been learning. Today we're going to take
up a notch and draw a rose. Roses are known for their intricate details
and unique petal shapes, making them a
perfect subject for practicing our line art skills. So wrap your paper and pencils. And let's get started on
drawing a beautiful rose. Here is the reference photo. I have chosen for
you in this lesson I printed this rose on paper
so we can see it better. We'll be using Micron pens in medium-size 03 and 01
for this lesson. Remember, you can
always download the PDF guide from the class resources in
the project section. Before we start
sketching the rows Take some time to observe
the reference photo. With this particular rose We can draw from the inside out, The inside of the rose
hair and oval shape. So the first step is to draw the oval Next, draw the pedal starting from the half of the rose You can draw your own
versions of the petals. as it doesn't have to look exactly
like in the reference photo. I continue adding
more details until the rose has all the pedals as in the reference. Now, add the stem and leaves it's time to ink the drawing. I’m using a medium pen 03 to ink the outline of this rose.. Oh, here I just realized I
haven't finished this petal. So I'm gonna use my
pencil to sketch first. And, actually it is hard to see how it looks
even in the reference photo. so I think I just go with my version After finishing the outline, use the pen 03 to ink the remaining parts of the rose and then erase all
the pencil lines. To add more details
to the pedals switch to a smaller size, 01 and use the broken
hatching methods. Start from the inside out. Remember to add more shadow
where the light can't touch. Okay. Hi. Hey. Finally use the broker HE
method to add details. Adding lines along the veins. Here is the final result
of this rose drawing I hope you enjoyed this lesson
and learned a lot from it. Tomorrow we will
learn to draw tulips.
9. Day 3 : TULIPS: Welcome back. Today we'll be exploring the beauty of tulips. Tulips are known for their unique shape
and vibrant colors, making them a popular
choice among artists. In this lesson,
we'll be focusing on the techniques we've learned so far and using them to create a stunning
tulip drawing So let get started and take our art skill
to the next level. In this lesson, we
will learn how to draw our 2 tulips from
the reference photo, and this photo is
from Pinterest. However, feel free to draw
all three if you wish. Before we begin,
take a moment to observe the subjects and familiarize yourself with
the shapes, and details. Let's start with the taller tulips As you can see from the
reference photo, it has a unique shape that we aim to
replicate in our drawing. Make sure you draw the
petals that overlap firs, then add the petals
that are behind. These will create depth and make your drawing
look more realistic. Moving on the shorter tulip Begin with the
leaf off the first one The form of this tulip resembles a rectangle
with rounded corners. So draw a rectangle and
add the rounded corners. Start with the pedal
at the top left corner, or the overlapping
petals first, depending on what's
easier for you. I'll be drawing the three
pedals behind first, then the remaining pedals Here's a small pedal that
you can choose to draw. or skip Finally, add the
stem and leaves. From today's lesson,
I'll be using my medium pen 05
for the outline. Since my 03 pen's ink has
run out. For the details, I will still be using my 01 pen. Now it's time to start inking And I usually begin by
outlining my drawing first. Tulips have veins on the petals. So I like to mark those veins
with my pencil before inking. This helps make the details in the pedals easier to think. Following the natural
curves of the pedals, When inking details on
the tulips pedals, it's important to keep
in mind the direction of the lines and the
variations in techniques The lines should follow
the shapes and curves of the pedals and
thicker lines can be used to create shadows and
depth. It's also important to pay attention to the veins
of the pedals and include them in the inking. Using a fine pen such as 01 or smaller can help create more
dedicate details. Additionally, it's
important to have steady hand and take your time to ensure that the inking
is neat and precise. It's also important to keep
in mind light source, and add shadows where necessary to create depth and
dimensionality in drawing. Another technique we
can use for the stem, is a combination of
broken hatching as stippling. This will create an
interesting texture that you might want
to try. To do this, start by adding some
broken hatching to create the basic shapes
and shading of the stem. Then then use stippling to
add more depth and texture. You can experiment with
different levels of density and spacing to
create different effects. Be sure to follow the
natural curves and lines of the stem
as you add the details. Do the same with
the second stem. To make our tulip drawing
look clean and elegant, we use the broken hatching
method for the leaves, but we also add some
additional lines to give the drawing
polished finish. That's it for today's
lesson on drawing tulips. I hope you enjoyed it
and found it helpful. Remember to take your
time when you're drawing and observe
your subjects closely before starting. Try different techniques
and methods to find what works best for you. Practice is the key to
enrolling your skills. So don't be afraid to make
mistakes and keep trying. Don't forget to share your drawings with us in
the class project section. I can't wait to see your
beautiful creations. See you tomorrow.
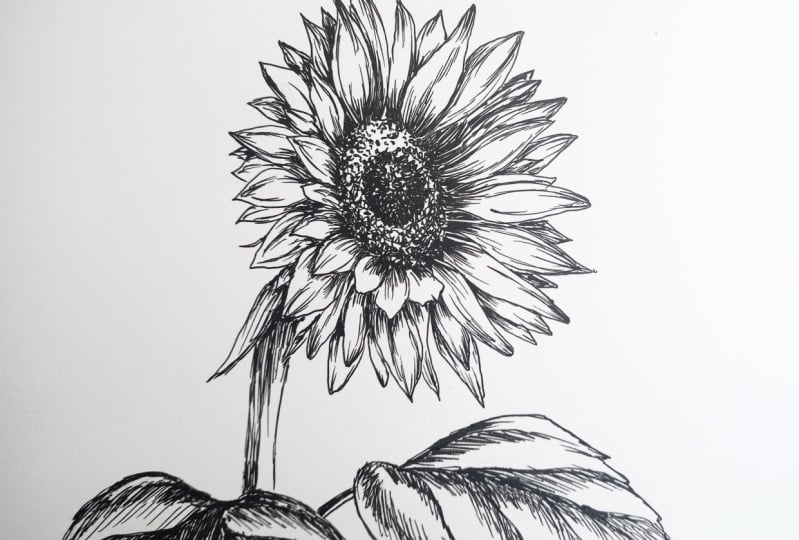
10. Day 4: SUNFLOWERS : Welcome back. Today we're going to draw one of the most cheerful
and vibrant flower the sun flower, with this bright yellow petals
and distinctive center, the sunflower is the
beautiful subject to draw. In this lesson, we
will continue to build on the techniques
we've learned in the previous lessons
and apply them to create a stunning
sunflower drawing. So let's get started. In this lesson, we
will be drawing a sunflower using the reference
photo from unsplash.com. Before we begin, let's take a moment to observe our subjects Sunflowers have a
similar shape to daisy but with a larger center
and shorter pedals To start drawing,
we will begin with with the center
of the sunflower. Let's draw three circles
to form the center. Remember to take this
time to make sure your circle are evenly
spaced sized Now, it's time to draw the
petals of the sunflower. And we'll start with
the first layer. There are no strict rules here, so feel free to
choose any better you like is your starting point. Remember your drawing
doesn't need to look exactly like
the reference photo. Personally, I find these
particular pedal appealing. So I'll begin by drawing it. Let's move on the petals on the second
layer of the sunflower. You can draw them based on the reference photo or create
your own unique version Don't be afraid to experiment to make
your flower stand out. The many overlapping pedals of the sunflower make it a
challenging subject to draw. to achieve the desired
level of detail, it is crucial to maintain a high
focus throughout. To complete the sunflower, we need to add a third layer
of petals. This layer. This layer is usually smaller
and more delicate and it fills the empty spaces
between the previous layers. You can refer to the
reference photo for guidance, or you can create your own
version of the sunflower. Don't be afraid to experiment
and make it unique. And now it's time to add the stem to your sunflower and erase any unnecessary
pencil lines. This will give your drawing a clearer look before
you start inking. Now it's time to
ink our sunflower. As usual, I'll be using my 05
pen to outline the flower. However, this time, we're
going to start with the center Before that, let me show you the technique I'll be
using to ink the center. Let's look at the screen. To ink the center of the sunflower. We use a circular
pattern technique. This involves making
small circular strokes with our pen to create texture effect That's mimics the natural patterns
of the center. So now I'm going to apply the technique to
the center. First. I fill the outline of the
center using circular pattern then I move inward to fill
the rest of the center, For small center of the sunflower. We'll be using a technique similar
to broken hatching, but instead of small
straight lines, we will we will
be using a series a series of lines that resemble rose thorns as you see on screen. And I use my 01 pen now. Now it's time to outline the entire sunflower using my pen As you may have noticed
the petals of the sunflower have some
lines or veins on them. So to make inking process
smoother and faster, I like to use a pencil to
mark out the lines first. Now apply the same
technique as we did with the daisy's petals and add line details
to the sunflower's petals Be sure to
pay attention to the overlapping petals
and areas where the light hits to create a
more realistic look. We'll be using a broken
hatching method for stem Since the stem is quite large, I believe that this
method will be a fast and effective way to capture its details
When shading the stem of the sunflower using
the broken hatching method Here are a few things
to keep in mind. First, pay attention to the direction of
the hatching lines They should follow the
shape of the stem Start with the line strokes
and gradually increase the pressure to create
a gradient effect. Try to vary the thickness of the lines and the spacing between them to add
texture and dimension, Remember to leave some
areas unshaded to create contrast and highlights to the areas where the
light hits the stem. Finally, make sure to maintain
a consistent pressure and angle throughout the
shading process to ensure a cohesive and polished look. Great job everyone! I hope you enjoyed drawing this beautiful . sunflower with me today. Remember every sunflower is unique. So don't worry if
your drawing doesn't look exactly like
the reference photo. The most important thing
is to have fun and enjoy the process of creating something with your own hands. Thank you for joining
me today and I can't wait to see your beautiful
sunflower drawing!
11. Day 5: HYDRANGEA: Welcome to day 5
of our drawing class. Today we will be
learning how to draw beautiful and intricate
hydrangea Hydrangea are known for their
voluminous blooms. And we will be focusing on
capturing the unique shape, and texture though the techniques we've learned so
far in this class By the end of this lesson, you will have a gorgeous
piece of artwork and deeper understanding
of the techniques and skills needed to draw
complex flowers. So let's get started and create
something truly stunning. Today we will, today we'll
be drawing a hydrangea. Although it may appear
complex at first glance. With closer observation, you
notice that is's composed of several simple and basic flowers that are quite easy to draw. So before we begin, take some time to examine
the hydrangea closely. We'll start by drawing the larger circle
and then move on the smaller ones that
are made up of the tiny flowers. As wee add
big circle to our drawing. It's important to
consider how big we want our flowers to
appear on the page. Additionally, we may
want to decide if we want to include the stem
in our drawing or not. While drawing the small
flowers is not necessary to replicate the exact look
of the reference photo. As it can be quite challenging and requires a high level of focus. Instead, we can simply draw some flowers that catch our eye and then come up with our own version to fill
in the rest of the space. For me, I like to use
the reference photo as a guide and draw the
flowers that I find most appealing before filling the remaining space
with my own variations. In this step, we will focus on drawing the small
flowers within, within the circles
we have created We can start with the
flowers we have chosen to draw based on
the reference photo. It is important to pay attention to the
overlapping flowers. And remember that
we don't need to copy the reference
photo exactly To ensure that our drawing
is clear and easy to see. We will be inking
while sketching However, it's important to be sure that you
don't need to make any corrections before
starting the inking process. Keep adding more
flowers to your drawing until all the small
circles are filled Remember that hydrangeas have lots of intricate details. So it's important to be
patient and take your time. Don't rush or feel overwhelmed. Feel free to finish
the drawing at your own pace in your own space. To complete the drawing, you can add some leaves to
make it more interesting. You can choose to add as many
or as little as you like. Remember to observe
there reference photo for the shapes and
sizes of the leaves. Don't feel like you have
to coppy exactly. I attempted to include
this stem in my drawing, but ultimately
decided to exclude it as I felt that the
drawing appeared, more harmonious without it. Now that we have finished
sketching our flower, we can proceed to
the inking process. To add more details to our drawing we'll begin by adding shadows where
the light cannot reach. To do this, I'll be using my 05 pen to add
shading to those areas. This will help to create a sense of depth
in your drawing. After completing the
shading of the dark areas, I switch to my 01 pen and begin inking
the tiny flowers. I use the broken
hatching method and add basic lines
to the petals. It's important to pay attention to the
overlapping flowers and remember to add more
shadow to show the overlap. Don't be afraid to adjust your
papers position as you work on shading Sometimes changing the angle or
orientation of your paper can make it easier to add
shadow to certain areas. I know this step can be time consuming and require
a loss of effort as we have many tiny flowers to. However, I promise that all your hard work will
pay off in the end. So take your time to focus and be patient while
completing this step Now, it's time to add
details to the leaves. These leaves resemble rose leaves, but I'll be using a
different style for them. I'll be adding lines
along the veins of the leaves using the
broken hatching technique. Repeat this for all
the leaves as well. Remember to add
more shadow to show the overlap between the
leaves and the flowers. Lastly, refine the outline of your drawing I often do this because it makes my drawing more stunning. Great job, everyone! We have completed our lesson. on drawing a Hydrangea I hope you found this lesson helpful and enjoyed the process of creating beautiful flower. Remember drawing takes practice and patience so
don't be discouraged if your first attempt
doesn't turn out perfectly, Keep practicing and you will continue to
improve your skills. Thanks for joining me and I look forward to seeing you
in our next lesson.
12. Day 6: LILIES: Welcome to day 6! Today we will be focusing
on drawing lilies, a dedicate and elegant
flower that has been a popular subjects for
artists throughout history. Especially we will be drawing
3 lilies together, in a composition or actually it is a
branch of Lily, which will allow it to practice creating depth and
balance in our artwork. By the end of this lesson, you will have gained the
skills to confidently draw this beautiful
flowers. In the photo, this lily has,
three flowers with the composition made up
of ovals and circles. To draw these flowers, we'll start by sketching
out their shapes It's important to note that the circle
shape is behind the ovals So we don't need to
draw the full circle. Don't worry about making
the shapes perfect. at this stage. To draw this lily flowers, we will use the shapes
we identified earlier, but we will start with
the circle shape And drawing a small
circle in the center. From this central circle, we will draw 5 lines
that will make up the petals of the flower It's okay if your sketch
isn't perfect, as we can refine it later, we will draw the pedals
our first flower. You can choose which
pedal to start with. Just try to replicate
what you see in the reference photo
without worrying about making it look exactly the same. Moving on the second flower, we can see the sepall
in the reference photo. So we'll start with that. First, we'll sketch the
lines for the pedals and then draw the petals
based on those lines. I personally like to erase
unnecessary lies from the first flower before drawing the petals of
the second flower. This helps me see
my drawing better, but you can erase any unnecessary lines
whenever you want. It just the way I do it to
make my drawing easier to see. We start drawing the
petals of the second flower the same way we drew the
pedals of the first one. For the third flower we also begin with the sepal and then draw the lines that
make up of the pedals. You can see the stem comes from the sepal of
the first flower. So we will draw the visible part of the sepal and then
move on to the stem After that, we can
add some leaves and other small
details such as the filaments and anthers
for each flower. Moving on, we will ink the flowers using
broken hatching method. First, we will use 05
pen to outline our drawing and then we will
add details with the 01 pen. Lily flowers have a
distinct depth at their center and it's crucial to capture that depth while still maintaining
the elegant look. I struggled with this at first, but with practice, we
can improve our skills To make inking easier. Don't hesitate to
rotate your paper. Pay close attention to overlapping areas and use more lines to capture
the shadows. When it comes to inking the anthers and filaments, feel free to choose a style that suits your preference. For me. I use doodle lines for the anthers and the broken hatching
methods for the filaments Keep adding details to the
petals until you're satisfied. In final step, use the broken hatching method to
add details to the stem Paying attention to the
areas with more shadows To draw the leaves of the lily start by sketching some lines and
then add more detailed lines along the leaves. Before finishing,
I like to refine the outline of my drawings
to make it look stunning. In conclusion, I hope you enjoyed this lesson
of drawing a Lily Remember, practice makes perfect and with patient and dedication, you can improve your skills. Don't forget to pay attention to details and capture
the depth of the lily. Keep practicing and
I can wait to see yours stunning Lily drawings
to you in the next lesson.
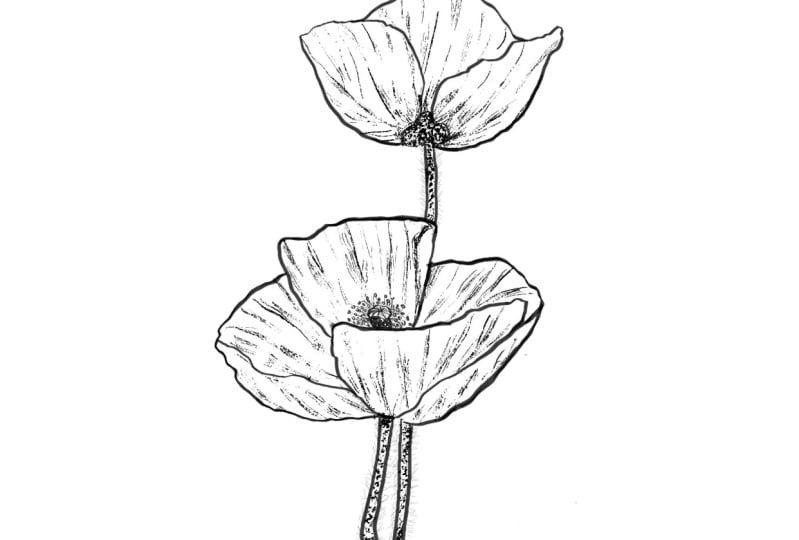
13. Day 7: POPPIES: Welcome to day
7 of our drawing class. Today we will be learning
how to draw poppies Poppies are beautiful and
vibrant flowers that are often associated with remembrance
and appreciation. In this lesson, we will be
using all the techniques that we learned in the
previous days to create a stunning and
realistic poppy We'll pay special attention to the texture and shading off the flower. And by the end of the lesson, you have a beautiful poppy drawing to add to
your collection. So let's get started and
discover how to create a beautiful poppy
drawing step-by-step. In this lesson, we'll be using different pens sizes
for different purposes. We'll use 05
pen for the outline. 01 pen for the details and 003 for the hair or
fuzz of the stem the zero-zero three pen is the perfect size for
capturing the hair on the stem As with previous lessons, it's important to take time
to observe your subject and pay attention to its details
before beginning to sketch. This will help you
capture the essence of the poppy and make your
drawing more accurate. We will begin by
drawing those poppies, starting with their
basic shapes and stems as seen in the reference photo. For the first Poppy, we will draw its pedals which are easy to replicate
based on the reference photo. Moving on the second Poppy, we will start by drawing the longest better from
the oposite side of the flower and then continue with the other pedals. We will also give the center pistil a basic shape for easier
drawing later on. Since the reference photo doesn't clearly
show the pistil we will draw the
immature seespod of the poppy and the
stamens around it Feel free to draw along
with me if you'd like. Now it's time to ink. our poppy drawing. We will be using the 05 pen to
outline our drawing. As may already
be familiar with the technique and my
way of working since this is our last drawing lesson. After that, I'll switch
to the 01 pen to add details, starting with the seedpod using
broken hatching method. The poppies pedals have texture, so I'll use my pencil to
sketch out those lines on the pedals first and then use the 01 pen for inking. When adding details. to the poppy petals, It's important to
pay attention to the overlapping pedals and shadows where the
light cannot reach. Use the broken hatching method. And add lines along the
veins of the pedals. You can also rotate the paper to make it easier to
ink certain areas. It's important to feel
comfortable and relaxed. while inking and to add enough lines to achieve
the elegant look without overworking it. For the stem we'll use the stippling
technique and add more dots where there's
more shadow on the stem. Moving on the fuzz or
hair of this stem We will switch to the 003 pen, Although is maybe difficult to
see the hairs on my drawing. I just draw lines that
come from the stem and make sure not to
apply too much pressure. As in previous lessons, I often redraw the outline of my drawing at the end to
give it a stunning look. Congratulations on completing this lesson on drawing poppies, as well as the last
drawing lesson! I hope you enjoyed
the process of sketching and inking
these beautiful flowers. Remember with practice
and observation, you can improve your skills
and create stunning drawings. Keep exploring and
experimenting with different techniques to find
what works best for you. Thank you for joining me in this lesson and I
look forward to see your artwork on the
class project section.
14. How to Improve your Skills Further : Congratulations on
completing the class, and I hope you have learned
a lot from previous lessons. In this lesson we will talk about how you can continue to improve your drawing skills even
after the class is over, here are some tips you can use. Keep drawing regularly to maintain your skills and
improve them further. Set aside some time every
day or week to draw and try different subjects in styles to keep
things interesting. Look for inspiration
and guidance from other artists
and their work. John online communities or a local art groups
to share your work, gets feedback and
learn from others. Try new techniques
and materials to give your art fresh
and challenging. There are plenty of resources available
online and in books to help you explore new techniques and expand your skill set. Set achievable
goals for your art, whether it's learning
a new technique or completing a certain
number of drawings. This will give you direction and motivation to improve it. Remember that improving
your life drawing skills is a journey,
not a destination. Keep learning experimenting and creating to reach new
levels with your art. Thank you so much for
taking this class and I can't wait to see
what you create next.
15. Final Thought: Before we wrap up, I wanted
to remind you to share your class project and
leave a review on Skillshare. Sharing your class projects
is the great way to showcase your new found
skills and creativity. And it can also inspire others who are taking this
class to do that too. And leaving a review is
important, not just for me, but for other
students who may be interested in taking this
class in the future. So if you haven't already, please take a few minutes to upload your class project
to the project section. And share your thoughts
about this class. in the review section. Your feedback is invaluable to me and it will help improve the quality of other classes and create better
contents in the future. Thank you so much for
taking this class, and I hope you enjoyed
it as much as I did. I'm looking forward to seeing your beautiful projects and hearing your thoughts
about this class. Keep creating and exploring, and I wish you all the best
in your artistic journey. So see you next time. Bye-bye.
 Phuong Lempinen, iPad artist| Surface pattern designer