

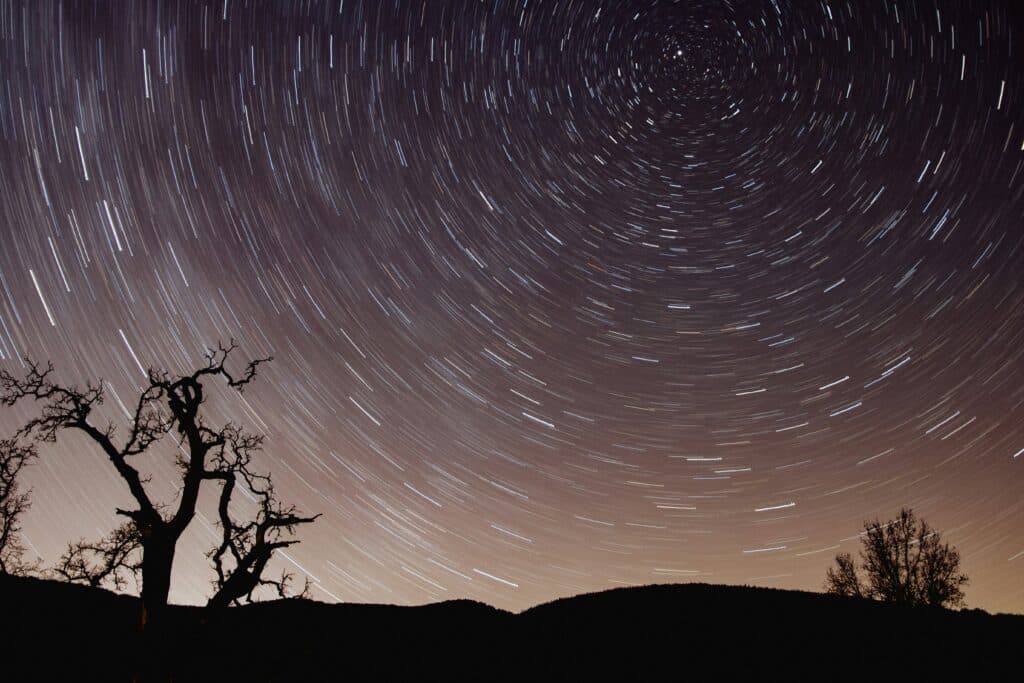
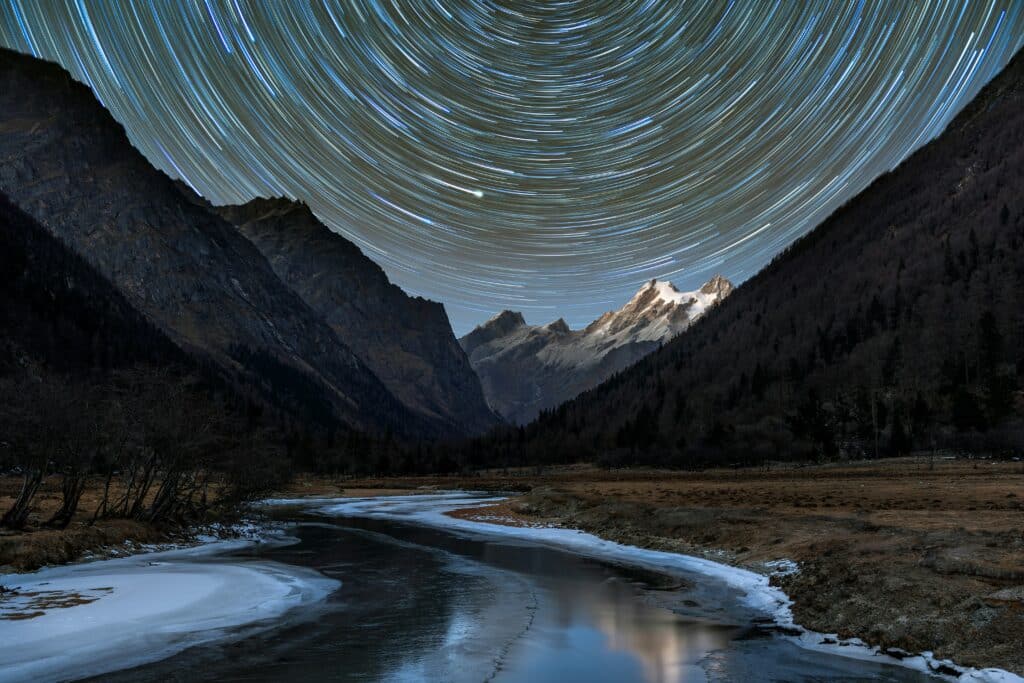
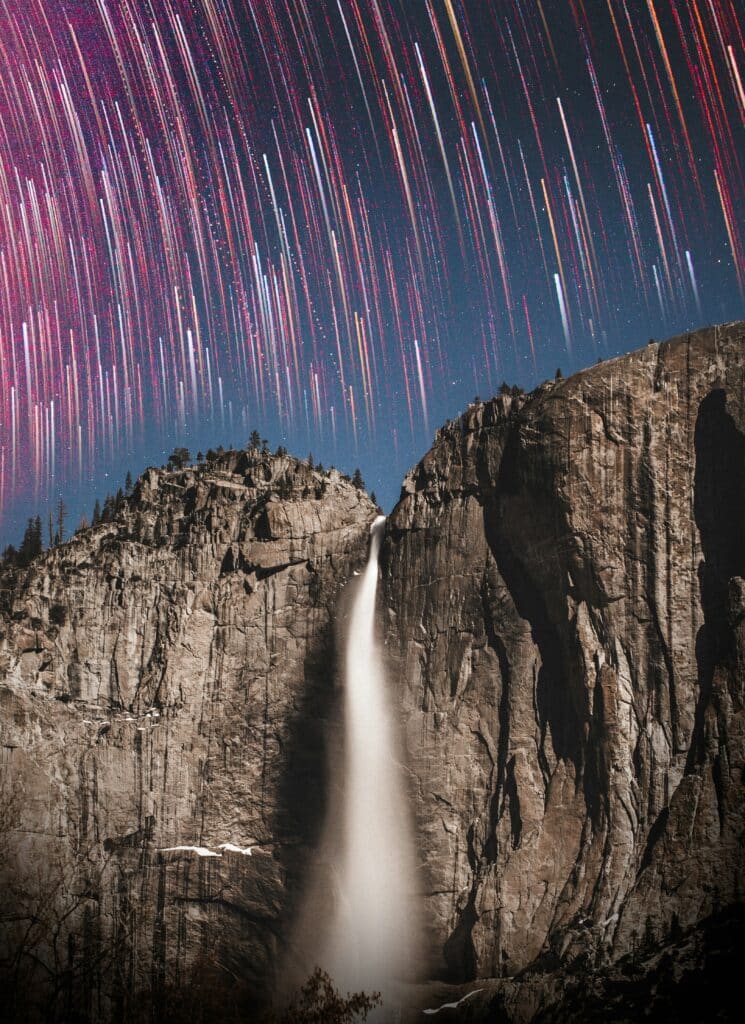
Star Trail Photography: What It Is and How to Do It
Images of the night sky are already gorgeous. If you’re a little more patient, you can capture even more wondrous images created by our planet’s rotation.


The New Zealand Maoris believed the stars were the souls of lost warriors with the brightest being those who vanquished the most enemies. Meanwhile, the Chaldeans supposed that the stars were little lamps suspended by strings and controlled by the angels. A few small tribes in Asia thought the stars were the children of the moon and the stars. Today, most people already know that the bright lights shining in the night sky of star trail photography are huge celestial bodies sitting thousands of miles away (or more!) from Earth.
What is Star Trail Photography?
While you’ve already discovered that astrophotography and its subgenre, star trail photography, are capturing more than the imaginings of the ancients, you may not know exactly what night sky photography entails. Star trail photography can often feel overwhelming for new photographers because it can require some extra equipment and knowledge of exposure time, camera settings, and those heavenly bodies that appear in the night sky each night.
Since star trails are photographs that capture the movement of the stars using long exposures, any curious astrophotographer can master the skills required to shoot those bright balls of light. Armed with the right camera, lens and a few accessories, you can take any knowledge you already have about photography and use it to transform yourself into an expert in how to photograph star trails.
The Equipment You’ll Need for a Successful Star Trail Photography Mission
As a part of night photography, star trails need to be shot with equipment that is capable of letting in enough light and keeping the camera very still for a prolonged period of time. If you’ve ever tried to take a picture of the night sky on your cell phone, you’ve probably noticed that the moon looks like nothing more than a bright light in the sky. This is because your phone camera isn’t strong enough to take in all the details it needs to. With the right star trail photography equipment and tutorials, you’ll be on your way to taking crisp images that will make you feel like you’re standing right in front of a beautiful night sky.
How to Choose A Camera for Star Trail Photography
Any DSLR camera with manual mode is a good place to start. Popular choices include Canon and Nikon. If you’re looking for a camera specifically for star trail photography, try looking for cameras that have strong low-light and high-ISO performance to combat light pollution, even in a seemingly dark sky. A camera with a built-in intervalometer will also be helpful, but you can purchase an external one if yours doesn’t already have one.
When trying to capture the starscapes, your camera settings can vary depending on the night’s conditions and the camera you use. You will usually use an ISO between 400 and 3200 depending on the existing light conditions but you’ll likely get the best results—think colorful stars and a crisp night sky—around 1600.
Picking the Right Lens for Your Camera
You can shoot star trail photography with a wide range of lenses, but the best will be a wide-angle lens between 14mm and 24mm and an aperture of at least f2.8. This will not only help more light get into your camera, brightening up those far-away stars to give you a more dramatic nightscape.
Bringing Along Some Extra Accessories
Some camera accessories aren’t always necessary when shooting star trails, but they will definitely make your life easier when standing outside on a pitch-black night. If your camera doesn’t already have a built-in intervalometer, you should consider investing in one. An intervalometer will connect to your camera and help you take the long exposures you need for stunning star trails.
Before intervalometers existed, photographers would let their images expose for hours at a time. But, this would usually lead to a final image that was either blurry or overexposed unless they were in a place with no night pollution and a new moon. With an intervalometer, you can take multiple longer exposure images right after one another at the exact same settings, which you can combine during post-processing using apps such as StarStaX, and Adobe Lightroom or Photoshop.
A sturdy tripod is key for clear, high-quality long-exposure photography. The less your camera moves, the better your photo will turn out and a tripod will keep your camera as steady as possible. If it’s a windy night, consider using a sandbag to weigh down your tripod.
Some photographers experience their lenses fogging up on cold or humid nights. To avoid this, you can purchase hand warmers or dew heating strips, which will help your lens stay cozy and insulated. Finally, extra batteries and enough space on your memory card will also ensure your night with the stars goes as smoothly as possible.
Camera Settings and Photography Tips to Know for Star Trail Photography
Technically, you could already be ready to head out and shoot for the star trails with everything you’ve learned so far. There are a few extra star trail photography tips that will help ensure your pictures of Polaris and other celestial subjects turn out well.
ISO Settings
ISO is one of the most important settings when shooting manually. Standing for International Standards Organization, ISO refers to your camera’s sensitivity to a light source. The lower the ISO, the less sensitive your camera will be to light and the higher the ISO, the more sensitive it will be. When deciding the ISO for night photography there will always be a careful dance between letting in too much and not enough.
Since the stars will always be moving within your image, you have to make sure your camera lets enough of their light in before they move to another spot in the sky. If not, your image might end up looking more like blurry colors in the sky, rather than the intense circular lines you’re expecting. Being able to capture the brightness of the stars is why you should shoot with a higher ISO starting around 1600.
This is also part of the reason why star trail photography on an iPhone is really difficult. The ISO of an iPhone camera can’t be adjusted enough to let in the light you need to get a photograph where the stars look just as bright as they do in the night sky. You’ll usually be able to make out the stair trails but the quality of the photo will be pretty low.
Exposure Settings
Three elements affect the overall exposure of your final photograph. Exposure is the amount of light that reaches your camera and is affected by ISO, aperture and shutter speed. Aperture refers to how wide the opening in the lens is. A larger opening lets in more light, and a smaller one lets in less.
The largest opening is the lowest aperture, or f-stop, value, f/1.4, which lets in a lot of light and provides a very thin depth of field. The smallest opening is the highest aperture value, f/32, which lets in the least amount of light and has a very large depth of field.
A fast shutter speed lets in less light, and a slow shutter speed lets in more. Shutter speeds between 20 and 90 seconds are ideal for taking pictures of star trails and should be combined with an aperture value between f/2.8 and f/5.6.
So the perfectly exposed star trail image should be between 800 and 3200 ISO, and then you can adjust the shutter speeds and aperture values as needed.
Mobile Photography Settings
Earlier, you learned that taking star trail photos on mobile phones is difficult, but that doesn’t mean it’s impossible. You’ll just need an app that will help your camera take multiple long exposures in a row in the same way an intervalometer would.
To photograph star trails on an iPhone, you can use apps like NightCap or StarryCamera2. Within the app, you’ll be able to adjust your exposure and the intervals you want between each photo. With a trusty phone tripod, you’ll be ready to take some pretty cool star trail shots.
It’s Time to Shoot for the Star Trails
Your camera has been prepped, your settings are set just right and you know some of the most important tips and techniques. Like any time of photography, you will learn best on the go. Over the next month, try going out a few times to shoot star trails. Soon enough, you’ll be shooting bright stars just like the pros!
Related Reading
Calli Zarpas
Producer & Writer by occupation. Ceramicist & Newsletter Editor by avocation.
Try Skillshare for free! Sign up for a 7 day free trial today!
Get Started- Unlimited access to every class
- Supportive online creative community
- Learn offline with Skillshare's app


