Transcripts
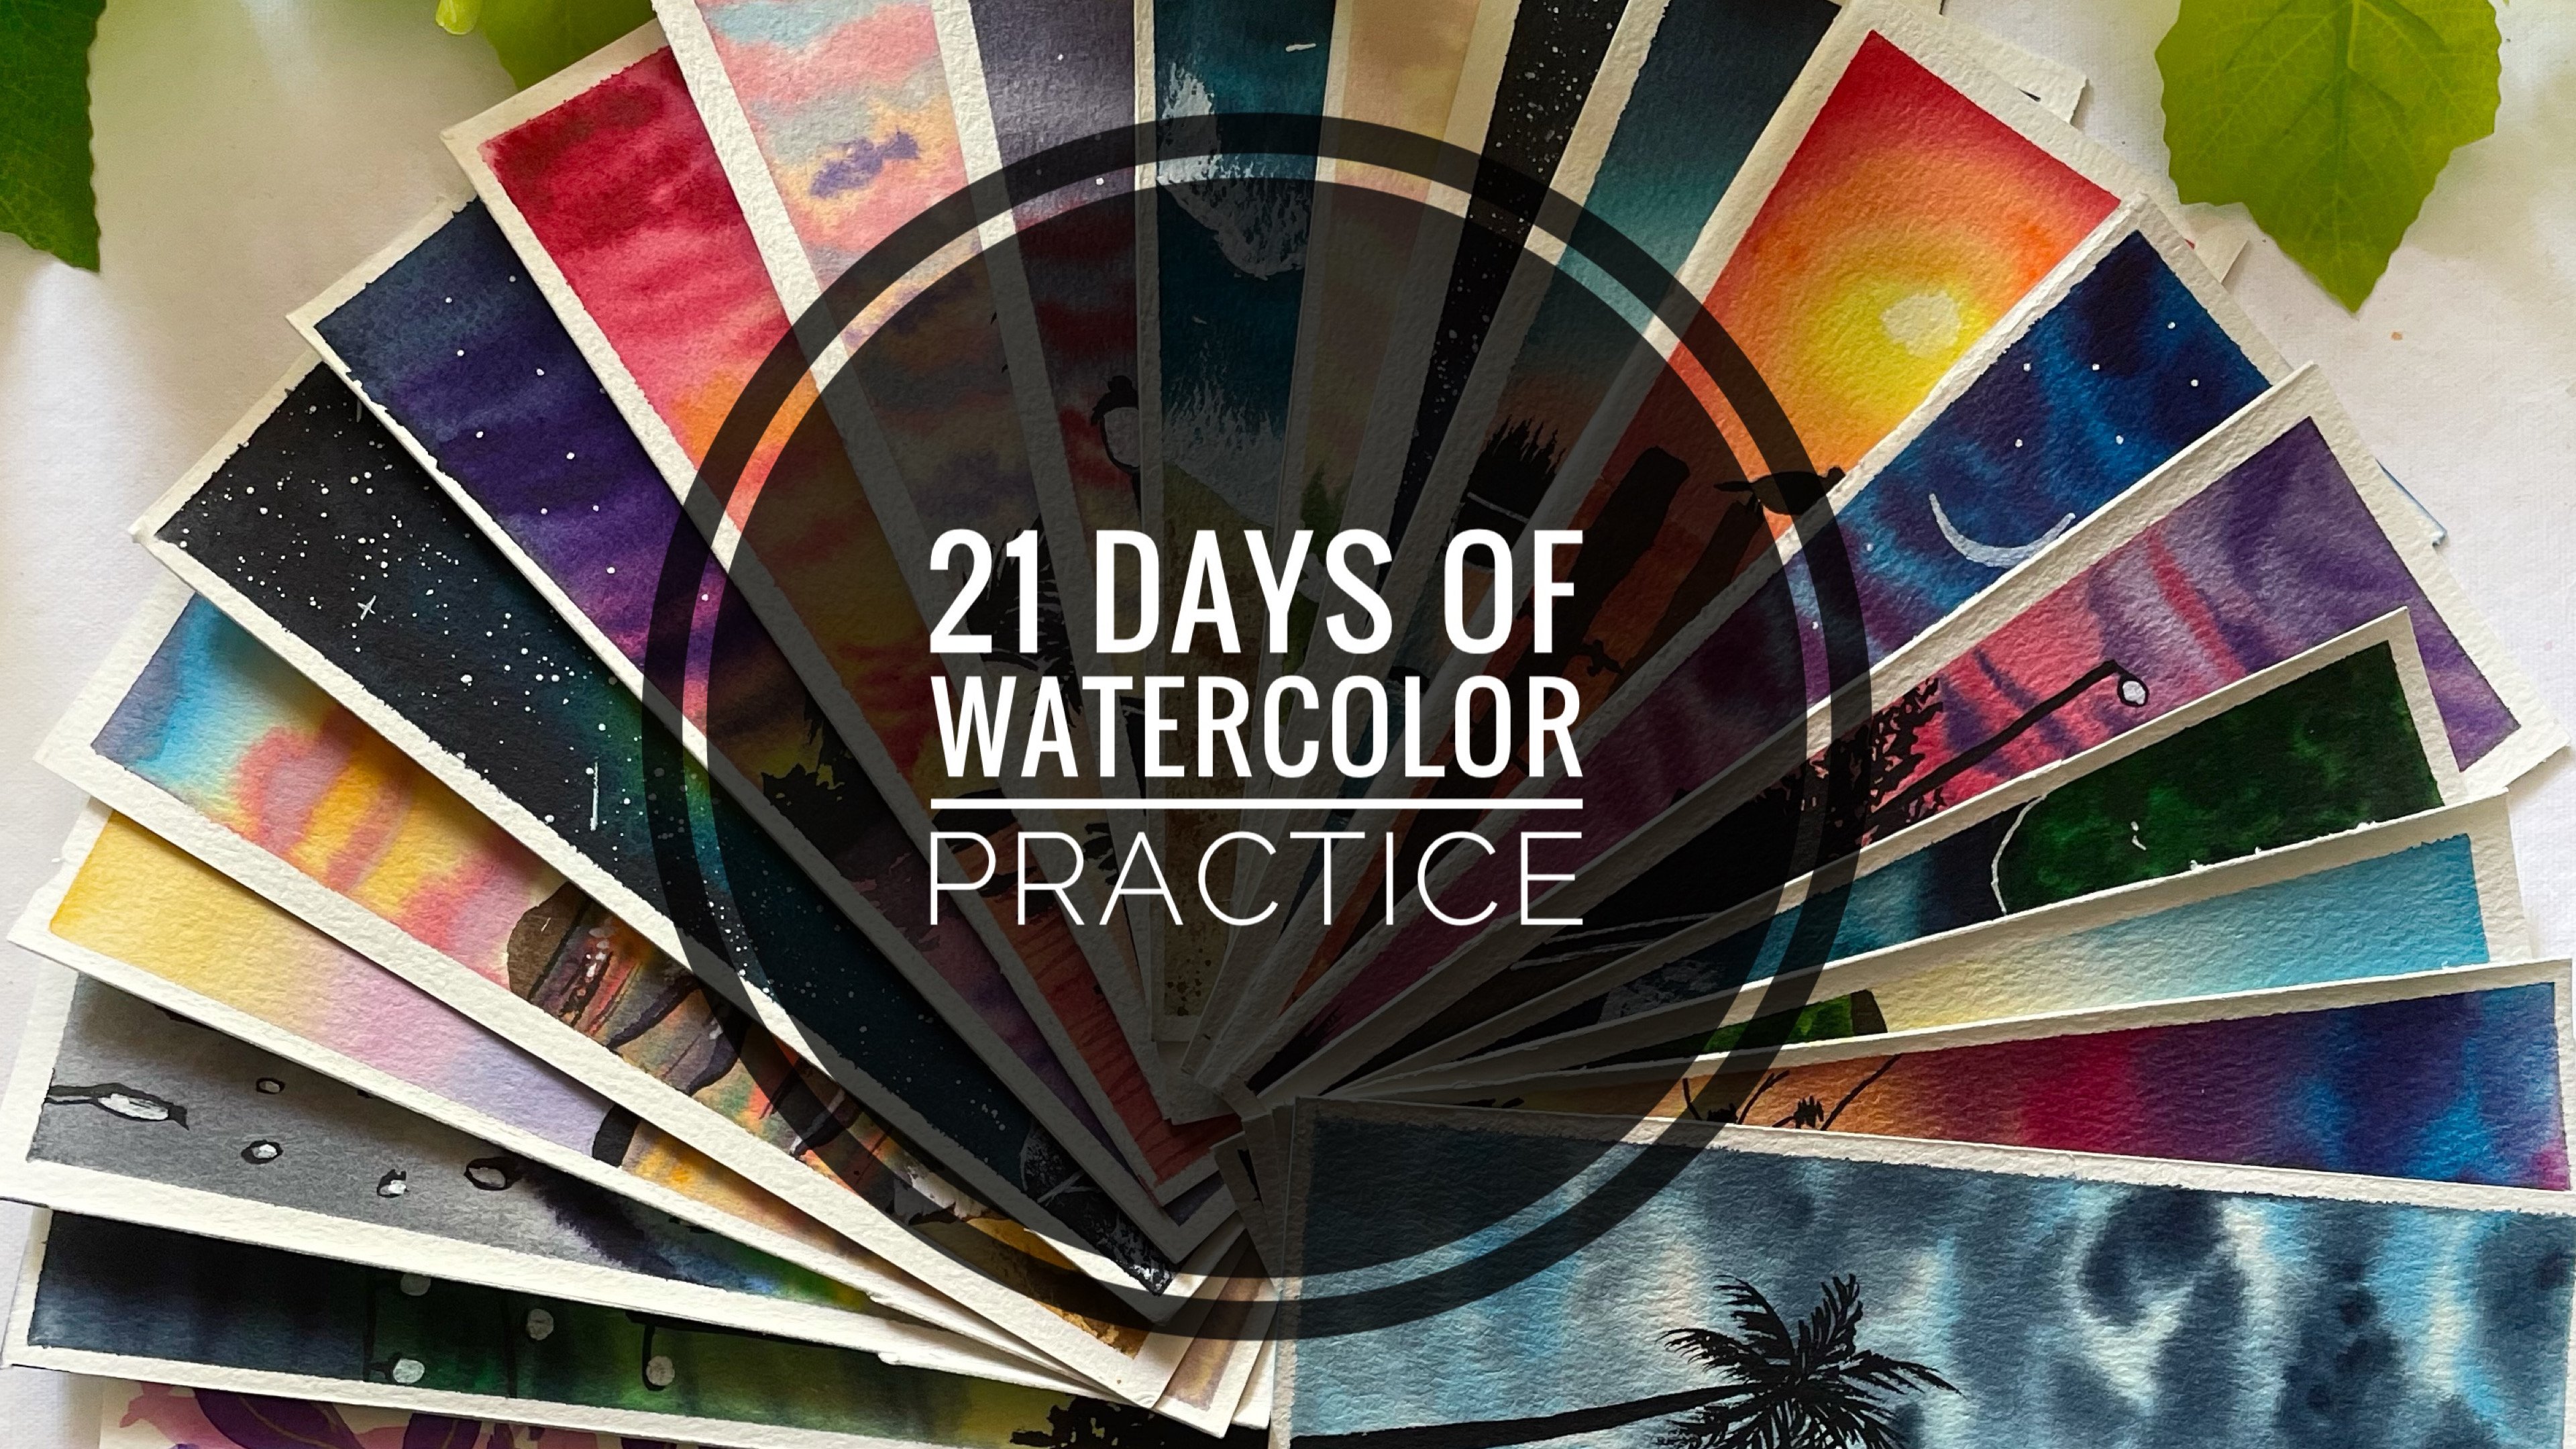
1. Hello and Welcome Back: Hello and welcome back everyone. Am a mushy and artist and an art educator from India. I put up my paintings on Instagram under the handle, creating from the heart. After launching my 21 days to watercolor class, many of you had been asking me how to keep your people bed for a longer time if you are using or 25 percent cotton people or rather, I had been indicating a lot about using the riveting technique. And many of you wanted to know how to use the riveting technique. So that is what has led me to create this very small class. Make you understand the concept or rather that technique of reweighting. In this class, we will be doing these two simple class projects wherein we will be using the riveting technique to add the depth. And Leo to ask guy is in this class projects, I will walk you through all the materials and then I will guide you and make you understand the right way of doing the re-weighting technique. And you know, the wrong way that should be avoided by losing the re-weighting technique. I have kept the class project pretty simple for this one because my main focus was to use the reweighting technique to add the Leo's and give up in thing. I would love all of you to understand this riveting techniques so that even if you're using a 25 percent cotton paper for your watercolor paintings, you know how to add in the Leos if your paper dries in between. So then let it dry completely and add depth. Once it is completely dry, then use the re-weighting technique and add the depth. If you remember, in my previous watercolor class that does the watercolor pathway class, in the class project 5, I had accidentally messed up my CAD, wherein I used a riveting technique to correct the mess that I created. So this reverse thing technique can also be used to correct your errors and make it look perfect again. So I hope this class will be helpful to you to understand the riveting technique. And I would love to see you guys join me in this class ahead and learn this technique with me. So come join me in the next section where we discussed all the materials and move forward to the technique and a final class project. I hope to see you join me.
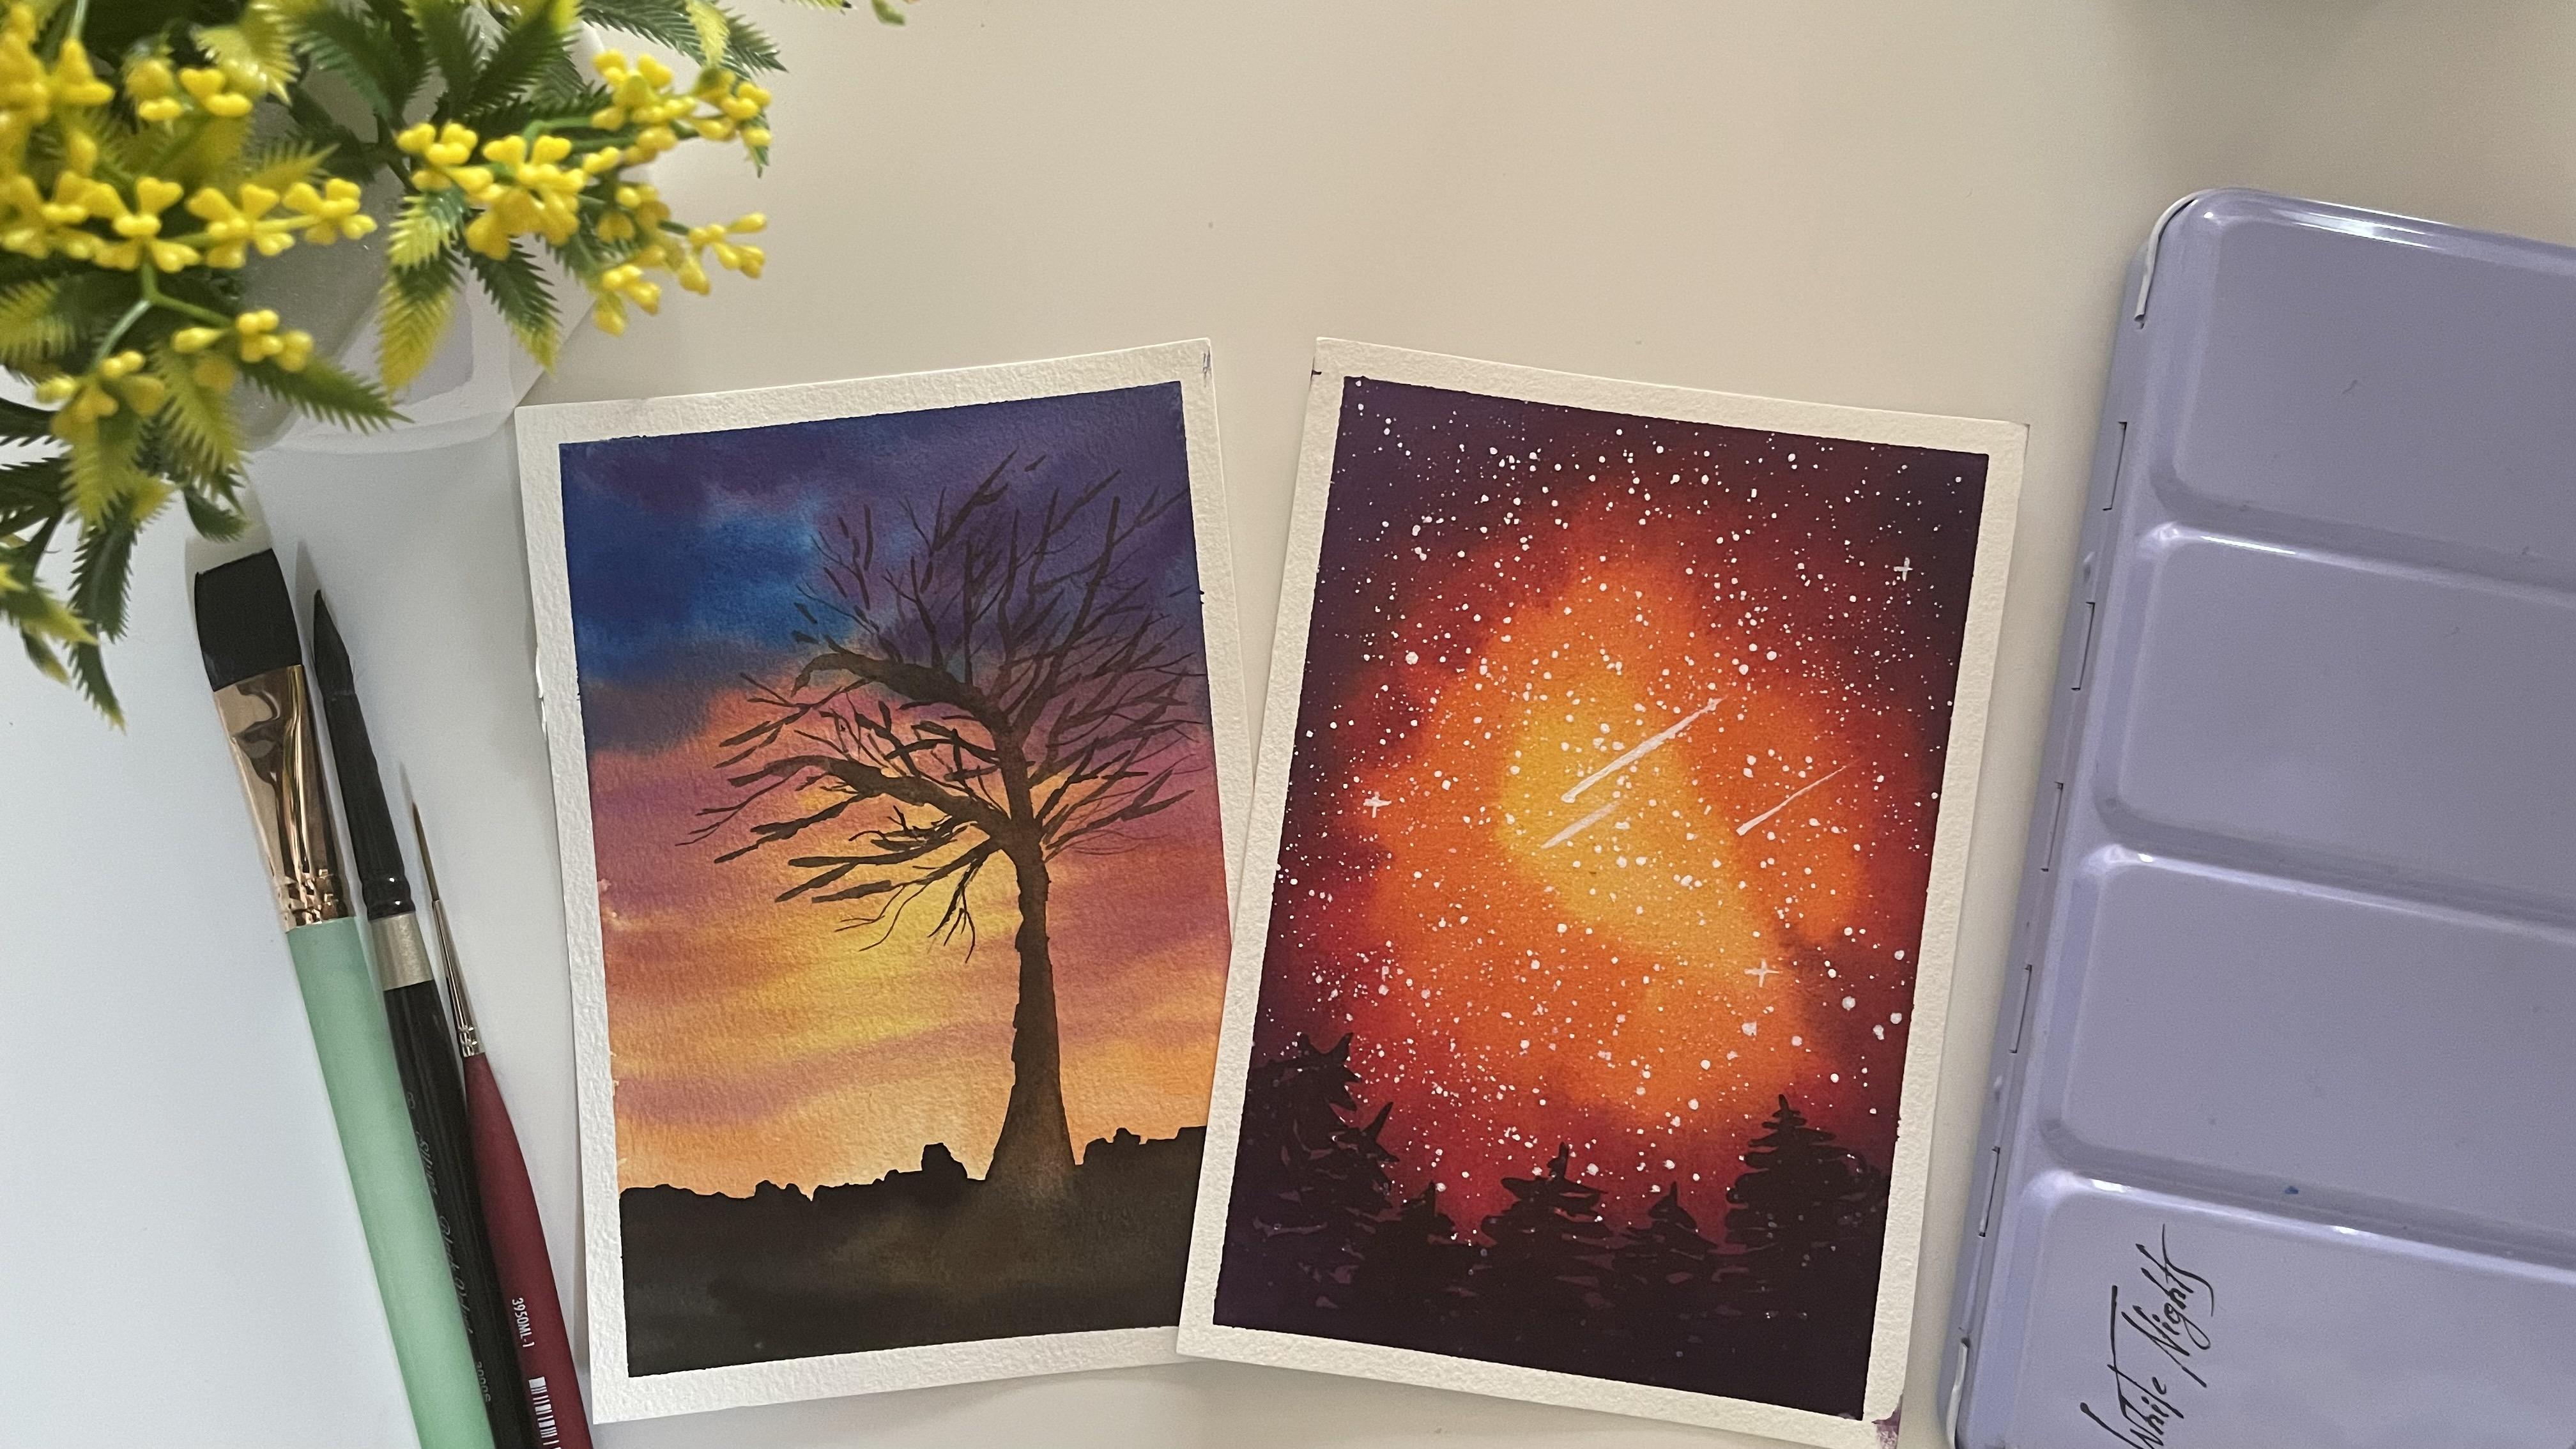
2. Materials Required: So let's have a look at the materials that we will be needing for this one. I will be using this Gong academy level watercolor paper pad for my final class projects and desist, seven by seven inch by 4.9 inch. You can use any size of paper that you are comfortable with. But I would recommend a 300 GSM, 100 percent cotton paper. The brushes that I will be using for this class is these five brushes. So these three are from the brand Princeton. These are Princeton, Neptune, Princeton and Neptune round brush. And this is Princeton velvet touch liner brush. And I will be using these two brushes from the brand silver black velvet, round brush, size eight and size four. I will be using my White Nights watercolor set. I will be guiding you through the colors that we will be using for the final class project. You will be needing two jars of clean water, don't. You will be needing a masking tape to tape down. You will be needing whitewash to splatter. Some stars will be needing either a rough clot or some tissue paper throughout to clean your brush you for using the riveting technique. So this is all about the materials that you will be needing for this simple class. So grab all the materials and see you in the next section.
3. Understanding The Paper - Part 1: So we'll first begin that testing on the brain in 5% cotton paper or a low version. Now, I have laid down a small box and mask it with the help of a masking tape. Now, I will first begin vetting this area completely with water. So there I have applied a clean quarter 4. Don't do this. People will begin applying the colors and see until How long can be, you know, apply the gallows without rewriting this paper. I'm using very random kalos engender and just trying to understand until what Leo is, does this people stay with it? Now, I'll even pick up some clips in Carlo. Now if you notice, my paper is beginning to dry a bit from the edges in the center. It's still a little right, but from the edges, it's beginning to dry from this edge if you see. Okay, so let's see how quickly can add more layers. Remember your, I'm not waiting between the layers and I'm quickly adding some evil to add more of them. But generally, even if the vapor little will be unable to add much layers. If you see now on to the left side, it's almost becoming too dry. And the right side is still red because I was adding the ozone layer. So because of the water again and again, this is still beginning to be ready yet. So you see, because I kept adding Leo's, it was true meaning red, but you're on to the left side. It began to die very soon. Okay, Now this viewer adding continuously layer on layer for it remained wet for a little time. Now let's test the same thing. 10, 300 GSM, 100 percent cotton paper, and see how long does that Steve it. So this remain wet for almost like two to three minutes. Okay, Now let's test a 100 percent cotton paper and understand the same thing.
4. Understanding The Paper - Part 2: So I have a 100 percent cotton paper. I have a block ready. Almost done applying a clean quote of even water. I'll begin. Now you're also, I'll begin with the same colors and keep adding wheels on layers and shift do the same colors as I used in the previous one. Now, Just as in this one, after this new era of crimson, I'm going to begin to start by adding Leo's on the left side so that we can understand the paper. So now majorly on the right side, I will be adding the remaining colors. You can see on a 100 percent cotton paper, despite I'm done adding all the layers on my right side. My left side is still wet, which was not the case in case of a 25 percent cotton people, the left side had almost dried by then. But in case of a 100 percent cotton paper, if I still wish to apply some color, it will merge very easily, but was some excess water, so sorry, focused. So you see despite applying the color Your, it will more easily. So this, in case of a 100 percent cotton people, the people stays wet for a longer time, which is not the case when it comes to a 25 percent cotton paper. Hence to debugging technique comes as aid while working with a 25 percent cotton people or even on a 100 percent cotton paper if you wish to add more of the depth to your painting. Okay, so now in the next section, we'll begin to understand how to use the riveting technique. This was understanding the people how long it stays bed and how you can use it. So in the next section, we'll begin understanding the riveting technique and how to use it.
5. Rewetting Technique- The Wrong Way: Now, to understand the re-weighting technique, Let's use the same exercise that we did previously. So now if you see in this painting, your, I do not have a sense of depth because the colors are all march together because of the layering on learning. And it just looks like a cluster of a populous color here. Okay, So to add depth to this, let's use this as obese and do the re-weighting technique and give it a debt. So what I will be doing is I will just use my flat brush to remove it. Joe. So phase first. Now, understanding how to live at the surface is the important question. So I will try to leverage this in the wrong way and show it to you and then onto the 100 percent cotton paper, we even learn the right way of reverting. Okay, so let's go with a wrong way right now. So this is, this area has completely dried, okay? It's very important for your painting to be completely dry before using a riveting technique. Now see, to rewrite this, I have picked up water and I'm applying so much pressure on my brush and I'm trying to leave at it. Can you feel the pressure that I'm applying on my brush? And also if you see, I'm moving my brush left to right as I want without worrying about the emotions or any movement of my brush. And now as you can see, the collection of the color that is happening. Okay, so basically what has happened is the base layer kalos have thought reactivated and they have all mashed together and form this color, which is a mixture of all the colors. So you are, if you see my brush has picked up all the colors. And now it has a populists show, Monday populists color actually, which has got collector. So this is the wrong way of reverting file reverting. You have to be very careful to not apply too much pressure on your brush. You have to rewrite it with a very gentle hand. After every stroke that they see event from this end to this end, I'm supposed to pick up my brush, clean it and water, pick up fresh water, and then go to the next layer of riveting. That is the next true. So that is the important way of understanding how to remove it. If I continue Live from left to right in one stroke, can you see the base neo color which was actually there is completely gone. All the colors have mixed. I have formed a new color onto my brush, which is a muddy purple tone. Okay, So this is what happens if you revert it in the wrong way and that is applying too much pressure or moving your brush continuously from left to right without lifting and cleaning after every row of riveting that you do. So first off, reweighting is you need to revisit with a very gentle, very, very gentle hand. Try using a because it's flat brush, whichever largest you, I can still revert in the correct width with this smaller brush also. But preferably, if you have a bigger size flat brush, and if you are working on a bigger area, it is recommended to revert to the topic of flat brush. Third important thing. Do not run your brush continuously from left to right without cleaning your brush after every stroke. So these are some of the important depth to understand way riveting in the correct way. Now, in the next section, we'll understand the riveting in the right way.
6. Rewetting Technique- The Right Way: So if you see the rewriting in the wrong way, the colors have faded and there is nothing definite, no strokes are visible. The kalos have faded so much that nothing is visible which follows we had used. Whereas the original Luke was somewhat like this. So diverting in the wrong way led to this. Now make this background has dried and we will learn deviating in the right way. So I'll use the smallest size blood pressure only to remove it. So now I'll begin deviating in horizontally. Okay, so I will begin applying water with my same smaller-sized brush. And let's understand reverting the right way. I will keep a rough clot and run off my hand all the time so that every time I'm done with one room, I clean my brush that is dab off the color that gets lifted off and then pick up freshwater. So let's begin. I have picked up freshwater very gently this time. I applied the first true. I dab it off so that I do not have any excess water. Now, again, I picked up clean water, lignin, just right next to that one. Again, I dab off to color, pick up fresh water and continue the process till the area that you want to revisit. My hands are being very gentle. If you see I'm not applying any pressure to the brush, I'm almost done deviating the entire area. So can you see I have reverted the entire area for DACA laws are still intact and the base layer is not lost as it was in this case. The base laws were completely gone. You are, the base layer is intact. The kalos are not launched to each other. That means in the base layer, the blue is still there, the pink can still be seen. The orange and the yellow is still being seen. So the base newer has not lost its element or it's look, okay, We have just driven area. Now, let's begin adding layers to this. So maybe I want to add a poeple touch to it. So I have picked up some color onto my brush and I can just lay down. So can you notice the kalos are getting the soft edge? They're not having the harsh loop because my background is again bet the base colors are being there. They are not reactivated and they are retaining its property wherever I'm not applying the next clear after revisiting. So this is how you prevent and even after the wetting, this paper will stay wet for a longer time. So if I want, I can still keep adding more of the Leo's. To see you can add some more depth of blue to it. So you see the purple and the blue have most well with each other because the paper was bad. The orange is retained. Your the orange and the purple still mix together did not form any muddy colored here. That is the reason I chose these colors and did not paint anything in a definite way, and just painted loosely randomly with random colors to show the different properties possible. And also being a 100 percent cotton paper. Even by doing a simple reverting the paper and still wet, I can still keep working more with it or give more depth to this. So say pick up some indigo color and you see I'm still able to add depth, the Carlota spreading when it's remaining wet. And I'm evil to add the details as I want. So that is why it's important to use a 100 percent cotton paper while working with watercolors. And if you want to walk for a longer time. And also you remember the previously, it was completely dark your and now I have a couple radiation or light blue tone to it. Okay, so that is why it's important to understand the riveting technique the right way. And this is the right way of doing the re-weighting technique that is using a flat brush with very gentle hands. After every row of applying freshwater, clean your brush, pick up fresh water for the next row. Do not run continuously from top to bottom with just one brush or rems. As we got in the previous one. This effect, it will turn like this, which is not what we want. So these are the important tips for doing the riveting technique that right, we, and we will understand this riveting technique by a few Class Projects that even be doing. After this. I will see you guys in the class projects and give it a try understanding this reverting to eat much better with the class projects.
7. Class Project 1- Galaxy - Part 1- Base Layer: So let's begin with our first class project. We will be being dq of any simple galaxy and try to understand the riveting technique and give a depth to our galaxy. So I have made the book Deep down and I am using the Mohonk academy level seven inch by four by nine inch watercolor pad. This is 100 percent cotton, 300 GSM people. I have discussed all of this in the materials section. You can revisit if you want to know everything about these peoples and the colors that I'm using. Now for the Galaxy this time, I will be using sunset colors. That is, I will be using shades of yellow, orange, pink, and red tones. So I will be painting a warm kind of a galaxy and I will not be adding much elements to it. Maybe at the end we may mountain range at the bottom. But my main focus is to make you understand the re-weighting technique. Hence, I'm keeping the class projects also very simple so that we can understand the technique rather than the firm position right now. So I'll begin by first G vetting might be both for the force here. So I'm using my Princeton wash brush three by four inch. Okay, and let's begin vetting the entire paper first. So I have the entire also faced with. Now, I will first begin with a cadmium yellow color. You can use any bright yellow dot is available in your palate. And leaving a little gap in the center wide, al please this yellow color. Next, I will shift to my orange color. You can use vermilion color or an orange color as available in your palette. Since I want to paint a galaxy, I'll begin moving my sheet in different angles. So type the colors merge velvet each other and they have already natural merging with each other. Now the next sheet that I'll be using as a Carmine Carlo, you can use a scarlet color or a pinkish red, whichever is available in your palette. Or you could even use or reddish tone if you know or pinkish, it is not available in your palette. I'm just trying to get the Carmine color or little and do the orange color. If you notice now, the colors are not that vibrant because I have just applied one layer. And I will be the vetting the area and then giving the second layer. So I'm not giving too much depth at present. Only. Now I'm shifting to my violet color. If you do not have a violet color, you can use a purple color. And even if you do not have a purple color, you can mix in any of your red and blue and form a violet tone and use that color. So now on the edges, I'll try to apply the violet color. Now, if you notice, since the violet color, most with the orange color, it began to form a little muddy. Don't. So be very careful about these little things which Collobert, which begins to form a little muddy color. Now, this was my first layer. Now I will wait for this layer to dry completely and then we will add another layer which will add the real depth to this painting. So let's wait for this to dry and then begin painting the next video.
8. Class Project 1- Galaxy - Part 2- Rewetting: So my first layer has dried completely. If you can see the kalos have died or Lytton done then the original Kahlo. Because always remember watercolors dry or tone lighter than the actual column when they are wet. So now this is not look like a vibrant galaxy. So to add depth to this, we will be using the shading technique, okay? And I will make this more vibrant. So I'm using my seam smallest size flat brush, and I will begin G vetting. Okay. Remember to have a clot to clean your brush. Use clean water. The gingiva thing. Now, also remember to not have excess water like I just had a little bit your okey. So if you feel you have excess water, brush dab off the excess water, then give the obtains Tokyo. Can you see moving in one direction only? The area is getting vet, the base layer is staying in bed. So you see, I can still see the white gap despite revisiting the idea. The yellow, orange, pink, purple, everything is visible as it is, okay, knocking off a test lost. It's basically a property. Now let's begin applying another layer of calories and make this galaxy more vibrant. So I will again begin with a yellow color. Again. Since this is a galaxy and I want to give it a little natural look, I will be moving the paper while applying the color in all directions. Now near to the yellow, I'm playing the layer of orange again. My people was a 100 percent cotton. I could have done all of this vial or, you know, in the first layer itself. But doing this in the second layer adds a sense of depth to my painting and also makes it move I print. And we can understand this technique also. Now let's shift to the Carmine color. I'm just trying to move my people in all direction along with painting so that the kalos flow naturally and form of clean blend or an actual blend actually. So I purposely have dropped this little Carmine you also that it seeps in Quito, yellow and the orange and even draw a little hole on the top, maybe moving it in all directions. I still feel the orange to be a little move I print. So I'll again add a layer of orange. Now you're OK. So now my paper is wet. I can keep adding new hostilities bad. And maybe allele all of the yellow color again. Tom applying it more neon to the orange colors so that it blends and flows naturally. And lastly, at the corners. And lastly at the corners, I'll apply the violet color. I feel I need to listen more of tocar main color. So I'll just start a little car main color, blue. This time, I will admit it seep at the bottom. Now, if anywhere you feel that there is excess water or excess paint, you can just pick it up with a damp brush. So just applying some little more carmine color. You're at the bottom near to the VNET. So you see using the riveting technique, I could keep my people read font double the longer time then what it would have been originally, because equity people are dry completely. So the pontine fibers were already a little bit. So the second load remains vague for even much longer time than the previous layer. Because of that. You remember the first layer that we had that was so light and not all vibrant. And now the layer that we have reached it so vibrant and so of all the colors that we have used. So this is, it will wait for it to dry completely and then add some details to this.
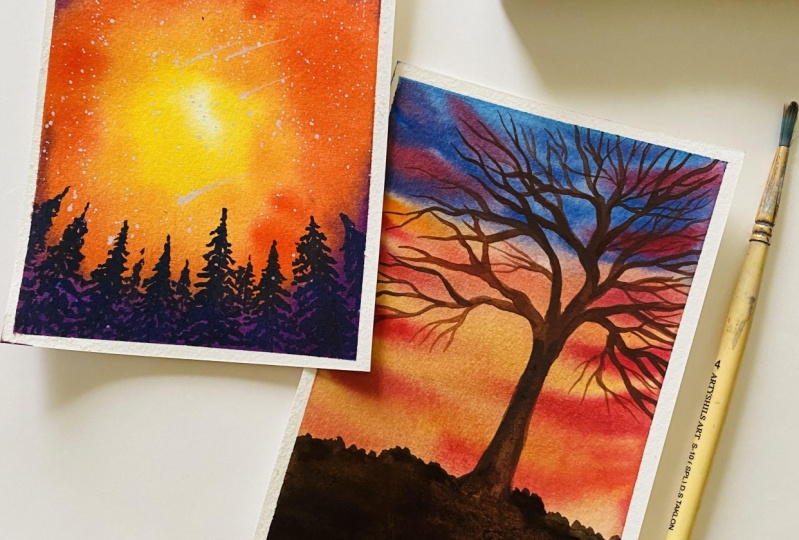
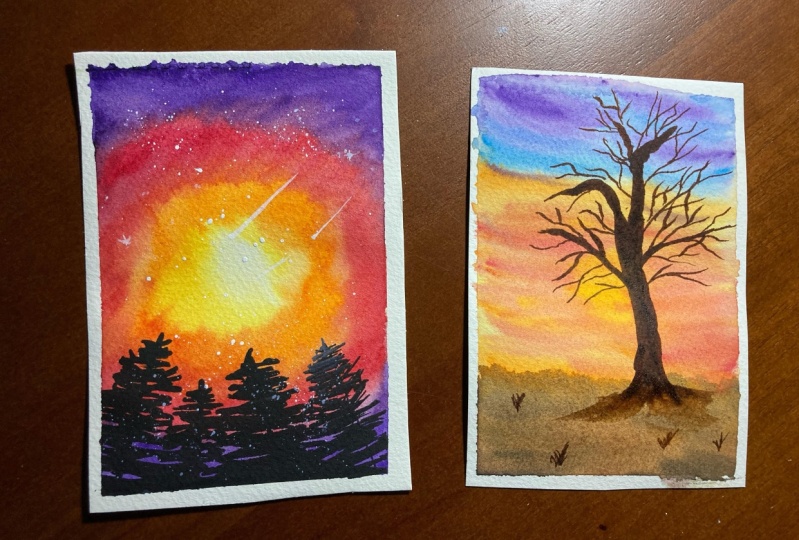
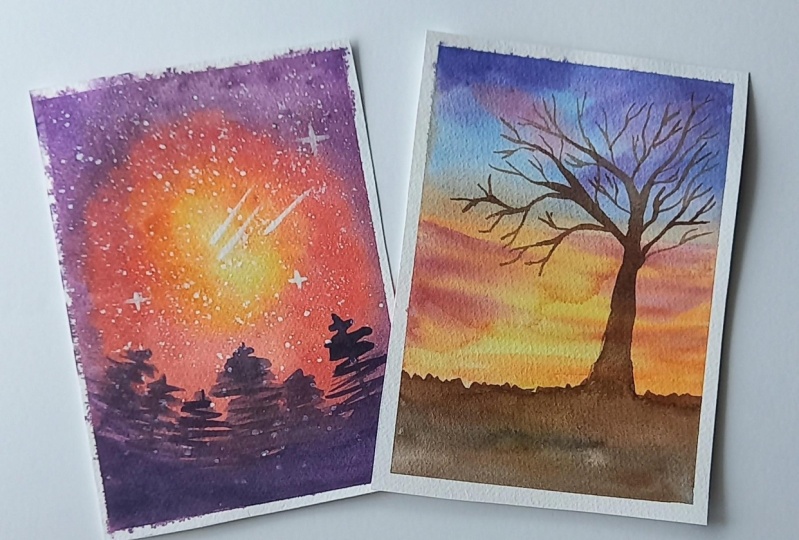
9. Class Project 1- Galaxy - Part 3- Final Details: So my second layer has dried completely and we can see how I print and how tau this galaxy looks now. And it is giving that warm looked at we needed. So let's begin splattering some stars. So I have some white gouache onto my palette. I have quoted or you don't right, consistency to splatter by just adding a few drops of four dots. And now using the brush, I've always flattering some stars. You can either splatter the stars using your fingertip your and dropping it onto the brush. Or you can use another brush and dab it on to this brush like this, and splatter the stars, whichever way you are comfortable with. But remember, there will be a mess around the remaining area. So be very careful. And let's platter a lot of stars now to make this galaxy look natural with this task. So you see where I'm splashing with another brush, I get very tiny stars. So that's the reason I'm using a mix of both does plugging techniques to get varied stars into my Galaxy. Some small, some big dance clutching the stars and you can see the mess around. Okay. So either you could lay down a rough lot order rough sheet and you know, avoid the mess or you could thin and afterwards as you prefer. So these money are the stars that I wanted to add a lot of them into my galaxy. Now, I will also be adding some shooting styles and some shining stars. So that was it for the stars. But now let's add some fine g's at the bottom area. This time for the pine trees, I will not be using the black color. Instead, I will be using the violet shade in our very dark consistency. That is, I will be adding very less of water and maybe add a little pinch of black to this to make it even darker. So this will go a lot more along with the painting rather than using plain black color to add though of findings. And I will be adding very loose pine trees, not the detailed ones, so quick ones, but remember, pine trees should actually look in the shape of our triangular after they have been dead completely. So that's the major important thing, just to remember. I'm using my silver black velvet size eight brush. This has a pointed tip, so it's made painting these branches easier for me. If you know, tests reaching the bottom. I'm just filling it with DACA alone actually, and not keeping it a lot detail. So I'm done adding these loose buying GCE. Now let's wait for this to dry completely and remove the masking tape and see our final painting. Then. We are ready with our fourth class project, understanding the re-weighting technique. And this galaxy looks so vibrant and one just as I needed. And also adding these purple by increased, Better loop then just adding those plain black pine trees always. I hope you guys enjoyed painting this with me. I haven't seen a rise in the mix project where we will again be a warm sunset using the re-weighting technique and won't conduct class project. So see you guys in the next class project.
10. Class Project 2- Sunset - Part 1- Base Layer: So let's begin with our next class project. The colors that I've been using for this one are also all the warm colors. And I will be using my bright blue and violet color. So I will be using or Naples yellow order cadmium yellow, yellow, orange color can find color and blue color. And the violet color. You can use any notice sheet available, taxes or shade of yellow, orange, either a rate or a pinkish shade of pink tone or light blue. Hello, either acetylene blue order bright blue. And you can use a violet color or you could mix injured and blue to get the violet color. And these are all the colors that I will be using for my sky. Now let's begin by wetting the paper first for the first layer. So I'll apply a clean CTO for DOE. Applying a clean CTO photo, I have some cadmium yellow onto my palette and I'll begin applying the yellow color in the center area first. Now next, I'll shift to my orange color. And I won't add too much water this time. And I'll begin giving some strokes with the orange color to the sky. So I am very randomly giving these talks and not giving too many. I'm letting that yellow color also retain its loop. And the water medium, I haven't been doing some silhouette, so I'm not worried much about giving the details at the bottom media. Now, at the top area, I'll force lay down the bright blue color. You can use acetylene blue or any lighter blue. Now remember, when the orange and the blue March, they again form a muddy color. So between the orange and the blue, I'll leave a little white space and let the colors fluid naturally together. So that's the reason I have tilted my board. So that took a loss flow naturally and they have a clean blend. So I have this wild shape formed, which is the mix of the blue and the pink color. And I will just lay down some clouds here. Remember to not add any excess water highlighting these clouds. Now I'll shift to my smaller sized round brush. So I'm using my size four brush and using the pink tunes separately. I will add some clouds on to the orange area. Since I need them in our smaller or look, I am shifting to my smallest size brush. Again, you're also remember to not introduce any new water. So you see, I'm able to add all the details in the fourth layer only because my paper is a 100 percent quantum. But to use this in alleviating technique, method, I even now stop adding these layers and wait for the page to dry completely and then add the remaining details, veto or reweighting technique and using the second layer technique. So let's meet for all of it to dry at this level. And then in the next level, we will begin painting the details and add more details to the sky.
11. Class Project 2- Sunset - Part 2- Rewetting: So now my falsely has drained and I'll begin revisiting again. Remember the important things. Be very gentle onto the brush after FE stroke, pick up fresh water and give a fresh coat of water for the next Leo. Do not have any excess water on the brush. And keep doing the same thing till the area you want to leave it. Now main diarrhea as leave it there. And I'll begin applying Leo's to this now. So I'll begin with the bright blue color first. I will give enough depth of the bright blue color. Now with the orange color also, I will add in a layer of depth first. So just giving some loose strokes. Be careful because it will begin to fall muddy color there. Let's add some yellow also to make it by print. But be careful to not have any excess water onto your brush. So baboons takes us what DO either onto it off plot or the tissue. So always keep either of two things handy. I'll just lift some gallows humor and make it look a little Plato. Let's add some violet clouds. So I'll mix my pink and the blue color to form the violet color. Remember, by adding these clouds also, to not introduce any new water. So dab off excess water from your brush before adding these clouds. I will even be adding some pink clouds. Again, the key to not introduce any new water. And now using the tip of this same brush, I'll be adding clouds at the bottom areas. So majorly, just some simple strokes to add in details. And just a little more of the violet clouds. So you see just the refitting technique. I have been able to keep my people wait for such a long time now that I'm still able to keep adding Leo's and Leos to my sky. Okay, but I'll stop here and now wait for this entire sky to dry and then add facilitate the, the spin day.
12. Class Project 2- Sunset - Part 3- Final Details: Now my background has dried completely and I will be adding a tree silhouette on my right side. And at the background, I will be giving a black field kind of a look. Okay, so forth. Let's begin painting the G. For the t, I will be using the bond, our MOOC allo, and a little bit of black to add shading to this. So let's begin with the bond amber color first. I'm using my size 8 brush. But if your brush does not have a pointed tip or if it is too thick, you can shift towards smaller size brush. This will majorly be having a lot of branches and not much of foliage. Now in-between, I have picked up a little bit of the black color. And at one off the edge, I'm just giving in a small line of the black color to add depth to this tree. Now slowly just begin to add branches to this. Remember to read the branches. Some take some tin. And if CAR crash does not have a pointer, good. First add in the branches. Branches, then shift was smaller size, brush, pointed tip to add the final branches. So you see I'm trying to make it a lot match June that is very randomly adding the branches and leading movements of these branches. So you see I'm adding some final touches now. If you want, you can skip adding so many branches and keep the j symbol. But I want to make it local branch fitted GI. I'll shift to my size eight round brush. And at the bottom media, I didn't be again painting with a mix of black and brown color. So near to that tree I have picked up the bond amber color. So that is it. Let's wait for this to dry. If you want. You can even add in a few boats to use chi, but I believe it your own and read for it to dry and then remove the masking tape and see the finding painting. So this is our final sunset, which we found using the rebooting technique and adding the layers using the re-weighting technique. And you know, the re-weighting technique has given it another depth. I hope you guys understood the re-weighting technique and we'll be able to use it for the new European endings. Thank you so much for joining me in this class.
13. Thank you : Thank you so much for joining me in this class. I wrote this class was helpful for you to understand the re-weighting technique. Also remember, you can use this reweighting technique for correcting any small errors if you make in a small area of a painting, I have used this riveting technique and one-off might be risky. The watercolor pathway class bedroom in the class project, I had mistakenly spoiled my CAD and I use the riveting technique there to correct that area. So if you want, you can visit that particular section of MATLAB and see how I use the re-weighting technique to correct my errors. Even in the future coming class, maybe at certain places, I may be able to use the riveting technique and again, depict to you how we can collect our mistakes using the re-weighting technique. But I hope I present this class was helpful to you to understand the re-weighting technique, the Connect to be off doing the derivative, and how to use it to add depth. Along with that, I hope you guys enjoyed painting these two class projects with me. I would love to see your class projects into the project section of this class. And if you only put them up on Instagram, you can tag me. My Instagram handle is creating from the heart. I would love to reshare your creations they're creating. And I will see you guys soon with my next class. Until then, happy painting.
 Umashree Taparia, Artist, Art Instructor, Entrepreneur