Transcripts
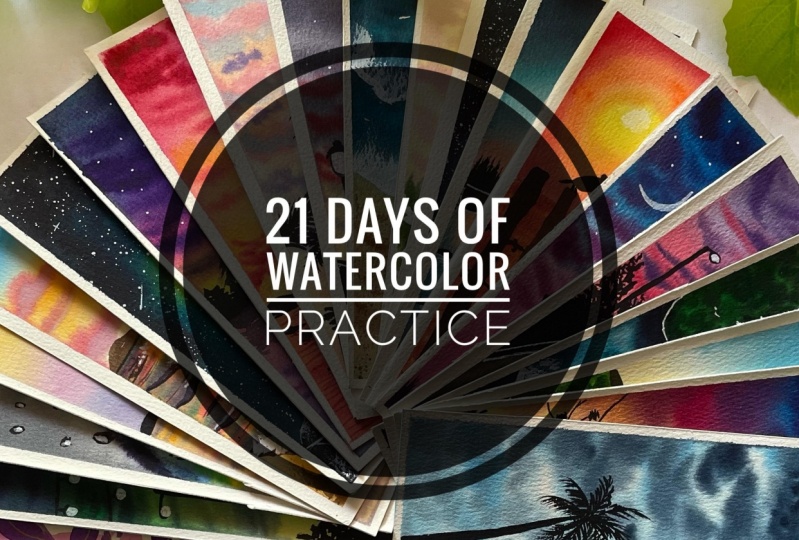
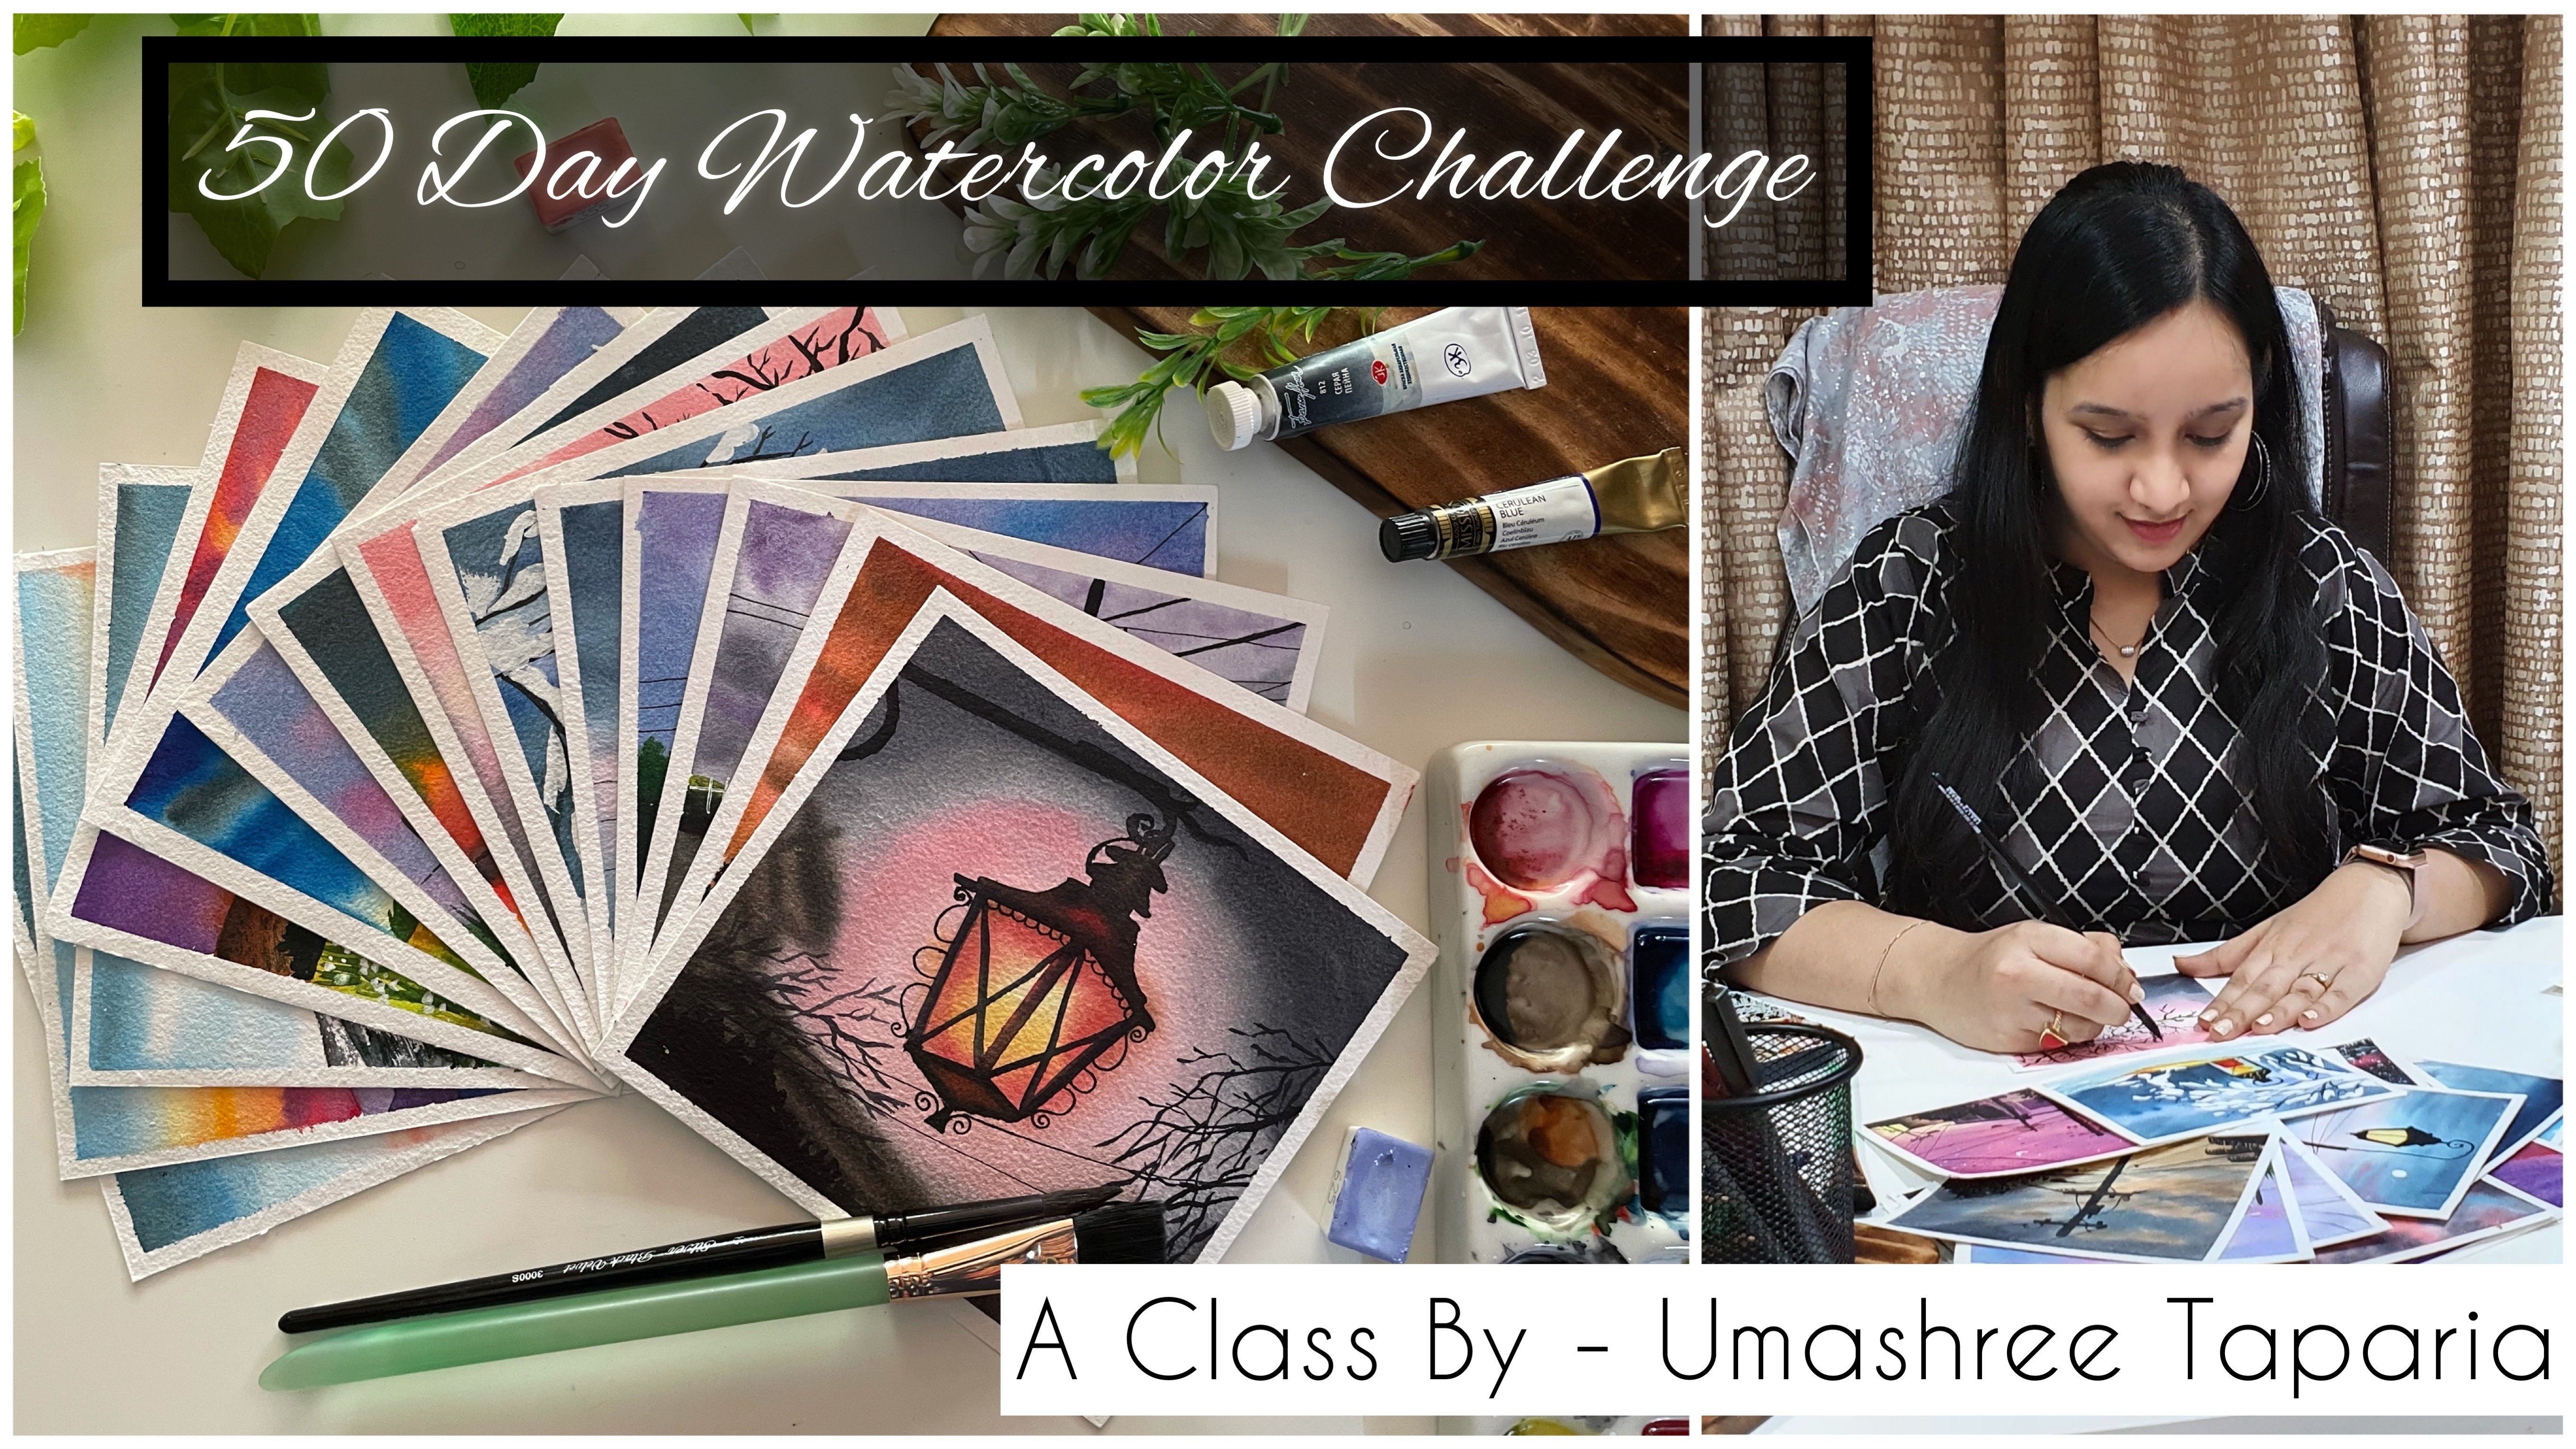
1. Hello and Welcome Back: Have you ever wanted to create ODD practice habit but fail to do so because of various reasons. Then this class is exactly for you. Hello and welcome to this 21 days watercolor practice. Plus, I am an artist and an app dedicated from India. You can find me on Instagram and Pinterest under the handle, creating from the heart, you would wonder why 21 days your is the answer to your curiosity. According to research, it takes 21 days to fully form a new habit. As 21 days is the time required for new neural pathways to be fully formed in your brain. This is a self-initiated program that you stick to a certain habit for 21 days every day. This concept of 21, this is what led me to curating this 21 be of watercolor practice class to develop a habit of daily practice. For the next 21 days, I will be uploading a new class project every day with a new concept and something new to learn. And most importantly, practicing dealing. So as to make the practice goes smoothly. I have created all the class projects on a bookmark size so that we do not have to spend a lot of time to develop this habit. Do not the body of your end results. Always enjoy the process. And why enjoying the process, you will automatically begin to love the results. Initially, I will discuss all the materials and techniques on D1 itself that will be helpful to you throughout the 21 this. So at the end, if you feel the need, you can revisit any technique that you wish to relook into I uploading all the final artwork for each day under the resources section so that you can refer as and when you need. Also, if you need any help throughout the 21 days, feel free to drop it into the discussion section and I will be happy to help you dig. I hope you will enjoy these 21 days and by the end, develop a habit of daily practice. So come what are you waiting for joining me in this 21 days, Joni? And let's grow together. But before that, remember to save to yourself today. I didn't do it. Not being as embossed had been.
2. Materials Required: So we will first have a look at all the materials that you will be requiring throughout the 21 days in this Jony. So first, I will be talking about the paper that I will be using. I would be using Academy watercolor paper pad, which is 300 GSM and a 100 percent cotton. This is of a size 10.2 inch by seven inch. I will be cutting this one sheet into four equal parts for my bookmarks. So it will be all these sizes. Okay, so I've got one sheet and 240 will haves, and I have used them as a bookmark. You can go ahead and use any size of paper and cut it into a bookmark size. The next thing is a set of watercolors. So I haven't been using my right Nights watercolor palette. So this is my palette of 35 shades. So I have not been using all the colors. So before every painting, I will discuss with you the colors that we require for that painting. So accordingly, you can get your colors ready for that painting. Then you would be needing a pallet to mix the colors. So I will be using this palette to mix my colors and this palette throughout we use for my black and white details. Next, you would be needing two jars of clean water throughout. One, to clean your brushes. And second, fold or applying the French Quarter 4 dot. Next, you will be needing a tissue to dab off any excess water from your brushes. You will be needing of AI auto white acrylic color to add highlights with white color in view of the paintings. If you do not have a wash color, you can use both Socolow or an acrylic color audience. You could even use white watercolor, but in a very thick consistency, I will be needing a pendulum escape for some pencil markings in few of the paintings. Then I will be using these three pins. That is a black pen, which is of size 0.5, or white gel pen for adding the details. And a golden color pen in one of the paintings, the North Valley, if you do not have a goal linchpin, it was just for added highlight. You can go ahead and use golden watercolor if you have already. It's completely fine. Also, if you do not have a white gel pen, you can go ahead and use a detailer brush and add the details with a white quash. And as far as a black pen, you can consider any black pen that is available at your end. Now, lastly, let's have a look at the brushes that we will be using. I will be majorly using these brushes. This brush I will be using for applying all my flat wash background water wash onto my paintings. I will be using the flat brush and few of the paintings for applying the sky colors. And then I will be using these for round brushes. So these three are from the brand silver black velvet, size 842. All of these brush have pointed tip, which makes adding details much easier. Then this Princeton Heritage brush three by 0, which is a very detailer brush for adding the final details. And this is also Princeton heritage wash brush. So these are the brushes that I will be for painting throughout the 21 days. And lastly, I will be using this canvas board to tape down my paper. For every bookmark, you can use any surface or even the surface of your table to tape down your paper. So these are all the supplies that you will be needing through the 21 this. So go ahead, grab all your supplies and I will see you in the next technique section. But in reinforced discuss all the techniques. And then today we will be painting the davon bookmark. So see you guys soon in the next section.
3. Technique 1- Basic Wash: So before beginning with this 21-day CDs, I would like to discuss a few basic techniques with you, which will help you throughout the 21 days to paint the different paintings that we are going to paint. So firstly, we will see some different kind of wash that is the wet on wet wash and the wet on dry wash. So of eight on wet wash is I'm applying clean coat of water onto my background.
4. Technique 2- Color Wash: Now we'll even look into the different kind of wash. So the first kind of wash is a flat wash. So this is a flat wash exactly that is with one follow the color, the entire background. The second kind of wash is a gradient wash. So I'll first vet my background again. So now our gradient wash means you use one follow, but you will need a Boolean value of o Carlo to vote. So say I'm beginning with this color, the dot, and as I'm moving downwards and try to make it lighter. So you can see I have used one column only, but with this one color, I've tried to go different tonal values of the same alone, making it a gradient wash. If you want the darker area at the top, you can begin applying the wash from the bottom media, taking it lighter towards the top. Then. The next kind of wash is of irrigated wash bedding. We use two different colors and create a blend. So I'm first applying this clean coat of water. Now this time I will begin with a yellow sheet. And at the bottom I'll apply the yellow sheet. And at the top area I will be using a shade of blue. And as I'm reaching near the yellow, I am leaving that space a little right? So both of these colors will automatically merge as they dry and will give me a profit of variegated wash. So do not mine this little pink that has sieved into there. But the gradient wash is, I have two colors and they are blending into each other. So this is one kind of a variegated wash Vaden. I have used two colors onto my background and, you know, they are lead into a flat wash style type is you don't simply the colloids and that is proper blend happening in the center area. Another kind of variegated wash is the strokes wash. So I have applied a clean goto photo. Now this time for the variegated wash, what I'll do is I'll just drop the colors randomly at different places, leaving some white gaps. And now I will pick up the Adobe shallow, that is my blue color in this case. And I dab off any excess water and I will drop off this blue color in the areas where I lifted, right? So you see, this is again, another kind of a variegated wash. So this was a flat variegated wash and this was a Strokes method variegated wash. So these are the basic kinds of wash types that it's important for you to practice so that it becomes easier for you to take down all the exercises coming in the 21 days.
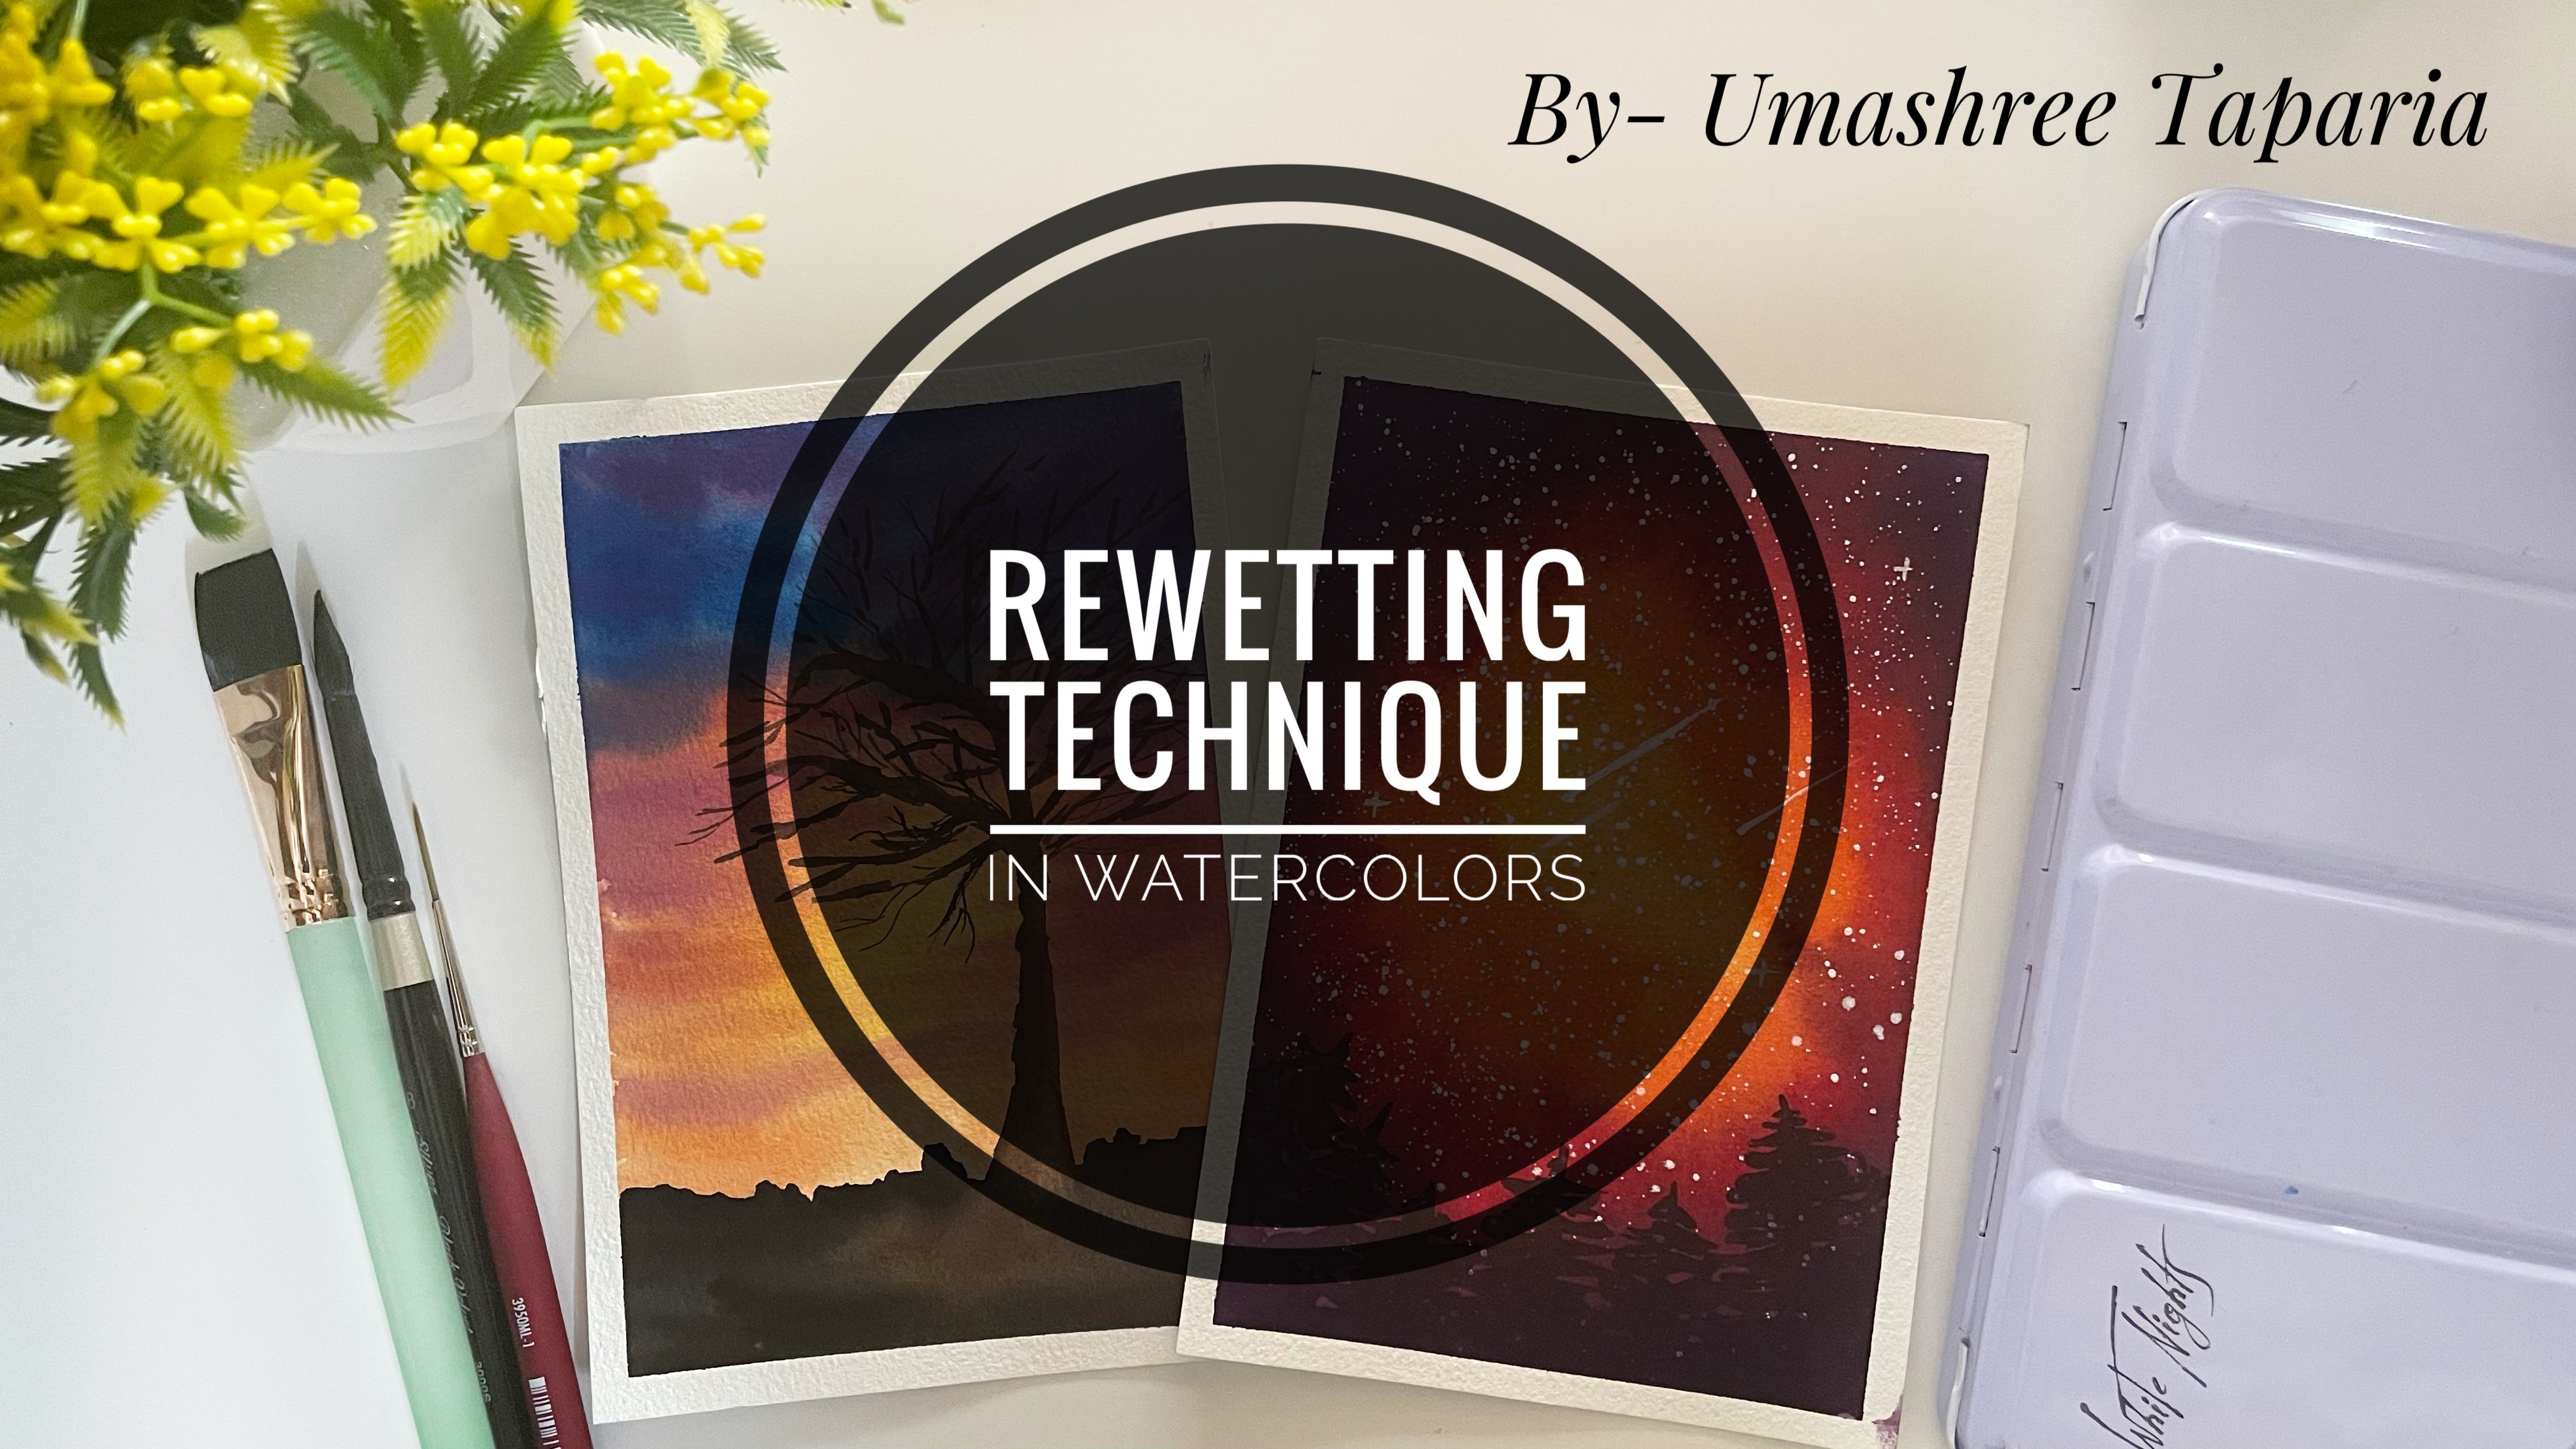
5. Technique 3- Clouds: Now the next important thing to understand is how we build clouds into a bygone. So I'm beginning to apply a clean I'm just giving a one-color wash. We're onto this. I want to add some dark uploads. So important thing to understand is when your paper is exactly GI for your clouds to add in. Right now might be but as exactly how after I applied the wash and now if at this moment I dropped the clouds, can you see it's spreading too much and not giving me the proper shape. So I have to wait for this to dry a little bit. A little means not completely dry. 50 percent gi of the state activated this right now. So I'll wait for use against maybe for it to dry. Can you see when I had dropped it, it's just spreading completely into the bag down and not having the shape in which I wanted or dropped it. So we have to be very careful about the timing of dropping these clouds. So now my page is an almost 50 percent died. So now I'm picking up the same shade again. And this time your, I'm dropping it at the lower areas. You can see the difference. You see it's not spreading as much as this one split if it's staying in the confined shape that I'm dropping in. And it's forming the cloud-like structure that I want. The second error that it generally will happen is say if I pick up this color only in a very liquid consistency, despite that means my pages 50 percent dry, but I'm picking up the color and too watery consistency and I begin to drop it again. So again, can you see vendors too much water? Although if you're dropping your clouds, it will begin to again spread and not remain do it's confined shape that you want. So after being 50 percent dry, the second important step to take care of is how much water should be in do your brush while dropping the clouds. So you should not have any new access Word doc and use IV and I'm dabbing that is so much water into my brush. So this is not the right consistency. You need to pick up the paint in a little thicker consistency. Babylon. Do a tissue very gently to remove the excess water and now begin applying. So now if you can see I'm getting the confined shape and its remaining there. Your the shape is no longer visible. It has most completely with the background leaving no shape of what color I had dropped. So the two important aspects of painting these clauses for splitting your background, wash has to be like 50 percent dry and 50 percent wet. And second, when you pick up the paint, you should not introduce any new water like I did youre okay. So always pick up paint that very gently onto your tissue. This will remove all the excess water and then begin dropping the clouds like this. So this is one aspect of painting the Cloud. So now for painting the clouds, we will be using two different motions. One is this kind of a circular motion, and the other is going to be a light C stroke, that is a half C stroke like this to dropping the pins. So these are the two kinds of methods we will be using for painting the clouds. Bond is moving my brush and round circular manner like this. And moving my brush in C strokes that is half c strokes like this. These are the two ways of painting clouds onto a background. The adult way of painting a sky will be, now this time I want some nitrogen right? Clouds. So what I will do is I will pick up the paint again. So for us, since we need little white clouds, this acts as all they did a first level. So now when we're adding the clouds as a second layer, we can not introduce any new water. So I'm diving off any excess water from my brush. And then I begin to dab the clouds that I want to say if I needed them, so kilometers, I painted like this. And if I want the C strokes, I dropped the strokes like this. So you see again, I will show it to you if I pick that up with excess water and I begin to drop it even in circular manner. If I begin to drop, can you see it's spreading so much and it is not retaining its shape. Although the C strokes, if I added with excess water, can you see and can use either the friends your, So that is why water control then adding the next layer is very important. You should not introduce any new water when you are adding onto a white background, the second layer for making any BDS. So basically your I meant was I want to have some bright background and clouds. So I will begin dropping the pins very gently leaving some white background. And automatically the sky will begin to be forming. And now see on this if I need some darker clouds. So I'm picking up Payne's gray. This is again 50 percent, right. And this is again 50 percent dry. I will begin dabbing lupins your butt. I will again dab off the excess water and then begin dropping the pins wherever I want, the darker clouds. So you see this is not spreading too much again, because i that both the excess water and I'm painting the rest of the things you have. So this was all about how we will be adding the clouds throughout the 21 days of this journey.
6. Technique 4- Ripples and Waves: Now the last important technique to understand is how we will be adding the rebels. So I'll begin applying a fresh coat of water. And now on to this, I will just be intubate one column in the entire area. Now just as by painting the clouds, VV did for it to be 50 percent dry. Before adding the rebels also, we have to wait for a little time for the background or GI. Otherwise, what will happen is I begin to add the rebuilds right now, bend it is complete with. So you see a spreading so much and it will not retain its shape again and will not give us the good ripple effects. And we'll have video edges which will not look good. So again, we have to wait like 50 percent of the people to be dry and then we will begin adding the rebels. So now my paper is 50 percent dry. Again for the rebuilt also, I need to have the water control that is not introducing any new Waldo. So I'm dabbing off the excess water and I will begin laying again in the half C manner that is roughly a little curvy of v, If that I'm trying to add. So this is how I will be adding gerbils. Make this. So you see, I've got the ripple effects into my water and I have been able to maintain the background yellow panel and also the ripples have stand out of the shape that I wanted them. So in this also, it's important to control the water that is your dab off the excess water off before placing it there. Just as we learned to your if you please, when the background is to vet, it will begin to spread if you please. Too much water in blue, these VMs, when the background is 50 percent dry, it will again begin to split. So again, I will repeat that two important aspects of adding the layers is firstly, your background should be almost 50 percent dry. Secondly, when you are introducing the next clear on a red background, do not introduce any new want o Because introducing any new water will spread the color into the background and will not retain its shape or the effect that you wanted to add. So that is it about the water techniques and the backgrounds. One last technique we will see in the next technique section is painting a few basic elements which would be helpful to paint. Or LA, 21 days.
7. Technique 5- Basic Elements : Now let's have a look at some of the basic elements which would be helpful throughout our 21 days. So onto these background only I will be painting the elements so that you can understand. So the first thing is, I think a palm tree. So at the top we begin with a very thin trunk of the palm tree. And as we go downwards, we increase the breadth of the boundary. And now I please these branches. And from these branches I begin to just pull out verifying leaves like this. So if your brush does not have a pointed tip, do so with the help of a pointed brush, orderly Dino brush, so that you get all these finer details. So that is how we will be painting a palm tree. Now the next one is painting a pine tree. So we will be adding pine t's into mammals. That is a detailed one and very lose one. So when we add a loose one, I draw a thin stem like this first, and then I just pull out these leaves like this. Okay, So this is painting a very loose one. The important thing to remember is these pine trees would automatically begin to form a triangle shape like this. So from the top to the bottom, they begin to form a triangular shape. So accordingly, at the top my leaves us smaller and as I'm going down, the length of the leaves are beginning to grow. The second kind of pine tree would be a Scots pine tree. That does not do much detail. So I'll just begin like this. And I'll add a few branches and leaving some space, I will add some branch and then again add just dabbing structures like this. So like this, very viscous means the leaves are pleased very far from each other and I'm just gently dabbing them. And the third kind of find G is a detailed one. So again, I have a very fine line first and then I begin adding the details. So I'm first popping out a branch like this and then underneath and about, I'm trying to give the small leaves like this, making it look more detail. But remember, all of these pine trees naturally at the end turn out into a triangle shape. So like this, adding too much detail scoring in a slow manner. So you see when the added this one, we could add it quickly. This one look a little more time. And this detailed one will take the maximum time. Still, this is not a complete detailed one. This is all you know, better or detailed one then these two. And then on to some of the branches, you could add leaves on both side and make the center area look a little darker with more leaves. So depending on how you want to paint more of them, you can keep adding the leaves. The next thing is boards. So we will be adding birds in a few painting. So the boards, it's going to be simple. One stroke like this are the stroke like this. Then you paint or inverted V like this. And from your again, you have a little S kind of a structure. So some of the basic shapes of boards that I'm trying to show. And then a V structure like this. Also, I paint or half C like this and give it your center and give us more line here. So these are some of the basic shapes of the boats that we will be using. Now the other technique that will be helpful is the dry brush technique. So for that onto one of the area here, I will just paint a black area and wait for it to dry. So till my black area is drying, we learn how to paint leaves, that is one stroke leave with the help of a round brush. So I've picked up my size eight round brush. And beginning from your eye falls, drop or branch. Now, to paint the leaves in one stroke, I begin with the tip of my brush. Pick out a small branch. Okay? Then I'll begin like this. And I press the belly of my brush completely and I moved forward and then I am satisfied with the length of my leaf. I begin to lift up my brush and get this pointed edge. So again, please the tip of my brush, press the belly of my brush and lifted up as I reach the end where I want the shape to N. Once more, I begin press, lift up. And at the end. Can give little shape as you want. The other way also you can do, you begin the thin stroke, press it again, lift it up and give this tends to look like this. So both ways you can begin to paint these leaves. So in one of the patterns, we will be painting a leaf pattern. So that time, this pattern will be very helpful. So again, practice this one stroke leaves multiple times so that it's easier for you to carry on that painting alone. The next thing is how we will be painting bushes in some of top paintings. So I basically just dab my brush like this. I use a smaller size brush depending on the size of my painting. And I'm just dabbing my brush like this in random mannose, okay, like this. And this is automatically giving the bush. And at certain places, I fill it with black that is majored in the bottom media. So that at the top I have that detailed look of the bush. So you see, I'm just dabbing like this. This is how, and the bottom media, I fill it up with black. So this is how I pin the bushes. And one last thing that we need to loan is painting the gene drops. So for painting the rain drops, we will be marking some circles and some shapes with black color. So randomly differentiate some so-called some ovals. You see the raindrops are of different sizes and different ways. So we'll be painting these droplets force like this. Now at one of the areas we will increase the size of this black color so that it adds a shadow. So medially in the bottom area, I'm trying to increase though, you know, brushstroke of the black color. And now when this dries, we will add in detail with the white color. Then then my black background has dried. So I'll begin with the dry brush technique. So for the dry brush technique, we will be painting dry brush strokes onto a backbone. So right now my background is dark, so I need the dry brush off a lighter Congo. See, I have picked up the white column. Then I pick up the white color and applied directly. Can you see it's being applied completely without giving me any dry brush stroke. So for the dry brush stroke, just as we used to that the water you are similarly I have to dab off the excess paint and excess water and then begin adding. So all these tests on rough areas first, so still see, this is not perfect means that steam has excess water. Okay, Now this is perfect. And then like this, with very gentle hand, I am trying to give these dry brush. Second thing, say, if I do not keep my hand, gentlemen, and I press it and give OOP. So see, like this, again, it will begin to give me big O poles of the colors which I don't want. So it's very important for your hand to be gentle like this. So very soft time you apply these tools. So this is the dry brush tool which will be helpful for us when we do a beach painting. So these are some of the basic things that we needed to learn. So the last thing before winding this up is adding the white color. You're not completely, but just at the bottom. Media majorly will be adding the white color. So this will begin to act as a water droplet. And one of the paintings which we will be doing, this will be helpful. So these are all the techniques which will be helpful throughout the 21 days. Or you know, some techniques would be helpful in some paintings, some technique and the other painting. So always in any painting, if you feel you are stuck up, you can go back to the technique and therefore that technique and follow along. And now I will see you guys today in the first class project of this 21 D is Shani.
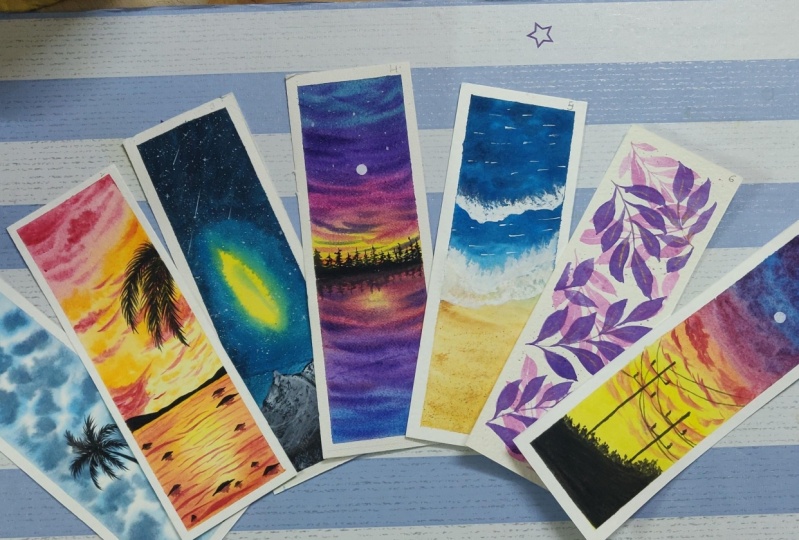
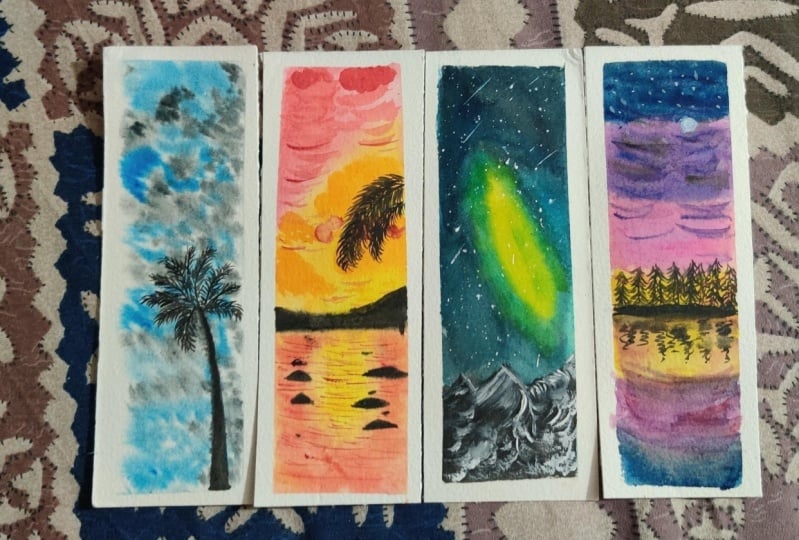
8. Day 1- Cloudy Sky: Let's begin with the first MOOC math. We're going to begin with easy bookmarks first and then gradually increase the level of every being d. So let's have a look at the kalos first for this bookmark, I will be using a bright blue color and an indigo color. If you do not have a bright blue color, you can go ahead. But any lighter blue that they say said he didn't glue or an ultramarine blue, but go with a lighter shade of blue. If you do not have an indigo, you can mix Prussian blue with a little of black to get a darker indigo. You can even go ahead and glue or any other darker blue. I will be using black at the end. So let's begin being enforced. Begin taping my paper down onto this canvas board. I first begin with applying a hold of freshwater. Now, I will first begin with the bright blue color. And now randomly, I'll begin applying this color, leaving some white gaps. Gap could be Big-O and some value could live shorter gaps depending on the variations of the cloud dot u1. Now, I will pick up the indigo Palo. Always remember, whenever you are applying the second column, do not introduce any new window. So please try to dab your brush so that the excess water seeps out onto the tissue and does not spoil your day. And now randomly, I'm applying this indigo color at certain places to form some darker clouds and to give depth to this. If you can notice, every time that I pick up color, I'm dabbing on to the tissue so dab, the excess water is removed and only pigment is left. Now again, I'm picking up indigo, but this time in much thicker consistency without adding any new water. And will again add some darker clouds to this. But very little this time. This is a little dark, so I'm just spreading it so that it looks even around. So if I were you feel you have dropped in excess Carlo, you could use a damp brush to spread it evenly. So I made sure the applied the darker tone much at the top ADR leaving the water media player. So that is it for our background will wait for this to dry and then paint a palm tree. So now my background has completely dried. So I am picking up my black color. You can go ahead with a black color, order of things, Greek on-off. And we will be painting a palm tree. So there we are done with the first bookmark. Let's remove the masking tape. I hope you guys enjoyed painting this with me. We'll see you tomorrow with another book, Luke.
9. Day 2- Warm Sunset: Hello and welcome to day 2 of painting the bookmark CDs with me. Let's begin with taping down, not be born. I'm done taping down my people. Let's have a look at the onwards that we'll be using today. I will be using a shade of this is cadmium lemon yellow from the brand whiteness. You can go ahead and use any light yellow available with you. Second column, I will be using this golden color from the band wide plates again, you can go ahead and use any orange color available. Abandon. The top cargo is a car main follow. And if you do not have this shade, you can go ahead and use anything digital ordered addition to own that is available in your palate. So today we will be painting a sunset view by the revolve around. This is our sky area and this is going to be a CEO. I'll begin with applying a clean coat of mobile only to my sky. I'm done applying my background wash. I'll begin with the lemon yellow column first and then apply it to my horizon line. The next column is the golden cowboy, which is almost an orangeish or more. I'll apply it next to the yellow. And now I'm picking up the Carmine sheet and an applied at the top. Now I'm switching to my size four round brush, and I will be picking up the anode in a little thicker consistency than the previous new and lay down some clouds onto the sky. So on do the yellow, I'm leaving some clouds with the help of the orange color. Remember to not introduce any new model. If you feel your brush has too much water, dab it onto a tissue and then apply it onto the people. And just dropping some small clouds that the tip of my brush. Now, next time we'll pick up the Harmon shade in consistency and follow the same process and give some dark compounds. Remember, you have to do all of this by looking for is still valid. So if your people has joined in between the process, wait for it to dry completely and then G vetted with a very gentle hand and then do this process again. And that is it for my sky. And now I will gently apply a wash into my CAD. And pick up some yellow force for the sea near to the horizon line. Then shifting my orange color. Just applying it at the edges. Now I'm shifting to my size four brush which has appointed it did and I will just give some CVs. So decide excess water. So it just spreading completely. So I'll just dab off the excess water and then do this. Now database for all of this to dry and then add our silhouettes to this being. So my background has completely dried and I'm shifting to my black color and using my size four pointed brush, mark, a small mountain range are the horizon line. And now I will just mark some knocks into the sea. And do this. I, II, III, IV, just draw one palm leaf popping out from your I'm using my size two brush, I will just give some lines into the sea you're randomly. So a basic need not added any more dark. And finally, added a little wind up Blackfoot. So that I get this Docker file. And that is it when some other block. So we had a deal with another bookmark. I hope you guys enjoyed being, being the sunset, me, the CO2 model, but some other bookmark.
10. Day 3- Galaxy: Hello everyone and welcome back to D3 of this popup painting series. So I have already taped down my people. And let's have a look at the colors that we'll be using today. We will be painting galaxy today. So I will be using this lemon yellow color. The next color that I will be using is a turquoise blue. And then I will be using Payne's green. If you do not have the lemon yellow, yellow, you can go ahead and use any lighter yellow. If you do not have a turquoise blue color, you could add a little bit of VDD and green to the blue and use it all. You could directly use any blue. Hello. If you do not have a Payne's gray color, you could mix Prussian blue with black, indigo with black, and go ahead and use that color. Or you can even use direct black color, but not the not looted consistency. So these are the colors that we will be using for our today's painting. So let's begin with a background wash. Always lift up any excess water on the edges that when we are painting, this water does not see back into a painting and phosphate happening with the lemon yellow color. I'm directly picking up my colors from the pan because I need them in a vibrant color consistency. So in the center area, roughly in an oval shape, I have applied this lemon yellow color. Now I'm shifting to my turquoise blue. And around this yellow, I'm gently applying this turquoise blue. Be careful to not apply it to hash orders. It will turn into green. Now applying this turquoise, blue and much thicker consistency so that it looks more vibrant. Trying to make that yellow color look more swallow. So you're either be having among didn't change. So I'm basically not focusing on to this stone area much. Now shifting to my Payne's Gray. Applying some Payne's gray even onto the green area. Now using a damp brush, I'm just trying to blend and make this Payne's gray and looked much smoother with each other. What I will do is I will lift off my vault and try moving it in detections so that the palace much better with each other. I will pick up more turquoise blue and add it here. I'm just placing this rule of tissue underneath so that this board stays in this direction for a little time and tell them, I'm picking up Payne's gray and applying more of Payne's gray at the top area and political decide you do not get too much Payne's gray underneath your because we will be having a black mountain there. So we want the mountain also to standard distinguished. Again, picking up some coins and adding your group made the blends model with a clean brush. I haven't even add some yellow again in the center so that it blends and begins to March. So can you see the dispersion that yellow has caused now because my borders in Islam position, and as soon as I leave this column, it is merging with the turquoise green. I'm just moving my ward in all direction to make the blend smoothly. Now, I laid down and wait for the bank down to dry and then splatter some stars and being the mountain. So now my background has dried completely. I'm picking up some white goulash into my palette. And now with the help of my size four brush, I haven't splatter some stars. Remember to use a clean brush was plugging this task autos, you're white-collar would turn into a blackish color that is on your brush. Also, it's very important to have the proper consistency for splashing this task. As you can see, I'm using my finger to dab onto the brush and splatter the stars so that I can control the movement of the stars also so that the remaining ADR does not get the white stars onto it. It's very important to have the perfect consistency of white quash to do so, or else they will not splattered on smoothly. Now, I will just drop some stars with the Holocaust and crashed and acne. That is awesome shooting stars. And someday some shining stars, Ladies. If your branch does not have a pointed tip, always shift to a new brush to make this process look much cleaner. Now, I'm picking up my black color and I'll pause drop among Genji. Hi. So that is the mountain range there. I will just wait for it to dry and then give some dry brush with the help of fight quash. My mountain range has trade and I'm picking up bright force without adding any water. Just my brush was bad. And now I will force dab off any water that is still remaining. And then begin with the dry brush. Very gently. I'm giving these giant brush strokes. And now on to the right side, I will mark the dry brush stroke running into the right direction. Just mocking fine lines to add details to this mountain range. And that does it for our third book. It's time to remove the masking tape. So we are done. We talk toward bookmark. I hope you guys enjoyed painting this beautiful galaxy with me. I will see you tomorrow. We can either bookmark.
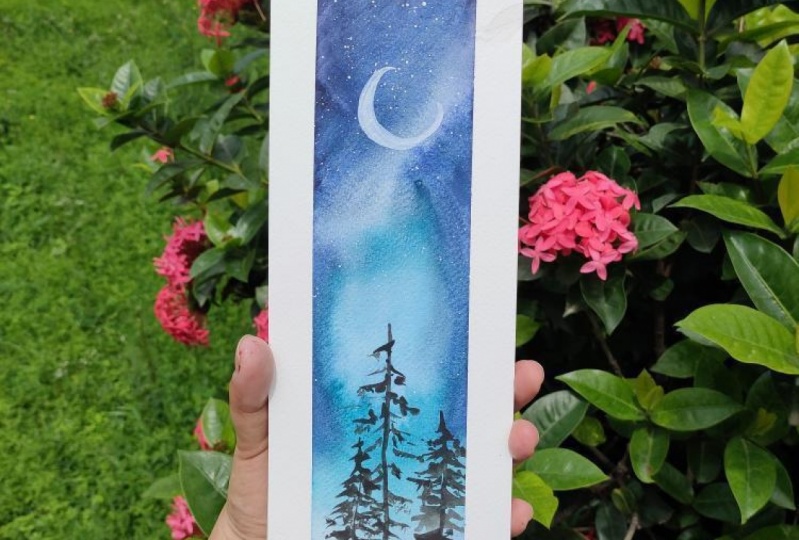
11. Day 4- Evening Seascape: Hello everyone and welcome back to day four of these bookmark painting series. So far we have painted these three plots. Let's have a look at the kalos IVB using a shade of lemon yellow, the civilian blue color. And I will be using these two shades from the planned Magellan mission, that is the red violet and the bright clay or violet. I will first one over rising line. So roughly a little below the center line. I will first begin with applying washed to my sky. Now, I'll first begin with the newer to my horizon line. You can pick up any pinkish shade that is available. Shifting to my bright violet color. And after I've laid down myself and just adding in a little bit off in legal to it. These colors when they dry, they will look very bright. Oh, I'm to make them look why invent. I'm going on with another coat of the same Carlos. Since my page is still wet, I can go ahead and do this and I'm not introducing any new wardrobe. Now, I'll begin adding clouds with my smaller brush that does my size four brush. I will not pick up any new want DO. First fit the pinkish tone. I'm adding some clouds on to the yellow. Then picking up the violet color. I'll just add some clouds onto the pink shirt and some darker clouds onto the purple shaded. And using the same book, I'm laying down some clouds even on do the blue color. So I've just used the basic half C-shaped structure to add these clouds. I will also add some very light purple clouds onto my yellow color. So that is it to my sky area. I'll wait for this to dry and then paint down my Cabo. My sky has always try it. Now this time into the sea, we will just be painting the deflection of the sky and the non PR adding any you not through your CVs. So I'm beginning with the yellow Nieto, my horizon line. The same colors that I have used for my sky is the kalos that I'm living in that same order, just applying it at the edges also. Now I'm shifting to my size four brush. And again, as we did in the clouds. Same vein, the sea, I'm picking up the color indigo consistency. And I'll almost the same structure like the clouds. So basically, you see is just a reflection of your sky. And that is it for a CEO also. Now we will read for this to dry and then add some black silhouettes. Nieto horizon line. My CTO has also dried. I am picking up my size four round brush and picking up some black color. I'll first walk contain horizon line here. And this time we will just paint some cute tiny little pine trees at the horizon line. If your brush does not have a pointed tip, shift to our detailer brush. I'm roughly mocking among didn't change first so that it looks finished. I'm adding these pine trees in different variations of different heights and sizes. The last thing is adding reflection of these binaries into the sea. So I'm using the black color, but in a very light consistency and the deflection would not be that clear as the boundary is located. So it's going to be a rough look. I just moved in the edges first and now I'll quickly are these reflections before it dries. You can see how roughly I'm adding these reflections just by moving my brush in a little the exact manner, depending on the height of the tree above. So that does it for the deflection. Now with my white gel pen, I will just mark a small moon. And we are done with this. Let's remove the masking tape. We are ready with our D for bookmark painting. I hope you guys enjoyed painting this with me. I will see you all tomorrow with another bookmark.
12. Day 5- Overview Beach: Hello everyone and welcome back to Day 5 of bookmark paintings with me. Today we wouldn't be doing a simple overview between them. So let's have a look at the colors that we will be needing. For the CAD. I will be using turquoise, blue, and indigo. For painting the signed area. I will be using this raw sienna color and then some burnt sienna onto it. If you do not have an raw sienna, you can go ahead and use yellow ocher mixed with a little bit of bone CNOT to get this shape. And then I will be using right quash for adding BFS. But before that, let's begin to apply a clean coat of water onto our ADR completely. I'm first beginning with the turquoise blue. And using my size 8 brush. I'll begin somewhere from the center area like this and marked as complete with the turquoise blue color. Now, I haven't pick up this blue color. That is the turquoise blue budget, not Tico consistency, and begin dropping this ticket at random places. Now, picking up the raw sienna, I'll pin this area for the raw sienna color. That is the signed area. Also, I'm just covering a little bit of the blue palo with this raw sienna with a very light hand so that the blue color is also visible underneath. And I haven't little raw sienna lock onto that. That is basically the CVs onto the sign that we are trying to deflect. Now, my ocean has dried a bit, not too much, but now I'm picking up though indigo color and giving some drops of this indigo color into the ocean to give it depth. You'll see randomly with a smaller size brush, I'm just dropping the paint without any new water. Now New York, the last Sunday, I'm not getting this darker indigo color, but your at the top, I'm trying to make these depth much darker. So adding it in larger areas again, that much is enough. Now, picking up the bond sienna and just dropping some bonds here not randomly. I'll weave, innovate some out of this to dry and then paint the leaves but the head buff right? Now, my background has completely dried and I wouldn't pick up some fresh white goulash into my palate. Now, using the dry brush technique that we have learned previously, I will give some CVs. So first I'm just mocking movie. And I've been mako gave some good human will. And so now you The dabbing technique for the dry brush so that there is no excess water. I'm just trying to pull up these leaves, look for getting these wave looks. Remember, your white floss should be opaque and should not contain too much water. If you are using white watercolor, remember to use it without adding any water to it. Now, in the same manner, I will find the same dry brush strokes onto this line. You'll be ready gender by learning these. Now, I'll just pick up this burnt sienna color in uptake consistency and add some splatters onto my son area. So remember not to pick too much water. Also. Want the beach area with your hand and then add these plateaus at the bottom area. You can use a rough sheet to cover the beach area. And I will also be adding some dry brush on dry sand, ADR. Now, last week, my white gel pen, I will just mark some small leaves. You could do this with the help of white quash also vary randomly and very few of them. And then we are done with this painting. Let's remove the masking tape. We are ready with our cute little beach Pokemon. See how tomato, but sonata new book walk.
13. Day 6- Leaf Pattern: Hello and welcome to day 6 of printing these bookmarks with me. So far, we have been to these five Pokemon. We will be painting a simple leaf pattern for the bookmark. I will be using these two shapes that it's a pinkish shade under violet shade for painting the leaves. You can go ahead and use any blue colors or maybe even a single color to paint these leaves. So this is going to be a very easy process and it's going to be fun painting these leaves. So I've just diluted my pink shade enough. And now I'll begin with placing the leaves here. So as we discussed for this thing, thing, we will not be having any background wash. Making the leaf, just starting with a thin stroke, then pressing my brush enough and lifting it up and getting this pointed edge. So this is how I'm painting these leaves. Hi, I'm Sean. If you'll practice this brushstroke of painting leaves a few times on a rough sheet. You would be able to get a very easy hang of this and paint along very easily. So we will first find all the leaves but this color first, and then shift to the violet color and the leaf pattern again. Once this background is dry completely. So beginning with a very thin stem, seeing the stomach of my brush and lifting it up. That does how I'm dropping these leaves. One last leaf. So this would be the last leaf branch with the pink color. And then we will read through all of this to GI and shift to the violet color. Now, I'll wait for this to dry and then we'll begin living with the column. My first layer has almost dried, and now I'll begin with this violet color. I will begin overlapping these leaves. Remember we are not overlapping them in the same manner as we need the pink one. So this is going to be overlapping in different directions and different sizes. But the technique that we are using is the same. Keep on adding these leaves depending on the size of the people that you're using. You can also vary the placement of these leaves according to your preference. I'm just redoing on this to make it more vibrant. One last branch of this purple color at the top. Just dropping some leaves at certain areas so that there's not much gap being shown. Now, I'll wait for this to dry. And then with the help of a golden pen, I will give some highlights to this leaves. Now my pattern has completely giant hand using this golden color. Some golden lines onto some of the pump beliefs vary randomly. Nothing in specific. As I said earlier, if you do not have a golden penny, you can go ahead and use golden metallic hollow. But the help of a fine liner brush, even if you do not have a golden color, It's perfectly okay because I think this pattern even looks beautiful without adding these highlights. So if you vary randomly, I'm adding these highlights, nothing in specifics. This to adding the center branches. If you do not feel like adding these, you can skip to add these two. And that has to be done with it that easy. Let's remove the masking tape now. Doesn't look so gorgeous. I hope you guys enjoyed painting this easy leaf pattern with me. I will see you tomorrow with new bookmark.
14. Day 7- Powerlines: Hello everyone and welcome back to day 7 of painting these bookmarks with me. Today we will be painting a pretty sky with some solute. So the colors that I will be using is a lemon yellow shade. You can go ahead and use any yellow available with you. I will be using this bright blue color. You can go ahead and use our blue or any other lighter blue. And I will be using this Quinacridone Rose. If you do not have this, you can go ahead and use any pink sheet. Feel free to use whatever supply is available at your end. I already have my paper mask down. And to begin with applying or clean water, I'm done applying my CTO photo. Now, I'm shifting to my size eight round brush and forced I will pick up the yellow color. You can even paint the sky with the help of a flat brush if you wish to do so. Now, I'll shift to the pink color. And lastly, I will pick up this bright blue color. Now automatically then the pink and the blue will most, it will begin to form a populous shade. So to make this more vibrant, I'm laying down another layer of these. Again. Make sure your pages still a bit if you are leading it again or else wait for it to dry completely and didn't read the entire area. Now, I will shift to my size four round brush and begin adding some clouds to this. So first beginning with the pink columns clouds. Did you notice there was too much water onto my brush because of which the cloud began to split out here. Now this time I'm giving these clouds in a little round structure. I'm moving my brush in a circular manner a bit. So you see automatically these clouds have turned into purple color because the pink mixed with blue. Now I'm picking up some fish pink paint because you're there was blue into it and onto this yellow. I will add little clouds with these pink. Always remember when you are adding clouds or any element to your sky after one leon do not introduce any new audience, it will begin to spoil. You're just adding some darker pink clouds onto the pinkie. And that does it for my pretty sky. Now, I'll wait for this to dry and then I'll add a bush and some elements when plaque here at the bottom. Now my bottom area where I want to place the silhouette has dried, so I'll pick up black color now and pile first mock some ADL like this. I will first fill this area completely with black. And. And then give detailed bush. Now, just using the technique to dab my brush, I will give some bush structure at the top. I have tried to 3D the height of this so that it looks more natural. If you notice, I'm just dabbing my brush. And now I will just start one fiber and some polyline bios. If you're not confident to add the street lane delay clean, you can first draw our rough pencil line, or you could draw this line with the help of a marker and a skin. Now we'll begin adding details to this PowerPoint. Before that, I will first place another PowerPoint. Now, if your brush does not have a pointed tip, go ahead and pick up appointed detailer brush to add these fine details. I'm just giving these things you can do so with the help of a fine liner. Randomly, I have added few lines urine there. And now I'm just connect to a few lines to the top. And now with the help of my right gel pens, I would just add a small moon. And we are done with the another bookmark for today. So let's remove the masking. So then we are ready with another beautiful sunset. I hope you guys enjoyed painting this with me. I didn't see you guys tomorrow with another bookmark.
15. Day 8- Meadows: Hello everyone and welcome back to the gate of the bookmark painting series. So far we have painted the seven beautiful bookmarks. We will be painting, or Basin sky and a floral middle. So I have taped down my paper. I will just mark of a really light line to distinguish the middle area. And now I'll begin painting the sky. But before that, let's have a look at the colors. For this guy. I will be using a shade of light yellow and a shade of pink. So you can go ahead and use any pink that is available with you. Or you can go ahead and use a lighter shade of red tone. And then for the field I will be using, I'll shade of light green and dark green to add some grass strokes. And then the help of white quash, I'll be adding the fluorines on do it. So let's begin painting a sky first. Now. Hello, how we have painted a blue skies, leaving some gaps in between. Similarly today we will be painting a sky that the yellow and the pink color leaving daps. So if you notice my brush movement very randomly, I'm just dropping this color, leaving some white gaps. Also, I'm using the shape very diluted so that it remains are based in Palo. And I want the sky to be very light this time. Now, I will shift to the pink shade and I will be using the pink shade also in a very light consistency that is a lot diluted with water. But one thing that, as I always say, we shouldn't introduce any new water to the sky orders it will begin to point us sky. And we want to even use this in a diluted manner. So again, I will dab off the excess water so that the pigment gene, meaning onto my brush, is light and with not much water. So you see that? And there, the light shape that I want and still there is no excess water. And now randomly onto the yellow area, I'm just placing some pink skies. So you saw very randomly, very lightly. I have pleased this pink color and such a piston color sky that I have, even without adding any white to my basic colors. So that much is it for my sky? That is how light I want my sky to be. And now I will begin painting my field area first with the green color. I will be using the light green directly without adding out. I'm using this light gene flow directly onto the Biden without giving any wash. So this is basically the wet on dry technique that I'm applying. This is our light olive green color that I'm using. You can go ahead and use any green that is available to you. While this is wet, I will pick up some dark green and I will then divide the bottom area regionally. Now, I'll shift to my size two brush, which has a pointed tip. And I will mark some grasses forced by. This is still wet. But this time I will pick the damping Kano in note-taker consistency. So you see your page is not supposed to be too wet or else you will not get these cleaner looking strokes and it shouldn't be too dry also, otherwise you won't get this soft grass looks that I am getting right now. Similarly, I'm dropping some classes like this, moving into the sky. So that this field loops complete. My page was like almost 50 percent dry and 50 percent bed. That is the time when I'm doing this technique. So it's giving me this clean look. And at the bottom, I will be mixing some black to my green and giving some darker glass structural. If you have a fine brush, you could do so with the help of a fan brush also. But I have noticed in my previous classes, not many of you have this. So this time I thought of doing the time showing it with the help of a detailer brush. So that is it to my field area. Now we'll wait for this to dry and then add the flowers. Now, my middle has dried completely, so I'll pick up some white quash into my palate. Now I'm shifting to my size 10 round brush. And I will pick up this white quash. Take consistency. And I will begin by adding the flowers you or if you want, you can go ahead and add these flowers in any other Kahlo, either using watercolor on Gosh. Some flowers, I will leave them, have some flowers, I will show them blooming downwards that is half blue, like this. Some just at the initial stage like this. So all this will add variation to your flavours and make your composition look more beautiful. Somewhere, I'm just dropping small petals, showing that those flowers are a dev, very initial blooming stage. So this will add depth to your meadow and it matches it. And now I pick up my pointed brush again and shift to my black color. And I will just add some small branches and stems to these flowers. At the bottom. I'm just giving some classic structures, but the black color first, so that all these flowers look popping out from that class. Again, you could do this with the help of a fan brush. But I did it with the help of a detailer brush so that it's easier for all of us to do. Now to every flower in some shapes, some bending. I'm adding these stems at this, try adding very small branches so that it will give more detail look. So I'm randomly dropping some branches into the middle. Now the law flowers try. I will just add some modes into the sky. If you are not confident about adding these boards directly with the brush, you could also do so with the help of a fine liner as we did in one of the exercises. And you see, I'm adding these books in all different sizes and shapes. And that much is it for the boats do. Now, I will just add some black dots to the center of my flowers. So pick up the black paint in a very thick consistency. If your flowers are not dry, bid for them to dry completely and then do this step. So basically I'm just adding the center director of these flowers with the black color. You could even do so with the help of a yellow ocher sheet. And we are done with this beautiful, easy looking middle. It's time to remove the masking tape and get done with a date bookmark. I will see you tomorrow with another bookmark. Time to once again, to everyone who has joined me so far.
16. Day 9 - Street Light : Hello everyone and welcome to D9 of the bookmark painting Series. Today we will be painting or very easy and a pretty sky. So the colors that I will be using is a light yellow sheet. You can go ahead and use the any, any yellow. Then I will be using this light green shade. You can go ahead and use whichever green is available in your Padlet. And lastly, I will be using a shade of indigo. So let's begin with giving our people a clean wash. Now, I will first begin with the yellow color. And this time I'll be applying it a little diagonally. Now I'm shifting to the green color. And lastly to my indigo porno. I will just give a clean blend, two colors. So just lifting up some color to make the blending easier. Now I'll pick up some green color again. Now I'm shifting to my size four round brush and I will begin adding some clouds. This time, I will be adding again the cloud structures. And again I'm going to be adding them from the edge center. Even on Buddha indigo, I'm giving some very thick indigo clouds. So you can see I'm just moving my brush from the edge to the literal center. And that is it. Now, we will wait for this to dry and then add a solute to this. Now, my background has dried and I'm shifting to my black color. Now, my background has completely dried and I have some black color onto my palette. And I will begin first marking or bushy area. You're just using the dabbing technique. I'll mark this area here. Now to this and we'll be adding of a written street light. So first I will begin, Martin, a black Stan here. Again, if you're not confident about adding this with the help of your brush, you can use a backhoe to add this. Or you can first to market with a pencil and then painted with the brush. Now put this, I will just mark two lights popping out, which I will then fill it with the help of the white doll. And now I will be adding to string lights here. So I'm just dropping this little connection to the light. And then after all of this dries, I will use my white gel pen to add these late. I find this idea a little md. So what I'm going to do this, I will add another power light. So this will be smaller as compared to this one because this is a, you know, far from our view. Since I made this bold tag go, I corrected my first poll. Also admit it also a little tickle. And now similarly you're also, I'll be adding these extension to add the lights, but again, these will tend to be smaller. Now I'm shifting know my white gel pen and I will add the lights. If this area is not yet dry, read for it to dry completely and then add this. If you do not have a white gel pen, you can go ahead and add these with the help of fight. With a white gel pen, the task becomes much easier. Now you're also, I just are these lights. And then we are done with that today's bookmark. So let's remove the masking tape now. So your day nine bookmark, I hope you guys enjoyed painting this fit me. I didn't see you guys tomorrow with another new book block.
17. Day 10- Windmill Sunset: Hello everyone and welcome back to day 10 of this bookmark painting series. So this is what we painted on D8 and D9. I hope you guys enjoyed painting this. Today. We will be painting beautiful sky and then add oven real silhouette. So for this guy, the two colors that I will be using today is this quinacridone rose and a bright blue color. Do not worry if you do not have the same exact sheets, you can go ahead and use any tone of pink, maybe crimson or a light pink or an opera pink, and use any shade of blue, civilian blue, ultramarine blue, whichever is availability of Fallot. Now, let's begin painting us cry. So I will first begin by applying a clean coat of water. Now, I will first begin with this rose shade from the bottom. So till the time. I want to make it look a little lighter. And now I will shift to this bright blue color and begin from the top. I wonder DR more darker. So I'm adding another coat of this blue dot dot. I'm shifting to my size four round brush. And with the help of this pink shade only, I will be adding some clouds. So then I dropped this pink shade onto the blue. Two, can you see the pink is reacting with the blue and forming a purplish shade on its own. So very randomly, I'm just placing some clouds such that the blue color still remains visible. Some van I'm using the circular motion. I'm just using the tip to drop off some beans. Now with this pink, I will just be adding some small clouds onto the pink area, but make sure you do not drop any new water. So always dab your brush to remove all the excess water. So that does it for my sky. I will wait for this to dry and then we will add us a little bit. But the black color. Now, my water media is completely dry but I want to place to vent. We'll first begin by just doing some pencil markings. So I am first drawing a triangle like this. Then I'm adding in too low fine lines to this. And now your inner circular motion, I will be placing the bleeds. So you could first draw a rough round circle, maybe. Now just divide this into equal halves. And now leaving some gaps between this, I will be painting them. Enforced beginning to pin these fine lines with black. Remember, if your brush does not have a pointed tip, feel free to go ahead and a detailer brush. Or you could do the same thing with the help of a market. Now the pencil line of the so-called was not visible. So you can have a look your, and then B into the head. So basically in also kilo manner, I'm just placing these triangular loop. Now. Your, I'm just giving some fine connection in slammed manner and in the center, making straight line to make these connections. Then some verges giving crisscross lines to make it look more natural. If you do not want to paint such a detailed silhouette, you can go ahead and print a simple silhouette line and, you know, get done with it. Now. I will just be adding the small sort of a thing. Now, this bottom area looks very MD, so I will just be painting some quick leaves. And at the bottom I'm just marking some grass structures so that all of this looks finished. Now, one last thing is adding a moon with the help of a white gel pen. This time, we will be adding half-moon and a bigger one. If you do not have a white gel pen again, feel free to use whitewash and add this. And I will just place some stars. And we are done with our painting for data. Let's remove the masking tape. And we are done with our day 10 of the bookmark painting. I hope you guys enjoyed painting this pretty sky and the simple silhouette. I will see you guys in the next class. Trajectory model.
18. Day 11- Seascape: Hello everyone and welcome to day 11 of the bookmark series. Today, we will be painting a beautiful seascape with a boat silhouette. So this time the colors that I will be using is a shade of orange, then a shade off rose pink that we used in the last exercise. You can go ahead and use any rose color that is available, shade of pink. And this time, I will not be using a direct violet color. I will be mixing this bright blue and this rose color to get a violet tone. So I will just mark down roughly at the center, our horizon line. So this is going to be as chi and this is going to be assay area. Now, I will first begin with applying water onto my sky area. So I have applied to clean CTO photo. Now this time I will be painting the sky with very light colors. So I will first begin with the orange color, and I'll begin from the top area. Now, I'll shift to the pink color, but I want a very light pink. So I have diluted it with a lot of water and just using a very light shade of this pink color. Now to this pink, I'll just add a little bit of blue to get a violet shade. And this violet shade also, I will be using a very light color. So that is the reason, you know, I'm dropping off take says what DO so that I get a very light shade onto my people. Now, I will just pick up some pink because I feel the pink is too light and once it dries, it will turn more like 80. So that is it for my sky. It's going to be this easy sky. And we'll wait for this to dry. And then we will see ADR and then add the silhouette. Now, I will gently begin to apply water to my CEO. I will make sure that it does not all you know, most with my sky and my sky colors do not lead into my C. C, even then, just a little drop out there and the Carlos started to bleed. Now to my entire OS, I will first apply this orange color in a lighter tone. So I won't pick up any photo pigment. I will just spread this color. So you can see I'm not picking up any more pigment. I'm just using this color itself very gently. I'm applying it to the area you're. So first, I will give the leaves with the help of the pink tone. Can you see your despite taking so much care, my orange seeped into my sky, so I will cover it again with the help of some black mountains there. And now my CAD is still wet. So we have to do this when idea is wet. So I'm picking up some pink color, dabbing off the excess water and just giving read the leaves from left to right like this. Very fine leaves. Remember to not introduce any new water. Otherwise this will begin to spoil. So if you feel your brush has somewhat Don't feel free to dab it onto a tissue and then put it onto your paper. Now I will just prepare the violet shade quickly and give some strokes with the violet shade. I'm doing the same thing, dabbing off any excess water. So I'm giving more of violet strokes near the horizon line because the violet color is your reflection would be near to the horizon line. And that does it to my reflection and the CVs. Now we will wait for this to dry and then add our silhouette. And after all of this dries, I will even correct this idea Your, with the help of black color. Now my C has dried completely, so I will begin adding the silhouettes with the black color. So first, I will just mark a line, your dream, this ED with a mountain range. So you see, even I had made a mistake, but it's all about how you connect your mistake and use it to your advantage. And now lastly, I will just add. So I'm first painting the outside of the board so that it's easier for you to understand the shift. So this is a normal shape that I'm painting. Just adding a straight line. Again, if you do not feel confident enough to add it with the help of our brush, go ahead and use a mako order fine liner to add these details. And lastly, I will just be adding some deflection of this boat with the black color and using some fine lines. So the exact reflection of the boot. And now to this guy, I will just add to both sides. And we are done with our painting for today. Let's remove the masking tape. So there we are done with our day 11 bookmark painting. I hope you guys enjoyed painting the slight color combination bookmark to David me. I will see you guys tomorrow with another new Bookmark. Thank you once again for joining me.
19. Day 12- Green Beach: Hello everyone and welcome to day 12 of this book, Pollock painting Series. Today we will again be painting a beach. So this time we will be having auxin greenery area around our beach. So I'm just marking this rough area like this. So this much part is going to be R3, R3, and this area is going to be a beach area. Now, let's have a look at the colors that we will be using this exercise. I will be using this turquoise, blue, and indigo for my AutoCAD and for the green AD AD, I will first video ring or the light cream color and then adding highlights with the darker green color. So let's begin painting. I will first read my CAD only. And now I will just give this wash with the help of a round brush. Now, I will begin with the turquoise blue color. I've laid out, the leader of turquoise blue onto the entire area. Now I'll shift to my indigo color and my background is still wet. I will begin adding the darker sheets with the indigo color. So majorly in the bottom area is where I'll be adding this darker shade. Now, this line that separates the greenery and the beach, I will be applying indigo in a very dark consistency there. So basically, this will begin to add as the shadow of the green ones we'd been that. So that is the reason I'm building this EDI DACA. Now with the turquoise blue color, I will again drop some turquoise blue. Remember to not add too much water again. So randomly I'm just dropping some turquoise blue again. I'm just trying to blend this darker blue with a damp brush into the turquoise blue. Now I'm just picking up some indigo and I will just drop some indigo near to this reflection. So you can see I'm just adding with the help of the tip of my brush, very small, fine lines. And that is it for a CEO. Now we'll wait for this to dry and then paint the greenery area. So I will begin applying a wash of water into the green area. Make sure you do not apply it close to the ocean. Otherwise, the kalos bleed. Always dab off any excess water with the help of a tissue. And now I will pick up my light green color first. And I'll give a wash of this light green color and do this complete area. You're now very gently. I will apply it near to the ocean area. And, you know, I'm being very careful such that both the spaces do not bleed into each other. Now I will be shifting to my darker green and I'll be using this dark green and not to go consistency. And I'll begin to add droplets like this. So some there, I'll leave the little gap for the light green area also. So the area that I'm painting it much darker. And now in a similar manner, I will be dropping some black color also onto my class. So I'm adding this black color basically to give depth. So I'm just dropping color without adding any new water to this area. If you feel your brushes were dove, remember to debit onto a tissue. I keep repeating these all, you know, simple tips again and again so that you do not meet on mistakes which use Pfizer and bioprinting. So that is it today. I'm just adding indigo neo to this again. And I will just small didn't this very lightly with a damp brush. So my background has dried and now I will pick up some white goulash and shift to my size four round brush. And I've been forced to add some drive-bys. Hand, I would first add some dry brush. So I'm dabbing off any excess water down nimbly your and now I will give some dry brush to this. And now some dry brush. I'm just giving this EDO with my right gentlemen. I will just add some highlights into the grass area also just randomly. And even on to the CEO, I'll just dot some drops like this. And we are done with our D2L. So let's remove the masking tape now. So I think I will just add a white highlight yours to the complete area of to make it look much better. So this is our ocean painting for today. I hope you guys enjoyed painting this bookmark with me. I will see you guys tomorrow with another new Bookmark. Thank you once again for joining me.
20. Day 13- Evening Sky: Hello everyone and welcome to day 13 of these bookmark painting series. I can't believe we're already more than halfway through the series. Today, we will be painting another beautiful sunset view. Let's have a look at the colors first. I will be using this golden shade from the brand name or palate. It is almost an oranges sheet, yellowish orange shade. I will be needing a purple sheet. This time. I will be using my red and blue callow, and I will be mixing these two colors to get my purple shade. I will be needing brown shade for my part V, and then I will be needing black color and my white gel pen. So first, let's do some pencil marking for this one. So roughly like this in a horizontal manner, I'm just marking a line and another line just parallel to this one. And the smallest space parallel line again. So your, it is going to be a footpaths. This is going to be our foot path. Let's mark our state law. So this is going to be the oil off my street lamp and I do just give this your connection to this footpath. Similar. I'm going to more street lamps, but these two are going to be shorter because this one is closer to my view. Now I'm just marking this cheek lamp also. To give it some detail look. I'm just adding some details to this lamp. So this area is going to be a lamp light and the others are just going to be colored with black. So that is it for our pencil sketch. Now let's begin painting. Now. I have the basic two colors for my sky that in my palette, that is a yellowish orange sheet and I have mixed a red and blue to get the populace shape. Now, I will begin applying a fresh coat of water onto my background. Now, I will first begin with a shade of yellowish orange and apply it Nieto this point particular area. Now I will pick up this popular shade. But first I will pick it up in a very light consistency and apply it at the remaining area here. Now, I will shift to my size four brush and I will pick up this darker purple color in a thick consistency to add details to the sky. Remember that you do not add any new water, so dab off the excess water and then apply the clouds. So this time I'll be adding larger batches of the dark O'Connor, but I will make sure to leave some gaps such type the previous color, that is the light-dark bone remains visible. I still need the clouds tacos, so I'm applying another layer, but I'm making sure that there's not much water that I'm adding. So when I feel that there is excess water that is getting being added, I'm just dabbing my brush. Now point to this yellow shade. I'll just add some clouds. If you notice, I'm dabbing off the excess water every time that I'm picking up beings. I'm just making the top ADR clouds more darker. I'm picking up some shade directly to add some clouds. And the auto, my orange color is where I'm adding these clouds with the red color. Also, I will be adding some clouds into the top area. But in the top area, I will measure the mock them only onto my right side. And that is it for my sky. Now, I will wait for this to dry and then I will paint the details of the park area. Now, my sky area has dried and I'm picking up the bond, our machine. And using the wet on dry method, I will apply this bond umbo and do this lowest part. Your, I have indeed been doing this in this small paddling line also, and this is going to be black. Now do this bottom area is drying. I'm going to paint these bowls of a street lamp with the black color. If you're not confident of painting these polls with TO brush, you can go ahead and market with the help of a fine liner order, Marcos. And if you are painting it with a brush, and if your brush does not have a pointed tip, remember to shift to a detailer brush so that you do not make it out of proportion. This D1 on the top of this Jeep lamp light. I will be painting it with black lab. Later on after everything dries, I will be adding white color with the help of my right gentlemen. Now, my Brown has also dry and I haven't beamed this complete area with this black color. Now I will be mixing a little of brown with my black to get a little dark brown sheet. And using that with the help of a pointer, I will be adding details to this footpaths here. So I have picked up the color and not take consistency. I will first mark this pattern in the dark sheet. Now onto this footpath, I will just give some tile the deals. So I'm first marking some straight lines and then I will given for the details. Notice these straight lines are little diagonal. Now I will be adding details to this, this parallel line. I will cover it with this dark brown color completely. Now, once the style string, we will even give some dry brush technique. But till then, I will shift to my white gel pen and add the details to the light of these power lights. If your area has still not trade, then please wait for it to dry and then add these details. Although if you do not have a white gel pen, you can add these details with white quash and thick consistency. And if you do not have even a white goulash, you can go ahead and do it with the help of white watercolor. But remember to use the watercolor in a very thick consistency. Now I'm adding a moon and to my sky and some few stars. Now with this same right, Ben, I will be adding some details. Add these details only when your painting is completely dry, even onto this foot. But randomly, I'm just giving some of these white highlights. Now to this part here, I will be adding more of these white highlight. Now, one last thing, I will just give a very light border with the black color to this lamp. And we are done with Hubble plot. Let's remove the masking tape now. So we had a deal with another pretty bookmark. I hope you guys enjoyed painting with me today. I will see you guys tomorrow with another bookmark.
21. Day 14- Pathway: Hello everyone and welcome back to day 14 of this book by painting CDs. Today we will be painting another evening sky along the route side. So let's begin with a pencil sketch that we require for this painting. So at around 40 percent of the people, I've just found a horizon line and now I will just mark roadway. So this is going to be about three and we will just reprinting it to black and adding some streetlights and PowerPoints. And this area is going to be a sky. Now, let's have a look at the colors that we will be using. I will be using this reddish orange shade. You can use audience shape that is available in your palette. Next, I will be using this karma in shade. If you do not have a carmine gallo, you can go ahead and use any pinkish shade, order crimson color. Then I will be using this shade of violet. If you do not have a violet color, you can go ahead and mix red and blue together and get a populous shade. And then I will be using brown mixed with a little off black. I have all the colors radio onto my palette. And now I will first begin by applying clean quart of dough only onto my sky. Now I'm forced beginning with the orange, and I will pin this orange sheet near to my horizon line. Then I'm shifting to my pink shade, that is my carmine color. Now lastly, alphas pick up the purple shade, but very light constancy first. And then with our darker consistency, I will be adding gauge for the highlights. Now, I will wait for my sky to dry a little bit and then I will be adding highlights to my sky. My sky has dried a bit. I will first pick up the Carmine sheet and add highlights with this shade first. Remember to dab off the excess water if any. So majorly, I'm giving some strokes of clouds from left to right, leaving space so that the lighter area is visible underneath. Now, I will shift to a thicker consistency of my violet color. And make sure again there is no excess water. And I'll just add highlights with this color now to my Cloud. So you see very randomly, I'm just placing some strokes. The most important thing in this is that you should not introduce any new water by adding these Leo's wet on wet. Otherwise, the Cloud will look very different and even launched have this distinct color look. And also if you notice, all of my clouds are mutually onto my right side. My left side is a little md. Now we will wait for this to dry and then add the details. Bottom ADR. Now my sky has dried and I will begin painting this pathway first. So first I will lay down some orange color. So this will add as the highlight of the sky above. Now, I will shift to my bond on book Allah and finish the rest of this pathway with this bond amber shade. And just let this little orange is shaded, be there as a highlight. Do not worry if your paint is going out right now as it is, we will be covering that with black. Now I'm picking up my black color and from the bottom I will give some strokes like this to add details to my pathway and make it Dakpo. So if you can see measure of my down, ADR has been covered with black budget still has the wrong highlight, Jeanette, and similarly on the top. But from the top, if you notice, I'm giving very small highlight waves. And now I'm even calling these and decide with complete plaque. I'm just adding a little mode of brown to this orange so that it's visible a little less. My PUT is still wet, so I'm able to do this easily. Now. I will wait for all of this to dry and then add more details to this. Now, my water media has also dried completely and I have picked up some black color on my size four round brush. And I've enforced add some bush, you're at my horizon line. So I'm fading it by making it somewhere to Allah and some very, very short. Now, I will add a power light. If you are not confidence to do this with a black brush, you can go ahead and do so with the help of a fine liner. So I've kept the light area, MT. I will be adding it with the help of my white gel pen. And also to decide I will be adding to power poles. So this one is shorter as it is far from our view. And the one is a little taller. I'm just adding these small connections. So I just added another small power line there. I'm just making the bushes a little more. Now, either shift to my white gel pen to add the final details. So first I'm marking or distinguish between this black color. And then on the center of the moon, I'm just giving some highlights like this. Now I will fill this lamp also with the white gel pen. This bowl. I will add a lamp and I will add the DDI with the black color using my brush. Now, I will add another line. So all this is just giving depth to my painting. You can feel free to stop video feed and lasting adding a small moon. We are done with this class project. Let's remove the masking tape. And we are done with another bookmark. I hope you guys enjoyed painting this with me today. I will see you guys tomorrow with another new bookmark.
22. Day 15- Rainbow: Hello everyone and welcome to day 15 of this bookmark painting series via just six days of v from closing the CDs. Today, we will be painting or rainy weather and some raindrops. Let's have a look at the colors that we will be needing for this painting. In the center ADR, we will be painting or the rainbow. And around this we will be painting a loose sky with a Payne's gray color. And then after that, we will be giving the raindrop details. So far the main movie will be going ahead with all the rainbow colors. That is violet, indigo, blue, green, yellow, orange, and red. And then we will be needing Payne's gray for the remaining area. So go ahead and select all the data is available in your palate. And then let's begin painting. I will first begin with giving a clean quart of freshwater onto my background. Now, I will first be marking the rainbow in the center and then give the details of the beans screen, the remaining area. So I will begin with one by one color. So first I will begin with the violet color that's already on to my palette. So I'm just using that now to paint the rainbow. I'm using my size two brush, which has a pointed tip. And I want to verify in lines of the rainbow color, make sure that your paper does not have too much water. And if your brush does not have a pointed tip, uses smallest size brush. Now after this, I will be picking up the indigo color. So if you notice this side, there is a little excess water that's causing these paints to spread unevenly. So I'll just pick up the excess water with the help of my brush. Now, I'll shift to my blue color. You can go ahead and use any bright blue available in your ballot. Remember when you're doing this, do not introduce too much water. Just pick up the paints and note-taker consistency will begin to spread and not give you a distinct look. Now, I'm picking up some green color. After the green color, I'm picking up my yellow color. So if you notice, I'm deliberately picking up these colors and noted consistency from my palette and not adding any water or diluting it too much. Now picking up the orange color. And lastly, picking up the red color. If you feel your brush has excess water, always dab it off on the tissue and then apply it on the people. And just make this violet color a little darker because it's sprayed it too much. Now, shifting domain because I is wrong brush, I'm picking up some Payne's Gray and I will add Payne's gray in a very light tone in the remaining area. Near to the end colors, that is the violet and the red. Remember to apply pins gray very carefully. So you can either leave a little white gap and then apply it. So automatically, it will merge properly. If you notice despite applying all the colors, may paper was still VET, which made it easier for me to apply the pins gray quickly. If your paper has dried, then wait for your rainbow to dry completely. And then in the remaining ADR, revert your paper and apply the pins gray color. I'm just giving some darker details with the Payne's gray. But near to the rainbow, I'm keeping it light and make sure you do not make it too dark also. Otherwise the raindrops will not be that visible. And that is it. Now I will wait for this to dry and then we even add the raindrops. Now my background has dried and I have some black color in my palette. And now with the help of my smaller size brush, that is a size two brush, I will be dropping the raindrops. So let's begin painting them. As we discussed, the raindrops are going to be very nitrogen and of different shapes and sizes. So begin painting them randomly. Again. Remember, if your brush does not have appointed the shift to a detailer brush, that will make your look much prettier. So if you notice, I'm adding these shapes very randomly and at random places and nothing in specific. Hi, we just add a few more in the center. So somewhere I'm giving the shadow on one end, that is the left-hand maybe somewhere I'm giving it at the bottom. So I'm just trying to vD it all and make it look more natural as much as possible. And I'm done adding raindrops with the black color. Now, I will shift to my right, gentlemen, if you do not have a white gel pen, you can use whitewash or white watercolor in Arctic consistency. Now to this, I will begin adding these by details. Do not fill it completely by some smaller ones. You can try and fill it completely with white. So I added all the white and let's remove the masking tape now. And we had a deal with our day 15 bookmarks. I hope you guys enjoyed painting this with me. I will see you guys tomorrow with another bookmark.
23. Day 16- Glowing Night: Hello everyone and welcome to Day 16 of this bookmark painting Series. Today we will be painting another evening sky by the 10k side. So let's just draw a horizon line. So almost at the center of the paper, I have marked a horizon line. This is going to buy my sky area, and this is going to be my C area. Now, let's have a look at the colors that we will be needing for this exercise. I will be using a shade of orange color near to my horizon line. Then I will be using auto coins, blue Kano, and at the topmost area of the sky, I will be using an indigo color. So the three colors that we need for our sky, orange, turquoise, blue, and indigo. And those are the same three colors that we will be needing. And additionally, we will be needing black column. I will begin with first wetting my sky. Now I will begin painting from my horizon line. I'm using a flat brush and I will apply a clean layer of orange color. Now I'm picking up some takeaways, blue color. And I will apply it, leaving some gap between the turquoise blue and the orange. And I'm applying it in a little circular manner. I'm just lifting off the turquoise blue that was spreading into my orange. Now lastly, I will pick up indigo. Clean blend between the indigo and the turquoise blue. And between the orange and the turquoise blue, I needed a little shiny area which has come out perfectly. Now I will wait for this to dry and then paint my C. Now my sky area has dried and I will carefully apply a wash of water into my C. Leave a little gap between the sea and the sky. As it is, we will be painting black silhouette there, so that will get covered up. And this will prevent your sky, Carlos from bleeding into the sea. Now for this, I will first begin with the orange color in the sea. I'm applying the orange also in allegiance ocular manner. Now I will pick up boys blue. And lastly, I will pick up indigo. I'm just making the turquoise blue also a little circular your and making the indigo darker. Now, I will wait for this to dry and then we will give him a final DDMS to the spindle. Now, my CAD has also completely dry it and I will just mark or Little Rock area with my pencil. Beginning from my horizon line and into the sea, I'm roughly giving this pencil mark may not be visible to you because it's very light. But I'll first being the borders of this so that you can see it. So beginning for my horizon line and at the bottom. So that's the shape of the place that we are covering that the black color. And now I will fill this entire area but black. While so additionally, I will be adding some drugs into the sea randomly, very small ones. So some there. I'm just giving out these little details to this area by just making them look rough ended. Similarly, you're at the top also. I'm doing the same process. So first at the horizon line, I will just give a mountain. And now to this, I will just add one fine. I'm not adding more detail. Pine tree. I'm just adding of ADP sick and a quick pine tree. I will add another smaller one just near to it. And put the remaining mountain. I will just give some grass details like this. Remember to vary the sizes throughout. That will give much natural look to your painting. So that is it. I will just shift to my white gel pen quickly. And I will add some details. First, I will add ammonia. Then near to my CAD on this black area, I will just give some white highlights. So you notice I'm giving these white highlights vary randomly and nothing in specific. And add my horizon line, I will just mark a very tiny white line like this to distinguish my horizon and the CAD. Now through these tiny dots I'm adding reflection with my right gentlemen. Very tiny ones and nothing in detail. And we are done with our D 16 bookmark. Let's remove the masking tape now. And there we are done with another pretty bookmark with an evening sky. I will see you guys tomorrow for the day 7 didn't bookmark.
24. Day 17- Landscape: Hello, everyone, and welcome to day 17 of the bookmark
painting series. We are just five days away from ending this 21 days series. Today, we will be painting
a very easy landscape. Let's begin to do some pencil
marking for this first. I will first mark
a horizon line at almost 60% below the sky area. And now into the bottom area, I will just mark a
lake reflection. So this is going to
be my lake area, and these two are going
to be my green field, and this is going to be my sky. Now, let's have a
look at the colors that we will be using
for this exercise. I will be using this
Naples yellow color, which is a very
light yellow color. I will be using the
bright blue color, which is again a very
light blue color. I want my sky to be very
light for this one. My blue and yellow are
going to be very light. Onto the sea area. I'm again going to be using
the same yellow and blue, which I will be
using for my sky. Here I will be using
Sab green and a dark green and some
brown to add details. That is it for the
color section. Now, let's begin painting. I will first apply
a clean coat of water onto my sky area only. Now, I will begin painting, applying the colors onto my sky. So I'm first picking
up the Naples yellow. You can go ahead and
use any light yellow, and I will apply a very small
line at my horizon line. And I'm just making the color. Okay. Okay. So Majorly
between my blue and yellow, it's going to be a
very light shade and you know the blending of the
two colors will be visible. Now, I will just
lighten this blue from the top till
the yellow color. So I'm just moving from the top to my yellow
color directly. You see this is getting
a gradient from a dark blue to a light blue
till I reach my yellow. That is how light I
want my sky to be. Now, till my sky is drying, I'll begin applying a
fresh coat of water with the help of my round
brush into my sea area. Be careful to leave
a little gap so that the colors from the sky don't begin to
bleed into the sea. Or else you can wait
for your sky to dry completely and
then paint this. Now, in the sea, it will all be the reflection
of the sky colors. So first, I will place some yellow near to the horizon line. Again, a very light shade. And similarly, like the sky, I will be placing the
blue color at the bottom and merge the two same
way as I did in the sky. So that is it for
my sea area also. Now, I will pick up
some sap green color and directly start applying
into the green area, but I will be careful such that it does not
bleed into my sea. The reason why I'm not
waiting for my sea to dry is because I don't want a very sharp edge between
my green field and the sea. That is the reason I'm
applying this bet on dry and very gently
near the sea area. So if you can see, it is
not blending into the sea, but it is also not
having that sharp edge. But for doing this,
make sure that your sky is at least
completely dry, or else the colors
would bleed into the sky and spoil your sky area. Now, I'm just picking
up some dark green. And while this is wet, I will just drop in
some dark green colors. So leaving some gap, I'm just dark green to add
details to this grass area. If your paper tends
to dry quickly, what you could do is
paint the sea area, wait for it to dry, then use the wet on wet technique to do
the green field area. That way, your paper will
remain wet for a longer time and you will get enough time to apply this darker
green details also. Okay. Now, we will wait for all of this to dry and then add some final details
onto this painting. Now, I have some dark brown
color onto my palette, and my green area
has almost dried. So I will begin giving details with this
dark brown color. You can go ahead and use any dark brown available in your palette or a sapia color. And first, along this greenery, I will just give some details
with this brown color. So to give it a natural look, I'm trying to vary the shape and not keep it a very
natural curve. So I'm just adding these
details along the lake side. Now somewhere, I will just drop some grasses like this
with the same brown color. Very tiny ones. Always remember, if
for adding details, your brush does not
have a pointed tip, always shift to a
detailer brush so that you have a much finished
look to your painting. At certain areas near
to the lake side also. I'm trying to add these kind of reflections of the
grasses above. Very few. Now, I will add a mountain
range at my horizon line. So I will first mark
a very tiny line. And now, I will give this a mountain range look by bearing its height
at different places. Also, in my field area, I will just mark a
very fine brown line, which will act as a mud field. Now, with a very
bright yellow color, I will mark a sun near to
the yellow color of the sky. Now, while my sun is still wet with the help of a very
fine pointed brush, so this is size three by zero. I will just try to pull out very fine sun rays
from this itself. Basically, from the
center area of the sun, I just tried to pull out
this sunlight waves. Now, one last
thing, we will just paint a very small
palm tree here. And that is it for our painting. Let's remove the
masking tape now. There were done with
another bookmark. I hope you guys enjoy painting this easy
bookmark with me. I will see you guys tomorrow with another new bookmark. Okay.
25. Day 18- Warm Sunset: Okay. Hello, everyone,
and welcome to day 18 of this bookmark
painting series. Today, we will be painting
yet another C sk. But this time, we will be adding very different
sylhuettes to this. Let's begin with the
pencil sketch first. First, I will mark
a horizon line at almost the center of my page. A little above the
center actually. Now, I will be marking. This is going to be a C area. So here I will be marking the details that we
will be painting. Basically, we will be adding some wooden stands on which we will be having
some birth sitting. So these wooden logs will be a little above
into the sky area. The background is going
to be the sea area. I'm roughly wearing the
shape and not making it complete straight because
to give it a natural look. Now, onto two of these, I will be marking
some birds sitting. A oval like this. Then a small circle
as the head and then just a leak and adding
the feathers like this. Similarly, I will be
adding a bird here. So that much is enough
for our pencil sketch. Now, let's begin painting. First, let's have a look at the colors that we will be
using for this exercise. For the sky, I will be
using the sunset colors. That is a yellow,
orange and red shade, and then a little bit of
a violet or a pink shade. And in the sea area, similarly, I will be using
the same sky colors. Then with a very
dark brown color, I will be painting
these wooden logs, and with black color, I will be painting these bodies. And then in the foreground, I will just add some details. Let's begin painting. I'll first apply a clean coat of water only into my sky area. Now, in my sky area this time, I will begin applying
the colors in circular manner so that I get a very bright sun
look in the center. This leaving a white gap, I will begin
applying the colors. If you feel that the
color is seeping in, you can brighten the
area with the help of a tissue that is just
lifting up the colors. Now, I will pick up
the orange color. So just to make the
blend smoother, I'm running a damp brush
between these two colors. Now, lastly, I will
pick up a red shade. Now, with a damn brush, I will run it across all the colors to make all
the blend look smoother. I'll just apply some darker
red color at the edges. Okay. My background was still wet, so I kept applying the color till I got a very smooth blend, and I did not introduce
any new water. Now, I will wait for this to dry and then paint a sea area. Now, my sky has tried and I will apply a coat of water
into my sea area. Now, for the sea area, I will first paint the entire
sea with yellow color. Now, shifting to my
size four round brush, I will add some details
with the orange color. Basically, till my
sea is still wet, I will begin adding
some sea waves, but remember to not
introduce any new water. And I will keep the center area bright because of the
reflection of the sun. And as I'm reaching the bottom, I'm just increasing the
size of these waves. So you can see my center is very bright
without any orange. Similarly, I will be adding some waves with the
red color of my sky. Again, with this red color also, be careful that you're not
introducing any new water. And major leaf, you see, it's only at the edges that I'm giving these waves
at the top area. Okay. So that is it for my s area. I will wait for this to
try and then we will add the final details with the
brown and black color. Now, my background
has tried completely, and I will pick up
some dark brown color and I will paint
these wooden logs. I will also be wearing the
color of these wooden logs, and I would not be painting it with just one color of brown. So I will be painting with lighter brown and some with
darker brown and black. This one I will be painting
with a medium brown tone. Also in between, I will
be using the black color. Now, on this wooden log, at this area, it's the sunlight
effect that is falling. So this area will be very light, and the remaining area, I will be painting with so
that the brown stands out. This basically depicts that
here because of the sunlight, this area is light and the
entire log is a darker color. Now, these two bigger
rods at the edges, I will be painting
with directly. D And now, also these two bodies. I will paint it
with a black color. Now, I will just
add a connection to all these rods with the
help of a black color. Now, the last thing that is adding details
here at the bottom. I will just take the
black color and just pop out some grass like this very randomly in
the center area. If you want, you can do so with a mix of black
and brown booth, or you could only do this
with a brown color also. So that is it for a bookmark. Let's remove the
masking tape now. Okay. So there we are ready
with another bookmark. I hope you guys enjoyed painting this beautiful
sunset view with me. I will see you guys tomorrow
with another bookmark. Okay.
26. Day 19- Galaxy 2.0: Hello, everyone,
and welcome back to day 19 of this bookmark
painting series. So this is what we had
painted on day 18. Today, we will be painting a beautiful night
sky northern look. Let's have a look
at the colors that we will be requiring
for today's painting. I will be using a
turquoise blue color, then an indigo color
and then black color. If you do not have
turquoise blue, you can use any
greenish blue or mix a green an blue to get a
little greenish blue color. Then if you do not have indigo, you can go ahead and
use any darker blue, and then we will be
using the black color. We do not have any pencil
sketch for this painting. Let's begin with wetting
our background first. Now, I will begin with
the turquoise blue color. So almost leaving
just the top edges, I will apply this
turquoise blue color to the remaining of my page. Leaving this center
area a little light, I will begin to darken the edges of the
turquoise blue also. M Now, I'm shifting to my indigo color. And I'm applying the
indigo color near to the turquoise blue in a
little circular manner. But I'm not completing the
circle here because this area, I want it to be in
turquoise blue only. So only at the top edges is where I'm applying
this indigo color. And now I'm picking
up pins gray. You could also use black color if you do not have
a pains gray color. I will still add
a little black at the topmost area to
make it look very dark. Now, I will be doing the lifting technique
to lift some colors to make some areas a majorly
at the top area here, So you see, using the
lifting technique, I just picked up some
color from there. And I'm giving in some
turquoise blue color there. Now, I will pick up
indigo and darken it and give another coat
at the remaining areas. It's very important for
your page to stay wet for a longer time to keep adding these details and
layers over layers. If your page is drying, then make sure you
wait for it to try completely and use the
technique and then move. So that is it. I will wait for all of this to dry and then add some splatters and add
the pine trees at the bottom. Now, my background
has tried completely, and I will splatter
the stars first. So I have picked up
some white quash in a thick consistency, and now I will splatter it
with the help of my finger. Wanted the top area filled
with a lot of stars. That is the reason I have
given so much splatters. Now, I will begin adding the pine trees with the black
color at the bottom area. So, as I'm reaching the bottom, I'm making the details and just filling it
with more of black. Now, in the center, I will be
adding one large pine tree. But onto this pine tree, I will not be
adding much detail. So I will make it look a
very scarce pine tree. You see, very randomly, I'm just adding few
branches here and there and not making it
a filled up one. Now, the last thing left is to add a very fine
moon into the sky. So I will be using my white
gel pen for that purpose. This time, the moon
is going to be but And that is it for our
bookmark for today. Let's remove the
masking tape now. So there we are ready
with another bookmark, a pretty one, but a easier one. I hope you guys enjoyed painting
this night sky with me. I will see you guys tomorrow
with another bookmark.
27. Day 20- Sunset Seascape: Hello, everyone, and welcome to day 20 of the bookmark
painting series. We are just one day away
from ending the series. Today, we are going to be
painting a beautiful C scale. So there is only
one pencil sketch. That is a horizon line. This time, the C area
is a little bigger, and I will just
mark a rough wave re That is it for
a pencil sketch. We will first begin painting a sky and then move
to the sea area. But let's have a look
at the colors first. For the sky, I will be using yellow color near
to my horizon line. Then shift to an orange color, and at the top part, it will be blue color. Then with pink color, I will be adding the clouds. These are the four colors, and those same colors we will be using into a sea area as well. Now, I will begin applying
a fresh coat of water only onto my sky area Okay. Now, I will begin with the yellow color at
my horizon line. So I'm using the
Naples yellow color. You can go ahead and use any light yellow
in your palette. These base colors, I'm
going to lay them down in a very light color background because I will be adding the clouds to give
depth to all of this. Now, the orange color, I'm laying it down a far from the yellow so that in
between both of that, I get a good blend. No last, I will pick up
the bright blue color. Okay. You can see, I've got such a clean blend of
colors into my sky. Now I will shift
to the pink color. That is a carmine shade. And I will begin adding clouds. But remember, when we
are adding clouds, we do not have to
introduce any new water, but I also want my color of the clouds to be
very light and not too. I'm first diluting it. Then before applying it here, I will off all the excess water, and now I will gently
place the clouds. This was still a lot of
photo, so I dabbed it again. You see, Despite
damping it so much. Still, there was a
little more water. That is the reason
the clouds have spread a little
more despite that. Now, I will pick up
some white cash. And onto the clouds, I will add details
with the white cash. So I'm just moving my
brush in the same manner, but in smaller areas this
time to give more details to these clouds here. What? So that is it for my sky area. I will begin applying
a fresh coat of water onto my sea area. Now, first into the sea, I will be painting a complete
layer of yellow color. Now, in the remaining
bottom area, I will be adding the
raw Sienna color. Do not worry. If your
raciena goes into the sea or your sea color
is coming into the raciena, it will make it
look more natural. Now, I'm waiting for this
to dry a little bit, not completely, and then I will begin adding the sea waves
with the colors of the sky. My area is 50% dry and it's the right time
to add these ripples. I'm first picking with a
light shade of orange. Remember to not
introduce any new water. And I want to keep my center
area bright with yellow. So I'm just marking
smaller waves. After the orange color, I'm doing the same thing
with the carmine shade. Now, I'm doing the same thing
with the bright blue color. But this time, very less
ripples with this color. While you are adding
the blue color, be careful that you do not place it too much
over the orange. Otherwise, it will begin to
give you muddy textures. Now, lastly, I'm shifting to my violet color to give
the final taker waves Now, I will wait
for all of this to dry and then give
the final details. Now, my entire painting
is completely. So I will first begin
adding a mountain range at my horizon line
using a brown color. Now onto my sea area, I will give some highlights
to these bigger purple waves. Basically, I'm just
trying to add reflection with a darker color underneath
these bigger waves. So I also added some fine waves with this purple color only. Now, I will add some highlights
with the black color. So underneath these
taco wave lines, I'm just placing
a very fine line of black to add more
shadow details. Okay. Now, I will switch to my white cash. I will first mark this wave line with the help of a white cash. And now, using the technique, I will try to pull
out the waves. Okay. Also with the white Case, I will add some details into the waves also in the sea area. So that is it with
my white color. Now, lastly, I will just shift
to my bone sienna color. And I will first add a highlight underneath this wave
that is a shadow. And now using some
drivers technique at the sand area also. And now the last highlight with the black color underneath
this wave again. And last pages throw
some platters. If you're not confident
with these platters, you could cover the area till here and then do these platters. Now, we're done
with our painting. Let's remove the masking tape. And there, we are ready with our beautiful seascape
bookmark for day 20. I will see you guys tomorrow
with our last bookmark.
28. Day 21- Pastel Sky: Hello, everyone,
and welcome to day 21 of this bookmark
painting series. I hope by now all of you would have got into
a daily practice of giving maybe just 10 minutes of your day to something
that you love. And if you have followed me
along through the 21 days, I'm sure by now you
would be in love with watercolors and would want to keep this practice on every day. So let's begin painting
our day 21 painting. Today, we will be painting a pastel sky and add a
lot of palm trees to it. So, you know, since being the last painting
of this series, I wanted to make it
a little different. So we will learn how to make different pastel
shades today and then use them into our sky and paint a lot
of palm trees along. So we'll first begin with
preparing our colors this time because I'm sure many of you would not be having
the pastel shades ready. So I am using the shades
from my normal palette and I will create pastel colors using these colors
and white color. So I will first
begin taking down the normal shades that
I want onto my palette. First, I will pick up
some yellow color. The second color that I
want is a shade of orange. Next, I need a shade of
pink or a carmine color. So I'm going ahead
with a carmine color, which is a reddish pink tone. Then I need a little of
the violet color too. And lastly, I need
some blue color. These are the five basic
colors that I need for my sky. Now I will be turning
them into pastel color. You could either use white
water color to make them pastel or you could use wide
cash to make them pastel. I will be using white
quash to turn them pastel. Now I will begin adding
this white quash to all the five colors
onto my palette. Okay. You see, it's turning
into a pastel shade now. But remember to not add too much white color altogether because it
may turn to pastel, then you may have to add again some little primary
color back to it. I always believe it's
not important to always have all the
colors readily available. There is always ways how you can mix the color and
prepare your own color. So that will always give you and make you more familiar with the
color and how they react. So I'm ready with my colors. Now I will begin
painting my sky. I will first begin with a
clean coat of water overall. Okay. I'm picking up my
round brush size eight, and I will begin adding
the colors one by one. So I'll begin with the
yellow color first. So since these are
pastel shades, they would be very
light in color. But when all the
colors will be put up, they'll look very pretty. Randomly in the center area, I've added little
yellow strokes. Now, shifting to the
orange color next, Now, I will shift
to this pink color, the pastel pink and apply it at the areas where I have left white between the orange colors. You see very randomly. I'm just dropping the
colors here and it's all pigging to take its shape
and creating its magic. But remember one thing, while dropping colors, always you never have any excess water. Otherwise, you will not get
the look of all the colors. Okay. Now, I will shift to the pastal blue color. Also, if you're not confident using this bigger size brush, always shift to a
smaller brush for adding such smaller
details so that you have more control
over the colors that are dropping and more
control over the brush. And now last, I will pick
up the purple shade. I will again begin dropping
some purple clouds randomly, but very small compared
to all the others. Okay. So that is it for my sky area. Now I will wait
for all of this to dry and then begin
adding my palm trees. So my background has
dried completely. And now I have my black
color ready on my palette, and I will begin
adding the palm trees. This time, there are going
to be a lot of palm trees. So I will begin with
the first one here. Now, another one from here
that is from my left end, so it will be coming
somewhere here. Now, here, I will begin painting some smaller palm trees. Okay. And now I will just pop out
some leaves from the bottom. And one leaf from your. And now, one last thing, we will add a few
birds into our sky. M We are done with our final painting
of this series. Now, let's remove
the masking tape. I hope you guys enjoyed painting this with me and thank you once again to everyone who joined me in this
21 days journey.
29. Thank you: Okay. Thank you so much to each and every
one of you who joined me throughout this 21 days of this watercolor
practice class. I hope in this 21
days all of you were able to develop
this habit of daily practice and just
give 10 minutes or whatever time available at
your end to daily practice, maybe practicing small
or practicing big. That would be your choice. I would love to see
all your creations under the project
section of this class. And if you put
them on Instagram, you can tag me at the
rate creating from the art and I would love to
reshare your projects there. Thank you once again to each and every one
of you who joined me throughout the 21 days and stuck by it and
practiced all of this. I will see you guys soon in my next class till
then keep creating.
 Umashree Taparia, Artist, Art Instructor, Entrepreneur