Transcripts
1. Let it snow!: Hello everyone. It's
that time of the, again, and the holiday
season is finally Hood, which means it's time
to jingles and belts, bring out the Christmas
cookies and embrace all the things Mehdi
and dried Christmas. The season of love, a time for being with the
people you really love. So open your hearts and
let the giving begin. So to make this
Christmas season a little more cheerful and joyous, I have come up with a gorgeous
Christmas themed class. I'm Ashley area and engineer disk and an art
educator from India. As you might have
already guessed, this class is all
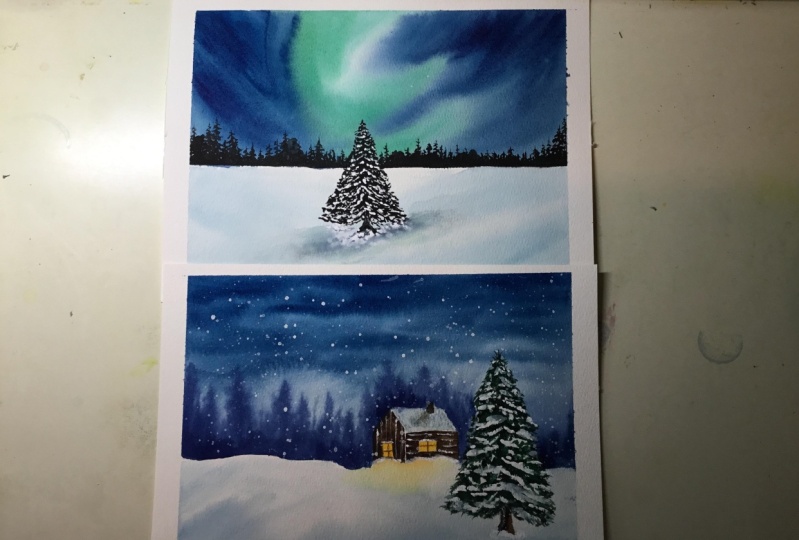
about Christmas. We'll be painting, do the front and beautiful
snowy Christmas night. This class is going to fill your heart with
so much of joint. So where a cozy sweater, light up some candles, grab a cup of hot chocolate, and of course,
your ad set place. All right, so now that the
Christmas mood is all set, let us begin painting.
2. Materials You'll Need: Okay, so let's take a look at the materials that we'll
need for this class. The first is the people. So for this class, I'll be using the paper
from the brand Fabriano. This paper is basically 300 GSM and it has got a
minimum thickness of 140 LB. And this is 100 percent cotton. So a 100 percent
cotton means that the paper will be able to
handle multiple washes. It gives you a nice texture and the people will stay wet for a longer
duration of time, which will allow
you to paint a wet on wet techniques and other
watercolor techniques. So go with any paper
that you have. Don't stress out
if you don't have the exact similar supplies
that I'm showing you all here. So you can grab any
paper and join me. The next is the backing board
or any piece of cardboard. So this is basically to
tape down your paper. And I'm fixing my
paper onto this board. Because there might be times where you need to lift
your paper and tilt it. And if you tape down your
paper onto the table, you may not be able to do that. So you can just grab a
piece of notebook cover or any other hard
surface that you have got to formally tape
down your paper. Okay, Next, let
us take a look at the brushes that we'll be
needing for this class. So first is the flat wash brush. This is basically to apply
an even coat of water onto the sky so you can go with any flat brush
that you have got. The next one would be a three
by four inch flat brush. This is from Princeton heritage. And I'll be using this brush to paint the sky for
the northern lights. So you can go with any
smaller sized flat brush. May not be from the same brand. And next we'll be needing
a couple of round brushes, size six and size it. So this is again from the
brand Princeton heritage. So you can go with any
brush that you have got. And lastly, we'll be needing some detailing
brushes of size 24. So you can go with 0 or
one if you have got. So that's it for the brushes. And you can grab any brand
brushes and join this session. Next, let's take a
look at the colors that we'll be needing
for this class. I'm using colors from
the brand White Nights. You can go with any
watercolors that you have got, nu naught be white knight. So you can grab
any basic supplies that you have and join me. Okay? So White Nights is
a Russian brand. So if you don't have that,
It's completely fine. Just join me with
whatever you have got. No need to stress out. Next, you'll be needing
some white gouache brush basically to add the snow. But if you don't
have white goulash, you can also join me
using whitewater color. So this white gouache I'm using is from the brand rooster. It's absolutely fine if
you don't have, Gosh, you can join me with
white watercolors. Okay. So next we'll be needing
some masking tape. This is basically to tape down
your paper so you can grab any masking tape or painter's tape with which you can formally fix your
paper onto the board. So VB, using this
masking tape to formally fix up paper and not
allow any paint to seep in. And next we'll be needing
some pencil, NOT z. This is basically to add some pencil sketches before
you start the painting. Okay, So these are pretty much some basic supplies
that we'll be needing. And lastly, we'll be needing some a paper towel or tissue. So this is to grab, this has to dab some
excess amount of paint from your
brush or watered. And you may also grab a
clock if you have that. And lastly, we'll be needing some two jars of clean water. One is to wash away the paint from your brush and the other
is a clean jar of water. This is basically, you know, to clean your brush
and lift the paint. So yeah, this is pretty
much it for this class. The supplies are very basic and you can join me
with whatever you have. So I'll see you in
the next class. Thank you.
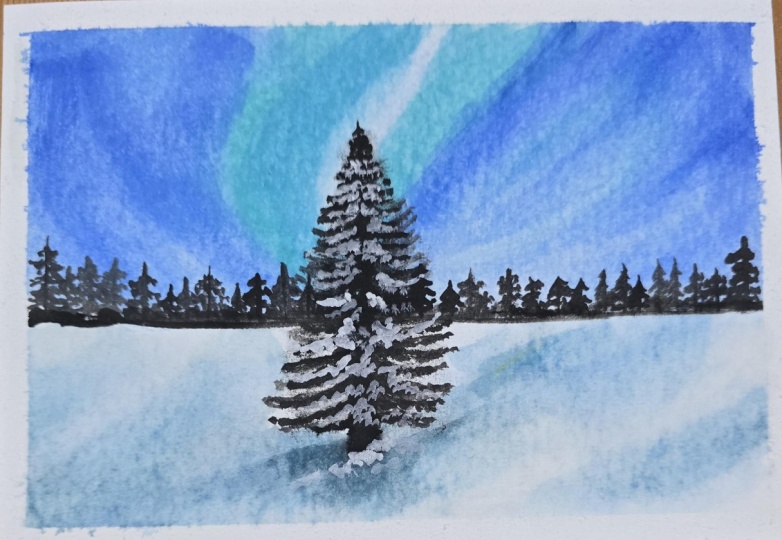
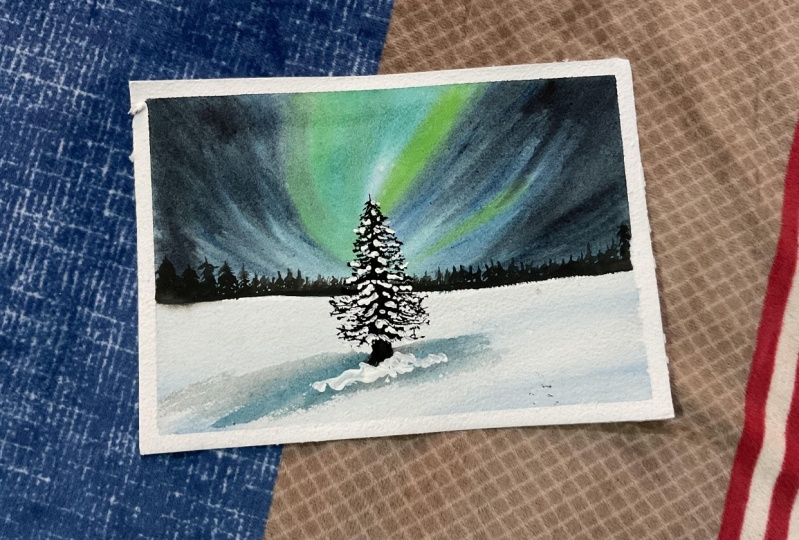
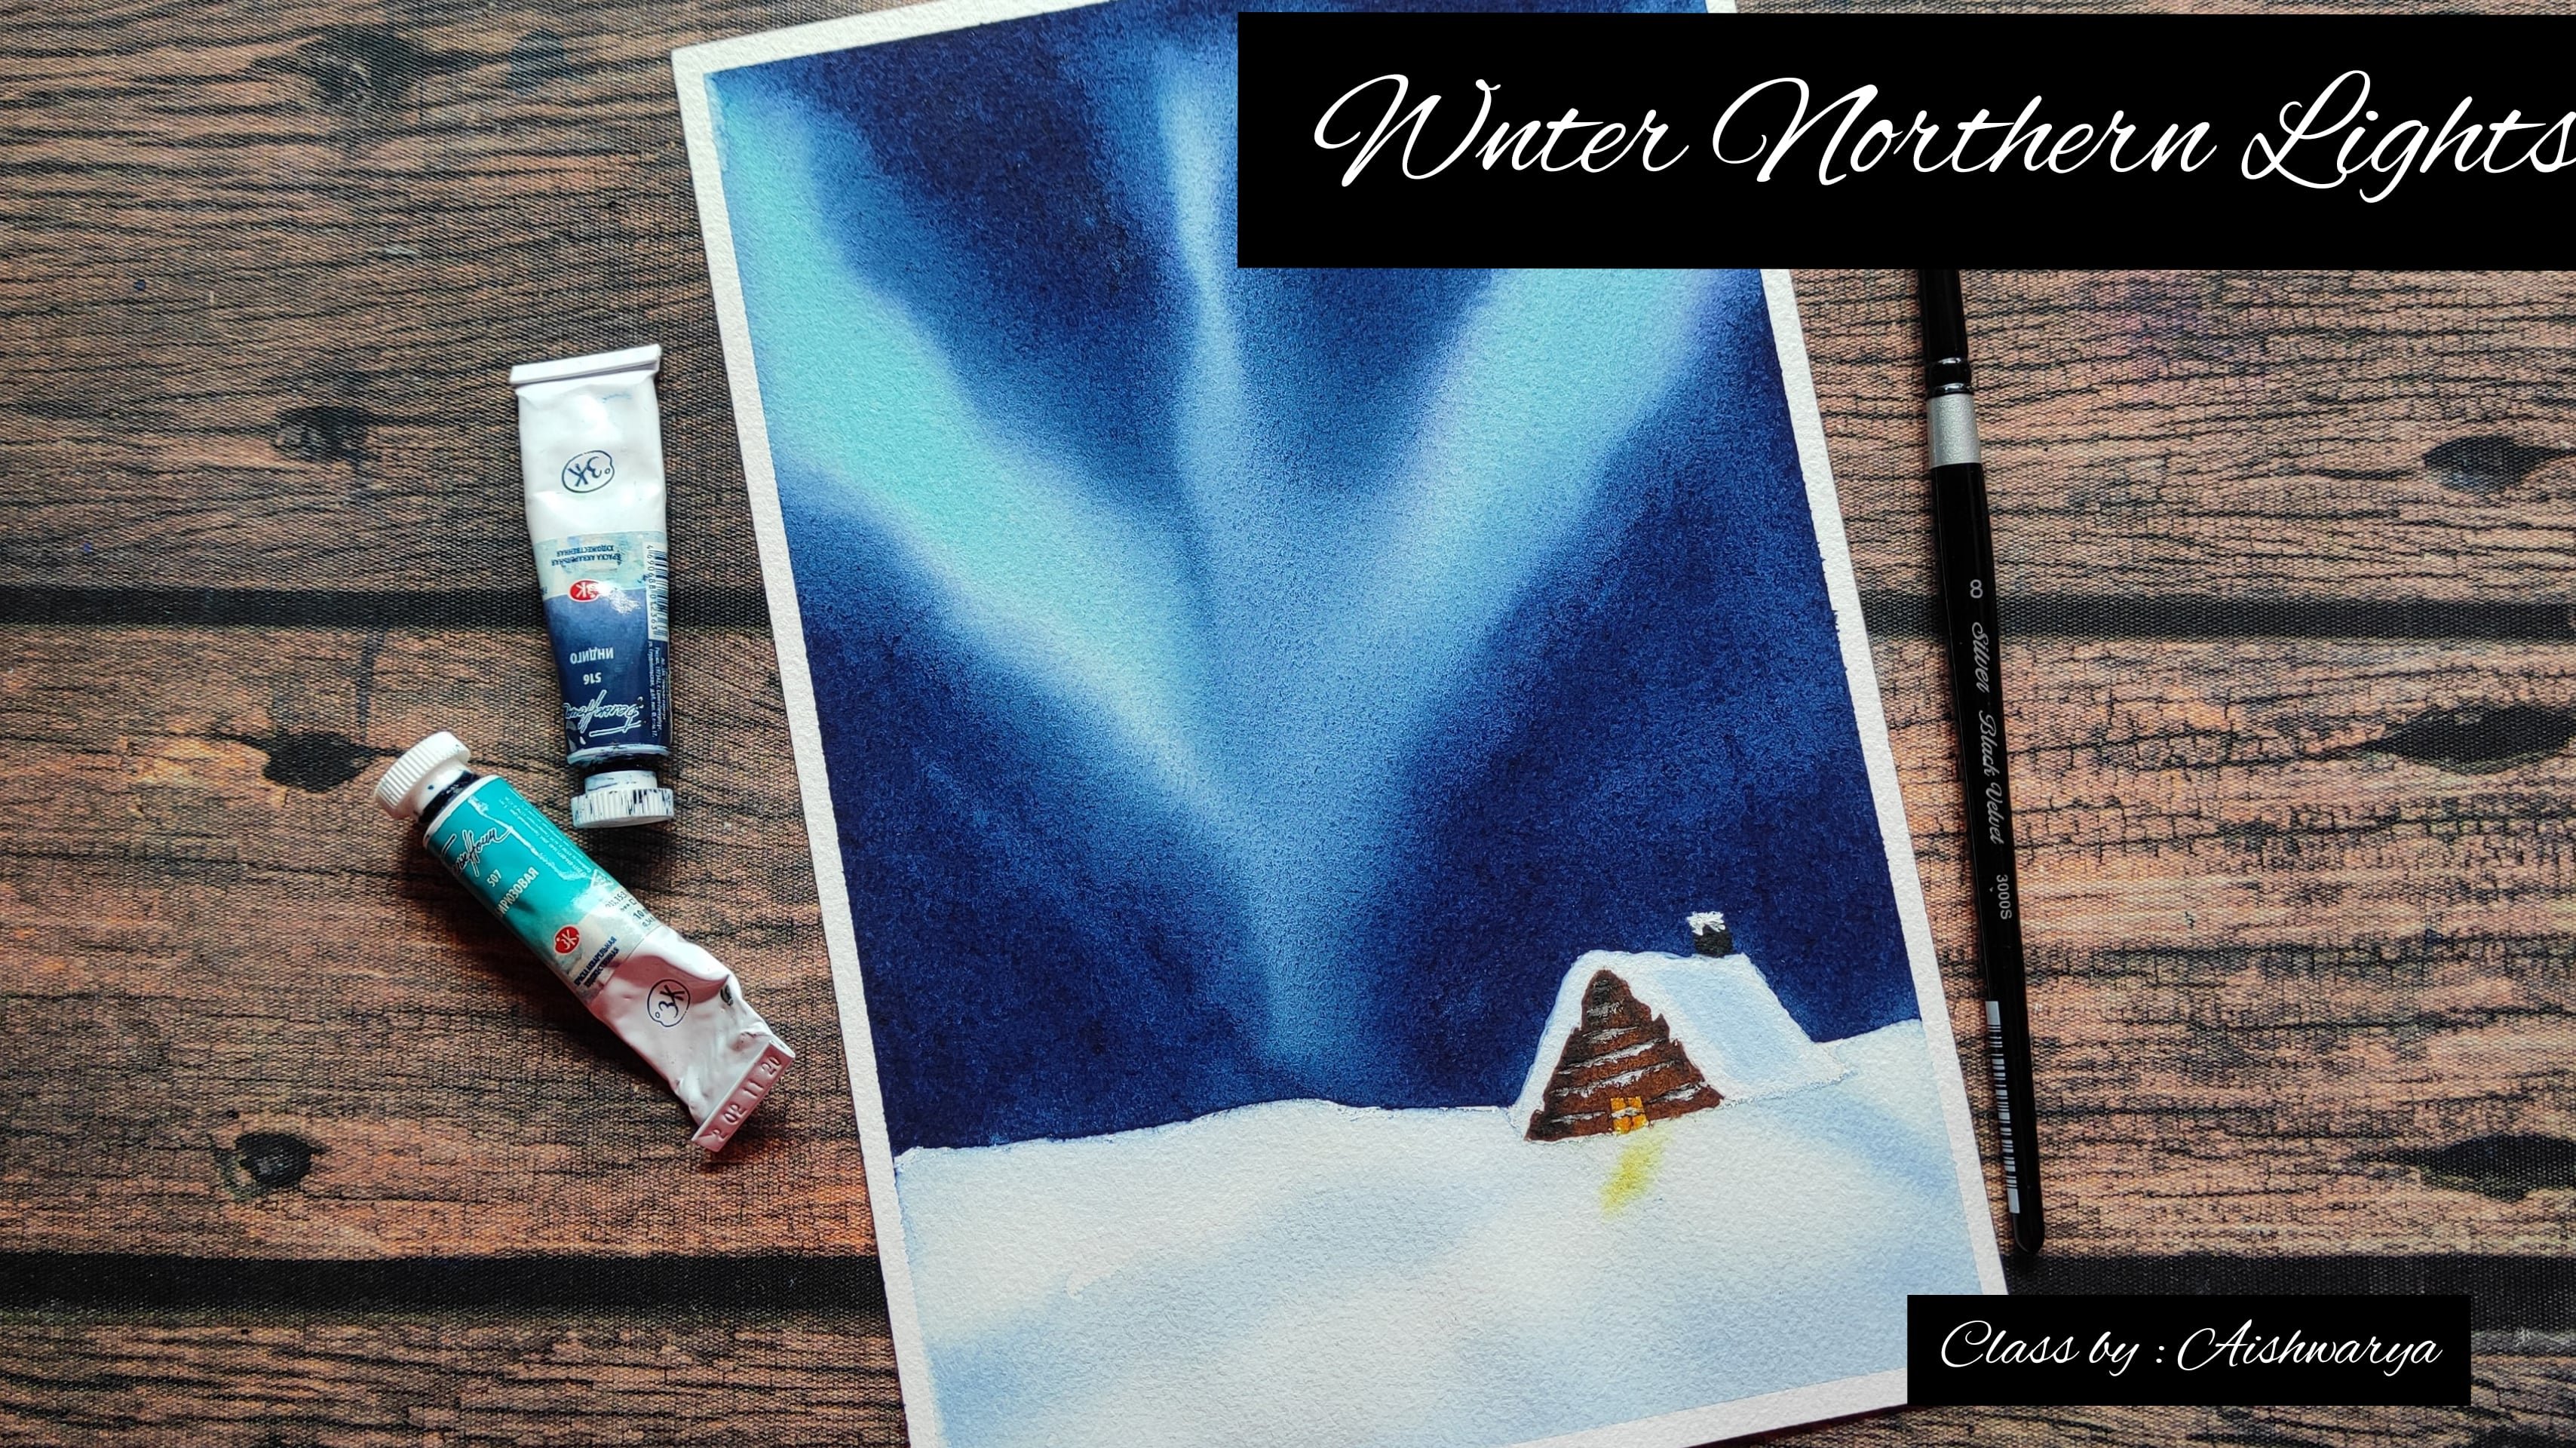
3. Class Project 1-Winter Northern Lights: Hello everyone. Welcome to the first
class project. So let us take a look
at the colors that we'll be needing to paint
this class project. So the list of colors
that we'll be needing. So for the sky will be
going with Prussian blue. So as you can see, skies Prussian
blue also there is another color in between
that is the turquoise blue. And along with turquoise blue, I have taken a pinch
of lemon yellow. So yes, these are
the two colors that you'll be needing for the
sky and for the background. Pine trees we'll be
going with black color. Also for the main pine
tree will be using black. So yes, and for the snow will be using white gouache or also you can go with
white watercolors. So these are pretty
much the colors that we'll be needing
for this class painting. So what are you waiting for? Grab your art supplies, and let us get
started. See you then. Let us begin with the painting. So as you see, the first step is to
firmly fixed your paper onto the boat with the
help of the masking tape. So you can see that I'm
running my finger all over the edges just to make sure there are no air
gaps so that you know, the water, the paint
doesn't flow out. So as you can see, I have divided the
paper into two halves. The upper part will be the sky, and the bottom will
be the snowy ground. And you can see I have drawn
a straight horizontal line, which is depicting
the horizon line. Okay, so now I'll be taking
one of my wash brush. Basically, a wash
brush allows you to cover a larger area
at a single time. So you can go with
any sized flat brush, but make sure like you know, for convenience purpose
you can go with larger size brush so
that you can cover the entire area with
the single stroke. So applied gently and carefully the water
along the horizon line. So at this moment we
are just directing our sky region and we are not touching
the bottom area still. So make sure you do this. Take your time and do it
ready neatly and nicely. V1 to apply the watered
multiple number of times. And this is done just
for the people to stay wet for a longer
duration of time. All right, so let's begin
with the painting of the sky. For the sky first, I'll be going with a
very light version of turquoise blue. Not exactly turquoise blue. I'll take a little bit of
turquoise blue and I'll add a pinch of lemon yellow to it just to get that greenish
blue sort of thing. As you know that, you know, northern lights basically
has that dark blue end, a little yellowish
green in between. So yes, I'm using my three by four inch flat brush from Princeton heritage CDs. And yeah, so you can go with a flat brush or you can
go with a round brush. But flat brush seems to be
good as it gives a nice shape. So you can see the amount
of paint that I have taken. It's barely light. I mean, it's very light. So I suggest you to go with a lighter version
insured on the top because at the sides will be having dark Prussian blue sky. So, you know, I want the
center to be glowing and nice. So I'm just leaving some white gaps in between
and applying this color. You can apply this color in any shape or any
direction you want, but make sure to leave
some white spaces. And in those white
gaps will be using Prussian blue to fill
up the rest of the sky. So now I have taken a
pinch off lemony a look, and I have just added it. Okay, so I think this
much looks good. The next color I'm using
is the Prussian blue. To go with a nice, good amount of Prussian blue, it should be darker, orange. You can also use indigo
if that is what you have. So indigo is also a good choice, but makes sure go with a
darker color for the rest of the sky because we want the
middle region to be lit. So i'm, I have taken
Prussian blue. So I'm applying the first code. So yeah, make sure to go with
a very dark consistency, especially the corners
should be very dark. So as you see, I have
applied more paint onto the coordinate and just gently drag down the paint
towards the middle. And as you approach
towards the middle, make it a little lighter. So this kind of gives
a nice perception. The viewer. So, yeah, just go over it and
make sure depression, lose it really dark
towards the edges and lighter as you come towards the center
and the bottom. Okay. Look at the amount of being that I have added
onto both the coordinates. It's really dark. And this dark color of the
Prussian blue is what makes the center part
light and glowing. Okay, so I'm just
going to switch to my size six round brush. And I'm just going
to drag paint and create some strokes like
structure in the middle. So you can see. And now I'm going to drag
the paint from all the sides to the center and fill up
the entire horizon line. So yeah. Make sure you just painted on the sky lesion and
don't touch the ground. So just carefully with you or any sized round
brush you can just, you know, go ahead and
do this particular step. Okay? And I still feel a lot more of Prussian blue
is needed because your watercolors tend to dry one shade lighter after
the paper has dried. So I'm just going over it
with undelivered and adding the Prussian blue
only at the top and just dragging it lightly
towards the bottom. So even you can
gauge your paper and the paint and check the
areas where you need. The paint has to be
still more darker. Feel free to just, you know, go with a darker
consistency of paint. Okay. So yeah. I taught at is this
make this a little bit more dark since
it's really light. And I'll blend it along with the Prussian
blue that we have. Note I have left a slight gap in the middle so that you're known that region looks
like it's glowing. So gently mix the color
with the Prussian blue. And make sure to add pinned only if your
paper is still wet. If your paper has got dried, then you need to read for the
people to completely dry. Then apply a single
quote of even water, and then perform this step
of the applying the paint. Else, if your paper has dried and if you try to
apply paint over it, then you may get harsh edges, which will make your
painting look bad. So I'm doing this step because I can still see that
might be but as red and I'm going over it and adding or Prussian blue to the areas that I feel
it is got lighter. So please note this step
carefully and follow along. Okay. So this looks good. And yeah, now the
darker edges look more better than the center is glowing and the sky looks good. Okay, so we're
done with the sky. Alright, So looks like
the background has dried. Now, the next step is to add some teeny tiny buying trees
along the horizon line. So we don't want very
larger binaries. These pine trees are
in the background and are very far
away from the user. So sorry from the observer. So let us spin some
teeny-tiny pine trees all along the horizon line. So for painting the pine trees, I have chosen a black color. Okay, so, and I'm using my Princeton heritage
number 4 brush. This has a very nice pointed tip and that is the reason I'm
going with this brush. You can also switch
to, you know, any kind of smaller size brush. It may be size to size 0. Or you can also go
with size food, but make sure it has a nice
pointed tip so that you know, your trees look very nice. And yeah, so I'm just
starting from the left side. I'm drawing the tree
trunk first and then I'm just drawing some
shapes like lines, dots. I'm just dropping my
pain, do with it. So don't go with a longer trees, go with the shorter ones and go with different
sizes of the trees, you know, don't make it even. All the trees should be uneven. And that's how it
should look, right? So just imagine a
photo or you know, imagine a sky and along
the horizon live, you have a faraway
background trees. So you can just
notice that this, these trees are very far away. Trees or bushes or whatever
you want to call them. So yeah, you can see how
I'm adding those trees. It's really, you know, not a very detailed process. It's just drawing a trunk
and drawing the branches. Okay. So it's badly that
repetitive process. And I'm just going to fill out the entire horizon line
with these binaries. And in the middle I'm just going to draw some G's to be longer, some trees to be shorter, some even more shorter. So I want all different types of sizes of pine trees to be heard. And just fill it according to your wish along
the horizon line. Yeah. So go with any
kind of pointed brush. This pointed tip will
help you to get that, you know, needle finds
which we actually want. So go with any brush that you're comfortable and just make
sure it has a pointed tip. I know this process is time
consuming because, you know, you have to draw trees all
along your horizon line. But yeah, I think I
haven't hack for you. So what I feel is
weekend just paint along stripe along
the horizon line and then just pull
the paint upwards. This will make the
process faster. So, you know, you
can go either way. You can either
directly paint trees, as we have been told earlier, or you can just go by painting the entire
horizon line with a black strip and
then pulling the pinned upwards as I'm
doing it right now. So you can see along
the horizon line, I'm applying a street, not exact street,
just a straight line. So I'm just dragging it
along the horizon line. And now I'm water I'm going
to do is I'm just gonna take the brush and pull the paint upwards to create some branches, some trees kind of structure. So yeah, this is 1.5 my hack. So all I did was I just
drew a black strip off line all along the horizon and just dragging
the pinned upwards, the form of lines which will
eventually look like trees. So I'm just gonna do the
stresses all along the horizon. And it is badly or
repetitive trusses. So just to watch me how
I'm doing this. Yeah. Hello. I think this looks good. I'm not gonna make any more
changes and yeah, it's done. All right, so the
background has beautifully dried and the sky is
looking so beautiful. Let us start wetting
the bottom area. So as you see, I'm not I'm not going to apply
a lot of water with her. We just want a
single coat of water and make sure you gently apply the water along
the horizon line. Because we don't
want any paint from the pine trees seeping
into our bottom area. Next, I think to paint the snow, we'll be using Prussian blue. I'm using Prussian blue. Maybe you can go with indigo. Usually you use the same
color as that of the sky because you're not that
study flexion that's going to fall on the
ground or the snow. So I have the contraction blue because my sky was
Prussian blue. So go with a very light tone. It should not be as
intense as the sky. It should be very light. So I'm using my flat
brush and I'm just dragging the paint
from the edges. So you can just
barely see any paint. That's how it should be. Gong Gu with a very dark
tone and the voice, please just go with a
lighter tone first. And then if you feel like it
has to be a little darker, you can go with
the second round. I'm just randomly
dropping the paint, dragging the paint from the
edges from board decides. And most probably and
focusing on the bottom. And I'm living the middle area as white because that
is where the snow, we laid the snowy feel in
this newly effectively BC. So I suggest you to do the same. If you have been to
the sky with indigo, then you can use indigo
to paint the snow. That's basically
the deflection of the sky that is
falling on the snow. So yeah, I think I need a little dark
dawn towards the edges. So I'm taking a little bit of paint and I'm just
barely dragging it, do that in a very zigzag
manner in a very randomly. Yeah. And I think
this looks good. I'm just correcting the shape. I'm just moving my brush. So there's no water on my brush. I have just, you know,
the brush is just damp and I'm just moving it, correcting the shape and making it look a little
cleaner and nicer. So yeah. All right, so the background has dried completely and it's looking
so stunning and beautiful. I'm already in love
with the painting. Hope you guys are also in
love with your painting too. I'm sure you already
liked your painting. So without any further ado, let's begin by adding
a Christmas tree, or what you call as a pine tree in the
middle of the painting. So I'm just going to
draw a straight line. Somewhere in the middle. It may not be straight, it can be crooked or anything. But you're not just
go with a nice pointed kind of
pointed tip brush. I think I'm using
my size six brush. This is again from
Princeton heritage. It has a nice pointed tip when it is dipped
into the water. So I suggest you also to go
with the same kind of brush, not the same brand, but your number size 6 or any other brush
which has pointed tip. And I'm going to use black
color for my pine tree. So I'm mixing a good, good consistency
of black paint and just going to go ahead and
draw the trunk of the tree starting from right in
the middle of the sky and gently bringing it down boats and stopping a
derived somewhere in there, middle of the snowy ground. So you can see I have drawn a tree trunk and I'm just going to define the shape
of this tree now. So we just don't
want ticker bottom and a bold tenor edges
towards the top. So just, you know,
make it a little thick and give that shape of the tree. So I'm just doing that. You can see I have given
a nice shape to the tree. Make sure the top and
should be very thin. And as you progress downwards, the tree trunk should be tick. So you can see how our
tree has taken the shape. You can find tons of images, reference images on Google or Pinterest or Pixabay or
any other online platform. You just type pine trees
and you get tons of images, you can use those as references. I'm not, you know,
forcing you to go with the way how I paint trees. You can follow your own
intuition and come up with your own version
of painting pine trees. So yes, I'll be
starting from the top. I'm adding some teeny tiny
branches towards the top. And I'll be slowly progressing down by adding a
little bit good. And by their branches
for the top should have bare minimum branches and the bottom should be
very wider and dense. So this tree is a little dense
and that cities and we're not going to leave a lot of
gap between two branches. So make sure to go with
a nice denser form. And to make it, to make the tree look denser, you need to have a
lot of beamed in the between and you
need to reduce or, you know, you should have 0 spacing between each
of those branches. So you can see I'm just adding some messy
lines here and dead. And I'm just
following the shape. It should be, you know,
like a triangle shape starting with the
point in the medulla, then going write it as
you progress downwards. Yeah. And don't take lot
of water onto your brush. It should be like
medium consistency. B12, the tree to
look darker because that's the center of the leg, that's the heart of the painting and all the focuses on the tree. So that should be a little dark and you see how I've
added the branches. Now this is going to be a better leader
productive process. I'm just going to go
ahead and complete the entire tree by
adding branches. Okay. So we are
almost at the bottom of the tree and you see
how she has progressed, starting from teeny
tiny branches, we have come down to wider
shoe which branches? And you're not dead zones. So I'm quite loving the tree, how it has taken the sheep. It's giving me the
Christmas E field. And that's how Christmas
trees are roles right? Triangular shaped. I taught of adding
teeny-tiny branches at the bottom just to give
it a realistic look. So young, I hope that when
you have finished drawing your tree and your tree is
also looking beautiful, make sure you leave some gap at the bottom and don't fill
up the entire tree trunk. We have to detain that bottom tree trunk
so that you're not, it looks like the trees
and grounded from there. Alright, so we'll be adding a shadow right at the
bottom of the tree, near the tree trunk. So for this, I'll be going with a slightly darker
version just to blend that tree trunk onto
the snowy background. So I'm going with a
mix of Prussian blue and a teeny tiny
pinch off black. And I'm just going to blend this entire thing
onto the background, making sure that I
have no harsh edges. So it's not too dark and not too light and go with
the right consistency. This is just to depict your no shadow or the reflection of the
tree falling on the snow. You wanted though adhesion
around the trunk to be a little darker and the rest
of the sides to be lighter. So I'm just blending out that extra pinned
onto the background. And now I think I was
awarded a little bit of water on my brush
and even lead paint, the background,
apply this ordered evenly onto the background
so that you know there are no harsh
edges right now you see it has formed
harsh edge over there. So to avoid that, I'm just gonna go ahead and add gently am going
to add water and northbound note I'm
adding water and not being I'm just doing
it towards the end. Diode bottom Ada
except the tree. So don't touch the tree. Just go ahead and apply
clean CTO for water and you'll get rid of
all those harsh edges. Yeah. So do it
until you're happy. Now see how the painting
has taken the shape. You can see that shadow falling right there and
it's looking so gorgeous. All right, so the
next step is to add some snow onto this binary. So for this purpose, I'm using white gouache brush. You can go with white
gouache or white watercolor. It doesn't matter, but I'm going with a white brush just to get that opaque and
matte look of the snow. I wonder snore to
be popping out. And that's the reason
I'm going with quash. But don't stress out if
you don't have grass, you can absolutely also go
with white water color. Just make sure you're going with more paint and less water. So starting at the top, leaving some gaps in between, I'm just adding random shapes of shapes are blobs of snow, and that's how you have
to be doing it exactly. Don't just go and fill up the entire tree
with whites know, make sure you leave
some white gaps in between and just add along
the edge of the branches. That's how snow gets
collected at the, you know, in-between
the branches. You might have seen some trees. Or if you have visited some countries do
witnessed snowfall. You might have seen the
snow getting collected and between the branches and
fallen on the pine trees. That's how we want to
depict this no order. So just go ahead and draw
some teeny tiny blobs, some larger blobs at the center and lighter at the
between. And yeah. So I'm just gonna
do this process. Watch me how I do it. So you see that I'm just adding some random blobs and
some random shapes. And towards the center, I'm just pulling
the paint and you see that the consistency
of the paint is very dry. It's not, you know, it's not having too
much afford though. If you have too much
water on your brush, then the garage white
watercolor or gouache paint or the white watercolor may
get blended in Buddha black and it may
form a grayish tone. So we don't want that
to be happening, right? So go with a very less amount of water onto your brush
before, you know, dropping the white gouache or white watercolor onto your tree, make sure you're dab off the excess water
with the help of a tissue and go with the
dry brush technique. So yeah. Oh my God, look at the tree,
it's looking so pretty and so
gorgeous, straight. I will sit all day
admiring this tree. I really wish to
travel to witness this snow-covered buying
trees and the snow. If you people have visited, then you all can
post the pictures, you know, so that we can
use it as a reference. And that's one of
the best ideas. So when you're
traveling, you know, I always love to collect pictures and that's
how, you know, I painted and being
from my own picture. Yeah. So we have
added onto the tree. Now, I'll add some snow to
the bottom near the trunk, only near the trunk region. So go ahead and add some
snow at the bottom area. This will look like the
tree is firmly fixed or uprooted from the ground
and it won't look reward. So just take some
dry white watercolor or dry gouache paint and just add few snow at the bottom and blend
it with the background. This also has to be very dry. Make sure it's a dry paint. I'm not having any water
with your I'm just mixing my paint with very little
amount of water and adding it. So yeah. I'll just go ahead and and few on the top and on
the bottom or her. Okay. I think the tree is
looking already gorgeous. And I think has stop at this step because I
don't want to spoil it. So yes. Okay. I think we are done
and it's looking stunning. So we need for this to dry. And yeah, the next step would be to peel off our
masking tape. Yes. So make sure you peel off the masking tape only
when you're painting has completely dried so that
the paper doesn't rip off. And you can clearly see, I'm holding the
board at an angle and billing the
masking tape so that, you know, the people won't tear. So I suggest you
also to do the same. So let's go ahead and be
laughter, meaning two edges. So far, for the two edges, we have got cleaner edges
and there's no paint. And yes, the last
one, Let's be loved. This. And you see this is
the finished painting. So I hope you enjoyed
painting this along with me. If you did enjoy it, then please post your projects in the class project section, and I'll see you in the
next class project. Thank you.
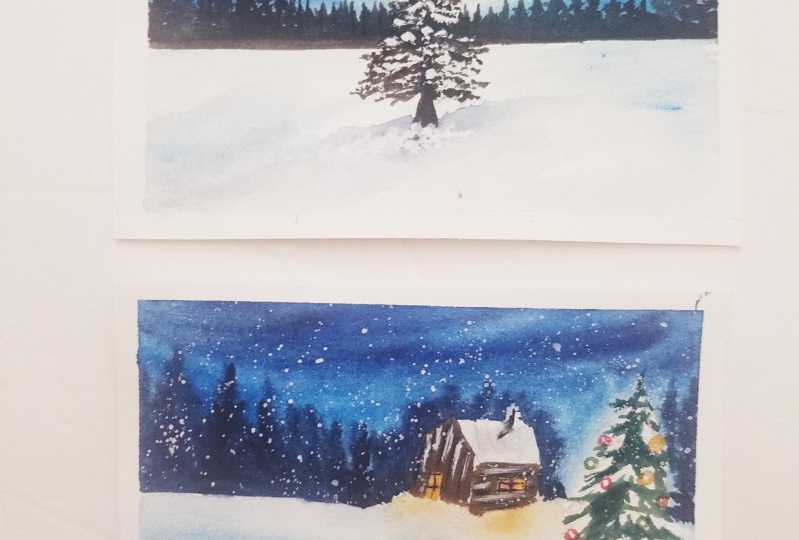
4. Class Project 2-Snowy Winter Cabin: Hello, Welcome to the
second class project. So let us take a look at the colors that we will
require to paint this. So for this guy
will be going with Prussian blue for the
background trees, we'll be going with Payne's
gray or you can mix a little bit of black
with your Prussian blue. Okay, and for those
snow cave in, we'll be using burnt umber. And for the Christmas tree, you can go with emerald
green or dark green. For the Christmas
ornaments are the lights. You can go with yellow,
orange, and crimson. So that's it for the colors that we'll be needing
for this class. And to add this
snowfall or the snow, we will be using white
watercolor or white quash. You can go with any of these. And the guage that I'm using is from the
brand Bruce, true? So that's it for the colors that we'll be requiring
for this class? Let's get started. Okay, so let's get started. As you see, I have already drawn the pencil sketch for
this particular painting. So you can pause your
video at this point, and you also can go ahead
and complete your sketch. So, yeah, pause and take your time and
complete the sketch, and then let's go ahead
and begin the painting. So yes. Okay. So let us start debating
the sky region. I'm using my flat brush
to wet the sky lesion. Note, I'm not adding any water onto the house and
the Christmas tree. So living these two objects, it will be going
ahead and applying water to the entire sky region. So if you're not comfortable
with the large flat brush, you can go with
the smallest size. Brush which has a
pointed pen cover those ADRs near the
house and the tree. So go ahead and apply a nice amount of water to
the entire sky region. Okay. So, yes. Okay, so now let us
begin painting the sky. For the sky, I'll be using a
dark tone of Russian blue. So go with of AD and
dense stone for this guy. So at the bottom of it will
be having a very light color, but at the top we want a very intense looking Prussian blue. So go with an indent
stone for the top. And as you progress downwards, just pull the paint and
with the help of water, just make it light up. So you see, I'm using
my number eight brush, round size 8 brush. So I'm just moving my hand back and forth
from left to right. So you can see I'm just creating strokes like structure and just leaving some white
spaces in between just to give it a natural
and realistic look. So we don't want a
flat wash of sky. We just want some strokes kind
of structure and you know, the sky is not even. So we'll just go and create random strokes
here and there. But make sure you don't touch
the house and the tree. There should not be any paint, blue paint on the
house and the tree. So we're just using
this blue color. We're adding this Prussian blue only to the areas where we have, you know, vetted the
people that want to. So just carefully add
the blue color and don't let the paint seep into the house and
the Christmas tree. So yes, just go
ahead and add this and feel free to add
more color at the top. If you feel it's looking light. Because watercolor
tends to dry one shade, light dot after the
paper is dry it. So accordingly gauge
your paper and just take your time and apply
the Prussian blue. Or if you're going with indigo, you can apply indigo
is when there's no hard and fast rule to
just go with Prussian blue. So yeah, just, I'll
quickly go ahead and fill the rest of
the sky adhesion. So yes, go with any
size two brush. So if you're comfortable with
the smallest size brush, you can also go with that. So I'm using eight
because you know, it is large and it will cover a larger amount of
EDA at a single time. So if, if you're
comfortable with six, you can go with six. So that's up to you. So yes, I think it's almost
done and let's complete it. All right. So this looks good. And I feel like some areas
are still left as blank. So I'll just quickly
go ahead and add some paint over there. Okay. So you see I'm just going ahead and carefully
adding the paint. I'm not loving the paint to note that the Christmas trees so
carefully along the outline, I'm just applying the paint. So I suggest you also to
do it in this manner. Alright, so I feel like some amount of paint
is needed at the top, and hence I'm going
with another layer and making the Prussian blue a
little bit intense at the top. So my paper is still wet and
I'm making use of the time. So even if your
paper is still wet, you can just go ahead with
this second layer and add it. So these are just
random strokes. And you'll see how
instantly as skies looking so beautiful and so bold, right? Yes. Okay, So this looks good. I'm just smudging the pinned and making it
look a little bit even. Alright, that looks great. So yes, now the next step is
to add the background trees. So for the background trees, you can go with indigo or you
can go with Payne's gray. The another option
you could go is just take a little bit
of Prussian blue and add a teeny tiny bit of
black and making good to be 0 shade
darker than the sky. So the option is left to you. So make sure you choose a darker color and not to go with the same
color as the sky. So yes. I'm just adding these pine trees like structured onto the
background might be, but it's still a bit
and that's why you see the paint is just
flowing very nicely. So we want a blurry look
for the background. So do this step as quickly as possible depending
upon how much, you know, vet your paper is. So my paper is still wet and
I'm making use of the time and going ahead and adding these small trees
like structure. We want trees of
variety of sizes. Don't go with the
similar shaped trees, just go with random trees
like dollar short and so on. So just give them a
structure like buying trees and just let it flow and
create a blurry background. Okay. So you just, you see that I'm just adding the paint and pulling it
in the upward direction. And I'm trying to make it as
more intense as possible. And I'm just defining
the shape of the tree. So yes, we don't want the
trees to be more detailed. It is far away from us
and it is, you know, bloody Soviet want to blow
the looking back ground. And this time again
while going, you know, while painting the
trees around the house, making short and I'm
taking extra care that the patient should not touch
the roof of the house. So I suggest you also to
do in the similarity. And hence you can go with the smallest size brush to avoid any paint flowing
into the house. Okay. So gently go
ahead and fill up the entire horizon
line with the pinned. And the same thing goes on
to the right side as well. So I think the left side is now looking good and we have added enough trees
onto the left side. So you see instantly
how we created a bunch of trees just to avoid
the wet on wet technique. So just, you know, it's just a dropping the
paint and pulling it upwards. And yeah, it's
already looking good. Similarly, on the
right side as well, we'll be adding small
bunch of trees. And again, we are taking extra care not to touch
the Christmas tree and not to allow any paint to be seen on the
Christmas tree. So just go carefully and add a bunch of trees onto
the right side as well. Okay. That looks great. And we have achieved a
nice soft background. So yes, severe, almost done, all done with the sky teaching. And I'm just going
ahead and adding and defining some shapes here and
dead until I'm satisfied. So you can also take a
look at your painting. Just get up from
your seat and step back and take a look and
just gauge at your painting. So if you feel like
you're satisfied, then you can stop. And if you feel like
you have to add still more trees,
you can go ahead. So it's all up to you. Okay? Okay. Looks like the
background has dried. Now let us begin by
wetting our bottom area. And for the bottom area
as well as as well, I'm going with the flat brush. You can go ahead and wet
the entire bottom area, but make sure you're not
touching the horizon line is the indigo from the trees, from the background would
seep into your bottom and it would spoil
your bottom area. So carefully, apply a
single coat of water. And you see I'm using
a smaller sized brush when I'm applying the water
along the horizon line. So I suggest you
to do this scene. Also when you are
applying the water note, I'm not touching the tree audio. So I'm just going around the
tree and applying the water. We wanted the tree to
be retained as it is. Okay. So just carefully
and gently go ahead. Wet the entire bottom area. Okay. Looks like we have added
enough of Bordeaux. And I'm just, again, just going ahead along
the horizon line. I'm just reading it
carefully. All right. Looks like the papers read. We can go ahead with
our next color. So for the snow will be going with the
reflection of the sky. Since I have used Prussian
blue for the sky, I'll be going with Prussian
blue for the snow as well. But it'll be a very
light tone of beans, and it's not a dark tone. So you can see the amount
of paint that I'm using, it's badly you very light. Just take a little bit of paint and smudge it onto
the background. I'm mainly focusing on
the left and right edges and towards the bottom
and the middle lady. And I'm reserving
the people right, because I don't want to
cover the entire snow. We just want some
reflections of sky. If you are in debt and also
at the bottom of the tree, I'm just making it a
little bit darker to indicate the shadow of the
tree falling on the snow. So yes, just go ahead and do this and smudge the paint
nicely onto the background. And you see that I have taken a little dark
dawn and I'm just moving my brush back
and forth only on to the left and right edges
and to the bottom area. And the middle is still left
as white and empty space. And so we are not adding any
paint wet there. All right. This looks nice. So I'm just going ahead and
blending it till I'm happy. So yes, if you feel
like you have to add more intense colors
towards the edges, you can go ahead and do that, but be extra careful
not to add more paint. So take a little
bit and that'll be enough for the
entire bottom area. So you see it's just, I'm dragging it in the form
of strokes from the edges. I'm bringing the paint onto the center and I'm
stopping right, Dennis, I'm not taking the pinned
on to the medulla. So the medulla area is
still white. You can see. All right, So this kind of gives a depth to our
painting and it looks good. So, yes. Okay. So I think now
this looks good. Now, I think we'll be adding some deflections below
this noche been. So I'm just going ahead
and getting the paper slightly because I feel like
the people is coming to dry. So I have just to
read did that ADR. So it could be, but
it's still a bit. Then union outperform this step. All right, so next we'll be
adding though Reflection. So before that I felt like my Prussian blue has
got a dawn lighter. So I'm just going ahead and
adding a little darker tones. Only doors, the edges. Okay. I think now it looks
good before it was looking very
dull and very light. I think now it's looking nice. So feel like you have to
add more deeper tones. You can always go
ahead and do that. Okay? So yes, that looks nice. And let us go ahead and add a reflection of the light from the cavemen
falling onto this norm. So you see that I have
taken lemon yellow. You can go with lemon
yellow or you can go with medium yellow or
any kind of yellow. We needed just a little bit of color and smudge that
color onto the background. Alright, that looks nice. So I think I need a
little darker tone. Okay, This looks nice. Along with yellow will be
needing a little bit of orange. So I'm adding a pinch of orange. So we'll be mixing both
of this yellow and orange together and smudge
it onto the background. This is basically to show the light that is coming
out of the window. You know, it's falling as
a reflection on the snow. Alright, this looks nice. Okay. At this point it
may be looking VR, but when we finished
painting the key, but you will see the realistic
feel and realistic look. So yeah, just trust the
process and go ahead. Okay, That looks nice. Okay, so now let us begin
painting the snow KB. So for painting this Nokia, I think we will be
going with burnt umber. You can go with bone number, you can go with dark brown or any dark color that you wish. So I'm going with burnt
umber and I'm carefully adding it along the
wall of those no cable. Note, I'm not adding any paint onto the roof V1 or snowy roof. So just be adding this bone down but only on to the
two sides of the cable, also the cabin. So go ahead. But that color and gently
added onto your cable. Note don't add any pinned on to the windows because for the Windows Be need
to show that light. So yeah, living the windows, just go ahead and fill
the entire cable. Just go with your smaller
sized brush so that you know, it is convenient to paint
since the Kb in this tiny don't go with the
largest size two brush. Go with the smallest size brush. And you'll be able
to add it carefully without disturbing the window or without disturbing the roof. Okay. So that looks nice. Carefully added and
don't touch the bottoms. No area. Otherwise you may spoil
the white snow area. So just carefully just
go around it and add it. Okay. If you feel like your
bottom area is still wet, then wait for the
bottom to dry and then go ahead for the painting
of the snow came in. Okay. So we have finished
adding bone number 4, one side of the cabin. So let us begin with the second. So again, I'm going
with burnt umber, and this time I'm living the tiny gap between
the first wall and the second volume just
to show the separation. So yeah, I have
carefully went and added the color onto
the second cable, just making it a little
bit more intense. So for the second role is when you see that I have left a tiny, you know, I have left
the window and cities. I'm not adding any
paint or there. Alright, so we have almost
finished adding the paint. The next step would be
is to paint the vendors. Okay. So yeah, let us begin
by adding on to the windows. So far the Windows, I'll be going with
the lemon yellow or you can go with any
kind of medium yellow. So wait for the background
that is the brown color to dry completely and then we can go
ahead and paint given dose. So this will avoid mixing
of the two colors. Okay. So yes. Okay. Looks like the
background has dried. I'm just connecting the shape. Wherever I see that
there is no paint. I have just added it. So yes. Okay. Looks like the Bond
numbers completely dried now. And let's begin by
painting the windows. For the windows, I'm
choosing yellow, as I said previously. So yes, we'll be taking a combination of
yellow and orange. So I have painted
the first window. For the second window as we'll be going
with the same color. First will be taking yellow, then we will be adding
a tiny bit of orange. Okay? Yeah, So that looks nice. Now we'll be adding a bunch of orange onto both of
these Van Gogh's. And B will be smudging
that with the yellow, which is present
in the background. So I'm going with orange, yellow sheet of so you can
go with any light orange. Make sure it should
not be too intense. Need a little bit of it, and just smudge
it along with the alone that we have got
in the background. So you see that now you see that the deflection
that is falling on this noise looking
socialistic, right? So that's why I said just trust the process and just go ahead. Okay. So we have almost
finished with the sky, the snow and the snow cable. And the main tasks that is left us to paint
the Christmas tree. So before that we will be adding some details onto the roof. So for the roof, I wanted the deflection of the
sky to be falling there. So I'm just taking a pinch of Prussian blue and smudging
that onto the roof carefully. Note this is a very light tone. And I'm not going to
ten intense storms, so we just need a very
little amount of paint and I'm using water and smudging
get to the entire roof. So these are the tiny
details, you know, that will give a lot of
character to our painting. So it's not a competition step, it is an optional step. So if you want, you can just go ahead and do this as you can, just leave it as it is. So yes. Okay. That looks nice. Now we'll be adding a
small chimney on Buddha. So for this purpose
I'll be using black. So don't add a very
thick and bold line. Just go with a medium
size to chimney. Okay. According to the
size of the cable, the chimney should be smaller. So just decide on the shape. And I've also added
a very light shadow. And yeah, that looks nice. All right, so now let us begin by painting
the Christmas tree. So for the Christmas
tree first will be just going ahead and building
some Christmas ornaments. Or you can call them as
light bulbs or gifts. So you can choose to decorate your Christmas tree
any way you want. So first, I'm adding those light bulbs or
those Jingle Bells, whatever you wanna call. So for this purpose, I'm going to use
different colors. So I'll go with crimson, yellow, orange, green, and
mix of different colors. So first, I'm just going ahead
and filling these shapes. And so killer phone. So you see that I'm just
leaving a tiny white gap in the middle and the rest
of those space around it, I'm just covering it with paint. Ok. So let us quickly
go ahead and add all of these tiny Jingle Bells, whatever you wanna call it. All right, so we have added a couple of bells onto
our Christmas trees. So you see that I have used
different colors like yellow, crimson, and green as well. So you can choose to add joysticks or some gift
boxes or QT genes, santa on your Christmas tree. So it's up to you how
you want to decorate it. So the first step is V
added these ornaments. So that looks nice. I think two more left, so I'll be going ahead and
filling those out on right. That looks nice. Okay. So yeah. This is it for the
Christmas ornaments. So if you want, if you choose to decorated
more, you can do it. So, alright, so now next step is to paint
the Christmas tree. That is basically the branches are the leaves of
the Christmas tree. For this purpose, I'm
using emerald green. If you don't have emerald green, you can choose to use your
green and mix a little bit of indigo or black to make
it a little bit darker. And you can pretty much
go ahead but that sheet. All right, so it's
a pretty simple to paint the tree because we have
already added this sketch. So this sketch will
help you do, you know, get to know where this noise and value need to
paint the leaves. So wherever you have
to add this node, just leave those areas as it is. And around us know, go ahead and paint these teeny tiny branches or leaves of the Christmas tree. So yes. So this is again, it's going
to be a repetitive process. And yeah, so you can just
take your own time and paint the entire Christmas
tree along with me. I'll kill. So it's a simple process. Just follow the shape
around the snow and go ahead and add this green, dark green, light green. And venue, venue, draw
or paint those leaves. So towards the ends. Make it like, you know, just give it like some teeny-tiny lines or some
random patterns so that, you know, it gives
it a realistic. So as you see, I'm just going in and just
filling out the entire tree. Okay. So just watch me how I do
and follow along with me. So you see that I'm just living this no blobs as it is and going around it and being ding the branches carefully
or the leaves, whatever you wanna call it. And also I'm not
touching the autonomics. So carefully go around
all the objects and add the branches only
on to the empty spaces. Okay, So when you are towards
the end and just meet those leafy patterns or some random lines or
patterns or structures. And yeah, so it's pretty
much the same process. This is the reason it
was very important to have a pencil sketch
in the first place. So that will give you
an outline of where exactly you need to add the
paint and betters to snow. Okay. Okay. So I hope you enjoyed
painting your Christmas tree. So we're almost at the bottom and a few more leaves and
branches to be added. So I'm just quickly going to go ahead and finish off this. So you see that it's looking so magical and so
peaceful and coming at this moment right
on Christmas tree is already looking so
glowing and so nice. And it's already giving
me the Christmas E field. Okay. So yeah. Yes. So it's almost done. And the next step
would be is to add the bottoms stem bought or the trunk of the
Christmas tree. So okay. So for that, I'll be using with the color burnt umber or you
can go with black. So yeah, just go ahead and
add a teeny tiny trunk. So we don't want to leave
this Christmas tree as it is. So we'll be adding a snow or a shadow for
this trees for that, you know, it looks grounded. Alright, so let us add some details onto
this new equilibrium. So for the windows will be
adding those all doors. So you can use either
your black monkey or you can use your
smallest size brush. So whichever one's comfortable, you can go ahead and add
these doors for the windows. So we'll be doing this
for both the vendors. So I'm just carefully
adding the black paint. Ok, so I'm comfortable by using paint or I can also use my pen. So if you're not comfortable
using your paint brush, then you can go ahead
with your micron pen and these doors for the vendors. Okay. So just carefully at it. And yeah. So I waited for the
yellow to completely dry first and then I added this. Okay, so now onto
the background wall, I'll be just using a dry
black paint and adding some patterns or lines. These need not be straight. So you can just go ahead with horizontal and vertical lines for both the walls of the cable. It's a very dry paint. Okay. So yeah, that looks nice. On top of this VDB, you know, adding some snore. And just to depict that
the snow has fallen on the cable and has got
collected on the cable. Okay. Okay. That looks nice. We have added enough of
these dry brush patterns. They may not be visible, but when you add snore. So you'll clearly make out. So for both the walls, for the first wall, we've added vertical lines. For
the second boil. We're going with the
horizontal lines. Okay, That looks nice. Now I'll be using my white quash and
I'll be adding snow on top of these lines that
we have made. Okay? So it's completely optional. If you want to leave your
snow cave in a hazardous, you can go ahead and do that. If you want to add the details, you can join me and follow. So it's up to you. So you see that I have
taken a very dry quash white paint and I'm just adding along the shape of the line that we
have added earlier. So it's very dry. It need not be detailed. Just go ahead and just
add the dry beans. So this looks like the
snow has fallen on the K1. Okay. So on the boat the walls
will be adding this. There's no water at
all on my brush. So we want this kind of
texture for the snore. So just carefully added. Yeah, that looks nice. We have added enough
of snow on the cable. And yeah, looks good. Alright, so the last
step is to add snow. So we'll be using
white gouache brush. You can go with white
watercolor, white gouache. It's optional. So I've added some snow
on top of the chimney. And now the last step is to splatters onto the
entire paintings. So go with a proper consistency. It's not be too thick,
not too watery. So V1, the medium consistency of white gouache or
white watercolor. And just take your
smallest sized brush and splatter the
snow everywhere. Okay, So it's already
looking so gorgeous. I love snowfall and I really wanted to witness
snowfall someday. I'll kick. So yes, add as much splatters of
snow as much as you want. So there's no limit on that. Okay. So I'll go ahead and splatter the snow until I'm satisfied. All right, That looks nice. So we have added enough of snow. Now let us quickly go ahead and peel off the masking tape. I can't wait to see
the final painting and I can't even be to
show it to you guys. So I'm sure that you already
loved your painting. And yeah. So an important dip below
your masking tape only after your painting has completely
dried in order not to report your group
beautiful painting. So yeah, just have
patience and wait for that to dry and then slowly take off
your masking tape. Okay. So yes, I'm so happy
that we have achieved all the cleaner edges and
there's no bleed anywhere. So yes. Okay. That looks nice. We have all four edges clean. Okay. So yeah, this is the final painting for the
snowy Christmas night. Everything is
looking so magical. Write the K been
the Christmas tree, the background
blurry, pine trees, the sky, the snow,
everything right. Okay. I hope you enjoyed painting. Do post your class projects.
5. Thank You Snow Much!: Hello guys. So I
hope you've enjoyed this journey of snow
event, the landscapes. So if you have been
to do class projects, the first one being
very simple with the northern lights
sky and a pine tree. And the second one, we have painted a symbol
sky with a snowy cabin, as well as a small
Christmas tree. So if you like projects, so you could post it in the boasted in the class
project section. And if you're posting
it in social media, then do tag me using my
Instagram handle and my story. I hope you enjoyed this
class as much as I did, and I'll be seeing you
soon in the next class. Thank you.
 Aishwarya Shetty, my__paint___story | Watercolour Artist