Transcripts
1. Welcome to the class!: Have you ever witnessed
northern lights? It's such a beautiful
phenomenon, isn't it? Some call it as
nitrous fireworks. I live in a country where
there is no snowfall at all. Well, I wish to witness this
through my own eyes someday. But for now, I have
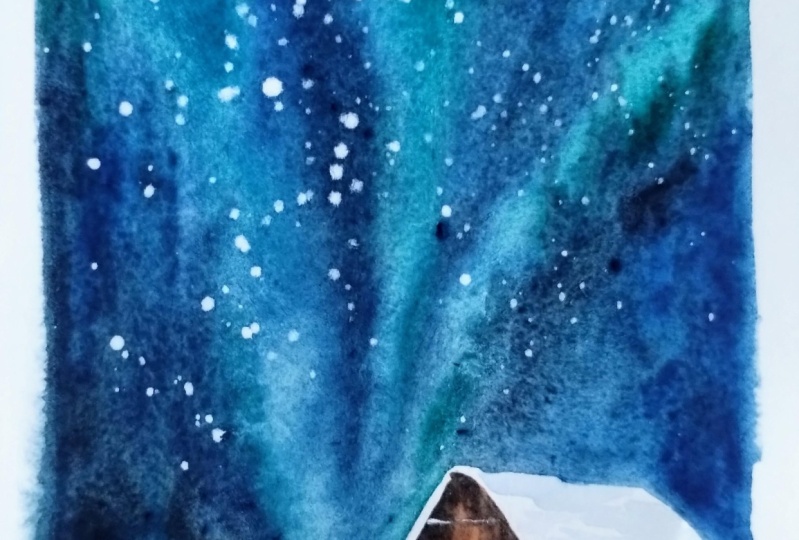
decided to paint a gorgeous winter Northern
Lights scene and grab all the happiness by just
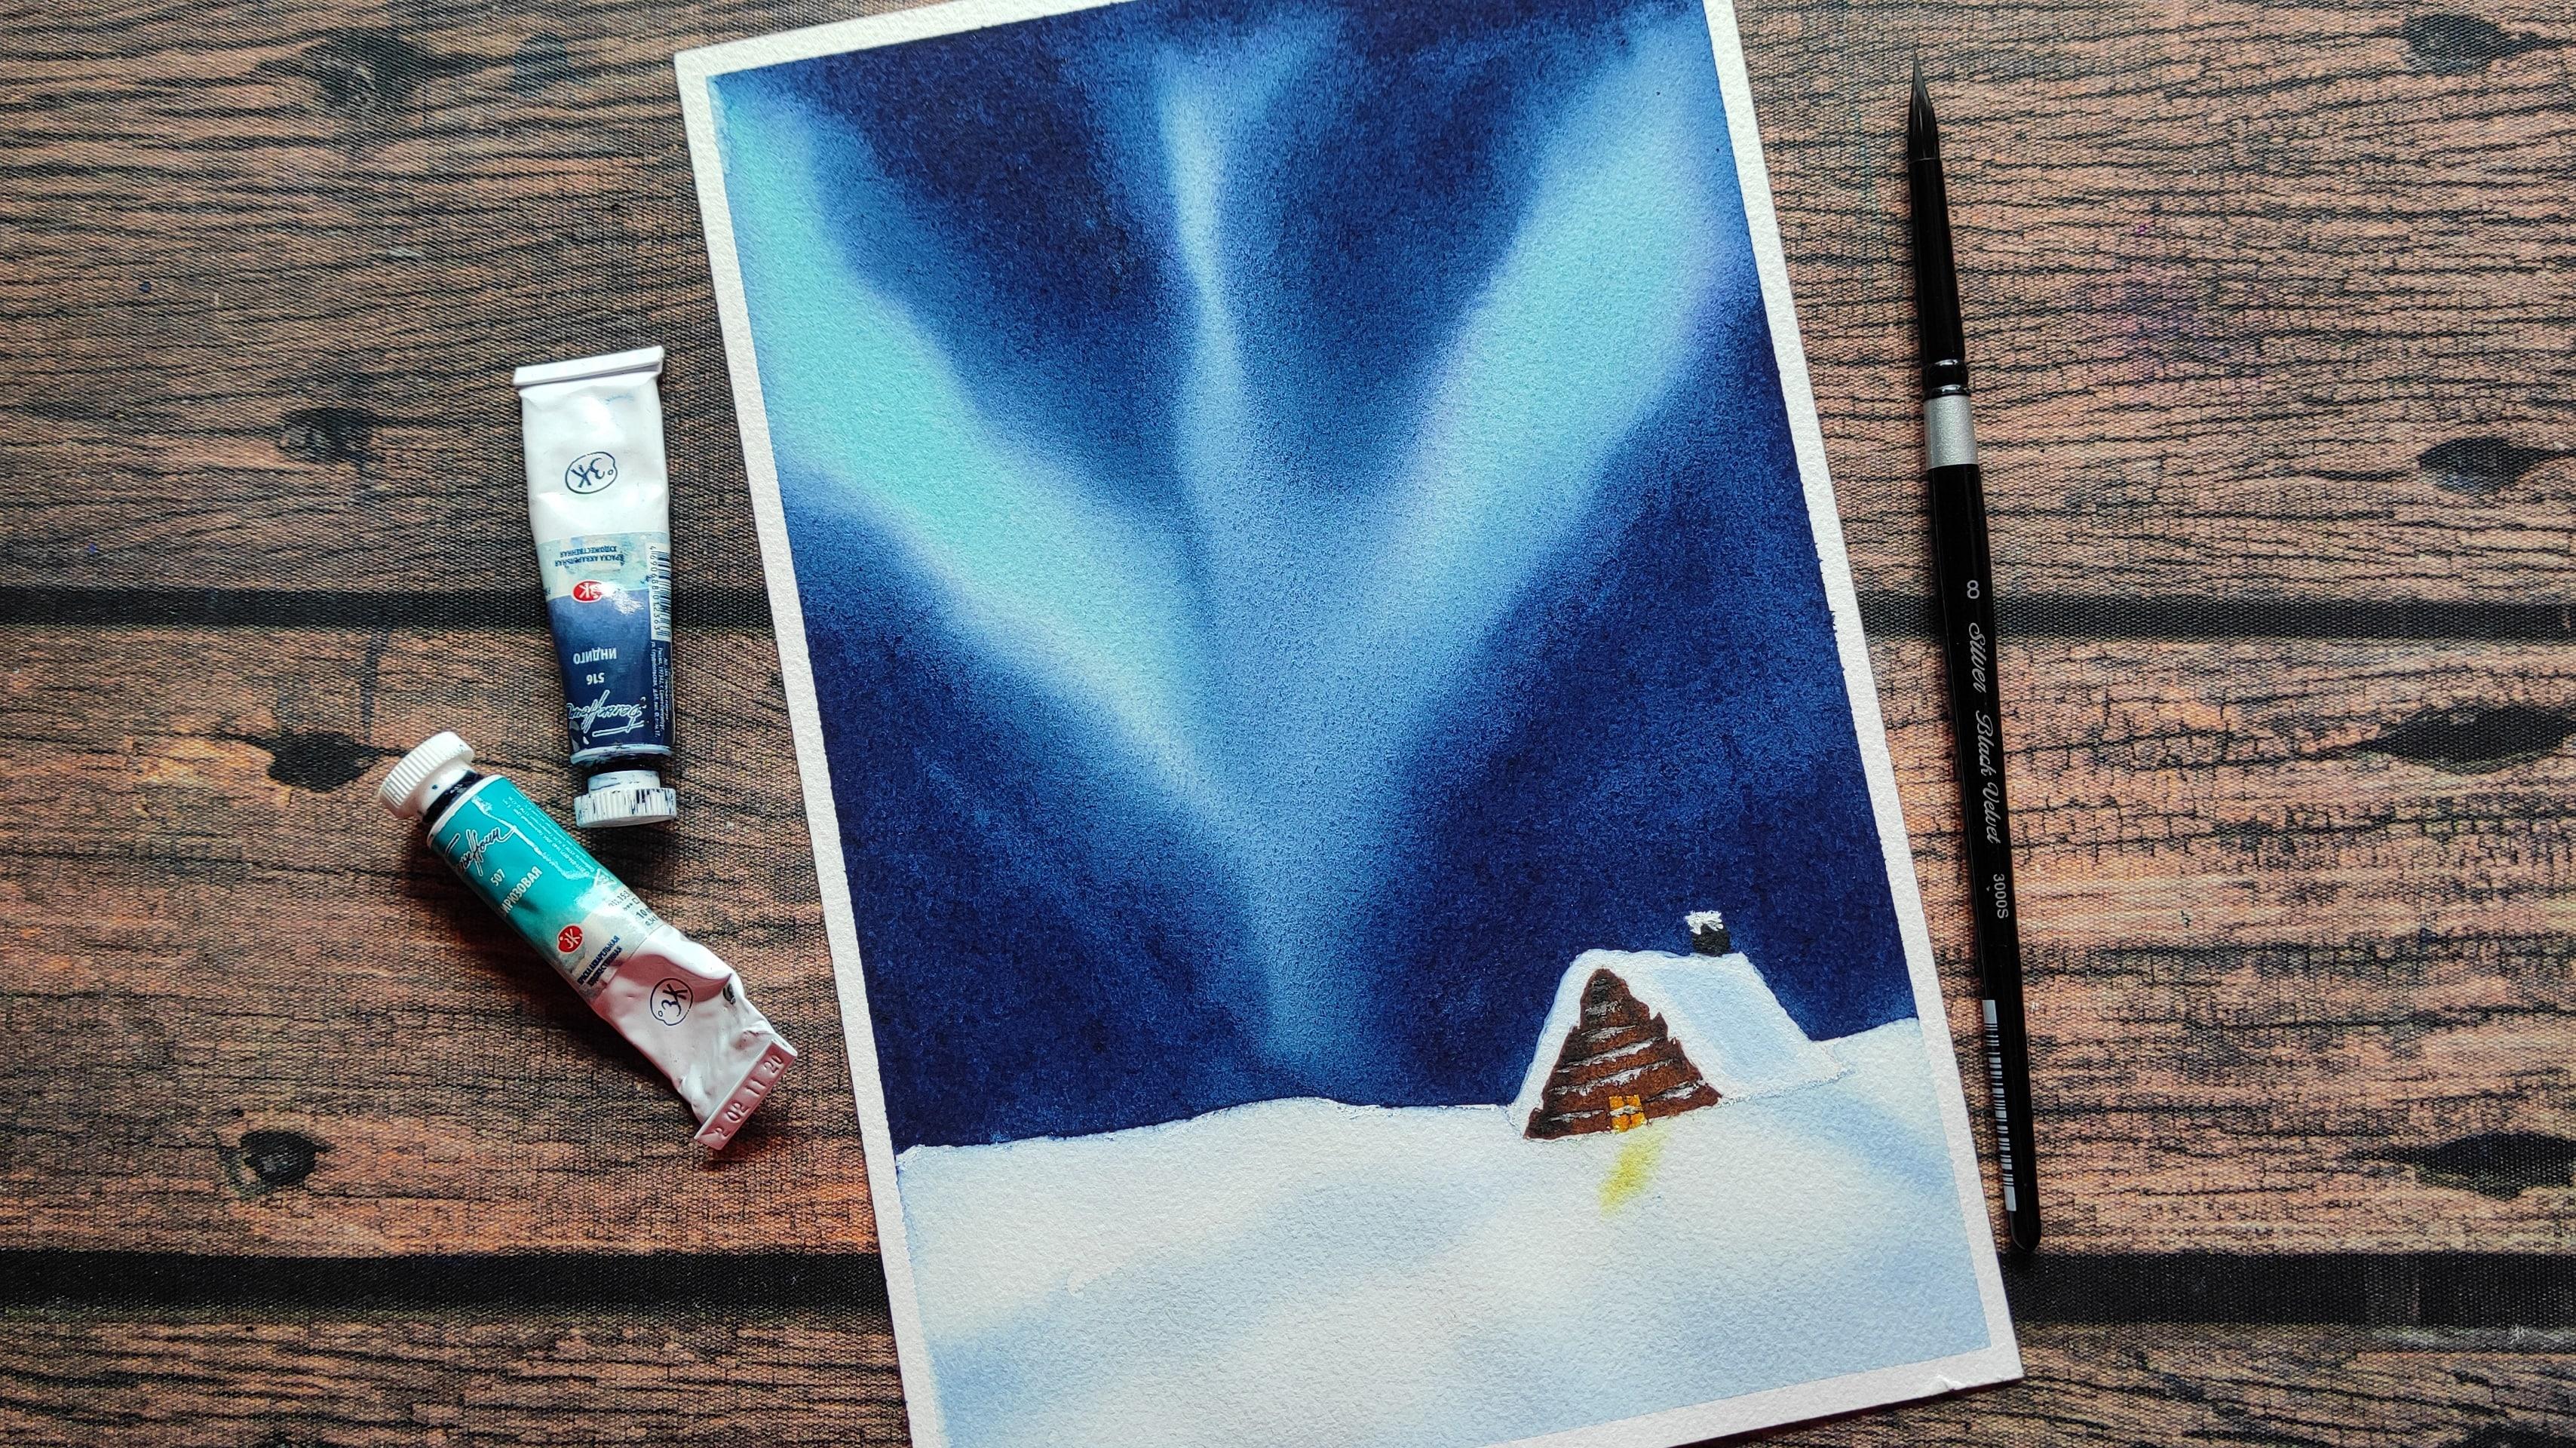
watching that in-person. Hello everyone. I'm Ashley and engineer
by proficient, a watercolor artist
on the creative side and an art instructor
based out of India. I love watercolors
and it is by far one of the favorite
mediums to work with. Watching the paints flow on the paper makes
me so mesmerized. It's a wonderful medium and at the same time and
uncontrollable one. In this class, we
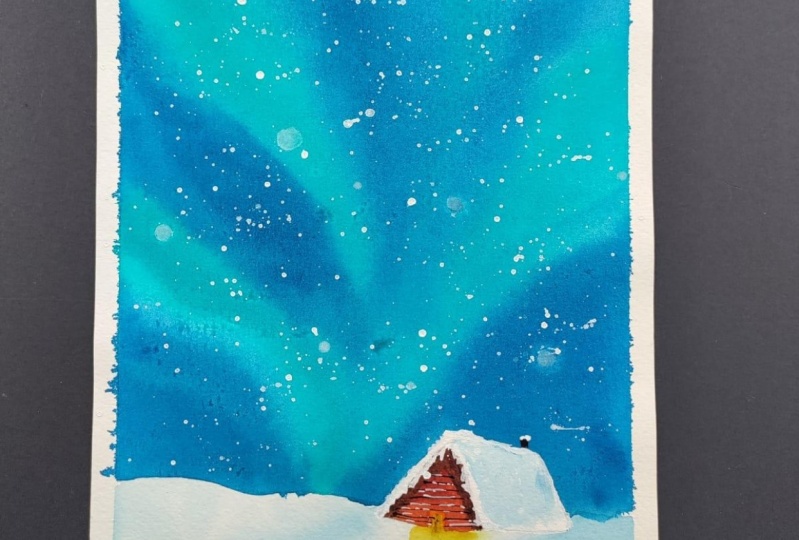
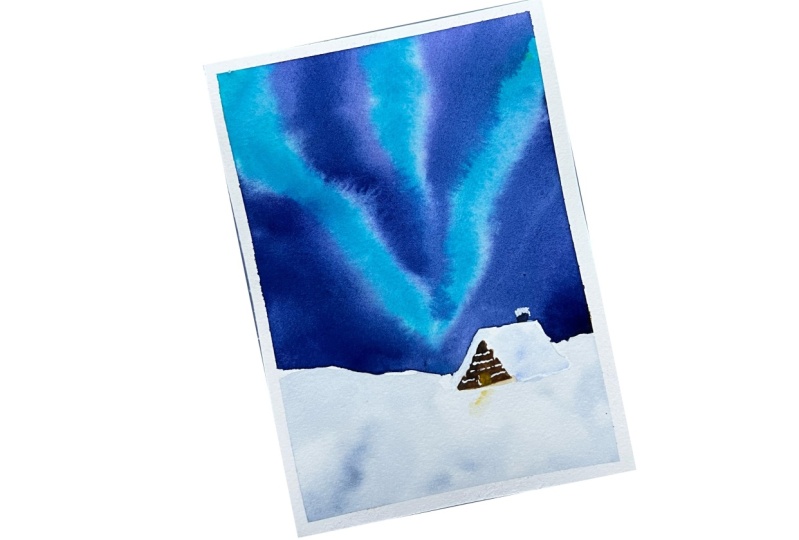
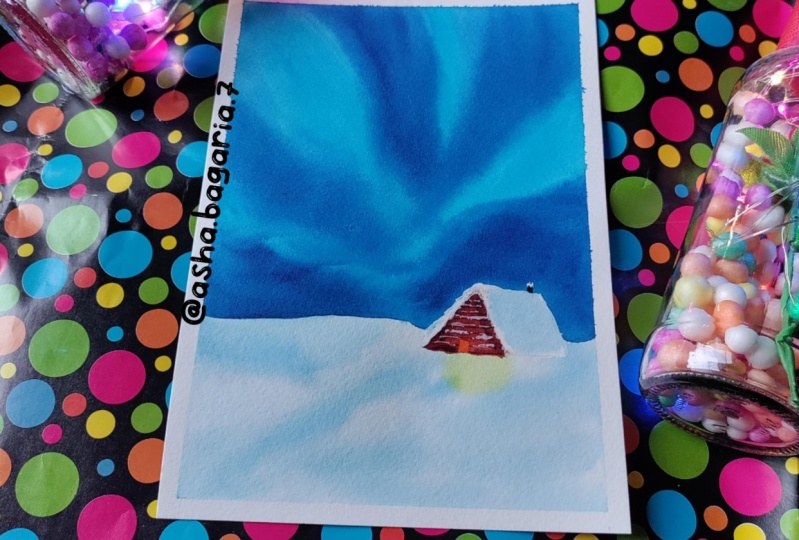
will be painting a stunning winter
Northern Lights seen. This class consists
of a single project, and I have designed it in
a very simpler manner so that you will be comfortable
in following and painting. Along with me. Everything you need
to know before we get started is clearly
explained in the class, like the materials
that you will need. Then we will take a
look at the colors and the color palette that you
will need before we start. And then finally, we can
start our class project. So if you're convinced throughout the
introduction that I gave you and you are happy with whatever I have
explained so far. Go grab your art supplies
and whatever you need, and I'll see you
soon in the class.
2. Class Overview: Alright, so this is the class project that
we're gonna be working on. So let me give you a brief introduction or a class
overview before we start. So for this class project, I will be using the paper
from the brand Archie's, and this is the size that
I will be going with. But you can choose to work with a bigger size or you may
even go with a smaller size, but don't go with
two smallest size. So I'm using 18 by
16 cm approximately. So you can choose to use the same size or a little
bit smaller than this. But make sure you're not
going with two small paper. Alright? So, yeah, this class is divided
into different sections. Like first, we are going
to be painting the sky. Okay, so then we're going to be painting the snowy ground. So I have divided
it into different, different sections
so that it'll be easier for you to
follow along with me. And then once we
add the foreground, we will be a tiny little cable. And then we will be defining
the details onto the cabin. Alright, so this is about the class project
that we are gonna do. And I would highly
recommend you to post your projects into the
class project section. And I will be personally
reviewing each one's project. And I would also
give you a feedback which will help you for
your upcoming projects. And if you have any issues or
doubts regarding the class, you could feel free to start a discussion in the
discussion section, and I would be
happy to help you. Alright, I'll see you
soon in the class.
3. Materials You'll Need: Alright, so let us take a look at the materials we will need. So first let us talk
about the paper. So for this particular class, I will be using the
watercolor paper from the brand Archie's. It is 300 GSM, hundred percent cotton, and
it is of 140 LB thickness. You can go with any watercolor
paper of your choice, but I highly
recommend you to use an artist grade to
get the best results. So that was it about the paper. Now, let us take a
look at the colors. For the colors, I will be using the colors from the
brand White Nights. But you can go with any
colors that you have got. And you'll also need
a little bit of white gouache to add the snowy details
onto your painting. And the detail list
about the colors and pigment which we are
going to use for our class. I will be talking about it
in the upcoming section. And I will also use some colors from my palette to
paint the cabin. So as I said, I will talk more about the colors in
the upcoming section. Now, let us take a
look at the brushes. So for this particular class, I will be using the brushes from the brand
silver black velvet. So you will need a wash brush and you will also need
larger size brush. This is of size number 12 to add the larger washes like
to paint the sky. Then you'll also need a brush, which is of size number eight. And you'll also need
size number six to paint the cabin and to
add some tiny details. And finally, you will
need a detailing brush, which is of size two. This is basically to add
some details onto your. And then you'll also need a mixing palette to
mix your colors. And you will need
two jars of water. One has to stay clean
and the other one is to rinse off the dirty
paint from your brush. Okay. Then you will need a masking tape to fix
the paper onto the boat. And you will also
need a pencil and an eraser to add
a pencil sketch. Then you will need some
tissues or paper cloth to wipe off the excess
amount of paint or water. And finally, you'll need a backing board to fix
the paper onto it. We're not going to
fix the paper onto the table because
we have to tilt it. Alright, so that was
it for the materials. Go grab them and
I'll see you soon.
4. Colors: Alright, so let us
talk about the colors. So I will be using the colors from the
brand White Nights. So these are all the colors
from the brand White Nights. But you can go with the
colors that you have. God, I mean, you can go with any brand that you
have with you. And to colors I will be
using from the brand camel, that is the Prussian
blue and violet. I will be using from the
brand Camel because I was running out of stock and hence I'm going with
a different brand. Then you'll also need white gouache basically
to add a lot of snow. Since this is a snowy
Christmas painting, you will need some
white gouache as well. Alright, so now I'll swatch all the colors onto the
paper, and let's begin. So the first shade is a very
nice and beautiful shade. This is basically the turquoise and this is from the
brand White Nights. So we're going to
use turquoise to add our northern lights on such a beautiful and
gorgeous shade, right? And the next color we will
be using is Prussian blue. This is from the brand camera. Okay, So this is again a
beautiful and a gorgeous shade. So we will be using
Prussian blue to add the darker
regions onto the sky. Okay? So not only Prussian blue, we're going to have a
set of different colors. So the next one is YA lit. So this is again from
the brand Camel, and this is again
a beautiful shade. Now, I will also
be using indigo. This is from the
brand White Nights. So indigo is to add the
deeper tones onto the sky. So basically what I'm gonna
do is I'm going to mix Prussian blue and violet indigo. So I'm going to mix all these three together into the palette. And the resulting color would be a mixture of all
these three colors. So I'll quickly swatch that. So I already have the
mixed paint in my palette. So I'm just going
to go ahead and quickly swatch that
particular shade. So you can see it's such a
beautiful, gorgeous shades. So it's a mixture of all the blues and
the indigo together. So we're not going to add
just one color onto the sky, but it will be a combination of three different colors. Okay? So, yeah, I think we have covered all the
colors for the sky. Now. For painting the cabin, we will need some browns. So first I will be
going with burnt umber, again for painting the cable. When we are not going to
directly add burnt umber, we are again going to mixing it with transparent brown
or Van **** brown. Okay, so in this way, you will get a natural
look for your cabin. So I'm going to use burnt umber. And the next color would be, is the Van **** brown. So I'm going to mix
both of this to get a nice golden brown shade. So let me mix both of this and
swatch that color for you. I'm mixing that in my palette. And yes, this is a nice, beautiful, dark,
golden brown shade. So you can go with any
brown that you have got. Nino be the same colors
that I'm showing. The colors here are just
for your reference. Okay? Yes. Then, now to add the
tiny window onto the cable, we will be going with a nice bright Indian
yellow shade. Okay? So this is one of
my favorite color. It is such a nice warming
and a glowing shade. And to give it a nice
look for the window, I will be mixing this Indian
gold with my golden deep. So I'm going to mix
both of these colors. And then I'm going to add
this onto the window. This will make your
cabin look more glowing. Let me swatch the
resulting shade. So after mixing
Indian gold and gold, indeed, this is the resulting shade that you're gonna get. So yeah, you'll also need
another shade, sepia. This is basically to add
depth to your cabin. I forgot to mention
about this shade. So yeah, you can go with sepia. And if you don't have sepia, you can add a little
bit of Payne's gray to the brown and
create the shape. So now go grab your colors and I'll see you
soon in the next section.
5. Let's make a pencil sketch: Alright, so let us begin by
adding a quick pencil sketch. It's really simple and
easy pencil sketch. We're just going to add
a teeny tiny cabin. So you can wait for me
to complete the sketch, and then you can pause the video and do a sketch for yourself. Alright? So I'll quickly go ahead and finish up
adding the pencil sketch. Alright, so now that we
have added the cabin, let us define the horizon line. So just go with
an organic shape, just a rough shape. Don't draw a straight line. Okay, so I think I'll fix the
shape of the horizon line a little bit just to make
it look more natural. Alright, That's
our pencil sketch, and I'll see you soon
in the next section.
6. Masking the pencil sketch: Alright, so now that we have
added the pencil sketch, let us quickly go ahead and
mask out the pencil sketch. For masking the pencil sketch, I will be using my masking tape. So I'm just going to mark out the shape of the cabin
on the masking tape. And then I'm going to cut out
and stick it accordingly. Alright, so this process is
a little time-consuming, so take your own
time and do it just roughly go ahead and mask
out your entire cabin. Alright, so you can see I
have masked out the cabin. Now in the similar way, we're also going to mask
out the horizon line. So again, I'm going
to mark out the shape of the horizon line
onto the masking tape. And then I'm going to cut
out the shape accordingly. Alright, so let me go ahead
and quickly finish off this. Meanwhile, you can go ahead and mask out your pencil sketch. All right, so we have masked
out our pencil sketch. And now I'll see you soon
in the next section.
7. Wetting the background: Alright, so let us begin by applying and even coat of water. So since we're gonna be working on the wet
on wet technique, we need to ensure that our
paper has soaked enough water. Alright, so I'm using my
hockey brush to wet the paper. You can go with any flat brush or any wash brush
that you have got. Alright? So yeah. Alright, so we need to apply
several layers of water. Before that, we will
just make sure like we are mixing some
paint until the papers, you know, soak the fibers of the paper so the
water really well. Let us make use of the time and start preparing our colors. So first, I am going to be
mixing my Prussian blue. So you can see it's
a very nice color. This is from the brand Campbell. We're gonna be taking Prussian
blue in larger amounts. And the reason why I'm
preparing the colors well in advance is once
we start painting, I need not look for my colors. I can directly pick it from my palette and drop
it onto the paper. So you can see I'm mixing a really good
amount of pollution, blue, preparing the color
well in advance will help you begin your painting. And you will also need not wait for your paper to get dried. So while the paper is still wet, you can work quickly. Okay, so the next color that I'm adding to this Prussian
blue is while it, if you don't have violet, you can go with purple. Okay. Yeah. I'm taking slowly little amounts of purple or
violet and adding it onto this Prussian blue mixture and don't make them
external to watery needed. It should be to take
it should be equal equal amounts of water and
equal amounts of paint. So yeah, propel the mixture as per the color that you want
to expect for your sky. You can either
increase or decrease the tonal values of all
these three colors. Lastly, I'm going to be
adding indigo to make this mixture a little bit more
dramatic and more deeper. Alright? Yeah. Okay, So the, another color that we will
be using for painting the Northern Lights is
the turquoise blue. And this turquoise blue is
from the brand White Nights. So for the deeper
regions of the sky, we will be going with Prussian
blue, indigo, and violet. And for the lighter regions
of the northern lights, we will be making use
of the turquoise blue. So I'm just going to mix
the turquoise blue as well. Okay? All right, so now let us apply
another layer of water and make sure our
paper is nicely, you bet. So go with another
two or three rounds depending upon the region where you stay and
depending upon the temperature in your area. So apply lots of water
and make sure you apply it evenly so that there
are no big puddles, okay? So make sure you do it. Do this very carefully. I'm gonna be gently applying another two or three
layers of water. And then we will
begin the painting. Right now that I have applied the water now I'm just
going to take off my excess amount of water from the edges of the paper
with the help of a tissue. So yes, I'll see you soon
in the next section.
8. Painting The Sky: Alright, so let us
begin the painting. So first color that
we're going to add into the sky is our lightest color. That is the turquoise blue. Alright, so we're going to begin by adding this beautiful shade. So just go in and
organic manner. Just pick up the paint that
you have already prepared and advanced and just go ahead
and drop it onto the paper. So you can see, I'm just
creating some strokes. I have this picture in my mind and I'm just adding
the strokes DVTs. So yeah, everyone's northern
lights may turn out to be a different
one at the end. So that's completely fine. Just go ahead and add
these random strokes. You need not paint in the
same manner as I am doing. You can add two
or three strokes. You can just add more, more of the turquoise
blue strokes and less of the darker regions. So it all depends upon you. Alright, so, yeah, just
keep adding these strokes and take enough paint
because later on, watercolors tend to
fade as they dry. Alright, so now I'm, you know, there's lots
of water on my paper. So I'm just cleaning that shape with the
help of some tissue. And i'm each time
dabbing my brush onto the tissue paper just to
remove that excess water. Alright, so, yeah. Alright, so now that we have
added the turquoise blue, it's time to add
the darker regions. We have already prepared the
mixture well in advance. So this mixture
contains Prussian blue, it contains indigo and
it contains while it. So now it's time to define
the darker regions. Wherever you have added the turquoise blue
just beside that, in the white region,
we're going to fill up this deeper tone. So just keep dropping
your colors. Don't worry about how the colors are spreading
at this moment. Okay. So we're going
to lift the boat and our board and let
the water do the magic. Alright, so I'm just going to gently lift the
board and tilted, don't tilt it very, you know, like don't build it
in a fast manner. Just be very careful and collect all the paint onto the table. Okay? So make sure
you are making use of some newspaper or something underneath so as to
protect your table. Alright. So, yeah. Alright, so I have collected all the excess amount of
paint onto the paper. Now I'm just taking my brush and taking a little bit of turquoise
and defining that shape. Just defining that shape
of the Northern Lights. Be very gently and carefully. You can see each time and
correcting the shape. I'm wiping the paint
onto the tissue so that I don't get any Prussian blue onto
the lighter regions. Okay? So yeah, it's barely
the repetitive process, so just keep repeating that. Alright, so, yeah. Okay, so now I'm going
to continue adding more and more deeper
tones because I know once the painting gets
dried it's going to fade out. So my paper is still
wet and I'm making use of the time
and I'm adding it. So yeah, just go ahead
and add the deeper tones. Make sure you have a well amount of paint
prepared well in advance. So this is the reason
I prepared the paint well in advance so
that I can make use of the time of
the paper being wet and keep on painting. Alright, so yeah. So just carefully drop the paint and make sure
you're not covering the entire turquoise
blue because we want to retain those
lighter regions as well. Alright, so, yeah. Now again, I'm going to repeat the
same process of dabbing the brush onto my paper and defining the shape
of the turquoise. Basically the lighter
regions of the scalp. You can see how I'm picking up the paint and dabbing
it on the tissue. Okay. So yeah, I told you write, the shape of the
Northern Lights has to be organic and dramatic. It cannot be the way
you want once you drop the paint onto the paper
and once you start tilting, let the paint flow. Don't try to control
the paint or the water. Let the water and the paint
do the magic for you. Alright, so that is the reason
I said in the beginning, you are painting and my painting may look different at the end, but that's absolutely
fine because Northern lights do not
have a particular shape. So yeah, that's how
it's supposed to be. So if you feel the darker
regions are getting lighter, you can keep adding
more and more paint. But make sure you're
doing this step only when your
paper is still wet. If your paper has dried, then please do not do this tip. Otherwise, you're gonna get dark patches and dark edges
which you do not want to. Alright, So, yeah. All right. Now you can see I'm
picking up a little bit of turquoise because
I see that some of the turquoise has
become lighter. So I want to retain
the turquoise regions. So picking a little
bit of paint and adding it. Not very much. So make sure don't pick up a lot of water and
a lot of pain. Just very gently and very
smoothly make this step. But if you're already happy
with your northern lights, I suggest you to
stop wherever you are and let the painting dry. Alright, so I can still see
that my paper is still wet. This is the reason of using an artist grade and 100%
cotton watercolor paper. So you can see, I still have some time to work
on my painting. So wherever I feel
the paint has faded. I'm just going ahead and
adding the deeper tones. Alright, so I think I'm
going to call it as done, and I'm going to stop here. Now next is a very
important step. So I'm going to grab my tissue and dab off the excess amount of paint and water that has got collected at the edges
of my masking tape. This step is done to ensure that no paint seeps
into the paper, mainly onto your painting. Alright, so now let us allow the painting to
get dried and I'll see you soon in
the next section.
9. Painting the snow ground: Alright, so now let us
paint the snowy ground. So before that, let us
peel off the masking tape. Alright. So let us gently
take off the masking tape and make sure your
background sky has completely dried before
you do this, alright? Otherwise the paint
is going to bleed. I think I have got some
bleeds, but that's fine. We can use our white
gouache to correct that. Alright, so yeah, let
me just go ahead and quickly peel off the
masking tape and then let us begin
painting the ground. Alright, so now let
us begin by applying an even coat of water
onto the bottom region. So be very gentle and
be careful when you're applying the water
towards the horizon line, alright, so that the water does not seep onto
the sky region. Okay. So I'll quickly
go ahead and wet the entire bottom area and then we can begin
adding the paint. Alright, so now let us start by painting the snowy ground. For painting the snowy ground, I will be picking up my indigo. Okay, So this is just to show the reflection of the sky
falling onto the ground. Note that we're not going to add the indigo in a
very deeper manner. We're just gonna
take a little bit of that indigo and smudge it
slightly on the background. You can see I'm having
so much of water on my brush and very
little of indigo. Okay. So this is the
consistency of the paint. You also need to be going with, don't go with bold, dark, indigo tonal value. Just go with a very subtle
and soft looking integral. Alright? So I'm just
adding paint onto the cabin just to depict the shadow of the cabin
is falling on the ground. Similarly, I'm just
going to go ahead and just drop some
paint over here. And they're just randomly in a very organic way to
depict the snowy parts. So as discreetly go
ahead and finish this. All right, So this is how
our snowy ground is looking. Now there is one more
thing that we need to add while the paper
is still wet. So we're going to add a
teeny-tiny window onto the cabin. So we're going to show
the reflection of that light falling
onto the snowy ground. Basically, we're going to show the reflection of that
teeny-tiny window. And for this purpose, I'm going to be using
my Indian yellow and with very little
amount of paint. I'm just going to
depict the shadow of this window or the reflection of this window falling there. Okay, So I'm just picking
up my Indian gold, mixing a little bit of
Indian yellow also do it. So basically Indian
yellow and Indian gold. Just a very subtle amount of it. Alright, so we have finished
painting the bottom region. Now, in the next
section we will see how we can paint the
cabin. See you then.
10. Painting the cabin: Alright, so let us start
painting the cabin. So for painting the cabin, I will be going with
my burnt sienna. And along with burnt sienna
to create a darker brown, I'm going to mix a little
bit of transparent brown. Okay, so note the
colors I will be using burnt sienna and the
transparent brown mixtures. So we're going to
paint the cabin with a slightly brown color. So you can directly go with
transparent brown or you can go with any other
brown that you have got. But I like mixing colors, not going directly with
brown because we want to add some deeper tones to the
cabin to depict the shadows. So first I will be going with burnt sienna and a little
bit of transparent brown. You can see the shade. I have clearly mixed
it in my palette. And yes, Let us start adding this particular
shade onto the cable. So slowly, follow the pencil
sketch that you have added and paint along. Okay. So you must have painted the snow drops
also on the cabin. So accordingly, you can
mark that and paint along. So we're gonna show
some snow dropping or dripping from those
top of the roof. Okay. So we're going
to paint this. And yeah, so I'm just going to go quickly
and being the Kievan. Alright, so I forgot
to mention one thing. We need to add a tiny
window for our cable. So I'm going to add that. So you can see I'm painting
a teeny tiny window. So don't forget to add that. I actually forgot to
mention in the beginning of the pencil sketch.
But nobody's. So you can make a small, teeny-tiny window and complete the painting for your cabin. Alright. So, yeah, I'll quickly go ahead and paint
the rest of the cabin. Alright, so now that we
have painted the Cuban, it is time to add some depth and some shadow onto the Cuban. Otherwise the gibbon
is going to look flat. So to give it a
nice organic look, we're going to add
some deeper tones, okay, for adding the shadow, you can go with dark brown. Or if you have light brown, then you can add a little
bit of Payne's gray onto it and you can create
your own dark brown. But if you have CPR
already with you, then that's a very nice option, or it's a nice color
to add deeper tones. So at the edges of the roof, I'm going to paint with sepia
to give the deeper shadows. Just a teeny tiny bit. And I'm doing this while
the cabin is still wet so that the sepia gets blended with the brown that is already
painted before. Alright, so, yeah. So you can see how I'm
smudging the paint onto the existing brown and I'm just creating
a nice blend. And now you can see the
Caribbean is looking so good. Alright, so now it's
time to add the snow. And this is my favorite part. Okay, So take some white gouache or you can go with
white watercolor. But makes sure the
consistency should be thick and not watery if you're
using white watercolor. But if you're going
to use gouache, then it's already opaque. So you can directly
use that and painted. So we're just going
to define the snow. Just carefully go along
and paint the snowy roof. I have some bleed from
the sky onto my roof so that can be easily fixed with the help
of white gouache, white goulash, you know, it works like magic. It's like a magic character. So you can add those teeny tiny drops of snow
falling from the roof. Okay, so let me go ahead
and quickly paint the snow. Alright, so now
that we have added the white snow onto our roof, we need to add a little
bit of reflection of the sky or the northern
lights falling on the roof. Otherwise, it's again
going to look flat. So as much as possible, try to make your painting look more alive and more realistic. These tiny, teeny tiny
details like adding the deeper tones are
painting the shadows really bring a lot of
character to your painting. Alright, so I'm just going to mix a little bit
of that blue that we used for the northern lights with a little bit
of white gouache. And now you can see
it's looking so stunning and so
gorgeous, isn't it? Alright, so now that
the cabin is complete, we're going to paint the
window that we added. For the window, I will be using my favorite color that
is Indian yellow. It gives a nice warm to look. It shows us do there
is some light in the cabin and there is someone
present inside the cabin. Okay. So I'm going to
add Indian yellow, but you can go with
any other yellow like cadmium yellow,
lemon yellow. There are so many options. So I'm just going to add a teeny tiny bit
of Indian yellow. And then to bring a
little bit of more warm, I'm going to add my cadmium
orange or golden deep. You can go with whatever
orange you have got. Basically it's a mixture of Indian yellow and golden deep. The color names are different, but when we swatch out, it's normally golden deepest equal to whatever
orange you have got. So yeah, that's how the
teeny-tiny window is looking. Now. It's time to
add the window bar. So I think I'm going to use
my brown to create that. So you can grab your, you can go with sepia or the same brown mixture that
you use for your cabin. With the help of
a detailing brush for this particular thing, I'm using my size
number two brush, but you can go with size
zero or one if you have. Okay. So yeah, that's how
the cabin is looking. And yes, I'll see you
soon in the next section.
11. Adding snow and details: Alright, so now that we
have added the cabin, It's time to add some
details onto the cabin. So we're just going to take our sepia and size
number two brush. And I'm just going to add some horizontal lines onto
the front part of the key. Go with very thin
and delicate lines. Don't draw very thick
and bold lines. Otherwise you're going to do in the shape and structure
of the gibbon. Alright, so always keep in mind the rule of perspective since
you are given is small. Those lines also should
be thin and delicate. Alright? So, yeah, so paint
thin and delicate lines. So now that we have
added those lines, it's time to add a teeny
tiny chimney onto the cabin. So I'm just adding this as I felt like the K1 is
looking a little bit flat. So I thought, why not
add a small chimney? But if you would like to
live your Caribbean as this, then you could do that. Or if you want to add chimney, then you can follow
along and paint with me. So it's very simple. I'm just going to draw
a teeny-tiny chimney. Just a rectangular shape onto
the top side of the Cuban. Again, the chimney
should not be very bold. It should not be
very thick and tall. It should be very
small and decent. Alright. Let me go ahead and
quickly paying that chimney. Alright, so now it's time to add some dry snow onto the
front part of the cabin. So I'm just going to
use my white gouache and I'm going to use my
size number two brush. You can go with
smallest size brush. And I'm picking up
a very dry paint. That means lot of paint and less amount of water
or no water at all. So you can see how
I'm picking up the paint and I'm not directly
adding it onto the cabin. I'm just dabbing off the
excess amount of water that has got collected in the brush onto the masking tape. You can use either your cloth to dab off the excess
amount of paint. And then you can add these dry snow onto the lines that you
have added previously. Okay. So, yeah. Alright. So now it's time to add some snow onto the
chimney as well. Don't add a lot and cover up the entire chimney just on
the top part of the chimney. So you can wait for me to complete and then
follow along with me. Okay. Yeah. So I'll quickly go ahead and add some snow on to the chimney now. Alright, so I think everything
is looking gorgeous. Now I can see some bleeds from the sky onto my snowy region. So I'm just going to quickly
go ahead and correct it with the help of my
magic character. That's nothing but
the white gouache. You can always correct
your mistakes. Okay. So that's the
reason I always say apply the masking tape neatly and press it several times so
that there are no bleeds. Nevertheless. Happy accidents. So yeah, I'll see you
soon in the next section.
12. Thank You: Alright, so we are towards
the end of the class and I'm so happy that you all
join me till the end. Now that our painting
has completely dried, let us gently and very carefully take off
the masking tape. So please take your own sweet
time to gently peel off the masking tape in order
not to rip off your paper. I really can't wait to show
you guys the final painting. I completely enjoyed painting this northern lights
and the snowy cabin. And I hope you enjoyed
along with me as well. So do post your class projects in the class project section, and I'll be happy
to review them. I will also be
personally giving you the feedback which will help
you in your future projects. Alright, so let us take a
closer look at our painting. Just look at that magical sky. Just look at the snowy cabin. Everything is looking so
gorgeous and so beautiful. Thanks a lot for
joining me again. And I'll see you soon
in my upcoming class.
 Aishwarya Shetty, my__paint___story | Watercolour Artist