Transcripts
1. Hello!!!: Hello everyone and welcome back. Monsoons and my country has already begun and there's
greenery everywhere. The fragrance of the
fresh flowers and grass is so delightful
and refreshing. The sky looks so gorgeous with the different patterns of
those fluffy monsoon clouds. I truly miss some
words and sunsets, but Mother Nature never
fails to amaze us. The beauty of sunset can also be witnessed
on a monsoon day. The sunsets in monsoon are just unique and gorgeous
in its own way. I made sure they
are an engineer and a very passionate
watercolor artist. In today's class, we
will be exploring and painting a gorgeous
monsoons sunset sky. This class is curated with
a beautiful color palette. So come join me and let's
paint the sky together.
2. Materials You'll Need: Okay, So let us take a
look at the materials. So the first is the
paper for today's class. I will be using
Saunders Waterford. This is a 100% cotton
and it is 300 GSM, as you can see it has mentioned. So this paper is, you know, ideally very good
for the wet-on-wet technique as well as other
watercolor techniques. You can see the texture. But if you are someone who has not invested in these
kinds of papers, then I highly
recommend you to do that as you can go with
whatever paper you have gotten. Okay. So next is the brushes. First is the flat wash brush
to evenly wet the paper. Next, we are going to
paint the entire painting using a single brush that
is the size number 12. Okay, this is the
larger size brush. You can go with your quill
brush if you have that. And lastly, I'll
be making use of some smallest size
brushes, size number six. And for all of these
brushes that I'm showing is from the
brand Princeton, okay? So you can use any
brand of brushes that you have gotten may not be like you have to use Princeton. Alright, So those
were the brushes. Next, let's take a
look at the colors that we will be using today. So I'm going to be using the colors from my palette
and it is already squeezed. These are all the colors
from the brand White Nights. But if you don't have wide nice, you can go with any
brand of colors. The colors usually don't matter. Okay. So next is, we will
need two jars of water. One clean water to, you know, take the fresh paint. Another is to clean the dirty
paint from the brushes. So you need two jars of water. Next, we will need a masking
tape and you will also need some tissue to wipe off the excess amount
of paint and water. Alright, so once that is done, the next thing that you
will need is a board. So I'm using an acrylic
board to tape down my paper. So these were the materials. Grab them and I'll see you
soon in the next section.
3. Color Palette: Okay, So let us take a look at the colors that we will
need for this painting. The first on the top
you can see this is an ultramarine color and I will also be
using some boil it. Then we're going to have
crimson or carmine. And for all those
yellow sheets will be going with Indian
yellow, indian gold. And we will also
use some orange. And then to add those dark fluffy clouds
are gone with Payne's gray. At the bottom of the sky. I'm going with the Van ****
brown mixed with the yellows. And finally, to add
those minor details, I'm using my Payne's gray. Now to get the pastel effect. I'm going with my
wife, watercolor. So we'll be using pinch
of white watercolor. So all of these colors are
from the brand White Nights. And you can see I have
watched all of these colors. So you can go with
any brand of colors that I'll see you soon
in the next section.
4. Lets Paint the Sky!: Okay, so let us begin
the painting first. Let us apply a clean code of
even water onto our paper. So you can see I am making
use of my large sized brush, that is the flat
brush or wash brush. So make sure you
completely wet the paper and this will allow
you to work on the wet on wet technique for
the longer duration of time. So you need to be a little bit patient over here
while wetting the paper. Because the more
you read the paper, that is the number of
times you wet the paper. What matters at the end? So do not skip this
step and be patient and go for 23 rounds of
wetting the paper evenly. Alright, So I'll quickly
go ahead and wet my paper. Okay, Now that the
paper is evenly wet, let us begin with the painting. So first, I'll be going
with ultramarine. You can choose any
blue of your choice. But we're not going to add this blue directly onto the sky. We want a pasty looking
sky, and hence, I am going to mix my ultramarine with
my white watercolor. So you can see I'm using a tiny pinch of that
white color, okay? So do not add too much, otherwise, the
color may fade out. So go with a medium tone. Alright, so I'm making a mixture ready so that I can easily go
ahead and drop this paint. And I need not create
the mixture again. So I'm just making a good amount of mixture
well in advance. And I'm using my
larger size brush, that is size number 12 and
this brushes from Princeton. But you can go with any brand
of brush that you have got. Preferably, I would suggest you would go with a
larger size brush. This way, it will allow you to cover the larger part of
the paper in a single go. Alright, so now I'm
intensifying the color and I'm going with a
violet or purple shade. So if you do not have
violet or purple, you can make use of
Prussian blue, even that. Go well. So go with your
choice of colors. The sky is yours. You can paint it
however you want. Okay. So yeah, I'm just trying to create a blend
between all of the colors. I'm not laying these
colors like a flat wash. So we do not want a
clean blend over here. So the sky is always uneven. Some parts of the sky or dark, some parts of the
sky are lighter. So that's what we
actually want to achieve. All right, So I'll quickly
go ahead and add this. Alright, I think we have added enough of that darker
shade of violet. Now, let us go with
our next color. So according to the reference
picture that I have, I see a little bit of
crimson and my skies. So again, this crimson is not
going to be used directly. We'll have to turn it into
a paste, it'll color. And that is done by adding a
pinch of white watercolor. Alright? So you can see we get a nice
pinkish baby pink tone. And at some places I'm going
to directly take the crimson from the palette and add it without mixing it with
the white watercolor. So this way we'll have different kinds of tonal
values for our sky. Alright, so keep
adding the pink. So if you do not want pink, then you can choose different contrasting
color that will get blended with
the blue. Alright? So, yeah. Meanwhile, since the bottom part is slowly starting to dry, I have slightly wetted
the bottom region. Okay. So the next shade that is towards
the bottom of the sky, we would be having a
bright tonal value. That is where exactly our sun is there and the sun rays are
spread out on this guy. So for that I'll be going
with Indian yellow, then I'll be using Indian gold. And on top of these colors
I'll be using orange tone. Okay? So make sure you do
not touch the blue on this guy when you have
yellow paint on your brush. Otherwise you're gonna
get greenish hue onto your sky and you don't
want greens and your sky. Alright? So just be a little
careful over there. Okay. So let me just go ahead and drop the different
shades of yellow. That is Indian gold
and Indian yellow. Alright, so now I'm
taking Indian gold. Do not worry if you don't have Indian yellow and Indian
gold, doesn't really matter. You can choose any
choice of your yellow or any yellow that
you've got for that matter, you can even go with
the lemon yellow. Again. We just want those yellowish
tones for our sky. Now on top of this, I think I'm gonna
go with my orange. Adding some orange tonal
values you are in there. So again, you can see my brush
strokes and brush moments. It's not really flat. I'm just going in a very
organic manner just to create the cloudy
look for the sky. Okay, So do not
have a nice blended finished for your painting
because that will not give the realistic
look for your Skype. So just go in a very
random and organic way and place your colors
wherever you want. Alright? So let me just
add more of these colors. Alright, so towards the
bottom region we will be depicting the faraway
buildings and some bushes. And for that, I will be, for the bottom layer of the sky, I will be going with
the darker tones. So I'm using Van **** brown, but in case you do not
have like a brown, you can go with any other brown. Or if you have CPR, take a little bit of
that and mix it with your orange and you
may get the shades. So this is the
composition of the sky, refers to end with
the bluish tones. That is with the V1
with a pistol blue. And then we went
with the crimson. Then we added some
shades of yellow. And then we added when Nike
brown towards the bottom. Alright, so this is how the
sky looks at the moment. Okay? So now, before this guy drives, we want to add nice
amount of fluffy clouds. Since this is a
monsoons and said, We want to depict the
monsoon plus the sunset. So to depict those non monsoon, we're going to add some
nice dark fluffy clouds and make sure it's dark. And again, I'm going with my same larger size
brush because I'm pretty much comfortable with this brush to create those fluffy clouds. But if you're not comfortable, then you can go with the
smallest size brush. I'm adding the clouds in a
very random and organic way. I'm just rotating my brush in a circular manner to create those organic shapes
for the clouds. So if you might, if you
might have seen the clouds, they're not in a perfect shape. They're always
scattered and fluffy and you have different
kinds of shapes. So if you feel like you're
not comfortable at it, you can just look at
some reference pictures or you can straight away, go out and look at the
sky and just, you know, judge those clouds and come back and put it
on your painting. Or you can just simply
follow what I'm doing here. But the clouds need not be always perfect.
It's always scattered. So each one of you at
the end of this class will have a different
shape for your Cloud. And that is what we call
a realistic painting. And everyone's imagination is
different and all of that. So you can see at
the two places, I've added a big patch of Cloud. And as I come down
towards the yellow tones, I'm making the clouds a little
bit smaller and lighter. Okay? So these are
the scattered clouds. So let me quickly go ahead
and add these clouds. Make sure you don't
go overboard. Because otherwise
you're going to hide, hide all the underlying colors, and your sky will be completely hidden with those dark clouds. So we don't want that though. Agenda of this class is to bring out that monsoons
and said feeling. And we want to have those sunny layers in the sky along with
the monsoon clouds. Alright? So I'll quickly go
ahead and fill up the sky with small clubs. Alright? Alright, so I think I've
added enough of clouds. I think the top area
looks a little bit blank. So I'm thinking to add
a small patch of cloud, they're not making
it too much dark. So it's not very prominent
gesture in there a little bit. And now you can see for
adding those smaller, tiny clouds, I've switched
to my smallest size brush. So it's up to you. You can go with a larger size
brush or you can switch to a smaller size brush depends
upon your comfort zone. Alright, so, yeah. So I know that watercolors will tend to drive and shade lighter. I tell this every time
in each of my class. And so I'm making use of the
time of the wet paper and I'm going again over
all of those clouds and adding the Payne's
gray over it again. Okay. So, yeah, I forgot
to mention that this color for the clouds that I'm using here is Payne's gray. But if you don't
have Payne's gray, you can straightaway
go with black. But I wouldn't suggest that you can mix a little
bit of black with ultramarine blue or black with Prussian blue and get
that darker tone. Okay. So, yeah, so you can see how I'm adding those patches of clouds, just intensifying some areas. Okay. So the reason why my
paper is still wet is because this is 300 GSM and
a 100% cotton paper. And since I also
wetted my paper for almost three to four rounds
or you can say even five. That's why my paper
is still wet. So I would recommend, highly recommend all of
you to do this step. Yes. I'm already in
love with my sky. It's looking so beautiful
and so gorgeous. The colors in the
sky, those you, those blue and the pinkish tones and the Sense8
tones at the bottom. It's altogether a
different game. Okay, so once your
painting has nearly dried, you can start adding
the bushes and the small towers are small
buildings at the bottom. Okay. So I did not wait for my
paper to get completely dry. That's a trick away her
because I wanted to make these bushes to be a little bit blurry
since they are far away. I just wanted to be I
just wanted it to be a little bit blurry and it's not the main
focus of the painting. So the main focus
here was this guy. And hence, I did not wait
for the paper to dry. I'm just, you know, it's a little bit damp and I'm just straight away
going and adding those. Again, this is a
very simple thing. Just go ahead and
randomly create some tiny bushes and create
some tiny buildings. Okay? Again, go in a
very organic manner. There's no particular
shape or there's no particular rule to
be followed over here. Okay? So I'm just gonna go ahead and randomly fill up
the entire bottom area.
5. Thank You!!!: Okay. So it's time to peel
off the masking tape. Please make sure your paper
has dried completely. Once it is dry, you can
take off the masking tape. I can't wait to show you
guys the final painting. I'm already in love with
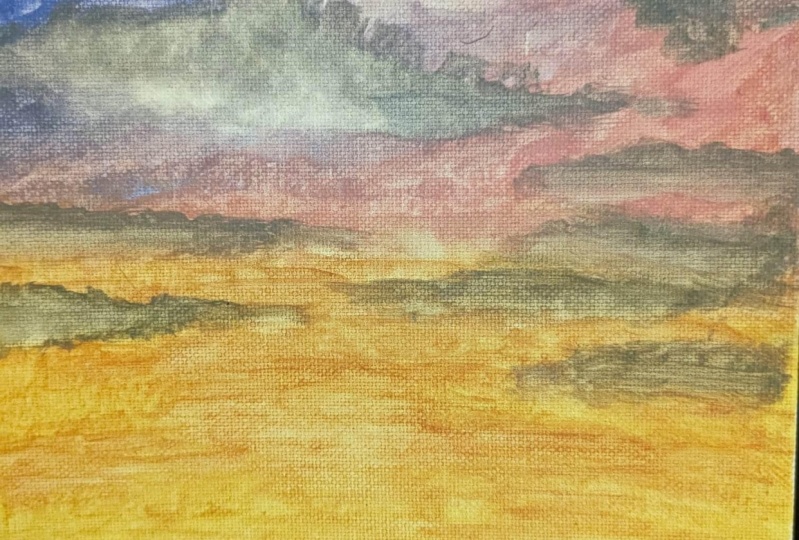
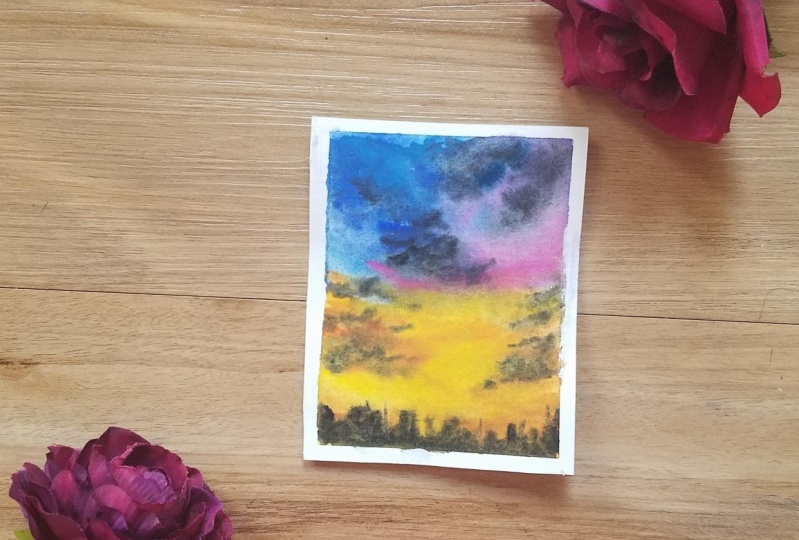
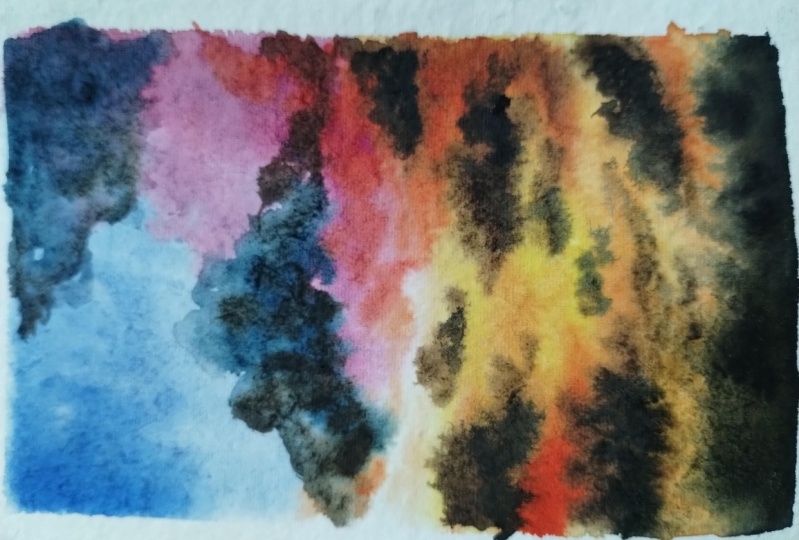
that soft, fluffy sky. It's looking so stunning. All the colors in the sky are looking so pretty
and so beautiful. So you can always have own
composition for your sky. So it doesn't matter which
color you're going with. Just choose nice
contrasting colors and your sky will
be pretty okay. So take a look at it. I hope you liked
today's painting. And if you did, then do posted in the class
projects section. And I'll take a look at all
of your class projects. If you're posting on Instagram, then do tag me using my
Instagram handle, my pins story. And I'll see you soon
in the upcoming class. Until then, take care, stay happy, and bye-bye.
 Aishwarya Shetty, my__paint___story | Watercolour Artist