Transcripts
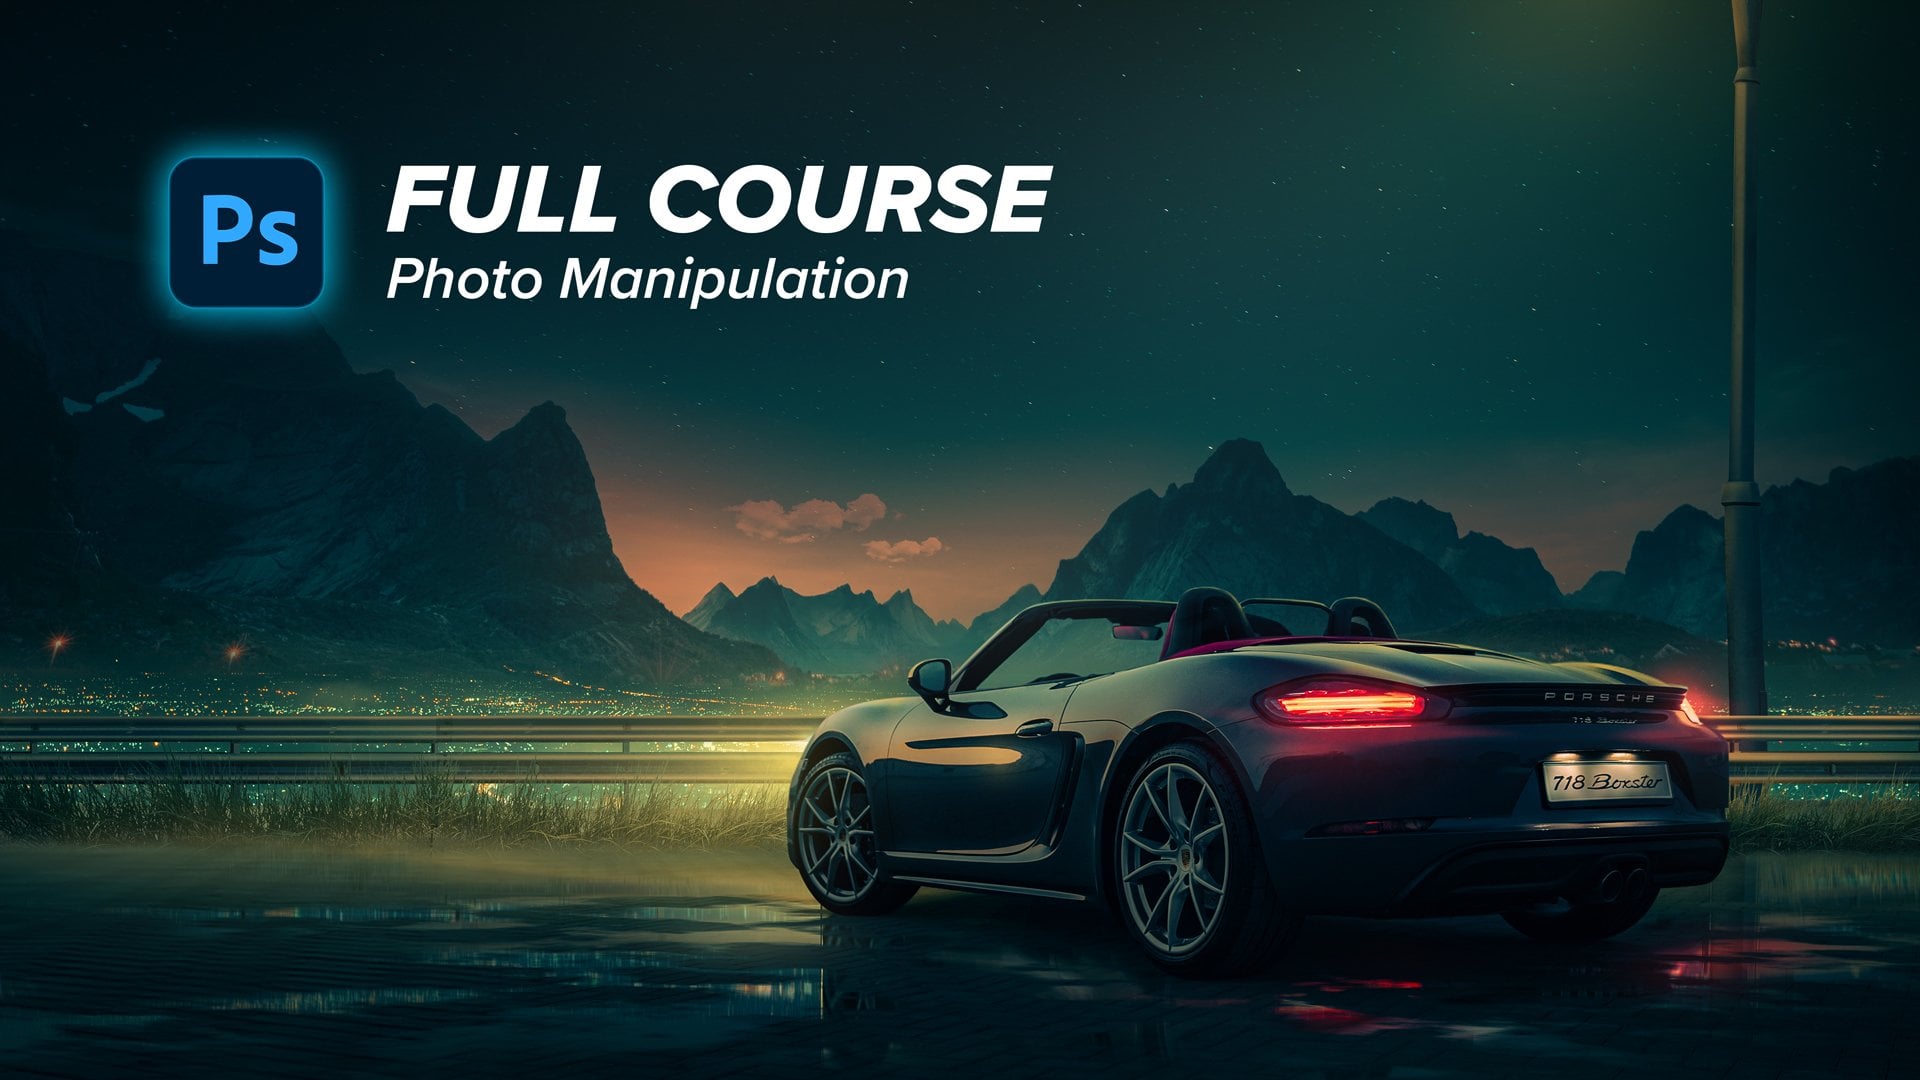
1. Intro: Do you want to learn how to create beautiful and inspiring digital artwork? This is the perfect solution for you. I'm Adrian chef and I have been teaching Photoshop for more than a decade. To my tutorials, I taught tens, maybe hundreds of thousands of people, a wide variety of powerful Photoshop techniques and tricks. I'm telling you this, so you know, you're getting the best possible value for your money. I remember when I first looked at some beautiful photo manipulations and I felt that I would never be able to do that being a beginner in Photoshop. That's why I created this course to help complete Photoshop beginners create beautiful digital artworks with ease and pleasure. This course is designed for the complete beginner who ans easy to watch tutorials and fun project-based lessons. But also for savvy Photoshop professionals who want to cement their knowledge and pick up some powerful techniques lambda away. This course is placed into two major sections. The first section, I'll introduce you gently to essential tools and commands that will quickly make you comfortable using Photoshop. Next, you'll be introduced to some advanced commands and techniques that we'll take your photos of game to the next level. All these newly acquired skills will quickly make a confident in using Photoshop and create beautiful digital art. In the second section, guide you step-by-step and your create alongside me and amazing photo manipulation that's going to live your friends, family, and coworkers. Speechless. You'll understand easily each and every set required to create a good-looking professional photo manipulation will start from the absolute beginning with the planning stage. Then we'll continue learning essential steps, secret tricks and techniques, and the required workflow necessary to create from scratch complex and good-looking photo manipulation. With the skills you're going to learn in this course, you take your Photoshop skills to the next level and you'll be able to create on your own crazy good digital art. Once you purchase this course, you'll get instant access to everything. You get premium, high-quality video prototypes. You have access to project files and assets that will allow you to easily follow along. So what do you say? Are you ready to embark on an epic learning journey full of fun, excitement, and powerful Photoshop knowledge. Join me now, let's create some beautiful R. Will Photoshop you and me together.
2. Who Are You?: Hello you beautiful person. Would you mind terribly, if I ask you a question, why are you watching this course? What is it you want to learn? Maybe become a little bit more skilled at Photoshop? Or do you want to be able to create amazing digital artwork? Or maybe to be able to fully express yourself through your art. And why not even use what you learned here to get paid, chose to be better in your work. I don't know the answers to these questions, but I'm going to do my best to give you valuable knowledge and insights into Photoshop art. However, it used this knowledge. It's up to you, but I hope is going to serve you well. My fellow artist, joining me now to this exciting Photoshop artless.
3. Who am I: Who the heck am I? And why should you listen to me? My name is at the nRT1, also known as at the end chef. You can call me Adrian, size two h. Now, I have been DJing Photoshop for almost ten years using a variety of mediums and techniques. I've written tens, maybe hundreds of Photoshop tutorials to a wide audience of people. Just by searching my name on Google. Adrian, chef. You can check out for yourself some of these cool tutorials here. Let me show you some of my digital artworks. Right now, you may be asking yourself, will I be able to create artwork that looks like that or even better? And the answer is a resounding yes. Yes. You can. You can create beautiful and interesting digital artwork. No matter your current skills or background. There's three things you need in order to create digital artwork. Number-one, imagination can imagine things. I bet you can. Now granted, some of us have a more vivid visual imagination, but all of us possessed enough imagination to create digital art. This means you're covered on this front. Two more things remain. The second thing you'll need is a digital brush piece of software that allows you to easily create and modify digital compositions. And what do you know? There is one such piece of software, widely known Photoshop. Chances are if you're watching this course, you probably have photoshop installed on your machine. If not, please go ahead and install photoshop now. Okay. You already have two out of three things needed to create beautiful digital artwork was the third thing. I'm glad you asked. The third thing is the 10K. You have Photoshop, have imagination. Now, what the heck should you do? How do you even start creating digital artwork? Was the general workflow. Are there some widely used techniques you can use in your own work? What about secret tricks? Almost no one knows them. Well, finish much in this course and you're going to get the answers for these questions. I'm going to teach you this third and final thing you need to agree, digital artwork, and that is great and useful for the manipulation techniques. I want to thank did McClellan for his comprehensive Photoshop lessons I've learned many years ago in his amazing series, Photoshop one-on-one dig, I hope I can be 10% as good as you in teaching my students and making them love using Photoshop in their daily life.
4. Essential Tools: Hello, Your amazing person. In this lesson, we are going to learn about the airbrushed Oh, the rectangular markets and the moved. Oh, let's begin. Look. There are three tools you absolutely must be familiar with. These tools are the backbone of every photo manipulation and you are going to use them 80% of the time. The brush tool, they're rectangular marquee tool. The Moved all. Each of these tools has a shortcut. You can either use the default shortcut or create your own, but you must memorize these shortcuts. You can see the shortlist displayed next to each tool. Just click on at all and hold until a little pop-up appears. And you can see here on the right, the shortcut for this tool. If you want to change the shortcuts, just go to edit keyboard shortcuts. Choose tools from the dropdown and change the appropriate keyboard shortcuts. If someone puts a blindfold on your eyes, I want you to select each of these tools and your keyboard, dammit, or BAM, without thinking in 2.5th, now, you may be deluded into thinking that it's easier to just use a mouse to select the stores. That is a misconception and a costly one that you're going to be switching between these tools hundreds of times per photon manipulation or Photoshop work. Doing it with the mouse not only wastes time, but also bricks concentration in the sludge desperation. Take time to memorize these shortcuts. Switch between these tools for at least 30 times or more until you feel you can change them instinctively. Again, these tools are the Brush tool, the rectangular marquee tool, the move tool. Use the keyboard, the tablet, or the ban to change between dish shortcuts on your own without using the mouse for 30 times or more. Like so. Brush tool moved all rectangular market or pause the video and start memorizing these tools. Now, I am going to give you a little test to see if you memorize these three shortcuts. Well enough. Open an empty Photoshop document. Place your hand. Nero keyboard doublet or Ben. I'm going to call these tools out loud and switch to them using my keyboard. You'll keep pace with me in switch the tools I call allowed as fast as you possibly can without looking, without using the mouse, just using the keyboard, the tablet or the like. So brush tool, Move Tool, rectangular marquee tool. Pause the video and get ready. And when you are ready, we shall start the exercise. I'm gonna give you three seconds. Let's start. Brush tool. Move TO rectangular marquee tool. Brush tool. Moved all rectangular marquee tool, Pashto, Move tool, Brush Tool, rectangular marquee tool, moved all brash toll rectangular marquee tool. If you're able to found me, continue to the next lesson. If not, try to memorize these tools once more and take this test again. Good job. You successfully finished this lesson. I'm going to see you in the next one.
5. Essential Commands: Hello you astonishing artists. In this lesson, we are going to learn about transform. Adding an empty Layer Mask, create a new empty layer, invert, invert, selection, deselect all, and clipping a layer through another layer. Let's begin. There are seven commands you must be very familiar with if you're going to use these commands a lot in your Photoshop work. These commands are transform, had an empty Layer Mask, create a new empty layer, invert in first selection, deselect all, and clipper layer to another. Each of these commands has a default shortcut. You can either use the default shortcuts or create your own by going to Edit keyboard shortcuts. I want you to get really comfortable in using these commands. Keyboard diameter pan. I'm going to explain very shortly on each of these commands does. But for a more detailed explanation, there are plenty of resources. Online. Transform. Transform allows you to change the size, position, or rotation of a layer. As you can imagine, this is the thing you're going to do a lot of the time. Manipulating, moving, resizing, and rotating layers is essential if one is to use Photoshop. Let me show you what I mean. Let's transform this layer by pressing the appropriate keyboard shortcut work by go into edit, transform scale. Now, if I drag the handle of this corner, you can see I will resize this dragon. I can move him around. I can rotate him. I can scale him up and down. I can skew him. Please note that in newer versions of Photoshop, the behavior of the transform command might be a bit different. Let me show you what I mean. If you go to Edit Preferences general, you can see that I have checked use legacy Fourier transform. If I transform without holding any key, the dragon will be transformed without constraining its proportions. So in order to scale the dragon or the layer and constrained the proportion, I have to hold the Shift key. This is how photoshop transform command worked for many, many years. So it is engrained in my hands and my fingers. But in newer versions of Photoshop, the behavior of transform regarding to this feature changed. Here's what I mean. If I am to go to general, uncheck, Use Legacy Free Transform, press OK, transform and not hold shift. The dragon scales and constraints its proportions automatically. Now, that may be a good thing. I'm not going to say now, about almost a decade of using shift to constrain my transform. It made me not like this new feature very much, but some of you who may be newer to using Photoshop might use this feature. So it is something you must be aware of. Add an empty Layer Mask. Sometimes you don't want to hide or reveal certain parts of a layer. For example, if you have a cat, you might add a layer mask to hide its tail or certain ugly hard edges from your previous election. Or if you have a dragon like this one, you might want to add a Layer Mask to hide this bottom part and to make him look like he's just rowing to the c, like so. I'm going to add an empty Layer Mask by using a keyboard shortcut. And now with the brush tool and black color, I'm going to hide the bottom part of this dragon. As you can see, in a layer mask, whatever is painted in black disappears. It is headed. Now, if I were to change to the white foreground color and paint in the layer mask. When white, I am going to reveal certain parts of the Dragon. The parts repainting wide. As you can see, layer masks are an incredibly useful tool and you really should know how to add an empty Layer Mask quickly. Normally, you can add a Layer Mask by clicking this icon in glare battle. But it is preferable, You know the shortcut because you're going to add a lot of layer mask, believed me. Create a new empty layer. Two layers are the meat and bones of far Russia. You are going to create a lot of layers to keep your document organized and easy to modify in the future. Let me show you what I mean. I'm going to create a new layer by clicking this icon in the layer battle, or even better by using a keyboard shortcut. Now, on this new layer, I can paint something. Then I can maybe move around this painting. Or if I decide I don't like it, I can dividends without affecting the rest of my document. I can delete layer by clicking this icon in the layer ballot, or simply by pressing the key Delete on my keyboard. Invert allows you to change the colors in layer two, they're opposite values. Now, I admit I rarely use the covert command and the layer themselves because the results. Are useless most of the time. Like so. As you can see, I've made this dragon white instead of black. So not very predictable and very rarely useful if at all. But inward is extremely useful in a layer mask. When union for the colors in a layer mask, the hidden areas are shown in the shown areas or header. As you can see here on my sea dragon, I have a layer mask here. A very small village of black and the bottom hiding the bottom part of the dragon. This hidden part is painted in the Layer Mask with black. Now, what would happen if I were to invert this Layer Mask? You guessed it. Black will become white and white will become black. What was hidden will become revealed, and what is revealed will become hidden. Like so. As you can see, the wide has become black. The black has become white. And now we see that the bottom part of the dragon atmosphere than it is now revealed. This is why invert is useful in a layer mask. Invert selection. Invert selection does what it says. If you select something, this command will invert the selection. Let me show you what I mean. Let's see, I'm going to make a selection like so. This is the selection. If I press the appropriate keyboard shortcut, I'm going to invert the selection like so. As you can see now, at the margins, animated marching as a now this is selected and this is not selected. To prove this, I'm going to choose the brush tool. I'm going to create a new layer. And i'm going to try and paint. As you can see, I can only bind in the selected areas. This is not selected, but this whole area is now selected. If I invert the selection, again, you can see the marching ants have disappeared from here. And now if I paint, I will paint only in this square. And I cannot paint outside because it is not selected anymore. So again, inverse selections. The selected invert selection. Again, this is selected if you are going to use selection quiet a lot in Phanish out. Once you know the selection, you will want to deselect all and continue normal work. Simply press the appropriate keyboard shortcut to deselect like so. Now the selection is no more. Let me show you again. I select something. I do my work inside it. When I'm done, I have to deselect it to be, be able to paint outside selection or do other work outside a selection. I will deselect. And now I can paint outside the former selection sleeper layer through another. This is another very important concept that you might be or might not be familiar with. Basically, it means show all the clip layers above, through the pixels of the layer below. Let me show you what I mean. I have here a huge Saturation adjustment layer. As you can see, when I turned it off. This layer affects all the layers below him. Affects this layer, this layer, this layer and this layer C. Let me increase the saturation to show you exactly why does off on. Now, let's say I want to apply this hue and saturation adjustment layer only through the dragon. I want only the dragon to be affected, this Black Dragon. In order to do so, I have to clip this hue and saturation layer through the dragon layer, hold the ALT key. Now, if you hover between these two layers, you can see a clip Layer icon appearing with the arrow pointing downward in a white square. If you click and watch carefully, you can see that the human Saturation adjustment layer shifted slightly to the right. A downward arrow appeared here showing that this is a clipped layer. And the hue and saturation, saturation effect. It is only applied through the Black Dragon. It doesn't affect any of the rest of the composition. If you hold the ALT key and click between these two layers again, you can see there is a sign that tells you that this is going to be an clipped. So now the layer, the human Saturation adjustment layer, shifted back to the left to it's original position n. It is applied now above all the layers and affects all of them. Now I can move this layer, let's say below, and clip it to the Sea Dragon layer. Again, hold the ALT key, go with the mouse pointer between these two layers. Ng-click. We can clip multiple layers. One layer, let's say I'm going to add color balance, adjustment layer. I'm going to change it all the way to read, all the way to green and let's say all the way to yeah, out here. Now, this layer now affects all the layers below it. But I can clip it again to the c2nel layer by moving it here on top of the previously clipped layer. Holding the mouse pointer between these two layers with the Alt key pressed, I click. And now as you can see, we have 12 layers clipped through this sea dragon layer. In order to include these two layers, we hold the Alt key again and click Like so between these two layers. As you can see, now, they are unclicked and they affect all the layers below them. Good job. You successfully finished this lesson. I am going to see you in the next one.
6. Good To Know Commands 1: Hello you beautiful person. In this lesson, we are going to learn about duplicating a layer without duplicating a layer, creating a new layer from visible layers. Grouping from layers, setting default, foreground and background colors, and switching between foreground and background colors. Let's begin. Are you ready to learn some more secretly awesome commands and tricks? Well, admit, maybe not very secret. Much so damn useful. While I recommended you also learn the shortcuts for these commands. You could get away with using the mouse. But if you're serious about your Photoshop skills, you should take time to memorize the shortcuts for these commands in tricks. Duplicate Layer quickly with old. Let's say you have a layer with a dragon like this one. What if you want to have more dragons, meaning the same layer with the dragon duplicated multiple times. Sure. You could go to layer Han down for the duplicate layer. Press OK. Select the Move tool and then move this one around. There's a better way. And I'm going to show it to you. Let's delete force this layer on k and l. First, select the Move Tool. Selected. With the move tool selected, hold the ALT key. The pointer, as you can see, will change into a duplicate layers small icon. You can see here a black arrow and a white arrow just below it. Now, while holding the ALT key, press the left mouse button. And now drag. As you can see, while I'm holding the left mouse button and dragging, i have created a duplicate. I release the left mouse button. And now I have two layers, dragon one and drag and copy. It sounds more complicated than it is, but if you do it yourself, you'll find it very intuitive. Once again, select the Move tool. Hold the old key, left-click and drag. And when you're ready to drop your layer, just take your finger from the left mouse button and the ALT key. And you have a duplicated layer. You can replicate it as many times as you want. Just hold the old key again. Left-click and drag, drop, left-click and drag drop, left-click and drag drop. Duplicate layer. We just learned how to quickly duplicate layer. We do move tool and holding the ALT key. But while using that technique, you'll also have to move the layer in an adult position. What if you would like to keep the layer juice where it is and just duplicated without moving it. Then you have to use the Duplicate Layer command. Now, you could go to layer, Duplicate Layer. Press ok. That's alright. But not very efficient. The best way is to learn its shortcut and use it or create your own shortcut by going to Edit. Keyboard shortcuts. Application menus, layer, Duplicate Layer, press, and select your keyboard shortcut. Another less useful possibility to duplicate the layer is to right-click layer and choose duplicate layer. Now, why did I show you two ways of duplicating a layer? You may reasonably ask yourself this question, the hats, because there are certain use cases when one option is better than the other. Let's say you have a layer such as this dragon, okay? And you want to duplicate and move it in a malposition. Well then using the Move tool with the old key makes the most sense. And it's the fastest way. You just hold the donkey and left-click and drag where you wanted to have this duplicate. I guess I want this dragon here. I, maybe I want another dragon. Hold the ALT key, left click and drag. Here I have another dragon. But if you have a special layer, such as a Curves Adjustment Layer or a hue saturation layer like this one. It makes more sense to use the Duplicate Layer command. This way you can duplicate layer no matter what tool you are using at the moment, let us say I have the rectangular market selected right? Right now. I want to duplicate this hue saturation layer. I cannot use the Move tool with your key because they don't have the move to selected, but I want to duplicate the sphere. In this case, I just used the topic Eclair command, preferably using the shortcut. So now it is duplicated. I can move it around, maybe clip it to this layer, maybe play around with it some more. You get the guest. This is why I have shown you two ways of duplicating layers. Merger copy of all visible layers and a new layer where a mouthful head. Yet this is indeed a trick that not many people now know, sir. What's even weirder is that it can access its remaining entry. You can only use it, true? It's Shortcut. What does he do? It flattens you layers. You can also do with control shift E. But unlike that command, this command also keeps your original layers intact. It places this newly created layer on top of your existing layers. Based technique allows you to create some spatial post-processing effects. That would be very hard, remains otherwise. Let me show you. We press control shift all 0s. And as you can see, nothing appears to have changed. But in the layer panel, we have a new layer here that contains a flattened version of all the visible layers. If we keep only this layer, again, nothing is changed because this is a flattened version of the previous layers. Now, with this layer, we can maybe apply sharpen effect like so. Let's say, let's exaggerate a bit. And maybe change the Blending Mode to achieve some special effects. Or maybe keep it normal mode and tweak its opacity. We can also do other special post-processing effects, which I'm going to show you later. Group from layers. Furniture, blog comments have a tendency to get messy real quickly. If you're not organized, you'll get last entails or hundreds MAC layer structures. This command group from layers will help you to keep your documents organized. It puts a set of selected layers into a group. You can then take this group moved around as it would be in itself, a single layer. You can transform it, hide it, applies style suite, and so on and so forth. Now, let's say I want to take this sea dragon. And let's say I want to clip the hue saturation layer to the Sea Dragon, right? And I want to keep these two layers. I want to put them in a group. I select Layers, click once on the sea dragon and shift click under hue saturation layer. Now, I use the appropriate keyboard shortcut to group the layers. I can give it a name or I can just leave it as it is. But I'm gonna give it a name. I'm gonna call it sea dragon. And now this is a group. With the move tool for example, I can move the whole group. I can transform it. I can hide it. And you can see the contents of the group will move with the group itself. Creating groups is very important if you want to keep your documents organized. Otherwise, when you're going to have tens or hundreds of layers, you won't know where, what goes, where you got me confused. So it's better to keep at least some sense of organization by putting layers into groups. Default, foreground and background colors. This command sets the foreground color and background colors. Their default, black-and-white. This may not seem very useful at first, but you'd be wrong about that. When using layer masks, which is something you're gonna do a lot, you may need white colored to reveal or black colour to hide. That is to paint in the Layer Mask to avoid all the headache. For choosing the colors manually with the colored people. You just use this command and the default colors will be available to you instantly. Let me give you an example. Let's go to the layer mask of the Sea Dragon. Click on it to select it. Select the brush tool. And now let's say for some reason, I have switched the scholars or maybe for some reason I have chosen this shade of grey. And now as you can see, the foreground color is gray and the background color is a black. And when I paint with the gray, I don't get exactly the results. I want. I only health, I only hideaway, sorry, the dragon with 50% opacity does not go. I wonder default colors, I want the white or the black. So I press the keyboard shortcut to put the default colors in place. I press it a nail. The default colors are black and white in there. I don't have to bother with the color picker anymore. Switch foreground and background colors. Remember the command which was discussed, default foreground and background colors. It sets the foreground color to black in the bedroom colored white, OK. But it does so only when you have a layer selected. If you have a Layer Mask selected, it does the opposite. It says the foreground color to white and the background color to black. That is a bit confusing in my opinion. Let's see. You have white as foreground color, black as background color, which it may happen, but maybe want them in reverse. Now, what do you do there? You just use this command that is switch foreground and background colors. And you will have the switched like so. Let's say I have a new layer. As you can see here, I have for the foreground color, this pink, this Muted Pink. And if I want to switch the colors, now if I paint, I painted this Muted Pink. If I switch the colors, as you can see, why it now has become the foreground color. And I can paint with white. This is important, especially in layer masks. So for example, let's say I press the keyboard shortcut to set the default colors. Now I have black as the foreground color. If I click New Layer Mask, white gets selected by default as the foreground color, as you see. And maybe this is not that I want, maybe one black. So instead of going here in the color picker and choosing black, No, I'm just gonna press the keyboard shortcut to switch these colors around. Like so. This is why it is important to know this command. Good job. You successfully finished this lesson. I am going to see you in the next one.
7. Good To Know Commands 2: Hello, Oh, you brilliant artists. In this lesson, we are going to learn about resizing the brush with the mouse, picking a color fast, zooming in and out, panning the image ID, the hand to selecting layer using the Move tool and quickly changing the brush of capacity. Let's begin resize brush using the mouse and using the brush tool, it's common to want to resize its size, the BRAF science. Doing so from the toolbar, it's painful and unintuitive. You have to go here and choose size and you don't even see the brush here, you have to move the brush aside, I add. So not very intuitive in my opinion. No better way to resize a branch is with the mouse or bell. With a brush tool selected, hold the ALT key, pressed, a right-click and drag left or right. As you can see, I can make the brush huge or small, depending on how far I drag to the left or right. Magically awesome. Mri it. Now here is another Bono's hand. By dragging up or down instead of left or right, you'll change the hardness of the brush. Another feature I usually use, but still good to know, like soak, hold the Alt key and I drag up anaphoric, nothing happens, sorry. But if I drag down, the hardness increases or decreases down, increases. A rider increase the bra size left I decrease the bra size. Very useful shortcut to now because you're going to use the Brush tool allowed anyone to change the brush size cannot pick a color fast. There are times when you need to quickly change the foreground color. Now sure, you could use the mouse like so. But you already know what I'm going to say, right? Using the mouse is wasteful when using a grid. Sure God is a much better way. There are two ways of quickly selecting a color in Photoshop. With the brush tool selected, hold Alt, Shift. Right-click. And you can see an interactive color picker has appeared. Here. You can change the desired color. I can change like say a red. Then I go here, maybe, let's say I want a green and go here and make the greener bid more dark. And this is very fun to use. And here's another bonus tip. If you hold the space key and you move the pointer, you can see nothing happened, nothing changes. You can put the pointer where you like. Let go of the Space key. And the point is here, because usually if you change the pointer, as you can see, it also affects this interactive color picker, but you hold the space key. Moving the pointer doesn't affect nothing. Granted. You have to have magical fingers, You have to keep the shift d old, the right-click in the space bar. And at the same time. It is a bit tricky. You'll get the hang of it if you practice, but I admit it's rabid, tricky. We're going to see different way, which you may prefer. The second different way is that we didn't have to selected not just the brush tool. You open the classical color picker using a shortcut. Usually it doesn't have a shortcut pre-assigned. So have to assign on yourself. Just go to edit. Keyboard shortcuts. Choose tools from the drop-down menu. Go to Foreground Color Picker, which you can find. You can find. You can find right here, foreground, color bigger, click, and set your preferred keyboard shortcuts. Now as you can see, I have some weird keyboard shortcuts here, which enemy maybe confused, but this is because I am using a Dvorak layout. So all my keyboard shortcuts are custom set. But if we're using a QWERTY, which is the, which is the layout that most keyboards have. You're probably going to have the shortcuts well assigned, well enough assigned. So this is how you can choose a keyboard shortcut for the Foreground Color Picker. Now let's say I have the rectangle marquee tool selected. And let's say I wanna change the color instead of going here, clicking, choosing. Now I just pressed the shortcut and the color picker magically appears. This is useful, especially when you're painting or doing cross our details. Or maybe want a different color is useful to have this color picker available at a click. Sure, it's also available here. But if you have a different layout in Photoshop such as maybe this one, the color picker disappears from here. So now you can still access it using this neat trick. Zooming in and out of an image, it's something yield to flat. You'll want to see certain minuscule details or maybe see a small version of your whole world to better gauge how well the composition and the cars work. You can quickly zoom in and zoom out using this simple trick. Hold Control, N space. And the pointer will change to a magnifying glass. By dragging the mouse or the pan left or right, you increase or decrease the zoom levels. To go back to the truly had selected before, just let go of the control space and mouse ISO. And you have the previous two selected. Again, when you want to quickly access the zoom tool, Control Space, left-click and drag left or right. When you're done, let go of control and space, let go of the mouse, and you have the previous tool selected with practice, this will become second nature. What about painting the image that is moving the view, the image left or right, up or down. Normally, you need to use the handle which is here. Click on the handle. Move, Go back to your previous tool. Now, that's not very, very efficient way. A quicker way of gaining access to the hand tool is by holding the space key. When your pointer is here above your working area, just hold the space key and use. As you can see, the pointer has changed into the handle. Now I can, I can bend the image up, left, right, wherever I want. This is quite useful and it will allow you to quickly navigate your image. Right-click with Move tool to select layer. This is a trick that to my shame, I've learned just a couple of years ago, eight years I've gone without saving myself a ton of hassle. Don't be like me. Learn and use this technique in your daily Photoshop dosage. So let's say you have the Move tool selected. Yeah. Now on the screen you have multiple objects, each on its own layer. How can you quickly select layer containing a certain object? Let's say you want to select the egg, right? Huygens selected, usually you would go to the Layers panel, has gone down for the object that you're interested in by looking at the Tomlin's, which in this case might not be very visible. Or checking the nave, which if you're unorganized, might not be set. That's how I used to do it. Water dummy, I was. But here's the way Photoshop masters do it. This is the way the pros do it baby. With the move to selected, hold the ALT key, and right click on the object you want to select hike. So as you can see, by doing this, you will also select the layer in the layer panel. Now, let go the ALT key, and now you can move the subject around wherever you want when you're done with it. Now let's say we want to select this dragon. Hold the ALT key, right-click. And as you can see in the layer battle, the dragon has become selected. Move it around. You're done with it. Let's say you want to select this one. Hold the ALT key. Pay attention to the layer panel by holding the ALT key and the right-clicking, I have selected the Sea Dragon. You see how good we can do it. I select the egg, I select this one. I select this one. This is very time saving and save you a lot of time. And another pain end's going to make the work with Photoshop so much easier and so much pleasant. Quickly change brash capacity using 0 to nine keyboard keys. Now, let's say I have the brush tool selected. Often, you want to quickly change the brush capacity, especially when you're slaving away at a particularly complicated Layer Mask, changing the opacity from the branch toolbar. It's a bit of a painful process and it takes just a bit too much time for my taste. Turns out there's a better way. You can set the brush capacity by simply pressing the corresponding number and your keyboard. For example, right now, the opacity is at 100% for the brush. Now, let's see, I want to change the opacity to 55%. I just press 505 quickly and make keyboard like so. As you can see above, I have changed the opacity to fifty-five percent. Another trick is that you only press a number once. So for example, if I press F5 just once, I will set the opacity to 50%. As you can see here. If I press two on my keyboard, I changed the opacity to 20%. And by the way, if you press 0, you would expect to say do your best to 0%, right? And that's not what's going to happen. If you press 0, you're going to set the opacity to a 100%. Basically, it's Photoshop ways of thinking. 0 equals 100, so I press 0 and the opacity is back to a 100%. Now, this may seem a bit tricky, but if you use it a couple of times, you'll see that it would be natural to you to change the opacity of the brush using numbers on your keyboard. Now look, I know there were a lot of commands in tricks to assimilate all at once. And I hope you'll forgive me. Don't worry if you don't remember all the commands I wanted to. I will keep reminding you during the course of this tutorial and you'll get the hang of them. Eventually. Good job. You successfully finished this lesson. I am going to see you in the next one.
8. Irfan View Saves Headaches: Hello, we're creative artists. In this lesson, we're going to learn about a powerful image editor. Does going to make your life with Photoshop easier? Let's begin. You need a good external image viewer that allows you to open images immediately in Photoshop? Or is it important? You may ask because it will raise your workflow considerably. That's why when working with Photoshop, he'll deal with tens or hundreds of image files. Maybe you download images or you have images already on your hard drive. To open them. Normally with Photoshop, you have to first open Photoshop or switch to it. If it was already open, then you have to go to File Open and hunt for the image you desire through your folders. It takes time and it's cumbersome. Whereas from by using this neat trick, you can open the desired image file. The second, after you decide you want to open it in Photoshop. For this, I highly recommend earphone view and also me powerful image view where I've been using it for years and in beads almost every other image viewer, it reads images fast and which is important, have Photoshop files, hundreds of megabytes in art, or even gigabytes. It also recognizes a ton of image formats. And most importantly, it recognizes dat PSD files, which is the native Photoshop image format. And that TIFFs, which is a very use the image format with Photoshop. Now, sadly, it is available just for Windows. So if you're on Mac or Linux, you have to search for other solutions. Now, download in front of you from earphone view.com. Install it. After we have installed is said to be the default image editor windows. By going to settings, click, choose photo viewer, and choose infinite view from the list of available programs like so. Now open your front view. Go to Options, properties, and settings. Miscellaneous. See here where it says set external editors. Now browse for the bad to your Photoshop, executable and press OK. Now, every time you have an image open in earphone view, you can open it in Photoshop by pressing shift one. Here, let me show you. Let's say I have a folder for files like so. I double-click the file. It opens with a front view. And now using my keyboard, arrow keys, I can navigate left and right to my images. As you can see here, this is a TIF file, which means I can open it in Photoshop and edit its layers. It's color correction, adjustment layers and so on. Let me show you this by pressing shift one n. As you can see, it immediately opens this file in Photoshop. Now, I don't know about you, but I like this feature very much. Let's say you have a bunch of files, you download it from somewhere and it just browsing to the amino casually and use a file you like. What are you going to do? Are you going to go back in Photoshop? Are you going to choose File Open in their hand for the desired file? And it is a pain. But when in front of you, you can simply go to the file-like press shift one. And that file, it's open in Photoshop. Believe me, I've been using this for a decade almost. And if been alive, saving program and little trick. Now you know it too, and I hope it will serve you well. Good job. You successfully finished this lesson. I am going to see you in the next one.
9. Planning: Hello you dazzling person. In this lesson, we are going to learn how to get ideas for a good photo manipulation and how to find good start images. Let's begin. How do we start planning for our photo manipulation will, first we have to look for a source of inspiration. We maybe have a vague idea of what we want, what we not sure exactly. So we have to look on the internet may be to get inspired and get some fresh ideas. And what are we going to do now? We're going to open up Google or your favorite search. And let's start looking for what we have in mind vaguely, to put a dog in a painting. Let's see. Let's type put dog in painting, right? And see what do we have here? We have another few edges. Now, we're looking at the image. You are looking through. These are some photos and we don't know yet what to choose. But as we look in here, we can see that we have here a nice look at this one. This is a nice one. This is a dog. Oh, in painting, I like this one. This one also looks good. Luck. As you can see, we have we have the dog, we have the painting, we have the free, and we have the background wall. So we kind of know now why do we need and let's take a look at some more. And this one is nice, too high. This one is funny. You're using the same pattern. I see. Yes. This one is also very epic. Yeah, nice, nice. Now. Okay. And here we have some more. Yep. I think we have I have the guest. So this is this is what we want to achieve. We want to achieve something similar to this. Now, since we don't want to copy it exactly, because that would be kinda, kinda stylish. What do you see if we shall make a new painting inspired by this but using our own ideas. How about, let's take a look at some famous classical paintings. Let's see, let's see, let's see. What do we have here? This one? Nope, this one. This one could be interesting. This one now, as you remember for from the, as you remember from the photos with the dogs, we will need a portrait, will need a full figure, fully focused. This is there too much people, too many people here and pay her a bit unfocused, I'm afraid. So let's say this one. Yep. Maybe maybe this one would be interesting to write. This one. Yes. We also nice. Yes, I see ICSE. Well, I don't know what do you think? What should we choose? This one, this one will be a bit tricky because she has a show. Let's see, let's see, let's see. Monalisa years. Monalisa is nice. I think we've gotta do a Monalisa here because it's a famous painting, instantly recognizable. And if you put the dogs out there, I think is gonna look very nice and very interesting to. Okay, so we're gonna use a Monalisa. Now, let's, let's find a royalty-free photo we can use for Monalisa. Let's see, Monalisa, Monalisa on Army saw we should wrap on from Wikipedia. Yeah. This one is a bit too small. This one is not good. This one, I think, although the resolution, it's a bit small, but I think it will do. So we're going to use the Mona Lisa here. Now let's download this image. You can download this image or you can use the one provided in the support file for this course. So right click Save, Image has saved, right? This is done. Now let's move on and let's find a photo over Dojo and nice real dog. We're going to use, we are going to use Pixabay. It's a, it's a website containing royalty free photons. So it's going to be perfect for us. Let's start looking for a dog. We could've used Google images. By the trouble is there could be some issues with the royalties. We could not use this commercially if you wanted to. So let's take a best bet and use a royalty free website like Pixabay. By the way, I know FEV that somebody just my favorite website when it comes to looking for beautiful photos for the manipulations. Okay, let's see. We need some daga photos that will look nice and Monalisa, first of all, we can have something like that because he's looking straight at us. We want the dog to look so a bit sideways, a bit in profiling. So a bit like Monalisa. Okay, so we want the dog looking slightly sideways. Alright, let's see. This one is interesting. We'll open it in a new tab for later. Let's see this one now. No, no, no, no, no. Now, not clear enough. We want a clear photon with good lightning. Good writing. Excuse me. And as we said at the one-way not, not to funk, you see this one is sort of the Buddha would be nice but the tongue sticking out. That's a no-no. Let's see. Let's see, let's see what do we have here, right, right, right, this one, maybe a bit too sad, but we we're gonna see later. This one, no, no, no, no, no. Now to black, to black. This one would be interesting. Let's let's see. Let's see. Yep. Now, I don't know. I would prefer the dog looking up and not down. Neil CS. And we're going to consider this 12. Let's see what else do we have here? That's all. We didn't miss anything by any surprise. We'll see if we didn't. Let's see if we didn't miss anything. Let's see, let's see. Let's say this one, this one, this one. K. No, no, no, no, no, no, no, no, no. Let's see on the next page, maybe you have a bit more luck. Now. This one maybe, but not really, right, right, right. Look at these beauty. Look at these beauty is, this is nice, this is nice. This one has the nose a bit too long, so now we have anything else that we have enough. We have 55 dog photos for consideration. I think we have enough. Now let's take a look quick look at them and see this one. Okay, this one, a bit too sad, although easily selectable. But since this is a tutorial, we need things to be a bit hard so you can learn something. Okay? So this one, hnel, okay, this one, maybe. This one could be interesting but key is turned away way to the side. And now, no, I don't think this one is a good idea. This is a very good idea. Very highly, very high rates on top, top, top two where we have truth photos and this is on top too. So we gotta get through the other one. This is the same dog. I see. This one. Now between this one and this one, what would it shows? What would you choose if you were in my place? Who they choose this one? Maybe, again, very easily selectable. But we are going to choose the funky part and the hard part. It is a bit funky because it is a funky looking dog. Let's be serious. He's a good dog, but also funky looking. And it is hard because lots of hair, lots of lots of hair, which is good, I guess because Monalisa also have here and this one didn't have doesn't have any hair at all. We're going to use this one. Okay? So download it. This is going to certify side thing. We learned out of this one. Or you can use the photo supplied in your support files for this course. Good job. You successfully finished this lesson. I am going to see you in the next one.
10. Select Dog With Pen Tool: How low you distinguished artists. In this lesson, we are going to create a basic selection with the pandora. Lets begin. First of all, make sure that you have open in your Photoshop, Mona Lisa painting and the dog image. You can find these files in the support files provided with this course, or you can download them by checking out my first videos where I describe how I got to select these images. Okay, so now we have two images. We have a nice, fluffy, cute dog and Monalisa. Now we want to put the dog's head and the part of his neck. And Monalisa. How shall we do that? Well, first, we have to make a selection of the dog's head. Now, if you have the fancy Photoshop version which appeared in 2021, you can simply do this. You duplicate the layer using the appropriate keyboard shortcut and click select subject. Now photoshop works his magic. And voila, what do you know? We have a selection of the talk will not perfect, not perfect, but good enough. Use this one. That is good enough. We're not going to use this fancy tool because we need to also learn something. And chances are you may be using an older version of Photoshop, which doesn't have this tool. So we could also use the Quick Selection Tool. With the Quick Selection Tool. Click and hold and drag over the dog. And as you can see, my going bed by bed over the dog. We select bits and pieces of it. Photoshop is smart enough, has an algorithm that smartly updates the selection well, as smart as possible. This selection is also not very bad if I might say so. And this is an alternative way to select the dog. If you want to use this. I'm not going to use this. I'm going to use yet a third selection method. This is one of my favorite methods. It involves using the pen tool. This is a normal school method of selecting and is going to be a good tool to now is going to be a tool and a technique that's going to be a new belt and you're gonna use it Pahlavi. Okay, so first we select the Pen tool using the appropriate shortcut command and we start creating a bad. First, make sure this is a bad, another shape, you don't want this. You want a path. With the bad selected. We zoom in. Remember, control space. Left click and drag to zoom in. And we start selecting the doc, or let us say we start from here, right? Click ones. Now click here and drag. You can see it makes a nice curve. We go here, click and drag. We continue here, click and drag. Here. We can drag, so on and so forth. Click and drag, click and drag. We don't have to be very precise with this one. Since we are going to be using layer masks. Click and drag, click and click and drag. Now, the pen tool is especially useful when you have a subject whose color it's close to the background color. In that case, the automatic solutions like select subject or magic one tool, don't do a very good job, then you need the Pen tool, especially on objects that don't have here at this node, has you use the pen tool to select precisely the object. Now we continue selecting that log and hold the Alt key before clicking on this final point. And now we have a bad selected. How do we transform this pad into a selection? Simple by pressing control, enter. And voila, we have a selection. Incredible selection. Not an incredible surgeon, if I might say so. Motherhood selection. Now, what do we want to do now? Now? We are going to use a Layer Mask to create strands of hair. You're going to see later. So for now, we need to make this selection bigger, like the selection is here, but we want to make it 20 or 30 pixels bigger to cover, to cover an extra portion around the head. See, like this. We want it to be something like this. You see y a bit later. Now, in order to do this, go to select, modify, expand. And let's start by choosing the value at, let's say 20 pixels, or happens not big enough. Let's try again. Select, modify, expand a stri, 35 Pixels. Yes, that's better, that's better. I like this a bit better, is that and this is good. This is going to do. Now. In order to copy and paste the selection to Monalisa, we can use multiple ways. That's why I love Photoshop, because you can do one thing in multiple ways depending on what you need. So for example, we could create a new layer from selection. We can use the shortcut keyboard to do this. And there you go. We have when you layer from selection. Or we could just press control C or the appropriate keyboard shortcut to Copy. Control tab. To go back to Monalisa controlled V, or the appropriate keyboard shortcuts to paste. And there we have it. We put the selection here. We're happy for now are the selection. We don't have anymore you more to do with a dog so we can close it and let it be, let the dog. Main piece. We have the selection, I'm Mona Lisa, and now don't forget to save the file. We've done some work, not very mature, but it is some work. So let's save it. File, Save As. And I'm going to save this in support files. I'm going to save this. As lets say. You have an idea for a good name for this photo manipulation. Let's say Mona Lisa. Monalisa, dark-haired, sounds a bit weird, but might not. Monalisa adult head. Alright. And save as type. Now we have multiple types here, but we are going to use T OFF or if we're not going to use BSD. But we could because tiff, tiff version that the format is more widely recognized by multiple image viewers. You can also upload an internet is a more's better supported format. So we're going to stick with this. So save as stiff, one is adopted. Saved. Here. We'll choose LZW as image compression to, so it doesn't occupy two MySpace byte order. Everything. Everything looks alright. We press OK. saved. Good job. You successfully finished this lesson. I am going to see you in the next one.
11. Smart Objects: How low you divine artists. In this lesson, we are going to learn a bit about smart objects. Let's begin. Now. We have with the dog layer above Mona Lisa, the doped layer. It's called layer one. What a nice name for a dog. Would you name your dog L1? I know I wouldn't. So let us change this double click on the layer name and let's enter dog. That's simple and easy to remember. Later when you kinda have like ten or 20 or 50 layers, you're gonna be glad to have this name nicely. So we have the dog, we have the Mona Lisa. Now, what shall we do? Well, we are going to transform the dog layer into a Smart Object. Let me show you why. Let's, let's see, we have the dog, right? And for some reason we're going to make the dogs smaller with the Free Transform, Right? So we're making the doc smaller, right? This we move it around and maybe a deciding what I like the dog bigger. So let's make it bigger. Nice and big. What's that? And the dog is blurry. Wise. The dog blurry. Well, the dog is blurring because when we made the dog layer small, we lost all the pixel information that was in the bigger dog. So you make the dog small, the pixels get deleted, recomputed. And now when we make the dog big again, Photoshop tries to calculate the pixel information based on the minified size. So he doesn't remember that we used to have a nice clear image of the dog. This is where smart objects come. With Smart Objects. We right-click the dog, click Convert to Smart Object. And now let's say we resize the dog. Right? Let's make the dots small. Move it around m. Let's make the dog big again. And what do you see? The dog retains its clarity. It doesn't loses any pixel information. And for example, let's say I want to apply a filter to the stock, let's say a blurb, right? Gaussian blur. Let's say 20 pixel are seven pixels or something like that. Now I have filters applied. Maybe later I don't want this filter. I can simply turn it off. Or maybe I want to change it. And I can see the results live here. That's a very cool feature. Of course. You can also follow this tutorial without using smart objects. But I highly recommend you use smart objects in new workflow for every layer, for every important layer, at least that you intend to re-size or move in the future. Good job. You successfully finished this lesson. I am going to see you in the next one.
12. Position The Dog: Hello you fascinating person. In this lesson, we are going to learn how best to position that dog's head and the Mona Lisa painting. Let's begin. Now, I am going to teach you how to flip a layer horizontally. As you can see now, our dog looks in the wrong direction. If we turn off the visibility of this layer, we can see that Monalisa looks to the left or to her right. The head, it's direction to her right, whereas the dog the dog's head is direction to his left. So we have to flip this layer around so that it looks that or how do we do that? Very simple. Just use the transform command. Using the keyboard shortcut, right-click, and choose flip horizontal, center, and voila, we have flipped horizontally, our layer. Now we want to place this in a good position. How can we do that? Well, I'm going to teach you a little trick that I use to place layers and layers below and have a little something to guide me. This little something, it's called a difference blending mode. So choose the dog layer and go to blending Modes and choose difference. Now the dog looks all weird and blueish and what the hell happened with him, right? But don't worry, we're going to turn back. We are going to use this just for orientation. So now if we move the dog with the move to selected, okay. We then move to selected. We can see a preview. We can see what Mona Lisa Marie says ISR. You see them right here. Now. We see where the dogs eyes are right here. And we could, if you wanted, align these two Monalisa size with the dogs eyes. But in this case, if, if it were a human, then yes, we could have used that. But since this is a dog, will want the dog to be a bit higher. So we don't want the dog to be above Mona Lisa's head, right? Just a bit higher. Like so, maybe a bit like now, maybe a little bit like this, right? We can go back to normal and you see how it looks. And let's just do another, let's lower the opacity, right? So NAND opacity is the 100%. Let's make the opacity a bit smaller. Let's click and drag the slider. Let's make the opacity like that, 38%. Now let's see, let's see Moodle dog a bit more maybe here. Does it look good enough here? My dad maybe chose to bid. I think this is the good position. Let's put back the opacity to 100%. Okay, back to 38 or something like that. I think. I think he looks decent. Yes, this this will do fine. Put to Doug capacity back to a 100%. And this is the final position from the dog. Now, we don't want to by mistake, move to dog layer. It seems good where it is. So in order to prevent us from accidentally moving the dog, we are going to lock the movement underdog by clicking this little icon here, you see it, it says locked position. So click on it. And now, even if you try to drag the dog with the move tool, we get a warning. Could not use the move tool because the layer is love. Good. All right, so we have positioned the dog. Good job, everyone. Good job. You successfully finished this lesson. I am going to see you in the next one.
13. Mask The Dog 1: Hello you hard-working person. In this lesson, we are going to start using layer masks to make the dog look good. Let's begin o k. Now, we want to make a proper selection of the dog. We want to have him look nice without this ugly border here. We want the hair to look decent nav. We want to add some strands of hair floating, make him look natural, realistic. So we're going to start by adding a Layer Mask. Click on the doped layer and add a Layer Mask using the appropriate keyboard shortcut or by clicking this little icon here. Now, select the brush tool. Make the brush tool just a bit smaller. Makes sure the layer mask is selected. Change or switch. As you can see, the foreground color is white, so just pressing the keyboard shortcut to switch, right? And now under Layer Mask paint with black. Oops. As you can see, my hardness is very big underbrush. So let's use the trick we learned in the previous chapter. In the previous chapters, excuse me. Hold the ALT key, right-click and drag it up. As you can see, the hardness goes down a bit more. I run out of space there. And now layer must select it. Black, black ass foreground color. And let's paint around the dog. As you can see, painting with black in the layer mask, hides, hides these ugly, deservedly outsides of the dog. So you don't have to be very precise. Just painted like I'm painting it here. Painted, painted nicely and do don't be shy getting inside there. You don't have to respect the edge or something. Just go a bit deeper than usual. Just go like down go like that. A bit deeper, yes. Like that. Like that. Like so maybe a bit more. Now that's a bit too much. Remember, when you make a mistake, you can always press Control Z or undo. Right? That's good enough. Right? So now we have this this black selection around the dog. You just, you. So what I did there, I just show you the Layer Mask without bilayer. In order to do this, hold the ALT key, and click on the layer mask. This is the layer mask. Now, let's spend some more black, not inside here but outside here. You're going to understand in a moment why we do this. Just add more black or black or black. Don't touch this inside. Just outside. More Blackmore black. Yes. Yes, that's good. That's good. Something like this will do. Now in order to get it back to the dog, just click on the thumbnail and we are back here. Now with this selection, we're going to do something magic, something that will make this dog look like it was selected very well. We'll do this in the next lesson. Good job. You successfully finished this lesson. I am going to see you in the next one.
14. Mask Dog 2: Oh, imaginative artist. In this lesson, we are going to continue using later masks and give our dog a nice natural hair. Let's begin. Now you're going to see the reason for doing this weird mass around the dog. Choose this much door. You can see the smudge tool here. Maybe you have the Burton and if you click, nothing happens. Click and hold. And this tool, whatever it is, blurred to sharpen tool and you see three options appear. Choose to smudge tool. Right? Now. Click on the layer mass. Increase the smudge tool, set the opacity. Or actually the strength. The strength is good, 50% is just good. And let's see what happens if you click and drag in the Layer Mask. With this much toll on nothing much. I admit that's not good. Let's increase the string a bit more. Let's make the string to say if the six, OK. Now we've seen something, made this much to a bit smaller. Remember, you can also use the tree Kyle torture by holding the alkyne, holding the right mouse button and dragging left and right to increase or decrease the size of the brush. Alright, let's say like this. And now if we drag, you can see we create a smudge. Let me show you a bit better here. I'll click on the Layer Mask. And if we click and drag, you see we create a smudge. Much of what this was the reason why we needed this tick band of black, because white reveals, right? So when we do my grid like this will reveal a strand of hair, like a big man strand of hair. And it looks naturally, doesn't look, doesn't oblige. It looks good. You see, we can do it like that. Like that, something like that. Say. But if we had a thin band of black, then we couldn't achieve this effect very well because our white order ran out in, would've looked ugly. So let's do this. Click on the dog again, and let's get back to work now with mismatched All right, selected once again. Make sure it's strange, it's something around 80%. You're going to have to change the strength on a dynamic basis. You're going to have to change it for yourself. If, if it's just too much, you lower the string. If it's smartest Toledo, you increase the strength. For now 70%. Sounds like a good idea. So let's do something like that. See what I'm doing. Let's decrease the brush size. You also play with the bra size. Play a bit with a string. Like that, just like that. And it looks, looks a bit better. It looks natural. Like that. Just like that. Make it a bit bigger here. Yep. Bit bigger here with smaller maybe. Now do you understand why it was so important to learn the, the trick, the shortcut for modifying the burst size. Because doing this all the time would drive you crazy for every brush stroke. But like that with a shortcut, we can quickly hold the ALT key, right-click on the mouse and resize the brush. So let's keep working. Something like that, like that. Yes, good. Maybe something like this. Bed here. Right a bit here, but here. This looks interesting. You can also wave it a bit, make like little wave like that. Down like that, something like this. With more hair here. But smaller maybe. Or get a bit here. Actually, this is not a very nice. Let's make the broadsheet on a smaller number, bigger. Let's fix this up. That's much better here, Right, right, right. As you can see, this is detailed work, but pleasant. You know, working out the details. Your results may be a bit different than mine, doesn't matter. Just make sure it looks similar. Like that. Like that is nice. Now, this big block of hair here, I don't like it. We are going to erase this. Now. Select the brush TO make sure you have, oh, sorry. Make sure you click on the Layer Mask and you have black as foreground color. And let's hide this ugly part. Yes, you see? Yep. We want it to be something like that. Something like that. Yes. We want this fluffy hair around an egg but we didn't want that ugly black part. Yes, something like that. Looks looks looks good enough. We will we will fix it with as much total BY later. I grabbed like that, like that. That's nice. Let me zoom out a bit. But misdemeanor. Yes, it looks interesting, although DO know. Now, when a zoom out very much and it's just this little town Male, It helps me and it will help you to better visualize the whole image. You can see the composition, you can see the colors. You can see if looks right, it looks wrong when you're close enough to attend. You don't see the forest because of the trees, you know how they say. But when you zoom out, you can get a much better idea. I think it looks, it looks nice, it looks decent. We maybe could have moved it a bit. Let me quickly make an experiment. Now. Now, don't change nothing. It's good as it is right? Now. Back to the smudge tool. Smudge tool, right? And let's make it a bit more. A bit more hairs here. And the neck, Yes, yes, yes. Sunlight that something like that. A bit more here. Maybe maybe maybe maybe again, select the brush tool. Hide this part a bit more. Yes, I think this is a good idea but not here. Something like that. Something like that. Yes. Now, change the brush capacity to 50% by pressing the five key on your keyboard. Can see 50% capacity. Now, paint a bit round here, change it to 20% by pressing the two key. You can see 20% opacity. And now just you know, so it will blend better with something like and it's not create. Let's make the best feedback to a 100% stake from here. Now, as the face back, come back, you know what? I think this dog is a bit higher. Let's try and move that ogre bit lower. Now, in your composition, you're going to find that what you initially thought was right is not quite anymore. You see things differently depending on the mask you do under selections you make. So we are going to adjust the position of this dog. Click on the lock position icon once to deselect it. Click on the Move tool and move the dog just a bit lower, and maybe not, let's make him a little bit bigger, just a touch. Use the transform command. May came a bit bigger. Maybe a bit more. Maybe a bit more, my dad. Yes, that's a bit better. A bit bigger. It doesn't matter if it's a bit exaggerated. We don't mind. Yes, this is, this is nice. Press the entropy. Now let's look. Yes, this is better. This looks better. Right? Now. Click again on the Layer Mask, select again dispatch tool. And sorry, this much Tool I selected the clone stamp tool, my bad. Right, this much Tool and and add strands of hair. Now with the brush tool selected, hide this fluffy parts if we don't want them in, that'll have to be perfect, but has to be decent enough. Right? See here, now we can hide this. We can reveal this. Remember, you can switch between the background and foreground colors while painting in the Layer Mask to hide or show. So for example, here we show n, if we switch the colors, we hide. So this is a nice nifty little command now. So let's hide a bit here. Right? Just until here. Like that. Something like that, something like that. Make this 20%. And with black hided debate just to blend it a bit better. Now slice, maybe a bit more. Back to a 100%. Yes. I, that this folks decentered up. Not great, but distance path. We're going to stop here and continue in the next lesson. Good job. You successfully finished this lesson. I am going to see you in the next one.
15. Mask Dog 3: Hello you incredible designer. In this lesson, we are going to add strands of hair using the brush tool. Let's begin. Now. Select the brush tool as usually. For Astra selected, make the brush tool small, small, just one pixel or two pixels diameter, like so. And create a new layer. Now, sample a color from the dogs here by holding the ALT key with the brush tool selected, of course, click somewhere. And you can see we sample a color from there. And let's see what happens if we draw it like that and that's bit away. Let's lower the opacity. A bit has changed the opacity to, let's say, 50%. Alright. This is a bit better, yes. And we do this to emulate strands of hair. Say just maybe we don't even have to use a tablet. You can just use the mouse just like that. Sample again. Sample again, draw again. I think it is a bit too much. Let's lower the diameter to one pixel. Yes. Diameter, one pixel. Unless she looks better. Bit more sharp, that's good, that's good. And click and drag sample, click and drag sample. They can drag. You wanna create decent number of strands of hair net too many. We don't look for perfection, but we want to add a bit of variety, a bit, a bit of realism, you know, just like that. Here, also. Some hair. So it's not perfect, but it doesn't matter. It doesn't have to be perfect. A bit here, maybe a bit here. And red here. Here. Here, a bit more. Math was wrong. Remember you can always press Control Z to backup your work. Maybe here. Just a bit here, my dad. My dad, Yes. This area is important. So focus your attention here. And we can see it looks interesting is Thomas looks a bit more realistic. Not great yet, but I'll be better. Rise simply do it like this. No controls. A backup whenever we make a mistake. No baby, you just back it up though it like that. And remember to keep sampling. You want a bit of variety in the hair. You don't want to create hair, so all the same color that it look weird, right? Sample draws some hair sample again, draw some hairs. That's the process. And you can also use the process on human people. It works well for dogs and people. I saw some thing like that. It looks decent. Don't you sing? It looks good enough. Snafus Obama. Right? C, flux. So most realistic. Remember, it doesn't have to look perfect as to look acceptable. Just good enough. I think we have enough. And then I think for now at least, this is going to be the final dog selection and we are not going to modify this very much. Let's rename this new layer strands or hair strands. Right? And we've done a good job. You successfully finished this lesson. I am going to see you in the next one.
16. Color Correct 1: How low you inspired artists. In this lesson, we are going to start color correcting their dog so that it fits well in the whole composition. Let's begin. So in this lesson, we are going to color correct the dog. Now before we do that, notice that we have two layers here. One layer containing the hair strands and the other layer containing the dog. Now, because we want to apply future color Corrections and the luminosity adjustments to both these layers. We will group them. Remember to group two layers. We click the first layer, shift, click the second layer, and press the appropriate keyboard shortcut. We will name this group, let's say dot, click OK. And now we have a group. We can apply adjustment layer to this group. We can move this group, Mike, so sorry. We can move this group. We can apply current directions. And what's the best part is that if we later decided to add some more elements, let's say more hair strands maybe or make this, make the head a bit bigger. All, all the adjustments applied to this group are going to still be applied. So it may seem a bit confusing, maybe showing remains. So let's say now, the next step is to apply a color correction to the dog hat because as you can see, the dog is somewhat blew in Mona Lisa is, has yellow, has brown. So how do we do that? Well, first, we create a new layer. Let's name this layer color, correct? Now, we want to change the color of the dog's head and we have a layer. Now, if we pick, we select the brush tool, okay, we sample a color, let's say from here, by holding the ALT key. And if we paint, Let me check out we have 50% opacity. Let's set it to a 100%. Remember using the 0, the 0 key on your keyboard, like so. And now if we paint, we will paint with ELO and hide the dog's head element. That's not what we want. Now. We want to take this color and make it so that it will only affect the color of the dog's head and not, not the, not the luminosity information. So we want the dog, instead of being blue, we want it to be yellow. So how do we do that? Well, simple, we change the Blending Mode of this layer, like song from normal to color. And magically, As you can see, the dog, Despite that list where we have painted with yellow has become also yellow. So for example, if we were to sample green and paint over the dogs, have it green. You can see the dogs. Areas painted with green are green. So if you change the blending mode of this layer back to normal, we can see that it's just a simple layer with greening between any, oh, all it takes is changing the Blending Mode to color. Now, let's say we sample a color from here, right? This read. And we painted like this. We want the dogs had to be red. But hey, what's this? Lucky that we just, we choose destroyed Mona Lisa painting. We added a color here. Well, we want to do, we want the scholar and the dog had done, dogs had, sorry, but we don't want this color here. What to do? What to do? Well, remember from the previous lesson that one solution is to clip the layer above. Through the layer below. What this does basically says, apply all clip layers, all the layers above, only through the layer below. Now, hold the ALT key. Aldi, OK. Move the pointer between these two layers and you can see that an article appears with a little black downward arrow click. And you can see that the color Greg layer has also, also is showing a little downward arrow. Basically says this layer is called correct, rare is clipped to the dog layer. And now here we can see that we don't effect anymore the painting. So look, we had the background, the painting, right? We have the dog head and we have this column collect layer. By clipping the color correct layer to the dark head. We only affect the dark head, none the background. Ok, so now let's deal with this information here. We don't need it anymore. We will want to color correct the dog using colors from Mona Lisa. Now let's delete this disc color correction pixels. You don't need those colors anymore. So select all by pressing the keyboard shortcut, delete, press the delete key, deselect. And now let's sample some colors from Monalisa. So if we turn the dog's head for a moment, we can see the Mona Lisa has brown hair. The color is brown. And for the face she has this yellow, right? So we see here Brown for the hair, yellow for the phase. We want to do the same thing for the dog. So let's turn back the visibility of the dog had again, right click on the color correct layer, select the brush tool. And with the old key, sample a color from this neck area. We want this yellow. So we click, we can see the foreground color changes to this yellow. And now we paint over the dog's face like so. You see, and how we've changed the color of the dog's face to the yellow of Mona Lisa's face. Now for the here. This and this area we want the use the read of Mona Lisa's hair, the red, the brown, whatever it is. So we sample from the hair from here by holding the ALT key once. And now we will paint the hair, right? So like, so, like so. This is nice, this is nice. Although as you can see, the difference between the hair and the phase is a bit, it's a bit too much. We need some, some buffer between these colors below and this red to combine. So how do we do that? We will lower the opacity of the brush. Now it is 100%. We will set it to 50% by pressing the F5 key on our keyboard, right? She's had it has changed. And now let's start sampling blood sample, let's say this brown with 50% opacity lead paint bed here, a bit here. Let's sample the yellow again. And paint just now does too much 50%. Let's lower it again. Let's make it, let's say 30, 30% percent. Alright, now let's sample this yellow color here and paint just a bit around the hair here, x. Oh yes, you can see it is a more subtle, more subtle color. It's not so strong. The divide between red and yellow is not so strong. It's more subtle, it, it transitions, which is good. So we pick again a red color from here. We paint some more with red. Paint, some more with red. Yes, we pick up the yellow color again, paid the face again. May be a bit here, like so. Let's zoom out. Yes, it looks interesting, although the hair, it's still a bit too yellow, I think. Do you agree? Is the hare is still a bit too yellow? Let's add as much. Let's add some more red color. Let's increase the opacity to, let's say 73%. Let's sample some hair, some color from here. Just like that, just like that. That's a bit better. I think. I think this will do it. We paint a bit here. Bit here. Yeah, this is quite good. Let's add some more yellow to the face. Sample a color from here. Paint under phase, right? Maybe also a bit of, a bit of red on the face. Let's lower the opacity first to 30%. Sample a bit of read from here. And let's see what happens if you paint on the face. It's alright. We want, we don't want a very distinct yellow and red color. We want this course to blend nicely, right? So if we look again, we say, I think it is, we have decently color corrected the dog's head and now the dog's head fit just a bit better with Monalisa. Although I can, I am seeing, you see these strands of yellow hair. This one, this one. And this one, we want some more red there. This is the advantage when you zoom out, you can see these details much more clearly. So we can notice here that this is too yellow in this is to read and we want this part to be as red or at least a bit more red, so it fits well with the rest of the hair. So let's sample a color again. Let us see from here and pain here. We have 30% opacity brush. And again, let's sample a color from here and paint a bit here, like so. And we sample again a column from here and paint it strikes. We want it to be nice and nice and blended, nice and harmonious. I think I think this is going to do it. We have successfully corrected the dog's head. Although it's still look strange, we will fix that in the next lessons. Good job. You successfully finished this lesson. I am going to see you in the next one.
17. Color Correct 2: Have you lovely person. In this lesson, we are going to finish color correcting their dog. Let's begin. Now. Looking at the dog, we can see that I don't know. It seems that he is a bit more brighter than the rest of the painting you see, when we zoom out, we can see that the dog is just attach too bright and this is not good. We need the dog's head to have a similar luminosity to that of the painting. Now if you don't catch that, it's alright with experience, you'll notice the subtle differences. Just zoom out a bit. Take a look at the overall composition in, chipped out and see if you can spot something that sticks out. Now in my case, I can see that this is just a bit too bright and we want to adjust that. Now. How do we do that? Very easy. First, we will use a classical Curves Adjustment Layer. Just go here to this icon in the layer battle. Create new Curves. Adjustment Layer. And before we start doing anything, flip this layer to the color correct layer by holding the ALT key and clicking between the two layers. This what this will do clean apply the curves layer only true, the bottom-most layer, which is the dog had. This curves basically, will only affect the DOM and will not affect the background, which is something that we want. The curves tool. It's a very powerful tool with which curves to, we can do all kinds of color adjustments. Now for this tutorial, we are not going to use the fancy features and we're not going to get overly complex wedded. We're just going to simply lower dominoes city. Now, how do we do that? Well, we could just click somewhere in the middle of the curve, like so and drag down. This will lower the luminosity and also increase a bit the contrast. Now, this is not what we want. We want to make this just a tad more dark without increasing the contrast. So we're going to click here on this point. Drag this just a bit. Not too much you seen. We don't want we don't want it to look like bad, but just, just, just just like so, like so. Now if we zoom out, we can see that it blends so much better luminosity wise. Let's turn this layer off for a moment. You see, you see now, now this is where the curves turned out. And we, the Kirsten Dan, now it blends so much better. Okay, let's name this curves layer. Let's see luminosity at just save. Don't forget to save. Always. Press Control S or whatever the keyboard shortcut. You're using raw Save and Save, save often. That's my advice. Okay. Now we have the luminosity adjustment and zooming out and looking at it. What do you think we should do next? What's the dog had missing? How is it different from the rest of the painting? What's the one saddled step we could do to make the dogs had features to build better with the painting. Can you see the course and how they are a bit washed out and lacking strength. I can see that. And I think you can see that too. You see just a bit too desaturated. Look at this, this red. This is nice and powerful. Well, this is somewhat, somewhat weak. So we will increase the saturation of the dog's head just a bit. Let's create a hue saturation adjustment layer. Clip it to the dogs have by clicking between these two layers, like so with the old click, hell, right? And now we can play with the saturation and we can see that it affects only the dogs have. Let's boosted journalist just a bit. Let's zoom out as always to see what effect our adjustments have said. That's a bit too much. I think. That's a bit too much. Let's say at 10%, we don't want to go over the board with this, but we want it to be subtle but strong enough to correct this difference between, between the strength of the colors. So now the colors are stronger, the dog's head and the colors are strong under painting, they are similar in saturation. Let's name this layer. Let's see saturation to just save as always. And what should we do next? Here's a little trick that I'm going to do. Let's say you want to take a look at this specific layer and turn off all the other layers. Now you could just click, click, click and have this layer visible. But then you'd have to click, click, click, click back again, make those layers visible. And yet, that's not a very effective way and will be less so effectively. We have a 100 layers. So and neat little trick is to hold the ALT key and click under visibility icon and the I and the layer you want to keep it. So holding bulky, click on this layer and you can see that we turned off all the other layers. And we're just keeping this layer to go back to the way things were. I'll click again this visibility item. You say, oh, click this only this is visible. I'll pick again. The rest are visible again. So let's take a look at Mona Lisa. Thus, you can see what what difference can you spot. Thank for it for a moment. The dog. Right, the face, the hair. Monalisa deface the hair. What difference is between Monalisa, colorize speaking, and the dog? Have a guest. Well, if you haven't guessed, that's alright. But Mona Lisa's hair is dark. The dogs here is light. Now, maybe we could get away with that, but we want this to blend in real nice and have a feeling of authenticity. So let's increase, let's make the dogs here a bit darker. Shall we? We're going to also use occurs adjustment layer to make the dogs hair darker like So. First, let's create a Curves Adjustment Layer. Go here to this idol in the layers panel. Create a Curves Adjustment Layer. Click. We have created it, clip it to all the layers here so that it will not be visible through the dog have hold the Al-Qaeda. Click right, and we want to make the hair a bit darker. We could use the previous technique by dragging this point there. But I don't like it because it loses contrast. When you drag this point downwards. You also lose contrast. You see it's all muted in washed-out. There's no difference between black and white. We don't want that. We want to drag, click once here on this curve wherever and drag it down. And you can see that not only we do it darken the here, but we also keep the colors and the contrast. So this is what we want. Let's drag it down a bit. Okay. Let's drag it down and say, let, let's exaggerate for a bit. And you'll see in a moment why. Let's keep it like that. And we want this effect to be applied only to the dogs hair. Clicking the Layer Mask once. And now, invert this mask. By inverting it, you will, may do white to black in this, hide. The effects of this layer. Perform the invert command using the appropriate keyboard shortcut. And you can see the effect disappears. And now in the Layer Mask selected, select the brush told, right. We have white as foreground color and paint with white to reveal all the dogs hair. Let's make sure the opacity is at a 100%. And paint over the dogs here you see. And by painting with white inner layer mask, we reveal that layer. So because this curve darkens the dog's head and it was black before. Now, wherever we paint with wide, we will reveal that effect. Pretty neat. A. Now let's paint over the hair likes, likes with a 100% capacity over the hair. And because we want a bit of transition between the dark and the light areas, let's lower the opacity to, let's say a 50% or 30% even. And paint just painted just between the hair and the face, just at the at the border between the face and the hair, right. So just ones. All right. Now, click on the curves thumbnail. Now we're going to really adjust the darkness of the hair however we want because we have a masking place and whatever decision we make, it will only be shown and the hair pretty Nate, right? It's a pretty neat little trick to note. So zoom-out to better gauge, to better see the affect. Our adjustment is going to have dragged this curve down and lower the luminosity of the hair, make it dark with just a bit, just a bit. Let's say that psi does lines like so. I think this is a good that just months. Yes, this is nice. Let's turn off the visibility of this layer and see how it looks without it. Yes, the you see the Harris was way too wide and now when I click it back, it is a bit darker and it fits better with the overall image. Let's rename this layer to hair dark. And I think we have done a pretty good job of properly integrating the dog's head with the overall painting. Zoom out, you can see that it fits nicely. There are no discordant colors sticking out. The luminosity is also similar between the dogs hair they own the Mona Lisa painting. All you know, we have done a pretty good sharp adulation. Good job. You successfully finished this lesson. I am going to see you in the next one.
18. Apply Texture: How low you Photoshop user. In this lesson, we are going to add texture to the dog's head to make it better blending with the whole composition. Let's begin. We have the dog head. We have the painting. Now, what do you think we could do to make the dog head blend in just a bit better with the painting. Now, if you're a bit experienced, you will maybe say, hopefully say, that we need to make the texture of the dog's head look similar to the texture of the painting because you can see the painting has some cracks. And painting. The painting looks like an old painting, whereas the dog's head is just a photo. So we need to make it look a bit more like a painting. How do we do that? I am glad you asked. We are going to use some artistic filters. Click underdog layer here in the dark head group. Because this is a Smart Object, wherever filters we apply, we will be able to adjust later. So you have click on the double layer, go to filter, filter gallery. And let's choose, let us choose, let's make this dog. We don't wanna modify it too much, but we want to make it look just a bit more painting, if I may say so. So let's see what do we have here? This is too strong posture edges, smart stake water color maybe, but now it causes inflammation. Accented edges. This one, this one basically when you want to do this, when you wanna, you just have to experiment to see you. You go through all these because you cannot be sure how it's going to look. And you make a decision based on, based on how it looks, you experiment to try different things. And if something looks right, you are going to use it. So in our case, we're looking at these noun no, no. These don't look very well. They modify the dog too much. Let's see, colored pencil, cut out, dry brush, dry brush seems interesting. In Chris, this just a bit. We want to maintain the level of detail. You know, we don't want to make the dog to painting, painting, to make it look too much like a painting. Let's maybe something like that. And the brush detail, what does it does? Let's see. Yes, this makes it look like a painting and loves us information whereas we want the maximum details. So I think something like that. And the texture, the texture also changes a bit. Let's keep the texture to one and default. And these are some good settings. And we're going to click OK. And now looking at our dog head, we see that it looks way too. Wait device like a painting. There's too much texture. Just to exaggerate it, this effect when we wanted only down a bit. Now, how do we do that? Well, we want to load the capacity of this effect. Now take a look here. You see the filter gallery was the effect we just applied. And next to it is a small icon. And here it says double-click to edit filter blaming options. We double-click this. And we have a blending mode which we could change. Yes, but we're not gonna do that. We're gonna keep it back to normal. But what we are interested in is the opacity slider. We can adjust the opacity of this effect separately from other effects. So let's take a look. Let's see full opacity. Too much. 21, six, forty, six, forty seven percent. We wanted you want to be subtle here. We don't want to go something like that. Let's see, preview. With the full opacity, yes, a 100% opacity of with this effect applied. And this is with 48% opacity. That looks better. Click OK. And now we have made the dog to look just a bit more like a painting. There are some subtle color variations which hide the fact that this is in fact a picture. Alright, so this is interesting. Okay, and let's save. And if we look at this one, we can see that this has the look of an old painting, because it is an old painting. Whereas the steel has the look of a fresh photograph is so one trick I like to use when making photo manipulations, we'd paintings, is to unify these two separate images, the painting and the dog head or another object, by using a texture riser, by buying a common texture over both of them, which helps unify the overall texture of the composition. Let me show you what I mean. First. Let me show you exactly what I mean. First, we are going to create a new layer. We're going to merge a copy of all visible layers on a new layer, we are going to use that secret Photoshop command, control shift all 0s. And as you can see, we have a new layer here created from all the visible layers. And this doesn't change anything because basically we have a copy of all the visible layers and a new layer, right? So let's name this air texture. Let's convert it to a smart object in case we decide, modify later the adjustment, right-click, Convert to Smart Object. And let's apply a texture arise. We do this by going to filter, filter gallery, right? Texture and texture riser. You see, you can see we apply a texture over our old composition. So let's play a bit with the settings and C, C was best Canvas break. Now we don't want to break. Now burlap campus sand stone. Sand stone is interesting, but I think Canvas is our best choice. Let's play a bit with a scaling. If the scaling is too little, there isn't, there isn't much difference. If it is too big, there's too much difference and it's a bit distracting. Let's turn it down a bit to say a 130% or maybe a 100, 120%, yes, that's about it. About a 120% scaling. Let's play a bit with their relief in see what it does. Yes, it increases the relief of the texture, the contrast of it, how high it is. So when it is too low, there is no effect. When it is too high, there's too much effect. Let's, let's see, let's achieve a nice compromise so that it looks nice. Around 4% as good. And I think, I think we are done. We have unified this nicely. Let's click OK. And as you can see now, it looks just a bit more authentic and it just fits better. Let's see how it looks without it. Not good at all. You see, there is, there's too much of a difference between the painting and the dog's head with it. Yes, that's much better. So this is a nice little trick you can use whenever you want to unify. Similar photo manipulation if you have two painting, say, and some external objects and you want them to look and you want the objects to fit into, blend in good, well with the picture. You use a texture, the texture riser filter, just like we used, and a new layer created from all visible layers. Good job. Use successfully finished this lesson. I am going to see you in the next one.
19. Change Eye & Nose color: How low you playful artist. In this lesson, we are going to change the color of the dogs eyes and nose. Let's begin. Haven't you wished to have your eyes be over different color? Maybe beautiful green eyes or a vibrant blue. Or why not? Maybe a witch, yellow, which is impossible, but hey, you guessed, I wish for it, right? Well, unfortunately, in my case, nature hasn't gave me blue eyes or green eyes, just boring brown eyes, just as it gave this dog. In order to change the color of the eyes. We're going to use a nice technique, which I know you're going to be using for the rest of your life in case you didn't know it yet. So here's how it goes. Let's say we want to change the color of the eyes, right? We'll start by creating a new hue. Saturation adjustment layer will boost the saturation all the way to the max. We don't care what it is right now. We just wanted to be very exaggerated. We click on the layer mask in the human Saturation adjustment layer, we inverted, right? An avid has disappeared. Select the brush tool. Make sure you have white as foreground color. In this case, it is black. So switch the colors. And now with the brush tool, paint inside the eyes, in the Layer Mask. And now this is not good because we still have this brown color. No, cannot see for sure where we are painting. So let's go to hue saturation again. And let's change this to something very recognizable, like so. Green. Go back and click on the layer mask in the hue and saturation adjustment layer with the brush tool paint like that inside the eyes. Because this is a very vibrant color, we can easily see where we are painting in the layer mask. Like so. I think this is all right. With care, we want to cover the eyes nicely outlast two modulus too much. I think this is enough. Okay? Now we have this hue saturation layer. We the mask. And this means whatever changes we make to this layer, we're going to only affect the eyes. And this is great, isn't it? And that was the reason why we use such exaggerated settings here. Now, let's go back to 0, hue and saturation. 0's iteration, I'm sorry. And let's play a bit with the hume. Let's see what they think. The color of the eyes should be. Maybe a nice blue. Let's put the saturation. Maybe a nice blue, maybe a nice green screen. Looks interesting for sure. How about, how about a nice, nice blue? So blue is nice. Or nice. Yellow is not so nice because we already have too much yo. So between blue and green, I've think greenness. See how does it look from a distance? It looks nice. And blue. And blue I think works even nicer. Green is a little bit less noticeable. Denim Bloom? Yes. I think realistic with glue, but I, if you want to use another color, feel free to do so, is not going to fit the final composition too much. Okay, so we have this, let's boost saturation. We want this to be nice and visible. And one more trick I like to try when doing this, when using a hue saturation for the color of the eyes is to play around the blending modes. So for example, let's take a look here. Let's click on the screen blending mode. And here's another little trick when you have clicked on a blending mode life. So you can see here it is selected within lethal blue border around it n. Now you just press the downward arrow keys to cycle through the blending mode. I. So you say, don't click anything, just use the arrow keys. And this way you can quickly preview how do blending modes look and this layer. So let's go back to the screen. Blending mode. Let's say this looks a bit too much or not. This is not good. This could be interesting. I think this would be interesting in another photo manipulation may be we, the human mud here, since this is a painting, not a very good effect. Let's say this one. This one is interesting, but a bit too dark for outpaced. Now. So we're gonna stick, stick with normal lending mode. But in the future, should you wish to make the eyes look just a bit different? You could use the color dodge, the Linear Dodge, or the Screen blend mode with your hue and saturation adjustment layer. For now, we'll stick to normal saved. Actually before saving, let's name this layer eye color, okay, save. And now I think it would be a good idea to change the color of the snout. Do you see? It is just too similar with the hair here, so I'd like it to make it look a bit more, read, a bit more vibrant. Let's use the same trick point, not created hue, saturation adjustment layer. Booze the hue all the way to the max so that it's easily noticeable. Click on the Layer Mask, invert. Select the brush tool. Make sure White has a foreground color, is selected. And paint over the snout. Made the brush smaller or bigger. Right? Go ride there zooming, zooming unless now so you can properly, properly paint. And you can see here, we went a little over the board. Let's switch between foreground and background colors, like so. And now when we paint, we hide that little mistake, right? And now, let's, because you see this is the transition is too sharp. We need a bit of transition here, so the blue blends in with the nice W or whatever the color is going to be. It's going to blend nicely with the rest of the composition. So in order to do this, lower the opacity to let's say 30%. And paint. We'd wide. Now I have black switchback too wide as foreground color and paint worldwide. In the layer mask around the edge, you see it just, it will make this effect look just a bit more natural. Is not going to be just a single hard-edged blush of color is going to be more blended, is going to look more natural life. So I think this is nice enough, not smart. Yes, this is going to be nice. Now, click under human Saturation adjustment layer and the thumbnail. And let's play around and see what color we are going to use for this node. Let's see green and we are going to use green, yellow. Now. That looks golden, like he has a golden knows a read or an orange? Yes, that's more likely. Maybe it may be a nice red are high, so let's, let's lower the saturation of it. Let's make it 0. Actually. Let's, let's see, let's see, let's see. This is to read. This would be just yes, this this brown is deep reached grad. And it looks just what we need. Let's see without, let's turn off the visibility of the Saturation adjustment layer for this node and see how it looks without it. We doubt with yes, a bit better but a bit too saturated. Let's lower the saturation a bit. This is all the way to minus 100. And let's make it something like like this. Yeah, I think this is a bit better. Turnoff to non. Yeah, I think this is, this is good. It definitely looks better with the colored snout. Let's change the name. Snout color or no scholarship before. And don't forget to save. And this is it. We have successfully changed the color of the eyes and of the snout. And with the trick you learn for the eyes or the snout, you can change the colors on different parts of your future photo manipulations. And don't forget that you should also play a bit with the blending modes, especially the screen, the Color Dodge and Linear Dodge. Good job. You successfully finished this lesson. I am going to see you in the next one.
20. Overlay: Hello you smart artists. In this lesson, we are going to improve the lighting of our composition using the overlay blending mode. Let's begin. As a further manipulator. You will usually ask yourself this question, What the heck should I do next? Well, the answer may be different depending on the situation. But when we reach a stage when more or less the colors are harmonious, first, create a new layer. Change the Blending Mode to overlay. Select the brush tool. The colors to default, Black and White. Change the opacity to, let's say, 20% or 25%. Let's try twenty-five percent. We do brush tool with black selected. Oh, oops, this is not Black. Sorry. Let's set the default colors. Now. Now it is black. You set the default columns using the appropriate keyboard shortcut. Okay, so we are an overlay layer. We have the brush tool selected. And now let's see what happens if we paint with black. Do you notice change? You can see that we have made this area darker. So let's go back. Let's see what happens if we bend with wide switch between foreground and background colors. Sit with switching fastly be them. So now worldwide, let's see what happens. And you see we are boosting the highlights and also slightly, maybe very slightly increasing the saturation. But most importantly, we are boosting the highlights. So if we were to paint with wide in an area, switch the columns again, paint with black in this area. We create a Nice contrast, give richness, and we put highlight on the places that we want. So let's undo our changes. Right? Okay. Make sure this layer is still an overlay blending mode, right? Overlay. And they'll assume, where should we paint. Now, we are going to change the painting. And this means we are going to correct the work of Leonardo da Vinci. Tag a pretty pretentious thing to do for us, but we shall do it. We shall correct the worth of Leonardo da Vinci went out. Why not foci, let's make sure why they selected the brushless, selected 25% opacity. And let's start painting on the hands. Make the brush a bit bigger. See just a touch. Do you see how it's suddenly changes? It makes it just makes this image pub, makes it pop in your eyes. Just looks better. Lower the brush size. Paint a bit here where you see light area, lighted up a bit more. A bit here, maybe here. Let's see, maybe share. Maybe here. Let's see multi-bit. Lets light up the ice, also a very important area to light up. Alright, maybe this now, just ability as that looks good. Now, do you observe how the neck in the face have the same luminosity? And this makes, this image looks a bit weird, like there is no shadow. This is too flat. We need to make this look a bit more natural. So we are going to darken the part under the dog's snout than egg so that it looks a bit more natural. Because when you look at the picture, the objects in front are a bit lighter than the objects that are more in the distance. Let me show you what I mean. Change the brush color to black. And let's see. Let's paint the neck a bit. Now this is too much. Let's lower the opacity to, let's say 12% zoom-out and paint and the net area, just a patch that you see that's painted also below. And now the neg, it's slightly darker than the snout, which makes this look a bit better. Okay, and let's switch back white. Let's see, let's spent a bit of white here, maybe a bit of white here. Why not? Uncertain strands of hair. Like so like so switch to dark again. Let's see. Play around police on dark paint with dark on the already dark areas. Okay. Undo if you make any mistake. Let's see. Let's make the heroine darker is like so maybe the snout node plus now looked good whether it was white. This is nice. Maybe a larger y's here, right? And this is interesting. Remember, you can always see the effect of your layers or the effect of the work you have done by turning the visibility on and off. For this overlay layer, we choose sternly visibility on and off. And without the overlay layer. With the overlay layer, without, with. As you can see, this layer improves the quality of this image a bit. I think this looks nice. And we're going to stop here and continue with our next lessons. Good job. You successfully finished this lesson. I am going to see you in the next one.
21. Signature: Hello you talented artists. In this lesson, we are going to add a signature to our masterpiece. Let's begin. Now. In the previous lesson, we have forgotten a very important SIP. We have forgotten to properly name our overlay layer, or rather should I say, I have forgotten, so I am guilty of this. We are going to change this layer and Double-click on the name and give it a good laid by overlay. Now remember, you might also sometimes forget to name the layers. It happens in the heat of the Creation. You will be forgetful. But if you notice that you forget to rename Layer, please give them names, organize them, let them be nice and neat. A's going to save you a lot of headaches later. Okay, so now that we have corrected our mistake or my mistake, let's go on to the next step and guess, what are we going to do now? This is our masterpiece. We have to sign it like all the grant. So how do we do that? Well, we are going to use the type tool with a script font. First of all, go to your support files. Locate the font file. And if you are on Windows, double-click it. Click on install. And let's set our windows. You have this font installed. Now, if you are on Mac or Linux or another operating system, you might have to use a different step to install the font. If that's the case, please consult your operating system, help file or manual, or even why not use Google? After you have installed the font I just shown you, you can use that font to in your signature. So for example, let's say your name as Michael John, right? When we zoom out, we increase the size the meteorite. And you can see now that I am using the ministry script. This is my favorite script, but I have provided a script for you in the support files and hopefully you've installed it already. So you can change to that script by going here and typing the name of that script. In this case, it is Barack script. And there you go. You have this signature using the barrack script fond, of course, you can always resize it by using transformed command. Or you can go to Character panel and set the font size from here manually, like so. Back to our painting. We select the Type tool. It is right here. Horizontal Type Tool, click on it, click anywhere on the workspace and type your name. So let's see. I'm going to type my name here. Adrian, chef, clique. Control Enter to finish working with a subscript. Because if you click enter, you see this is what happens. This, this carrot is blinking, carrot goes below. You don't want this, you just click Control Enter. Right? Now we are done. Switch back to the Move tool. And let's make this a bit bigger. Transform. This layer using the transform command. Resize it proportionally by either holding shift or not holding shift depending on the setting you said some lessons ago. Just make sure if, if you hold Shift and it resizes sum and proportionally, then let go of the shift key and drag it. Right? So let's make it just, let's say like so maybe let's pull it right on the bottom right side of the painting. Click enter. And that is pretty good, pretty good. Right? Now, let's change the color of this fund. Let's see. Let's see how do we change the color? We go to the character battled. If you don't have the Character panel open, just go to Window. Character. Say this is going to appear. And here you can change the color of your script. Click here. And let's, let's sample directly an image from the painting. You can see here. We could of course, use this color picker, but we want to sample an already existing colony. This is important because this way you're going to have a nice, harmonious color. Your eyes will deceive you if you want to choose the color for yourself and hope for the best that is going to fit well with the rest of the columns. Best thing to do. Have the color picker, like cell and click. See, let's say a red. Now, click somewhere on the hands, like so. And this is a nice yellow visible enough, but not too visible. Click OK. Now, if we zoom out, we can see that this is a bit too perfect. And then this is just the perfect was signature is going to get a bit smudged in diamond, the dirty read, a bit less visible. So how can we do that? How can we make this look a bit more natural, more ragged, hypsometric? Create Add Layer Mask for this Type Layer. Layer Mask. Now in the window layer mess selected go to Filter Render Clouds. You see what happened when you added the clouds to the Layer Mask. You have just created a random gray in white area over this, over this signature over this type font. So some parts are slightly hidden. Are there parts are slightly visible. And all of this is done by using a render cloud filter. This is not perfect by any means. So we can finally adjusted, click on the Layer Mask, select the brush tool, set the opacity to, I don't know. Percent. Make it a bit smaller, makes sure black is selected. We want to hide things. You can switch between colors or we can set the color manually. However you wish. Let's see what happens if you paint it white. Now under black. Just a bit here, just a bit here. Just to make it a bit more irregular. A bit here may be, you know, height bit here, display pane just you don't want to hide it too much, but just a bit. So it looks nice, natural. I think this is good enough. Yes, this is, this is nice. Now we have added a nice signature TOR painting. And luckily, when we have typed something here, it has also changed the name of the layer here. But let's be very organized and change this to, let's say signature. And that's it. We have added a signature to our masterpiece. Good job. You successfully finished this lesson. I am going to see you in the next one.
22. Post Processing 1: Hello you talented artists. In this lesson, we are going to start adding some cool past processing effect to our composition. Lets begin. And now we come to my favorite part, past processing. Now, I love past processing because be honest, it allows me to hide my own mistakes in how I might not be a perfect photo manipulator and it is hard to be perfect. You make, you can make some subtle mistakes. But in post-processing, usually we can cover up this little mistakes nicely. In post-processing, we somehow unify the whole composition and give it a more vibrant and unified look. You'll see what I mean right away. Okay, so how do we go doing post-processing? Well, first and foremost, we are going to use the very powerful Curves Adjustment Layer. With curves, we can adjust luminosity. We can play around with the colors mark. In our case, mostly, we want to play around with the luminosity and maybe boost the contrast a bit, maybe lower than lightness or darkness or increase it. Let's start by creating a new Curves Adjustment Layer. Let's see, we target integrate occurs, right? And you can see here we have this little slider and this little slider. If I drag from this little slider to the left, you can see I increase the brightness while at the same time maintaining the contrast between the colors. If, on the other hand, I drag this slider to the right, I decrease the luminosity while maintaining the contrast. That's important. So let's boat increase the contrast in the dark areas and in the light area. So let's drag this just a bit to derive not too much, because if you see, if you go too much, we are losing a lot of coral reef formation and this just becomes an ugly black. This is just too much, too ugly, too pronounced. So let's be a bit more subtle. And let's just drag this a bit. Maybe something like that. This is good and now do the opposite and increase the brightness while maintaining the contrast. Just a touch. We don't want to go by bad because you see, we burn the color as we made them much too wide. So let's go back and just increase that for herb bed for a bit like so maybe a bit less, a bit more subtle things like that. So we have 219 for this slider and sorry, 12 for the black slider. Just so you can follow my tutorial to the letter K. This is nice. Now, if we click here on the curve. And drag up will also increase the luminosity. And if we drag down, we will decrease the luminosity while also maintaining contrast. So what do you think is going to look better if we increase and let me not say or if we decrease domino stage. If we zoom out as I thought you, and look at the thumbnail in order to better see how the image will look overall, we can see that if we are to increase the luminosity, auto brightness, it looks a bit too wide, a bit too strong. It's statewide, doesn't look so good. But if we decrease the luminosity slightly, I think it's rather improves the image. You know, it makes just a bit more serious, a bit more visual, more visible, more powerful. This is what we are going to keep. Let's see how it looks without this layer. We turn it off. Wow, that doesn't look too good, doesn't it? Just looks washed out. And we did look at that. Voila, this is, this is why I love post-processing. We can create an improve our compositions so much better. Let's name this layer, let's say. Okay, and now let's move on to the next adjustment. Then. What shall we do next? My favorite color adjustment is the color balance. And go to this icon and create a color balance adjustment layer. Now, you see here we have three sliders, from cyan to read, from magenta to green, and from yellow to blue. If we drag this slider, for example, all the way to yellow, you can see that we increase the yellow color in our image. If you drag it to blue, we increased the blue collar. It's quite magical. So Let's see, let's, let's experiment a bit. Sometimes I'll shrink. Very awful. I myself don't know what's going to happen when I play with these sliders, make an educated guess, but most likely, I just like to experiment and I recommend you do the same. So let's see what happens if we drag this, this ion, this is too cold, too cold, and I don't like it. In this case, this call does look well, this is nice and red, warm, warm colors are good. I like that. Now let's see here. Green. Green is nice. Magenta. I don't know, maybe a bit. It is a bit too much red. The green version a bit more. And I'll tell you I had MIT here is weird. It is a bit weird, this green. But I think it also gives this composition the unique look. I'd rather prefer that we have something wacky increasing like this very booster green that will make our work stand out from among all the others. So, yes, the green is a nice idea. Let's see what happens if we play with the blue slider. As you can see, by going towards the right and increasingly blue, we're canceling between Effect, which is not what you want. And if we go to the green, to the yellow, sorry, we are boosting our green effect. Which is very nice. Okay, so let's see, and let's play a bit more with these sliders. Yes, this is a nice, a nice screen. This is a nice yellow. We don't want to exaggerate all the way, but something like there maybe zoom out to be so we can better see the overall composition and the colors a bit more with the green. No green, more green screen, something like dad. But more yellow, maybe. Just a touch more your, your site think. But a bit of red, right? Yes, I think this is looking good. The color balance not only has changed the colors, but also help unify this head, this extra object with the background painting. As you can see now the colors are so much alike that it's hard to say that this object came from a different part in, wasn't already here. Let's move on to the next adjustment. Now, before we move on to the next adjustment, and let's not forget to rename this layer, alright, so color balance, we're going to name it. I don't know what color fixed maybe or something like that. Now, let's move on to the next adjustment. And how another favorite adjustment of mine, the photo filter adjustment layer. You can create a new photo filter adjustment layer by going to this little button here. Choose photo filter, right? Increase the density o had. We not going to keep this setting, but we want to better preview how these, all these images are going to look, how these options are going to look. So click once on the warming filter, like we did with the blending Modes. Choose one. And just press the up and down arrow keys to cycle through all these options and see in real time how they look. So now in pressing the down arrow key, and let's see, this is a nice green. Now, the blue is not very nice. This is not good. Now too much. This is o, this is nice. This already both sow green tinge or green huge. This is nice. This is not good. This is two washed-out. No, no, no, no, no. This this one also interesting but it's similar to the yellow. Sorry, no, no, no, no, no. This one is interesting, although a bit too much for my taste. That's, let's go back to the one we noticed and we liked this one. This one, this was the one, yes. So we have choosing from the filter here below. Now, the density is basically the power of this filter. If it results 1% or 0%, it doesn't effect it at all. But if we increase it, we can see, we can see that it boosts our colors and further really unifies our composition. It's not, it's a subtle effect, I admit, but if we turn it off, say you can noticing the background, now it is green. And if we turn it on, you see a, just a bit more yellow energy unifies the composition even more. In a composition, it's important to have. Balancing, it's important to have the colors unify because if you have here a very striking green in here, a very striking yellow, they are going to look for and they're not going to look like they belong together. Ok, so now we have this photo filter. Let's rename it, let's say yellow filter. Now, save, Don't forget to save. Cue to know when something is gonna go wrong and take all your hard work with it. Now what shall we do next? Let's see, one of my favorite adjustment layers is a selective color layer, because this allows me to change each color separately, and this gives me an eight will give you a match, better flexibility. It'll give you more power to make your composition locally just like you wanted to. So let's see, let's start. We can either see here, these are some dropdowns, these under colours we are going to effect. So for example, we have the green is right. And if we change the slider, you can see that the greens in our composition good, also are changed. So we change the greens, you can change the yellows, and so on. Now, let's put this back to 0%, and let's change most present color in our composition, which is yellow. Let's choose yellows. And let's see, Let's see, by dragging this to the left, we increase the year, which is nice to the right, we increase the Greenwich I'd done now, I think I like this a bit more Now, the other slider, magenta, mixed mode, green island. Now let's leave it as it was. Let's play with a yellow. This subtracts yellow, thus making it more mute. Nope, we want to increase the yellow bit, right? The cyan Again. I think we've gotta go. Randall, I disk. Oftentimes, again, you're not going to know what effect will give. Sliders have, just experiment, play with them, drag with him and you'll get to a nice result. Let's go to the next. The second most preeminent color in our composition, which is green, strip the greens lists what happens. We make the greens less visible. We make the grease more visible. Yes, this is nice. This is nice. You wanna keep that. Let's see with this slider. If we do it like that, it do it like this. Now if we now live this, sorry, we got to live this slider at 0%. Let's play with the yellow slider. This, there is a subtle effect you can see here. If we drag all this all the way to the left, we made the greens a bit more bluish. And we, if you drag this to the right, we made them more green, more vibrant. So, yes, this is a good trick. Let's go to the reds. We have a bit of red here in the hair, probably in here in the arms, and orange, red. Let's see what happens. If we drag the sliders. You can see also the road here gets its color change because it's also red. So we want more red or less read, miss decide. This is less red. List is more, yes, sweet like a bit more red, not too much. Now, let's play with this slider. This is interesting. This is not so very interesting. Bit. Maybe get more red. Yes. Just now, this is a way, let's, let's pull it back to 0%. Let's play with yellow. Boasted all the way up there. It's a very subtle difference, but it is a difference. It is very subtle. And I think this is nice. I see cyan is we don't have science here, we don't have blues, magentas, maybe we have some agendas. Now. We don't have knowledge synthesis. So now let's see how are our image looks without this selective color layer. Turn it off and turn it on again. Off, on are we s? You can see how we slightly and suddenly change the vibrance and the intensity of certain colors selectively. So this is a good adjustment. So let's give it a name. Let's say boosted colors. Colors, sorry, I haven't mistyped. Boosted colors. Save our document. And I think this looks pretty, pretty nice. And just to see what effect all of these adjustment layer have an op document. Group them together. So click under boosted colors layer, hold the Shift key and click on the contrast layer. Now we have all these four layers selected. Group them together by using the keyboard shortcut or simply clicking on this item. Let's change the name. Let's say color adjustments. Okay, save. And now let's turn off this color adjustments group. Wow, wow, wow, wow, 100 difference. These adjustments makes Look at this. This is without them, right? And this is with them on. This is some powerful stuff. This, this takes this blend looking image and makes it into a strongly vibrant coloured popping, screaming for attention image. So this looks good. I am proud of you that you follow me until here, we have just some more lessons left, not many now, we are nearing the end of our course and the results are looking good already. Good job. You successfully finished this lesson. I am going to see you in the next one.
23. Post Processing 2: Hello you amazing person. In this lesson, we are going to finish with the post-processing effects and finalize our masterpiece. Let's begin. We are nearing the end of all cores. 100 arrived it was, and we still have a bit of a right-left. Anyhow, one of my favorite effects to blind post-processing. It's what I like to call the angelic effect. You can see in a minute just what I mean. So first of all, let's create a new layer from all the visible layers using the appropriate keyboard shortcut. You see now we have a layer containing all these layers, always visible layers. And let's name this as say angelic K. It's a name as good as any other. Let's transform it into a Smart Object, Convert to Smart Object, grade and less change the Blending Mode to soft light. Now, x doesn't look too good, bad. There's still a bit of work to do. Let's apply it to this layer set to blending mode of flight. Let's apply a Gaussian Blur, right? Filter Blur, garage Tumblr. And as you can see, by applying a blur to a layer. And so flight mode, we achieve this angelic effect is dreamy. Dreamy effect is seen to a dream. More contrast and soft colors is you say, let me show you what I mean. Without this. With this, you can see and we basically make all the image glow, glow on the inside. And it's such a cool effect. And not only it gives a glow to the image, but it also slightly increases contrast. So let's click OK. This looks good. And let's drag the capacity all the way to 0. And let's start pumping up the opacity until we get a nice effect. We don't want it to be too exaggerated. Let's see something like like this, maybe a 50. Let's see, without this layer, we have this layer. Yes, does look good alone bit too strongest, make it 40%. Without, with that is much better. This is nice, this is nice. Let's save the image. Now, you can apply this effect to all your images. It doesn't have to be a photo manipulation. You can apply it to normal photo. Just create a new layer from all the visible layers, from all the work you have learnt until now. Set it to soft light blending mode, apply a Gaussian blur, and then play around with the capacity. Okay, let's move on to the next step. Another thing I like to do to increase the sharp highlights in our image. Right now, the highlights are not very, very visible. We have some highlights here. We have some highlights here, maybe here, but they're not too visible. And I'd like to improve the highest in this image. The best way to improve the highlights in an image. Is to first create a new layer. Set to blending mode to Color Dodge. Select the brush tool. Sample, a yellow color or a whitish color from somewhere in the painting. By holding the ALT key, set the diameter of the brush to something like, let's say 55 pixels. And now let's see what happens. Let's change the opacity to say 50%. And let's see what happens if we paint on a highlight. You can see, you see here, we just have the power of this highlight. But 50% is a bit too much. Let's lower does make it a 30%. Oh yes, that's nines less lies. So let's paint some more highlights with the same color, this yellow color. You can change this color by using the shortcut we learned in previous lesson. Basically, you hold Shift Alt and right-click, and you have the name a color picker. And now we can change, we can make it more wide, may be more real, more, more dark, but we are happy with it as it is. So let's continue painting some highlights. We don't want to exaggerate, just, you know, paint a bit here, paint a bit here, a bit here, where there are already highlights. There. We will also paint highlights. You see, this is nice, this is nice. Or maybe a bit here. Yes, that's cool. Let's increase the highlights here to right here. If you have a tablet and a pen, that would be, that'll be even better. But if you don't, that's also nice. The mouse can do the job just as well. Maybe a bit here. Nope. When you make a mistake, don't worry, interests Andrew with controls it. This is not good. Let us see here in this area if I go and do it like that. Yes, just a bed with care. If you have a mouse, it's a bit tricky, but you can do it like so. Let's see maybe on the snout here. Yes, just, just a bit here. Just a bit here. Let's see on the eyes, maybe under Riemann the eyes. Let's see what happens. Not bad. Maybe a bit more here. Yes. Now, this area of the road maybe let's increase the diameter and see what happens if we boost. Yes, yes, it looks good if we increase the highlights on the road to well, lambda highlights because this is, this is the size of the routers too big, but we increased the luminosity, which so good. This is too much. Let's decrease the size and play around and make some more highlights here. Like so. You don't have to be too precise, just, you know, squiggle a bit here and there. We want this area to stand down, just the light colors basically to stand out a bit more. Right? Let's see. What do we have here? We have some mountains here. Let's see what happens if we lean some highlights on the edge of the mountains. Like so. We can live also play by holding the Shift and Alt or by selecting the color picker here, clicking it, or by using the shortcut. And let's change the color to green. And let's see what happens if you paint. Yes, this looks interesting. Let's play a bit here. Add a bit more highlights here. Maybe a touch here. Maybe here today it's just not tomorrow. It's just something to make it pop a bit more, just just a bit more like so. So if you're not happy with how the colors look, select the color picker either to interactive one, which shift all, or the classical one. Let's go a bit more yellow. What happens if you've been here maybe a bit on this mountain, maybe something like that, you know, just get creative there. Maybe I don't know here. Now that's the much less undo a be, a touch sheerly slow, DO best city a bit more to a 20%. Now, not to 20%, that's right. In this. This looks, this looks nice. Let's see, maybe on the fingers where the knuckles are. Here, where the rack OCR Arabic of highlights. Not much, just a bit, maybe under nails through. Just a touch of highlights there. Maybe here. Here. Here too. You just want to pop a bit boring highlights. Let's lower the opacity of Beatles change into a more yellow. So yes, that's interesting. Now, as you can see, after oral call corrections, the signature, our name and this masterpiece is a bit muted. It's almost not visible in there. So shame has a shame. We have to let people know who created this beautiful piece of order. So let's choose a yellow color. And let's paint a bit over our signature. Just follow the lines of the script. You know, make this like a ten or nine pixel diameter underbrush and now does not get us too much. Let's lower it. Maybe two pixel. Zoom in real close and paint over the script like so you see, follow the lens of the script. You want to boost it up a bit. Just paint there with care. No need to hurry. Like so, follow the lines. You name might be different, so you might have to follow the lines a bit differently, but you get it to follow the lines of the script and increase their, their lightness, Right, right, right, that's nice, that's nice. And this is a bit more visible as paint a bit more. Maybe. Let's undo that. A bit more, a bit more with more here, more here. Let's increase the capacity, lets say to 50% A bit more maybe here. Here where there is a lot of yes like that, like that. Yes decibel visible. And now we are done. Let's name this layer highlights. And let's see how our composition looks without this layer. Without this is without the highlights, and this is where the highlights, oh, you can see the difference. Without with this is an improvement. Not only one, but all these little touches. They add up and time and will make your image look beautiful. Now, it's time for our final adjustment. In this adjustment is again, a very useful adjustment to make an all your photos or composition. This is called a vignette. Basically what it does, it creates a dark, dark area at the corners of the image and thus guides you right towards the center of the image. So let me show you exactly what I mean. First, create a new layer. You can either use this button or use the keyboard shortcut. Now, set the color to black and white. We have black. Now hold the old key and press the backspace button on your keyboard. As you can see, by doing this, we are filling the layer with the foreground layer. Now let's invert this. Invert, use the import command. Now we have a layer filled with wide. And you will see exactly why we need this. We want to apply a filter and a lens correction, lens correction filter. If our layer would have been empty, this filter sadly, wouldn't have worked. So we need some sort of color here. White is the best color. Because when we have wild and we change the Blending Mode to multiply, all the white pixels disappear and only the black pixels will be shown. Let me show you what I mean. Let's go to Filter Lens Correction. Go to the custom tab. And you see here where it says vignette, lads increase the amount. We want it to be nice. Maybe not like minus 90. Okay, let's play it to the midpoint. That's too much, let's say plus, maybe a plus, plus 30, Australia, 39. This is good. Now click OK to apply this filter. Now for the trick in the hat, click on this to change the blending mode to multiply. And as you can see, the white pixels disappear and only the back, the black pixel, sorry, only the black pixels remain. So we have created the vineyard. Look how it looks. Without. We have without, with, as you can see, it darker is the corners and thus focuses our eyes toward the center of our composition. And this is a good thing. Maybe it is a bit too exaggerated, less than what the opacity a bit maybe. That's you just, just, just a bit at the max. The max this is let's see, without with, well, I don't like it. I don't like that. We have this vignette, this black area covering the face that I don't like that. How do we fix that? Well, very easily, we change, we switch the colors here so we have wide as a foreground color. Using the keyboard shortcut or clicking on this button. Select the brush tool. Make sure we have 100% opacity and airbrushed. Oh, and we paint with wide in this layer. This basically will hide the black effect. So we want the face fully visible. Yes, we increase the size and maybe also paid. You also want the hands fully visible. This is a way to adjust a vineyard layer. When you paint with white, you basically make the dark parts invisible. So right, so we want this to be fully reversible, right? Right. This looks nice. This is good. And I think this looks quite nice and lovely. There is just one more thing to do. Do you see these white blood cells that are around the eyes? Do you see them? Now? This happen because we probably went too high and some of our color adjustments in the heat of the moment we exaggerated. Well, I exaggerated, and I haven't noticed that I overblown the colors here. And this has become an ugly white, just is too wide. It looks certainly it's not a good thing to have. So we are going to correct it because they answered photoshopped does it allows us to correct wrong parts of our composition. So let's create a new layer from other visible layers. Let's select the clone stamp tool, which is located here. If it is, if you have the baton stamped or just hold and click on this until you have this pop-up appear, choose the clone stamp tool, change the sample to current layer, right? And now the clone stamp tool copies information from one part to another. You basically, let me, let me sugar, I mean, first, hold the ALT key and you see, you will have this little, this little target icon appear. Let's see click here once. And now with the brush tool, if you paint, you see, you see this little, this little arrow, how it moves. Basically, you are copying from where the little, the little arrows, sorry, the little cross is, you are copying the pixels from the little cross to the brush. You see. So if I were to old Click here to set the sample point from here. And if I would do paint here, you see I'm copying and copying whatever it is under the cross with the brush. So let's set the opacity to, let's say, a 70%. Now, we want to hide these white, ugly splotches. And we will sample a nice, healthy yellow from here. Hold the alt button, click to set a sample point, and then with the brush, carefully paint on the wide areas. And again, I'll click again, you don't want to. I'll click here and just keep painting because you see you will get to some areas you don't want. So it's better to just keep sampling near the area you want. To do. Cover to hide. All click again. Paint a bit, maybe. All click again here. Paint a bit more here, right? That's nice. Let's lower the opacity to let say, 60 noes slower into 50%. All click here. Paint a bit more, or click here. Paint a bit more. Onclick here. Okay, into bit more. All click here. To get more all click again. That's the process you want. Click you paint. If you make a mistake, no problem. We'll just undo the previous brushstroke. I'll click here, pinch here, or click here. Then here. Click here, here. This is definitely better. And that we're looking, I'm also notice a white, overgrown white here. Let's sample from here and paint just here, just like so. And now our image looks nice. We doubt that ugly, wide. This was it. We've done it. We've finished the photo manipulation. I'm so proud of you that you stuck with me and get to the end of this course.
24. Course Finish: Congratulations to my fellow artists. You have successfully completed this course and hopefully learn a lot of useful things. Now, you should be able to create some photo manipulations or on your own. Granted, it takes some time to really become good at something. If you enjoy using Photoshop and creating digital art, that learning journey will be pleasant and exciting. The learning never stops, no matter how good you already are. Using Photoshop. Even with ten years of strong Photoshop knowledge, I still find myself learning new things all the time. So I urge you, don't stop here with your learning process, experiment, and practice on your own. But take time to further improve your Photoshop knowledge with more horses. It's been another teaching you. And I can't wait to see you again in my next courses.
 Adrian Scheff