Transcripts
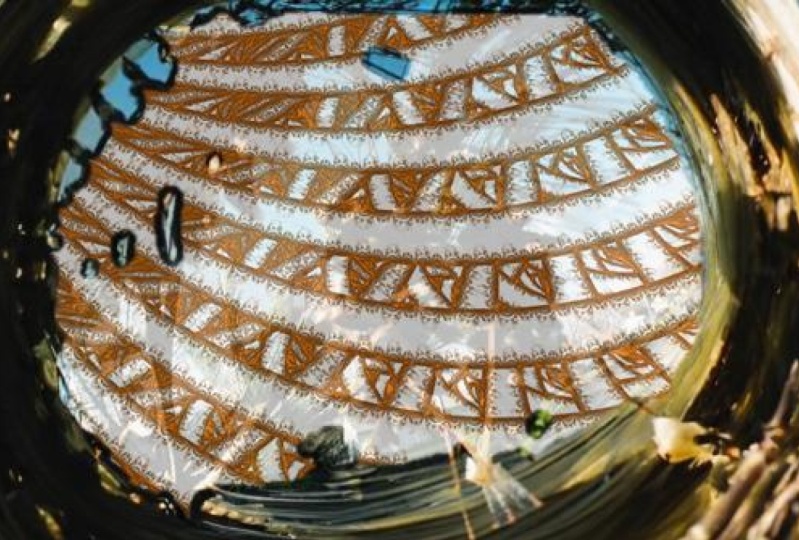
1. Intro: Adrian chef teaches J, wildfire and Photoshop. Have you ever wanted to create beautiful and amazing crackles or on your own? If the answer is yes, then this is the perfect course for you. After finishing this course, you will be able to create amazing and beautiful crackles using special software and some knowledge. I made you can shift and I have been successfully teaching photoshop or more than a decade. I've held hundreds of thousands of people to learn Photoshop and other design software. Just do a bit better. I'm going to show you exactly what software we need to install and where to get it from. Dam, you'll be introduced to the most basic way of quickly creating crackles. Next, we'll explore the most important options and functions of this amazing fractal creating software. Finally, we'll use the beautiful fractals we've created into a good-looking and jelly Photoshop composition. Join me in this course and let's create some beautiful art and fractals you any together.
2. Download JWildfire: Hey you crazy artists. In this lesson we are going to download J wildfire and install it. Right? So let's let our creative juices flow. We aren't going to have any kind of constraints, any kind of requirements do is explain that, is just gonna be me natural, normal laughing, go into my creative process and let me in on some of my secrets and maybe sharing with you some life experiences. And while all along creating some nice, pale cool. Okay, so first things first, let's start by putting some good music to inspire. And my music of choices, heavy metal, not always, but heavy metal gets me in that aggressive. Might want to work mode. Any know what I'm talking about? Let's listen to some heavy metal. Right now. This is a good start. I'm already feeling my creative juices flowing. Let's make it just a bit lower in the background. All right, so how do we even get started? How, what shall we do now? Right? Now, we're going to have some fun. And me personally, I love experimenting with new programs that create graphics, that create cool graphics, you know. And especially I'm talking about fractals, man. Oh man, I looked practice, I am in love with fractals. Fractals are awesome and creating them feels like an act of God and gives me that nice statistical power and gives me the element of surprise. I never know what fractals I'm going to create. Now. I've tried a lot of Fractal program's, believe me, I've tried, you know, Apophis, that was the granddaddy of fractal programs. And it was decent enough, not great, but dissent. And let's see what kind of other Frontline programs there are. Let's see fractile software. Let's see best 616 Franco generate, those are right now block. And let's see, Mandela will be S. That's a good one. That's a 3D fractal generator, which is also nice. I think fractal allow, I tried it. It's the sin is nice, not the best. Ultra fractal, decent, decent, practical for us. Okay, fracks. Also nice. This one now. Ok, and you'll see there are a lot of fractals. And I look Apophis, the good of the office which had some good results, not the best, but good results. And J wildfire, the program we're going to use today, which is in my humble opinion, the best fractal software on the planet. I mean, really this is the S HIT. Alright, so let's go on with this one. We're going to use j wildfire and we're going to have fun with some fractals. And then we're going to take those fractals and combine them in interesting ways in Photoshop. So. Let's click on G wildfire and go to the website. And if I'm to be honest, this website looks like it's from 20 years ago. I mean, no offense to the guy who made it. I'm glad the program is good. The program is amazing in its awesomely fun to us. By the website. It's a bit oldish, it's a bit, it's a bit outdated. But hey, you know how they say right? Don't judge, a book after its covers. And in this case, J wildfire, it's the best book in its genre. That is, it is the staff, believe me. So let's download it to Downloads. Now. If you're feeling generous and if you have some money and you want to support the author, which I encourage you to do. You can buy this program on Steam. You click this, Let's see. Click it opens in New York tab. And you can bite on Steam if you'd like. And if you have a CMA account, it's €10. So if you can afford it, please do so and support the author. Or if you can't afford it right now or you just want to experiment with it. You can download it for free from here. So let's click and let's download it. It's gonna start downloading. And the meantime, let's take a look at the main page and see what interesting stuff people have downloaded. I'll look at that, Look at that. That's a nice stuff. Let's see more, more, more, more. What's more? There are some more here. I don't like these too much. If I'm honest. I kinda like to diffract those 3D has its uses but not always great. All right, so this one has downloaded. Let's and zip it. Click on the first yes, yes, I'm going to buy it. So open the sorry, let me let me just have a sip of coffee to come back to my senses. This is some good job. I hope you're enjoying a good coffee. Coffee is great, isn't it? I love coffee. Okay, So open the downloaded file with when rar or wind zip and click on the first file here where it says shift become the last one. And let's see, let's create a new folder. Let's create a new folder. Now I can put this folder in Program Files or maybe you have a separate folder where you put your programs. I don't know. I'm just going to create a temporary folder here. And I'm going to name it J wildfire, right? And I'm going to drag all these files here in the newly created folder. I'm going to close this. I don't need that anymore. Now let's open J wildfire. And all you have to do is to just double-click this executable. But please note that in order to use this program, you'll need Java. If you don't know what Java is. Well, what can I say? Java is an environment which allows you to run programs written in Java programming language. So if you don't have Java, just go on Google or whatever. Search for Java, go to Download. And ESX Apple cookies. I don't care about those cookies. I have my own delicious cookies, which I want to eat. Those cookies am agreeing stops free download. You install Java, and then you'll be able to use the software. But I think if you're using a computer and you have used it for at least one a month. Chances are high. You already have Java installed here. So let's go ahead and just double-click and start this awesome program and see what that's all about. What's all the fuss about, right? Double-click. And here we have a nice little window appearing. And what does it say? Java Runtime, two years. Yes, that's fine. I don't care. Now this is important. It's going to ask you how much memory to use. Well, if you have a lot of memory, that is RAM memory, I advise you to input here a big value or as big as possible. I have for now I'm going to use, let's say, four gigabytes or would be six gigabytes. Let's go with five. Let's see, five gigabytes. This is 124 by 5. Five thousand, five thousand, one hundred twenty. Yep, that's right. And here u is scale. I'm going to leave this as it is one low-priority. I'm not going to do anything here. Just click on Start. And let's see what happens. We have to wait for a bit. And there you have it. The program has started. Bravo, bravo. And look at that. It has a nice black UI, which is cool, isn't it? We can change this. Let's see. Nimbus metal. This is white. Let's leave it, Let's leave it on black. It's an ice as it is. And this my friends is J wildfire. Now I've dried the lack of fractal generators and I mean, I think I've tried them all paid, unpaid. Try them out. And this is hands-on. The best fractal a generator out there. In terms of results, in terms of customization, in terms of options. This is the father of fractal generators and it's an amazing program. All right, so how do we start generating some practice? Well, it's easy. We just click on this little button here where it says random batch. Click it. And we're going to see here on the left side some fractals appearing. They keep appearing, they keep generating. And right here you can see a preview of a fractal. So for example, if you want to see it, this REPL here, you double-click it right and it will appear in all its beauty and splendor right in the middle of your screen, right here. So let's see what have we generated here? This looks interesting. Yep, Not bad, not bad. But I'm sure we can do best. Let's see. Let's pause the video for a second right here, and we're going to continue in the next video to keep things nicely segmented and organized. And we're going to explore more features of J wildfire.
3. JWildfire Presentation: Hey, hey fractal livers. In this lesson we are going to look at some of the most important features of J wildfire. Let's begin. All right, so this is the interface. Hen I admit it's a rate is scary interface. I mean, look at all these buttons and tabs and sliders. Button, button, button, button, button, button, button, button, button, button, button, button. One could go crazy looking at this buttons. But we're not going to go crazy. You have me here to guide you gently and to show you the main features and the main perks of this program. Now, first things first, you have this random batch here. This is your meat and bones. When creating fractals, you just click once. And random batch of fractals is created for you. Just like that, the genie in the bottle works its magic and fractals appear on the left. You'll double-click one and fractals appear in the middle of your screen. And then you can modify them further by dragging these interactive points, whatever. Now, what should it be of interest to you? It's this little drop-down right here where it says earned rand or R and D claim generator. Now we have a big list right here. And for example, let's say we are going to choose Zaydan, know what I see galaxies n Now, if I click around them, batch is going to generate just galaxies for me, which is helpful in case you want to experiment and see what this program has to offer. And maybe now I want to, let's say machine and I click run them. Batch is going to generate just machine fractals, whatever those are, I don't know. And this is a good place to start. This is a good place to start generating your fractals. Now, before we go any further in discussing the features of wildfire, the important question is, how the heck do you take this fractal from this program into a nice PNG which you can use. You can use new Photoshop work. You can post on your Facebook, Instagram, wherever. And the answer is this button here. So let's say, for example, I like, let's say, let's pick a cool fractal. Like, Well, it's not cool, but now that's not cool. Let's, let's, let's say this one, right? It's descent one. Whatever. Let's say I want to render this fractal. How do I do that? Well, I just click on this little bottom where it says Render, Image or movie. And right here on the right you can observe we have the mentions or dimensions of our rendered fractal. You can play around and choose some bigger dimensions. Let's say, for example, a one thousand, nine hundred and twenty, one hundred eighty. And this is going to generate a nice HD version, HD quality crackle. And here you can choose the quality of the fractal. I wouldn't recommend using very low or low. These are going to generate very cool effects. You're going to have nice, you're going to have Arab effects, at least, at the very least, use medium quality or even better is high-quality. This is, I think in my opinion, has the best report of performance inequality. Of course, you could go with very high-quality, but that would be an overkill in my opinion. So this will suffice. And let's say for example, you have chosen this little option here. You want it, your faculty be full HD and you click on the Render Image or movie. And it's going to ask you for a place where to save. And let's see, I'm going to, I'm going to create actually a new folder right here. Let's say, I'm going to say cool fractals. And I'm going to give it a name, let's say test fractal, right? Let's name it. Let's also give it a termination. Let's make it this fractal dot PNG and click on save. And what's happening? My rendering surfing, am I not rendering something? You know, this is the first thing. I've asked myself what the heck is happening. I can't see any any indicator. Well, actually you can't see it, but it is hidden right here. You see where it says 5% here next to real time. This indicates the status of your rendering. So right now is at 10 percent and is going to increase as it will render your image. Now, this may take some time, especially if you have high-quality here and the fractal is complicated maybe, and you have high document dimensions. It's gonna take a bit of a time. And what's, what's, what's bad about this. And I admit, I admit this is one thing I don't like is that this software uses the CPU to render. If I take a look at my task manager, I can see that the CPU, It's going strong at 98%. Whereas my GPU, it's sitting idly at 11 percent. This is the main, I think the main drawback, the little, the only, this is the only disadvantage of the software that it doesn't take advantage of the GPU. If it would, then rendering would happen so much faster. And I think visualization was to happen faster. But it is what it is. You know, let's not let's not inspect both feet of our gift horse. It's a gift horse, so it's good. We are grateful to have it. And you'd think that go into preferences may be, and let's say choosing something like, well actually you know what? The preferences look quite strange. And I think this is because of the UI. Let me just put the UI back to a default. Let's say applied to application, right? Save and Close. And now let's check the settings. And let's see what do we have here? Well, this looks strange and I think this has something to do with Windows 7 and having, sorry, windows stamp and having a black UI in the Preferences. I'm not sure. Anyway, you can see here we have all kinds of options. But none of these options, as far as I know, none of these options allow us to change the render to the GPO, which is too bad. I hope that maybe one day, maybe one day we'll have GPU rendering, but until then, CPU will do just fine. Let's, let's change the UI back to Nimbus or maybe system. Let's see apply. Yep, I think this looks a bit cleaner, right? I think we're going to keep this that dark one. You can keep it if you want. But I'm going to keep this one because this one because it just looks a bit more cleaner. And actually I can see that in fact, this is too white, so I don't know what happened there. Oh, this was a sub-team. I see. And if I apply it, it's Blanco and default is white. So yep, that was the thing. I prefer a nice white team usually. Sure, black themes are also core, but in this case, I find that white teens make this program a bit more, a bit more clean, a bit more understandable. I can navigate easily in I think so will you. So while I Blackbird my mouth here, the rendering is almost done. It's at 100% now. And right now something cool is going to happen. I think we're going to have a little pop-up. Oh, look, there's the popup. As soon as the rendering finishes, popup appears with the frankly you just created and you can save it again if you like. But in my case, it's already saved. And we can close this. And if I open the pictures folder and go to my cool fractals folder, I can see that I have this ugly fractal. It is gonna be fractal, although it may have its uses, but it's kinda muted. It is a bit vague to say so. So yeah, this is where the fractal is rendered. Nice and cool. So now you know how to render a simple fractal. Let me recap for a real quickly. You double-click on a fret alike. Choose the dimensions from here, the quality from here. And click Render and choose the file name, and that's it. That's how you render a simple fractal. But this is not the best choice. I'm going to show you an even better choice to render multiple fractals. Because let's face it, you're going to have a lot of fractals you like am going one by one to each of them and pressing ran that on waiting for them to finish. It's a pain in the where. So I'm going to show you a better way next time. For now, let's end the session and let's continue.
4. Generate Fractals With Scripts: Hello, my smart friend. In this lesson we are going to generate fractals using scripts. And let's begin. Hey, hey, hey. Let's explore a bit of creation some more. I'm so excited to work with wildfire and we might the reader because it is a very exciting thing to try out a new graphics program, the new software that renders such a beautiful results and that we can use an artistic ways is just a kind of a joy for the soul and joy for the artistic person in me. And I'm sure in YouTube, Let's create some more fractals. Now, I've already showed you the old way where you click on random batch here. And it's going to generate depending on what you have chosen here. But now I'm going to show you yet another way to create fractals. This program has a lot of ways per fragment creation, and that is arrived here. This is a little dab, a bit hidden. Sadly, it's called scripts and custom buttons. You click on it once. And row two, built-in script. And you see here, that's gonna to be a big list of thing is what are distinguishes. These are scripts which when you run them, are going to create practice based on some predefined settings. We don't know, we don't care about that. But all you care about is to run this script. And you can run the script in one of two ways. You can either they run and it's going to run the script, or you can simply double-click it. My favorite way. And if you double-click it again, it's going to generate based on the same screen to another random fractal. And my God, there are lots of scripts here that allow us to generate even more frac of varieties. Then we have right here. So let's play around a bit and see what happens. Let's see, Let's start double-clicking here. We have an error here either. Now, let's move on. Let's see this one. Galaxies. This looks nice. Look at those nice galaxies right here. Yeah, more galaxies. Planetoid. Oh, that's cool. Look at that. We have a nice planet here in space. We are in space, baby. Okay? Yes, clouds. That's cool. More galaxies wall. These are some nice galaxies. And you know what? I'm going to show you in a moment, how to save the cool fractals that you encounter and render them later. And we're going to explore this a little bit more in depth later. But for now, I just want to show you one little thing. You see here where it says button. If you click this, it's going to add this script in a button right here. So for example, let's say I want to take item now. Let's see galaxies positive, right? And if I click button, see what happened. A button appeared here. It says HB, HB two to j from Galaxy. And if I click on this button, it's going to run the script here, which is a cool little way to put your favorite scripts in handy. You know, you want to have them at hand. But I don't want this. So I'm going to undo that. It's right here where it says Macro button 6. This is another quirk of J wildfire. If you want to remove the button, you go to this tab where it says macro buttons. And you click on this H B to G, and click delete it. And just like that, it removed our button from there. So that's a nice feature you want to be familiar with.
5. Batch Render Fractals: Hey, hey, hey my beautiful friend. In this lesson, I'm going to show you how to batch render some fractals. Let's begin. Now I'm going to show you a way to save your fractals because you are working you now and then you make a cool fractal and you click one button and all your nice work is gone in your beloved fractal is no more, and that's sad. So how do we save our fractals? Well, first of all, the fractals are called flames. In wildfire terminology, you want to save a flame. This will not render the fractal. It will only save a fractal in a special format, I guess XML or something that Jay wildfire can understand and can parse. But to render it, you will have to either render the flame with this button or I'm going to show you a way to do some batch rendering. So let's save, let's say this plane first and this is important. You have to save the frame forced in a location. So click safely. And I'm going to choose, let's see, pictures. And I'm going to choose g wildfire flames. This is a temporary folder I've made for the purposes of this tutorial. But normally I have my fractal safe in a special folder on my BC where I keep them nicely organized and I recommend you to the same. But for the purposes of this tutorial, I'm going to just save them in this document, j wildfire flames, and I'm going to call it, let's say this flame, right? I'm going to press Save. And I have saved this fractal. Now let's say I create another fractal. I click on random batch and create another series of goals fractals. And let's say, I fancy little beauty. How do I save it now? Of course, I could also go to safely and give it a name. But I'm not gonna do that because there's a better way. My friend, in that way is quick. Say, Do you see this little button right here, this Q button? If you click on it once, you will, quick save this fractal in the folder you previously chose. So if we look in the folder, Let's see pictures. Wildfire. You can see we have here, you save 2021 and so on and so forth, that flame. And this is a quick save of our fractal. If, let's say I choose another fractal, and let's say press Q again to quick save it. And I look in the folder, there it is. Yet another practical saved. So now all those fractals are nicely saved there, and you can save them very easily by pressing on this little button, which I admit it's a bit hidden in the UI. But nevertheless, it's good to know. So you have saved all those fractals, right? But how the heck do you view those fractals? I mean, you can't open them with anything right there. Just inflamed format XML. How are you going to view them? Well, it turns out wildfire has thought about this and has offered a solution. And the solution is, you go to windows right here in the menu, and you choose flame browser. Now, at first, nothing is going to appear here because you have chosen the folder where G wildfire needs to look for those crackles. So click on Change folder and choose from pictures. Let's see, choose the folder where you saved the practicals just now. So in my case, J wildfire flames lick open and look at that. They are nicely organized in a folder. And if I click on this folder, I can see these three fractals right here. And I can even send them back to editor by clicking on this button here. And they go here. Or maybe I can send them to the Batch Render or message, interrater, or delete or rename, whatever. So this is a way to quickly browse your claims. And we have the fractals you're going to say, but how are we going to render Dame? I want to render them fast and cool. I want to sit nice and seek my coffee. Relax, play with the cat, kiss your girlfriend or boyfriend, whatever. You don't want to stay here and click on each of these fractals in render them right? I get you. If you want to batch render the fractals, all you have to do is go to Windows and choose Batch Render. And what do you see? Nothing appears like a waste. We have to add some files. And we are going to add files by clicking on this button here where it says Add files. And we are going to choose the folder where we just saved our fractals, that is in pictures and J wildfire flames. Double-click it. And here we can choose what fractals to Batch Render n, What school. We even have a nice little preview here, which is very thoughtful. And I'm grateful to the author that he thought of this. So let's say for example, I want to render all these three flames that I saved, right? I select all of them. Click on first shift, we count them as open. And look at that. I have the flames right here. And now to render them, I am going to choose, Let's see from here some dimensions. We could go with one, with this HD, one hundred, nine hundred and twenty multiplied by 180. This is HD quality. And from here, high-quality. And we could just click override the images just in case we have rendered something before, and then we just lead render. So let's say for the purposes of this tutorial, I'm going to choose a real low dimension. I'm not advising you to choose this dimension in real life. This is just for the purposes of this tutorial. And let's choose, let's say, a low quality and quickly overwrite the images. That's it. And I'm going to click on Render. And look at that. You can see job progress. This is each of the crackles rendering, and this shows all of the fractals. You can see here. These two have already rendered. And the third one also has rendered. And you can also see the elapsed time it took the fractals to render, which is cool. And we can even show the image. We click on the fractal, Let's say ng-click show image. Ad is going to show us the rendered image. Now, if I open the folder, DJ wildfire flames, where I have saved my flames, my fractals. We can see that along those XML files, we also have the rendered files, the PNG files. Now, this may be convenient to you or maybe not. I don't know, but in any case, this is what J1 fire does and I'm okay with it. You just click sort by and let's say you can sort by type. And you have all the fractals rendered and nicely in a place. You can shift click them, you can cut them, you can put any somewhere else, Do whatever you want. But this is how you batch, render some crackles.
6. Other Good To Know Buttons: Hello my beautiful friend. In this lesson, I'm going to show you some good to know buttons. Let's begin. There are a couple more buttons you should be familiar with. And let me start by going through this little button here. And let's say for example, you have this wrapper here, right? And let's see item l. You change some settings on it. And you want to keep this version, but you do want to save it yet. So what do you do? You click on this button As Shot, and this would create a snapshot of the current flame and put it right here. So Lake ones. And you can see that we have created a snapshot right here. And now let's say, for example, we are going to move it again. Maybe I don't know, modified crazily like so. And see, you know what? I don't like it. I liked it just fine the way it was before. And then we just double-click this thumbnail here. And it will come back. Although a bit slower, it will come back to its previous settings. So this is a nice little way to store some interesting variations may be that you think saving later. Okay, let's move on. We have this button, this dye, and this will randomize our fractal. I click on it and you can see I get some variations, some random variations which are cool to experiment with and to work. All right, now let's move a bit upper. And you can see here we have real-time. Now it is checked if I uncheck it like so. And now let's say play around with the settings. You can see, I barely can see what happens in the fractal. There is no real-time rendering. And if I click on real time, now, whenever I make a change, J wildfire will start rendering this fractal. Okay, let's move on. This is the indicator of how much time is left for it to render or where it is in terms of rendering status. This is a grid. I don't like grids, so I don't get about it. These are some guides. You can turn them on and off. I don't care about them. These are some more options which aren't very interesting, if I'm honest. And again, we have here a ton of controls for fine tuning the fractals. Okay, So another button you should be aware of and that it's important is this middle button here, what it says, render image preview. So let's say you have this fractal loaded, right? And you're curious to see how this fractal with look rendered. And you click on this button. And you can see here it has started rendering. And this is how the fractal is going to look. And you may find some use for it. It is good to have your disposal. And note that it is different from this icon render frame. If you click on Render flame is going to ask you for an image to save. But if you click on this file, it just going to render it in the editor. So these are some buttons that you should be familiar with. And finally, right here below, we have these buttons, which are the scripts from here. Let's say you have a script. I showed you this, but let me show you again. Let's say you have a script from here and you want to add it as a button here and just click button appears here. If you click on it, it's going to generate a fractal using that script. And if you want to remove that button from this toolbar, go to macro buttons. Select the offending button and delete it. Bye, bye baby. I don't want you anymore. I want my other buttons. And these are the most important buttons in the main section of a wildfire user interface.
7. Color Tabs: Hello my friend. In this lesson, I'm going to show you some color tabs in the lower section of wildfire user interface. Let's begin. Now let's move on to exploring the final part of the UI and namely this bottom tab art. Now this is a place where you can adjust and color and play around with your practice even more. So let's say we start with the crackle, like so. And let's start on the first step where it says camera. And we can play around with the row. This is like a rotation with the bitch. With the, OH. These are camera controls which change the position of the camera. And we can play around with bank may be and with perspective, what have you. But I'm going to reset this by clicking on this button here. I don't like to play around there. And let's see, this is interesting. This allows us to move the fractal left-to-right, quite useful. And upper down. And this Zoom allows us to zoom in. And maybe, and I don't know, maybe we have an interesting part that we want to render. We are going to zoom in. And thus, that's interesting. This is a nice part will diffract of n. Remember, all you see here are mathematical formulas. All of this is rendered using nothing but numbers, equations. There is only math behind all these beautiful fractals. Okay, let's move on to the next step. This is bulky. This without some bulky. And me, I don't find this very useful. So I'm not going to use this. We're going to skip it. We could add here the form of a bubble, maybe some blur. But why would you do that? Why would you add blur from here? We can better at blurb from Photoshop. So let's move on. Now this is an interesting dab. This is coloring. Now here we can really change how the fractal looks. So we can boost the brightness. And we can see that it takes some time to update. And we can play around with low brightness, which I don't know what it does, but I'm guessing it boosts the brightness of the less brighter areas of the gray areas, of the darker areas. If you want. We have Gamma and Gamma threshold contrast. That's all nice and good. Let's see. Let's just choose another fragment because this one seems to be rendering very slowly. So let just choose this fractal here. And we have read balance. We can basically add red, green, and blue. We can fade it to white or black. The vibrancy, my favorite slider. We can make it the saturated, but we prefer it's saturated. Saturation. That's nice. And background color. We can play around, but this doesn't affect much. It seems like we could choose a background image. But I'm not gonna do that because we want our fractals nice and pure. Okay, let's move on. Here we have anti aliasing. Now anti-aliasing is important because it will make the fractal look sharper and it's going to have less noise. So let me just around there, this fractal in the editor by clicking on this button. Let's see how it looks. It looks. All right, and now let's increase the filter radius. Let's say that's boosted all the way to and the sharpness indicator. And I'm going to boost the aliasing, the anti aliasing amount, and maybe the radius. And now if I render, you can see that the image looks a bit different. I think it looks a bit clearer from my perspective and maybe a bit blurrier in some sections due to some high settings of the anti-aliasing radius. That's a bit hard to observe in real time because aliasing shows details and details are best observed in the final render. So this is if here, if you want to check it out, Let's go back and check out the gradient dab.
8. Gradient Tab: Hey my friend. In this lesson, we are going to take a look at the gradient dab in J wildfire. Let's begin. Now let's look at the gradient tab, which is a monster of a dab. It has some little sub-tabs here, each with its own setting. So let's, let's explore. Let's go step-by-step. So what do we have here? So we have the gradient, right? That's right. And we can create a random gradient by clicking on this little button here. And it's gonna create a random gradient. That's cool. Maybe we can save the gradient if we find something that we like, I don't find something that I like. So I'm not gonna say we have random shift here, which basically takes the gradient and shifts it left or right. Then we have some more randoms here, which I'm not sure what they do. They seem to affect the colors, but I can't say for certainty, what exactly do they do? So I'm going to leave them as they are. I'm just gonna generate another random gradient. And here we have a nice collection of gradients. And if we double-click on one of these gradients, we can apply them. This is a big library. Look at that huge library. And we can use these to give our fractals that unique look that we may be looking like, this bright colored or maybe this green. All right, this was the library. Let's move further. Let's see, Create New. Here we can create a new gradients. These are the colors. And if I double-click on a color here, I can change the value of the red. So for example, we have a gradient starting with, we have our right. And if I click on this number, I can set the red to be 200. And green and blue will make mostly green. And thus, I have changed the color of the gradient. Not very intuitive, but hey, it works. If it works, it works. Now let's move on. We have Curve Editor here, which allow us to fine tune and adjust aspects of the gradient like saturation. And this applies, for example, take this Webflow curve, right? This supplies over the whole gradient. So for example, where we have these yellows here, the saturation is at max, but where we have this colors here, approximately, the saturation is at domain. So for example, if we were to drag the saturation down for all of these points, Let's see down, down, down. You can see that we have the saturated, everything you see, it has become a gray, dark gray. And if you start increasing, you can see we increase the saturation in these parts of the gradient. The same thing for luminosity. We can maybe boost the luminosity. You can see here we have increased the luminosity here. Or maybe we can decrease the luminosity. We want a darker gradient in certain areas. And here we can play with the hue. So for example, let's take this point, right? You can see it right here, how it changes the hue based on how far, up or down we drag. So that's a nice little way to waste your time and a gradient. You know, I can spend all day refining and playing with this little curves and these little buttons. I'm going to let you waste your time, like I wasted mine. For now. Let's move on. And we have modified gradients. And we can swap RGB here, which basically I think it's cycles over the colors and goes over the hue. I think this is kinda like the hue slider in Photoshop. Let's say this is frequency. We have increased the frequency of the gradient. And we have blur, which if I'm guessing, it's going to blur the gradient. And we're not going to have those separated colors, but instead we are going to have some nice blurred transitions. We can reverse it, inverted, sorted. This is cool. This is cool. Okay, Let's move on. Let's go to balancing. Here. We can boost certain colors. For example, we can boost the red and you can see that we make the whole gradient just a bit more red or the green. We can decrease the grid. We can increase the green. Same for blue books, too much blue. Let's go back a bit. We have overblown our colors. Let's go back. We have hue here, we can play around with the hue may be changed. This again, I think works like the hue slider in photoshop, hue saturation adjustment filter. And we have saturation. That's nice. Contrast. That's cool. Gamma. And finally brightness. Now, these are a ton of settings and boy, oh boy, you can waste some time fine tuning and adjusting your gradients. Let's move on. Finally, we have colormap. And I think this works by creating a color map from an image. So let's see. I'm going to select any image. I'm going to go to, let's say, say pictures. I have nothing here. I'm going to go actually to call fractals, where I've just generated my test fractal. I'm going to choose it and you see it loads the image. And this image acts as a gradient, which is crazy if you ask me. It's absolutely bananas. I have an image acting like gradient. We just cool, maybe but crazy. And I think is better that we remove this image and just use the old gradient. So this was the gradient tab, pretty advanced, pretty advanced tab.
9. Extra Tabs: Hey, my friend. In this lesson we are going to take a look at the extra tabs in J wildfire. Let's begin. Now let's move on to the next tab. We have 3D rendering, which I'm not going to get into right now. Stereo 3D, again, I'm going to leave it just like it is. Now we have symmetry. This is interesting. If we, for example, choose x-axis. You can see that we create a symmetrical gradient and the x axis and y axis. We do it on the y-axis. And point is just going to create the same gradient, is going to repeat it around a point. And at symmetry order, basically, we increase the number of iterations. So let's say we choose x axis. We don't have symmetry order anymore, but we can only move it left or right if we desire so. And this is not very useful. If I'm honest. Maybe, maybe it will give us some interesting effects for simple gradients. And you can play around with it and see who can obtain some interesting effects. But my favorite is point. Now, this means that we can take the same gradient and duplicated multiple times around a single point. And in effect, creating a sort of a kaleidoscope effect. So let's put this back to 0.5 and this one. And you can see that we have, we can boost the number of gradients. And this will also slow the rendering sadly. So let's go back to, let's say four. And let's put this back where it was. This was at 0 actually. And this is nice. This is a place where he can achieve some extra beauty from your gradients. Let's move on. Let's reset it for now. Let's see. We can add some blur, but I'm not a big fan of adding blur from here. The rather add blur from Photoshop layers. Now I admit the way layers work here, It's a bit confusing, so I'm not going to get into it right now. Let's just move on for now. And here we could do some more crazy adjustments, but we're not gonna get into that now. That's for a more advanced lesson. Let's move on. Here we have Leap Motion, and here we have miscellaneous. And this is a nice little button which will randomize. So that's cool. But we can also obtain a randomization effect from here. And this is more safe because it will only randomizes the heights. And we're gonna keep the colors intact. Whereas this bottom, we'll also randomize the colors and other settings. So yeah, this is it. And in the next lesson, we are going to start creating some cool gradients and adding them to our library. And then we're going to render them.
10. Create fractals: Hey, hey, beautiful. In this lesson, we are going to actually create so fractals. Let's begin. And after all that boring introduction and all that tinkering with you and learning the ins and outs of J wildfire. Let's get to the actual creation of fractals. This is my favorite part. Now let's get our hands dirty and let's create some great, cool-looking, amazing crackles. And okay, so we're just going to start create a random badge of fractals. Well, we are going to choose all. We are not interested right now in a certain dipole of practice. We just want to gather a nice collection of fractals which we can render and then we can use in Photoshop or in a different software. So let's see, this one looks interesting. I'm going to save it by pressing on this little Q here. And you can see here it says click Save, Save. Now. Okay, let's move on. Let's explore some more. What do we have here? This looks interesting. Save this one too. All right. Let's see. Now, obviously, you won't have the same results as I have because the results here are random. So you just go and double-click on some fractals that you may be like and weak saved them, you know, press on this button to save them. And let's say if you find the fracture like this one, you can randomize it. If it's not exactly how you like it, but usually, I don't do that very often when probably you won't do. Just click on random batch again and see what fate brings you in terms of fractals. And I bet it will bring you some interesting results. Probably way different than what I have here. And I'm going to save this one. Let's see, Let's around them batch again. It takes a bit of time while it loads. This one is interesting. I'm going to save it. Let's say this one. This one looks funky, but am I going to say that on? This one is interesting. Let's save it. Let's random batch again. And this one looks quite. I'm gonna save this one. And this is enough for now. Now, we are going to create some fractals from this clips. Now, these scripts can create some real interesting crackles. And here is where you will achieve some results that are similar to mine. So double-click. Let's see. The first one does nothing interesting. The second one, this one does some pretty interesting stuff. So let's say that this one bubble wrap, Julian. Now this one asks for some input. I don't want to do that. Let's see Usher flux. Now. I like this one. Let's add it and save it. Let's double-click again. And you will also get some similar shapes in your case, you can also do the same thing. Click Save. Yet is out of so many interesting crackles. Okay, let's move on. Now we have the Galaxy series of fractals. And some of them may look interesting like this one. For example, M, in that case you can save. Let's go one more galaxies. And I'd say more galaxies. Let's save. Let's see single galaxy. Double-click, save. Planetoid. Now, we don't have much use for bana towards my mom. Gas clouds. S1 is interesting. Let's save it. Oh, look at those beautiful colors. Look at those beautiful colors. Man, those who agree. Nice. Let's see, this is a nice scrape. I like this. Remember, if you find this screamed at you, like you can add it to your toolbar by clicking on this little bit in a button here. Let's move on. Let's see. Galaxies will look at those colors. This is why I live. This softer, man. You can see some things that are going to let you bloody amazed and bloody impressed to the sites you're going to see. Here are some sites you aren't going to see anywhere else. So go on and double-clicking on this. Let's see galaxies. And whenever we find something interesting, just press on the little Q here and click save them. Let's see. Click Save. Let's go on moon. No, I don't want no moon. This is interesting. We could use this little bubble here to create some interesting, I don't know, maybe like alien and bonobos or something with those sort. Let's save it. Planetoid nematodes. Planet though it's clouding. No. Moon, moon. Guess clowns. Let's move on. Yeah, Let's see galaxy moan, moan, generator. This is interesting. I think I'm going to save one moon here. Now. We could use one of these moons may be enough space photo manipulation. If we were to create some outer space scenery, we could use this as an alien planet and exotic planet of sorts. So let's, I'm gonna save just one. I'm going to create one more time. This is interesting, I'm going to save it. And now let's move on. Planet generator. Now. I'm not liking that very much. Let's go one. This one. No. No. Is this amazing? Good, is this amazing? Look at those forms, man. Look at how intricate those forms are. I bled 11 this, I'm going to save this one. And you know what I'm gonna do? I'm gonna play around with it a bit more by clicking on this randomize. Now this doesn't do very much. Let's go to MRTK tab here. And the randomized, oh, let's see if we can achieve some interesting effects. Now. Now we can just double-click this again. Keep them separated. And that's how this trip is skull. And wow, again, pure for beautiful forums. Let's play around a bit with the gradient and see if we can achieve a different coloring. Let's say you did rainbow now, mystery, no, oak tree node two is linking, twisting. Or maybe we can just do randomize. Look at these beautiful green. I'm going to save this one. Okay, let's move on. Lumiere. Now this one is more Satterly, you know, it has that smoky quality like a sort of a prism, sort of glass. The words, my words are lacking the power to describe such a beauties. Let's save this one to this one or no, so cool. And let's see. I'm gonna save this form. And like I said, your results are going to be different. But whenever you find a factory like click this little button here and save it. Let's explore some more sweets. Know, some of these scripts asked for our input. I'm not going to complicate my selfie that I'm just going to use this simple script. Let's see, let's see why. This is nice. Oh, this is even nicer. I'm going to save it. And let's go to Edit loss, Lumiere. And then I save this one. Let's see, what do we have here? Let's go one, this one is nice. This one. I don't know what it does. This one is also nice. Save IT. Sphere, sphere. This is interesting. I'm going to save this one. And look, if you want to stop an experiment, you can go to Post symmetry here. You can choose point and you can increase the symmetry order. And let's say if you use like a nine, you can create sort of a kaleidoscope effect and multiply this fractals around the single point, which is. Cool. And let's say Why not? Let's save this to, let's go on. Let's see. Lumiere mean Coast scope, painting. Mobius dragon. Oh, this is cool looking to build the colors are a bit too muted. Let's play around, go to coloring or actually gradient, and let's choose a random gradient. Now still don't like colors up to mute it. Let's go to oily Julia scope, number, plastic. I am lovely. Show you are. And you are in the lovely little bit too random from my face. Let's go to I in space, grow nice, Save, I'm going to save it. I'm going to save that bad boy. Let's see a scene space. Wow. This is beautiful. Whenever I see these sides, I feel very privileged to view them. I may be the first person in the world and you as a viewer, maybe the second person in the world who we'll see those, the images who will see this arc. And I'm telling you, this is like soap for the eyes. This swashes your eyes, washes your brain. This is like dy du, no. Candy. For your visual sense. Can be for the eyes. Delicious, delicious candy. Let's move on to the script. Let's see the CFO. The CFO. Let's see printing. And sometimes you can double-click and click a single script multiple times to generate different. Because don't forget, these are random scripts. Let's move on. I need love. This is how the script is called. And I can understand the feeling. We all need some lab and they'll live donkey. These are some beautiful, beautiful vistas, some beautiful views. And I, for one, feel very privileged to be viewing them. This is our generated by a computer. And it is beautiful. Is very beautiful. And this is why I enjoy working with graphics. Because I get to see beautiful things that other people might not have the privilege to see. Let's create some more. Let's see octagon. This is also nice. Let's save that square rise. Let's move on a bit faster. So we explore all of days the app, this is nice. Let's see maybe some more variation. No. Cylinders spirals. These dogs and say, They're very nice. I'm going to skip through them fast. Let's see. Wedge wrapping can bubble wrapping heart. Now, wrapping this up plane you, now this is not my cup of Joe. And let's move on. And these were all the scripts. We have created some beautiful fractals and hopefully you have created some beautiful fractals alongside me. And you have saved them using this button here. And this is it. In the next video, we are going to batch render the beautiful fractals we just created.
11. Final Batch Render: Hello, my trusty friend. In this lesson, we are going to put the fractals we created to batch rendering. Let's begin. Now. Let's render those bad boys we created in the previous lesson. So in order to do that, let's go to Windows and batch render. And we are going to add files. And we're going to choose pictures. And the J wildfire flames or the folder you created. In the first lessons where I told you you have to create a special folder and save your first practical. Now where you save your first fractal, that is the place where all the other quick saves are gonna go automatically. And you can see here we have Q saves, quick saves. All of them are sitting nicely here. So let's add all of them. Click on the first one, shift, click on the last one and click Open. And this has added to the batch Render all these cool fractals. You can even see a preview of them right here. Now here's what we have to do next. Next we have to change the global settings. We want to render these fractals. Now, I like to render fractals at the high resolution image, let's say like an HD image, like so. And use high-quality. You can, of course, maybe choose a smaller resolution if you'd like. So, but I find that this resolution is a good report between quality and time spent rendering. So I'm gonna go with this. I'm going to choose this setting in terms of dimensions and high-quality. In terms of quality. I also am going to click Overwrite images just in case I have rendered image and I'm going to re-render it again. This will overwrite the image without bothering me and asking me what to do next. So all this is done. All that we are left to do is to click on this render button. We click on it and then we can kick back and relax. Because this is going to take either now, depending on how strong your CPU is and, and how many flames you have added here is going to take at least one hour, maybe more. So I'm going to pause the tutorial here, and I'm going to resume the tutorial when I have finished rendering all of these flames. When this bar will show 100%, that is, when all these veins will have finished rendering and it might be C. And on your computer.
12. Course Finish: Adrian chef teaches J wildfire and Photoshop. Great job. My fellow artist, you've successfully completed this course. I wanted to say that I'm proud with you and I want to congratulate you for sticking with me to the very end. In this course, you've learned how to successfully create beautiful and amazing it looking practice or annual using a wildfire. And also how to use those fractals into a nice and good-looking Photoshop composition. Is this the end of the journey? Now, not at all. The learning, experimenting never. You always have to keep learning new things and experiment on your own. Speaking of which, I have a little tiny cohort just for you. I want you to download the photo with a man, with a guy go for girl with yourself. Doesn't matter, just have to be a parson and apply the same techniques used in the final lesson to use the practice you created in an artistic and beautiful way. My fellow artist is being anonymous teaching you. I really hope you've enjoyed this course and I can't wait to see you again in some of my other courses, which are also quite cool.
 Adrian Scheff