Transcripts
1. Intro: I love the holidays, from baking our family's
favorite Christmas cookies, decorating the tree while watching our favorite
Christmas movie. Taking a walk outside
in the neighborhood and looking at all the pretty
lights on the houses. I personally love wrapping
the Christmas presents. I know a lot of people
don't like wrapping gifts, but that's actually
something I like to do. Hi, my name's Isabelle. I'm a graphic designer
and illustrator, and in this class, I'll show you my way to create some original gift
tags that you can use to decorate your
presents this year. We'll be combining analog
and digital techniques to create our gift tags. First we will be using Procreate to design our gift tags, and then we'll print them, cut them out, and decorate them. I'll be using stuff I find in my craft room like pretty twine, glitter glue, a metallic
pen, some washi tape. You can use whatever
you have lying around. Admit it, you probably
have a stash of materials lying around,
just like I do. I'll be showing you
some gift tags to make for Christmas because it's
the holiday time right now. But you can definitely
use the same techniques and create gift tags
for thank you gifts, birthday presents,
whatever the occasion. I hope you'll join me
in this fun class, and I'll see you in
the next lesson, where I'll explain to you the materials and supplies
that you'll be needing.
2. Supplies & Resources: In this lesson, I'll be showing you the
materials that you'll need to create these gift tags. What you'll need for
this class is an iPad, an Apple pencil or a
compatible stylus, the Procreate app or another
drawing app of your choice, a printer, some card
stock, scissors, and some decorating items like glitter, twine, washi tape, glitter tape, foil, puffy paint, anything that you can find
that you might want to use. I've also created some
resources for you to download. I've created for you a prompt
list to help you jumpstart your ideas for your
gift tag designs. I'm also sharing my
Procreate color palette that I use for my own gift tags. I've created two
procreate brush stamps of tag shapes that you
can use for your project. You can find the
link to download these resources in the
class description. In the next lesson, we'll go and search
of inspiration.
3. Finding Inspiration: [MUSIC] Since it's the
holiday season right now, inspiration is all around us. All you need to do is go
to the shopping center, take a walk in your
neighborhood at night, go to an outdoor Christmas
market. Those are awesome. If there's no inspiration
to be found outside, you can always set
up your best friend, Google, and search
Christmas doodles, holiday doodles,
or winter doodles. You can also turn to photography websites like
iStockPhoto or Unsplash, and search for holiday
photos or Christmas photos. After going in search of
all that inspiration, now you can sit down at your
desk with a pen and paper and start jotting down all the ideas that
pop into your mind. One thing to be
careful when we're doing all these searches
online is to really just get inspired by
what we see and not actually copy what the
other artists have done. Just get inspired by either the way they use linework or the way
they do their shading, or the shapes that they create, or the feel, the mood that they have
in their illustrations. You can get inspired by a lot
of little different things and then just bring them all
together in your own design. In the next lesson, we'll be sketching out our tags. [MUSIC]
4. Sketching Out Your Design: [MUSIC] Now that we have
plenty of ideas to work with, let's start sketching
out our designs. Let's start by
creating our canvas. Tap the plus in the
upper right-hand corner, and then the little plus inside the black box to create
your custom-size canvas. I'm going to change the
unit to inches because I'm going to be printing my tags on a letter-size cardstock, which is eight and a
half by 11 inches. I'm going to leave the
DPI to 300 because I want a high-quality print
and I'm going to leave the color profile to RGB. I want to create a grid
in order to be able to divide my paper into
six equal parts. In order to do that, I'm going to click on
the little wrench icon in the top left-hand corner. Tap "Canvas" and then I'm going to turn on
the drawing guides, then select "Edit
Drawing Guide". Change your unit of measure to inches and in the grid size box, tap on the number and
change it to 0.9. That's obviously if you're using the same size canvas as I am. This will roughly
divide your paper into 12 squares across. Count six squares from the top and draw a
line at the center. Next divide it into three by counting four
squares from the left, making a line down, count another four squares
and draw another line. Your canvas should now be
divided into six equal parts. Open up your Layers
panel and add a layer above your grid layer by
tapping the plus sign. Rename your bottom layer by tapping on it and
select "Rename". I'm going to name it grid. I'm also going to name my
new layer tag sketch 1. You can install the
stamp brushes from the downloaded resources
by simply tapping on it. Choose one of the
brushes and tap on your canvas to
stamp the tag shape. Repeat the same thing with the other tag for a
total of six tags. I did three of each, but the number is up to you. If you need to undo something, all you need to do is tap
once with two fingers on your screen or use the little back arrow that's on the slider in the
left-hand side. One of the new functions, since the 5.2 update, is found in the Brush Library. If you scroll all the
way up to the top, you now have a folder
called Recent, and this is where you'll find the most recent brushes
that you've used. Now let's add a layer above our tag shape and start sketching out some
of our designs. You can refer back to the
prompt list that you wrote down or to the one that I
supplied with the resources. When sketching out
your illustrations, keep in mind to
leave a space either on the side of the
tag or at the bottom, so that you can write
a person's name. [MUSIC] I need to resize my tree because I didn't leave enough
room for a name. If you need to resize something, use the selection tool that's the little S shape up in
the top left-hand corner. Make sure that it's on freehand so that you can draw
around the item. Once you've done that, you can tap on the arrow in
the top left-hand corner, and make sure that your
uniform is selected. Now you can resize it and it will keep the
same proportions. [MUSIC] Here are my sketches
for my first six tags. I'm going to sketch
out six more tags. I'm going to add a
layer above this one and I'm going to name
it tag sketch 2. That way I only have the sketches of my
designs on that layer and I don't have to re-stamp the tag shapes because they were on their own separate layer. Don't forget to turn off the visibility of
tag sketch 1 layer. Through the magic of editing, I've quickly finished my
second set of sketches, but you'll notice that there's one tag that
I didn't sketch anything out and
that's because I want to create a plaid pattern. I'm just going to write
plaid here in the corner, so I don't forget. Now that we're done
sketching out our designs, let's move on to
the next lesson, where we will create our color palette and add
a base color to our tags. [MUSIC]
5. Choosing a Color Palette & Coloring the Base: [MUSIC] Now's the time to
choose your color palette. You can use the one that I
supplied in the resources, or you can decide
to create your own. I suggest matching your tags
to your wrapping paper. But if you're somebody
like me who likes to use neutral colored
wrapping papers like black and whites and with just a little pop of
color or craft paper, then go nuts with your tag. This is where you can make
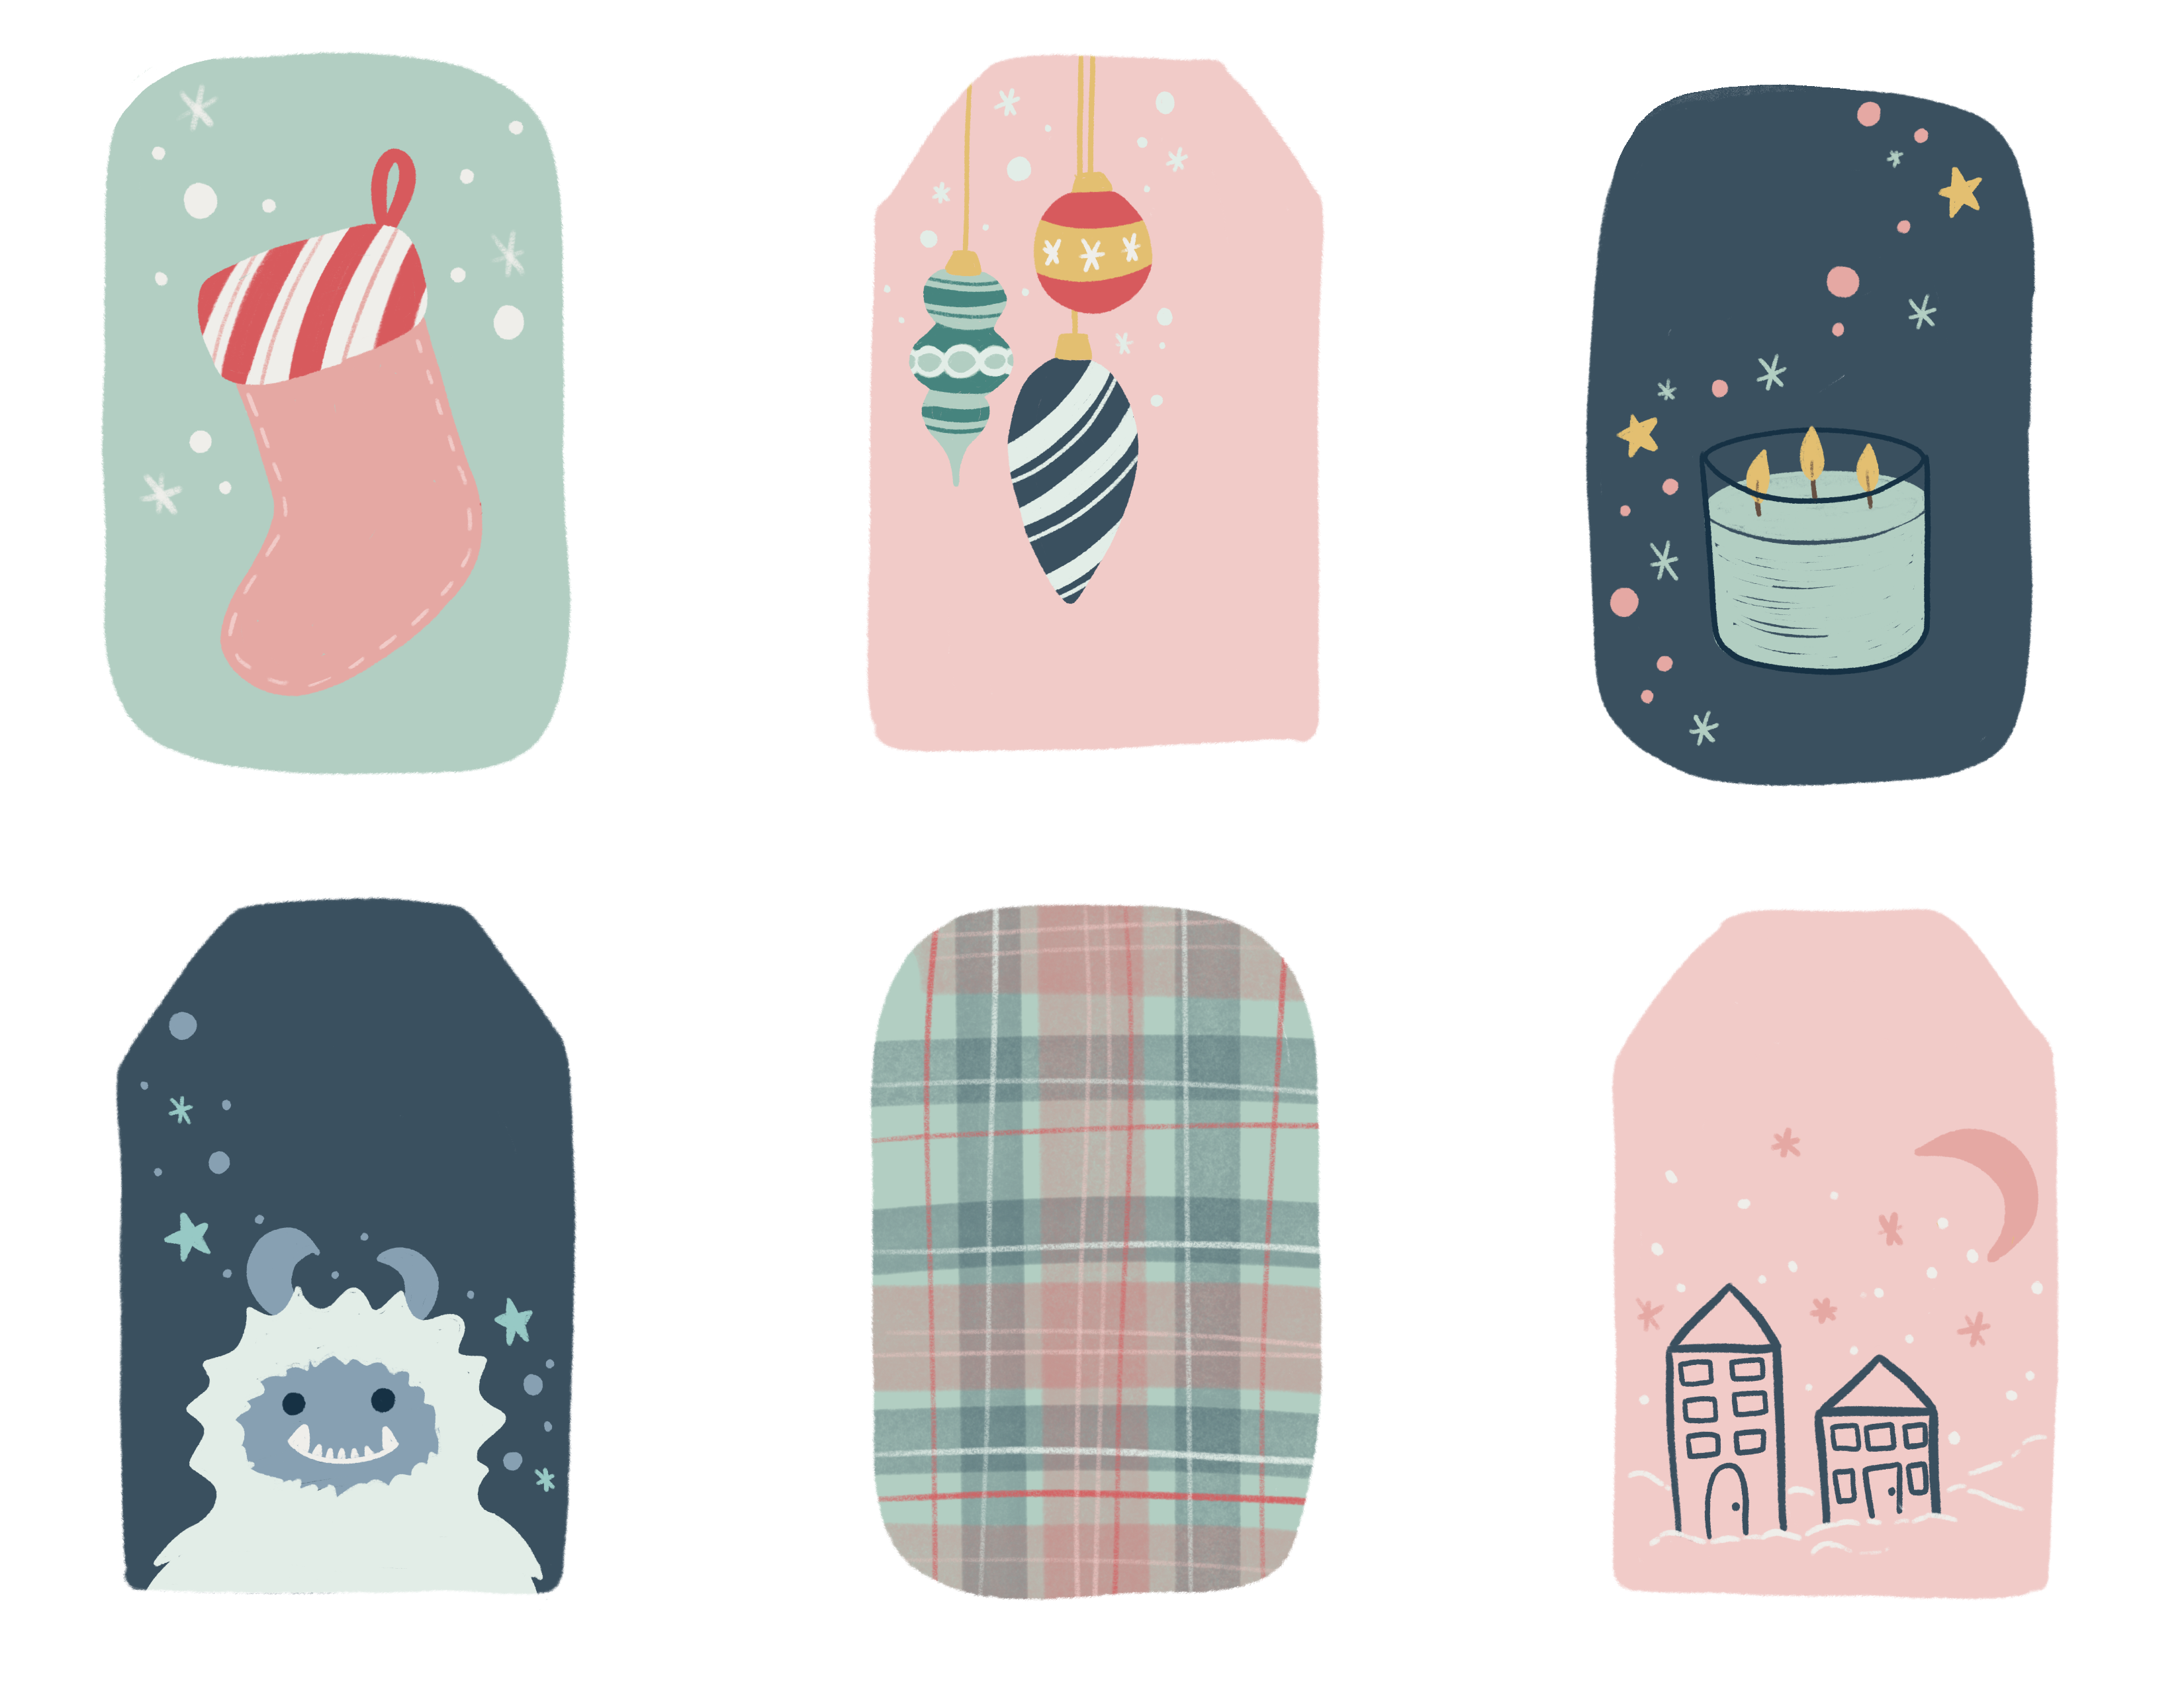
it really, really fun. For these tags, I decided to do a little twist on traditional
colors by using red, greens, and gold, and I added some blues in there. I just played with
different shades. My reds are ranging from pink to a dark medium tone red that is more poppy than Santa red, and my green is more in the
mint green and sage tones. I have a navy blue
and light denim color and a golden yellow. I've even added
some blue-greens. Here's the color palette
I've created for you. You can find it in the
class resource downloads, and I will show you
how to import it. Tap the little plus on the
upper right-hand corner, select New From File, navigate to where you saved
your class resources, and just tap on
the color palette. It will automatically
import it to Procreate. Since the last update, you can now name your colors
by simply tapping on them. Another thing that's
new since the update is whenever you select
the color in a palette, that palette now becomes
your default palette. Just keep that in mind
if you're picking colors from multiple palettes
when you're working. You can also pull out your default palette
for permanent access. If you already have
a color palette that you enjoy and you
have the hex codes, you can create your palette
by entering the hex codes. Simply tap on the empty square
to add it to your palette. If you want to remove
a color swatch from your color palette, you just have to hold down on the color block and a little
trash can will appear. You can also choose your
colors from a photo, and I'll show you very
quickly how to do that. Tap the wrench icon in
the top left-hand corner, select Add, then
select Insert a Photo. In order to create
a new palette, open up your palettes by
tapping on the color circle, tap the Plus, and then
create new palette. You would do the same
process if you wanted to create a palette from hex
codes that you already have. Now for the photo. With your finger on the screen, just hold down, you're going to see a
circle that has two colors. The bottom color is the color that's in your color
picker right now. In the top half of the circle is the color that
you're now picking. Move your finger around and select the color that you want. Once you've done that, just tap on one of the empty
squares in your palette. Keep doing that until you have a color palette
that you're happy with. [MUSIC] Don't forget to
name your palette. If you tap on the three dots on the top of your
color palette, you have a few choices. You can either
share your palette. That's how I shared my
color palette with you. You can duplicate
your color palette, or you can delete
your color palette. We're going to start by adding color to the base of our tags. First, we need to do something
on our sketch layer. Select your layer
that has your sketch. Tap on the little n, that's going to open
up your blend modes and opacity options. Set the blend mode to multiply and bring down your
opacity to about 50 percent. Select your grid layer
and tap the plus. This will add a
layer just above it, which is below our sketch. We want to keep the sketch
layer always at the top. I decided to use three
colors for my base, so I'm going to select
my first color. I'll be using mint green. Another thing that is new
to the brush folder since the last update is that you
can now save a brush size. That is a total game
changer, my friends. It's so practical. Play with your
slider until you get the brush size that
you want to work with, and then up in the corner
you'll see a little plus. Just tap on it, and that will add
a bar that will stay permanently in your slider. Your brush size
is now memorized. When you want to go back
to that brush size, all you need to do is
tap on the line and it will automatically
give you that size. Go ahead and choose
your favorite brush and let's color the base of our tags [MUSIC]. Keep in mind that
we'll be cutting out these tags with
a pair of scissors. So any texture that
you would have on the outside edges is
going to disappear. [MUSIC] I'm done coloring my first six tag bases, and I'm going to keep these same colors for
my next six tags. What I'm going to do
is I'm just going to duplicate this layer. In order to do that, select the layer with
your tag-based colors and swipe it to the
left, select Duplicate. I'm going to move
the duplicated layer just below Sketch 2. Now that we've added the
base color to our tags, let's move on to
coloring our designs. [MUSIC]
6. Coloring Your Design Using Layers: [MUSIC] In this lesson, I'm going to show
you how to color your designs using layers. Working with layers is a way to keep your designs modifiable. It's also called working
in a non-destructive way. If you're interested
in learning more about working in a
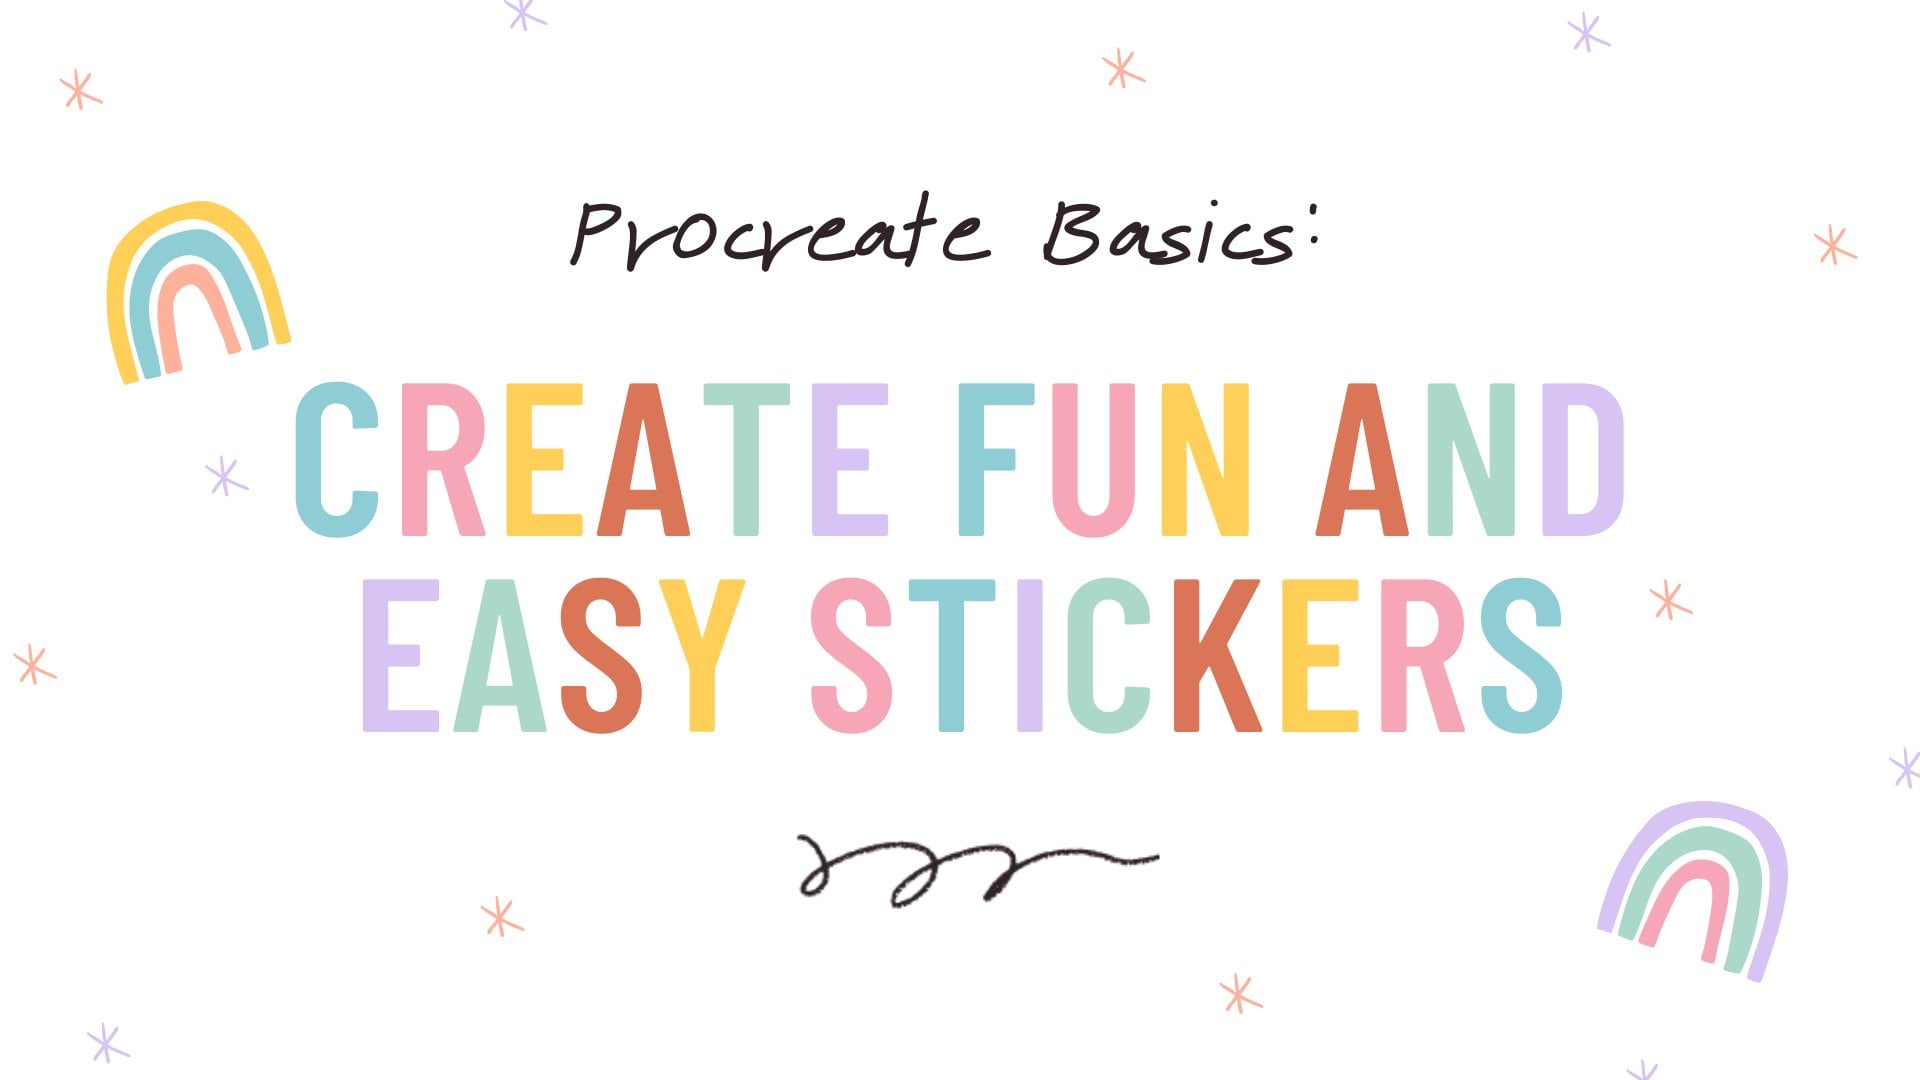
non-destructive way, I go in depth in my class called Procreate Basics: Creating
Fun and Easy Stickers. Now that we have the
base color for our tags, let's move on to actually
coloring our illustration. We'll be using multiple
layers in this project. In order to stay organized, we should probably
rename our layer. Since we'll be using layers
to color our illustration, this will actually give
us more leeway if we want to change things
without having to redraw or recolor everything. We don't want to draw directly
on our base color layer, so we'll be adding a
layer just above it. I'm going to start by
coloring my mistletoe. I'm going to select the
dark blue-green color because the base of my
tag has been done with the light blue-green color
and if I use the sage green, it has some brown undertones and it just looks a little off, so I'm going to keep
it in the blue family. I need to bring my
brush size down to about 15 percent and I'm
going to save that size because I know I'm
going to be using it multiple times across
my illustrations. [MUSIC] If you have anything
drawn at the top of your tag and you decide to punch a hole
to attach a ribbon, obviously there will now be a hole through
your illustration. So you might want to
keep that in mind when you're deciding
what to draw. Now that I've drawn all
the mistletoe leaves, I want to add some of the
little mistletoe berries. I want to keep the option open if I ever want to
change the color and I don't want to have to erase some of the
leaves to do that, so I'm going to draw the
berries on a separate layer. Open up your layers panel, tap the plus, and
add a layer above. Let's move on to
our Christmas tree. I'm going to go back
to the first layer where I drew the
mistletoe leaves. I'm going to draw the
Christmas tree on this layer. You can basically draw
an element from each tag on that first layer as long as they're not
touching each other. For my tree, I decided to go with a non-conventional color. I'm choosing to use the denim, so my tree is going
to be a dark blue. [MUSIC] Now that my tree is colored in, I want to add some
details on my tree. So I'm going to select
my white color. I'm going to create a third brush size for all the small details
in my illustrations. I'm going to drop the size
down to about five percent, and I'm going to save that size. [MUSIC] I'm going to select my
base tag color layer and tap on the plus to
add a layer above it, and at the same time that places this new layer below
the tree color layer. Grab the brown and draw a
tree trunk behind that tree. I'm now going to add
the little stars and dots and little snowflakes
on a new layer, and I'm going to put this
layer above everything else. As long as none of these
little elements are touching, I can put them all
on the same layer. Here's a quick tip for you. If you need to erase and you're using a textured brush to color, just do a long hold
on your eraser icon and it will automatically switch to the brush
that you're using. That way you can now erase with the same texture that you
were coloring your with. [MUSIC] Now on to the Christmas lights. I'm going to go back to
my main color layer, so that's the layer with the Christmas tree and
the mistletoe leaves, and I'm going to
draw the light wire and light sockets of
the Christmas lights. I'm going to select
by midnight blue, which looks almost black. Next on a layer above, so the one with the
mistletoe berries. I'm going to draw my colored
light bulbs using red, yellow, mid blue,
and light pink. [MUSIC] You could definitely
leave it like this, but I'm going to
add a glow behind the lights to make it look as if they're actually
turned on and glowing. Tap the plus to add a layer. We want this layer to be
below the light bulbs, so hold the layer and
drag it underneath. I'm going to use a brush
that's native to Procreate. It's in the airbrush section
all the way at the bottom. I'm going to select the
soft small airbrush and set it to a size
of about 30 percent. I'm going to use
the same color as the light and with the airbrush, I'm just going to create a
dot underneath the light. Open up the layers
panel and tap the N, change the blend mode to
give it that glowing effect. Play around with
all the blend modes and find the one that you like. I'm going to use the screen mode and I'm going to drop
the opacity down. I'm going to keep
coloring my designs and we'll come back once
all of these are done. [MUSIC] I'm going to show you
a neat little trick. I want to turn this candy
stick into a candy cane, so I'm going to take
two fingers and swipe right on the layer
that has the candy cane. This will turn on the
Alpha Lock function. You could also tap on the layer and select
it from the list. Just keep in mind that when
you're using the Alpha Lock, this is actually a
destructive way to work. For example, if you need
to erase the white lines, it would actually erase
the red underneath. Sometimes it's a
great little shortcut if it's for a symbol
modification. Now that all my elements
are finished and colored, I want to group everything
from my first set of tags. I'm going to select my tag
sketches and then quickly swipe right on all the layers that I want to group together. Once those are selected, just tap the group up in the
upper right-hand corner. I didn't add the base
color to my group because I want to resize
my hot cocoa cup, and I don't want it to
affect the base color. With your group selected, use your selection tool to draw around your hot cocoa cup. Tap the little
arrow to resize it. I've colored in my
first six designs, I'm going to go ahead and
color six more designs. In the next lesson, I'm going to show
you how to create a plaid pattern that you can
use on one of your tags. [MUSIC]
7. Create Plaid Pattern: [MUSIC] In this lesson, I'm going to show you
two ways to create a plaid pattern on your tags. The first way, I'll be using
a brush that I purchased and it's a marker brush so it has some texture and
some transparency. The second way I'll
be showing you is by using things that are
native to Procreate, like the rectangular
selection tool and some of the texture brushes that come with the
Procreate app. Now that all illustrations
have been colored, I still have one tag
that's plain and that's the tag where I
said I was going to create a plaid pattern. The first way I'm going
to show you is by using a brush that has texture
and transparency. I'll be using a marker
brush that I purchased and it has a very straight
square edges. So it's actually perfect to
create lines for my plaid. Choose your first color. I'm going to use red. Create a layer just above
the tag-based color. Tap on this layer and
select Clipping Mask. Now everything that I draw
on this new layer will be clipped to the shapes
that are on the layer below. I'm going to start by
creating a very wide line. You'll notice that when you draw a line and you hold
your pen down, it will actually snap
to a straight line. Because this brush has a
nice transparency to it, when I create my
horizontal lines, you can see the place that
the two lines overlap gets darker and it already starts giving you
that plaid feeling. Select the second color. I'm going to go with the
denim color and I'm going to reduce my brush size to
create another set of lines. Even though this brush has
some translucency to it, I did set my brush opacity to 50 percent to get a really
nice overlapping colors. Next, I'm going to do
some really thin lines. I'm going to go back to
the brush I was using to color which has a little
bit of texture to it, but because this brush doesn't already have some
transparency to it, I do have to bring down the
opacity a little bit more. So that would probably
be around 35-40 percent. I'm going to do the
same thing with the red and draw some very fine lines. So there you have it.
That's the first way to create a plaid pattern. Now the second way I'm
going to show you is by using elements that
are native to Procreate. Start by turning off the visibility of
the layers from the first way that I showed you. Add a layer above the tag base, tap on it, and select
Clipping Mask. We're going to use
a selection tool. That is the little s in the
upper left-hand corner. Instead of using the freehand
like we did earlier, we're going to use the
rectangular selection tool. Make sure that the color
fill is also selected. Select your first color
and draw your rectangles. Now open your layer panel
and select your layer. We need to set that
layer to Alpha Lock. Take two fingers
and swipe right on the layer or tap on it
and select Alpha Lock. Drop the layer transparency
to about 50 percent. Next, we're going to go add
some texture to these lines. So go open your brush library. Scroll all the way down to the bottom to the native
Procreate brushes. I selected Hard Rain out
of the elements folder. Make sure that you are on the eraser function
and not the brush and that your eraser is set to the texture brush
that you just chose. Drop the eraser opacity
down to about 60 percent. Next, tap lightly on your
red lines to create texture. [MUSIC] Duplicate that layer and rotate it 90 degrees. I want to modify
it a little bit, so I'm going to tap on
the selection tool, that's the arrow at
the top left corner, and I'm going to make sure
that it is in free form. I'm just going to stretch
it up and down so that it fits on the top and
the bottom of the tag. I'm also going to squeeze
it in a little bit so that the lines are more in the center. Let's keep going. We're going to add a new layer. Automatically, when
you add a layer from a layer that is
in Clipping Mask mode, it will automatically create that new layer as
a clipping mask. Select your next color
and make sure that that layer is at 50
percent opacity. Choose your selection tool
and make sure that it's on rectangle in color fill and
draw your next rectangles. [MUSIC] Open your layers panel and set your layer
to Alpha lock. Make sure that your eraser has your texture brush set to
it and add some texture. Next, duplicate that layer
and rotate it 90 degrees. [MUSIC] Next, I'm going to go grab
my sketch brush and I'm going to select
a lighter color. I'm going to start with a
really light blue color and I'm going to draw some fine
lines on my blue layers. Don't forget to switch layer
when you switch directions. That way you can keep
the color variations when the lines overlap. [MUSIC] It looks like I'm having a
little trouble with my red. It's not really showing up, and that's because my
layer opacity is too low for that color
to actually show up. I'm going to add a layer above my big red lines and draw my fine line details
on that layer. Now you can see that
the colors are so much richer and the
lines really pop. I'm going do the same
thing with the white. As you can see, I did my white line on the same
layer as I did my red lines. Because it was
sandwiched between the big red lines and
the big blue lines, you can see that
there is a change in color tone when it goes
underneath the blue lines. I really like that look, so I'm going to create a
few white lines underneath everything by adding a layer
at the bottom of everything. Maybe I went overboard
a little with the lines, but
there you have it. A second way to create
a plaid pattern using native elements
to Procreate. I like everything that's been
done so far for this plaid. I'm going to select
all the layers of this second method
and I'm going to squeeze them together
to merge them. Just keep in mind, though, that once you merge
your layers together, you can no longer change
individual elements. You can leave it as is or
you can play around with the opacity of the layer and
the blend modes if you want. If we select the Hard
Light blend mode, it's actually very similar
to the finished look that we had with the first
plaid pattern that we did using the marker brushes. In the next lesson,
I'll show you how to add a fun little
border to one of your tags and I'll
show you how you can add the names to your tags
before printing them. [MUSIC]
8. Creating a Border & Adding Names: In this lesson, I will show you how to
use clipping masks to create a candy cane
border around your tag. I will also show you how
to use the text tool in Procreate to add the
names to your tags. If you don't like any of the fonts that come
with Procreate, I'll also show you how you can import one of your
favorite fonts. We're going to go back to
our first set of tags, and what I want to do
here is I want to add a candy cane border around the edges of the tag
with the hot cocoa. I'm going to add a layer
above the base color layer, I'm going to select
my red color, and all I'm going to do is color the edges of
the tag in red. It doesn't have to be
perfect because we're actually going to clip
this layer at the end. Next, we're going to
add a layer above the red border that we just did, and we are going to set this
layer to a clipping mask. With our white color, we're going to draw in
our candy canes stripes. Tap on the layer that contains the white lines and
select Merge Down, this will flatten it
onto the red layer. You can now set your candy
cane layer to a clipping mask. There you have it.
You have a nice, clean candy cane
border on your tag. Next, we're going to go add
some names to our tags. So open up your group and add a layer at the top of the group. You can rename it to Names. With my darkest blue
color selected, I'm going to start writing
a few names to the tags. Now, I'm not perfect when it comes to writing
names by hand, so it's a little off-center. To fix that, I'm going to use the freehand selection tool, select my name, tap
on the little arrow, and then move the name to
the center of the tag. If you have your snapping
guides turned on, you should have a line that shows up when you
get to the center. I'm done adding the names
on the first group of tags, so let's move on
to the next group. I'm going to turn off
the visibility from the first group and turn
on the second group. Now, if you don't like
your handwriting, you can use fonts that
are in Procreate. In order to do that, we're going to tap on
the wrench icon in the top left-hand
corner and select, Add, then Add Text. Type in the person's name, double tap on the
name to select it, and tap on the two letters in the top right-hand
corner of the keyboard. This will open up
the fonts panel. I'm going to select the font
that's already installed, and I'm going to use Pacifico. Next, I'm going to
show you how you can import a font that
you've purchased. Same as we did before, we're going to tap
on the wrench icon, select, Add, then Add Text. Type in a name that
you want and tap on the two letters in the upper right-hand corner
of the keyboard. This will open up
the font panel. Now you can see that next
to the Done button there is a Cancel and an
Import Font function. Tap on "Import Font", navigate to where
your font is saved on your iPad and select
the font you want. It will import automatically. Hit "Done". All that's left is making sure that my name is
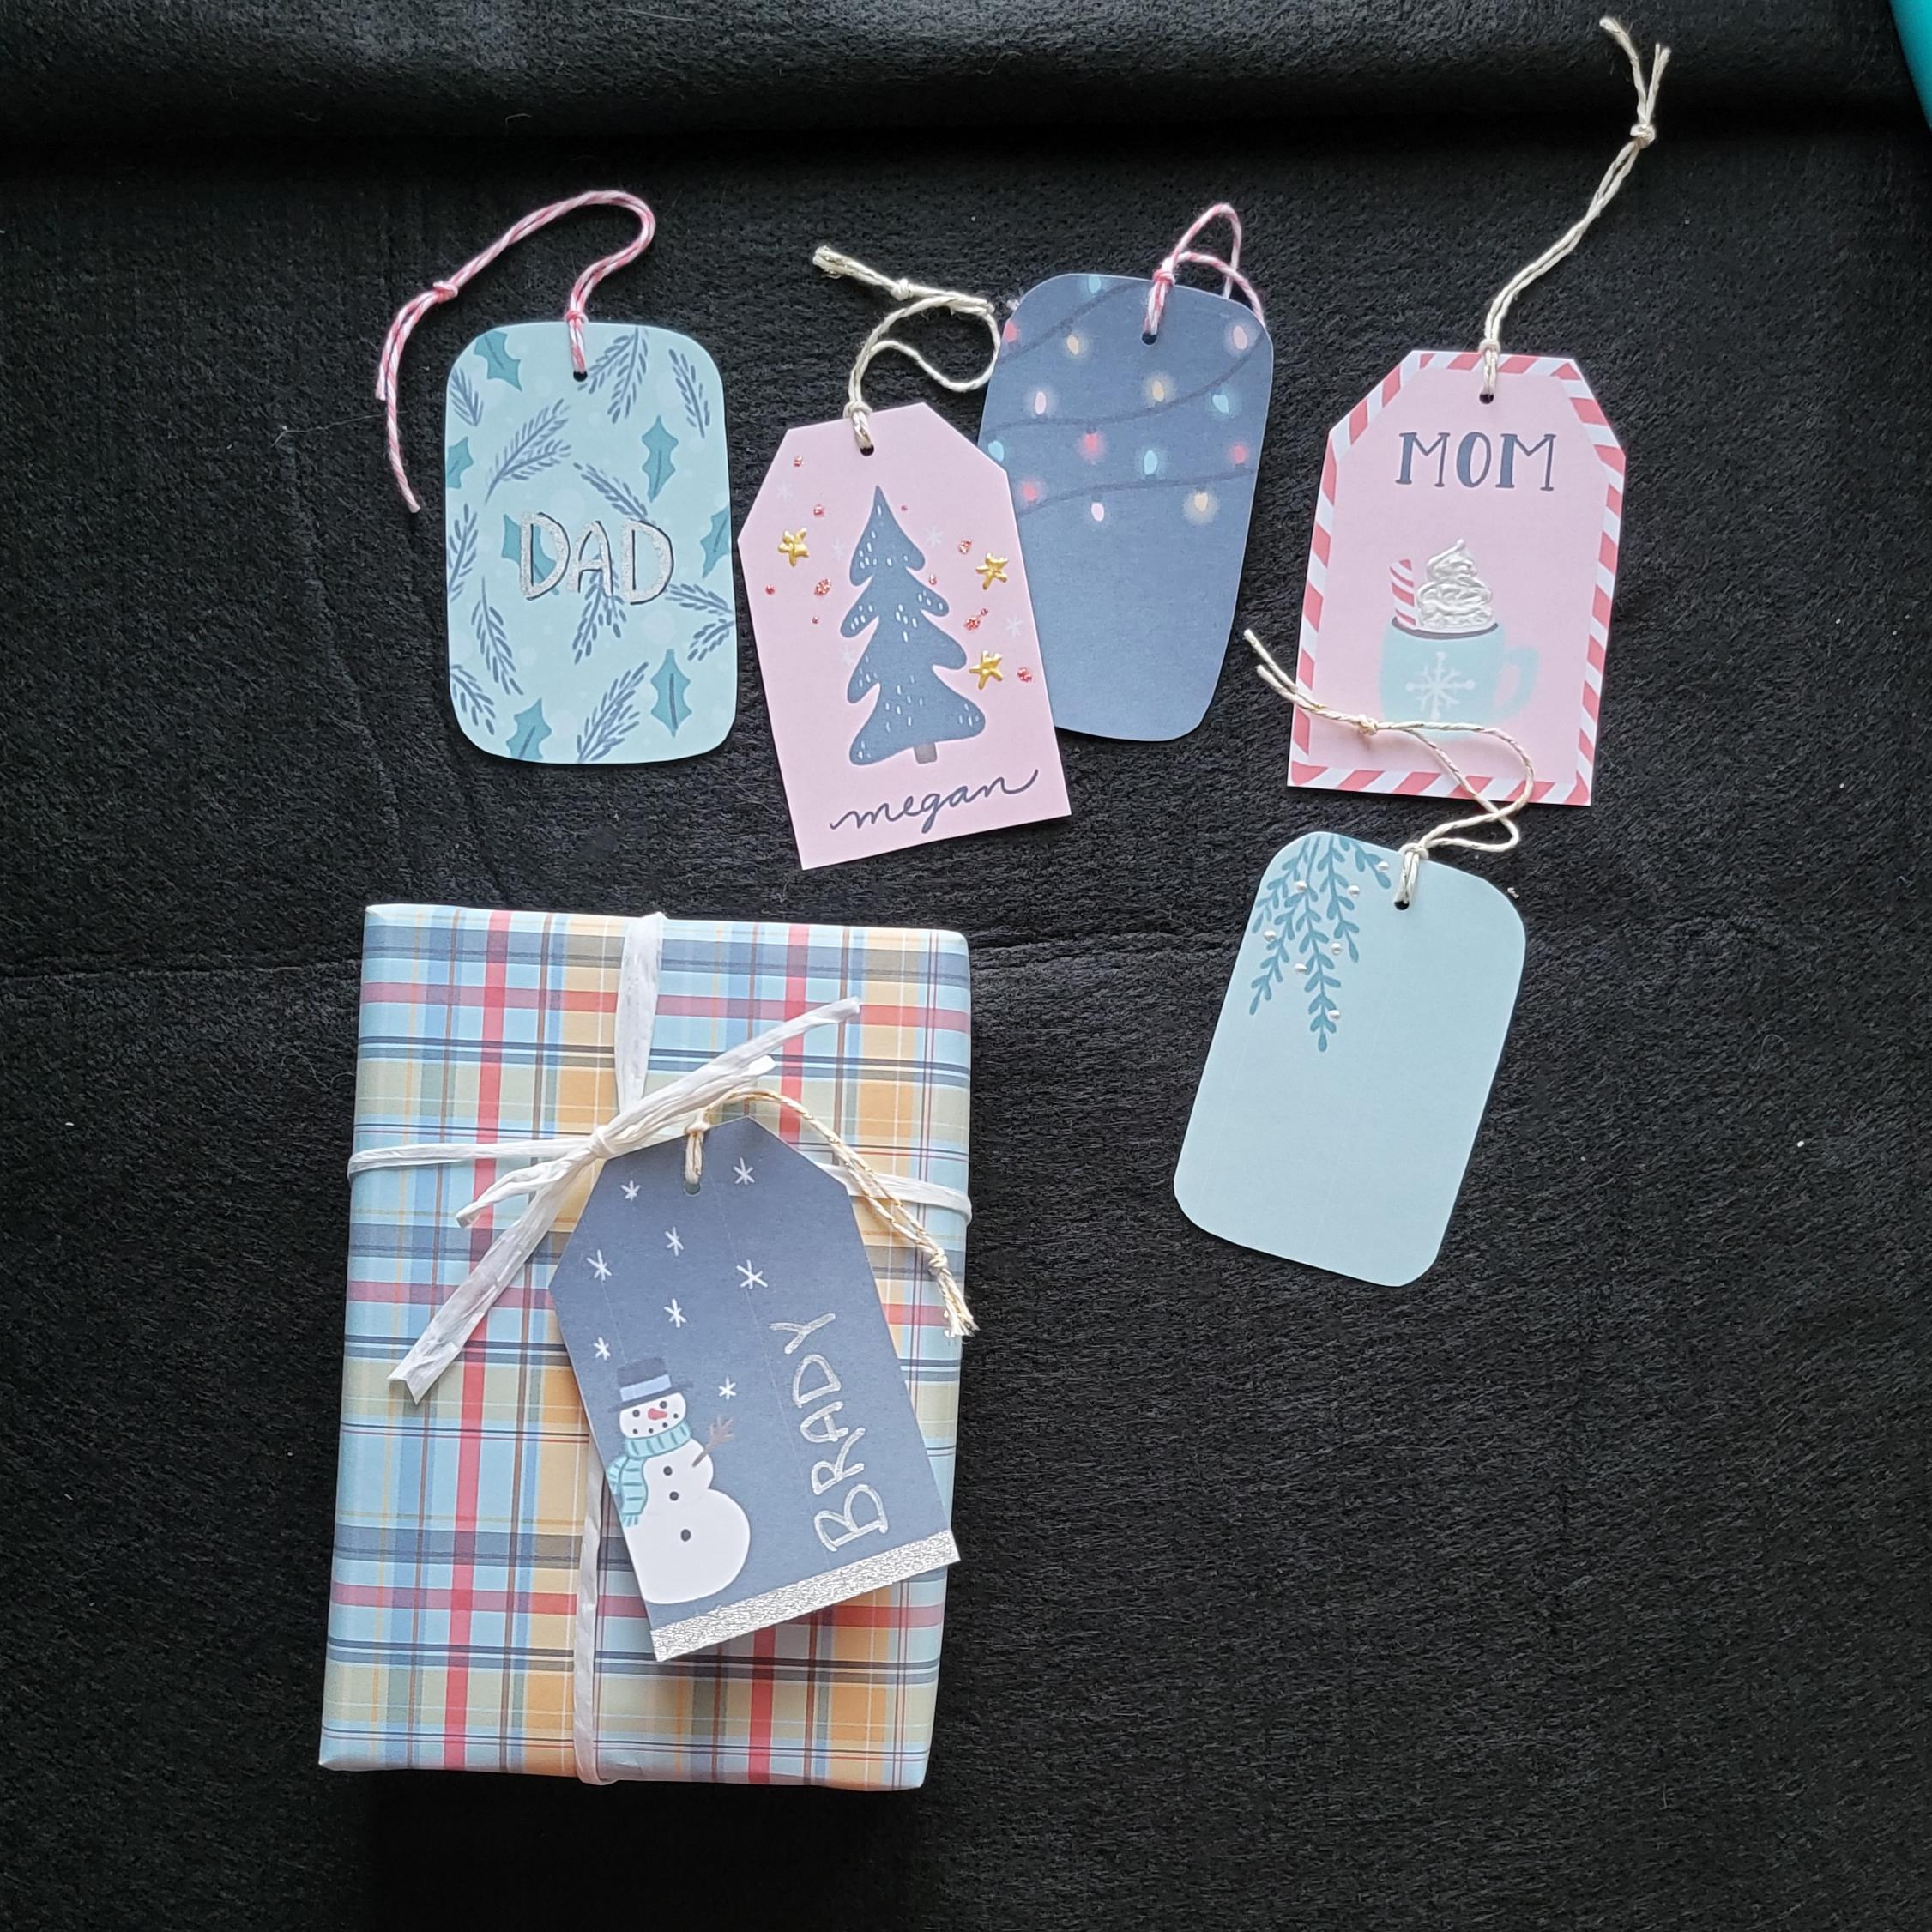
centered on my tag. Up next, we're going to print, cut, and decorate our tags.
9. Printing, Cutting & Decorating: [MUSIC] So now that we're finished with
the Procreate part of creating our tags, it's time to print them out, cut them, and decorate them. In this class I'm
showing you how to create your tags on card stock but you definitely could
create your tags as stickers. If you want to learn
more about how to make your own stickers at home you should definitely check out my other class called
Procreate basic, create fun and easy stickers. Now that we're finished
with the Procreate part of this project, it's time to export our designs so that
we can print them. Tap the range icon in the
top left-hand corner. Select "Share", and then select the best format that
works for your printer. I'm going to save mine as PDFs. I'm going to select
the best quality. If you have a Mac
computer you can airdrop your project but since
I do not have a Mac, I use Dropbox to
transfer my files. Do this for both sets of tags. I'm going to go print my tags and then I'll be right back. Let's cut out our tags. I find it easier to work
on a smaller piece of card stock to cut out
the individual tags. This is another reason why
the grid is practical. I'm going to cut
out my sheet into six parts and then I'm going to cut out my
individual tags. Just be careful when you're
cutting out your tags to not leave a
little white edge. In order to do that, you either have to cut right on the line or a little
inside the color. To create smooth cut lines, you want to cut
with long strokes. If you cut with short
strokes there's more chance that's going
to give you a jagged edge. If you wish to attach your tag with a piece of
twine or a nice ribbon, you can punch a hole at
the top of your tag. Here I have some gold
and some pink twine. I'm going to cut out a piece of twine and fold it in half, make a little knot
at the bottom and pass it through my
tag to attach it. [MUSIC] Let's move on to decorating
some of our tags. A few things that we can use is some sparkle blue to add
interest to our tags. I'm going to be using pink and making the little dots
on my Christmas tree tag. [MUSIC] I'm also going to use a white puffy paint for the whipped cream
on my hot cocoa. [MUSIC] If you didn't add all the names on
your tags on Procreate, you can use glitter
pens or metallic pens to write out the
names on your tags. I have this liquid
chrome metallic pen from Molotow that is going
to be fantastic. [MUSIC] On this tag, I'm going to add some
black outlines to the name just to make the lettering pop
a little bit more. [MUSIC] If you have a straight edge tag, you can also use thin washy tape to create
a border around your tag. For example, here
on my snowman tag, I'm going to use glitter
washy tape at the bottom to create an effect of snow. [MUSIC] Congrats, your tags are done. So what's next? [MUSIC]
10. Thank You: Well, you're probably
wondering what's next? You got to finish that shopping, wrap up your presents
so that you can use your wonderful original
gift tags that you created. I would love to see your
process for creating your own gift tags
from your prompt list, to the sketches, to
the finish tags. You can do this by going
to the project section of this class and creating
your own project. While you're there,
don't forget to check out the other
students' projects, and maybe leave a few
encouraging comments. If you share your
project on social media, I would love it if you
tag me @isabellewood.art, so that I can also share
your wonderful project. If you enjoy this class, I would really appreciate
it if you took a few minutes to
leave a quick review, and if you want
to be notified of when I publish my next class, you can hit the
follow button under my photo in my teacher profile. If you want to keep up with
me on a more regular basis, consider following my
Instagram account. It's @isabellewood.art, and if you just want to get the highlights
of what I'm up to, you can go to my website
isabellewood.com or isabellewood.ca and subscribe
to my monthly newsletter. Again, thank you so
much for joining me in this class
and I hope you had as much fun as I did
creating your own one of a kind gift tags for
this holiday season. I'll see you next time.
 Isabelle Gagnon Wood, Artist | Designer | Teacher