Transcripts
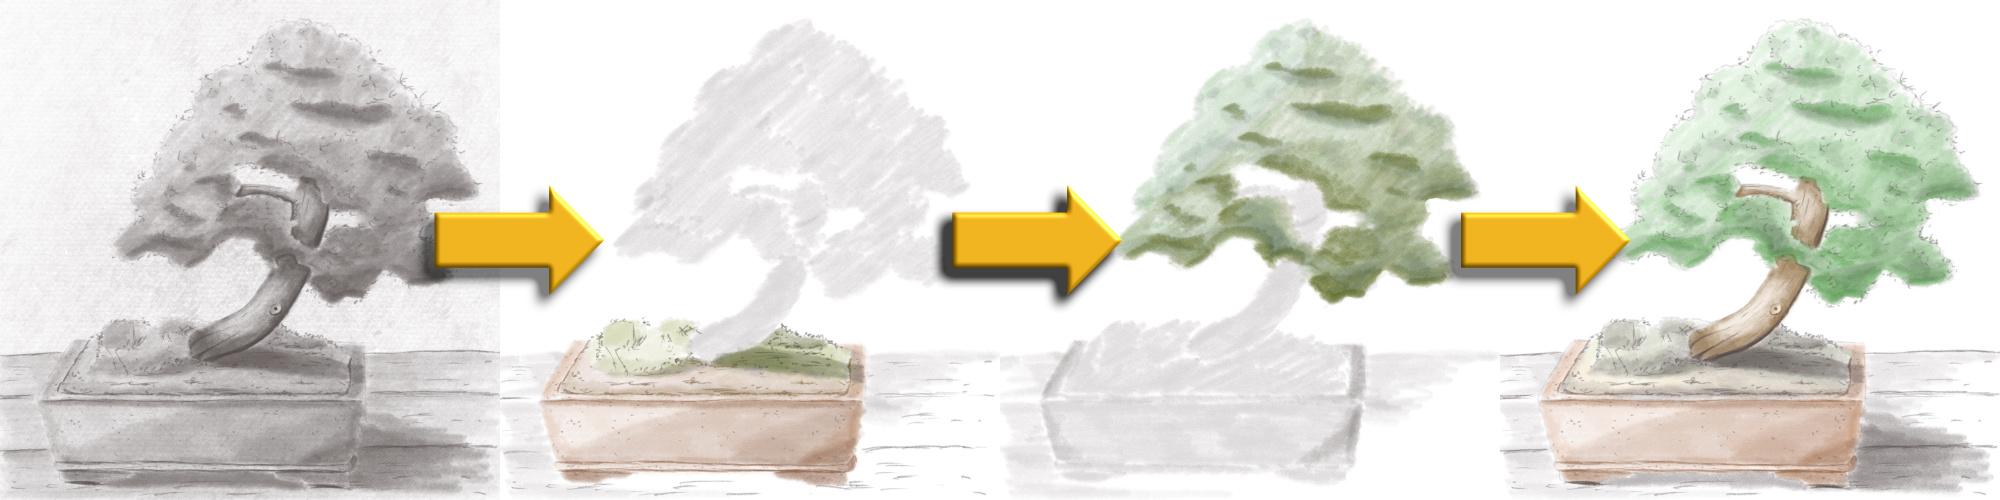
1. Introduction: Coloring the uncolored. There's an interesting title
for an art class, isn't it? Well, what the title says is what we're
actually going to do. We're going to call it
something that is not colored. And we're gonna do
that in Procreate. In a previous bonsai
tree classes, I've shown you how
to draw trees. For this one. If you haven't followed
those classes, you can still come
along with this one. You can use project that
I've provided and just go along and learn how
to add color to something that doesn't
have any color it up. But you could also use this
method to re-color something. If you don't like your colors, you don't have to
start all over again. You can recall something. For that. I'm going to show you a number of methods
in Procreate. There's various methods
to accomplish this. Some are really quick,
some take some more time. And you could even nicely buying these methods so that you can add or change color
to an artwork. You have to make it exactly
like you want it to be. I'm going to take you
through all those methods. There are going to have fun to re-color something that
is totally colorless. Forest said, something
that has colored. It could be coloring,
which you like it, or create something really alternative of the same
artwork you already had. Alright, well, let's dive
into that in the next lesson.
2. The Alpha Lock Method: I said in the intro, we're going to
re-color our images. We're going to
recall something we made in the previous class. And that was a black and white. I'm not black and white
and gray tone bonsai tree. Now, if you have not
followed that class, that is not a problem because
with this class you will find that projects
I made attached. So you can just use that. I'm fine with that.
Just use that. You can download that and get it in Procreate and
then work along with it if you have done
it the previous class and of course pick
your own bonsai tree. We're going to just
work with that. So it'll work with
my project or yours, and we're going to
add color to it. Now, adding color you can
do in a number of ways. There's a few of these ones and there's a few
less obvious ones. And I'm just going
to take you through the process of re-coloring your artworks that I've cut, Procreate ready and I need a
tree from last time that is this gray tones
tree and nice tree, but I want this
tree to have color. Now I can do that in a few ways, a set, and we're going to
just explore it together. Now most likely, I'm not going to re-color the whole tree, although I'm not sure yet, but I'm just going
to show you how to process a little bit works. Now, there's a few
ways which you can do. If you have this
artwork from last time, what is best to do is go
back to your calorie, slide, this one to the left
and say Duplicate, because we're going to mess
around with this really much. So you might destroy the whole world and you may
want to keep the original. Good. Now, the first office ways, what you can do is go
to a certain layer. I'm going to pick
these. I want to work with the leaves
now a little bit. So I'm picking that layer, that is layer six
and layer eight, I'm starting with layer six. What you could do with
that is you could recolor it very easily. So go to that layer, tap on it, and then you have an
option called Alpha Lock. If you select the alpha lock, that means you can
repaint your subjects, but without touching what
you haven't painted. So it will only paint. What do you have painted? So in this case, I only painted that tree. So the next thing you need, of course, is a brush. Let's see. We're gonna go
to the standard brushes. And what am I going? I'm going to pick organic
here, That's nice. I'm going to pick
this cotton brush. I think that is, looks
like a nice brush. Let's work with the
cotton brush in organic and you need
a green column. I've selected a green color, but I'm not sure if I like this. So what I'm gonna
do to make it easy, I'm going to slide this to the middle in the green section. And I'm not sure. Let's start. We're having some
dark and light parts. I'm just picking a color. It doesn't really
matter that much. And next is the brush,
while around 15%. And I'm just going
to paint this again and then I'm going to
add color that way. That's, that's nice. Might want to have a little
bit darker at that site. So I could just move that
slider, slightly darker. Repeat that part under
here just a little bit. And there you go. That is the obvious,
the easy way not to make it complete
what I need to do, do that layer above it. That is a darker part. I want to say to that
one, alpha lock two, I'm going to pick a darker color and I'm going to paint
in that layer two. And by hiding the other layer, you see that color edit,
though it's not much. Let's do a slightly
darker, really dark. In this case, it's better to know who are
bringing my layer back. And to dare I have
color in my tree. Now you notice that this
part doesn't have color yet. That is because that is on a totally different
layer down here. I would need to repaint
that layer two. Now I'm not gonna do
that because this is the easy way and I want to
explore some more methods. I'm going to show you
some different methods. So I said, not
with every method, I'm going to repaint
the whole tree. But what I'm going to
show you is how to separate the parts of
the tree because now the background's painting
to the underpainting is one big tree with the pods
and everything on it. And I want to separate that into certain parts so that I
can actually recolor it. Let's do that. Before I'm gonna do that, I'm going to undo what I did. So I'm going to get
rid of that color. And by tapping two fingers on, I should get rid hopefully
off all my color. I'm gonna go back a little bit. And my justice will
use the button. Love painting. I will
keep on tapping. So going back to the
total beginning, everything restored, the
Alpha Lock is now off again. See, you can see that because this turns
into those checkup, the checkerboard
that transparent in. What I'm gonna do is I'm
going to separate my Underpainting and
for doing that. And my height every layer. Because I'm going to
need this later on anyway so that I only have
the underpainting and left. There we go. There is D on the painting. This is under everything. That is this layer. So I'll need to make sure I'm on Layer three where my tree is. The next thing what
I'm gonna do is I'm going to hit that ribbon. I'm going to make sure
this is on free hand. This I've cut on Add. Now, that's okay. First of all, I'm
going to separate the leaves from the tree. So what I'm going to do, I'm
going to just select that. Now here I need to go a
little bit more accurate. Select that all the ego. Next thing, what
I'm going to say, I'm going to hit the wrench
and I'm going to say cut, and now all of that is gone. And the next thing I'm
going to say two is here, paste and it should be
back again in a new layer. It's called inserted layer,
inserted image here. And that is only that part. Now, there's a mistake
in this of course. So what I need to do next is
I need to cut out this part. And the easiest thing
is just do this again. And there we go and say cut
again and say Paste again. And I'm fine with that. Now what I'm gonna
do with that is since that is part of my trunk, I'm going to move this
one under the leaves. And I'm going to say here, tap on that layer, that
Inserted Image layer, that part of the trunk, but to say merge down and
now it merges with the rest. But the rest, I still
need to separate. I'm going to hide
my leaf for now. I need to separate this part of the trunk into a new image. So I'm going to do
exactly the same again. Select that. I don't
want to say cut. Nice. I don't want to say paste right away again
and the respect. And the last thing I need
to separate the background. Now I need to make sure
I'm on the right layer. I need this layer here. Let's see instead already
separate know that is an extra part
for the background. Okay? So I need this layer where the background is
on and the pot. And I need to separate
the background, the pot from the background. We'll do it in two steps
to go and hit the ribbon. And I'm going to
select this part. There you go on to say Cut, say paste right away,
and that's good. Now we're going to make
sure I'm back on the layer. I need to cut this part two. And I'm going to select
that ribbon again. And what I need to do is I need to separate or
that's not right. It goes further apart. And that should be it. And say cuts and say paste. And now I should have
everything in separate layers. Let's see these two
inserted image. And this one, I'm going
to merge together because that's the background and
I might as well renamed it and say the floor. I'm going to call
that the floor. Enter this. I'm going to call rename
the trunk so that I know later on what is always
these are the leaves. And this is done the path, the plant, the plant pot and
we'll just call it pods. They go. And let's see here, this is still from the
background and that's it. So I separate it all as well, everything into separate layers. And now I can
repaint every layer. So if I wanted to repaint
this with the same method, I could see alpha lock. I'm going to pick my color, I'm going to pick a
nice light color. And I'm just going
to repaints and then it's only repainting my leaves with the pot. What we can do too, we want to probably
separate this part two. Let's do that too. I'm going to alpha on alpha lock this and I'm
going to undo this. There you go. I need to put that is this
one the pot and I need to separate that flow because
I want to give that a different color to
make sure I'm on that. And I'm just basically doing
the same again, separating. Oh, I need to make sure
I'm doing this. Well. Normally I would place my
head really above the iPad. But in this case I
can't do that now. I don't have to go down here. Because that is
separated already, I just have to connect it here. I'm want to say cut. And I'm going to say Paste. And I should have a new
separate layer two, so I can call this D.
I'm renamed, rename. The other one, the floor. Let's call this the soil
is not very soluble, but let's do that
like that. Okay? This one is still on Alpha Lock. Now we do have them
all separated and now I can call on
them all separately. So the trunk, the leaves, the soil, the floor, everything I can now
re-color so that I can make use of that so that we won't
end up with one gray thing. And this is making it
ourselves a little bit easy. One we're going to go repaint. And later on we're going to use, make use of this two, so this will come in handy. I'm going to repaint
just a little bit, but I'm going to
speed up product. And then you just see
what it looks like. What I'm gonna do.
First of all, again, I'm going to make a duplicate of this one because I'm going
to play with this of course, and show you other methods. But I don't want to end
up undoing everything. So what I'm gonna
do, first of all, I'm going to do this
relatively quick. I want to say alpha lock. We're going to paint
this really light. The next layer I'm gonna
do is these leaves. We're going to put
that on alpha lock to make them a little
bit darker than before, but I need to bring
them all back. Otherwise, this is
not going to work. There you go. So this layer, I'm going
to now recolor two, and I'm gonna do that
layer above it with a really dark color that
will not like that. See that goes wrong. That's why we need alpha lock. There you go. Now, see, the tree
already gets color. Now the outline, I'm not
sure what to do with that. We can hide it. I'm
going to the trunk. This is one of the trunk layers, but I want that under
trunk layer, this one. And let's go for an orange color and but really a darker
orange light color. And I'm going to just recall
it that bottom trunk. See that some colon, even if I only do some policy that gives a hint
of nice column. Now I'm gonna go to that
layer where the trunk is on. That's two parts
of it are really dark part and a light part two, I'm going to alpha lock that. I'm gonna give that
slightly different color. And there you go. And I'm gonna do
that part above. But I'm not sure if I need to. I could leave it like this. I could leave that
color like for now. Yes, I'm going to leave
that I'm gonna go back to the pot. Let's do the soil. The soil I want some brown on the here and
some green up there. So I need to work with
some brown knocked. Don't want to have
the same brown. I want to have a lighter brown. This brown. And I got to alpha lock that. I need definitely
a smaller brush to have at least some control. This is gonna be the soil. And the next thing what
I need is a green color. Hello, I'm moving to the green, but I want to have
some olive color so that it's closer to the yellow, but a bit darker than that. And I'm going to color that in. You go. And then I have done that. Now I'm going to do that pot, going to alpha lock that pot to some reddish color
into the red orange. So I'm Tara car. I think I like this. Let's see what we end
up bar that's good. And see really easy. Just repainted really quickly. And the only thing that's
left is the floor. And we're gonna do that now. And you get, I think
you get the idea. So the next thing I will do is determine where's the rest of
the pod. That is this part. I'll follow up
that darker color. Repaying that and see
if I liked that or not. I do. Kind of like that. Might go slightly darker
even on the here. At the bottom, not at the top. And there's my product. And you could play with this. So if the tree too,
I will do this part darker and with the floor to you have some
light and dark parts. You could play with that and
the tree even you could make this part slightly darker to
make it more interesting. But for now, I'm going
to leave it like this. I think you get the idea. Alright, well, that would
be the first method. The obvious, easy may affect
just recolor everything. But there's more methods does
quicker methods than this. But before we go to
quicker methods, we're going to go
to a method which is still re-coloring but less destructive
it is because now we've basically destroyed
the whole tree. We cannot go back to
that tree that we had. And sometimes you just want
to go back to the original. So we have to find
another method. Some of you probably pretty
much will notice method, perhaps for us this will be new. We will be discussing that
in the next lesson. For now. This is the Alpha Lock method. The easiest way to
re-color something, not the quickest way, but definitely easy way with a lot of control
because you control where light and dark girls
and you can give it different colors if
you wanted to make some, some yellows mixing some
really dark greens, maybe some blue tends to
make the leaves really nice. For example, you can play
with that in this method. Alright, good. I would say play with
this a little bit, and then I'll see you
in the next lesson.
3. The Clipping Mask Method: In the previous lesson, we explored the
Alpha Lock method a little bit to
recall something. Now there is a second
way to do this without destroying
your original. You can keep your original
and you can paint over it. You can use a clipping
mask for that. Now, some of you probably are
familiar with that method, but we're going to explore that. And if you're not
familiar with it, well, you will discover
something new. Let's go. I've still got this tree. I'm going back to
my gallery. Now. You won't have ten trees. Although yeah, if you want
to explore every method, you will have nine
attention to entries that would be highly accelerated, but you get a few trees. What I'm gonna do, first
of all, I'm going to actually duplicate
this tree again because I want to
keep an original to work from for my next lesson. So I'm gonna go to this one. I'm going to first of all, my layers back probably. No, no, let's not do that. That's not keep the letters. Start with the bottom layer. Alright, I've got
this all separated. Now for this method, you don't necessarily need
to separate everything. You could actually
paint really accurate, but still this is easier. So what I'm gonna do
next is, Let's see, I'm going to pick the pot because I've still got that color from the last time. I want to pick the
pot. Now instead of going to alpha lock, what I'm gonna do
is I'm going to add a layer above this one. And I'm going to tap
on the layer and I'm going to say clipping mask. Now clipping mask does the
same as an alpha lock, but not on that layer. If I change my mind later on, I still have my original
layer and I could just recall that part or if I want to change something on the original layer, I made a mistake or whatever, I can still correct that. So I've got a new layer. What I'm going to do next is
I'm gonna go to the color. This one is too dark and I'm
going to just paint over it. I'm going to, on purpose, kept myself, get myself
a larger brush, 16%. And if I paint here,
apparently nothing happens. What something does happen? We don't see it. Now
forget over the pot. There you go. It paints nicely over the pot without
going outside. Now what I've painted
is still there. Because if I do, we'll
de-select this one. No more clipping mask. I'm actually getting this
see where I painted. But because we say
clipping mask, it only regards what is under
it's the layer under it. And you could do a couple
of layers of clipping mask. So if I do the soil
at a clipping mask, so I could actually
add a few layers here. So I'm going to do that. I'm going to add two layers. So I've got now two
clipping mask layers. On the bottom one, I'm
going to do actually the soil might wanna
go for this color. For the bottom soil. I'm making myself easy. I'm going to just paint
the whole thing. Degas. And then I'm gonna go
to that layer above. Now that I wanted that,
that mosque green, so a little bit yellow, green, that's too loud, That's a nice color, but
I need a smaller brush now because I only want
to paint this part in. Now I can accurately
paint whatever I want. Green. There you go. Now, that looks
already quite nice. Now what I'm gonna do is I'm not gonna do the leaves
and everything, but I'm going to continue do
this a bit nicer, the pot. So I'm going to do every part. So I need to find the
part where the pot was. And that is, let's see. This is definitely on the path. There you go. I need this layer. I need to change that layer. And we're going to
change this layer. We're gonna go back
to that color. Going to make that
actually slightly darker. And I need now a new layer
above it, of course. Plus I'm going to
say clipping mask. And I'm going to paint this in. And am I happy with that? I'm pretty happy with that. Except I want this
part to be darker, so I just can't go darker. And do that on there a
little bit to the ego. And that will be
then the next part. There is more, let's see, that is here, that is also belonging to that
and this layer is darker. I think there's not
much more from the pot. Now. That is the floor. Alright. We have some scribbles on it to, let's see, I'm gonna
do this layer. I'm going to recolor this one. I'm going to say, I'm
sorry. No, it's not. That's just not right. Benjamin. Undo that. Please see if I can
undo that, right. I need a layer above it and don't make that one
a clipping mask. New layer above it. I'm going to go for the soil. I'm gonna go Dad's
this color and paint. Now I'm going to paint
slightly accurate. That's what's going to be soil, but I want some dark color. The bottom, there you go. And now that these dark parts that I want to make green again, so I need to go back to that similar green
eyes. It's on a dark. That is good because this
will be pretty dark. There you go, and the rest
will be a bit lighter, smaller brush, so that I
can get in-between here, or I need a really small
brush for this part. Now I'll bring back
shadows and light. And now I can re-color
these parts too. And then I'm going to go small and I'm going to go darker. Because this is fiercely
slightly darker. Disputes. Got a little bit. There. You go. See, now I'm recoloring everything in a less
destructive way. Now, need a clip, a new layer above this
one to it clipping mask. This one is really dark, so I'm just going to
wherever that is, I'm going to go really big and I have no clue where that is. So Diego recolored. And that's the
potholes this now. Oh, that is on the part. That's okay. This one is on there now I don't want
that green and stuff. This is now gray. What I want. I want the layer above that to, that is this layer. Plus make that a clipping mask above the layer where all
the scribbles are in. Because I want those scribbles
to have some color too. And let's see, let's go
smaller because I want, I need to say clipping mask on this one still I'm
on the wrong layer. So I'm going to
make first of all, green, of course, a
dark green in this. When I make this a dark brown, you go there and now I
have recolored that part. So recoloring through
clipping masks. And of course you
can keep on going and going with this,
do everything. I'm just going to
demonstrate this part. That will be the second method. This is the less
disruptive wave. If you make a copy
of your artwork and recolor it by alpha lock, that works fine too. But in this case,
if you want to make some changes or have a little bit more
control than this is the less destructive way to add just a
clipping mask layer. That's not all the risks. There are quicker
methods because now I still need to repaint
the whole painting, but there are ways to
do that a lot quicker. And that's for the next lesson. For now, I would say
explore this a little bit. Maybe do the whole tree,
have some fun with it? And then I'll see you
in the next lesson.
4. Three Color Adjustment Methods: I ready to explore
another method. Now we've done
repainting in two ways. Now we're going to
actually let Procreate, recall everything just by moving some sliders
here and there. Sounds exciting
or sounds boring. Yeah, there could be two
years moving some sliders, but it's really
helpful and really quick to add color.
Let's explore that. Alright, for that, I'm
going to leave this now and I'm gonna go to the next one on my
duplicate it again. I'm not sure if we're
ending here or if we need another lesson to
explore a little bit more. So I've still got this tree. Yeah, I've still got all
these separate part. I'm going to do the
leaf for this one. I have to leave selected. Now I want this to have
one color in one go. What I can do with this,
there's a few ways to do that. You tap on that magic ones and the magic wand is going
to do some magic for us. All kinds of options. We're going to stick to the
top block here with you, the color balance, the
curves and the gradient map. The gradient map would be basically a really quick
way to re-color something. I'm going to just
demonstrate that you tap on the Gradient Map and
you get a new, new men. You come in here and that's
not the same screen, but you have awesome
gradient map, a 100% slide to adjust, then it's only going
to color parts of it, not as strong, it's going
to put something over it. I wanted a 100 per
cent because I want to change the colors. Now, there's a number of pro set gradient maps and you will see that I have
some different ones. But there they are. But there's none.
I actually know. I like if I would call
do briefs for example, see, now it gets a different
color, these leaves. I don't like this color. So what I'm gonna do, I'm gonna hit the plus and I'm going to make my own gradient
for the lease. And for that, I
need a Color Range. I want some color range
from dark to light. You can imagine, I wondered, I'm going to hit
this first block. I'm going to say,
Okay, I need a color. And you can pick colors
from your palettes. You can do that, but we're going to stick to
that color wheel. What I'm gonna do is
I'm going to move this obviously to the green. I'm going to pick
a green highlight. And we're gonna do
this pretty dark, but not as dark as it is now. Still want it to be green. Now you see already
that it changes to your changes to different color and you see here a
little bit color too. I'm going to pick
that next one here. And I'm going to
go to the color. We want to move this to
about the same color. I had gonna do
that really light. And there you go. And
I'm going to see them. You could call,
give this a name, then it's not gradient anymore, but then I know
these are the lease. And I want to say done. And I'm gonna say down here
to recall is that the ego? Now, this is a faint painting because it's the background. So it's not that strong. So let's see if we can
add the top layer two. So I'm gonna go
to the top layer. We're going to hit
that same thing. That really magic wand. I'm going to say Gradient Map. I'm on the wrong layer. Obviously. It's still hidden. There you go. Now it's back. That's at the other one too. Okay, I have the layer now I'm
going to say gradient map. I'm going to give it
that same leaf, see, and it's already automatically
now adds that color. And because this is a
stronger drawing them before, it adds more color. So I now have that faint
here and this is stronger. And we'll just say
dumb, I like this. Alright, I'm gonna go
to that top layer. I'm basically gonna do the same. I'm going to say gradient map. I'm going to give it
that same leaf color. And that's it, I'm done. You could give that, of
course, a different color. So let's, let's explore that. Let's say gradient. What we'll do here, I'm going to actually leave this on black. Only got to change this one. I'm going to do that too. Nice, light green, but now I'm
getting a very darker one. And you could slide this C with the colors that
layer that is now there, that changes lighter to darker. And all the other way round, way darker, way lighter. I like it. Way dark like this. You could also add another
color if you wanted to, you could go crazy with this and add a yellow coral
color in-between, then it's going to recolor that C with a hint
of brown in it. That is quite nice so you
get a different color. So you have the
option to add more. I'm going to say
done, this is good. I'm gonna go out of it. And now I have changed my life in a really quick and easy way. So by adding gradient maps, and I can reuse these gradient
maps over and over again. So I could recolor this, for example, with
the same colors. If I wanted to do that, I'm gonna go to the soil. I'm gonna go to
that gradient map. And I'm going to
re-color that with debt. Great, new gradient I made. And there you go. It has that color right
away and I'm done. So if you make your
own gradient maps to color you like
them, you get that. You get this effect. Let's see, is there a gradient map that
would work for the pots? Yes, let's go there.
Let's keep this. I'm going to go to the pot. I'm going to do
that as last thing, Gradient Map and I could
go for the mystic, see, you can get a nice
interesting color. I might go, for
instance, finished. I would like Mocha,
Mocha as nice or noaa, or make again my own column map. If I'm going to say
no, I don't like this. I want this gradient
from dark terror color. Better go here to very
light, nice Terra color. And recolor stat
for me like that. And I can change again
the gradient map, one that's lighter if I want a darker, but
I don't want it dark. I think I like it like this. I don't want to say down
here. There you go. I have a new gradient there. And that's the way you do this. This is a nice method to recolor everything that you
have a certain control to do that because you can add some nuances here and
there, even change colors. It's a fun way to
recolor everything, but it's not the only way a
set as few methods for this. We're gonna do the next one too, because that block has
more options for us. So let's do that. You can guess what
I'm going to do next. I'm going to start a new one. I'm going to duplicate this one so that I keep the other one. I couldn't remove them later on. Of course. I'm
still on the leaf. Yeah, that's fine with me. The next thing we're
gonna do is I'm going to hit that magic wand. And you'll see a
few options here. Now you have used
saturation and brightness, where you can control
how dark something goes. So let's do that.
See, I could make this really dark
or really light. I could saturated
with some more color, a lot less, but there
is no color in this. I first need to
add color to this because I can't do
anything else with this. If there was some color, I could recolor this, but because this
is all gray tone, I'm going to leave this unless I would want something darker, this would work really well. But what I'm gonna do, instead, I'm gonna go to
the color balance. With the color balance,
I'm going to actually re-color this whole
part of leaves. And for that, I
have a few options. I can do the headlights. So the really light paths, I can do the shadows that are obviously the really dark part, and I have the mid tones
as basically the rest. We're going to start
with those mid tones. So I'm selecting the
mythos by tones, by doing that sunshine
thing is the sun mid tones. And what we're gonna
do is obviously, I want green in this. So I'm going to slide this slide the two green and then you see some green is appearing
and you just have the choice. You want a light green
and dark green ones. Disagree. Now to add slightly more green, you can use this 12 for
the yellow and the blue. And if you do the yellow,
It's going to be light. If you do the blue, it's
going to be darker. The red, the same,
saturated with some red. Or go to the cyan
color with this one, I might go a little
bit to the cyan color. Now, you could see
it a little bit. Next thing we're
gonna do is we're going to do those shadows. The deeper snack I
want DO screen to, of course, the ego and there's a lot of
deep tones in this one. Do I want that light
to I want the dark. I have that choice.
If I want a darker, I'm going to the blue color, not that much, of course. If I want it lighter, I'll go into the yellow. Since this is my underpainting, I want it slightly
lighter so I'm going to watch the yellow
and the same here. I could go towards the
red, brownish color. The more warm color, or do I want more science
or more cold call up? Basically, that is what this one controls on my color here. Go on to keep this pretty
much in the middle. And the highlights,
let's do a two. I could go green C, and then my highlights slightly shifts but
not really much. And I want that light. If I want a dark,
I'm going this way. I'm leaving my
highlights like this. Alright, that is
good for this one. I changed my color balance by just moving some slides
to the colors I like. Next thing what I'm
gonna do is I'm going to add those other leaves two. And we're gonna go
for this bottom, the bottom layer here,
the bottom of the leaves, where I really want
a lot of color. Hitting that magic once again, go into the color balance, and now you will see
pretty much a difference. Let's start at the
shadows for this one, the dark part, because
there's a lot of dark. See that there's two green. I need to pick the green. I like I like this green. Do I want this darker? Do I want this lighter now? I still like it
slightly lighter. Do I wanted warmer or
do I want it to colder? I might want it slightly warmer. So I'm moving this
slightly to the red to get this nice tone. Mid tones, I could change. I have to control gonna go from not autumn color or some add
a little bit more green. Just I'm adding
slightly more green. I'm happy with that. The highlights, I might
go to a nice screen. And if I add some more
yellow, there you go. And that is what
I am happy with. I don't want that. Then the
next one is the one on top. Those leaves, I got
to change those too. I want them to have
a darker tone. We're gonna go again
to the color balance on Start with those
shadows because I want the dark tones moving
this to a little bit darker. This two more, two the blue? No, not that much. If
I do all the way down, you see there that's
too much blue. I want to control that a
little bit and I might want a warmer color on this one. Not that sciencey, that is too much, slightly warmer color. There you go. Now
I get a nice tone. Let's do those mid tones to
just add a little bit of green and the highlights add
some green and light green. Although I might wanna
do this one to the blue, keep it dark. That's
too much blue. I think. That's okay. And do it and there you go. Now, I have recolored
my lease in a really quick and easy way. And of course you
can do the rest like this to every layer you have. You can just adjust and slide and add your color
the way you like, and even get some tones
like now this is lighter, this is really dark, even with some shadow
colors through it, a little bit of the blue
and you have that control. Alright, Dev will be the
second recoloring methods. Okay? There's another method
because there's one left because I
said the first one to use saturation and things doesn't work that
much on a gray scale. Although now we have some
color might actually work, but we're gonna go to one more and that's
a different one. Let's do that one. The third one is not for this picture because
yes, I'm gonna do it again. I'm going to duplicate this one. Hello. I could have kept
them one because this might be the last one. I'm still on the leaves. Do I want the leaves now? I want to play with the
trunk, with this one. I want to play with the trunk. Here's the trunk. For the trunk, what we're
gonna do is we're going to hit that magic wand
and there's one left, and that's called curves. Now, with curves, what you get
is literally what it says. You get, you can create
curse of color with this. Now, this is a very
simple straight. You won't see any color. If I would pick a colored
work, I might do that. Let's pick something,
call it first to show you that there must be
something colored here. Or this is nice. Lots of colors in this one, lots of colors in this one. We're going back
to those curves. And now here you
see on the gamma, gamma, they can actually control
how bright and how dark. Some things you see here, a little bit of color, because there's color in here. If I do reds, greens, there's all the color
spectrum is right here. And that is the difference
with what we have. We do not have a color spectrum, but there is some hairs
really small though, just so many colors used. Going back to my gallery. It can I have something, this is this more colorful. Curves C, that is in a different spectrum,
blues, greens, reds, gamma, that has a lot
more colors here, a lot of bright colors. And we can control these curves. Now if you have
column, it shows up these curves is you have
a lot of colors in it. The more you see, the less
colors, the less you see. Now without drawing,
we do this again. There is no color. So
we're getting actually, there's something, a
little thing there. I think there is no color. Now, I'm going to first
show you the Gamma. What I'm going to do.
I'm on the trunk. I think I'm still
on the trunk, yes. So we need to pay attention
to this part, the trunk. If I change that gamma, it goes into darker or
it goes light brighter. And if I move this one goes very bright and see
another color curve comes. It goes very dark. The closer I move this and
I can add a new curve. I can control whatever
I like here for gamma. I think I want to
monitor for now back, I can do the same with directs. I can add red color to this. I'm gonna do a curve
in the middle. And I'm going to add a red tone. No rats. So you get absent of
red and a lot of reds. And you just slide this
to the color you like, can move this again. You can add more red, less red. And you control basically
where your reds come and it determines where the darker and the lighter parts
are automatically. Now we can add take out, take away the green and we go to the Mackenzie or add
some more green. Can do the same here, that's my color curve
there I'm adding colors. So I can add a lot of green, or I can add a
little bit of green. And I have to control here to do I want a green or red history? Do I want a real magenta tree? Think I'll keep it like this. And for the blues,
we can move this. And I want actually less
blues because I don't want that warm tree. So there we go. And we could also
control it here. And you can play with this
until you have to college. You like. This one, I like this
color for my trunk. So now I've recolored my
trunk by using some curves. Next thing what I
would do is get that this one with
it and play with it. I want to add that one to
start with the red again. I'm going to add some
red color to this. Not too strong. I go this way, it's lighter. If I call this one, I get
more red, stronger color. So this one, Let's read this one more relevant
to stick to the middle. There you go. Well, do I want to add
some green to this, or do I just want
no green to this? Or a little hint green scene and you get some most like color. You control that with this one. Might go here. I might actually
add a second one. There you go. Make it like this. And blue. Do I want to take out the blue? What do I want to keep it in? Now? I want to take it
out because I want this to be not so cold. It's a bit hard. Warm,
so not so-called Yes. Not cold column at a warmer
color. There you go. Now, if I go to the
hammer with this one, the gamma, make it really dark, could make it really light. I could add another point here. And control like that. I like this color, good, and you play with it until
you have the color you like. Now there's one more on top of it that is a really dark color. That is now this.
And now you can see, I don't like this columnar now. It's really great. So I need to change
that to the curves. And I'm going to that
red color because I want that to be red
bit to the darker red. Let's see. Do I want to add green? I don't think I want to
add green on this one, although that's
the darker sides. So you could add a mosque column and it will be too strong. A little bit like that. And now I'll probably want
to take out the blues. We don't want to
have to lose to me. And I can play with
that a little bit. Add another curve that has less blue and the lighter parts
and then a darker parts. We still have some of it. And there you go. That is the way I now
recolored my trunk. It looks actually looks
nice, doesn't it? Alright, and that
is a nice method to control your colors. Really nice. It's a bit tricky. You get used to it. You can play with those sliders, add more nodes to it to get
some more column new answers. We can do the least two.
Okay, let me demonstrate with this method the leaves too. Alright, the leaves,
Let's do the leaves then. We're going to delete the
first leaves we have. We're going to say curves. Now for this, of course, I want to start with my greens because I want my
leaves to be green. So I'm going to add some green. How much green do I want? Do I want a really light green? Or do I want that dark
green in this case? I want some light green. And I'm not going to add
the other colors to it. I'm going to leave
this one like that. Okay, that is my bottom one. I'm going to go to the
next set of leaves there. Those are these ones
on layer six here. And the moment say
curves again, right? The green, so that's good. I'm going to add some green. So I have to control
again, do a one light. Do I want darker? I do want
some dark greens in here. There you go. Let's see if I want
to change something about the rest goes
to the cyan color. Yes, my due dates change the tone a
little bit. Cool. Really liked this or
somewhere in between, I think I like this. I think I might keep this one. So I'm making it a slightly cold column by air by taking
away some of the red, the blue, if you add that, you get a cold color. If you add more red, you get a warm color. But if you take away
some of the red, you still have a bit
of a warm color, but alias own color. Alright, the next one, this layer I need back. I want that to be really dark, perhaps towards the blue, even. Start with the greens. I'm going to start
in the middle. Not want a really dark tones, so I want to be there. See, if I do that. I get too much red or I
want that highlighted. Now I do want this
to be down around. This curve is nice. Blue. I want to add some
darker blue here. So not like this. Now again, really
strong shadows, but I do want a little
bit of a hint of blue. Let's see. Do I want to go onto
called andesite or not in the middle and sliding
it to it's disappointing, but right there, up there, do I want to take out some
of the red? Let's check. Or I think I might do that. Then I get slightly stronger shadowy color
and there we go. Three colored these parts with
just moving these curves, adding some nodes,
adding the color I like. So we started out with grace and grace and now
suddenly in color, because I'm adding
reds and blues, I'm making a color
mix from this. Alright, well that is
the trunk and the leaf. Now I really need to keep going. Of course, I need to have
one finished colored work. Because I think all of
these half colored works, you could also actually
mixed East Memphis. Of course, you're not obligated
to do only one methods if you want to have
now some more control at some different colors to it, you could just simply add a
clipping mask to it because that will be the quickest way and start playing with
different colors. We've got to do
another, Alright. Okay, We really gotta do that. I want really some
highlights here. So what I'm gonna do,
I'm gonna go to that. Let's see that is
that bottom layer, the leaves, I'm going to
add a new layer above it. I'm going to say clipping mask. I'm going to get myself some really yellowish,
greenish color. There you go. I've got
that same brush still. I'm fine with their
cotton and other large. And what I'm gonna
do is this part, I'm going to make lighter. There you go. I've added
some highlights like that. There you go. So I can use all these
methods together. You could do the same
on the trunk too. If I want this to
be a lighter color, what I'm gonna do
if their trunk, I'm going to actually see
which one do I need for that? The bottom one, I
need actually in both the bottom and the top one. The bottom one I'm going to
start with the bottom one. Add a new layer, say
clipping mask to that layer. Then I'm going to go into
the yellowish brown. And I'm going to add here some nice highlights colors,
but I need to do that. There are two. So I'm gonna go to that layer
where this dark line is. I'm going to add a new layer. I'm going to say clipping mask. And I'm basically going to add a little bit
of that same color there to get a nicer
highlighted part so I can influence that. Concludes really the
lessons for this one. What I'm going to do
in the next video, I'm actually going to re-color the whole tree as you
can see how I do that. But I think you get the idea. So if you said,
oh, I know enough, I'm going to recolor my
tree or the tree that I supplied totally in the way
or mix some of these ways. Then I will skip the next
lesson, go to the project. And if you want to see
me do the whole tree, then I would say, go to the next lesson and then
go to the projects. Alright, pick whichever
less than you like, and I'll see you in that one.
5. The Demonstration: Welcome to this
extra lesson where I'm going to demonstrate
the whole tree. I'm going to use
that last method, the curves to
recolor everything. I might just throw in some
more clipping masks to. I'm not sure. We'll see where we end up with that whole three. Alright, so I've got
this part now already. This is recolored. The next thing what I
wanna do is I wanna do that soil probably with that. So yes, I'm going
to need probably a clipping mask and
record part soil because there's two nuances. There's some green and
some of the brown. I need to make a choice.
Now, I'm going to re-color this one
with the curves. I'm going to say, I'm going
to add some reds definitely. Now it's all red. And that is the tricky part. I don't want that.
But I want some red. Let's see. That dark going here. Take out some of the blue. Take out most of the blue. So I get a nice more here. So here, more soil color, right? I like that. I'm going to say done here, I'm done the roof the next I'm going to
leave that like this. I want to play with
the top layer. That's where I'm going to add the I got to find
that one again. That's this one here, this one, the layer night. So we've got a few layers that have color too
on it. Let's see. This is the pods. This is the ground. I think
I've got them all and we have that those scribbles
on it. There you go. And this is just scribbles
there and the outline, but I don't want the outline. I think we're not going to work with the outline for this one. Alright, I've got
these three layers. I'm going to start
with this one. Let's see where that is.
That is more green blue. So I'm gonna do re-color
it with the curves, give it a green color. So bright they go that she might add some of that red to get a little
bit of moss color. I'm adding a little bit
of red. There you go. I like that status
and not a lot nicer. And I don't mind that
this screen, by the way, this system that soil
colloid and I just don't mind these collar new
answers is up pretty okay. Alright, I need that next layer. That is this part and
obviously some shadow there. I could have caught that, but so we need some blue
now for this layer curves, we're going to go to
the blues, blue in it. See if I can control
the blue day. You go more to decide. Alright, let's see. Do I want to add red takeout rats to take
out some red to get more blue. There you go. You get some nice shadow
colors like this. So I've added a lot of blue. I've taken out a lot of red. I'm not going to touch
the green for this one. Then those scribbles, let's see what would
make them darker. And I guess we're going
to go to the curves. So we're gonna do the green. Light green, terrible. In nice dark green color. That is fine. I'm
fine with that. Right. Don't need to take up no, I'm not going to take
up more color here. The one that just needs to go
see it starting to recolor. What's the next thing?
I need to have pots. Let's do that. Soil pots. Here's the bot. The pots. Let's give it some color now we have a choice of what do I want? I liked that red color pod. So I'm going to add
a curve like this. Need to show you what I'm doing. Okay? I'm not got a nice
straight I picked. Add a note quite close that you go
on, on, on this. Now, this means that it's
building up color quick, and then it leaves the
color and the rest. There's not many nuances
which you could do with this. See now it's getting lighter, darker again.
Really getting red. I think I might go like this. Just nicer, nice curve. Do I want to take out some blue to go to the Altera color? I definitely wanna do some
sliding or blue to have. And I got a nice terracotta now. Alright, let's find
the rest of it. Now he wants this, I
think that's the ground. This one. Yeah. Of course, I need to do something with I can't
have that color on it. So I'm going to
those curves again, I'm starting with the red again. Might actually do
pretty much the same to strengthen that idea. Good to Blue, take out the blue. There you go. That's
a nice pop of color. See, my drawing is
getting cooler. Definitely getting
collar, right? What do I need? I need
the scribbles here. I'm going to go to the
scribbles up here. That's the ground scribbles. Scribbles. I want to of course, I want to have them, but I
don't want them to be gray. So I need to add with my
curves, need some green. And I do like this. This is a nice green color. I'm going to leave it like this. So add a little curve here, almost to this segment here. And I'm okay with this. Alright? Yeah, leaving this. Now, see, now we're getting
a nicely colored tree. What's next? The ground, we haven't done the grounds. We've done the soil. Here's the ground.
Sorry, that's the floor. Yeah. That's the ground to having a dark color under there. Couldn't go to the floor
first, got the floor. Select this. I'm going to those curves. Now I need one, some yellow and then
I'm going to take out, going to add some red to it. Now I'm going to add
definitely some green to it and take out the blue so that I get closer
to a yellowish color. Let's see. I'm leaving that node. Now got to play with their
red a little bit more. Get closer to yellow. I'm taking out some of that red, but I'm leaving it in the cup. Alright, I like this. The next one is this here. That is really the ground shadow and certainly gonna do pretty much close to
what I've done already. And it's unread than
taken out some red. I've gotten rid of my blues
and I added some green, but not too green. Here, my take-out, a little bit of green to get that color. Now, this is not dark enough. This probably could have been bluish or I'm
leaving it for now, might change my mind
about this one. Let's see what else
there is on the floor. And then I've determined
what I'm gonna do with it. What is this? Those
are dose flow lines. Yes, I need to go
back to the curves. For this one not used
to curves actually, we're going to go
for color balance. And I want to add yellow to it. I need to go to the shadows. And yellow. Don't want them green but
closer to the brown. So I'm taking out some of degree and I could add some red, but it's too much,
slightly reddish Diego. Then the really nicely
recolored with that. Then we have oh, we did that one too. All right. These I need to these are
underground and on the floor. So I need to, I'm going to go for the
color balance again. Go for the shadows.
I've got those. Add some yellow, take
out softer green, make them a little bit brown. So by adding now the
red, more yellow, Let's green, bit more
magenta than some reds. And there I go. That looks pretty neat already, does it, doesn't
it? We've got this. I'm not happy with this part, but I like the rest
of the colors, so I need to only
re-color debt part that needs to become shadow. And I think I've pretty much got everything except
for our background. So I'm going to this
one where that is. On top of that one, I'm
going to do a clipping mask. Then I'm going to get myself
a nice dark blue color. I'm going moving
this into the blue. Nice and dark. I'm gonna go here. And I'm gonna just
recolor this bits. There you go. Nice shadow because now I have a nice shadow here
to see if there's some other hair I might want
to recolor that bit too. And the rest I am okay with. Right? That is better. Now you could paint a little bit extra behind there
on another layer. Let's do that under it. I'm going to add
another layer of paint, some of this color
and then not that strong place that you go. Just a little bit. My small brush on the dare to
do adhere to a little bit. Just to get some extra shadow that looks a little bit
better than I might wanna do. Adhere to bigger
brush opacity to half because I don't want
it that strong. There you go. Alright, I might
add some color on here to see, should work. Little bit of shadow of course, here to know this. This of course is now green. That's not right. Got it, correct this bit. Got to find where that
is and correct that. That is somewhere up here. That's a tricky one to
find. There you go. Got it. Layer nine. This is now green. I got to re-color that. So I'm going to add
a clipping mask. At clipping mask, I want to have more discolored on picking
this color. There you go. I'm going to record that bit. Yeah, that should do the trick. Too much opacity. There you go. That's better. And now that is correct too. Because that wasn't,
that shouldn't be green, but because we done the
whole layer that is green. Alright, well, I think
except for the background, I'm pretty much done with this. So I'm going to add my
background back again. And I had a few options. I had this background. I have this background and I've got no, that's not
the background. I'm going to choose that
layer 17 background or less stronger one. There you go. Don't like this color. Definitely don't
like this color. I want to play with this
color a little bit, but if I change
the color of this, we're gonna do that, then
it might not look great. So what we're going to do is, let's go for the color balance. Let's see, I want to
add some yellow to it and play with this and some rests
on the right layer. I'm not on the right layer and that's why nothing happens. So gather, undoing this. Go to the right layer,
that is layer 17. And now I'm going to
do the color balance. I'm thinking already. Nothing happens. Alright. I'm going to add yellow.
Looks interesting. Do I have to shadows? Yes. I could add green to it, but then this blends all away. I could look into to it. Get a nice contrast, a little bit of magenta. Seeing or at, I definitely
choose to read. That looks pretty good. I think we're getting
away with one. Let's do the highlights too. Nice and yellow. For this one adds slightly
along with green. Rest. Add some red and the mid tones. Mid tones go for yellow. And I'm fine with that. Alright. Hello you go. That looks pretty nice. Now what you could do is, if I want this morning, this is now a nice
colors and nice color, but let's say I wanted this
bit more bluish or yellowish. Let's do that. We're going to add another layer
on top of this, tell it to be a clipping mask. Of course, choose, let's
say a yellow color first. Go with a nice big brush. In this case, that's not
really yellow with it, right? Diego might be too yellow, but then you can add
that yellowish tone, which is too much anyway. You could add more orange color. That is definitely better. But I still don't go on that. And you can pick the
colors you like. You could do a bluish
color, bit darker. Bluish color would definitely
look quite interesting. Hugo. Don't want it to
still want this color. What you can do to play a
little bit with that red color. And I'm not going go dislodge. And on this side, for example, at a little
bit stronger color, really dark at the bottom. Get a nice color shift
from lighter to darker. You could do that on the Her2 that would
work for this site. Strengthen carefully. The same color, the mood a little bit
more. There you go. I think I like this. Let's go back to that orange, yellowish color and add a little bit here to get
a nice nuance, right? Then I'm going to add some
really dark red here. Yeah, Good. Now, you could play with this. I think I'm going to
leave it like this. Might want to go slightly
darker around there. Alright, good. Now I've recolored
my whole tree. Repainting at some past. I've repainted it most parts. I've just changed the
color balance, two curves. So we're done with re-coloring. What I want to show
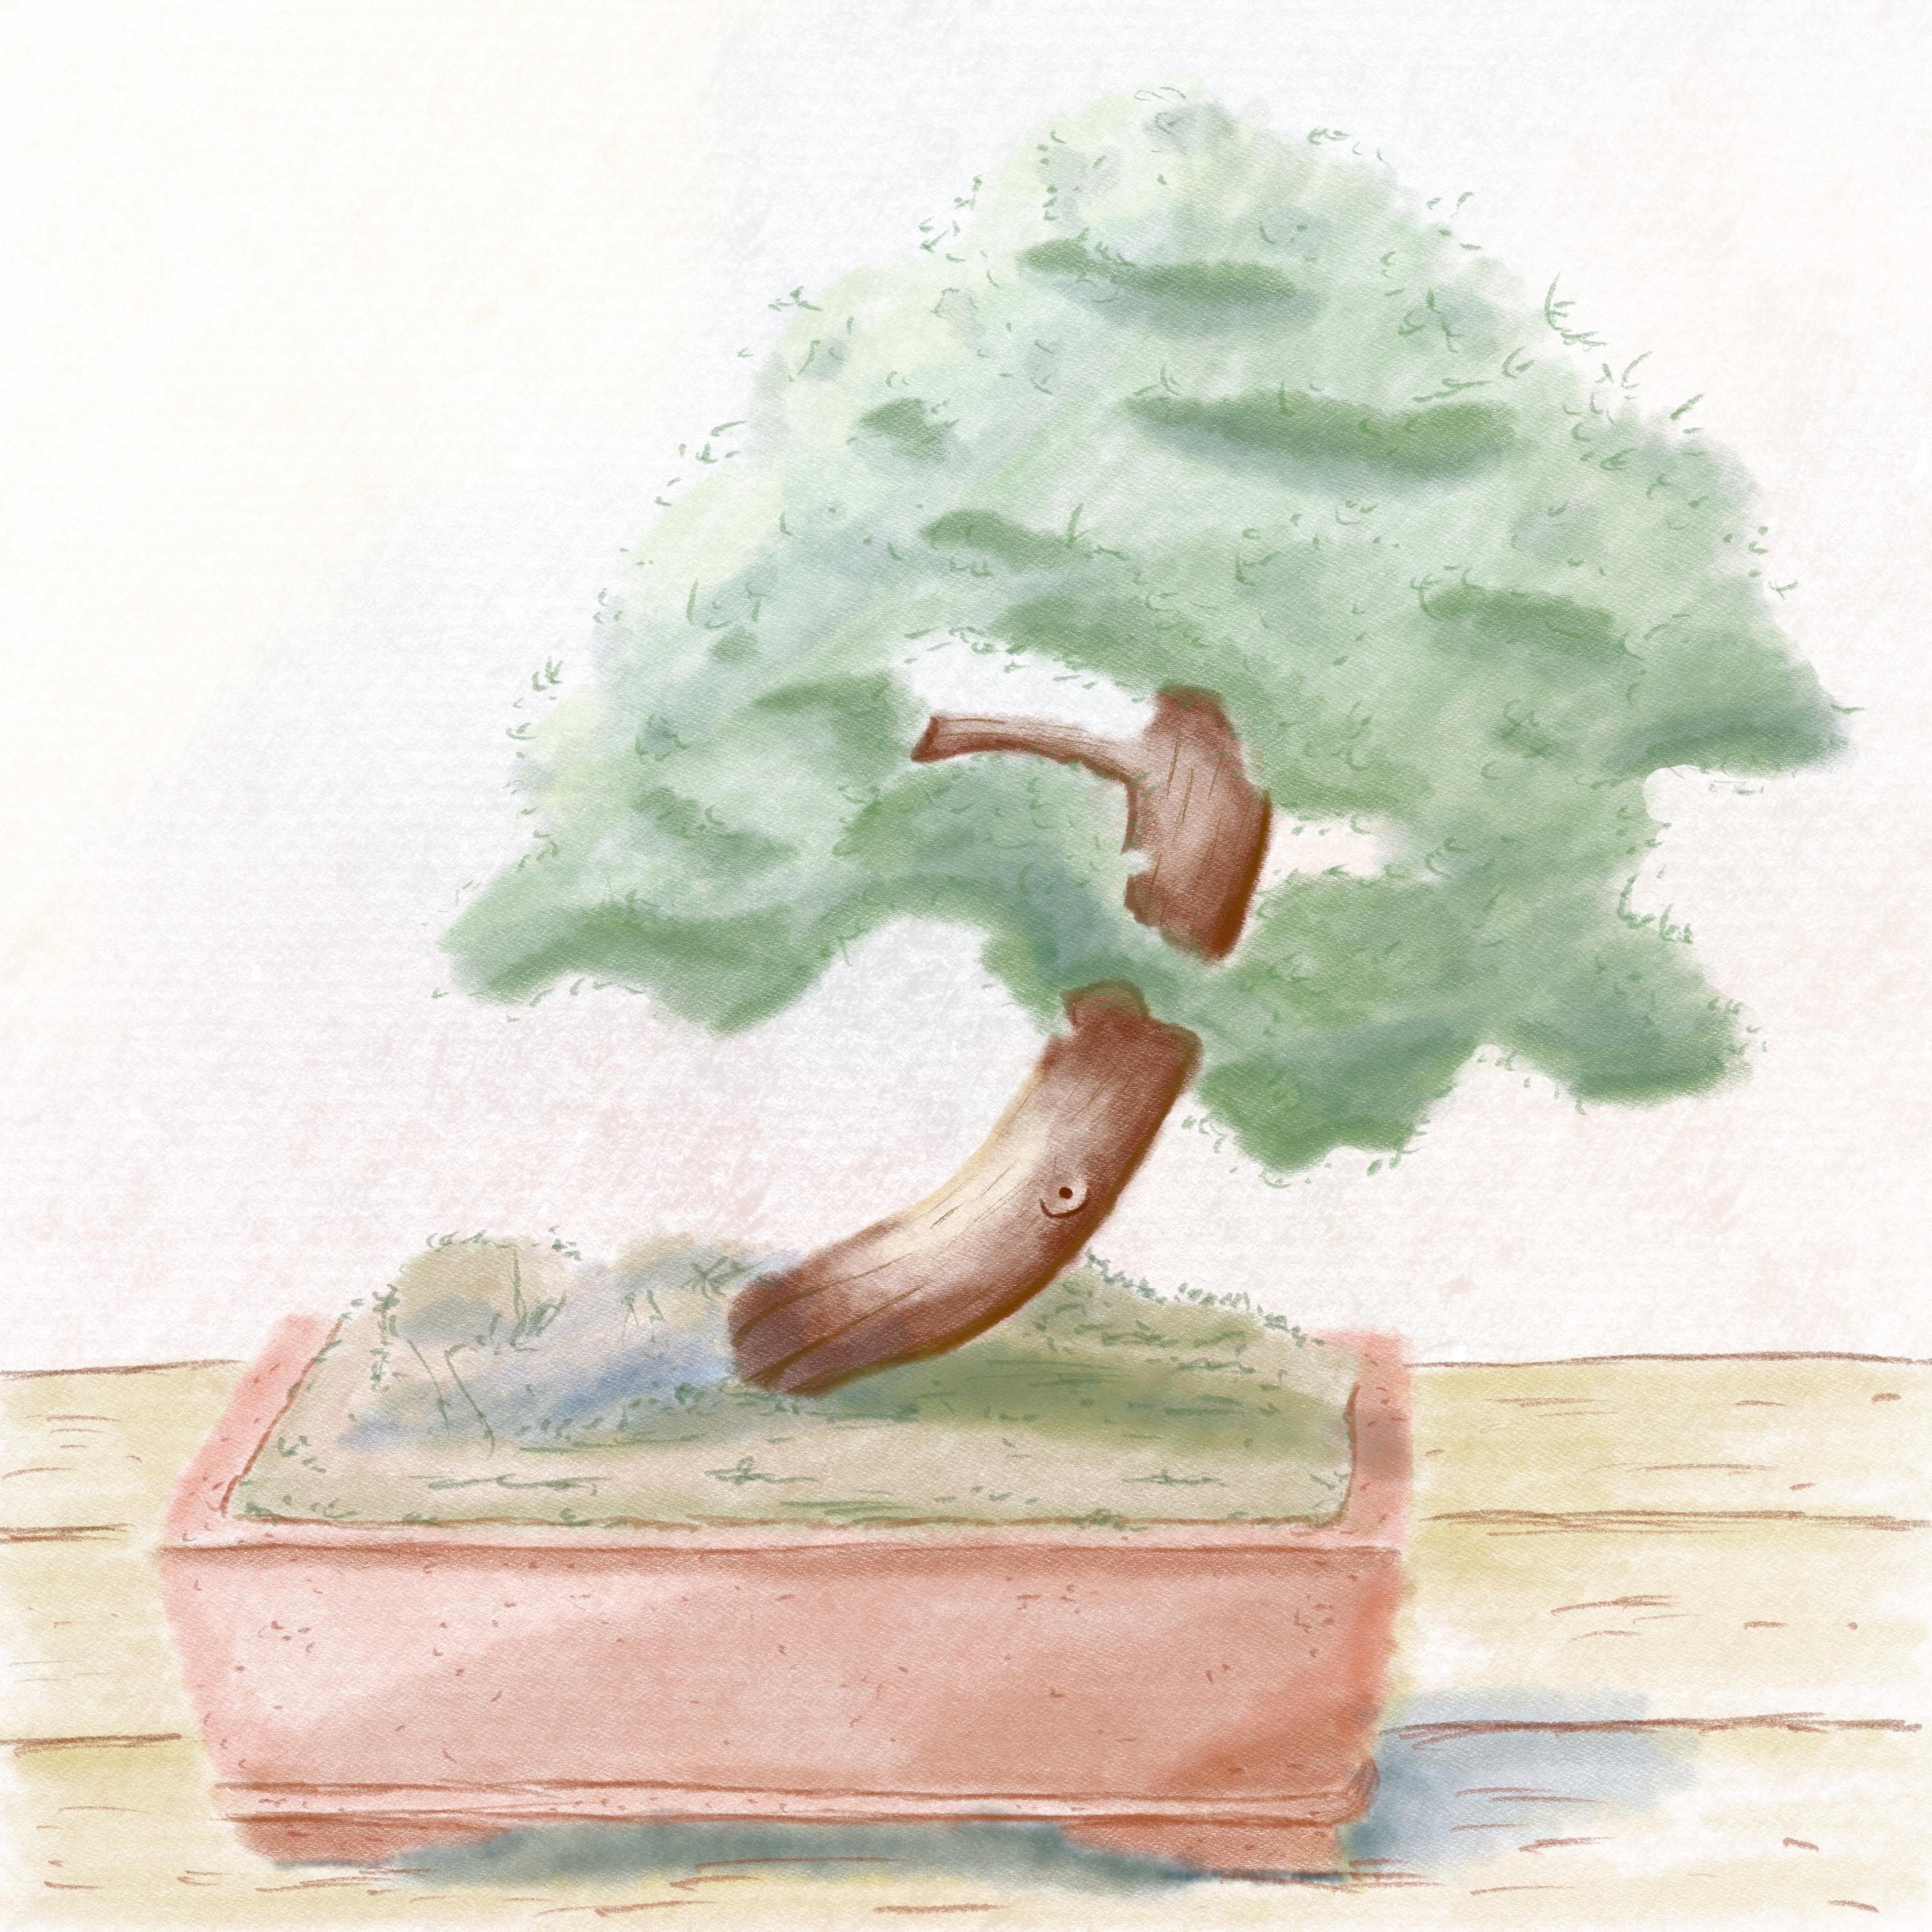
you one thing, let me go to my gallery. And then we have that tree. We started out with
a totally gray tree with all these gray tones, gray three, very nice. We changed it now into a completely solitary,
nice Tom Stewart. Now you can keep on working
with this score at deeper, darker colors if you want to. I'm finding with this keeps
it nice, still drawn. But it's totally different
than what we had, although it's the same base, we still have a completely
different tree. And that's the way
you can recall. You're not colored works. Now if you have a colored
work, you could of course, use this to recall
everything to. You could change with those
curves or with the sliders, you could actually change your colors into something
totally different. So she call it something
you don't like it. Don't need to recall it. Everything, repaint everything. But you can use these features
to completely recall it. So if you have some green
and it's not dark enough, you could add some blue to it. If it's too cold, you add some red to it. If you want a really
cold bluish one, then you take out debt
red, for example. You can do that with
all your colors too. So there's lots to play with, but for now, we're
going to stop. We're going to move to
the project because I'm done re-coloring my tree, taking it from gray tone to
it, completely colored three. Alright, see you in the project.
6. The Project: Last video, the last lesson, the last video of the projects. We're gonna do the project. And what are you going
to do is, of course, recall your tree, the
grayscale tree, recolor, it makes something pretty nicely colored as I've done
with one of the methods, may seem a little bit
of the other methods. Now you can do this as
you like, use Alpha Lock, clipping mask,
change the curves, move those lines around. Whatever helps you to
add color and combine the methods do create a
nicely colored trees, pick the colors you like, and then either repaint
or recolor your tree. And then once you've
done with that, posted so that we
can all see it. And you could also
use it, of course, for other article shift down, I would just challenge you to take another atom of you've done with or without color that is totally up to you because
as you have seen, it doesn't matter if there's
color and not to pick another ad work with or without color and change the colors. Just turn it into something
totally different. And then of course, I would
love to see that too. Alright, I think that's enough for a project. Recall your tree. Do an extra one, play
a little bit with those features and just
kept comfortable with them. Well, That's it then for this class will come
at the end of it. That way, if you have missed the other classes,
the bonsai trees. First, really cute,
then semi realistic. And how adding the
column, I would say, why not go to those
classes and have some fun with those to learn
how to draw this tree. If you want to learn
some other things, painting, illustrating, doing flowers, then
I've got plenty of classes here at
Skillshare to show you that. So that I would say pick another class and just
have fun with it. Thank you for being
with me in this lesson. I hope you just picked up some new things you
haven't explored before. And I hope you just use them
whenever it's applicable, whenever you want to use them, whenever it's handy to use them. Alright, well, there's
always a thing to close a video than I have to think how we're
going to close this. I should have just
stopped at that point. Thank you for being with me. So I'm just going
to repeat that. Thank you for being
with me in this class.
 Benjamin A, Art Teacher, illustrator Art by Benjamin