Transcripts
1. Intro: Hey guys and welcome to the Character Design
Crash Course. This is the first-class
of the series where we will talk about
character poses. We discussed in
the previous class about how to draw
heads and portraits, how to draw expressions, and how to create
character stories. If you want to create poses for a specific
character of yours, make sure you go through
those classes as well. I'm excited to be
continuing this series. I hope I will be able to share
with you some information, some insight and
some inspiration. If you wonder who I am and why I'm teaching
you this series. Hi, I'm Laura. I'm a freelance
character designer and a children's
book illustrator. I have been doing digital art professionally for
the last four years. And there are many more years of traditional drawing and
painting before that. Enough about me, let me tell
you what this class will be. About. This class we'll cover a breakdown of multiple poses. Some of them will be standing, which are the easy ones
in my point of view. And other ones will be sitting. As always, the breakdown of the references will come first, and then we will select a few poses and start
drawing each one of them. If you are interested in
only a few of these poses, feel free to watch
only those lessons. This class is a part
of a series that will revolve around
character design. If you want to create
meaningful characters that will speak to your viewers, that will be different, special, and that
will have a story. You should definitely
follow the whole series. This is what the
series will look like. Each month, we will
cover all sorts of things such as character
portraits, expressions, full body poses, costumes, illustration, cinematic
posters, even props. And finally, I will
show you how to create your very
first art portfolio. I know that a lot of you publish your artwork on social media. So don't be a stranger. Let's connect and keep
inspiring each other. Find me on Instagram as
M lara underscore Arc escape and send me a direct
message with a simple high. I would love to chat about ARP, answer any art
related questions, and become artsy friends. Come join my small
art community. My TikTok account is also
growing and it will soon surpass my Instagram so it
could become my main platform. Make sure to follow and let's
get to know each other. I have the same handle is on Instagram if you would
like to follow me. And because I know it's really difficult to grow on Instagram, I want to help you
grow faster than I did If my class has
helped you even one bit, tag me on your posts and they will share your
art on my stories. Not only that, but if
you submit your projects in the skill share
classes from this series, I will feature your
work on the next class. No one will do the work for you. So I wanted to compensate
you for your work with a little bit
of extra exposure. You will also create your
portfolio bit by bit this way. So without any further ado, let's get started with
the first lesson.
2. Poses Breakdown: Hello guys and welcome to the
first part of this class, where we will take
some references or various poses and
break them down a bit. I feel like generally
beginner artists tend to understand better or faster
how standing poses work, but they tend to avoid
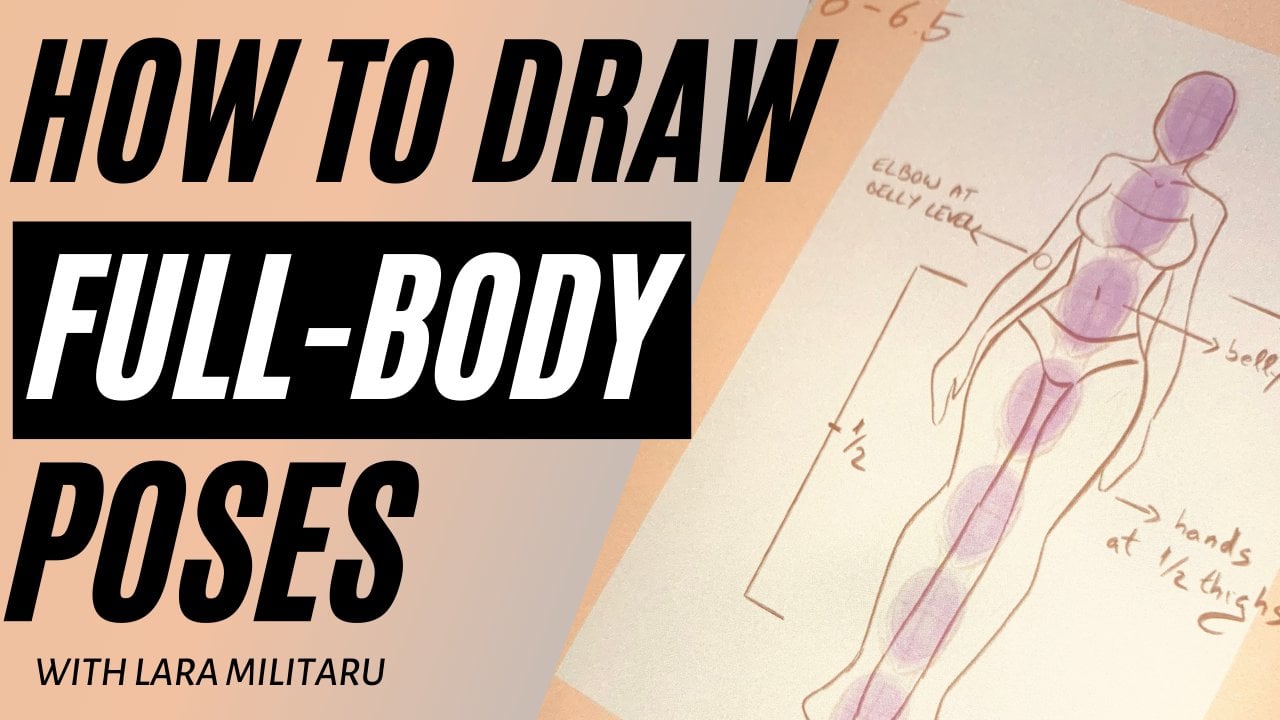
crunched or sitting poses. The thing with this poses is that the line of
action tends to be shorter and the gesture might not be as fluid
as a standing boats. Also, it might be intimidating to draw lakes that are crunched, that hold the weight
of the body and that feel like they are
intention all the time. But not worry. We
will do what we always do and gather
references first, break them down and understand
what we are looking at. And only after we understand, we will start
drawing on our own. Let's first choose
a few references. I saved some sitting
positions from Pinterest and I want to bring
them all on a mood board, which we will then safe to use as a reference for
when we will draw. One of my students,
one of you guys, lift the review at
some point asking to see the whole process of
creating a mood board. So here it is. I have all of my references already
saved in my gallery. So all I have to do now is
important photo on the Canvas. They will be automatically
imported on different layers. And you can choose to resize and position each one
however you want. If you want a nice mood for it, I would put a nice pastel
orange on the background, grab a textured brush and create some almost white frames
on top of each reference. I would also do the in-between references for some
extra interests. But I didn't really think that foreign when I
recorded this video. I only want it to have a reference sheet
to work from later. But you will see in the
recap lesson at the end of the class how it will look
like if you stylize it a bit. Alright, so by now I finished preparing
the reference sheet, and now let's study
this references. The pulses are from
our darkest dark and you can find
them on Pinterest, on DeviantArt, on Instagram. Feel truly anywhere. Let's group these
layers by dragging H1 to the right, tap on group. Then what I do is I grabbed the group to the left
and duplicate it. Then with the duplicated
group, I flatten it. I usually don't need
it to be duplicated, but I still duplicated so
I can have a safe Copy. Now I can lower the opacity for all the
references in one go, which is exactly what
I'm going to do. Now let's draw on a separate
layer over the reference. And no, we will not trace the poses because that
will not help us. We will try to understand
what the line of action is. What shapes should we use to
draw the body on our own? Let's start by emphasizing
the line of action first. Generally, the line of action is the longest uninterrupted
line of the flows. We could on the 110, consider this our
line of action, starting from the
top of the head and ending on the fingertips. This is not the longest
line of action, but it is enhanced by the almost parallel line
created by the sword. But we will not stop at the fingertips because the
extended leg is in the front, which is not accidental. Let's go ahead and make one full line of
action out of it. So it will look like
this. This is beautiful. This is the line of
action that we will guide ourselves after. Moving on. This is not the
most dynamic both, but you can
definitely use it for a nice casual illustration. Maybe you will place it
in a countryside setting, so similar to the one before the line of action
will go like this. I really liked this next
preference and you probably already saw that I even colored this one
for the thumbnail. In the next pose, It's easy
to see the line of action. The final one is a
bit more difficult. I would say it's like this. But if I were to draw this, I would feel the need to
adjust the pose a bit. Okay, so now that we identify
the lines of action, let's proceed into
breaking down the poses. The best thing you can do
if you feel overwhelmed by a post is to try and
draw simple shapes. Let's try this on this arm. First, I mark the shoulder and the elbow with two circles, connect them with lines. And we will now mark the
volume of this shape. We will basically
have a cylinder for this part of the arm and then another one
for the forearm. When doing this exercise, try not to worry about
the actual shape of the forearm and all the details. Try to understand
shapes and volumes. You can do this for the whole body to want
to understand it better. Moving on to the
rest of the body, we will make a simple shape
like this for the torso, time-of-flight, the chest plate, then a small rectangle
for the belly, and then another
shape for the hips. I'm drawing next to our model so we can better see what
they wanted to do and how I break down the process without necessarily tracing it. For the legs, you can
do something similar to the arms if you want to
understand the volume better. This will later help you
with your shading so that effort was
definitely not be wasted. For the leg that's
kneeling on the ground, make sure you
capture the point of pressure around the knees, where you will see the
small curve on the call. Another point of
pressure will be around the fruit
where it's bent. So try to capture that
nice angle as well. Finally, we will add the second arm and the
position of the head. Front ahead, I explained
what lines to follow for drawing portraits back in the fortress class
of the series. If you miss it, pass this class and go watch that right now. Okay, So if we remove the
underlying references, this is what we have by
drawing basic shapes only. The pose is already
very reasonable, even without adding any
details and stylization. Let's move on to
the next references and do essentially
the same thing. I included the references sheet
in the resources section. So if you want, you can
draw along with me. There's nothing more
to explain over here. So I will let you
watch until the end, and I will see you
on the next lesson.
3. Kneeling Pose: Welcome back, guys. After breaking down each
pose in the last lesson, I will now draw from scratch, free of those poses and stylize them into a new
original character. We already know that this
is the line of the action. We established that in
the previous lesson. I will start drawing the
shapes that we discussed previously while following
the gesture line. I will also use the liquify
tool when necessary, in order to correct some shapes or exaggerate
parts of the photos. In the end, when we stylize, that means we
exaggerate in order to emphasize the part of the
post that really stands out. I usually draw the hands
too big when I'm sketching. So you will see that I keep adjusting them as I
advanced with the sketch. For the purpose of this post, I think I will keep
the high hills, although I'm not
exactly a fan of those. When drawing hands,
it's useful to take note of the
overall shape that the hand is creating and what the purposes
for each finger. I find that it
really helps me to draw the hands better
and faster that way. Okay, so now we are
going to stylize a bit and start creating
our own character. I want to have a short
haired character with a really competent
to look unfair. And maybe some
script ninja look. I want her to have
shorts, a tank top, and her mid section
will be covered in bandages because it's a
frightening gel-like thing to do. So I love drawing high socks on my female characters and an asymmetric accessories
such as a single globe. I also want to make some kind of jewelry high on her arms. Now that I have some sort
of a sketch finished, I will lower the opacity
and I will create a more refined sketch that will have more features
like the face, the hair, and the jewelry. During this phase, I also like
to create some details on the clothes like faults or
a belt and stuff like that. This is also the phase
where we will resize certain elements if we
think it's necessary. Because after this
clean sketch phase, we will have the line art. So it's preferable to have all the small details
figured out already. Thanks. If you have been
here for awhile, you already know what my
favorite line art brushes. But in case you are new, you can find my brush back
in the resources section. You will find some
render brushes too. But I promise you the best
one is the line art one. Thanks. Alright, so this is
the final result. I kind of liked this
character and we'll keep using her design for
the next pose as well. I will see you on the next
lesson with the new foods.
4. On a Swing: Welcome back to our
second poll study. We will now draw the swing pose, which I'm really looking forward to you is it is my favorite. Again, we will start
from the gesture line. Since the pulse is
quite elongated, I will sketch the body as a stick figure and start
adding volumes after death. Somehow the legs catch
my eyes the most. So I will start by drawing
deals and resize them as I go. You don't need to worry about the sketch being
pretty at this stage, you only need a
silhouette that you will keep detailing over and over. Now I'm adding in the
swings ropes and I will try to add more tension
compared to the reference. So it will look like
she's pushing against the ropes because she's
now swinging forward. Now I will reduce the opacity of the sketch and start adding
more details on a new layer. I will add the clothes, the hair, and the face. And then I will jump
into the line art. This is it with this pose? You already know this, but I liked it a lot. So I also ended up coloring
it for the thumbnail. I will see you on the
next lesson where we will go in depth
on the next pose, sitting on a bench with the
profile view. See you soon.
5. Side View on a Bench: Okay guys, we're back
and we're going to draw this beautiful pose
sitting on a bench. I love how the back is arched
and how she looks over her shoulder as if being called by someone that's
outside of the picture. Just like before, I will
start from something like a stick man that will show me the basic orientation
and proportions. And then I will start adding
simple shapes and volumes. I struggled a bit with how
large I should make her legs, especially towards the body. So I kept adjusting, yes. Which leads to fight. I've said this before
and I will say it again. There's nothing wrong with using digital tools when
drawing digitally, you may hear people say
that digital art is not real art and that the
computer does everything. But you should already know that it couldn't be farther
from the truth. It's like if you had really
expensive paints and brushes, you wouldn't use
them on a canvas because they did
the work for you. It's not true, of course, it takes a lot of time to master the tools you have
at your disposal. And every form of art has
different word patterns. That being said, I will let you watch the rest of
this post and I will see you on the
next lesson where we will start drawing
standing poses. See you soon.
6. Elegant Walk: Okay guys, so we already drew three different sitting poses. I hope you took the time
to draw along with me in order to form that muscle
memory of drawing. Because I'm sure that
just by watching your visual memory already
knows what needs to be done. But you can't become
a better artist without actually practicing. So let's now move on three
different standing poses. I'm still using the darkest
dark for this poses, and I'm simply importing the
pictures from the gallery. Now let's save this reference and bring it up on the side. I want to start with this
silicon posts kind of looks like an elegant
flocking maybe, maybe in a way that would be illustrated in a princess story. For this sketch phase, I had to lower the contrast
of the video for a couple of minutes so you could see the thin lines that
are used by accident. It will go back to normal after
two minutes, don't worry. So in standing poses, it's even easier to use the Stickman method to create
your polls really fast. It's actually the
way that I learned to diversify my poses. I would try to draw complex
poses in ten to 40 seconds. And that time only allowed me to do was stick man
and the gesture line. If you do this enough times, you eventually will
up the time ligament and you will start having time
for body volumes as well. The more you exercise them, the more natural it
will feel to place certain curves in
the same places no matter what the post is. Alright, so after we
sketch the board, we will use the liquify tool for some subtle adjustments and then we will add some clothes. Really important part
of this pose, RD arms, especially the hands because the character is keeping
them up elegantly. And she is even looking
towards one of her hands. That's the hands that will
need to be really well-made. While the one in the background
can have less detail. I'm thinking of recording the hands practice session for you guys in the near future. If you're interested in that, let me know in the comments. Finally, after adding all
the details on the sketch, we will start to
finding the line art. Don't forget to diversify
your line weight.
7. Taunting - Standing Pose: Okay guys, up next we have what I call
the counting posts. It might as well be
a fighting stance. I'm not sure, but I feel like she's taunting someone
to come at her. I want to exaggerate
this one and Brinker front leg even
more in the front. And I want her upper body
to lean more backwards. The upper side of the
arm will follow the line of the body and add
to this nice rhythm. Her leg in the back is
slightly foreshortened. So you need to think about it as if looking at the
cylinder from above, it will be thicker upwards and you will not be able to
see part of the proof. The head also has a really
nice upside down Gold. The whole pose is
coherent and has a story. Now that we have our bows, I will start adding the characters,
features, and clothes. When it comes to close, I love drawing standing
poses because it's so much easier to
see what's what. I hope you guys are practicing
this teal and that you are already preparing your
projects for this class. But Tiffany, if you weren't,
that's okay. Take your time. This is the final result. Now it's time to move on to
the final standing pose, which I might also use later on for a
complete illustration. I will see you on
the next lesson.
8. Dancing with a Fan: Okay guys, we are
at our final pose, one that I really like and might re-purpose for a
separate illustration. One thing you should
know when it comes to drawing standing poses is that the lines of
the shoulder and the hips should not be parallel? Yes, in reality they are. But any illustration parallel indicates a lack of dynamism. So you can see I
exaggerated the lines of the hip and the
one of the shoulder. And the hip now goes
up on the left side. By now you should
already know that we need to make a stick
figure for the pose. And this is a really
easy pose with the only difficulty
maybe towards the hands. I'm not entirely sure I liked the modals left hand position. I might change it later on. Okay, So I finished
the overall post. Now we will lower the
opacity of this layer, bring up our
character reference, and start adding the details. I find it funny
that even if it's the sixth time when I
draw this character, I still need to see
the first drawing I made for it so that it looks
like the same character. Well, I have a short
memory, I guess. Okay, so now that we've
finished our detailed sketch, we will lower the opacity of this layer and start
working on the liner. Just a reminder that you
can find a liner brush that I use in the resources
section of this class. So that's pretty much
it for this class. I hope that you have
a clear view of what needs to be done
when drawing poses. And if you still have questions, let me know in the comments. I will see you guys
in the recap lesson.
9. Recap: Okay guys, so we went from six different poses
in this lesson. Three of them sitting and
free of them standing. Based on this poses,
we could define, create the character design
page in our portfolio, but more on the portfolio
site worst end of the series. I hope you guys managed to
draw along, but if you didn't, no worries because you will have the chance to work
on your project. More details about that
in the final lesson.
10. Project and Final Words: Congratulations for
finalizing this fourth glass from the Character
Design Crash Course. I'm so excited to be
doing this series of classes and I hope you are
loving it as well so far. I'm hoping to see many
entries from you guys because no matter
how many classes or tutorials you watch, whether they are free or paid, not working on what you
learn will get nowhere. If you watch this
class until the end, I know that you are
one of the people determined to learn and
get better results. So demonstrate that by
publishing your project, you will get detailed
feedback and you will also get featured
on the next class. Your project is to draw two sitting poses and
to standing poses. Try to make them
dynamic and follow the gesture line from the
chosen and references. I will include the
references that I used on the resources section. So you could use those or
you could find your own. If you want, you can
only draw the posers, but I recommend you try
to stylize this poses for your own character
because later you will use these drawings
in the first portfolio. If you found this class
useful in any way, I would love it if
you followed me on Skillshare so you could get constant updates
on my new classes in-between the classes
of the series, I'm sometimes creating
a shorter class in a draw with me style. Last month there was one
about drawing a mermaid. Also, please follow me
on Instagram as well. It's where I share all of my
work free to five times a week depending on how much
time I have for drawing. I took a break in June, but I will be back on
track after I finished editing this class on TikTok, I posted two to three
times every single day. I absolutely loved the
community over there. I might start including shorter tutorials
over there as well. The next class within this series will be
about drawing costumes. If you have any specific
questions on the topic, don't be afraid to
ask in the comments. Or you can DM me on
Instagram about it. Until next time. Feel free to watch
my older classes for more details on coloring. And I will see you guys soon. Have a great day, a great week, and a great drawing session. Bye guys.
 Lara Militaru, Digital Illustrator & Coach