Transcripts
1. Introduction: Hello and welcome to
my class where you can learn how to draw various
different expressions. In this class, we
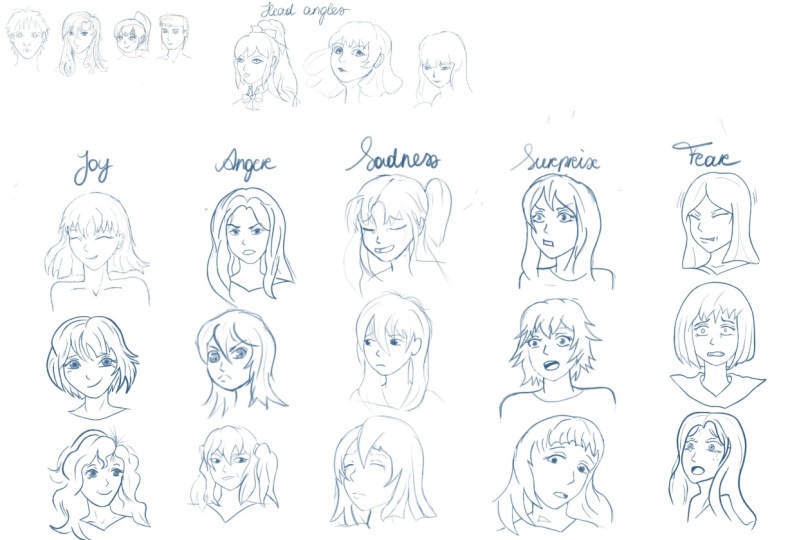
will eventually draw 21 different
characters and we will learn how to express
five different feelings. The feelings presented
in this class are joy, anger, sadness,
surprise, and fear. These are probably the most illustrated feelings out there. And while there are
many other ways of conveying each one, I choose to illustrate three different intensities
of each feeling. If you are only interested
in one of these feelings, feel free to skip around the class because
I value your time. If you want to learn
everything from scratch, including the and how
to position them, then I recommend you
watch each lesson. Now, the best way to actually implement what you learn
is by drawing yourself. Your assignment will be to draw at least one of the expressions presented in any of the lessons and submitted
in the project section. However, if you want
to challenge yourself, you should try to draw
one expression from each of the feelings
presented in the class. You can either draw
along with me or create a character and
expression of your own. There are so many ways of
expressing each emotion. And of course, I couldn't have covered it all in this class. I would love it if you asked
me any questions you have, either here or on my social
media, be a stranger. You can find me on my Instagram pretty much every
day of the week, and I always try
to answer my DM's. I'm also trying to create a
small artist community and post useful content as
well alongside my art. I would also love you
forever if you leave a review on this class and
let me know how it was, what you would like to
see more or less of, or even if you have
any topics that you would like me to
cover in the future. Thank you and enjoy this class.
2. Basic Face Proportions: In this lesson, we will concentrate on the
basics of drawing faces. When you are just starting out, everything about the face can seem easy when understood it, but way more complex than it should be when you are
doing it yourself. Let's take it step by step
and see how you can draw the head and the face by following some
simple guidelines. In this lesson, we
will only draw a front facing portrait
without any extra details. It won't look fancy, but I just want to explain the basic proportions from
the beginning of the course. Always start with a circle, that will be the upper
side of the face. You will see that in a moment. If you cannot draw a perfect
circle to save your life, first of all, don't worry, it's not that big of a deal. But if you are using procreate, you can simply
keep the pencil on the tablet after you
finish the wobbly circle. And it will automatically
fix it for you. Same with lines,
squares, and so on. Okay, you have your circle. Now you need to make
a straight line that is cutting the face
in half vertically. The length of this vertical line is the length of the face. This vertical line can be moved to the left
or to the right. It can be tilted or you
can play around with it, depending on the post that
you will want to draw. You will see in the next lesson on head angles how
you can do that. Following up, we will have two horizontal lines that
will cross the vertical line. One should intersect the
middle of the vertical line, and that will be the
position of the eyes above. It will be the eyebrows line. There's no set rule on how far above the eye line
should the eyebrows be. Afterwards, you will want
to create the jaw line, starting from the
edge of the eye line. Create a short line, just about the
remaining length circle that you drew in the beginning. Then create a diagonal line, slightly curved
towards the end of the vertical line that will
be your character's chin. Do the same for the other side, and now you have a jaw line. Now it's time to work on
the upper side of the head. Starting from the eye line, you will create a slightly
curved line upwards. You will curve it towards
the inside because that's the simplified way to
illustrate the eye socket. We do not have a straight line. We have it slightly curved where the eyes
are supposed to go. Now for the part that a lot of people are scared of the ice, my trick regarding eyes and the placement of
ice is eye socket. First, basically you
can draw some ovals. They can be as wobbly
as you want in the place where the
general position of the eyes is supposed to go. You can then evaluate
if you need to bring them closer or
further from one another, if one of them is too small
or too big, and so on. If you don't spend time
on adding details and you first establish the general
shape and position, adding details afterwards
will come easy. Now let's go and mark where the molt line should be placed. I added some guidelines, the red on the left
side of the drawing, so that you can easily tell where you should be
placing everything. Now let's add the
details of the ice. I won't spend too much time
on them since the drawing is only a demo proportions and it's not made to
look that pretty. You will see that after
I add the details. I feel like the eyes are a
bit too far from each other. I simply select them with my lasso tool and I
move them around. That's the beauty
of digital art. If you ask me, you can correct
mistakes quite easily, but you also need to be
able to spot them in time so that you won't throw
away hours of rendering. We are now almost done, but let's add a bit of context. Let's start by adding a neck
and a part of the shoulders, and then let's draw
some hair for this guy. I will try to create an
outer shape of the hair. Erase the guidelines, and then I will stop
for this lesson. If you have any questions regarding the
guidelines of the face, let me know through a comment and I will do my best to answer. Now I will see you guys
in the next lesson, where I will show you
some common face shapes. If you want to jump to the expressions part
of the tutorial, you can go watch
from lesson five.
3. Face shapes: Welcome back to another lesson of this expressions tutorial. There are a few more
things that I want to tell you before we start
drawing the expressions. However, if you want to
get straight into it, feel free to jump to the
lesson five of this tutorial, because that's where we will start drawing the
first expressions. I also want to take
a moment and mention that because my sketch
brush is rather thin, I had to adjust contrast
of the video so that you can see my guidelines and all of the subtle
details of the sketch. I did this for the
previous video as well. If you notice that the
canvas is not exactly white, it actually is white, and my sketch lines
are not exactly gray. They are, in reality,
a dark purple. But because they
are way too thin, the recording didn't
get all of them. I had to simply
adjust my settings. Now you are seeing everything
a bit more grayish. Now that that is out of the way, let's get back to our lesson. Whenever we are
drawing portraits, we should keep in
mind that if we want to diversify
our characters, we need to understand shapes. Not everyone has the
same face shape. The more you decide to add
shapes in your illustration, whether it's for faces, or bodies, or buildings, or anything that
you are drawing. The more you add shapes
into your illustration, the more variation
you will create. The most common face shapes
are oval, round, and square. That applies to
everything that you draw. These are the main shapes that
you will see at any place. Maybe triangles as well, but they do not apply
that much to faces. Now let's draw a character
for each one of these shapes, starting with the oval. We will keep in
mind the guidelines that I showed you in
the previous lesson. However, because I
want to not repeat the same information as before, I will skip through some
parts of the drawing. As you can see, I'm
using the circle, the vertical line, and the horizontal line to show
the direction of the face. I always do this whenever
I start a new sketch, even if sometimes they are wobbly or not perfectly aligned. I usually try to draw fast, sketch fast and simply
get into the concept. In order to make
the face look oval, you need the face
length to be longer than usual and the jaw
line to be elongated. A nice curved shape
of the jaw line will mostly set the whole
shape in this case. Now let's add some features. I have the eye socket now I need to add a
few details and create the eye shape that I want the need to figure out
a way to draw the hair. I will draw the hair for each
of these drawings because otherwise they would look
slightly incomplete. However, since it's not the
main focus of this tutorial, I will skip here and
there so you don't have to waste time seeing me
detailing everything. So this is the oval shaped face. Now let's move on to
the round shaped pace. We will also start by
creating the basic guidelines And at least a vertical
line so that I know which way our
portrait is facing. Then I will create
the eye sockets, the small nose, and the mount. You can see that in this case, I haven't wasted any time
creating the horizontal lines. This is why I will have to
move the eyes around a bit. And keep adjusting
their size until I feel like the way they are
positioned is just right. Okay, So I will erase the guidelines now
that I know where the eyes are supposed to go and I will start
adding a few details For the round shaped face, you can see that the jaw
line is not as elongated. The line that creates the jaw
line is not going almost. Straight upwards. It has to give a wider jaw line so that you can tell
this is a round face. Moreover than that,
you can see that the features are slightly
more compressed. The nose and the mouth
are closer to the eyes, and that gives the face a
less elongated perspective. It makes it feel
shorter, denser. And that's why we can tell from the distance that
this is a round face. Now let's create a hair
shape that will the face, by that I mean
that I will create a hairstyle that is
a bit in itself. In order to create
a nice face shape, I want to create a upper
side of the hairstyle, and then I want to continue
with the ponytail. Let's not forget
about the eyebrows. And now I will go over
some of the details. This is our round shaped face. You can see me creating
a red circle above it. This is pretty much
our new portrait. Let us now move on to the final face shape
that is square. Once again, we begin by
drawing the circle and the vertical line to show us
the positioning of the face. Now we will go straight
into creating the jaw line, because the jaw line is the most important part that
shows the shape of the face. In this sketch, I
will draw a man, the first man that I'm
drawing in this tutorial. I want to create a larger neck and more
defined angles if you want, you can see that the chin is not only one point or
a very short line, it's actually almost
half of the next size. Then we will create
smaller eyes than for the female illustrations
that we created earlier. A small nose as usual, because I like to render it. Later on we will keep erasing parts of the guidelines and keep
adding some details. Now we will create the
character's hair line, because I want to emphasize
the shape of the face. I will try to create a
hairstyle that is also very angular and almost
square shaped. You can see that I'm not wasting a lot of
time on the hair. I'm trying to create a
general shape and some of the hairs I recommend. Whenever you are trying to
create a new character, try to create features that emphasize main shape
of your character. That's pretty much it about
the square shaped face. Now let's try to recap
everything that we went through. We went through the oval
phase where you will try to create an
elongated vertical line, where you will try to
create the smooth jaw line. Then we have the round face, where the features
are more compressed, where you do not have an
elegatedvertical line. Then we have the
square shaped phase, where the jaw line
is very angular and it's more suited
for male characters. Now let's create a page of the drawings that
we have made so far, and then we will move
on to the next lesson.
4. Head Angles: All right, so in the last lesson we discussed about face shapes and drew together three
different characters based on three shapes. Now you should have a
better understanding of how you can vary face shapes. So the next step
is to learn some basic head angles
that you can draw. In this lesson, I will cover only three common head angles that are probably the most used in regular portrait
illustration. But if you want to
see more angles, I'm covering that
in my older class, part of the Character
Design Crash Course series, which you are seeing
on the screen in the lower left corner. If you want more details
about the head structure, go check out that class as well and the resource
provided there. Let's start with
my favorite angle, the three by four head angle. As a brush, I like
to use Lotus bubbles gesture sketch brush for
any sketch that I make. This short sketch section
of the video will be a bit darkened so that you can
see my soft sketch lines. It will turn back to its
light appearance shortly, we will start with
the wobbly circle. I don't really care
to make it perfect, only needs a guideline. Then we will create
the next guidelines, the cross that shows us the direction in which
our head is facing. I will then start creating
the outer shape of the face, the general position of the ear, and another guideline
for the eyebrows. Now I will draw the eye sockets. Not the eyes exactly,
but the sockets. Basically, this means
that I won't spend too much time rendering
the eye shape perfectly. But I will draw some ovals
resembling eyes in the places where the eyes
should go in time. This trick proved
to be efficient, helping me draw the
dreaded second eye without too much difficulty. Basically, instead of spending a few minutes drawing
a perfect first eye, and then having set up the part too high
for the second eye, I instead create a placement
for the eyes first and then adding details
to both eyes as I go. Like lashes, pupil, lower
lashes eyelid, and so on. At this point, the sketch
is still really soft. I'm not committing to
anything just yet. I'm simply creating a
skeleton for my sketch. This allows me to
still be able to move things around with
liquefy or with a selection tool without
being scared of having wasted time on beautiful details that are placed on
a flawed skeleton. For the mouth, I like to go for a simple shape without
adding too much details yet. I usually add the details
with the coloring, but we will not be doing
that in this class, we will only do the
sketching part. You might notice that the mouths that I'm drawing
are very, very simple. Let's add the irises and
make her look to the side. Then go back to adding
some more details around. Although this is not
a class on hair, you can see from
my guidelines that the hair is not
sticking to the head. It's actually the headline. And then you have some
space before you draw the hair. All right? I made some soft marks for
where the hair will be placed, but I will only leave
it like that for now. I basically want to give her a nice ponytail
with bangs all over her forehead and some longer
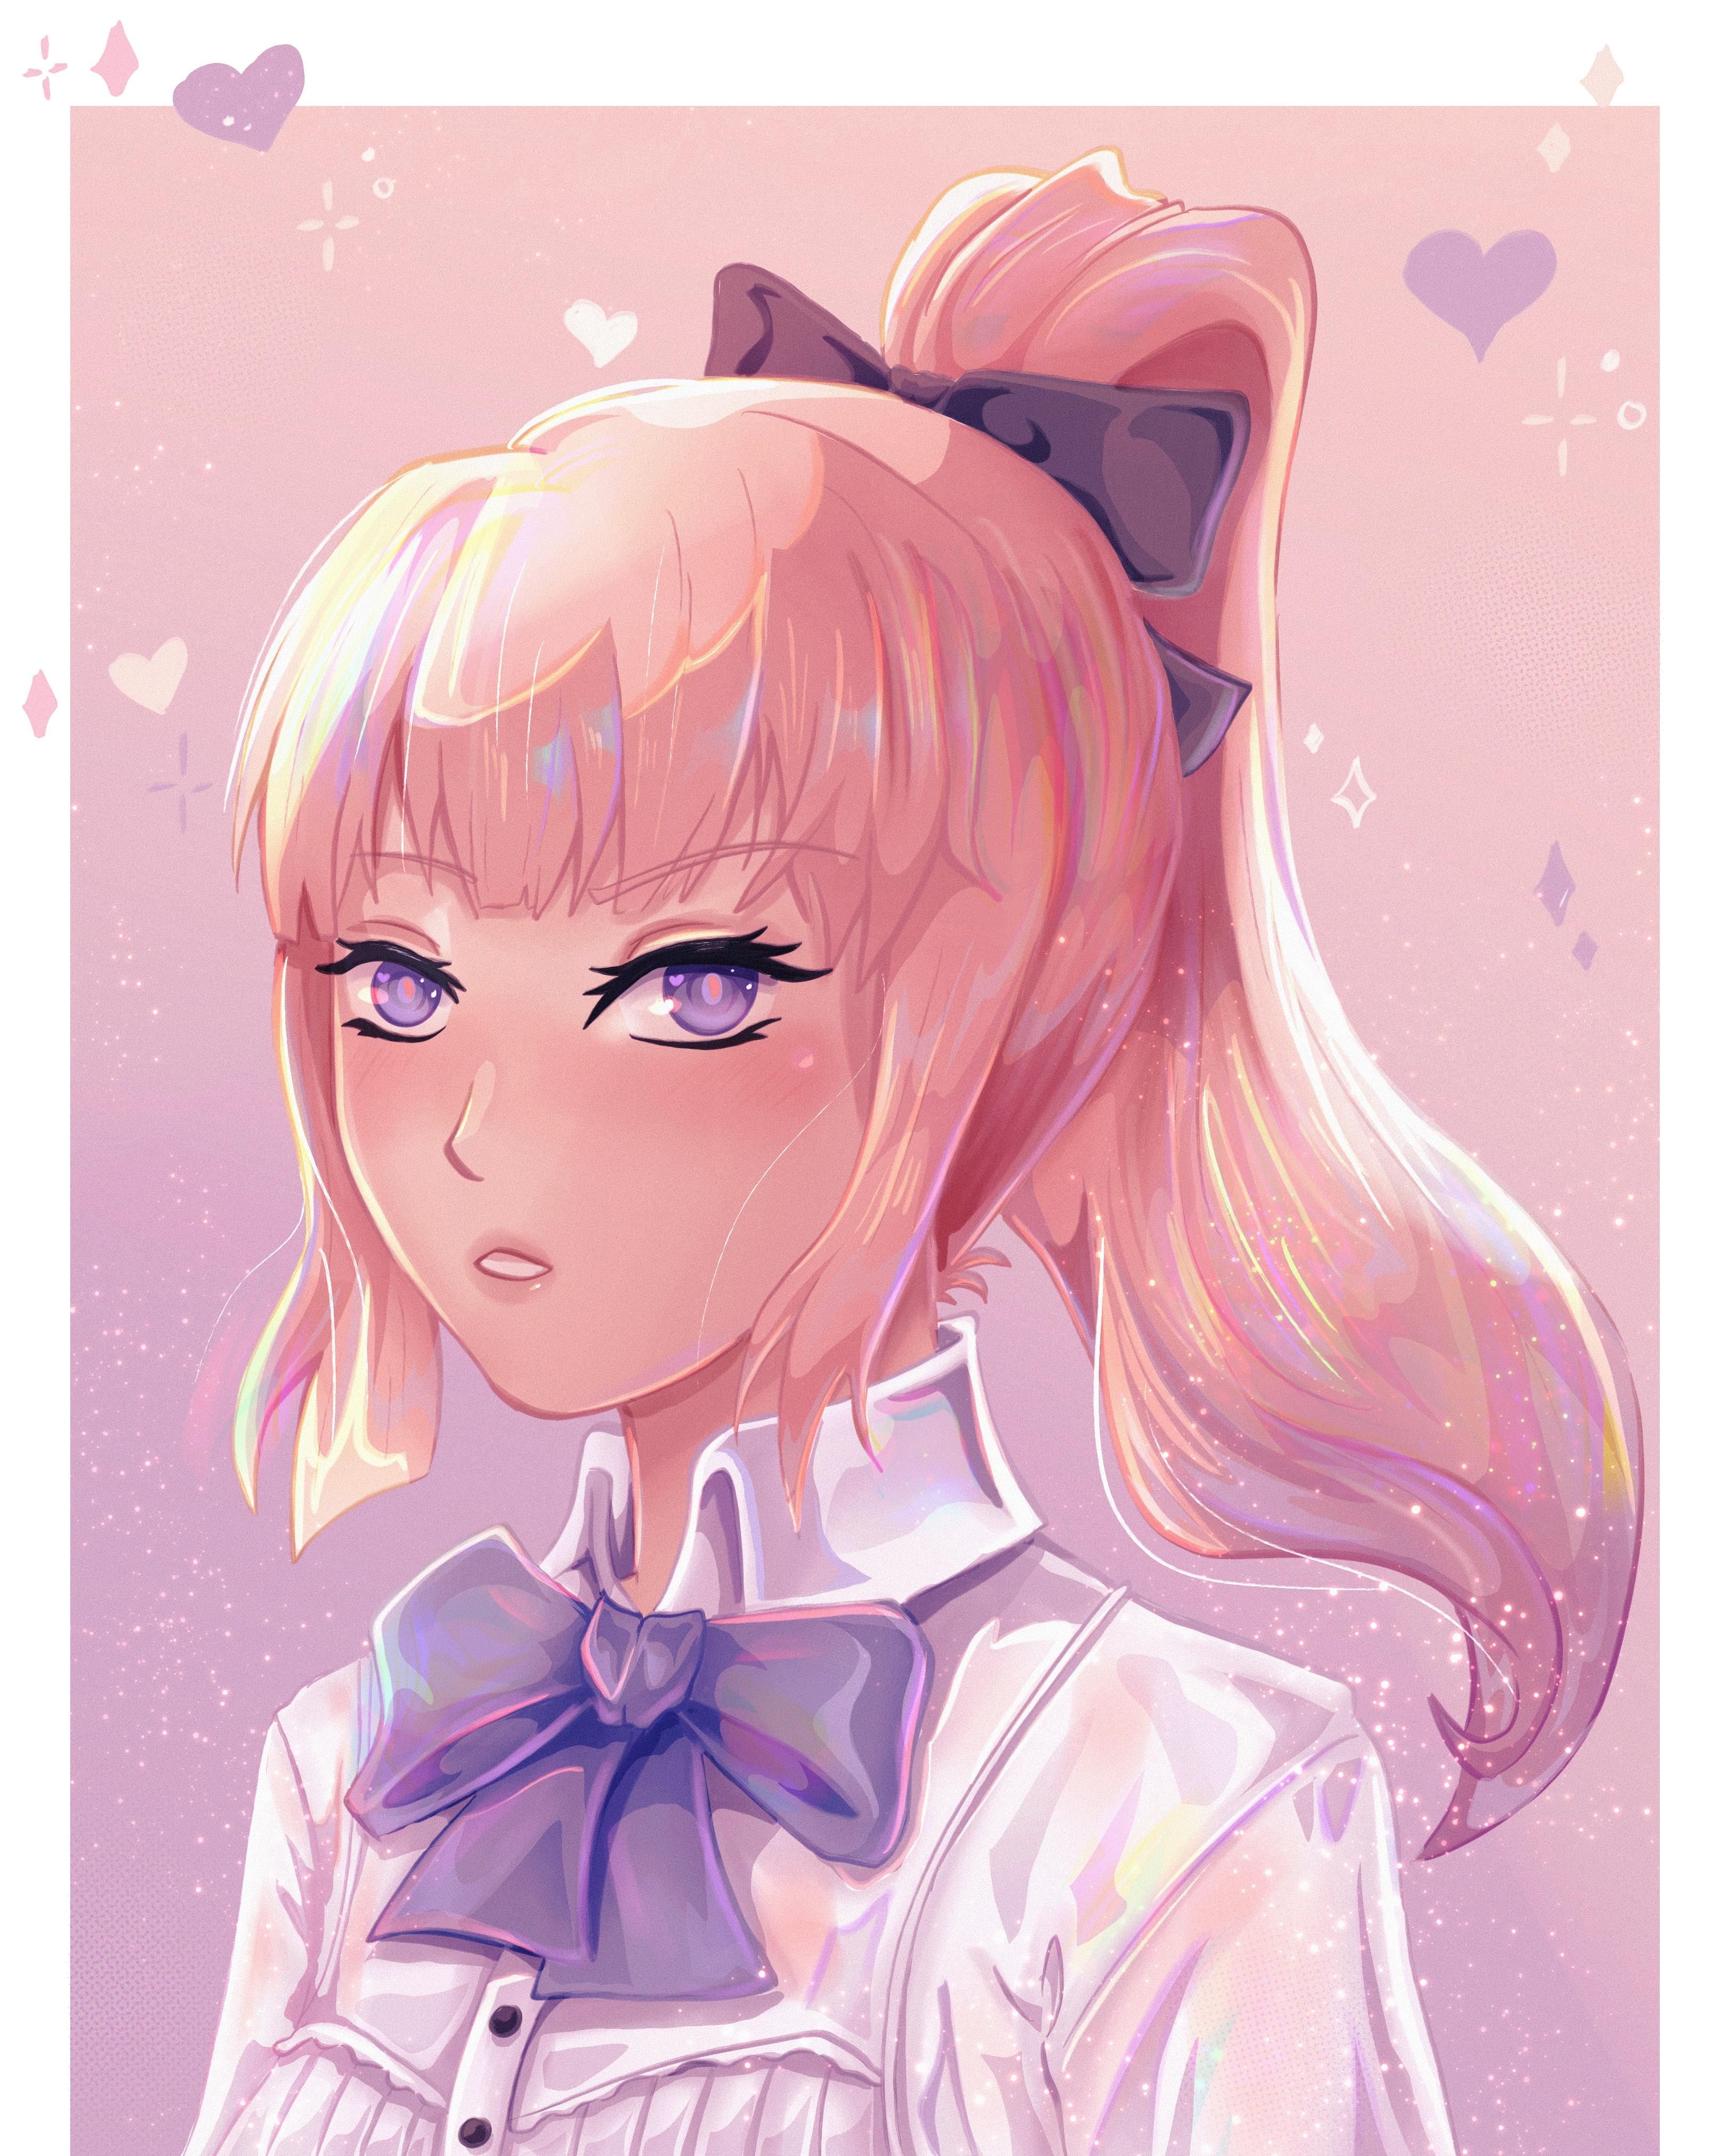
banks around the face. While we are drawing
these angles, I thought that we can add some
character design into it. Let's make this character
some an elegant lady who is slightly surprised
to hear or see something. Since she's a lady,
she won't exaggerate her expression because she
was taught better than that. And that she should keep
her emotions in check. Now I want to start
working on her clothes. I figured that a nice buttoned up shirt with a bow
would be very fitting. I will erase some more of the overlapping lines
and start working on some details for the eraser. I'm using a simple
round brush because I don't want anything too
soft when I'm racing. Whenever I'm racing,
I'm basically carving inside the brush that
I used to sketch. Liquefy is your best
friend in procreate. It's the easiest way to modify a sketch without messing
up with the pixels. Unlike Photoshop, procreate
is not a vector based app. Whenever you will try
to readjust the size of your sketch or finished
drawing or anything like that, you will see that it
becomes a lot more pixelated since the sketch
is a bit more detailed. Now I will soon remove
the screen effect so that you can
see what it really looks in procreate by now. Okay, we are now back
to the normal screen. Basically, I'm not using any more adjustments because my lines are a bit darker now. They are still too
soft for the video, but at least you can
see what I'm doing now. Let's continue with adding
details to the hair. Since hair is not the main
potential point of this class, I will skip every here and
there in the video where I'm wasting too much time refining the hair
and the expression. But if you would
like me to create a new class on hair
and the comments. Okay, so let me just add a beautiful bow in her hair
that will tie her ponytail. I feel like this
will go nice with the bow that she already
has at her neck. Let's quickly draw the ponytail and we are going to be
done with this one. Since portraits are usually
rather static as poses, I like to add some dynamism to my portraits through the
movement of the hair, as if the character
just turned their head, or as if a gust of wind was blowing their hair
or something like that. All right, so this
is our final drawing of this head angle. Let's move on to the next one. The second head angle will also be in the three
by four angle, but this time it will
be looking downwards. Let's see how we can do that. We will also start by
drawing a wobble circle, which right now is not
easy to see on the screen, but it will be short. I'm already at the
eyes of the line and starting to work on the
outer line of the face. You can see that the eye
line is arching downwards. That will be an indication for my later self that she
will be looking downwards. Since this is a
downward facing pose, you will see more
of her forehead, more of the characters top of the head and the lower
part of the face, that is the nose and the mouth. They will be placed
downwards and they will feel like the distance
between them is closer. You see how I'm drawing the
nose quite low on her face, and the distance between
it and the mouth is very small compared to
the previous expression. Let's draw some
sockets for the eyes. You can see I'm only
sketching some ovals. Now let's see how much of her
head we are going to draw, so that we will make
this pose believable. Just like before, I
will add some banks, let me just erase some
of the guidelines since our character
is looking down. The banks will almost
cover her eyes, they will definitely
cover the eyebrows. But even so, I still like to make my eyebrows noticeable
even under the hair. But generally the banks
in this situation will cover eyebrows if
they are long enough, maybe they will cover
even the upper side of her eyes, maybe
her eyelashes. Now I'm working on intensifying the eyelashes and actually creating the shape of the eyes. Don't forget to
add the eye lids. As you can see, I'm
drawing the eyebrows on. The hair illustration
doesn't need to be extremely realistic
as long as you can convey the emotion that
you are trying to convey. Let me just select the nose and the mouth and bring
them downwards. Now I will sketch
more of the hair. In my normal illustration, you can see that I'm trying to add a lot of detail in the hair. I'm trying to keep this practice
in my sketches as well, even though I'm wasting a
bit of your time right now. But I hope you can get some inspiration from the way
I'm drawing hair as well. Let me just use some
liquefy to adjust a bit. The pose. Now I will start moving faster
with drawing the hair so that we can move to our next expression
as soon as possible. All right, this is pretty
much our second head angle, the one that is
looking downwards. Let's move on to the
final head angle. For this head angle, I want the head to be
looking upwards and I want the character to
be looking down at us. That means I will also
start with the circle, but the guidelines of the face, you will see that the eye
line will be arched upwards, the complete opposite of
the earlier head angle. The nose will this time be
closer to the eye sockets and the distance
between the nose and the mouth will be greater. Right now, I'm trying
to create a skeleton of our pose and then I will
add a few more details. It's best not to rush a pose
that you are not used to try to create a good skeleton and only then add the
beautiful features. All right, now I will
draw the eye sockets. I will always take a good look at where I'm placing
the eye sockets. And if I want to
move them around, this is the best
time to do that. Now I'm adding the
irises that will signify that the character is
looking down at something. Let's erase some of
the guide lines. Let's add the eyebrows as well. Because of the pose,
the eyebrows will seem closer to the eyes than
they would normally look. Let's reinforce the jaw line
and start adding some hair. For this head angle, I will
go for a short hairstyle. I want it to be a bit
bouncy and slightly way. Let me just draw the ear and now I'm going to reinforce
some of the hair lines. As mentioned before, whenever
you are drawing portraits, they will tend to
look a bit static, so don't be afraid to use the
hair to add some dynamism. Now our character is starting to actually resemble a portrait. Let's add the eye lashes. Now I will erase some of my previous lines
because they were a bit messy. And then I will add them again, adding the eyelids and
detailing the here a bit more for this character. I want to actually reinforce
her lips a bit. This is what I would
normally do when using color while we're at it. Let's actually fill
in her eyes as well and leave a small
spot for the light. This is our third head angle. Let's create a short summary of the head angles that we
have previously drawn. I will have this summary for all of the
following lessons. If you want to go back and
look at what we have drawn, you can skip directly
to the end of the class and just look at this summary. All of these summaries
will also be available in the
resources section. Okay, that's it for
this lesson guys. I will see you on the next one where we will start
drawing the feelings.
5. Joy: Welcome back. We have
previously covered face shapes and head angles
in the previous lessons. Now it's time to really get
into drawing expressions. The following lessons will be centered around
specific emotions. For each emotion, we will draw
three different characters expressing the said emotion in various intensities or forms. That being said, let's start sketching the first
character, expressing joy. Just like before, I will start
sketching the circle and the cross showing the direction
that the head is facing. I will start by creating the
skeleton of my portrait. So we are starting from the big shapes and
then we will add the smaller shapes which would represent the
features of the face. I want the first
character to be cute. The closed arched eyes
are a way of showing that she finds something
funny or pleasing. The eyes are arched
upwards and that signifies that this
is a funky emotion. This is a pleasant emotion. Whenever they are downwards, it's a sad emotion, maybe an angry emotion. We will see later in the class, I will erase some of
the guidelines as I go so I can keep
the pose static. The eyebrows will
also be relaxed. They will be arched upwards. Now let me just work on
her eyelashes some more. I want to keep the eyebrows
as arched as possible, and the smile will
be asymmetrical, so it adds interest
to our portrait. That weight also feels like our character is
up to something. Now, I will reinforce
the lines of the face. Now I will work a
bit on her hair. I will give her
short and wavy hair and the banks will
be quite spiky. I want the banks to be short
enough to show the eyebrows. I feel like this will give her a really young and fresh look. Now, I will work a bit more on her neck line and her shoulders. Usually when I'm
drawing portraits, I am trying to include at
least the shoulders inside my canvas because
otherwise it will feel a bit incomplete
more than a portrait. It's rather bust I to make the hair bounce
and that we am trying to add dynamism
to this portrait. I will spend a bit of
time detailing a bit around her hair so that it
has a more finished look. And then we will recap what
makes this expression joyous. All right, now let's see
what is a joyous expression. The first thing
that gives it away are the eyes. The closed eyes. The upside arch gives them a happy look even by themselves. Second, the eyebrows are
also simple and arched. This shows that there are
no frowns on her forehead. Then there's the
lop sided smile, which adds a bit of
playfulness to the character. That's about it for
the first expression. Let's move on to the second one. For the second expression, I want to go for a
more shy character. I want the head position
to be a bit inclined and the character will look upwards through the corners of her eyes. Just like before,
I will start with the guidelines and then drawing
the counter of the face, creating a place for
the eye sockets line. All right, now let me reinforce the eyes and erase some
of the guidelines. Okay, so I want
the lower part of the eyes to be rather flat. The inner corners of her
eyebrows will be a bit raised. If you were to only take a
look at her eyes and eyebrows, you would almost consider
this character to be sad. However, the mouth will make the difference as you
will see shortly. The subtle blush added to her cheeks also showed
that she is bashful. Maybe she received a compliment
or an encouragement. You can see now after
adding the mouth that this is happy expression. Now let's add to the bangs. To go with this pose, I originally wanted
to use the rest of the space for a fluid hair that looks a bit suspended
in the air. But then I decided to go the
opposite direction and make a short hair with a clean cut and only have a
few strands standing out. Don't forget to use liquefy
whenever you need to correct some mistakes or when
you want to change shapes, sizes, or anything similar. Let's just clean up
the sketch a bit more before we create
the shoulder line. This is the part where I was
trying to create a long hair to cover the rest of the space and then I
changed my mind later on. So now we have the short hair and we will reinforce some of the lines and erase some of the guidelines or some
of the messy sketchy. Let's adjust the eyes and reinforce the eye lashes
and create the eye lids, all right? So this
is pretty much it with our second expression. Let's move on to the final one. For this lesson, let's change the direction
this character. I draw a lot of these characters
facing the left side. Now I want to change
it up a bit and make this character face
the right side. For this one, I want
to draw a character with an oval face that's rather long and with really round eyes and a
large smile on her face. You can see that I'm
arching quite a bit. The upper side of the eyes, the eyebrows are really risen. They are quite far
from the eyes. You see a lot of the irises. Let me just draw the
ear really fast. You raise some of
the guidelines. This is the most basic joyous
expression, in my opinion. A simple smiling face that's looking directly in
the viewer's eyes. Here we go with a large smile. Let's just move it around a bit. There we go. Let's clean it up a bit more before we
start drawing her hair. As I start sketching
her curly hair, I will keep retouching the eyes either with
the Lasso tool or with the Liquefy tool to correct some mistakes or with a sketch
brush to add more details. I notice class is not
related to drawing hair, but I keep spending some time
stylizing the character, so we wouldn't just have
some bald heads expressions. If you would like me to go
deeper into drawing hair, don't forget to let me know
in the class review if you would like a new class on
how to draw and render hair. Okay, let me just reinforce
the eye lashes a bit. I really believe eye lashes make a character look a
lot more feminine. Let's never forget about the eye lands and
the lower lashes. After spending another
minute on the hair, we can then wrap up the further expression and move on to creating the summary. Okay, so this is our
further expression. Let's now arrange them all
together in our summary. If you have any
favorite expressions, don't hesitate to mention which
one you liked the most in the review that said with the joyous expressions. I will see you on
the next lesson with a new feeling and another
set of free expressions.
6. Anger: Welcome back to another lesson. This time we will
concentrate on drawing free expressions
that reflect anger. Let's not waste any time and get started with the
first expression. The first character will be almost front facing the viewer. I try to avoid poses that
are facing the viewer perfectly because
everything would have to be symmetrical. And that's the most boring
pose that you can draw. Also one of the poses that's
the most prone to mistakes. You can use the symmetrical
functioning procreate to draw one side of the face and the app will mirror what you draw
on the other side. But in my honest opinion, the result seems flat and
overall not interesting. It looks lifeless and still. And in illustration, you should be doing the
exact opposite. Unlike the previous drawings, I was a bit unsure on how to start the first
angry expression. So I spent more time on
defining the head and the hair until the enough
idea came to mind. Whenever you don't have
any idea where to start, go for the basics. As long as you have
your guidelines, you will know where to place the nose and the eye sockets. Start with that. Usually as you are drawing an idea
will sooner or later come to you and you will find
yourself sketching away. You just need to
trust the process. You can see that I started with the eye sockets and only then start adding the eyebrows that are starting to create
the desired expression. After I have that beginning, I will start creating a
better conter for the lashes. Adding the irises
so that she will look upwards to someone
outside of the frame. Erase a bit more
of the guidelines. Now I will enforce
her eyebrows even more and add the frown
around the inner corner. I think I want to make
her shout at somebody. So let's draw an open mouth. Now, I will erase part of
the sketch and draw above my sketch with cleaner
lines and a smaller brush. I will also add
some more details to make the sketch more refined. Usually as artists, we
understand our sketch even when we only put down a few
chaotic lines on the canvas. Because in our mind, we
know what we need to be, the end result, or very
close to it at least. But if we want to present
our idea to others, let's say it maybe to a client, we need to spend a bit more time refining it and
adding some details. Spending this extra
time will help the viewer understand
our initial idea better. For instance, this
is the process that I'm using whenever I'm clients. A sketch of the commission
that they want. I don't want to commit to a line art just
yet at this stage. But I sketch, but I want the sketch to be
clean enough so that the client can understand
where I'm trying to go. All right. The end result of the first
expression from anger. Let's move on to the second one, right from the get go. I know that I want
this face to be round. To emphasize that I will
create very round eyes. And the shape of the mouth
will be arched upwards. You can see from the eye sockets how round I'm trying
to make the eyes, the face is very short, the eyebrows will be shorter
to reinforce the idea that I want everything to be
round just like before. Let's erase the guidelines to make this look
more aesthetic. This character will
be looking downwards, really angry at something or someone that's
outside of the frame. Let's reinforce
this spout a bit. Keep the jaw line pretty round at the ear and the neck line. Now to completely contrast with everything that we
have done so far, let's make her hair
with spiky ends. In terms of symbolism, the spikes can be considered a triangle shape, which
signifies danger. In essence, I'm adding
to her expression through other means besides the eyes, eyebrows, and mount. Let's add the eyelids and
reinforce the eyebrows. Now she really looks mad. Let's go over the eyelashes and as the unwanted lines. In the end, we will erase the ear because the
hair is covering it. Now let's go over
the sketch again and reinforce some of the lines. Now we have finalized
our second expression. Time to move on to our
last one for this lesson. This time let's draw
a character that seems to be visibly
bothered by something. See here I'm thinking of creating eyes that
are a bit closed, a mouth that you can almost
hear disapproving from, and maybe neutral eyebrows. Let's start with the basics. First, we have our circle
and our guidelines. We will move on with
the eye sockets, placing the nose and creating
a sketch of the mouth. We will go for flattery
lines. For the, yes. Let's erase some
of the guidelines at the irises and some creases around the
mouth and the eyes, eyebrows and a bit of
crease under the mouth. I struggled a bit
to come up with a hairstyle that would
fit this expression, which is why I have tried push
it back as far as I could, but I figured I would go
with some twin tails. After drawing the hair, however, the face seemed a bit too
rough and they clashed. So I decided to change them out into a semi
opened position, as if commenting
towards someone. I eyebrows as well, into an asymmetrical pose, one of them being lowered
and the other a bit risen, transforming the expression
into an incredulous one. Now that I figured out the
final skeleton of our sketch, let's spend some
time detailing it. The sharp eyes are
accentuating the expression, so I want to keep
the eye lashes to a minimum so as not
to ruin this effect. You can see as I progress
that I tend to erase the lines that I don't really
need or that are too thick. Basically, I'm carving into
my sketch with the eraser, and only nice,
crisp lines remain. I want to clarify
that these are teeth, so I'm drawing a small line on each side of
the mouth to show that whatever you do when you are drawing
open mouths, never draw. Each individual ends up looking extremely weird
in an illustration. Now, I'm almost done here. I will just add a few more
details to the hair ends. Pretty much. We can now arrange all
three expressions and create a summary
of this lesson. Here's the summary of
the angry expressions. I hope you guys enjoy it now. Let's move on to the
next set of expressions.
7. Sadness: Welcome back to another lesson
of drawing expressions. This one we will draw three
different sad expressions. I don't know about you
guys, but I was personally, really impressed as a kid, whenever I would see
sad, almost crying, or fully crying
expressions in Anima, and I would always try to draw them and obtain that expression. Now let's start the lesson
with a similar expression. I'm choosing to start with a lowered head and closed eyes, as opposed to the closed
eyes that we drew in the joyous expression
a few lessons ago. These eyes are arched in the opposite
direction downwards. To express sadness, I will draw tears in the
corners of the eyes, both inner and outer corners. The tears from the
outer corners will be more prominent and stream
down on the cheeks as well. The head position also gives
me the opportunity to draw an open mouth that will intensify the feeling
that I want to depict. All right, now let's start
working on the mount. Let's draw a hint of the T. When you are drawing the tears
streaming down the face, remember that the
face is not flat. Try to create a little
curve in the stream of the tears so that you can understand that the tears
are following the shape, the volume basically
of the face. Now let's try to add some
hair to tie up this portrait. I will go for some twin tails. Again, just like before, I will use the hair is my
main element for movement. The twin tails will have
this dynamic flow to them. Remember that since this is a rather down facing
head position, we will see a bit more
of the top of the head. You can also see
that the nose and the mouth are quite
close to each other, which also signifies that
the head is lowered. Erasing the guidelines
as I go and trying to get rid of the sketch lines that
I do not need anymore. Now I will start reinforcing some of the lines and
keep adding details. Trying to contrast
the subtle tears with a rather jaw line. Now I'm committing
to this hairstyle, also adding the eyelids and doubling down
on the eye lashes. No, let's concentrate a bit on the shoulder and neck line. Now I'm darkening the corner of the mouth and reinforcing
the line around the mouth, using like fit to adjust one of the eyes that
seemed a bit too long. The eyebrows of this character
have the inner corner significantly rised compared
to the rest of the eyebrows, so they will naturally create creases on the skin around them. Don't be afraid of adding
these details to your sketch, as they can make the
expression even richer. I will erase some
of the Xs lines and carve with my
eraser whenever needed. The first expression
is now done. And let's move on
to the next one. For the second expression, I want to show you
how you can create sadness with the look
in the eyes as well. Not only through tears. The head angle is
nothing special. However, the way the eyes look even further
in the distance is definitely making you think that this character is avoiding
meeting someone's gaze. The eyebrows and the small
put formed by the mouth indicate that this character is not happy with their
current situation. If I were to draw
more of the body, I could try to push
the shoulder on the right towards the viewer
so as to keep them away. Maybe the character could
even cross their hands around their chest to show even more the need to
distance themselves. These ideas actually
started from the eyes and the way they are facing the opposite direction
from the viewer. Adding a bit more
details to the eyes. Adding eye lashes and
reinforcing the iris. Reinforcing the jaw line. Let's reinforce the
hair and neck lines a bit more before moving
towards the final pose. I will try to adjust this eye a bit and move it
more in the middle. I'm using the selection
tool for this and now cleaning up
the after effects. As always, I'm erasing the guidelines to keep
everything clean as possible. Usually, I'm not drawing this clean whenever
I'm sketching, I'm usually having
a messy sketch. And then I'm coming with
a new layer above it and simply recreate the
sketch on a clean layer. You can see how the
eyes moving away from the viewer can actually contribute to this
sad expression. The eyebrows as well are giving away that the character is
not feeling comfortable. This is about it for
our second expression. Let us now move on
to the final one. For this one, I want to make
a head angle that's risen and the character is keeping
their eyes shut close. In this case, I'm drawing the
eyebrows a bit more wobbly. The eyes will be arched upwards, but unlike the
joyous expression, you can tell from the eyebrows that this character
is not happy. I also added some
very small tears in the corners of the eyes. I'm adding these subtle
lines for the blush, adding a crease underneath the mouth to show that the
character is spouting. Since the head is
facing upwards, the nose will be placed higher
and it will seem bigger. The distance between
the nose and the mouth will also seem bigger, but it's only due to the pose. When we will draw the hair, you won't see too much
from the top of the head. These are all things
to keep in mind when you are drawing
a pose like this one. All right, let's make
this expression actually become a character and
give her a nice hairstyle. Once again, I will be doing
a shoulder length hairstyle. It's easier when
drawing these busts. Now let's zoom in and add
some details around the eyes. It's always important not to
forget about the eyelids. Now let's reinforce
the face line, the jaw, the neck line. And let's carve a bit adding some eyelashes and
reinforcing the hair line. I like to play around with the line weight. It's always good to have
a line weight variation, especially when you
have no color and you are only presenting
the sketch or a line art. Okay, just a bit
more and we will finish with our third character adding a few more details. This is pretty much
our first expression. Now let's prepare the summary and move on to the next emotion. I'm hoping that
these summaries at the end of each lesson
are helpful to you. I believe they are a
good visual reminder of what you have seen
through the lesson. And you can simply
pause the video. If you want to draw by yourself one or more of the
finished sketches. I will see you guys
on the next lesson.
8. Surprise: All right guys, it's time for
another set of expressions. I hope you guys are enjoying the various characters
that we are creating. And if you would
like to see more or less of them,
please let me know. In the review or in the
discussion section, let's start sketching
our first character from the surprised series. We will start in a
classic manner with the circle and the cross
showing the direction that the head is facing
this character. We will go for an
upward facing head with the eyes wide open. And now I'm adding the
sockets of the eye. Now let's add the nodes. Remember that this is
only our skeleton. Let's guidelines. And then add the
slightly open mouth. Now that we have a clean face, let's sketch the mouth. Now let's add the
eyebrows and irises. Usually, you can tell that the character is
surprised or shocked when the eyes are wide open and the irises are really small. And the idea that you
can see the full iris, the frowned eyebrows, will
contribute to the expression. Whenever you have
round eyebrows, don't forget to draw the
creases around them as well. Now that we have our
expression a bit more clear, you can tell that the character is taken back by something she seems like she cannot believe whatever is
in front of her eyes. Let's draw the neck line
and the shoulder line. Let's add the hair. I will go for a simple
straight hair line and simple bangs to
cover her forehead, erasing some of the
sketch lines as I go. Now that we have our skeleton, let's enhance our lines and commit to what we
have drawn so far. By the way, during
the full class, I have only used one brush. The one that I at the
beginning of the class, It's from Lotus bubbles brush pack and it's called
gesture sketch brush. This goes to show
how much you can do with a brush that
feels comfortable to you. I actually tried a lot of
brushes for sketching. This one feels creamy,
it feels soft. Whenever I need to, I can simply erase in it, carving it, and
obtain crisper lines. But of course, this brush
is only for my sketches. I have a different brush
that I use for a line art. I'm not going to use
it in this lesson, but in any other of my classes, you can find it attached
in the resources. Okay, so now I reinforced
the hair line, adding a few details to the
hair and finalizing the bust. Now let's add some eyelashes to make her look more feminine. Erase some of the
unwanted lines. Let's also reinforce the
irises and the lower lashes. I think in this case, adding the bridge of the nose. Be really fitting. I want to use a bit of leg
pi on the side of the face. Let's also darken the
corner of the mouth. This is pretty much it
with our first expression. Now let's move on
to the next one. For this expression,
I want to go for a character with
a wide open mouth. I will first construct
the head and shoulders and then jump directly
into drawing the mouth, because I feel like
the first thing to catch the viewer's eye. I'm trying to create a more dynamic post
by tilting it a bit before drawing them out. Let's erase some
of the guidelines. Let's go for a really wide one. Don't forget to draw the tete. Then the tongue and darken the background to show that
you have a volume here. Since the eyeline is a
bit on the upper side, that means we can only
see the top of the teeth. We will only sketch those. Now let's try the eye sockets. As I mentioned before, in order to depict the
surprised expression. The eyes should be wide open and the iris should be small. The eyebrows are arched as well to emphasize
the expression. We can already start to see
how surprised this character is already adding
the eye lashes. Now let's do the same
for the second eye adding lower lashes. Now let's start adding
some messy short hair. And then we will start
refining the lines. Now that we have the hair, let's start going around the features of the
face and then the face Reinforce the lines and erasing. Whenever we do not
need any sketch lines, let' s create an ending for the past and then reinforce
the shoulder line. I think for this character, I will color the irises and a small light with the eraser. This is our second expression. I really liked how
it turned out. Now let's move on
to the third one. I got a bit bored of
drawing left side poses, so let's change the side that
our character is facing. You can see that in every sketch I'm starting with my guidelines. They are absolutely vital
for drawing a good skeleton. This character will be
looking downwards to the viewer as if she's a
really tall character, but the irises will still be small enough to see
the entirety of them. I'm still creating
the structure of the head and shoulders
and then I'm adding the eye sockets,
erasing the guidelines. As I'm moving along, I already know where
I need to place my eyes for this character. I will be making the
eyes less round. So you can see that you
are not forced to draw round eyes to obtain
surprised expressions. The eyebrows will be raised even more so with the inner corners. Eyebrows don't necessarily have to be arched to be surprised. There are multiple ways you
can depict this feeling. I would say that the
most important part of this expression are the irises and probably the open mouth. We can already tell that
this is surprised character. Now let's add some hair. I'm a bit out of our
ideas for hairstyles. After all of these characters, I will simply keep it short
with a straight line. I decided on creating
really short banks that are ending right
above the eyebrows, but I will add a bit of
dynamism to the hair so it can still be of
interest to the viewer. Now that we have finished
creating the hair, let's reinforce the lines a
bit and clean sketch lines. Let's also add the eye lids. It helps to imagine
that you will be showing your sketch
to a client to motivate yourself to keep
it clean and easy to read. As you can see, I use
the liquefy tool to adjust the length of the face and the position of the eyes, because I felt like I exaggerated the post
a bit too much. Now I will intensify
some of those lines. I will go over them again
with the same brush. And then the first
expression will be done. Time to wrap up the
video by creating the summary of the expressions
that we have drawn. All right, the summary
is now finished. Let's move on to
our final emotion. Make sure you watch the last
video of this class as well, so that you can
have a good grasp of the five emotions that
I have tried to depict. I will see you on
the next lesson.
9. Fear: Welcome to the final
lesson of this class, where we will cover free
expressions based on fear. In my opinion, fear is somewhere between
surprise and sadness, or between surprise and anger, or at least in terms
of illustration. Basically, you will have a
combination of the white eyes from the surprise and
the mouth from anger, or the eyebrows from
surprise and so on. Just like in our
previous lessons, we will start with
our guidelines, adding the nose as
an anchor point. Let's see our first expression. Just to show you what I meant
earlier with a combination, let's draw the
closed eyes that we have previously drawn
in, the sad expressions. But combine it with angry
eyebrows and mouth. Let's erase some
of the guidelines. The mouth will be only semi
open. We will see the T. Let's add the eye lids and
creases around the eyebrows. Let's erase some of the sketchy lines and
create cleaner ones. I think it's human nature to
shut your eyes for a second. When you are bracing for
something bad to happen, you are tense so your eyebrows naturally and you clench your teeth expecting
the worst to happen. This is exactly the scenario I tried depicting with
this character. Reinforce the lines of
the hair end of the face. I'm working on the
hair line right now, just like before. I'm going for a
simple hairstyle. I'm trying not to take
away from the expression, but I'm also a bit out of ideas for interesting
hairstyles. But that won't be an issue because that's not our
focus on this class. If we want to add
some extra details, let's make this
character tremble by making these shaky
lines on the sides. Now let's add some
details around the eyes, Like eyelashes, eyelids creases. That is pretty much it. For the first expression, we kept it rather simple. Now let's move on
to the next one. For this expression,
I will try to make a front facing character. I mentioned in one of the
previous lessons that the symmetry of front
facing portraits is boring. We will try to get over that obstacle by playing around with the
hair and the mouth. We will try to create an
asymmetry from whatever we can. Let's start by making the
banks a bit more asymmetrical. I spend a bit of
time here before I move on to the
actual expression. You can see that I even added the clothes
around the neck. Okay, so now that we have
the outer appearance, let's start drawing
the eye sockets. We will make the eyes wide open and the irises will be small. Let's draw a small
nose over here. I want to make the outer line of the mouth and the
teeth clenched. Now let's go for
really small irises. The eyebrows will be similar to those that are
expressing sadness, with the inner corners going up. Let's reinforce our eyes a bit. Let's work on those lower
lashes and clean up the sketch. You can see that
whenever I'm zooming in, I'm trying to erase the sketch
lines that I do not need anymore and reinforce the
lines that I want to keep. I think it would be a nice
addition to small tears in the corners of the
eyes, not the eyelids. Adding these dramatic
lines to show the fear, They are usually used
in manga or in comics to show that a character is scared of whatever
they are seeing. Now let's reinforce
some of the hair lines. I think I want to add a bit
more details at the middle of her banks because I felt like
the ship was way too oval. Using a bit of liquefy to
correct the proportions, you will see me sometimes
zooming out to see how the character
looks from far away. Because after zooming
in for a while, you lose the idea
of the big picture. Let's add a few more
details on the hair, reinforce the jaw line, and add some hatching to
the back of the hair. This is our second expression. Now let's move on
to the final one. I think I want our final
expression to be a bit more cinematic and have a
more complex pose. The shoulder will be upwards, there will be more dynamism. I want this character
to seem like it's jumping backwards from
whatever is endangering her. The head is slightly
tilted backwards. The eyebrows with the inner
corners are highly raised. Eyes are wide open
and just like before, irises are facing downwards, but you can see them entirely. I'm already adding the
eyelids and the lashes, so you can tell that I
really like the pose. Now I will draw a
dynamic shape for the hair and start drawing the smaller details like
individual hair strands. The last few characters
that we drew had quite simple hairstyles, but I think I really fell
in love with this pose. Since I added so many details without needing too much time. The mouth will be a
bit open and I will fill in the corner of the
mouth with a dark color. I want to add some details
like small tears in the corner of the eyes and
sweat drops on the face. These details are adding
more drama to the pose. Adding more details to the
hair, reinforcing the lines. Okay, so this is our
final expression. Now let's make the final
summary of this class. These are our final
three characters. I hope you enjoyed the various characters and
ways of expressing emotions. I hope that you were
inspired to create your own or exercise with the ones
presented in this class. I will see you guys in the
final part of the class where we will also discuss the project that
you should work on.
10. Final words and project: Congratulations for
finalizing the class. We have gone through
five different emotions and we drew over 20 characters. I hope that the content of
this class were useful for you and that you picked up some new ideas, tips or tricks. Now, the best way to actually
implement what you have learned is to draw by yourself. Your assignment is to draw at least one of the expressions presented in any of the lessons and submitted
in the project section. However, if you want
to challenge yourself, you should try to
draw one expression from each of the feelings
presented in the class. You can either draw
along with me or create a character and
expression of your own. There are so many ways of expressing each
emotion and of course, I couldn't have covered
at all in this class. But you are more than welcome to try and come up
with something new. I will love it if you ask
me any questions you have, either here or on
my social media. Don't be a stranger.
You can find me on my Instagram pretty much
every day of the week, and I always try to answer
my direct messages. I'm also trying to create a small artist
community and post useful content as well
alongside my art. I would also love you
forever if you would leave a review on this class
and let me know how it was, what you would like
to see more or less, or even if you have topics
you would like me to cover. Thank you so much for watching. I will see you guys
in the next class.
 Lara Militaru, Digital Illustrator & Coach