Transcription
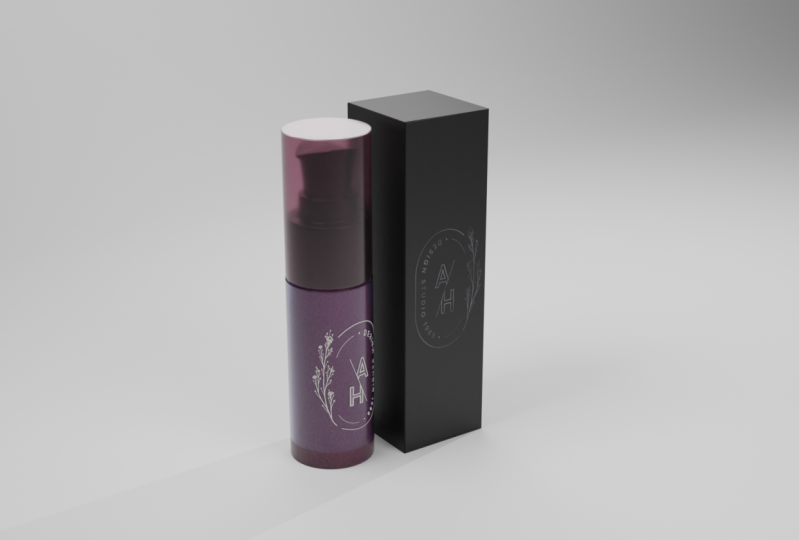
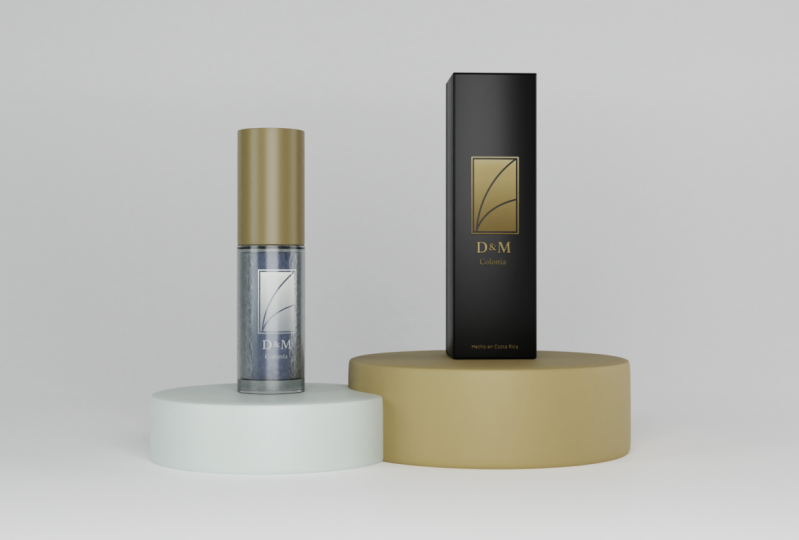
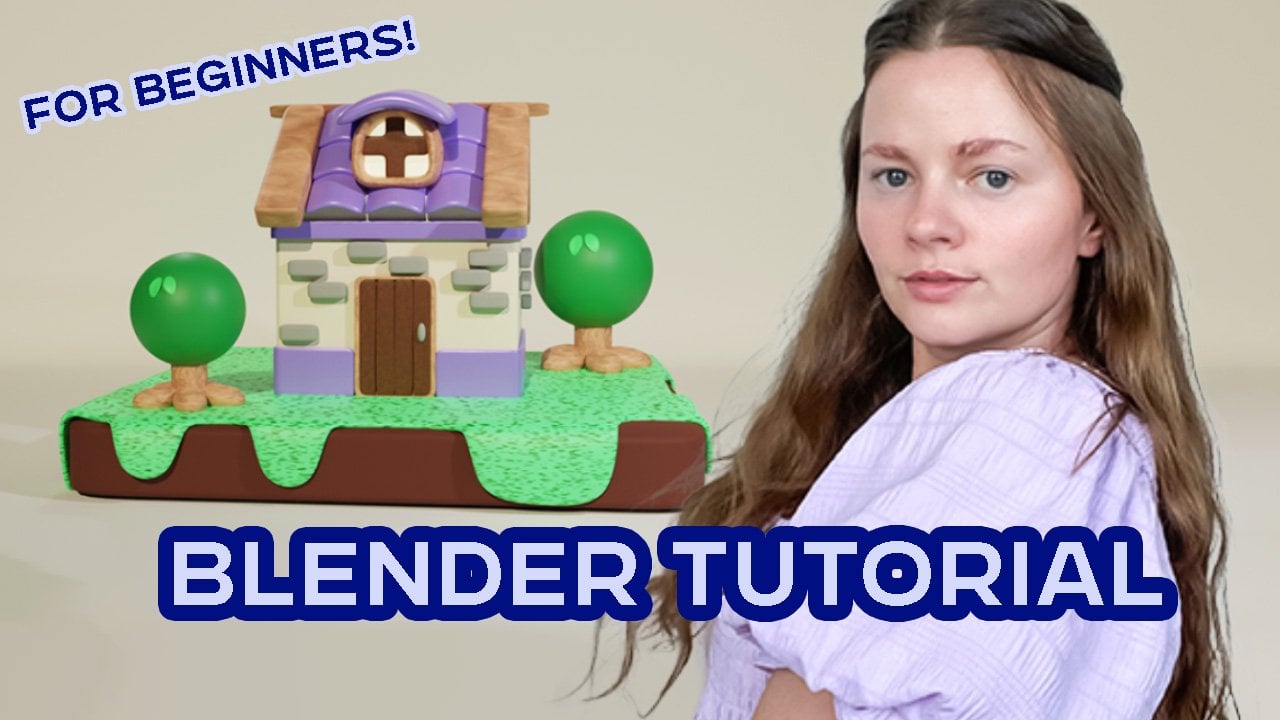
1. Introduction: Bonjour, sur webcam de ma classe, mon nom. Et je suis venu du Cambodge. Je suis enseignante dans mon pays et ma matière enseigne en droit des mélanges, mon oui, 3D Mac et Scott. Matt maintenant, tu peux me voir dans mon scanner cutané. Un mixeur a pris le vrai bien, une visualisation 3D. Dans la classe IV. Vous, pour l'intermédiaire mosaïque deux, notre Martinelli. La voie à suivre pour créer de nouveaux, nous avons dit la caméra d'éclairage matériel. Et puis il y a une application sur quel côté voiture ? Et je regarde mon avis, écoutez. À la fin de ce cours, vous connaîtrez le processus complet. Foley va adorer votre mère et dit, et quand la pluie s'est activée ou non avec Blender. Alors laissez-vous aller de l'avant et laissez-vous fâcher contre moi et dites « Toi mon verre ».
2. Image de réfence de charge: Bonjour mon ami et mon directeur financier, Dan Burnham dans ma classe. En particulier, je veux vous montrer comment importer cette image. Imaginez que nous avons rencontré Blender en premier. Si vous n'avez pas fait d'autre chose, vous ne pouvez pas télécharger cette photo dans mon projet en cils de peau. abord, je dois faire référence au professeur de rendu MATLAB. Et vous le ferez. Maintenant, vous pouvez voir une photo et une présentation de marché dans mon St. Paul. Et pouvez-vous voir que vous pouvez regarder dans mon péché dans le programme quand blender ? Vous pouvez donc voir quelques maths, c'est que vous pouvez voir comme ça. Vous pouvez cliquer sur N pour le spam socket. Si vous apprenez qu'il y a un socket, nous URL, vous pouvez y aller et préférer
et ensuite installer, puis installer certainement ce et ensuite l'activer de sorte que nonane a comme ceci. Vous pouvez trouver mon site Web dans le sable que vous pouvez installer. Vous pouvez donc voir ici,
maintenant, j'ai craché sur un endroit comme celui-ci. Vous pouvez donc voir ici et cliquer sur ou désactiver. Allumez-vous comme ça. Tout d'abord, je veux passer à la vue de face. Vous pouvez cliquer sur le pavé numérique v1, comme ceci. Vous pouvez voir une image comme celle-ci, comme celle-ci. Et puis je vais dans l'importation, ma galerie d'images a été exécutée dans mon écriture manuscrite. Maintenant, nous pouvons aller en CA pour bien comme ça. Un de plus ou un sur le sable. Vous pouvez cliquer sur Ajouter, puis sur OK. Il peut sélectionner une référence. Vous pouvez donc voir une simple réforme stupide dans Blender. Ce fichier est un fichier PNG. Maintenant. Et puis le référent du déjeuner. Dans mon après cela, vous pouvez voir une image référencée dans mon mélangeur de scène. Et puis vous pouvez voir, désolé, que vous pouvez déplacer la hauteur sur la configuration comme ceci. Vous pouvez déménager ici à ici en arrivant. Vous pouvez donc cliquer plus sur J quatre, puis cliquer aussi loin que cela. Et puis plus encore. Mao en haut. Nous allons toucher au sommet. Vous pouvez donc avoir ici et cliquer sur le milieu. Vous pouvez voir avec normal. Vous pouvez voir ici que vous apprendriez à comprendre. Vous pouvez comprendre mon Zotero. Maintenant, j'ai un tableau P si je suis tombé sur mon péché. J'ai vu un Samsung Nomad dans le hall Dow. J'ai l'impression que vous pouvez importer un pitch pour courir dans mon péché, dans votre péché. Mais maintenant, vous pouvez voir que tous dans ma classe sont ma largeur, notre tutoriel.
3. Modèle de bouteille de corps: Bonjour à eux et cette largeur, je me demande. Vous devez donc avoir Medan comme ça. Celui-là se retournerait ici. Et je peux faire mes spécifications pour plus que d'abord, je vais dans le pavé numérique V1 pour votre part, puis je clique sur CA pour l'application. Créez des souris. Je trouve le silence. Maintenant, nous allons dans la vente du soleil. Vous pouvez augmenter ce que CELUI-CI aime ça. Et ensuite, vous pouvez peser un peu sur un ami patriarcat. Vous pouvez cliquer sur G, désolé, trois touches, puis cliquer sur Y pour une ligne. Vous pouvez donc cliquer sur le pavé numérique Vo1, aller à nouveau de vous, puis cliquer sur G et un bien plus aligné. Parce que je veux déplacer ce centre pour un mode facile. Et puis, puis vous pouvez convertir, scanner un peu les îles CG. Et plus d'électrons sur g. Comme ça, vous pouvez le voir, maintenant vous pouvez cliquer sur G et cela pour plus aligner ce genre de chose. Et puis cliquez sur Tab pour qu'il ait été monté. Nous allons voir, est-ce que vous envoyez un tableau comme celui-ci ? Pour quel cul. Et ensuite, allez plus comme ça, comme ça. Vous pouvez vous déplacer. Meilleure offre, puis éteignez, allez à V, allez dans le réglage de la fenêtre d'affichage. Ensuite, nous allons cliquer sur Insérer comme ceci, puis cliquez sur un pour sa gorge. Vous pouvez cliquer sur G pour G. Donc, comme ça, comme ça. Vous pouvez maintenant cliquer très vite. Comme ça. Bloc numéro de clic, Vo1, paille. Franchement, vous, et ensuite allez vous retourner contre nous, en vous installant comme ça. Et disons que c'est possible, vous pouvez cliquer sur, sélectionner cela, puis déplacer un peu comme ça, comme ceci. Jusqu'à plus dans sa gorge. Comme ça. Vous pouvez vous ajuster. Vous pouvez aller dans Fichier et cliquer sur ton, vendant le top Mustang. Top. Vous pouvez appuyer sur I pour insérer, insérer et plus encore, illégitime. Et puis vous pouvez cliquer comme pour scanner, comme ceci et nettoyer moi pour un autre. Puis cliquez après que vous le pouvez. Nous cliquons sur pendant des mois, puis nous flottons au centre. Donc vous avez comme ceci,
Vous dites, vous voyez comme moi,
vous allez au satellite a Vous dites, vous voyez comme moi, et puis sélectionnez un contrôle, désolé,
je clipte comme ceci, puis Control V pour celui-ci, puis augmentez, disons S1, S2, S3. Par ici. Par ici. Vous voyez comme ça. Et vous pouvez, eh bien, vous pouvez modifier, modifier, trouver, modifier ici. Et puis Sony phi sonify pour obtenir un tel et augmenter. Sydney 0,05. J'ai vu que c'est aller chercher Sedna dans ma madame, mon bouton. Maintenant, vous pouvez voir autour de mon glaçage n'est pas mauvais maintenant et a un spam. Très bien. Par ici. Et trouvez le modèle d'application. Ensuite, appuyez sur Mode Edition. Nous pouvons d'abord sélectionner x1 et cliquer ici. Ici, cliquez sur les boucles comme x1 et consultez la plaidoyer pour des annonces telles que x1. Voir clics sur l'interface de ligne de commande pour l'éthylène x1. Parce que le centre ne peut pas boucler comme eux. Et éteignez, allumez et éteignez. Un acyclique. Acyclique maintenant que j'ai vu est correct pour mon satellite Mal et je vais à un rayon et je passe à autre chose avec notre pavé numérique de flotte, mais un pour la vidéo étrangère. Et ensuite, vous pouvez bouger comme ça. Déplacez, appliquez ceci. Mec, je chante, c'est bon pour ma monade. Et je vois simplement cliquer et se déplacer. Vous pouvez cliquer ici. Donc, vous cliquez dessus pour un pavé numérique, v1. Et je vois qu'il y a une page. Vous pouvez cliquer sur Tab, puis vous
allez dans Modifier le périmètre, vous ajoutez modifier. Et puis vous me trouvez où vous pouvez ajouter Sam, modifier, subdivision surface. Et ensuite, vous pouvez aller à nos yeux. Et la géométrie est maintenant activée, vous pouvez voir comme ça. Et avant. Vous pouvez augmenter Statesman, être bien, modifier V12 trois ou deux. Vous pouvez voir comme ça. Et puis vous pouvez augmenter et passer à 75. Et ensuite, vous pouvez augmenter le puits dans la surface de subdivision du puits comme ceci ici, 1, 2, 2. Et puis vous pouvez voir en douceur sur MyMathLab. Nous pouvons donc, ou nous allons cliquer avec le bouton droit de la souris, puis sélectionner lisse. Et vous pouvez aller à notre a et se révéler, comme dans la géométrie. Maintenant, je chante, je l'ai fait, mon modèle n'est pas mal. Dans la dernière vidéo, je vous renumérote. Pour ma première étape V1, vous pouvez voir un quatre cylindres, puis vous pouvez augmenter le plan de subdivision. Vous pouvez déplacer notre cadre, puis ajouter notre deuxième tampon. Vous pouvez ajouter une spécification pour créer un sigma. Ensuite, nous créons un soleil de connexion pour la subdivision, sulfite, puis l'obtention d'une surface de subdivision. Vous pouvez donc voir que vous pouvez avoir plus que dans la langue L. Je dis, j'espère que vous comprenez pour moi plus que si vous ne comprenez pas, vous pouvez combiner ci-dessous avec 00. Je veux vous montrer comment la COP II a été faite.
4. Modèle Capot à l'intérieur: Bonjour, amis. Alors, la webcam dans mon WE DO. Et le Lavett 0. Il faut donc modéliser le bas. Et cette veuve, je vous ai vu comment aller au Bhoutan à l'intérieur. Donc,
vous pouvez voir que nous pouvons en avoir plus que et maintenant je l'ai fait à l'intérieur. Vous pouvez voir que vous pouvez regarder ici légèrement. Maintenant, vous
comprenez que la casquette à l'intérieur de Watson est maintenant cartographiée avec moi. abord, je vais dans le pavé numérique V1, X2, puis C, a, et j'ajoute un APA silencieux. Vous augmentez ce que ce plan. Et l'ensemble peut spams. Vous pouvez ajuster jusqu'
à la numérisation, puis cliquez sur J et Lang mu ici. Et puis vous pouvez entrer dans un APTA gris. Vous pouvez cliquer sur tabulation, passer en mode, puis sélectionner cela dans l'orteil et dans un objet comme celui-ci. Et ils peuvent passer en mode Sélection. Ainsi, vous pouvez voir comme cet APA, vous pouvez descendre comme ça. Ensuite, vous pouvez cliquer ici, puis en ajouter quelques-uns. Mais la voiture s'est retournée. Maintenant, vous pouvez bouger comme ça. Je peux donc bouger comme ça et moins de vue. Vous pouvez regarder autour de vous et regarder autour de vous. Vous préparez un salon de jazz comme ça. Ensuite, vous pouvez cliquer sur Insérer ici. Vous pouvez cliquer sur une chute, c'est par ici. Puis cliquez sur Ajouter, insérer avant, facilement. Avant d'insérer notre pensée, vous avez vu une tonne de tableau comme celui-ci. Vous pouvez entrer dans sa gorge. Nous allons donc cliquer sur une chute. Encore une fois. Vous pouvez cliquer sur Insérer, puis aller au zoo. Vous cliquez sur T quatre, désolé, cliquez sur un pour sa gorge comme ceci. Ces derniers temps. Vous pouvez cliquer un peu pour sa gorge. Maintenant, vous pouvez cliquer, j'ai scanné ceci, puis vous pouvez
sélectionner mon tampon un par un et faucher ici. Et par ici. Et sélectionnez celui-ci, descendez à quoi mais comme ça et fauché et comme ça, comme ceci et comme cette taupe. Et sélectionnez celui-ci déplacé vers le bas. Vous pouvez donc avoir cela de l'intérieur, tapez à l'intérieur. Vous pouvez travailler cela dans quoi, mais nous pouvons donc choisir celui-ci et celui-ci. Vous pouvez cliquer, je suis désolé,
k, Celui-là, celui-là. Et comme ça et cliquez sur payer pour plafonner et celui-là, celui-là. Et n et k Encore une fois, flotte, flotte. Hé encore, pli, pli en k. Encore une fois, pli, pli, pli, pli, pli, pli, pli, pli, pli, pli, pli, pli. Vous pouvez donc voir cette ligne ici. Nous appelons le Japon. Nous appelons, nous appelons avant un cap autour d'une carte rapide et supérieure. Vous pouvez cliquer sur Tab pour le mode objet et dire que c'est possible. Vous pouvez aller dans Modifier le primitif et ajouter un peu de primitif. Sam, modifiez, désolé, certains modifient. Rapide. Je l'aime symboliquement. Maintenant, je clique sur commande. Je clique comme ça. Vous pouvez le voir dans le clavier ici. Et puis j'ai oublié ce dossier. Nous pouvons donc entrer dans PAP et sélectionner Fichier, cliquer sur Mettre à jour, puis cliquer sur Supprimer, et maintenant vous pouvez supprimer rapidement. Vous allez dans, nous allons dans l'onglet, passez en mode objet, vous allez à solidifier. Et puis vous pouvez augmenter la masse 1, 01, désolé, 0,05 ici. Et puis à B quand vous pouvez augmenter ses 11, 22 et augmenter notre ajustement. Et Dieu a dit que Tim, pour certifier ici lors de notre dernière modification, vous pouvez ajouter des subdivisions si rapidement pour une fluidité. Et puis le dernier bap,
vous pouvez cliquer, cliquer avec le bouton droit de la souris. Choisissez, réglez la douceur. Maintenant que vous l'avez fait, vous pouvez voir comme ça. Et puis je regarde autour de moi, Sam, probablement dans ce MATLAB. Je peux donc entrer dans l'onglet et cliquer dessus. Et puis Souvent, vous pouvez bouger comme ça, comme ça. Mu Lang, Lang et Overhear. Vous allumez, allumez la carte que j'ai vue est en Grèce et je suis allé bien en moi, car je l'ai vu c'est 33 sig. Je pense que c'est bon pour 14 ans. En Grèce. Comme ça. Vous pouvez trouver que u1 utilise de l'or. Vous pouvez sélectionner 45. Comme ça et éteignez-le. Par ici. Vous pouvez voir que ce n'est pas bon. Est-ce que TSMC ne connaît pas Matt ? Je vois ça va bien. Je dis : Oh, c'est bon. Vous pouvez maintenant cliquer sur Sam. Sam. Et vous pouvez cliquer, donc superposer comme ceci. Et ensuite, vous pourrez vous y joindre. Vous pouvez cliquer ici et Joanne comme ça. Maintenant, vous pouvez voir que vous pouvez ajuster un peu là-dessus, sur cet objet. Vous pouvez donc cliquer en tant que permis Galilée, puis accéder à un onglet et sélectionner celui-ci et descendre. Et vous cliquez sur l'onglet et allez travailler, mais désolé. Mais vous le transmettez et vous l'éteignez. Maintenant, vous pouvez voir comme ça. Vous pouvez voir et regarder autour de vous. Regardez autour d'objets comme celui-ci. Je dis que c'est quelque chose de nomade. Et la veuve, j'espère que vous comprenez mon fils ou mon modèle et que vous pouvez, vous pouvez, j'espère que vous le pouvez,
Madame, je peux renommer la casquette en psi, celle-ci. Et je l'appelle MALDI Wu-Tang. Nous devons avant d'aller au dossier et de vendre sur le marché. J'espère que vous comprenez encore, encore, encore une fois. Et je ne comprends pas. Vous pouvez commander aller fumer, télégramme à Pise. Demandez-moi, je l'ai réveillé. Votre réponse. Désolé. Et je l'ai réveillé, George Mason, j'ai eu mon fils. Et tout. J'ai vu que tu devais mourir à l'intérieur comme ça. Et le dernier document que je dis.
5. Model à l'extérieur: Bonjour, amis et bienvenue dans mon milieu de notre région. Et cette veuve, je voulais vous montrer comment bouger. Et l'adore. Oh, j'ai vu que vous avez deux modalités comme celle-ci. Nous pouvons appeler onglet à l'intérieur, comme ceci et terminé span. Vous pouvez passer avec moi. Maintenant. Vous pouvez cliquer sur Aller à, aller au pavé numérique, Vo1. Frank avec vous. Et puis vous pouvez trouver, et à C, une souris humide et cliqueuse et elles peuvent jouer silencieusement. Lire Silent est u1 pourrait ajouter Belinda. Vous pouvez numériser, augmenter lors de la mise à jour. Cliquez sur Analyse F4. Et puis vous pouvez aller à nous lancer dans des mouvements comme x1. Vous pouvez donc voir ici et ensuite les quatre clics sur cette application mobile bleue. Vous pouvez voir que nous sommes accrochés à l'intérieur. Donc, vous allez à, nous allons augmenter. La lumière s'est allumée. Maintenant, vous pouvez voir l'image de la rivière coulée à l'intérieur, Madame Cap à l'intérieur. Vous pouvez donc cliquer sur l'échelle F un peu comme celle-ci, puis cliquer sur Tab pour ce mode. Vous pouvez. Et le dernier que vous pouvez cliquer. On y va, on choisit Medan et Moab. Et puis, comme ça, descendez et asseyez-vous. Encore une fois. Vous pouvez ajuster pour supprimer des fichiers et en ajouter, modifier. Corps simple Bhoutan, et avoir à l'intérieur. Avant le spam, car je peux renommer silencieusement pour avoir ALCI. Et puis la finesse a suivi en eux. Nettoyez et allumez. Désolé, éteignez. Et puis cliquez pour le haut et a un fils. Ainsi, un APA, vous pouvez cliquer sur le lien pour la lèvre rapidement. Ensuite, vous pouvez accéder aux fichiers et sélectionner un objet. Vous pouvez cliquer sur. Nous allons en clic. Insérez ici, ce 11 de plus, celui-ci. Et je suis très éloigné. Vous trouvez au centre ici. Ensuite, vous pouvez cliquer sur la boucle de contrôle FOR, sélectionner x1 et cliquer et descendre comme ceci. Et à l'intérieur de notre manette, notre petite casquette. Puis cliquez sur l'onglet. Passez en mode objet. Vous pouvez, nous allons ajouter quelques modifications. Cliquez ici et trouvez à modifier. Tout d'abord, je sélectionne soudainement phi. Et puis je retire en k. En Grèce, joli, réglé sur 1, 0, 0 ,
1, 0, 0, 0, 0, 0,
1, 0, 0, désolé, comme ça. Et puis j'ajoute, modifiez une tonne de clic comme ça pour soudain phi. Et puis vous pouvez bien me voir, modifier. Ainsi, vous pouvez augmenter dit Man, 1 à 3 sur 1, 2, 2. Maintenant, vous pouvez voir ceci et vous pouvez voir les jours lumineux et vous pouvez l'allumer, l'éteindre. Et la dernière modification, vous pouvez ajouter le symposium Paul est. Surface de subdivision comme celle-ci, comme celle-ci. Et puis vous pouvez voir Sam, probablement même. Maintenant, vous pouvez augmenter et passer modifier et augmenter l'angle de chaîne 3023 phi, comme ceci. Et le dernier, je sélectionne l'onglet comme psi. Et puis je clique sur choisir de définir le lisse. Vous pouvez donc voir que vous pouvez
avoir ALCI ici. Et le dernier sur lequel vous pouvez cliquer. Et le haut est à la hauteur de Select sun. Et la semaine dernière, oh, regarde autour de moi. Comme ça, je dis que c'est parti pour celui-ci, pour cette feuille de route. Maintenant, je renumérote
pour notre laboratoire sans ici. Et moi, je chante son post BAB. Étape 1. Vous pouvez créer des souris en silence. Vous pouvez augmenter, vous pouvez augmenter ce qu'est ce plan. Vous cliquez dans le fichier de salutations, vous pouvez voir 123 ou moins. Et le canon. Et vous pouvez, vous pouvez, vous pouvez activer à modifier, soudainement, solidifier pour Sedna crée a et B, bien pour créer Lang puis subdivision. Très bien pour de petits objets comme celui-ci, comme celui-ci. Et la langue L, j'ai vu, vous comprenez dans ma somme à mon esprit 0 et 0 IVs. Vous êtes donc plus que cette carte. Et cette carte a fait référence. Et ici, je vois, c'est comprendre que mon moral est dans la photo. S'abstenir et ne pas insérer cette image dans ma scène et je vous vois la prochaine vidéo.
6. Boîte de modèle: Bonjour mes amis et mes amis volés, mais je suis dans ma couche supérieure Without. Et l'adore. Oh, je vous ai vu. Je crée cet objet ici. Et chez la veuve. Il faut donc bouger cette jambe, prendre ça avec moi. D'abord. Je crée une taupe. Cette souris démonte tout en nouvelle glycine. Vous pouvez donc cliquer ici, puis cliquer sur l'outil Déplacer, puis cliquer sur nouvelle glycine. Vous pouvez renommer les deux tonnes, plus encore. Mon application, quelque chose comme ça. chose comme ça. Et puis cliquez sur, oh, OK, pour créer. Vous pouvez l'éteindre comme ça. Et ensuite, vous pouvez aller à nous, de vous. Vous pouvez donc cliquer sur le numéro un et plus relatif avec un œil à moins et frapper pour chat, cliquez comme ça, vous pouvez cliquer comme ça. Vous sélectionnez la carte. Vous pouvez cliquer sur G pour sélectionner un SAN et cliquer sur une ligne similaire à celle-ci. Et encore un peu plus. J'ai vu que c'est plus bouleversant pour trois, G et propre comme ça. Je dis que c'est quelque chose, est-ce que Dieu dit. G, c'est quelque chose. Allez-y. Et donc ça tend, bam, j'y vais, on y va, on clique sur G, désolé, sur Control, un four, créer, ad. Et puis trouve de la masse et j'ai choisi. Montrez ça. Vous pouvez. Nous y allons exactement comme cet ajustement. Vous pouvez donc le dépenser peut bouger un peu. Puis cliquez sur Numériser. Comme ça. Vous pouvez l'activer comme ceci et activer un tableau. Et cliquez sur S pour l'échelle et la numérisation propre, puis cliquez sur ce bouton pour effectuer une mise à l'échelle ici. Et maintenant, vous pouvez voir de nos jours et vous pouvez cliquer sur PAP mammaire car il a monté APTA, vous trouvez une tonne, notre soleil satellite. Et puis ils peuvent le faire, pouvons-nous aller au soleil clair ? Sur Apigee ? Api, vous pouvez cliquer sur G et cela
aligne beaucoup plus la carte, c'est que vous passez mon mode de sommeil. Vous ne pouvez pas sélectionner G et que vous pouvez voir ici, vous pouvez cliquer sur cette carte de grille. Vous cliquez ici, vous pouvez cliquer sur G pour plus que cela, s'aligne vers le haut. Et puis dans cette vidéo, je ne peux pas. Je l'ai fait ? Cliquez sur Plus, puis sur Sélectionner Sandbox afin de pouvoir cliquer sur G et G pour plus d'informations. Et c'est ce qui arrive. Et souvenez-vous de U, G pour plus d'efforts. Rotation. Vous pouvez accéder à l'onglet, puis cliquer sur Tab. Par ici. Vous pouvez cliquer sur claquer loin et hé, sélectionner le soleil et le 10. Vous pouvez voir la lumière comme celle-ci et voir les quatre Nébucadnetsar et probablement. Et puis éteignez ici et touchez, trouve un satellite. Et le pion Fas et Pap sur ce que je dis est gardé. Bob. Et celui-là, c'est arrivé haut. Et puis l'ampoule, je dis, j'appelle MALDI bop, bop, bop. Ensuite, appuyez sur et sélectionnez celui-ci et cliquez sur Supprimer. Et puis choisissez phi phi n. Éteignez comme ceci et touchez. Maintenant, vous devez mettre à jour Bob, pour que vous
puissiez cliquer sur celui-ci, celui-ci s'allume comme ceci. Et comme ça. Vous voyez. Et encore une fois. Vous pouvez. Nous allons dans cet objet, puis cliquez sur Créer une nouvelle glycine, puis cliquez sur Renommer. Renommer. Vous pouvez cliquer sur. OK. Maintenant, j'ai trois x1 et celui-ci recule, et celui-ci, Le, désolé, le Bhoutan, et celui-ci. Vous pouvez maintenant cliquer sur barre
oblique et la lèvre faisant référence ici. Comme ça, comme ça. Maintenant, j'ai celui-là et celui-là. Je m'éteins donc. Va voir Bob, je suppose que plus comme ça et sélectionnez Bob Bob. Puis cliquez sur Tab et jouez. Puisque les lumières sont éteintes. Désolé, allumez un rayon et c'est facile pour moi. Accrochez-vous près de vous. Vous pouvez donc cliquer comme ça. Vous pouvez choisir comme ceci. Vous pouvez sélectionner un poste trois. La carte n'est pas le lysosome. Donc, vous cliquez comme ça. Et on peut jouer à ça. Vous pouvez désactiver le clic. Et un satellite pour satellite est facile. Cliquez sur celui-ci et voyez politiquement et dites politiquement. Puis cliquez autour de cette carte. J'ai fait, cliquez ici pour un puis Contrôlez V pour moi. Eh bien, vous pouvez voir comme ça et augmenter le vendeur trois pour augmenter, je pense que c'est le sourire pour trois cartes que j'ai fait, j'ai vu ne pas augmenter. J'ai choisi 36 Simon sur deux. Alto, c'est bien. Maintenant, j'y vais, je m'adapte comme ça. Je clique ici et je clique,
puis je clique, puis clique sur Plus. Vous pouvez donc voir quelque chose comme D, quelque chose comme ça, quelque chose comme ça. Et puis je règle celui-ci, allez dans le pavé numérique un et appuyez sur. Et puis voyez quand je clique ici et APTA, C, C, cliquez ici parce que je tourne autour. Donc, un magnat A12 ici. Tout d'abord, je clique sur C et cliquez avec le bouton droit de la souris sur celui-ci, puis accédez à Objet. Sélectionnez Set, géométrie originale, notre curseur 3D d'origine. Maintenant, vous pouvez voir comme ça. Ensuite, vous pouvez marquer automatiquement. Et ça va vous plaire. Madame, mesdames. Et des prévisions. Encore une fois, le pavé numéro de parc V1. Et je le vois je clique puis mise à jour, SET original, original en 3D. cosinus et le sécant sont Egonet comme ça et je pense que c'est bon. C'est bien. Maintenant, je clique sur le pavé numérique, je clique sur barre oblique loin et j'ai de la glycine et ressemble à la. Je vais donc à nouveau dans Blend et j'appuie sur. Sélectionnez celui-ci, puis cliquez sur E pour un trait ici. Et puis plus de lithium avec un S. Et cliquez sur Scanner et allumez pour un aigle terrestre comme celui-ci. Et une barre oblique. Et puis tabulez, passez en mode Sélectionner la classe, et appuyez sur un, sélectionnez celui-ci, celui-ci je peux mentir des jours. Et moi, e grade, f, un scanner à l'intérieur, maman à l'intérieur et celui-là, désolé, E pour sa gorge et ses yeux d'aigle ont une ligne. Puis déplacez-vous à chaque clic. Et avant sa gorge, vous pouvez cliquer sur F4 scan comme ceci et descendre. Cliquez sur Tab pour le mode objet, puis cliquez sur. Mais jusqu'à présent et il en a comme ça. Ensuite, allez à PEP et contrôlez notre boucle for comme celle-ci. Et cliquez sur celui-ci. Je vais aller voir celui-là. Et celui-ci, et cliquez sur Échelle, désolé, cliquez sur Eagle-eye pour un pays. Comme D et celui-ci, et de plus en plus. Et puis celui-ci,
celui-ci, je viens de tabuter et de cliquer sur l'onglet. Plus probable et plus de bibliothèques. Et cliquez sur ce bouton, mais déplacez-le en arrière. Comme ça. Je pense que c'est bien. Et vous pouvez y aller a monté dans cet objet et ensuite dessiner notre chute. Regardez comme le lisse, comme ça et tapez. L'annulé est E pour localiser. Et j'en crée un petit pour que vous puissiez créer des modifications. Tout d'abord, je clique sur Envoyer et définir Sydney. J'ai choisi l'ensemble 0, 1 0, 0, 1, 0,
2, 0 , 0, 0, 1, 0, 1, 0. Des poèmes qui vont aussi bien. Comme l'ensemble 0, 1, 0, 0, 0, 1. Ensuite, allez à celui-ci, modifiez 75, définissez 0, 0, 0, 0, 1, comme ceci. Et puis un chapeau K, puis tournez à nouveau, un petit animal de compagnie. Vous devez, vous devez, maintenant vous pouvez voir comme ça et vous pouvez sélectionner ces Moab, Contrôler Z à nouveau et sélectionner l'objet et bouger comme ça. Et enfin, bien que je dise que ma mère est optée pour Medan et Samsung, nomade et vadrouille et a été faite comme ça. Et comme ça. Et maintenant, je clique sur le pavé numéro 3, 4, 5, vous. Vous pouvez donc voir comme ça. Vous pouvez voir comme ceci et celui-ci, et celui-ci, celui-ci, celui-ci, celui-ci et celui-ci et celui-ci. Donc, la dernière vidéo, je pense que vous comprenez, mon fils. Vous pouvez cartographier. Vous ne comprenez pas. Vous pouvez commenter ci-dessous avec le o in skin dire que je lui ai réveillé votre question. Et la dernière vidéo. Oh, désolé. Et tout. Je le ferai. Vous devez donc rester pour 3D Man. Dire une chaussure pour regarder et remercier votre Londres. Voyez votre prochaine vidéo.
7. Étape de préparation du produit 3d: Bonjour Guy. Bonjour, Je dois regarder, je suis dans ma dernière vidéo depuis la terre. Et deuxièmement, je crée votre chemin et Maria et j'
allume et j'installe puis j'ai mis l'épingle et la poupée larve. Il faut donc multiplier celui-ci comme ça. Et cette largeur. Oh, j'ai vu que vous en avez deux de plus que l'Espagne dans le péché. Maintenant, c'est la jambe. Il se peut que, nous
entrons, nous pourrions le 1er mai. Je vais ajouter et vert. Apple. Vous pouvez cliquer ici sur l'analyse F4. Et plus gros, plus gros, comme ça, puis cliquez sur Tab pour qu'il y ait de la bouche. Vous pouvez entrer dans l'objet comme celui-ci et cliquer sur f. Celui-ci est un et C. Et C sélectionnez, puis cliquez sur Supprimer, puis choisir comme ceci après avoir cliqué sur Tab pour monter un peu comme celui-ci. Et puis j'ajuste SPAP par goutte, cliquez sur S pour une échelle comme celle-ci et Moab. Puis cliquez sur l'onglet, allez sélectionner un certain a et sélectionnez un Control V pour moi. Et bien, cliquez sur celui-ci, puis augmentez six mois ici. Et comme celui-ci,
un stylo, quelque chose comme ça, quelque chose pour vous. Vous apprenez Kayla, c'est une unité unifiée. Tu peux bien. Vous pouvez augmenter la ligne. Montre une lumière lâche. Maintenant, je passe au pavé numéro un pour x2, puis déplace un lipide avec et je me déplace et S pour l'échelle, puis je clique sur les yeux d'
aigle, et je passe à autre chose avec la vie. Ces dames, mesdames. Et plus comme D et touchez, retournez un, écoutez. Et plus ou moins à écrire. Et vous pouvez cliquer sur Control R pour le bouchon N par taupe, celui-ci à nouveau et dessiner notre boucle peut cliquer et bouger. Et le contrôle est le petit et la taupe et le contrôle R. Cliquez sur celui-ci et bougez. Puis touchez. Maintenant, je veux créer un lipide dans mon esprit. Donc, vous allez voir nous y allons. Notre surface d'ajout, de modification, de subdivision. Et puis j'augmente Laval à la carte. Vous pouvez voir deux symboles au pouvoir. Maintenant. Je peux créer un peu de silence. Cliquez donc sur Contrôler, un clic, Ajouter et trouvez la masse et le cylindre comme celui-ci. Et ensuite, augmentez ce que cela a dit. On dirait que c'est 20 ou 30 à la ferme. Reculez, 32 ici. Ensuite, allez dans le pavé numérique, échelle
V1 et F. Et cela le permet ici. Et bougez-moi. Et de l'humeur, nom. Et Lady et Scan. Numériser. Descendre comme B et C, la flotte ici et déplacer l'application. Et puis sur la vadrouille, remontez J et bougez comme ça, bougez moins susceptible de mentir. Et le Mukden et probablement sélectionner mettre à jour et déplacer comme ceci. Ensuite, je vais au numéro un ou au numéro trois, et je clique sur celui-ci. Cliquez avec le bouton droit de la souris sur Sélectionner. Ok, et puis aller à un rayon est C insights by mu comme celui-ci et celui-ci que j'aime le, puis allez à View et tournez un chemin de rayon. A et L cliquez sur Control V et augmentez avec et LAN. Et j'ai encore choisi pour celui-là. Et je suis le Père Noël. Et comme ça et vice est une taupe, et je suis au Père Noël, ai choisi celle-ci. Pap, rapide et facile. Et, hum, au centre. Cliquez à nouveau, puis cliquez sur le centre. Onglet. Vous pouvez maintenant vous ajuster. Ma douceur comme ça. L'application modifie la surface de subdivision et est
bien apte à la subdivision, puis augmente l'angle 13 à 19. On dirait ça. Et cliquez avec le bouton droit de la souris sur le mode Et puis celui-ci que j'ai choisi est en Grèce, 1, 2, 3, puis ajouter quelques modifications, les subdivisions suffisent. Et cliquez avec le bouton droit de la souris, définissez le lisse Et puis celui-ci, j'augmente Soyez bien, tel homme à 0, 1, 2, 3. Vous pouvez donc voir comme ça. Vous pouvez donc voir comme ça. Vous pouvez voir comme ça. Maintenant, j'ai dix, je sélectionne celui-ci, R3, je suis nouvelle glycine, puis renomme spec pour 3D. Et puis, d'accord. Et la dernière vidéo, j'espère que vous comprenez. Vous pouvez créer un espace pour trois libéraux comme
celui-ci, et vous voir la prochaine vidéo et le téléphone. Permettez-moi, je vais créer des UV pour les colons.
8. Créer la boîte à montage UV: Bonjour, mon ami et mon directeur financier, alors je suis dans mon nouveau groupe et la dernière rangée que j'ai vu que vous devez être enflé. L'espace pour le modèle 3D. Maintenant, c'est le veto. Allez par exemple, ou vous deviez créer des mappeurs d'éditeur UV. Vous pouvez passer la vadrouille ici, puis cliquer sur l'automne dernier. Et hé, sélectionnez fils, plaque plaque chaîne britannique dans la disposition que nous vous obtenons. Et maintenant, vous pouvez voir à voir et ceci vous arrivez. Vous pouvez voir la vue 3D. Utilisez l'offre de base et moins de zoo. Vous pouvez voir Bu Gou, nous pouvons appeler un éditeur UV, un éditeur UV. Encore une fois, vous pouvez cliquer sur Afficher plus comme ceci. S'il vous plaît Encore une fois, vous pouvez maintenant voir qu'ils sont élevés et la liaison dans l'édition. Et avant d'aller à la mise en page et de cliquer sur slack. Donc et la lumière SEM haute auxiliaire x1 et ensuite 11, alors vous pouvez aller vers nous entrons en vous, nous conservons. Vous ne pouvez en voir qu'un seul parce qu'il est différent dans le visage. À l'avant. reviens maintenant avec moi pour l'édition du spam. Vous êtes nous ? Tout d'abord, je sélectionne celui-ci, et encore une fois, c'est le dernier de plus. Vous pouvez voir ça jusqu'à ce que vous alliez. Mais, désolé, géométrie par image. Et puis cliquez sur onglet et cliquez sur a. Et je sélectionne une mise à jour l. Et celui-ci, l. Encore
une fois. Voyez, désolée, cliquez et voyez réellement. Et coeliaque tardif et fin, précis. Maintenant, vous pouvez voir comme ça et jouer en toute sécurité, un clic glitzy. Et une application mobile. Dites jouer en toute sécurité et en toute sécurité. Et puis vous, vous allez dans sélectionner certains peuvent pécher pour le chat sur le satellite fils d'un CI, puis cliquez sur un quatre heures comme le soleil. Vous pouvez vous voir, nous aimons ça. Un comme celui-là. Je vais d'abord couper les UV pour mon péché. Et puis, encore une fois, nous allons passer à la sélection x1. Et maintenant, vous pouvez voir la lumière UV avant. Avec nos familles. Créez cette carte. On peut voir sur l'UV R L par un homme qui élément. Ensuite, vous accédez à un lien. Vous cliquez sur UV, puis trouvez l'Islande. Vous pouvez bouger. Et puis déplacez-en un de plus. Et celui-là comme pour la ligne de balayage à. Et puis il a dit : oh, cliquez sur celui-ci et jouez comme Y. comme ça. Vous pouvez accéder à partir de votre pavé numérique V1. Et puis, comme celui-ci. Vous pouvez voir comme ça et vous, ainsi que le jet de lumière de vous. Maintenant, vous pouvez le voir. Puis cliquez sur le, sur l'UV et bougez. Encore un zoo et un enveloppement. La même chose, la même chose. Maintenant, je dis que c'est quand ils tombent, créez Youwei et cliquez sur créer un KAB Bob. Cliquez sur l'onglet Maintenant. Et le dernier. Ensuite. Touchez un voyant sur vous pour accéder à la cartographie UV et à MLab. Maintenant, vous pouvez voir comme ça. Maintenant, vous pouvez voir comme ça avant. Vous cliquez sur barre oblique, mec je dis que c'est correct pour les UV dans la bouche et pas You Dao IV. Vous devez donc créer cet objet. Et la dernière vidéo que j'ai vue, vous comprenez ou je me souviendrai de vous. Vous pouvez donc cliquer sur U, cartographie UV. Vous allez à une sélection profonde ici, et ici, mon péché et ma RAM, notre budget de votre part. Et celui-là, vous pouvez choisir votre chemin, puis aller faire Islande cette commande 142424 comme celle-ci, comme celle-ci. Et puis je vous verrai la vidéo suivante.
9. Faire un montage UV 3d: Bonjour les gars, bienvenue. Dans ma fenêtre. Vrai. Et cette vidéo, je veux vous montrer comment créer des UV au Bhoutan. Cet objet par jours. Et d'abord, c'est avec moi. Sélectionnez Activé, puis cliquez sur barre oblique pour terminer la ligne. Vous ne pouvez pas voir une telle application. Et ensuite, vous pouvez être un haut. Vous pouvez cliquer sur la VaR. Maintenant, vous pouvez retourner n, puis faire un panoramique souvent en ligne. Et puis vous voyez un sous-type ici pour plus de facilité. Si vous comprenez que vous et nano avez du temps. Et cliquez à nouveau et vous
ne pouvez voir que l'objet et sélectionner, puis modifier et désactiver, désactiver comme ceci. Alors, dormez. Pour un mode Did. Vous pouvez cliquer sur une plaque et L. Maintenant, vous avez Lu Xun,
puis L C plaque secrète. Et le soleil léger est malade, malade. fils vu est une encéphalite et un ici et à l'intérieur et la licence Sam, un fils sélectionné en C voit la lumière, voit classiquement, voit et clique sur le Soleil Select. Donc il a mon fils sélectionné, voit, il a TO, les annonces sont des fins. Le soleil lumineux
a maintenant un soleil satellite ici dans ce né et, disons, un fils, Sam, une scie et je clique sur L et C pour une annonce, sélectionne les boucles x1 et L comme quelques courriers un clic dernièrement. J'ai donc bas à l'intérieur. Les nourrissons sont ici devant nous en lb/po2 comme ça. Une fois que j'ai fini, comme x1 que j'ai vu n'est pas quand Matt s'en va maintenant, allez dans le clic Joe et puis faites péché. Il y a donc un Mason à vous. Vous pouvez voir, vous voyez une ligne jaune ici. Et puis nous allons dans un for boucles sont comme x1. Puis cliquez sur Joe, puis cliquez sur End Lab. Maintenant, vous pouvez voir comme ceci, carte, un méchant ou un, ajuster un peu a. Alors je clique sur une ligne, ils
sont propres, 11 places, puis L, lobes supérieurs d'
argile comme une flotte UPenn vous et ensuite mon péché. Maintenant, il y a autour de ça,
puis a, puis fait une fausse lumière sur un représentant. Maintenant, vous pouvez voir comme ça, puis vous regardez à gauche, vous pouvez voir les UV, cet objet. Donc vous avez la lumière allumée, puis allez à u.
U , nous avons besoin de la page des fans, de l'Islande, Islande et du haut J'ai cliqué sur classe, puis appuyez, retournez ici. Cet objet crée une couleur. Donc je ne peux pas, est-ce que tu as fini avec toi ? Nous et cet objet, créons du matériel bénévole Law of One, sans image. Donc vous l'exécutez, vous allez aimer
celui-ci, celui-ci ou celui-ci ou n. La dernière vidéo, j'espère que vous comprenez comment obtenir le bord UV, cet objet ici. On se voit maintenant la semaine prochaine. Tout ce que je vais créer et faire fonctionner un éclairage qui est ma spécialité. La prochaine vidéo.
10. Comment créer de l'appareil de caméra: Bonjour les gars, bienvenue à nouveau chez ma nouvelle veuve, encore une fois. Et ces veuves, je veux vous montrer étape par étape comment les créer dans la scène. Cette jambe est aussi mauvaise avec moi. Tout d'abord, étape 1, vous pouvez accéder à la mise en page, puis cliquer sur l'application. Vous pouvez voir une commande C, a, puis trouver gamma. Il a donc gamma et il a une dominante dans le péché à chaque étape À VOUS POUVEZ, très bien. Vous pouvez cliquer sur ce rayon gamma. Et enfin, à nouveau, comme ceci, et cliquez sur le pavé numérique Control L. Donc, les caméras passent sur la fenêtre d'affichage. Alors allez maintenant mettre Premium P2. Et puis, en Grèce, desserrez
vraiment ces cellules phi de taille n et v1 autour de cette façon. Et puis j'ajuste la fenêtre d'affichage pour que vous puissiez jouer n, aller dans View, allumer la caméra. Je vous l'ai dit, vous pouvez maintenant ajuster notre camp en caméra. Vous pouvez donc bouger comme ça, comme ça. À l'intérieur. Celui-ci retourne comme ça sous une lumière MAO-B. Alors allumez, allumez, allumez et bougez, puis ajustez-en un de plus et cliquez sur
celui-ci, celui-ci, celui-ci de plus. Comme ça. Comme ça a maintenant un BU dans mon péché. Je peux déplacer la caméra en descendant la glycine. Nous allons donc dans la démo en direct, puis flotte M pour créer un nouveau gamma n, Désolé, créer une nouvelle glycine et la lumière peut compter sur m, peut exécuter des k-moyens sur la caméra. Maintenant, mon appareil photo est ici. Et comme ça, et après les familles, n'
oubliez pas, cliquez ici. Maintenant, cliquez sur moi, identifiez-nous. Donc, je suppose que vous allez à l'installation de View Post et à 10 h 00. pouvez voir que vous ne pouvez pas voir ? Objet car ce n'est pas un éclairage. Ce n'est pas un éclairage dans la scène. Et je veux vous montrer comment créer une ligne. Et cette vidéo. J'espère que vous et l'envergure. Vous pouvez créer une caméra dans la même chose dans Justin et renommer ma première fois que vous allez dans Créer une caméra et un
objectif J'aime gamma et trouver deux vidéos après avoir cliqué sur Control L, numéroter des animaux de compagnie, puis cliquer sur em. Allumez votre appareil photo, puis réglez. Pari. drôle, tu peux apprendre Plate ? Désolé, vous cliquez sur Désactiver Allah ici et cliquez sur Terminer. Laboratoire. Vous pouvez aller à la pilule de mise en sortie puis la chaîne augmente, desserrer
vraiment les limes Vo1 aux yeux d'aigle et aussi permettre et orteils et aussi pas de pizza. Maintenant, à vous voir et laissez-moi tomber.
11. Comment créer de la lumière: Bonjour, je vais planifier et nous reviendrons dans ma vidéo. Oh, et la dernière vidéo que j'ai vue, il
fallait grader la caméra, ajuster la sortie, le
mettre jusqu'à ce que je choisisse à v1 phi 0, 0, 0 a choisi Sal et aux yeux d'aigle. J'ai choisi de mettre aussi des pizzas. Et cette veuve, on dit : « Êtes-vous une souris ? Comment créer un éclairage ? La lumière naturelle revient avec moi. Et avant le spam, vous pouvez vérifier. Vous pouvez cliquer sur N, puis éteindre ici, manchmal, vous pouvez régler notre caméra MOOC. Donc, vous voulez aller à la caméra et vous pouvez cliquer sur le numéro, pad, le régler, puis vous déplacer ici et moi. C'est une prise. Encore une fois, cliquez à nouveau sur le bouton central, puis déplacez-vous. Sigma sombre, ou quelque chose comme ça. Quelque chose est u1. Maintenant, je m'ajuste, crée une goupille lumineuse, donc je clique sur le pavé numérique 3, 4. Vous pouvez voir depuis BYU en mode objet dans ce régime. Maintenant, et j'y vais, nous allons en CA, puis en ligne fine. Et je n'ai choisi que toutes les zones de ligne. Il y a donc de l'éclairage ici. Et ensuite, les échecs augmentent. Cliquez sur S pour une échelle comme celle-ci. Et Moab. Cliquez sur et cliquez sur, allumez une concession foncière, puis cliquez sur 19, le gris. Donc, dans Eclipse. Et ensuite, vous pouvez plus ou moins à l'intérieur de la feuille de route comme celle-ci. Et puis cela s'aligne, qui fait pivoter celui-ci. Et l'échelle F s'étend sur cette échelle, qui se termine comme ceux-ci et plus comme ceux-ci. Et bien plus encore. Mesdames, puis allez dans le pavé numérique 0. Et je vais dans Afficher la partie ce nom, puis je vais dans Rendu joli matériau. Je vais enchaîner un cycle V TO. Vous pouvez donc voir que les mathématiques de Lang sont u1. Pour voir comme ça, vous allez ici, superposez puis éteignez. Maintenant, Bowen a menti. Donc je peux voir comme ici sont dans notre caméra, puis cliquez sur Ligne et cliquez sur le clip. Et ensuite, la nouvelle glycine renomme nos lignes. Maintenant, vous pouvez voir des dames et renommer cette couche. Cliquez ici et renommez a, G, G et Gamble. Plaque d'immatriculation C, a, a, a, a, reste en ligne. Et puis je clique sur la zone mensonge, allez à l'objet. L'amortisseur lui aussi. Vous pouvez donc ajuster la ligne de couleur Power Line. J'augmente donc la puissance de dix à 100. Vous pouvez donc voir comme ça. Et je vais créer une vidéo dans le SYN. Et puis, et nous allons cliquer ici, cliquez avec le bouton droit de la
souris, cliquez avec le bouton droit de la souris ici. Quelque chose comme ça. Et puis légèrement. Mais parce que retournez, puis cliquez comme ça et vous arrivez. Et juste une affaire de base. Et puis, longuement, vous restez à l'appareil photo au Sun pour une localisation facile. Maintenant, je connais la lumière du soleil de cloison. La lumière du soleil, c'est facile. Ainsi, comme cette ligne, voyez les quatre sélections x1 et cliquez avec le bouton droit sur Value a un éclairage supplémentaire pour le CD du kit de laboratoire. Puis bougez un peu et éteignez. Bougez un peu et tournez notre Et vif. Et celui-ci et moi, un double animal de compagnie supérieur Vo et plus d'entretien de 11, C, D
et A. Et ensuite R pour la rotation et la rotation suit cela. Et l'ID mobile et le mode objet. Et évoluez un peu comme ça. Maintenant, je dois mentir. Et puis j'augmente cette ligne de 100 à 500. Et ensuite, tournez un peu. Vous cliquez donc là-dessus. Et plus comme D et les identifiants mobiles. Ensuite, allez sélectionner cette ligne. Une ligne et 10 heures et heures. R est le lieu de ma vie. Et retournez celui-ci, C, D, et cliquez pour une ligne ici, puis redimensionnez un peu, puis retournez-le pour faire pivoter R, alignez-le. Et puis bougez comme ça. Et comme ce MOOC à l'échelle n et l et m. Et ensuite, augmentez 100 à 500. Et le dernier éclairage, sélectionnez-le et laborez bien, un de plus que et faites-le pivoter. Cliquez dessus et fuyez et laissez tomber mes journées et plus encore. Nous restons dans cinq heures de bon marché. Mesdames et supérieurs, vous pouvez augmenter de 100 à 300. Maintenant, une poule, je vais en chaîne, traite une feuille de route et la petite feuille de route. Et ça va comme le soleil et la lune, comme ça et tourne le chapeau comme celui-ci et cliquez sur celui-ci et sélectionnez probablement mettre à jour dans et Moab. Et puis retournez celui-ci pour la tête. Et maintenant, je vais à n et je vais à Vue, caméra, vue caméra. Et vous pouvez vous ajuster comme ça. Vous pouvez vous ajuster. Vous pouvez régler la caméra de vue. Maintenant. Allez à nouveau sur la carte. Les numéros de flotte sont n pour vous, puis déplacez comme ceci. Et puis la lumière choisit probablement la mise à jour et les identifiants mobiles. Et puis, mon foutu a été élu avec celui-ci ici. Celle-ci, déplacez-vous et descendez. Et puis je pense que c'est très bien. Mon échantillon. Et maintenant, j'ai ajusté un peu d'éclairage dans ma scène. Je scanne donc mes genoux. Et celui-là, j'augmente cent deux cents et mes jours j'ajuste 300 à 700 jours. Et celui-ci est un gestionnaire. Je dis donc que c'est bon pour mon éclairage. Et puis j'espère que vous comprendrez que je le crée dans mon péché. Et la dernière vidéo que j'ai vue, vous deviez obtenir un Medallia MOP et vous voir la prochaine vidéo.
12. Créer du matériel pour la boîte: Bonjour, bienvenue dans ma région. Et cette largeur va à la CIA. Vous devez créer ce mode objet. Et la dernière vidéo que j'ai vue, il
fallait créer un éclairage, quelque chose comme ça. Et tu peux être toi et Sam en train de dire critique pour la semaine dernière. Oh, et Lu Xun, 15 000 00 00 00 00, 00 00, 00, 00, 00, 00, 00. Et un huitième. Et puis j'ai mis de l'éclairage pour vous voir comme ça et un peu plus encore. Je vais ajuster un peu de hauteur. Pitch combiné. terre a ça avec moi pour un matériau qui s'installe dans une boîte à chaussures. Ensuite, je sélectionne cet objet. Sélectionnez ici, puis cliquez sur. Maintenant, vous ne pouvez voir que la carte simulée dans le péché, vous ne pouvez pas voir la prise. Je clique donc sur N, puis je vais trier et cliquez sur Terminer. Vous apprenez, oubliez votre n non euclidien, comme ça. Et encore une fois, IV che, dans la lutte pour s'installer ici, je, V, J. Ceci Toi aussi. Donc ça va vous donner. Et puis retournez le pavé numérique 0 pour vous, rendez et déplacez un peu plus, un peu, puis passez ici, vous pouvez voir comme ça et de droite à gauche. Ensuite. Maintenant, je vais activer mon programme à la radio. Donc maintenant, vous avez quatre d'entre vous et cette vue 11 est due et vous retire et passez en revue. Nous vous enseignons en mai. Et celui-ci plus quatre créent du matériel dans la scène. Encore une fois, encore une fois. Va à la vadrouille et à la coupe. Et je ne sélectionne que mach comme ça, puis je vais créer un nouveau matériau. Créer une nouvelle Medallia a un nouveau matériau qui s'installe comme celui-ci. Et nous nous sommes battus, ajoutons-nous, allons chercher le sel comme celui-ci. Et dans Photoshop, je crée des chèques de paie pour mon objet. Vous pouvez donc voir que c'est le cas, et il s'agit de Motown. Et maintenant, je vais traîner comme ça. Et puis Control C, Control F à vendre, accédez à Fichier et enregistrez. Ensuite, renommez notre cellule comme payant pour les SOP en P et G. Vous cliquez sur la cellule, puis cliquez sur OK. Encore une fois, vous allez à Lambda. Et puis je clique, vois une chute dedans. Je clique, cliquez sur Insérer une image dans mon image. Vous pouvez donc voir comme ça, vous pouvez voir ceci, vous pouvez le voir. Et puis vous cliquez sur oh stylo dans mon, maintenant trouver au Royaume-Uni, vous voyez ceci, cette image. Maintenant. Oh, un stylo en mai. Il y a donc de la hauteur là-dedans. Il peut être photographié. Et puis vous pouvez cette armoire ici et ensuite monter la couleur de sortie modalement ne peut pas suffire. Maintenant, vous pouvez voir comme ça. Mais ma voie n'est pas de suivre. J'ajuste un peu mon chemin. Je vais donc à un pitch bas. Et Cheney répond au clip. À clipser. Après que je suis allé à notre chaîne oculaire dans l'état d'esprit qu'à l'éditeur UV. Maintenant, vous pouvez voir comme celui-ci et celui-ci. Vous ne pouvez pas voir la carte. Tu oublies, je vais jouer. Vous, nous l'avons dit, maintenant vous pouvez voir comme ça. Vous pouvez voir comme ça. Ensuite, vous pouvez cliquer sur. Vous pouvez aller au laboratoire avant, vous arrivez à quelque chose comme ça. Maintenant, dans mon péché, je vais trop loin et vous allez dans la meilleure vue de l'offre et cliquez sur Fichier et cliquez sur cet étau, puis mu j et sélectionnez celui-ci et déplacez-vous. J'ajuste mon chemin ici et une force comme R et je sélectionne notre mu hors de l'endroit. Et puis je clique comme ça. Cliquez sur mon visage, allez dans Vice, nettoyez, cet étau et plus encore. Et puis je clique sur sélectionner ce phi, désolé. Vous êtes bien, puis tournez. Faites pivoter comme ça et tournez 900 jours. Et puis c'est mon stylo à prendre,
un stylo plein dans mon dossier. Dans ce fichier, vous pouvez cliquer et cliquer comme ceci et mood name. S'il vous plaît encore une fois, légèrement. Et celui-ci se déplace comme ça. Et puis, au moins, vous pouvez sélectionner ceci et mettre à l'échelle S et N, mu et mu et similaires à ce que c'est. Et maman, maman, ici. Faible réparation en place, mon chemin ici. Et sélectionnez-le ici. Et celui-là, comme ça. Et la nuit claire, cette carte, mon image en 3D n'est pas quelque chose qui ne va pas. Maintenant, vous cliquez ici et cliquez avec le bouton droit de la souris. Flip. Miroir Lang. Comme ça. Vous pouvez cliquer sur Miroir, miroir. Vous pouvez donc voir comme ça. Vous pouvez voir comme ça. Maintenant, je regarde autour de moi si je suis poli, je pense que c'est bon. Et puis je vais à la chaîne de
décantation dans un appareil comme celui-ci, comme ça. Et puis je crée un ensemble que l'enseignant s'installe. Vous pouvez donc cliquer sur CA, puis cliquer sur le côté à chaque clic. Vous pouvez donc voir Mac Sedna. Maintenant, je ne peux pas mentir des jours et cela suffit dans le matériel de sortie. Et puis je clique sur la couleur en C ,
puis je clique sur celui-ci. Posez comme ça et voyez le, que nous avions cet ensemble et ne pouvons pas celui-ci. Maintenant, je vais changer de couleur. Celui-là. J'aime la couleur, la couleur noire et cette chaîne IV. Vous pouvez donc voir la couleur rouge. Tu regardes mon Jack attrape mon Said qu'une sortie métallique à part et puis mon péché, tu peux l'obtenir comme ça de Ca, C N où je suis. Vous pouvez donc voir ceci et celui-là. Vous pouvez voir un solide
et je suis un professeur sur ma photo. Donc, ici, vous créez, vous mettez ce matériel, ce matériel dans mon cerveau m'a dit ceci et la longueur de ce clip. Comme ça. Cliquez comme ça. Et après, vous pouvez répliquer
celui-ci, celui-ci et le connecter à celui-ci, et connecter celui-ci à celui-ci et celui-ci à celui-ci. Maintenant, je me souviens que vous pouvez enchaîner pourquoi la couleur sur l'image. Pourquoi la couleur et le corps. Quelque chose comme ça. Je vais créer ma couleur noire. Et puis le sommet est 0. Vous pouvez aimer celui-ci et créer. Et puis vous allez à la vadrouille, la vadrouille. Celui-ci, sélectionnez un 01, puis cliquez sur celui-ci
et sur les décanteurs de plaques à 0. Et comme ça, V0, V1 encore. Maintenant, vous pouvez voir dans ma partie vue, dans ma partie vue, j'augmente notre numéro de chaîne Pesaro et y vais. Et maintenant, vous pouvez voir que le A est
comme ça, comme ça. Et je veux créer des microglies. J'ai donc créé ma mère dans le terrain. Maintenant, je vais dans Photoshop, puis Enregistrer sous et renommer la vadrouille. Vous pouvez voir, vous pouvez m'écrire, vous, euh, ER, puis enchaîner au PNG. Maintenant, je vais à la cellule encore et encore et je clique sur OK. Ensuite, allez dans Blender et cliquez sur celui-ci, et déplacez-vous comme ceci et Moab. Et ensuite, choisissez celui-ci pour la couleur pêche dans l'enseignement. Vous voyez, vous voyez comme ça. Et puis je clique sur C, f, désolé, sur ma photo. Et puis voyez un homme comme celui-ci. Maintenant, vous devez vous connecter au centre commercial et ne pas vous connecter au centre commercial. Et vous trouvez que celui-là n'est pas une image ouverte. Et ensuite, tu pourras voir Bob. Cliquez donc sur Ouvrir en mai. Donc, cliquez sur Ouvrir dans mon œil a, dans l'objet,
dans le rendu, vous pouvez voir, hé, acheter ceci et l'application PaaS comme celle-ci, puis j'en mets cinq. Vous pouvez le voir un peu. Si vous le voulez. Nom de la tête, vous pouvez cliquer sur les inverses. Vous pouvez jouer là-dedans. Mon A1 pour jouer. Je veux faire une photo. Donc, vous cliquez sur ce bouton, vous apprenez à cliquer. Inverse. N'a pas cliqué sur Inverser. Mat. Vous pouvez vous ajuster fort. Hé, hé, comme ça
et cette gentille d'entre vous peut cliquer trois sont vraies. Donc, l'onglet ici, et vous pouvez l'ajuster. Stylo, stylo. Et maintenant, je vois que c'est le fond de mon argumentation. Je vais m'ajuster, refléter le soleil sur le terrain. Je vais donc à Medallia. matériau de la plaque est réglé sur l'application et l'image couleur ne peut pas le définir ci-dessous comme ceci. Et puis Janice, Light Color et réfléchissent le soleil. Réglez 0, 1 a. Et là je vois mon,
j' ajuste 1,5 à trois sur ce qu'il a dit plus de 12. Comme ça. Et atterrir GAD, sélectionnez-le. Je ne fais que refléter les fils que 0, 1, 0 a et la masse du tout 12 IV vérifient à nouveau. Donc un anthro 12 parce qu'une Medallia est similaire, similaire. Un semblable. Et ensuite, vous pouvez voir que vous avez l'air d'or que je vois dans mon labo. Et ensuite, vous pouvez le renommer avec moi, avec moi. Et ces métadonnées crient, vous pouvez voir, vous pouvez avoir deux professeurs et celui-ci, celui-ci, pas de fond et matlab et juste mon terrain et mis en place. Madame. Madame. Donc, dans celui-ci, vous pouvez ajuster l'interface. Et ensuite, vous pouvez voir celui-ci. Je crée ma sortie, puis je crée mon colon. Et celui-ci que je crée dans mon PyCharm, vous pouvez importer une image sans faire. Et celui-là, j'ai mis les métadonnées crier comme ça. Nous demandons la couleur noire et bascule a et vitreux moins un à 1 TO et spéculaire 1 a. Et celle-ci mène à nouveau à l'amour ou 1,81, la même chose comme celle-ci. Et la couleur de l'automne, la couleur pêche. Par ici. Vous pouvez copier et ensuite ajuster par exemple couleur au jaune bas ou pourquoi ? Quelque chose comme ça. Puis j'ajuste ce 57 et j'ai tondu que je voyais comme 1 un et un amour spécial 1.9. Et puis j'ai créé un pitch pour cela. Il a ma patte au sol. Et puis créez-en quatre dans Po Ca, vous pouvez définir comme ceci, puis connecter celui-ci à celui-ci. Donc la dernière fois que vous pouvez voir Jack une application comme celle-ci, comme le n. Et vous Brenda, je dis que c'est très bon ni mauvais. J'ai l'air d'avoir vu un Samsung ? Pas d'homme. Je chante la forme physique pour ma mise Medallia dans ma mère et la largeur de l'IV. Vous devez donc créer du matériel, Mustang ou du matériel comme celui-ci, comme celui-ci. Et nous tombons, disons au revoir. J'espère que vous comprenez cette image. Vous pouvez créer une image. Vous pouvez télécharger le graphique dans mon Procreate. Je vous verrai dans cette vidéo.
13. Créer du matériel pour la bouteille: Bonjour, étudiants et amis viendront dans Ma veuve et dans cette veuve et partageront quelques conseils avec vous sur la façon de créer du matériel dans cet objet. Maintenant, comme si c'était moi. J'ai d'abord à l'intérieur, puis je sélectionne trois de g pour le Bhoutan que nous allons. J'ai cliqué sur barre oblique pour la leçon haut de gamme comme celle-ci, ma liste. Et puis je crée un matériau, ainsi que celui-ci et je crée de nouveaux matériaux. Et puis je convertis, j'augmente. Pourquoi la couleur est trop polie pour apprendre ça ? Et puis je me spécialise en Grèce, 0, 1, 3. Et puis j'augmente écrit comme 0 set. Comme ça, en Grèce, il change. Alors, quand en Grèce, c'est ensuite à o Poème 3, 10, poème loin. Maintenant, vous voyez comme ça. Ensuite, éteignez et renommez à l'intérieur notre APTA L psi. Sélectionnez cet objet, accédez à Medallia brim jusqu'à, puis très bien, cliquez sur ce navigateur vers le bas. matériau comme celui-ci. Mais réalisez ceci et celui-là. Et l'identification matérielle et ce camp à l'intérieur de notre ALCI. Le même matériau. Donc, vous pouvez, c'est plus comme la couleur 1. Et comme ça. Et puis je créerai du matériel, celui-ci. Donc, avant d'obtenir, il peut s'agir de celui-ci ou du dernier matériau avec le logo. J'ai un pitch dans mon dossier. Et puis je vends à la photo. Vo1 connu par terre et orteil a la même puissance que celle-ci. L'idée simple est simple comme celle-ci. Ensuite, allez dans Blend, File et New. Puis cliquez sur Enregistrer. Cliquez sur Solid. Trouvez une image comme celle-ci. Et Moab est plus dans ce genre, puis sélectionnez celui-ci. Découvrez le labyrinthe Moonlight. Et je vois encore une fois une falaise et M. pour voir Maxine. J'ai mis plus celui-là. Allez au mois de mai. Oh, Penn, HR. Bob. Et augmentez les réponses à la classe. Et puis cela connecte
celui-ci, celui-ci à celui-ci et celui-ci à celui-ci, et celui-là à celui-ci. Et celui-là pour celui-là. Maintenant, vous ne pouvez pas voir, je ne vois pas le logo. Quand je mets à la légère. Je crée donc de la couleur. Augmentez. Ceci. Interrupteurs Medallia, augmentent à 1, 0,9. Celui-ci, 0, 1, 2, 0, 0, 1, puis augmente la tendance. Mason a dit, oh, 21 ans. C'est ainsi que vous pouvez voir la dernière maladie. Vous voyez Davisson. Vous pouvez voir du verre. Et image, image, vous pouvez changer de couleur. Ceci, ceci, ce matériel Sedna que vous pouvez voir ce jaune. Vous pouvez voir le jaune, fou, j'augmente, pourquoi TLA ? Couleur par défaut comme celle-ci. Et puis j'en ai, probablement sur cette photo. Je règle les UV, le montage. Ajustez les UV, cet objet. Alors, nous entrons avec moi et vite. Sélectionnez un clic. Vous pouvez choisir autour de cet objet, puis
vous rendre à la lumière du soleil, envelopper et moral. Cliquez ensuite sur un et sélectionnez à nouveau ce mode. Et le dernier mouvement dans ces objets, se déplacer dans cet objet. Et chez Thermo, vous pouvez passer au paiement automatique. Comme ça, l'homme a dit : Oh, puis redimensionnez un peu et sélectionnez cette application de plus. Et sélectionnez-le, descendez, descendez. Ensuite, vous allez dans Modifier le O n primitif, temps libre. Maintenant, vous pouvez voir comme ça, vous pouvez voir comme ça. Et puis repassez à la tabulation, je nettoie en psi. Ensuite, je vais sélectionner OK, puis scanner f et cliquer sur une analyse rapide. Vous pouvez donc le voir. Vous pouvez voir comme ça, vous pouvez voir comme ça. Et vous pouvez appliquer notre application R. Vous pouvez activer ce n'est pas bon. Donc, pas d'allumage, pas de temps. Et vous allez envoyer ça. Vous pouvez faire pivoter. Et ça. Vous pouvez donc voir cette photo ici. Et puis j'ai créé ma mère dans cette Medallia. Nous allons donc à la CIA et je suis un groupe supérieur. Vous pouvez voir une photo et ensuite dire :
Hey, on utilise, euh, après ça, vous pouvez voir, maintenant je peux ajouter de la couleur au foin et non pas au centre commercial. Et puis allez à Oh, Pen et Bob. Et puis un autre. Vous pouvez voir maman. Vous ne pouvez pas voir de pop-up sur la photo. La photo. Et tu peux juste cracher TLA dit : Oh poème, survivre. Et le brillant est 0, 1, 0, 0, 0. Donc vous l'avez fait, donc la ligne est C comme ça. Et puis le dernier matériau, je change de couleur, blanc en bleu ligne cette ligne, ceci. Et nous tombons en famille. Je vais en créer un peu à l'intérieur de ce verre est obtenu. Je clique donc sur barre oblique pour le haut et la lumière, puis je vois probablement les quatre répliques APA. Et puis salut encore, à plat à nouveau, V1 et Flatow et aller à la décantation et taper plis. Pli. Et pour le couvercle APTA Plan 5 pour l'appareil. Puis cliquez sur celui-ci, cliquez sur Alpha. Cliquez sur Supprimer, en haut. Vous pouvez cliquer sur un étau très bien. Et encore une fois, cliquez sur celui-ci L. et un autre de plus. Alan, cliquez et cliquez sur celui-ci. Et celui-ci, vous allez dans un champ l N
Jusqu'à ce que n clique à l'intérieur de celui-ci et j'insère celui-ci pour mars, puis sélectionnez centre. Maintenant, vous voyez comme ça. Je crée donc un pitch à partir de laisse, ce Medan. aussi,
je crée une suppression de cet ensemble maintenant. Je vais à Medallia brim till, puis nettoie celui-ci pour du matériel
distant et à distance, puis je crée de nouveau, cliquez sur celui-ci que vous allez ensuite. Et en haut, je vais à ma couleur, disons. Je vérifie celui-là. Vous pouvez voir ce colon et celui-ci n'est pas réglé. Maintenant, je vais éteindre ça à l'intérieur, à l' extérieur de notre terrain, notre dernier objet. Et puis je vais créer ou augmenter la chaîne par disons couleur à cette couleur. Apa, tu vas créer un pichet de bruit dans ma mère, j'ai vu en créer un de plus comme ça et puis je vois deux et pas plus à nochmal. Et puis vous pouvez voir, vous pouvez voir cet objet et le pavé numérique V1 et remonter un peu. Vous pouvez voir comme ça. Et puis je m'intéresse. J'augmente gal, j'augmente gal
, 20, 25, comme ça. Et le PAL, tirez la chaîne pour former. Comme ça. Vous pouvez voir, vous pouvez voir. Et j'en augmente encore un, 100 et je scanne, j'augmente 100. Et après que je suis allé régler cette affaire lisse, meilleure affaire a été allumée lisse, lisse et non lisse. Et puis j'ajuste des spéculaires spéciaux comme ça. Set 0, 1. Donc, quand un poème est mis en place pour la loi spirituelle et qu'il y a suffisamment de chagrin, un comme celui-ci. Puis allumez-vous. Boston interdirait Mal en disant que ce n'
est pas le cas et que celui-ci n'est pas atteint. Et j'ajuste un
peu la couleur là-dessus . Et non, Oh, j'ai vu que tu devais créer notre façon de s'installer. Et avec la psychologie, c'est un nous. Et puis j'ajusterai l'épingle rouge parce que dans le même A est plus en ligne. En ligne. Maintenant, je te vois dans un hibou de nuit.
14. Configuration de rendu avec des Cycles: Bonjour ami et toujours webcam. Mais dans ma vidéo et dans cette vidéo, je vais mettre en vente. Il faut régler l'éclairage et posséder le soleil, mais là-dessus. Et puis, spécialement un jeu d'échecs, aléatoire. Ensuite, il y a une application avec sidecar. Matlab s'énerve contre moi. abord, je vais à la mise en page et ensuite je clique pour R.
So R, Donc R comme ceci et ceci, vous allez vous révéler, donc superposer. Vous pouvez donc le voir. Vous pouvez donc voir sur cette carte dans mon péché, dans mon objet n'est pas une application de caméra sur gage. Je clique donc sur N, puis je clique sur N pour activer et désactiver, comme ceci, comme ceci. Et puis j'ai ajusté la spécification un. Je me contente de mentir et de sélectionner mentir et d'éteindre les panneaux et Moab un peu. Et puis celui-là, augmente la puissance. Lime, gérez ça. Et cette V1, V1 qui sont également permet que o. Et celui-ci s'installe du tout. Et celui-là, je m'adapte à ce qui est non plus. Et celui-ci a des messages v1 que j'aime aussi ça, comme ceci, N mu. Et tournez un peu. Et puis j'y vais pour ajouter du matériel dans l'état. Je reviens dans 70 ,
puis je clique à nouveau ici et je clique sur celui-ci. Et comme les jours et allez ajouter de nouveaux matériaux et créer de nouveaux matériaux. Et puis j'augmente la couleur pour savoir pourquoi épingler. Et puis mon nouveau, et j'ai choisi pourquoi la couleur, la couleur blanche. Maintenant, nous allons dans L. Et puis j'ai fait uniquement l'étape C, l'étape 3, et ainsi de suite, je mettrai bord jusqu'à un, trouve cela aussi permettre et poster cela aussi. Après cela, je vais lancer l'application, rendre la pilule en Grèce, la psychologie. Et puis j'augmente à l'essence jusqu'à Saint Paul, un homme, une tonne de nier comme ça. Et puis je vais alarmer le pot. Vous pouvez en chaîne, Royaume-Uni, Chang. Hey, peut-être un contrôle élevé et des couleurs, RVB et VM. Et celui-là, et ce seul homme que je dis est, d'accord, je vois très haut ou haut pour toi est u1 pour voir c'est aller. y aller. Et puis vérifiez à nouveau. Et vous pouvez jeter en Colombie. Puis cliquez sur celui-ci et celui-ci. Et j'ai peut-être vu une voiture latérale. Ensuite, allez à la caméra et sélectionnez Moran. Et moi, c'est fini par trois. Je vais donc cliquer avec le bouton droit sur celui-ci et rejoindre mal. Vous pouvez voir. Et maintenant, nous allons dans un plan propre pour le rendu. Ensuite, vous pouvez vérifier et TFNP. Maintenant, un rendu de fitness et une localisation ne vont pas mal. Et le dernier évincement de la classe, vous connaîtrez totalement le processus complet. Nous adorons le nom de votre jeu de données pour le modèle 3D dans Blender. Et on se voit à la prochaine classe.
 You Tith, Krouta