Transcripts
1. 1 ) Introduction to the course: Hello, riven, and
welcome to the course. My name is Yash,
and in this course, we'll learn about creating a basic landscape using
Blenders geometry nodes system. We will start out by creating the main land part
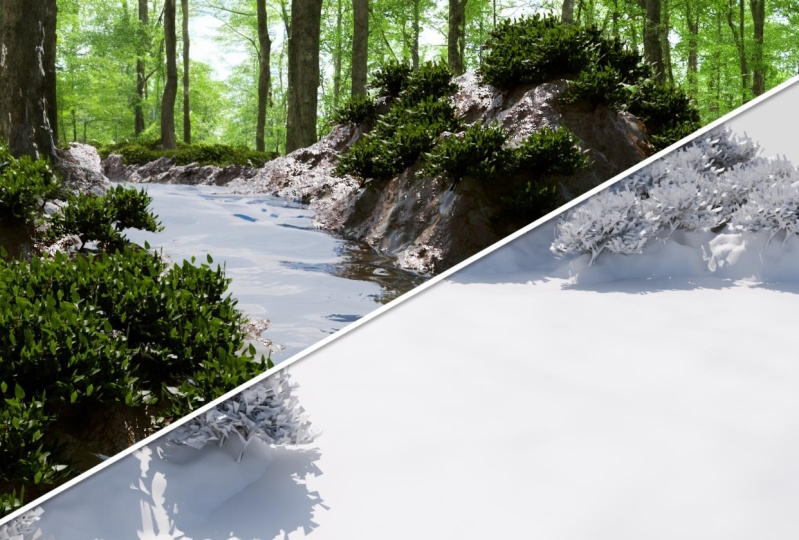
of our landscape. Then we'll add a water
body and some bushes, and finally, we'll
add materials to it. Now, I must tell you that this class is a bit on
the intermediate side, so I expect you to have a basic knowledge
of geometry nodes. If you're new to geometry nodes, I highly recommend checking
out my other class that is meant for people who
are new to geometry nodes. Your project for this class will be creating your own landscape. I also want to say
that it's recommended to use the blinder git add
on for this course because it's going to be very
useful for adding materials and using simple
models such as bushes. So what are you waiting
for? Let's begin.
2. 2 ) Creating a landscape: Hello, everyone.
So in this video, I will talk about how to create a basic ndscape using Blenders
geometry notes system. And then in the later videos, we are going to learn
how to add a body of water and also some
shrubs to our landscape. And then finally, we'll learn how to texture the
landscape as we want. So starting off, first of all, I'm going to just res ke
and delete everything. And then I can just shift
and add any kind of mesh. I want it doesn't really matter because I'm not going
to use it anyway. And then I'll come over to a split window and go to
geometry notes a and press new. Now, as you can see, geometry nodes modify has been
added to the plane. But right now, as
I've already said, we don't really need this plane, so I'm going to delete
the group input bad. Instead, I will choose a grid and plug it
into the group output. We've got a grid right here. And the reason I
chose grid is because we can not only change its size, but also the number of
what is sees we wt. So let's say at 3:45. As you can see, I've got a
lot of detail right here, which is very useful in
elevating our landscape. And if you have a
powerful computer, then you can raise it even more than 345 or
anything you want. But right now I'm just
going to keep it at that. Next thing we want to do is actually start raising
parts of the landscape, so it actually looks
like a landscape because right now it just
looks like a flat plane. To do that, first of all, I'm
going to press shift A and set position. Plug
it in right here. Now, as you can see if I
just increase the z value, it's going to just
raise the entire plane. Now it's not actually raising
the plane as a whole, but rather it's
individual faces. But right now it
doesn't look like that because we are just raising
all the faces evenly. And to not do that, what
I can do is pull out this offset node and
search for noise texture. And now we can see all the faces are
being raised randomly. But now as you will see
it's a bit slanted, and that's because it's raising
the faces on all the ***. It's raising it on
the x y and z as, and I only want it
raised on the zs. So to do that, I'm going
to search for vector math, plug it in and select
the operation to multiply and only multiply it on the z as to,
let's say 0.5. Or I can just keep a t one. And of course, you can change the settings
if you want to, but these are the settings which I found to work the best. So I'm going to
set the scale to, let's say 0.1, and
the detail 12. And now as you can see, it's starting to look like
a detailed landscape. But obviously a landscape
is not going to be like an even flat surface, and different areas of it are going to be raised
to different levels. So I'm going to
press shift again and search for R GV curves
and plug it in here. Now, right now, nothing has
changed, but as you can see, I can click on this line
and start editing it. And this way, I can start raising and deforming different
areas of the lad scape. And if you think the landscape
is not raised enough, I can come over to this spectrum
increase or decrease it. Now, right now, it
only goes up to one, but actually, I can just speak on it and input
any value I want. So we are not actually limited to the option we have
been provided here. We can just use any
value which we want. Like such. And now we've already got a basic
landscape which we wanted. Of course, if you
don't like this, I can just change the
texture to for d, and I can try out different
versions of the landscape. But I'll just keep
it at three D for nob because I think
it looks pile. And that's it for this lecture. In the next lecture,
we'll learn how to create a body of water for this
setup. See you there.
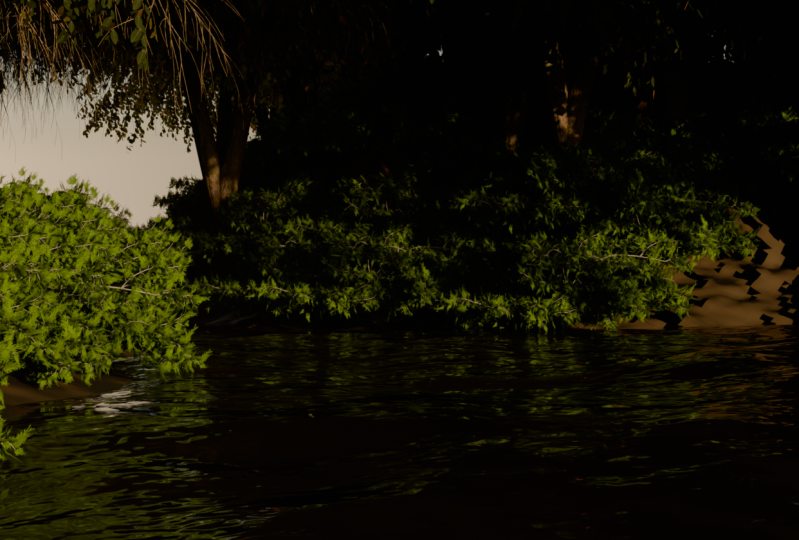
3. 3 ) Adding Water: Hello, everyone. So
in this lecture, we'll learn how to add a
water body to our landscape. Now, this is a very simple step, and hence this lecture is going to be a bit
shorter than the rest. So first of all, I can just come over here
and copy all of this, so press shift D because a body of water is also
basically just noise texture, but with a little bit
different properties. Right? So first of all,
I can just slip this GV curves node right here out of the set up for the water body. And change the dienals
of the texture to 40. And now I'm going to add a joint geometry node
to the main setup. Put this right here
and join it to this. And we go we have basically
got a water body. I'm going to decrease the detail to let's say 120 because I
don't need that much detail, and maybe multiply it by two if you want a greater
number of waves. And now of, I can just do another vector ma because the body of water
just went to higher. So I can just do
another vector mat and subtract from this value. So subtracting it to, let's say 0.6 works really well. And that's basically
it. Actually, I'm going to subtract it by 0.7. And that's basically it. We
have brought a water body. If you want to animate it, then you can just come over
to this noise structure and let's say add hasta frame by
60 or something like that. And that way when you play bad, you can see that we
bought a little bit of an animation in case you want
to render a video of this. Right now, I'm just
going to not have the animation because I'm just going to render a static fave. But anyway, the last thing
I'm going to do is come over here and select all of this and just press control G, and then tab out of this and
just rename it to water. And again, select all of this, control G, tab out of this, and rename it to land. In this way, we
can actually be a bit more organized
with our setup, and maybe just bring it both closer over here.
And there we go. We have got two components
of our setup right here, the land and the water. The only things left
to do right now is to first of all add some
shrubs to the scene, and secondly, adding
some materials. So in the next video,
we'll learn how to add some plast to the
scene. See you there.
4. 4 ) Adding Foliage and Texturing: So we have already created a basic landscape and added
a water body to our sea. So the only two things left
now are to first of all add some foliage and then to
texture our s. For now, I'll just use a
single type of bush, but of course, you can modify it to include multiple bushes. So starting off first
of all, like I said, in the beginning of the post, I recommend having blender
kit installed in blender. So right here, I'm just
going to search for shrub. And I'm going to
pick up this one. Let's say, and drop
it into my sca. So we've got as sub right here, but this is a bit
too high resolution, so I'm going to add
a decimate modifier. And I turned out the ratio
to the point where it's not just completely
evolving into OS, but just showing
me a few leaves. So I think this much
is w to be enough. We don't need it
to be super high for leave because
we are not going to see a lot of detail
in this scene anyway because of
the sheer number of bushes we are going to have. So right now in the
Jome note setup, I'm to press stab on the land. And now I'm going to
take this tree right here and drop it in because
we are going to need it. So here, in the group
output, first of all, I'm going to press shift
and add a joint jot. Plug it in right here. And then I'm going to
take this joy tree from the set position and
convert it into points. So I'm going to search for distribute quit surfaces because we want d random distribution. And then I'm going
to take it right here and plug this into
the joint geometry. So we've got points all around. But as you'll see, I don't want the points going
inside the water because obviously the same
bushes that grow on don't usually grow on water. Now, this is actually a
really easy problem to fix. First of fall and just to
take the water bit down. So something like this. So we have a little bit more space to work
with right here. And now, in here, as you see, when we are distributing
the points, we have the selection
lode right here. And this is basically
used to specify which vertices or which faces we want to
distribute the points on. So first of all,
it's going to be decided by the
position of the face. Going to pull this out
and search for position. And this will give us the
position of each base. And then I want to separate
the components of the pase. So I'll just to search
for separate X Y Z, to separate the y z
vectors or the faces, and then combine XYZ because we want to combine
it all in the end, and I only the z
ordinate for now. And after that, I'm
going to plug in a mass node right here. And what I want to
do is s greater the. And then see at which threshold, I start getting a bit of points. So I'm sacking to get a
bit of points at 0.100. And I think already it's
serving pretty good, and 0.200, it's already
above the water. And obviously, you can adjust
the density as you want. And now I can just use an
instances on points load, plug it after the
distribute point surfaces, and then take this
object in four here and pu the j tree into the instills. And also, I'll just apply this decimate
modifier right here. Now, I think this
is a bit too much. So I can just come over here and first of scale down the stats
to 0.05, let's say. And then the threshold, I will take something like zero point to six or something. And they will break
down the density to something like this. And I think this is
looking pretty good. And the last thing we need to do is to apply some materials, and that is actually
pretty easy. So if I come over here
in the materials review, you will see that
we already have the material for our shrubs. So we need just two materials. First is for the water body and the second is for the land. To do that, I'm just
going to use blend gate. Now obviously, you can create your own materials
if you want to, but I highly recommend using Blender c for these
types of things. So first of all,
I'm going to create two cubes to sample
the material song, C out the materials, stamp and first of
all, search for water. And you can take any
material you want. I'm going to just take this one and drag it onto the cube. So we have our water
material right here. And the second, I'll search for mud and fug it tail to this. All right, so we have both of our materials,
which we wanted. And the only thing left
to do is the first vault, press tab on the water dam and take this group
output somewhere further. And I'm going to
just press shift t and search for set material. And in the material, I'm
going to snip water. And as you will see now, we have our water material. I'm just going to switch in to this dm pom because
it's getting too laggy. And right now, I'm also
going to shade it smooth. Before adding the materials, and I'll do the
same for the land. So press stand here, put out this group output, search for set material. And then in here, select
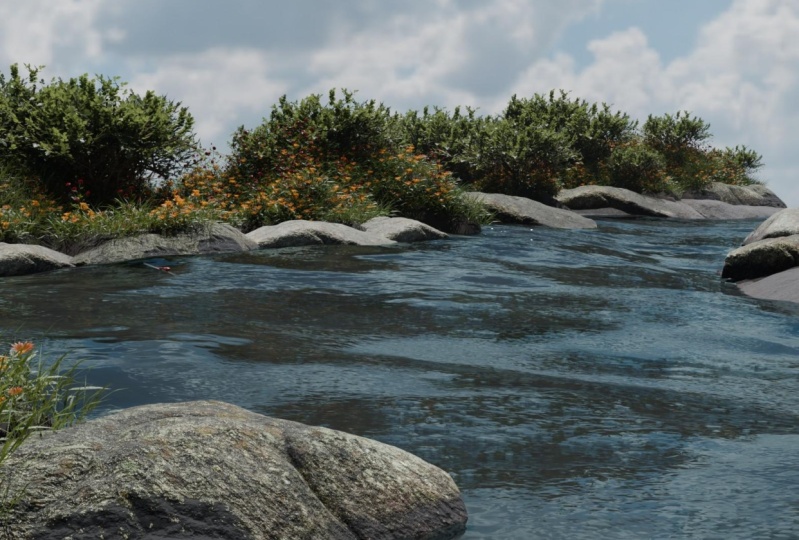
mud and also set shades. And here we go. And that's it. That's all we need to do. By now, you should
have a landscape that looks something like this. And that's it for this course. I hope you really enjoyed
and learned something new. Your project is
going to be creating your own landscape using the techniques to
attend this course. So thanks for
watching my course, I really hope you enjoyed and
see you in the next photo.
 Yash Kejriwal