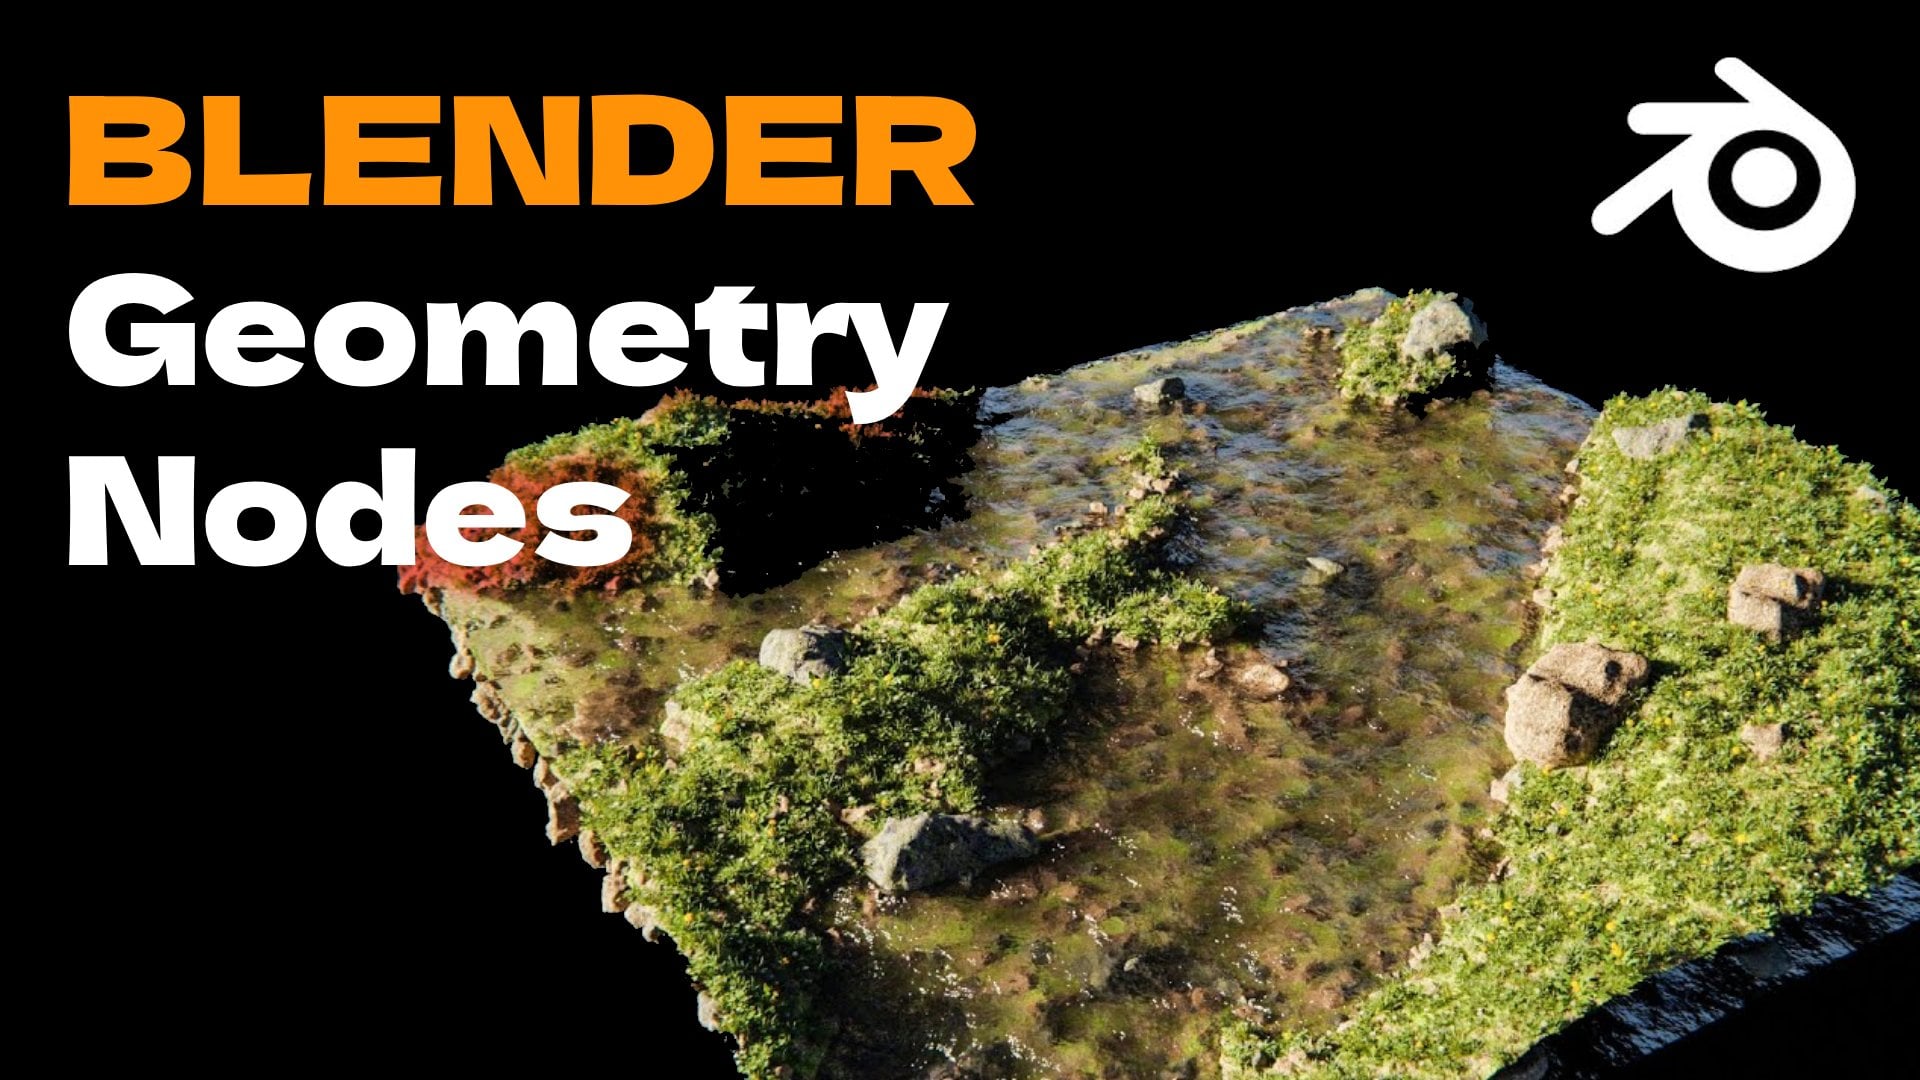
Transcripts
1. 0 ) Intro: Hello everyone and
welcome to this class. My name is Yesh and
in this class I'm going to teach you how to
create this cartoon character. We'll look at modeling
particle systems, texturing, rigging, posing,
look, development, and rendering our character. This class is meant to be simple enough for a
beginner to understand whilst also showing
you ways to model a character you probably
didn't know before. Now this could be your first character design project
if you're a beginner, or it could be
just another piece of work to add to
your portfolio. I also want to see
your renders of this character at the end
of this class. Let's end.
2. 1 ) Creating our bench: Hello everyone and
welcome to this class. My name is Josh,
and today we'll be starting out creating our
own cartoon character. The character I've
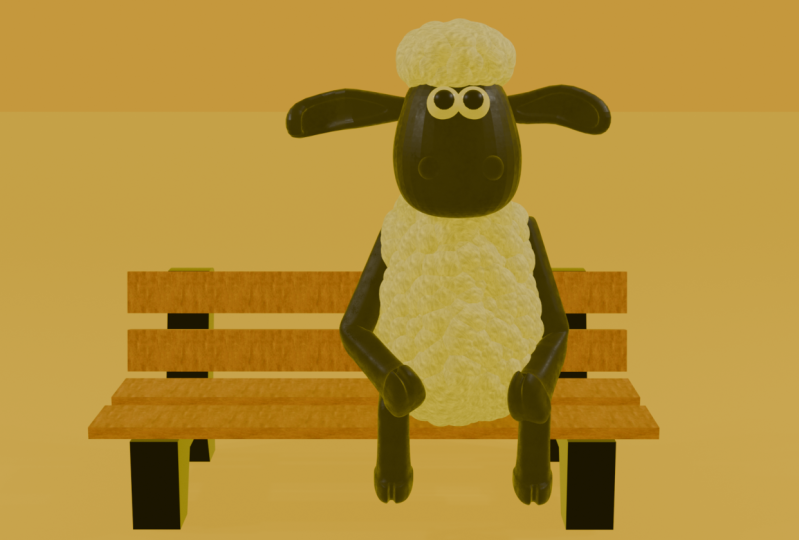
chosen for this class is Sean the Sheep from the
famous cartoon show. And this is what a
result will look like. So let's jump into
blender and start creating the first part
of the scene, the bench. First of all, delete the default blender
scene by pressing A. And then then we can start
off by adding our own cube. We will first be creating
the legs of the bench. Scale down the
cube on the Y axis and then scale it up
a bit on the X axis. This is to specify the
thickness of the legs. Now use control
plus R and scroll with your mouse wheel
to add two edge loops. Now scale them along the X axis to move them further towards
the edge of the cube. Now we can select the
bottom middle face and go Alt plus E and extrude manifold. Now as we move our mouse, you can see that it
cuts into the cube. We can scale the
resulting face down on the x axis to create a
tapering shape for the legs. Now extrude the top edge face, also pull it
backwards as we want the back rest to
be a bit slanted. Let's also polish
it above bit by adding a bevel to a
few of the faces. Now since that's done, we can create the second leg by duplicating the first one. But instead of that, I want
to use a modifier to do this. Go to the modifier
tab Select Array, and then set the X
factor to zero and increase the Y factor to move
the copy along the Y axis. This is because now if I make
changes to one of the legs, it will be reflected
in both of them. Next, let's create the base. This is the easy part. Create another cube. Now we can adjust the
scaling and position of the cube to create one plank
for the seat of the bench. Next, add another
array modifier. Adjust the x factor. Now, duplicate this
for the back rest. Now go into the side view and rotate it to align
it to the chair leg. And that's for this tutorial. We'll learn how to texture
our bench later in the post. I really hope you
learn something new in this lesson and see
you in the next one.
3. 2 ) Modelling the body: Now that we have our bench, the next thing we want to start making is the body
of our character. Now we can create the body
in many different ways. Let's explore a few of them. The first way is by using
a simple sphere primitive. To do this, let's move a red cursor a little
to the side right here. Next we can hit shift A, add mesh UV sphere. Now we can go into edit mode. Next we can scale the
character up a little bit. Remember to turn on
proportional editing by using this button right here or by
using the shortcut key O. Now slit the edge
at the top by Alt. Clicking on an edge, then hit. Now as you can see
as I drag my mouse, it's not just scaling the
edge we are working on, but also all the
surrounding edges. Now let's also adjust the top and bottom vertices to create a shape that
doesn't taper off that much. It doesn't have to be a high
poly shape because later on we'll add fur to the body which will cover
most of this up. The other way is to
use a cube primitive. Create a cube. Now we can use extrude and
scale operations we used previously to map out the basic shape of
our characters body. Once that's done, we
can use control plus two to add a subdivision
surface modifier. If you do this right,
you should get a pretty similar looking
shape with both the methods. Lastly, let's finish
off by adding a tail. Move the cursor to the
back of the character, then add a sphere. Scale it down to
your desired size. You could also taper
it off a little bit. Remember, we are not really trying to get
into the posing of the character just
yet because we'll do that in the ring
section of this course. That's it. We now have a basic body shape
of our character. In the next necture, we can
start modeling our head. See you in the next video.
4. 3 ) Creating the head: In the previous lecture, we made this basic shape
for a character's body. The next thing we want to do is model the head of our
three D character. Now I want to preface this
by saying that it's going to be a bit more involved than the body modeling we just did. But you don't need to
worry because I'm going to guide you through
every step of the way. As we can see, our character
has a pebble shaped head. Think about how we can
achieve this shape. We can start with a cube. The reason why I'm
doing this is because a cube only has a small
number of faces and edges. Which makes it easier
to shape out our head. Because we have a lot
less things to manage, We can start off
by just selecting our top face and scaling
it down a little bit, then moving it backwards
along our x axis. Then maybe we also bring this bottom face backwards
a little bit as well. And we can also move this
back face slightly forwards. What we're doing here is
that we are basically trying to roughly match the shape of the
character's head. We could now exit Edit mode and press control plus
three to subdivide the. The reason why we are using a high subdivision
level is because the head isn't going
to be covered by fur. Unlike the body, it is important that it is as smooth
and detailed as possible. This can still use a few minor improvements for this part. You can either follow me
along or you could use your own creativity to create a shape you're
satisfied with. I'm going to use an
edge loop and bevel the bottom phase just to make the shape a bit more accurate. But you're free to do
whatever you see fit here. In the end, apply modifier
to create the nose. We can create two spheres where we want our
nostrils to be. Just join the two
spheres with control J, select your face mesh. Go to modifiers, add
modifier, and select bullion. Select your sphere as
the bullion object. Make sure the difference
operation is selected. If you get any problems due to the bullion not
working properly, you can try changing the
solver from exact to fast. Now we can apply the
modifier as you can see. Now if I delete my
nostril sphere, we have our nostril
shape right here. The eyes are pretty
straightforward. Just create two spheres and align them at
the correct place. We will texture them
later in the course. Let's move on to the ears. Just create a cube scale
up the outer face, then extrude it, scale
it up on the y axis, and make other adjustments
to your liking. To make the ears look like ears. Then select the
interface right here, the head to insert it. Now press and drag it inwards, create the ear cavity. Press control three
to make the shape smooth and apply the
subdivision surface modifier. Align the ear to the head. Duplicate it for the other ear. Now select both ears, as well as the head and press
control J to join them. Now we have our head ready. In the next lecture,
we'll create the limbs of our
character. See you there.
5. 4 ) Modelling the limbs: In the last lecture, we created the head
of our character. And now we want to
start making the limbs. This is going to be a
really simple part. Just create a small cube. Now, slid the top face, insert it and then extrude the resulting face upwards
to create the leg. Now press Cade to
activate the knife tool. Then holding down shift Clair cut right down the middle
of the front face. Then we can select one of these two faces and
extrude it out outwards. Now scale it down
just a little bit. I also want to select
this outer edge and bring it inwards
a little bit. We are trying to
get the basic shape of the Fogs with this method. Do the same with the other face. Now add a subdivision surface modifier
with control three. We also need to add some edge loops to
tighten up this mesh. Now you can make some
quick adjustments to shape the legs
to your liking. For example, I'm adjusting the shape of the
fors right here. Now just duplicate
this limb four times and put it in
the correct places. And that's it. We
now have our limbs. See you in the next lecture.
6. 5 ) Adding the fur: With a basic model ready. We can now add fur to a model. This is a really
straightforward process. Just create a sphere, This is going to be
our fur particle. Next, slip the character's body. Go over to this tab, which
is the particle system tab. And click the plus
icon right here. Change the particle type
from Emeter to hair, but we really don't
want regular hair here. We want to use our first
sphere as the hair. Scroll down to Render and
select Render as Object. Select your first sphere
as the instance object. Now we can adjust the scale and scale randomness
to our liking. I know this looks
laggy right now because I'm recording at the
same time as doing this, but for most people it's
going to be super smooth. Anyway, scroll up to
the particle number and decrease it and play with the hair length till
you are satisfied. I'm also going to scale
down the body right here, because it's currently
clipping into the head. We also need some
fur on the head, create a sphere on the head. Then repeat the same process
as earlier, and that's it. In the next lecture, we'll start texturing our model.
See you there.
7. 6 ) Texturing our model: All right, so with our
modeling work basically done, I think it's a
good time to start texturing our model because
it looks a bit blend. For now, for texturing, I'll be using two methods
in different scenarios. One is the classic method
that's built into blender, and the other one
is Blender Kit. Now Blenderkit, if
you don't know, is a great blender add on, which gives you a ton of models, textures, HDRIs,
among other stuff. Right inside of Blender, you can get most of
its assets for free. So if you haven't already, just go over to Blenderkit.com and download the add
on and install it. Now that we have Blend of It, you should see this
bar right here. I'm going to click on this
second icon right here, which is the material stab, then search for
black rubber because that's what Shawn's
skin mostly looks like. Now I like this first
material right here. All I have to do is click and rag it over to Shawn's face. And as you can see, the material
is applied to his face. I can use the same texture
on his limbs right here. Now for I, I've created a very simple image
right here to use it. Come down over to material, stab and click on new material. Then click on the base color
and set it to image texture. Now select your image texture right here,
and you're done. Now I'm going to leave
this other sphere and duplicate this current one. Moving onto the bench, I can
just search blender kit for wood textures and pick my favorite one if the texture
isn't applied properly. The easiest way to fix it
is to tap into edit mode. Press to slip all W Ss and then press U and
Smart U Project. Now finally for the fur, I can search blender
kit for fur. And drag my favorite
pick over to the main sphere. And that's it. In the next lecture,
we'll rig and pose a character on the
chair. See you there.
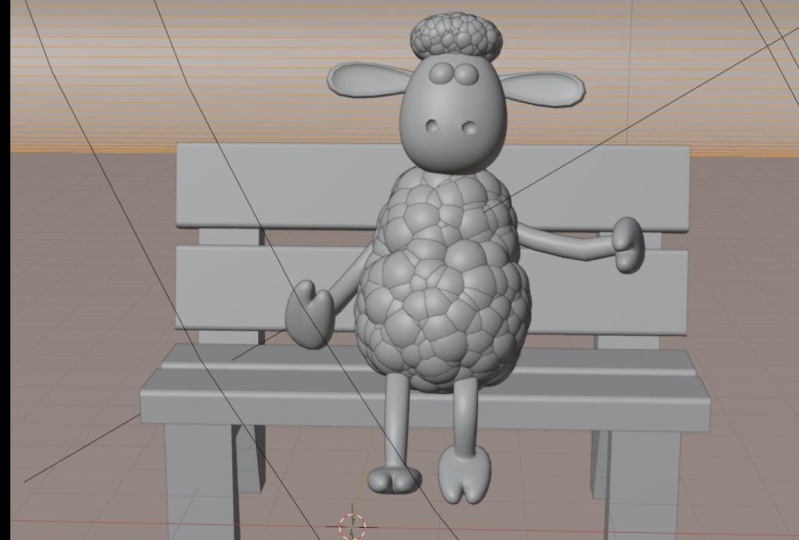
8. 7 ) Rigging and posing: At this point, most
of our work is done. In this lecture,
we are going to be rigging and posing a
model on the bench. To start off, make sure the cursor is right below
the character model. And press shift A and select
Armature. Single bone. Also click on the stab and in Viewport display
select in Front, now in edit mode,
select the top of the bone and bring
it up on the Z axis. Now to extrude it and take that extruded bone
up to head height. Now again, select the tip of the previous bone and
extrude it to the shoulder. Now repeat the same process for the elbow and the forearm. Actually, we don't have any need for this bone,
so we can delete it. Repeat the same process
for all the other limbs. Next you want to bind
our model to the bones. Go back to normal mode. Then select the body shift. Select the mature and
press control tab to go back to pose mode. Now select the
backbone right here, and press control
and press bone. This is going to bind the
entire mesh to the single bone. Repeat the same
process for the head. Now let's talk about the limbs. For this slect the
limb shift sect, the mature and then pose mode. Select both the bones
corresponding to the limb press control parent
with automatic weights. Now I can grab the armature and move it over to the bench. Now I can go into pose more and start moving
the limbs around. This process may take a while, but it's very rewarding. Once that's done, we're
almost done with the project. The only thing that's left
is the look development, and we'll do it in the
next and final lecture. See you there.
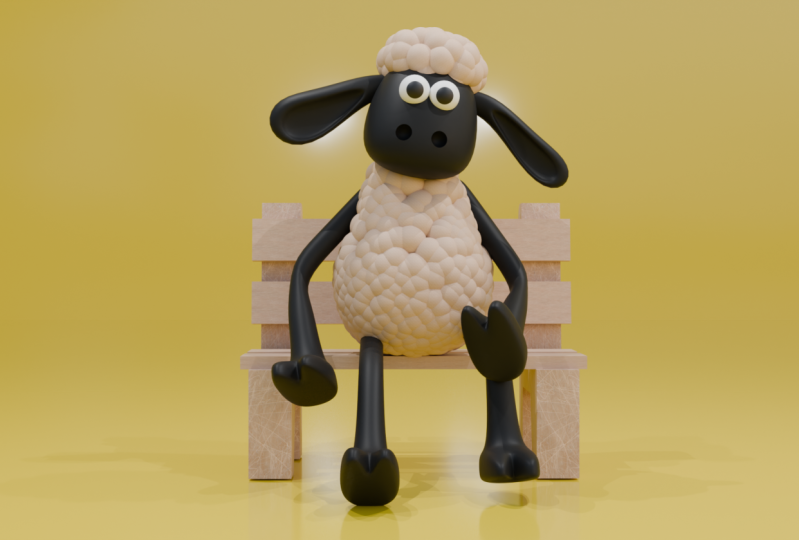
9. 8 ) Look development and rendering: We are at the final
stage of our project. Now in this part we'll set up a scene lights and
render out a scene. First up, I'm going to press Shift S and select the cursor to World Origin to place our cursor in the
center of the scene. Next, let's add a plane for a ground and scale it
up to a large size. Now go into the side view. Duplicate your plane, rotate it 90 degrees, and
bring it back. I'm also going to show
you how to add the HDRI. Let me remove the
existing HDRI for now. To add the HDRI, click on the color icon in the World Property Spanel
and select Sky Texture. Next up, we can color
the planes with a simple yellow color or
any color of your choice. Now I'm going to add a point light and
move it into place. Then you can go into the light property spanel and ramp up the intensity
of the light to about 10,000 You can also
try duplicating the lights and setting the up in places you want until you
get your desired result. Now add a camera frame your Viewpod to where
you want the camera to look and press control Alt Numpad zero to frame
your camera in that place. Once that's done, go over
to the Render menu and select Render Image.
And that's it. I really hope you enjoyed this class and learned
something new for it, and I really look forward to seeing your versions
of this character. Thanks for watching
and see you later.
 Yash Kejriwal