Transcripts
1. Course Introduction: Hi there. My name is Sean Fowler and I'm a 3D freelance artists with over ten years experience and a ZBrush artist for
almost 13 years. And I'm here to give you
an in-depth tutorial on my newest course, ZBrush for the first time, beginners course dedicated for those interested in
learning ZBrush. In this course, we have an
introduction section for our first-time users
before proceeding right to sculpting
alongside with us. Sculpt and environment,
utilizing both 2D and 3D reference
provided for you. Some of the things we'll
cover are as follows. How to sculpt in ZBrush
for the first time with a, an intuitive and
compounding approach as each lesson progresses. And understanding
of the viewport of ZBrush with a simple
breakdown of its elements. You'll gain a grasp of the most commonly used
functions of ZBrush, such as poly grouping, zero, measure, and the gizmo
tools will cover an introduction to how the
basics of life booleans work. And in addition to you, again, a solid understanding to ZBrush
is built-in hair system, viral rash, and finally, a breakdown on the basics of rendering and
exporting an image. Now it is my hope that by
the end of this course, you should have a
solid foundation and confidence in
understanding ZBrush, as well as a fully
flushed out character yours to add to your portfolio. Now, with that said,
let's start sculpting
2. What To Expect: Okay, so let's officially begin. Hello and welcome to the ZBrush for the first
time beginner course. This course is
basically dedicated for a beginner person
that's opening up ZBrush for the first
time or somebody who has a general beginning
amount of experience. And of course, in this video, I'm going to outline to you the basic three Section
approach of this course and what to expect
down the road. So to get started with, we're going to have a
section one Introduction. And on this section
we're just going to be covering in the first
seven lectures about, I should say, first
six lectures. Really, it's about
the basics of ZBrush. And it's really something mainly geared towards a person
opening up ZBrush for the first time or a
person that does has not had a lot of experience
at all with ZBrush. It's sort of like a conditioning
point to get you into the second section
so you can have a start off base of
everything you need to know. So to break that down
a little further, that first section, we'll be covering things like viewports, learning how the gizmo deformer and gizmo tool translate tools work how sub tools are organized in ZBrush
with multiple meshes. And some of the more
basic core concepts of digital sculpting with ZBrush like subdivisions and
how they work with brushes, smoothing, isolate, select
understanding polygraphs, DynaMesh and 00 measure. All these things are
covered pretty much in the introduction to ZBrush. Now, we're also
going to say that the very first section
does not cover every single small
feature of ZBrush. And that's because we
want to start you with the starter basics to get you started with
sculpting a character. These are some of the more
commonly used features in ZBrush that we
included in here. Now, as you continue in the second section where we
begin our character sculpt, you will continue learning
new features within ZBrush, which can translate to how small things like dynamic
thickness or surface noise, how all those, all
those fun things work. But I would like to stress
to you very carefully that ZBrush is main function is a
digital sculpting program. So definitely have a mindset of you're gonna be
learning things pertaining mainly to what it's mainly used for,
which is sculpting. So with that said, when we go into this
beginner section, we're going to give
you a 2D reference. We're gonna give you
3D models also of that same reference to give you a little bit of flexibility. And that's going to help
you to start and follow along with us as we
block out a character. Now will be blocking out the character's body with
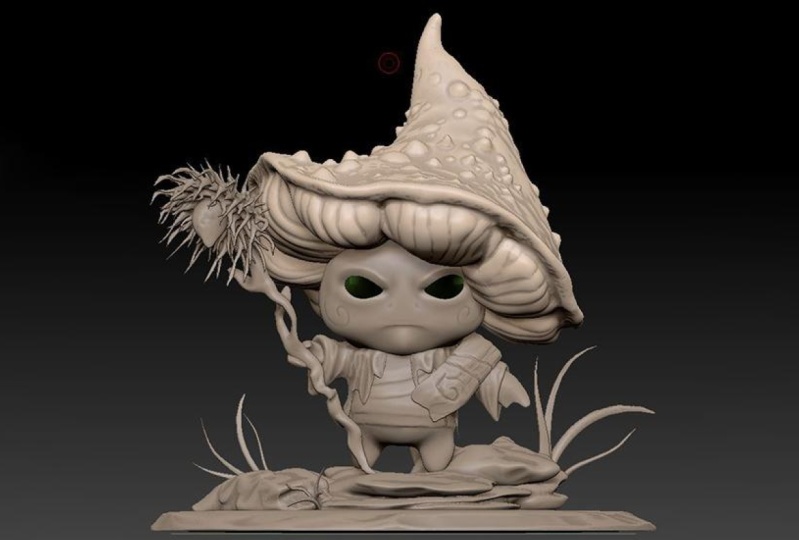
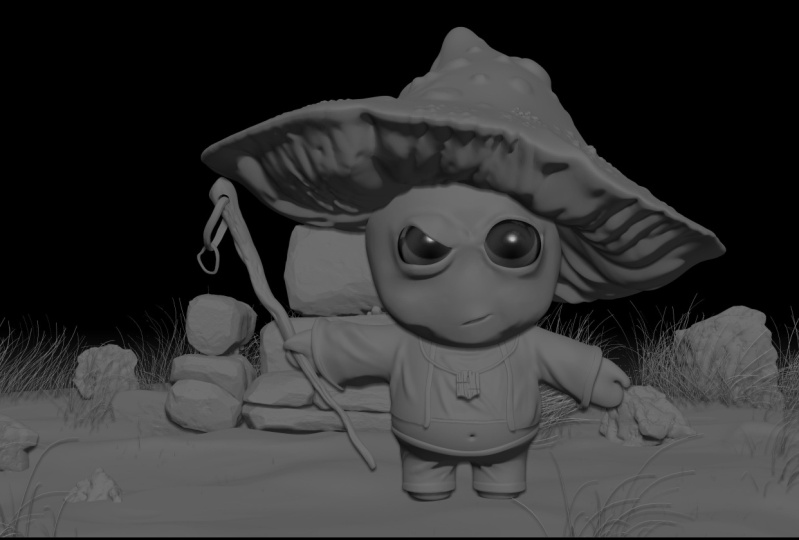
basic shape primitives. We'll start with the
top of his head, that mushrooms sculpting area. We're going to be
sculpting a mushroom. We're gonna be working on eyes, mouth code, just
about everything. And then from there, we're going to finish off with a section three
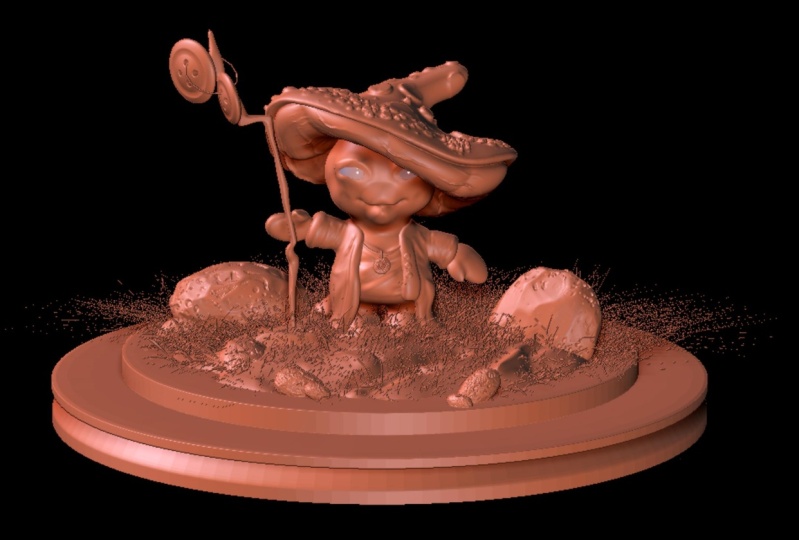
where we sculpt and create an environment for our little mushroom
monk to exist into. And after all that
said and done, we're gonna be doing rendering. Now again, some of the things we'll be doing environments is, is we will be learning
how to create rocks. How the concept of
sculpting ground can work with various brushes
and nice quick little introductory into fiber
mesh and how we can break down that feature and use it to our advantage in
creating something like grass. So once you are done with that, as I say before, the very end of this course, we'll conclude with a rendering
image of a character. Now, again, you can feel free to use this rendered
a character that you sculpted and added to
your portfolio to have to assist in your career or a beginning your
journey as a 3D artist. Or you can just do it as a hobby to kind of build
your skills off of. So with that said, the last thing we're
going to talk to you a little bit about is just trying to have a strong
emphasis on this course is all about learning through a process of
iterations repeatedly, over and over again
through practice. And finally, when
you are learning, if there is ever a time, I'm going too quickly
or talking too quickly. Again, this is a video
course online, so please, please remind
yourself that one of the biggest advantages is to
stop rewind, watch again. In fact, my own instructors said one of the preferred
ways is just simply watch the video completely through without having
to do anything. And then go ahead and follow along on the second time
because you wouldn't believe how many
things you catch if you re-watch the video or stop rewind play to catch something that
wasn't there before. With that said, I
want to wish you a awesome journey
to learning ZBrush. And I say, let's start sculpting
3. View Port Breakdown: Okay, so let's begin. In this first video
of the course, we're going to talk
to you a little bit about what z brushes. And also we're going
to go ahead and do a demonstration of how you go about drawing an object
into ZBrush and go over the basics of the button configurations you have to press to
make it sculptor. And after that, we're going
to then conclude with a breakdown on the viewport of ZBrush and all the
components around it. So let's go ahead and begin. Now. The question comes to mind. What is ZBrush? And ZBrush to put simply is a digital sculpting program most commonly used
for artists for our portfolio purposes or for gaming or VFX industry
standards of workflows. They are used to create
high red sculpts. And then most commonly
those high-risk gulps get projected into low res
models for normal maps. It's very much a program that is capable of
doing rendering. And it's also capable of doing
Rita apologizing as well. But those two, amongst other side feature ZBrush can do isn't really what
it's known for. As I said right
at the beginning. As there are many
different softwares out there that can do sculpting. Zbrush is still the most in-depth digital
sculpting program out there. It is definitely an
industry standard. So let's just go ahead and give you a little
demonstration of it. When you first open up ZBrush, you're going to notice
this little shelf typically most commonly shows. And what this is is
called a light box. And a lightbox is sort of
like a, an asset organizer. It gives you a whole bunch
of things to start off with, to get a project
started for you. Think of it like a spice
rack that helps you put several ingredients
together to get an object. So if we go up here, we can see like projects, like we can go into here, like a head planes if you wanted to sculpt
like for example, a head, there's many
things for that. It's just a sort
of compiled nation of many different 3D objects. And furthermore, it's
a place that stores any extra brushes that cannot be fitted onto the main
brush pallet that shows up. You can always refer to here
and do some experimenting. In addition to that, you also get a whole
bunch of alphas as well. And if you just
kinda go through, you can see there's
even a quick Save tab that shows all the quick saves you do if you want to choose a
certain quick so file, it will automatically
calculate that for you. Now to turn on or
off the light box, you just simply go
up to here where it says lightbox and
just click it off. Or you can just
hit the Comma key. So that's just sort of a quick
little intro to light box. So now we have a
complete blank canvas. You should have hit the Comma
key or hit the light box. So what we're gonna
do next is let's just draw in a 3D
primitive of ZBrush. So I'm gonna go over here to the right side here
where it says Tool. And I'm going to
choose a 3D permanent, such as the seed cylinder 3D. Left-click on that. You'll see a whole bunch
of drop-downs and just sort of options
modifiers for there. And if we click,
left-click and drag, you can see a cylinder come up. But if you left-click
and drag again, it doesn't really
kinda draws one over. And so we're asking ourselves
what's going on here. I'm constantly doing all of these little left
clicks and drags, but I can't seem
to sculpt on it. Well, that's because right
now what you're seeing is is what they would call
two-and-a-half d mode. It's sort of like
a blank canvas. It's a little confusing to explain to a first-time person, but a lot of the times
we use this mode to create things like
normal maps or alphas, et cetera, with the
sRGB grabber, It's a, it has a multipurpose use, but for us, it doesn't
really serve our purpose. If you're a first-time beginner and you're trying to
learn how to sculpt. So let's just go ahead and hit Control N to clear all that out. And I'm just going
to draw one more in. If you want, you can hold
Shift to snap it in. Now. Go ahead and hit the T key. And that will make
this rotatable now. So now when we move Around, not new
cylinders won't show up. Now, you may think
you're ready to sculpt at this point,
but believe it or not. Because if you left-click
and try to sculpt, you'll get this to
enable sculpt sculpting, please convert this 3D
primitive to a poly mesh 3D. Now, before we go into this, it's important to note that
right now what you're in is sort of an initialize edit
mode of the 3D primitive. So this means that if I
hit go into wire-frame, which is Shift F, you can kinda see
all the wireframes. And if I go into the
modifier of initialize, you can do things to initialize and create your own
customized version here. Now, to truly make the
sculptural as the sine gave you, we go over here to tool and
we hit make poly mesh 3D. So that's how you do that. And once that happens, you'll be able to sculpt. You can kinda see geometry displacing when you
hold left-click down. So with that said, we're going to review
how you do that. First thing you do is you will go ahead
and left-click drag. In a primitive, you
will hit the T key. And then from there you go up to here where it
says make poly mesh 3D. And then you click on that
and you're ready to sculpt. Of course it's got a lot
of low density and a lot of low geometry to make any
sort of high resolution. But we'll go over
that down the road. Now, moving on, Let's just talk now about all
the components that are around all
the areas around here and just do a real
quick basic rundown. And we'll start
over to the right. Now over here where
it says Tool, you'll have your
options for loading and saving project
files which are typically stored as CTL
scenes or as ETL files. Down on import, you can
import 3D models into here. And also the format for
that is it dot OBJ, FBX. Typically, you can
do also export FBX, BJ's, or FBX is out. Now below here are the
different sub project files. So if I have another
project file and I wanted this one to
be like a cube, you can work in
different areas here, but I don't want to
get you to focus on that just yet because I want you to kinda stay
with me on this one. So after that, we're going to show you there's a
whole bunch of things we have to go over
and a whole bunch of courses that can actually talk about each
and every one of these. So we'll just go
ahead and keep it down to just a little bit that all these areas are
pertaining to a form of modifying the
object in some way. The tools for this are most commonly if you want to modify an object like deprivation, these are all things that
have different functions that give a behavior out to the
sculpt that we're doing. If we made a thing called
group loops on here, we would have also
a whole bunch of modified topology options we can do where we can put edge loops
around those group loops. It's just endless supply. So we're not gonna go too deep. It's just this is where
we go when we want to manipulate the undo
some auto topology. The only thing I'll talk
about here is that we do have something called sub
tool and any 3D model, whether it's an environment
or a character that has multiple separate meshes
is typically under here. As we go through
further down the road, this is gonna make sense
how we organize this, how we split it, the various ways we can split it through concepts called masking, which again we go over. But that's sort of what
we're going to do. They're now moving on. We're going to go
to the top here. And this area right here, particularly these three
areas here, here and here, are pertaining most commonly
to the manipulation of the brush in terms of its
radius and its focal shift, which is that small
circle that is within the ZBrush diameter brush. So it's like if you
hold spacebar down, you can also get a similar quick pop-up menu
that shows up right here. And you can kinda see where focal shift is and how
you can change it. We'll go over that
later down the road. So all those things are
gonna be lots of fun. And then down over here, this is sort of modifying the attributes of the
brush most commonly. So like we have a
standard brush, a stroke for that standard brushes are gonna
be sprinkled on there. We sprinkling Alphas of any
kind or just regular dots. You can do a whole bunch
of modifications to it. And then of course, down
here we have something where we can change the mat to help us see the texture better. So to kinda give you an
idea and conclude this, this area here is about
talking about the, how the brush paints onto here. Over here. The standard, the brush, the stroke
and the Alpha. Those are all things
that pertain to how the brush behaves and paints on here sort
of like its behavior. And then on here, discusses the size of the brush. Over here, these features
have become outdated, but they're most commonly associated with a
concept called gizmo, which is this piece right here. If you hit the W key, you can kinda see
it pop up again. That's the W key. And it's gonna be
something that we cover in the next
video lesson here because we want to show
you how to manipulate objects before we start
sculpting onto them. So with that said, let's go ahead and move
on to the gizmo deformer
4. Learning Gizmo And Subtools: Okay, so let's continue. In this video, we're going
to talk to you how to manipulate and move an object, both with out and with
the gizmo deformer. We're going to also go over
a brief demonstration of how sub tools work and which will be one
of the first tabs under our tools section. And then after that, we're going to move on to how to sculpt and the concept
of subdivision levels. So let's go ahead
and get started. Now, if we take a look
at what we have here, one of the first
things I want to say is if you don't like this gray area and you wanna get your
screen to be bigger. Go up to document here, and just go ahead and
hit new document, but make sure that WE
size is turned on. Once you do that, it will say closing
document has been changed. I want to hit no. And then you got a
nice big canvas. Let's see if we can
draw that once again, right back in there
with left-click drag, go by what you learned before. If you drew another
one, like so, hit Control N, do
it one more time. Hit T. You can move it around. But it's not. Well, it is sculpt the bowl, but most people
will hit poly mesh. Now, to pan this, you can hold left, left,
Option, left-click. I'm thinking of a
different software because I work in a lot of
different 3D softwares. And of course, if
you wish to zoom in, zooming in is a
little bit tricky. It's holding left option down. You're in left-click down, so you're in this
pan mode right? Now while still holding down left-click, release,
left option. And now you're
still holding down left-click and you can just
kind of zoom in that way. It's a weird, weird, weird way of zooming. I know. But it's, it becomes
pretty, pretty fast. Also, another thing is, is you gotta do it in
empty space, like here. So again, that's left
Option, left-click. And then once you're
in this pan state, release the left option, but you're still holding left-click and that's
how you zoom in. So that's kind of how
you manipulate and rotate han an object. It's left Option,
left-click per pan, just left-click for
rotating around. And it's left
Option, left-click, then rotate, release.
Left option. And you're gonna go ahead and get the Zoom as long as you're
holding down left-click. So that said, let's
talk to you a little bit now about what's up here. And it is going to be the Gizmo. If we want to access our gizmo, we can hit either the W, E, R keys, and you'll see this kind of target
radical come up. Now. This is an important one for manipulating
objects around here. But what you're looking
at is basically like a mini user interface
to move an object. Of course, you've got
your circle to rotate it around and you can rotate
it in different directions. And of course, if you want to go back to that default state, all you have to do is just hit Control Z or drag up
here to the history bar. Like so. Remember, again,
probably a very common one to use Control Z undo. Alright, so moving on, we're going to go ahead and just kinda show
you that in gizmo, we can also hold
down Shift and it will snap by 30 degrees. In addition, it does
that for the scale. But it won't be doing
that for the translate. On top of that, we have a whole bunch
of things that go by. We see a whole bunch
of little area under Transform type which is
characterized by this cog here. We can do things
to manipulate and bend the shape of a gizmo. For example, 11. A type is, you can
kinda see right here, we can manipulate
it gizmo through the orange cones under taper, which was this modifier, you can just hit Accept. And if you want to
turn gizmo off, you can hit the Q key and then you can just
sculpt from this state. So to summarize again, to turn on the gizmo, it's either the WE are keys. You can move, you can translate, you can free roam, or you can rotate. You can scale, you can
stretch it like so Course I'm hitting
Control Z to undo. You can manipulate
transforms like for example, I did the twist for one
which are, I'm sorry, not the twists but the, Forgive me, the taper. But to give you an idea though, 11 thing that advanced users do is they will compound a whole
bunch of things on here. Like you're seeing
me do right now. You can do that. So this is where you
have to go through. And as I say, we're showing you how to
explore the whole thing. We're not going over
every single one, like it's an encyclopedia
because this is still not constituting a
digital sculpting. But you can do quite a, quite a few interesting
concepts through here. If you want. This is an example of another
deformer, the bend line. I'm sorry, Ben
curve, forgive me. And you can manipulate
the dots like so. And you can kind of
have fun with this. So that's kind of a
little breakdown of the deformers that
you're seeing here. You can also change the
primitives out if you wish. Now, moving on to the gizmo, the next one is going to, I don't really touch
sticky mode that much but this upside-down teardrop, you ever, if you ever
have a center point off, you can just click that
upside-down teardrop. And it can basically
turn everything. You can turn it back
into its center point. If you hold left option, you can move this around and the gizmo will
move through here. And another interesting
point is that sticky mode is kinda like maintaining where the pivot points that I never
really touched that though. Mesh to access is sort
of resetting everything. Mesh reorientation is just like as you can hold left option
and click on the translates. You can also do that
for here as well. So when you do that, if you hold left option and
then click Reset orientation, it will reset to
a default space. And of course, when you
click to go to access, it will go to its center point. So actually I clicked the
upside-down teardrop. Now, transpose is something I kinda want to stay away from until we're clear
on understanding other concepts of ZBrush. So with that said, we're gonna go ahead and conclude with the
sub tool section. Now. No backup here
just a little bit. Now the sub tool is basically like an organizer for
all the different meshes that exists within a character or an environment that you have that
you're sculpting. So you can be sculpting multiple different
meshes at the same time. Now, the sub tool, It's a little, there's a lot
quite a bit to go through. But one thing I will say before going any further is
if you hold the left command, you can go through and see all the different
descriptions under Neith, where it says sub tool. So we have quite a bit
that we can do under here. But to put simply, since we only drew
in one object, we have one sub tool. If we wanted to duplicate
this, which we can, we can then hit the W key and translate across and
you'll see two pieces. Then I'll go ahead and give a taper so you know
which one's which. You can hit. Accept. And I'll hit Q to go back into edit mode now
and before I forget, Q is sort of, I'm sorry, right here. Draw is right where you want to, if you want to do any sculpting. So if I try sculpting on here, nothing's going to happen. So I need to be on the right sub tool in
order to do sculpting. You can also turn the
visibility on or off. These extra buttons
here pertain to Boolean operations which
are a little bit more advanced and complicated
for hard surface, ideally But an additionally,
we have things like we can rename the Boolean
like straight, and it will rename an update. We can do a lot of things also like delete it, That's
pretty obvious, but let's say you wanted to import your cone
in here. Like so. And you wanted to
go ahead first, you'd have to like, let's, let's pretend
for a second. I hit the Import
button and I was importing a 3D model of a cone and it came out
looking like this. I wanted to combine
it with this. Well, first I'd have to choose, you can kinda see the two which represents the two sub tools. First thing I'd have to do is click over here
where it says a pen. And I'd have to go ahead and
impend the cone in here. Now you can't see it very well because it's in that cylinder. I can kinda see how
it works right there. So this is kind of how it works. Another thing you can
do is you can also merge sub tools in a whole
bunch of digital noise. Merge down means merge
one-piece down below this one. So like we do that, we can kinda see and we
can also split them, which can be done either
through a group split, which we see there's two
different poly groups. We didn't talk about that yet, but poly groups are represented
by two different colors. Once you hit Shift
F in wireframe. Or we can go ahead
and split two parts. Since these are two
separate parts, it's going to split
them automatically or split masked points, which can also do something
where if I hold down control, a mask will reveal itself. So let's go ahead and go
with split masked points. I'm sorry, split two parts. And we can kinda see R sub
tools are kind of rearrange. Now, you can also drag these to the top or bottom, like so. You can use the hold shift and bring one all the way to the top or all the
way to the bottom, hold Shift and left-click. And of course, lastly, you can kind of put
them all into a folder. So let's say if I wanted to create a folder and
call them Prim's, and I just simply left-click and drag all these pieces
in here, like so. You can categorize the
multiple sub tools that way as well. So it's pretty easy. It's not that hard to go over. A lot of these other things are just kinda self-explanatory. When we said split two parts, that's like a two sub tools
are combined and you wanted to do it through the unmasked
points or the mass points, which again, that's
just if you're holding control and dragging
a mask over something. One last thing I want
to go through is, is remember when I said
that you have to click on a sub tool in
order to sculpt it. While also, if you
hold left option, you can kind of automatically click on any of these sub tools. So that's kinda nice to go
through in case you want. So from this point on, we're gonna go ahead
and do a quick save. And then we're gonna move on into the concept of subdivisions and sculpting with
your first brush and take it from there.
5. Understanding Sub Divisions and Brushes: Okay, so let's continue. In this video, we're going
to talk to you about subdivisions of a mesh
and sculpting for the first time by manipulating the brush size and going over the type of brush and many other brushes that come
with it through hotkeys. So let's go ahead and dive in. Now, subdivisions
are the first thing I want to cover here
because the resolution of a mesh has everything to do with the resolution
of what sculpted. Let me give you an example. Now. If we look here, we can kinda see
in wireframe mode, a sort of default resolution and it's pretty relatively low, or I should say it's
relatively low for sculpting. If I tried sculpting, you can kinda see
the displacement of the sculpting and
we're just doing a basic standard just to show. And it's all kind of pixelated. And that's all because we
have a very low resolution. So I'm going to hit
Control Z and undo that. And this time I'm just
going to hit Control D. And if we do it again, you can kinda see
that the sculpture is slightly bit more finer. Now what happened was that we doubled the amount of
geometry when we did that. So let's go ahead and go
over here to the right. We're kinda gone through one. Let's go into geometry. Geometry is one of
the main places where we're modifying
a sub tool. And if you can see that big
button where it says divide, That's the same as
what Control D is, as it shows already
right next to there. And don't forget to hit
that left command button to learn of all
sorts of new things. So you can go ahead
and hit it again. So now I've hit it twice. And as you can see, we have yet again an even
finer looking sculpt like. So let's go ahead and go undo. And also, if you look up here, we have subdivision levels. Now what that means is if I write now I have
three of them. If I drag this all the way down, you can kinda see the
first resolution is there. And of course the second
resolution is there. Then the third
resolution is there. So we have multiple
resolutions we can sculpt in. And this can be sometimes very useful when you want
to collapse and smooth things down real fast on a slow division and then rebuild them in
a higher division. It's very useful. When we go into the
smoothing tutorial video. We'll go ahead and talk to you about the relevance of
subdivisions there. But to go into it
a little easier, we can kinda see basically, if you look up here where
it says active points, Let's go ahead and
just swing this back down to the first division. And you can kinda see the
resolution kinda change, but also look where
those active points are, those vertices. You can kinda see also a
little bit of a change in it, but the total points is
still remaining the same. If you go up one, you can see what it
looks like and it's doubled and tripled state. So every time you hit
control D or divide, you're gonna get another
subdivision level. And again, subdivisions can
be explained right here. Course, when you do that, you can kinda see an even
finer sculpt like so. Let's go ahead and drag our undo bar all the
way. Have some fun. Now. Now that we have that, we're going to talk to
you about the hotkey for switching back and forth
between subdivision levels because you're not really
gonna go over here and put any subdivisions on hearing constantly
switched through the slider. You can put it takes a
large amount of time. So I'm going to start
from the beginning. I'm going to hit Control
D wants now it has one subdivision
twice, three times. Now I have hit it three times. And if I wanted to go to a lower subdivision
without clicking on here, I just hit Shift D and it
will go down one shift D, it will go down again. And shift D, it'll go
down to its first. To go back up, you do not hit Control D because it will
simply give you this message. So what you want to hit is
just the D key, like so. So Shift D to go down
and subdivisions, and D to go up in sub-divisions. It's pretty much that easy. Now another thing you
can do is you can delete subdivision levels
by hitting Shift D, maybe you didn't like. And what that will do is
that will just delete all the subdivision
levels below it, which is what Delete lower is. I can also undo that
to regain them. And if you want, you can go to the very
first one and delete all the higher subdivisions
and you'll see the total lacked points return. So that's sort of its breakdown
of subdivision levels so that it kind of gives
you an idea how it works when we sculpt
first things first, we need resolution in order
for things to work out here. As we progress, there are ZBrush has multiple ways of
establishing resolution. It doesn't necessarily
have to be Control D, but whenever we want to
sculpt some detail in, you gotta always keep in mind first you
need to divide it. And so that you can start
seeing some resolution because this thing is
isolating geometry. And you got to also be
careful not to go too high. Because I've seen people
do like some pretty crazy. Like you should never
have a sub tool around 3 million or
1 million is what my instructor always said, but I always cheat and go over 1 million sometimes because I have some pretty crazy sculpts, but that's for a different time. So with that said, we're
going to now kind of end off with the brushes and how
to modify the brush. Now, let's start off
with standard brush. If I click on here, again, you can see a whole bunch of brushes that we can use and
we're going to give you, and you may think again that you might need to go through no, all of these brushes. It's not necessarily the truth. In honest reality. You could get away
with doing most sculpts with five
or six brushes. And then from there, you can honestly expand out with experimentation and
make more interesting, quicker results through
a similar brush of, from your basic five. It's very important to go through and experiment
with these brushes. But don't think in your mind, you have to know every
single one of them. For me, it's like five or six is what I use the most
to get what I want. So with that said, we're gonna start with
its default brush. Now this is one of the five, but there are several more. I honestly think
I could use six, but it's not really a big
deal of this default brush, which is standard, can be accessed by clicking
on the brush. And then looking for
standard on here in this lovely Where's
Waldo outfit here? And we can just simply
find standard right there. Another way we can do is hit
the B key to bring up brush. Remember B for brush,
and it's standards, so that's s. And then
it narrows things down. And you can kinda see this
letter right here is t. So t will access standards. So BST will always
switch to standard. You can kinda tell
every brush kinda has something for you on here. So like if you wanted
to move brush, it would be B to bring up the brushes palette M for the first letter,
which is move. And then we look
in here and we see that V is that key, so V, So now it will switch
to the brush and now we can move our mesh and again, go back to standard BST. Now, having said that, there are ways of
making a quicker like similar how we have ZBrush is built-in
little mini pop-up. When we hold the Spacebar down, we can get our brush where
we want here as well. And we can also make additional small little
mini pop-ups like Control C to make all our
favorite brushes come up. I'm a little bit
against that for a first-time user though, because I really want you to get used to the hotkeys of
accessing everything and commit it to memory
because I don't want to skip you ahead and you don't develop the right habit
of knowing how to access things from a
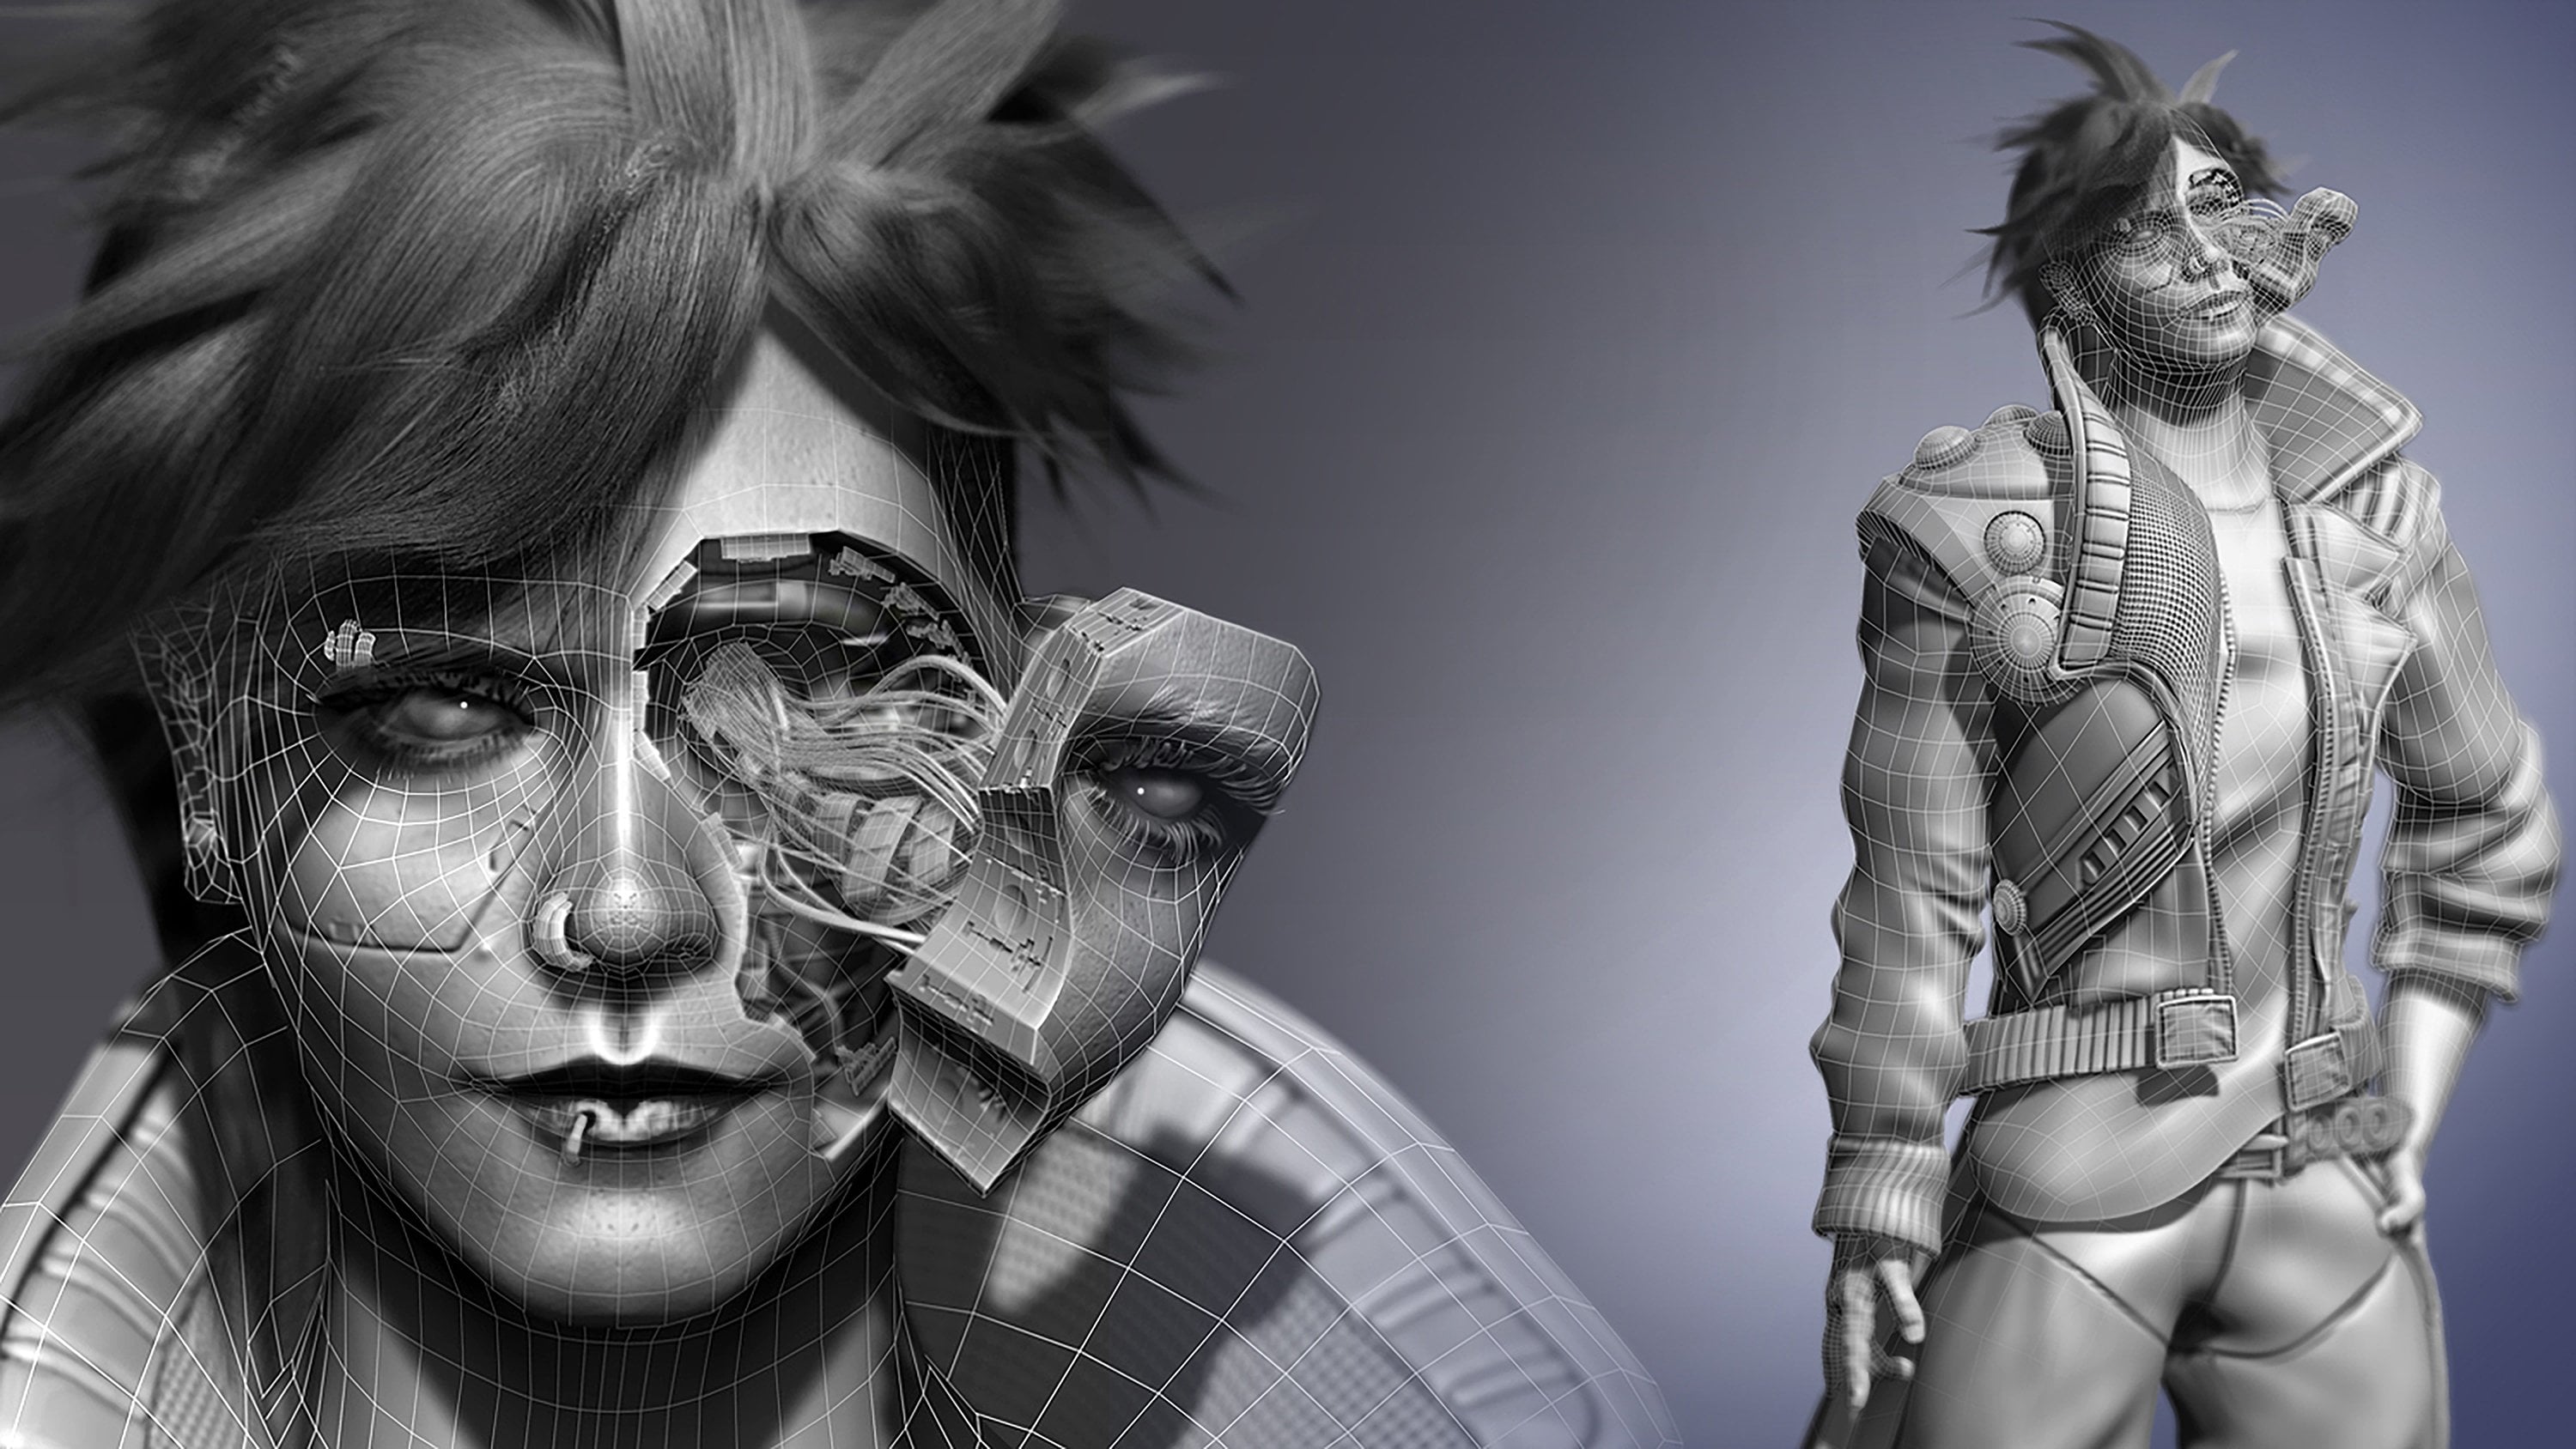
different computer. So I do have a tutorial on that, on my cyber punk
ZBrush character. But in this one, this is a first-time user. We're trying to
get you to access everything in its default phase. So with that said, this first icon is
the type of brush. The second one is the
type of screw stroke So we saw like what dots do. You can see these debits, but of course, Control Z, undo. If I choose freehand. You can kinda see
it's a similar case because it's standard. There's not really much
of a difference behavior. But if we choose focal length
to be a little bit smaller, it blends a lot easier. That's because the
distance between the focal length
and here is sort of a blending point to make a
different shape like that. Now the thing to remind you is that you can also
do an alpha brush, which doesn't really do
anything with stroke. But let's say if we experimented with some
different types of strokes, like for example, spray, that's what it looks like when
it's combined with brush. But then again, you'll get different results
if you did like spray with the stroke
changed to that too, instead of free hand, go ahead and do that out. So let's go back to standard. And other one is rectangle, which is sort of like
a drag and drop. So that would be very, very, very important with alphas. If I wanted to
make, for example, this alpha, you can kinda see
the edges kind of fall off. So let's give one more
resolution by hitting Control D. And I'll give you a preview, kinda see those corners there. That has something to do. Again, the focal shift
which is up here. I'll undo it and this
time change my focal shipped by holding
spacebar in that area. And you can kinda see
a little bit more of a harder edge across everything. That's because
there's no blending or fall off to the end. Take a look at over here. And then you can kinda
see how it blends into this alpha over here. Because you can imagine like a circle is kind of giving you, just take an imagination of a circle being put in
that inner circle. It's kinda blending
it all the way into 100% value for it to be seen. So that's kinda how
focal shift can be made. But don't let that keep you from experimenting because that's what
it's all about. Experimenting. Strokes can be done, sprays can be done. Strokes kind of give a little bit more
randomness in depth. Whereas spray is kind
of a consistent depth. Drag and drop is a
little bit more of a of a similar mentality as the drag a rectangle except
you can manipulate it. Whereas drag rectangle is
stationary to one spot. So you can see how
all of this works. We want you to understand
this part right here. Not this heart, but the whole idea about
combining alphas with different brushes
is really where the creativity in ZBrush is. It's really, really
got sort of a, a, you can really drag through a whole bunch of unique
of scenarios with it. We also want you to be
very, very, very curious. And in the idea of doing things like experimenting two
different strokes and flows. Like we'll go back to this
one and you see this. But then if you go to spray and then go ahead and turn the
flow like really down, you can kinda see
it look like this, which is a lesser Hello
than what it was here. So it's like kind of putting it in random spots and making
less stamps in the process. You can do stuff like that. And now this is about
where you got to experiment and have some
fun and experiment. Like just kinda create
your own unique look. Now, one last thing
before we will go, and this part we almost
did on its own video, but we wanted to talk about
it was the smooth key This is a very important
one for a sculptor, probably for one that is
for organic sculpting. And smooth is sort of this concept where you're kind of imagine it like
the eraser button, button in some way. And what it is is it's
basically as it sounds, smooth, relaxes what
you've sculpted. So if I, for example, made a whole bunch of
dots like so, and try it. And I hold, held
down the Shift key. Then while holding
down the Shift key, you can see my whole
mouse goes blue. So when I click on the surface, you can kinda see it
kind of smooths set out. Now, it's still pretty lumpy. And that's because we got
like six subdivisions. So let's go ahead and
undo all of that. And this time, let's take it down a couple
of resolutions. Same thing, except this time. A lot quicker process
of smoothing. It's a lot less bumpy. Smoothing is something that helps us relax and
kinda give us a do over or blends what we
sculpted into the surface. It's very, very useful. But one thing to
keep in mind about smoothing is that the
lower the subdivision, the more it will collapse, and the higher the subdivision. Like. You know how this works, I'm old and smooth down. You can kinda see it's
not really collapsing. We got a lot more geometry, quite a bit more than we should. But you can kinda see how it
stays together like that. So one thing we can also do is when we're
holding Shift down, we can control the
intensity of the smooth. If I release Shift, you can see this is the
normal brush intensity, sculpting in and out. And then holding shift is
the maximum intensity. So you can control
the intensity. Turning it down will
kind of give you an idea of the debris
of the intensity. And just like with
the regular brush, you got your own focal Shift
and draw size as well. With that said, we've gone
over everything in the brush, but we didn't go
over the one thing that is used almost
as much smoother. And that is the alternation
between z add in Z sub. So what that means
is by default, if this is on z add,
Most people say, well now I gotta hit
c sub two minus. Well, not necessarily. You can hold left
option or, I'm sorry, no left option and just do
z subs this way as well, then go about it that way. Now left option doesn't, isn't a quick key for z sub, it's just the inverse of it. So now if I hold left
option under z sub, it would just give me see, if I hold left option
with the head turned on, it would just give me z sub. So that's just the last thing that we wanted to kinda
go over with you. So this concludes
the basic rundown of brushes and
subdivision levels. The next lesson we're gonna
go over is going to be about masking and how masking works along with
isolate selection. So that said, stick around
6. Grasping Masking and Isolate Select: Okay, so let's continue in this video now we're
gonna go ahead and do a demonstration of
how to do masking and how the isolates
selection function works. So let's go ahead
and get started. Now to put simply
what is masking. We're going to
start with masking. It's going to be a way to
cover up the geometry with a mask or a shaded area that cannot be edited
or sculpted upon. To give you an idea. Let's go ahead and
draw out a stroke. If I show stroke right there, notice I'm also on
basic material. Again. If I draw a stroke out and you can kinda see it performs as expected. But if I hold down
the Control button, just the Control button and sort of paint a
glob right there. You can kinda see
this as a mask, this dark shaded
area right here. So if I paint that same stroke, you can kinda see
it went everywhere except the glob area. I'll undo that. Now. One thing to note that when I hold down control and I just hope did
left-click to draw my mask. You can sharpen the edges
of this mask simply by holding down control
and left-click tapping. And then if you, I'm sorry, left option click tapping. And if you want to soften it, you can just sort
of hit left-click. Now, it has a very,
very high resolution, so the falloff is
going to be a little bit slower than a sharp. So we can go down
a subdivision here and do the same thing
where it's left. Option, click to sharpen. If you want to soften it, just hold control
and left-click. And you can kind of
make it soft again. So Control left Option, left-click makes it hard and
softening it makes it soft. If you wish to clear the mask, one thing you can do is
hold down Control and just simply delete
the mask that way. So with that said, there are several different
ways we can apply masks. We did one which is
done through a stroke, but you, if you build
off of what you want, if you hold down Control, you can see the mask brush as its own little different areas separate from the regular brush. So you can apply similar
concepts like this, where we do a
stroke modification and experiment with an Alpha. And if we hold down control and maybe adjust the focal shift, we can make a little bit
more of a pronounced alpha. And one thing that's
very interesting is, is that if we draw in
an Alpha like this, Let's get a little bit
more of a sharper one. Like so. Go ahead and
bring it back up. But we do anything
like this and drawing an alpha like so we
can see our mask. We can also invert
this mask as well by holding down control and
left-click in open space. And you can kinda
see the same thing. So if you wanted to kind of draw on something like so you
could do something like that. Or if you wanted to
go with something like maybe you want
to try inflate, you can do something like that. Then of course smooth it out. You want. So that's
kind of an idea. So to recap, to draw a mask
first, hold down control. Take note that the
brushes change up here. Modify the stroke
to what you want. And it can be anything. And you can just draw a mask
with the alpha on or off. It's up to you. This is
all about experimenting. And you can change
the focal shift down. And again, that's
holding down control and left-click or control
option to sharpen the mask. Or if you want, hold down control
and left-click. And of course like smooth at higher Division
Subdivision levels, the process is going to be significantly less
than what it would be if you made the mask at
lower subdivision levels. Now, the other thing is, is you can create a mask noxious
with the stroke on here, but you can also do it with the mark key,
like right here. And one thing we
didn't talk about yet is we can also
paint off the mask. So if we hold spacebar, spacebar and give
a demonstration, we hold Control, left
option or left home. And then we can also
paint the mask off Like so. If you wish to clear
off the mask completely, one thing you can do is
just hold Control and just simply drag off and you'll
clear the mask as such. Now, one thing I will say is that's sort of the basic
rundown of how masking works. This becomes a little
bit important down the road as you become a
more of an advanced sculptor because you learn to
organize poly groups through masking quite often
and it becomes very useful. We didn't talk about
poly grouping, but that's definitely coming up. So the second half of this
is going to be looking at something called your quick
pick 3D sculpting brushes. I call them your secondary
sculpting brushes tools. And if you kinda take a
look at any of these, you're going to notice that
you get something that is by default a
select wreck, tangle. This brush right here, Is it like an isolate selection? It's basically if you
hold down Shift Control, you can access it. And if I hold shift
control and left-click, you'll get a green little drag. You can kinda see what
we did right here. We can kind of isolate geometry. This is another way. We can also mask. Now, just like the mask, how it changes different
brushes up here. Also the isolate, the select, select radical rectangle is
going to do the same thing. Now, one thing that I will
go on record of saying is that if you hold Shift Control and then
release shift control, but you're still
holding down left key. You can kind of just
keep that alive. It doesn't require you
to hold Shift Control, you just need to do it at
it's initialized state. So again, if I hold shift
control and left-click drag, I can still release
Shift Control. Still keep this as live as
long as I'm holding it down, holding left-click
mouse button down. But another thing
that's interesting is if I hold the space bar button. Now I can pan this around. Now in case you're wondering,
masks are similar. You just hold down control
and left-click and then release control and then
hold down spacebar. And you can pan
the mask like so. And it also goes
without saying holding left older left option can
create a subtractive state. And then you can invert
that and paint that out. Or you can hold the press DW can push that out if you want. You can have all sorts of fun. Or hold the Shift
button and bevel it. It's sort of compact, compounding all the
things we've learned. Or if you really want, you can also hold inflate and I have a whole bunch
of fun there as well. It's part of that you
got to experience experimental learn and
have fun sort of scenario. So if we again hold Shift Control and we showed you that spacebar
trick for panning. Let's show one
more demonstration of that by modifying the brush, I'm going to hold Shift Control. I'm going to change a
radical this time to curve. You haven't done that yet. We haven't touched this. But now I draw out
a slant. Like so. We're going to get
ourselves and isolate, select on whatever's
on the green side. If I'm going to go to
a lower subdivision, if I want to draw a shift
control slant and maybe stop at Midway and then tap the
left option key or level. I can create a curvature. And then we can kind of have a little bit of fun there. Of course it doesn't like
to obey that very well. So we might just have to
do it the old lasso style, but that is something
they need to fix. And of course we can also
try it with the circle. So it's important
to kinda do that. Goes without saying when
you hold mass down, you get the same result. If you're using example a curve, you can have fun doing things and manipulating
things this way. Now, one other thing
about isolate select is, is that you can also
do Subtract of things. So hold Shift Control, release Shift Control, and
then just hold down option. And that can subtract
things as well. So all of these things are very important down
the road because like, let's say you really
want to manipulate geometry like or have a
specific pattern here. And you want to poly
group out of that for future sake that all of these things come down to
an important function. So with that said, the next lesson down the road is going to
be about poly groups. And it's a little bit
of a complicated one, so feel free to re-watch it, but it's not something
that I am going to say. It's in paramount priority, but it's something
to get a good head start on if you're a
first-time beginner. So with that said, we're moving on into
polygraphs. So stick around
7. What are Polygroups: Okay, so let's begin. In this video, we're going to now talk to you a
little bit about poly groups and how
poly groups work. And we're going to go
over compounding that with what we learned
in the last lesson with Isolate,
Select, and masking. So let's go ahead and
get started with that. Now, poly groups
are a little bit of a complicated subject in ZBrush, but to put simply, as I can, poly groups are sort of
ZBrush is built-in way to organize a mesh or
pieces of a mesh into a section by color coordinating
its poly groups seen in wireframe to do
various ZBrush functions. Now, that probably sounded
a little bit complicated. And it's one of those things where we're just
going to have to show you an example of in order for you to understand a little bit more. So let's go ahead and
get started to create a poly group which can be created in multiple
different ways. One of those ways is by
creating first a mask. So I'm gonna go ahead and hold down control just
like we did before. And I'm gonna change my
stroke back to free hand. And I'm just going
to create a mask. Now it's just a normal mask. But what we're going to
do is we're going to turn this mask into a polygraph, just this section right here. Now, if we do that, to do that, all we have to do is hit
Control W, and that's it. Now, you may see like
awake, nothing happened. There's no color. I,
it's all the same. Well, in order to see
a poly group, fairly, you have to hit Shift F
to see the poly group. Also, you can just
click over here to go into wireframe mode and
you can see it from there. Now, this is what
a poly group is. It's sort of an organized
little section that helps us to identify
a little bit more of like various
ZBrush functions can be performed with using the organization of
a polygraph pick. What's a good example of that? Well, if you remember also
like with Shift Control, we can hold Shift
control and left-click and you can kinda see a poly
group will only be selected. Another example of
various functions that ZBrush uses poly groups
for is for example, edge loops, like maybe
you look at here. And if I turned, if I, for example, isolate selected all of this, hold a mask on here, and then to bring
everything back, I would hold Shift Control, left-click and open space, and then sort of
invert the selection. Let's say I wanted to
move this like so. Well, it's all jaggedy up here. But if we did something, for example, like for example, we could do something where
we could use a group loop which basically looks for poly groups and puts
an edge ring over it. That would be a function
of ZBrush that relies on the assignment of poly
groups that you have. You can kinda see a nice
new plane is there. So we tried to
repeat the function. You would see a very, very clean mesh over there. In addition to that,
there are other, there's a whole bunch of
others like there's a deformer that will polish things by the groups of poly
groups that you have. There is auto
remeshing processes like zero measure
over here that looks for freezing poly groups so that a more or keeps
the groups intact. So when array mesh is done, you can have a nice
little edge flow based on your auto remeshing. It's basically a very, very, very organized way to control
how you're doing things. Now, you may argue
it could be like the, how do I say this? It could be something
that is little bit complicated because we haven't gone over any of
these things yet. But again, we're getting there. This is again about trying
to look for a sort of baseline start with you on all the important things in ZBrush that are its
best-known for and that's sort of digital sculpting and poly
groups is important when you want to
help yourself with like sculpting
certain areas that you don't want to interfere with on the rest of the areas. That extra little nudge As you progress and learn more and more in discover
more features in ZBrush, you'll be able to make more
combinations in your heads using new ideas in your
mind using polygraphs. So this is one way we did
an example of a poly group simply by creating a
mask and just hitting Control or Command W to
create the poly group. That's like I said, one way to do it. There are also like if you
go into the polygraphs tab, you can hold down left
command or left control. And you can kinda go through and see all the different
features that are used. Like group by normals is
focused on the angles, on how acute the
angles are on in the XYZ axis of trying to
get some good poly groups. It will auto, apply
poly groups like so. If we turn the tolerance down, you can kinda see an auto
group normal happened for these two areas
because there was a nice clean angle here. That's usually through the
normals of the 3D model. If we kinda see like this
little waviness here, we can do things, for example, that can help
us clean up all of that. Like this area right here. Maybe you want to go
through defamation and Polish by groups. Now you can do that. You can kinda see
it a little bit in this area here when I do it. And it kinda cleans
that up pretty good. And that, like I said, there's just a whole bunch
of features that ZBrush has with the concept and
basis of polygraphs. Now we're only giving you
just a brief intro to it. But hopefully down the road as things get more complicated. For example, one thing I like to use is often is zero measure. And I always like
to use keep groups. And you can, you'd be
surprised how well you can get a
pretty nice 3D mesh just through poly groups. I don't think I kept
the borders same, but you can kinda
see we have now a very basic mesh
based off of this. And now of course, that's
just going off of one of the many functions ZBrush has
that obeys into polygraphs. Another example is, for example, if I tried to divide this
because when you see Ramesh, you go, which is re, reconstructing a lower res model out of what you've
already sculpted. If you do that, you delete all the subdivisions. So if I tried to delete, divide the subdivisions again, you would probably
see it rounds out, so I'll undo that. And another perfect example of using poly groups
is, for example, if we go into Geometry
modify or I'm sorry, geometry crease, there's something called
crease poly group borders. And if you look really
close at these borders, I'm going to hit crease and kinda see a little
barrier was there. It's kinda like an invisible not counting a edge
holding edge loop. And so if I divide again, it's going to kind
of keep it sharp, as you can see right there. So it's pretty nice
to use poly groups to kind of give yourself
that redistributed plane. Because if you can
see like how we use poly groups to get this
nice, clean, crisp edge. We were all the way
over and I'm going through my whole we were at a point where like it was quite frankly a lot
better than what we had, which was this ugly piece. We did two different
functions in ZBrush that relied on the
organization of poly groups. We started with poly loops
around the poly groups, which looks for poly groups that are too different
places and inserts a set of poly groups between them like an edge
loop to make it cleaner. We went through the deformation
to clean that up and make it more smooth than we
went through geometry. And zero measure to keep
those poly groups intact. And then we just simply remeshing it, maintaining
the polygraphs. There was a whole bunch
of features on it. So we're just kinda
getting you warmed up on understanding
what poly groups are And just how far
they can take you. So with that said, we want you to keep
on going through and experimenting with
all sorts of things. One thing that is
this is more of a, this is something that
we're going to talk to you relatively quick about, is going to be a
knife, cut brush. And well, it's actually going
to be a knight curve brush. And what this is is just something we wanna
kinda NGO off with. Since we now have an idea about poly groups and
how they all work, we wanted to show you one
more demonstration of poly groups and how they work
with some other features. Now, what I have here is
a knife curved brush, and in order for it to work, you have to sometimes delete
the lower subdivisions, but it's basically like
this slicing mesh. And if I left-click and drag, you can kinda see we
cut off the mesh. If I hold Shift F, you can see a poly group
is right there now, the avarice is a two. This are pretty profound. Like you can do a lot of fun, hard surface sculpting
with this concept. And it will be of very, very fun thing to do. I mean, you can have a whole bunch of fun creating
a whole bunch of things. And again, this goes back
to more hard surface, but it kind of gives you an idea of why we need to
understand poly groups so much so that we can understand more advanced brushes like the
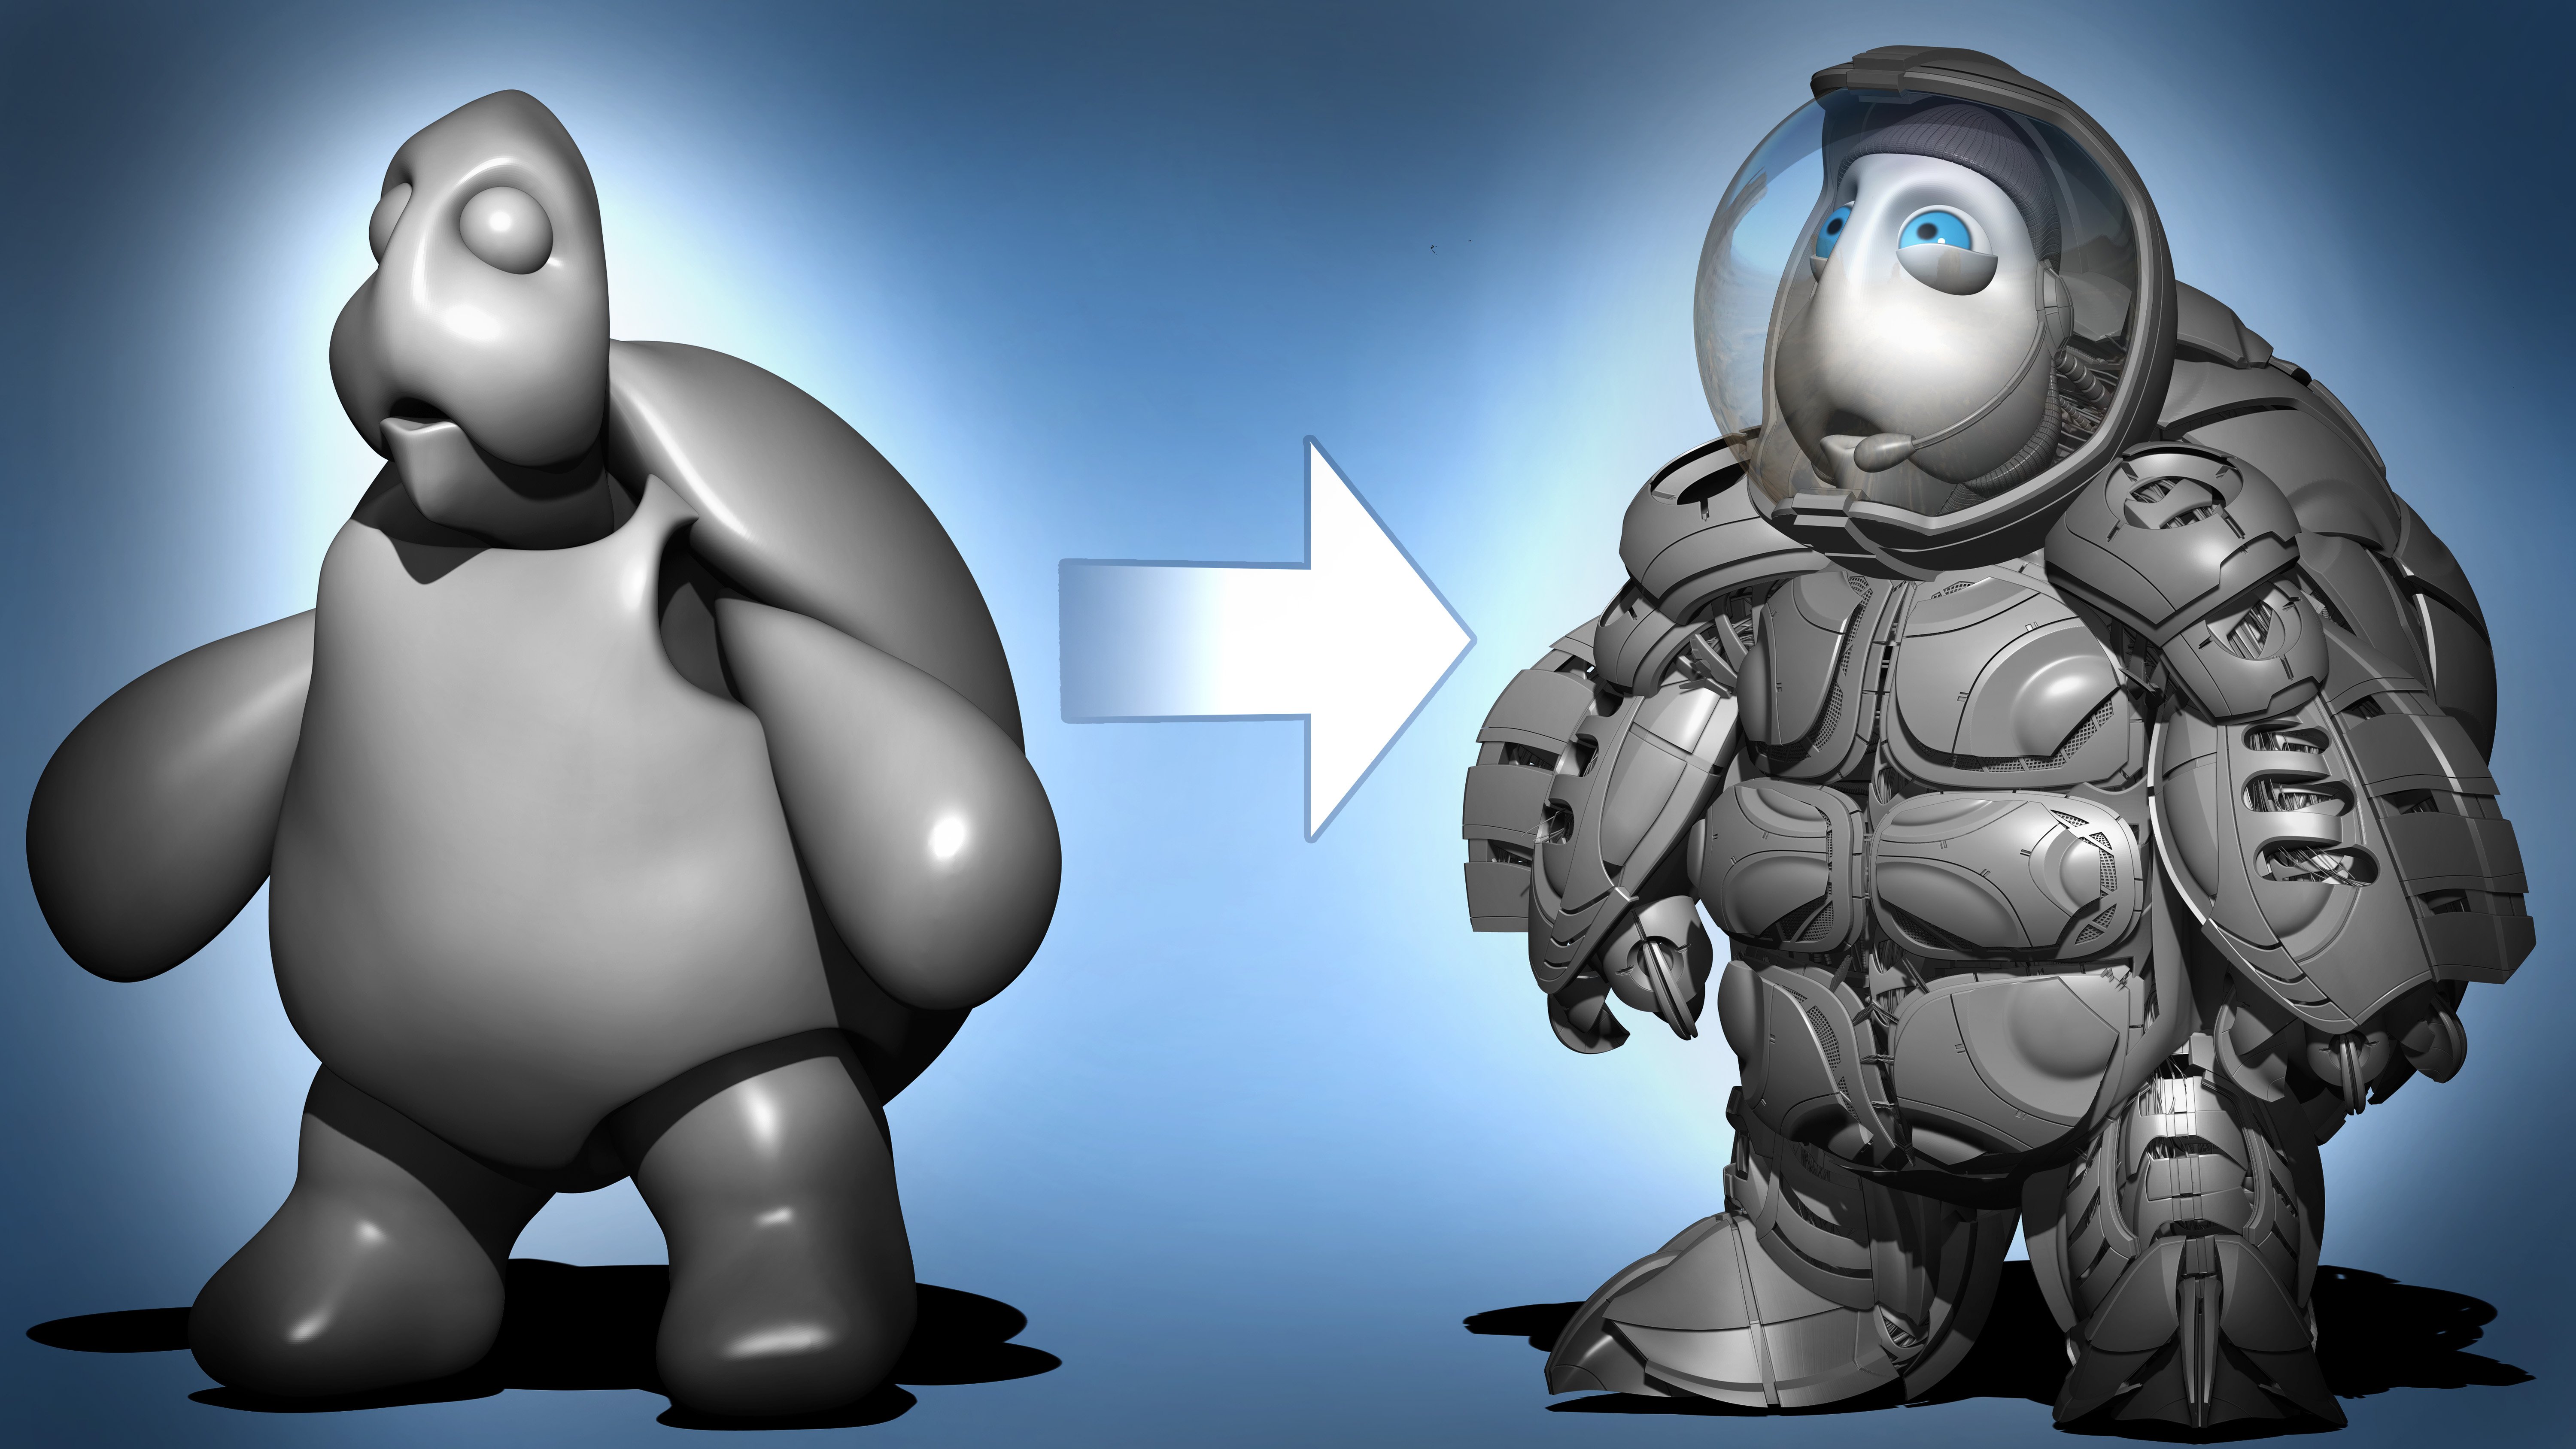
knife curved knife circle. Now these brushes are taught
in a different course. One, regarding a turtle, a space turtle that I did. We go pretty deep into it
regarding all its functionality because this is again as a beginner level
course for ZBrush, so we don't want to
overload you were just kinda giving you
a preview of things. So again, practice establishing poly
groups, particularly in masks. Start building and compounding
what you've learned. If we've showed you how
to do poly groups through a manner of Let me go ahead
and do a different mesh here. If we start doing poly
groups this way for you, then by default, you should have the same concept apply
then for curves as well. So this is a good example of repeating the whole
thing that we just did. Once more just to kinda
give you a straighter, an easier time of understanding
how it all works. We want you to kind of
be in the whole process of practicing like that, doing something really
fast like that. So like, like going from
doing an isolate select to hitting the mask by holding
down Control left-click and then creating an entire mask for things that are
isolated selected, then doing an invert, then hitting the W key. And then you learn that
this was the center masks. So it's going to go over here. And then we want you to bring
it in like so now we want you to kinda compound the things that you've
learned so far. And it takes a little bit of practice and a
little bit of time. But it is definitely
worth it to sort of learn to compound this before we begin our character
because it will make, it will be easier
to track through. So with that said, we're going to finish up
with one more lesson. And that's gonna
be into DynaMesh. And then we can
start our character. So with that said, stick
around, stay tuned.
8. Dynamesh Zremesher Introduction: Okay, So let's finish off. In this lesson, we're going to talk to you a little bit about DynaMesh and how DynaMesh works. And if we have a
little bit of time, we might just go over one extra remeasure just to give you a sneak peek
of things to come. So let's just go ahead
and get started. Now, DynaMesh is sort of
like a remeasure which basically rearranges
the topology of a mesh. Now, you may ask, why do we need to have that? Well, there might be
some certain scenarios and where you stretch out. For example, let's go over
here to one of our pieces. If I choose the move tool. And there might be some
scenarios where the geom, she's so stretched that
when you start dividing it, you don't really get a
lot of tessellation here versus the areas that have all divided in more
scrunched in areas. So this is kinda
where DynaMesh is very useful in maintaining that. So let me go ahead
and just stretch out a piece of geometry for you and go through the
location of where DynaMesh is. If you go and check
under pardon me? If you go through and
check under Geometry and we go into where
it says DynaMesh. You'll pretty much
find DynaMesh there. Once you click it on, you'll see how all the
geometry suddenly is really meshed and now you have a whole bunch of resolution. So now when you divide up, you can kind of have a lot more sculpting resolution that will be a little
bit more sharp. So with that said, some things to take into
account about DynaMesh. Usually I like to do a deal
where I just give it a couple of divides or a few divides
and then turn on DynaMesh. And when it asks for
free subdivisions, I normally hit No. That way I kinda have a nice
standard setup for DynaMesh. And if you look at it, if you need to make
any readjustments like you notice how I'm
really stretching everything. Dynamesh can simply accommodate
you by holding down control and dragging a
mask and then releasing. And you can kind of, it will basically re-compute these areas so I
can keep dragging. Let me go ahead and
establish something more like the snake hook for you. Like so you can kinda
see how we have the Stretch Geometry
and we can just reach, apologize it now, this
is pretty good for things like for
say, blocking out. It's kind of a nice one. Now, let's go ahead and go back. One extra thing I'd like to bring into
account is DynaMesh. Also, if we were to go through sub tools and if I hold down
control and left-click over, you'll notice I duplicate
a sub tool like the, I'm sorry, I
duplicated the Mesh, not the sub tool. If you kinda look over here, it shows basically
two different meshes. So we didn't hit the
duplicate button. We didn't duplicate
any sub tool. We just duplicated mesh here. So let me clear off the mask. Now, one thing that's interesting
with DynaMesh is that if I were to have these
pieces intersect, so if, for example, I had these pieces intersect
like this, no matter what, the pieces are two
separate meshes, they would be very
difficult to separate, but something like move topology could segregate
them off, like so. So if you want, one thing DynaMesh can do is if you use DynaMesh and
intersecting geometry, you'll notice that it merges
and recomputes it and everything within is
taken out of the account. So that's kind of a
nice looking scenario for how we do it. You can kinda see all the
geometry and transparency mode. There's not really
anything in there. So that's always nice of a feature and DynaMesh
and it's something that we want you to keep in mind
when you are blocking out. Typically with DynaMesh, one of the most common things
it's used for is in fact character blackout is the one that gets
a lot of choices. A lot of people like to use DynaMesh for
character block out. So if you were to
use a whole bunch of nerves and I'm
sorry, not nerves. That's a My term primitives in here to help you with a character block out using a combination of that and maybe the gizmo tool to stretch some objects
and taper them into shapes you want for
a character, block out and then combine them
all up with DynaMesh. You can do that.
Additionally, you can just keep constantly
stretching things out and just reading a
meshing by just control, hitting control and
dragging off like so. So that is kind of weird. Dynamesh is. Now, before we end this, I want to kinda give you
a quick show real quick of another type of
remeasure that ZBrush has. And this remeasure I always
like to use because I'm a little old school
where I like to work with multiple
subdivision levels. And that is under Geometry. And under DynaMesh, we're
going to go to remeasure. Now, zero measure
is another form of auto remeshing topology
similar to DynaMesh. But it also does the job
a little bit more clean. Like if you can kinda see all
of these pieces right here. It's not really like too
terrible on this one, but there's like some pinches on here that we have to
always deal with. Zero measure on the other hand, gives us a more clean Ramesh. However, the problem
is with zero measure, it takes a little bit longer
to compute that clean mesh. Another thing that we can talk
to you about regarding see remeasure is that you
can guide it example. You can create edge flow here and then create a
more uniform piece. But we wanted to kind of
give you a little bit of a different Overview between
this and DynaMesh and kinda see how
everything's more uniform here has a little bit
more cleaner topology, whereas DynaMesh is just sort of constantly got this
little tapering off. Tries are everywhere. So we just wanted to show you the
difference between this. What I like to do is a lot of times if
I'm using DynaMesh, I'll start off with my
block out with DynaMesh. And once I have what I want, I like to use zero
measure more than just work with multiple
subdivision levels, which I can just
hit with Control D and then go down and
up with shifting. So with that said, this concludes our
crash course or for the first timers that
are opening ZBrush. Because now we're
going to take what we have and start to
begin a very basic, very simple character for you. So with that said, stick
around and stay tuned.
9. Establishing Reference Blockout: Okay, so let's begin. In this video, we're
going to go ahead and start our character
for the first time. And we're going to start by teaching you a couple
of things that are new that we're not in
the first-time section. And we're also going to do a quick little basic block
out to get us started. Now, before we begin, I would like to remind
again everybody on this, if you, this is your absolute
first-time opening ZBrush. I do recommend
that first section to use first because a lot
of the things we're gonna be doing right now kind of compound in to what you've already learned
in that first section. It's basic stuff. It's sort of that stuff
that it will become naturally ingrained
because you're reusing it so many times. So please feel free
if you are the first, first-time beginner user and you don't know
things like dividing a mashup and then cycling up or down through
the different meshes. I would definitely recommend that first section for
the first-time user. So with that said,
let's get started. Now in the, again, the
video is about on here. For this one going to
be about how we set up our reference and how
we can do a blackout. So with that said, go ahead and try to
download the references. There should be two files
from your resource folder. In those two files are
a J peg, a 2D image, and a OBJ, which is a 3D model containing
the end product result. So take a moment to pause
and download those. Now if you can. Now, once you have
downloaded that, what I want you to
do is just kinda double-click and
look at that image. Because what's
happening right now is that that image is
going to look very, very different from what we see on here because I'm going to load my
reference image on here. And what you're looking at is an image of a finished product. And I kind of, I'm going to put in a quick scratch image just to demonstrate
what it looks like. It's not gonna be
like a finished concept or anything like that. It's just gonna be like a
quick sketch that I did just for the sake
of demonstrating how to load 2D reference image. And that's really all it is. And we're gonna be going
over spotlight and how it works with the
2D reference images. You do have a 3D
model also in there. And if you want, you
can go ahead and hit Import and bring that in. We've shown also in sub
tools how to append models. So don't forget we can do that. So with that said, let's go ahead and get started. Let's first disabled
a light box, like so. By clicking on the
lightbox or the comma key, Let's bring back a little
bit more real estate here. If you want to get more image, we did do a demonstration
that just go into documents. Click w size and
hit new documents. Remember, feel free to pause, stop, rewind, play again
if I ever go too fast. So with that said,
let's go ahead and load in our 2D reference image. First we go up to texture and scroll to where
it says Import. This is where we bring
in our 2D image and go ahead and I double-click
on your image. It will show up right
here. And you can kinda see this sketch which is very different from
the image that you have, which should be an ortho. Go ahead now and
left-click on that. And what you want
to do is just click on Add to spotlight. And it's going to show up
right there in front of you. Now from here, we can, if we're going to have
a little menu here, and this is the spotlight dial. There's a whole bunch of things we can go over
with this, but for now, we're going to just
show you how to move the spotlight like so, rotate it like so if you want, you can also do Shift,
rotate to snap. We can also write next
to rotate, scale it. And we can pan it
across like so. We can move the
spotlight dial and like a pivot point when
you scale it and it can kind of go
bigger or smaller. And again, this is a different image from
what you're saying. And if you want to make
the dial disappear, hit the Z key Z as in zebra. And if you want it to come back, hit Z again to make all of spotlight disappear,
hit Shift Z. So that's kind of the basic
breakdown of spotlight. So let's now go ahead and go into bringing some
primitives in here. Now, a lot of people are
going to use the 3D image. In my opinion, I'd
like to see if people can use the 2D
reference. If you can. I only put the 3D image
only in as reference. But let me go ahead and show you something
real quick first. If you do decide to
go with 3D reference, I'm going to draw in a pre, a primitive first I'm going
to click on the cylinder. I'm going to change
it to a sphere. And then I'm just gonna go ahead and left-click
drag, bring it in, hit the T key, hit the make poly mesh 3D. We already did all this before. Now, if you try to import
a 3D image on here, it will replace this piece. So what you need to do is
click off of here into another place like a cylinder. And you need to go
ahead and import the 3D image from here. And then once you have that
3D image, like so, whoops. Trying to figure out
which one I have. Go ahead and hit make
poly mesh. There we go. Once you have everything
that you want, we're gonna go ahead
and we're going to hit sub tool and append. And you're going to
look for your 3D model up here where it says quick pics and you can
bring it up there. And of course you can press
the W key to go through and translate across
your main model so you can kinda see it. Now again, I'm not recommending
any one to do that, but I just want to kind
of give you a heads-up. One thing to note
about spotlight is when this is turned on, you're not really going
to have access to a lot of sculpting tools, I believe Move brush you will, but to kinda turn it to
make sculpting enabled. Turn it off like so. It's not, it's a
very stupid rules. The brush has never
been a fan of it. Also keep in mind x is cemetery. I like to also have
local symmetry. So if you ever want
to do anything there, that's what you got. So let's go ahead and
set up some primitives. So to begin with, I'm going to go ahead and this is probably
going to be the head. Let's append in a, another piece on here. If it wants me to, there we go. Let's see. I'm going to choose
the sphere in 3D. And let's bring
this guy down here. And I'm using my gizmo, hitting the W key. And I'm just going to
bring this in like so. Maybe bring it in like that. Like so. I'm just kinda go
in through here. And let's see. We can do the same thing for
the arms and the legs here. So I'll just go ahead and duplicate the mesh
instead of appending it. I'm going to hit
the W key again. And then I'm just going
to bring this guy in. One thing that we have
to decide here at this point is do you want
to make this a T-Pose? Are in a pose? Normally, I would go with a
T-Pose only if I was planning on doing some sort of work on the character
for rigging or animation. If not, then we'll probably
just go with just a pose, since this is mainly digital
sculpting beginners course. Now we're just kind of
putting placeholders in here. We're not really doing
anything else than that. We didn't talk to
you about mirroring. So this is an opportunity to
also learn something new. Now, just before, we're going to duplicate this mesh as well. And then this time to mirror. It's a weird place
to find mirror. But if you go
through deformation, you'll find mirror right there. And now you might
notice also the, because we mirrored the gizmo
is in a different place. Let's go ahead and re-center the gizmo over here with
that upside-down teardrop and just kinda
bring him like so. Now hold left alter
left option to reorient the piece right here. And again, pause, pause, pause. We're just kinda going through And setting things up to be
a very simple, basic mesh. Halfway through it. Then we're going to append. And I'm probably just gonna go again with another cylinder. And I can also just click, instead of finding over here, I can find it here
by holding left Alt, left option, and left-click. And then hit the W key. And he's got pretty
short, stubby legs. He's a, he's a little guy. Now repeat what
you've learned. What? Again? That's going to be duplicate. Deformation, Mirror,
center point, that guy. All right. We got one more thing
do and that's the hat. Not gonna be too hard. This is gonna be pretty easy. Append. We need a new shapes so
we can go with the cone. The arrow will to cone. This is gonna give me
some opportunities to show you how to
read mesh geometry, to give us something different. Let's bring it down. I'm scaling the guide out. And I'm not going to mess
too much around with the rotation because I'd like to have some symmetry
options with me. I think that's gonna be it. We have a staff to work on, but until I know where
everything is here, the steps is going to kinda
come towards the end. This is sort of a
basic block out. Now, from this point on, what we're going to do is
we're going to show you how we're going to merge these
meshes in with DynaMesh, which was one of
the end resulting last lessons to bring these together and sculpt and
smooth all these pieces in. So feel free again to do
anything from just quick, like just real easy, quick adjustments of any kind. If you feel that
there's something you want to see on there, go for it. So take your time. Just kinda get that right shape. If you're that first-time user, this is where you're supposed
to be taking your time. In the next lesson, we'll talk about how we can bring
all this together and DynaMesh and start sculpting
out with your brushes. So with that said stick
around and stay tune in. Don't forget, quick save
10. Creating Block Out Body: Okay, so let's continue
in this video, we're going to pick
off where we left last left off by sculpting
certain volume, you may notice you
don't see anything. That's because we quick saved. Now, we did a little bit of talk about quick save
a little bit back. People can choose to save
the file out as ETL and then go back to low tool and reload the file
that they want. But another thing we
can do is click Save. But to access the quick
save files that you hit, you gotta be able to go into spotlight for one which is in again lightbox or that comma key that you want to bring
up and choose quick say. And we can bring our lightbox. And that way, one thing
that we will notice is, is that we didn't bring
this up very well. You will need to save
out your spotlight. And what that means is like, we didn't really save
a spotlight out. We just kinda loaded the texture and then just did nothing. So let's go ahead and try again by reporting that texture in. Taking that texture, left-click
on it, add to spotlight. And then we can go
into Save Spotlight. And you can call
it a mushroom ref. And then you can choose
the folder that you wish. Hit save that way. Now every time you
open up a file, you can just load in your
spotlight right there. So some extra things we
wanted to remind you on. So let's go ahead
and bring them in, bring him in here, and then don't forget, choose spotlight to save. So from this point on, we're going to use
DynaMesh to combine all these pieces up
and then sculpt in. Make these look a little bit less primitive and
a little bit more, a little bit more. How should I say organic to cloth where it kinda
meshes into one another. So with that said, we might go with a little
bit of a bigger head here. And it goes without
saying bigger hat. And of course, so
when the time comes, that's gonna be a very
fun one to work with. And we're just going
to go ahead now and take all these pieces here. And we need to merge
them all down. We didn't go over merging
sub tools too much in there. So let's go ahead and
say to ourselves, Okay, what all needs to
be merged right now, I just want the arms, body, and legs to be merged, will do the head in
a different time. So make sure that heads on top. You can just drag it on top and go through and make
sure the hats on top, you can just simply
left-click on here or hold, Shift, left-click and just bring it all the way to the top. Then from there,
you can click on the body and just
hit go down below. And the sub tools merge and just choose Merge
down into sub tool, which takes the sub tool
below it and merges it down. I'm just going to always
hit always. Okay. Just keep merging down. Like so. Now that we got
that all taken care of, Let's go ahead and
give this a couple of subdivisions just to
smooth it out a bit. Maybe something like
that. It's just fine. Now, let's go ahead
and close out our sub tool and then
go through geometry. Dynamesh, turn on
DynaMesh and hit now. And you can kinda
see it move, it, went on ahead and merged
the meshes within. Now, like if I hold
the Shift key, let me first turn off spotlight because it
likes the screw with you. You can kind of merge
all of these pieces in. Now. That said, I'm probably going to want to take a
little bit of time, just a little bit of time to go through and sculpt
some volume out on here. And this is where I like to
use my webcam tablet for. And so what I'll do
is I'm just going to kind of go through
and first of all, smooth out all these Kravis, these cracks areas where they intersected and bring it all in. And again, I'm hitting
the shift key. And I'm also hitting the Z
key to bring up my reference. Hit Z again to turn
off that piece. And all I'm doing is
just kinda going through Smooth and this guy out
just a little bit more. I have been working
with any brushes yet and believe me,
we'll get there. But this is all just a matter of just kinda smooth
and everything around. So it kinda blends in. So take your time on how you
want this to go through. Don't forget underneath. Alright. Now one of the first
brushes we use on here, it's going to be one
of your main ones. It's believe it or not, not the standard brush, move brush or any of
the movie brushes, by a default are probably
going to be what we use. There's anything you don't like. Remember you can undo. But we're going to use the Move brush to kind
of give us a little bit more of a just sort of rearranging the
shape a little bit more. You know, he's, he's
sort of average, portly fell out, kind
of smooth that out. With he's got he's got the pack. Now. Let's see if we
can bring that in. You always want to
check that profile. You can also do
so with the head. Now one thing about these Move brush in case you don't
know is if left option, left all kind of moves
as Z in command. And that's something that's very helpful because this is like, for example, asleep, you can kinda bring something in here. Then kind of just
kinda pushing it. But we're not there yet. So let's just go
ahead and don't. Also, another thing that
I neglected to mention is don't operate on a small
brush when it comes to move. Work on a slightly bigger
brush on this one. Maybe. Worked all to kind
of bring it in. Take your time to
bring this all out. I'm holding Shift
and just kinda going back-and-forth between shift
and move, shift and move. Just kinda bringing
everything in before I start sculpting out some of my pieces leftover and just
kinda see how that looks. Maybe the higher density. And I'm just kinda
messing around with them. Just kinda scene what
I like and don't like. Might make this a little bit
bigger towards the end to kinda show like
asleep, for example. Make sure that's checking
the side profile. Then I'm just
holding spacebar to bring all of that back in. That space holding spacebar
to kinda bring all of that. Don't worry about
stretching anything. Again, stretching is not
something you should be afraid of ever when
it comes to DynaMesh. Because we got a little
bit of a sleeve here. Might need to readjust this down the road when the time comes for putting
your hand in there. But that will be
a different time. A little bit in there Scratch something, then if you want, you can kinda give yourself
a little mask to help you get an idea how it's
going to look a little bit. And again, it's just a blackout. It's not to the official sculpt. We're just using the Move
brush to move things around. No, I don't know. And be careful not to do what I just did
and use the x key. Feel free to, if you
ever feel the need to kind of use DynaMesh again, you just to kinda draw, you can no big deal on that. Let's see if we can
bring this guy up. Now. What I'm gonna do here is something I'm going to
mask this area here, hold Control or out the mask. Hold control and left-click,
invert the mask. Then press W, hold, left, option, lift, bring it in here. Maybe kind of bring it in. Little bit more like this. So he's kind of just out here. It looks a little
it's just sort of, you know, iteratively going
through it as you go. Scrunched in here. I'm going to touch too
much into the gut, some ideas for the fee, but right now I just kinda
wanna leave it alone. X, I'm going back-and-forth between hidden x, turning X off. I'm creating a little
bit of symmetry. Kinda check it out the profile. Like so. This is going to be
kind of like a jack and so maybe make it
a little bit more on some brushes I want to use, but I'm going to be taking
it nice and peaceful. Alright, now, we're gonna
put some hands in there. And that's usually
going to come out in the the when we get
to the body section, but this is pretty much
the block out that I need to get started
for sculpting. So you'll notice all I'm using
is mainly the Move brush. Now there isn't really
much of a need of symmetry for sculpting
on this guy. So what we're going to do is leave the face a little
bit alone right now. And I'm going to also
remind anyone if they want, they can feel free to
change the color of the change the color of the whole area here of
the mat or the material, I'm sorry, kind of talking and also sculpting at the same
time. It's so much fun. But this guy, this is probably going to be the
last part we block out. It's gonna be sort of a
mushroom looking heads. So we want to kinda
get that just right. So that's going to
require some remeshing and playing around with
DynaMesh a little bit more. So with that said, let's go ahead and take a break there and do some stuff on the head, remeshing the head
on the next lesson. Again, go through and
click Save or if you want, go through and save the
CTL and simply load. And if you need to reload it, just go ahead and click up here and click on one of
your earlier profile. Save files. So with that said, I'll
stick around and stay tuned.
11. Blocking Out the Cap: Okay, welcome back. Now in this video we're going to finish off our
blackouts by working a little bit more now
on the hat here. And you can kinda see how
the hat looks like this. It's a little bit different
than what we have, so we're going to have to go ahead and do some work on it. And if we kinda hold Shift F, we're going to try first of all, one thing and that is, I'd like to look at the hat by itself without the
character here. So first things first, we can either do this by turning the visibility
off on all the sub tools, or we can just simply hit Solo. And this gives us an idea, like if you hit F twice, you can kind of center the rolling point a
little bit easier. Again, F twice helps
with the center point, centering the hat to you. One thing I'd like you to take a look at, especially down here, is that there's not a lot of sculptural geometry
because this all pinches off and you'd have to divide it like 100 times to get something. Well, not 100 times, but five or six times
to get something really sculptural
and as a result, you'd have a really
high dense mesh. So what I'm gonna do is is three mesh this through
DynaMesh, first of all. And to do that, I'm just going to go
ahead and first of all, smooth it a few times until
I see that is all smooth. And you can kinda see
it's really dense. It's kind of somewhat
semi dense here. I don't really like any of this. I like to have consistent geometry sculpting
across everywhere. So let's just go ahead and just divide it to
smooth that out. And let's just go through
DynaMesh and geometry. Then let's just go
ahead and hit DynaMesh. Don't know. We got something that's a little bit more evenly distributed. Now this is a pretty good
spot right here to get into. One thing that I
will say about this is that we may need to, since there's like little
poof, some pouches, we may want to refrain from making this wavy
until maybe the end. The reason I say that is
because if we start sculpting, moving this around
in the similar way that it's moved
and wavy up here. That's going to make it
very difficult to sculpt all of these pieces
consistently and evenly. So what I wanna do is
maybe go through and just get a nice cone with a little
bit of abroad or top here, little bit of a dip. And this top right here
where it's pointing, I want it to be a
little bit less pointy, but still jutting out
a little bit more. So it's a little
bit more rounder. And I'd like for this to
poof out a little bit. And from there, we can kind of do some things
with radial symmetry, something we haven't
talked about yet because I want to give
them an opportunity to discuss a little bit on
what radial symmetry can do. So this may be the
first thing we officially really sculpt
on the character. We'll see how it works. But first things first, let's go ahead and
try to hit the B key. And let's look for inflate now. I'd like to inflate
this just a little bit. So b, i, and n, which is going to be the three button key
for inflate BIN. Now if we can plate this like so and just kinda
make it look like this, don't worry about
all this tearing. Or we can do something where
we hit radial symmetry. Now, normal symmetry is when we hit the X key and
it's just two points. So what we have to
do is go through transforms on the top,
hit radial symmetry. And you'll notice that radial
symmetry is turned on, but it's turned on, on the wrong access. So we got to change
that access to y. And now we've got
something that's a little bit more evenly poofed. Now, be very careful
how you prove this, because this can
really bulge up a lot. Like so. So I'm probably going to turn
my intensity down a bit. Just enough To kind of bring out and I'm not worried
about any of this. Okay. I'm not
worried about any of the stuff that I'm seeing
because a you can just smooth out like so you can do that and just sort of radial symmetry, all of this. And again, I got intensity
that's pretty low in them right now
using my mouse, but I'm not carrying
out any bit about that. Go ahead and see how this looks. Okay, Let's go ahead and now hit BMD and just bring this up. If you keep your mouse
can go, only go so far, kinda double-click on that dynamic and you can
make it much bigger. Let's see if we can just bring this mushroom head a little
bit more in. Like so. Looking for that dip. And then press the B key. It saves the brushes that
you want for that session. So I forgot. Don't forget. To turn off your your spotlight. Let's go ahead and go back. That's about where I want. And remember, you see
all this stuff here. You can do something
about it just by dragging off to the side, by holding Control, left-click, just dragging a mask off. And you can also hold
left option to kinda push some of this in as well. And that is something
that we're going to do here because we want to have a little bit of a
dip right here. Okay. Bring this down to just
kind of taking my time. Holding shift. Just
captivating the blackout. Bit too big. The whole thing moves, then it's probably
too big of a piece. I'm just kinda trying
to get that right. Mushroom look here. Now remember another thing. If you feel like you
didn't, don't forget, we can do things to kind of bring this out
a little bit more. It's not like we have to
be in a certain mindset, for example, of
committing to this shape. Right now what I'm doing is
holding control and kinda doing some
experimentation with it. See what this looks like. Centered around the mask. Then it's trying to bend down. And I'm just right now
just experimenting. So don't like that a little bit. It's a little bit too wide out. So let's do a couple of things. Smooth this down a little bit, and then hold Control. And then left
option or left Alt. Now let's bring it in
a little bit like so. Something like that. I'm curious what DynaMesh is gonna do on this guy that's going
to hold resolution. And I figured it
wouldn't figured Let's see if Z remeasure can actually clean
this a little bit more up now that I
have a little bit of a shape that I can
work with here. Z remeasure again is a different autorun
measure from DynaMesh. It's giving you more
clean topology. I will say, I'm not sure. It's results will be though in this since I've done a lot of deprivation and pinching here. But hopefully we get something
that's fairly whoops. And it can also look a lot
like that if you have the, if you have the
symmetry turned on. So let's try that again. Kinda has a little
bit of a look to it. One thing that we
can do is this. We can undo everything. It controlled W. So we have two different meshes. And we can then say keep groups. Let's see whether I want
to smooth it or not. To just see what it does just
with those three turned on. This is more me experimenting. If it works, I'll
explain how it worked. That's a little bit more clean. Okay, so now what I just did was something
relevant to polygraphs. In the introductory section we talked about poly groups
and how they can be used to help ZBrush guide
automated processes like Z remeasure poly
groups can also be useful in organizing the top
section with shift controls, isolate, select, or
the bottom selection. But the other nice thing about poly groups is if you divide, you get a nice little crane
clean piece right here, which is very nice. But the other thing is, if this for whatever
reason didn't divide and it kind of smooth
into this bottom section, you could always just go through crease, increase poly groups. So that's kinda what I
was expecting to do, but fortunately it
didn't require that. Let's go ahead and divide this
a little bit with Control D. And let's just see. And I just want to see
what that looks like. Just sort of messing
around with it. Just kinda creating
the mushroom. You have a little bit
of a problem there. You can also do things
like turn off symmetry, taper, which probably won't work unless you make it
its own little mesh. So we can do VMB and symmetry on kinda bring these guys and by holding
left, Alt, left option. Okay. It's looking slowly, slowly, slowly like a mushroom. It's getting a little
bit closer to it. Once we start painting
the segments in here, we can then begin to create
some waviness within here. So we're getting there, we're getting close to it. But like I said, this is all about the blackout. So let's get out
of solo mode here. Gonna look a little bit weird as it's like
this, don't worry, the final touches
usually come with the a rearranging deformations similar to what we did with the body, the
beginning blackout. And from there we're going
to then work on the face. So what we'll do
from this point on is trying to think we should do the face
first or the head first. I'm gonna do the body last
because there's a lot of, it gets more
complicated with that. Screw it. I'm gonna go ahead
and do the body last. That's going to be the fun one. With the next lesson
we'll go ahead and get started with is working on the mushroom cap and
having fun trying to get a cool looking shape
out of that where we'll start creating some
segment and pieces here, probably through the dam
standard brush for fun. So with that said, stick around and stay tuned.
12. Sculpting the Mushroom: Okay, so let's continue in this video now we're
gonna go ahead and sculpt out some of the segments
underneath this mushroom and see if we can kinda pose and
maneuver it the way we want. Similar and to our concept, which is my ugly little sketch. And your very awesome and peace. So let's just go
ahead and begin. This is a good chance
also for us to get to one of our main most
commonly used brushes. Another one that
we're going to breach into of the big
ones that we use. It's a dam standard brush. And that's what we're
going to be used to sculpt the under part
of these segments. So let's start with that. First things first I'm gonna
go into solo making sure my sub tool for a
mushroom is selected. I'm gonna kinda go
underneath here and I'm going to mask off
everything except this. So I'm going to hit Shift
Control left-click. I'm going to hold Control, left-click and drag a mask off. And let me go ahead and
turn the Alpha off there. And then Shift Control left-click to bring
everything back. Then I'm going to hold Control left-click to invert
the selection. Now that's a lot to do if
you're the first time beginner, but I swear to you, the more time you do it, it gets so natural and
it becomes so fast. So bear with me. Now from this point
on, Let's go ahead and select that dam standard brush. We hit the B key, will find that it
is right over here. Now if we hit D for dam, and then standard is S, So d a b, D s. Now, what we can do is we can sculpt a piece in through here, or we can turn our
symmetry back on. Remember, you're supposed
to have radial symmetry. And one thing I want
you to take notice is your focus shift might
be a little bit different. But another thing I'd like you to take notice is the alpha, I have the stroke changed
from dots over to free hand. Now that's my personal choice, but you can go with
something else. Now. The other thing is I
changed my intensity to seven. If I really, it would be, I'd probably have a very skewed
looking piece right here. And some people might be okay
with this for a to10 look, but I'm gonna go ahead and do something that's a
little bit more subtle. I'm also going to
turn my focus shift a little bit up and just start taking some
simple strokes. Like so I'm just kinda
iterating the strokes through until we have
something nice and soft. Nothing too crazy. Something like that. Alright, so let's go
ahead and clear that mesh off and turn solo back on. So now that we got
everything that we want, it's time to have
a little fun with the process of going through and having a way of just kind of pushing this
all into the right spot. Now this can be a
little bit tricky. Let me hit X to turn
off radial symmetry, because you can use
either a Move brush or a snake hook brush. But this is not
something that's done in a step-by-step manner
like we've been doing. This is typically going to be some finagle mean that you
have to feel out and practice. First things first, we're gonna be working with move brushes. So I want you to switch to the lowest subdivision and
if you don't have any, make sure you hit reconstruct to get all your low
subdivisions on. And you can use either the
Move brush, that's b, M, v, or you can use the, the snake hook brush. I prefer snake hook brush. It's just a little stronger
and what I'm kinda used to. But it's up to you. I think I would
choose if I were you, the Move brush,
because it's a little bit more beginner friendly. So let's just go ahead and
just kinda bring this in. One thing to take
an open mind is, is you're gonna kinda
most things together. So you need to be consciously
aware that first-off, turn your turn off your spotlight so you can use a smooth there's ways of disabling that by the
way, but I kinda want to Keep it oriented. And you're gonna be
doing a combination of kinda want to keep
it a user-friendly. You kinda want to do
though a combination of smoothing and moving. So, you know, kind of, or I should say relaxing. So we got this, okay. This might be a
little too thick, so I'm going to isolate, select Control,
bring it all back, invert, hit the R key. Let's see if we
can maybe flatten out a little bit and move
it up a little bit more. Might work a little better. That's just my take. Notice my rotation is off, so I'm going to
hold Alt or option and just kinda
re-center that because maybe I want to bring the head
up a little bit, like so. Maybe back a little bit. Just for now like that. And with Move brush, we always like to kind of
take some little bit of small movements. Like so. Now it kind of tapers out and this is kinda tapering down. So now feel free to go a
little bit off the rails. There are some brushes like spiral where you can have
a little bit of fun. It just kind of
breaking things in. But if you work with spiral, maybe go with something a
little bit more like that, might, might do it a little
bit more off to the side. Then switch back into move. And this is what we do. We basically are kind of
going through and taking the time to switch between
different brushes. Like this one here, this would be a
spiral right here. So maybe I can
spiral it downward. It's little bit
more downward here. Little bit more downward here. So it's a little bit like that. Maybe here. So I'm just kinda getting
it sort of blocked out because we see that
underbelly a little bit more. Just for the record. Getting more and
more tempted to use the snake hook brush because that's kind
of my personal go-to, kind of stretches things
out a little bit easier. Of course, you
have to make a lot more adjustments because it's not as smooth around
like this straight line. I kinda, I want it to be
a little bit round here. We want it to look round
everywhere in every angle. Just go ahead and just
keep making my adjustments and not to something that, you know, there's one right
way or anything like that. It's just kind of a Let's
see how it looks here. Let's see how it looks
here. I like it better. Let's move it the other way. So let's put it right here. And I'm just gonna
kinda just make my adjustments and
that's what it is. We're not really going
too far into the mode of of sculpting too deeply with the brush clay to just kinda making
the adjustments, smoothing it down to get
it to a little bit of a straighter line and rinse
and repeat like this again. So then it's a little
bit too far out. So we'll just go ahead
and bring this guy in. Like that. Looks like there's a
little bit more of a straighter wave going on
here that we're not seeing. So let's go ahead and bring that in and then smooth the way out. So Bezier is a
little bit better. Again, that's smooth as the key If you get this, don't fret, just quickly do a very
brief smooth around and you'll kinda get things to kinda come back to
their place little bit. Don't freak out too much to
do it on the next subdivision to just a quick little smooth to kinda bring
everything back into its place. And if you lose a little
bit of the segments, don't let it get Tia, it's not gonna be the
end of the world. I was hoping that it wouldn't, but let's just go you can just go ahead and kinda
see where there are indentations all were and go through and Dan
standard all of it. Make sure your brush is
fairly fairly, fairly, fairly sized to the right
radius because we don't want to It's not going to be
the end of the world. It's just all sort
of trial and error. And don't forget to
have a little fun with the the the gizmo. Let's go ahead and
just keep going here. I'll keep using snake hook. And if probably have to. This is really one
of the best ways really to learn the
brushes is just kinda getting yourself
out there to kind of just sort of see what
it looks like here. By the way, that's Shift X to separate the
meshes like that. And I have no problem
going around and just seeing if I can
push a shape like so and then kinda flush something out a
little bit from it. And it's just like not
really a sort of correct, right or wrong roadmap. It's just sort of kinda mask and the bottom part so I
don't affect it too much. Going into move. And just kinda bringing it a, re-establishing that
smooth curve. C. It's just all kind of
a process, you know, I'm using left all to also
in case anyone's wondering. So we're just kind of, you can kinda see
it's starting to take a little bit of place, but again, we got to go up through the
subdivisions, correct. Anything like right here, go through dam standard, that's gonna be an
area that's known. Let's maybe turn up the
intensity just a little bit and see if we can maybe bring that out a little bit more. Yeah. And maybe use the Move, brush and hold left all to kinda push this
out just a little. I'm doing it again through
the low subdivision again, I do moves mostly mostly I'm saying through the
low subdivisions Alright, so once you get
to a nice place like that, just from here on
out, kinda smooth, like this area
right here needs to be smooth a little bit. I can do it on a
higher subdivision. And then if you want, you can give it a couple
more divisions like that. And one thing that you
can go about doing on here is kinda give it a little bit more real estate
room for something where you can kind of I would
do your realist finishing touches on this with the gizmo just
because you want to kinda get some idea of where
the eyes are gonna be. But another thing
is I did put now a couple of more
subdivisions on here because I'm going to
hold Shift Control, mask, isolate,
select or I'm sorry, reverse the mask to
put it right here. I'm going to hold down
control and I got dragged right now selected. And I'm going to just choose an alpha like
that has dots on it. So like alpha
three, for example. I can kinda just see, in fact, I think what
I'll do is this. I'm just going to isolate, select the alpha like so. Like all I'm doing is to kinda
just drawing dots on here. Then I'm holding
left Alt or left option and control and left-click and
sharpening the mask. You can just kinda get
a little creative here and just kinda drag
some dots on here. Let's Control Alt Option again. And then kinda invert the mask. One thing we can do is
just go through and maybe do a very soft
inflate, you know, just to kind of
bring it up and then hold shift to kinda
bring it out. You know, it's it's
really up to you on how far you
want to take that. My opinion. I think maybe since
it's stylized, it may look a little bit better. If it's like less like that. Since we're dealing with
something that's stylized. And then maybe we can do, this is what I'm, what
I'm doing right now is nothing more than
experimentation. And just kind of seeing
what something looks like, a little bit, like
smaller dots at the edge, holding Control left option
for this by the way, then that probably
is the right one. Then I'm just using a blade. We can do something like that, although not the biggest fan of the little glob mushrooms there. So I'm gonna go ahead
and mask that off. Make sure they
don't get touched. These big gloves alone. Okay. Then of course, just kinda
bringing them all in. We can just kinda do
something like that. Just something to
bring into the effect. And of course, you can repeat, repeat this same concept
again with maybe the lines. Maybe you wanna do
something that's a little bit more segmented here. Like, you know. Then soften that up and then use the tool to kinda bring it in. You can kinda do
something like that. You can kinda get
a little bit more. I'm not gonna do it
though, because again, this style is a little
bit more of a cartoony. So I kinda want to
keep it simple. I may put a noise texture
on here like a real basic, simple noise texture
just to kinda keep it all some simplified. But yeah, that's gonna be sort
of the aftermath of this. So once we're done
with the hat now, we're going to move
now into the face, which is left all leapt option. Don't forget to click Save. And we'll see you
on the next one.
13. Constructing Eyes: Okay, so let's continue. Now in this video,
we're gonna go ahead and begin to block out the face and establish
some eyes on here. Nothing too complicated
to start with, but we're going to show
you a little bit of an old school trick to
establish things like eyelids and maybe go over some map material was signing up for a
first-time beginner. So let's go ahead
and get started. One of the first things
we'll go ahead and do is we're going to append some
extra spheres into here. So first, let's go ahead
and hit sub tool append. And let's see if we can find ourselves a sphere, sphere 3D. And if we go down
here to that sphere, It's probably
underneath this sphere. Let's hit the W key
and move it forward. And we're going to talk to you about adding some materials on here for the first
time just to kind of give you a heads up
of how it works. So let's start with that. Before anything. If you want to change the material and the
color of something, first, click off z
ad and click on RGB. And then we can kinda
go through here. And I'm going to
choose skin shader. I'll choose toy plastic. Now you'll see the
whole thing change. And that's expected because we didn't assign
anything on here. So this thing goes universally. So let's assign this toy plastic onto this sphere that we see. And to do that, we
just go through color and just merely
hit Fill object. Now when we switch it
back to basic material, it will stay the same. Let's go ahead and go back
into toy plastic now, just one more time. Because we want to
show something else. If you want to change the color, you can do so right here. Obviously it changes for
here, but it didn't change, we're here because it also
took the color value of white and also a swine did on there
because this is material, as well as the color channels, RGB, red, green, blue. So now let's go ahead
and reassign it again, since it's now set to black, and this will now
be set to black. Let's bring it to white again and bring it to basic material. So now let's go ahead and just simply give it a
couple of bites. Make that nice and smooth. We got something like an I, a cute little lie. Let's go ahead and bring
this guy in here like so. And this is up to you how
you want to form this. There's no way. I'm gonna go ahead and do a
little bit of experimenting. I'm gonna just kinda hit into
the DMV brush, move the, and just kind of go
into Symmetry mode and just kinda flatten
things out for me. Give myself a little bit of
the canvas than left Alt. And turn off symmetry. I'm just going to tuck
that guy in there like so. Now we can decide that shape. And honestly, the
shape is up to you. I'm sorry, the sizes up to you. I'm kind of leaning towards
some nice big eyes, like so. Now we can do one of two things. We can duplicate the mesh
and merit over or we can just duplicate the sub tool
and mirrored over either way. So I'm just going to
duplicate the sub tool. Since we're going to be
marrying overthrew defamation, one of the first
things you have to do is realize you got to delete subdivisions to
do this function. So let's go into
geometry and hit Delete. Don't worry, we can reconstruct the subdivisions
again because we are not going through and changing
or remeshing anything. Let's get back into defamation. And let's hit mirror. And don't forget to center
the pivot on this guy. Now, we can do one
of two things. We see this like
so let's go ahead and see if we can combine
these two sub tools. Now we go through
the top one and let's go to merge, merge down. Now that it's merged down, if we make sure our local
symmetries on we hit the X key, you can kind of decide placement of our
character, like so. So this is just
you experimenting. Kinda like the look of that So now let's go ahead
and go back into our, our face, which I again, I hit left Alt,
left option, click. And just kinda give ourselves a little bit more real
estate room on here. Maybe we want to do
something like that. Just some easy. Now here's something
that we can do. This is a little bit of
an old school trick. First things first, I'm
gonna give a couple of subdivisions so we
can smooth this out. And I'm gonna go up to brush. And this is an old
school trick to use to create eyebrows width. And that is working with
the Z project brush. Now, Z project brush
is kind of something that we haven't really
talked too much about. And to put simply, it's a brush that's
kind of used to project onto its shape in front of whatever is
in another sub tool. So it's kinda down here. So let's go ahead and click it. And if you want to get
an idea how it works, we can kinda show
you right here. But first let's go ahead
and do transparency. You might need to go through and bring the mesh up higher. I don't know if it really, it doesn't really work if
you turn the intensity up. But in order for it to
project its shape on here, need to have a little
bit more of a higher, closer proximity to the mesh. So let's go through Move brush and just kind of bring this up. Like so. Way project has
something to work with. And let's just go ahead and
switch into Z project again, which is now probably up here. Kinda see it's so little bit of a tricky brush to
work with on here. We kinda turn the eyes on. See if we can bring
that up here again. Does the trick a
little bit with here, we turned it off, it kinda
does the trick right there. So it looks like I'm
going to have to bring a little bit more of this on here. One thing I can do
is just kind of just go through
and hit the move. Like so the eyes open. And that probably is a little bit more of
a closer proximity. Let's go ahead now
and do the Z project. Kinda likes to do that, but unfortunately it also kinda likes to like so. So we kinda get ourselves
what we need on here. Now what we do is go in, Whoops, I hit the V key. There. We go through the Move brush and just kinda move
this forward now. Like so, we get this
nice clean projection. Now if there's anything
that's often in any way, you just smooth it out. We don't have too terribly
much if you want, you can go down subdivisions, hit Shift D and smooth it out. Any place that it might seem. D again, smooth it out. And d once more smooth it out. So it's kinda perfectly
overlapping everything. If you need to do another, if you need to just kinda go through and redo
anything going ahead. I'm a little bit okay
with what I got as far as the depth goes, the eyes. So what we're gonna do next is we're going to go through
and sculpt the eye openings This, and this is
where you can get the shape that you
want out of this. So remember when we're doing
something like Z project, keep in mind that
you're going to need to make the proximity of the mesh pretty close
over this to make it round. You're also going to need
to use the Move brush to kind of bring things
a little bit forward. And then once we're done, we're going to sculpt
things a little bit back into the shape we want. So, so let's go
ahead and just give you an example of this and
what we can bring to it. Like if you want to do brush clay tubes or
brushed standard, you can do that. Don't forget to turn
right now the L key off. But you can begin to
sculpt in your eye. Like so. Guys, visibility off from here. Just kinda getting
everything situated. And we can now also
use brush and the left Alt to push in
and out as well. That is something you can use. Additionally, we can
also sort of craft in, for example, the the
pinches of the eye. We can smooth and push in, push out the eye. It's something I kind of
like a little bit more, but it's also something
that requires a little bit more finagle in kind of you get a really good sense of using
the left Alt button to this. Kinda like the AI version of the Move brush
version better. Because you get more
practice with this and be good to establish a little bit more crevice of the the eye socket through here. So please remember
when doing this. This is definitely
about utilizing the the left Alt or
left option button. That's gonna be a big deal
when it comes to using the Move brush here to
sculpt gently smooth away. We may also do one more. This is kinda all right,
keep accidentally hit. Wondering if I can just left old pushing in Kinda wanna do this
without the hat. Now, going to have to turn
that off and bring this in. You can kinda see I'm just
kinda working through this shape. Like so. Relax, smooth on here. This is just sort of a of
you taking your time moment. It's going to come
differently for everybody. Let's go ahead and see
if we can pinch this. And there is a pinch brush. It's not one of the ones
that I would use completely, but we do have a brush that kind of scrumptious things
in a little bit. Maybe put a little bit
of volume on here. Let's try volume brush,
brush Clay Tubes. Brush clay tubes, by the way, it's gonna be a brush you'll
use very often for anatomy. Kinda see how I use the smooth very carefully to
kind of blend it in. Kinda show little cheek. And let's do a standard to
kinda bring back a little bit, a little bit of thickness. Another thing we
can do is we can use the Danes sander brush. Feel free to use that as well for anything
you might want to try. Just remember when you sculpt
it in to smooth it also Al, you can kinda see how
I'm kinda working it in very subtly, very gently and then kinda just bringing a
very, very much out. Just kinda smoothing it
and bringing it back out. You hold left Alt
and left option. You can also invert the
dam standard as well. This can be nice to create, maybe like a fold line
on a end of an eyebrow. Be very, very gentle. Doing it. Make sure you
are taking your time. And just take it one
stroke at a time. I'm just simply kind
of working it in. Move in and out. Being very, very light on my webcam tablet. Okay, so that's how
we're gonna do the eyes. We may do a little bit more
with the eyes down the road, just kinda do a
little small tweaks. But this is where we're going
to leave it for this one. Afterwards, we're going to go ahead and work a
little bit more with the mouth and then
tweak them out to match a little bit
more with the eyes. So with that said, we are going to say stick
around and stay tuned.
14. Sculpting the Mouth: Okay, So now we're gonna
go ahead and sculpting or real quick mouth and then go over just a little
bit more detailing, usually with the
dam standard brush. So if you haven't already, go ahead and select your
**** standard brush, that's B, D, S. And just go ahead and if
you want, just kinda, i'm, I'm, I'm gonna just
make sort of like a little bit of a smirk here. I'm going to also set my focal length,
something like that. My focal length
is around 40, 49. I'm looking I'm just
taking a couple of practice swings on this. I think what I want is just to give kinda like a short mouth, you know, like just
the real short one. Then I'm going to press left, alter left option to invert it. And I'm going to make
us not parallel, but just kind of a slightly
down angle on here. I'll just kinda something
simple like that. Um, I may do this
a couple of times. I may just kinda just shifted, but I'm going to take
a couple of swings. Just define that right spot. Just that right spot. Because there is no such thing
as the wrong way to do it. Especially if you're
learning for the first time. Maybe just kinda make a little
dimples spot right there. Then I'm just gonna go
through my volume brush, which is going to be BCT. That's Brush clay tubes
and maybe just carve a little bit more cheek into this and then just
kinda smooth it in. Just to kinda give
us a little bit. I'm just gonna kinda, what I'm gonna do is we're
gonna keep practicing doing this until I kinda
capture this, just right. So if I have to basically kinda go back a little bit and
try one more time. I'm going to just to kinda give myself a
couple of little bit of little bit of fun with it. Want to make it longer? Go ahead. I'm just experimenting
with it to do just that. And after you sculpted, don't think one
sculpt for one brush. I'm also kind of, you know, using the Move brush in conjunction with the
dam standard brush to kinda look for what I'm just kinda find a spot that
I'm looking for here. Kinda like how he
hangs down like that. So just don't feel you need to commit to
anything completely. Let's go ahead and turn this down real low and see if we can. Then one thing I always like to do is I'd like to go
through the search history and see if there's
anything that I've ran into that I kinda like more. There's that one and
then there's that one. Kinda like as well. That one. Yeah. I like I think what
I liked, what I did. They're the most. Let's just go ahead
and bring that and just kinda give us a little bit
more of a subtlety. Now, once you get
that kinda taken in, I know we used I only tried
using the sculpting brush because I or the clay toothbrush because I wanted to give an
opportunity to try to use it. If there's anything you
want to do from here, feel free to like, if you want to sculpt a
second layer on here, then smooth it in. You feel absolutely
free to do so. Same thing here. If you just kinda want to reaffirm the eyes a little
bit or anything like that. Feel free to. I kinda
like doing it this way. This isn't supposed to be like a super advanced course
on anatomy sculpting. This is just sort of
having fun with your spot. I am, I was thinking
about doing a nose, but I kinda like his look
a little bit like that. I can do also more detail to it. It's really easy. If you look at some
of my other courses. It's pretty pretty. I love sculpting
a lot of detail, but I also don't like
to go overboard if it's kinda like a beginner
first-time or course, because it can sometimes be
a little bit overwhelming. So with that said, there's a lot more
things we can do. And I'm thinking about saving
it kind of towards the end. Like one of those things is
going over the whole surface, detailing material where we create some noise just
out of the texture. And try to have
some fun with that. And try to put some
noise onto it. That's always something that
you can always do as well. But we're gonna go a
little bit more into the noise thing a bit
later on down the road, you can't really see the
noise all too well on here. So having said that, what we're going to work on
next is going to be the body. Then we're going
to try to sculpt out a little jacket
out of this guy. And then we're going to put
a little bit of a staff on him and see if we
can finish up with a little bit of a plate to
put him on with something. So with that said, let's just stick around
and move on to the body
15. Blocking out Coat: Okay, welcome back. In this video now we're going to talk to you about blocking out that jacket and getting
that jacket established. And for that, we're going
to use poly groups. Now, we gave you a little bit of a demonstration of
how poly groups work. So we're going to
show you how we can build off of
that first timer to first-time or tutorial to
kinda give us what we want. At this point, you should have a good idea or have
your face flushed out. At this juncture. If not, just take a moment to
sort of get it everything, everywhere that you
want. Sort of speak. Just kinda like take your finishing touches
out and go from there. So with that said,
let's just go ahead and get started on this jacket. Now the first thing we're
gonna do is we're gonna go ahead and select the
sub tool with the body, which you can do with
left option, left, Alt, left-click, or go to the sub tool and
just click it there. For this, I think what
I'm going to go ahead and do is duplicate this sub tool. I know why am I duplicating it? Because I'm going to
cut a jacket out of it. So let's go ahead and
show you how that looks. First, let's turn off
our Reference Shift Z. Duplicate this sub tool. And for now, I'm just going
to go through and delete. I'm not delete. Why did I say that?
I'm just going to turn the visibility
of everything off. Now, from this point on, I want you to go ahead and just maybe toggle between
back-and-forth between symmetry
and with the X key and turning on
Cemetery and hold down control and just simply
carve out a jacket. Even I like to kinda hold Control drag and do a marquee
for these back areas here. And you just kinda looking for like a carve-out
of a jacket. It's basically only
thing we're doing here. So just take your
time if you want, if you want to really
get a nice sheen jacket, one thing you do is you can, while holding down control, go up to transform
and not transformed. Apologies. Go up to stroke
and hit the lazy mouse. And you can kinda have a
lazy mouse curve on here. So to help you with like a sort of smoother
line, if you will. So just take your
time on this curve, what you want from it. Just a cute little jacket. And if you want, you
can also make sure to kind of get a nice
little spot right here. And then you're going to
have your jacket now, make sure you get all the spots and this
sleeve all taken care of. Now, if you remember
from this point on, what we're going to do is we're going to build off of what we learned in the first time
beginner intro course. And that is, I'm
just going to hold control to soften it
and then Control left all to kinda hard it and
kinda go back and forth to kinda smooth out the edges there from this point
on, hit Control W. So we can create a poly
group out of this. And now that we have
some poly groups, let's get something that's
a little bit clean here. So let's go through geometry. And let's go through edge loops. And then we're gonna
do some group loops. And that's just going
to make us give us a nice little cleaner line here. So if we hold Shift Control, we can see a nice clean
line in all of this. And if you want to make
that smoother, if you wish, you can always do that
just by going through defamation and then
hitting Polish by groups. And then we can give
that a couple of runs. I like to go up here and click
that to hollow circle in. That kinda gives us a little
bit more of a cleaner sheen. So once you have all
that taken care of, You have a nice clean drag it. Let's hold Shift Control, left-click to get this guy. And something we
didn't talk about is, is this back face calling here. If you want to see
the back face, you can just go through display properties and hit double. And so now what I
wanna do is say this, I isolate selected all of this. That means if I Shift Control left-click, it's
going to come back. What I wanna do is delete
that geometry like so. So to do that, we're going to have
to go through and go through Geometry,
modify Topology. And under here is where
we hit delete hidden and that's how you go
about geometry. Sorry. Go about deleting hidden topology through
and isolate select. From this point on. I like to go ahead and kinda
clean up the mesh, make it something a little
bit too smooth, ER, because this may give me some unwanted debits that
I may not want to see. So I'm going to go for a cleaner looking topology
and as we know, DynaMesh, a blackout, remeasure zero measures sort of where
we want to zero measure. It gives us the quality that we want to get something cleaner. We don't have to have a very
advanced setting for this. We can just simply
hit the button in default and we'll get
something like this. Now if you notice, the hand kinda went this way, That's because x
symmetry was turned on. So let's go ahead
and turn off x. So symmetry must be off. And we can see a much
cleaner topology. This is a topology that
we can also build off of. Now, one extra thing
I want to say right here is that we
have a thin fold. And I would like to go about creating some
thickness here, kinda like an extrude. Now, Z modeler has some
options for extruding. But I think what I'd like to
do is just go ahead and do the extrusion through DynaMesh. So before anything before
giving myself any thickness and going over DynaMesh and a whole another feature on having
like a sort of a thickness. I'm going to want to block this guy out a little bit more. I'm going to want to reposition
it on to my main sculpt, which is this guy,
because it's right now just overlapping the geometry. So what we're gonna
do in the next lesson is sort of position all of this kind of over
the body before we start in by giving it a little bit of thickness
in the process. So with that said, sick
around and stay tuned.
16. Blocking out Coat Sleeves: Okay, let's get started. In this video, we're going
to move around width the the blackout
that we have here. Of course, if I hit Shift F, i, you can kinda see how it's occupying the exact same space. So we're going to use
the Move brush to reposition this jacket to look a little bit
more like a jacket. Once we do that and move
it above the body mesh, we're gonna go
ahead and then add a little bit of thickness
once we're completed. So let's get started with that. So one of the first areas
that we have to focus on pretty much mainly is going to be this
area right here. So let's go ahead and
select your brush, b, b, M v brush. And then look for
the move brushes, which is right there
and the V key. And I'm just gonna go ahead and remember we're
using left Alt, left option to bring all
of this kind of above. Because we don't
want to see any of that grade topology
going through. We want to have just
enough distance really to kind of just enough distance to see that thickness happen. Let's just go ahead and
bring that out and you kinda see how it's
kind of going through. Now, remember I'm
using left Alt, left option to kinda
push it through. It's sort of z like Access. Little bit of a kind
of move that camera around to see all the
different parameters. Like so. Too worrisome for me, this area right here, because the hand's
gonna kinda look cute little mitten is gonna kinda The put through here. Like so. And you can
kinda see like the, it's kinda separating
through here if you want, you can also left, all left option,
just kinda bring things back this way as well. There's anything that
you're seeing that's above. You can kinda, just
kinda cut it out. Another thing you can do is
if you hit transparency, you can also just hit select radical and just kind of cut out everything that's holding Shift and dragging out a piece and then releasing
**** I'm sorry, holding Shift Control,
dragging out a piece and then releasing Shift
Control and hit left, Old Left option to
turn that red and you can delete any unwanted
geometry that way. Which is nice
because then you can just go through Geometry, modify Topology, and then
just hit Delete Hidden. Yes. So let's get back
into it again and turn off the
transparency, like so. And we're almost there. Let's just go ahead now one of the things I
wanna do is kinda square up this area right
here because it kind of smoothed out like this. Some people might be okay with it and some people might not. So let's just kinda give it a little bit more of an angle. Like so. And even if you
want to smooth it, that's fine because it's
not going to hurt anything. Because same thing
over here as well. You're just going to kind of just kind of give it a
little bit more of an angle. Like so. And of course, just give it a little bit
more of an angle. Alright, so now that we have
that kind of established, let's go ahead and add
some thickness to it. And for that we're going to use something called
dynamic subdivisions. Now, dynamics subdivisions
is something I would throw into intermediate users, but we're not, we're not
really going to be using, in essence, actual
dynamics subdivisions. It's really a feature that's built within
here that's been very convenient and creating clean thickness that
we're gonna be using. So to start off with, I'm just going to first-off turn on Dynamics subdivisions. Now, if you turn it on,
nothing really changes. You may get a little
bit of a smoother mesh. But the first thing I'll
have you do is turn your smooth groups down
to zero subdivisions. That way, nothing really changes even with this as
on because this kind of functions like IT projects the subdivisions without
actually having to divide them. And now I just want you
to kind of add some, go through and go through
the thickness slider, and just sort of add
a little bit on here. You can define or
decide the thickness. I'm okay pretty much with this. It's kinda nice because you also get a poly group in here, which is really, really
convenient for me. Now, one thing to
take into account is, is you may think that
you have a mesh that's been created and that's
actually not true. You technically still
don't have a mesh. The reason for that all is, is because it's been sort of instance and
projected in as a dynamic. It's, it's sort of like
hitting three mode in Maya. From one, from three key in Maya worth
smooths everything out. It's not actually
adding geometry, but we can still go
through and add this. We can still go through
and add topology. And that's just simply by
hitting the apply button. And once you do that,
this becomes topology. Now, one last thing I'm
going to want to do here is I'm going to go through, and I'm just simply
going to go about sort of wanting to do this is
Chris the poly groups. And that's just something
that's kinda nice because if you ever want to
add subdivisions like so, you can get something that's pretty clean and a thickness. And in addition, you can
now smooth this out and it will collapse
into a nicer area. Now that's up to you, but this is just sort of
the part two of blocking this out and establishing some
thickness on a character. In the coming up. Once what we're gonna
do is we're gonna go about trying to add
some tears into here, make it a little bit ragged. We may drop the mesh
and which by the way, I'm completely alright
with we may do some editing of how the
hardness comes across here. So with that said, stick around and stay tuned.
17. Finishing Coat Block Out: Okay, so let's continue
in this course for now. We're going to start to turn
our little jacket in here, in here too, a little
bit of a trench coat, since we're working also
with poly groups as the theme on our character, we're also going to explore knife cut brush a little
bit and how we can reuse that to guide zero measure with the poly
groups that it creates. So that may be a
little bit confusing, but Let's just go ahead and
go show you what I mean. Now, if I hit Shift F, I go into solo. You can kinda see poly groups
were made and everything. But maybe I want to make
this a little bit sharper. So one thing you can do
is hold Shift Control, left-click and just
select that knife curve, brush and hold Shift
Control left-click drag. You can maybe draw out
a curve left, Alt, left option while holding down left-click kinda gives us a
little bit of a Bezier curve. Now we got a little bit of
more of a sharper piece here. So that's something
that we can work with. See if we can show you again. And of course we hit Shift
F to look wireframe. We can see a new Poly
Group has been put there. And that's important to look at because it's a
different poly group. We can then add, for example, crease the poly group there and which creates
creases around here. So when I divide it, it will kind of go through. And once more like
we did before, we can also do things like
go through zero measure and go through the whole process of once again remeshing
everything if I like, for example, say keep groups, detect edges, keep creases, maybe turn the smooth
groups down a little bit. We can do another zero mesh. And maybe you might have
to do a couple of them. Like to clean up some geometry because the first try is
always a little bit wonky, but it kind of builds
off of what you make. So like if you see
something like this, kinda undo and just kinda keep at it is the
operating word here. Keep experimenting
two different areas. One thing I do is change the target poly group so that it can kind of go through
and find something clean. And you saw the progression
of how I work that out. If you get through if
you type it like a few, four or five times and you're still not
getting what you want. Kinda go all the way back, maybe store with a
different polygon count to get your way out there. Now that we have all of this, Let's go ahead and kinda
elongate this. All. I'm going to hold down
a mask like right here. Just kinda mask out the, the, the sleeves here. Because I'm going to use
the Move brush and I'm going to drag this all down. Let's turn off solo. And if you want to
take a moment to kinda bring back
your guy, you can. I'm gonna go into the
Move brush and kind of bring all this down if you see something like
that, don't worry, just go ahead and bring
it in and just kinda slowly but surely kind of
bring everything closer in. You can just kinda
bring this code down. You can use snake hook, you can use any kind. Don't worry about the topology
stretching because again, we're just going to
remember all this. We're just bringing this guy and see if we can also
maybe sake of argument, do something about
the mesh there. And if you want, you can
just hit zero Michigan and we can get a nice little
clean piece off all this. Since everything is
creased poly groups, it should be at least if it's not and you see
collapsing link right there. Just go ahead and go for once again another
crease Poly Group. Fill in that gap right there. And then just go ahead and
give it a couple of two bytes. And this is where you
can do another thing where you can create terrorists
on here if you want. But it's sort of this buyer
beware sort of thing. If you go through and
create terrorists, I would do it at the very end. Because one thing that
I like to do is I like to sculpt out detail on here. I like to maybe
like for example, wrinkles we can do. And to do that, we're going to be
much easier to do that with the
utilization of like, for example, a, The utilizing multiple
subdivision levels. And if you're going
to try and sculpt out tears with the
knife curved brush. You're going to have to delete
those subdivision level. So I would just go ahead and just kinda say that
towards the end. And keep yourself in trying
to get all the work you need done while you still have the subdivisions available
available to you. So I'm just gonna kinda, I'm on left Alt
and move and just kinda pushing this in
a little bit deeper, kinda gives us a
little bit room, wiggle room to kinda make
this slightly thinner. So last thing we'll do here is, is if you want,
this is your call. You can just maybe
do a quick little. Just glaze. Smooth, lightly
smooth the corners here just to make it
a little bit thinner. And then after that, we can go ahead and
get started maybe sculpting some detail
on this jacket and just sort of going about and having
some fun with wrinkles, sculpting, and seeing
what we could add to it. So with that said, let's stick around
and stay tuned.
18. Detailing the Coat: Okay, so now in this one
we can start sculpting. So we're going to sculpt
some details of some folds, go over some review of
what we know on how to use masks and soft and masks to create
some folds with you. And also how we can sculpt
some wrinkles in here. So let's go ahead
and get started. So one of the first things
I'll do is I'm gonna go back into solo mode here. And I'd kind of like the idea of just simply going
through holding down Control and just painting just those fairly even
little mask here. And you can just go up to around here since the
head already covers it. Kinda just, you know,
you can make it. It's your choice on how
thick you wish to make it. But what I'll do is
I'll just kind of go back and forth between
control and control, left Alt or Option, and just tap a couple
of times either way. Until I got what I want, make sure that that's still
being covered up there. Yeah, little bit. Back into it. Kinda see what I'm doing here. Alright, so I'm just kinda kind of just invert the
mask and I'm going to start with bringing the Move
brush and that's again be M V and just bring it out
and slide it over like so. And then just simply
hit the smooth key. And all I'm doing is just kind of grading myself a
little bit of a trim. You can do the same
thing over here. And I will just
start with the trim. We're just kind of
outlining some pieces here. And this is one of
many, many, many, many ways we can go about
establishing a sort of a, a fold in a wrinkle. Go. Just kinda bring
that out left Alt, kinda push it towards us, then move it to the
left a little bit, and then just kinda smooth
it down a little bit more. I'm gonna make this area
a little bit shorter. So let's practice this a little
bit more with this area. Now remember when we
hold down control, we can change our stroke
to something like curve. And if you hold down
Control and then release and then tap all kinda create yourself a little bit of a Bezier curve and
then switch the stroke back and kinda
like it like that. I'm just going to soften
it by holding down control than control option
to kinda bring it back in. Then invert the mask by
holding Control again. Better. I can. I think I'll bring
it out this way. I'm just gonna kinda move
all this forward like so. Just to kind of give us
like a little bit of a minor little scene. It looks a little
jagged, don't worry, because we can
smooth it right out. If you want to thicken it up. Now you can always go back
to inflate if you want. And you can kinda bring in a little bit more thickness
to it and then of course, relax it back out. Do that too. All right. Then I'll just kinda do a once-over to kind of
bring it all out. Like so. Let's go ahead and do
the same thing as well. Another thing that we can do is a little tedious and
a bit of a pain is, is we can use one of
the stitch brushes in your your lightbox. And you can create sort of like a stitch that kinda rolls
around here as well. The only, the only
reason I'm not doing it is because it doesn't really make much sense with
stitches being at his size. So alright, so now that we
got all this taken care of, Let's go ahead and just take the time to
just do some light to sculpting on the body Before I start, another
thing we can do, go ahead and hold down control. We can also, I can't believe I didn't
really go over this, but we can also make like a
little bit of a pocket here. Let's make sure we
understand where the pocket is in retrospect, packet can be like for
example, right here. You can just kinda
bring in a pocket. Same concept again, where
you're just moving it in a little bit and left all
left Z to bring it down. Like so. And then kinda shifts smoothing it out a little bit. In other way you
can do a pocket is similar to how you
did the mouth. And I may even experiment with
in-flight just to kind of give myself a little
bit of volume on this and poof up the
pouch a little bit more. Go through each subdivision.
Just like that. Pretty easy. Just kinda bring it through. So and of course you can do like a dam standard brush with and
just kinda cause carve-out. Like a little bit of
a divot. If you want. Just to kinda show he's got
a little bit of a pocket. So you can always do
something like that. That's just really quick, fast stuff that we can do. Just make it very subtle. But I kinda want to now get
into some fun sculpting. So let's go ahead and do some
some work with wrinkles. Now, wrinkles are
a little bit of a tricky thing if
it's your first time. So one thing I'm
going to want you to do is hold down spacebar. Look at your focus shift. I'm starting off with
35 on intensity of 25. And when I sculpt in a single
wrinkle than first thing I'm going after is
thinking, okay, I want to smooth the
ends here because the whole idea here is to make
this blend into the code. So you gotta kinda
smooth the ends. And the more it
gets to the center, you do less smoothing. In addition, I hold left Alt, left option to do
the inverse effect. And I have no problem
with the idea of just kinda giving a little
bit of a taper there. Now, there are things
like anchor points that we can go over with a
width creating wrinkles. It's not something that is, it's kind of like a science that I don't want to
get too much into. Definitely go a little bit
more into it with the, the Cyberpunk
character that I do, which is a little bit more
advanced to intermediate, but it can also be something
fun for beginners as well. But I don't want to really
go to too deep into that until you get a basic
understanding of the basics here. So let's just go ahead and
keep it fairly simple. There are even more
advanced techniques to sculpt out wrinkles. Even in this stage. The other thing to take
into account is wrinkles. For this type of character. I kind of feel should be. How shall I say? I feel
like they should be kind of less detailed since
it's like a cartoon. But it's your call
how you wanna do it? Again, if you're having trouble smoothing it out at the ends, just hit Shift D and kind of
work your way through it. You know, just take
your time and ideas. Do you use the wrinkles to
kind of break up everything? Not make it look perfectly
smooth one way or not. Just kinda wanna play
that subtle game. Bring that back. So kinda getting through it, we're kind of making
our way into it. Just kinda hitting
Shift down and kind of trying to relax
it a little bit. I don't wanna get too
too overly wrinkled. Kinda want to just have it. Because if it shows
too many wrinkles, one thing that it tends
to always look like as silk in the process. Now, one other thing we can
do is go to the top here. And if you want to, you can also maybe put
some trims on here. Same thing, same concept. Pretty much like a perfect beginner level
thing that we would do. Just to kind of hold
left all to tuck it in. Excel. This out. Like so. Invert and of course smooth. And of course the
same thing goes here. Spacebar trick for panning
the curve and bring it in. Like so. Then left Alt, left option to kinda
push on the z-axis. Once more, space bar or
smooth it out a little bit. We got that going. Alright. There's anything
that you feel you missed. Maybe on here, kinda bring
it all back. **** Standard. And of course, one thing
that we'll have to do is kind of guard against this because we were turning the
the there's two layers. There's one
underneath and below. So we were in Isolate Select, so Let's go ahead and mask
this stuff out and use the Move brush to kind of push all this in so
it doesn't interfere. You're not really going to
see what's inside the hole because the hand is
going to cover that up. All the fun stuff we get to do. Even now, I just BST it on here. It's pretty nice exercise
when you can do this. I forgot also one thing
that I love to do is use my quick key tool
palette for brushes. Again, we don't cover too
heavily into that because of the because we're really, really centered around trying
to get this whole thing. Basically looking a lot more like getting you to remember and remind yourself
of all the brush keys. Like DMV is brushed, move, BST is standard ECT, brush, Clay Tubes,
things like that. All right. So all that's left
is holding Shift Control. And we're going to now just cut some cuts into this to make
it a little bit more ragged. We're going to use
the knife curve and we're going to delete
our subdivision levels. Because once you're
done or have a place, you can just kind of, you know, kinda just go through and well, to go something like that. Just having some fun with this. This probably would
not be ideally though, a fun thing to reach. Apologize. I mean not reach, apologize, but not be a fun
thing to auto, reach. Apologize on four
here with C Asher. And again, I'm making
these acute cuts through a double tapping the
left option key on here. Even spaced. Got to break it up a little bit. So we're getting there.
We're getting there. So we've got a little
bit more down for that. We'll just finish off with
putting a few buttons on them, just some basic little buttons. So I'm just going
to go to sub tool and hit Append sphere. And I'm going to
take that sphere and I'm going to bring it in here. And it's just a
small little sphere and just kinda flatten
this guy out like so. And make that a button. Just something very
easy, very simple. Got a little bit more to him. And I'm going to hold down
control to duplicate the mesh. Notice that when I hold down
control and I translated, I did not duplicate
the sub tool. So there is that we're almost getting done here. It's kinda nice when you
hold control because it's, it creates a mask so that you're not moving
the entire sub tool, which is always nice. You need to change any of these. I would go with move topology As your choice to move brush because they'll move multiple meshes
at the same time. You want to move one
at the same time. So now that we have a little
bit more of a jacket here, we're going to go ahead and now just move into the next phase, which will be the
little certain belly here and finish with the shoes. And then from there
we'll work on hands and staff and finish off with a little bit of a platform that said stick around
and stay tuned.
19. Sculpting the Chest: Okay, so let's continue. We're going to now
work on the chest here and start to sculpting
out some detail. It's gonna be a pretty easy one because we're going to build off of what we already did
on the jacket onto here. So let's go ahead and
click on that body here. It's not going to
be all that hard. It's just gonna be sort
of like I'm just going to create a shirt here, area here. And just like what we do
with these scenes here, we don't have to go with
something too crazy. We can just kind of
put a jacket over it. Sorry, not a jacket
but a shirt over it. By kind of pulling this
out a little bit more careful it doesn't go
past the the jacket. So if you have to tuck in, if you will, the pants
instead, that's fine. But don't forget when
you're doing this. Definitely want
to smooth it out. So smooth is your friend. Now, from here you
can go ahead and put some fun things on
here with standard, just like we did before. Maybe you want to do like maybe
some more of the similar, similar styles that
we've so far done, as is with the brush. That's not the similar wrinkles
that we have done before. That's not a problem as either. One of the reasons that
we do stylized cartoon is because it's less detail
for a beginner to tackle. We wanna, wanna go ahead
and do this a little bit more easier for the
first time, beginner. Feel free to add anything
that you want on here. Whether it's something
like a trim, like this. This is just the dam standard
that we're doing here. You can definitely do that. You're welcome to
take any kind of interpretation to
this as you see fit. It's yours to go with. So once you get a nice-looking sheen of
a character on here, what we're going to do now is just have a
little bit of fun, just kinda improvising
some things here. So one such thing is like maybe some sort of a
little necklace here. You can now build
off of the things that you've learned
and know so far. If you want to do that. Like for example,
build off of how we append cylinders in here. Like let's see here. Maybe you want to go with the cylinder piece and it's
usually on the bottom. Let's go ahead and just
kinda bring it in here. We want to make it
like super thin. And this can be like
maybe a string that connects a whole bunch of pieces of some sort of shrink
it necklace that we want. We can improvise that as well. And again, we are building
off of what we've learned. So like we've learned
how to manipulate things through many
different ways. And one such way
is the bend arc. Now you can just make
a little bend there. So let me go ahead and make this slightly
smaller, slightly wider. And yeah, we'll just go
ahead and do a bend arc. Try that again. Much better. And we can just bring
this guy in here like so. Bring him, remember the
bend arc is sort of the, the, it's the green
arrow, so to speak. So go ahead and click on
that cog and hit Accept. And you can just
sort of either use a combination of move tool or a scale to make it fit in there to just
kinda bring it in. You can do that.
We can use likes. After we get this place, we can maybe start
connecting some beads. So I'll just use the
Move brush tool to place this guy in here. Like so. We can do something like that. And then like maybe anything
you want to do, anything. But the idea is, is you're starting to get to a point where we
really are starting to encourage you to break the boundaries of
experimenting with things It's not going to just be us, it's going to be
about you exploring. That's the most important
thing about ZBrush. Maybe this is a mushroom guy. Maybe you want to put
a domino on here. It's your call. I'm not going to put a domino, I'm just going to put
some maybe sculpt something in with random. Do something with the mask. Maybe give it one more
subdivision for comfort. Invert that mask,
bring it in like so. We're at the point where
you should now know something about how to make
something through improv. Right now I'm just sort of improving with a standard brush. And let's see, I can
do a drag Alpha or maybe a drag piece and we know how to make
these hard if you were in the first part. So that's changing. Our focal shift. Brings in here, wants you to experiment with how to
manipulate things through here. So it's gonna be sort
of a free for all. I want you to practice
on alphas here. I also want you to feel
free to go through and have some fun
making combinations. Like what I'm doing
right now is I'm making a combination with alphas and Ben darks to see if I
can flush out a fun shape, like you see right here. Maybe I want to see what it
looks like when it's like so. And maybe that can be
part of a trinkets piece. So what I'll do is, for example, sub tool. I'll hit, except maybe this can serve as sort of like a gnarly
looking Guitar Pick. Though. We may, if we do a guitar pick, we're going to have
to do something about that. Maybe a guitar pick is something
that we can do to make this piece sort of
proportionately sized for him. We'll duplicate that and
then we'll go back to the original one and
z it all the way back into this default state. Maybe now I want to go ahead and flush out another
shape out of this. So like for example, bend arc or maybe taper. That was something fun
happened there with that, let's go ahead and
see if we can sort of something like that. Maybe they'd accept and maybe
tweak something with move. Because again, this is
all about not doing any one particular move, but combination of moves. So let's bring this in. Now. We're just, like we said, we're just kind of putting combinations in,
putting combinations. And let's put a little
bit of Jenga and this just simply being
random right now, because this is one of the biggest advantages
about what ZBrush can do. And that is it can just flush out the shapes
that you want. Super, super fast So here's another
piece right here. Let's go ahead and V&V brush. Let's go back to this guy. Now that we haven't,
let's duplicate it. Deformation and let's mirror. And let's center that point
and reset the transforms. This is going to have to be a little bit more readjusting. Alright, go. We're just
going to have some fun, just doing some fun stuff. Just be as random z1 come
up with your own design. I made a very quick
design very quickly, but that's really what the crux of learning z brushes we did. We've been doing a lot of
like step-by-step guiding. But this lesson is really
starting to be more of an emphasis on
things such as well, trying to explore ZBrush and
trying to get through it With an example of just doing random things
to see what they do. As my instructor famously said, push buttons is the
key to all of it. Push buttons, push buttons, and learn from what it does. For example, I don't
know what this does if I stretch this guy's
cloth out, like so. Or maybe if I do this in
combination with something like, for example, the
spiral brush that we learned to see
what that does. We don t know at all. So we have to kind of push buttons to see and learn
how something works. So that's kind of what I'm hoping that you're
going to get out of all of this when you go through and if you don't
like it or if you feel that it is like a little bit off or doesn't
match up very well. No. You can just simply slide it all the
way back and just return it back to to what
the original piece was, which is right here. You can just decide where did you like it at?
You like it here. You like it here. We're, where's it better at? You know, use the slider
to guide your way through. So please, please, please understand pushing
buttons is important. Learnt doing experimental things just to flush something out
more is something that's, what's going to happen is, is you're going
to kind of create an incremental process
in all of this, where that transfers over
to your next project, your next 3D project. That's actually part
of the reason why they do things like speed
sculpt practices because they want to get you to discover
something really quick, really fast without
thinking about it. So that's kind of what
this lesson is all about. Take a minute to
just simply push buttons and have
some fun with it, like we just did. In fact, I may even just leave
it draped over like this. With that said, we're
going to now move into making some hands here
and crafting some legs. And then after that, we're gonna go ahead and finish the character itself by
putting a staff on there. And of course, make a
platform for him to stand on. So with that said, stick
around and stay tuned.
20. Creating the Hands and Pants: Okay, so let's continue. In this video, we're going
to go ahead now and work on the hands and work on
the lower body here. So it's gonna be fairly easy, fairly nice little review from the blackout base
meshes and DynaMesh. So let's just go ahead
and get started. First things first, we
do what we always do. We append a sphere in and go to the bottom of the sub
tools to collect that sphere. Will go ahead and hit
W key to go through the process of rearranging the sphere into a certain spot. And from here, I'm
gonna go ahead and just take my time
to kinda make this. This is gonna be like a
cute little mitten hand because he is after all, a little mushroom guy. So we're going to make
something like that. Let's go into solo
mode so we can see things a little easier. And I might even work a little bit more, just experimenting. And this point I'm
hoping a lot of people had some fun with
experimenting before. In the last video with some fun looking little
piece right here, just a fun little flap. Then feel free to make any final editing adjustments
of the piece. Like So. Hit F twice so I can give
myself a little bit more of a you can just make whatever shape you want. I'm going to go
ahead and duplicate that are not
duplicates sub tool, but duplicate the mesh. Just so I can now
have something that is just a little bit easier, like a kind of opposable thumb. And then from here, I'm gonna go ahead and
duplicate that sub tool. Now, from this point on, I can go ahead and make
this a little bit bigger. I can make this a
little thinner. Probably bring it up
to hear a little bit. And then I'm just gonna
go through the process of DynaMesh and just kinda combine this all up into one mesh. So let's just go through
geometry and this is just real basic
stuff, beginner stuff. See if we can project and
see if we can get something. I don't like project that way. Let's just crank
up the resolution. Whoops. Turn off that project. Yeah, something like that. And we'll just go ahead and
bring solo backoff again. And now we'll just
bring this guy in here. Let's turn that just temporarily
turn that sub tool off. So it's kinda like
a little claw. I'm just using the just sort of bringing it in like so working my shape and maybe even do
something with a bend arc. Just to kinda experiment
with things are at. Now, this is kinda
like with the hat. You just got to take your time, find your mesh, find your shape. And definitely go through
the whole fun process of just having a
little bit of a blast, just to simply just
relaxing and taking, just flushing out the
shape as best as you can. See if we can avoid cutting
in a little bit there. Alright, so let's go ahead now, repeat the whole process
for the other guy as well. The second piece. So let's just We're going to see
these two pieces here. Let's go ahead and hit
Control W so we can turn them both into a
polygraph that way. If I need to mask one of them, I can kinda just go
through that and just isolate select mask and
to work on the other one. So let's go ahead and mirror
this one over Deformation. Mirror shouldn't
have any sub tools. Let's re-center, pivot
point that back. And let's bring it
out a little bit, kinda like we did before. What we're gonna do is this guy is going to
hold himself a staff. Let's give him a staff. Now I'm going to isolate select. And I'm just gonna kinda
move this guy in here. I'm not too worried about the the whole intersection
into the sleep. Just doing one thing
at a time right now. I think we can do
it just fine there. It's DynaMesh this in. Let's go into solo
mode and geometry. Try it again with a little
bit more resolution. There we go. I'm not too. We can go higher
resolution and fix all this by going up to
resolution slider here. But if the staff is going right through it and you're
never going to really see it. It's not worth doing the time. For a first-time beginner. Let's go ahead then and
bring this back on. Make sure the
visibility of our off. All right. So this is all just sort
of a funneling process to get it all looking right? We're just gonna kinda plan a
little twig stuff in there. Make sure make sure it kinda
angles out a little bit. Okay. So we're getting
that taken care of. One of the last things we'll do is we'll just go ahead and kinda give the indication
that there are some pants on this guy. So like for example, one way we can do that is
just going through solo. Now let's just kind of
bring it to yea, Hi. Fact, let's, let's give it
a couple of subdivisions. And try that again. We'll control and bring
it down like that. And then just like we did before with the shirt
and everything else. This is all like very basic. Now, bear in mind, there are a lot of
ways to do this, like how I'm creating this fold. Like one way is to turn
this into this mask in Nepali groups and
do group loops, polish the group loops, and just clean it up that way. For a nice clean look
for you can isolate, select between the two areas. This is a very, very simple ones model, so it's not like
necessary for that. But it's just sort of help, helpful to know like that you have multiple
choices in all of this. When going about. Let's just go ahead and bring
it through here like so. Now again, we can go through
the whole process of of of sculpting like some very
subtle and small wrinkles. So I wouldn't ever go. It's stylized and I
always prefer and stylized to do things that are, how should I say very subtle,
minimalistic, and limited. It's not necessarily a hard
line rule about stylized, but it's, it's just A good way to start
off things with. We want. We can create a trim
for these pants as well. By holding down Control and
selecting your stroke to be holding down
Control and going into the mask menu and selecting
your stroke for occur. To be this. Let's go ahead and
try that again with higher resolutions. Just to sort of give us a
hint that this is like, Hey, this is a, this is a trim. Then now you check out
the other side here too. This is kinda like
one of those things. So if you're due at your
own cost because it's not going to really be
seen too much on here. But you can do the back. Then we just kinda go through, okay. Let's go through the Move brush. Ring the guy in. I'm sorry. But just to give it sort of
like a an illusion of parents that this is a this has got trims just like the
jacket does to help us out. Same thing over here. Something real simple, real easy. And then we'll just kinda solo, bring this guy out. Like so. Your choice if you want
to put a zipper on there. If you do want to put like maybe a quick little zipper,
one quick trick, you can always use
this brush and then go into like slash. Let's see. Where would
the slash be on here. Wants to smash. Usually slash two
is what I go with. High vocal shift. You can melt a zipper
into all of that as well. Ideally with this, if you do go the route of a zipper
in any way, you can. You can. I would hit the wall. I put it, the lazy mouse, the L key for it. And that would help a lot. I wanted to do this
without the zipper though. Just to kind of give
you a little bit more of a blank canvas to
work with sultan. Know, like make sure we're smoothing this on
a fair resolution level. Make sure we get a good
amount of super smooth. Just some very subtle,
something like that. But like I said, feel free to experiment in this
as much as you want. You can do a whole bunch
of things you can do like this and something like this. This is like I said,
your character. So it's kind of up to you on
where you want to take it. You know, kinda like it just sort of like
a boxers scenario. Who's thinking of actually
putting a little bit of a checker boxers on him, but we'll see how
it goes in there. So from there we got the hands, we got the legs and the
feet all taken care of. So what we're going
to work on is a little bit of a staff and then after that we'll finish
off with our platform. So that said, stick
around and stay tuned.
21. 19 Creating Staff: Okay, Let's continue in this video now we're
going to create a little bit of a staff here
for our character to hold. And it's going to have some
buttons attached to it. So let's go ahead and get
started with this first half of making this staff by just
making the little staff itself. So like, kinda like
how we did before. We're going to append in a cylinder just like this
little round area here. Except this cylinder is going
to be slightly different. And whenever you
impending sub tool, It always comes to the
bottom of the sub tool. Let's hit the W key and
bring this one out. Now. So let's just go
ahead and scale this down. It's gonna be really
thin and well, it can be whatever
you wish it to be. But I'd like it to be
a little bit thin. Probably something
like that, maybe. Something with a little
bit of headway for it. And probably put it
like right here. The idea I want to
have on this is that it shuts and angles
out a little bit. But before I do that, let's just go ahead and kind of crooked it
up. Make it crooked. Alright, so see here, first thing I'll do is
I'll give it a couple of subdivisions and then maybe
just smooth it out here. And I'll just go ahead and make a mask and
kinda just crooked, make it a little bit crooked
here with that mask. Just kinda bring it like so. And like that. And kinda see that. It's just kind of a
crooked little piece. Reset this guy. Bring that back up again. Some peace. Q and I'm just kinda
going back and forth between this and what
I'm making here. It's just making it a little bit slim, little bit crooked, and hitting the space
bar to smooth it out. So now from here I'm gonna go ahead and add some volume to it. So I'll give it one
more subdivision and I'm going to add a
little bit of volume. And for that I'm going
to use the in-flight brush just gently though. So b, i for, inflate an n to
complete that key. And it's just sort
of a, a, kind of a, you might need to turn the
intensity just a little bit down just to give it a little
bit of inflate our way. We can just kind of break
this down a little bit more. You can feel free to bring this in any
way you want just to kind of give it just
a little bit of inflate in areas that way. When we do this
in sculpted down, it will be a little
bit easier to manage and it won't collapse completely in this in Excel. Okay, So now I'm
just going to hit the B key and I'm going to look for something
called high polish. And a high polish isn't
something we touched very much. It's definitely a
hard surface brush, but it can also be used in certain circumstances
if you're skilled enough with it to
sculpt stylized wood. And this is going to be a very brief intro to giving you an idea of
what that looks like. So let's just go ahead and select our high polish
brush, which is there. So that's B, H P
for the three keys. Take your time on this one. This is very much You just taking time to see how you see those little
lines right there. That's what you
want to go for that You want to kinda take away the look that this
is a rounded object. You want to remove that. So now just kind of do very, very quick small
strokes on here. Kinda helps with,
you can kinda see how this can kind of bring into like something such as stylized would little bit here. All right, So it's kinda, kinda filling out a little
bit more here. Again. That's all we need. So
now that we have that, let's just go ahead and
center this sign here. And let's just finish
by just placing this into our character. If you want, you can kind of
shrink it down a little bit. There we go. It's probably an
angle I'm happy with. Just bring it in
through here, like so. And then I'll use the
Move brush to kind of make that bottom piece kinda. And so don't forget, move is a great way to kinda
finish off everything. Like so. Alright, so we got to our piece, so let's just put a couple
of buttons on there. So that's gonna be
our next lesson. So we got a little
wooden staff there for our mushroom monk slash hobo. As so, let's go
ahead and move on. So stay tuned.
22. Making Buttons through Booleans: Okay, So let's finish
this character out. We're going to put a couple
of buttons on here to finish the character out
and just kinda prop them onto this little step here. And we thought this might be a good opportunity to
cover for the beginner another ZBrush feature which
will be live Booleans. Now we've gone through a
lot of different features. Live Booleans we dipped into very briefly in the
first time or section, but now we're going to try
to put it to applicable use. And so to do that, let's first of all sculpt the initial shape of the button. So what that means
is like we did with the staff here where
we brought a cylinder in. Let's go ahead and
do that again, where we hit a pen and bring this time a
sphere 3D in here. It's gonna be at the
bottom of your sub tool. It will be probably
tucked behind this head. So I'm just going to
bring this forward. And just for now, I'm going to go ahead and go
into solo mode right here. Additionally, you can go through and turn the sub tools off. And I'm just going
to hit W to bring up my gizmo and scale this guy
to be a little bit flat. Now, from this point on, I'll hit Q and hold down
control and select for stroke my drag or I'm sorry, my circle stroke, not My Drive rectangle
but my circle stroke because I kinda want to
give you a little bit of a heads up feature that you can modify the
stroke by going to center. And what that means is this. If I draw something out, it comes from the corner. If you can kinda see kinda
in it's sometimes hard to kind of pick the right
spot and where this goes. And that's why sometimes using a spacebar trick
which we covered again in the Mask
section and isolate select is very helpful. But another way that can be helpful is turning
on this center key where you just go
simply straight to the center and drag a
circle in that way. So utilizing that,
let's go ahead and hit control D couple of times to get to a couple
of of subdivisions. In fact, I'll do one more. And you don't normally necessarily have to
have an Alpha on there. So you can kinda just leave it blank with the
alphabet turned off. But try to drag in a rectangle. And if you want, you
can release control but still holding
left-click and then just simply hold
spacebar down to kinda get yourself a nice
little clean spot right there. Now, from this point on, I'm going to soften the mask. I may even hit Shift D to a, soften the mask a
little bit more. From this point on. All also kind of turn the mask off there. That's holding left,
Old Left option. And I'm gonna go ahead and just simply press this
button in. Like so. So it's kinda like that. So that's kind of
all we're doing. And then from here, we can do a couple of things. One, if you wanted to kinda
push up a little bit more, you can do that several ways. I mean, you can just kind of give it a bulge and
then just kinda push it back like that if
you want or you can go with inflate and poof
it out that way. That's also an option. There's no such thing
as the wrong key, except failure to experiment. From here. Now, once you get
this kinda situated one, what we'll do next
is we're going to do a demonstration of
making a boolean. A boolean is what it is
broken down is where we use the mesh of one object's mass to subtract away from
another meshes mass. So to give you an idea, I'm gonna go ahead
and hit append. And I'm going to choose
a cylinder, cylinder 3D. And you can't really see it
because we're in solo modes. Let's turn solo mode off And let's also bring
it up a little bit. I'm going to divide
this cylinder up a few times, like so. And then I'm going to
go through geometry and hit Delete lower. I'm also going to
click on here and delete lower this geometry. So now I'm just going to
rotate this cylinder, going to really lower it down. And let me give you a
demonstration of how this works. What we're gonna do is
make this a Boolean that's going to cut
through this piece here. To do that, we need
to enable two things. First of all, we have to
turn on Live Boolean, which is up here. Additionally, run
in the renders tab, you can access
Live Boolean here. And then finally, we have
to tell this sub tool. This is the one we want to make Boolean under Live Boolean mode. So let's go ahead
and click that. And this is the
cutaway intersection. You will see the mesh
disappear, but don't worry, you can still see it again
if you hit the Shift F, which is kinda hard to see, but it's right there. So if we move this through, you'll see a cut right
through, like so. So let's go ahead and
build off this concept. I'm just going to kind of make this a little bit small,
break it through. Maybe something like that. Do you guys remember when we did the F4 button or
the duplicate mesh? Well, because this
is a live Boolean, we can do the same thing here. Then. Don't forget to draw
masks to clear both off. Like so. Now, Right now all this
is doing is merely projecting the look of a button. If we turn this off,
nothing really happens. So we got to turn
this into a Boolean. But to do that, we've got to turn
everything here off. We're going to turn off
all your sub tools. And that has a lot to do with the fact that if we made
a Boolean out of this, this whole mesh would
be included as well. So let's go through
our sub tools. Disable the visibility
of everything. I know we gotta go through
and disable everything. It's not so bad once
we get through it. Alright, so now we're
on justice piece. So now that we have this piece, let's go ahead and turn
it into a boolean, which is very simple. First we select the button, then we go in the sub
tools to where it says Boolean and we simply
hit make Boolean mesh. Now, before I hit this, one should keep an eye
out over here where it is because the Boolean mesh becomes its own little tool
stored out here. It's going to go ahead
and do a union mesh. And you'll see right there
our piece is created. So now if we turn off everything and append this piece into our 500s sub tools
that we have so far. You'll see it at
the very bottom. So now we have our
button and it's got its mesh on there. Cool. So now that we have that, let's go ahead and yeah, you probably guessed it. Let's turn everything on. It was a pain. I now we'll go through in
return everything back on. Like so. All that's left now is just going through and putting
this button on here. Now, we'll just go
ahead and delete these two meshes since we don't
really need them anymore. And then don't forget to hit this upside-down teardrop
to center it on here. So now that we have that we can kind of put
a button on here, I'm going to want to probably have maybe
like a little tether or something on this mask. So like a little ring that's
similar to our necklace. Nothing really too crazy
or anything like that. Just something that can bind
all these guys together. So what we'll do
for that is we'll go through and we'll append. And we'll bring in, and yet again another cylinder. Bring that guy in here like so. Really make it then and
really stretch it out And then let's just go
ahead and go through our deformer and do a bend arc. Remember it's the green cone. Once we hit Accept. Let's go ahead and give it
a couple of subdivisions. All right. Let's recenter the point here. This is all just about
giving a little bit to give him just a little bit
more detail onto it. Not happy about the
length of that. So let's do the undo bar and bring this guy a
little bit more wider. Fact, it probably should just kinda bringing in like this. See what that looks like. Yeah. That's fine by me. So kinda redoing
what I did again, trying to get this looking
just right for me. You can scale it like that. Boom. That's what that one. Here we go. No hold left Alt, left-click, and just kind
of bring it through. You can have it go through a whole bunch
of different ways. Including one way of
just having one of maybe the holes go through here. Like so. Then duplicating the mesh. Gonna see it's just sort
of coming together, but it's a little
bit of a process. Because if I can't make this go through and
might just have to go through the process
of just dealing with one. I'm very close to doing further down. Excel. So I'm going to
hit Control W. So these are two
different poly groups in case there's anything
I want to edit further. But now we got ourselves a little bit of a
button going on, a couple of buttons. So it's sort of like his staff. So now that we have
that all taken care of, the next lesson we're gonna go over is gonna be
the environment, the whole background,
the platform. He's gonna be on, just
some basic, simple stuff. And from there we'll
talk about rendering. So with that said, stick
around and stay tuned.
23. Sculpting Rocks through Noise Masking: Okay, so let's continue. In this video, we're
going to begin by making our environment, starting with sculpting
some rocks out for you. Also, it will be helpful to know that since we have
finished our character, let's go ahead and put these sub tools that we
have here into a folder. Now we would never really gone over folders and sub tools. So it kind of is
that continuation. So first thing I'm gonna do is go to the very top sub tool. And I'm just gonna go
ahead and under sub tool, I'm just going to go down
here to where it says new folder and I'm going
to call this mushroom. And then from here, I'm just going to drag the fold, all the sub tools
in here like so. And you can kind of see this
vertical line a denotes and signifies a folder that it's
in the folder structure. So let's just go ahead
and bring this through. Scroll down a
little bit further. Like so. And we're almost done. Perfect. Now we can
collapse this folder down. And now we have cleaned a little bit more up
on our character. So let's move on. Now that we have
that taken care of, Let's go ahead and append a yep, you guessed it, 3D sphere. And let's turn the, let's click on that
sphere and turn the visibility of
this folder off. So now that we have this sphere, one of the first
things I'll do is I'll just go ahead and maybe just hit the R key and stretch
it a little bit like that. I don't ever like this little
convergence of topology. So usually I like to
DynaMesh something. So nine times out of ten, I'll just go ahead and
just hit Control D and divide the mesh just to smooth it out and then
go under Geometry. And DynaMesh hit now and just kinda give ourselves
a little bit of a smooth rotation right here. So now we can begin sort
of sculpting our rock. Now, there's a lot of different ways a rock
can be sculpted. This is one of many ways. This is definitely a
way I would start if I was ever doing stylized rocks because it tends to look have
a cartoonish feel to it. So one of the brushes
that I found to be a very good one and it's
a little bit old school. If there's anyone that's
familiar with it, is a brush called trim dynamic. Now it's not one of
the main brushes that we would use, which are, again, brush Clay Tubes, brush, standard Move brush,
Dame standard brush. And I'm forgetting one and the high prop and
the inflate brush. I wouldn't bring those as the
most commonly used brushes. Robots still. This is one I kind of like it's all the way to
the very bottom here. And if you hit b, t, d, you'll get the
quick key for that. Now that we have this, it may feel you may
get a little bit confused on which
the top side is. Just go up to your
head up here and you can reorient
yourself like so. If I take a shot at this, you can kinda see how it works. It's kind of a, we want to sculpt this
into quadrants like so. You can kinda see how it pushes in and creates that nice
little crease there. And we kinda know that's
kinda what we want. We want to put a crease into these areas here and
create a lot of randomness. And you can make your own interpretation
as much as you want. And it is yours to work with. And make, just make
sure when you're doing this to have fun,
take your time. Definitely something you
would want to do with a webcam tablet just to enjoy. But you can also see how we can kind of go through and
find all sorts of fun shapes. If there's something you
don't like in the design, like maybe that little center
spot you can kinda make it disappear through sort of a by pushing into
the adjacent areas. Make sure you take one
stroke to smooth it out. Kind of just see I'm having
fun just being random You can also experiment with, of course, it goes without
saying different sizes. Get yourself something that's fairly representing
to what looks. I would say like a beginning, start to a stylized
looking rock. Now, when we finish
going through all this, it's not going to be
okay. We can put it down. Hey, mean you can, you can use it in this format if you want. But one thing that we're
probably going to do then is we're going to go ahead and kinda put some
textures on it. It's rock. It can have
imperfections on it. So once you get it to
a spot that you like, if you are that you
are comfortable with, you can then go to
a new function. We did a little bit of this function when we're
doing the mushroom cap. But I guess we can actually explore a little bit deeper into this and that's under surface, hitting the button noise. And that gives us an
interactive preview. And if we bring this in, it's the same rules over here. You can kinda move everything
like you do normally. And the two most commonly
featured dials in this little edit
bar is going to be the noise scale
and the strength. And that's where I would
start if you are a beginner. So let's go ahead and
rotate this around, see if we can find ourselves a fairly apt representation here. Something like that. That's good enough for me. And let's start
with noise scale. And you can kinda see
a consistent noise that's applying
across everywhere. Whoops, I accidentally hit noise magnify if I bring
it all the way up, like so you can kinda
see what it does. Now the strength is up to you, but I start with a that's like the strength is essentially like
the intensity, how deep those cracks
and crevices go. Then down here you see this
diagonal half checkered, dark half checkered
light shaded area. This is an area that
helps you find, tune the crevasses and to look for some
interesting shapes. It's something that is, in my honest opinion, not easy to get on
your first try. And it's also something
that I would probably put as you got to just practice it a little
bit to really grasp it. And if you ever get stuck or
lost 31o delete something, you can just hit the reset button and you can
just take it from there. One thing I just like
to do is kinda draw in extra areas for these little
cracks, crevices here. Give myself something that
I'm working with here. Just to kinda see what I
can make for a rock shape. It's not very much something that I would call exact science. There's a little bit
of a method to it. So like this could be
like one type of mesh, which could be fine. If you want, you can reset
it and you could just sort of make this
kind of a mesh. You just have to play with it. You just got to have to work
with all the fun features. Like Here's another fun one. I kinda like this one
a little bit more because it can give us
some flat surfaces. But at the same time, I also kind of want to make it perfectly
flat, but just right. Then we can tweak
the intensity a little bit further
down if you want. Kinda see like an
intro area to Iraq. And this is sort of
like a beginner state. And we can have like
a little bit of a rock looking
texture out of this. Now, if you apply to the mesh, it's gonna look a
little bit different and you'll have what you want. But normally, the
representation on here and the intensity
are two different things. So one thing I'll do, I like to do is depending
on how much is mast I like the test to ground by something called mask by noise. And that will sort of give
us a like a little bit of a an opportunity to do manual sculpting on it
with what was masked. So if we kinda go
through and hit B, C, T and change your stroke
to something like spray or dots and then
turn off the Alpha. We can maybe hold
left all to push in. We can kind of move around
and see what we got here. We can just kind of do
something like this. If you feel that it's
a little bit too soft, we can also sharpen the
mask a little bit like so. Start off with
something like that. Now, you can reapply what
you've learned already. And you can then also do
an additional applied to mesh to kinda
get to both areas. But I kinda like to
go through the mesh and just have a little bit of fun just experimenting with
all the different types. Like sometimes I'll
just do something very standard hit, Okay. And then a mask by noise to
see what that looks like. And then sharpen the mask out. Like so. Even sometimes I'll
invert the mask and then repeat the
same process again. So like I'm kind of
bringing in everything. You can kinda see, smooth out these cracks and then kinda maybe I'll push like this to be the
area that I push in. So let's go ahead and invert
the mask and put it like so. Then what does this look like? Well, too much noise. So maybe I'm just
going very light. Too much hair cell. Let's just start it
out here too much. So we'll just push it in here. Kinda just using the
inverse mass to find areas I liked, don't like etc. So you can kind of make
yourself a little bit of a mask already, like that. Now, if there's any areas you feel like maybe you left out, you can just kinda put
another mask on there just by simply hitting me. Look for it. Strength
of the mask. No, I don't want that. I can go through and
just change the noise, plug the scale, and
then once again, mask by noise, sharpen the
mask, invert the mask. And we can just kinda
put something in. Like so. You can do several of these pieces like a one
can be done like this. And then we can just
simply duplicate that. Go back to the one with
the history bar here. And just simply, if you want, you can stretch this guy out. Maybe you can have technically a completely
different looking rock like so. And duplicate that one off. And I'm going to of course
turn off the I'm sorry, the pieces, the viewports. And maybe like this. And you know, you can do
a whole bunch of them. So we have now like a
few rocks that we made. But one last one I
want to go over. This is one that I feel is a little bit of important things since
it's a beginner class. We go through all sorts of
different features and we try to use every video to
talk about something. Like In this video we
talked about noise plugs. We didn't really talk about the insert mesh brushes
and that's what we want to conclude to sort of get
you into a final thought. You can also insert brushes are basically
pre-made models that are inserted onto the mesh. Let me give you an example. Let's go through our
spot or lightbox, go through our brush, and let's go ahead and look at our insert multi mesh brush. Now, I'm going to click
on the brick here. If you look at all of this, you can see all the
different types of bricks that we can use on here. Including a little
bit of a fun Claude. And if we left-click drag, we can drag in a
whole nother rock. It's a little bit
different because it's a pre-made model and it's different from the
model that I made. But if we kinda turn in
that spotlight once again, you can see bricks as
another choice and you can see all the different
bricks you can bring in. Like here's one brick. This one was done
pretty well and has a nice looking
sheen around it. Similar technique of what I did, but it's in the form of a brick. So I could probably do
the same thing where I kinda trimmed dynamic
the same thing. It's a little bit less debited. But if you ever wanted to do an insert mesh brush to
add to your environment, you can definitely do that. Notice when you draw
an insert mesh brush, you have to have a
couple of things done. First, you gotta go ahead and understand
that this is still technically being
done in one piece. So to separate this
from this mesh here, we have to go through sub tool split and then
hit split unmasked. And what that's going to
do is that's going to put this in its own little sub
tool, like you see here. Of course hit the center point, but it's just something
to keep in mind. So if you want to use
that, that's fine. We're not going to be making a whole bunch of
insert multimethods, but we wanted to give you an
opportunity to understand the different brushes and the different options that
are available to you on here. So with that said, we're going to
conclude by moving on into creating a platform with some dirt that we can place
some of these rocks on. So with that said, stick
around and stay tuned.
24. Sculpting Dirt Ground: Okay, so let's begin our platform and
sculpting out some dirt. So what we're gonna
do in this lesson, we're going to create a
little bit of a platform and a dirt mount for this guy
to start on which we can build our foundation to place all our props
in including grass. So let's just go ahead and
get started with that. Now, the first thing
I'm gonna do is I'm going to append a cylinder. I'm just going to
left-click on here. And before I go any further, if you look in my
sub tool section, you're going to see I've
placed all the rocks into a folder to kinda keep
things all nice and neat. So moving on, I'm
just gonna go ahead and left-click on
this guy right here. And I'm just gonna go ahead
and just simply bring it in. What I'm doing is just
kinda giving myself a little bit of a foundation
platform for him. You bought a couple
of divides on there to smooth that out. We're just gonna kinda, I may put this a little
bit below for now and then see how that may
make that slightly bigger. Actually, that's a
fine size for me. So let's just go ahead and
thicken it up and see if we can sort of duplicate this mesh. And we'll make this
one go right below. And just kinda like that. So we got something started. Now, I'd like to go ahead and
append another primitives. So we'll put a sphere in here, like so, and will bring us sphere up just for now, up here. And if I hit Shift F, I'm gonna go ahead and
rotate this around. And I'm going to take half
this sphere away because I really don't need two sides. I'm just going to kind of
go through half of it. Like so That's
really all I need. And then I can just
delete the hidden parts. And again, we did it once, but let's just review
to delete hidden, it's Geometry, modify
Topology and delete hidden. So we can have a little
bit of a smooth area here. And if you want, you can also mesh the whole piece so
it's a little bit smoother. Like that. I don't mind it being one mountain
though I'm not going to lie. So I might just
leave it like that. So let's go ahead and this mound here is going to
function as our dirt clods. So I'm just going to make
this a little bit bigger. And then I'm going to scale
this just a little bit down and just kinda put it right down in
the center there. And just kinda expand
this across, like so. I may even flatten it a bit. Now, this comes down to a
little bit of readjustments. Like for example, I may bring this mount a little
bit lower down so I can make room for the mount or the
platform a little bit down. So I can make room for the mount a little
bit more and give it a little bit more
thickness to see. Maybe something like
that. That might be it. So I'll just kinda
bring it through. And you can kinda see I'm just kind of size and everything up. Kinda like so. All right. So once you have that
taken care of and you got to your mount
all established, let's go ahead and give that little mound there a couple of subdivisions for
us to work with. So from here, I'm gonna go ahead and start with
the brush standard, which is your basic
brush just to kind of what the goal here is to sort of break this all up
is sort of speak. And that's the only
thing I'm doing here. And if there's any adjustments
you want to go through the whole process
of making sure it kinda blends into
the lower platform. So kind of work with
that a little bit. I'm just gonna
kinda work at very, very slowly, very gently, and may even do my final
adjustments on here. With the Move brush. Just to the whole
idea is, is like, like for example, this area
right here, the whole, the edges that
you're seeing here, they all just need to
be broken up a little bit so that it kind of gives the illusion of
just a little bit of an uneven surface for
you to work with. Kind of see how I'm doing. It's just kind of a bit of
a chore, but, you know, then I'll maybe do my final adjustments with
the Move brush and use that left Alt to kinda bring things out a little bit more. Kinda see, kinda like that. This is still a little
bit of a chore, but it's all good. Just wanted to give
a sort of indication of sort of a dirt
mound indication. Then from here, you can go to your your higher subdivisions and go back to that
brush trim dynamic. And you can go about
also just kind of taking your time to break this up
and create sort of like an, a little bit of an
angular look on here. That can also help with
the a, look a little bit. You can kinda see how it's
given us a certain look. So it's not, it's not just something you
can use for rocks. You can also use this for like patches of
dirt, for example. And just go ahead and cycle
between the three brushes, move standard and trim dynamic
and just kinda go about, Let's see if we can make
our adjustments there through and see if we can little bit more
of the pouch area. Alright, so kinda have
a little bit of this. If you want it to
be less, more flat, you can just bring it
in like this and kind of make it come up like so
you can do that as well. But once you have
all this taken care of and you've done
your final touches, we can kinda compound what we've learned about
rocks and just have some fun experimenting
again on surface with noise again and just kinda
seeing what we can flush out like
we did before. And now it's, it's really
something that you just gotta kinda play with
and have some fun with. Like just giving you
an idea to look for patterns on here that
you might enjoy. Just feel free to kind of
look for some sort of scale. Ron right here could be an
interesting looking scale. And you can just kinda hit Okay, and see a little bit of that. Of course, because we have
small division right here, it's not going to be
the best projection if you hit Apply to mesh
and it's not too bad. You just wanted to kinda
give it a extra amount. Another thing you can do
is just a mask by noise again and bring it all in through that same
pattern that we did before. Now, feel that too. It's too soft or
anything like that. You just kinda undo it and just bring it in
another way like that. Now, you can just keep
reapplying the noise or edit the noise and hit reset and do something like maybe
a strength to be here, scale to be something like that. Maybe it okay. It's more just experimenting to see what something
looks like. So once you go with all of that, I would say just make your final finishing
touches on here. I'd like you to try to get a good amount of real
estate in all of this. So you can actually make
room for things like rocks or grasp or grass or
things like that. Just the kinda have
some fun with. So with that said
in the next lesson, we're going to talk to you
a little bit about grass. So cigarette and stay tuned.
25. Introduction to Fibermesh: Okay, so let's continue in this video now
we're gonna go over fiber mesh and utilizing techniques we did
regarding surface noise. Show you how to apply
fiber mesh into the, a new combination of what we just learned to something
new that we learned. So let's go ahead
and get started. Now, first off, before we
wonder what is fiber mesh? Fiber mesh is sort of like ZBrush is built-in
hair rendering system. It can also be used for grass. And to give you an
idea how it works, I'm going to go into
solo mode here and show you this piece. And we're just gonna go
to the right here and look where it says fiber mesh. And if you want to enable it, just simply hit the Preview key. Now, as you can see, it's showing like a
dark little fuzz. So if you want to really see
an actual preview of this, you can just go all the
way up here where it says BPR and hit BPR rendering. You can see everything
that you see there. Now, it's kind of a little furry to qualify for wrap grasp, but if you want to turn it off, you can turn it off. But remember, preview is sorted, just giving you a preview
of what it looks like. When we are done
modifying the grass. We then go through the
process of hitting except to turn it into a sub
tool to which we can sculpt. So another thing that
I want to go over is, is there are several ways
to apply fiber mesh. One of them is going to be mask. But before I cover that, let's go ahead and talk to you
a little bit about some of the parameters under the
modifiers of fiber mesh. Now, you see a whole
bunch of these sliders and you're not really sure which one to go off of
and what these all mean. So since this is beginner, we're going to just highlight the ones that are
most important. Now, the first part
is the max fibers. This dictates the number of
fibers that we see in here. And it's a good way to do some fun little testing
if you kinda go through, you can kinda see
a demonstration. When I turned down
the max fibers, we saw less fibers. Of course, if we go
through a render, you can kinda see
what that looks like. But also something that's incidentally very
interesting is, is that if I just leave fiber mesh on this
way scattered throughout, take note at the density
and number of fibers. Now, if I turn preview off
and hold down control and simply just do a quick
little mask right here. And then turn Preview on. We will see probably a
denser group of fibers. And the reason that is is
because these fibers on here, they are scattered
evenly across here. But if they're all bundled up into a small little mask,
you're going to see it there. So to compensate that you
got to work with the fibers, max fibers to get something
that's interesting out. Now, having said that, moving on, let's go ahead and just go back
into preview again. Another thing that's very
important is length. Length is a sort of giving
you the length of the fibers. You can kinda see
a little bit of fur hair out of all of this. And finally coverage. Well not finally
coverage kind of details into sort of like
the thickness of the fibers. We decrease these fibers a little bit and then
turn up coverage. You can see what I'm
talking about here. It kind of gives us an
edge extrusion thickness. Now, moving on, if you take NO to how these fibers are all kind of divided up into like an insert edge loop here
and insert edge loop here. And it seems almost
like there's a plane, well, down here where
you see segments. You can change that. Now. Drooped down so you're
going to have to go ahead and work on
sculpting that backup. So I'm just going to go with just a kind of a simple
default right there. Now, these other
ones like gravity. Gravity is something that less gravity the higher it goes. But the only other
thing that I'm going to talk to you about before
we get into this, is that you can
change the color. Let me go ahead. First of all, turn down
the coverage and make these guys thin
again and maybe give A few more of these. If
you take a BPR render, you can kinda see the
color of all of this. But if you want to change
the color like say white, you can change the tip
and the base to white. You'll see sort of a lighter looking representation for hair. So that's kind of a breakdown of all the important modifiers
that you see there. So pardon me. What we're gonna do
next is we're going to put two levels
of fibers on here. One will be for like
little nooks and crannies in here using
this surface noise. And then we're going to paint
a little backdrop area. So let's get out
into solo mode here. And let's go ahead and
turn off the preview. And let's go through
and hit surface. Click on noise. Hit Edit. Let's go through here again
and do what we always do. Maybe start off
with a high scale with something like with a
very subtle strength and mess around maybe with the whole
of the the curves here. Just to kinda have a
little bit of fun scene. If we can find something
interesting out of this. And if you lose it a
little bit, that's okay. Maybe something like that. Just kinda bringing it down, just building off of
what we did before. We just haven't done
anything different. Now we're getting
that projection. But I want to use a
mask because again, fiber mesh relies on masks, not actual projection sculpts. So let's mask by noise. And if we put fiber mesh on now, it won't really do anything. It's just gonna kinda
go through and give us wherever you are. There's areas mass it
will project fibers onto. So let's invert the mask
into all these areas here. And then just for
kicks and giggles, let's see how fiber
mesh handles it. Turn on preview. And we can kinda see a little
bit of a preview on this. Let's now going off of what we went over
with the parameters. Let's apply it altogether. So I want to make
this particular group let, let lot shorter, but at the same time, a lot shorter but at same time
increasing their numbers. So like for this, for example, let's do a BPR render because we said that's what puts it. And you can kinda see already
the fibers are showing up. Now since this is a
white background, I might do something
like maybe go with a slightly darker color of hair because it might contrast a little bit better and
be easier to see. You can kinda see it like that. Alright, so let's just
go through fibers. Just maybe, let's just
go ahead and maybe just add a little
bit less fibers and do slightly wider coverage just to see what
that looks like. And it's all just a game of just seeing what
it looks like. Let's work around the gravity and maybe turn the gravity up to kinda angle out these fibers so they're
not perfectly straight. I mean, grass can be
perfectly straight, but so we have a little bit more of an
easier time with grasps. So I'm okay with this. I'm just gonna go ahead and
maybe give it a little slight tweak on the length and
then just hit accept. Yes. Now when you hit Accept, you'll see a new sub
tool shows up here. And of course, if you
want to see it again, you can just hit
that BPR render. Now, let's just
repeat what we did and kinda create sort of
like a back area right here. So what we'll do is, is all just kinda create sort of like a little back area here for fiber mesh to
kinda come out on. And then we'll go
through and we'll have fiber mesh again by
hitting first preview, changing the length to
something a little bit easier. And maybe I'll make the
tips a little bit wider. We can kinda see a
demonstration of grass. Now at this grass, I can say probably is going to be a little bit
too high on the coverage, so I'll just lower that down
and do another preview. Yeah, it's a little
bit more grassy. That grass likely To this point, now that we have a little bit of a,
some grass established, this could be a good
time to go over and end with explaining things like, for example, the, the grooming brushes that are in ZBrush to help form the shape. If we take a look room
brushes are here for you. You can do, for example, Hair toss if u, which is a good one for like. First of all, I have to go
ahead and make this into a fiber mesh and then go through sub tool and select
my longer hair. We want we can manipulate
grass a little bit. If it gets a little tingly, like you see here, that's because of the
fiber mesh segments, which is down here is low. So higher segments will
mean less tangles. Please feel free to experiment as much as you want,
including groom lengthen, which gives us a sort of
we double-click on that. Sort of a groan lengthen look. Then from there you can do
something like groom spike. But that won't behave
like anything. Fiber mesh though,
which is probably a kinda just see how that works. It just indent doing BPR render. You can kinda look. You can manipulate
things different. Now if I wanted to do
like for example, hair, one thing I would say
is I would turn up my segments because when you try doing
things like grooms, spike, you can kind of see
how it tangles like that. And segments helps with
that a little bit. So this is now where you
take the time to sculpt your character and your
grass as you see fit. Maybe you have different
variants of heights. So again, you would
go through groom lengthen to get there. Now, clump it in a little bit. You can certainly do that
if you want to have it, like go straight up. My opinion the best
one is the groom. Hair toss. That
one always resets the hair just exactly in the
direction that you want. So you can do it IPR render
and see how that looks. But honestly, I kind of like just having the grass be like that just a little bit. I think that kind of gives
me the look that I want. So with that said, that's how we do fiber mesh. That's the breakdown
for the beginner. Alright, so there
was a lot more to cover and what my teacher
always said again, push buttons, learn
push buttons, learn push buttons, learn. You've got to be able to take that step to go beyond the
confines of the video. So we've given you
that map guide. It's up to you to drive
and explore further. So I hope you do have some
fun with this and we've given you a good head start for you to explore and try all
sorts of fun things. Maybe you want to
have, for example, a grooming lengthen of
different pieces here. You can do that, which is once you to experiment
and do your own thing. Now, from this point on, we're going to go ahead and
show you a little bit about decimation master and how
to reach apologize count, size and rocks so we can read, duplicate the rocks across here. And then from there we're
going to go over to rendering. So that said, stick
around and stay tuned.
26. Prop Placement and Decimating Meshes: Okay, so let's continue
in this lesson. We're going to go ahead
and just finish up by putting our rocks into our place and also do a quick
breakdown of decimation. Master that final step you do before you want
to just in case, export a high rose out of ZBrush and bring it
into another program, such as read apologizing
programs like Topo Gun, et cetera, so forth. So let's go ahead
and get started. First things first,
I'll go ahead and open my folder that I had originally put in, which is for that I have my rocks put into and
I'm just gonna go ahead and select one of the rocks here that I did and
bring that forward. And you can kinda look
at the poly count. Now, this is already a
pretty low poly count. But to give you an idea of how ZBrush war decimation
masterworks is. It reduces the poly count of it while still
preserving the details. It doesn't mathematical
computation of rearranging everything to a more
efficient mesh. So first of all, to give you an idea, go ahead and make sure
we in the right area, I'm going to click on Z plugin. And I'm going to click on that upside-down arrow
and dock that over. And then I'm going to
click right here where it says decimation master. And the first thing
we hit is going to be preprocessed current. And what that's going to do is pre-process the sub tool here. So we can do that. And because it's such a low mesh with this amount of points, you can get a pretty
quick result. Once that completely goes
all the way through, you can just simply
hit decimate current. Now, if you look, you saw that it
changed a little bit. So it's alright to do this, but Just don't do it a couple of times because eventually you
will start to lose detail. One thing I will say
about all of this though, is, is I'm not
going to duplicate. I'm going to I just wanted
to show you how that works, but now that you've
seen how it works, I want to show you something. Hit the R key and
kind of stretch it. You begin to see all the little areas
that are decimated down. So I'm gonna go ahead and
just keep it blank like that and just kinda go
through every rock. And well, basically I'm
just going to go through and put some rocks
in here like so. Some of them I'll
put on the ground, others I'll rotate around
and change the scale of them like so and just kinda place them
in random spots. And I'm using the mesh
duplicate for all of this. And remember when you're
duplicating the matched by holding Control and
trading the Translate key. And now it's going to create a little bit of geometry
that will eventually tax in. So bear that in mind. So we're just gonna
kinda go through and it probably would be wise
to always scale about. And I'm just kinda get a good head start
into all of this. You can do all do that guy last. If we're if we do it, I only wanted to show
you the demonstrate. Here's another one we can do. We can just bring this guy in like so and
you can just see I'm just filling in areas with this
rock like it is right now. Another thing we do is
just create sort of like a clump of rocks, which can also be
good to do just to kinda get the atmosphere of the whole area here, like ECE. Let's go ahead and turn on
that rock that we did here. This guy right here. We can kind of, once
this is turned on, we can kinda bring this through and just kinda
bring it about like so. Maybe make this one rotate
different direction and scale this one to
be a long, longer. You can just kinda see, it's just sort of a process. Just want to take
your time on it. It may feel a little
bit too boring, but it does add up a little bit Just a simple, harmless
saw a little bit of fun. It's a happy rock. Maybe rotate this one. You can just see I'm just being very random
on all of this. Course might be interesting just to see what this
looks like when you just kinda duplicate the
whole thing and mesh and just kinda repeat the whole
process like this. And if you want, you can hit EMT to select Move topology and just bring
these guys and like so. So it's all just a little
bit of it's just meant to sort of give us
a little bit of like a little bit of
fun just going through and having some fun improvising all the
different kinds of meshes. If you do want to
do the final brick, you can always do that. It's not like a big deal. Just got to make sure you choose a nice place for this brick, maybe to bench or some kind. Now, you can decide
where you want it to be. So it's just all meant
to be all in good fun. So this is, you can kinda
see the number of times I duplicated this and see how the number of points
has duplicated. And now we have a lot
more to decimate down. So if you want, you can always
hit pre-process current. And it will go through and
pre-process all the meshes. And then once it completes, you can hit decimate current and you can kinda see it kinda goes down while still
preserving its shape. So that's always
something that is very, very useful, very handy. And so this is going
to be where we stop, is at this point it's
nothing but just sort of fine detail in making
some adjustments. The very last piece that
we're going to work on is just going to be doing
a quick little render. Give you a breakdown
of ZBrush is render and how we can
have fun with that. So with that said, stick around and stay tuned.
27. Rendering in Zbrush Introduction: Okay, so let's finish up. Is it will be the last video of the course you've made it. Alright, so now we're just going to render
this out real quick and go over the
rendering process and give you a crash
course on this. Now rendering has a lot of
depth in every software, ZBrush is no exception. So since this is a
beginners course, and this course
focuses on what ZBrush is mainly known for
digital sculpting. We won't be covering
every single itty bitty, nook and cranny of the absolute smallest pebble
left unturned in renderings, but we'll still be
able to walk away with something
decent by the end. Pretty good in my opinion. So first things first, before we begin, if you want, you can go ahead and
turn on perspective, which is over here. And that's going to give
you a slanted look to kinda give you a
little bit easier time if you want to do
any compositing. But first thing I'd like to do is talk to you about
maybe manipulating the background of the
document and changing the resolution in case you
want a specific image size. So let's do that first. Now, to do that,
it's pretty easy. The document is where we change all our resolution and where we go over things like color. If you see this
color right here, it says document background. Well, you can actually
change that to anything. You can change it to white
and you can give yourself a nice new color
scheme right there. If you're interested in
something like, for example, changing the resolution,
like say 2048 by 2048. Well, we got to turn
this pro constraint off because it will
adjust accordingly. And we can just sort
of click at 20:48 tab 2048 and we can
just hit, resize. And you'll hit yes. You'll see it stretch.
But don't freak out. Because remember the very
first thing we taught in the first time resection Command N and just redraw
it back in like so. Now, 2048 by 2048 is a
resolution of a square, but this doesn't
look like a square. So if you want to see the
full spectrum of this, you would go ahead and just kind of see where it
says zoom over here. Just go ahead and zoom back out. Like so. If you're having a
problem with that ramp, you have no problems whatsoever because
you can just easily go back to a gradient
color of dark if you wish. Just too, to go over and give you an easier
time to see something. So let's go ahead
and zoom out so we can see everything a
little bit easier. So now that we have
this all taken care of, we have a good idea of the ramp. One of the basic and
easiest things to do and rendering is just start
off with the BPR render, which is pretty easy. And by default you already
get a very nice image. But we kinda wanna do a
little bit more than that. We want to manipulate the
lighting, for example. So how do we do that? Well, first things first, let's go to where it says lights up here and
let's dock that over. Now. Right now as it stands, there is currently one light active with this little brush. And if we move it around, we can see all sorts of different fun looking
dark, light schemes. And you can kind of get an
idea of how something works. You can also do the
same thing over here. Maybe you want to put
something like this. You can now see his face a little bit
easier. And that one. Another thing you
can do is create a rim light where if you just kinda click in the back of
that corner of empty space, you can create sort
of like a rim light. And that's kinda need to, if you want to do something like a nice little cool
rim light that kinda goes over the side there. But of course, that rim
lights not going to really be enough in here. You can also change
the intensity. Look at the light
property, et cetera. But what I'm thinking
I'll do is I'm thinking I will go ahead and bring this guy in like so just kinda start
off with a rim light. And from there, once I
have that rim light, Let's bring in a second light. So all we do is just click on a new light bulb and double-click and
bring it in like so. And this guy is going to be a little bit of an aid
in right off the bat. We can now do a little bit
of filling the volume. Now. We could go ahead and try to bring that up
a little bit more just to see what
that looks like. And you can kinda see
already how this fills out I'm thinking now I'd
like to this is kinda the trial and error concept that we're doing now we're
trying to go through and enjoy having to do quick little iterations
of the character. So see what it looks like
from one area to the next. And now it's gonna be
a little bit tedious. It feels like, but
it's pretty easy to manipulate the whole
rim light process. I think I wanted to take
this guy off and make my make my oops. There we go. This here is usually my primary
light, my dominant white. I'll bring him to about here. And then I'll go ahead and take my room
line, put it here. And this is all it is. It's just kind of going through and experimenting with different experimenting with different little color
scheme strategies and see what you can like. It's kinda fun, it's kinda
interesting to go about doing. But if you have one light that's clashing in
against another, one thing you might
want to try doing is turning off the
shadow of one light. That way you can kind of
keep the the second one, the ambient occlusion or the second light
from going through. I kinda like just
working though with one light and just seeing
what I can get from it. Bring him through. No shadow. I forgot. So it's just kind of trial
and error sort of thing. This is already something
I kind of like, I don't mind too much. So now I'd like to kind
of take you through. Again. Rendering is
not something I too, too terribly much matter too. But one thing I do
want to kinda go over is the anti-aliasing. And that's just sort of a thing that we're going to find
as an issue with grass. So let's go ahead and
take a look at that. Kinda see already Let's
turn the super samples up. I forgot to also turn of the detail. That helps us to see it
a little bit easier. So there's a whole, whole bunch of fun
things we can try doing. But one thing that I do want to take your eyes onto
is the Render passes. These render passes
are mainly used for things like
compositing and Photoshop. If you click on them,
you can export them out. And it's something you can
then bring into Photoshop. So bear that in mind. Another thing you can
do on here is try to experiment with
different shaders, like for example,
see what this looks like with a fast shader. If you like that, feel free to go about enjoying just all the different
pieces that you can do. You can also do the
plastic basic material to know and you can kind of get a little bit more specularity
out of all of this. So feel free to experiment and draw out because it's very, very important to kind of go about trying
to find that right. Look. Another thing you
can try is filters. Filters are a little bit
of an interesting BCE. Like for example, they can help with certain things like blur. If we, when it comes to grass. And we can actually have a
little bit of fun with that. I think I'm going to go with shader is my
choice by the way. Or maybe I'll just go
with the basic material, has a little bit more ambient
occlusion I can work with So it's, it's kind
of something you have to take a little
bit of time doing this. There's a lot of
forms of rendering. Lot of different softwares
that have rendering. If we want to be honest. It's sort of a,
you pay for what, you get, what you pay for. So like for example, Maya is an expensive, expensive bees, but
it has Arnold on it. And it's probably
one of the better renders out there amongst them, even more so than IRA. But then again, there's another one called
marmoset tool bag, which has been mainly
known for rendering. Such that two is a like a possibility that you can bring
yourself to enjoy. I personally like to use. If I had a choice,
I would probably go with the marmoset tool, but I'm sorry, the Maya Arnold. That's not something
that everyone has. So you can still go with this. One of the biggest issues about a rendering with this
is there's not really a very good they have a very wonky animation turntable that is very difficult in non-intuitive to
animate motion in here. So it's a little bit tricky. But then again, this whole
thing that we're looking at, it's mainly for a concept of trying to work with and enjoy sculpting this
whole software, this entire ZBrush software. It's mainly known for
digital sculpting. And these things that you're
looking at right now, they're more like extra
side features that kind of accumulated lead got
implemented over the years. So that's kind of
why we're focusing mainly on the sculpting
part and not the rendering. But I can tell you
from my experience that this is my rendering. It's still used
every now and then. But over the years, it's really being more
common that people will use something like marmoset tool bag or even blenders rendering, which I would probably
put higher because it's easier to do and using
Arnold for Maya. So keep that in mind. So one final thought
in all of this is that I would love to
have a takeaway of, is. First of all, when you are
done with your rendering, you want to export it out. Go ahead and hit the Export
Image button under document, and you can go
ahead and hit Save. You'll get a little bit of
a pop up here and heal. Zoom in a little bit, but don't worry
because he'll come out the correct frame
based on what you see. And anyways, what
I was going to say is if you are a beginner and you watched all the
way through this course, I congratulate you and
I patch on your back, but at the same time, I can't stress to you how
important it is to explore, explore, explore,
even using the thing, not necessarily
explore features, explore combinations of the
features you've learned. That's probably the
most important thing. Like you've learned
Booleans and you've learned how to use booleans. But what does booleans look
like if you'd wanted to make a full mouth cavity
through a sphere. Or what if you wanted
to use this eyeball as a way to create a Boolean, to create, for example, a mouth sphere or
anything like that. Just build off of what
you've learned through masking and through poly groups, through all the different
things that we've gone over. And please just
keep on sculpting, keep on doing just
random fun scopes. And please, by all
means, show them to me. Feel free to email me or
message me on my platform. And I will definitely
get back to you. I always get back to everybody. So with that said, thank you for watching this and hope to see you down the road in some of my more
advanced classes. So stick around and stay
tuned for that next course. Bye
 Sean Fowler, 3D Instructor