Transcripts
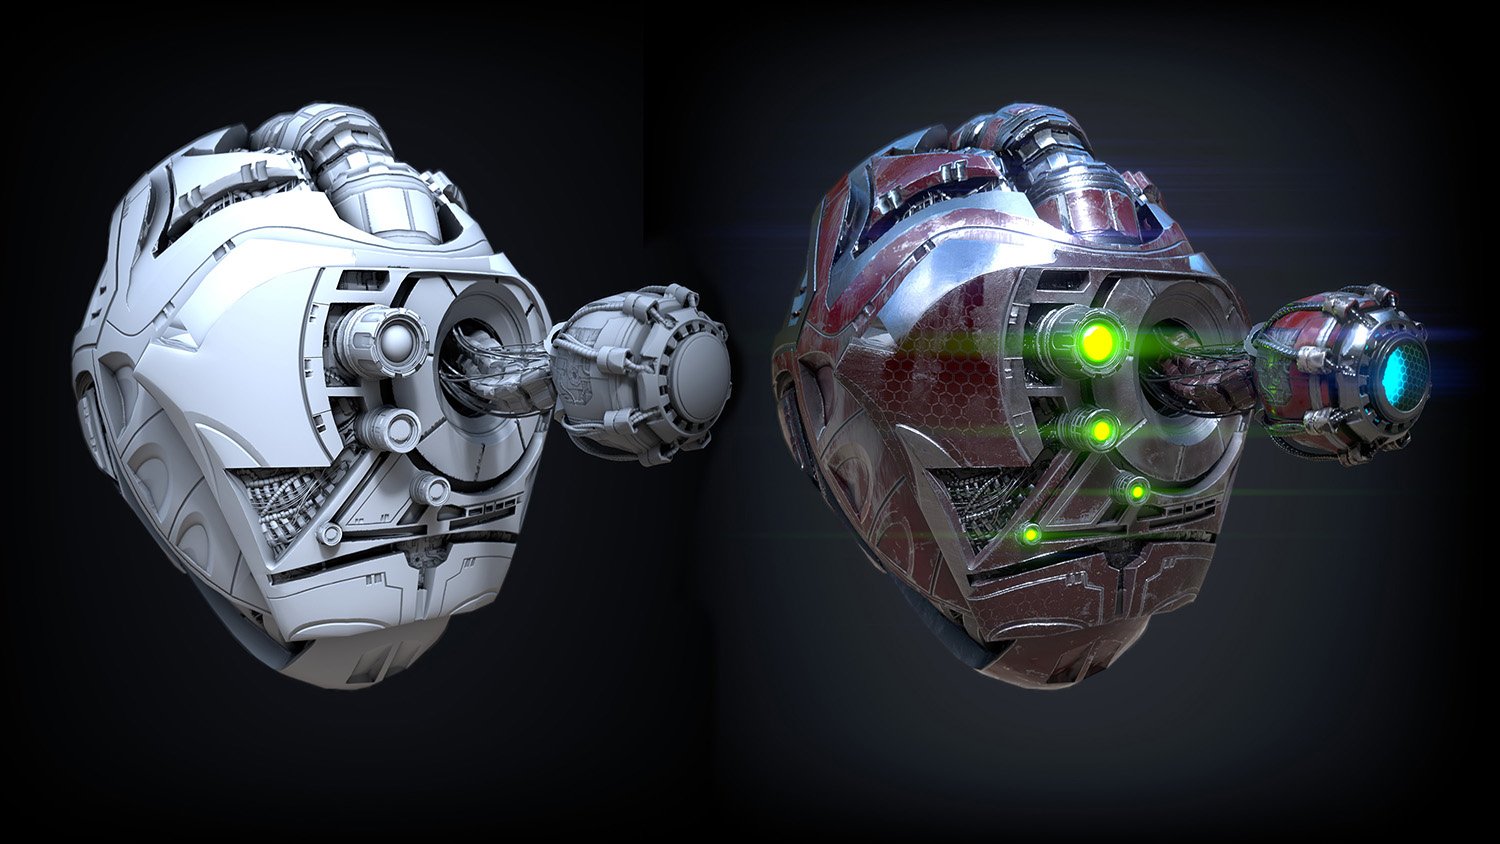
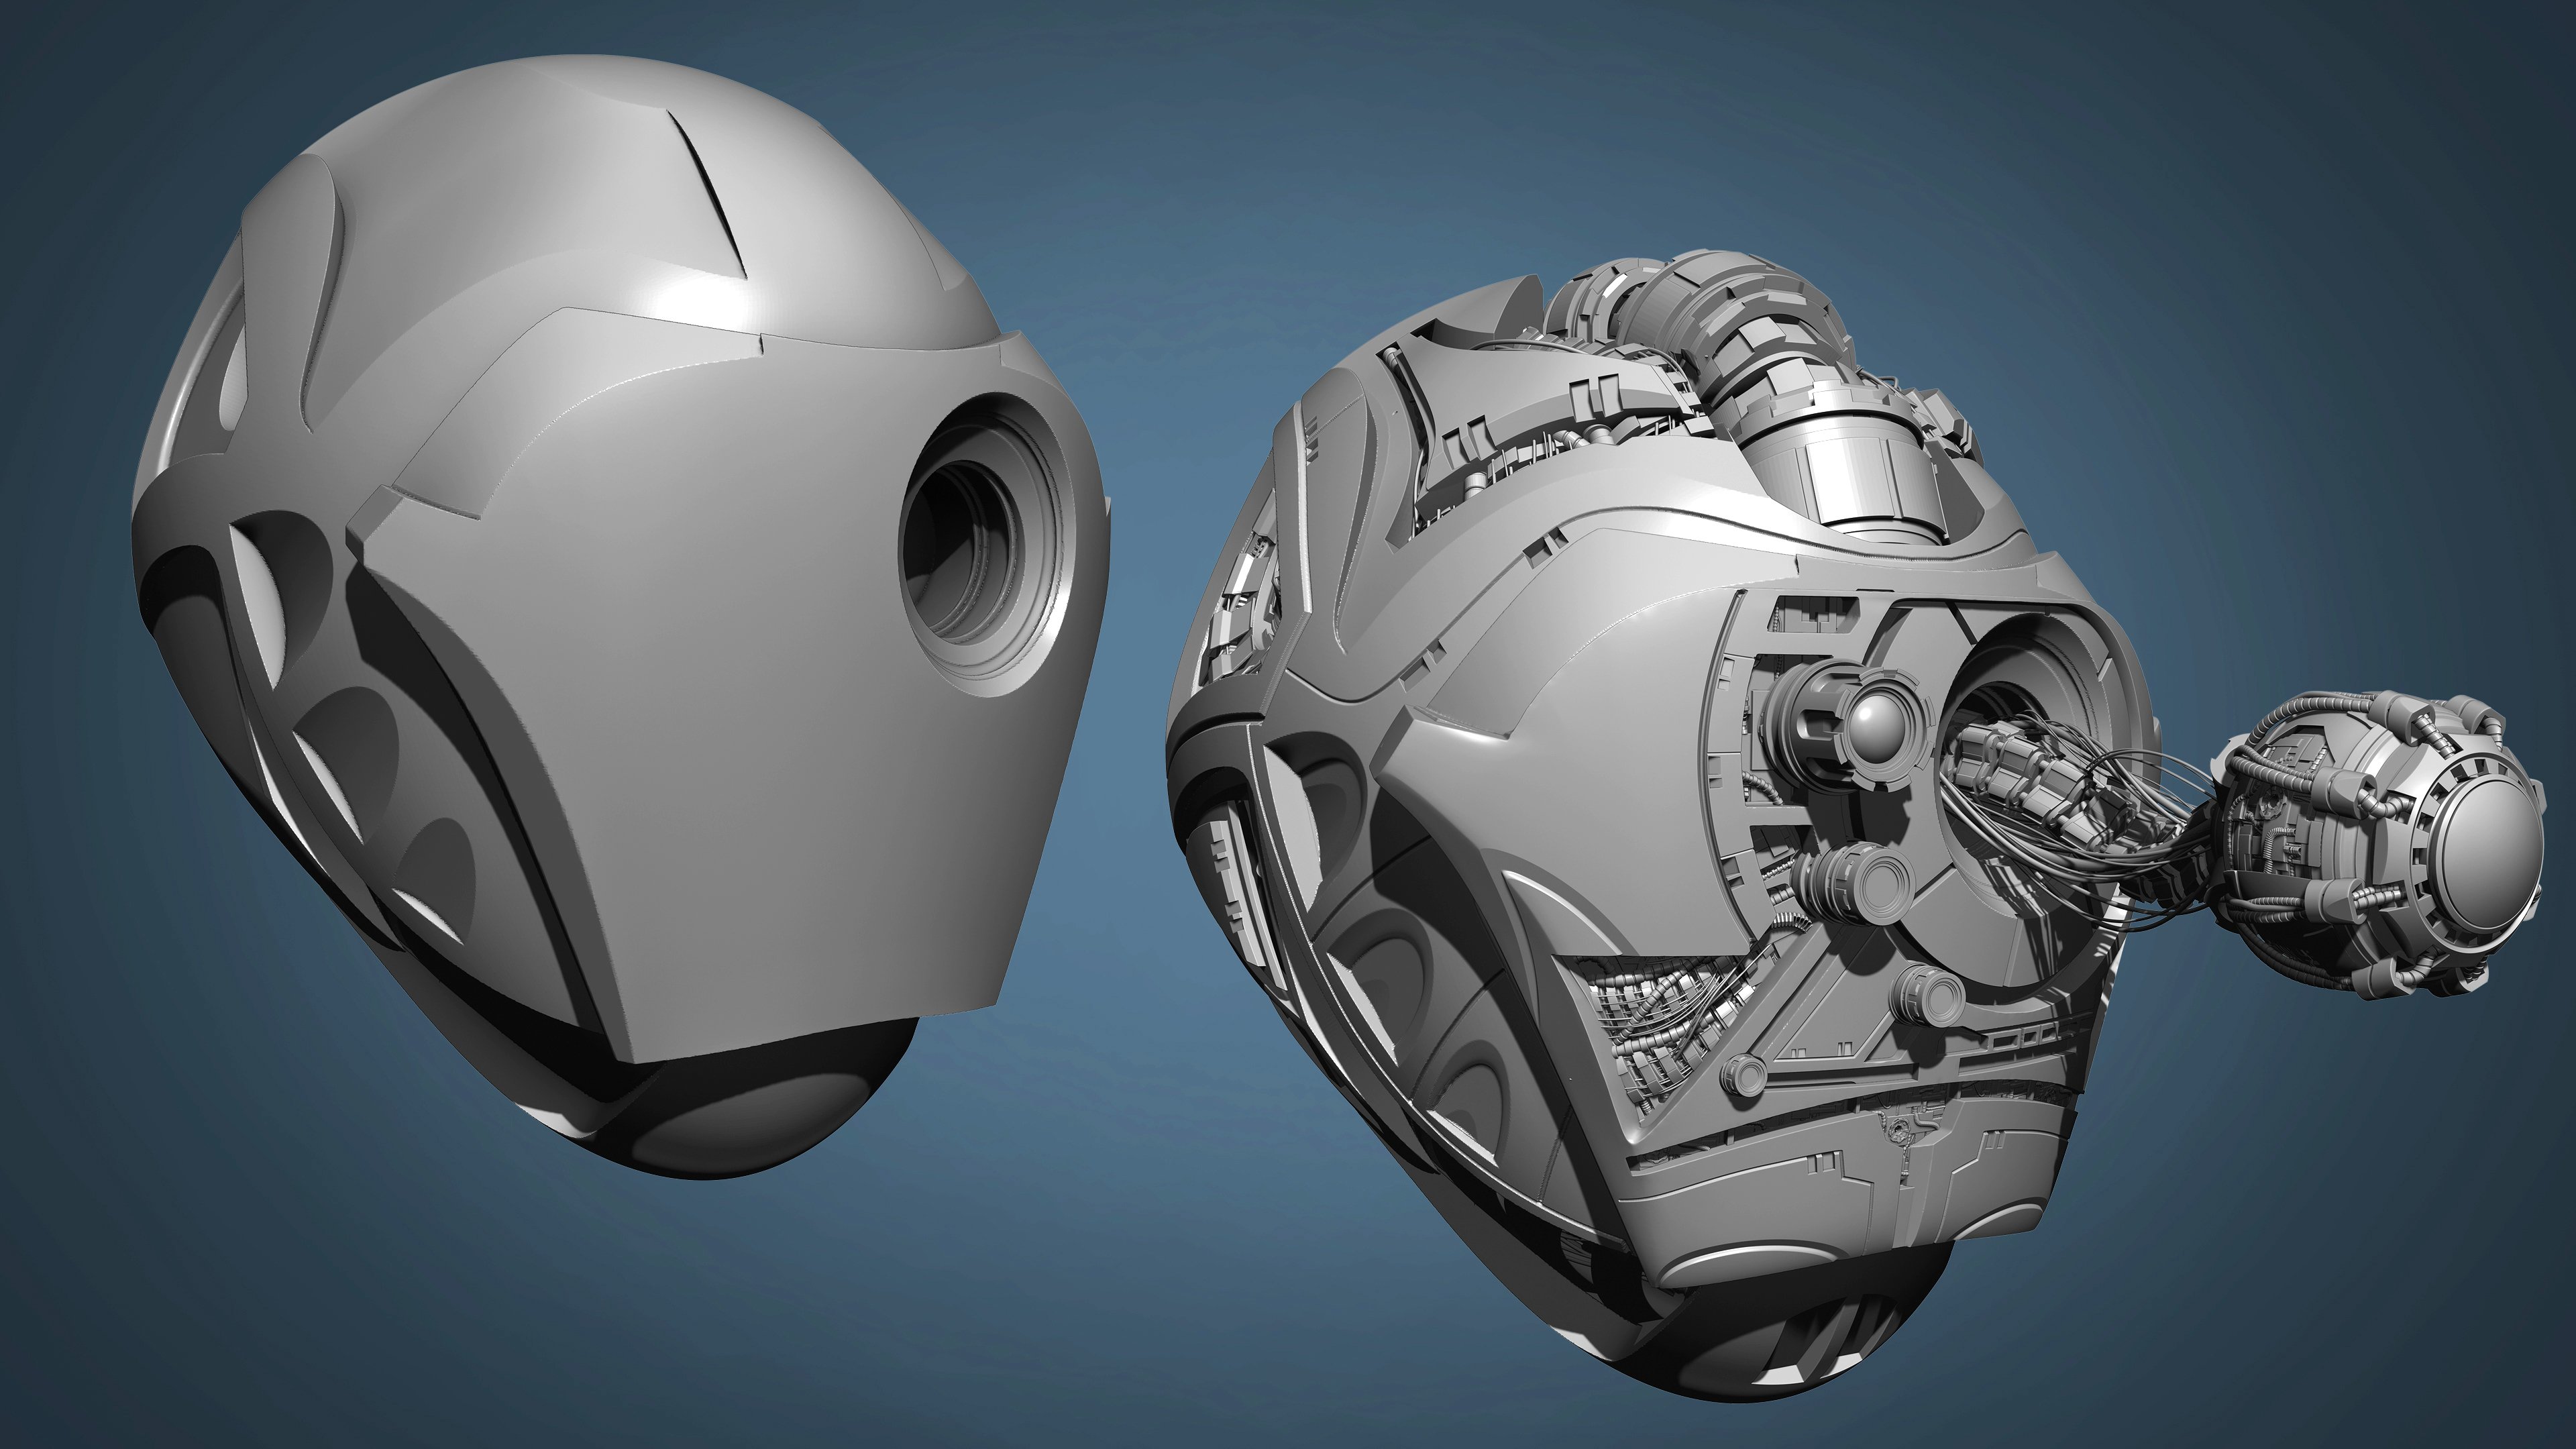
1. Course Introduction: Hi there. My name is Sean Fowler and I've been a professional 3D freelance artist for over 10 years in the industry. And I would like to welcome you to my course, Learner's Guide to 3D character creation. A new course dedicated to all levels in teaching the process, how to sculpt and read topology guys, 3D characters all within ZBrush. For this, we will be sculpting a fun character challenge theme, the Cyberpunk hacker girl. Now, to that end, we've crafted a course that will deliver to Unique Learning workflow approaches in teaching character creation by affording you the opportunity to showing you how to sculpt in either split screen mode using models we supply to you for aid and comparison. Or a more traditional approach of 2D orthographic will reference images in every piece of clothing as you progress, which we will provide and show you how to import and set up in spotlight. With that said, some of the concepts and features we offer you in this course are as follows. For beginners only, we start off with a quick section break down to the basics of ZBrush so no one gets left behind before starting illustrating important concepts of how to navigate through the viewport accessing throughout the main brushes of ZBrush, as well as set you up with a customized starter pop-up menu for you to access all the necessary ZBrush functions within for creating this character. Next, we'll illustrate how to create your own base mesh from scratch. And in addition to that, will be supplying you your own course learning base mesh yours to use as a bonus option to be used as many times beyond this course. Now, other concepts you'll learn is how to pull layers of geometry off of a base mesh to sculpt a full body of clothing of this character, as is done commonly in the industry pipeline. And we'll go further in where we take you through creating scenes utilizing some fun combinations of features in ZBrush, such as group loops and masking and inflating. Now, from there, we're going to move on to the face where we demonstrate our process of sculpting and establishing the basic shapes of our anatomy and sculpting through a simple incremental lesson by lesson approach to establishing and completing the results you see. And from there, we'll push your subject piece forward to a detachable face you see in our finished product. Now, moving on, we'll show you some basics of fiber mesh and some of our techniques and using this built-ins hair system to not only create hair separately, also apply the hair through the gizmo transformers. Now once your mesh is complete, we discuss, read topologies rising and various approaches that can be taken, such as a manual method through edge extrusion versus an automatic method such as Z remeasure. Then we reveal how to transfer high res details onto the low res through the history, recall brush. And lastly, we'll finish off our subject piece by transposing your character as well as exporting a T-Pose of the low-res and high res which can be reused in other 3D softwares for purposes ranging from rigging, animation or games. Now with that said, by the end of this course, you should have a fully sculpted out character complete with the high res, along with a low-res exported out and ready for texturing in an upcoming C-Cl pores that goes into the 3D texturing discipline. Finally, it is my hope that by the end of this course, you should have a strong foundation of confidence in sculpting 3D characters through ZBrush, as well as a strong understanding to the importance of read topologies using characters and how it relates to the 3D character creation pipeline. So with that said, let's start sculpting.
2. What To Expect: Okay, so let's begin. In this video, we're going to go ahead and do a quick little breakdown of the course curriculum by going through and showing you some of the material that we got for you and direct you with some guidelines to help you absorb some of that material just a little bit easier. So with that started, we'll just go ahead and say that when going through this course, first off before anything. If you're a beginner, please take your time and please pace yourself. This is a video course tutorial. So that means that you have benefits of stopping, rewinding if anything is going too fast, please, please, please remind yourself that you can take a moment to stop, rewind, and go back over it again, over and over. That is one of the biggest advantages about a tutorial courses that you can play this at your pace. So please, please consider that. The next thing we want to tell you about is, is that when you're watching these courses, sometimes it's a little bit better in the video just to simply watch the video first. Then just to give yourself an opportunity, just to absorb the material that is very, very helpful for beginners. And speaking of beginners that might be entering into this course, we do have a section 2 of the ZBrush intro to basics. Now if your intermediate now but different higher level, some of this stuff may not pertain to you. And so therefore, I would recommend you go into section three, which is getting started in blocking out. But in section two, we do go through the introduction to ZBrush, such as the UI break down, masking and group loops, the space bar trick and et cetera. And it's also very important for both intermediate and beginner students to know that in lecture 7 of section 2, we have a Creating customized UI pop-up menu. If you want. We really do recommend all students at least watch that one that way you can get a little bit of an easier time in terms of establishing a pop-up menu which you have solo mode as well as split screen mode activated. So it's a very important one to go over, which is lecture 7. So with that said, we also do the base mesh creation in that same section, which is Section 2. Doubt that's considered a sort of practice session for intro students and it's not mandatory. We do give you sort of a recommendation to work with our course learning base mesh. But if you want to just kinda go through and for the sake of your own practice, go through and just learn the bait, how the whole process of base mesh creation, section 2 in the practice sections towards the end, starting with Lecture 8, is where you'll start. So moving on, we are going to have Section 3, which is just a real small section just to get yourself started, just starting off really easy, really simple with just going over the basics of setting up your reference for the first time where we go over spotlight. And then we'll just go through just simple processes of extracting out geometry and creating sort of like base mesh layers upon base mesh layers, very easy stuff. And like we say, with that all said, we want to also iterate that how this course progresses is on a sort of inclined difficulty level. So in other words, it starts really easy and each section kind of tax on a little bit of more of a challenge as you go to give you an example of that. For example, Section 4, which is the next one, will be the most simplest section. Just as you begin, which will be sculpting the shirt. And we'll go over a process of creating the shared through the base mesh and give yourself a little bit of getting your feet wet to sculpting some wrinkles for the very first time. Again, you'll have access to that split screen mode as well as that 2D reference orthographic images like we do in every section, just to help you out. Now, moving forward, we're going to then go to sculpting the pants, which again builds off of what you learned as far as sculpting wrinkles. And it adds a little bit more depth in terms of getting your feet wet with alphas. And also going about learning some techniques of sculpting seems through panel loops. Moving on, once again, we build off of that with the jacket, where we then work with a little bit more of the same concept with creating base meshes or that we pull off of. We create group loops to establish seems. We even go through and add a little bit more. Depth in our wrinkles, sculpting, and as well as go over for the first time a little bit in the process of Booleans. Now that this is not going to be like, this is probably going to be sort of coming close to what we would call a beginner friendly level stuff. We have about one more section to go after that before you graduate to that next difficulty level. And before we get to that next difficulty level, we have one more section. And that's going to be sculpting the belt and shoes. And that's just an opportunity just to get all the small stuff out of the way, like cleaning up the belt and doing a block out of the bell to or just going through the simplicity of grading the shoes. Now, Section 8 is where if you can make it to Section eight, even as a beginner, then you're sort of at that ready phase where you can then just kinda graduate to that intermediate level of sculpting CE. Now we do have a face breakdown, sort of like an intermission of what to expect in the next three sections that talk about how we're going to go through sculpting the face as you go through. And again, we're going to show you all the references and all of the 3D models for you to download and go through so that you're not left out in the open. Now again, the face, it should be said, even to a beginner that's sculpting a realistic human head can be one of the most challenging things in ZBrush. It's very common done. Now, you may wonder why I still introduce it to people of all levels. And I'll go ahead and go off the record with you right here and now and say that was literally what they did in my education when I was going to school. They didn't waste any time. I'm taking it slow. They kinda shocked us into doing one of the most difficult things right off the bat. And believe it or not, we actually got good at it, even though our first result wasn't the best one, we iteratively went through the process over and over and got better and better all of us in our class, so we're doing the same thing. I really want you to take your time with the face and do iteration. So if possible, of the same thing over and over again, if you can. This is pertaining very specificly to beginner, so please take your time. Now. We're gonna move on into the creating the detachable face. Now that is the next section and that's going to be sort of a fun one of its own where we go deeper into booleans and we talk about concave Booleans as well as convex Booleans and the differences between the two. Then we, after we do the basics of the Boolean breakdown, we go into doing more complicated concepts like customize booleans, which will be giving you some 3D models of customized booleans, which will show you how to use in conjunction with other brushes such as matchmaker, which again, we'll go over that as well. And you're going to be able to produce a good amount of detail in a very short amount of time. Now, moving on after that will be section 10, which is hair creation with fiber mesh. Now, fiber meshes sort of Z rushes built in hair system. And we're going to go over a couple of approaches in which you can do at two main approaches. In fact, one is going to be the most common one where you have a mask that you draw upon the scalp. And then we go over the basics of the most important slider channels to adjust when going through fiber mesh. And then the next one's going to be sort of a little bit veering off, where we create sort of a separate individual strands of fiber mesh that we would be reusing over and over again using transforms in the 3D gizmo deformers. Again, we'll go over that. It may sound a little complicated at first for anyone new to it, but we'll go over that as we go through. Just remember, re-watch the video, really cement that process. Now, moving forward, we're going to go to the major second half of this course where it's about read topologies arising. In other words, the process of taking a high res model and producing a low-res model that occupies that same silhouette in which you can bake all of those details onto in terms of repurposes of game characters or rigging for the sake of animations, etc. We go over that as well. And finally, because we read topology guys a full character and because we would go through the process of showing you that history, recall brush. And how to transfer and project, or I should say reproject high res detail to a different mesh. We give ourselves the option of doing a very nice, clean transpose of the character using one of z brushes built in plug-ins, which is called Transpose master. Now after that, we do give you a little bit of a crash course bonus that's not really necessary in part of their curriculum, which we do a little bit of bonus rendering, or we'll give you simple BBR settings to work with. And then if you have Photoshop, it's again a bonus we give you where we just saw, take you through the render passes process of where we create sort of some wireframes that will overlay over what it is that you created. So that's sort of in a nutshell. What we have in store for you down this course, down the road. Now, all that said, again, I've said it probably throughout the course, so I'll say it over again. Please, please, please. If there's anything confusing, please re-watch the video. And if you still have questions, please feel free to ask me as I am happy to answer them for you. In addition to that, I want you to know that I would be more than happy to see any pictures or screenshots or if you can, BPR renders of your character. I'm happy to give you a critique in any, any way possible for that. And of course, I want to lay down a fun challenge Fourier right here and now, just something to keep in mind. And that is this a simple, simple statement that I issue, a gauntlet that I laid down before all of you and that's called surpass. The concept. Now surpassed the concept is, I know it's a weird sentence, some saying, but it's where I want you to surpass what I have on here. And I can tell you, I've been in this industry long enough to know that is very easily possible. And if you want, it's, it's sort of a gauntlet challenge that I laid down in front of all of the students that take this course, no matter what their skill level is, surpass the concept by adding something that wasn't there before. Maybe you learn something in the jacket phase of the section that you think, hey, that looks pretty good. I like how we did seems there in the jacket phase, but we didn't do that in the pants phase. So let's go back and add some scenes in a different way. Or maybe you see something or learn something through Booleans that you kinda like to apply with the sash that is on the jacket. You know, I want you to start thinking you don't have to necessarily constrain yourself to anything. You just simply have to grasp the concept and come up with new fun ways to reapply what you've learned into different sections. So please don't feel tunnel vision or constrained in any way that you have to make a perfect replica. I challenge you to do better. I already know you can do better because I've already seen proof of some amazing stuff that surpasses easily my own work. If you go on to sites like art station or CGI Masters, there's some truly amazing artists out there and I want you to be one of them too. So with that said, let's just go ahead and get started sculpting.
3. Introduction to Zbrush: Okay, so let's begin in this section. This is going to be a sort of refresh your series to any beginner that is opening up ZBrush for the first time. It's sort of an introductory level of suction to get everyone caught up. So everyone's on the same page for the next section, which will be section 3. And in this we're going to talk a little bit about ZBrush, what it is, what are some of the most common features used? How to access Quick Keys and create customize UA palettes that we'll be using throughout the course. We'll also be working on understanding concepts like the space bar trick and how to create three separate access, three separate pop-up menus, such as the B key, the space bar pop-up menu, and then customize pop-up menu as you see here. So if you're an intermediate user E and you wish to skip section two, which is the introductory basics of ZBrush, your course, you're welcome to just remember one thing though. And that is that when we start on Section 3 in your custom pop-up menu, you'll need to have a solo mode attached as well as a split screen menu attached. If you're unsure how to do that, we'll have those tutorial courses at the end of Section 2 to explain how to create all those things. And then lastly, it will be mandatory knowledge to know something about the space bar trick. And that's just where we can pan are masks, our selection tools like so it's just the capacity to pan. It will be important to know that in terms of creating accurate curve cuts, like in our face, when we're creating that detachable face and et cetera, It's going to be important to know. So with that said, let's go ahead and get started. First thing we're going to say is, what is ZBrush? What is it that this program is? Well, what's the brushes is? It's a digital sculpting program that is commonly used in the industry of gaming and movies. And what they typically, how it pertains specifically in the pipeline is, is in character creation. Most commonly, we start off sculpting a character within ZBrush. And after the sculpture of the character is created, we go through a series of read topologies using that character down to a lower res 3D model. Now we do this because if you're in the game industry and you're putting game models inside a game engine. There are a lot of real-time calculations going through. And all. You can't have a high res in there because that high res might have millions and millions of polygons all tessellate it and sculpted into a very specific look. And instead, what we do is we take all that detail and sculpt a low res model that occupies the same amount of space, but with a far, far lower, lower, lower polygon count. What happens next is then we would take all the details from that higher resume session. We would sort of bake in project. In other words, the details onto that lower mesh worry would be stored in a UV texture set such as normal maps or diffuse maps, ambient occlusion maps, all of those. I would be stored there. Now, again, all of that, the uv plane, that texturing and rendering, we set you up on that in a separate course from this one in a second series. Because again, this one focuses really deep into the discipline of sculpting and producing a high res and a low res through read topologies rising and going through the process of exporting and low res and, uh, Jairus out. So it's sort of again a two part series where this is the first course and then we have a separate course focused in a very different area, very different location of discipline in the game production pipeline or the 3D character production pipeline, pipeline, I should say. So. With that said, we're going to go ahead and get you started now on the basics of ZBrush. These are things that you need to know just to get through this course. All the main things you're going to continue to learn as you go. So let's just go ahead and get started.
4. UI Breakdown: All right, so let's get started. In this lesson, we're going to talk to you a little bit about the UI in ZBrush. Just kind of give you a little brief overview of everything is in. So just to give you a little bit more comfort and where to locate everything. If you open up ZBrush, you might notice that this little window comes up. It's a very common one. And what this is, is this is the light box pallet that sort of access like the backstage of ZBrush to accessing all sorts of additional tools or projects or various base meshes in addition to various base start outs for fiber mesh, etc. I'll give you an example right now if I click here on to where it says brush, you'll see a whole bunch of arrays of brushes here that are not loaded in when you hit the B key that you can access to. So there's plenty to explore there. To turn off light light box. We can just go ahead and go up here to the left and hit light box and that will disable it. And clicking on it will re-enable it like so. You can also hit the less than sign, or I should say the comma key as well. That occupies that same key in that also will be a quick key for turning on and off light box. If you create sort of little artifacts like this that you see before, you don't freak out. That's just simply you existing currently in what is called 2.5 D mode. And that's going to be something we talk about a little bit later. But for now, you can clear all that by hitting Control N. Or if you're on a Mac, you can hit command. And now to moving forward, if we wish to draw in an object, we only need to click on the cylinder itself and then left-click drag and you'll have a 3D object dragged in. But if you try to drag again, you may notice that it is hard to get in there. You're still in 2.5 D mode. So to bring something in, you just have to hit T key and it will be in there and anything before you hit Command or Control N. And again, if you wish to sculpt on it, this is where we go. It's make poly mesh 3D within the tool section. So that's how we get to where we were when the last lesson. So let's go ahead and do a basic overview. Just a quick way to summarize everything that's around us. To the right, you'll see the tool palette. And here you'll have a whole variety of ways to customize and edit the mesh itself, which is going to be in your main canvas. Now that said in the tool and you'll have up here at the top where you can save and load ZBrush files that traditionally are done through the CTL file. And if you wish to import or export objects after transfer to different 3D softwares, you will do that in the import export area. In this area right here. Those will be in the form of dot OBJ tool. Typically OBJ, you can do other file formats as well. If you're trying to do something like a Z plugin import, then you would have to go up to where it says Z plugin at the top here, and then go to where it says FBX export, import. And that's where you would import OBJ files. Moving forward, another important one is going to be the sub tool palette, which is directly under the tool palette here. And that's going to be where you will be storing multiple meshes of 1 z broad ZBrush file project. So for example, if you have a character like a Cyberpunk girl and she has like a, a coat. And then there's a separate mesh which is her face. There would be two sub tools here. Now that's a very simple example as there will be many, many sub tools throughout. And as we go further on, we're going to explore deeper into this. But all you need to know is sub tools section is where we store our separate meshes at. And we can obviously play around with that. We'll go a little bit deeper down into that as we go through. You may notice also above sub tool, you see all these different canvases of areas. The, what these are is basically like, think of it like a game engine. And you create one game project. And then each game project has a bunch of different scenes on here. Now, if this area has this array of different sub tools, when you click on here and then you click on a random new area like this poly mesh 3D. You can start a whole new array of sub tools and meshes. But keep in mind if you do that and create a whole bunch of sub tools here, and then create a whole bunch of sub tools. And another one that can also tax memory. And you also need to take into consideration that if you save out a zt OWL file, it will only save out the file that has the currently selected sub tool preset. If you wish to save multiple meshes out. Quick say, tends to be a very popular one, which you'll be hitting quite often throughout your ZBrush sculpting project. And that will save multiple meshes of these compiled sub tools that you see before you. Now, going further on, you will see again geometry and all these other areas. All of these are basically areas that go through to make a sort of a section to modify the topology. There is a large list of all of these to go through and we're going to cover all that further down the road. Now, if we go to the left-hand side, you'll see that the palettes here are categorized and divide it up into two main areas. One is part of the shading, rendering and coloring, while the top three here are all about the modifications to the brush itself, from the type of the brush, if you click on it, to the stroke in which that brushes being delivered, and then which Alpha it appears when placed onto there. And we're going to give more and more examples of that as we say. But just think of these as various methods to customize a very specific brush to a very specific look that you want. And again, all of that has to do with exploring. We're going to be guiding you through that further down the road in this course. But we just wanted you to get, again, this is about a layout of the UI and where everything is. Now, if we go into this top area here, this top palette here, we get sort of an array of different things that also cater additionally to things like the brush, the size of the brush, which is defined through its draw size, the fall off of the brush, which might have a strong relevance based on what alpha you have. For example, if I were to sculpt on this cylinder right here to explain what focal shift is and draw size. So I'll give you a quick little demonstration. If we turn up draw size, we increase the radius and we can create bigger, bigger strokes of the sculpt we do, but we never really talked about what focal shift is. So if I create an alpha such as a square, and I give a couple of subdivisions. So this might be easier to see and draw a sculpting. That square-like alpha will sort of have a hard fall off. Now how well it connects from one to another is based off of that second circle within my draw brush that you see right there, you see two circles. And if you increase the focal shift, then I'll hit undo and do that same brush. You'll see a very different look. And that's because it's only capturing in that small little circle that we just turned up in focus shift, it's capturing just the white areas and everything from the outside is a fall off. It's just making it so it's softly falls off from whatever is in the center here on out. It's like blurring it out to such an extreme that it goes through the center. So I'll undo that again and I'm going to turn a hard, I'm going to make my focal shift very hard. And if you can guess it, when you draw something that you get some hard fall offs that are repeating throughout the stroke, like you see here. So I'll go ahead and undo that. Like we've explained before. If we draw a stroke here and will give us displacement going outward, and if we hold left Alt, it will give us displacement going inward. And that's displayed again in the UI up here. And finally, our intensity is illustrated up here. We can adjust the size and that will determine how much displacement goes on. It's like the strength of the brush. Now, other things that are, there are other things that we can go into. There's Live Boolean and unlike to actually ease you into Live Boolean on a separate lesson. But the one thing that I will say is that we can create sort of a pop-up menu within the view port of the main sculpting work area right here, by holding the space bar button down. And again, we've Showed that a little bit before in the previous lesson. And all those things like focal Shift and draw size, they can be illustrated here. All the things such as the standard UI, the dots stroke, and whether an alphas there, those are all present in here as well, along with the Mac cap and the textures. So having said that, there's not too much more I want to cover on the UI because we're going to be incrementally illustrating that as we go through. But I wanted to give you sort of a basic outline of where everything is. One thing I did want to close on is that while you hold B and you can get a whole set of brushes, if you hold Control Shift. And then click up here to where the brushes are, you're going to get some selection tool brushes. They're like 3D sculpting brushes. Now this is going to be covered further down, but these are, as you notice, a very different set of brushes that are sort of like subtractive cutting off brushes. And they come in a few different forms. Forms. But three primary ones that you're going to keep an eye on is the selection method, which if I hold them left drag marquee, I can select a certain section of one sub tool to be illustrated to help me sculpt in that area, undo. And if I hold Control Shift and try to create a new selection, I can try the trim curve brush. And what that will do is I will draw out a curve like you see here. And for it to work, you notice the mesh has composed, composed of multiple subdivisions. So let's go ahead and click on there. Go into geometry, delete the lower, and try that again. And you'll notice that that cuts off everything there and puts a piece of mesh on there. And then finally, if we try one last one, we have all these different versions of the same kind, except it's instead of a curve, it's done through a circle. Instead of a circle, it's done through a rectangle further and further on. But one thing I want to add is that we have a clip curve as well. And a clip curve brush does the exact same thing as the trim curve, except it doesn't cut the pieces off. It, mashes it down. Now, this can be pros and cons of that is, is that it does tend to create non manifold geometry, which will cause possible errors in creating a Live Boolean. Which again, like Booleans, are a method of sculpting that we'll be touching base on when we go into the advanced, more advanced areas of sculpting like the detachable part of the face, will talk to you a little bit about Live Boolean there. We don't want to overwhelm you with too many parts, but I wanted to let you know right now that there are a secondary tool set that is available in the quick keys when you hold Control Shift. Without it, you just get the brush just by simply clicking on it. And if you hold Control Shift and click on the brush, you get the sets here. And we're going to do so many examples of this. It's going to happen. We're going to be doing so much accessing through this that it's going to get to feel very natural for you. So having said that, we're going to move on to the next part of ZBrush, which is going to be illustrating how to work with poly groups and how they, what they are, and how they are connected to all the various functions that are used throughout ZBrush such as Z remeasure and crease poly groups, et cetera. So stick around and stay tuned.
5. Masking and Grouploops: Hey, and welcome back. In this lesson we're going to talk to you a little bit about masking and poly groups in ZBrush. And you're going to find that we're going to be going through and using that quite often when creating our character. And then the following leptin lesson after that, we'll talk to you a little bit about isolate selection tools a little bit more, and the Space bar trick. And then finally, we'll close off this section too with customized pop-up UI windows, which will really make your workflow go a lot quicker. Now, to open up with, Let's go ahead and start with what masking is. That's going to be the easier one to get you warmed up with. To start with, I'll go ahead and clear my lightbox off by hitting comma or less than symbol or lightbox itself to clear that out. And they'll clear off some of those artifacts like I did before by hitting Command or Control N. And let's just draw in our first 3D primitive default in ZBrush. Click on that cylinder there, left-click drag. I'll hit the T key, putting me into initialize phase. And then from there go to make poly mesh 3D. From there, I'll go ahead and then give a couple of subdivisions by hitting Command D or Control D. And if I'm moving too fast again, please, please, please just hit stop and rewind. That's the beauty of a video tutorial. So from here we're gonna go to mat cap. And I'm just going to always go to my personal default which I like to use, which is going to be basic material one. All right, So now we're all set. I got to the ability to sculpt on here now, which all Z out. And I'm going to now go into talk to you a little bit about masking. Now, what masking is, is basically it's painting over a mesh, a mask, basically a shaded area. And within that shaded area nothing can be sculpted. So let me give you an example how that works to create a mask, if you just pull over your draw size over and hold down control, you will go into, this will change, as you can see from standard to mask pen. And then from here you can change out the stroke or create alphas of masks. But if I just hold down Control in Mask mode, and if I, while holding Control down, I can create a mask. So what does this do? Well, if I release control and just go into my standard brush and just make a streak. You can already see that it just creates sort of like a mask area, in area that won't be affected. Now this is a pretty advantageous thing that we have here. And we are going to make some very fun shapes through this concept later down in this course. But for anyone that wants to know, though, one thing you can do when you have a mask is if you wish to clear off a mask holding Control down and do dragging off will clear the mask and do buy hold Control down and just click on the mesh that will feather the mask into a much softer fall off. And then if I hold Control and left all button that will harden the mass. If I do a couple of those. Additionally, I can subtract off of the mass as I paint by holding Control and left Alt. And I can now minus things away. And then finally, you can also do holding control and dragging a mask off into empty space. Which can and entire mask like so. It goes without saying when you hold down control and make a marquee selection of a mask, you can also hold down C. I'm going to go ahead and try that again, holding Control. You can also hold down left Alt. And then that's going to go ahead and put you in subtractive mode to know whether you're in subtractive mode are not like that is just when you see the indicated a dark gray turn into a light gray like you see right there. So that's sort of a little bit of a starter to get you warmed up and understanding what masks are. I'm going to go ahead and access my undo bar up here and just undo a lot of that so I can get back to a normal place like so. So now that you know what masks are, we can now transition into poly groups and we're going to show you how we're using masks to create poly groups. So before we begin, you may just want to ask the basic and first obvious question. What are poly groups? Well, poly groups are ZBrush is method of organizing groups of polygons within a high res mesh or even a low res mesh within a sub tool into a representative in detail indicated color bracket. And that group bracket represented by that specific color can be used to, you utilize and access. Some of ZBrush is more automated functions like group loops or remeshing through group creases. These are all automated functions designated throughout. See brush that help you to create cooler and more accessible areas. So to create a poly group, the first thing we have to say is that there are quite a few different ways that you can make a poly group. But one of the most common ways is a simple one, which is just simply holding control and going into Mask Mode and simply drawing in a mask like you see here. And then if you wish, you can simply hold, can release control. Then after that, a quick key button is to hold Control W. And you'll see that the mask disappears, but it almost appears like you just clicked off and clear the mass. But what you really did is if you hold Shift F or you go down here to wireframe mode, you'll see your new created poly group. And as I said, this is an example of what a poly group looks like. This is a very powerful tool. A lot of z brushes functions access through the concept of poly groups. I can give you some examples of ZBrush functions that access poly groups to show you what I mean. For example, if I hold Control Shift, we get our secondary tools and we can use the isolate select buttons to select certain sections of the mask that we can do right here or we want. And I'm gonna go over the isolate selections within the next lesson. So don't think I'm moving too far ahead. But if we want, maybe we look at deep down inside it seems like it's a bit anti alias to hear a little jaggedy and low res. One thing we can do, and again, this is skipping a little bit ahead and we'll explain this in a little more detail is this we can add some group loops around here like so. And then by doing that, we first have to delete our geometry. We have to go through edge loops and then just click on some group loops and see what we can get. And you'll see a much smoother edge. And combining the two concepts like isolate, selection, inverting the mask, we can create some cool things like that. Another ZBrush automated feature that you can do is if you look at some of these waviness is that you have here, you can access some other ZBrush automated features like polished by groups. And you can get some smooth this area out in case you were wanting to see, you see this ripple right here. Well, if you access the Polish by groups and there's a group loop right here that is separate from here. Even though they look like they have the same color. They do not have the same color. It's just a very slightly different shade of green. By hitting Polish by groups, you can really smooth that out. So there's just a lot of different functions that access and tap into whatever is registered as a group loop that you create. Now, we have explained one method to you as far as how Create Group loops or I'm sorry, how to create poly groups. However, I need to impress the sum pawn you that it's very important you understand there are many methods into creating a group loop and to access some more of those methods just to help give you an idea is as you can go to your right-hand side below tool, look down here to where it says poly groups and just looking at the names, you can kind of already get an idea of what to expect. Like take groupby normals that actually detects hard angular surfaces and creates glutes, throw them like so. And we can kinda just see a new group loop is being pushed here on New Group loop is being pushed here. And now you can do a lot doing that as well. You could. It's sort of like an automated feature. I don't like doing it that way though. I I only resort to group by normals in some very extreme micro surfacing, hard surface detail events that I need to create, access some 0 measure methods to. But again, that sounds complicated when I say that. But when we do the example, it's gonna make up a lot more sense to you down the road. We just wanted to get you to understand the concept right now of what groups group loops are and how to use them. For now, I want you to consider creating masks, group loops through masks as your primary method just for now. So again, that's going to be holding Control down and then releasing control, and then after that control w. And that is how you create a group loop. I'm going to create another group, Luke, you can create another one like so. Now you can keep making as many group loops as you want and a different color will be in all of those. So that's the concept of group loops. You're going to need to understand the basic premise of it. I'll walk it through and I'll continue to narrate my keys as much as I can when we go into our main character. So don't feel like you have to have this absolutely memorized right now. It's just that we want you to know what it is, the basics of how this works. And you're going to see a lot better examples and more complex examples as we go through. So with that said the next lesson, we're going to talk to you about the secondary tools. That's when you're holding Control and Shift and accessing things like isolates, selections, and trim curves, et cetera, and how they can create additional group loops. We're also going to talk within that lesson about the space bar trick. So with that said, stick around.
6. Secondary Sculpting Tools: Okay, welcome back. In this lesson, we're going to talk to you about some of the secondary 3D sculpting tools that are available to us when you hit Shift Control. And we're going to talk to you a little bit more about the space bar trick finally, as that's one of the most important thing that I'm going to impress upon you to learn as well. It's going to be a very, very important concept to master down when creating poly groups or using clip or trim curves. So let's go ahead and start with that. Let's start with accessing our 3D sculpting tools or secondary sculpting tools. And what that is is if you hold Shift Control, you will notice that you start off with a default selection tool right here. And that's a great place to start off with what the selection tool is. The selection tool is basically a tool that isolates, select certain pieces of geometry so that you can work on just that area without being distracted by other areas as well. It's also a great way to administer masks and how to lower each year having high choppy frame rate within a single sub tool if it's too heavy, you can isolate certain areas to get some of your frame rates back to help sculpt a little bit better. So let's go ahead and give you an example what that means. If you hold Shift Control, you'll notice it's right there. And then if you go ahead and hold Shift Control and drag out marquee select drag out from empty space. You'll notice a green little cube come out like that. And whatever is within that green little cube is going to be isolates selected like so. If you release, you'll see everything is isolated and selected. And you can do all sorts of things. Sculpt just that area. Now, if you want to get everything back, you can just hold Shift Control and just left-click in empty space and you'll get everything in the sub tool back. Now you'll notice that there are a couple of poly groups that are within here. And if you didn't realize by now from the last lesson, you can go ahead and isolate those particular poly groups if you want. And that's done by just simply holding Shift Control and just simply tapping on a poly group. And then of course, if you want to invert everything that you see, you can hold Shift Control and drag out into empty space and you can invert the selection that you see. And of course, if you want to bring everything back, you can just hold Shift Control and just tap. Now that may sound like a lot. So I'm going to encourage you to take a little time to do some practice, creates some poly groups and just kinda have some fun with what I said. Just kind of getting that memory, muscle memory established on what everything does. Now, this is a pretty good thing to use because for example, we may find ourselves doing something like this where we isolate this poly group right here, and then we left-click and drag a mask over it. And for the record, you can also just left hold, left-click and just simply tap in empty space, drag a mask, and then you can bring everything back. And then you can just simply sculpt here without having to worry about anything here. That's always something that is a very, very advantageous thing that you can do as well. Or you can even create a new poly group from it if you want, just for fun and color. Now, having said that with this, is going to be moving on to the next one, it kinda gives us a real speaking of poly groups, we're moving on to the next 3D sculpting tool, and that's going to be our trim Curve Tool. Now, our trim TR curve tool is a curve type brush. And what that means is if you hold Control Shift on out, you're going to draw out this line. And whatever is on the shaded side of this line is the side that will be affected. In this case, it's a trim curve. So what will be affected is it will be cut off completely. And when you cut it off, it kinda fills the area here with sort of a decimated mesh that is separate and has been generated to be right there. Now, you'll notice it's a different color. So that means it's a poly group, which again, that's a good thing to have. That's a really, really good thing to have. If you're doing poly groups. And you want to create cuts, trim curves are a great way to start off with. So let me give you an example of how we can rematch using this new poly group, how we can read topologies. This is going to be a fast example to how we can do some auto reach apologizing using our newly established poly group that we created through the trim curve. So let me just show you. I'll go ahead and I'm going to move a little fast but don't freak out or anything like that. It's just sort of a demonstration to get you open to the possibilities of what we can do. Alright, so there's poly groups there, There's poly groups. They're now going to crease those poly groups like you see. Now, every edge has a crease defined by the location information of those poly groups. Now we go through Z remeasure and tell it to auto Romesh and do its remeshing edge flow through the creases it sees. And to detect any sort of finely tuned edges and the groups and see, Let's see what we can create through that. And as you can see now, we have this very finely tuned mesh. A new shape completely, all thanks to having poly groups available to us. So that's sort of a idea of the power of a trim curve. Now, there are, I'm going to go ahead and Z back a little bit now and going to give you some disadvantages regarding the trim curve. The term curve does not handle convex curvature very well. And what do I mean by that? Well, if you hold Shift Control and drag out occur and then hold left old and create some. You can kinda bend that curve and make what you want. If you notice, it doesn't handle that very well. So that's going to be a good place to say Our next curve type brush we can use to help fix that. And that's going to be the clip curve of a clip curve is the same type as a trim curve. And as you can see, it's a good little mesh right there. And the difference between the two is, is it right here you can see it gives you a clue that it's not cutting off anything. It's just simply mashing in everything down. Now this could seem pretty cool at first. But if you do an example over here, you'll notice it's hard to see a little bit. It creates a little non manifold edging where it flattens everything down. Like so. That's kind of a, for example. And non manifold edging is sort of a bane when it comes to doing automated procedures such as making a Boolean mesh out of it or going through the remeasure a, you can encounter some errors which will require additional automated procedures in ZBrush such as DynaMesh combining with C refresher to eliminate all of those things. But those are, again, those are like complex processes that are going to go down the road. But I just wanted to give you an intro to accessing some of your clip curves and trim curves. The clip curve and trim curves. Some of these are the same. We went over the selection tool, but there's a lasso version of that, which is sort of like a nice little marquee selected the exact same concept. There are also additional trim versions of the clip curve, like a lasso version of the trim curve, and a circle version of the clip curve. And lastly, I would probably say that the one thing that you might want to also look at is we have a slice curve. And what that does is it doesn't really cut out anything off. It just is sort of like an a to help us create some more slices for poly groups. And the slice curve can be modified from its curve point to a circle, for example. And I go ahead and just clear all these off. And it will go. And it sort of creates a beginning aspect that would be very useful to us who didn't gives us a nice little edge that really becomes very helpful in creating geometry if you have no subdivisions. So I just wanted to sort of give you that heads up and how those things work. This is the time now just so we know a, you might want to take a little bit of practice in experimenting with this. So as I said, this course Acts, this lesson acts as a guide to get you to practice with these tools. So moving on, we're going to close out this lesson by explaining the space bar trick. I know that I wanted to do this all in one lesson, but I've decided that I'm going to go ahead and put the space bar trick in its own little area of an separate lesson. So that's going to be coming up now and the following lesson, I'm sorry, I didn't, I know I said I was gonna do it in this lesson, but you go ahead and just look for the next lesson where it says spacebar trick to learn that. Because I want everyone to understand it so quick one, but it's a very important one. So stay tuned.
7. Learning the Spacebar Trick: Okay, welcome back. In this lesson, we're just gonna do a quick overview on what spacebar trick is. It's going to be a very, very important one to know when it comes to creating accuracy and drawing out your, your clip curves, your trim curves, or any of your masks or masks that you choose to have a curve, stroke and stroke instead of a drawing streams. For so, to give you an idea of what a mask is, it's just a method of panning your selected tool across with a little more accuracy. So let me go ahead and give you an example. If you wanted to draw, for example, a mask over here using a curve, you'd have to guess roughly around, like the area at which to draw it from. And you don't really have a way of moving that curve. It's sort of stationary and it's there. So what the spacebar trick is, is it's the art of moving that curve or moving a circle stroke. You can't really move a stroke at all. You just have to work with whatever you got. So it's sort of always like a best guess of where you want the mesh to be at. But with the space bar trick, you can now move this curve anywhere you want for. You can move this, I'm sorry, the circle wherever you want and you can move this curve that you see here, anywhere you want, like so. So that's sort of what it is. And of course this applies to other concepts like isolates. Selections now can be done this way. Or if you want to change your isolate selection tool circle, it can be done this way. You just want that certain area and are trying to do that from outside is a bit hard. Trying to draw a mask in a certain area and trying to guess where it's supposed to be exactly can be a little bit hard. So that's why we have a space bar trick to help us get through that. So to do that, we'll go ahead and illustrate it through a control example. And so what I'm gonna do is I'm going to hold Control down. And I'm going to have my curve selected. And here it is. Hold Control. Draw out your mask and you're still keeping the curve alive. So your left mouse button should still be holding the curb down. And now you're releasing control. And now the curve is still alive by holding down the left mouse button. And now to pan that, you just simply have to hold spacebar down. That's all it is. Now you can also, if you want, you can hold Control. And you can also hold spacebar down to pan as well. But you don't, it's not necessary because one thing that you're going to find yourself doing is, is that you can, you might want to bend this around and trying to hold three keys might get a little confusing. So once the curve is drawn out, I just released the Control button all the time. And that way I have one finger available to create a little left Alt Bezier a to turn this end. So to recap, it's whole control, release control. But you're still keeping the curve alive with your mouse button or your whack him tablet by holding down and keeping it alive. And then just simply hold the space bar to pan. And again, you can also in the middle of this release Space-bar or tap left Alt to create a, a little bend and then go back to panning this. And then the, using some of the, for example, 3D sculpting brushes like the trim curve brush, the concept is exactly the same. Let's go ahead and just give up a quick little example of that. That's holding Shift control. We're not holding control because control is for mask. We're drawing out a curve just like before. I'm releasing Shift Control. And now I can go ahead and pan that by holding the left space button. Now, you can also do that with clip curves as well. And click Curves are probably a little bit easier. And don't screw up on you as much. But you can do the same thing there. So that's the concept of the Space bar trick. I, it's spacebar trick isn't like some universally everyone calls it. It's nothing like that. That's sort of my little name for it because it just doesn't really get a lot of emphasis through the pixel logic tutorials very much. So that's just something I'm just calling until somebody gets me an official name to it. So until then it's the space bar tricks, so that's what that is. In the next lesson, we're going to talk to you now a little bit about creating a custom UI pop up, That's this pop-up brush. So you can create your own brushes and put them in there. And how to assign some solo modes and get set up to begin understanding what spurt split screen workflow is. So stay tuned.
8. Creating UI Pop Up Menu: All right, Let's get started. In this lesson, we're going to finish off this section by talking to you a little bit about how to customize your user interface in ZBrush. And more importantly, we're going to talk to you a little bit about creating a pop-up user-interface palette for you to access some of your more commonly used tools to expedite your workflow a little bit more efficiently. So let's go ahead and get started. In this world, we're going to first disable this light box by either clicking on light box or hidden comma. And well, I'd like to have access to a pop-up for my brushes. So I'm just going to draw in a cylinder here and left-click drag and hit the T key. And you'll notice my brushes start to light up right there. Now from this point on, one thing I want you to take notice of is, is that you'll notice the, we're going to need to have a solo mode available to us in our pop-up UI window. So to do that, this is something I did intentionally. Some computers have a 15 inch screen or so and they have a lot of what they're supposed to have cut off below goes transparency to get that solo mode that you see below it back. We're just going to go to up here where it says Load Previous user interface layout and just left-click on that. And then just to the right of that there's load next user. Nice layout. Click on that and you may notice the solo mode comes back to you. Now, that's important because we're going to need to have that there in order to drag that into our pop-up menu as we move along. So before we can create a menu for ourselves, we have to go into a customizable mode so we can drag everything that we need on to that menu. And to do that, we're going to go to Preferences and dock that over to the right side. You can do that by clicking on that left circle or left-click and dragging that circle. And you can just kinda bring it in like so. Now from this point, you'll see it illustrate that we have a config tab menu under our preferences. We'd like to left-click and drag and to go into our edit mode of dragging whatever we want around, we hit Enable Customize. Now enabled customize is where you can just move anything around you want to see or rearrange all the buttons that you're seen in ZBrush. And to do that you just hold left, controlled, left or Alt and left-click drag. Anything you want on here to B. Sort of re, rearranged to your liking. It's a very much something that you can experiment around if you're new to this, I don't have any recommendations. I don't really recommend that you try to move too many things around. It's better to learn everything at their default position before you start experimenting on alternate user interfaces. So keep that in mind. So now that we're in this mode that we can move everything around, Let's just get started in creating our pop-up menu. To do that, we're going to go to our custom UI, and that is within our preference tab. And that's going to be where we open that up. We see Create new menu. Let's go ahead and left-click on there and create that. And then you'll see a please enter menu title for this. I'm just going to go ahead and title it. Start. Starter menu. Oops, there we go. And I'm just going to hit return. Now once you do that, you may notice that up here, it's going to then be transferred. And you'll see it right at the end. It may actually show up also right here as it takes a little time to categorically load. But once you left-click in there, you're going to notice it's a little bit empty. Well, that's because we didn't drag anything in there. So let's go ahead and get to that and start to fill in in this menu on all the things that we need. Now you may have an idea of already the tools you wish to put in there. So feel free to do that if you've got some experience, but if you're new to ZBrush, I'm going to give you some of my more commonly used brushes. I don't put a lot in there. We're not gonna go too crazy in this starter menu. There's a lot you can put in here, but for now, I just want to keep it a little bit simple so you can get a little bit quicker access to it. So the first thing we're gonna do is we're going to put a few brushes on there. And, you know, the one thing I want you to keep in mind is that don't think you may have already come to the conclusion that you might want to just left-click hold, drag, left, control, left Alt, drag something in here. But that's actually not where we're going for. What we want to do because this is a selection of the current brush and it's interchangeable. I don't want to really do that. I want the basic standard brush that is within ZBrush to be put in there. To do that, let's go ahead and find where our divider is, which is right around here and double-click like so. You're going to see a new empty space. And from here, I'm just going to dock a new brush over here. And as you can see, it's the smaller areas, these smaller alternate selected areas that we want to go ahead and left-click and drag. So if it's your standard brush, go ahead and left-click on it and click some arbitrary brush so that standard brush will choose, will show up here. So let's go ahead and hit. Okay, I think I clicked the wrong one, but left control, left-click drag and then bring that standard brush in there. I'll do one more example and then I'm going to fill out quickly the other two that are already within here. So let's go ahead and choose. Let's say we want to move brush in there and we are going to need a Move brush. I'm just going to left-click and find that move brush, which is right there, left-click on there. We do not want it to drag in this position because it's the currently selected brush and it's interchangeable. So I'm just going to left control, maybe choose a different brush and then find where my move brushes now that it pops up here. And left control, left Alt, drag, like so. So now I'm just going to fill out a couple of others I have already on here. So Damien, damn standard brush is going to be on there and I'm going to rearrange the order there. And I like using them flayed for some certain particular areas when it comes to seams. And I'm going to also use the clay buildup, like so. Now the next thing we're going to need is we're going to need that solo mode brush the brush. We, that's where we started off with changing our user interface so we can see this brush down here. Let's go ahead and bring that in there as well. Solo mode is going to be very important for us because we're going to be switching everything in and out on and off of all the other meshes so we can still maintain some reasonable sculpting frame rate material. A reasonable frame rate for us doing sculpting and going into sub tools and turning everything on or turning everything off can be a bit of a hassle. So let's go ahead and do that. Old Left Control, left Alt, left-click drag. And if you're wanting to know where transforms are, you just go ahead and R, I'm sorry, where solo mode is, you just go to where it says transforms and find solo mode right there. So speaking of transforms, we're going to do one last thing, drag one last thing in there, and it's going to be our split-screen workflow slider. This is the slider that is used to turn on and off split-screen workflow mode. And we're gonna go into what that is. We explained a little bit more in the what to expect area, but to have a split screen enabled, we have to always toggle this great, this slider on now, right now it's grayed out, but don't let that scare you because in the next lesson we're going to talk to you how to enable that. So left control, left Alt, left-click drag, and let's now bring that in there. Like so, and it should be now in there. So now that's your starter kit. If you want, you can go ahead and try to put a little bit of a divider in here to help. Like get a new mode, like so. That's always nice from our custom UI. If you want to make it prettier like that, That's always a nice thing to do. But for now, I'm going to close everything out and I'm going to close out my brushes. I'm going to close out this divider and bring it back. And though next step for me to do is to add a pop, make the menu pop up in our workflow area. So to do that, we're going to talk to you a little bit about turning off Enable, Customize and creating a hotkey. So as you can guess, turn it all. That wasn't so hard. Now when you turn off Enable Customize, we are now in a mode in which we can assign hotkeys to what we've created. And once you, Let's go ahead and give you an example. Let's go to find where our starter menu is. And before I start, I want you to keep an eye right here where my mouse is, where there's text showing up when you put your mouse over some Keep an eye right here. So my mouse is going to hover over Start menu and I'm going to hit Control Alt. Left-click and you're going to see something pop up. Remember that's left control, left top, left click and release. And it's not holding it down, it's just release. And you'll notice press any key combination of hotkey. So that's going to be, those key combination of hotkeys are going to be what creates our pop-up menu. Now, that is important. But I will say this, do not use any shift keys please, because shift will get mixed up with the brushes that you have in your starter menu and what's supposed to be used as smooth wind up being used as a standard brush. So please don't use any shift combinations for me. I'm going to hit Control C. And when you do that for me, I get a pop up because I already did this before. And it's just asking me to overwrite the previous set hockey, I'm just going to hit Okay. Now when I hit Control C again in my mouse is in the viewport, main view port, I get a pop-up, and that's how we can now access. Our keys are quick keys, buttons and all those fun stuff, all those fun, enjoyable things. The last thing we have to do now is we got to save this user interface out. So when I hit Store config, that's going to save the menu out. Now, we're important thing you want to make sure I always like to do this a little quickly. I just go ahead. Just because he had Store config does not mean that you are saving the quick key. So I always do this. I hit ZBrush, quit and I hit now. And then I get this tab closing ZBrush save changes to the startup hotkeys file before closing, I always hit yes on there. So that's going to be the important thing to remember or else you're going to have to reset your hotkeys again. So that concludes how we get to our pop-up menu. Hope that helped you. In the next lesson, we're going to talk to you about loading our references in and how to work spotlight and how to work with the split screen workflow. And that will be covered as a separate pre starter warm up when we bring in our meshes. So stick around and stay tuned.
9. Base Mesh Introduction: All right, Welcome back. Now, in this lesson tends to be more of a bonus section that is meant sort of for graduating past the introductory level. And it's going to be detailing a discussion regarding base meshes, particularly pertaining to what base, what base meshes are, their function, and what methods ZBrush has to take the Creating base meshes, what methods will be using to create base messengers with and why we're going to do that. And it's going to give you a good opportunity to work in practice for the first time in split screen mode with your previous lesson where you established your UI like you see here. So to get started, let's talk to you a little bit about what a base meshes. Now, a base mesh is essentially a mesh that has the proper silhouette that captures a starting point for where your character is to be at. Now, let me go ahead and give you a good example of what a base mesh looks like. I'm going to go up here to tools and I'm going to hit Import. And I'm going if you seen your resources, you'll have female BaseOne underscore. And this is going, I'm going to hold left-click and drag out, and I'm going to hit the T key. Now what you have right here is an example of a base mesh that we made. And it's going to be preference that you use this base mesh, but we're going to show you how to create this from scratch so you have a good baseline for it. Now, to get to this point, ZBrush has tools built in to its program to create base meshes like this. The two most common ways to do it are more older school way where we use something called Z spheres. And what? Z spheres are kinda like the spheres that play sort of like a connect the dots, stick figure, sort of representation that resemble a silhouette of the shape that gets converted into geometry. I'll go ahead and bring in some Z sphere. So you can see this is an example of a Z sphere. And of course, if I hold left-click drag and out, you can see how I can make Z spheres out of this. If I press the W key, I can move these around and even I can, if I want switch back to QC to draw something, I can put a Z sphere right there, hit W key and move some of these around like so. I can also go into E and then sort of change the scale of all of these. In addition, we can do a whole bunch of fun things like if you hit the R for rotation, you can rotate where the Z spheres go. In this basic, basic concept, you create sort of like a stick figure, silhouette that is resembling the Z sphere. Afterwards you would go down to adaptive skin and probably convert it into a mesh like you see right here, that helps you out with the silhouette. Now that's just sort of a basic breakdown of how that works. Obviously, I didn't make no effort to really try to hit it because we're gonna be moving on from that. We're not going to use that approach. Again, that is the older method of creating a base mesh, the width, the release. The second method is that with the release of DynaMesh, we have in popular trend of people that's simply take and hit the append tool and bring a sphere in, like so. And they may hit like for example, the R key, scale it down and they'll take this sphere and they'll turn it into a DynaMesh sphere. And to do that, we go through geometry. And I know you're wondering what DynaMesh is, but we'll get there in a second. And if we go to geometry and find where it says DynaMesh here, hit DynaMesh just to see what it looks like. It remeshing and read changes the topology. Now why, why is this so significant? Well, if I go ahead and bring up the Move brush like so, and make it a little bit big. You'll see all this stretched geometry come out. I'll hit X for some like so. And then if I hold down control and left-click drag, it meshes really quickly and you get a nice good amount of resolution and continue on, which is pretty advantageous. If, for example, I hit the B key and I go into snake hook mode, you know, I can really start to get a character just built right off the bat. And I know just doing some fun with this. And then we go with the Move brush to start moving everything around very quickly to sort of make what we want. And you can kind of get an idea with enough enabling, you can get what you want. Now, if usually for me it would take about anywhere from 20 to 40 minutes to establish anything into this. But the reason what we're gonna do is something a little bit different. And quite frankly, I find it a little more efficient and hat affords you a little more opportunities to do not only game characters, but stills as well for 3D printing. So what the method we're going to go with is a method that utilizes a combination of both approaches. Now these two approaches are going to be a tool that ZBrush has within its light box that is specifically built for constructing base meshes and that is mannequins. Now, mannequins are a combination of both Z spheres and what you would eventually result to using DynaMesh to alter the geometry to what you want. So what we're gonna do is this. We're going to go ahead and click up here to light box or you can hit the less or comma sign to bring up light box. And we thought this would also be a good opportunity to give use lightbox just to give you an idea of what you can see in it. And we're going to go into the folder that says mannequin. Now from here, you'll see a whole bunch of different types of mannequin pieces to use. You got a mannequin hand. A mannequin human, female, if you want, you have a eight head female right here. I could go with either one. I may just go with this one right here. The eight head female, it's just below the folder. And I'll just go ahead and just hit no. And we'll have ourselves a mannequin. And just like before, it's like a very constructed Z spheres project. And what I like about this is that it's really built her posing. And in our case, we want to establish a T-Pose. So if we go ahead and left-click on like say the arm, and then just clicking on the triangle, not the circle, just the triangle. You'll see that we can kind of exert a sort of control in all of this. Now, be wary that rotate is on up here. But if you switch to W and move, then if you click on any of these spheres, you're going to have a stretchy area and we don't want to stretch the proportions. So I want you to keep that in mind. So let's hit the R key. And if you do that, back up to where it says rotate. And let's just go ahead and left-click on each place to bring up the highlighted view, make sure x is turned on so that you have symmetry and kinda pose your mannequin. Now here's where we get to have some fun for the first time. Now, what I want you to do from this point on is I want you to get practice with your base mesh that we have in your recessed folder and habit compared to this piece. Now, if you are planning, this is very important for you to hear. Now, if you are planning on creating a base mesh from scratch, it is very, very important that this base mesh matches the scale of the 3D reference of the base mesh. Because if you're going to be using any further 3D references and split screen mode, the scaling will be off, so the one side will be very far off and the other side will be very close. So we're gonna go over that in a bit of a second here. So here's what we'll do. I'm going to go ahead. And because we started this in a new project, we lost our base mesh. I'll just going to click off into a sphere here and I'm going to hit Import and read, bring in my female based mesh again. Like so. And then I'm going to go ahead and go to my mannequin. And I'm going to bring them both together in the same sub tool. Because I just now have two models. I brought one model in and now I'm going to merge it into the same palette of sub tools for me to work off of. So I don't have to switch between these two. So to do that, we're going to hit append and bring in the base mesh. You will once again notice that if I hit transparency, that it's a little bit off scale. And I will say this. I don't want you to change the scale of the character. It's the scale of the mannequin. And we can't change the scale of the mannequin until we make a mesh out of the mannequin. So for that, let me go ahead and show you what I mean. Turn transparency off. If you want to go ahead and just sort of kinda just move the character into a very similar pose, similar to the character that we have. That's fine. I'm hitting W and cheating a little bit to get the look book. That's fine. And now that we have that, let's just go ahead and turn this into a sculptor mesh because you'll notice you can't really sculpt anything on here. You can only see sphere, so Z spheres aren't sculpting. So to do that, to make it a sculptor mesh-like our base mesh here, we're going to go down to adaptive skin. And depending on what resolution you want, you can get a little bit of a preview of it. Like so. If I hit Shift F, I can see a little bit better. Or if you want a little bit more density. And you'll just have a higher poly count. I like to start off a little bit easier here and just hit make adaptive skin like so. Okay, so now that we have make Adaptive Skin, want to go into my sub tools and I'm just going to turn off the visibility of my mannequin. So it should just be visible this piece. Now, take your time. Pause at any moment if this has gone too far, too fast. But now, once you are caught up, we want to take that mesh that we created just now, and we want to bring it in here. And we're going to hit append. And now you'll see we have a little bit of a fine old left Alton click. We can switch from this sub tool to our mannequins sub tool will have ourselves a good starting place. So now what we wanna do is we want this mannequin to scale to the same size as our base mesh. So let's go ahead and just bring it to about or right around there. Like so. So we have something to look for. Now, what's the goal here? It's simple. It's going to split screen mode and work on our anatomy of our basics. We don't have to get perfect anatomy. Remember, our base mesh is mainly used just to pull off articles of clothing. We don't have to sculpt technically toes in here and we'll show you how to get hands on there with more tools. But at this point, this is the moment in the point that you want to be at right here. So if you want at this moment, go ahead and hit the quick save button. And in the next lesson, we're going to talk to you a little bit about adding some volume, how we put in a little bit of DynaMesh and how we're going to use clay tubes and move brush to give us one step closer. And finally talk to you a little bit about a technique in some of the ZBrush masters like to use, using DynaMesh to bring in some hands as our intended for tools of creating base meshes. So stick around and stay tuned.
10. Base Mesh Body Blockout: Okay, and welcome back. In this lesson, we're going to pick up where we left off. And that's going to be working on trying to establish, not necessarily anatomy, but the silhouette of our character right here. So just trying to get the shape going for our character so it matches properly here. And we wanted this to also be an opportunity for you to get your first session practice with split-screen workflow with the models we have proved it in here. Again, as you go through the course, you will be given two options for reference. Both 2D reference for something maybe like Intermediate 2. And the 3D reference like here is for somebody who wants to start a little bit easier on learning C brush. So we figured this would be a good opportunity to get us going here. So also, it's going to be an opportunity to not just practicing your smooth brush, but also learning how to work and bring up the pop-up screens so that you can navigate through it like so. So and for that, we'll be primarily focusing on inflate clay tube and move brush primarily. And of course, we're going to give you your first dip into giving you an understanding of DynaMesh. And the next lesson we'll be giving you, expanding on DynaMesh, how we can create an attach a primitive objects in addition to a base mesh. But that's down the road and the next lesson, so let's just go ahead and get started. So for this first one, I'm going to go ahead and hold Control C, bring up my inflate. I'm gonna kinda start on the lower body and just work my way up. And what I wanna do is I want to bring in the gap there. And that's when the nice thing about inflate, it kinda inflates everything is He's see like so. And what we wanna do is, is we kinda want to just create ourselves a little bit of a V. Maybe give ourselves a little bit of a round out like right here. Like you see. Now, you'll notice that the mesh has just kind of smushed in between. So now we're going to show you a little bit of what DynaMesh is. For those that don't know, DynaMesh is a test. Isolating is a feature in ZBrush that test relates geometry when the polygons become too low resolution. I'll go ahead and give you a quick example. First off, let's make sure our DynaMesh is enabled. Let's just go to geometry and you'll see it's turned on. The resolution is at 256. Higher resolution will give you more geometry in here. And when I say more geometry, I'll go ahead and give you an example by holding down Control and then dragging off an empty space. You kind of see there's more equivalent, equivalent geometry all around here. You also know that it, all the smushed in geometry that was intersecting here has just sort of been cut off and just retest slated to be around here. So there's no geometry that is within the mesh. So keep that in mind. Also, one thing i'm, I'm gonna do is I'm going to turn this into a single poly groups. So I, I don't really need necessarily anything up here. I'm just going to hold down control and hit Command W. So I have one single mesh poly group. So now that we give you a little bit of a taste on that, I'm going to bring up my resolution to say 456, do a tessellation. That's fine by me. I may bring it up a little bit more, but what I'm doing right now is I'm having my right hand on my webcam tablet, my left hand on my keyboard, and I'm just holding Shift and just kind of softening out all these pieces. Now I'm choosing a lower resolution because I want to collapse this and more. If I have higher resolution, you're going to be holding Shift and collapsing things for a lot longer. So let's go ahead and bring the sun a little bit more. So it's kind of a little bit closer in C. Let's go ahead and do the same over here in the back. Just a little bit more. And we're just kinda given ourselves those steps. Just those real quick steps don't make it too close or else the DynaMesh will bridge into kinda connecting the gap here. And then from here, I want you to just think about switching between inflate and move brush to kind of rearrange and mimic your silhouette. So as you can see, I'm kinda just doing the same thing right now. She's a little bit muscly mess, but I can change that pretty easily in a second. So from what I look over here, I'm just using my reference. So I'm going to just bring this up like so. And it's not that, it's not really all that difficult. It's just a little bit of work to just finagle in and messing around with it. You can do either DynaMesh arm, sorry, You can do either inflate like kind of what I'm doing right now, or you can go in and manually work it with the Move brush and kind of choosing the ladder in all of this. So I'm just going to be choosing the The inflate. So notice it kinda goes inward on the lower body. So I'll use my Move brush, hold a Control C, bring up MOOC, and I'll go ahead and bring a higher radius. And so I can kinda do a little bit more fun with that. I'd like to, I'm turning my resolution just slightly down because I kinda want this to collapse and a little bit more. There we go. When I say collapse in, I mean, like when I'm using holding Shift down and smoothing everything out, I kinda like to bring things in and collapse them down. So we're going to switch now into clay buildup. And it kind of just slender Li connects and there's, it's not doing the same thing here. It seems very segmented here. So let's just paint in just a little bit. Then hold shift. And maybe make this a little bit smaller. And again, higher resolution gives longer times in holding Shift down to kinda give you what you want. And lower resolution gets quicker times. Some kinda have something a little bit easier. It's a little Buchla good. So we're just going to have to work with which is bringing it in muscly here. Let's just bring in the legs a little bit more and then hold shift. And it's just, it's just sort of like a game of mimicking what you have right here. It's a little jetted out in the lower area here. So let's just go ahead and bring out our character. So you can, if you want, if you ever wanna do any subtle any subtlety to any of this, you can always just work with damn standard carve out the muscles. But like I said, we're not really focusing too heavily, too heavily on the as I say this over and over again, I'm not focusing too heavily on anatomy at this moment. We're going to get into anatomy. The thing is, is I'm only trying to focus strictly on establishing some kind of silhouette because our goal on this thing is to get close off of this character. So I'm going to go ahead and just work my way up now. Like so I'm just going to hit MOOC. Maybe widen out the upper body a little bit and just holding Shift down and smoothing this out. And again, you just take your time in all of this because this is not a race. This is you trying to get comfortable with the controls of using your whack them tablet and using your pop-up menu for the brushes that you are feeling most comfortable with. So maybe traunches the slight. I kinda like to think of the the clay buildup brush as a volume adding brush. And that's mainly just me on there. But again, we'll look at here we see, make sure you're understanding silhouette and profile. It's sort of a slight angle off in this one sort of kinda going outward. Let's go ahead and fix that. Using the Move brush. Let's go ahead and maybe back it up a little bit just to see where we're at. Slightly do something about the legs whenever you're going to do this, make sure you're kinda glossing over with shift. You don't need to carve the anatomy just yet. I keep reiterating that it's not an essential component just yet. Just get the rough shape of everything. If you want, you can use through dam standard and maybe just kinda card, which is something in the center. That's and you can do that. Just make sure just getting rough sketch blackouts. And I keep reiterating it over and over again. We are doing this to have some kind of a profile to start off with when we pull close, and that is our main, main feature. Who wanna do anatomy? I may upgrade this little bit later on to be anatomy. If I get a little bit of time off of freelancing whenever I do an inflamed, one thing I always do is I always drag control and then smooth so I can add something there. So I could any Chet geometry that's stretched out, I can kinda just push it in. So we're going to go to the arms here and don't be too afraid of maybe just of using the flat brush. Just make sure when you're using the brush that your test isolating and holding down control. We go, It's a little bit of a stream right here. So let's go ahead and see if we can do something there. Honestly, I think a standard brush my work better in that area a little bit. And again, this isn't just about practicing with DynaMesh or all the other or everything else. Make sure you have left Alt key turned on and you're having fun with pushing things in as much as you're pulling things out. I'm not going to do too much again on the, you can feel free to also go through and do experiments to see which brushes work. I would say it's something that, That's what this whole beginner section is kind of about. It's about just trying to get you to kinda get comfortable with what you have. So we have, for example, let me go ahead and see here, I'm going to, I'm going to add these arms are kind of in the way. So what I wanna do is I'm going to hold left Alt and click on this. And that's going to bring this guy over here. I'm going to hit to make sure my X key is on. So it is on. Now what I'm gonna do is I'm going to hold Control Shift. And that will give us our arm. Then Control Shift Invert now will give us a little bit more of a profile. So now we can kind of see a little bit easier of a profile. We can do the same thing or we can do the inverse where we hold down Control Shift. And then instead of inverting and we can just simply hold lept all to make it read like so. And we can have a little bit more of a silhouette profile, just make sure it's not your characters. And to lumpy, let's go ahead and work with them. Move a little bit more, see if we can have some fun with that. Little angular here. But we can have some fun. Just gets something that you can have that you can pull close off of for extractions. And that is it. Let's go ahead and bring it all back in. And then hold shift and smooth some stuff out. This guy out here collapsed in a little bit. So let me go ahead and bring in a little bit more across. Let's bring back the I'm just holding Shift Control and click, just tapping an empty space so I can get something back. We're going to show you how we deal with our hands. And the next one, we're just trying to get the basic forms on all of this. Once you to just take your time on all of this, you know, between using in like matters of the arm, I find that the brush I like to use is debt tends to always be the Move brush. But if you're using the Move brush, just make sure you're glossing gently over with that smooth modifier to make sure it works. And then I'm just gonna kinda punch in with left old, kind of slightly takes some volume away and put some volume back and then bring it in. Now, I can see if I can just simply carve something here. I can carve something with the inflate here maybe. Or I could just carve something with the the dam standard or the standard. Just kinda bring it in. Let's bring in so little bit of the ring and the move now rearrange some things. Oops. Let's go ahead and see if we can get that back a little bit more volume. So little bit Muslim. And that's our I. So if we wanted to do some things like with anatomy, you know, you could get to a stopping point at this point and I would be happy. But if you wanted to do some things with anatomy, you can. It's always common to just start with maybe something as simple as clay tubes and just bring in some muscle groups for of the bicep. Forearms can also have a little bit of a cut. I like cutting in with the damp standard to help him hit my marks. Where I wanna go. Now, like maybe something here. But those are pretty much the idea. Spots you're going to want to hit. We want to bring them move again. I like to bring my Move brush in a little bit. Not to saying, like I said, we just need to establish something that gives us a sense of what we say over and over again. Silhouette. This course has an incline difficulty. So what that means precisely is, is that as we go further and further and higher and higher. In all of this, we are going to work on things like like how to practice further with the cloth wrinkles, sculpting, how to practice further with extractions, how we practice with creating creases and z remeshing. All of those things will make it easier when we go into our hardest difficulty level setting, which will be in the facial anatomy, that we will start, really start to give us something to have some fun on. But like I said, I don't make these, these, these are, Shall I said, these base meshes to overgeneralize are too detailed because again, they only serve me for one thing and that is just creating sort of like just starting spots to just pull off clothes. Because in the end I just go ahead and make something very different anyways. So I'm now really sculpting the anatomy. I'm just sculpting the silhouette and the shape for you to get started to pull something off of here will get further into that later down the road. So this, if you can get this far, that's good, that's a good stopping spot. And probably we'll have to do a little bit more on the chest region. But again, I'm not really too heavily keen to like sculpting out accurate breath right now because it's going to be a baggy shirt that covers over this. So let's just go ahead and once you get to this stopping spot, just go ahead and move to the next one, which will be how we sculpt on a like a head that will be placed. And we're going to show you how to get a base mesh head onto this using DynaMesh. We're going to show you how to get base mesh hands onto this with DynaMesh and then we're going to move on from there. So with that said, you can stick around and stay tuned.
11. Base Mesh Head Blockout: Okay, welcome back. In this lesson, we're going to continue creating our base mesh from scratch using all the features that we have here in ZBrush. Remind everyone, this is one of many different ways we can arrive at a base mesh that we have. And again, a base meshes just a mesh that has a form of free you to provide as a starting point. And for this case it will be a starting point to pull and extract close off of so we can start sculpting off of this. And that with that said, this is in the introductory section. So it also serves doubling up as an opportunity to practice split screen mode and also practicing your pop-up menu and working between all the different the starter brushes that we have laid out for you here. And again, feel free to add more if you wish, down the road. So let's go ahead and get started. Now, I was I said we're going to be doing the head section next. And to do that, we're going to go ahead and put a sphere in this area and eventually down the road. In the next lesson, I'll show you how that sphere attaches, but that sphere is going to be used to be molded and sculpted to shape roughly the same shape as this piece right here. So with that said, let's get started. First thing I'm gonna do is I'm going to turn on my sub tool. I'm going to turn off the visibility just now for the reference that we imported in. Turn, split screen mode off. And we're just gonna go ahead and I'm also going to turn off perspective. I think we'll go ahead and do is we're going to have to bring in a sphere. So sub tool will hit append and we'll bring in a sphere shape. Everything's a little gray, so I'm going to make it all white there. Now I'm going to go into sub tool and click on my sphere, hit the W key, and I'm going to go ahead and translate it above and scale it in that white circle, white square there. So it's sort of in the relatively same area of where the next should be. We'll do more reshaping down the road in the next lesson. But for now we're just going to work with that. So now that we have it roughly in the same spot, Let's go ahead and turn off our main mesh. We don't need it anymore for now. We just need to now turn in, turn on our 3D reference. And what we're gonna do is we're going to just turn on split-screen workflow. And if you hit F, we can get everything, split. Everything on the right is going to be sculptural. Everything on the left is just sort of for us. If you want to switch and sculpt this just hold left Alt and left-click tab. And now it will be on that side, which leads us to the next point. If I hit Shift F, you'll notice a little poly group right there. So if I hit Shift and left-click, I can isolate, select that, and then go back over here, hit F. And now we got ourselves a little bit of a starting spot for us. Now that was a mouthful, so you might have to rewind, but we wanted to get that out of the way. So a reminder all this is is just simply getting the rough shape of everything. You don't necessarily have to sculpt in all the details here. And we remind you that it's not really cheating at this point. This is a pretty blank canvas with no anatomy on it. And if you go ahead and turn your light box, you'll see in the projects tab, this is actually the head planes smoothed out like so. So and then it's been attached through DynaMesh. So we're going to go ahead now and try to get something roughly to the similar shape put on here. And then again on the next lesson, we'll show you how to attach that along with the hands. So let's go ahead and get started. So all first off, hit the X key so I can go into the cemetery mode, make sure your perspective is off. And I've believed the first thing I'll start off with is selecting my Move brush and maybe just creating, well, make it a little bit smaller just for my own benefit. And I might just kinda just starting off with, I'm going to work on creating a shape similar to what I'm seeing over here. Now, keep in mind, we're also going to take this time to be learning a little bit more about DynaMesh. So I'm going to probably give you a demonstration of that in setting this up for DynaMesh. Fact, it might be a good time to do that for those again, that don't know DynaMesh, It's like a tessellation geometry test isolating feature in ZBrush that test relates geometry. If it's stretched out too much, it kinda raise meshes and rate equalizes the geometry. I'll show you exactly what I mean here in a second. By hit command D and divide it a couple of times, you can kinda see it. And then if I go through geometry and go through it, Project, turn up the resolution to most. 312 and hit Done a mesh will hit no and get a little bit of a DynaMesh going on right there. So that's just sort of for your benefit to know. So let's just keep going. So now I'm just going to kind of work from basic starting point, from the side view and the front view. And then we'll work our way to three-quarter views later here. But all I'm doing is kinda just checking out the chin, checking out the top of the head and seeing them line up. Like so. And again, please take your time on all of this. And if you want, you can hold down control and just kinda drag a line to kinda see how far off you are. And you can kinda see I'm a bit far off. Eyebrows and knows all those things are going to have to be looked at. And again, I'm just working on the side right now. Now work in into the front just yet. And kind of see, we've got a bit to work with there. It's kinda oval it up. Maybe make the sides. We want to kind of have a little bit of a starting point where it's a little bit more like that. Maybe in the centers It's a little bit wider, but that's probably towards the front. Then from there. This is where we have some fun and just kinda switch between the brushes here, all the bush, all the brushes. See here. I'm gonna see if I can carve out a little bit of take-away, a little bit of volume by holding left all among Clay build brush, just kinda push in a little bit. And it kinda looks a little bit like a helmet. They all tend to o is look like a helmet. Or alien a, I guess it all depends on the order of what you try to what you try to move first. Not go inward a little bit. You know, just just go a little easy. Because it's an iterator. It is in fact an iterative process to arrive at this, all of this. And now it's not something you can just go straight linear to. Everybody arrives at their shape. It, it's, it's different for everybody. Everyone has a tendency to just arrive at their shape at different points or different segments. So don't feel like you need to rush it. I'm just going to work on making a mask here for the neck. I'm holding down Control and just simply stripping a mask holding control and tapping to invert the mask, I'm just going to hit W and just kinda move it down a little bit. And this is a big opportunity to show why DynaMesh is important. Here I hit Shift F, you see all that Stretch Geometry, hold down Control, clear the mask, hold down control and drag again. And we have a little bit more tessellation, more geometry to work with, to sculpt with. We can kinda do some of this is, is just, you know, it's just an iterative process. And, you know, one thing I always do is I always keep rechecking my line right here, see like right there and kind of just see how far off the ER. So don't be afraid to get back in there and just check to see where everything is. And I just want to make sure just to take your time and just get the silhouette of this looking just right for you. Again, my one to go through. Like I said, this is all just on a layout. It's not really going to be our main anatomy just yet we do that at the, towards the end of the course when you get a little bit more practice going on here. Let's go ahead and cut into the jaw line, little bit of an angle, and then maybe cut a little bit more. And then if you want, you can hold left old and just kinda make damn standard, pop out a little bit more. Let's see here. What can we have fun with its work, the MOOC brush a little bit. So now probably work a little bit with the eyes here. And you can use left Move brush or you can use a little bit of the standard as well. Either one. I always for some reason have lazy mouse on for my standard. I don't know why. So I'll just go ahead and Just take it easy. Like using dam standard though it's a little bit easier to control than standard with mouse button. And again, let's measure out that's roughly the same area. Little bit flat at the top here. Might little bit. And of course, feel free to work with your volume brushes. Yeah, so we're working with the dog. Don't worry about that. That's just going to be something we can fix with her. Damn standard. Just go. And of course, Let's go ahead and sculpt a little bit of little bit of bone on the top here, and kinda see our home phone with them. Now, one of the last things we can do here once we are comfortable with where we're at with the head, is we're going to do the ears sort of last. The ears are a little bit on. It's somewhat important. You gotta get about the top or the bottom of the, it's a little bit off on this one quite a bit. I actually, but you want to get the bottom of the ear to be somewhere a little bit closer to the bottom of the ridge. Of the nose and the ear on the top of the line to be around the eye line. So let's go ahead and maybe just do a little bit of a mask. And just core, sort of just use the Move brush there and we're just going to pull some Mao home, home left old, then making that brush smaller and told them left all, I'm sorry. Left all to pushing in and out. You can get and keep in mind, this is all going to be once again, kinda read DynaMesh down. I am right now and just having fun, just kinda messing around with the proportions, nothing really to saying. She's kinda working with C, You know, if I can get a fair shake that just represents what I got over here. Little bit more pronounced on the impact here. And again, it's also a little bit, as Linda said, it's all just a very iterative process that you should feel completely comfortable with just taking your time with. And again, it's all also for the sake of practicing. So just keep that in mind. And now you want to, I feel very comfortable at this point when you're getting to this point here, you're going to want to feel very comfortable with accessing your quick pop-up menu switching between the all the different brushes. That's pretty much what all of this as far as getting you to be more uncomfortable practice, we're not doing anatomy just yet. We're going to be working on anatomy towards the end of the course. Because again, everything here has an inclined difficulty level to sort of speak in. We just kinda want to work your way up to that once we get to the face towards the end here. And that's going to be very important. So kind of keep that in mind and remember it's, it's all, everyone arrives at their shape in different segments, in different time segments here. So just kinda keep that in mind. In the next lesson, what we're gonna do is we're going to show you how we are going to work with the getting you the getting this head shape here to be attached to the this head shaped to be attached to the main body here that you see. And we're going to show you how we do that through DynaMesh. And then we're going to also show you some extra features if you wish to start even at a lower or easier level than this current level, we're going to show you some of those features to how you can start even easier than that. And again, like I said, very important that you understand this. It is you taking your time on all of this. So please, please pace yourself. Please. Please also have fun with it. Because this is supposed to be sort of relaxing experience. We tried to give you the, all the, all the reference that you need. But in the end, you've got to be able to have a little bit of fun as well. In a course like we said, you'll get 2D reference in the next section as we step up our game with you. But with that said, just stick around and stay tuned.
12. Attaching Separate Base Meshes: Okay, and welcome back. In this lesson, we're going to continue on with our character base mesh and show you how to attach this face with DynaMesh into our main body. And we're going to use a opportunity since this is a beginner section for the people that are relatively new to ZBrush, to go over some extra features in ZBrush such as the insert meshes and try to illustrate important lesson about how there's more than one way to arrive at an approach to creating a base mesh. We're going to show you some insert meshes on how we create what they are and how they can be used to create some hands. And we're also gonna go over other features like mirror and weld as well as Z remeasure for a first applicable time. So let's go ahead and get started. Now that we have a relative silhouette. Now remember it. Don't get yourself too hung up on the perfect proportions. Once we finish all of this, we can swing around back to readjusting the face, heightened everything and making sure it matches. Because remember, it, we do recommend you use this base mesh that you see here over this one which will be on the files we download just so you can be on the same page of learning. But if you wish to continue to use your own base mesh that you want to do from scratch. Again, that's why we have these bonus lessons, so you can have that option. So let's go ahead and continue. Now, first thing I'll do is is make my goal to be attaching this to a full body. So I'll just go ahead and go open my sub tool. I'll disable the visibility of the main 3D reference. I'll bring up my pop-up, get out a split screen, hit F to frame into center. Now, I will go ahead and turn check on the visibility of my full body-based mesh. I'll click on that and hit F to frame that out. And as you can see, there's still some proportions that we need to do some readjusting to all over the place. And again, that's why we say, don't commit to everything. We need to do some work here on the glute and we need to do some work on the neck and also make these legs a little bit longer because I'm pretty sure just by looking at them, they need to have a little bit more work there. Pretty sure that the other mesh is also probably a little longer? Yeah. Looks like it has a little bit and are there so we'll go ahead and get to work on that when the time comes in the upcoming lesson. But for now, let's just get this head on here. So first off, I'm going to go ahead and hit the W key. And I'm going to just go ahead and try to size up and bring my head into view. Like so maybe somewhere around there just so it's kind of somewhat in the right area. You see? There's a little bit of a long neck. That's okay. Again, don't feel like you gotta get everything perfectly matched. Just go ahead and just get everything relatively in the same spot. I'm going to switch to this mesh sub tool by hitting left Alt and left-click. And then I'm going to bring up my pop-up, bring move and make my brush a little bit hot, bigger with space bar holding down, bring up that menu. And I'm just kind of kinda tucking all this in right now. I'll switch back to my head and took that part in. Nothing has to be committed here. Just getting this all set up so that when the time comes, we can go ahead. It's a little bit off. Actually, it's quite a bit off my standards. So we'll make that had a little bit smaller. Again, you don't have to get it perfectly straight. In fact, it's better to do the adjustments after you meld it on. Okay. So now that we got everything that we want and you're sure all the mesh of the body is tucked in inside the head. And again, I'm just using the Move tool and left all to just kinda push in. Let's go ahead and merge these two sub tools here. So start with whatever sub tool is on the top and click on that and go down a little bit. And we're going to hit merge down. So we'll just, and what that will do is I will just merge down to the sub tool below. And we'll just go ahead and hit that. We'll get a little undoable operation pop-up and just hit Okay, and now we got our Mesh Merge Down. Now again, these still exist as two different meshes. If I use the Move tool, I may not get a whole bunch of results. But I believe if I hit the Move topology, you can kind of see that there is definitely still two results. So let's go ahead now emerge and meld this end because we can kind of see it's just kinda going in intersecting right now. So we're going to use DynaMesh to do this. Let's go ahead and go through to geometry. Let's go to DynaMesh. And since it's already on, let's just go ahead and hold Control and just make a mask mark key and drag off. And you'll see now that it just merged the two. All the geometry that we tucked in underneath was also deleted for optimization automatically. So now it's just a matter of just kind of smoothing this out. Now from here, let's do a little bit of work, just trying to get everything back down a little bit. I think I'm going to bring this. I'm switching to my Move brush right now. And those shoulders are a little bit broad, but we're just kinda doing a little bit of work here. Again. Make it a base mesh, not a full anatomy Mesha little bit. May have had some merging. We'll just go ahead and and I'm just holding Shift and smoothing things down. I can't help myself right now. I just have to look at those legs and say, Oh God, do some about that. That's a little bit small. So ideally it's about 7.57 head lengths average. I like to always go with molten left Alt to rearrange my pivot. I'm just holding down left told to change the pivot so that I can be in a different location that way when I scale it like so. Oops, I can kind of get a little bit of control there. Alright, so there's plenty of things I can do here. And in the chest, it's not my 100% priority. I'm using this as a base canvas. Again, this whole thing has one centralized purpose for me and that is really about pulling close off of, that's really it. But even still we can do something right here. It's little bit bulked out for Build. So just hold down Shift ring. So men, I'm going to do a lot more. But that's probably pick that up on the next lesson with readjustments. So now that we've gotten what we want taken care of, we're going to go ahead and work on the hands. Now this gives us an opportunity for new commerce to see what the insert meshes to. What insert meshes are is insert mesh brushes are brushes that have pre established geometry that is simply inserted onto your existing geometry. So if I hit the B key and I hit, I kinda get a narrow down view of everything. So they're all right there, but I just simply the, I will give you something. So like if I type insert multi mesh basic, you can kinda see all the pre-established meshes right here. And if you want, you can see him in a better view by hitting M key here, like right here. And kind of see Everything's there for you to work with. It's sort of a nice way to also help you out. So with that kept in mind, we're going to do two things. First of all, we're going to select a different mesh, insert mesh. So I'm going to hit B i. And again, we're going to hit insert mesh part, body B parts. It should say body parts, but I had to hyphenate it. And with that, if I hit the MK, You can kind of see after I get out of Draw mode, all the different insert meshes you can do. We have anatomy for the arms, you have anatomy for the hands. And already you can come to see where the gears are turning for the opportunities of what you can put here. And now. Right now I think we have a hand. For example, this is a male full arm. But if we did like for example, a, a full body hand like so you can kind of see the opportunities that it yields. Right now I think we'll just go ahead and do a hand. You're probably going to ask, well, wait a minute, show why did you do it this way? Why couldn't you just do it this way from the start and just kinda play in our Mrs potato Head and just assemble it all together. Well, I could, but again, we wanted to give you. Opportunities to see what mannequin was and how it can work for both 3D printing as well as CG or game characters. So we wanted you to understand all your options and what's available to you so it can fit to the right situation. So let's go ahead and keep continue. Now that we got an idea what that is, once you to go up to where it says hand. So you can select that up here or you can hit M and select hand right there. Now, I want to cut this piece off completely off. I don't want it anymore. So yeah, I want to just get rid of it now, if you hold Shift and the control, you'll see it. The main brush where ultimately multi-method is turned to a selection tool. Let's click on that. And now let's look for our trim curve, brush, not clip curve, trim curve. And now if we hold Shift Control and drag out anything past the shadow line is what gets cut off. So let's do that and you'll kind of see that we cut off the handwrite their little ghoulish, but we'll keep on going. So now let's go ahead and put a piece right there. So if I just kinda click on that center there, you kind of see a hand form. One of the nice things about most insert meshes is that whatever you insert it on, you have free range to adjust that meshes an individual piece. It automatically masks everything out so you can work with your Gizmo to adjust it to the location you were at. So I'm going to first of all, one thing I forgot to say is I have the symmetry on. I'm going to be taken that off because again, trim curve doesn't work on the other side. I almost forgot to mention that. So let's go ahead and do that again. So I'm just gonna kinda face it, right, so, and drag that out. So now let's hit the W key. And let's just go ahead and adjust this. Like so, just so it's a little bit of a nicer place. Now, this is kinda cool. We have ourselves a good starting spot, but we're not completely done just yet. Now what I want you to do is I want you to actually explore even further options of what you want by giving you an idea of what split is under your sub tool. Because I want you to look at your fingers. The fingers here are very close together. If you tried to do a DynaMesh on that to merge it with the main body, It's really going to get some webbing results here. So we need to split out these fingers that you see. So to do that, let's go ahead and notice that the entire body here is masked while the hand is unmasked. That's very fortunate for us who especially something to keep in mind in multimethods, insert brushes because we can then take advantage of something new. Now what our goal is is we want to have a sub tool for this piece and a sub tool for this piece. So we can work on this piece alone using masks without affecting the mask here. So let's go ahead and just split that off just temporarily. So I'm going to go ahead and hit split unmasked. And you'll see now the mask which was unmasked, gets its own sub tool. So visibility is turned off. So let's go now to that. I'm going to keep the visibility turned on on both of them. And now what I want you to do is you're going to be able to take advantage of an old school transposing trick. Now, we didn't talk too much about this, but if you hit the W key, this is known as the gizmo manipulator. And again, it's a nice feature that's been going on for a long time. But before the gizmo was made in ZBrush, we had a transpose line that would be here all the time. Gizmos, just something that's easier for us to move on and comprehend. But a transpose line works perfectly for exactly what we wanted to do here. So here's what we're gonna do. Just watch my weight. We're going to disable the gizmo and turn on transposed lines. To do that, we're going to hit Transform and see where it says gizmo 3D. Let's turn that off. Now we have a transpose line. This was what was used to move objects around in ZBrush before gizmo, it is clearly, clearly very confusing. So you may be asking, why are we using this? Well, I'm going to show you here in a sec. If you left-click, you can kinda draw a line right here or anywhere you want. But this is what we're going to use to Web out and separate these hands. So I'm going to do this. I'm going to start from here where my mouse is. I'm going to hold down control and left-click drag. And you can notice how the mask. Automatically kinda covers this one area, which is really neat. And now if I hold, left-click and drag from the top of the finger from here. And I switch from, as you see here, the move to the rotate. And then just drag this guy out like so. You can kind of see where we're going now with this. So with the gizmo, it's a little bit like this. You can do this, but you gotta do a lot of new sensing, manipulating the pivot line and all sorts. If you get transposed line, we wanted you to know, again, like everything else, more features as we can give you to learn about C brush. So I'm going to hold off control, clear my lined, do the same thing again. I'm going to switch it if you hold Control and you get back to this, that means here in Draw mode. So let's clear off that and hit W, do it one more time. And then switch to rotate are like so. Hold Control. Drag a line all the way through to the finger. And hold control. And you can kinda see how quickly and nicely this works. It's like one of the few applications where I really do like gizmo 3D transpose R, sorry, transpose line over gizmo 3D else I would always just be in gizmo mug all the time. So let's go ahead and clear off the mask again, take your time and rewind back as many times as you can to grasp how that worked. Now, from here, you can now, let's see if we can just kinda move things too narrow out the, the hand a little bit here. There's kinda branches off here. This is kind of narrow it around a little bit more. And I'm just kinda readjusting so things can kind of look a little bit closer to what we had before. So you can see, excuse me. And then we're going to then use this opportunity to merge this sub tool once again with this tool. And now if we do that, we're going to go to the top sub tool which is above here. The main body. We're going to go to Merge Down, which is under merge within sub tool tab. And these two are together now. So now that we have that we can go ahead and once again as we did before, we can hold down control emerge. If you get a little bit of collapsing or it feels a little bit jumbled UI. You can go ahead and maybe just do something like maybe go through geometry DynaMesh. You might be able to do maybe like 428. And that should actually help a little bit. The reason you see these little dimples is because you didn't divide all the way through. I didn't really care about that mainly because I'm gonna be showing you a z or a measure after all this is said and done. So what we'll do here is we'll just go ahead and get all of this kind of re re shifted. If this feels a little bit small, if you look at it and it could be fine, but if it does feel a little bit small like that, it does seem a little bit like that. So let's just go ahead and do something here. I'm going to hold control, switch two. I'm going to hold control right there, hold Control left-click tap to soften that mask, invert that mask, hit R. You can do. Let's go ahead and turn our gizmo back on. Let's hit Transform. There that Gizmo 3D circle is right there. Let's go ahead and hit left ALT and the outside cone here to re-adjust the pivot point. And now you can kind of make it a little bit bigger if you want. If it seems a little strong. You can also scale it a little bit. You got, you got control over this. So you can change the scale. We're going to go into, maybe doing a little bit of volumes sculpting on the hand here in a second. But now we gotta figure out how we can get this across to the right-hand. Now, the reason we did it on this side is because in insert meshes, they give you left hands. So it's a little bit of a nuisance. We could have done this with cemetery, but I wanted the opportunity to show you a little bit more about mirror and weld. So let's just go ahead and make that our next little goal here. So what we're going to do is demonstrate Meron weld and how it works. If you go to Geometry, modify Topology and just simply hit mirror and weld, you'll notice it goes back to that. That's because it always mirrors everything on its right side over to the left side. So what that means is is that we need to go ahead and hit Command Z or just undo. And we have to get that hand to be over on that side. So if we take advantage of a feature within deaf formation that is mirror, and then you'll notice that it kinda just mirrors everything to be inverted to that side. So now if you try mirror and weld, you're going to get that result ZC. So with that said, we do have a little bit more things to go through. I think one thing I'm probably going to do is the hand still look a bit small on my end. So I'm probably going to say that that will be Now we'll probably be. My next task. Might even bring him in a little bit. Getting hypnotized and my work, forgive me, I just want to give myself a little bit here because I'm seeing some things. I want to make the arms a bit longer here, and I'd like to make the hand slightly bigger. I also want to give one demonstration super quick. On Z remeasure. Show you why we do 0 measure. Let's do a little more time. Richness or pivot point. They're really make these longer. So it's a little bit easier. Alright, so now that we have this taken through, I'm always a perfectionist in this area, so I'm probably going to be doing a little bit more when the anatomy section comes up. Now what I want to go ahead and do now before we conclude is, is I want to show you 0 measure. And then in the next lesson and we're going to go over doing a little bit more volume on just adding some quip volume into the hands and readjusting and doing a final check of our proportions all over to make sure it's scales correctly to the main body. Now, 0 measure, we've already done one demonstration of. But just to give you an idea, if you want to notice one thing here, I kind of have poly groups here, but I don't really care right now. I'm gonna do that in the next lesson. If I just go ahead and throw through Z remeasure as it is. Or show you one thing that is kinda nice to help clean up our base mesh. All right, in as you can see, we have our 0 meshed piece. It's a little bit cleaner as you can see. And we did do an optimization. If you look above, active points are now down to 11,374. I think we were 978, so that's pretty efficient. So we'll leave it right now at that, in the next lesson, we're going to work on our body proportions and getting this to match a little bit more. It's sort of a clean up of the body proportions. It's going to also be sculpting a little more volume into the hands and showing you how we can do poly groups, group loops together through a 0 measure operation to manipulate topology. And that's going to be an important one down the road when we do a lot of auto R3 topology Ising features. So grasping this concept with group loops, crease group poly, group loops in a Z remeasure method is sort of like an advanced version of 0 measure. So we started a little bit on the basic of what Z remeasure is. And in the next lesson we're going to take it one step forward, a little bit further for you. So with that said, stick around and stay tuned.
13. Base Mesh Proportion Adjustment: Okay, and welcome back. In this lesson, we're going to finish off our base mesh by doing a couple of more adjustments to the body and its proportions. And we're going to make sure it matches up a little bit more closer to our 3D reference. We're also good, didn't do a demonstration of making poly groups in conjunction with group loops so that you have something like this that you see before you. And then we're going to go ahead and finish the lesson by getting started on doing the hand and having leaving you with sort of a practice exercise, uh, to work on for the hand. So there's a lot to do. Let's go ahead and get started. Now before we begin, let's go ahead and just start working on just fixing up the head or the body so it matches with the head or I'm sorry, with the 3D reference, making sure everything's there. If you'll notice minds a little bit smaller. So you want to go ahead and do measurements like with the mask by holding Control in empty space and seeing if it locks up. It doesn't really lock up there. So I'm just going to go ahead and hit W, hit my center key to center it, and then hit left Alt on that rotation to reset my gizmo. Let's see if we can get this to size up to the same height. As we see here. We can also use this border line here to kinda get ourselves a little bit more of a reference if we need to. So that kinda gets us a little bit closer. We also noticed the heads a little bit small and this one as we can see. So I'm just going to go ahead and just hold down marquee select mask over there and hit left-click on empty space to invert the mask and left tap on the mesh itself to soften that mask. Let's go ahead and do a couple of things. Let's center that pivot point now. And then let's just bring that guy. Maybe. I'm going to hold left Alt and change my pivot point to be around the neck. See if we can show just oops. Let's just go ahead and just assume Chloe, maybe just make it a little bit more like that. Perfect. Now the arms are a live just a slight bit long in this one. So I'm kinda look about the writing angle, but I'm just going to go ahead and make, first of all, make sure x is hit. We're doing both sides. And we're just going to go ahead and just do a couple of quick adjustments. Not the more. So once we finish getting to a comfortable spot here in everything. So we see that the pelvis area is roughly the same, hips are roughly the same. We can go ahead now and go to to making a poly group now. So again, that's where we're trying to do this that you see on the right side of the viewport. Okay, so we wanna make that, but we want to do it with poly groups. So to do that, let me go ahead and give you a demonstration. If I go ahead and hit Control. And if I went holding down Control, I select a stroke for circle. And let's say I just do something like that. Make sure you have exon like so. And if I hit Command W, I'll create a poly group. As you see, it's a little hard to see between the two, so I'll just see back and give you a more easier color. And you'll see a poly group created. If I hit Shift and Control, I can isolate it, but I got all these jaggedy. So let's go ahead and undo that. I'm going to now just hit control D to divide it up a couple of times. And then I'm gonna do the same thing. I'm going to draw a poly group around. And this time, I'm going to go ahead and give you a taste of group loops. I want you to learn this because this is also how this is going. Getting an idea of group loops is going to be a foundation on how we do seems for clothing. So let's just go ahead and just kinda get us started and understanding what group loops are to start off with. If I hit Command W, I'll create a poly group. If I hit Shift Control, you'll still see those jaggedy is a lot smaller of course, because we divided. But I want it to be smooth all the way across. So what we're gonna do is we're going to put some group loops. That's basically a strip of polygon edge flow that goes between this group loop and this group loop. And they will be their own group loops that are separated from these two all to smooth out the sides so it rounds it out. So let's go to geometry. And if we go to edge loops, you'll see group loops and It is obviously the number of loops or group loops that go and wrap around. It's like these rings that go around these areas. I don't really need four, so I'll go ahead and do. I'll say three. And if I hit Group loops, it will say this function. It's a function basically that requires you to delete your multiple subdivisions. That's pretty easy. All we do is just go up to 0 measure arm Saris geometry, and we hit Delete lower. So once we do that, let's go ahead and do it again. And you'll see some group loops applied. Let's go ahead and zoom in. You'll see all those group loops. It's basically write all there. Now, I want to emphasize one thing here. Now, why do we do that? If we hit Control Shift, you'll see we now have a much smoother area. But what if I want to actually use group loops as a method of read topologies, I want to show you some what I mean when I say that. So let's go to 0 measure. And if we remember, now we can say something like detect creases, Deep Tech edges and detect groups. So what I do is I kinda do this thing where I turn on all three. Just says a defect. But the most important one is this keep creases. So what I'm gonna do is I'm going to go ahead and combine the group loops that I made with this group loop so that it still remains to poly groups. Let me show you isolate, select, hold, Shift Control, and invert the selection. I'm going to frame out. And I'm going to draw and hold down Control. And then I'm going to hit Command W. And what that did was it took all the group loops you saw around here and combined them in with these group loops to make one singular group loop. Now hit Shift Control in empty space. And let's go to crease. And then crease poly groups. That means it's creasing everything that's a poly group. So now I did that mainly because I didn't want a whole bunch of creases to happen in these group loops. So I combine these two is what I did. So when it does a Z remeasure, it just looks for edge flow of the crease that is right here. And that's why we did that combining so we can have one crease for it to work with in the keep creases section for 0 measure. So if we hit 0 measure one more time, it's going to do a little calculation. And as you can see, we now have a much lower poly group that adheres to, that sticks to the very edge flow we created right here. Now this is going to be important down the road when we do some auto read topologies rising. But we wanted to show you that just to give you a taste of it.
14. Base Mesh Creation Hands: So the last thing we're gonna do, We're now at the hand. So this is going to be the fun stuff. We're going to go ahead and take a look. What we're going to do here on this hand is going to be part of your exercise. Now on this hand, you can do anything you want. But what I'm going to do is I'm going to do a demonstration in finish this hand halfway. I've already sculpted this handout for once, but I'm going to sculpt basically halfway where I'm going to do basically like two fingers, little bit of the silhouette of the body work and everything you see on the fingers here and the thumb that you see in demonstration. I want you to learn how to do with these last three fingers. So that's part of the quiz. So keep that in mind. We're going to go through that now. So the first thing I'm going to do is look at this in probably say, for M I Hein, x mode symmetry. Yes, If so, let's get started. I'm going to go ahead and divide it a couple of times. So I'm going to hit Control D twice. So I can have a couple of subdivisions and I'm going to change if you haven't tap on the hand. So you have your pivot point B here. And I'm going to hold, Shift the control and work a little bit with the hand. So I have something here. You can do left. All click on here. Do the same thing. So now we got a little bit start right here. So now let's go ahead and just go ahead and square this up. Now one of the first things I'll probably do is I'm probably going to work on the body of the hand. Now remember when working with the hand, you don't just have to work with just your your, what is it? The reference that you're seeing here? You can also work with your own reference, your own hand as well. And it's actually preferred in case if you want to. So just kinda keep that in mind when doing all this that you do have options. Don't constrain yourself to one form of reference and take your time. Let's go ahead and probably also going to square it because if you look, it's kind of a little bit on the slant. See if we can go ahead and hit shit. Remember you, when you give it two subdivisions, then shift D is going down. D alone, the key D alone is going up in division. So whenever you're working with the Move brush, for example, I always like working with a lowered subdivision because then I don't create these ripples. All right, so we can do anything from damn standard to kinda push things in here. Just take your time. You see it's a little bit ganglia here, so we're going to have to work that out. Maybe even pull back on the hand here. And as well as the fingers. And you just kind of setting things up really is all you're doing. Let's go ahead. And so I'm just kinda work in first-off force, first and foremost saw with just the hand and squaring it up. Then when you feel little bit comfortable with the hand, Let's just go ahead and where it's gone. Let's just go on ahead and give it some volume as we would say. So to do that, we'll go ahead and do just like we did with the legs, will go ahead and do a little bit of a template here. So just very carefully. If you have to keep mine around 20 or so, we can just inflate. Maybe go a little bit higher a little bit. It's a little too much. 20 to 25 her and played. And that's recommended with a Wacom tablet. And just adding in the inflamed, she's kinda enlarges all of this, adds a little bit of volume for us to sculpt down on. Oops, too much there. Remember just hold Shift to collapse something in. If it's a little too big. Course the thumb is probably going to be very. Very fun little guy right there. Let me go. One. Like I said, this is just you taking your time and you get uncomfortable with what you want with your hand. It a reminder over and over again that anatomy is not a prerequisite. No, we're not sculpting anatomy yet. We're not there yet over and over I say this to you. We're not at anatomy. You may feel like where are we, when are we going to get to anatomy? We get towards it towards the end. Let's go and then bring it up. Thoma's a little long. So let's bring that down. Shift D. And I'll tell you right now, just trying to get a little bit of a good head start in the low. Whereas in capturing the right silhouette, the right shape. As much as you can is definitely going to be to your advantage. When you work your base, the better your silhouette is on the low levels than the higher chance, the better your overall Skulpt is going to be as you read up. Right? So one thing I like to do on the fingers, and I'll go ahead and do subdivision 2 for this just for now and see where it takes me. I like to. When I'm doing a finger, we're going to do the index finger again and we're going to do the thumb and then we're going to leave it to you to handle the next ones. Now, one thing I do like to do is as a start off is for some reason I like working with trim dynamic over clay buildup. Go figure on this one can't really tell you why. But I seem to get a better result for some reason that I just can't put my finger on. So I'm going to work with clay or I'm sorry, trim dynamic on the initial aspects of this. And what we're going to do is we're going to try to skip square up the fingers. That means that we're gonna kinda angularly square them up. So first off, let's get the trim dynamic on. Hit the B key. And if you find it faster, hit the T key. And you're going to see trim dynamic right there. It's be td. Let's go ahead and start off just to see what it looks like on Resolution two. And when I say kinda square up, I'm just kind of taken the sides and kind of you can kinda see. Let me go ahead and mask, whoops. The FK, I think I clicked on my head. Let's go ahead and click on the hand again. Sorry about the mooring that guy back in. Now let's go ahead and draw masks so we don't mess with anything on the side here. We're just gonna go ahead. May look a little thin and ganglia ish right now, but that's okay. We'll bring it back. Let's go ahead and I'm just kinda bringing it back again with smooth. Now that you can kinda see what I did, I kinda squared it up a little bit with the hand, sorry, with trim dynamic and then I used in flight to bring it up chest tapping it barely. So now I'm going to go up one more subdivision and then kinda round out those edges that you see right there. So now that we have that, let's go ahead, especially towards the end there. And now that we have some Merlots, go ahead and work with segmenting as I call it the finger off. If you look underneath your index finger, this finger here you'll see a whole bunch of lines. So let's just draw our lines. You might have to also redraw the lines later on down the road because it might be a little bit off. But just kind of drawing and segmenting our lines. Again. We're not too crazy worried right now about anatomy. No, I'm just kinda smoothing just this area and just this area out. Leaving this area a little bit more. I'm hitting Shift, holding Shift down on division to, to kinda collapse the sun. So I can leave a little bit of room here. In the middle. Stay the same over here. Shifting kinda collapse of and little Shift to smooth for the sick. And again, we're not sculpting our anatomy, we're just getting basic shape here. This is all just basic shapes. Again, I might even go up one more. So let's go ahead and clear that mask. And we can do something where we just hold our Shift button right here. And now, if we go ahead and we can draw in some knuckles. And then when I like to do is kinda like two becomes to the center knuckle here. I kinda like to add a little bit of I like to cut in a little bit with the dam standard. Now there are definitely some alphas here that we can use to kind of get this part allocated. So now, once we do that, let's go ahead and go down alone division. We're going to kinda finish this little guy off right here. Again, not too worried. On the anatomy. We're just getting our shapes taken care of right now. I'm holding control. Bringing it in, left-click, inverting the mask, an empty space. And I'm using the Move brush. Let's go. And then of course I'm holding Shift D to kind of fix the smooth mean, kinda see how it kinda works itself out. Okay, so once you get to a little bit of a comfortable spot with the knuckles and the dam standard brush. I like or I'm sorry to carve out the knuckles. I'd like to use the dam standard brush kind of carbon or use maybe like left all to kinda use the dam standard to just kinda carbon like the little places that I want. Let me show you right now here. Just kinda like do a little groove, cuts in, like right here, maybe. You know, you can do anything like that just to kinda give a hint of a little bit more of indentation so you don't have to work so hard when sculpting in maybe like a knuckle right there. Same with the hand that you see there. So let's just go ahead and just get to it on the thumb. I'm just going to wrap up on that. And like I said, we don't have to be too perfect, pitch perfect or anything like that. We just kinda have to just kinda have to just take your time on it. Little bit was pointed out just a little bit here. One here. And then maybe large, just slightly like so let's go ahead and smooth it a little bit more. And just make some, it's just a little bit of adjustment at a time. Nothing too crazy that we do here. And again, I like to use that trim dynamic of b, t, d. So to help out where you want, maybe want to use it like right here for example, that can really help in getting that little spot. Like so. We'll make it too much because we don't really, it's a pretty fleshy part the thumb is, so we may just go ahead and just kinda not go too crazy. It's not like the fingers are. So once you kinda get a little bit of it to kind of surface down. Remember I like to, when using the Move brush, like to always work in low res to just kinda graft off a little bit of real estate for us to do our thing, our mask that would come to like make. So need to go ahead. Maybe just work a little bit with segmenting that off like we did before. And are just what we're doing is we're laying our foundation in, in all of this. We're just laying a foundation. For example, our foundation with the segments. Let's just go ahead and kinda see a little bit. We can see a little bit of opportunity. This is sloped down a little bit. So I'm gonna go ahead and maybe just bring that up a little. All right. So let's just go ahead and carve out or segments, see if we can get them as best as we can. And just use that command D to if you find yourself in the wrong place with, uh, just, you know, just sees that command D. Just take your time and be in a happy place. Here. Whoops, select my devices running a little low on my Wacom tablet here. And that's okay. Let's go ahead and just kinda do a little bit of the work on trying to do like we always did. We kinda always carved out ourselves a little bit of a fingernail. Like to work with the Move on that which is kinda tuck it in a little bit there. Bring out a little bit smaller of a looks a little bit like a it looks a little bit like a vampire finger now that's okay. We'll go ahead and fix on SOC here. It just all requires for enabling. So for example, you can just kinda just flat and we notice that the fingernail, if there is a little bit plants. So let's go ahead and then a course. Maybe work on the C Sharp and the mask a little bit. So a little bit there we go, which is hidden Control and Alt. And just kinda given a sharper mask and left old, kinda pushing it up. I'm kinda relax it down there. Then push it in. And then just slightly holding Shift down. Just kinda bill accident. Okay, so now that we have a little bit more of an idea of what to expect here, I'm going to leave off, as I said at the beginning of the lesson here, it is the first two fingers that we're going to do a demonstration of. And your workshop lesson in this is, is you're going to take what you've seen in what you practice and using that 3D split-screen reference, you're going to finish off the last three. So we're kinda removing the training wheels for you to sculpt now on your own. We don't want to be holding your hand too much. We want you to get that practicing, get that hands on experience sculpting, workflow in. So with that said, that concludes our practice session on this intro level for all beginners. In the next section, though, very important that we will say for the purposes of learning that you go ahead and use our base mesh that we have supplied our course learning base mesh, which will be in the next section. A lot of people are going to be starting in, in that section for the first time. So kinda bear with me as we kinda go over things that you may have already learned as well. That's going to be loading into 3D reference, loading in the 2D reference. And that's going to be something we haven't really caught on to too much. You're going to learn how spotlight works if you want to learn 2D reference. And then we'll be able to officially start in on our Cyberpunk characters. So with that said, Stay tuned.
15. Setting Up the Provided References: All right, Let's get started. This lesson will officially be the start of our Cyberpunk character, where we start off by going over how we set up references for the learning mode workflow of your preference. So in that case, it would be either 2D ortho reference images with spotlight or 3D objects for split-screen learning mode. So we're gonna go over that in this lesson. But before we do that, we need to make sure everyone's kind of on the same level because there are some people that actually have some experience in ZBrush that may have skipped the introductory section, which was Section 2, which is completely fine. We're if you feel comfortable, definitely by all means, move forward. But in that regard, we do have a little bit of a checklist that go over to make sure that we're all on the same page. If you haven't already, make sure you take a look and have a pop-up menu. If we do an illustration of that in Section 2, lecture 7 called Creating customized UI pop-up menu. And that goes over how we create a customized pop-up menu. How we attach the split screen mode slider to it so that you can go and split screen mode a lot quicker. And additionally, you can have some brushes of your own. The other thing that we're going to address is, is we're going to also be bringing in our base mesh for the first time as a method of extracting our clothes. Now again, this is mainly just a blank canvas base mesh. If you are wanting to learn how to create a base mesh from scratch. We do have what's called practice sessions that are at the end of Section 2. That's the intro section which involves base mesh creation. And we'll show you how we go over making some from scratch. Having said that though, very important, to remind everyone, we do ask for the sake of learning and everything be staying consistent, that the base mesh you stick to is the base mesh that we provide you our course learning base mesh. That way, if you go to 3D split screen workflow mode, all of the meshes will size up accordingly to the scale of that base mesh. It's just going to make things a little bit easier. So we do encourage everyone to stick with our base mesh that you'll be importing in this lesson. So with that said, let's go ahead and get started. To begin with, Let's clear out our light box. If you open this up and to do that, you can just simply hit lightbox or hit comma or less than sign. And then from there we're going to have a blank canvas. I like to also start with making sure if you can, that you go to document up here and W size hit New Document, and then closing document. Has documents have been change I hit now every time just so I can have a little bit more of a wider canvas right there. Like so. Now after that, we can talk to you a bit about getting our 2D reference loaded in and how to work spotlight. So let's start with that. To get a 2D image in here, first thing you're going to need to do is download the image reference Ortho that I have put up in the Resources folder. And that's within the site itself. So you wanna make sure to check the lesson and look for a folder that says resources on there on the site. So to do that, once you've downloaded it, you'll see a couple of things have downloaded. One should be an ortho J peg and the other should be an OBJ base mesh. And we're going to start with that JPEG. And to get that in there, Let's just go ahead and collect, click on texture. And then from there we're going to hit Import. And then from there we're going to select that JPEG which says main ortho reference. Left-click open. And now that we have it in ZBrush, we need to get from ZBrush into our light box, which is sort of like our image base array storage for program. It's used to object images of textures on 3D images. It also is used as a, as a tool method to bring up and turn off and have reference displayed for us. So to do that, let's just first of all go to where it says texture again. And you'll notice your image shows up right down there, left-click on that. And then where it says Add to spotlight, go ahead and left-click right there. And then you'll see that image pop-up. And if you're new to spotlight, we'll just do a real quick overview at this wheel that you see as sort of like the control system for spotlight. Don't get freaked out about it. Don't worry about you have to know every single button on here for now. Just know the rotate one and how to shift snap by holding down the Shift Key. Know how to scale it like so, and know how the opacity works. And finally, know how to readjust the position of the wheel by clicking within and left dragging, clicking and left dragging the wheel itself, and more importantly, know how to move the entire image like so. Now once you have that, you will then move to the next part, which is to turn on and off both the wheel Andy image. And that's pretty simple. So first to turn off this cumbersome wheel that gets in the way, we just simply hit the Z key and then our image will be placed right there. And then anything that we put in, I'll just drag in a piece right here. And if we go ahead and hit make poly mesh 3D. Now we have the image showing right in front of us. You also notice some of our brushes don't work with Spotlight when it's turned on, will show you a way to get around that in the upcoming lessons to come. But for now, let's just go ahead and just focus on how we can turn these things on and off. So Z key will of course bring everything up. Z key will bring the interface for the controls off, and then Shift Z will turn on and off spotlight as you see there. So from this point on, Let's go ahead and then talk to you about our next step, which is going to be our split-screen workflow. Now, splits grain workflow is a feature that was added in a previous version of ZBrush that is meant to help the absolute beginner of ZBrush sculptors to help them. It was like acted as an aid to assist in helping people improve their sculpting skills. Now what that means is is this. Let me go ahead and just give you the example and stop wasting time. And we're gonna go ahead and do a sub tool. And I'm going to append another primitive on here. And the primitive I'll choose is a cone. And I'm going to choose that cone. And that cone is, as you see within here, occupying the same point in space. Now again, you should have a pop-up menu that allows us to access split-screen workflow. This pops up when you have more than one sub tool and becomes available if you do not have it, again, checkout that last lesson. We'll tell you how to add that in and how to create this pop-up menu as well. So I'm gonna go ahead and turn that on. And I'm going to drag that slider to split screen mode one. Everything's a little bit off, so let's hit that F key. Now, we have an interactive version of a side-by-side comparison of what we can sculpt based on what we see here. Now these are two very different shapes, but what will, what this means is that when we go throughout the course, I'm going to give you all sorts of high res meshes for you to import in to ZBrush like a tank top shirt of the cyber punks character's shirt will my version of it, you will import in here. And then there will be the base mesh version of that shirt. And you'll have them side-by-side. And it will act as an aid to help you out as we go through. Now, is this mandatory? Absolutely not. It's just to help the people that are just starting out learning ZBrush, just to help them get a little bit more boost in case the ortho is not doing it for them or they're having trouble with it. So what you wanna do is you want to get to a point as you're practicing. You want to get to a point where you no longer require split screen mode to learn anymore and you're able to do your skull in through here. But a lot of people find it a lot easier having that extra aid of split screen mode available to start them off just to get them easy. Get them a little bit more of an aid to help them out. I don't. Please take advantage of it. It's not a big deal. Everyone has to start somewhere. I can tell you right now when I was first learning ZBrush over 10 years ago, I wish there was something like this available for us, so keep that in mind. So having said that, that's sort of a demonstration of split screen mode. If you go through the other sliders, you'll notice different versions of that mode. There's a horizontal mode that you'll see. So, you know, you're, you're welcome to experiment down with that, like so. So keep that in mind. I'm just gonna go ahead and go back to my default mode. And then now I'm going to turn off my spotlight. Make sure again, you save your spotlight out after you're done. Edge or if you need to leave, make sure the name that spotlight I named mine Cyberpunk ortho and hit Save. Now we're just going to do, go ahead and delete these to. I was just doing that for a reference check. Oops, I couldn't do that yet. So now that we have all that taken care of, we're going to do one last thing and that is we're going to bring in our base mesh. So to do that, we're going to hit Import. And import is good to use if you wish to go ahead and bring in an OBJ file, which we'll be doing here. And a lot of the files you get from the resource files, like for work split-screen workflow, you'll see a lot of resources folders going throughout the lessons and with OBJ high residues available to you. But in this case, we're going to be doing a base mesh. Now I'm going to hit Import. And you should get that base mesh in there. And I'm going to hit the F key to crane that out. And this is going to be a starter base mesh for you to use. Now, you may think, well, isn't this cheating? Starting off and start with just a normal sphere and sculpt out everything just from scratch. And I'm going to say, people do do that. But those people are really good at what they do and have a lot of practice at what they do. I'd like to actually get everyone on the same level and get everyone to understand that we don't use base meshes as a way to cheat, but we use base meshes a way to expedite our workflow. For example, this base mesh is going to be used to extract further base meshes of articles of clothing that you see on here. In fact, that's going to be where our next lesson leads us to. So all you see on here, such as the, let me give you a good example. The shirt is going to be extracted as a base mesh off of here. The jacket will be extracted as a base mesh off of here, the pants, they will all be extracted as base meshes off of here. And furthermore, we'll even have opportunities in creating split screen mode base meshes with what I have completed. And you'll have sort of a side-by-side comparison of the two meshes from my high res completed version and this base mesh for you to work off of. Just sort of imagine that one is the completed one that you're importing into ZBrush that you're sculpting on. So it sounds a little convoluted and I apologize if it does come off as that way. I just want to make sure that you understand what's to come next. And again, at will put additional reference of 2D in case you wish to start at a higher level, like using 2D reference instead of 3D reference of split-screen workflow instead. Just to challenge yourself even further. So with that said, this is where you should be. Now a, you should have a file that contains a single base mesh. You should have a spotlight saved out that is in the form of a Z SL file. And then you should have, probably if you haven't by now, access either your quick save, which is up here, or you should save out your zt else. So that's where we're Everyone should be. And of course, you should have a pop up window that has Solo Mode, button splits, screen buttons. And while I use these brushes for my own personal, if your intermediate or experience, you can have your own personal choices. But again, that's all covered in the previous lesson, how to create those if you haven't, please go on ahead and get that there, it's going to be very helpful. So with that said, let's go ahead and move into the next lesson, which will be creating and extracting out our clothing base meshes. So stay tuned.
16. Creating Fabric Base Meshes: Okay, So let's go on ahead and continue. In this lesson, we're going to be using a extract method to extract off of our base mesh are three primary method are three primary articles of clothing, which will be our jacket, are T-Shirt in our pants on here. And we're going to use an extract feature in under the sub tool palette right here. Some of you may have figured out already by now that if case you haven't, that you can't access your brushes while spotlight is turned on, or I should say you can't access all your brushes while spotlight is enabled. To do that, you're going to have to make sure to go to Brushes where it says samples. And make sure you go down here where it says Spotlight Projection and go ahead and disable that. And you should have then access to a whole bunch of brushes that you see fit. So having said that, let's go ahead and get started. As you can see on our reference here. And I'm just going to small out up a little that we have about three main articles in the first one I'm going to want to pull out is I'm going to pull the T-shirt out off of this base mesh. So to do that, I'm going to go ahead and turn off spotlight. And I'm going to use masking to create sort of the outlining shape of a T-shirt. And for that I'm going to hold down Control. And I'm going to change my stroke to freehand if you have. And before I begin, I'm going to hit the X key and make sure local symmetries on and just simply create some rough shape. Like you see here. Nothing crazy. Thin to swag, just something like so. Now it may seem like a very odd T-Shirt a little bit off, but we're just going to subtract some things on. And so for that, I'm going to hold down control and change from free hand to circle. And then from there, I'm gonna go ahead and hold a circle down and I'm going to release control and then hold spacebar. Make sure you're still holding left-click, left-click so you can keep that mask alive. And again, you're panning around with the space bar held down. That's the space bar tricks. So minus some things right now. And one thing I'm going to minus is right here. I'm gonna release Space bar and hit left Alt. And I'm going to do the same for the sides here. So we got ourselves a little bit of a start for a t-shirt. It could be some really high up tee shirt with very short. It doesn't really matter because it's jackets going to be covering it. And you may notice some asymmetry going on here in the, the T-shirt where it just kinda slangs to the side. So we can do something like that if you want or you can just simply extract and remove the mesh with the Move tool. I'll just go ahead and do that though. I'll turn off symmetry and subtract mode. Some base, see, maybe something like that. I might be fine. Then I'm going to put my mouse over them mask and just hold let control, feather it up and then soften it by holding Control Alt and clicking a few times. And so now we got ourselves a little bit of a mask. It does seem to go a little bit deeper, so I'll go ahead and just redo that real quick by turning that. And like so. And maybe because there's a perfectionist who with him. Then we'll just go ahead and do something a little bit like just to sort of create a little bit of a fashion sons. So with that, I'm pretty much okay. I can go ahead and do some other things. I'm just going to keep it like that though, just for fun. And now let's go to our sub tool and hit extract. Now, extract does. Before you do it, make sure you have solo mode off. If it's grayed out, just make sure you have solo mode off in split screen turned to 0 or else this is going to split up across when you hit extract. And extract is basically when you click on it. Here, it's not giving you the actual mesh, is just giving you a preview of the actual mesh. You have to hit, Accept to hit. Okay. And now I'm actually going to work with that thickness because I can always tuck it in to not be seen. It's a little too much. Yeah. I think I'm actually going to accept that because smoothing that down will give me a thinner edge. So I'll go ahead and hit except for that. And we'll have the first block out. And right now it may look a little bit clunky like so, but we're going to thin that out and push that a little bit down in. In the upcoming lessons, we just needed to get some base meshes for you to work with. So I'm gonna go ahead and turn that off. And then I'm going to go back to my character sub tool. And then we're going to repeat the same thing all over again. Except this time I'm going to clear that mask and I'm going to work on a jacket. Now for this. It's a little more complicated. We start off the same way as we made our shirt. In fact, you, well, I'll just go ahead and store from fresh. I'm going to go ahead and just draw out some circles like so. And then from this point, I'm just going to subtract away the things I don't need. So this jacket goes up here, so I'm going to have to minus stuff here. That means symmetry has to be turned off. I'll hit X and we'll put the jacket right there. And then there needs to be a hand showing. So we'll go ahead and put the jacket right there. It's gotta be an opening for that jacket. So let's see if we can either draw that in or we can drag it in. It's up to you. I think I think what I'll do is hold Control down and just play it safe by dragging a basic strip and like so that's holding Control, drawing out a rectangle space bar trick panning it over. Remember to look at spacebar trick if you haven't, and then I'm holding left Alt, like so. You'll see it on the other side where it is lost. So I'll just go ahead and go from this angle. Whoops, probably not going to work that way. Let's go ahead and just color that in. It's going to be O minus then subtracted away anyways. And then from here, going to go ahead and do a minus once again, right around there, like so. And we have our base mesh started out for our jacket. I'll go ahead and extract that. And you may want to add just the tint of thickness to that extract because it's jacket. That's a little too much, That's a little too extreme. Try to see if you can get Yeah, I'll work with that. That's fine with me. Remember these base meshes are not going to be there. They're going to be these clothing base meshes are going to be occupying the space where the base meshes. So in the end we'll be deleting all of this stuff off. So I'll just go ahead and hit extract. And I'll take that off right there. And now we're down to our last piece of clothing. Now, if you look at it, it's going to look something like this. This is kinda where it's going to be. Don't worry, don't freak out over that. It's not a big deal. If it gets to this point, like you see here, we're going to go ahead and fix that later on down the road. So from this point, going to go ahead and simply turn off everything except my base mesh, making sure that's turned off. I'm going to left-click. And then from here, I'm going to create the pants which also are little bit on different heights. So the pants should be pretty easy, not going to use a circle though. So I'll hold Control and get a drag rectangle. And I'll just simply do something as easy as that. Now. Go a little bit higher. For the knees. Yeah. Something like that. Nothing crazy, nothing too out of the world. And we'll just simply extract that. Except again, all of these are going to look probably baggie and bulky, but we're going to be cleaning these meshes up, remeshing these meshes. And then we're going to thin out the edges with these meshes come time. So don't freak out that these are a little bit too crazy. One thing I will say is as you look right here, this may be something that you might want to take a little bit of a particular notice too, I'm might make the thickness a bit thinner on the pants because I don't want to I like to What is it? I like to have a little bit more wiggle room here as a croc. So let's go ahead and turn that thickness just a bit down. Not that thick. I'm choosing point 1, 0, crap. Alright, so let's see what that gives us. That's a little bit better. I'm going to probably go with 0.00294 for my thickness. And I'm going to hit Accept and that's what I'm gonna do for that there it may look like a very different type of pants. Don't worry, will thicken that out and rematch that so that it lines up that way. It's going to be a good way to show an exercise on how we get this. All this is, is basically establishing the shape of the dimensions of our base mesh and how we create and pull our base meshes off on here. So in the next lesson, we're going to go ahead and show you how to group these three base meshes up into a folder. And we'll begin the startings of our first import of our reference of a high Rey's on here, which will be used as, which will be the t-shirts. So those that I wanted to do split screen workflow will have that and we'll make sure you have a reference for that to help you out when we go there. So stick around.
17. Cleaning Up Shirt for Sculpting: Okay, so let's continue. In this lesson, we're going to set up and get started with our first Skulpt, which will be our shirt. And before we begin, I'm just going to do a quick illustration of how to get our 2D reference backup in case you're opening your file up and that's going to be in texture up here on the top. And then assuming you of course saved out that spotlight, we said, as we said in the last lesson, you should have a save file. So all you need to do is hit load spotlight. And from there you're going to see ESL, depending on where you will go to search for your designated spotlight folder. And as you see, it will go ahead and pop up for me. So I'm gonna go ahead and frame this right now by hitting the tile proportional. So it's a little bit bigger for me to get started on this, a little bit more centered. So before we begin, I just want to go ahead and recap and explained that everything here is going to be inclined sculpting. So it's, what I mean by that is, is that we have three base meshes and each one has a varying degree of difficulty that is more than the last. So in other words, we're going to start with that basic T-Shirt. Now that you see right underneath. And then after we're done sculpting that we're going to go ahead and graduate to the pants, which is a little bit more work to do for us. And then after that we're going to graduate up to the jacket. And then finally, we're going to end it with the anatomy of the face and also making some hair. Whether it's both sculpting, I'll hair or fiber mesh hair, we're going to do both. So with that said, I'm going to go ahead and turn that spotlight off my reference there. We have our 2D reference already loaded in. And from this point on, I'm just going to go ahead and organize my sub tools over here. Is that way it's not cluttering up too much here. To do that. I'm just gonna go and open sub tools to the right there. I'm gonna go ahead and put my mouse over new folder and click on that. Now I'm just going to title it base meshes and hit return. And then from there, I'm just going to go ahead and drag in everything that we have so that it's all within a folder, a little bit less clutter to work with. Afterwards, I'm just going to put my mouse over the shirt here and disable visibility of just about everything else so that we can go ahead and get started to the next step. And that is importing our first 3D reference for split-screen workflow. Now again, that should be in the resources folder of this particular lesson. So go ahead and feel free to download that. There should be both at 2D and a 3D you can add to it. So I'm going ahead and do that right now. So let's go to textures. Let's go to Import. And I'm going to back out a little bit here and see where we're at. And that's where we want to be. I'm going to load in first my shirt ortho, and that's my 2D reference. Now if I go ahead and click on that just like before, I'm going to hit Add to spotlight. And just like that, we have, as you can see, our original reference kind of miniaturized and our new reference right here. I'm going to hit tau proportional. So now we have a little bit more room. But if it gets a little too in your way, go ahead and just kinda click the wheel off here. And then you can scale both of them down at the same time. So you can pick and choose which reference you want. Now because you just imported in new reference, don't forget to update that new reference. And that's going to be in the texture. Save Spotlight. And now you don't have, you have an additional are going to be adding references to this zs cell file. So every time you load it back in, you're not going to have to start from scratch. Now that we have that done. Okay, so let's go ahead and import our 3D reference in case people want to start a little bit further back or like to have something a little bit more 3D. So I'm bringing that in. And like so I'm going to first of all, my apologies, I z dot there. I'm going to click on the cylinder and I'm going to import from a different tool, my shirt, like so. And then go to my original tool right here. And then I'm going to hit append like so. So if you hit the transparency key, turn off ghosts, you can kind of see right there where it's all at and what that shirt looks like a little bit more. And now, if we want, we can go into split screen mode. And we can have ourselves a good start. Now, having said that, what I'm going to do, you may have the claim to go on ahead and just get started sculpting, you're welcome to do that. But what I'm going to do, since this is a guide, is I'm going to alter the geometry of the mesh that you see before you so that we can work with it a little bit easier. So to get started on that, I'm going to disable my split screen mode. And I'm going to turn off just for now the visibility of that short. And I'm going to hit Shift F to look at my topology. First thing I'm looking at and I would like to see changed is that well, it looks as though I'd like to kind of turn these two into one poly group right here. Maybe turn the inside pieces to a single poly group and then do a Z remeasure so I can get some cleaner geometry. I might even thin out the edges right here before doing so. So let's go ahead and do that. Hold Shift Control. Go ahead and isolate select, hold control down, marquee select or shift control again, restart. And then I'm just going to repeat the concept that I just did here. Now why am I doing this so that after you're done hitting the masks for just this front outer area, hit Command or Control W. So it's all one poly group. That's our first goal. Now I'd like to go ahead and I'm gonna go ahead and just control on this. And then see if I can get the poly groups of those edge corners selected like so. And now I'm masking that out and I'm going to invert the mass selection. So now anything that's masked is on the inside because there's a whole bunch of Polygon poly groups in there. And I'm just going to hit Command or Control W that way. Isolate, Select, and I have that. So I should have roughly three poly groups. Now, some of you might find a trouble moving your draw size around and you not seen an update, just go ahead and either up here where it says Draw size or holding space, our time, tap a couple of times on that dynamic and you maybe a double or triple tap to get it to come back to you like that. So now that we have that taken care of, I can either thin out the edges here with a smooth or I can do it after my rematch process. So I don't know which one's going to give me the best result. But before I do anything, I'm going to hit X so that I'm doing this on both sides. And that might work a little easier for me. And I'm just, what I'm doing is I'm just holding smooth on here. I'm just kind of smoothing the edges down a little bit. Now I'm doing that by holding Shift key. I'm going to get to a point now where I'm also not really going to need this inside area here. But for now, that's all I wanted to do. I just want to hold the Shift. And I may look at my reference. Here. You can notice right now I'm switching between Solo Mode and split screen mode, like so to get what I want. And from this point on, this would be a good spot for me to hit quick save above in case I lose anything. I'm going to go ahead and take a chance, just see what this looks like. Well, I'd like to actually manipulate these handles here. So let's go ahead and turn solo mode off and look at this wide range we got here. So let's go and access that move brush and bring that in a little bit more. Like so. Maybe up top, little bit. Maybe bring it up here. Maybe bring it up here. All I'm doing is just establishing a cleaner base. Now, undo that. So little bit of a shallow here when the silhouette, it's pretty deep. So let's just go ahead and bring that out. While at the same time, we don't want it to look too. It's kind of gaining the perspective of what this looks like in its base mesh form. I don't really care too much now. It's, it's kinda overkill to do this, this way. But it's just sort of also helpful to give you an idea what to do our future. Pieces, how we're going to be doing them. And I'm just going to be doing it like that. Alright, so I'm okay with that. I'm actually fine with that. So this would be a good time now to hit poly groups. I'm going to make sure x is turned on because I want cemetery mode turned on so I can get a good symmetrical reach polymerization on this. So let's just go ahead and go to geometry. Let's go ahead and go to edge loops. And then let's go ahead and well, we could do group loops. I'm sorry, I'm going to go ahead and hit crease poly groups instead so that I have a good rematch here and I'm going to keep my creases and I always like turn in all three of these on just to see what we can do. So I just went into geometry, 0 mesh. This is keep creases, detect edges and keep groups. And I did that after I went into edge creases and hit poly groups. So, so now we have ourselves a little bit more of a cleaner mesh. Look at that. I like that. It's a little bit more easier, a little bit more easier to read. I may hit it one more time just to see if I can get some cleaner up here. Like that. It's it's okay. It's not like too horrible. I always do it just a couple of times just to see if I can get something a little bit more clean in this. But yeah, it stretches here. So I may go to the next one. And it looks like it's a little bit more relaxed, so that's good for me. I like that. The last thing I'm going to do in establishing this into a cleaner base mesh for our sculpting like we see here, is going to go ahead and delete this back geometry. So that's going to be holding Control Shift for my isolates selection and left clicking on there. And I'm going to drag a mask over their bring everything back. And then I'm going to go to sub tool and I'm going to go ahead and say Split mass points. And that should be its own area. And we're going to hit delete. So let's say Death Note reference sheet. So after that, we're going to go ahead and pause it. You may not you may look like it's invisible right there. If you want to bring that invisible, that visibility back, we can go ahead and just go all the way down here on the right-hand side to where it says splay, where are you looking for? You display properties. And we can just hit double. And now you can kind of see the backside of that. Now the reason again, I delete this doesn't have its backside deleted, but I went on ahead and deleted it here was because of the fact that I'm not going to be seeing these edges. I'm not going to be seeing the jackets going to be covering up most of this. So don't get too critical about what you're seeing on the outside here, like so. So having said that, let's just go ahead and move to the next lesson. Or we're going to be actually sculpting some of these wrinkles get in our first test into this. So stick around.
18. Sculpting Shirt Wrinkles: Okay, so let's continue in this lesson. We're going to go ahead and finish up this mesh by sculpting in some wrinkles here. And we're going to then go ahead and move on after that to our pants. This is pretty much going to be a simple one. As you can see, I have already some of my 3D reference setup, but I also have some of my 2D reference in case people want to use 2D reference, help them out. They're welcome to. So anyone that's wondering why I went through such trouble to go through a low-res block out mesh. It's because I need to have a resolution that will be easy to collapse down the ends of the wrinkles strands so that they look like they're blending into the cloth. You'll know what I mean by that in a second, but let's go ahead and get started. One of the first things I'm going to do is I'm going to go ahead and look over here to this diagonal slant and get my move tool out. And I'm just going to go ahead and select that, create a little bit of asymmetry and create some, just a little bit. Just working on creating something there. Now, I'm going to go ahead and give it just a few divisions. So I'm going to hold Control or Command D. And I should have around three subdivisions on there, like so. And then go back down to my lowest subdivision was shifty. And we're going to get started on those wrinkles now. So let's go to our standard brush. That's that, or BST. And the first thing we're gonna do is if you use the standard brush with that wrinkled, that's kinda what you get. A little bit like that if you go back and forth. So one thing I like to do is I'd like to turn up my focal length so I get a little bit more of a, a little bit more of a harsher. And and this is what I'm talking about, why I kind of prefer a low resolution because it's easier to collapse in. And with when you hit the smooth button to go into smooth brush mode, it's easier to kind of collapse in like so. And I'm going to go ahead and sculpt very gently. Hey, smooth brush. Now I, you'll also notice that one thing I like to do is is I if there's anything I don't like on here, remember I always have no problem going back or going backwards with the Z key because my right hand is on my webcam tablet and my left hand is on either smooth or with shift or Command or Control Z for undo if I don't like it. So if I take a stroke and I don't like that stroke, I immediately go back. And if I take too many strokes, so I go up here to my undo, so feel free to go through like so. So we'll just go ahead. And you can just kind of see how I'm doing it. You might notice I'm not copying exactly what I'm seeing in my reference. I'm just sort of using it as a sort of aid to see if I'm on the right end and you from getting what I want out of it. And I'm just kind of pushing in there, pulling out in other areas. Maybe looking over here and I'm noticing that and I'm using the reference right here to notice that it kind of goes into a slant like that. So see if we can do a push and maybe know that actually looks I wonder if I can try to hit that with the slash toothbrush and I'll show you how to get that later on. But I'm also taking into account. I'm also not just constraining myself too, one size brush in all of this and kind of, you know, alternating between the brush and other other sizes. Pulling in, pulling out, tapering the sides, which is important to have low subdivisions. Like so. You know, it's just your, your call, it's your sculpt. Again tapering that side so it kinda blends and just change that size, see if we can get some interesting. And you know, we got something cool there. And let's see, it looks a little blobby up here. So let's go ahead and just simply make this, even though technically this is all stuff that we're not going to really see. If you can already read this out as cloth. Let's go ahead and really collapsed the stem. I'm going to go down and division and really collapses down. And again, that's why we've gone through the trouble of remeshing this out so that we can have that option. I'm gonna see if I can On that out to the side. And that's all this is about. It's about making your sculpt and then taking the ends and blending them in. Blend through the smooth. It's again all about the smooth here. So just kinda go in through like so. And again, we don't use the side but we're not it's not like totally mandatory. But so that's a little bit on how it looks. Now that I have a little bit of an idea of this shirt, I may redo this section here. I may find myself looking for a more interesting patterns. So I might just use the Smooth tool and just to a couple of softens on here, maybe I just feel like that's a little too pronounced. Maybe there's something else so I can find. So now I'm going to switch it up. That was a standard brush. Let's go ahead and switch it up to the slash two brush. Now again, that's not accessible on the main brush and palate here if you hit the B key. So let's go ahead and go to Lightbox, which is up here. You can hit the Comma key to get there as well. Let's go to brush, and let's go and find our slash folder. And in there you'll find slash two. And this is really nice because what this does is it displaces and pushes geometry up and pushes geometry damp. Now a couple of things you need to realize is, is that we're going to take a couple of practice strokes to get what we want now if we just do a normal stroke like that, yeah, that's kinda what we want a little bit. And but I'd like to have access to the move tool. Yeah, I could do that identical. Ideally, what I would like to do whenever I worked with the slash two, I also work with a high focal shift, as you can see. And I also hit the L key so that we get that, oh, I think I was already on the L key. That's why I already had that. So if you're not sure if you're on late, alkenes stands for lazy mouse. Make sure that's turned on. Make sure the radius is somewhere around 30 so you can get something good there. And sometimes what I'll do is I'll just sort of do a slash and then do some very gentle, very, very subtle. And this, this is kind of like trying to produce sort of taking some practice strokes to experiment with what I want. You can kind of see it's a little skin a little bit. Losing material soils. Move that down a little bit. And I'll smooth that to the side. I don't know what something's going to be unless I take a swing at it. And these are single strands here. So it's nothing, nothing too insane. But, you know, EEG, you get a little bit of a different look with the slash two. So if you notice that if you go from right to left, it will slash upwards and displaced Geometry folds upward. If you go from left to right, it's displaces that geometry down or it's like so. And you can kind of already see the possibilities here. So you can see, I'm kinda almost looking. You notice that I'm not following exactly what you see on the what is it, the 3D reference That's just there to help you out in getting some ideas. It doesn't necessarily mean you got to fall through with it. I'll be now alternating between this and seen. There's anything I can find with A lot of people, one thing I'll say is that there are cloth brushes on the internet that you can also experiment with to make your job a lot easier. And that also like for example, these have been out these brushes have been out for a while. The cell we brushes, That's SEL WEEE. Why if you Google that you can install some of those, and those are like modified version, modified brushes that really gets you some good results as well. They're like very healthy, are very nice, pretty fun looking brushes to work with. I would say. I'm not like for example, I'm not trying to get you to go out there and get all these brushes. I'd like you to actually try to have a foundation on how to sculpt cloth before you go ahead and, you know, a hope for some magic brush to fix or sell we brushes won't do very good if you don't know how to sculpt cloth still, they're just there to make your job a little bit easier. And honestly, if you can make a good-looking claw through the standard brush or the slash toothbrush, then you can make good claw through cell we brushes as well. And that's why I'm having you focus so heavily on that so that that can be the case. So that is I don't know if that's actually going to work. Again, this is the let's go up and we couldn't do some, they're gonna go down because it's going to be hard to smooth that Dan and blend that in. So I'm going to choose subdivision two on there and see if I can push in like so. You notice there's actually a bit of a difference between this and that brush. That's because from a kind of using that second one to build off of what I already know to help me out a little bit more. So that's very important. Don't get tunnel vision that you gotta make it exactly like what you see here. That's what I kept going over before. Don't get tunnel vision with your 3D reference. Feel free to just kind of go outside your comfort zone, you know, to experiment. It's your brush, It's your sculpt. Go ahead and try this area with the slash 20. So it's not all my pop-ups, It's, but it is on my brush pallet. And let's run it again. And it kind of, lets try it this time. Up here. Juts out a little bit. So let's use the Move tool. Maybe get that. And we got a little bit of what we want. And this also is a little distracting out here. Let's go ahead and bring this guy. I'm going to go ahead and use my tool to see if probably like that, I like that area right there. So again, this is just what I'm doing for mine. But your brush or your shirt and you're wrinkled pattern may be different. And here just say one thing. Good. There's nothing wrong at all with it being different. In fact, I'd say it's a good thing. You're doing it right? If you have a different pattern, may not go down that road. Looks a little too. Mostly right there. Like to keep things a little bit simple down here. Now that I'm seeing it. So I'm going to collapse that down. I'm just going to create a more simpler cloth strand. Not overdo it, to go crazy. And that's probably good enough for me. And there we go. And again, that's going to be our cloth. And so if you have any more questions on that, feel free to ask on site. But you so far that is where we're at right now. So we're we're gonna go from here is that we're going to go ahead and move on to the pants section. And it's going to be a little bit, little bit the same. We're going to clean up the pants to be something of a nice clean topology. And in case you're wondering the, it's important to get into the practice of how we clean our meshes through 0 measure because that's going to also play a direct role in how well you read topology guys as well. So it's going to be a little bit important to get familiar more and more. These are all good opportunities to learn 0 measure, like so. So in the next lesson we'll clean up our pants base mesh and import our 3ds reference for the pants as well as our 2D reference and add them to our spotlight. Sewing. Just keep growing our spotlight collection like so. So without a doubt.
19. Blocking Out Pants for Sculpting: Okay, so let's get started. In this lesson, we're going to start working on cleaning up our pants mesh. As you can see in this one, we finished our shirt and I went on ahead and made a new folder around here where it says new folder and call that folder finished sculpts. And I just went on ahead and drag my shirt in there. I also deleted my imported split screen 3D reference of the shirts so that I can keep my file size relatively low. When going through this. If you haven't already make sure to double-check in that you have your spotlight loaded in. So without further ado, let's just switch to our pants sub tool. And from this point on, I'm just gonna go ahead and give myself a headstart in importing all my references, my 2D and 3D references. So let's start there. Sort of the texture, go to Import and then choose in that resource folder on the site pants ortho J peg its for this particular lesson. And once you do that, you'll see your pants right there. And go ahead and select that and mouseover to add spotlight. And like before you'll see it line up to full screen mode and you should now have three references. Let's just go ahead and try to do a little bit of saving now. Because like I say, every time we import something in to our spotlight, we go ahead and make sure to save our spotlight like so. Now that we have that taken care of, let's just go ahead and just see if we can just rearrange everything out. I'm going to just rearrange all these things right here. Here we are and will be what we have. So as you can see, I did a little bit of changing from the original ortho just to add a little bit more of a challenge that would stack on top of what we had on the shirt. So this is essentially building off of what you did in the last lesson while adding a few more things like panel loops here or stitching Alphas, or Projection Master. We're going to be doing all those fun things. In addition, we're also going to get an opportunity to work with the, the mesh to former buttons. Those are when you, these transform deformers that we get to work with, we're going to be able to mess around with that to show you how we make these trims down here. Like so. So without, with that said, what we're gonna do now is, is I think the first thing I'd like to do is clean this mesh up and out. To start with, I'm going to go ahead and see if I can thicken out all of this here, like so. I'm going to go ahead and I don't really care too much about this. But what I'll do is I'll hold down Control Shift. And I'm going to change my selection brush to a trim curve. And I'm going to drag a curve across here that cuts from the top by holding Control Shift and from left to right drag across. Now when you do that, you'll notice already that it kinda fills in the whole that's okay. I kinda want something like that to begin with. For the pants Mesh. You're not really going to see that because eventually when the time comes, we're going to put a belt over that, like the the main ortho shows. Now I'm gonna go ahead and do the same down here. I'm going to, but if you do it like this, it will go it will go ahead and cut this off. So I'm just going to hold control down, marquee, select a little bit of that portion so nothing gets affected. Here. Let me make some claim and that should be good. Invert that mask and go ahead and just trying to get myself a nice clean mess mesh started up. So in other words, what I'm trying to do is I'm trying to create clean poly group Topology here, between here so that we can do a crease poly group selection. Now, I'll also another thing is, as you may notice to poly groups here. So let's go ahead and do like we did before, and just go ahead and isolate, select them and do the same thing here. I'm just holding Control Shift and just tapping on their whoops. If you get the trim curve, make sure you can switch back to the Isolate Select and you can get it back that way. Go ahead and check that. Now, that is one single poly group. Let's continue to clean this mesh up now. So let's go ahead and clear our wireframe off. And now I'm thinking I could just start with importing my 3D reference and start bagging this up. But to start with, I still want to get to a place where this is going to be cleaned topology. So I can either, I think what I'll do is I may have to repeat a few steps again, but just for the sake of keeping some things clean before I start. And because I'd like to always use my Move brush on a much lower density mesh. Let's just go ahead and 0 measure. So we'll start by going into geometry, crease and they increase poly group borders so we can get some creasing here. And that way when our Z remeasure goes through, it's going to know the places to identify good edge flow in this area, this area and this area. Make sure Also this is asymmetrical, so don't forget to turn off the X key. So symmetry is off else this side will fill up. And let's just see what kind of results we can get out of this. Like I said, I intentionally want to have these clean up lessons here because I kinda want to have a foundation for you guys to understand 0 measure. Because it's going to be quite important when we go through the read topologies rising phase, coming up later down in this course. So, all right, so we've got a nice clean mesh. We got something that's pretty decent. You may notice some, a little bit of asymmetry right here. Don't worry about that. If you wanted something that was fully symmetrical here, then you typically would want to have the X key enabled. I'm not too worried about it right there. I just need something good and clean for me to start off with when I'm moving things around. So before we forget if you haven't already, you should have imported your 3D reference in. If not, you can do so now, just make sure that when you do so you're on a different tool. So that way you don't import over the year for files your four sub tools here. So accidentally hit Import. Click off of there. I'll click on an empty tool here and just import my 3D reference of my pants, which you should, again, fine in that resource folder. All right, there we go. There's our pants. Let's just get started. Let's get back into it. Let's select that tool. Let's go to sub tool and get that appended on their excellent. All right, so it's going to always show up at the bottom there. And if you need, you can always turn on transparency with ghost to get sort of an idea of where to fill things out at. Here. You could, if you wanted to trace with the move tool here, but we're trying to get an objectives that so that you can do it through splits screen mode more instead of trying to do it by having a 3D model over. Because in the industry, the idea is to look at reference, that is 2D and then go ahead and copy based off of what you see there. Because if you already have the 3D model, what's the point in sculpting the exact same thing that you already have. So hence, we wouldn't need concept artists. So let's just go ahead and just, just, what I'm trying to do is I'm going to back this up now. I can, I'm going to do some experimenting with my pop-up menu, see if how inflate works with this. And just maybe thicken it out a little bit here. I may be stretching out that geometry when I do that because that's the drawback when you're using a expanding tool like inflate. But again, what I'm planning on doing is doing a second 0 mesh in the process here. And see just to add some light strokes with the, the inflate. It just kinda look around here. Keeping my eyes on that center area here. I'm not really too sure how 0 measures going to behave there. And I'm probably going to do a little bit more iterations through there, but just for now, let's just go ahead and we're just using this to add some volume. You can also add volume through the standard brush. B, sorry, and cute. But standard brush doesn't expand on all sides. It's just a one side, like so. But you can do that. All roads lead to the same area. So maybe I might use a standard brush to kind of carbon. And just a little bit too. Which is trying to get some silhouette shapes because I noticed this is a little bit wider out here. So maybe on my trial right now, just sort of Spearman, I'm not constraining myself to a formula of just one brush. Let me see if I there we go. Planner around sand where we can get something relatively easy without trying to go too crazy. Now it is starting to lose a little bit of its symbol here. So I'm just going to draw that draw size down and just hit the smooth key. And I'm just going up and down to try to get a little bit of that back. And just going up and down, holding smooth key with a little bit more of a smaller jaw size. And then maybe tapering it up a little bit of a pinch with inflate so we can push smush a little bit more together up top. Warm. I think it's part of my problem. Here we go. Alright? So this is kind of what we're doing. We're just trying to simply get a decent look in mesh are decent, I should say silhouette going. Okay, so now we already have something here. I may I notice that when I'm over here, looks to be a little bit more of a V going on here and I'm kinda not, I'm not getting a VM, getting a little bit of a stranded look here. So I may just increase that with like so. Let the wrinkles create an interesting silhouette between here for now. But that's all I kinda wanna do. Just kinda 12 creates sort of a silhouette that matches here with a little bit more of a cleaner and lower resolution mesh like you see here. So once so we get once you are getting the desired resolution that she's like on here. What we're gonna do is make sure to first save your file out, Savior, spotlight file also out. And then from there we're going to work on trying to sculpt some decent wrinkles and also give you a little bit of a tutorial on panel loops. So stay tuned.
20. Sculpting Wrinkles Folds: So let's get started. In this lesson, we're going to go ahead and get started in sculpting some cloth. And we're going to then proceed after that to the next lesson, which will be to work with some panel loops to get some of our cools scenes as we see here. But further ado, let's just go ahead and get started. All right, So first things first, let's give this a few subdivisions by dividing it 123. And maybe go, I like to do this because I like to switch between different divisions based on which brush I have. For example, division for I like to work with on slash two, but Division 3, I prefer using the standard brush and you'll probably see why I can just collapse, collapse things and smooth things out better with that brush. Let's see, I'm looking at everything we want and one of the first things I wanna do is I want to use my standard brush to sort of warm myself up to break up this piece so it doesn't look like one big glob. So let's go ahead and get our pop-up menu. Select our standard brush or BST. Make sure you have focal ship turned up. And from here let's just go ahead and jump right in. And like for I always like to give a couple of strokes in the same position and then taper out the ends. But you don't have to get too crazy or meticulous with this. We're just doing this simply to break out and break in our, our pants so that it doesn't look like a perfect little sheen of blobby clade. We wanted to just kind of break it up a little bit. So let's just go ahead and might want to just go through there. Maybe even thanks. Smooth out that top butt, keep that bottom going. And you know, I get a lot of questions asked about are there any brushes outside of ZBrush? And I know I've said it before, but I'll repeat it there most certainly is. And you are definitely, if you're looking to research into cloth and sculpting cloth. It's been around for a while. It's kind of an old brush but cell we brushes. That's SEL, WEEE. Why those are brushes out on the Internet that are really, really good for things like sculpting. In anything from soft cloth materials to things such as silk. Silk is a very good example for that cell we brushes do very good on, let's say just gonna, you know, I'm not going to go too crazy on this. I'm just going to have just some fun with this. I'm not going to look at the wrinkles on here and be like, oh God, it doesn't look good. It dead on to what I'm seeing here. And I'm just going to go ahead and don't like it pinched like that. I'm just simply warm and myself up in some fun out of this. And one thing I will say over and over again on here is, is that now if you are attaining results that you don't like or you don't feel are matching up to what you want it to be. You know, just remember to kinda keep in mind, you just Z back or use the slider to go all the way back. There's nothing wrong with that. It's something that's commonly done. It's also why I have multiple subdivisions so that I can work with smoothing modifiers to clear the canvas if I don't like. A particular way as sculpt or a fold is, I can just simply undo a little bit of what I have here. So if it's not perfected exactly as I see fit, I mean, there's a whole bunch of erasing and undoing that I did when I first sculpted this out. So, so it don't don't go too crazy or critical in trying to get it all correct and all absolutely right in the first try. So just kinda keep that in mind. Don't forget also. To experiment on and work on different brush sizes as well. And then after you do a couple of strokes in one direction, just go ahead and smooth it back down again. So it looks like it's blending in. Like so. Good Collapse here. And then ssh make a smaller brush size to sharpen its collapse a little bit more. And then we just sort of lightly smooth ball back in. And it's all, like I said, these 3D references, all these 3D meshes are, are they're just there to afford you again, that opportunity to practice, practice, practice, practice. Oops, I have a focal my spoken shift is turned really low. There we go. And we'll go ahead and we'll switch off between this and slash two so we can have some, a little bit more in there. And weirdness. Here we go. And you notice also another thing is, is that my wrinkled pattern is not exactly as it is over here. You know, like it's not the same as it is over here. Well, that's a good thing. Trust me. I'd rather you come up with ideas out of inspiration then trying to allow yourself to be absolutely critical of copying exactly what she's saying. You're not gonna get the heaviest and best results if you're completely constrained to one shape, let the shape be free. And now let this be free and don't let it to turn it into something else. Just kind of go wherever the wrinkled looks like it's going to go when you sculpt something, you know, let the like, I don't like that. So I'll go, I'll go ahead and undo that. Don't be in this mode of thinking like, Oh, he sculpted a very certain way, so I got a sculpted like that. Now, this is all about just, you know, here's my guide. I'm just trying to give you sultan to do, to practice on, but you don't have to stroke too. Give a stroke of sculpting identically to mine. It's definitely something that I would probably try to steer away from. Really see if we can get some more finer looking ones too. I'm thinking maybe I might just to see what it looks like ECR with globs up here. So we smooth it back in, back and just take your time on this one. Push back in. Like so. And you're probably asking why are we using, it seems like we can almost accomplish anything with the standards. So why the slash to, slash to kinda gives us a little bit of a another option API things look a little bit different when you're using slash two as opposed to standard, especially when it comes to pushing things in. So that's kind of a cool concept. Oops. All that pattern like so. And you know, it's just what the goal is, just to get you to make your own pattern. You know, the, you can try to emulate what you see or you can make go off of it. I'm going to go ahead and bring in slash two. So go ahead and click light box up here. It brush and hit slash folder and get that slash to make sure the L key is turned on. Turn up your draw size and turn up your focal. Make sure that lazy mouth, again, L key is turned on. Let's see if we can get some. I like to work on division for with slash two once, you know, it's a little bit for Bowden just doing a couple of practice strokes to see if we can get some work. And again, you can kind of see already light. It's just think of slash 2 is something that like compliments. The standard brush a little bit. See if I can do some. I'm just experimenting, so bear with me. I never tried softening the mask and then blending it. But hey, may work, may not. I'm just kinda little bit. And be mindful when using that slash to definitely want to make sure that you are mindful of which direction from left to right or right to left because that's the direction in which the displacement goes from up, the lip goes down a little bit for their say. And again, this is EC like right here, how it displays that. That's an example of why alike slash 22 so much because it's a good displacement tool if you can catch it just correctly. And now, let's see if it's Joni. Now. Let's go ahead and tuck some of that back in. Whenever I use Move tool, I always work on the lower subdivisions. See if we can get some there. Good. Let's get back up to division for good. Back into slash two. Let's maybe just Ooh, that's really when you get some like that. It's probably because you get your brush a little too big. So it's all about knowing the brush and having an opportunity to practice with it. And let's see if we can. I'm just sort of looking for my shapes scene if I can find something in there that might be fun, like that. But let's see if we can do it from top to bottom so that it looks like a little ad. I don't know. I'll leave it on. But we can also use some of the areas here are these anchor points, especially in this area to work slash two and I went from right to left. I'm supposed to go from left alone to get that underlain. But here, I'm going to give it a nice little loop. And here is a good opportunity when I see it. I'm going to work with the polish brush, BHP. That's the high polish brush right here. I'm going to try some lung just going to, this is, this is going outside of the curriculum, but just to have a little fun, I'm going to gently flatten some of this out. Now, why am I doing that? Because I'm going to combine it to another brush to see some results, to see if I can explode, expose some of these cool little edges here. So let's just go ahead and just kind of smooth that out. Now let's go back into our standard. And I like working on the subdivision 3 for standard. Let's just go ahead and see how we can maybe make that a little bit bigger. Trial size. And hear. A little bit of an interesting journal says it's, this is just maybe an experiment of if I don't like something that's okay, I may work a little bit more on that and experiment a little bit more. But all I wanted to do on there was just come up with some ideas of fun. And I'll find something new right in the middle of making this course just to have a little fun by with high, high polish brush. Let's make sure on the fourth so division that smooths out fairly well. Yeah, it looks all right. I mean, that's one thing that I would say is important. You know, I am giving you a guide direction, but don't think this guide is the only place you can find brushes, for example, Damien standard, that we haven't really talked too much about it. But you can also use the Damian standard brush if you hold left old. That's the dam standard brush. You can also create some fine seems and really bring that out. And then of course, you can really push that in as well to get what you want going on here. And that also is an option. And I'm probably going to say that in all of this, that's the main theme. It's not about how you work with one brush. It's about how you combine brushes like I just showed you the Damian standard now and go into my standard to carve in soft brushes right here. And now, and then I'm going to pull in a different fold right here. And then that's kinda how I'm going to do it. I don't know what it looks like when I put a high polish, just a harden that out and then go from smooth. But what does that look like? A one shoe to be in that experimenting mode of what something looks like if you try it. All right, That's the most important thing I can tell you to think is this. You have to be willing to take the moment to practice outside of the guide. The guide can only liked this video guide. I can only take us so far. But you still have to be willing to practice beyond what it is that I show you. And that means experimenting a lot in what you discover and find. All right here. Turn off the eye like to work with standard. I'll work with standard. Maybe. And then BHP high polish. Maybe flatten that down a little bit but keep those edges like so. And then go back into standard and create a little bit of a groove right there. Push in and then really small kinda move in. Smooth this side, but keep that side on smooth little bit. So there's a little bit more pronunciation there. And maybe if you want, start breaking up and start making combinations, what can I do to complement what I've made already with the brushes I worked with high polish of worked with standard. We still have slash two. We can see if there's anything interesting out of this. We still have Damn Standard brush also, you know, I don't know what it will look like, but I'm still willing to try just to see what it looks like, you know? And That's the mentality. If you don't like your results, you can erase your results. But it's important that you are willing to take the risk in what, in trying to discover the results so that it applies to your next, your next project. And that's cool, but think of it like this to be little bit higher. So let's just finish up with in this area right here. To the move tool. Swatch. Go to our lowest subdivision, bring this guy up a little bit more to our highest. Not gonna do too crazy things on here because we're going to be doing some tracing outlines and I don't want to compromise anything further. I can do some more sculpting in this area though. I'm going to do a different combination. Just do my slash two already. We have something cool going on here. Yep. And that's displacing the geometry really nicely that we get. And go to high polish on this one. The high polish is something definitely I would not use ever unless I had a what is it? A Wacom tablet. Let's go to standard. Let's start to, we could also go to you could also do what is it? Damps standard as well. Let's go ahead and smooth all that out now. I mean, the important thing is to remember the varying degrees of detail. You know, some of these are glob a look and wrinkles. Some of these are a little bit more finer looking at wrinkles, really too crazy about that. Maybe I can get some cooler with the string. Let's leave it alone. I may work on it a little bit more. But for now I'm just going to go ahead and if I work on it, I probably will work on it through slash two just to sort of get what we want out of it or something like that. You know, a lot of this is also to do with tapering as well. I don't like leaving them up here like this. Yeah. That's just going out. And if then now that I'm deciding I don't like what I just made, I'm just going to go ahead and undo it because it probably won't be seen to further in. So that's a little bit how we can get some raw wrinkles going. This whole thing again, as we are reiterating over and over and over again to you, is it's really coming down to being about taking your time and experimenting with the shapes. Ideally, you want to go ahead and sculpt in shapes that taper and a little bit. And like into a V, like you see right here. But you just want to really be painful and taking your time with this, especially if you're completely new, a lot of people will say to themselves, Oh well, we want to go ahead and make something that is really good in just a couple of strokes. Well, it takes a little bit more time and practice to go there. So you've got to first get a feel of stress points, anchor points, and so on. Before you get there, it's like right there or just trying to break up any areas that are bare, like here. So like I said, this is this kind of area where you want to just simply put the time into just simply practicing what you're doing. I gave you a couple of ideas of brushes. One is a dam standard, another one is a cell. We, and of course we showed how we combine those with our slash toothbrush. So this is a little bit of a longer course tutorial to get the results you want, but I felt it was a pretty important one. When you're done with that, just make sure that the silhouette is an obstructed too much TOC everything back into what it was originally at with the Move brush making sure you have the lower subdivision. Again. The next lessons going to be about working on trying to get these brushes, these panel loops to be implemented into here. That's why I kept a lot of this area here blank. But we're going to show you how to do that. And unfortunately, we have to delete our lower subdivisions. So that's kinda why I went through and did the wrinkles first on this. So in the next lesson we'll go over panel loops and how to create scenes there. So stick around.
21. Seam Sculpting through Panel Loops: Okay, In welcome back. In this lesson, we're going to move on in work on making some scenes to outline all the different areas, all the different islands of these detailed areas throughout our pans section here. And we're gonna do that through panel loops. And in order to work with panel loops, you're going to have to make sure to go through geometry and delete lower. So this would be a good time to make sure to finish up in sculpting all your wrinkles before proceeding forward. So for me, I'm just gonna go ahead and stop it there and just make sure everything is where I want and just go on ahead. So the first thing I'll do is I'll go ahead and delete lower. And now I will not have any halting pop-up messages when I create a poly groups and edge loops around there and panel loops. So start off with ON going to look at all the patterns that I see and try to make a poly group island off of there. So like this area can be a poly group area. This area here can be a poly group area. This area here I made into a slash 22. So I'm not going to really worry too heavily about that area. So I'll just worried just about creating in here. And of course we'll be doing this through a process of masking. So let's go ahead and hold down control and change our stroke over here while holding Control down to curve and release control. And will we now have our mask stroke set to curb. So finally going to turn on the X key and then hold Control and drag out diagonally a mask like kinda like what you see there. You can even hold, go from the other side, hold control from the right side, and then hold left Alt minus some things if you want to make it higher or lower. And I think I like that a little bit better and make sure to cover this area here up as well. So everything below is a mask. So finally after that, I'm going to go ahead and invert this mask by clicking off into empty space here and holding Control and hit tap to invert. We'll have our first poly group and a second by hitting Command W or Control W. And if I hit Shift F2, you should see a second poly group created in the areas of the masked. Now for this area right here, it's going to be our second poly group and it's going to kinda over cover this area. So some of this will be deleted and so forth. I noticed that this area is kind of flat and this area isn't. So I may have made one mistake that I would like to rectify, so I'll just go ahead and just smooth that down a little. I don't want to lose anything here, but anything that is within this general vicinity, going to just hold Shift down and just sort of flatten it out. Give myself a little bit of a starter. So I'll change my stroke from curve to drag wrecked just to give myself a little bit of a headstart, then drag rect to freehand. And suppose it could have don't control as well on this one. You know what I think I'm doing. I think I'm gonna go ahead and clean this all out with o, the curve brush. So we'll hold down control, switch back to curve. And then using my spacebar trick, I'm going to make some masks here. Same thing for this area. Looks a little blobby. So she does want to clean it up. And again, I'm using that space bar trick to get the curve to pan across like that in case you're wondering. And you can also while holding control, go up to transforms. And you can go through and enable lazy mouse to get more finer streak as well. If you would like. Hey, I can work with that. And we still have some areas here that we accidentally also mass. So let's go ahead and take them off because it's not on the other side and I like asymmetry for my design. It's not mandatory. So don't think it is. You can leave them there, but you gotta make sure to clear the insides here as well unless you have some design for the end scenes of the patch as well. So I'll go ahead and hold Control drag and then hold left all for clear. Oops. And I noticed I did that in cemetery mode. So let's turn off X and then make sure it's off here as well. Perfect. And now I'm going to make a poly group that overlays over there. So now we got to poly groups and we may have our geometry divisions lowered. So let's go ahead and add some edge loops over these poly groups. So that's, I'm going to choose, I'm going to go through to geometry, edge loops, group loops. I'm choosing two for my group loops. I find that works best for me and I'm just going to hit group looks like so. And that will just add some group loops into wherever there are poly groups. So we have a little bit of a straighter line here. I see it's a little bit wiggly. So one thing you can do is this is just if you want, it's your personal choice. You can go to deformations and go to where it says Polish by groups. Turn that into a hollow circle and maybe just smooth it. Now, you don't have to smooth it that far because you might also get a little bit of a, you'll lose a little bit of the geometry here. If you want to hold on to it, you can give it like for example, in a subdivision, an extra, and it will collapse less as a result. And it will also give you a smoother line here. I'm just wanted to just show you and give you that for extra options so you know what you have available to you. I'm going to go ahead and just see what this looks like without having to rely on that. From this point on, we're going to move on to our panel loops. So for panel loops, I'm really going to just focus on just two loops. And I want you to not be fixated on numbers of copying on what you see in the video guy, but instead experiment to your own. So that's what I'm doing right now on experimenting to what I like. But I find that two loops for panel loops and two loops for edge loops works best for getting this particular scene pattern. So let's go ahead and just hit panel loops and see what that's like. One thing I forgot to do is turn off Double cause that will make a backside to all of this. And maybe what I want, the final the final test is when you're going to go through and very gently run a smooth brush across so you can get a fine look like you're seeing. And that's the scene, that kind of idea, that little seam is what I'm looking for. It's not about what the results come from in the panel loop, but what the results come from after you hit panel loop and you run very gently, your smooth brush very, very lightly across. And to get that fine look that you see right there, I'm okay with this. Look as is for now. So I'll count myself lucky. But this is all just through experimentation. Looking for what you want to get out of it. You see a little bit more here. So let's just go ahead and I'm going to do a quick BPR Render. See how that looks like that. Just to have some fun. Whoops, that's because of a shadow issue that I have that's intersecting with the other one. So I'll go I'll go, I'll have to make some adjustments and or render well to overall, that kinda is where I would like to take it. So from this point on, what we're going to do is I'm just going to give you a demonstration of how we create this pocket by doing a smaller version of that demonstration with Our pocket right here. And again, I'm going to use slash 22 since it's one of the only brushes that does a displacement of down and up at the same time where it pushes down and pushes up at the same time. That's why I like select two. So I'll just go ahead and turn on my light box. Select my brush tab and farm I slash folder. And choose slash to rearrange my work with the high focal shift. If you work with a low focal shift, that's what slash two does. It just really makes a hard fall off for the alphabet than you want that soft on one. And also want to make sure I am working with something like that. I'm probably going to start from down to up so that I can get that displacement aware of the pocket is, and there is a little bit of tessellate a geometry there. So I may give us subdivision. If I can't get the smooth amount, what I want, but let's just see if we can fix that on this subdivision. I'm trying to avoid adding another subdivision there. But I'm just going to sort of but little bit I'm just going to mask off just happened this in half of this area within. Maybe sharpen the mask. And let's see if I can work with the move tool. Also. Smooth it a little bit, of course third. And then may look a little choppy as you're seeing. But let's just go ahead and invert that mask and see if we can smooth that choppiness down. Like so. Yeah, the course stump. We've got a good start. So we add a little bit of a beginning, start to the basic premise of the idea how we want to create a pocket here. Because I wanted to give you sort of a head start on that because I wanted you to know how to use a how we're going to be doing the pocket on this side, it's roughly going to be the same thing with few extra steps to it. I may even do some experimenting like trying to work with the slash or I'm sorry, Damn Standard brush to maybe create sort of either like a fold of some kind and work with the I don't have my starter, my Wacom tablets also kinda lagging on me, so I may have to plug that in. But what I'm going to do is I'm going to see if I can finish up with maybe trying to get a little bit of a lip here. And after that, I want to make my lazy mouse radius a little bit longer. I might oops. Something like that. And then of course, we can also put in some stitches in or along that side, just help us out. And you can even experiment with doing different sizes, as well as different focus shifts to see if you can get a different iteration of that brush. But that's all I want you to focus on is this just simply getting to this point here and probably work a little bit on smoothing out any displacements that you create. Maybe also if you notice, it's a little bit sharp here. Grading a little bit of thickness. I like to inflate no matter what people might tell you about inflate because it stretches out the geometry. But that's if you abuse it as long as you're sticking to it, by smoothing things in relaxing things back down. Again, you can get a pretty good result with the smooth brush or I'm sorry. Yeah. With the smooth brush combined with the employee brush. So so that's sort of a, an idea on how we're going to do it. So try to get to that point. If you can. Then in the next upcoming lessons, we're going to try to see if we can work on detailing now to this side here, impossibly breaking up some geometry a little bit more in the projection master as we progress. So stay tuned.
22. Secondary Pants Blockout : Oh, okay, so let's go ahead and get started in this lesson, we're going to go ahead and block out the side here to get started. If we take offs a little solo mode, I'm going to just adjust some things here. If we take a look at our 3D reference or if you have your 2D reference up, who free to reference that. But if you take a look over to the side here, we have some details we want to bring out on this side. One of the first things we wanna do is we want to establish a little bit more of a thickness on this as shown. And we also want to get that sculpted pockets sort of just in the right place and maybe lay out our lines has seen there. So let's go ahead and begin with that. So for starters, I'm going to start with the thickness and tried to elevate this side patch out. So to do that, I'll first go ahead and hit Shift Control to isolate select. Then I'm going to go ahead and drag a mask on there and bring everything back with Shift Control, tapping into space. And from here I'm going to go ahead and hit Control while holding Control down. I'm going to just tap on the mask a little bit just so I can get a little bit of a soft taper there and then invert the mask like so. And then after that, I'm going to change to deformation and see if I can get some sort of an inflate out of that. Maybe something that just works a little easier. And that's sort of kind of I'm choosing inflate balloon for my choice here. And take a look at that from the side. And that's roughly kind of what I'm going for here. Maybe give a little bit more predominant in flight. All right, and then let's just go ahead and smooth out those ends there a little bit more. And now I'm just going to use this standard brush and I'm just going to select that. Turn my focus shift up a little bit and draw size down. I'm going to just sort of break out a little bit of this center area just so it just doesn't look like a perfectly round glob, you know, so I don't like it too. Saying I'm just going to just draw in a couple of strokes with the standard brush. Maybe make it a little bit just to end then smooth it down into the mesh. And all I'm doing is just sort of trying to imperfect, create imperfections in all of this. So, you know, the degree of how hard you want to do this is up to you. You'll notice I'm staying away from the edges. I'm still trying to maintain that. And that might be because I'm thinking about doing some secondary sculpting details on there later on. All right, so now, once you have everything that year got needed on there, the next thing that we're going to do is we're going to go ahead and try to get a good sense of where this pocket is going to be. So we're not isolate select. And I'm going to look for kind of this to be in the same vicinity as this. So if I just bring back everything, it looks roughly the same. It might be this might be a little bit shorter. And that might just be because I have this going down a little bit. My do some adjustments there. But now if I isolate select, I'm going to hold control down. Just choose a curve. And then we use my space bar trick to see if I can get a good idea where that where that little pouch angle is just trying to mimic that a little bit. Kinda like that. And I think that's where it's going to be. And I'm just doing this because I just would like to have a reference. And like we said before, we're going to be using group loops. I'm sorry, not group loops, but what is it? The slash to, to kind of help guide us through there? So one thing we're going to have to do is now we need to get these two isolated together and so that we can mask out everything else on the outside. So I'll show you what I mean. First. I'll hold on, Control Shift, tap on that. And I'm going to change my mask to a drag rectangle. And I'm just going to draw over that. And then Control Shift isolates, select, bring that guy in, and then just simply invert the mask, like so. So now. When I go to lightbox and I select brush and then go to my slash two. And we can go ahead and do the same technique from the last one on here. And now we have a poly group that helps us give us a reference to where to sculpt that, just to help us out there. So let's just go ahead and make some adjustments. That's slash two like we did before. We like to work with a higher focal shift with slash to maybe turn that down a little bit and go to stroke and make sure lazy mouse is on. Like to work with 30 on the radius. I'll hold Shift F to bring everything back. Actually, I'm sorry, I'm going to take a little bit of a practice stroke to see what I like. That's pretty much the idea. So let's go ahead and, you know, if you want, you can hold Command D to give yourself an extra subdivision if you would like. I already have. So just keep that in mind. And I'm just going to simply start a little bit further back. And I'm just going to draw in nice kinda rounded area, little bit off. Go, something like that. Kinda looks like it's in the general vicinity. So now that we have that, we have a little bit to work with, now, one thing that we can do is we can use the poly groups as a method to tuck in everything. I want to show you what I mean by selecting a. The mask here. Go ahead and back out. So not left by starting off, I'm going to go to a lower subdivision, hit control shift isolate, select, and I'm going to draw out a mask and bring it all back and invert the selection. Then hold Control and tap a few times on the mask. And we can go ahead and do it that way if we wish. Or another way we can do it is just simply do some manual use. Start with this exact same way and then hold control and change to standard and do some manual. Because one thing I'd like to do, and I will admit this. I like to go ahead and get this little lip here to include it in. I'll go ahead and tap that once just so that I can get a little bit of a softer fall off. And then let's go to our Move brush. See if we can bring that down a little bit. Just bring it in like so, and tuck it in by holding left Alt, like so. And took in that way. Maybe also talk in a little bit, bring it up a little bit. And that's just sort of how we can get our first part now it looks a little thin here. So we're gonna go ahead and do like we did before and fix that by switching to our inflate brush. And you may see that geometry just kinda tear a little bit. Don't let that scare you. Will go ahead and fix that in a second. I'm going to clear out some of this mask so I can get a little bit more to work with there. And I'm just running my inflate across now, it's very important to try to do your best to evenly make it across there. And then after you get a good thickness, just very gently holding while holding shift, which is ease it back down again. We want to round this up. Like so. Nothing too crazy enough than two and saying, all right, So something like that can work for us. So from here on I'm going to then take a look at this and look at some of the other patterns. As we see here, we have a little bit of a divide, sort of border area. And I'm going to try to do this same with that here. But first I'm going to make sure that using the Move brush we have a nice, good straight line. Because I think what we'll do is we'll try to work with our standard brush to get that look like we see there. I'm just going to make a little bit more adjustments. And some of these areas. Cell that looks like that works for me. All right. Let me go ahead and do now. I'll just work with that. I had to see if think the reason that happened was because of my soften the mask accidently. Here we go. All right. So now let's go ahead and straighten that back up. And let's go ahead and work with our dams, standard brush, BDS. And let's do a couple of practice strokes. So it's kind of looking like that. Let's try some a much smaller draw size radius. Yeah, that will work. I'm going to bring it up one more subdivision and take that. Yeah. Probably. I'll go ahead and leave it like that. Alright, so let's just kinda gauge the thickness right there. It's a similar thing. See, now, if you were wondering, we never really talked about it, but you can also, if you want to do a practice stroke by just hold the straight line, by holding the Shift. So what you're gonna do is just kinda press and hold down on the mesh and then hold shift. And then you're going to draw out a line. And that should give you a nice clean straight line like so. So I can kinda help you out in identifying some straight areas. And so we're going to may just kinda clean up in the end where it kind of falls off. And then I'm going to look at this and I'm just gonna kinda repeat the same thing here. Maybe maybe there. Yeah, that works for me. All right. So we'll just bring that back in. And I'm thinking now what I'll do is is I'll go ahead and do some adjustments here to bring this back up again, like so. And then from here, I'm probably going to do some extra standards sculpting. And the next upcoming lesson, what we're going to do is we're going to work on trying to get these straight lines going through as we see here, and work on some stitch alphas and finish off with some projection masters. So stay tuned.
23. Creating Stitch Details: Okay, so let's get started. In this lesson, we're going to go ahead and continue on detailing the side of this. Now that we have our block out of shape on what we want, we'll be doing some stitch demonstrations and also some projection masters. So let's just go ahead and dive right into it. Now where we left off, we created a nice little fold here. So one of the things I'd like to do is do a little bit of a more breakup here, like we have here because I'm feeling this is a little too perfectly rounded and I'll go ahead and turn off x. I like to go ahead and see if I can go ahead and just repeat and just kinda break this up a little bit so it looks a little bit more cloth here. So go into my standard, put my focus shift in. Like so I probably should try this with isolating. I'll just go ahead and just put a mask over everything. Just sorta just break up the shapes so it doesn't look all to perfectly glob down. So we have some air which are strong in some single line strokes and just kinda bringing it up a little bit more. Like so please feel free to take your time. I'm just going to give you a quick demonstration on that. So one of the first things we'll do is we'll put a stitch across here using one of our ZBrush built-in stitches. So I wanted people to know where to find that. From there we go from projects, our light box, and from there we go to Brush and look for a folder that says stitch here. And you'll have a few more options to go with. Our first demonstration will be with stitched three. So go ahead and click on that. And I'm going to go and reset some of my modifications. Now, like the dam standard brush in the slash to brush, She just got to take a couple of practice strokes to find that right size the stitch that you like to see. So I'm just going to turn my radius down and see what I can get out of there. Now, looks like it's a little bit jaggedy and I need some more resolution. So one thing I'm thinking I'll do is I think I'll give this whole area subdivision, but I won't let this whole area B. I don't want to have to divide the whole area, just this two spots right here. So what I'll do is I'll take this area and I'll take this area mascot out, and then invert the mask. Now if I just hold Control D or Command D, I'll get a pop-up in that I have division history. So first thing you wanna do is if you're just going to give divisions on here, go ahead and delete the lower and make sure nothing's hidden and you should be able to get a second wave of geometry just in this area here. So that should help you out. And we just gonna go ahead and gauge now little bit. And I'll try to draw some 17 that looks to be good enough for me. And I'll go through my stroke and maybe addressed my lazy mouse to be a little bit longer, maybe somewhere around 13. And I'll just simply draw out my first stroke like so. So that's just sort of give you an idea of how that works. And you can feel free to experiment with different sizes. I'm just going to show you this now with different size iterations, maybe even just like we do damn standard. You can do it the same way with the single date, single stroke by holding shift. And it's just tapping it down and just pulling on it. And let's see. I think what I'll do also is, is I will, hey, just go ahead and do the same thing just with here. Oops, that's a little bit off. Something like that maybe. And then maybe just go with something a little bit more bigger up here. And it's good. I'll do a quick stroke, maybe go, maybe just work for me. And I'm just gonna kinda trace my edges. Take your time, make sure you have the lazy mouse. Go and Pooja. If it's not long enough, just feel free to change out that area. And we haven't talked about manipulating an alpha on here yet. So I thought that might also be a good idea to work on next. So here's what I'm gonna do. I am going to go ahead and mask everything off except this area. Even though there's no isolates, select Poly Group available for me. I'm going to hold down control, goo, my curve, draw out a curve, then release the control hold down space bar to pan. And just going to create myself a nice little area here just to work with real estate and give an example on how to modify our Alphas. And then we'll give a, a bigger example of that later on here. With the projection master method. Right? Looks like it's a little bit some thin, roughly like that. Don't get too crazy critical. And then of course feather and soften that. And I'll hit the W key. Click on that upside-down teardrop you see right there and center or an N and maybe just kinda push it in like so. So there's no bitter feelings of Stretch Geometry. I'm might just sort of relax a little bit of this with the smooth brush that back in slightly. Alright, so I remember when I did this the first time in what I did was actually all I just wanted to kinda see what it kinda looked like with a slash to slash one brush, which I think is a standard. And I wanted to do that just to do a demonstration of how to manipulate alphas by repeating them just to kinda get you to open your mind and see some more things. So let's go ahead and access our slash. One brush. Let's see, B, S, and L, I believe. I'm just guessing. No, it's not. L. Slash is always a stove or Melinda, fine. I feel like I play with at Where's Waldo? So I'll just access it through my lightbox where everything's easier. And there is my slash one. So slash one's pretty simple. You know, if you just kinda draw it across like that, It's, you get a pretty good looking results. You can also then compare this up with something like inflate and then just get some cool looking. Seems like that. Well, and if you switch, if you smooth it back down, you can get some pretty good looks like that. One thing I'd like to do is just do a quick demo. I just wanted to show you that like to combo technique and then show you how to put that with an Alpha repeatable by r. I'm sorry, manipulate the Alpha through the up here. What I'm saying is that I'd like you to access slash, like you take a look at your alpha. Now let's take a look at alpha, modify. And then let's go ahead and work with all say three just to see what it looks like. And if we do that, you can kinda see how it just gives you more than one. Like so. It's a little bit on the the kind of choppy side. So I'm going to turn on my lazy mouse and adjust my lazy radius out. And then I'm just going to use something like that. Wonder if that's a little bit better. You can do this again with just this. This is just sort of demonstration to show you a little bit on how to get slash or manipulate alphas. Because again, I wanted you to get the idea through a single brush simply because it's going to be imperative when we do this next part here. So I'm gonna go ahead and reset that now back down to my H tiles of one. And I'm just going to drag some straight lines across. And I'm going to lower that to some like they're okay. Then just gonna work on bringing that all back in. I think so. And you know, it can keep going on and on. Maybe you want to, you don't have to stop there. You know, the art of exploring ZBrush is not the art of sculpting with one brush, but to the art of combining ideas with several brushes like slash foo to inflate. Or if you really want to see awarded slash inflate and then high polish look. And now this is the art of exploration, pretty much where we just kind of learn ZBrush through what we do. So I'll go ahead and clear that off now.
24. Detailing Side Pants Finishing: I got what I wanted. So in this last area, we got going on going I do another demonstration as you see right there. And that is with the basic stitch, I believe. So. Let's go ahead and just do couple of practice strokes to see what that looks like. It's a little bit too. Who boding enlarge? Something like that. And of course it's a little bit like that. Yeah. And as you can see, I'm also working on that stitch or I'm sorry, I'm working on that. The shift and to draw my straight lines like so. Now I'm going to go ahead and trim. I'm going to do a little bit more on what we did before. That was at the very beginning, we're going to break up this glob with the standard brush. Just to have some fun. And you know, you have a hard line mask here. So you might need to show a little bit of flexibility just to have a little loops. Do that. I'm losing my, you know, that works, that works fine. All right. So now let's go ahead and trace out some trims here. Yeah. So to do this next part, I'd like to talk to you a little bit about projection mass from rejection master has been around for a long, long time in ZBrush. It's been I remember all the way back in 2009 or could have been 2009 or 2010. Man. It's been around for a while and it certainly has come a long, long way. But it is still to me a very viable form of of workflow for sculpting and ZBrush. We're going to just do a quick demonstration through modifying alphas like we just showed you right there above with the slash two. We're gonna do a demonstration with a different type of outflow. So we can give you so much different kinda looks here in a second. But the first thing we have to do when working with the Projection Master is, is we have to realize that we need this era. We just want this area that we see here to be projected onto. So that means we're going to require ourselves to put a mask over everything. So let's just go ahead and do that. And I'm using a curve to mask everything out. And then maybe for down here I'll use a stroke because it's not perfectly straight. Make that a little bit better. There we go. Now the funny thing about Projection Master I've found is that the results you see on there are not accurate to the results that are being projected because the project, they do a demonstration of what the details are that are going to be projected. And you're going to see that in a minute. But those details, they don't come in. They don't come in exactly as they are projected because you might have a very different resolution and you're going to see what I mean in a second. So you've got sometimes every once and awhile, do a little bit of experimenting to see what it looks like. So when you get a mask like this, go ahead and go up to Projection Master. Turn color off, turn double side, fade off. I just simply have deform and normalize and hit dropped now. So I got it already set up right now, if I drew a, it's a drag method for my stroke and I'm choosing Alpha 47 here. So if I go up to Alpha just like we did in slash 22, and I maximize my H tiles. That's basically 32 versions of the Alpha all scrunched in across. That gives you this look. So to fix that, and if we go to alpha and maximize our V tiles, now we'll start to compress it, or 30 to 0 places across vertically. So now everything is sort of more on a square as you can see. And if you hit the W key and maybe just click on this outside blue circle, you can kind of move the Projection, like you see right here. You can also scale it if you hit the E key and then manipulate through these top handlebars, or C, Let me go ahead and reset myself. Sometimes doing a Z out always gives me that result. So I have to reset my scale. And of course, you can scale on the x, y by clicking in the inner quadrant of the circle, like you see here. And so I'm going to go hit W, going to move this around. And now I'm going to hit Shift S. And I'm going to duplicate what I have here. And if you see, if you get an error where you see things blank out, don't freak out. You just need to go ahead and just go and return back your alpha. Sometimes shift Fs likes to do that. So I'm just going to see if I can try to eyeball it and that to be as best as I can. I'll hit Shift as well, more time. Like so and shift this one more time. Now one thing I did not do on here that I should have done. This might be a little too small for resolution for the number of divisions. This is what I was talking about earlier, the projection this is projecting the details as it would appear, assuming, of course it has the necessary subdivisions of the geometry. So you might not have enough subdivisions, so it will fade. So I'm going to have to make a judgment call on whether or not I want to keep my results or either make it bigger projection. That doesn't put the geometry that a test or by a half too. Just simply make a bigger projection instead. So I'll go ahead and hit pick up. Now, whoops. Looks like it wasn't a big enough result because of one very important reason. And I'm gonna go ahead and show you. Projection Master does not do good. When you don't have enough intensity. Let's go ahead and try that one more time. Whoops, I guess it didn't do. Well, that's on here. Or I might just be working on the wrong standard brush. Let's see here. I love problems. There we go. We add the projection. I think what I did incorrectly was I did my projection in Isolate Select mode. So I'm gonna go ahead and try that one last time. I notice my Alphas back on 47 for some odd reason. I don't know why I did that. That's why you saw that weird look. But let me go ahead. Sorry about that. This is the one thing that keeps on getting wonky about Projection Master. It's a little bit on the glitch, is that it likes to turn off when you duplicate the Alpha. So it's kinda protruding there. So I might move it over and I might just move back down. All right? And that is that. So now we got our pattern here. So the next thing we're going to be doing is, is that we're going to put a little bit of a lasting stroke right there, stitch that we're going to be using and that's going to be our stitch to stitch. Two. Actually, I think if my memory serves me, know which one. And you'll notice, if I draw right now, you're going to get a weird look and stitch. That's probably because it's been multiplied by 32 by 32. Let's go ahead and turn that off. Although I will say you could accidentally lose, land on something fun if you mess around with these V, H and V tiles. Let's go ahead and bring that out. And I'm just going to draw a straight line. It's kind of nice like that, but I may just go ahead and go a little bit smaller. Just to break up the technique a little bit more like so. Okay, so that kinda concludes detailing to the side there as we see, I think if I look back on their missile little bit of the projection, so I might go through and do one more projection just for that area right there. But I'm not going to let it get me to distract it because we need to move on to the last areas of finishing this up. And that's going to be just kinda sculpting the center. We need to get these two bottom trims here. I'd like to do a little bit more work in just kind of getting you started in the idea of sculpting little folds at the scene. So with further ado, Stay tuned.
25. Creating Pants Trim: In this lesson, we're going to go ahead and finish the pants off by putting a trim down here and just maybe carving in a little slip for the zipper and maybe doing a little bit more breakup in the center of this area will between the scenes here. So let's go ahead and get started. So for starters, let's just go ahead and break this up real quick here. It's feels a little glob a. So I'm going to hold Control Shift and tap and bring in and isolate select right there. And I'll just go ahead and mouse off. And we should have just that area selected. And I'm just going to hold control. And I'm just going to soften the mask out a little bit more. So it kinda takes a safe distance from the seams. And then I'm going to invert that mask. And remember, this is just what I'm doing, but you can feel free to do other things beyond this. For example, I know I'm taken a detour away, but there are other things you can do like deformation. You can work with some of the deformations with what you see here. And create sort of like an inflate process to create a different look. Your mesh like you see here. And maybe create, maybe some sort of quilted or padded pattern like there you see on many Cyberpunk sorts like a strip of blobs that are going through. You can start with that using that and combining damn standard. You can do things like that too, but that's just me kinda reminding you to answer the gauntlet of creativity, they give you some ideas and other one is a good, nice little knee pad there. But I'm just what I'm doing here is I am just simply breaking this area that you see up. Just, just, just trying to find some fun patterns in this. Not worried about where it goes, where it takes me. I just don't want it to look all to like a perfect glob. So in other words, it's important to show its imperfections. And it's waves even if they're the smallest amount. All right, I'll go ahead and do the same now up here. And I'll go ahead and undo protect the seams by faith, feathering them away. And then we'll just go ahead and invert and maybe just create just a little bit of imperfections. We see. Now. One thing also we can do is here. We can go ahead and do some similar to the pockets and bring in a slash to brush. So I'll just go ahead and bring that in. And bring in my focus shifts to be a little bit higher. And make sure L is turned on. And you could do something like that. And then maybe we want to do some a little bit different for this seems maybe we'll use Damn Standard. Instead. Let's see what that looks like on a straight shift. Works for me. Maybe give it a little bit more intensity. Sometimes you just don't know what someone's going to look like until you just simply take a practice stroke on it. So just holding down, Shift dragging down. Alright, and you can fill in the gaps how you see fit if you wish. I'm just going to go ahead and use my curve to align up with this. Right around there. And soften the mask. There we go. So often the mask go into my move tool. I'm just going to tuck some things and so I'm just moving it over to the left. And then once you move it over to the left, hold left ALT to push it in a little bit. Like so. Invert the mask. Try not to lose the detail of which GOT going on in the sculpted damn standard brush. And then go with inflate, like slow. Just like in and out. All right, So now let's kinda the generalized area. We just wanted to clean some things up there. It's a little bit more than what we did before, but that's all right. So now let's just go ahead and get as separate our pieces for these trims below, taken care of before we move on to our jacket. Now, that's going to be a pretty simple fix and it's not hard whatsoever. What we do is, is we're going to start on a different area. And that's going to be, for example, a different tool that can be a cylinder or a poly mesh 3D. And I'll choose that. And it's just clicking off. It's kinda like a different Canvas we're working with where we're going to build our separate tools from. And this will be much more common in the jacket area. So from here, I'm gonna go to sub tool and I'm going to go down and hit append, and I'm going to choose Q. And then from here, I'm going to go ahead and delete that star. I have no use for it. Now, we are in split mode, so let's go ahead and it won't make a difference since it's the only one. But we'll have to disable it when we appended to our original mesh cell. So what I'm gonna do now is hit the R key and flatten this guy down a little bit. And I'm just going to just sort of kind of establish the shape that I want. And I think I want a relatively wide shape here, something like that. And I, my work, some like that. Okay. That with, I think that can work with that. Now I'm gonna do is 0 mesh because I need some geometry to work with and I don't know why pixel logic can't fix this, have that for over 10 years and they just won't change it. You'd think they'd know how by now. But let's go ahead and go to Geometry. 0 measure, we could make a really clean topologies mesh, but it's not really completely necessary. And I'm just going to hit Refresh. And so now from this point on, I'm going to give a couple of subdivisions. So Command D twice 12, just to give it a couple, just see what it looks like. And I'm going to turn up my brush size radius even if I have to turn off dynamic. And I'm going to hit X key. So I have symmetry and I'm going to work on just sort of smoothing this down. I may even hold Shift D here and just go ahead and so it can collapse a bit more in with a lower resolution. Alright, so now that we have that taken care of, Let's just, while we still have, Let's go to our highest resolution. And while we still have that up, let's go ahead and with our cemeteries still turned on, Let's hold Control down. And while holding Control down, Let's switch to drag rectangle and simply drag in a very thin looking mass drip. There's a lot of things we can do from edge loops to group loops to panel loops to get this, but it's not really necessary for this area. So let's just keep it simple. We don't need this to be perfect. Let's just go ahead and hit clean. Or let's just taper off by holding Control and tapping on this with control. And then one more time control and all to sharpen it. And then invert the mask, press R and bring that guy in a little bit, like so. And we have something right there. So let's go ahead and then let's just go ahead and pin this to our main area. I'm back on my original tool. I'm going to hit Control C, takeoff split screen mode. And I'm going to turn off my reference of my 3D reference. And now I'm just going to hit append and bring in that too, which will be at the very bottom here, hit R. And let's scale this guy down a bit more and maybe rotate him across horizontally. Zoom in a bit more. And then from here, let's just go ahead and get to this angle here and click on this little cog wheel that says customize. And look for the bend arc. Now it has multiple subdivisions. So let's go ahead and hit geometry and turn off, delete lower. And then go back and try that bend arc. And take where it is at the center here, that green arrow and just bring them all the way across like so. And that is all you need to do. Press W and press W twice and then hit Accept. And we got ourselves a good start. So now all we need to do is we can do this one thing we can duplicate through transpose or we can just duplicate it. So tool itself, I'm just going to write now duplicate the sub tool itself and turn the visibility off. And start with this one. I may need to realize that this has to be a lower resolution and it probably needs to be centered. Let's be a little wider to C, which means this guy probably isn't. That doesn't mean much. And that looks about right. Hey, h. And now let's work with getting this person set in there, bringing them in a little bit. And I'll primarily be using the Move tool for my pop-up. So Control-C move or BMP, bring this all in there. Just key is make this look imperfect and waved out a little bit. Don't make it look like a perfect straight line all the way across. Even if you have to that off a little bit, go ahead. So that works there. And you can even use your reference. And the reference will appear skinny as you can see. And that's fine because in my original reference I have the mesh just kind of wrapping around the leg and it's kinda bagged out like it's shows right here. I'm gonna go ahead and take care of that towards the end when I fill out the base mesh to be more anatomically correct. So I'm leaving a little extra space for that calve. I'd be seriously concerned for that person's health. There we go. And now let's go ahead and see if we can do the same thing over to the right side. So let's drag this one in. Bring in, maybe like so. And just like before, we're creating an imperfection, we're just moving around, breaking out that straight line and then clicking on the the pants to kind of overlap it over it like so. All right. So that's kind of where we're at right now with the pants. So you've finished that. I think there's still some areas in the back. I'd like to break up to make a little bit more broken up here, but this is so far going to conclude the pants. It's a little bit more of a slight more detailed than the other pants. And especially in some areas like crotch area there are where the zipper is. So what I'll do from this point on is take this out of the base meshes, collapse that down, and then put these two guys here. I'm going to make sure they're separate meshes. I mean, I'm sorry, separate sub tools and put them in the finished sculpts. So we'll be sort of where we finish from that point. And also, once you are at a comfortable spot in which you can stop, you can also delete your 3D split-screen reference. It's not necessary anymore to hold onto. So I mean, this is also again where I keep saying, you know, answer the gauntlet of going beyond the reference that you see here, I have done intentionally a job of trying to leave some empty space for you to conceptualize more. Knee pad would be an excellent idea right around here, for example, where you can kinda twist taper in a, a knee pad to be put, placed in here. That's sort of where the fun of all of this can like go because I want you to think beyond just the constraints of this guide. But let your imagination go much farther than that. So with that said, we're going to move on next to the jacket. It's going to be a little bit more. We're going to be building off of everything we learned from this one, from creating new reference, are created importing once again more references. Making sure do our sculpts that have divisions on there and maybe give a couple of more ideas on how to sculpt seems throughout addressed some hard surface sculpting and give you some introduction. So there we may do some Z model or work as well. And we're just like we gave an example with the trims here, we're going to be doing a lot more examples like that, where we build outside of the main sculpt to append on here. So stick around and stay tuned.
26. Cleaning Up Base Mesh Jacket: Okay, so let's continue in this lesson. We're going to go ahead and continue on into our jacket. And we're going to go ahead and jump off our our pants to be completed. If we wanted to. I'm just gonna go ahead and dump that into the finished sculpts now that we've finished through that, and I'm going to select into my base mesh and my jacket. Now let's work on crafting a new crafting a base mesh, a cleaner base mesh. Then what we see here. But first off, let's just go ahead and get in our 3D reference sub four. We go any further. So first thing I'll do is bring in 2D spotlight. So I'll go ahead and hit load spotlight. And just click here. And then from there I'm going to click on import, and I'm going to click on what should be your newest reference located in your reference folder. And once you download that for this lesson, go ahead and click on that and click on Add to spotlight. And that should be on there. Oh, I'll go ahead and hit tile proportion. And I'll just click off here and make everything else small. And now let's bring in our 3D reference. So I'm going to click off when I'm importing an OBJ, I'm going to click off into this poly mesh here and click Import and like where you're the newest Ortho was, we're going to look for our jacket reference 0 V J and bring that int. So we double-click and bring that in. Let's get back to our original extract tool and let's just go ahead and hit Append to bring the jacket end. So it's roughly occupying the same point in space as you can see. But now that we have these two pieces and we can get started. So the first thing I'm gonna do is I'm going to disable spotlight and the reference and work on primarily just trying to clean up this mesh that you see here. Now if you look, if you hit Shift F and look at it, it's kind of broken up into a whole bunch of poly groups here, here, here, and then everything on the inside. So and then also the trims. So there's probably 123677 poly groups on this tool. What I wanna do is have three poly groups instead, making it as simple as possible. Pauline group for the outside polygon, for the trims and the Pauline group for the inside. This is going to help me a lot and not only remeshing, but also read topologies in. So let's just go ahead and hold Control Shift and click on this first part. I'll start on what I'm doing as I'm starting to create a poly group, one poly group BY on combining all of these together. So Control Shift, bring it back. Bring it back. And bring it back. Is there anything I'm missing back? Nope. Okay. And that is that. So that is my first poly group. I'll choose a different one. Here we go. It's a good contrast in color, and I'll do the exact same thing on the outside. So Control Shift, drag a mask over, Control Shift drag a mask over and just going to drag a mask over. Oops, bring it all in. Now it's all broken up into three poly groups. So now we got something that's a little bit more simple. So now all we need to do is just take these poly groups and crease the edges. So when we do are 0 measure, It's going to remember these edges and make something that's a little bit more cleaner, little bit more easier to read. So let's just go ahead and go through geometry. And let's go through crease and crease PG or crease poly groups border like so. And now we can see Ramesh this, make sure you have X key turned off because this is a shorter sleep here. And I'm just going to then hit Keep creases, detect edges, keep groups. Let's see if we can get something and add just a little bit cleaner, easier to read something that's on lower subdivisions so that I can smooth down and relax. Just something simple to work with. All right, so now we got something here, something that's a little bit easier to work with. It's a little bit messy in the back-end on the edges here. So let's go ahead and see if we can. Redo a second Z remeasure, which will give us a different calculation based on what we're seeing here. See if we can do that. See if we can get something cleaner. Much, much, much better. All right, So something like this is completely fine. I'm just seem curious to see what it looks like. It looks a little kind of off. It gets a little bit of a collapsing process in all of it. So I'll just hold it right there. Now you see that the topology is a little bit off on the back, but that's okay. We're going to show you how to get around that when we do our readers apologizing towards the end of this course. So let's just go ahead and put our focus in trying to use the Move brush and get a little bit more of a silhouette that's closer to matching a jacket like in our reference and we see here. So instead of the traditional approach of tradition, traditional approach of using our model split screen, we're just going to use the spotlight to help us out this time around just to I think it might be a little bit easier. All right, so I'm just going to, first of all isolate, select this poly group, bring this in, make a mask, soften that mask in. And I'm just going to go ahead and hold Shift key down. You turn all I forgot to shift a smooth doesn't work too well with Spotlight. I'm just going to go ahead and smooth this down So it's less of a silhouette here. And go through, clear them. Bring in mu eric, you are just back this up. We're just sort of getting this a little bit bagged up. That's all we're doing. I think I'd like to work with a little bit of a silhouette like that. One thing that you might want to do is is you might want to bring in your shirt and your base mesh female character to see where stands in height, you don't have to make it perfectly line up just yet. We'll get to that point a little bit further down the road, but we just kind of one to get a silhouette that's a little bit more matching that of a jacket. And sometimes that just means kind of bagging this up, you know, kind of bulking it out a little bit more. And I'm doing that again because we're going to be subtracting off of this. So we're going to make it bigger than it really is bulkier than it really is to get. Because we're going to be pushing in quite a bit everywhere. Like this area is going to be pushed in because this is going to be puffed out a lot. So let's just go ahead and don't worry about going through and stretching any geometry because we're going to do one more 0 measure like this little bit. It'll go ahead. Because the objective in all of this is to just create a silhouette that matches through to a jacket. Let's go ahead and open our finished and bringing her shirt. See where that's at. I'm just using the shirt right now is a reference to how high up this is. Me. I just want to push it out a little bit more and I'm holding left Alt and dragging like so. It's not. Let's look at our main ortho reference. It does go up a bit around here, but it's still a little bit high. So we can go ahead and bring this guy down just a little bit because we'll put another extra trim around here that extends further. And so I think that will work just fine for us. So I'll disable the shirts again and then do one more 0 measure to relax and equate the geometry around a little bit easier so that we have something that's a little bit easier to read and start off with on sculpting rankles here. So one more 0 mesh to kind of equalize it. There we go. You need to. I also will say this much. Sometimes I like to create a little bit of a v here for that sash. Because I'd like to have some real estate that goes around here because we're going to do an extract a little bit. So just sort of best you can try to get a nice little sheen that is smooth around here. Okay? So we got our peace. All are our first base mesh established. And the next lesson we're going to work on trying to create a little bit more of what I would say is the secondary pieces. And what that means is, is that if we take a look at our 3D reference here, let me bring it up and put you in split screen mode. And we're going to have all these areas that you see here. This is the base mesh of the jacket, but this is a separate mesh. This too is a separate mesh. This is a separate mesh lane and top of it, these pieces that are also here are separate meshes down below. These are all separate meshes placed on top of the jacket, almost complimentary. So think of these like secondary base meshes that we're working with. Think of these as complimentary pieces of the jacket we're going to work with. So it's all going to add up. So we'll be spending the brunt of our time trying to make these pieces as separate meshes and then applying them to our main piece. So we'll start here with the trim on where it's at. And then after a bit, we may go into sculpting. And we also may then apply some of these other secondary pieces above in addition to it. So stay tuned.
27. Making Jacket Trim Apparel: Welcome back. In this lesson, we're going to start working on some of our modular detachable pieces that are on this jacket so that we can have them sort of on standby and ready for us to go. Some of these pieces will include like the trim that you see here, the end strip that holds the zipper that can be reused also to wrap around some extra detailing of the edge for the shoulder. Then or maybe some of the end taper off leather pads here. Just some extra things that helped to sell the model. So we're just going to have those in there like so. So let's just go ahead and get started to start off with, I'm going to start in a different tool and hit the F key to frame up. And then I'm just, like I said, when I like to sculpt these detachable pieces, I like to sculpt off of a different tool. I'm going to then hit sub tool and hit append. And I'm going to bring in a cube, like so. Select that, or I'm going to delete that star. Now we have the cube. And to start with, I'm just going to sort of look at this strip that wraps around the jacket. And what I'm gonna do is, is I am going to essentially imagine this as a straight strip that doesn't really wrap around anything. So I just like it's just on taken off the jacket and it's straightened out to be a straight looking strip and that's where I'm basically trying to do. Let's go back to that tool again and just sort of conceptualize that shaped through the gizmo by hitting the R, E or WK to bring up the gizmo. And I'm going to use this scale to just sort of get that going for me. Don't worry about how long it is. If it's too short, you can go ahead and just sort of duplicate the two and combine the two sub tools if it's too short. And I'm just going to work with something like that. So afterwards, I'm going to then do a 0 measure on this. And I like to do a clean 0 mesh on this particular one because this one is going to require a little bit more even lead distributed topology across. And I'd like to do something that's clean, but also give an opportunity to show some extra ways we can assign poly groups. So because these are perfect 90 degree angles, one nice little trick to get some poly groups on here is just simply do groupBy normals and we can get to a different color assigned to each side. And so if we want, we can now go to geometry and go to crease and then go decrease poly groups. And then with that enabled, we can go ahead and go through 0, measure and turn on, keep creases, detect edges, keep groups, and do a quick little 0 measure. So from here it's going to be pretty simple. We're going to create, we're going to build off of what we learned in the pans section of sculpting. And we're going to apply what we learned about modifying alphas through that. So I'll disable Shift F. And I like to go ahead and I think what I'll do also is you made it too big. Don't forget to turn off your dynamic button to make the brush a little bit bigger. I'm going to hit X and I'm just going to pretty simply put this kind of smooth the area out. Like so I'm just kinda smooth in and out. Doing one extra 00 mesh didn't seem to give me what I want. I can live with that because I'm just going to divide it afterwards. So I'll, what I'll do then is I'll give it a couple of divides by hitting Command D or Control D, So 123. And then I'm going to hold control and go into Mask Mode and change out my mask to be a drag rectangle and use an alpha with alpha 28. Now this is where we apply what we learned on the pants section about modifying alphas. If you hold down control and checkout that Alpha and go into Alpha mode and go to modify. We can do some modifications that Alpha in I just increased the, the H tiles up to 32. So now I've gotta make this horizontal because it was h tile. Now, what we can do. You can go ahead and do it like that. So now I'm going to hold control kind of feathered off and then hold Control left all to firmly sharpen it just once with one tap. And from here I'm going to go to deformation. And I'm then going to go in, in checkout in flight. From here you can get some cool looking results if you want. Like you see right, there might be one interesting pattern. I don't know what that looks like with inflate, but I'm just curious to try that out. That's a little too overbearing, least strongly wish try that with the Wacom tablet and with a smaller brush. I'm just doing. What I'm doing is just just having fun with my inflate brush just to see what this looks like. I'm not really going to try it like this though. I'm just having fun right now just to see what something looks like, it kinda looks cool. And that's what I keep saying over and over about ZBrush is, is experiment. To find what you want. Don't forget to smooth across like so. It's kind of a cool look. If you want, you can kind of make it a little bit longer. So that's one approach that you can do. It is using the inflate to bring that out. Or if you also want, you can invert the mask by holding Control. And invert the mask and do an inflate that way as well. Little bit Dong Lou, the more you can do an implant like that. You wish. You can even go a little bit up. And then course smooth back down, clear the mask. And you can then make whatever you want on this. This is yours, This is your baby and you want to modify it like that. You can, you can stretch it out to be something like that and get a different shape. Again, this is yours, your change in the scale. And if it's too short, just go ahead and duplicate and bring it across and combine the two sub tool It's yours to work with. So once you're done with that and you've made and decided what she wanted to work with, go ahead and impend that into the main sub tool. I just went ahead and clicked up here to my main, went into sub tool and I'm going to hit Append. It's probably going to come in pretty big, so be ready, like so. And any a pen tool is going to be the sub tool that's always on the bottom. So let's just disable are split screen and shrink that guy down. Make sure also x is turned off. Okay? Look at this again. So go ahead and size this up. Some other things you can do if you want to get creative is as you've worked with the polish brush to sort of flatten this down if you want, like BHP for the high polish brush. And if I go into solo mode in my pop-up menu, you can just go ahead and kind of flatten all of this down. You know, this is about, It's about experimenting with what you want to do. And never seen it do a flattened like that. That might be a little bit tricky. I think I wouldn't use a boolean for that. But you can do anything like that if you want. I'm going to undo it like that though, because I like to keep my options open. Solo mode back off. Let's get this to be scaled appropriately. And I'm just getting this setup. All right, so I'm going to maybe make it about that length. And I think what I'll do is I am looking at this and I'm seeing that this does not seem to meet the one, is it the it doesn't seem to meet the length that would wrap around. I'm not 100% sure it's going to be able to. So if it doesn't, we're just remember, I can always duplicate this, like so. But just for now, I'm going to go ahead and stop it right there because I when the time comes and I have all the necessary pieces created, I'll go ahead and do the attaching on here as that final last step before we go into our wrinkles sculpting phase. So for now, we'll finish this lesson up by just creating a new folder. And we're going to title that new folder. Detachable pieces, or you can call a modular separate pieces anything you want. And that one piece will be placed in there, like so. All right, so in the next lesson we'll work on that next piece, which will be this piece. And then we'll move into that strip that is contained through there. And then we'll work on how we can apply input these across the model, like so. So we'll just start only with the trim for now and possibly this area, but we'll see when the time comes. So stick around.
28. Making Jacket Trim Pads: Okay, so let's continue where we left off. We went on ahead and created a folder called detachable pieces to put our new piece in. If you're wanting something, by the way, I forgot to say my last one. If you're looking for something that's a little bit more flatter on the end, you can always just sort of kind of drag a mask over here, soften that mask, invert it, and then hit the R key and do a center on that teardrop. And you can always get yourself a pretty fairly decent I'm like a little bit of a flatter area that resembles closer to that if you were wanting to. But I just wanted to go ahead and have that taken care of. The next thing we're going to work on is this area right here. And if we have enough time, we'll go into this strip area. That will be what we use to hold the zipper. And then from there we'll see if we can create some of the rest of the block outs that come around here and get started on some wrinkles sculpting. So let's continue. All right, so I'm going to go back into that tool that I used to sculpt all my pieces from. And I'm just gonna go ahead and detach that like so, and append another cube this time around. I'm going to select that cube. And if I look at my reference here, it's basically kinda like a sort of a slight, a thick of foreboding rectangle a little bit. It's been decimated so that the file wouldn't be too large. But we're going to see if we can do some different tricks than our normal tactics just to get your mind warmed up from different possibilities of getting the same results. So let's go ahead and work with that. I'll go back into that trick and go to my cube. And I'm just going to like before this guy, uh, roughly the same kind of dimensions or might even make it slightly thicker. And then again, like before, I may go on ahead. And I think I will 0 mesh. Now. I will not see Romesh. Oh, actually, I'm sorry, I will, but not with poly groups because I'm going to have poly groups on here that I don't want to combine. And again, that's on such BAD, but anyways, there's no such thing as a wrong way. There's plenty of different y's. So let's just go ahead and go through 0 mesh and see what our results are. I don't want to poly groups on there, so let's see if we can do this without the poly groups. Sorry. I'm going to have to disable all except maybe detect edges. I might not be able to select, detect edges is what assigns poly groups. So just go ahead and do it like so. And that's good enough for me. May not be a clean mesh, but believe me, I do not want a clean mesh because all of those poly groups are actually going to create a complication for me. So that's why I'm trying to avoid getting poly groups on their detect edges is what apparently gives us that. So I'm going to go ahead then and draw a mask, and I'm going to clear the backside I mask. I also got to turn off my Alphas since it's still turned on. So now all that is left is just this area right here. And I'm going to turn that one area into a poly group. And now I'm just gonna go through my edge loops and I'm going to put some group loops on there at 32 or three is good enough for me. And we have ourselves some group loops that exists between these two poly groups. So now what I wanna do is I want to mask everything except for the group loops. So this is going to be important for future technique down the road with the jacket and how we do some new techniques and seems so. Keep this in mind. Hold Control Shift, Isolate, Select, drag out a mask, hold Control Shift, isolate, select this area, drag out the mask. Now it's just the poly groups around here that are unmasked. So let's just feather these out, like so. And then let's see if we can bring them back in. Now we're going to do couple of things. We can use our deformers to deflate this like you see before you. Yeah. And that can kind of give us a area. You can we can do it like that. I think I'll keep it only as far as that area goes. I do not know what it's going to look like if I do it like this. But I may just find myself. Smoothing this out just to round it out or working a little bit more with inflate just to see what some of these are just a, rake up a little bit on all of this. Just to essentially make this imperfect like so. Do a couple smooth just slightly. And then I'm going to give a couple of subdivisions on there, probably two or three. Now I'm going to go ahead and do isolate select in that center area. Going to drag a mask over there and then bring everything back. Then I'm going to feather this off so that it sinks in. I'm sorry, one thing I didn't do is I need to be in a low subdivision when I feather this off. So I'm going to go ahead and try that again on a lower subdivision. And then invert the mask. I'm even going to make sure to read double up on everything. Like so. Now I'm going to probably start on this resolution instead. And then we'll just go to Standard. And from here, all I'm doing is just sculpting some imperfections. Like you see. I just want to, yeah. Then if after doing those Emperor vec imperfections, I'm a eve, even that out. Like so. Bring that back out. Just gives something out like so. And then out of my own personal curiosity goes switch to inflate brush, bring the brush a little bit bigger. Maybe. Just blob the subtler, smoother back. I'm just trying to see if I can work with more interesting shapes. Go back into my standard, see if I can go to a lower subdivision with this new silhouette. I'm just having fun experimenting. You, that's yours. So, and feel free to experiment as much as you can. Take your time. Don't try to crack the perfect pattern or spend too much time. Just make whatever you want. Like so. Okay. And I may go ahead and try to work with the Move tool to sort of, well essentially make an imperfect shape. And this also would be an interesting time. Feel free to go outside your comfort zone. Go with something that works on your deformers. And there are plenty of deformers if he had the W key and go to that gear. I don't know what any of them could do for you, but, you know, it is kind of interesting to work and have some fun experiment in further with the formers. I don't have time and throughout this saw one lesson to do every single combination, but might be something fun in there. So now that we have that in there, we're going to go ahead and switch to our main area, hit append. And we're going to bring in that cube that we see there. Probably be up there. And let's just go ahead and just simply bring a guide down. Switch into solo mode. One thing I do think I see that I want to do is switch to that lowest subdivision and bring it in again. I like the poof that comes on the edges, but I want to kind of push it in closer towards the center so I can do that maybe with the standard. Everyone keeps probably screaming clay buildup. Why are you doing clay buildup? You can do clay buildup for you. I'm not I prefer clay buildup when it comes to organic phase sculpting. Some thing like that. Maybe. If you don't like it. Like that. That's something a little bit more like our piece. So we now have the next modular piece created. So coming up next, we're going to go ahead and do a sculpt on the strip, which actually isn't going to be too hard. It's kinda of building a little bit off of the other concepts we've already learned. It's going to be pretty easy. But once we get that taken care of, we'll show you how to put these on here, or at the very least start with the trim. And then once we have a good silhouette, establish with our silhouette of wrinkles will put the rest on their example like this area, once we established a good silhouette, will put the strip on here, like so, so stick around.
29. Creating Zipper Strip Apparel: Okay, welcome back. In this lesson we're going to go ahead and continue making the strip that holds the zipper of the jacket, as well as a strip that doesn't contain a zipper. And after that, we're going to go ahead and work on blocking out this area, creating some base meshes that are simple to start and work off our sculpting from. And once those base meshes are established, we'll circle back and reassemble all our pieces together and create some wrinkles to our silt pre-established silhouette. So It's going to be pretty fun once we get to that. So let's just first of all, go ahead and get started on some more detachable pieces. Now, where we left off, we scripted, we sculpted out this little cube area that's sort of meant to be for this area. So let's go ahead and drag that in there too are detachable pieces folder. And let's go ahead and turn the visibility off. Now, in the last lessons, I was sculpting off different tools. But this particular time I'm going to sculpt here because I like to measure a length distance for getting this piece. And you can use your reference of your 2D reference that you've imported into beginning of this section. Or you can go ahead and use the 3D reference like what I'm doing. So we'll hit append and I'll bring in a cube and take that cube. And that cuz probably really, really, really big way above. So I'm going to hit F or no, it's not. It's actually down there. I forgot when I unified all of this down to the one size it was it was all just like above. So I got in the habit of thinking everything was above me. Alright, so it's just the same thing as before. I may even turn transparency on with goes turned off to help me out here, just to simply give myself a frame of reference. And you could always do this with your 2D reference. No, easier, I'm just using the easier 3D reference, so that's what we'll be using. All right, so let's go ahead and turn transparency off. I'm going to go into solo mode. At this point I'm going to hit a quick save. So from here it's like before we're going to go ahead and do a Z remeasure. I'm not going to convert everything into poly groups. I'm going to do a basic standard pre ZBrush are pre 0 measure 3 to do some very simple no edge detection necessary because we're going to smooth it all out, smooth all the edges out here. So let's go ahead and go to Geometry. 0 measure, and just go ahead and click it so we can equalize geometry a little bit easier. And once we have that, let's just go ahead and start in on smoothing out that cube. Like so. It's a little bit high poly for a smooth. So one thing I might do, the smooth is not if you are, if you are experiencing a very high poly smooth or your smoothest going very slow, you can always go with a lower target poly count to get a lower count C refresher so you can get your smooth to go a little bit quicker. That works for me. All right, so let's add a couple of subdivisions on there. And I'm going to drag mouseover and bring something in there, like so. And then I'm just feathering the mask by holding Control and tapping a bunch of times. And then we're going to invert. And we can do inflate. And we could do something as simple as that also. And it looks to be a little thick. So just remember, you can clear them mosque. If it looks to be a little too wide, they're just remember again. You can either go back and fix it by undoing all the way back, which I might do, or you can just invert it and scale it back in a little bit. So it's a little bit more hugging. That shutdown and that's a little too much sunlight that yeah. All right. I never really care about the tops of the bottoms. I just need something that is going to be there. Let's take a look at my solo. I believe I used some stay stitch Alphas for some of that. So it's not really going to be too big of a deal. Let's just go through an access or spotlight. And let's go through our brush. And let's see how we can handle this. I messed around with the sizes of my brush, so bear with me on this. I'll fix that in the next one. And I'm going to probably choose out stitch three. Let's go ahead and reset the alpha. And then let's shrink down that brush size. And just like we did before, Let's do a couple of tests to see the width of this and make sure we're on our top bowl subdivision. And now a comes down to, if you zoom out, you're not going to notice the details. And even in the render, the details won't come too bad. But if you're really going to zoom in, you may want to go ahead and secure a fourth subdivision level like so. And I may just go a little bit smaller, see how that works. That's way too small. Maybe some like six and at work. So I'll just hold, left-click down and then left shift down, drag something down like so. Then release Shift and it will give me something like that. And it'll do the same thing all the way up. So we have something already like that. So that's sort of already a pretty good place we can start off with. But one thing you'll notice is there is some wrinkles that I sculpted and I believe I did that through the what does it through the through the standard brush. Don't worry about these areas out here. Once we're done with what we got, I'm going to be covering those ends. That's why wasn't too meticulous about having a perfect set piece here. So let's go to standard, bring in our brush size a little bit more. Yeah, let's bring up and, or draw size. And and I forgot. Let's go down to a lowest subdivision and bring Let's do a check on here. Make sure everything is being kept. Looks like it. We're just sort of like we're doing what we always do in creating the imperfections and all of this. And then smoothing towards the outside. And all are sculpted details are still, most of them are pretty much he may think you're when you're hitting Shift your smoothing this out, but there's details to it that are still held in the top three subdivisions that bring it back. So don't panic too much on there. Just don't completely flatten everything out. When you're going through here. I'm just kinda breaking things out here. Not too sure. Yeah, it doesn't hurt to kinda need just keep that part just simply like that. Now we got. Our peace established like so. So that's just what we're gonna do with that. Let's go ahead and take off or solo and bring this piece off to the side, it's going to be added in. But the first thing I'm gonna do is I'm going to a, I like one piece to have subdivisions, so I'm going to duplicate it, turn on my detachable, and I'm going to bring that guy in there like so. And then drag that in. And then this one I'm going to select. And this is going to be the one that will be holding my zipper. So let's go ahead and press the B key. And I'm just going to choose the first one, a metal zipper. And if you look up here, if you hit the M key, you have some did choices to go by. I'm going to choose this one here. And I'd like to rotate this around. I want the zipper to be on this side. So I'm gonna hit the E key, hold Shift down and click on that outer white circle and just rotate it to the left until it's a full one, negative 180. Press Q. And I'm going to select that. And you're going to want to take a couple of practice runs. I think 12 was one that I was happy with. But this is also why I duplicated as two sub tools because when working with insert meshes, going to have to delete the lower subdivision. So go ahead and take a couple of practice ones. I think maybe 12 or 11. Yeah, I'll work with 11. So what I'll do then is is I'll just start right from the top hold left. Just like with the stitch, I'm going to hold the left mouse button down. And then after, while holding the left mouse button down, I'm going to hold then shift down and I'm going to drag this down like so. I think it didn't give me what I wanted. There we go. So you kinda have a little bit of a line. And that's kind of like what I want. It looks like it kind of Girard it off to the side sometimes I like to see it just kinda come out in a different angle, but you might need to hit the E key and rotate this guy and let me go ahead and like that. Square, square the it up and then, you know, like how you see the spokes on the side here. It's supposed to run squared up like that. And then hold left Alt and then reset the rotational values while holding left-click on that reset orientation and just sink that in a little bit like so. And then let's just bring that out like so. So now we got ourselves a little bit of a zipper. You can even do a little bit adjustments. You might. I think I can work with that. So I'm just going to shrink that down. And I'm and if you're wanting to get rid of this, I'd like to this curve just zoom in right here. Make your brush size small and click on the mesh and you'll make it disappear. And now you've got yourself a little bit more of a clean little strip that we can use. Don't forget you can, now that it's one mesh, you can also deform this mesh like so. And it can be used for multiple pieces that we're going to be going into. But like I said, to give you an idea, we're going to be using the deformer curve to manipulate this. Like you see right here. This is kind of a quick example of that working. I thought, God, it's red. And we might think, and let's bring, see, we want to kinda come up with some cool ways to deform this. So we're going to be using that to establish a sort of bend or curve like you see right there. So that will be coming up. That's just sort of a preview to get you to understand where we're going with this. All right, so with that said, I'm going to move that guy into the detache doubles. So now it should start to look a little bit like this. If you feel it's a little bit too short, you can always, if you want, just kinda scale it up a little bit. You can do that. There is no sin in that. But in the next lesson, we'll see about working on establishing some base meshes for the jacket on our base mesh that we see here. So with that said, Stay tuned.
30. Creating Collar Base Mesh : So let's continue. In this lesson, we're going to work on creating some more of our base meshes that are wrapped around the jacket. That's to be specific, this little slant flap right here and the little color that is sort of very signature for Cyberpunk right here. And also we're going to see if we can do this flap that kinda wraps around and kinda circles around like so, and kinda goes down and drapes down. So all of those three pieces are going to primarily be like three separate pieces that we take and clean up in the same way. Like we cleaned up our shirt, we cleaned up our pants, we cleaned up our jacket for having paste base meshes, just all clean meshes that we can have a good starting point. So we can do some of our automated functions with Z remeasure, poly edge group loops, things like that, just all sorts of things we can have fun with. So let's go ahead and get started. All right, so the first thing I'm gonna do is start with this piece right here. And I'm going to build this piece in here because I'd like to use my base mesh. The length from this of my base meshes reference as well as my spotlight picture. So what I did was I went on ahead and hit append and brought in a queue which showed up at the bottom here. And I'll just go ahead and hit F key to frame that in. And I'm going to go ahead and hit scale this up to be the roughly around the same shape as what we see here. And we're going to use trim curve to get most of the block out basics on here. And then we're going to use a Boolean to cover some areas trim curve cannot cover. Now we're not going to be using clip curve to sculpt out of all of this because clip curve likes to create some non manifold edges which have a little bit of a complication when it comes to spotlight or I'm sorry, Z remeasure. So I don't want to go through the whole process, but you got to trust me that clip curves don't do very good in non manifold edging. And if you have non manifold a gene, you're gonna have problems with C refresher in the app, problems with 0 measure. You're going to have problems with reached apologizing. So let's just go ahead and clean this guy up here. And what I'll, what I'm gonna do is ongoing to add some poly groups on here just out of a. Something may be needed geometry. And I'm going to increase the poly groups and then go through 0 measure. I'm going to turn on keep creases, detect edges, and keep groups and give ourselves a nice clean little mesh. Now make it around that thickness. And now I'm just going to make sure it's the right proportion at length. Looks a little bit long. So I think maybe something like that might tell work for this area. Little bit lower. Now when I look out a little bit thinner, I'm kinda judging whether it is from here to the flap. Right? So something like that. Now what I'm gonna do is I'm going to use trim curve is sort of sculpt a basic silhouette out of all of this, and then finish up with a Boolean to finish out this crevice area right here. Since trim Curve can't handle these concave cuts without breaking and click Curves create non-medical the edges for that scrubbed Z remeasure. So let me go ahead and just go ahead, hold Control Shift, click on and make sure you have your trim curve. And I'm going to look at Spotlight, take a real quick glance and just draw some straight lines. Now I'm using trim Curve also because when I'm doing my 0 measure, I want some poly groups that are there. So when I do my keep creases, I can assign some creases to those areas which are very handy for me. And maybe a second curve like so. And then I'll put a cube Boolean that will cut into here. So you can see to clean meshes right there. Let's go ahead and go to sub tool, hit Append. And let's go ahead and hit cube. We should have a second cube below down here. Hit F key and maybe FQ one more time. Let's bring this in. Let's claim this Boolean up. This is going to be a Boolean. We haven't talked about Booleans yet, but live booleans are basically a form of us using the silhouette of the shape. In this case it's a cube I'm choosing to use that will be put in, used as a way to be subtracting off of another mesh. In this case, it's this piece right here. So one of the first things you wanna do is you want to make sure it's the only piece available. That means turning off all of the visible tools because you only want this tool to be focused on. I'm going to make sure to turn off my detachable pieces. So it's just these two pieces. And I'm going to move this around like so. And like before going to go ahead and do deformation or poly groups, group by normals to clean that guy up and then do geometry and do a quick 0 mesh. I'm sorry, I did one thing wrong. I forgot decrease these poly groups and I forgot to do and increases detect groups. Let's try that one more time. Now we've got a nice clean mesh. Let's go ahead and bring it in like so. And now to turn this Boolean into a poly group, we're going to do a couple things. First of all, I'm going to divide it a couple of times. Just to incase we get any artifacts going to delete the lower. And from there, I'm going to then, in order to turn this piece into a Boolean, you have to do two things. You have to, first of all, enable Live Boolean mode, which can be done up in render, render Booleans and Live Boolean. And then you have to then, now you're in Live Boolean mode. So you can take any of these sub tools and converted now into a Boolean if you wish. In this case, it's going to be this piece right here. And now, when we click on these, it should be a white circle intersecting with a shadowy circle. That means that this is subtracting off of here. Now it's in wireframe so you can still see it. But if you hit Shift F and turn off wireframe, it will disappear. And it's because it's subtracting off into space. Go ahead and hold left all to reset the values. Alright? So maybe if you want to see it again, you can hit Shift a. You wanted to go in like that with a little bit of a piece right there. Now this is really nice to use because this creates a poly group in this area as well as this area. So let's go ahead and then once you're done with that piece, let us create and converted into an actual mesh that would be in sub tool where it says Boolean, make Boolean mesh. And then you'll see your new Boolean as an extra tool all the way up here where it says tool. So and if you hit Shift F, you can kinda see all the different areas. Like so, all primed and ready to go. Now you notice you have all these different groups, so we can either do a rematch from here or we can just bring it in to the other end. Will disable both of these and append the created boolean mesh. And then turn that off. Make sure your Boolean is disabled. Let's turn our base mesh back on. And you can see we have the starting aspects of a a. I'm sorry. We have the starting parts of the base mesh created here. So now what we need to do is we need to do a little bit of clean up on this piece. So like before, let's go through to 0 measure or I'm sorry, let's go through to geometry. Crease. I'm going to just hit increase all once and then crease poly groups. And then go through 0 measure enabled keep creases, detect edges, keep groups. Let's see what we can get out of that. That's a fairly decent base mesh. It's, that's why I, I like about 0 measure. They really upgraded it. Well, so you can go if you want a little bit lower. I don't think I'd recommend it though, but that's not too bad. Let's try one more time. I sometimes try it a couple of times just to see we get a little bit of an alternate geometry. But honestly, that could very well be what I want. Just the first one. Yeah, that one. Just to have something with a little bit density helps a lot. So we now have our first piece that is there. Now in the next lesson coming up, we're going to work with this piece which will be done differently than this piece where we won't be using live booleans, but instead we'll be using deformers of the curve itself, which will preclude how we also put our end trim curves. So what's going to happen is, is we're going to create all these base meshes that you see as separate pieces, very rigid and not really looking like they're attached. And then we're going to go through and attach these pieces in, in the lesson, the following lesson that comes after creating and cleaning up the base mesh of each of the areas. So this area is going to be a base mesh. We just finished. This is going to be the next area we work on that will have a similar result but won't look like it's attached very well. And then the third area, we'll be having this area which will look a little more attached because it's extracted off of the geometry. But it will be sort of like our last detachable piece before we take a break into doing some sculpting. And then after that, we're going to assemble everything on here to fit it properly, like cell so that it makes a little bit more sense. So stick around.
31. Creating Neck Collar Base Mesh: Okay, so let's continue. In this lesson, we're going to continue blocking out in creating blackouts of our color area and our sash that go across here and make sure those meshes or clean every time we end a lesson. And then after that we're going to try to reassemble everything like so. Now you notice I haven't placed this perfectly along the sash. That's because I always like to. What I'm gonna do is, is I'm gonna go into sub tool. And I'm going to take this sash piece right here and I'm going to go ahead and since it's a base mesh that I'm going to be duplicating it off of. I'm going to make sure that it goes into the base mesh folder, which honestly, I think I deleted an earlier one and I apologize for that. So let's go ahead and get that back in there. So let's go ahead and just select that mesh, hit New folder and hit base meshes, like so. So it goes in there. And I'll go ahead and just drag that folder all the way back up because I think I accidentally put it. So we're going to put all this piece in there, this piece in there, and any other additional pieces including that? Let's just go ahead and group or folders. So we should have a base mesh of finished sculpt detachable pieces that we've done. This was the piece that we used originally to size up before we convert it into a Boolean. So let's go ahead and delete that off. And let's go ahead and delete our actual Boolean. We don't really need that anymore, so we're just kinda cleaning up this area. Alright, so now that we have that all sudden done, let's just go ahead and now and like I said, I'm not to I didn't I didn't want to have a straight version of this as a default because I'll be duplicating off of this. But let's just go ahead and get started with this area right here as our next piece. And this one we may actually do a little bit more placing because it's a little bit more required. It's a unique, little bit more of a unique OR piece. It's not as modular that can be repositioned like this one. So let's go ahead and get started with that. Before I do this, I'm looking at this model and I'm looking that there's some curvature in waviness going through here. So what I'm gonna do now is I'm going to go ahead and turn my Wacom tablet on. And I'm going to go ahead and see if I can fill out that way Venus with the Move brush sort of reposition and create little bit more of an interesting mesh. I'll start by Mark he dragging across here like so. So I don't create anything. Don't want to mess around with the other side. Just the, I just want to kinda look at this. And again, this is why I worked with a low Rey's like so so that I can have something to smooth around with without trying to repel it up, which you get very often. All right. It kinda goes in a little bit. And that's just kind of what I'm doing. I'm just kinda widening this out. Just readjusting my silhouette. When the time comes to place this all go ahead and do the same thing over here. So that's just something I'm working on right now. So just have some fun there. And now let's get started. So let's append and bring in a cube. And let's back out and bring that cube above like so. Get some poly groups on there and you're going to want to make sure this is nice and clean like everything else we're on. So let's do poly group by normal under poly groups. And then let's get rid of that tapering. So let's go ahead and do crease, crease poly groups. And you're seeing a little bit of a repetitive formula. But you should also come to the conclusion. When the time cubs, that that might be an idea for you to put in your pop-up menu. If you wish to re-edit that. Let's go ahead and turn those all on. Now we add some a little cleaner. We might do a couple just for now. And I'm going to drag this guy horizontal, like so. Bring him in. That sort of home flattening him down. Because what I have to do is I have to look at how it has a little bit of a complication complex, that complex fold. It starts off flat and then kinda tapers up and then goes into the other side. So it is a little bit more of a complex thing that requires a combination of both the move and the deformer curve brush when time occurs. So let's just go ahead and make this a little bit low. Like so. And we're work with it like just that far. I'm only going to work as far as that. Alright, so one more 0 measure to equalize all this. There we go. And now let's just get started with that. Ben curves start doing some deformer work here. So hit the W key, bring out your gizmo move tool. Click on that COG right there where it says transformed types. And let's try that Ben curve. And now in this mode you're going to have a whole bunch of target radicals. So if you mess around with some of them, you can kinda come up with where you want. You'll notice that it's on the wrong access. So we're going to have to change that so it runs across instead of up and down. So that's going to be on the red key and you'll see it switch. And you're going to also decide, well, if I move it doesn't really bend. So let's add some points to that. And that's up here. And this key right here. And if you drag it out once, you'll get one. And now if you try to maneuver, it works a little bit like a Bezier curve. So that is also something that you can drag out further. And it has a little bit more move it you're like you can see right there. So I'm going to start off with three. I usually like to start out with the bare minimum of three to just see what I can get so I can get the smoothest result on here, like so. And then once I get, once I push it to where I want and go ahead and bring in the next amount up to sort of fill out what I want. So this is kind of you playing around, messing with this. Like so kinda folds out already kinda nicely for us, which is already pretty nice. But let's go ahead. One thing I'm looking at is, is that this is kind of tall, specially if you look up there. So I'm going to go to my undo folder to where it was flat. Except during that guy down just a little bit more. See your mesh equalize. Some like that. Let's get back into it now. And just to this point, you can watch. If you're looking, if you click on here, you'll see some extra radicals in, you know, one of them is where you can taper this outer one cone here. And one of them is sort of where you can scale like so. But you can also rotate by pulling in and out. And that's going to be how we are going to establish that twist most motion that you see before you. So it's going to become like that. Try to work on not if it creates folds up here. Try to just kind of move it along so that it doesn't get to that point. But if you hold Shift, it's gotta kinda be that runs around, that lays kinda like that. Like almost the v right there. So we've got to work on that. I think the two it's not something that just as the most natural way, but just gotta kinda work and finagle with it a little bit more. And that's kinda what we're doing. Just simply go around and don't try to get, don't think in your head when doing this, that man, you got to like, be able to get the perfect, perfect shape out of all of this. And that's not true because this is sort of just giving you the head starts of a smooth look that we start off with. We're going to really do a lot more clean up to this with the Move brush. Right now, it's just about getting this all kind of perfectly formed to the general area. Once once we have this sort of place a little bit more, then we go back to placing this. And then we, because how this is placed affects how we place up here. And then that's going to be based on how the sash gets placed. So it's all going to have to line up, but he kinda just want to get all the pieces kind of head started and ready to go. Let's see. Let's check that back. Let's bring it out when that guy out a little bit. And if you need to, you can pull out for an extra piece right there. Like so. It's just it's just sort of like the patient's game. Back a little bit. Whoops. Goal to be pulling out of. Now I'm not going to hit except just yet, but you gotta be very careful when you're doing this, that once you get what you're kind of looking for, you're going to want to make sure to do as much as you can from this. The reason is, is we're going to finish up all of this through the Move brush just to sort of kind of get everything situated. I mean, we, like I said, we can only do so much with the Move curve, like you see here. And see if we can bring a lot of the time. So the where it really filled out was when we started working in detailing, it was smooth out the edges that also smooth out the silhouette. And this also had an angle that was going downward, which again is brought through the move. So don't worry about that just yet. Let's bring this guy down one and maybe bring this because we want to make sure that it's sash has a little bit of room to connect in there. Again, be the Move Tool. So I think I can work with what I have here. You may look at it and say, well, it's not perfect. You got here, we got moves here. Don't worry, you just gotta get it as far, so far to a point that Ben curve can give you before you start working with Move tool to clean up the rest. And in this case, it will be a lot easier to just do it through there. So I'm just going to now just work with the curve moving upwards. So, whoops. Worry about imperfections like this. You can always relax it away with the or does it with the. Relax poly group by normal under deformations. So much, listen and don't forget, we are going to be remeshing this week, so don't worry about stretching anything here like you saw right there. We're just going to relax edge. I don't want to do that just yet. Not until after my 3D mesh. We're not going to smooth everything out here. I'm probably bring back a bit. Like you see. It's all just taking times. You may think, Oh, this looks weird, this little edge, don't worry. Because of the nature of this being such a low res Pauline group, this is going to collapse just fine to this level length that you see here under the smooth modifier. So again, just be in the mindset right now of just be in a mindset of focusing on moving this into a silhouette. Okay. Let's see what we can get out of this with the 0 measure. Little bit easier, a little bit messier here. A little bit better. Much better. Now let's go ahead and work a little bit more. Crafting a silhouette. I'm just sort of taken my time crafting this guy out a little bit. Don't freak out. I know in my I keep reiterating, don't freak out at the thickness of this. It's going to collapse just fine on there. Like so. Don't worry about the waviness being a little bit off. That's all going to smooth out just fine when we start in detailing or just simply establishing a base mesh, a nice clean base mesh. I may not see Ramesh if it does, if it gets me in my slope result here, but all right. That works just fine for me. I'm okay with this. It should work. Yeah. It looks pretty good for me. Alright, so now that we have ourselves saw a good starting, stopping spot, we have a little bit more of a beginning place. I may do a little bit of revision further on down the road to bring this guy up a little bit more because he seems to be a little bit far reaching. So I may go like this, may do some like that. Because I'd like to see a little bit of the sash in here. It's not a problem by me. But after and then upcoming lesson, I'm going to now work on trying to get a blackout base mesh for this sash that reaches around here. And that's going to be through how we got our pants, shirt, and jacket in the initial first place. So that's just going to be through an extract, which also means we are going to be having to work with subdivisions and adding some subdivisions to our base mesh. So with out further ado, stick around and stay tuned.
32. Creating Sash Mesh: Okay, so let's continue. In this lesson, we're going to work on this sash area that you see right here. And we're gonna do a mass extraction on there so we can get the base mesh of that established and cleaned up. We're also going to take a look on how DynaMesh works for some certain fixes that we can combine up with on 0 measuring, cleaning up this. So let's go ahead and get started. If you had if you haven't already, make sure you drop your color piece into the base mesh folder. Along with this piece right here, the stiff as a board color. And from here, we're going to go ahead and see if we can paint out a mask. Now. I didn't show it before, but I gave about up to four divisions for this piece. So it does have some resolution now, and I'm going to need that for the resolution when I'm painting through my mask like so. So now further ado, what I'm gonna do is I'm just going to hold Control, Shift, isolate, select. And from here, I'm just going to turn on transpose or transparency with a ghost mode turned on. And I'm just going to paint a mask that mimics this shape of this that wraps around like so using either my reference or my 3D reference to get there. So let's go ahead and get started there. So let's see, I'll just hold down Control. And I'll just simply not to go too crazy, nothing too insane. Might even look at the angle a little bit. Seems like a little bit kinda like that. Angle loops. Then. Yeah, something like that. Maybe. Then we'll just kind of circle it around like so. And I I I'm I'm rushing it a little bit. You may not be able to get the same results at this speed. So feel free to take your time as much as you need to get what you're looking for here. Maybe just try to play it off like that. So now that that is happening, Let's go ahead and do an extract off of this. So I'll go ahead and bring everything back. And I'll turn transparency mode off so we can see the thickness and see if we can go under sub tool and just do a default extract, see what we get. And that's good enough for me. So I'll just go ahead and accept and clear off the mask. So it's a kind of beetroot in through that color. So I'll go ahead and bring up my Move brush and kind of bring that guy back in. And at this point, we gotta do a couple of things. We need to do a clean up and we also need to get this to extend all the way down to here. So we have some extra geometry. So one thing I'll do is is I think what I'm going to do is I'm going to kind of define some poly groups through here a little cleaner with the trim curve. And if you have a mesh that's pressed against here, trim curve doesn't go all the way through if this meshes intersecting. So make sure you turn transparency on. And I'm going to hold down Control shift, change my selection brush to trim curve. And I'm just going to kinda cut a piece right here. I'm going to be careful that it doesn't cut to the back, so I'm just going to mask some of that. Let's see if I can get something going. It's not 100% mandatory if you do this yourself when doing it. I think honestly a, I think that a 0 measure without this will still give you some clean results. Merely doing this. Just to sort of on that next level up. It's something that's a little bit cleaner and it has a little bit of a sheen poly group there. Now, I'm going to do the same thing down. I don't know if it's necessary. It might not be completely necessary. But I'm going to draw out a poly group here right through there. So. She's like so the real question is, that's a pretty complex tackle for a trim curve and I'm not really too sure if I want to tackle it may now be worth my time. So now that we got this, what we need to do is, is we need to get this to go all the way down. Now, we haven't talked about it yet and we never made much use of it. But I think we're, we're gonna try to do is 0 measure to give us our initial phase block out and then clean up from 0 mesh or I'm sorry, let me back up. When I say that, we're going to use DynaMesh to generate some extra geometry and then go from a DynaMesh to a cleaner set mesh to 0 measure. So it's a little bit of a two part stage at prepper, prepping our base meshed for some clean geometry for multiple subdivision levels. So let's go ahead and do an isolate select. Make sure this is the only poly group if there are no other masking, the term curves should have just made this its own poly group stragglers mask over it. Control Shift and click off in a space. Bring that guy down. And once you do that, press the W key, more than likely you'll have your gizmo not show up there. So if that's the case, just go to the head up above and hit the F key and hit that upside-down, tear dropped. Bring that guy back in. Press the FK, FK one more time and you should have what you got. And then let's just bring this guy down. Alright, so that is all that is necessary there. So I'm going to go into solo mode so I can start seeing this a little bit better and even isolate, select this. So I'm looking at this and I'm thinking I'm going to now use there's going to be an ugliness there. I'm going to do a couple of things. One, when it see if I can cut a clean or curb right here. So to do that, I'm going to I'm not going to take any chances here. I'm just going to drag a mask over in case I cut through to anything and I'm going to use a trim Curve 2. I'm also going to just mask a lot of this area off so my trim curve doesn't cut oh, over here. Honestly, the easiest way to do this would probably be just the mask, invert the mask. And I'm just going to Control shift. This typically happens when you're on hidden mode, so or solo mode. So I forgot. Let's go ahead and bring that back out. Is going on with, you know, your work in there. Here you are. I must have been cutting into a mask. I think that's what it was. All right. I did that because I wanted because if I undo and a little bit of messiness that was going on right around there. That would have been problematic for a clean read topologies 0 measure. So I just wanted to go ahead and take care of that. So I'm going to move that right, you just yet though. So let's go ahead and go into solo mode. This would be a good time to hit quick save. Because whenever I work with DynaMesh, I play it safe by that. Now, I'm going to go through DynaMesh. Dynamesh is a much similar to 0 measure, but a little bit more flexible and quicker and dynamic by just simply activating it by holding a control marquee select and dragging off into empty space. The only reason it didn't work right there, because it wasn't turned on. So if we turn on geometry, go to where it says DynaMesh tab, turn it on. You'll already see it generated necessary topology right then and there for us. And we can go ahead and keep the groups, see if we can project in Polish, see if we can do some similar. Might get a little bit more of a longer wait time, but like I said, I'm just doing this primarily to fill in the holes here. Dynamesh is also really good for cleaning up any non manifold a gene or that is caused by click curves for example. The only downside with DynaMesh is you get something, sometimes you get something like that. If you try too hard with it. I think what I did was something. Let's try that one more time. Now. There we go. Perfect loops. Here I'm going to actually do a couple of things. Here we go. Like so. So that's kind of what the idea of DynaMesh is. I think I'm gonna go ahead and up the resolution though, so I can have something a little bit more clean like that. So now that we have something that we see is a little bit bearable, Let's go ahead and change this DynaMesh that has this. We've, we did DynaMesh mainly. So we can get equivalent to topology dispersed equally around. Sometimes 0 measure will be a little bit funny, but I wanted to just kinda show you what the potentials DynaMesh could do is. So first thing I'm gonna do is I'm going to hit increase all and then increase poly groups. See remeasure, keep creases, keep edges, keep groups, and see if we can get something a little bit cleaner out of our DynaMesh. Now, I wanted to show you, not just I didn't just want to show you DynaMesh because of what it can give you in terms of a bean, an alternate way of generating mesh by just clicking off. But I also wanted to explain to you that this is a method of problem-solving that you can apply with in terms of if you have non manifold edging that might have been established by a clip curve and you need to create booleans, for example, they will break down and so or, or give you an error because they don't go through DynaMesh is one method you can do to break that up. And then going from DynaMesh to Z remeasure is, is another way. So let's do that one more time. Let's see if we clean that up some more. And finally, just keep going on like that. That's actually pretty defined for me. Yeah. So let's go ahead and we're going to un-solo. So let's backup here. So as you can see now, now that I have something of a lower poly, I can feel a little more comfortable without creating ripples to just simply move that base mesh back in. So to recap, we wanted to show you one extra way to give you generate an alternative to 0 measure, which is DynaMesh. Dynamesh also closes in holes or eliminates in destroys any verte on vert issues that you might be encountering that Z remeasure does not have the ability to fix. So DynaMesh is an excellent solver for those kind of problems. So that was also why we wanted to go through 0 measure just so we could show or go through DynaMesh just so we can show you some extra problem-solving skills. Because again, when using any live Booleans using clip curve, which creates often non manifold genes, causes a error where the Boolean does not get created. And DynaMesh in the mesh that was created by a clip curve. Or if you sculpted a clip curve across the Boolean that's sculpting the mesh. That usually fixes the Boolean. If you DynaMesh that Boolean and 0 mesh it back out. That's a little bit of a mouthful, but I can assure you we go into a little bit more depth than my hard surface course explaining that as a problem-solving thing, you're not going to have any issue with it, but we just wanted to make sure that you have We're aware of these extra these extra options that you can get. So now that we have that, let's go ahead and bring this guy in to our base mesh folder. And we're going to go ahead and turn off ghost and transparency. So now as you can see, we have sort of the starting outlines of for our base mesh here, here, and here. So in the next lessons coming up, we're going to go ahead and work on trying to really solidify and shape this out a little bit more, assembling our trims to move around based on what we've learned through our assembling our base mesh here. We're going to then base on where this is. We're going to assemble our detachable collar be vest here. And then we're going to work a little bit more on sculpting our wrinkles. So stick around, stay tuned.
33. Placing Trim Apparels on Jacket: Okay, welcome back. In this lesson, we're going to continue on with our mesh of placing all these pieces that we see together. That's going to be done in the next few lessons. So to get started, one of the first things I'm gonna do is I'm gonna take this piece right here. And if we scroll over to our, our imported mesh, and I'm just going to hit Solo button so we can see it looks like we have this kind of running all around here. So I'm going to do something like that. The other piece as well. So let's go ahead and get started with that. So first thing I'm gonna do is I'm going to disable my Solo Mode, bring everything back. I'm going to turn on my detachable folder and look for this piece. And if I'm looking at it, kind of eyeballing it right now. But between here and here, it looks like there's more subdivisions than there are here. So one thing I think I might do is make some scale adjustments. So what that means is, first off, I'm going to bring this right underneath here and then duplicate, duplicate that for myself because I may need something of that scale later on. And then I'm going to bring that out and turn off the visibility of the detachable pieces. So let me see if I can work with this. Just make some quick adjustments. So I'm going to hit W, going to center that up but that upside-down teardrop. And then I'm probably going to do something maybe along the line of that. And maybe it's something like that. And now it looks a little deepen these crevice patterns. So let's see here, I can make some adjustments. I'm just going to go to my lowest subdivision and kind of mask half of this and hold control maybe feather off the mask and then center it like so. And I'm just kinda scaling it in, trying to flatten it. Like you see. Maybe that's a little too flat. Let's see how this plays with a higher subdivision. Like it says, is all just kind of. Let's go ahead and try that one more time. And then that looks fine to me. Let's try that now. Oops. And just sort of holding control and while holding Control, feathering that off center that see if we can whoops. Sort of making myself some extra revisions is all this is. I don't really care too much about that. So and to compensate for any length, I'm just going to go ahead and duplicate that across. I can't I can do it. One of two things. First off, I need to go through geometry and I'm going to delete the lower. I'm, I set myself on the highest subdivision and just hit Delete lower. I'm going to hold W. Hold control down, left-click. Make that go across edge. Work. Perfect. Let's center that backup. And now I'm holding Shift rotate around. I'm going to rotate that the other way. Beautiful. So now let's place that somewhere in the center. Now one of the things we're going to do like we've done before, is we're going to use a curve, a bend curve to get what we want. And that's gonna be, it's gonna go up and down, starting as your default because we rotated it. So let's change that by clicking on that and click and drag on that red cone that you see here to go to the right axis and then click on the orange cone to push yourself a little Bezier orange curve right in the middle of there. And then that's just how I like started off with just so I can get a nice sheen curvature going on. It's just like what we did with the color. Practically the same. C. I'm just going to see what this actually looks like with one extra resolution I might because I'm noticing stretching that's going on there. Let's see if we can do it like that and see if we can hold any sort of resolution in this. Now, this, as we've said before and as we've done before with the color, this is meant to establish the basics of the blackout in the shape and where it's supposed to, It's just supposed to act as an aid to get it in the relative right areas. We're not going to rely, over-reliance on it. Remember, you, orange cone is a way we can rotate this around. And the other ones are Squeeze and scale the proper areas. So keep that in mind. So I'm just sort of bending this guy all around. Cmo. You're going to go through what we can get accomplished. And this is just all like eyeballing it basically, we're essentially just eyeballing this. And yeah, probably not a good idea to do it that way. Let's make sure we're clicking on the right one on the right side. And making sure we're making good use of rotational values. Try to get as much as you can, if at all possible when maneuvering this around. Because trying to hit once you hit Accept, you're going to have to kinda work with what she got. And sometimes he may not get the desired results. So just try to make sure you're sure where you're at, where you want to be. So that might be at, like I said, don't worry about it being perfectly laid out. We do know one thing this piece here is going to wrap around based on our reference. Maybe we need an extra point there. So let's just go ahead and drag that orange cone out. So we can bring that extra point in. Like some make sure it's rotating. So on. So I know I'm not following my own advice. Sometimes it can be a little addicting to say, don't try to get it perfect through the bend curve because the curve will move brushes probably gonna be a lot faster, but here we go. So after we do that, go ahead and hit Accept on there and clean up whatever is left through the Move brush. So that's BMG quick keys or if you have it on your pop-up, we should like so. And you can either move this piece or adjacent pieces before you get what you want. Let's now regarding up here, don't worry about this because the way we're going to sculpt or rankles, it's going to hang and go over these little pieces. So don't free to crazy much about it. There we go. So you kind of see what I mean right now. It's just gonna kinda it's going to go and overlap over all these pieces. And that's kind of what I'm doing. I'm just kinda moving and positioning these pieces to go over far in. Let me switch to a lower resolution or creating a little ripple work here. And kinda see what I mean. It's kinda tucked in. Alright, don't worry too much. That's going to be for a different lesson when the time comes. Fact, I'm almost tempted just to smooth it out as it is. May do that yet. Alright. So now that you have an idea of how that works, we're going to move on to the next attachable piece, which is going to be our little QP. So that's that little luxury piece. Let's go ahead and duplicate that and bring that out as well. And let's go ahead. And this probably also has some multiple subdivisions and we're in a need to duplicate, which means we have to turn the geometry off, switch to our highest one and just go ahead and hit Delete lower. And let's get that guy on there. Like so. Yeah, I'm probably going to move it like that. Kinda counting my steps ahead and you see this little part right here. Don't worry about that. We can either tuck that in or we can go to our mesh and bring it out a little bit. Either way. Dublin. Okay, well let's go back to this guy. Hit W and hold Control and drag with their translated. Duplicate that out. And do not try to scale unless you want one that's bigger or smaller and bring it out to about here. Now we're doing the same thing roughly. Maybe then created a little bit off center if you want. Like so then just go through the MOOC brush. Go through and we're just kinda readjusting everything. Maybe even tucking that in. So you're in a little bit of an idea what we're doing. Now we got a couple more things we can do. One of the biggest ones is probably going to be this piece. And I think we may finish up with this piece right here. This is a little bit of a tricky one, because first off, I should say, if I hit the W key and you don't see a radical, It's probably on ground 0. So I'm going to put this head on the very top and hit F. And there's our radical. Let's get that centered by hidden upside-down teardrop. Let's see here. I'm thinking I'd like that piece to be something like this. Maybe might even do something like that. Could work. I'm not too overly concerned on how it's going to look, but for the sake of it, I'm going to start off with the bend arc. Make sure it's following the same. I'm not I'm sorry. Did I say bend arc? I'm sorry. I meant to say Ben curve. And let's take this down. Not too concerned. This is going to need to twist. So let's go ahead and was this guy right here and maybe bring this guy up here. And you can kinda see what we're doing. We're just trying to get these pieces to relatively fit into place. Now, I'll show you something after we finish this and that is I think I like that. I'm going to go back to my jacket. I'm going to go to my Move brush, make the size a little bit bigger, smaller, focal brush, hold Alt and just left trick or Dragon. Push that in a little bit. Okay, so now it's a little bit closer to where it needs to be. Now, this is a good spot to hit quick save. What we have left to do is this is sort of like the first half of all of this. So if you got this far, kinda pat yourself on the back, take your time, please. Let's just go ahead and mouseover and just kinda give you a checklist to see what she accomplished. So let's go ahead and do a solo mode. We got this piece on here, more proportion, and we got the little squares here. If you'll notice, we didn't start positioning this piece to be a little bit more closer to it. But there's a little bit more of a jutting piece that goes off to the side, so we'll work on that as well as this piece. And I'm probably then going to be putting this on the next lesson as well. So that's going to be in the second half of placing our detachable pieces. Once we finish that, we get to go to the fun stuff, we get to get into those wrinkles and have some fun with them. So stick around.
34. Placing Zipper Strip into Jacket: Okay, welcome back. In this lesson, we're going to start, finish off our detachable pieces that we have. It's going to be part two of that. And for that we're going to be working on putting our zipper on here like so. And also our little Cufflinks that we have right here. And then from there we're going to move on to sculpting. And finally, we're going to get that taken care of. We may do a little bit more after we sculpt in this stuff. We may do like an extra fold of detail here, but that will be down the road. Just FYI. So all right, so let's go ahead and get started. First thing I'm gonna do is I'm going to take myself off solo mode here and go into my base mesh. Everything else seems to be fine. Let's go ahead and open up a detachable piece, and let's go find our zipper and take that out of the folder. Finally, let's go ahead and collapse that back down and resize that. Now, our zipper is going like before we're just going to place this simply like so. It's not too complicated. It's very similar to what we've already done before. The one thing I kind of want to look at is whether or not I should make this bigger or smaller. If the scale is just a bit off or not. That's kinda why I was a little bit leery on whether or not I had the right size zipper, but honestly, I could go with that. C. So as before, we're gonna do a bend curve and make sure you have at least three points on there. If not, pull on that orange cone on the outside corner and just go ahead and we're only trying to establish a good arc for this. And this is going to reach again outside and beyond what we already have. It's just going to go extend further beyond me, give myself an extra curves so we can start working with a little more flexibility in this zipper. So let's go ahead. We haven't. Let's go ahead and look at our 3D reference. Feel free to switch into your spotlight reference if that makes it easier. But let's look where it looks like that's super just kinda goes right into that piece right there. So let's go ahead and go back. Like some take are some backhaul. I may even shrink this to bring it down just a little bit for me. And I'm going to switch into this piece right here to readjusted. Just see where we're at. Move it. And that's fine. What I'm gonna do here is I'm just going to go ahead and smooth this down when the time comes. So this blends in a little bit easier, like so, but let's go ahead and switch back off into this going toward Ben curve mode again. Let's get this guy and the like. So maybe if you can try to create a little bit of waviness, going to probably say I may have him may bring this out a little bit more. And I know that once you move one piece, you've got to move a whole bunch of other pieces. But if that's the case, so be it. Let's go into a brush. Whoops. Just took that guy and then go and talk. And and again, don't worry about how off this looks. We're going to go ahead and trim that out when the time comes as well. So I think that I I can live with that. I feel a little bit like we could do a little bit more with it, but try to create a little bit away when you can hold, press W and hit except right now and I'll go ahead and accept with that. Don't worry too much about how things are here. Because again, we're going to go to this piece here. And because this is such a low resolution, this is going to collapse down and create ourselves a nice little smooth area that's going to be easy for us to sculpt into. That's why. That's why it's important to create low base whereas meshes. So let's now go ahead and take a look. We have our first piece there. And, you know, if you haven't already, one thing you can do is and I did this kind of intentionally was, you may have noticed we only created one strip of a zipper. So if you're a little concerned, wait a minute, What the heck, man, all you have to do, we need another one for this other piece. And this piece only fits specifically for this area. Don't worry about it. All you have to do is just simply go to your selected zipper piece, hit Duplicate on the sub tool of what you got, and then go ahead and just go back to the original piece and you can either z all the way back to your defaulted position. Like so. So you kind of have yourselves a little bit of a, a little bit laneway room. Now, with this one, I don't want to have a the little zipper like it is here. So one thing I may do is just kinda, kinda get that a little bit straighter. Sorry about the tangent. One thing I'm going to do is actually one of two things. First of all, duplicate and then take the duplicate piece and put it in back into my detachable folders and collapse. It's like it didn't go all the way. And so let me try that again. There we are. And then we're going to take that piece that we have here. This is a poly group right here. So I'm going to hit Shift Control to isolate select. And then I'm going to drag a mask over it. And then control shift to the empty space to bring everything back. And we're just going to simply hit Split masked point. And then from there we have a peace without it. Let's go ahead and delete the sub tool that has that little detached mask piece. Go back into our zipper on this side and you can choose either side. I'm just going to simply hit the E key and hold shift and rotate this over and bring this guy over to the other side. We're going to Z back. And I'm going to see if we can get this guy to line up fairly. Well. We want don't worry about how far this have the thickness of this jacket is. Again, it's a low res mesh, so we're going to be able to have no problem collapsing that into some thinner when the time comes. So let's get in and hit the COG of our transport and tight bring up our bend curve. Make sure you're on the correct access on the orange curve. So it's going up and down. And I'm going to start, I always start always with a three and then from there I go and make my adjustments. Like so. Let's see if we can bring this guy in. And it's just sort of, you know, I'm all about just trying to create the right kind of adjustments and taking your time. Let's go ahead and bring in one more curve now. Not like that, just one. There we go. Right? Once you got a little bit of what you want to taken care of. Like so I which honestly, I'm a bit of a stickler fanatic about trying to get exactly what I want. Just go ahead and hit the except key. And now the last piece of the puzzle is going to be making these little pieces, which is going to be pretty, pretty easy. All we're gonna do for that is go into our detachable piece and start off with what it was for a default. And that would be starting off with just selecting our default little piece right here. I'm going to duplicate that off. And then I'm going to drag it out of my detachable pieces and then collect and close. All this is is just W key centering it upside-down teardrop, doing a bend arc composed of multiple subdivisions. So let's just go ahead and delete. Those are not altering the geometry, so we can always reconstruct the curve again, reconstruct the meshes and the divisions and get him back. And like so you have your pieces. Now, let me just show you again in case you're wondering, it's just holding that COG going to bend arc from ven dark putting up to a side view and pressing the green cone, holding left trigger and just dragging all the way across like so. And then just hit, except from here, you can just scale the piece. As you see. From here. What we can do. A couple of things. Now. This is going to be a little, not as easy as you may think, but the one thing I almost want to always start off with saying is, is make sure you have a little bit of decency with resolution like this. And then I don't normally suggested, but it does seem a little bit thin. And that might be because of the adjustments we made. You can try to go for deformation and just try to get it a little bit thicker again like that. And that does kinda help like so. But remember, inflate does do some things and that is it does stretch out geometry. So you just got to be mindful of not going too far. So all we're doing is just sort of kind of pushing that in. And we're just sort of kind of giving ourselves a little bit wiggle room placement within here. And again will be readjusting this particular piece when the time comes for the arm. So let's go ahead and duplicate that sub tool out. And then let's just go ahead and bring that in. And it's going to be a little bit thinner down here because it's wrapping around a risk while this is wrapping around the forearm, this still will be shrunk down. But once we kinda bring in our base mesh, we may get, do a little bit more of an accurate assessment because I want to get these to be the right scale size before actually getting the arms are getting the the jacket base mesh to wrap around and fold around and be the right size. So let's go ahead and turn on our character. And as I expected, It's a little bit thick. Okay, I'm leaving a little bit of extra room because as you can see, this is a lanky, almost alien look. We're going to be doing some rework also there. And we're going to be doing some rework. They're just trying to maybe do some rework. They're tuned to the base mesh. Not going to shrink this down because I may make the wrist a little bit bigger. But now, now that we have this all taken care of, we have established much stronger foundation for creating our base mesh and having all the pieces that we want attach. Now that all that's left here is just, just Ross sculpting and sculpting onto. So that's going to be the next upcoming lesson. So with that said, now that we have all the pieces we want on here, everything is kind of set in place where we would like it to be. We can now move into the next phase, which is going to be sort of a, it's going to be a fun phase. It's just going to be just doing some scopes of the main jacket, which is what we're going to be focusing primarily on next. So stay tuned.
35. Sculpting Jacket Wrinkles: In this lesson, we're going to go ahead and start on sculpting some wrinkles here. And we'll be mainly prioritizing this area and the arms and maybe doing a little bit of a breakup of the wrinkles like kinda we did with the pants. Now, we'll go ahead and also in start you off with the slash two and show you how to create landmarks in addition to this, like in areas that are key areas where there's a lot of division, just sort of a way to mark the areas that you can build off of. But also, one thing I would like to stress strongly is that this is a finesse sculpts. So what that means is is that if you're a beginner, don't let that get to you. Just remember that you're going to want to make sure if it's not going your way or you don't like where are the sculptors or you don't like where the wrinkles are. One of my, one of the things might own teacher said is, is just do it over again. I know that doesn't sound fun, but just go to the top of the orange bar right here where it says undo, get to a point where you save the file to this area. And if your wrinkles are in common the way you want, just go to this top undo bar that my mouse is over here and sculpt all the way back to an area you, where you liked it and just kind of start from there. This is just, again, an iterative process to help you get your gear sculpting better and better as you get along. So let's go ahead and get started. So I'll go ahead and start off with my move tool to get some things situated. First thing I'll do is I'll work on trying to get maybe just a little bit more bag year. I'll look because I'm going to be subtracting off quite a bit. And then just go there. I'm going to be switching back and forth. I have four subdivisions and I am on its lowest one. So I'll just hit D to go well per division. And we'll do our landmarks of our wrinkles through slash two. So if you haven't already go to your lightbox, go to your brush slash folder and go to slash to make sure you do a couple of practice swings with that slash brush by hitting the L key. And to make sure it's enabled and make sure that you have a high focal point. And let's just look at some of the major landmark areas of the sculpt and just do a couple of swipes just to get sort of like the right areas that we want. So like right here is an area. Maybe somewhere up here might be an area. Look, I went from top to bottom or bottom to top so I can get it. That's one area. Another area could be like right here. And maybe if I'm going through here, I'm just kinda going through all the landmark areas. Let me see. I'm not really paying attention what division I'm on here. And I wanted to I could go up to three. Might just do that. And it doesn't look like we're ankles. Yeah, it's so don't let that freak you out. But this is just sort of given us are areas where we're going to be doing our work from. So here's another area and here's another area that probably can be something we can work with right there. So from here, from this point on, I, I'm probably just going to work with standard. Again, make sure that you have a relatively high focal point and do a couple of practice strokes and make sure you're getting something that looks like he can read. But like for example, right here I take this stroke and I'm going to try to make like a little bit of a sway that goes on here. That kind of. And then I'm going to use smooth blended out here. Then do the same thing. And slower subdivisions mean when you smooth, it's going to collapse down. It's okay. If you just need to go up a subdivision to get it to be a little bit more sturdier. Go ahead. But if you're going through like what I'm doing and going through the Move brush, make sure you're moving. And getting something that is on a lower subdivisions. Go back up again. Once you hear, you know, I may try to do instead of standard. And I'm just hold and left old to push in a little bit. You may even want something sharper. You can always do some sharper Dame standard helps really good if the Old Left Alton see these crevice areas, you can just kinda sharpen that a little bit. Same thing if you want to kinda push in a little bit, you can kind of do that. Because the dam standard, it's a very subtle, subtle brush. So it's not, it's sort of, I like to think of it as that polish brush, you know. So it's not a probably Sultan best used for. I know I'm doing it, but it's not something that's completely I would use best on here. So let's just go ahead and just push in a little here. Here. Maybe kind of build off of so little blobby. But again, E, We can you can go ahead and then cut it out with the dam standard, then smooth it back down. Certainly see a little bit of a pattern right here that we can work with. See if we can merge this. See if we can define a line here with the dam standard holding left. All go like so. And then let's push in where our line is at. And I'm just being very gentle and subtle on here. Alright, so let's go ahead and kind of scrunched this in just a little bit. And when we're moving, we're moving through the division to get know, just kinda playing with distorting the pattern a little bit just to see what it looks like. Another thing you can do, I don't know, I've never tried it before, but you can also try things like trying to distort the pattern either through snake hook or twirl. I don't really do it very much because it gives me some unpredictable patterns like that. I really don't. But some people, I know some people tend to try to just do a very subtle interpretation of it. Just like that or something, you know, but I couldn't tell you if that would work Fourier or not. I have my instructor actually tell you. If I ever were to recommend it, I would probably recommend snake hook as the way to do it as opposed to any other brush. But you can, if you want scrunch things up a little. Here, it's a little bit sharp, so let's go ahead and kinda move all this stuff back in with our Move brush. Readjust. Whenever you're readjusting the silhouette, make sure to do it on a lower subdivisions so you can retain those details. So we can do something here. Standard. Let's go on to sow division. And I'd like to push sum up, maybe cut it up a little bit more, smooth it in. You know, it's, it's basically, you know, your your sculpt and where you want to do it. That's why I also go with saying, don't get tunnel vision with the reference, you can make something completely different if you want. Now, one thing we will say is, I left some area here blank. We're going to go ahead and oops, hit, if you ever get a duplicated error, just hit Command N. I left some of this area here blank. That's because we have a little bit of a shoulder pad that we're going to be doing in the upcoming lessons to show you how we deal with that. But let's just go ahead and make sure this rearranges correctly with the Cufflinks. So real quick, I'll just go ahead and turn off my split and screen and then go into sub tool, turn off that high res just for a second and then just go to my Cufflink that's on here. And I'm just going to move that that sub tool so it kind of goes around and hugs the appropriate area there. And I'm just sort of use and Move tool. And you may notice on here it's a little bit sculpted. So we'll be doing that also in the Upcoming upcoming lessons in setting everything and resetting everything. So that's just where we are going to be with that. Let's go ahead and take a look at it. I think. Well, let me say I may scrunch this just a little bit. Just to see. Yeah. So that's kind of like the what we're wanting to do. I'm going to probably now do the next one, which will be over here. So I'll just go ahead and just go into my split screen, turn off Cufflink and go ahead and get that taken care of. Right. So we're just going to go ahead and remake our marks again with our slash to bring our focal point again high. Remember go up to the orange bar in here and undo and drag across if there's anything that you don't like. And make sure the L key is turned on. Accidentally hit the wrong. And I'm taking a little bit of a different approach with this one. That's because this one's kind of extended as a little bit further out. So there's just not going to really be any any sorts of need for really scrunched in wrinkles or anything like that. All right. Not just finish up with some I'll probably take something a little bit smaller, like a smaller brush for standard. And you need to sharpen anything up. Let's just go ahead and go through Dame standard. Remember to hit left all on the high spots. And then just normal for you want to cut, cut in and just try to very gently smooth blend down. So kinda see, what do their lips p. Okay, so now that I got a little bit of what I want taken care of here, and I have a little bit of what I want in the area. I'm gonna do two more things. I'm just going to do a little bit of blocking out in the body, just breaking it up with standard brush. And then I'm going to do maybe just a little bit more reorganization of the mesh on on my shoulder side because it feels slightly off and I want to see if I can maneuver this around a little bit. But the blocking out is it's just that simple breakup. Nothing really has to be done on this side since the sash is kinda covering it. So we can just kinda leave that alone. We want. We can just see, you know, it makes a difference when you're blocking something out like that. All right, now, let's see what we can do. There's anything more we can do here. Another thing we also can do is you can store morph targets on here if you want. Not huge into that, I kinda just prefer getting the practice in on just starting over on the undo. But that is an option if you're feeling like you just want to kind of clear the board in a different way. We can always do. This is just sort of clean up a little bit more. To think of it. Let's go ahead and do some maneuverings with the Move brush. Not going to do the lowest level because I don't like to see a little bit of the pattern here. Little bit, one, little bit. It's just sort of, I honestly could spend almost hours on here just getting the right pattern, just sort of, but that's also something that's half the fun is you can just sort of kinda get glued into this. Oops, too high of a rose. Let me go ahead and do some. I think one of the last things we're going to do before we know is we're going to try to see if we can just get ourselves a little bit more of a size up that Cufflink on the other side might be the only thing that's left and see if that area. Now if one thing I wanted to also show you is that if you don't like what you're seeing or feels a little like too much there. You can always just hold shift on lower subdivisions and then bring it back up to D and it will kind of come out a little bit pronounced. Another thing you can do is you can just go to a lower subdivision, like subdued, I think, let's see, this is Subdivision 1, this is Subdivision 2, this is subdivision 3. You can kinda just kinda tapped Shift and just kind of make it a little bit more. How we say less defined, less deep. If it seems a little bit too much for you. But for me, I kind of like just trying to get a little bit more work into deeper crevices. If something is a little bit like oh, like scrunched in like this. I think when I was doing it. For the other piece here, I was working a little bit more heavy on to slash two. And I may go back into it just to show you what I mean. I'll go ahead and do. Slash two. And if you ever have your back go black, just hit V. And you can just kinda go back and just kind of see all the cracks that you've created and just kinda fill them out with slash to probably try. Oops, one, We'll blobby there. And my two BH, push that a little bit. Php, I'm going with a high, high polish. Kinda push that in. And then Standard going down a little bit. Oops. And this is me just kinda having some fun with some wrinkles here. Just kinda circulating through until I find a little bit more what I want. And it's, it's, it's definitely this is what I say when I say it's an iterative process. To do a lot of this. You just got to keep trying at it and not walk away from it because you can get some different kinds of patterns that might be interesting. And then you can kind of combine what she did from previous. Now that we used high polish like we did with the pants. Again, you can get some cool looks here, but maybe you want to accentuate and polish that up with the dame standard again to give ourselves some deeper looks. Or maybe take pick a corner of a and where it falls off like right here. Just to make it no deeper. Now. And then afterwards you just kinda accentuate a but it's definitely something that I would say is stick with it no matter what, I, myself find that one of the most important things about all of this is just sticking with sticking with trying to get what you want. And remember, if you go a little too far, like you see me going a little too far here. Just remember, you can get you can always get this back. And that's what I said at the beginning. Now, pick an area somewhere around there that you like. And then go ahead and start back up again. And that's half the fun with ZBrush, you know, kinda building off of iteratively what it is you sculpt. So I'm going to play fair with you guys and I'm not going to sculpt pass whatever the video is. I'm just gonna make sure to do a couple of things and that is make sure the Cufflink is sized up on the other end. And then we'll go ahead and conclude this video course here. Let's just go ahead and make sure that it's put in correctly among the lowest subdivision. I'm just going to bring move in. And I'm just going to bring this guy in like so. And it's not that hard at all. So in the next course we're going to work on setting things. So what that means is this woul, go ahead and thin this area out. We're going to also work on getting everything sized up in this area because when we start thinning these edges out, it's going to actually collapse or going to reset some things and move on to the next area. So stay tuned.
36. Cleaning and Adjusting Jacket: So welcome back. In this lesson we're going to do a little bit of clean up prep work for moving on to the next area which is going to be this so shoulder pad area. And before we do that, this lesson's just going to be about just doing some cleanup prep work, maybe sculpting out the folds here. Also, we're going to start to work on the folds that go around the trim and see if we can get them to hang over a little bit more. And we're going to do on creating sort of like a cover here. I know there's a zipper that you see here, but thinking of saving nap or a different portion of this lesson and going with something similar to what we did in the pants section, which was sort of like a pocket trim, just so you can get more practice in on doing that. And then finally, after we get all that said and done, we're going to see if we can sculpt out maybe a region for a poly group area here and make sure there's a good lip that goes in both for the arm, shoulder blades as well as the back area here that you see. So let's just go ahead and get started. Now, for this, probably just going to temporarily turn off my split-screen workflow. Just so I can have a little bit more real estate on the view port to look at and just turn everything on that we're gonna be using, like so. And you can see one of the things I want to do is that I want to rearrange everything that I had on here back. So you'll notice also there's a little bit of a it's a little bit off centered here. That's because of the blackout area of the sash that we put. It's kinda going underneath there, so that's okay. We can escape. But like I said before, we're going to try to thin out this side area right here. And I think what I'll do is I'll start with that. So when I do all that thinning, I make sure that I'm on a low subdivision level because that's going to give us the best results in terms of making a collapse when you hold Shift and smooth. So that's why I'm going to a lower subdivision for there. So let's go ahead and do that. I'm just going to just hold shift and simply go along here. And we're just smoothing down everything. You can even do that underneath as well. Like so. And we're just kinda smoothing it down like so. Then I'm going to work with mu to sort of reestablish all our pieces back together. Now, for the sake of referencing, I may turn on some of the additional detachable pieces that are around there to help me gain perspective. A wall we're doing here. And these all look thick as well, but we're going to address those on separate separate lessons. And I think what I'll do is I'm going to start by pushing it all in, pushing everything that's overlapping with a standard brush. And then I'm going to go through switch into Move brush just simply by holding left ALT, pushing it all out. Kinda just going back and forth. What I want to kinda do is create like a little bit of an uneven surface and make sure it doesn't look torn out. Maybe just a little bit blocky. Relax it a little bit more. We're just we're just kinda creating sort of like a thickness that kinda hangs that looks like it's kind of draping and going over this area right here. Now having said that, you can also work hold left Alt and click on this piece right here, induce some of the same thing. So just kinda make it look like it's uneven. Like so. Well, you don't leave that area all tucked in. Let's go back into our jacket, left all to switch and just tapping on the mesh to switch between sub tools there. Let's go ahead and hold shifts. You will we got alright. I'm going to take it up a subdivision. And from here I'll go into standard. And maybe just, just like before with the whole mesh, we're just going to sculpt some imperfections. So I may go one more division there. And we're just going to work. We're just simply sculpting out sort of like an imperfections of the mesh. I know I like every time when I'm dealing with wrinkles, I always like to put the small brush but this don't be afraid to Spearman outside of it in any way. I have my let's go ahead and just make a and so all I'm doing just simply making it look as though kinda given that illusion that it's kind of just hanging over like you see there. So now I'd like to look at the real estate of the pocket that we're going to be doing here. And we've done it before several times, but I always like to just kinda try it anyways is we use that slash two to get the pocket that we're wanting. So let's go ahead and type in our light box. Let's go into our brush and let's go into slash and hit our slash two. And we work with a high focal shipped with slash two. And we also like to hit L key to get it to be in lazy mouse mode. Let's go ahead and take this up a couple of subdivisions now and just simply carve out a little line there and then hold shift and smooth that line just slightly like that. Bring that out like so. And then let's go back into hitting the Move brush. From here, let's start masking out that top overlain area to see how particles. And just take your time. Now let's go ahead and we like when we work with that MOOC brush, Let's go ahead and see if we can maybe try a lower subdivision when we move it in and we tuck it in. And just push that, clear the mask off. A little bit crazy here I don't like. Let's go ahead and I'll probably do the mask here. And the whole higher level, just trying to catch that corner there. Same thing over here. Let's go to a lower subdivision and just bring the mood, then move, brush, tuck that in, then clear the mask, and it's a little bit better. Let's go ahead and try to smooth that out. And now let's go ahead and try to thicken out what we have here. We may not need to. It does look like it has a good thickness that it might not be necessary. But I'm just using a plate here. Simply give a little thickness. You're going to see that geometry expand out. So let's make sure we hold the Shift and just kinda run it along. Couple strokes in like so. And then let's seal it off with maybe something just some simple like Damien standard. It's just making some subtle here. I have a pretty low subdivision, so I can maybe just give it one more just for resolution. Just some simple we don't need to go, but you can take further time into, and maybe you want to hit B key. This is where you go outside of the concept again, maybe you want to hit the B key and do some stitching that goes around here. That is something I encourage. You. Just have your fun with it. Now. We're just trying to give an example on stitching. So you guys can see sort of like an example. Let's see here. We are. You can do some like that. Work with the I would say probably do a couple. Practice strokes. And you can kind of make something cool through there. And anything you want to do. And maybe just fade it in. Right now. It's not the heaviest of concerns right now, but we're probably going to circle around that later on. I want to get through everything else before I circle back to that. So let's go ahead now and look at these areas right here. Nothing too special. Let's look at the coupling. It's going to standard and all we're doing is we're doing a combination of standard and move to merely hold left old and push in a little bit towards the center. And we're just doing that to kind of to deform the mesh. So it doesn't look completely perfect. And if it starts collapsing and like stone right there, you can just kinda bring it back up with inflate, like so. And maybe make it so it's a little even. And then we do the other side, just some similar distorted a little bit. And then we go ahead and do standard. And we just sort of collapse it in on its center. They're just kinda right in the middle. Kind of look. And then probably if you want, bring up the thickness. It's a little too much. So anything like that will work just fine. So we're kinda getting a little bit closer to what we want. So if we look at our concept here, and I'm not going to just use my 2D concept. We still got some other things here we need to work on. One is the lip line right here that we need to do. And we need to make these little new forms of seams, which we've done a little bit on in the pans, but we're just gonna do a variation of this zipper. We're going to take touches and extra credit, extra credit video later on down the road. And then finally, we're going to work with a little bit of trying to create a lip here and a poly group here. So let's just go ahead and establish just getting this backline here set up. And from there, we'll go ahead and try to see if we can block out of poly groups. So let's start with the back here. Now. I should actually say, after looking at this, the one thing I would like to look at is, is before I make the back that I should, I'm gonna go into solo mode so that I can get a better frame rate plus slag that. Before we make this lip line back here, we need to work on maybe creating a scene barrier right here. And we don't have to do anything too heavy crazy. We just have to define where that the pads are going to go. So let's just go ahead and shift this down to a couple of subdivisions. I'm not going to go on my lowest one. I might start right here on division two and see what I can get. And I'm doing an isolate select. So I'm just selecting just this outside area because if I don't want to like color in on the inside lines of this mesh. So let's just go ahead and isolate select so that you have just that. Now I'm just going to simply, I may need to go up a subdivision right now, but for now I'm just working on making kind of like a block out of real estate for a poly group is what I'm doing here. Just trying to get sort of like a pre-established line barrier here. And the one thing I don't know right now is whether or not this is good enough resolution for group loops to clean up. And if it's not, don't worry, you can still just hit D key and go up one and then just really smooth it by holding Control and tap and then Control left all to reform it back up again. You can always do that. It's not bad, but I think I might bring it a little bit higher, maybe something like that. What does the yeah. Something like that where the arm meets blood. Yeah. So something like that. And then just sort of reaffirm the image like so. And we could do, I think we could work with that actually. So from here on out, what I'm gonna do is I'm gonna go to geometry and I'm going to delete that lower subdivision because that's going to cause me some problems I fear later down the Rhine, this is what I'm gonna do. Okay, so pay attention to this one. Delete lower is what I'm going to hit. And the reason is, is because of this, if I hold Shift F, I'm going to show you some. And I just go ahead and hit Control W and turn that into a poly group like you see there. And that's just, again, that's just Control W. You'll see the lines right there and you'll notice the resolution. If I go up the resolution, those lines, yeah, They won't change and I won't be very happy. But the other thing is, is that if I go down a resolution, you'll see it block out. And if I go up a resolution, then it starts to not to change. So let's go ahead and undo that. We don't like that. So we gotta make sure when we're doing this that you are comfortable with the resolution you are at, at this point. This is sort of a unusual little glitch that I kinda wish ZBrush would make. So before you hit your mask, when you create your mask out, makes sure that you are on a resolution that you feel comfortable with at this point. In other words, be sure that you have all your wrinkles done. All you're moving. As much as you've done with your moving done, don't go to a point where you're at this phase until you're done with all your wrinkles and your mood using your movement brush. That means down here as well, where the pocket is. So I'm just going to hit. I'm thinking I'll hit. And looking at the resolution, I may go ahead and hit that and then see if just doing a little test here on resolution. So what I think I'm gonna do is for me, I'm going to go up to maybe just one more resolution. Control down to soften it and then control all to feather it. Like so. And then I'm going to delete the lower. And then I'm going to go ahead and delete the higher. And then I'm going to hit Command W and turn that into a poly group. Make sure you have a good visible poly group. If not, just hit Undo and keep cycling through until you've got something that you can see really well. So that's going to be sort of our resolution four over here. Now, if you want, you can also do some. Feel free to do any form of additional editing. Maybe. Let me go ahead and undo so I can see, maybe you want to look at it and say I kind of like how it kinda others in a little bit like a V here. And then kinda goes up or maybe just make up your own pattern here. And then just simply once you're done, hit Control W, So you have a good resolution that you like. I like that one there. That's easy for me to see. They have two good contrast in colors. So now that we have our poly group established, now that we have a little bit of a pocket sculpt in for us. And if you have any reservations about anything, just go through and smooth to clean it up. You can always do that. So now that we have all of that done, the only thing that's left for us to do is to create both a lip line that goes around here and create these lines that you see here. And then of course the line that goes across here. So that's going to be the part two of this cleaning and preparation for the next phase. So stay tuned.
37. Reusing Apparel for Other Areas: Okay, and welcome back. In this lesson is sort of a part two of our clean up and adjusting for this area of the jacket. So what we're gonna do in this is we're going to continue what we started in the first one. We're going to just try to create sort of like a a lip line throughout here and try to work and finishing out a Cover System area here. And also for over here, we're going to see if we can create some of these seams. If we do have time, we'll address the the shoulder pad, but that might be sort of like a segregated part three. It just depends on how far we get. So let's go ahead and get started. So what I'm gonna do now is I'm going to turn solo mode off. Once again, I'm not really worried about this because there's areas get overlapped with what we see. I do see some areas where I kind of felt pod around. I can't do much about that right now. But that is just going to have to be something I'll have to figure out. But the first thing I'm gonna do is now that I have my lip line defined out, I'm going to go ahead and create sort of like a little bit of a back shoulder area here for myself. And that has to start with having this seem defined out. So again, like before, I'm going to need to go into solo mode, isolate, select this area. And honestly, I think I can get away with just doing an isolate select. I may not need to really have this area. So I'm just going to hold Control down and change. And i'll, I'll start with circle first to see if I can just simply get a mass going right around this area. And as you can see, it's a little bit wonky. And you'll notice I'm using that space bar trick again. So it's just, just so I could find that right curvature, something like that and then cover up anything that's on top. And it looks a little bit off coding here. So there we go, something like that. And again, I'm just going to turn this piece here into a palindrome like before. Now that we have this piece of poly group, makes sure when doing that you have a readable poly group, something that is easy to contrast. And from there, we can just go ahead and begin to it. We're using this mainly as a way to create like a seam line or an area we can go back to and reference for constantly if we want to mask something. So I'm just going to hold down control and tap it a couple of times to feather it out, invert the mask, firm up the line on the mass by control Alton tapping. And I see a little bit opus snuck right here. I may just go through and change my stroke to a normal freehand and just sort of clean it up like so. And so this isn't too bad. We can just go ahead and then proceed to, if it's too much, we can soften the mask, but from this point on, we can just go ahead and proceed to use a Move brush and just go ahead and tuck it in similar to how we did with the pocket. We just kinda push in with the while holding left Alt. Like so. Just kind of push Nolan slightly. And that's all it is, is just simply just kind of a nice little clean line. And then from here, I may just go through and invert the mask. And now I'm just going to go through and hold Shift to sharpen it. Wakes up. It's a little bit sharp here. So let's go ahead and hold Shift and dole this out. And we're just, we're just trying to create like a focal point of base point for all this, for this scene. To start off with here. So something like that. That's kinda what we're kinda go on for. So now that we have sort of defined an area where our siem is, we can do the same thing on what we did from over here to over here. I didn't really I wanted to do it twice for a couple of reasons. One, I wanted to give a good iterative examples so you never get lost. But the other reason is, is because this is a symmetrical, you'll have to be doing some. This is going to be asymmetrical. You're going to have to be doing some tweaking anyways. So because of that, if you hit the X key, so I just figured I might as well just go ahead and just kind of eyeball it. It's not like a big deal over here to get it perfectly right. Those the other reason, because we're going to be covering up quite a bit of it. And that was another issue that I just kinda thought, man, it's not that huge of a problem. The rough thesis idea of it down. Maybe something like that, maybe. And that's probably enough for me. Maybe clean up a little bit down here. May look soft and this may look hard. So just kinda hold to fix that, just hold control and keep tapping and then control all to reaffirm that we'll just kinda soften it's self-help, invert that mask. And it's just like before. And we're just simply going through and we're pushing in a little bit here. Like that. Nothing too crazy. It's pretty easy, pretty simple. We'll go ahead and I'll eyeball the left side or the one side from the other so I can kinda make sure it all fits somewhat the same. And like before. I'm just going to for me, I could take some time into you'll notice it's a little thin. I could use some inflate to help me out if I if you find yourself going too far, just use your flight to just get some thickness back. And then once again, reapply the smooth afterwards. Once you're done. But may not be too necessary here. No. Just need something like that. This isn't huge for me because to get it right, I'm not going to use inflate though because it's kind of already covered up because we're going to have a shoulder plate on this particular area. So I'm not like to Seoul on trying to get the perfection of this as it is over here. So now that we have this lip line, we can now start in on. We can now start in on to creating a center area. And that again is sort of like, I'll just go ahead and draw a mask so I can kinda circle, draw a mask so I don't affect anything like so. I'm gonna go ahead and do this and here I'm just going to draw an a mask so not affecting anything. Now, now that we have everything, if you remember, like we said before, we showed a demonstration through slash one, I believe, and a combination of slash one and then flay to create a lip line. The one you see on the reference on the video is just simply just slash T2 with a smooth out. And techniques done similar to establish this seem. So. In other words, what I'm trying to say is this slash two in cemetery mode was used to create this. And then we smooth it across. And then like where we masked everything, we just kinda tucked it under with the MOOC brush. So that's basically the same thing we did here. I'm going to try a different method though. If you're looking to try something different and it's something that's a little bit similar to what is it, slash one. So what that is, is I'm going to work on just the first trusting and getting my brush to slash one go. I'm gonna go to lightbox and access and and then I don't know because how symmetry is, how well it's going to meet in the center. We can take a couple of practice strokes and it kind of looks like what we want. Okay. That's how it looks. Yeah, that's what we want. Now. Now, we're not gonna get that way. Let's just take a couple of practice strokes. You will. We're looking for yeah, something like that. Now let's see if we can bring it up a little bit more. Some like that. Good, Good. Let's try again. Alice, start on the outsides. Something like that. And all I'm doing is simply creating over and over again, I'm just hitting on undo. And just simply just taking that time to create a practice stroke. Now this may look a little jaggedy, don't worry. First off, we're just going to go ahead and hold Shift, smooth it out a little bit like so. That's fine right there. And now let's see how we can clean that up with inflate. And you can see how the geometry tears and that's okay. Because we're going to fix that as well. That's kind of like what we wanna do. That's basic premise of it. So I'm going to undo that again because we did a very deep, deep, deep cut. And I'm looking at my resolution. I think I can do something a little bit higher. So I'm just gonna go hold down Control D to get some resolution in the center here. Just a little bit, just for the center, I know everything else, its mass, but that's okay. I'm just gonna go back to my slash one brush and we're going to look at what I want for resolution. That's could be a makes it different is I'm kind of just starting from the center on that one. And I'm just sort of just very gently hitting the and flaky to sort of give some pop. And one thing I kinda like when I do it this way is a kind of create a system of imperfections across here, like a seam should be sold as. And that's some my kinda like a lot is imperfections. It kinda helps the cell, the fabric. I'm looking on here and and that's kind of already what I'm kinda looking for. So now that we have our vaccine kind of re-established, I'd say take a couple of practice swings at it yourself. I kind of like it like this, but remember, we can go ahead and beyond the concept and then realign the bottom area with any variations of stretchings, Alphas that we do. And that can be something you can do on extra credit. But because we have also a little bit more time left, we need to go ahead and do a demonstration of the extension that goes beyond here. So when it first hit X, turn that off from what I'm referring to is this area right here that you're seeing. So let's go ahead and start in on that. And for that, we're just going to access a detachable piece. And that's in my folders. I'm going to go through and I'm going to select one. Like so. I'm just going to duplicate it and off and for now, I'm just going to take it out of the detachable piece folder. And I'm going to turn solo mode off so I can see everything. Find my piece here. I guess I didn't really take it out. There. We go. Now, this folder, this piece here is going to be brought over and wrapped around the area that you see here. To do that. First off, make sure you have a good amount of width that you want it to be. It's just sort of like adding onto it. So we'll just simply do something simple as bend arc. Former, make sure you're deleting the lower divisions and hold the COG piece. And we're just going to simply kinda wrap it around like that. Now, when you shrink it down, you'll notice the width will go down too. So one thing I'm going to do is after I hit, except I'm going to go ahead and make sure where that piece I'm going to re-center it. And where this pieces right here, I'm going to kinda angle it in a place that's not commonly hidden. And I'm going to make sure it's got a good width to it. Like so. I believe I have transparency turned on and you may want to turn that off because you're not going to be able to see too well work goes through. So that's probably going to be where I want it. Now. I'm just angling it down. And let's go ahead and turn transparency off and shrink this to hug in a little bit deeper. It's just that extra room of a piece that we can use. And if you haven't guessed by now, it's going to simply be, it's going to be a matter of using the Move brush to kinda get it to conform around all the wrinkles. And that can be a little bit time consuming, but it's always worth it in the end to kind of sell those pieces like so. So here, one thing I'll do is I'll go ahead and do this right now. I'm just going to hit the Move brush. Initially, I think I'm going to save that out because I got a plan for that. They got a better way of fixing that. But we'll save that. And all I'm doing is sort of taking my time on here and just sort of just wrapping it around. And remember, if it gets too thin, don't let that bother you. Just wanna go ahead and use the inflate to bring some things back. And that's all it is. That's all it's a matter of doing is inflate. That's just kinda like the idea of what you wanna do. You just kinda want to just take your time on it and just kinda look for areas to really maneuver it around. All right, so once you're done doing that, just go ahead and you can just sort of repeat that there if you don't like it, you can also kinda tuck it in a little bit more just to help out with. It's just so it's not too heavily distracting. You can just do that as well. So what I'm gonna do is is you're just going to go ahead and play that same concept to the other side. And from there, we're going to finish up the readjusting aspect by making the shoulder pads and the side seams that you see over here. So stick around, stay tuned.
38. Creating Jacket Seams: Okay, welcome back. In this lesson, we're going to continue where we last left off. As you can see, we have R2 extended little straps. They're just for some extra subtle details. But if you look right here, well, we're going to work on is now this shoulder area and these seams that we see here. Now Ford. In order to do that, one thing we're going to do is we want to make this lesson mainly about practicing your accuracy with the curve tool, the curve stroke tool. And then we're going to be using very strenuously the space bar trick, which was what we practice in the beginner intro section. So let's just go ahead and get started. So I'm going to start actually on the shoulder area here and then make my way down to here. So where we last left off. If you look at all the little spots right here, don't get too crazy. How many strips you have to carve out, just make something that looks fairly even throughout the course. And for this, I'm just looking at it right now. And what I want is I want to treat every strip here like it's a poly group. And again, we're going to use masks to cover that. We're to carve out all those poly groups. So to get started with that, I'm going to go and go to my piece right here, my chess piece. And I'm just going to go into solo mode to give myself a little more space. And we did make a little bit of a poly group here. So let's go ahead and go into there. So we should be in this mode where our poly groups are all here. Now from this point we're just kind of carving out strips and turning. We want to strip of different poly groups to go across here. And we're going to use again our, our curve stroke in the Mask section to get there. So let's hold down control. Let's change, while holding Control down, change that stroke to curve. And then go back here. And let's just go ahead and just like we did with our space bar trick, let's just go ahead and I'm just going to remind myself where the spacing is here. And yeah, that probably will do. All right. So I'm just going to hold Control. Bring out a curve to drag it out. Look at my curves there. Maybe hit left old here. And I'm holding spacebar to readjust where I want it. Like cell right there. That might be something just don't get too crazy on it. You may want to try and get a fairly equal spacing, something like that and just hit Command or Control W so that you have a second poly group carved out. Now we're going to go ahead and carve the strips out on, from that point onto the left side and then we'll work our way to the right side. So let's just go ahead and just rearrange the point of view. Again, you'll notice I am, I'm making good use of that space bar trick to give myself some accuracy. Looks a little bit off there. So I may need to rearrange my spacing a little bit here. Kinda fun angling with the mask so I can give myself a better point of view. And let's go ahead and try that again. There we go. Like so. And we got ourselves a strip ahead and I'm holding left. Remember I'm holding that left all to get my Bezier a point hit. So you drag it across to create a curve, it's left Alt to create. And then you kinda get a strip like that. And it can just you can try to get it as best as you can. I am moving a little bit quick, but feel free to take your time. All right. So that works. All right for me. So let's bring everything back now. And then I'm going to start by isolating and selecting this area here. And you know, I was thinking I'd go ahead and start an isolate select, but I need a pointer reference on thickness here real quick, It's about that kind of thickness. So let's go ahead and just kinda mentally remember that. And this time. And you can kind of just seeing them. I'm just kinda giving myself a range of different emotions that kinda looks a little bit off, doesn't end. So let's go ahead and undo. You gotta keep on reminding myself to check both sides. That's kinda why I am doing a top profile. Here. Let's hit shift up so we can see it a little bit better. Oops. Just kind of see how we work it a little bit here. Looks. And he can, like I said, the objective here is to sort of get ourselves some fairly even lines. And we're just kind of work in and along. And like I said, over and over, I'm going to say this to you. Take your time. This is a big time practice when it comes to learning. The learning and the spacebar trick and measure an accuracy with your space-bar keys. And I always like to undo so I can do it a couple of times. We're all undo and then hit Control W, undo, Control W until I get a good color on there. One more time. Maybe. There we go. Alright, so now we got something going on there. Little bit equal to compress. It looks like a little bit or rainbow there, but that's okay. At is fine. Now you may see a little bit of unevenness may be up here. That's all right. Remember, after we get done with this, we can go ahead and go through the MOOC brush and rearrange everything, what we see, but that's sort of the main gist. What we want to get right there is something like that. So now from this point on, we're going to go through and try to carve out strips like we see here. We want treat this little line right here. We want to make it look like a mask shadow. Now you can do that through a stroke where you can just simply go while holding Control down. You can just sort of draw a stroke. Of course, you're going to make your draw size really small and you can do something like that. But for me personally, I'm going to kinda continue on where I last left off with stroke tool. And I'm going to just simply draw a mask. So I'm going back to curves and I'm going to draw like a little bit of a, how should I say it just a curve. I'm just kinda giving more and more practice with a curve with this because I think that would really help. So I'm just going to draw a straight line down, hold Control down, and draw another one. And I'm going to release, just see if I can try to make that straight. Now going to hold left ALT while holding down in front of anyone that's getting a little confused on what it is I'm doing. I'll go ahead and repeat what it is I'm doing. I'm holding down control to draw out a curve. I'm releasing control and holding down shift now to lock it into place. He release it, it will go anywhere. So I'm gonna hold down Shift to do a full 90. And while still holding down Shift, I'm holding spacebar down to pan it around. That's the R space-bar trick. And now I'm, that's about where I want it. Now I'm releasing Space bar and now I'm hitting still holding down Shift. I'm now going to hit left all to go subtractive. Oops. And I just released a little too soon. Try that again. It sounds like a lot. It does sound like quite a bit. Don't let that scare you. It it gets pretty, pretty easy after doing it a certain number of times. So don't let that scare you too much. So let's go ahead and look at that. You kinda just does it just right there. All right. So let's just go. Actually, I think I know what I'm gonna do is I'm going to do some mouse. I'm going to try to do a marquee select. And I'm just gonna do it like that. Okay? And then I'm gonna go to curve, and then I'm just going to slide off. Whoops, you get it like that. Just hit Control and go back. And I'm just going to marquee, select it off like that. And then I'll just go ahead and this will give me I wanted to do it this way too. So I can give you an example of hitting acute angles by titin double-tap. So what that is is I'm drawing out the tangle, doing the same thing I do. And now to get a hard angle, I'm going to double-tap left old. And that's going to give a nice acute angle. And I'm going to string. And I'm just kinda not holding Shift anymore. I'm just kinda eyeballing it. And I'm going to double-tap again, left old. And I'm bringing it up and from here I'm holding Shift to lock it in. And while holding shift, I'm hitting left Alt and I'm going to minus off everything. I got it on the other side as well. You can do it on the other side. It can happen, but the thing is the other side is going to have the sash covered. So I'm just figuring why not? It's not worth the hassle. So I'll subtract that off of there. And it looks like a cemetery mode. So I'll hold Control and just subtract that half off of there and check my model to make sure everything else is taken care of. Now from here, I'm just going to hit Control W and that should give us now poly group that goes right there. I'm going to hold Control Shift, click off into empty space to bring everything back. So what I wanna do now is I want to create some group loops. Now, I can create some group loops. When you trait group loops, it's going to put edge loops geometry of an additional amount of group loops between there. And this is to help smooth out that line of jaggedness that you see. So I'm thinking I might do that but just be warned, It's going to also do it to any other place that has existing group loops. It's not going to be a huge deal for me because I'll just clear mouth during the time that reach apologizing goes through. But just to a b1, there will be some extra areas of group loops in like here. And here may not be a big deal. Too terribly though. But let's just go ahead and see what it is and we'll problem-solve as we go through. So to put some group loops on, Let's go to Geometry, go to edge loops and go to group loops. I think I may choose three for this one. And it's probably going to process some honey on how fast your computer is or how many geometry? Well, I have 1.3. All right, so now we have some group loops put into place, which is what we want. So the next thing we're going to do and is we're going to try to get a mask over all the areas that are in the center islands. When I say center island, I mean this strip here that would be a central island. This area right here, that this is the center island. So let me give you an example. I'm going to go ahead and hold Control Shift, left-click on one. And then we're going to then release in whole control. Mask that island off, like so. Okay, we're gonna do the same thing throughout all of these. Like so. You can kinda see what I'm start out where this is going. Alright? So now that we have all of these areas turned in, we can now work with them a little bit. And what that means is, is that first thing we're going to do is we're going to soften the mask off. It's very hard right now because we have a hard line. So that means I'm just going to hold down control and left-click on the mesh. And then I'm just going to go ahead and bring it back out. Now you can already guess what we're gonna do now, right? Well, yes, there is. We're going to inflate this. We're used the group loops to help us create a mask or a line so that when we inflate, it's gonna kinda smushed together, like you see here. Now again, this can be done in several different ways. One way we can do is just sort of use a manual method like the what is it? The inflate brush. We can go into deformations and then we can use it that way. So you're going to get different results. And as a consequence on saying to you now, let's just go ahead and just see what it does so you can learn a little bit more on it. So we'll go ahead and go back to it. So let's start off with deformation right around here. And just, just experiment. This is what I've been kind of screaming at for everyone to do. Just simply experiment around and kinda do it like this. And then from here, you can combine it up with a brush to bring it out further, like inflate. And you can kind of bring it like so. And then we smooth out. And you can make something like that. Now from here, you can do a couple of things. You can go to your Move brush, or in this case, maybe a snake hook brush to rearrange widths in any area that looks like it's not even, for example. And you can kind of very like right now I'm using snake brush and snake hook brush to kind of give me a little bit more of an even distribution. And then for here, what I have to do is, is that for here I'm going to have to work on doing an isolation of the entire mask, the island area. So now it's just the group loops that aren't being affected. So basically the group loops are that go around the poly group are not being masked. All go ahead and invert that and maybe soften it and then invert the mask. And then let's see what a inflate can do. You can kinda see where I'm going with this, right?
39. Detailing Seams and Pocket: You can get a sort of look like that. You've gotta make sure you soften that mask though. Okay? So and, you know, there are a lot of other things like let's go and further. This. This is a lot to take in what you're watching if you're new to this, I have to be honest, this is actually a lot if you're completely new because we just did a quite a few things to get around this. So I'm just gonna kinda repeat what we did. So it's a little bit steadier. Let me go ahead. I'm cycling back down here so you can kinda see again, there is in this area group loops that surround that area at these, these are edge loop geometry that has been procedurally entered in through Geometry Group loops. When we hit Create Group loops, now, we still inflated the actual mask island of the main original poly group through a combination of inflate and in this case a manual brush, but this was still just done simply with inflate. Now if we keep going through as I'm cycling forward, and that's where I'm doing all my adjusting. This is where things change. From here. Do an isolate select of everything that's around the group loops. So in other words, this area and this area share as one poly group that is surrounding the edge flow group loops. So I do an isolate select, and right now all that's selected is the main island of the mask, the group loops and the center main group loop of there is not being selected. And as I go through, we bring it back. I do a soften mask. And that's soften mask. And what I did right here, I'm sorry. I'm sorry. I'm going to back out. So when we bring it all back, the group loop is not selected and the center mask is not selected. Then I do and isolates select of just the center main group loop that was originally created, and I mask that out. So now all that is just the group loops that are not being selected. So from here, I soften the mask a little bit so it's not so jaggedy around there. And I just simply then invert the mask and then manually with an implant brush and just kinda push it in a little bit. Like so. Try to also remember there are more things you can do. This is just the beginning. I don't want you to get too overwhelmed if he can get here, that's fine, but there are more things you can do. You can go up to deformations and do a, a Polish by group edges to see if you can kinda straighten this area out. As you can see. See there's more that you can do. I kinda like it the other way because I can enjoy this. Look right here. So that's sort of where we wanted to kinda put a stopping point at. If anything, I think the only thing left I'm going to probably do is maybe do a little bit of a mask or just some work on here. I'm just going to do some quick work on the pocket that you see here you probably been looking at and being like, Oh, Shawn, fix that. So I'm probably gonna do that now. And keep in mind, I am improving right now. I'm not even sure I know what this is going to look like. So let's just go ahead and have some fun because you're about to see me improv. So I'll start off by taking some practice strokes. Now we'll just add that subtlety with a devotional. It'll t. And that's going to be a stitch. And again, I'm just practicing seeing what something looks like. I'm going to hit that LP. Kind of moving us in a certain angle, upside-down. So I because I can draw a straighter vertically than I can horizontally. I now, why is he using polish? Right? I'm using Polish mainly because if I see something or feel like something's getting a little too blobby. Sometimes I like to just kinda push it in. Another thing I can do is I can just simply hit the pinch bug brush. But that's just an in, in this certain angle. It's sort of like just experimenting. I don't even know what it's gonna look. It's just sort of me following my own advice and plain field of practicing one time. So just one thing I love doing though on here is, although this lesson's over, I, this is sort of what you're looking at is bonus material. It's bonus footage material. I just liked his sometimes just kinda see what it is that something looks like, you know, one of the times, the time such as kind of like to have fun with random brushes. Because that's sort of, again, my favorite tool to be used in. Let's see if we can blend this area in a little bit more PHP. Because I had no idea what something's going to look like until I actually work at. And that is the best fun. Smooth that out now. So that is sort of the conclusion that we're going to leave at right now. With this area, I'm seeing it's a little bit blobby bear compared to where it is. So one thing I can definitely do is I can certainly go through and maybe work a little bit of this area here. Kinda like how I did with oh, what is it with the reference? Because I think there's some areas here that that needs some sort of attention. And you can make it a little bit interesting as you go through. But having said that, let's go ahead and take so back off again. We kinda taking our next steps out. And you can kind of see now that how this is beginning to get one step closer and slowly getting to where we want it to be. My turn on. The next one. What we're thinking about doing next is, is that we're thinking about going to either probably we're going to go with working the centerpieces that you see here. That's these areas right here because you're probably thinking to yourself, sculpting this area is a bit long overdue, and I would agree. So with that said, stay tuned because this area right here is our next area trait that we're going to work on. So stay tuned.
40. Creating Front Overlay: Okay, and welcome back. In this lesson we're going to start to move on to this front flap here like you see in the ZT or I'm sorry, the spotlight file reference for those wondering why I'm not doing split-screen workflow. I think I didn't mention this before. I only work with split-screen workflow and I think you should as well. If you have one mesh to one mesh, and if you have like a whole bunch of sub tools upended and turned on for the sake of getting spacing or reference, I would work with the spotlight reference just to help you keep things under control and on track. So that's just my $0.02 there. So from this point on, one another thing I forgot to tell you and I'm sorry, I didn't say this to you guys. Was that there's a little bit of a strip here and I want to go ahead and correct that by putting that in there for you right now. So this might be a good, good time to get you to practice a little bit of the matchmaker brush to help fittest strip in there. And that's again why we create these modular pieces that we can reuse. So let's go ahead and go to a detachable piece and find that normal strip we see like right over here. And let's just go ahead and duplicate that off and drag it out of that folder. And then we'll just drag it below, like so. And then we'll zoom out like that. And all I'm doing is just sort of bringing this guy and, and using the gizmo tool to sort of size and scale it up so it's hovering just above where it should be placed. I'll go ahead and turn off that front flap there. It's covering up everything so we can see a little bit easier. You can this is your baby, the whatever you wanna do with it and size, radius, that's up to you. Maybe you have some reference on how you want to see this, or maybe you want to make your own different design of a strict, definitely no problems there. But as you can see, I'm just sort of size in this up. Not too worried about what's going on the left side, but I am worried about on the right side and how it's going to tuck over there. Then maybe do some final adjustments with the Move brush. See you there. Like so bigger. And I might just move that down so it doesn't get caught in anything. And then we'll just go and access our matchmaker brush. So we had B and matchmakers is going to be over here. So just select that or hit the M&M and then just simply do go to the center there. Left-click drag. And you should get yourself a nice little piece that conforms nicely to the area that you see there. It's a little bit wonky there because of that. But don't worry, this is all going to be eventually part of the normal map. So keep that in mind. And what we're doing is we're just sort of size in that up, maybe bringing it a little bit higher, just a little bit. And from this point on, I'm going to go back to my Move brush. And I'm just going to hit Move brush and select that down and get that guy so that he's sort of tucked in a little bit more. And then maybe even select the just sort of trying to get this so that everything is kind of moved in, tucked in proper, properly here. And then from here, you can do two things. You can either leave it like this if you want or you can have it's sort of like it's, it's it's up to you really. It's not like any wrong case scenario or anything like that, but you can use the Move brush and just sort of maybe just tuck in using the left toll key, just bringing it in. So that way, it just kinda looks like it's trimmed out, may just hit the smooth here. But that's just sort of how we can just get like a little bit of a little bit of a TOC there. So now that we got that taken care of, Let's just move on now to our next piece, which is going to be our front flap here. So for that, I'm going to go ahead and isolate, go into solo mode here. And one of the first things I'm gonna do is I'm going to look at this and I'd like all the corners here. I would like them to actually be the edges to function as one single group loop. Just for now. And then we'll go ahead and readdress that later on. But just for now, I'd like to have all this as one group loop. So what I'll do is I will go ahead and hit marquee select to here. And then isolated Control Shift to isolate select that poly groups so they're one poly group. And then if I isolate select again, I'll get just those two as one poly group, bring everything back. And I'm sorry, I'll isolate, select and then invert the selection and then draw a mask over everything here. Like so. So we have something that's a little bit easier, a little bit simpler to cut through. And then I'm just gonna kinda make everything collapsed down. Right now. Nothing too crazy, just that simple little collapse. Nothing too out of whack. I'm also then going to go ahead and give it one more subdivision just so we can get something that's a little bit smooth here. And then I'm going to delete that lower subdivision because our next procedures can have to leave out. What is it? They have to leave out no subdivisions. Now, when we were making this, we had creased poly groups on here and I'm going to want to go ahead and turn that off. I want to undo all the creases that we put when we rematch this. So I'm going to go into geometry. Edge loops, crease in, do an increase all so that we remove that because we have new poly groups reestablished. And I'd like to go ahead and put some new creases around here. So decreasing is mainly something that we can do to help us in read topologies rising and like we did when we made that rematch, but we'll go on that later lessons. Alright, so now we're going to go ahead and go through edge loops and do some group loops around there. And we can do group loops, we'll get that. So we can do one of two things. I wanna make, sort of like a, a little bit of a dip sponge here, like a little spot. And we can go ahead and deflate the edge loops. Or, I'm sorry, deflate the group edge loops that are between these two major groups through a deformation. To get there, I'm going to go ahead and do a real quick demonstration of that. So you know what that looks like where I go ahead and isolate, select this poly group. I isolate, select this poly group. And again I'm drawing a mask. So the only thing that's unmasked are the edge loops that we put in there. I'm gonna go ahead and hold Control and feather that out and hold shift so you can see it better. And of course we go through deformation and go down to deflate. We can kinda bring something in and then we can use the move to brush to sort of readjust everything that we want to see here. I don't know, I haven't tried it this way. You can experiment beyond your borders. I haven't really tried it this way. But one thing we can do is we can just go ahead and inflate this way as well. And it is kinda nice because you kind of see a little bit more of equivalent circuit around here. But you're going to have to actually do just about a similar looking. It's it's a little bit more elevated than the other area. So for my sake, I kind of like the first way a little bit better where it's just simply going through and we're going through and keeping the edge like that. I think that's my personal preference because then I can work a little bit more. You can do couple of things like we can just sort of I don't worry too much about this top area because again, that area I'm thinking I'm going to cover out. But now if we bring everything back into solo mode, we can go ahead now and readjust with the Move brush and bring it so that it once again looks like is kind of overlapping and I think like to more when it fit or long corners size like that. Okay. So that's one way we can do it. Now let's go back into solo mode again. And if you want, we can just go ahead and isolate, select these two areas. One thing I'll notice is that when I look at these two areas, we have an area that doesn't necessarily need to be there, and we'll show you a way to get rid of that in the upcoming lessons. But for now, we can go ahead and just do some real quick basic, simple sculpting like you see in your reference. Nothing too fancy. I'll go ahead and put my Wacom tablet on so you can see that should be connecting or right about. Now, there we go. And, you know, you can do anything you want here. There's not like you've done wrinkles now enough to know what you put. I haven't put anything too crazy strenuous on here. You can use any approach in the past that you've done. I'm just going to simply put something very simple on there to help get what we need here. And now, you can just go ahead and do just the beginning parts of what you would do in any basic of wrinkles and just sort of distort the mesh out. You know, you can do something like that. And then Feather it all off. Yeah, it's not really too crazy. Oops. That's what it looks like when the Pope was shipped is turned on. You can also go beyond the concept and add maybe a zipper like you did with the opening flaps to there. And this would be an example of just kind of stretching beyond your own limitations, like so. And so that's going to be the first part. The next part of the lesson we're going to show is how we dress this overlapping hang. It will start off like we did at the beginning with just this beginner mesh. But then we'll go into some more complicated issues with along here and how we got that to look the way it did. So stay tuned.
41. Creating Collar: Welcome back. In this lesson, we're going to keep moving on to the next part, which is going to be our color area up here. And that's sort of going to be building off of what we've already done in this area and kind of expanding beyond that using Z modeler for the first time. So the first thing I'll go ahead and ask everyone is, is that don't do a direct follow along, but in don't like pause and rewind on this, but instead, watch this video through once all the way through because there are quite a few steps on this that may seem a little complicated if you're a first timer, especially when trying to get the geometry correct and straight. And I have myself even found sometimes tripping over on this one. And so I just want you to be just kind of a forewarning that this one does have a few steps. You might want to go ahead and just hit pause on your own ZBrush file and just look at what I do here. So the first thing we want to do is before this, I'm just gonna go ahead and hit the Move tool. And I'm just going to go through and make sure that when I do my read topologies using that I have something that's kind of hugging the side there. I'm going to open up sub tool. I'm going to go into my base mesh folder and I'm going to go ahead and bring out my color that I made. And then I'm going to close and collapse that down. And then I'm going to select that and bring that below. So that's what it should look like. And I'll go ahead and turn on my front flap. And it looks like my God, exactly what I want on it. There are a couple of areas that I could once again readdress. But this is kind of the resolution that are close to the resolution that you want to have. Now. Right now there are no subdivisions on it. It's just one piece geometry. But from this point on, Let's just go ahead and isolate, select this out into solo mode. Now, in solo mode, we're going to hold shift and like before, we're just going to kind of round out all of this, like you see. Alright, next thing we're gonna do is we're gonna go to Geometry. We're going to go and we use creases to construct this rematch. So we're going to take out all those creases by going to Geometry, Edge Loop, crease and unfreeze all. So we can remove all of that. So let's go ahead and take a look at some of that reference. Now, in our reference, you may notice there is sort of a little bit of a line that goes right here. There's a secondary line and then there's a whole bunch of debits. Now these debits are constructed through Z modeler. This one's kind of done through slash to inflate that we've been practicing. And this was done this outer area. It was done like we did in the last one. So where we just went and put some group loops on. So there is quite a bit to do on here. So let's go ahead and do the first thing, which is, Let's block out some real estate of a new poly group inside this main area that you see here. So to do that, I'm going to go ahead and isolates should select with Shift Control. And then I'm going to lower down my draw size. And again, this is why I chose Z remeasure over DynaMesh or anything like that. Because see remeasure gives me a nice clean edge flow all the way around that's consistent. That will serve me very, very well. So I'm just sort of kind of just drawing out my mouse. And I'm not even using my Wacom tablet on any of this. So don't to think. All I'm doing is holding control and dragging something out. Remember, hold Control and Alt to erase or subtract away something from a mask. And you got to remember that what we want is we want a clean, clean, consistent edge flow that stretches all the way around. So what that means is here let me show you. I'm just going to hit Control WC can see we don't see how we have little missing gaps here or all the way here. We want to fix that. We want to make it so it's one straight, clean gap. So let's just go ahead, make sure the lines are kind of working. Do it's a little bit jumbled here. Little bit jumbled there. Let's just go ahead and hit Control W. Looks clean except right here. So let's just go ahead and molding control all to minus that off. So we have a nice clean little real estate that we can use. We can break now it's hard to see with that. So let's choose a different color so we can see a little bit easier that way. So now that we got that, let's just go back into our reference here and take a look at all the things that we need. Now for here. I didn't thinking what I'd like to do is I would like to go ahead and take it up a subdivision and work on making these little spots that you see around here. So let's just go ahead and hit Control D. Now, we're going to work with z modeller now. So if we hit b, z, m, and if we do Z modeler, that will bring our brush up. But you'll see meshes composed of multiple subdivisions. That's easy. We just click off that and we just delete our lower so we can now work in here. So here's what's going to happen. We want to make a whole bunch of spots like we see here. And to work see modeler, we do this, we covered this quite a bit in another course with that involves hard surface sculpting. But for here and z Mahler, you want to kind of lower that draw size down so it's easy and it has three selection points, either a vertices, little point right here, an edge or a flat face. You want to have that brush over the face, like so. And while it's over the face, hold Spacebar. And then while holding down that spacebar, you're going to want to choose inset. Now, inset, you want to tell how you want the behavior of inset to work in set is going to work simply by poly group all, not a single poly which were just do one quad or all polygons? No, we just wanted to do poly group all. And now if we hover over that space of a polygon, the center island there, and left-click and drag and create a whole new Poly Group. Now from there, we're going to change a different function, holding that center island hold spacebar down. We're going to choose Extrude. And then again we're going to tell its behavior poly group all since this is all one poly group, all yellow here. And then we're going to just left-click hold. And we can just sort of drag that out. And once we complete that, you'll notice that again, more poly groups have been made. These are poly groups. I want this whole area is still to be one poly groups. So this is what I'm gonna do. I'm gonna go ahead and go into a standard brush. Let's see. So I can get access a little bit more to my isolate select. I'm going to isolate select something right here. By Control Shift mark key drag, bring it back. And while it's subtracted, I'm going to hold shift and control and left-click to subtract that. I'm going to subtract that. And then I'm going to subtract this and this and this. And I'm doing this all so it's just mesh here that I have. Now the next thing I want to do is I'm going to hold control over. And I'm just going to make this a single poly groups like you see. So now when I isolate select, it's like this. I'm doing this mainly so that I can make my read topologies rising a little bit easier when we go into 0 measure. Because obviously these small details aren't going to mean too much of anything. Now. Now that we have all that taken care of, I'm going to go ahead and give it one more subdivision. And that's just going to kind of give me a little bit more of a smoothing point. And again, like before, I'm going to delete that lower. We're gonna do more functions that require no subdivisions. Now, here's where it gets a little creepy and tricky. You may think we have everything cleanly poly grouped off here. And that's where we go into our group loops like we did in the last lesson and then go from an auto deflate function. Well, the problem about that is this. Let's go ahead and try this. And I'm going to show you an issue you'll probably run into. And that's going to be where we go into geometry. And then we're gonna go to edge loops. And then we're going to go in. I'm going to set it to three. And now let's see what the problem is. I'm going to hit Group loops. We suddenly lose a little bit of that resolution. Now, some people might like this. Some people might be okay with this because it kinda gives that Teflon look, which is fine and everything. But if you're looking to preserve this a little bit more, because quite frankly, when you're doing your normal map bake, this might get washed out. Let's go ahead and undo this. You can go ahead and do an isolate select, invert the map, and then do a group approach like this. And you can still hold your details out. Now that is one way you can actually hold everything. Cell. So from this point on, we can just move into like we did before where we select all the poly groups and invert and then just simply make a deflate like that. So that would be this piece right here. And go ahead and this piece right here, go through, go ahead. This piece right here, go through, go ahead. And then our two bottom pieces, back piece. And we're going through the word, remember when we're going through. So the only thing that is not masked is the edge loops, or I should say the group loops. And then from here, we'll go ahead and just soften it out. Maybe I'm just holding Control left-click and doing once off. And we can just see how that looks in deformation. Like so. Alright. So now we're getting a little bit closer to what we want. Let's go ahead and finish up that last piece that we see, which is around here. That's this piece right here. Now, there are several approaches we can take. We can do an additional process similar to how we made our group loops here. We can, for example, just go ahead and do a whole bunch of masks that we might want to use. We can do something like that, but I'm thinking of doing something a little bit easier and simple and little bit quicker. It's nothing too complicated and that's where we go into our light. Box, IT brush and check into our slash and get our slash two or I'm sorry, slash one. Now let's bring everything back. And the only thing I want is I just wanna kinda mask over this, bring this guy in, do a couple of feathers, feathers off the mask a little bit, so it kinda goes inward a bit. And then invert the mask. I'll hold L and I'll put a small focal shift. And from here you just take a couple of practice strokes on your diameter, how far you want, and then see how it fits when you do combine it out with an inflate. Like so. Now, something like that. Another thing you can do is if you're finding yourself needing, is, is that you can, if it gets too pixelated because we are working with inflate unfortunately. Is is that we can if you don't have any divisions are subdivisions here, we can go ahead and just select this area here to have more subdivisions by putting a mask over it, inverting the mask in hitting Command D. And then you'll get an extra layer for subdivision or extra resolution division just for this unmasked area that you see here. So just keep that in mind. So let's see if we can go ahead and now and finish this off with our slash brush. And I don't think I really didn't much on my practice stroke. So remember, it's a small focal point. And then you can just sort of Holt's a hold Shift to smooth it out and then go into inflate and then played it a little bit. And then smooth it back down to relax it. And if you need more subdivisions in that area, That's just a small area, you can always do that. So that's kind of, so what I want you to do then is go ahead and sort of repeat what I just did all the way around and across here, like so. And then from there, we will have completed our area that we see here. I'm gonna go ahead and do some adjustments now that I have what I need right here with move, I'm going to go ahead and finish out the other side. I already did a couple of demonstrations, but I'm gonna go ahead and finish out the other side. So I'm going to make these two areas than just simply connect and we'll cover some upper right there. And then our last two areas are going to be the sash that you see here and the shoulder pads and a little bit of an ornament that we can use to recover up and perhaps even over here for modular use. So with that said, sick around, say two.
42. Creating Base Mesh Shoulder: Hey, and welcome back. In this lesson we're going to continue on making the base mesh of our shoulder piece here and get started with that. It's going to be a good opportunity also for us to be working with making Booleans for the first time. Because the next lesson beyond that's also going to be working with Booleans itself. So it's going to require a little bit more understanding of combining Booleans with radial symmetry. So this, think of this lesson as a little bit of a crash course on how to get it into booleans if it's your first time ever. So let's just go ahead and begin, as you can see, just to recap where everyone's in the same place. I finished off this little area here That's again with slash one and inflate. And then a court to smush them together and then just relaxing them with smooth. So as he can also see from over here, there's a little more real estate to see the shoulder pads. So I may just go ahead and do some adjustments with that. Kinda just give us a little bit of a look so we can see where we have there. So like for their ado, let's just get started with how we're going to work this. Now, what booleans are, are a procedural technique that are primitives or meshes being used to their shape to subtract away from other pieces of meshes. So to give you the best example, I'll start off with the base mesh of what I'm going to use to sculpt in my shoulder piece. And that base mesh is going to be a sub tool. So first thing I'll do is open up my sub tool palette. I'll go to append right here and then click in a cylinder, I'm going to hit F key twice. And then just select my sub tool for my cylinder. And I'm going to hit E for rotate and hold Shift down to snap it horizontally. And I'm just going to place this simply across the line right here. And I'm just getting it roughly to the spot that I want it to be. So now that I have that where I want it to be roughly, I'm going to go through and I'm going to disable the visibility of everything here, I would go into solo mode. But unfortunately, since we're working with Booleans, I need more than once and will be available and visible for me to use. So let's just go ahead and turn those off. So now we're just in this. So before we begin on doing a Boolean demonstration, let's get it prepped and ready. I'm going to give it a couple of subdivisions, 123. And then I'm going to use trim curve and not clip curb to clean it up some more. We're using trim curve because clip curb creates some non manifold edging geometry that will create errors in our Boolean mesh. So of course, when we're using trim curves, we need to go ahead and delete the lower. And now let's just hold Shift Control and select our rectangle and go to trim curve. And I'm just going to make a clean cut on both ends to get rid of this belongingness here. So one there and one there. And if I hold Shift F down and she kinda look like that, press R to make that a little longer now. So let's open that sub tool tab and let's hit Duplicate. So we should have two of these now. So to finish off this piece, we're going to explain a couple of things. This top cylinder here is going to be our main shoulder piece. This bottom sub tool here of the cylinder is going to be our Boolean piece that's sculpts this top piece right here. So to do that, first thing I'm gonna do is I'm going to, is going to be a shoulder piece. It's not going to wrap all the way around the shoulder. It's just going to be halfway. Let's just go ahead and do a horizontal cut right here. So Shift control and left-click drag to make a straight line like that. Then finally, we're ready to use a Boolean to sculpt out our piece. I'm going to drag this Boolean down below. And now the one thing you want to remember about Boolean says is that whenever they subtractive way, it's always going to be depending on what the order of the sub tool is. So if it's a sub tool that is below this sub tool, it will affect it. But if this Boolean is above the sub tool, it will not affect this, it will only affect everything that is above it. So you might want to keep that in mind. So to turn this into a Boolean, we gotta do two things. We gotta go to render on the top. We got to go to Render Booleans. We gotta hit live. And then after that, we are in Live Boolean mode. We still, nothing has happened yet because we still haven't done anything. So what we need to do next, this turned convert this particular sub tool of this particular mesh into a Boolean. And remember by doing so, only this piece becomes buoyant. So to do that, That's where these, we'd go to this little circle here. There's an icon of a shaded circle and a light circle. We just click on that. And if you have wireframe on, you should see a turn into a ghost mesh. Else, if not, it should just simply disappear. If wireframe mode is off, it's still there, it's just now turned invisible. That should tell you it's in Boolean mode. So if I move this up or turn wireframe off, you can see how it's meshes now subtracting away from the hair. So that's sort of the crash course. So the owl that we got that all straightened out, Let's just go ahead and sculpt sort of a evenly spaced piece of geometry. Try to get as, even as you can make it here. And maybe a little just simply trying to make the most even shape as possible. Now that you have that, the only thing that's left to do is to take, select this sub tool that is being sculpted by the Boolean. And that's the top piece here. And you're going to want to now turn it into a mesh because right now you're only getting a dynamic projection preview of what's been happening here. So we need to actually convert this mesh into a piece for a Boolean. So to do that, let's go to sub tool Boolean. And we're going to hit make Boolean mesh. And when that happens, you should have an extra tool suddenly pop up here from your other sub tools. So let's click there. And you can see we have our new mesh. Now it's not. Now a couple of things will happen. First off, if you hit the W key, you'll notice your Gizmo doesn't pop up. That's because it's in the zero-zero point is space in ZBrush. So let's go ahead and hit on this upper right, this top head corner, and hit F to frame the mesh. And then I'm going to hit left all to pan over and look for my gizmo manipulator. So hit that upside-down teardrop to center it onto the mesh and it should be right there. So from this point on, what I'm going to do is, is that I'm looking at what I see and I want to have a clean topology because as you look here, there's a little bit of a sheen of a strip that's shown right here. And I wanted things that one of the things I did was I isolate, selected this mask. And what I wanted to do was invert the mask and kind of just bring it out and just create this cool little sheen, kinda like that. But if you do it like that, you kinda get some wonky was weird looking results that just, they don't really fit very well. So what we're gonna do is similar to what we did in the base mashes when we created our base meshes, we're just going to do some crease poly groups and then just remeshing using 0 measure to detect those poly groups increases. So let's go ahead and do that. Now. We're gonna go to Geometry. We're gonna go to crease, creases, poly groups. So that's create because there's a poly group here, here, here, everywhere. And then we're going to, after we did that, we're going to go to 0 measure, keep creases, detect edges, keep groups room, turn all three of those on. And we're just going to rematch this piece. Now it may come in a little bit messy for some, like it did for me. There. Sometimes I just have to hit to 0 measure twice to get something that's a little bit cleaner. So that's going to work for me just fine. So now when I tried to isolate, select this polygon row by holding Shift Control, dragging a mask over it, and then inverting the mask. I can kind of create a little bit more of an easier stead look as we see. So now what I want to do from this point on is I'm probably just going to make a couple of adjustments. Something like that. Maybe. Yeah, it works for me. I'm I'm okay with that. I'm not going to be too picky. I'm not going to go too crazy with it. So one of the things I'm gonna do is I'm going to try to create a poly group for this stripped area and a poly group for this stripped area. And there's a whole bunch of different ways you can do that. You can do a through Z modeler or you can just do it by masking some areas off and just creating new poly groups in that area. And for me, that might be the simplest way. Because what I wanna do is I want to create a new area here to put cream. Over so that when I divide, I hold this edge line to be clear. Because if we divide it like right now, you notice it's going to smooth out. I want to keep that there. I want to keep that line. So to do that, let's just go ahead. And I could use clip curves, but I think also it's going to help me in the long run when I do reach apologizing to have that edge flow there. So I isolate selected poly group and just went on ahead and masked it off and dragged a mask and hit Control W for that area. This area we're gonna do the same. Whoops. Get it into frame view. So it's like this. And I'm just going to mark key select and drag a mask. I'm going to choose this area right here, same thing over here. And I'm not entirely wild about this area. I might just play it safe and still make something there. But truth be told, I'm thinking I might just use the Boolean to cut that all off and make it clean again. And we'll see where it goes. We'll see. So let's go ahead and try to do now another 0 or I'm sorry, not a 0 measure, but a crease poly group to the new poly groups that we have and then go through 0 measurement can sure all three are there and see if we can get something. And we have something that's a little bit more clean. Like I said, I am not too crazy wild about it, but I'm not sure if I want to mess with it right now. But for now, I may just go ahead and use a Boolean to cut off that area so it's flat. I could try a trim curve. But if you try and trim curve, you're going to notice that we create some wonky non manifold edging and some collapsing. I try to click curve but you might create some non-medical legend. I don't want any of that when we do a remeshing. So let's just go ahead and use a Boolean us to kind of cut that area off. So I'll append and I'll choose a cube. And I'll choose cube. To bring up there. I'm going to give it a couple of subdivisions. And then I'm just going to delete those substitutions because I think we might get an issue who turn into a Boolean mode like that. So then just turn it and we don't need to return in or others. But that's about all we need to do right there. So now we just go back to our selected piece, which is up here at the top. And then we do a second iteration of our Boolean. And then we go all the way up here. This has two sub tools. This is our main tool. This is our newest Boolean mesh. Now, it can be done right here. This is pretty much all that's needed. If you want, you can once again go through the whole process of, you know, crease poly groups and then z remeshing all of this just so you can get something that's clean over here. That's not a problem. That's pretty easy as well. May need to do it twice because of this. I don't know. But that's kind of the basic premise idea of what we all want. This is how we sculpted all of this pretty much through a Boolean. And this is sort of a breakdown crash course of it. So now what we're going to do is, is because all of these areas have been creased. Like you see here. If you put a div, if you divide it a couple of times, you'll notice that the collapsing didn't happen. That's because we put a poly group here and we creased along there so that holding edges would keep that Xin there. So from here, after doing a couple of divisions, I'm going to delete the lower because I'd like to go ahead and do a quick deformation on it. But of course, when you bring your Gizmo up, you gotta remember you made a new boolean so the gizmo manipulator reset to 0 to 0. So let's just go ahead and bring that back. Now. Bring that into Center where he is. And now let's just have a little fun experimenting. Now I'm going up to my gizmo. I'm choosing my transform type, I'm choosing bend arc, and you'll get this little layout. Now the main area that you want to focus in on are the green triangles. Now, bend arc is basically like imagine a line. It's just creating an arc out of the mesh. And the green cones are the main areas for now. We'll just have you worry about them. And if you see right here, we can kinda, kinda just create a little bit of a bend right here. Maybe you might. I don't know. I, I, I'm gonna, i've, I've done this quite a bit. I can create all sorts of shapes for me. I might cry, create a more shallow shape for myself. But, you know, you can really come up with some interesting looks here. You really, really can. And this is back to what we're saying about experiment, experiment, and go beyond my concepts. And now go beyond everything I do to just have some fun with it now. So I'll just go ahead and stop with that and hit Accept. I'll try one more like Taber. And Taber just sort of pinches things at whatever ended is. For example, if it's at this Android here, we'll see a sort of a taper. Maybe if it's at this end and we'll see another taper. So you can kinda already see the possibilities that can extend and go. And if you hit Accept again, we have a new shape. And now you might even come to the conclusion. Well, now that we have this new shape net, what would bend arc look like a, again. With this new look, maybe we want to try one more time, or maybe it doesn't work the way we won. And we want to use something else like say Move tool. You can do that. Or maybe you want to try trim curve to cut off some interesting areas. You know, you can do that. Again, this is your mesh, this is your concept. You can do whatever you want to do. It's not a big deal. There is pretty much no such thing as the wrong mesh here. So let's go ahead and append this now into our main tool set so we can keep going. So we have our bottom two Booleans here. Let's just go ahead and delete those off. We don't need them anymore. And I'm just going to hit append. And I'm going to choose that as our main piece and for, so we can place it in the right context. Let's just go ahead and turn on, turn back on everything so that we can see it really relation to everything else. And that also, especially probably most definitely the color. Because you might think to yourself, hey, this is too small. And it is a little bit too small, but that's okay. We can just do some about that right now. You can do whole bunch of things on it and continue to rework the arc. Maybe we want to do a sum like that. Maybe you can do, you know, it's just no such thing as the right tool. No such thing as a wrong move on these. So let's just go ahead and just have fun. Now the last part about this is you're probably going to want to know what we do with the to create this little lip here. And that's a little bit of a fun tidbit. That's just sort of my fun little signature thing I like to do. I like to work with the plainer cut thin brush for that. So that's going to be lightbox and choosing your brush. And then from there we go to planar and then we go to plainer cut thin down here. And I'll just, you know, it's whatever you want to make it pretty much it's yours to do. Planar cut is a fun one to work with, but you gotta really remember to make sure that you've got a good amount of resolution for it. Okay. So I would say that that's sort of it. It basically, the reason I like it so much is because you get different patterns based on Draw size and position of where you draw from. And each time you do it, you are kinda course correcting for it to be something different. So hey, maybe you want some bigger, okay, start in that same spot and do a bigger drawn and then go from there. Now or hey, maybe you want to see what it looks like from the backend. And I like that Also. There's in, or hey, maybe you want to start from here and you want to create something like that. Yeah, you can do that as well. So that's sort of what we did there. So I'm probably going to finagle a little bit more and find the piece that I like most. But once you're done, you may find a little bit of a problem here. Now, what I will do, what I'll tell you my approach to doing is probably after finish doing this, I like to go ahead and do a little more Boolean to kind of make a clean area mesh here. That's just so when I read topology guys, I can have some a little bit cleaner that reads easier. But you can do whatever you want if you're not using 0 measure as your main tool. So kinda work with that and see where it is. And what I'm going to do is work a little bit further into the Deformation tab. Maybe go back to the original one that I see here and work on trying to get a smoother surface out of it. Maybe tried to have some. But like I said, the one thing I want you to do is please have fun with this, okay? This is probably going to be like one of those things where you just got to have lunch, just simply experimenting with what you're doing and how you're getting there like that right there is already fun, fine for me. Because what we do next is after we get to where we want it to be, we go through a process of using Booleans to create the nodules that are in the center. And then see and use booleans Carbon to these areas that you see fit. So when we do this, we're going to pick up is, we're going to go into a more advanced version of, of of making these little circular nodules right here and how to cut into these holes. And from there, we're going to go ahead and move into the sash. So stick around and stay tuned.
43. Creating Nodules: Hey, and welcome back. In this lesson, we're going to keep moving forward now and work on the little pegs that you would see that are attached to the shoulder pieces that you see right here in case you're wondering if it looks a little bit different from what we had in the last lesson. That's because I did a little finagle in with a little further funneling to adjustments to make the shoulder piece different. Let's give you a good example. What I mean here. For example, one of the things I did was I made this rap a little bit further down by just hitting out the first-off, pressing the W key, bringing up my gizmo to former and working with Ben dark. Just kinda taking it from off to the side and just kind of making it wrap a little bit further down here so that it would kinda come down a little bit more and also a little bit further down here as well, just so we can have some different looks. So that's just an example of once again, just playing with it to get a shape you want. Now, moving forward after that, we're going to take it to the next step by trying to put these little pegs here. So what we're gonna do is I'm going to go ahead and click on a different tool here and just said any tool you want, it can be just like the basic cylinder 3D tool. And I may even just start with that. What I'm going to do is just start to make these pieces that you see right here. And what this is right here that you're looking at. It's just sort of like a fill in a gap closer piece that is basically the same as these top pieces here. So we're going to show you how to make that. So to start off, I'm going to start with the cylinder part of this. I'm going to give this a couple of subdivisions. I'm sorry. I'm going to back out of that and undo. I'm just going to first make this into a poly mesh and then I'm just going to divide this up a little bit more and give myself something like that. Can go ahead if I want to and just hit geometry, delete doubt the subdivisions. I'm gonna go to trim curve now. And I'm going to just sort of two like I did at the last lesson and just cut those pieces off. So we have some nice and clean like that. Now, moving forward from here, we can do a couple of things. You can, if you want, you can give it some edge loops. We're just going to make a couple of simple extrusions here where we can either do a invert of this mask and then just maybe scale it out. Just something simple as that. It doesn't have to be too crazy. It's not going to be the most distracting thing ever. It's just can be something very easy and very simple. We can do that a couple of times. Maybe just soften the mask and then re Harden. Soften, harden. So that's just holding Control down to soften and feather off the mask, Control Alt and left-click to rehired and the mask so that we have something there. And then invert that mask. And then you just go ahead and maybe just do something once again. Like so just just enough to kind of register something that is a little bit of a hard surface. You know, often too crazy. Because this is going to look, this, you're going to be seeing this from a very far away distance. Maybe I'll go ahead and make that part of it's like so I'm not going to really be doing any sculpting, so that's okay. So that's going to be the first part of this. Now, let's go ahead and move on to the second part of creating this piece. And that's going to be where we go into sub tool. We're going to hit append and we're going to bring in a sphere, like you see here. And that sphere will go ahead and move to be just above there. And I might even kind of shrink it down in my, through my gizmo scale on the y-axis. Just so I can have something like that. I'm going to turn on now transparency so I can do a trim curve or cut across there, maybe even divide it a couple of times. So we have some smooth and null delete the lower end. We'll just go ahead and Control Shift, trim, curb cut that. Like so. So it's going pretty good, no problems yet. So the next part of this is, is we're going to do a couple of procedures to get this. First you see like a little circular line, and this is also shown in your 3D references. You see like a little bit of a circular area here. Let's work on making that first. And what I did was this is a great opportunity to show you some group loops and how we can make them go through. So if I were to take a mask inverted around, sometimes you can get a pretty nice and clean cut like that. And already that can work pretty fine. I'm I'm okay with that. But if you ever find yourselves where it's a little bit jaggedy, feel free to go through edge geometry, edge loops and put some group loops in the mask area that you chose so that you can get that nice little clean sheen, uh, going on there. We don't really need to in this particular case, but just thought we'd go ahead and do a demonstration of that. So it's a it looks like it's a protruding just a little bit more out. So let's just go ahead and once again, feel free to experiment. Just have some fun with it. Like so. And if you feel it's a little too pronounced and hard and you can always shrink it down, although probably say maybe shrink that down. You can always do that. Just to get something nice and claim, you know, if we did a BPR render, you could always see something nice and clear out of all of that. So let's just do it just one more time in this very center piece. It's not, it's a little bit subtle in the shallow, but we can just do it one more time. And so we'll just go through here. And then invert the mask by Control. Left-click into empty space, hit the gizmo key with the W ER to bring it up. And then just kinda scale. And like so. So we're already there, we're already halfway through all this so or Get in there. So now the next part of this is making all of these areas that you see fit. Now, this is all done through radial symmetry. And so what I'll first do is I'll go up to sub tool. I'll go ahead and hit turn off my top cylinder. And then from here I'm going to hit the B key. And then I'm going to look for an insert primitive brush. Now let's just hit the eye. We can make that easier for us to locate all our insert brushes. And from here you'll see Insert Multi Mesh Primitives and insert multi mesh primitives H. You want this one or it says T. Now, from here, let's just go ahead and choose a insert cube, not a Q Qb, but just regular insert cube. So if I drag this across here, like so, you'll see it come out like this. I'm going to go ahead and turn down off transparency so I don't get any weird wonky penis. So it's just one piece right now. So let's go ahead and go up to making this radial symmetry. Because what's going to happen is, is that these pieces, they're going to function like our Booleans and we're going to separate them off. And we'll show you what that means here in a sec. So the first thing we're gonna do is we're going to go in and go to stroke. I'm sorry, did I say stroke? I meant to say Transform. And we're going to hit Activate cemetery. And right below this x, we're going to hit that are key for radial symmetry. And you'll notice it doesn't line up like that. That's because we have to change its access. And I believe that it is on the y-axis that we want to go through. So now when we drag it out, we're going to have something like that. So from here, you can just drag something out it don't worry about the width, size or anything like that. What we'll do is because this is all masked and this is unmasked. We'll go through our sub tool and we'll go ahead and hit split unmasked. From here. One thing you want to keep in mind is is that you don't want to ever change out the center pivot point here. Because right now you can edit these individually as long as radial symmetry is turned on. So don't hit X or do anything like center the pivot point. Because if you do that, you're not really going to be able to do much, but if you keep it so that it's like this and don't center the pivot point. You can then go through, I think what I did was you can then go through and edit it. But one thing I forgot to say is over here. Local cemetery, very, very important for all this to work. Make sure that's on because now we can edit individually all these insert pieces. So Let's just go ahead and do that now. And let's go ahead and just have some fun with a pattern. So let's start off by getting ourselves into Boolean mode if you haven't already. So we're going to do render, render Boolean and Live Boolean. And we're, we say it over and over again. This is where we go into exploring shapes. And now you can go ahead and do it many times as you want. Or you can duplicate the sub tool as many times as you want. And you can make some fun stuff out of this. We'll do it like that maybe. And if you hold down Control, I'm going to hit Shift F, C. You can see it. You can see our Booleans. If we hold down control, we can duplicate this while holding the same mesh. And this will become mast out. And we can continue to put something in here. Maybe we want to put something like this. Maybe we want to make it so that it's smaller, we can do that. So again, this is now you notice that I am doing a demonstration with the cube, so feel free to experiment and make your own pattern. That is, again, what this is all about, making your own pattern right now I'm just gonna go ahead and just make this as my pattern. I'm not gonna go too crazy. So what I'll do next now is just to keep this on here. So it's all one piece I'm going to go through and I'm just going to simply left-click on here. I'm turned this on. So when I do a make Boolean mesh will include this piece as well. I think. I think I may just go ahead and just keep it like that for now. I'm just gonna go ahead and just simply hit Boolean and make Boolean mesh. That's all I'm gonna do. So now we have constructed our piece and you can kinda see how it is and we don't need to do anything more here. This is all we need right here we got our nice little hard surface piece. We do a quick BPR render. We got something that's just nice and clean for us to work with. So now what we're gonna do next, this is we're going to try and attach this like we do in our reference, all across our pieces, like you see right here. So Let's go on to bringing our main tool back. And I'm going to disable every thing on visibility again. So you just have to worry about scene. Just the shoulder pad, like so. And then let's go ahead and hit Append. Bring that in there. It's a little bit big, so we're going to go ahead and scale that off. And again, this placement this this is placement of your discretion. So don't feel like you need to do this microscopically to the Mesh. Don't get tunnel vision. Like I always say, don't ever find yourself getting into a place of tunnel vision with your concept. Go beyond the concept and have some fun. I'm going to probably just shrink this down. I may even bring it in a little bit like that. Just all I'm doing is working with the gizmo to get a good spot to bring all of these into. Maybe I'll do one right here and then just simply rotate it around just for this area. You can do that and that's not a problem. And I'm holding control again while pressing the translate to duplicate that it's still staying all in one mesh. And what I'm gonna do now is just simply go through. And I'm going to be placing these in areas that are strategic throughout. So I'm just gonna do right now three, there's more in the concept and you're going to be practicing with it. But we'll just for now, we'll just go ahead and do a three. And I'll just go ahead and and I may put more later on, but like the strips on the color that we did, I'll do a couple of examples and then you're going to be tasked with finishing it off. So let's just go ahead and bring that in. We're going to show you again then how to bring this all in and turn these gap pieces into booleans afterward, done so that we're not left with this unnatural intersection. Look. So like, for example, what I have here is a sub tool that is here that has three of these meshes. What I'm going to do now is I'm going to duplicate those meshes. And this is again why turned everything of visibly off. Because now I'm going to turn off the top layer of this duplicate and turn this piece into some Booleans that will cut in. Now, as you can see, what we need to do is we need to first of all, take this top piece. If you move it around, you're not going to be able to see it because it's the occupying the exact same spot and therefore covering up this top area. So let's just drag this below the Boolean area here. And you should be able to see it just fine. But of course, it's not really showing much of the mass. So this is what we gotta do. We gotta go through our Boolean and we're going to go ahead and drag a mask over there. And we're going to hold on. So let me go ahead and make sure I am on these. We're going to invert that mask hits center. Whoops. Wanna make sure I'm getting everything on here. We're going to invert that mask. We're going to turn everything on. And we're going to just scale it to be a little bit bigger like that. So let's just try to do that again. We're gonna go into solo mode. And now we're just going to select this piece right here. And then invert the mask and then center it. So it goes over here. I'm going to bring everything back out and solo. And then once again, just kind of make it so it's kinda cut in into these areas that you see here without any hassle. So we'll do it one more time. I'll go into solo. And when you go into solo, you're seeing, you're going to see your Boolean in solo mode. It's kinda weird, I know all these worlds to remember, but once you get the hang of it and do it enough times it won't, it will become a lot easier. So that's sort of the idea with creating that. I did three examples right here. If you can try to do more or if you want, try to do different variations of it.
44. Detailing Sash Trim: Hey, and welcome back. In this lesson, we're going to continue where we last left off, where we last left off, we were working on these little pegs that are attached to the shoulder piece here. And if you remember, I did do one example and then I showed you how to do a Boolean that would wrap around it. So hopefully you repeated that example throughout all of these shoulder pieces and then after you're done, you should have turned off the entire jacket so it including these pieces. So it looked like a hollow, empty shoulder piece. And then you should have done a make Boolean operation for that piece and then substituted because that's exactly what I did. So if you've got through that challenge way to go pat yourself on the back, Let's move on to the sash. So for the sash, what we're going to do is if I bring up my reference here, you can kinda notice it's got a little bit of a bump that kinda goes off to the side here. And also we're going to see if we can carve out some beginning spots right here in the front of the sash that you see. So let's just go ahead and get started with that. So to begin with, I'll go ahead and switch to my base mesh sash by holding left Alt and left-click on the mesh. And then I'm just going to go ahead and hit into solo mode so we can begin. First thing I'll do is I'll make a little bit of a bigger brush and hold Shift and maybe just kinda round out this piece right here just so we can get it. So it's kind of a little bit more rounder as you can see. Just to make it a little bit more round, just kinda barely tapping it like so. And then after that, what I'll do is I'm thinking I'm going to use one. I'm going to go up one subdivision that's about the level of density right now. So I'm just gonna go ahead and give it one more subdivision in that I'm going to delete that lower division. That's only because group loops are going to be our next step and we don't want to have any unnecessary pop-ups where it says delete subdivisions. So we just want to get ahead of that. Since I did collapse the sin, we may go. I'll, I'll cover it a little bit later. The next step I'm going to do, I'm going to increase all since crease was originally applied on there. And I'm going to tell myself, what is it I want on here? How many poly groups, who I want? Well, essentially right now, we want to poly groups. So this flat little plane here and this flat little pain that we want to see as one poly group and the entire edges that run all the way across and around here. We want to see that as another poly group, just one single poly group. So that when we do some deformation choices, it will not create any divisions that occur between these crevices. So let's just go ahead and hold Shift Control and isolate this poly group, drag a mask over it, and then bring everything back with Shift Control into empty space. Let's try one more time. Shift Control on to that Poly Group. Drag a mask holding Control, marquee select, and then bring it all back. And then I'm just going to hit Control W to make that one area a mask, a way single poly groups. So now if I hit Shift Control again, it will take both of these. Now all that's left is just simply to hold Shift Control and marquee select out and invert the selection is you see here. And now I'm just going to hold control over all these multiple different poly groups and make them one like so. So if you have to feel free to pause the video at this point to do the same or you can just keep going along in watching this video. So now the next thing I'm going to do is I'm going to try and experiment with a couple of things. First, soften when a tag in a couple of group loops onto here, which are going to be under Geometry, Edge Loop. And then you should see group loops right there. I'm going to choose three loops for my choice. And now all I'm going to do from here is after you put the group loops on there, I'm going to go ahead and do one more shift control. And thinking what all go with is I'm just going to draw a mask over their bring everything back with Shift Control again. And let's see here. I'm probably just going to experiment with something here just to see what it looks like. I just messed everything. Only thing unmasks are the edges and the group loops that are running alongside there. Those are the only things. So let's just go ahead and try to go through deformation. And I'll go ahead and do an inflate just to see what that looks like. That's not so bad, that's about what we're kind of going for. So I'll just after that, I'll just go ahead and very lightly, just kinda I'm just kind of tapping the Shift button. So I can get some just barely just kinda barely tapping it. So we can get some like that. So that gives us a little bit of an edge border so that we're already halfway to through what we wanna do in this lesson. So now let's go ahead and switch to our move tool by holding down our pop-up menu in that move brush. And let's take off solo mode. And let's just do some funneling and, and working around. You can already see how this is kinda defining itself out as a pattern for us. Like you see here. And if you haven't by now, this would be an excellent time for you to hit quit. Say. I always like to do that myself, but but I keep always having unexpected places. Just doing a little bit of a quick smooth here and maybe just kinda, alright, let's get back on to our place now. So the next thing that we're going to do is we're going to go back into solo mode now that everything's still there. I may, I, I have plenty of options. I may try to kind of bring this in a little bit, maybe distort it. So it just kinda, just so it looks a little bit, you know, wha be like so. And let's bring up solo mode. And now this is one poly group. Let's just go ahead and just hold Shift Control to bring this back out. And now what I'm going to want to do, I'm probably going to affect this area here. So that's going to be probably a little bit unavoidable. But I'm not going to worry about it just yet. I'm going to look at my reference and I'm going to say, okay, what needs to change? I see a line that kinda goes here. That's part of a strip line. I'm just going to carve out right here, similar to what we've already done. So it's sort of like this pattern that kinda does a diagonal slant and then kinda goes all the way through as a second diagonal slam like that. So to do that, who probably I think what I'll do is I'll give myself one more subdivision. So I'll just go ahead and bring everything back and just hold Command D, bringing everything in. And then I'm going to hold Control down and bring a curb and, and while holding Control, drag out your curve, release control but still hold your left click down. And remember this is where we use our space bar trick. Quite important. So to make some hard acute angles just while holding it down, double-tap left Alt. And you can get a nice hard curve, delta L once more. You can get something like that. Now it does look a little bit jaggedy still the resolution is still a little bit off, so I can probably salvage another. So let's just go ahead and do it that way. So one more time. Double-tap, halt. Thanks that. And after you get your mask, just hit Command W. So it's kinda like you're saving your mask out and you can bring it back anytime you want. So let's just go ahead and bring everything back. And we should have this now. So let's just hold Shift Control. And now we have this piece. You did get the back piece, but don't worry about that. We're not going to really worry about it. We're not going to even see it when the reach apologize and goes through. So we've got some jaggedness that we see here, some anti-aliasing looks That's because of that resolution. So let's go ahead and smooth that out with some edge loops. And we may even do a little bit of adjustments here. Now, one thing to note, when we go through geometry and put some group loops on here. I'm probably going to say that your polish may smooth out and bezier these angles. And so you've gotta kinda find a right spot in the GI Polish area here. So for me I found something like 22, 23. That would work probably for all intensive purposes. It's still going to kinda smooth out a little bit, but oops, can delete that lower. But it will give me, for all intensive purposes, everything that I need. So let's go ahead and clear that Moscow. I'm going to go ahead and isolate select. And I'm going to then change this curve to drag rectangles so I can get back. And we go a little bit of a nice clean area right here. Let's invert the mask. And we can do anything we can do move brush for example. Or we can do a gizmo brush if you want as well. I can pretty much it's there's no such thing as the wrong brush as long as you're just placing it to move back. Choosing move for my choice here. And I'm using left Alt while left dragging up to get that sort of look to push three-dimensional from and towards you. That will work for me. So that's sort of where we want to go ahead and lay off on. In the next lesson, we'll work on some alphas, and that's where we're going to try to Deco out this area and this area as well as the back area here and work on how we talk to you, how we get these three streams. So with that said, Stay tuned.
45. Sculpting Sash Straps and Strips: Okay, and welcome back. In this lesson, we're going to begin to finish off our sash detail. I'll bring up some of my reference here. We want to go ahead and sculpt out some of the details that you see here. And as we go along, we'd like to see if we can just finish off along here now and maybe carve out a little piece here of a stripped using an Alpha stitch pattern, which we haven't really covered, but thought this would be a good opportunity to get your hands a little dirty with alphas and so that it can kind of bleed into the subsequent upcoming sessions. But first off, if we take a look over here into our reference, you will see, and I'll just use this piece right here. You will see that there's a little bit of a piece right here that we have to put in there. And there's a little bit of a stitch piece, but this that you see going right here, that's going to be a separate piece we make off to the side. Nothing too special. Same with that. It's just the same piece as this piece, but just scaled differently to seem and appear differently. And as for this little circle part right here, essentially that's just what this piece is reduplicated all the way down here just to add some modularity so we can kind of circle back to that. But for now, let's go ahead and carve out all the separate pieces that we're going to be appending on to the sash, starting with this strip piece that you see both here, here and here, and this three strip piece right here. So let's just get started with that. So I'll go ahead and click on a separate tool out and just go ahead and draw in a piece. Whether it's a, it's a cylinder right here. And then I'm going to go ahead and make a poly mesh 3D out of this. And I'm just going to go ahead and get started right then and there. Now I don't really need this. I just needed something arbitrarily be there so I can begin a canvas. I can change this into a cube. So I'll just go ahead and do that. Now for this cube, I'm not going to do any sculpting on here, and I'm not gonna do any sculpting on here. So I'm going to get myself into a frame set where this is horizontal like so, like you see. And if you need any reference, you use the head right there. And all we're going to do is we're just going to drag this guy out. Like so it's nothing really too crazy. And then maybe a 0 mesh this and to give us some guides to hold the corners, what we can do is add some poly groups to that. And just by going down here where it says poly groups and hit Group By normals and will have a normal on each side. Now let's just go ahead and go to geometry. And we're going to go to 0 measure. And oh, before I forget, let's go ahead and make sure we have creased poly groups turned on, then go to 0 measure, and then keep creases, detect edges, and keep poly groups. Now we can get something even here, like so. Pretty easy, not a big deal. Now, it's not really a secret war we're doing here. We can just simply drag a mask on here, like so. Make sure it's equally distributed on the sides. And it's pretty much inverting the mask and bring it in and a little bit there. And that's all we need. We don't need to do anything more beyond that. We can stretch this to different lengths. It's not a big deal. We're not going to be doing any sculpting on this. That piece is pretty much complete. So I'm just going to go ahead and turn that off for now. And we're gonna go back into our cylinder and turn that back on. And this time, very similar to how we did it before. We're going to just keep ourselves. We're going to do something very similar where we just hit the odd gizmo key or the Alt key and just do a real stretch right here. And let's see if we can do a 0 mesh to get some subdivisions back here. And we can do that one of several ways. We can go through the poly group. I don't know how it's going to handle a cylinder. So let's just hit it and see. So like we got what we wanted. Okay, Let's go fine by me. Now that we have where we want it, let's go to Geometry, crease poly groups. And then let's clean this piece up and give it. Divisions with keep crease, keep groups detect edges. So we have something that's a little bit more flexible. So now that we have that, let's just go ahead. It doesn't really matter what's on the end here. We're going to be chopping off both ends. But one thing you can do if you wanted to try and save, you can just kinda cut it to the side. It's not going to really make much of a difference in the long run. But what, what is important is he hit the W key and then hold down control while holding control, toggle the translate button to do a duplication. Like so. So you can kinda get something like that. So now if we divide this, you should get a strip kind of like that. And that kinda is the premise to this. You can then re-center this back in and maybe add a little bit of a little, little scrunch if you want. There's no wrong way to do this, but that's just kind of how we arrived at our piece, like you see here. So I'm just going to now append all these pieces n. And then we're just going to continue through the process of finishing our sash here. So let's just go ahead and get back in here. And it's a little bit different size. Don't let that discourage you. Just bring it in, hit append. And then scroll all the way down. And we're going to have a long list and our sub tools to clean up and that's going to be coming in subsequent lessons. But for now, let's just bring this all in here and get things squared away. So we're just kind of sizing this up, sort of speak. As long as you haven't reset anything, you should be just fine. If you need to give it a couple of subdivisions to compensate for stretching out, that's fine too. And you can kinda just scrunch that and bring that across and kind of line it up right directly in front like that. Don't worry about any of this. We'll figure that out later. But for now, Let's just go ahead and see if we can. What we're going to plan on doing is we're going to do a project matchmaker upon this. So for matchmaker, you hit B and then the M key, and you'll see matchmaker there and that's M again. And you can just simply draw it out and as you'll see, it will conform into the size that's there. It's going to count scrunching across another piece, but that's fine as well. We just want to make sure that whatever we make kind of conforms and fits fairly on there. And you know, matchmakers and gonna give you perfect results. It's just going to give you a good start. And that's important to remember. What you've finish off with is the Move tool in the process. And then from here we clean everything else up. Go ahead and look at the profile here. Ideally, you want to scrunch the sun. And now, now we have everything that we want. Let's go ahead and go into transparency mode and start cleaning everything up with a trim curve. So Control Shift, hold down your selection rectangle and then go trim curve. Then from here, let's just go ahead and start cleaning these pieces up. Like so. So we have some a little bit there. And I'm just kinda tucking them in with the left all holding down. So now that we have that, the next step is to bring in the strip that goes across here and have it connecting with that sphere and these two adjacent strips as well. And then we'll finish off with the alphas and work of the. The slash as well as the Alpha work that we will put into here, which is in anything too crazy or too fancy. So let's just go ahead and just bring in our next piece. Let's just go back to our tool. Select our second piece that we have. And that's this piece right here. And now that we have it selected, Let's just go ahead and hit append and bring it in like so. Now we have a couple of them to use, so we're going to have to duplicate them. If you know how to do kick bashing, you can also put it into Kip bash tool as well. Right? So let's go ahead and take a look. Before we put anything on here. For that, Let's just give ourselves a moment here to frame or reference up and refer to our reference for Saul, Go ahead and duplicate this sub tool term, both of them off. And I'm going to go ahead and look on this. So I have a strip that's going on here. It's awfully far more narrow than here. So we're going to have to first things first kinda clean this piece up. And this one in the back here is wider and this one sort of mediocre. So let's go ahead and identify an area to put this P sat. And so far, I'm just going to choose first off to left, Alt, left-click switch to this piece and then hit W. And I'm going to wall holding Control down, duplicate this piece off, and bring this little guy down here. Maybe somewhere in this region. Skill it differently. Bring it in. Like so. So now we kind of have a little bit of a reference where we're going to put everything here. So with that said, let's go back into our first strip piece. And let's just, sorry, that's the narrow strip piece that we made here. And let's just go ahead and bring it in a little bit. See if you can make it parallel with this sculpted area, might make that a little bit wider. And again, we're going to use matchmaker to realign everything and then move brush to finish everything off. But before we can do that, we gotta make sure we have straight is, can be proponents. So it's sort of like you're moving everything around to sort of fit everything. So you might have to go back and forth with an alright. So like right around here because it really curves around here and you want to get as much surface detail as you can with matchmaker. Which means you might have to readjust that disk that we made. Let's go ahead and switch back. Let's go ahead and switch to my disk here. And I'm going to turn that off. Because when I do my matchmaker, it's going to get in the way. So let's bring in matchmaker. And let's just bring that in like so. And it's a little bit convoluted there, don't worry, Let's go back in and bring our move brush1. And we're just kind of lining everything up. Don't worry about all the stuff that's at the end. Like before. We just go ahead and we just cut that out. Like right here. Let's go ahead and turn our disk back on and we'll go ahead and switch to that and bring that up. I think I should probably keep both on now. And now. Let's switch back. And now we're just going to do like we did before. Turn transparency on, cut the piece off right about here. It's got multiple subdivisions. I forgot. So let's go ahead and and I'm not using clip curve, I'm using trim curve. Now we've got something that's been cut off there. And we got some of that's been cut off there. So that's our first little connection. Now all we need to do is make two more connections, which are right back here and to the bottom there. So it's going to be pretty simple. So again, just go in through to our original piece here and see here we got two more. So I'll go ahead and duplicate it again. And I'll turn one of them off. And I'm just going to go ahead and bring that in. Like so. Mm-hm. It's probably going to took underneath all of that. Maybe be a little bit thinner. You can wrote her back to either your 3D screen or the other screen as much as you want. And then we're going to go to the final piece right here. And we're going to bring that guy now, once we're doing all this, you may think, do we gotta read topologies all of this? And the answer is probably not. We're going to let the normal map do that, work on this and just turn this into one big high res when the time comes. So, well, this one has a little curvature. So let's go ahead and be MM, matchmaker, brush this and bring that guy. Right there we go. It's good. Tree. And I keep forgetting that. And so cut things off right about there. And so now we got that taken care of my want to give ourselves a little bit more wiggle room. But that concludes the first half. Now the second half is going to be done through a brush out, but which is pretty easy to finish off with in this lesson, all we need to do is just first of all, go to our standard brush, which is BST. And I'm going to change myself to free hand. And in your notes, you should have a Alpha, this Alpha available to you to download. And this is a fun little alpha. It's sort of the next scene that you get to have to learn. There's a whole bunch of CME Alpha brushes, but we never done any of them through an Alpha. We always did seems by hand work. So when you're doing this, the first thing we'll do is left click and just left-click on this piece right here. And we're going to continue to finish this sash off by carving in just Alpha work here and then siem work using alphas and the next lesson. So with that said, state Tim.
46. Finishing Detail of Sash: Okay, so let's begin In this lesson. We're just going to finish off the sash with a couple of alpha works here and the back of the sash and do a little bit of alpha works with some tile BL effects over here. So let's just go ahead and begin. Now if you haven't already, I mentioned in the last lesson, to download this output should be listed in your lecture here, but I'm going to make sure to put it in both the previous and this one so in case you can't miss, but it's pretty simple. If you have the standard brush selected, you just simply click on Alpha. It will probably be like this turned off, you just turn it back on, hit the Import button, find your Alpha and then loaded into here like so, and you should be ready to go. So with this, like so many other stitches or wrinkles, one the first things I'll do is I'm going to go into solo mode just so I can kinda, well, I'm sorry, I'll go backward here. Apologize. I'm going to first go into transparency mode, and now I'm going to go ahead and make a little, little circle here for me. And then maybe do a circle. It's just basically a mask I'm making and I'm using, I'm putting these masks here as reference point because when we go into solo mode, all this disappears. So gear probably just go ahead and just put something there for reference when everything disappears and solo mode, so we know where to at least go. So go ahead and do that. And then after that you're done with that. Just go into solo mode and you kinda, I don't need anything perfect, just something that tells me where everything is. So in solo mode with this selected. And now, as we have done, if you did it correctly from the previous lessons, if you hit Shift F, This should be its own poly group. So if you hit Control Shift again and we'll go ahead and isolate this off. I'm going to hit Shift F again to turn off poly frame. And I'm just going to go ahead and I'm just going to take a couple of practice swings, a practice strokes to identify this pattern here. And so I'm going to just sign a, do a strip right there. And then I'm going to say, okay, now works kind of. But what about something like that? Does that work? Yeah, that works a little bit better. Maybe I'll go ahead and just do this. And now I'm going to hit the L key. And since I will turn on lazy mouse and if I hold left-click and then shift, I can draw a line. Here. Oops, I think I had L turned on to begin with. Here we go. I can do something like that. Might actually work. Another thing we can do is as well. We can go ahead and maybe divide some of this up. If you feel that you don't have enough resolution or you don't like what you're seeing. We can always divide all of this up, so I may do something like that. And just by hitting Control D, I'll go ahead and give myself everything in extra resolution here and just draw out my site. So right. No ghost. Oops, turn off transparency. And then go back into my solo mode. And since I have lazy mouth's enabled, if I hold left down and shift just like that. And that can be what we can just simply use for that. And if I wanted to, I can do the same thing for over here. But maybe I want to try a different pattern. Maybe I want it to be a little bit bigger or pronounced. Well again, I'm going to have to do a couple of practice strokes here. And I'm probably going to try to protect myself a little bit, right, with a mask. And I think that works actually for me. So maybe if might increase the radius, draw my lit, my lazy mouse radius so I can see what that looks like. It looks kinda fine. I'm sorry. I didn't mean that. I meant the kind of as interests. It's giving me, it's segregating my Alpha out. So I'm probably going to have to just go ahead and hold off of that. Yeah, that's all right. I'll go back to what I was just trying to see if I can do some interesting things, but I'll just go ahead and draw it out. We'll do to pronounce that. Let's dial that intensity down. Try that again. Yeah, something like that. See what that looks like now. Known Dawn. Just simply bringing everything in. And now from here, probably going to puff it all up with inflate. Just the C is to kind of mush it together. And if it goes a little too foreign, if it seems a little too mushed, you can kind of just smooth it out again to separate it a little bit. And that kind of is what I'm going for right there. Now, you can go from here to a point of view in just a few wish, you can go ahead and just sort of lengthen the sash down a little bit. I'd probably go with Move tool and maybe cast a little bit of a silhouette here. Nothing too crazy, nothing too bad, But that's probably where I'd put it. So now that we have that taken care of, we can move into the last section of this, which is this area right here. And it's nothing again to insane. All it is is just sort of go in through once more. I'm going to go into solo mode. And we're just gonna go ahead and just focus in this area. Nothing too crazy. Maybe just take a look here. I just put some Alpha work here is all I really did. And there's a lot of different ways we can get our alpha's to look the way we want. First I'll hold down Control and I'll change my stroke to a curve and then hold Control down using my spacebar trick that we have in our beginning. I'll just kinda blurred out, taper it by holding Control. Left-click wants to soften it, left-click all to reform it. And then do some tracking. Yeah, something like that, nothing too crazy. And then we'll go into here. And then from here I'll just go into standard brush change rectangle and maybe just go with alpha 28 and do some modifications with that Alpha. And now nothing too insane. And I'll change the tiles down to anything from 46 to see what it looks like. Kinda do it that way. It's subtractive or additional at the softness also turned. Want to capture it on a hardened. Then maybe move that back a little bit. So it has a little bit of a frame. And that's pretty much it. So let's go ahead and bring it all back again. And now we've sort of completed our sash. Now you can add more and that's sort of the surpass your concept phase of all this. But now that we have our jacket taken care of, we can kind of now look through our reference here. And let's take a look at our character reference on what we're going to do next here. And for that, we're going to do a little bit of clean up because the next major thing that we need to do is try to focus on doing the head. But before we do the head, we're probably going to work on the feet a little bit and maybe work on some body proportions on the hands and also carve out the belt that you see here. And then once we do that, we can then proceed to the head. Of course, before we go to the head, we're also going to need to really restructure and clean up everything. If you're having problems with anything like desk, things need to be decimated down. Make sure that you have poly groups enabled else, just keep the visibility of it all turned off until we're ready for read topology. So with that said, that kind of concludes our lessons in the jacket area and we're now going to move into the miscellaneous side of perils of the shoes and the belt, and organizing our sub tools to clean things up before moving into the head. So with that said, stick around, stay tuned.
47. Adjustments and Belt Block Out: Hey, and welcome back. In this lesson, we're starting a new section here where we finished our jackets. So now we're doing a little bit of clean up here. And for that, what we mean is we're going to do clean up and create some miscellaneous props around here for the area of the belt and the shoes before we move on into the head. So this is sort of like to get everyone reorganized and such. So to get started, we're going to begin by organizing our sub tools. So we're all on the same page as you can see, I've categorized them now into three pieces. The detachable pieces you can keep or delete. I'm going to just keep them just in case should I need anything more. But as you'll see from the finished sculpt, I've included everything that I've done in the jackets so far and placed it all into here. And I've just simply left the visibility turned on and then just controlled everything by putting it through here. Finally, I put the base mesh at the very bottom. And so what I'm gonna do now is I'm going to turn on the finished sculpt and the base mesh and you'll see all these protrusions going on around here. And we're just going to essentially kinda clean up around here and try to fix and make sure that we don't see the body underneath. You can kinda see how the hands kind of moved down a little bit. So we'll have to do some work there. You can kinda see the arms a little bit bigger than it should be. There's like a little part of the light going through. So we're just going to use the move tool to help navigate us to control all of that and reorganize. Before we start up on creating the base mesh of the belt, which will be coming up pretty quick here. So let's just get started when he hit the Move tool. And then I'm just going to hold down Alt. And just simply, if you hold left Alt and left-click, you can do a kind of a fast, quick switch to the tool. So what I want you to do is I want you to kind of just sort of kinda clean up so that there's no protrusions going on here. You can kind of see like if we go through to the shirt left, I'll click and then hit F twice to do a foramen Zoom. We can kind of see that what we need is we need that jacket to be coming out a little bit further. Or if you want, we can just go ahead and click on the body. Since we never really see it, we can kinda just push it in a little bit, you know. And that can solve quite a bit of problems without having to change the Sculpt if you have it decimated down, like so, so and sometimes holding Shift F down in wireframe kinda helps you get an idea of where everything is. So we'll just go ahead and kind of clean everything up like so. I'm not really too concerned about what I see underneath because it never gets shown when we do the final output. Maybe readjust arms little bit. And I'm just kinda push it in with left Alt, holding left Alt and left-click drag. And just kind of bringing everything in that way. Same thing with the hand. Maybe I want to do a combination of both. Then of course, rearrange everything out like that. See that the shirt is kinda punching through right there. So I may just push that in. And I'll hit Shift F to see all the areas where it's kinda going in. And now from like some, you can also see from the looks of it, it's a little bit off. That's okay. Like right there. You see it's a little bit off, but that's okay. We'll just go ahead and hit transparency. We can just sort of, well, we can just kinda bring it out. So if you need to, you can go to smaller subdivision is a recommended thing. I'll switch out. So I can kinda see this is a separate sub tool, so I'll just go ahead and bring this guy out. Well, now I'm gonna see if I can push the shirt in a little bit. Maybe that might be a better solution because I don't want to have to move those two. And we see also the flap kinda is going. Bud there. So let's go ahead and push that out. And let's push it in here. Bringing it out there. So we kinda have something here. So now what we're going to do, I'm going to bring up some reference here, is that I'm going to work on constructing two primary assets. The first one will be the belt, which we see over here. It's just some simple, not sum over complicated and it's just gonna kinda wrap around this area here. So we have something that's sort of covering it up and then we're going to work on the shoes to finish out. So we're doing all this first before we finish and move up on the very last section, which will be our center masterpiece, the head. So that's going to be coming up here. So let's go ahead and just get a headstart, a leg up on the belt by starting to create just a base mesh. So what I'll do, I'm just going to kind of disable the visibility of the finished sculpts. So I have a little bit more because he may notice it was a little bit choppy and I want to kinda get that out. So we'll just start with our base mesh. Now what I'm gonna do here is I'm going to append a cube in there, like so. And if you want, you can keep the base mesh on just for proportion. I'm just going to kinda just flatten this cube out and just kinda bring this cube in. Kinda just establishing good proportions of what I think this might look like. We're not gonna do any like accurate measuring or anything like that. Just want to make something claim here. Now, I'm going to reach apologize this through Z remeasure. But first things first I want to cut some pieces out here. So first thing I'll do is maybe make it a little bit thinner. So you can kinda see because all we're doing right now is we're establishing a base mesh for the belt and getting some good sculpt details out of it. So in this base mesh, what we'll do next is we'll go ahead and use a trim curve. So we can kinda create some grooves going about here. So going to probably go into solo mode for this, I don't really need to see the, the model. So I'll just go ahead and hold Control Shift, go into selection mode, and go into trim Curve mode. And from here I just want to make a little bit of a slant this way and this way. So it's up to you how you want to make it. I think I might make it a little bit shallow. Like so. And again, I'm just holding down Control Shift while left-click dragging. And when you are holding that down and kinda get a little bit of snap, It's a little bit off here. So Make it could just do a mirror. Well, to get some going boat. There we go. Something like that. Now, as we have learned already, that poly groups in 0 measure are just about everything in all of this. So that's the next thing we're gonna do. So I'm going to go into where it says poly groups and just the sign some automatic poly groups based on what the normals are, the angles flat are being represented in the camera view. So we're just going to go into Poly Groups tab and just simply groupby normals. We don't have to make any adjustments. They're fairly even here. Let's see. Looks like we have a little bit of a poly group change here. If you have that problem, just go ahead and left mask out and make a poly group there. Make sure you have a different poly group going on in each of these like so. So every angles like that. Then we're going to go into geometry. And we're going to then go into crease and crease PG or crease borders. And then finally into Z remeasure. We're going to keep our creases, detect edges, keep poly groups. And let's just see what the result is right now. We may not get what we want, but let's just see, some might happen here. Oh, and look, something did happen there. Now if you see some sort of collapsing like you're seeing right here, the first thing you're gonna wanna do is just undo this back. Double-check to make sure what the problem is. And it looks like this is all one poly groups like before. So let's just go ahead and make this a separate poly group. Let's go into creases on crease all and recreates everything here. And then let's try this again, see if that helped any. And if maybe did, maybe it didn't. Sometimes you'll get a collapse still that will go off. And you gotta be ready for that. Like maybe an angles like really ugly and it got through. Just go ahead and work on changing it to a higher poly group on angle up here. Like so, if it does that and then after a while, work your way, do a second iteration to a lower from that higher. So for me it looked like it gave me what I needed. So I'm okay with that. Like so. So when that is said and done, I'm going to also show you some that's pretty cool. If you hit the X key when you're doing a 0 measure, your mike give yourself a little bit more of a cleaner poly group because it's in cemetery mode. So that's going to give you some that's just a little bit worth cleaner. And I'm probably going to try to do some a little bit lower. Like so. So now we've got something that's a little bit more cleaner and this is a whole antithesis. The whole central theme antithesis of using poly groups with 0 measure in read topologies in an object. Now again, that's a manual, automatic method and we're going to go with over manual methods of reach apologizing if we should ever come into contact with failure of a 0 mesh process. But this is sort of like how we want to see it. And this is establishing what we want, which is our base mesh. Our base mesh for our first piece, for our belt piece. So on the next lesson we're going to finish the belt piece up, doing a little detailing and working with some bend deformers to give us an idea of where we stand. And then after that we're gonna move into the shoes. So stay tuned.
48. Detailing and Setting Belt: Okay, so welcome back. In this lesson, we're going to pick up where we last left off, where we see a little bit of a belt here that we're going to be putting and wrapping around our character, like you see here. If I turn it on it, We wanted something to fill in for this space here to fill in for the gap. So we're just going to be continuing along with that. We're gonna do some detailing to get some seams in here. And we're going to put some buckles crossed here to finish off before we move into the shoes. So let's go ahead and get started with that. To begin, just going to turn off the sculpt because I don't need it. And I could use the frame rate because it's probably pretty choppy when everything's turned on. And I'm going to go into solo mode. I don't need to see my character base mesh. Now the 1 first goal I need to have is, is I need to make the edges all one group loop. That's because I'm going to be, I'm sorry, one poly group. That's because I'm going to be putting group loops on here. And I want it to go all the way around here. But I don't want those group loops to be going in between these little crack crevices that you see here. So we fix that. We need to make this all one poly group. So to start off with, I'll go ahead and hold Control Shift and click on that part. Hold Control Shift again and drag mark key out to invert the selection. And then hold Control Shift to make just that area invisible. So now, all we have is this. Learning, the selection tool of control shift is a little bit tricky and takes a little practice if you're new to it. So, and I'll do it, watch this as many times as you need to to get that part. So what I did was I went on ahead and drew a mask over there, holding Control down and just clicking a mask over and hitting Control W. And now all I need to do is once again, I can probably get away with it. It's not necessary. I'll probably just there to different poly groups in the front back, but I don't think it's really going to be necessary. So now all I need to do next is round out these corners that we see here. So to do that, if I hold Control D, you may notice that it divides, but it doesn't collapse like I wanted to. That's because again, when we did that Z remeasure, our geometry was holding where the poly groups were dictating. So we need to take the creases once again off by going into geometry and hitting increase in all. And now if we divide again, I may, I'm looking at this right now. I may want to do possibly. Let's see what that will do. Now I'm probably know what a collapse and I really don't need it. It's not like comparative. I kinda like the idea around looks so I'm not gonna go out. I'll go ahead now and just hit Control W 02 or three times, maybe, possibly even a fourth. E y naught. Now, what I'm gonna do is I'm going to delete that lower and then I'm gonna go to edge loop and two or three, it doesn't really matter. I'm just going to hit some group loops. So as we see, group loops will run all the way around this belt, like you see. So now what I wanna do is I want to access just the group loops. Those are those poly groups that run along those two strip rings of poly groups that are running all along. Now if we see it's awfully thin between here, so we gotta get in there by once again repeating what we did with the control select. We select this one, and then we invert selection. And then we knock out this piece and this piece by holding Control Shift and left-click so that we just have this area. Now what we do is, is with these poly groups on both sides, we just hold Control down and marquee drag a mask over him. Let's hold Control Shift and bring it all back into perspective again. And it will notice a mask is over the group loops. Let's invert that mask, and now we have just access to our group loops. Now you can probably guess where we're going to go with this. Now. It is probably going to go into doing a deformation deflate. So we can get a little bit of a seam going on here. Like so. I think what we got, if you want to be a little bit careful because you don't wanna go too far in this. Like we just need to go like maybe something like that. And if you want, you can kind of Just bring it in, like so. So we kinda have something that's a little bit of a cleaner Xin for ourselves. If you wanna do anything like and maybe use the standard brush to draw on some strips or imperfections. You're welcome to do that as well. Definitely not an issue whatsoever. If you want to do anything like experiment in and run a deflate to bring it out, to see a little bit more, you can do that as well. I'm definitely not too much though. You don't want to tear the geometry would input that much in there. So. Now that we got sort of the first part of this done, let's bring in our solo mode, and let's go ahead and fit this belt to this character and see how well it goes. We may have to do some readjusting. Now, if I go ahead and hold Shift, I'm going through and I'm just kind of holding the pressing the W key to access my move tool and my gizmo. And the belt looks a little bit off. Maybe something like that might work. Something of that caliber that might actually be good enough for me. I may make it a little bit thicker. Because when I go through the bend, arc deformer on our transform types, it's going to thin out when we make a full cone circle. So two, once you have what you need, you then are going to do a BPR to see how well the anti-aliasing cleans up. And it looks like it cleans up very fine here. So once you have what you need, Let's just go ahead and hit W. Click on that cogwheel and the left end to open up your transform type. And let's hit bend arc. And I'm just going to just kinda go back in a solo mode so I can see it a little bit better. I'm just going to toggle that middle green button to see how well it goes around. It's not too bad. So little thick. So maybe I was a little bit off among miscalculation. So just double-tap the R key, maybe just thin it out just a little bit and go through and go back into my bend arc. Probably will do. And once you like which C Just hold, press Transform COG again and hit Accept. So let's bring everything back in. So let's take off solo mode. Let's go ahead and we're going to have to obviously shrink this down, it looks like so don't worry about that night. Yeah, that's probably good for me. I'm going to scale this a little bit more up. And I'm going to bring this a little bit more in. And finally, I'm going to hit the center with that upside-down teardrop and then see if I can rotate this belt around. Like so. Now that we're getting it's getting a little bit closer to what we want. I'm just going to kind of bring this in a little bit more. Yeah. I don't really I'm not I have a philosophy. I don't really care about what is seen on the what is seen on the hidden areas only what is seen on the scene areas, unless my rigger or developer tells me the shirt is going to be lifting on the other side, which I would consult with on the developers in a game production pipeline. But if not, I'm not gonna do the extra work, it's not worth it. So now that we have that, let's go ahead and go into sub tool. And let's just go ahead and turn on our finished sculpt folder so we know where it stands. So I'm a little bit off. So let's go ahead and bring that in a little bit more over here. Maybe size it up, scale it on the Z. Like so. All right, so now that we have it like this, the next step we're going to do is we're going to try to win. You got what you want out of it. Then we're going to try and may scale it down just a little bit more. I'm going to you'll see me interrupt myself just to kinda nitpick on it. We're going to then work on trying to finish this out by creating some belt buckles which will be place somewhere maybe around here. And then as it kind of reaches all the way across here, we're going to see if we can put some straps and maybe do some hole punches as well. So that's going to be in the upcoming lessons. So stick around.
49. Finalizing and Polishing Belt: Okay, So we're back and now in this lesson we're going to finish off the belt by doing just a few simple detailing around here. We're going to start with putting some rings around the belt. We're going to, but before that we'll try to rearrange the belt because we have it just sort of meeting the metal. So we got to fix that right there. And for that we're going to use a different type of move brush that's not the same as the Move brush, standard Move brush. We'll make a quick little Law, little belt buckle using a series of Z model or slash Boolean techniques. And we'll finish off with a little bit of straps, the kinda hold it in and then after that we'll just move right into the shoes. So let's go ahead and get started. So if I hit the B key and I hit the M key and T key, I'll get move topology brush. Now, that's a very different type of brushes compared to the Move brush that is right here. Moved topology brush just behind it, moves the actual mesh separate. So if this end is separate from this end and I'm starting here, it's going to move this end separately. So let me go ahead and give you an idea that you can kinda just see how that, even though my radius is so big, it's not really affecting this area. So, but otherwise in that it kinda moves in function similar. So we can do the same thing over here. And what we wanna do is, which is kinda want to create this sort of overlap concept. Now, one thing to be careful of is try to, if you can work with a large brush radius with MOOC topology, if you try to push it in like you do with left all, you're going to get like this weird little creasing stuff that's going to really mess with it. So you gotta kinda really work the camera angle around. And if it's too folded, maybe work a little bit further in and then push it back out again from the middle. Like so. So that's kind of how we're going to do it there. Feel free to just kinda rapid along. Like so it's not a big deal will be reached apologizing all of this when the time comes. So I probably will have this go a little bit lower. So we can kinda see something going on there. Maybe just kinda push that in. You know, you can just finagle with it all you want. It's, it's one of those fun brushes or you can just spend a whole bunch of time on. So now that we got that done, our next step is going to be we need to create some belt buckles for our, our our belt here. So we're going to start with creating something in the center here. And for that, I'm going to scroll up and select a different tool. In this case, it will be a cylinder, but you can kind of just go ahead and simply append a cube. Whenever I do the, whenever I create separate tools, I work off of the main palette selection here so I can pretty sum up my space and frame rate up. So it's just going to be what we want is sort of like a simple, basic cube. And it's kind of hollow in the center. Nothing too crazy, nothing too difficult. We may we don't have to do anything there. We'll go ahead and give it a couple of divisions and then we're old, delete those divisions. And just like so. And then from there we're going to go to sub tool and duplicate this guy off. And with that separate piece, we're going to bring it in like so. It's pretty simple. It's nothing too crazy. And we're just going to scale that in. You decide your thickness on where you want it to be at home, going to go with someone, maybe some like that. And then we're just going to Boolean it across like so. Go ahead and try going to render. And then we're going to go into render Booleans, hit live Booleans and change this small piece here into a Boolean by clicking on the intersecting circles. So we got some like that. So now let's click on to our main piece and then let's go under in our SOC tool tab to Boolean and do a make Boolean mesh operation. Now from there, we can do anything we want. We can go ahead and clean it up with some further z remeshing. It doesn't really matter to me what it's going to look like. So I can probably be all right and contentious with this. But I may do a scale down a little bit. And let's just go ahead and bring that piece now into our main tool set. Shift F. And let's just append that piece. Usually append to pieces go in the bottom and the sub tool. So let's just scroll all the way down to get that. And now we're going to scale that guy down and just see using the gizmo deformer we're just going to apply in place this like so. Now it may seem a little bit thin if you feel like you want a thicker one or a notice more noticeable one. That's fine too. No, nothing too hard to do. It's an easy fix. All you have to do is just go into where we originally left off and just work on a thicker Boolean when we scale it down. See if we can use regular Move brush. And then I'm going to switch to a lower resolution so I can bring them out without rippling it. Now, it's pretty simple from here, you can just go ahead and do some simple stuff like for example, you can, you can, if you want, you can just put some insert tourists rings on here. Nothing too crazy. I forgot. I'm going to. You can also, if you want, you can do the same concept with a cube that we just did. And you can get creative and do it with the sphere instead, where it's two spheres intersecting. Where that point is, we're not doing anything too complicated. We had already plenty to do over here, so we'll just go ahead and just move to the next one. Let me go ahead and append a second cube in here. So, and switch to that cube. Bring that Cuban, nothing crazy, nothing crazy. Just scale that cube down. We're just kind of bringing parts together. All of that is part of the read topologies in process when it comes to big. And let's scale that in. So we can have sort of like a little piece kinda cuts in. I'm just kinda smoothen it out. And I'll go into solo mode. Maybe you want to do something or we want to give it a little bit of an arc. You can do that. Remember, if you're going to work with the transform types, you gotta take out those subdivision levels. And we can just kinda just work some simple. Like I said, this is for beginners. We're just going to keep it steady. You can do some skewing and make it thicker on each end. You can do that. Let's bring it back out. And then we have something like this. Now again, if you want, There's no pressure to it. Feel free if you need to, to, if you need a thicker buckle, you can do that. Or if you want to do a sphere instead of a cube like we did. So it has sort of an arcane radius. You can do that too. And now, or maybe you want to make some sort of other unusually weird contour shape that is at the end of the cube and then duplicate that piece and then shrink it down and then cut through the Boolean. You can do that too. That's kind of that expanding beyond the concept thing I'm trying to get you to do where I show you something and then you go beyond me. So next part is going to be just adding some simple tourists. And we'll do that through an insert brush. So again, just going to be something very similar to simplicity. For that. I'm probably going to, I can do it with a pipe if I want to. I don't know if I want to do it though just with a simple sub tool because that is a little bit, I may go ahead and just do it with something a little bit simpler, like just append a sub tool because I'm not, tourists aren't an option. There's pipes, cylinders, hollow cylinder said I can do and then I can smooth out the edges but just go ahead and hit append a primitive shape of a ring. And then let's go to that ring. And let's bring that ring in. Now this ring is the probably not going to be necessarily read topology guys. That's probably going to just go on ahead and be part of a normal map when texturing comes along in the second course follow-up to this. So keep that in mind. We'll just do some fun little rings. Now thin, too crazy. Maybe scale them down a little bit. Make sure it's kinda uniformly. Same. C. Alright? So now that we got that, we got to a, one more thing we gotta do on here and that's just add some strips. Now we can do this all sorts of different ways on here. We can, even if we want to, we can borrow some pieces that we made on here to make our strips if we so wanted to, like we can make we could go back into our detachable pieces and just maybe use something that we made from here. That's not going to be a problem and I think I might go for doing that as well. So I'm gonna go ahead and duplicate and take this strip off. So let's go ahead and say I'm going to hit Cancel. I'll hit that piece. And I'm just going to go through. And let's see here. I'll go ahead and duplicate this guy off. And then I'm just going to take this guy outside of the detachable folders. And then I'll use this were a whole plethora of things. So one of the first things I'll do, let's bring him and scale them down to about that size. Something like that. It's going to look pretty thin, but we can just work with it. May just go ahead and what I'll do is I'm going to just sort of DynaMesh this down a little bit more, maybe work on making it a little bit, little bit more manageable. Because right now it's sitting at a pretty heavy amount. So let's go ahead to solo mode. And I want to collapse some of this stuff down because I don't really need any of this. So let's rematch this. We can do it two ways. We can go through geometry and do this at DynaMesh method or we can do this on the Z remeasure method. Let's just see what it gives us. It gives us a pretty bulked out piece. So let's see what project can give us when we term project on. Right? So that's fine for me right there because now I can collapse the SYN and then I can just clean this up through C refresher. If it wants to. There we go. Ere, he goes, there we go. Let's see if we can get rid of some of those areas. I'm just kinda making a strip based off with someone else I made. And this is a little bit troublesome. So what I'm gonna do is I'm just going to cut it off because it's not kind of bothering me right now. Air we go. This is really all I need. All right. Some a little bit cleaner. Now, let's get back to it. So what I'll do is I'm just going to make some little simple. It's not really, it's just basically our recycling. What I have done already for something new. So I'll just kind of do a mask, soften the mask. Bring it in a little bit like so. Clear the mask. Do a little bit of smoothing here. And maybe even thin it. Then we'll do a little bit of fun, just have been a little bit of fun. Let's do some group loops. That's probably going to need like four. And then like we did before, we're going to just have some fun with all of this. This is kinda like how we did the belt, basically. Not that crazy. So we have something pretty simple like that. All right. So let's go ahead and bring it back in. And we'll just go ahead and just bring it through and apply what we have here. Maybe kinda push it in a little bit with the Move brush. There's anything it's going to run into, whole deal with it. And if it needs to be water, we can do that. So now that we got that, let's go ahead and reapply what we did here to everything that goes along the side here. So if you want, let's just hit the W key and hold Control and translate across. And it's composed of multiple subdivisions or forgot. So let's go ahead and delete that subdivision. And now we hold Control down and it will automatically duplicate right there. Let's just go ahead and bring that in, like so. So you can kinda give yourself a little bit more room, push everything in like that. And you can kinda see and get the point right there. I may just put it right there because technically that's more of an accurate place a belt strap would go. But so that said that's kind of a quick little run-through of trying to get something like that going. So on the next lesson, we're going to move on into is, is we're going to work on the feet and doing a base blackout of the feet. And then from there we're going to finish out in the head region that you see above. So stick around and stay tuned.
50. Shoe Block Out : Okay, Welcome back. Now, in this lesson we're going to start on our shoes. So what we're going to do in that end is we're going to go ahead and make a base mesh to start off with, to sculpt all this. As you can see right now, I have imported at 3D reference of the shoe. But you'll also notice that even though you'll go into your folder, your resources folder to download this base mesh, there's going to be an extra piece of a base mesh. And what that extra piece is is it's going to be a low-res base mesh on top of this high res reference that you're seeing. So in other words, we're going to have two files for you to download for this shoe. The first one is going to be this complete 3D reference that you see here. And the next one is going to be this low res based mesh. Now what this is you see here is sort of like a stepping stone that we have to get to this that you see here now, it's not too overly complicated. I didn't put a lot of time on shoes because honestly, we have a lot of things we have to cover. And I I've learned from experience that shoes can be anywhere from two hours to a 15 hour tutorial and we just have a lot still to get by, especially in the face head hair and reach apologizing and UV. So I wanted to give creates something that had somewhat of a simpler form and just would be friendly to a beginner. So we started with this. So for now on in the end of this lesson, what you should be thinking about doing is trying to get your shoe to look something along the lines of this. This is the goal that we want to have towards the end of the lesson, just some base form that we can use as a stepping stone to arrive to this that you see. So with that end, let's go ahead and get started. I'll go ahead and turn off solo mode here so we can bring everything back. And now, just like we did with the articles of clothing that we pulled off of this character. We're gonna do the same thing all over again down here, but just a little bit differently. So to begin, let's go ahead and turn off finished sculpt, and let's take our main base mesh. And very important to remember, let's go ahead and duplicate this base mesh. Let's turn the visibility of one of these off, like you see. And I'm going to go ahead and then just kind of cut away everything here except what would be used as a foot. And then we're going to reshape that into a base mesh that you'll see later on. So to get started, let's go ahead and hold Shift Control and change our selection brush to a trim curve brush. And then again, I'm going to hold Shift Control. And probably here, let me see. Maybe something along the lines here and have it cut off like so there's anything left over. We can always clear off, but it looks like it got everything. Just remember to use the selection tool along with delete hidden to clear off everything else. We've already given quite a few examples, but if you need more, go ahead and leave a comment on the question window. Now from here, I'm just going to go to the top view that you can either snap with the head or by just kind of moving around in hold down Shift to snap it to top view. I'm going to hold Shift Control again. And I'm just going to cut off these toes. Sounds a little ghoulish, 90, but it's a sculpt. It's not people, actual people. So from here on out, we're going to go ahead and rematch this. Traditionally we've been doing Z remeasure a lot. And that's only because I wanted you to get really comfortable with C refresher when the topology comes in. But we're going to change gears a little bit and go into DynaMesh as an alternative, because we need to fuse some geometric shapes onto here. And DynaMesh does that, whereas Z remeasure still retains separations of different meshes that are intersecting into one another. That will make more sense of what I just said. But let's go ahead and get started with that. So if I hold Shift F, we see a couple of poly groups. We'd done a mesh. Those groups are going to get DynaMesh along. We don't really need that right now. So I'm going to just drag over a mask and hit Control W or Command W. Now, I'm gonna go ahead and I'm going to hit the projection key here in under DynaMesh, which is under geometry, you don't want to turn my resolution somewhere along the lines of 384. See what I can get out of that. And I'll just turn that on and we got ourselves a good start. So now let's go ahead and just bring back our low res piece. I'm going to go ahead and cycle this sub tool all the way down so I can switch between the two a little quicker. So I'm just going to go to this arrow, not this down arrow, but this little arrow moving downward to bring this sub tool all the way down. So it's so that my eye low-res base mesh reference is there for me. I'll go ahead now and turn the visibility on that. And now I'm going to just simply hit the split tool and F to center and frame. And we can now get started on this. Now the goal here is going to be that we want to go ahead and make this area that you see here, this top area right here. We want to make that from here. So we're going to be working a little bit with Move brush in flay brush, all sorts of brushes. And we're going to be interchanging between the DynaMesh to compensate for anything that might be slightly, how shall I say, stretched. Now, I'm looking at this right now and I want, I'm hidden smooth. If I'm not getting what I want, I can either read DynaMesh or if you really look into collapse this down in any way, you can always just switched down to a lower resolution in DynaMesh, for example, to 64. And now when you hit Smooth, you might be able to get this, the collapse in a little bit more. Now I'm just going to probably cut it off a little bit more. And then let's see what we get. There we go. Something like that works for me. So let's get started. So bringing up my quick UI menu, I'm just going to start with a little bit of inflate, add some geometry. I'm not worried at all about anything that I might do here. That might bring like stretching. Because again, we're going to be doing DynaMesh. We're going to be doing some auto read topologies arising here. See you like you see this stretch and right here, I'm just going to smooth it out and then just drag a marquee mask to read DynaMesh. You can kinda see them. So and all I'm doing is using the inflate to kind of expand. And it's kinda nice when you can do this, you know, you just kinda just have to keep your eyes on any noticeable geometry. And it's going to look a little bit like a sock. Don't worry about it. We'll use the Move brush and we'll, it'll make a little more sense once we get the, once we get the soles on there. For now, pay close attention to curvature in this area that you see here. And make sure to make good use of the ALT button when using the Move brush, because that pushes geometry out based on wherever the brush is facing. So if the brush kinda wraps around in this angle than the ALT button will make the brush go in that direction that it's just kind of wrapping around the norm of where angle in which it runs around. So just take your time. This is definitely not a race. You don't need to go like super fast and get it. You just kinda wanna get it to look a little bit like this. You see already there's a little bit of a groove that goes up here. We'll get into that in a second here. My redial mesh, you can kinda see right there how it dissipated. Maybe rounded up a little bit more with DynaMesh or I'm sorry, I'm a little bit more rounded up a little bit more with inflate DynaMesh. Now let's go ahead and see if we can capture something that makes sense on the top profile view with the Move brush. I'm just trying to find a round silhouette. Like so. And now let's just go ahead and go down here to this heel. And let's just raise it up. So you just go ahead and find a good brush size here. Might need to experiment with different brush sizes. Don't want to make it too sharp. Let's make sure that's consistent all around when we raise that swap, it's drooping a little bit there. And we're just kinda raising it. Take your time. No rush here. So when you start getting something, looks along the lines of that and you're starting to feel a little bit comfortable. You can feel free at any point to move forward. What we're gonna do next, this is that we're going to start carving yet again another trim curve off right along here. So I'm going to hold trim curve down with shifting control to access my trim curve. And I'm just going to draw out a line right here. Maybe make it a little bit higher. Something like that. Alright, so let's go ahead now and take a look at our bottom profile. Go ahead and make sure to hit shift and to snap it to that bottom profile. And let's work with that move brush to see if we can move some things around. So it looks a little bit more like the bottom. Now, don't think in your head that you have to match my pace or my speed. If you're a little bit faster, fine. Go for it. If you're a little bit slower and that's fine too. Just make sure you are at your own pace when making this. Let's go ahead and and I'm not going to try to make the absolute quintessential replica here, but I'm going to try to make something that's relatively, I'm not worried too heavily about. Read topologies seem right now. Okay. Which is kind of tweaking a couple of spots here before we move on. So now that we have that, let's go ahead and hold down Shift Control. And then in then I'm sorry, we're an old Shift Control down and then switch select back into selection tool. And then let's go ahead and invert the selection here. Let me go ahead and undo that. I'm sorry, two. I'm going to go ahead and just kind of see if we can do an invert control selection here. Now, we may need to put some group loops around here, like so, because we might be subtracting some geographies. So if you're following along, don't do this move yet unless it's a complete tough of success. But I'm thinking I might need to put some group loops on here because it might subtract some jaggedness because I see the mass kinda masking in already in there. If that's the case, it's not going to be a big deal to fix. But let's just go ahead, play it a little bit safe. I'm going to probably say, let's just not take any chances because I want to, I want to extract this off and I don't want it to be very jaggedy here or else it's going to mess up my soul. So now that I have that, I just hit Group loops, put some group loops between here and now. I'm gonna go ahead and draw a mask in. And I'm just going to go ahead and invert that it sub tool and go to Split masked points and see if that gave me some smooth. And sure enough it did. Now, you probably will notice there's some of the group loops that were taken with it. That's fine. Just make sure you hold down control and drag a mask all over it and assign a new group loop as one full group loop because we don't want to group loops on here. We want one group loop or else are 0 mesh will get all wonky. Ok. So let's just go ahead and go to 0 mesh. I guess we won't get too wonky, but I'm wanna make sure when we do reach apologizing, we have everything that we need. So as you can see, we have our piece right here. We went to geometry. We went down to 0 mesh. I may go for a lower rows, just see if we can risk it. And I may even try it one more time. Add don't like it like that. I think I like the other one. So now that we have this, we can, we can do a couple of things here. What I wanna do is I want to create a thickness that goes on here, just kinda like in our boot that we see here. But there are two ways we can do it. There's the 2021 method where we can go into DynaMesh and there's a thickness tab under dynamic subdivision that you can access, which is pretty much the easiest way to. There's gonna be a thickness slider that you can hit and it's going to be the easiest way to create thickness. Or if you don't have that and you have an earlier version, I'm gonna go ahead and show you how to do a thickness through that, through a function in C Modeler, which is edge or not edge extrude but just a face extrude. So go ahead and hit the B key and select your Z modular. And when and z mile or mode, you have three modes to choose from. Here. Let's go ahead and hit our draw size to be a little bit down. If you hover over a face, you're going to get certain amount of options. If you hover over a point, you're going to have different options. And if you hover over an edge, you're going to get different options. So make sure you're hovering over a face, hold it down, and then select, while holding it down, select the polygon action extrude. And then you can choose all polygons because that's the function we're choosing how to behave when we extrude a thickness on here. So now that we've done that, let's go ahead and just simply draw thickness and make sure you're over a polygon when you do that. So now we have the first part here. We have a soul. And what's best about it is, is that we have poly groups also in here as well. So let's go ahead and take a split screen mode off for a second. And let's turn off the visibility of our base whereas mesh and do some adjusting to what we see here. So from here I can designate a thickness just by scaling it. But if you let me go ahead and center and make sure you hit the upside-down teardrop hold left to alter. And then right here, reset the orientation. Let's go ahead and just make it a little bit thicker right here. I can either designate a scale this, or I can select the mesh and work something out there. I'm going to go ahead and just work on the mesh. So let me switch out of Z modeler to the Move brush. I'm going to left Alt click to select this now. And I'm going to just work with my Move brush to kind of tuck this in so we have a little bit of a thickness going on. And I'm just kinda looking at this line right here that we see, making sure everything sort of even, right? So now we've got a good start right there.
51. Shoe Souls Block: So now that we have that we can do, we can move on to the second part of this, which will be two Z R to pick up the back soul. Now that's not too hard. All we're going to do for that is we're going to hit the append key. We're going to select a cylinder, and that cylinder is going to come in. It's probably going to be pretty big for you. So go ahead and go to the bottom. That sub tool hits cylinder, hit the F key, and then just hit our key and scale that down. So it's within. Now from here, we're going to going to cut this up a couple of times. I'm going to go for me, I'm going to just go into solo mode, make it easier. I'm just going to give it about probably two or three divisions. Then I'm gonna go ahead and delete those subdivisions because they want to work with the trim curve. So let's do that. And now let's just go ahead and hold down Shift Control. Select back into trim curve again. And now you can hold Shift Control again and shift control again. And then I'm going to cut one more piece right here. I may actually go a little bit off little bit here. So it looks something like that. Now we can either DynaMesh it, we can see Ramesh it, it doesn't really matter right now as of this moment because it's all going to get DynaMesh one way or another because we're fusing this. And so let me go ahead and turn solo mode back on. And let me just go ahead now and just snap into bottom view. And we're going to use the gizmo to rearrange this. Now this is gonna take a couple of tries between that using the scale tool and also probably using the Move brush to kinda line this all up correctly. So you can just see how I position it. I also look to make sure it's relatively on the same end. Then I'm going to work with the Move brush. Let's go ahead and maybe push it out a little bit. Because I want a little bit of thickness to happen around here. All right. So now that we have that, we can go ahead and do a couple of things here. We can try to risk a little bit of fun. And, you know, this is deviating and expanding beyond the concept. You can go ahead and do something like this. Maybe there's nothing wrong or nothing. There's no such thing as a wrong answer. I'm I to go ahead and hit transparency to kinda look in size this up. So it's perfectly on both sides. I may try to do some sort of a deco pattern with trim curve. I think I did it the wrong way. Oops. We can do something like this. And then from here, maybe go to Move brush. Make the brush a little bit bigger. Trying to lose. Not just having a little bit of fun. Let's turn transparency all. And now let's check the thickness to be relatively the same all measure through here. So I don't want to mess too much with the sole. Alright, so now we're gonna do something where we combine this piece with this piece and we're going to fuse them together with DynaMesh. So the geometry will fuse in one, everything that's intersecting inside of it will disappear. So the foot will disappear inside a here. And for that end, let's make sure that it's not too close up underline. So before we do anything, this is a good place to hit quick save. Alright, now after you do a quick Save, we're going to go ahead and then we're going to look at making a duplicate of this heel because if you don't like what you're seeing or something goes wrong, it's always nice to have a backup for you in case. So let's just go ahead and just find our heel which is down here, clear the mask off. And now let's just make sure the mesh here is also all the way down. We want these, the heel to be on top or and the new mesh that we made here to be on the bottom, the foot mesh. And I'm just going to duplicate that just to give myself a backup file. Like what I see, I'll go ahead and delete it. Now. Same thing goes for here. I'm going to duplicate this just to give myself a backup if I don't like what I see. So now, once we have all of this said and done, we're going to do and merge down. Now emerges can't be undone. So be very cautious here. That's why we're duplicating everything. We're going to hit, Okay? And you'll see the poly groups, they retain. Its not DynaMesh yet. We haven't done that. But from here, we're going to go ahead and give it a couple of divisions. So before I go any further, I'm just going to just kind of do crease poly groups. And then I'm going to go ahead and just divide it once, making sure it's fairly smooth. And then from there on, I'm just going to go ahead and do DynaMesh. Now, the degree of how far we DynaMesh is up to you, but I strongly recommend a higher level of resolution when you have project turned on because you might get a dilapidated version or a real run down version. So the best way to know whether how high to go is just simply hit. Choose a resolution. Start with like 616. Hit DynaMesh, go ahead and hit now every time you don't need it. And you can kinda see there's some tearing that goes in here. So yeah, that was a good start, but it was a little bit messy here. And we need this to be as clean as possible. So let's go and take it up to about 1136. See what we can get on that. You want these to be as fairly clean as possible. And that was better, but it's still kinda was a little bit off putting right there. So let's go ahead and double it to 20 to 2096. No. See if we can get something. And it should be a lot closer. Quite frankly, that should make it and that's a fairly accurate position. If you have a something like that, that should actually do it. Now from here, we need to remember this. Now That's the one nice thing about z0 DynaMesh is, is that when you do this, it keeps the poly groups. So let's go ahead now and just do a Z Romesh. So what we're gonna do first is we're going to go to 0. Let's see, we're gonna go to crease. And I like to hit on crease all and then crease poly groups. And then from there I'm going to turn on keep creases, detect edges, and keep groups and see if we can get something fairly clean on here. We're not looking for the most cleanest, but we're looking for some fairly clean on here. So this is actually quite a few steps you can understand now why I wanted to put a base mesh of this point in. But if he get enough practice and you can actually use this concept to get through a lot quicker here. To be truthfully honest. I know there's about a 110 different ways to do it. There's also a Z modular approach on here. But again, this way I kind of would prefer to do simply because of the fact that I want as much setup time of different circumstances where you can have a little bit introduction with DynaMesh and also how it can relate to 0 measuring, getting what you need. So keep that in mind. Now this one's going to be a little bit of a longer 0 mesh because I have a higher number of points, but also because I have a lot of computations going between all these different poly groups. So I'm expecting for something, it's going to like slag a little bit here and then probably just go all the way across pretty quick. But I would say trust the process and see what we can get it. Now. I never expect my first 0 mesh to give me good results. So I'm probably anticipating like a battery mesh, but that's the whole point of this. We want to have a good ground. This is so far good start. We might be able to, I'm going to risk it, but I kinda like this already, but may try to hit it again just one more time to see if I can get a cleaner result. And you kinda see you do get something that's a little bit cleaner here for C remission, I might just go with that for now. And again, this is where we want it to be left off. I'm just going to divide this up and probably go through. But once we do it like this, now we have not only a base mesh, but we have sections that we can work with. We can kinda bring in. And this is sort of what we want the end result to be. So a, again, the other thing is, is that with this, we can do some further revisions. For example, you may want to say to yourself, Well, let's go ahead and make a little bit more of a boot here with the Move brush. Maybe we want to make it come out a little bit here. You know, it's a little it's all up to you. And I really couldn't blame anyone if they want to just make revisions on this, but this is sort of the starting spot that we want to get you to get to in making this cell and the upcoming lessons we're going to work on just kind of cleaning up this piece by maybe smoothing it down and then work on the beginning parts of maybe creating some spots of the zipper and work on straps and designating of where all the patch seams are. So with that said, stick around and stay tuned.
52. Making Shoe Panel Adding: Okay, so welcome back. In this lesson, we're going to continue on to do some panel loops in some edge extrusions and some group Lupe. I'm not magic solutions but group loops to start pulling out patterns across here. So to get started, I would like to say first off it after you've constructed your base mesh, if you want, feel free to go ahead and continue on getting it to the proper silhouette that you like. You can do that all sorts of different ways. Maybe wanna do it through the the in-flight brush or anything like that. You're welcome to do it just so it kinda looks a little bit more like a shoe. Like so kind of a shoe boot. Like I said before, you know, this is kind of an iterative process that I would like you to really take your time into. But don't be overly critical about the shoe because the shoe is because we have so much going on. I'm not putting a huge, huge emphasis on issue after doing this for about over 12 years now, I can tell you doing shoes could literally be at 12 hour course. It's home, right? So I'm not going to give like a huge, huge amount of emphasis on the shoes, especially when you're hardly seen him since main emphasis is going to be coming up on the face. So the other thing we'll be doing is we are going to be working on the treads here. So that's going to be sort of our first area of focus. So I'm gonna go ahead and give this maybe just one division with Control D, maybe hold Control drought a mask, readjust a thin little strip across with the spacebar, hit E and invert the mask by holding control and it looks a little bit pixelated. I may give one more division on there. That's just my discretion. That can probably be what I need right there. And let's invert that mask. And let's just go ahead and kind of bring it in a little bit like so. Just hit in the hierarchy. All right, so now we've got some going on there. Let's clear that mask off. Let's go ahead and just go ahead and draw another strip. And I'm not doing anything too overly crazy here on the treads. Not I like I said, I can go on and on and on about this, but nothing too crazy with the treads. So I'm just making something that is pretty basic, pretty simple. And good, quick, easy approach to getting something really fast for you. Because one of the things I wanna do is I want to really get you into the working, the hard surface stuff in face and so forth. So make sure it's all there, invert the mask. And that kinda gives a little bit of a sci-fi feeling like there's some sort of hard surface work. There. Can maybe work some emissive lighting effects. So I'll go ahead and move on. So on. Now that we have done that, Let's just go ahead and just kinda get ourselves to a point where we're comfortable with the silhouette of the shoe. And after you do that, maybe give it to a one more division. I'm going to do one more just because I guess I don't really have to, but just kinda playing it safe. Just kinda sure my spacing is all equal here. All right. So from here, I'm going to go to Geometry. I'm going to delete the lower. I'm going to hold down control and change my free hand to circle and just drag out a circle from a side profile view here, maybe kinda cut out a piece there. And what I'm doing is I'm going from a mask to group loops. So I'm carving out-group loops through masks. So I'm going to try to do the same thing in the back here. Just going to first of all, shipped control, isolate, select, and probably just going to do something, maybe something like that. See how that works. Cross? Yeah, that works just fine. Now works for me. So now I'm gonna go ahead and cut underneath here as well. I don't want I want the mask to cut off here, so I'll just go ahead and kinda just Work my way across here, do some subtractive work. And again, doing some subtractive work. And like before, I'm just going to turn that into a group loop. So now we've got all these group loops grade. So we'll start with this one. I'm going to put some group loops there. And by doing that I go to Geometry Edge Loop and then make sure to bloops are selected and do some group loops there. And then I'm gonna do the same thing over here. So I'm going to clear that mask, go to do the same thing. Now, from here we have two methods. We can carve these panel outs. We have the panel loop method or we have the Move brush method, and either one works, one is automated, the other ones manual. So let's go ahead and talk about that a little bit. If I go ahead and do, let's say I just want to isolate select, Shift Control, this piece right here. And then I want to go ahead and do panel loops. First thing I'll do is make sure double is turned off. And honestly, I'm just going to see what it looks like on its default, see how far it goes. And honestly, I kinda like that, but if you wanted to go further out, you can adjust the thickness there, but you're going to get more excessive tearing so you need to be careful. That's also why I kind of like having a Move brush as an alternative to all of this because you can then kind of work around any of the automated glitches and errors that occur here. So to give you an idea how that works again, the MOOC brush is pretty simple method. It's basically what we've been doing all the time. It's just kinda doing something like this. So, so if you can't make panel loops work, you can always do something like that. I'm going to try to do a panel loop method and see if how bad the damages here. When I do that, map to problem-solve if not, and it's not too bad. I like the edge. So little bit murky here you can kinda see some areas, but I think we can just go ahead and smooth this out. And let's just take our time. There we go. I think what we can do is if we invert the mask, you might be able to create an interesting little gap line here. There it is. It's feels a little more kind of soda in. So something like that. So now we got some, a little bit nicer now. So now that we have that we can go ahead and turn into a reference. We have a little bit of a line that kinda cuts across here. We got some socks. We have a little bit of everything to work with still, but let's just go ahead and see that. Let's go ahead and see if we can carve out a line. So for a line we can use, again, any method we've seen before. We can use, for example, of the we can use a daemon standard brush followed by inflate or like we've done before so many times we can just do a slash to and then into inflate. So again, I'll reiterate and demonstrate that technique again. So we'll just go ahead and try slash one. Sorry not slash two but slash one. I'm going to go ahead and isolate this poly group and invert the mask. So I'm not affecting any of the corresponding geometry. Let's turn on L for lazy mouse L key, and let's addressed. And we're going to see what this does. And that's not too bad. It's not too bad, just like that. But if you do, you can try doing a little bit of a scrunch with inflate, but be careful it gets a little choppy up there. So make sure if you get too choppy, you can kind of just smooth it back down again. The other method you can do is you can create a would go ahead and go out of this again. You can create a poly group as a method to create an aligned similar to how we've done seems before. Let me go ahead and readjust this guy because like it's getting a little bit when we did our our part and our panel loop, it's like it went past. So I want to get that out there. Let's get back on here. Left Alt, left-click to switch and sub tools. Gonna go ahead and we can do this other method that we've done before with seams in week when we were doing back of the coke cape. And that's where we hold down control, bringing a circle here. Maybe do something like that. Make a poly group out of it like so. And then on this area right here and we see the two poly groups. It's a little bit hard to see with everything, but we use poly groups because they put two Pauline, a line of edge flow between these two poly groups that we can use to then kind of smush in. It's like a nice little way to carve into a scene. So let's go ahead and go to Geometry. Go to Group loops. Now we have some group loops there. Now we need to find a way to use a mask to block everything out except these two group loops that we see here. So hold Shift Control and block this guy, I'll shift control block this guy out. Alright. Now let's just go ahead and if we want, we can go ahead and just hold down Control to sort of soften it. You can do whatever you want. I'm probably going to just do one single control-click. And then we can go into move tool here. And I'm using the Move brush to just simply hold left Alt and push in. Just in very subtly trying to push any areas here. So we can do the same thing over here. Just kinda push in. Like so. Kinda give ourselves a little bit of a scrunch seem now. And of course, you can do a very gentle breeze of a shift like a single smooth just to kinda, if you want to see a little bit of the, of the scene that's going on inside because then you're kinda getting back the poly groups that you want to see underneath. So you can do that if you want. So now that we've kind of gotten a little bit closer, we've gotten a little bit more done in trying to get what we want. The next lesson, we're going to go through it. We're going to just kinda continue on PUT and maybe some sort of a sock that overhangs underneath here. Maybe even sculpting out a few wrinkles, things like that. So with that said, stick around and stay tuned.
53. Finalizing Shoe Sculpting: All right, So welcome back. In this lesson, we're going to go on and continue. We're going to make a little bit of a SOC here and a little bit of a displacement of material to break this up and kind of finish out our shoe, as you'll see here. So one of the first things we'll do is I'll take, if you haven't already take a look at your reference because I believe that was imported in. You can either have the imported reference or the the, the 2D ortho reference. But we'll give you a little bit of a clue here. That's kinda what we want to go for some that's basic and simple. Nothing too overly complicated for anyone that we want to go with a beginner level because again, we're not, we could do about 12 hours if we wanted with the shoe. So I kind of wanted to keep something with a simple silhouette for first-time read topologies geysers. So let's just go ahead and get right into it. So one of the first things I'll see is there's a little bit of a sock that kind of goes around here. So let's go ahead and do what we do most with our base mesh. And let's pull some fabric off of there that way we can get that going. So just like with the shoe, we're just going to go through maybe turn on transparency so we can grab any shadows through there. And we're just going to go through and just kinda make a mask. Just, you should know by now how to do that, or at least I hope so. So you can just kinda make a mask that could be an any kind of silhouette you want. Honestly, don't overthink it, but I'm just going to make something pretty easy. So I'll just leave it like that. That's fine by me. And I may soften the mask and then Firm it up backup again by holding down Control. And then from it backup Control Alt, left-click. And now let's go ahead and go to Geometry. I'm sorry, I didn't mean geometry and high meant sub tools. And let's see if we can go ahead and pull out a piece here. Let's do an extract. And you know what, that's actually fine. I'm okay with that kind of thickness. So now that we have that new piece right here will show up below here. Let's clear off the mask hold Control and drag off. And let's just go ahead and we can use shift to kind of smooth that in. You'll see there's no real geometry or topology here. But if we hold Shift smooth, we can kinda bring some of that in there like so. And if you absolutely need to, you can certainly no doubt about it, you can go ahead and refresh that. At this point, we should know 0 measure as our friend very, very well. If you're getting too many pinches, takeoff transparency like that, see if we can make this a little bit bigger. In fact, I'm seeing these pinches right here for myself. So I may actually just go ahead and just do a quick 0 mesh. So for that, I'll go to geometry and I'm going to go through 0 mesh and just do a standard one. I won't do any special conditions for it. Just so I can smooth this out here. Here we go Some easier. And if we kinda hold down shift, we can smooth something, go out right there. Okay, So now that we got this, this little piece here, this is going to be our socks. So I'm going to go ahead and rearrange the silhouette of the sock because I want it draping and hanging down over this shoe. So makes sure the first thing you do is hold left Dalton so it can push it out like so, so it goes outside of the shoe. And now let's just go ahead and break up this line so it's not straight across like you're seeing here. Let's, let's have some fun with the silhouette and same thing here. Maybe try something that reads little bit more like a sock. And I think after we get to a place that we're comfortable with, you know, just like we have with, with every other process that we do with sculpting our cloth. Let's go ahead and work with our slash two and our standard brush so we can make some wrinkles out of that. So for that again, we're just going to give it a couple of subdivisions by holding down Command D or Control D. Let's bring up our slash toothbrush. So we're gonna go through our light box here and we're going to go through slash, slash to set up our slash T2 by turning the focal shift up a bit. And we're going to adjust and hit the L key for lazy mouse and do a couple of practice swings here. And again. And what I'm doing is I'm just kind of doing a slash and then I'm smoothing it out just to round out that slash so it doesn't look so angular or square. Okay. And again, take your time on any of this, please. Now we're just kinda carbon out. Doing something pretty easy, pretty simple. Kind of breaks out there. And again, you know, you can break it up with different patterns by using different brushes. Same thing, just like we did before. Let me change this into a stroke. Tab a little bit. Look. Bring that out a little bit more. This is just simply haven't some fun with all my brushes. Have a good time. And once you get to a point where you feel uncomfortable, correct? Any jutting out mistakes like right here, My want to go ahead and just kinda go down a couple of subdivisions, go through and readjust. Like I'll do right here. Feels like the feels a little too pronounced here. So we're just making Sultan back up and running. You can go ahead and take it as far as you want. You can also have fun again, like we've done before in the past, we can work with snake hook a little bit. And that also will give us more interesting distortion. If you want. You are welcome to kinda have some fun with that. Turn off X and definitely be careful not to have your x button on. So we now got that taken care of. I'm going to hold left Alt and just tap on the shoe to switch sub tools now. And now I'm going to work the rest of my time on the shoe here. So what we're gonna do is I'm going to just draw in a zipper because there's usually the traditional shoelace way. And I was thinking about, I was originally going to start that when I first made this, but then I kinda thought Cyberpunk is really open to interpretation. That's a lot of the time eat less is more. And I got to thinking about that Back to the Future, to power laces, how it has such a simplicity and almost a Cyberpunk feel. So I kinda like the simplicity of less is more. And also I don't want to go ahead and parade more complications with read topology Ising if this is a first-time user for read topologies rising. So I'll go ahead and start with doing kind of a finish off. I'm just going to go ahead and do a solo mode. I'm just going to go ahead and what I wanna do is I kinda just want to break up the silhouette of this area right here with standard brush. And then we're going to pick it up later on. I May 1 start before I do anything, I may do something like this where I may just kinda blur out the edges here a little bit just to kind of keep any distortions I make in this isolated mask. You know, of course soften any distortions. I'm making this isolated mask. I'm not affecting the silhouette of the edge loops here. So I'm just kinda cover and in that up a little bit here. And if you need to have a softer mask, you may need to do a 0 mesh, but I don't really think of going to need it too much. I'm just going to hold down Control and then tap to soften the mask. So let's go ahead and get started. I can just, it's nothing really crazy. I'm just drawing out some simple streaks through here, like so. And then anything that come, I push out or push in, if I get that, I just kinda smooth that out a little bit. And then of course, I'll kinda do a little experimenting and have some fun. And I'm just kinda trying to define different material by showing one part of this being sort of a leathery cloth fabric and then another part being a much more harder fabric. So maybe just kinda go through here. Just kinda breaking things up and clear off the mask and bring it back all in. Like so. So now we got all that taken care of. Let's take off our solo. Now the next thing I'm gonna do is I'm going to just draw a zipper right in the center of here. So by doing that, I'm going to hit shift in control and go back into my solo mode. And I'm just going to draw as zipper, some very simple, nothing too crazy, nothing too insane, just a zipper. So to do that, I'm just going to first hit the B key. And I'm going to choose one of my insert mesh zippers, either the metal zipper or the plastic one. I don't think it's really going to matter for me, but I'll just go ahead and choose this one. And, you know, legacy, the size of the zipper is based off of the size of the brush. So again, that's a good opportunity for you to practice. And as you can see, it's a bit of a big one right there. So let's go ahead and make that smaller and then tapping on there. And now I'm actually thinking, looking at that, I'm going to undo, I think I'm going to experiment with the metal zipper. So just to see if I think what I'd like to try as the metal zippered, see how that gives me Yeah, I like that one a bit more. And feel free to just kinda make something like that. Or if you want to go ahead and make one of the close zippers, that's fine too. I'm probably going to choose draw sides like that. Yeah, I like how that goes. Maybe go to draw a size 12 CL, that gives me kinda like that. And again, when the radical terms green, it means that you can do some adjustments here. You'll see this, don't worry about this. This is just sort of the piece that you get. I can cut that off either with a isolate select. Think I'm okay with that. So I'm gonna go ahead and clear the curve that goes through there by just tapping on the boot. And again, you can do the same. And then what I'm gonna do is I think I'm just gonna go ahead and use the Move brush. And I'm just going to left Alt, push this in just a little bit just to kinda tuck it in. Like so. Now from this point on, I'm going to hold Control Shift, drag out a green mask to cover and then I'm gonna release control shift, but I'm holding down that left radical and then I'm now holding left all to turn the radical read. And you'll see that's kinda of a minus. And it looks like I'm going to, I forgot this. I need to do a separation of this piece right here in order for me to do that. So let me go ahead and go to Split. Split, unmasked. Let's bring that guy back up. Here. I'm in solo modes. Let's take that off. Going to go ahead now and clear out that piece. Like I just told you. And clear out this piece right here. And now they're just simply hidden, so we gotta delete that. So let's go to Geometry. Modify Topology, Delete Hidden. Now it's hidden. Let's go back into our shoe again. And let's just go ahead and we can do several things. We can either cut it in through slash two because it's a displacement geometry and it will give us a little lip if we do it that way or we can do it through just a Anything from standard, if we wanted to, it's sort of your decision. But one thing I wanna do is I want everything mast except this area of the shoe. So I'm going to hold Shift, tap out to control with control and then hold shift. And I'm sorry, shift and control to bring everything back. And then once again hold control to invert the mask. So now let's go ahead and change this slash two. I know so many steps, but once you get through understanding the, once you're really on a foundation of understanding the hotkeys, this really does become a very easy process for you. So I'm going to use, I'm kinda using slash to kinda like that. From here, we can do several things. I think what I like to do is I've always liked experimenting. But there we remember what we said at the beginning of the course. We go beyond the concept. If you remember that it's very important if you want to use, for example, Damien standard and then start remembering what you learned about Crete, creating creases, creating anything from stitches from the other one. You can go ahead and do that. Remember this is where you're now going beyond what I'm showing you to make your own piece. I want you to stretch beyond that. So yeah, you can go ahead and just sort of create your own if you want. And let's see, I believed I also could use I could go now outside of my comfort bubble, maybe do a little bit old, that it's not so bad. And then I can just finish up with maybe some stitch. And you can use any stitch you want. I always like to using the same kind of stitch because it was my preferable favorite. And you can kinda do something like that if you want. All right, so now that we have all that, we're just going to finish up one last thing on here for this shoe. And what that is going to entail is, is that we're going to go forward and see if we can just put a little bit of a strap around the top area like a tongue strap, so that you can have a little bit of fun with that. And for that, we're gonna do some shortcuts. Now this is why we did the boot of firsts or I'm sorry, the belt first. So let's go ahead and go back up to where our belt was. That's that tongue piece right up there. And we're going to go ahead and just duplicate that guy. And I'm going to click on this little arrow here to move it all the way down, so it's with our shoe. And now if we hit the W key, we can center it back up again. And if I hold left all to click on this little rotational thing, I can re-center the rotational point. Now remember it's important you duplicated the belt because there should be another one right there. So make sure that that's duplicated. And we're just gonna kinda use this as sort of like a way to Closing the Gap for something a little bit simple. Just to have some fun. We're just kinda taken it in and reusing some modular pieces. If your level design artists, this is actually a pretty good practice for you. And I'll just go ahead and widen this up. And I'm just kinda right now placing it. And I'll do my course corrections on it with The Move brush. Just gonna kinda go around. Ring it above. And you're going to, once again, you may need to work with the SOC a little bit to kinda bring that over. And like before, you can just go ahead and kinda have some fun, not make it a perfect straight line all the way across. You can have some fun with that. There's no nothing that says you can't. Just have some fun. Do anything you want with this pattern. You can see it be, or I should say standard. For example, you want to do anything with an Alpha pattern. You can, you know, maybe i'm, I'm right now going beyond the concept of what I have on my reference. So there's nothing here on that. Since this is a poly group, maybe I want to do something here by and we're gonna go ahead and invert the mask duplicated. I'm just having fun right now, so bear with me. I'm gum going outside my my comfort zone. And now I see, there we go. So some fun. So I'm just kinda given a fun little pattern here. I'm not really haven't doing like my most advanced or I'm just kinda feel unlike something should be there. Yeah, you can just do whatever you want to do on this. If you go through pixel logic, you'll also find quite a bit of quite a bit of Alphas for hard surface that might actually be here. And now you can do that. And also if it does go both ways for this, like for example, you can have something here, maybe I'll just have some font, just do whatever you want to do. Before moving on. No one said that that wasn't against the rules. So having said that, that's kind of what we do. Like I said, we kept the shoe intentionally of a simple design because we wanted to focus more on the upper body. So I hope you did enjoy that. We're going to go moving on next to the hands and then finish up in the face. So with that said, stick around and stay tuned.
54. Explaining Faces Breakdown: Okay, and welcome back. In this video, we're going to give you a little bit of an intermission into what to expect from here on now, now that you've gotten through the body section, because now we're going to be working in the head. And the head is going to be a little bit more challenging for you, which is a good thing. And so we figured we'd add, lay out some guidelines and advice on where to go. From here on how you approach sculpting in this course, we're also going to talk to you a little bit about each phase of the head in the corresponding sections that you see. So we'll start with what you see on the left, which is going to be where Section 8 is. We're, we're sculpting the head. And in this one, we're just going to be going through the process of sculpting the head one landmark at a time, we're going to be blocking out the rough landmarks. But as we continue through, we're going to also sort of just add more as we go, sort of create increments of sculpts throughout the lesson. We'll go into a little bit more detail into that towards the end of this video. For now, let's just see if we can get through the rest of the sections here. Now Section 9 is going to be detachable face where we're going to work more with Booleans. And for that, we're going to actually be working a lot with both concave as well as convex Booleans, as well as some customizable Boolean. So you're going to get an idea what that feels like in the process. It's going to be pretty fun as we go through. And then finally, we'll go into the next section, which will be our fiber mesh section. This is going to be a section that allows us to go through and just have some fun with fiber mesh and show you a couple of tricks on how we align the hair to kind of render out through the bend, curve and so forth. So it's kind of a fun one to go through in that regard. So some guidelines we wanted to give to you. This pertains most especially to lesson 8. And this is a very important one for you to know Lesson 8. We want you to know that if you're a beginner, it's okay to go through several iterations of the same lesson over and over again. If you are having trouble with your sculpt or establishing a sculpt or the shape that is at the end of each video. Just remember a couple of things everyone arrives at. They're shaped differently and that everyone is going to have a different learning curve of catching on. So if you ever find yourself like just kind of stuck or it's just not working out. Just go up to that orange bar of that undo and just kind of scroll all the way back to a point you feel comfortable where it was at its peak and begin sculpting from there. I'm not necessarily going to say you should have to do that every single time. But I am going to say that if it does help a lot when you start with a fresh mind. The other thing that we wanted to talk to you about is kind of something that's a little bit more of a trick that my instructor gave me. And that is, is that as we go through sculpting facial anatomy, one thing he told me that is important is that tried to sculpt and establish the base shape of the landmark. In other words, when we're sculpting the eyes, we're not completely finishing the eyes were just sculpting the basic shape of it. And then moving on into the next basic shape. And what he likes to do, and this is kind of something I do myself now is is he likes to kinda sculpted somewhere around halfway on the eyes and then just move into the nose from there and then do about halfway through the nose. And throughout each video he showed, he does a little bit of incremental active sculpting that adds on additionally to every single lesson. So if we are finished sculpting the basics of that nose throughout in the first half, hill then go through the second half and kind of do some incremented IV small adjustments to the eyes. And then if he goes to the nose, he'll continue to do more incremental adjustments the eyes and then more incremental adjustments to the nose. The reason why we do it in this weird way as several, there's two big reasons. One, sometimes it helps to have an extra anatomy part is kinda blocked out to sort of make adjustments to where the previous and sculpted eye is or this previous sculpted nose is. So, in other words, like where the ends of the mouth meet down, up through the proportions of the center of the eye. Sometimes you need the other parts of the face to finally make it work and fit together. So that's one reason. The other reason is, is that he found that. And I find this the same. When you're sculpting a face, you're going to need to be able to give yourself a moment where sometimes your eyes can just get tunnel vision, staring so deeply into something. And you gotta give your eyes a little bit of a break and walk away and do something else. And by doing something else, whether it's the nose you start blocking out and then just kinda walking away from it in the mouth. You start blocking out by kind of getting your eyes away from the eyes or the nose and just taking yourself away from that tunnel vision mode. You kind of established sort of a fresh perspective of saying, wow, oh, I need to change this all I need to change that. So you're going to see how that works very much like from the very beginning lesson of the very first lesson on to the very last lesson, because it's all about incremented sculpting where I'm constantly taking a break away from something tour and never really committing to finishing anything completely. I'm just sort of increments actively adding more and more on the second half of the course or the second half of the video. So what I want you to think where the structure and all of this is going to be, is, is that the first half of the video, I'm going to kind of sculpt that basic landmark, whether it's the eyes, nose, ears, or mouth. And then maybe add a bit more detail to it. And coming towards the second half, we'll be doing more and more incremental native sculpting. And now we'll get more prevailing towards the, towards the end of this section. So I just wanted that to be clear, you know, don't commit necessarily to finishing the I completely don't commit to finishing one anatomy part completely throughout. Just give yourself a moment to just take a break from sculpting. Just like sculpt halfway. Give yourself a moment to take a break so you don't fall into any kind of hypnosis of tunnel vision where you can't see anything more on there. Because like I said, walking away from all of this can actually help a lot in a gaining of fresh new perspective. So with that said, just wanted to break that down for you. And in the next video we can get started and sculpting our face. So that said stick around and stay tuned.
55. Setting Up Head Reference: All right, So let's continue. In this lesson. We're officially starting in on the head here, and we're going to make sure everyone's on the same page and getting setup for the head. So that means we're going to be importing in our 2D reference as well as our 3D reference for whichever choice you want to take in helping you age you and learning to sculpt head. We're going to also remind you of a couple of things about the head in that is, is that if you're looking to start off with a sphere and get to this section here, we do have a practice session at the introductory in section two that helps beginner level students get acquainted with ZBrush by practicing on getting this shape here. Again, it's not necessary, but it's not like a course requirement. Again, this is a base mesh. And we do ask, you know, if you're especially a beginner in to take baby steps in arriving towards a head shape. When I first started in ZBrush around all God, ten years or over ten years ago. We would actually start in very similar shapes like this before going to a full face. So we had to take it in baby steps or self. So we do ask that you start with a course learning-based mesh here. But if you feel the need to go into sculpting from a sphere, we can do that too. So let's go ahead and get started. Now, as you'll see, the sub tool menu is a little bit more cleaned up. That's because we moved all of our pieces into the finished sculpt section, the belt pieces, the shoe pieces. And so all we have right now is just this piece right here. We also trim curved off the bottom feet so it doesn't stick and protrude out of the shoe as you can see. So let's go ahead and get started. And one of the first things I'm going to do, I'm going to disable the visibility of the shoe. And I'm then going to go ahead and hold Shift Control to isolate select. And because this has its own poly group, it will select just this area here. And I'm just going to hold control over and drag a mask. And from here I can go ahead and go down below sub tool to where it says split and I'm going to hit Split masked parts. So now that this part is completely alone that way when we do subdivisions, you don't need to worry about dividing the whole area. Again, the practice mesh, we go over this stuff in the creation base mesh if you want, but just moving on. So now let's go ahead and turn off the body since we can move forward. And we're going to go ahead and import in our reference. Both are 2D reference and our 3D reference. So without further ado, let's load in our spotlight to begin with. And that's our z SL file that you have. And I'm just going to hit Z and hit tile proportion to get everything tiled there and just kinda shrink it down. I'm going to then go ahead and import first off my 2D reference. So that's going to be in texture import. And my newest import is going to be a basic head mesh. Let's go ahead and load in this and talk about it. Now what you're seeing here is I'm going to click on it and then click Add to spotlight. What you're seeing here now is your scene, the pre-created set section. Now I know we haven't had an attachable piece and the I section around here. And again, we update our reference and we are going to go ahead and do that detachable face. But first we want to have a complete face before we move on to that detachable face. So if you're wondering, Wait, this isn't the reference from what you showed us in the video. Don't worry. Again, we'll go over that as we update our reference, we're going to show you how we can easily swap out stuff out. You'll find it actually surprisingly easy. So let's go ahead and just turn off spotlight by hitting Shift Z and bring in our 3D reference for anyone that really wants to start on an easier level, we go to Import and 3D head reference again, all these things are found in the all these things are found in the resource folder. I forgot to say this makes sure you, if you've imported your 3D reference in this piece disappeared. Just go ahead and hit Command Z and click on a different tool up here to bring in a 3D reference. Sorry, my bad. So we'll do that one more time. And now we'll go back into our tool of our reference that has our other completed pieces. And we'll hit one sub tool append. And we'll bring these two in. So now, once we have that, I'm going to go into split screen mode one, hit F to frame it up. And then I'm just gonna go ahead and do a quick 0 measure because I'd like to have some. Some divisions to work with. Now we did do DynaMesh and with the sphere on this. But from here on out, we're going to work with subdivisions a little bit to get what we want. So I'm going to again go through and geometry 0 measure. And let's go ahead and make sure x is hit before you hit 0 measure. And let's just don't forget to turn on local cemetery. And we can just go ahead and get started there. And it's just gonna do a quick little 0 measure with target poly count of five. Just so we can have a lower res, reference because we want lower red so we can collapse things down easily with the, what is it? The smooth brush. Kind of. Also don't forget, let's, I'm gonna move this head up to the top row, hit F. And just going to hit some kind of centering my pivot point to be up here. And then I'm holding left Alt and clicking on that. Clicking on this while holding left all to re-center the orientation. Even hit a little bit back to a little bit wider, just a smidge because we lost a little of that when we went into this mug. So now that we have our 3D reference setup, what we're going to do next is we're going to start blocking out our eyes. Similar to how we did it with the with the what is it the I'm sorry, the close of the base mesh. We're going to try to establish a rough silhouette shape of the eyes. We're going to be taking it very easy. We're going to be taken it very simple. So it's going to actually go through. But before we do that, one thing that we're going to do is we're going to make some small, little minute adjustments in the head just so we can get started before we go through blocking the eyes out, we want to go ahead and just try to set ourselves up for creating a block out of the eyes. So let's go ahead and get started with that. First off, I'm going to measure hold control and kinda measure my rough. So what so I see looks like the chin is slightly higher. And maybe noes can go down, probably the eyes. Only this whole face can go down. And let's go ahead and do that right now. So I'll be working on the move tool. And we want to try to make that knows kind of in-between. And I'm just working on basic silhouette shapes. One thing I forgot is you can go into perspective. But one thing to be careful of is that if you're working in split screen mode and you turn off, the H4 is the horizontal camera, you're going to lose your piece. So just kinda make sure that's in mind when working with this in perspective mode. So just kinda bear with that. Now, let's go ahead and continue on with our sort of kind of working on establishing silhouette of the shape makes sure you're having symmetry on with your x. And this is kind of why I like having a little bit of a lower Rey's because when you're working with the Move brush a lot, you're going to want to work with lower Rey's topology to start off with, because trying to move things in higher rents, depology creates a difficult time and smoothing things out. So bear that in mind. It's also raised the ears up a little bit. Make sure they're kind of align with the eyes and the lower knows. Just kinda, kinda rounding everything out. Then just kinda holding Shift to kind of blend it all back in. We're just kinda creating sort of like a, a rough in Chine ourselves closer to the shape. And again, on the next upcoming lesson to be, we're going to be working on doing a block out of the eyes where that is going to go. So I'm just going to just go ahead and maybe. You a faint look right here. Like so. And go try standard to help me out there. And oh, I'm before I forget, I'm probably going to give it three more divisions. So at this point, I'm going to hold Control D and hit it 123. So I have four subdivisions under geometry. Now I can go down and up with the resolution Shift D to go down, D to go up. And I'll probably work on just a little bit sculpting. And I keep in mind, bear in mind you that typically this does tend to always look a little ghoulish when starting out. That's because we're mimicking anatomy properties of the skull. Let's go ahead and do a quick little and may do one more division, but I'm not entirely sure I needed I don't have really all that much. You don't have very much to work with. Maybe see your ads enough. Maybe just carve out a little bit of a temple region and hold Shift to kinda move it in. And then do the same. Kinda bring in a little bit of a just having fun and a little bit higher radius. Smooth the whole thing out. You can do in this is what I say. You know, feel free to experiment with the different radiuses. If you feel like you're starting to lose geometry, don't go to, don't fret too much. Remember, you can always tried to 0 mesh this once again, or just go up with D on a subdivision level and just kinda smooth it out. Like so. So what we're doing is we're just, again, just trying to setup for our proportions on our eyes, on sorry, on the whole face here. So that it matches again. You can use this section as well if you want to help. All right, so that's probably as far as we're going to make it go just for now and may bring a little bit there. And again, this is all just some fun funneling that we're, we get to go through throughout the case, throughout the course. So don't commit and say everything's done just because we finished one section or like for example, you may say all the I's are done because we went through the ice section. You are welcome to continue on working with the eyes even past that moment. So let's go ahead and troponins. C do have a little more work on the years when the ear section, ear lesson comes to be. All right. Little bit right here. Kinda try to establish a little bit of a foundation slant there. And again, all this stuff will be filled in with the volume that we need. Through. Clay. Clay tubes are standard, if you will. So this is sort of like this beginning stopping point that I want you to get to. Because again, this lesson was about establishing your reference for your 2D reference, your reference for your 3D reference. And you're trying to get a good baseline on proportions for everything. Like for example, we see something here that R knows could go a little bit higher, so could our eyes. So let's go ahead and just make that. And you can do the same thing with the head as well. And I'll obviously it's not renders, but when you're working with a concept or a reference, you're doing pretty much the same thing. So we can go ahead and do that and you can kind of see it kinda matches up a little bit easier Now that way. So just take your time of work. It's slowly and get roughly around to a stopping spot like this. And just pace yourself, please. So with that said next lesson, we're going to be blocking out our eyes. So stay tuned.
56. Blocking Out Eyes: Okay, so let's continue in this lesson. We're going to continue on in Wake a blackout for the eyes here, just a rough shaped block out for us, just like we did with our clothes when we did an extraction with some base meshes out of it, we're just going to capture form in the eyes. So to get started, let's go ahead and put some spheres in there. To do that. We'll just go ahead and hit into sub tool append and bring in a primitive sphere which will be at the bottom of your sub tool. And of course it's going to be on the bottom. So hit F to frame out. And we'll just go ahead and just kind of use the gizmo tool by bringing that up with the W key and scaling that down. So we can get an I in there. On the right side. We want to put it or this side here. So I'll just go ahead and just bring that IN. Ideally the size of your eye you want to make about it's going to be a little bit bigger than you see in like a normal eye because it's kind of misleading very often. But I always go half the length diameter of the ear. But it was a good starting spot. So let's go ahead and get that in there. And remember placement at this moment, although it's important, it's not entirely crucial just yet. We can kinda 0 back if we want and do some readjustments. So don't get in this mindset process that like, oh, I have to have exactly in a certain spot. It's not going to be a nightmare if you misplace it, you can always readjust later. So don't just get something in there right now and then any adjustments we can cover later on down the road. So now that we have the I there, Let's go ahead and duplicate that I. And let's go through deformation and hit mirror copy. Now that we did that, that we duplicated the two sub tools mirrored one over. Let's go ahead and combine these two. For that, we're just going to go under sub tool merge and combine these two sub tools together. That's what merges. So we're going to merge down the sub tool below. And now we can finally begin. So this point, you want to go ahead and just hit quick save so you have yourself a good starting spot. All right, so now that we have the eye, Let's bring in a little bit of volume. I might go up to subdivision two just to bring in some volume. And again, I can just left all to and adjust any time I want. If I feel that the eye is a little bit off. But once you are at a comfortable spot with the eyebrows, we can just sort of bring in some volume. I'm going to hit Transparency, select a volume brush like clay buildup. And I'm just going to kinda just make some circular shapes, circular strokes just so I can bring in the volume to just go above the eye. And if it's too much, we can go back. We can circle around what we're just kinda crafting and creating sort of an I start off. So let's bring it up one. It's because and then just maybe hold Shift and smooth it out as you just to relax to geometry. Let's go ahead and fill these creases down here a little bit. And as you go through a stroke, I'm going to go ahead and turn transparency off now since my tree is all, they're going to bring the eyes slightly back a little bit. Feel like the islands are protruding a little too far. Looked old. I'm just kinda making some strokes, some oval ish like strokes. You can always choose some more maneuvering either through standard or move brush. To kind of pronounce. I'm just kind of improvising as I see the adjustments that are needing, I'm responding to. Okay. I'd be a little too pronounced the two pronounced than I might just collapse it and let's bring the eyes and just a little bit more. Now, you noticed I didn't really go through any major like any sort of major like crucial placement. I just kinda put the eyes in there and started adjust seen accordingly. So now that we have that in there, Let's go ahead and kinda push in with the standard brush to kind of cut into it a little bit with left at all. So we can get something in there. And now, let's just go ahead now and start bringing up a reference and start cutting in. Try to mimic the eye shape as best you can with what you have here. So I'm using standard and I'm kind of taken some practice strokes to kind of show to get my eye correctly as needed. Just to sort of get an eye shape. We're just trying to craft a nice shape. I know that doesn't look like an I, but don't worry, just get something in there. And then we're going to work on getting our Move brush. So it gets a little predominant to the upper area. Let's bring in, go down one. I accidentally duplicated mesh command and to delete that, kinda see how it's beginning slowly to take its form. And as we go up, we're just going to have to very gently glaze the area. Now the eyelid kind of is more protruding little forward from the eyelids. So that is something we'll have to keep in mind. Let's bring that back. Bring in mu. Right now we're just working on blocking out the, I am getting a little bit sidetracked. They're the sort of kind of like that a little bit. One. Again, that's why I like working. A lot of people like working with DynaMesh. I don't like working with DynaMesh mainland because you gotta get everything right on one division before making yourself up to the next division. And I kinda like having a little bit of flexibility of going back and forth between divisions a little bit. So in case anyone's wondering why I prefer that route. Right. Now, Let's go ahead and take a real quick peak. We're going to and I always say this, I haven't said it enough, but I'll probably say it a little bit more to you if the eye shape you get or what you do doesn't come out in the way that you want. That's okay. Just got to remember that you need to just do what my instructor always told me, tells me to do. And that is start over. Just make sure you save. That's why we said quick save at the beginning of this course. And then we're gonna go ahead and then you just go ahead and pick up. You just have to reiterate and do it over and over and over again. It's just practicing the same thing over and over and over again. Use your reference. Right now I'm using more memory than of what I know then the reference, but you have your 3D reference all set to go for you. So kinda remember that as we go through all this. Now one thing I always like to do is I kind of like to I kind of like using Damn Standard left and left all to kinda pull out a little bit of an accentuation. Of the eyelid. Little bit here. Show a little bit more. I'll give a one more subdivision, so we're on the same page here. I'll go ahead and reset that. And so then go ahead and do it one more time. Get an even spacing here. For that. I'm going to need the MOOC brush a little bit more just to pick it up here and just want to make sure we have an even line Throughout. Same thing on the bottom, sort of a thickness. Thank you, sing. And then I'm just going to divide it one more time. Kinda smooth it out, just a little bright and just kinda very gently smooth it out. And let's see if we can keep a little bit more. Then just kinda re glaze over and smooth it out again. Might go with pinch Also another one you can do. But this is going to be sort of like a refinement that we do as we go through now you can always again do the same thing. But another thing that is going to be sort of an idea for you to sculpt through is that we're going to go through a two-part iteration of making this i, what you're seeing right now is sort of like a block out of the eyes. As CBC with this is kind of where we want to get you to. And then at, after this, we're going to want to take it one step further with sort of refining the I by adding more details. Cleaning up the surface as we see here, maybe experiment with some different brushes as well. If you want. You can even start out, I kind of always like doing damn standard, but another brush you can do, I don't like using it too much is clay arm, sorry, pinch brush. You can actually get some pretty good results in getting nice crease on the eyelid here. But the drawback is it kinda scrunched, is all the pulls, all the geometry together. And as a result, you kinda lose a little bit in the process of op here. So that's going to be kind of the trade-off between this. So like I said, this is going to be our starting or stopping point with the eye. It's sort of our Blackout to it. In the next lesson we're going to see if we can finish this ion. So stick around.
57. Sculpting Eyes: Okay, so let's continue in this lesson. We're going to go ahead and continue working on our eyes, just blocking out some of the shapes a little bit more, getting that eye shape correct and getting placement on the eyes a little bit more easier. We're also going to go over how we can, if we need to perform an operation that requires our geometry to delete our subdivisions because there's some tools you need to use that have an effect on deleting subdivisions. We're gonna go over how to reconstruct that back. Now again, couple of things before I start. If you are at this point or having trouble getting to this point, my teacher ten years ago told me one of the best things to do it may not sound fund is to start from scratch, start over because your iterations get better every single time. So I say that over and over again. That your iterations are going to get better every time if you're doing it over and over again from scratch. I'm not talking about any scratch. Maybe just like from this stopping starting point, make a save file and just start over from this point or the previous lesson and so on. So with that said, we're going to go ahead now and continue forward. And so first thing I'm going to do is I'm going to go ahead and you'll notice again, I have pretty much like four subdivisions. That might be a little too much. If I probably could say, you see a little bit of a slight variation of lumpiness around here, maybe on the fourth subdivision. So I might just go ahead and shift down and delete that one. And honestly, I could just shift down again and delete the higher subdivisions. So now we have just subdivisions going this high. And the nice thing is, is if I read divided again, so little bit more smoother because it's not, it doesn't have any data on there, but we're going to keep it at three subdivisions. We go on. So as you can see, kind of from our 2D concept, we got a little bit of a, a fold that goes in underneath here. And also another thing is, is that if we look at the eye, you'll notice that the eye has a little bit of a lip that have, that overhangs over the lower eyelid. So let's start and see if we can get that replicated. So I'm just going to hold control. And before I forget big note, make sure you hit X. I'm going to make sure to tap local symmetry over here on and just hold control. And we're just kinda maybe make our draw size a little smaller so we can get a little bit more accuracy. I'm just taking a very easy at a time and just trying to create like a little bit of an overhang. So I might move it up with the Move brush and then left Alt to kinda tuck it in like you see here. And then clear the mask. And then I'll just vary with a small diameter size. I'm just gonna kinda smooth that out a little bit. Well, actually I could, I'm going to undo a little bit. I think it can go a little further. There we go. And then it's kept in a little bit wide over there. And you can kind of see in this lesson is really going to be like very small minor moves that we do here. We're doing just the smallest and in the minors, minor of move, very minimal movement. It's just sort of a refinement. Sort of spake. Then I'm just kinda using smooth the kinda, just kinda bring it out a little bit. There's a little bit of a fold also in the upper eyelid between the eyebrow in here. So again, very similar. We're just going to go ahead and maybe just kinda whole control and bring the mask and a little bit. And I'm kind of gunning for a little bit of trying to capture as much of the eyelid as I can before I do, It's pretty much the same concept as before with the eyelid. Or just kind of replicating the same. Idea here, but just with the entire eyelid. And then maybe just one you can switch to a lower one. But I'm probably going to first off, just see what it looks like. I'm just bringing that down, maybe just seeing how it looks. And again, just cleaning up with the smooth brush. And when I'm using smooth up here, I gotta remember, smooth is going to probably collapse something down here. So let's just go ahead and mask that out and maybe just make holding Shift and I'm just kind of bringing it in a little bit. So you can kinda see we're getting a little bit more of our crevice or shape to be. So we can go ahead and move on. Maybe we can do some construction with the eye lid here. A little bit more of the lower eyelid. It's not really on your reference, but this is why video reference is going to always be so paramount and kind of do a little bit of work. And I'm just going to hold control to soften that mask. And now I'm just experimenting on my brush to see which one I'm going to use. Maybe. I'll go with something like that. Perhaps. And then maybe all worker and a little bit of magic. All depends on how much you want to do for the anatomy there. Now. It's coming along a little bit now it's a little bit finicky in some areas, but it's starting to look a little bit more like where we want it. So why don't we try to focus on making the area right here be equivalent. Same above. It kinda juts out a little bit more. Around here. Let's think about our eye placement now, the upper eyelid, we're going to want that to be a little bit on the phone. It's going to do let me see if I can give you. It's not two prevailing in on my reference. But one thing you wanna do is kinda want to bring that eyelid to be a little bit more forward. And that might also mean you need to move the eyes just a little bit up. And if that's the case, you might also need to move that up a little bit. Now. It's getting a little bit closer. So now what we're gonna do is we're going to work a little bit more on placement of the overall shape of the eye. Let me go ahead and tell you what I mean. Like the sort of shape that we have here. So it's a little bit slanted here. There's a little bit of a curve. And then on the downside here, seems to be drooping a little bit more on the side than it is over here. So let's go ahead and see if we can bring up that eyelid. Show us the smudge. I want to be careful. I don't want to move anything on the top area here, so I'll just mask that off. Again. Just take your time. You're still not down to a meat and potatoes adjustment just yet. One of my favorite adjustments is actually doing a combination of bringing the sub tool and the eye and the head, merging them together and doing my work continued on from there. And I'll show you what I mean for a second there. Let's just bring it in there. Maybe left-click on that. I see when we bring it in. And so it's a little bit what we want. And I'm just taking my time. Now one thing I'm looking at as I'm doing this is probably going to just say, yeah, I like that point right there. You can go through a slider, kinda go through the slider and just kinda see where. Good stopping point is. If you feel like you've strayed. Now, here's what I'm going to do next. I'm going to go through sub tool and I'm going to go ahead and take my head. I'm just going to click on this down arrow to move it all the way down. And then I'm gonna go ahead and combine my eyes with my head here in a second. Before I do that, let me go ahead and bring the ISO up just a smidgen more. I'm just going to go on. What's going to happen is I'm going to combine these two briefly in a second just so I can sort of capture out my bearings just once before moving on. So what I'll do is I'll click on that. I'm going to hit Merge Down. And what that's gonna do is that's going to kin by my two sub tools, the eyes and the head. But it's also going to delete all geometry of subdivisions. Don't worry, we'll show you how to get that back in a second. But why do I like doing it this way? This is sort of my final thing I like to do. Make sure after combining you hit X again. You can kind of start to now get an idea just by looking at this that I'm actually going through and establishing what it is that I want. It's starting to look a little bit more feminine. Honestly, I like these eyes more than my reference eyes, but you can kind of see how it looks a little bit more. Kinda tuck in the lip there here. Let me undo that second one to mess with that. Kind of see where we're going now a little bit more. And once you have a little bit more of a kind of an idea where that is. You can retake these eyes, kind of isolate, select, mask them off, go through sub tool and then just split the mass points left, all click on the head itself to select that, and then just go through geometry. And once more, he just hit reconstruct subdivisions. And you'll get your three subdivisions back like so. So that's sort of like one way we can do it now. Okay, with where it's starting to look a little bit more like what I would like to see. It's going to look a lot better when the time comes for the eyelashes to be put in. What Let's go ahead and maybe just as we see our adjustments, the nose is slightly higher. So let's go ahead and Shift D and bring that nose down a little bit more. Just so it's a little bit more of a crevice. You can kinda see how it's finding its shape a little bit more. Just treat it like it's an iterative process. Basically. No. And if you want, you can go ahead and give it to a one more subdivision. At this point, everything's kind of smooth. We're not doing any skin details are pores just yet. Let me go ahead and bring that in. But if you can get to this point or stop at this point, that is a good place to stop at. Then we're going to be proceeding forward into the well, the block out like we did with the eyes. We're going to do a block out towards the nose. And we're going to then fine detail out and the nose and then finish off with the mouth, and then finish off with the ears. And then we're going to do an overall checklist of the entire face again, readjusting, making sure our proportions are all there. You know, checking for things like this. For example, in outgoing up to the forehead and creating our our forehead anatomy by sculpting and word a little bit of a platelet. And then kind of in that forward so we can have a little bit more. And I'll things like this, you know, we're gonna go through all that as well. So with that said, this is, this should be sort of like a stopping point for you. If we can kind of see what the details of this are, I can probably just go ahead and hit first of all, quick save. And if we go to the very beginning, I guess it doesn't really have and that's probably where we were at towards the I think that was before we mess with the eyes. But if you kinda look at the picture in the beginning of this lesson, you can kind of see the difference which is closer towards here. So that's just bringing us again one step closer to female face. Next lesson we're going to work on is all blocking out the nose. So stick around and stay tuned.
58. Blocking Out Nose: Okay, and welcome back. In this lesson, we're gonna kinda continue on where we left off. We kind of did the main parts of our eye and we're going to move into blocky now to our nose next. And just one thing we want to take into account is, is that even though we're moving away from the eye doesn't mean we're technically done. We're going to find, as you do one piece of the landmark in the face to the next, you're going to always find that you might still need to readjust previous landmarks now that you've sculpted the next landmark out that you have to adjust your proportions. And for that end, why we use our reference to recheck ourselves. So that's going to be sort of the underlying theme of this lesson. We're going to show you how we constantly recheck ourselves again and again through here. Now this time we're going to work a little bit more with our 3D reference last lesson we did 2D. So let's go ahead and get started. So the first thing I'll do is I'll just kind of just get started with making my eye or I'm sorry, making my nose a little bit more. As I see as I go through here. If I look on here, I probably could do a little bit more foreboding on the raul just a little bit. So I might just like just mask that area softened a little bit because I am after all a stickler. And just going to move the eyes just a little bit back. Just a little bit more fun. So it looks a little bit more feminine slightly. Now let's just go ahead and get to that. I now on here I have 123 subdivisions right now. But I believe actually I have four. I'm going to go down and delete that. I don't really need four, I just need three, so I'm going to delete that higher. We'll get back to a woman gets started here. So let's just go ahead and just get started here. Maybe I'll start with a lower subdivision and just add just a little bit of a nudge, just a slight nudge. You don't really need to have it too insane. I don't want it. Most people just go too far out here. I just barely touch it to the end. So it kinda looks like a little bit of a triangle that you see here. And then I just go with Damn Standard and carbon, a little bit of a crease, then I proceed to readjust afterwards. So let's go ahead and see if I can. We're just kinda messing around score, just kinda sculpting the landmark out here. Might go up as subdivision and try to make that crease. If your nose is a little bit off like shown right now, just don't worry, you can use the Move brush to course, correct? Don't think you have to get up perfect stroke. And you carve that crease. Can just kinda, it started like that. So now let's go ahead and just see if we can add a little bit of some nostrils here. And I forgot to hit L key to turn off lazy mouse. That way you can get a little bit more. Just getting the basics in there. That's all we're doing here. Oops. Go through a little bit smaller. Mm-hm. Kind of see, we're already starting to get a nose to where it looks like right now. Notice I'm doing these minimalistic movements. Looks like we could use a little bit more cheek on there, especially here in this area. When we get to the mouth, I may carve my little crease town here, but until then we're just gonna take it nice and slow. So now let's just go ahead and we've made all sorts of adjustments. We've made all sorts of changes. So let's just measure it with our reference now. So if we turn on our reference and then go into split screen mode, you'll notice that there's a pair spheres there. That's because the sub tool of the eyes is detachable. We'll just turn that off just for now. And we'll get back to that a little bit later. Right now we're on the basic block out mesh for the nose. So we haven't really done too much with it yet. Or just trying to get a basic landmarks sculpt so that we can start off with. And then I think I might go through a little bit more. But more there. Here we go. Let's see if we can add a little bit of volume. I like to use clay to kinda bridge, merge their hair everywhere, which is a little bit. So let's go ahead and reef measure our volume here. Now if we look on here onto the chin, if I hold Control and drag all the way to the right there you'll see our chins a little bit off. On the right side. You'll notice that our nose, the nostrils a bit higher. And if we go to our RI, the eyes somewhat in the same spot, I rouse or actually a little bit higher. So we'll have to look into that. What we're doing is we're just doing sort of like a check to see all the things that we can move. So let's start with the, Let's Move the top of the head and get that to be a little bit more proportionate. Now remember, we're using Shift D, we're going in a lower subdivision level. We're going to go ahead and switch into move. We go into lower subdivisions when we like to move, use our Move brush. So it's a little bit closer. So that's probably where we want it. And now let's take a look at that bottom area right there, that chin. Let's see if we can do it from there. Look, I don't want to move the face, so just want to move the US, the chimp. Good it a little bit to like that. Now the nose is probably going to be just a little bit different to see. And also our For head shape is a little bit kinda slants and goes down. Mine on the other hand, I think because I moved it. Let's try the front. What we're doing is we're just kind of moving everything up a little bit. I'm going to go ahead and mask. And then invert and make some bigger masks and bigger draw sizes. You know, I'm doing is just kind of reshaping everything, just re measuring all my proportions. This one's a little bit, a little bit. Should we say it thinner than the other one? I kind of made that choice of my own because I kind of want thinner, angular chin on this one as opposed to the other one. And I need to put some cheekbones more in here. So now that we made these faces, we're probably going to look at our eye and we'll notice that the eyes a little bit off again. So let's go a higher subdivision, little ghoulish. Let's bring that i, and by left, clicking on that, I bring it in and up again. So now we got it a little bit closer to where we want it. Let's continue on with getting that knows a little bit more squared out. So one thing I'd like to do, which is a little odd you may think is, is actually I liked to work a little bit with trim dynamic on the ridge of the nose. So if I hit B, T, d, brush T for trim, and D for dynamic, that's this brush right here. I kinda like to do weird little thing where I just kinda like to just do a very little subtlety break there and then just kinda do a, a very subtle smooth. And you can always do that anywhere. Just kind of have some fun with making something like that. It's actually a weird little quirk I like to do. Maybe then carve a little bit of a subtlety grew with Damn Standard. So that we can kind of get ourselves situated. And now that I'm kind of approaching a little bit more to the end here. Let me go ahead and recheck. There's still some things I can do with the nose. Let's go into split-screen again. And again, you can use split screen or you can use the 2D reference. See you're caught case. 2d reference might be slightly easier. One thing I like to do is go from side view. Do just a little bit more and you know, checklist of everything. You have a little bit of an eye socket that kind of goes up here. A little bit of a eyelids are a little bit higher up here as well. So let's go ahead and make that our next charter towards the mouth. I'll probably fix them in this upcoming lessons. Like I say every lesson I like to remeasure things constantly and add a little bit more iteration. For now, I'm going to use this time to catch up with other things. So let's go ahead and see it's a little bit angular here. Let's see if we can do some similar. Make sure we hit X. We go mean, kind of see how that nose is beginning to take its form and take its shape. It's just the basic concept of the nose. So all we're doing, we know a little bit more of a shift. Smooth, thinning it up a little bit, just give it a little bit more subtlety. My work a little bit more. She has a much broader range than I have here. And that's again, an intentional change. This one's based off of one of our old z. We're references. I kinda like this one because I see a little more potential and where she can go, but we'll probably start stop in there. One thing I'd like to do is add a little bit more of our cheekbones into her. So I think I'm on subdivision two right now, adding some cheekbones. And this is just a little subtlety. Don't do very much, please, please. Now, we just just hold it a little bit and just very gently. I'm talking very generally. Just kind of sling it throw. Keep in mind that we're going to have to have something here as well. So, so we're taking our steps a little bit closer to getting this. Remember what I say to you over and over again. Every lesson on here is an iteration that we're adding. So not only are we doing, you know, like an add to the nose, but we're doing additional refinement to the eyes were additional refinement to the cheekbones, additional refinement into the forehead and to the chin and so forth. So it is coming together slowly. Let me repeat more RIs and again, because I think it may have been off. So we might have to bring that back in. The eyes, have to be again similar that then I'm going to hit X to turn on symmetry. You can go ahead and chest it by bringing it forward. And then wider. Or if you want to narrow it out a little bit, just bring it out a little bit. Like so. Kinda see, once we start getting things like the eyelashes on here, it's going to start coming together. You'll start seeing that come together a little bit more. But as we go forward and bring that out a little bit more, as we go forward on here, we're going to continue to advance on things like the eyes and it's proportionate width to the mouth and so forth. And ears, in terms of top of the ear matching to the eyes and the lower IRR matching to the bottom ratio, the nose. Things like that are going to get more and more parents. So like I said, every lesson we iterate. We do have basically like I say, a main theme or we block out a landmark. And as we're blocking out a landmark, we circle around and continue the secondary details very subtly through. So with that said, our next landmark is going to be closer towards blocking out our mouth. And with that said, Stay tuned.
59. Blocking Out Mouth: Okay, welcome back. In this lesson, we're going to move on to the next landmark, which is going to be a block out of our mouth. Now once again, landmarks are like little sections of the face, like the eyes, the nose. Those are all considered landmarks. And again, what we're trying to establish is the basic shape to work off of. So what that means is, is that we're not trying to sculpt every ounce of anatomy there. We're just trying to get the rough shape idea. And then, like the previous landmarks, we increment an add little micro adjustments every subsequent lesson. After that, as we move along making new landmarks. So let's go ahead. In this lesson again, it's going to be the mouth. And in the first half of it, the second half is probably going to mm, probably going to work a little bit more on that incrementing micro adjustments of the eye a little bit in the eyebrow and check its profile on the side because I'm looking at it and I feel like I can actually do a little bit more and bringing that back as it is. So let's go ahead and get started though. So in the mouth, one of the things I like to do is I like to just kinda check to make sure I have a good enough real estate around here. I'll bring it up one subdivision. Actually, I'll stay on my lowest or second subdivision. And I'm probably going to work with Move brush to start off with. And I'm just going to kinda fill up a little bit of the face, just kinda rounded out slightly just holding left all pushing some of it out and then smoothing and across. And then I'm going to, the first thing that's going to go to my head is I'm going to switch to dam standard, go up one more subdivision. And I got to be thinking about drawing my mouth line. So for that, I'm first of all probably going to do a couple of practice strokes. Yeah. I might be able to go some somewhere around 20. Yeah, that's probably good enough for me. And probably in ideally, I want to go somewhere where just as the it's touches the iris down. Now there are different widths, different widths of mouth. So keep that in mind. I might do a couple of practice strokes. And again, you're welcome to do that too. And I'm just going and I'm not going to start right in the center. I'm probably going to start a little bit higher here. I might also keep in mind, after you make the base mesh, you can do some adjustments. We're, you're expected to do adjustments after so, so let's go ahead and just kinda draw in our mouth a little bit. Like so. Get a bird's eye view. Ideally, you want the eye to kind of match up to this length. So it kinda bear that in mind. Let's go ahead. I might even just add a little bit more real estate to Mao. Just a little bit. Get her started. Not yet. Okay. So from here, I'm then going to carve out the lips, which is going to be left Alt. And I'm just kinda, kinda bring the lips down from there. Like so. Again, you don't get too bogged down on what shape your lips are going to be. I think my reference has a little bit more rounder lips. And again, that's also fair as well. And you're going to find yourself wrapping your head around trying to make just the perfect shape lips. And again, that's going to all be part of the micro adjustments sections. So just just try to focus on trying to get something that is the rough shape of everything. So again, I'm just kind of you can kinda do it like that. I mean, there's, there's all sorts of shapes but try if you can to hold little bit. Don't try to go past here. It's slightly around here that you want to draw into. So it's kind of already getting our shape to what we want. So now the next thing that we're going to do is we're going to it. We want the upper lip to be a little bit forward to the bottom lip. And you check your reference. You'll see that in some ways you want to think there should be a line that kinda draws straight across here right now are lipids and behaving that way. So let's go ahead and work on that. So let's just go ahead and mess this out. Hold control to invert. Again, bring that in just a little bit more. So it's a little bit more of a predominant line. Again, we're just taking our time. We've got things, plenty of things to deep filling out the side of the dimples going down a little bit of volume here. Underneath the lower lip, we got to work on even adjustments to the mesh itself in the lower lip if you want, and its shape of the upper lip if you want to make some changes, we got all sorts of fun micro adjustments to make on here, just like we're gonna do in the second half with the eyes. So let's go ahead and then just do a couple more things on here. And then we'll move into some micro adjustments with the eyes and slightly micro adjustments with the nose. So let me go ahead and just, I think what I'm gonna do is I'm going to mask these lips out, holding control. Like so. And then what I'm going to do is I'm going to invert the control and then hold down control and smooth things out a little bit more. Now, I'm doing an invert because if I did it the other way where I just inverted in with smoothing, the match score would fall off here. I don't wanna do that. I want the mass to reach out here. So I might just tap things he wants just a couple of times. And I'm going to just very slightly bring out the lips just slightly. So we have a little bit more of a straighter line and then hold Control. Switch to a lower level here. When I'm working with my mood brush. I'm just gonna kinda ring in a little bit. Like I say, on the sides here, we don't tuck it in too much closer towards the lower lip here that you see, we don't want to tuck it in too much. It's more predominant and the lower lip. So kinda keep that in mind. It would kinda getting ourselves, again, this is the base mesh of the landmark. Think of it like a base mesh. It's like the shirts we extract, it has no form or anything. It's just kinda get us started so that we can then start beginning our micro adjustments. So just kinda keep that in mind again, I'm going to probably also sculpt something in the center here, and this might be a good place to lock it off. Maybe do just some very subtle holding Shift and smooth. All right, so Now we got plenty. That's kind of already where we want to start. We can make, we can already see there's plenty of things we can do. Maybe make the eye of mouth a little bit, for example, wider or maybe needs to go up, maybe knees go down, anything that we need. But again, we're not going into a crazy amount of detail because our micro adjustments are still being done to the eyes, the nose, all the proportions that we do here have an effect on where our proportions are here. So that's why we do micro adjustments on the second half of our core, our lesson in each lesson for the face anatomy. So let's go ahead now and get started with the eyes. Okay, so let's go ahead and work that out now. I also may work a little bit on the cheekbones just slightly to give a little bit more volume on here. Just so I can have some that work with. So let's go ahead and do the eyebrows verse. I want to go ahead and take care of that. So I may take it up to a division like this and just kind of do a nice little mask and then hold Control to soften that mask out. And we can collapse this down through smooth. Or maybe you want to work it through MOOC. For now, I'm just going to work little of both. So I'm going to smooth it. Holding Shift. Then maybe move, going to kind of bring it in a little bit more. So it's a little bit more feminine as you can see from looking on there. All right, so we're getting a little bit closer. Let's go ahead and again, let's add another mask. Oh, probably go up one division with the out another mass ground here. Let's see if we can do something about these, these cheekbones here. Going to experiment a little bit on this. If we go find something that's a little bit more foreboding. Just a little bit here. Okay. It's just going to, again, these are all micro adjustments in there not to like the end all be all. You have to get everything right. You know, I don't want you to think like that. Smell. Let's go ahead and bring the eyes and just slightly. In fact, one should have imagined sort of like a the skull underneath here. And you understand how the eye sockets are a little bit bigger than the eyelid, quite a bit bigger, actually. Want to get down to it. So one thing I might do is I might just kind of hold and create a mask. Let me go ahead and start again. Majors make a nice, easy mask. And then maybe soften the mask, harden it slightly with Control and Alt, invert the mask. Don't want that to be affected. So let's go ahead and then maybe just soften it one more time. Just taken some control with the mask. And then let's just see if we can bring that in. Let's turn off the eyes are a little distracting as is. We're just going to bring that in a little bit. By doing that, we can create a little bit of a prelude to some eyebrows or lower eyelids little bit more. So we kind of get ourselves a little bit little bit closer. Again. Let me go ahead and bring that kinda want to just bring their eyes just a smidge down. Like so. These are all micro adjustments now these are all just small miniscule adjustments. Everyone arrives that they're shaped differently. So just keep that in mind. We're kinda starting to get a little bit more of a round or surface out here. That's going to be fine for me. Might make a little bit of a maneuver with the nose and make that slightly. All right, with that said, let's go ahead and move on. The as you can see, it's starting to, with increments of sculpting. It's starting to look a little bit closer, a little bit closer to what the face should look like. We're going to continue our increments of sculpting as we progress further to make it closer and closer into it as we sculpt more and more landmarks. In the next lesson, we'll work on trying to get something going on regarding the chin and the lower lip to have a little bit more depth to it. And after that we'll finish up in the ER and the neck. So with that said, stick around and stay tuned.
60. Detailing Mouth: Okay, so let's continue in this lesson, we're going to continue to work on our lips a little bit more, to give a little bit more volume in the anatomy of the chin side of those dimples of the lips and make that lower lip pop a little bit more. And then we're just gonna do a little bit more adjusting with the lips shape. Afterwards we're going to continue on with our micro adjustments are incremented, sculpting two things like the eye, maybe a little bit on the eyebrow, just to have a little bit more fun to just take it a little bit more, add a little bit more so we can bring ourselves closer and closer to a face. Like. So, let's go ahead and get started. Now, let's see the first thing I'm gonna do when I'm looking at the lips, I noticed that we need to have a little bit of volume right around here and underneath here we need a little subtlety of the chin to be defined since this is a younger female woman. So let's just go ahead and let's just go ahead and start with our clay brush. And just kind of if we can just bring a little bit of of a pocket here to work with how deep you go is very subtle and all of this, in fact, We're sculpting. Let's make sure we're masking out our lips when we smooth all this down. Like so, so that way we have just a little bit more sculpt. Kind of almost if you can try to imagine a straight line from there. That way when we do all this, kind of blends in and don't want to really see the pocket line here. So I just want to go ahead and kinda smooth out everything there, but I kinda wanna see some subtlety there. So we're just kinda bringing it a little bit closer. If it helps, try to imagine a little bit of a line that goes from here to here. If you have to draw it out very subtly, go on ahead and put make sure you're smoothing it down. Because again, this is some very subtle, subtle work that you're doing now. Then a maven use in my damn standard to kinda go underneath the chin. Like so. So we can get a little bit more of the shape of the mouth. Now, remember, when we're doing the mouth, we got to also kinda carbon a little bit of a temple mark and smooth that out too. Just to kinda help. And you want, you can kind of bring it in there, like so. So it's just all, take it a little bit at a time when doing all of this. And now, even if you make a mistake, like for example, you're sculpting and the chin and you finding your chin, It's a little too far out. And that's okay. We can go ahead and just circle around and get that back if need be. But I'm just very lightly sculpting out, just taking it a little bit at a time on all of this. So with that said, we can also, if we want to look at the line, we could if in theory, just kind of break hold control, bringing in some of our lips here. Inverse ellipse. And then just go ahead and hold Control soften enough. And if you really feel the need, you can kinda bring the Lipson. Then kinda just bring the lower lip to be just a little bit smaller. Let me go ahead and just work only on the lower lip and I want to bring the whole Chenin or I might just bring back guy in. Now what we can do something like this. Finally, one thing that we do, we don't have too much resolution for the lips, but that's okay because when we do our final touch ups here, we're going to go ahead and give you some more tricks on how to get that resolution. And right now just kinda focus on trying to establish a lip line that's fairly adequate. Right here. If you need to redraw, go on ahead. There is no such thing as doing it wrong. Remember we got subdivisions, so that means one thing we can if we want, we can we can if we want to just go on ahead and just make our adjustments and if we do anything wrong, we can go to lower subdivisions and fix it out. We lose something here. That's okay. Just simply just carbon a mark and then mask out everything you don't want affected. And then just gently smooth to kind of control the frequency. So you kinda see in a little bit more smoke, in a little bit more of our shape. We're incrementing a little bit more into it. Spring that in a little bit. Bring our intensity. So it's something like that. And so we can do that. So now I'm just going to do a couple of more things. Maybe in the eyes here, just kinda do a little bit more, bringing the eyes back just a bit. And notice my intensity is a little low. So go ahead and bring that in. Star with masking those eyes. Like so. Then I'm just kinda Wacom tablets little low, so don't let that distract you. Then I'm just going and to control here, maybe just a little bit more subtlety. So we're getting ourselves a little closer. Everything is just bringing us a little bit closer. And kind of see the face is starting to take its shape a little bit more. We want, we can make some adjustments if you want to go and deviate outside of this, that's also fine. Just remember that I really don't have any kind of objection to u1 team to have a different phase from on here. Definitely your face, what you wanna do with it. So please keep that in mind as we go through this and as we increment further and further. And so with that, I'm also going to make sure to do a couple of things with the eyes here. Maybe make them a little bit narrow. Qrs I am, I think that's a little long overdue here. So let's go ahead and kind of just a smidge. Make the eyes just a little bit shorter here. Wonder if I actually, maybe I'll and somewhere along there. So you can kinda see it's getting closer. We're getting a little bit closer. Our sculpt in our lips are starting to take a little bit more form as we go through. If you feel like there's too muddy, just go ahead and very gently split it. But that's going to be where we are going to stop it. Now, remember that if for any reason you don't like your lips, That's again why we have subdivisions like we do, so that we can go ahead and go back and fix what we don't like here. So again, so we can do whatever we want. So with that said, we're going to, as we always say, we're never going to commit to letting anything go. We'll keep working on everything as we go. That's what incremented sculpting is. Now our next area that we're going to work with here is going to be the ears and the neck. But don't let that stop you from thinking that we're done with the whole we are just getting started as far as what we wanna do further on down the road here. But to give you a head start on this, once Go ahead. I keep losing my keep losing this guy. Let's go ahead and bring that in. A little bit. Forward, I think could go. So our character again, it's starting to take a little bit more shape. It's starting to take a little bit more. I'll form. And from here on, we are going to see if we can finish up on the eyes. Are I'm sorry, the ears the next and then start working on some fine detailing like in the lips and the eyes further, which is kinda, kinda be paired with our skin pore. So with that said, stick around and stay tuned.
61. Blocking Out Ears: All right, So let's continue. In this lesson. We're going to move on now into our ears and do a little bit of a block out base with that. And we're going to just sort of take this a little bit at a time, one step at a time. The ears are always a tricky one. It's not the biggest priority and means sculpting the ears right now simply because the hair practically covers up the air. So we're kind of sculpting something that is kind of not really going to be seen. But we felt we should still sculpt something there just to be safe just so we can be a little bit thorough. So let's go ahead and continue and begin. So the first thing we're gonna do, just like we did with everything from the mouth, the nose to the eyes, is we're just going to try to block out a shape. Just something very simple. Nothing to enhance the crazy or anything like that. Just simply blocking the shape out. So I'm just kind of creating a mask in here. Let me go ahead and start over. I'll hold Control. And then I'll go ahead and soften the mask, invert the mask, hit E to bring up my gizmo. And from here, I'm going to go ahead and hit the upside-down teardrop. Make sure symmetry mode is open so that you get some symmetrical readjustments on here for the ears. So going back to it, I'm hit knee and I'm going to just start by kind of rotating the ears a little bit in and maybe just talk a little bit out. Now we'll have to do a little bit of smoothing to clean this up, but that's okay. I think we can work a little bit with that. It's just sort of a micro adjustment. Now we're gonna go ahead and hold Control and invert that again. And now I'm just kinda push using the Move brush, pushing everything in. And then creating a little bit something there. It's like we got a little bit of weird geometry going on here might not have been masked completely. That's okay. We can just clear our mask and just smooth that out. So on a low subdivision, so nothing too crazy to worry about here. So we're getting ourselves a little bit closer. So let's look at the reference. A kinda, kinda slopes in right here. So let's just kinda in the ER kind of comes at a little bit of a diagonal of view. So keep that in mind. Ideally, you want it to match up to the lot bottom of the nose and the top of the eyes, sir. So let's just go ahead and just kinda bring it like that. And kind of just see I'm slowly inching my way to just kind of blocking again a shape out holding shift, maybe moving it a little bit like so. If you want, you can kinda carbons some grooves a little bit just so you can get some definition in the back here with damn standard, bring that out. And I feel like maybe we can make it a little bit rounder and bring it down just a smidge. I'm just making some micro adjustments. I'm going to go ahead and remove mass this just a little bit. And we're gonna see if I can maybe just bring the air just a little bit more slanted like so. So we have a little bit more all we're doing is just trying to take her time with the shape. All this is is just simply blocking out. Alright. So now I'm going to go ahead and bring up my brush pallet with the B. And I'm going to look for some I like to do is I like to actually select the high polish brush on signs like this. Bhp is the key. And I'll just go ahead and one thing I like to do is I kinda like to flatten it a little bit. So make sure you pick a good contour angle which the surfaces, and just slightly, it's a little too much. Slightly just kinda work your way around everything. Just to kinda get a good Xin flatness going on. I'm worry about the Bacchae there. We're not going to get there just yet. Just work here and then maybe hold Shift to smooth it out just a little bit. So now from here, we're just going to, once you get a little bit closer to your shape, will probably thou one to get just a little bit of a head start on thing by just carving slightly Intuit, very, very subtle. I'd like you to actually do this with no major motions but just minimalistic motions instead. So just kinda, you know, I'm I'm choosing a volume brush like clay buildup holding left old and just kinda cut in into the ER varies and try and I'm working with a very low subdivision level on this one. And I'll even and as I do this, I kinda help, it helps me to kind of see my point of reference. Like for example, down here feels like it's a little bit, yeah, it's a little bit to where we want it. And then maybe just very gently shift, kinda smooth it all out. I'll even use standard to very, very, very gently push slightly on the edges. Then just all I'm doing is taking my time here, cutting in like so. I'm sure there's a notable indentation that goes around here that's equally distributed across. And then from here, this is kind of the first stopping point that we want you to get to. We're getting closer now to where we want this to stop at. Because at this point, what we're going to do is a little bit more of a complex shape that goes around here that has a little bit more of a kind Crater. It's very complicated look of a piece. It's not really easy to get, especially if it's your first try ever. So we're just going to take it a little bit at a time. So let's just go ahead and start on that. And for the record, I would also say this hit Quick. Say that this spot. Take your time just getting to this spot. I should I forgot to say that. Now let's go ahead and get started. Now, one thing I'm actually going to say, and it's kind of something that I have not gone over. Is that in my own personal workflow, I prefer using sculptures pro when it comes to the ears. That's just something I will kinda wanna do because a lot of times when I go up subdivisions, I keep running out of resolution. And sometimes DynaMesh or sculpture is pro, really fixes in areas where you really need a lot of contoured geometry. Because if you spread this all out, it would probably equate to salt mode like this. So we I don't think I'd like to take it there just yet. Because I think for learning purposes we should still stick to the the subdivision level since this is a learning course on that. But just keep in mind that when you are learning how to do something, do not get yourself into a thought mentality. That this is the only way this is. This is just a way for to help people that are beginning ZBrush. This is the subdivision approach. There's a DynaMesh approach to take in the air. There's a sculptures pro approach to taking in air. And if you don't know what sculptures pro approaches, it's pretty easy, but it also requires, it. It just tests summates in real time geometries for what you need. But it also requires you to leaning your subdivisions. And that's kinda why I haven't taken that approach yet because I don't want you to kinda knock out your subdivisions just yet. I still think that there might be something there for you if you've forgotten. But still, I figured I'd go ahead and remind everyone not to get too committed to one approaching level in any of this. So I'm just kinda bringing it in. It's going to loop into here. These are the, think of this as a why. She's going to slim around here. This is also probably the crux of why I like DynaMesh so much in this area. All right, So now that we have a little bit of what we want, Let's bring it up into division level. So let's hit D, or if you have yet just hit Command-D. And from here, now what we have is the essential blackout of where we're going to do our, all our types of geometry sculpting in here. So in the next lesson, we're going to go over how to just kinda continue on adding into this. And now I haven't done much on the neck, but we're going to also see if we can add a little bit more into the neck as we go along. But again, this lesson was about to just try and to do a block out into this, probably will do a little bit more adjustments. Make sure as I have made the mistake already. Make sure that your adjustments are kind of in line with your reference when it comes to the ER on this one. So that said sticking around, I'm going to be working a little bit more on this because I am obsessed with it. So having said that, stick around, stay tuned.
62. Detailing Out Ears: Okay, so let's continue on. In this lesson, we're going to start working on trying to expand on our base block out of what we have here and sort of iterate and sculpt and give ourselves more opportunities for iterative sculpts that even stack beyond that. So we can just sort of, we're just layering the details little bit at a time here. So let's just go ahead and get started with that. Now. Well, one of the things I want to focus you to is if you look over here, you see sort of like this Y shape right here. This is what we're going to be making our main focus, trying to sculpt out right here. In, to do that, we're going to be doing basically, what it is, is this is, I believe the antihelix of anatomy and this is the fossa triangular us, I believe, of the year that you gotta be able to have it's like that Y and the antihelix. So you got to have that there. And to have a good antihelix and fossa triangular Eris, you got to have a good gap crater here for the concha. So this little, so all these things, we got to set a good, strong foundation in our low res to establish what it is we want to do. So let's just go ahead and just pace ourselves. And then after that, we'll go ahead and iterate and take it up one notch. So let's get started. So if I go into D and appraise it a little bit more, I may work a little bit on with a combination of standard brush and damn standard. So it kind of melds in a little bit here, kinda as these two areas. So we gotta kinda see that same thing where it's got a meld in a little bit more. So, you know, you just got to be able to have your undo button ready. For anything that might go through. We need to have a good gap here and minds a little bit small. So maybe that's something I can focus a little bit in on. Maybe working that. So you can kind of see what I'm doing. I'm just kind of I'm going to go ahead and try to see if I can do this without having to do too much destruction to my outer ear here. So I would like to have a good, fairly definable, my, my goal here is to have a fairly definable antihelix. So maybe something needs to go down here. I need to go ahead and push this down. So I'll just go ahead and I think I'll just start with shift, just see if I can smooth a little bit of that because that will relax some of the geometry. So I can get back a little bit more. Truth be told that might actually have in that slope there might make things easier to sculpt little bit more in Word and I'm just taking my time. Anything that I do wrong is okay because I can just simply get it back with either undo or smooth. Push this guy a little bit more back. And just using left old, just as my way of kinda push in a little bit. Using smooth to relax some things. Just take my time. This is if you really want to dissect the science of this, this is probably one of the more difficult things to sculpt in all of the face. It could be sort of, at least I should say it's one of the most difficult things to sculpt that I found in the face. So, you know, I would then therefore remind everyone to do the most important thing that my instructor always says. And that is, again, iterate. Start. Make sure you're on a good savings spot. That's in line with the video reference. And make sure you have a save file that you can always go back to and start fresh again. If you have to always start from the same spot, then so be it. Right now I'm just trying to establish fairly good antihelix. I'm not trying to call carve out the the bones of the gaps or anything like that. I'm just trying to establish what I would call real estate as I would probably say, just given myself a little real estate here. See if we can do a little bit more smoothing. Go back into is all just kind of establishing just a relaxed seeing kind of a state that we want the salt to be in. That's all this is. It's just given ourselves a little more real estate, more taken our time. I find the standard brush kinda helps with the sculpt. But one thing you can do is just kinda hold left old. Probably going to do those initial sculpts. Once I have established a good baseline, I'll start them on the higher res. Segment this off a little bit. And again, worry about space or proportion. Think more in terms of establishing all the landmarks that need to be get put in there in this particular case and then afterwards, switch over to deal with space and proportions. So for example, we can do something here. I'm just going to come on time. Not an easy thing to sculpt. I can tell you that much. And we're going to have to circle around this because this is going to look very off whack when the time comes, when we do the side here, which you're going to start to see. There we go, I think to not enough geometry. We'll go ahead and do that on higher res. Alright, so let's bring it up one. Now if we've been operating primarily on three subdivision level, so this is the first time we're now really on too heavy of a US Hi of a subdivision. So I can give myself a couple of divisions now to work with. Let's just go ahead. I'm just going to can think of in my cheese. Go ahead and we can get out of this one. Forgot. Let's see if I can actually get that a little bit more. I think it's a little more prevailing than one the left side than it is the right. This one is just spending your time, which is taking it very, very easy. Standard, smooth the string. Know what I'm doing and just started from just kinda sculpting. And I'm just iterating right now. Little bit more of a b we're trying to do is just kinda hit our foundations here. Now as we say over and over again, everyone has a tendency to arrive at their shape. Different segments. Yes, use standard. So let's get into a little bit closer. But now worse, we now got to start thinking about how we're going to work out or shape a little bit more. All right? So it's not really like it, there's some kind of a science and what I'm doing right now, I'm just kind of slowly being iterative. Now as we get a little bit more into this, what we're going to do is continue iterating our shape a little bit more further on down the road. If we're not in any spot to that I would say is finished. But we are in a spot where we are little bit closer to establishing what our shapes supposed to be here. For that I'm okay with just for now. Because right now what we've got to also think about is we need to think about adjusting landmarks here. That's going to be a very fun true. Okay, so as we iterate this through further and further again, it's not like going to be the hair is going to pretty much cover up this year. But I felt like I wanted to put something is still there and I don't think hair's going to actually be doing that on the other side, but still I wanted to have something there. So what I'm gonna do now is just make some adjustments with the ear because if once we see it in the side, it looks a bit off putting. Let's go ahead and hit Make sure you have Exxon hit W to bring up gizmo, hold left Alt and reset the center. They're going to bring it up to about there and bring the ears just slightly in again and slightly down. And now what I'm going to do is just kinda, kinda add a little bit more of a hang with here because right now they're a little bit high. So maybe I can bring that down just a smidge. Fact. I might even make it smaller, shows the bit. Bring that out. She's the snitch. More, maybe a little bit more. And we can do a couple of things either damn standard here or maybe just standard clade to, to kinda get that go on. Let's cut that out. So we're just getting a little bit closer. We're bringing ourselves a little bit closer piece by piece and part out. Let's bring the chin slightly. Strings slightly here. All right, so getting a little bit closer to our ear. Now we are going to do some more iterative adjustments just like we did with the eyes, but the overall import most important arcs are in there. But we'll go ahead right now and just do some quick, fast landmarks for the neck. One of the most important ones I'm going to switch to clay buildup for this is sternocleidomastoid mastoid muscle. We want to have that. And just make sure when you do this, it blends well. Fact, I probably shouldn't be doing this more sculpting in and actually going throughout. Let's also tag in a collarbone a little bit. And we're just going to kind of something that just give us our landmarks because that's all we're doing right now. It's just bringing in landmarks. Tell him just having a little bit of fun. You can see it's starting to come together on the face. So like what we're going to do is the same thing we did with the eyes where we're just constantly doing a little bit of iteration at a time here. And working that in. We're going to work a little bit more on adjusting a little bit on the lips and maybe puffing them up slightly. And don't forget, one of the things that we have to do also is work on the eyes in terms of the eyebrows and do a little bit of do a replacement I because right now we've been working on these placeholder EIS and they've been smushed up because we've been constantly recombining them with. So kinda keep that in mind as we go through. Going to just do a real super quick adjustment to the eyes. Slight adjustment just to make her a little bit more feminine. Just my thing. So you notice again, this is a little bit different than the reference we have. And that's kind of going in circling back into me saying I don't want you constrained into any mindset of the reference. It looking like the reference. I want you to think of the reference as your guide, not sure. Shackled to mimic exactly what you see. So now that we're getting a little bit closer into this, I want you to just kind of bear in mind what we have coming up next after we finished with the eyes, putting in the official eyeball, putting in the eyelashes and doing the eyebrows. We're going to move and finish it off with some skin pores and then move into our cybernetic implant. So with that said, stick around and stay tuned.
63. Eyes and Ears Refinement: Okay, welcome back. In this lesson, we're going to continue on making our adjustments to our character. We got to still do some more clean up on this ear to make it to a fit and look a little bit more natural, even though the ears going to be covered up. It's never been my number one go-to priority, but we should still do it justice and do some micro adjustments and try to get some more volume on the top of the ear. Maybe eyes do some work on the lower edge of the ear and so forth. But before we do that, we have two main agendas on this lesson. And that is that we're going to now go ahead and make an craft our eyes themselves. Now if you look, you do see some eyes here, but these are kinda like our place holder eyes. They were even combined with the original mesh to help us adjust to find a proper proportionate face. So we're going to now take the time to craft out a i that is going to have a convex shape to it kinda, kinda combs outward. And we're going to replace it and put it in where this area is. After that, we're going to make a little bit adjustments, see if we have some time to do some eyebrow mask so we can find something that's interesting. And if we have a little more time, I like to go into the ER and maybe do some work there. So again, we have main agendas and then we have micro adjustments on the second half of the lesson. So let's get started. So the first thing I'll do is I'm just going to go ahead and append myself another sphere. And we're, once you hit Append under sub tool and select your sphere, you'll find it's probably at the bottom there. So let's just go ahead and bring that guy up and have him right there. Like so. Now, you will notice it's a little too big. So we might have to do some about that. Make sure the eye is a sufficient size. Though, I usually start off with, and then we will round my way down to about for half the diameter or the length of the ear. Just as a starting spot. And this is going to be interesting because this is very important because what you wanna do is, is you always want to have a perfect sphere. And if I turn off my head, you'll notice the eyes are kind of wiggled around and that's again because we mush them around when we combine them in the, earlier in this section. So we had to replace those eyes back out again. So let's go ahead and just kinda put them where these place holders were. And here's what I want you to pay attention to. Let's turn our head back on. And let's just turn off our eyes. Notice it's a little bit off now. That's because we did a little bit of work on the eye and it's a we did a little bit of work and that's because the I was a little bit mush, so we got to kind of bring that back. So if you want, you can say to yourself, well maybe I can just go ahead and readjust the eye. Well, you can do that. Or you can adjust the eye itself. Like I said, there's no right way as long as you have your main important features. A landmark. I'd say I kinda like it like that though. So once you have that taken care of, go ahead and duplicate the eye, go through deformation it, mirror and bring the eyes in like so. And then let's just go ahead and try to go through geometry. I'm sorry. So Tool, click on your eye and combine them down under merge, it's going to hit Merge Down. And let's just go ahead and hit, make sure x symmetry is on. Do our adjustments so that we have some eyes that are a little bit more to make them a little bit smaller because I'd like to leave in a gap right between there. Which means I might just bring out a little bit of the eye. Let's bring it up one. And the eyes or just the Smith. And it's a little too much just like that. And then let's go. So we can do something like that. So now we're getting a little bit closer. I'll keep it like that for now. So now that we got that a little bit more established, let's go ahead and check our lip line on the AI should be even all the way across. If not, we need to do some adjustments to get it there. So let's go ahead and you can either do this through. Oops, clear that mask, Try that again. So I'm just kinda making things a little bit. Even. The eyes below are also a bit on the even side. So we're getting that taken care of. Let's go ahead and read cement the slip line right here. And we can do this in a variety of ways. We can do a mask and maybe pull something down a little bit on the eyebrow, or we can just go ahead and damn standard this. Whatever choice you do, make sure you're protecting the shape of the eye in case you need to do any sort of preliminary smoothing. So maybe like that. Vds and then smooth out. And I'm just kinda raised cementing root, reestablishing my shape. And I may have lost. We can go ahead and check or shape. And if you need to check your reference, go on ahead. Okay. So now that we have that you can go through the other areas here. Like for example, there's a little bit of a slip line here. Maybe we want to work some time here. You can go ahead and do that. Like I say, if there's anything that you feel you've lost, you can always get it back. Just take your time on all of it. Okay. So we're getting a little bit closer, which is good. When the time comes, we're probably going to have to stop and our micro adjustments and work a little bit further into doing some poly pain with the ears. I'm sorry, Polly, painting with the eyes, not the ears. Right? So let's go ahead and get some, at least some shadow. Some shadow eyebrows in there. Okay, And I'm gonna go ahead and do just a real quick iteration with a sculpt here, because I forgot when I do mask and tried to do that. Let me show you something that's will quirky. That's going to have to change is as if you try to make a poly group like so and do like that, you'll see the resolution. But if you shift down, go to lower resolutions and then shift back up, you're going to lose your poly groups. So we're going to have to sculpt a little bit of something on there for the eyebrow to be seen. I apologize about that. I forgot who was supposed to tell you that. So we're just gonna go ahead and fix our mistake and just make a mask. So to do that, I'll hit Shift F. I'm going to give it one more subdivision just for good resolution. And then I'm going to go down here to store a morph target. And we're going to explain what I just did there in a second. But after this I'm gonna hold down control. Good. Take my stroke to free hand and maybe just kinda block out some real estate for a mask holding Control down. Let's go ahead and try that a couple of times. Something like that a little bit. Now, what we just did here was just sort of the first part of this. Now, what we would like to do is kind of hold Control Alt and subtract away from the mask. And another thing that we can do while we're at it is what we can do a combination of what we did earlier in this lesson and now and use maybe like a curve to give ourselves a nice smooth line. Again, I like doing this because this kinda iteration helps us work out some shapes without having to really micro go through and get perfect straight lines and curved just kinda does that for us. But again, keep in mind, you got to know that spacebar trick to Merck that move this curve, curve around. So again, that's in the second section. See if I can try to find something a little bit. I'm going to basically here, I'm going to just kinda look for my curve. Then hold left all to subtract, going to go into subtractive mode. And I'm just kinda doing some experimenting, just some quick iterations of what I'd like to see. Maybe make a slight variation of width here, kind of leftover. Bring it out a little bit more. I'm doing is just kind of going through little side. So okay. And I'm just kinda having fun here. Kinda like doing this because I get an opportunity to work through some interesting shapes really quickly. And then maybe just clean backup, holding Control. Might like what I'm seeing a little bit there, but I need to kinda be thinned out. I'll invert the mask and maybe just hold Control to kinda just give myself a little bit to the small, it'll fall off. And then I'll work with that. We've brush again c, So that's down here. We then maybe just make it a little bit bigger. You can kind of see we're getting ourselves a little bit to what we want. Go in through a little bit more of a eyebrows. Now, if you feel like things are too big, That's where we go to that morph target that we did it originally. And you can kind of give yourself more opportunities to add an edit it out without having a smooth and destroy your eye. So you would just go and find your morph brush, which is going to be am, sorry, b and m. And then look for Oh, right there. And you can, and what we'll do is this morph brush, you store the more point it was like this. So using a morph brush reverts that back. And that's kinda also something I kinda wanted to do as well. So this also helps you to refine the shape that you have a little bit more. So you can get a little bit more detail out of it. Maybe the eyebrows were to or maybe it's a little high up here. You know, you can actually just kinda go through and just get some detail out of that without losing too much of it. So let's go ahead and move on to the next one. We're going to work with the eye and getting a little more convex and do some eyelashes. At this point, feel free to take a little bit of time to yourself to do anything, any other kind of clean ups that you would like to do on here? Like for example, if you feel like your lips are not where they should be, Go ahead, look into it and change it. It's what these micro these micro adjustments are all for is things like that. So with that said, we're going to move into the eyes and make some eyelashes, make sure that I is convex. We have time. I'd like to do some Polly painting, but that might come closer towards the end when we do skin pore detail. So that said stick around and stay tuned.
64. Constructing Eyelashes: Okay, welcome back. In this lesson, we're going to go ahead and work on our eyes trying to make them a little bit more popped out convexed and put some eyelashes around here. So let's just go ahead and get started. To get started, I'm going to use a mask to kind of give me a block out of my eye brows shapes. So I got to draw a size of about 11 on here as I'm kind of working a sort of a shape placement to start off with On our eyes. So anything along that would do just kinda what I like to do is I kinda like to just kinda browse through, make a circle what I like to see and if it matches what works for me, I'll go ahead and just kinda okay, and then just go ahead and just simply invert the mask. Then from there, we can just simply do something like maybe just hold left Alt and do a move. And you can kinda see we have a little bit of a start. And I'll give it one more subdivision, will even smooth it a little bit. And then, you know, you can do a little bit to like to do in flight, to kinda give it that pop. Just so we can get something that gives us a, how shall I say, a good indication of where the eyes are going to be. So we got that a little bit covered. One thing I'd like to do is I'm going to swing up to my browser here and I'm going to hit the M key. And then I'm going to hit material. And then I'm going to look for a material down here to the standard materials called toy plastic. I'd like to fill this area up with toy plastic. So I may choose m RGB because that stands for material. Then the color channels appear. That way. Once I go to Color, which is up here, we're going to say fill object. And now no matter where we choose of different materials, that M RGB is already covered. So it's kind of a nice thing to do as we go through all of this. So bear that in mind. Now, let's go ahead and see if we can do something about making some eyelashes. So to do that, I'm going to go up to here, to the right. There should be a cylinder 3D. And what we can do is, is I'm going to go through, if you open up ZBrush, you always start off with these basic cylinders here. But hit the F key to kinda bring it in there, hit Shift F. And what I'm gonna do is I'm going to go through initialize, which controls the number of subdivisions that you're going to start off with before you turn this base mesh into a sculptor mesh. So if you can just kinda go through the divisions, like maybe the h divide, I may start with three and then give myself, Let's see. Maybe like a, it's a Segments. And that might work with me. And then of course a taper also be something to work with. And again, you could just give it four divides. That might actually be a little bit easier. And then let's just honestly, this would probably just work as well for me. After that. I'm just going to go ahead and just make poly mesh 3D. So afterwards, from we're going to hit the R key. You can do three or four, but make sure you have something that's got a fairly good amount of length when you're scaling through the Y. And after that, you can kind of just bring it through like so. And then I'm going to while W selected, select that COG, hit on that. And let's just go ahead and go with bend arc. See that green arrow right in the center there. Let's just go. Bring that guy sideways, like so. Now you can add some more divisions. See, you know, it's not like the end of the world if you don't, but just remember that you need to appraise it if you do. So, keep that in mind. Let's now go through and go back to our main mesh. And we're gonna go through sub tool and we're going to go ahead and hit append. And then we're going to select that new eyelash that we created, which will be at the bottom of the sub tools. So we're going to prompt now, we're probably going to hit W twice. Probably going to need to do a little bit more work with it to get it scaled, but get that into a fairly suitable place. Now, having said that, and try to ignore the unicorn, they're having said that. One thing we need to make clear about eyes is there's a whole bunch of different ways we can make eyelashes. We can do it the geometry method, which is what you're doing right now. Or we could do it the fiber mesh method. So what that means is you could, once we go through and do the fiber mesh tutorial, we can circle around and take these eyes at more placeholders and replace them with fiber mesh coming up. So kinda keep that in mind that we're going to show you how to do fiber mesh. And then you're going to be able to learn how to apply that on here. So let's go ahead and just kinda down resident. And what you're doing is you're just kinda doing some placement right now. Just going to be making a few adjustments a little bit at a time. The most adjustments you'll be making as to that first eyelash, pretty much IT W and Q to turn off that, that gizmo toggle. If it's getting too crazy. Ideally. You kinda want it to be long for it to really reach. Read as female. Eyelashes, good eyelashes that really read for female will be long. So once you have a good placement, go ahead and hold down control and then tap and you'll get a duplicate of the geometry. It's all sharing the same area of, sorry, same sub tool. So when you duplicate, so you're not making another sub tool of this. And you just kind of working your way through all of this, kinda taking your time. Don't get too bogged down. Remember when you do that. The original one likes to mask out, so go ahead and take your time. If they are too long, like minor. That's okay. Not going to let it get on my nerves here. But one thing I will do is make sure that my move brushes activated so that I can do a little bit more adjustment, hold control to invert the mask. So I can work on these guys back here. Again, don't worry about how long these are holding control and duplicating the whole thing. Again, not worried about how well it lines up. I'm just going to use the Move brush. Again. We're just kinda go in through this little bit at a time. One thing you could, I'm probably coming to the conclusion of is that these guys are a little bit little bit too big. That is quite all right. Cause we'll just go ahead and fix it. So you can kinda see how we're putting our eyelashes, so on there. Now, what I'll do. It is I'm not going to commit to making these smaller just yet. May i can all if they're a seem too far and wide like they do kinda like right now. Let's go ahead and center it. You can kind of see all the adjustments I'll make into it. Then again, we can just kind of bring this all in. Like so. If it feels a little too much. Remember, we can also do this. Then we can do this, oops, geometry, delete this one. So you can kind of see where I'm going with this now. All right, So that's one. Let's go ahead and see if we can duplicate that. Now let's see if we can go ahead and just hit the W key. Left all three center of the rotation and bring it down here and rotate it around like so. We're going to take on the lower eyelid. Now again, I'm stressing this one for everyone to know. This is one of many different methods of how we can bring a character's eyes to gather. We can also do it the other way, which is fiber mesh. See if I can NFP feel like the eyes are kind of going in a little bit too much. We can know is a ring bring in and might have to redraw the piece down here. It's not lining up like it is down there. So I'll go ahead and have to just know big a on. Just go ahead and have to delete this. I was hoping I could reuse it, but it looks like it's not going to give me what I want. So we'll just delete that sub tool, re-upped our eyelash. W twice. Scale this guy down a little bit more. Too much. Just need to start fresh when it comes to that lower. But even with just the upper eyelid, you kinda see how it's slowly, slowly iterating. Use that word very carefully. Iterating to female looks slightly. And that's kinda what we want. We want to just kinda take it one step at a time. One, the C, What I don't want is I don't want the lower eyelashes to be longer than the upper. One thing that you want them to be shorter. Let's go ahead and just left Alton tap to reset the rotational value. There. We are. That's about slowly what I want. I'll just go ahead and just simply iterate little bit at a time. Let's control to create the mesh. Control. Duplicate the mash, be even adjusted a little bit. Work with what you got. Clear. The mask and knees move brushed, work with what you got a little bit. Everything right now is a little bit to evenly space. So let's go ahead and put that left control. Duplicate the next shout. See if we can do the same thing over here. Problem was in that other one, I think I was just trying to work with too much. Monica said say it over and over again. One of many different ways we can make eyelashes. We'll just go ahead and just finish this up a little bit. And again, you can do the same thing if you want. But make sure you've got a good, fair amount of volume in there. Now, some point. Alright, so that's going to be roughly the idea what we do there. Now all we're going to do is merge the two eye lashes together, which is going to then be merged down. And then we're going to duplicate that, go through deformation. And then we're going to mirror that one over. So let's go ahead and left old tap on our main sculpt here, see if we can get a BPR renders, see if we're closer on track to what you see in your reference. Now my reference, but your reference that you downloaded. All right, so that's a little bit closer. You can kinda see how it's angling out. A little bit more. Reminder, I said it already four or five times. We can also do the fiber mesh approach to all of this. And that's something that you'll be learning when we move on to the hair. Now in the next lesson, we're going to be working on doing some skin pore details, working a little bit with the lips, and then seeing where we can take it from there. So just kinda hang with us and 0 and also we want to poly paint the eyes a little bit so that we can get kind of a murky cool look going. So with that said, stick around and stay tuned.
65. Skin Pores and Eye Painting: Okay, welcome back. And now we're gonna go ahead and finish things up with Polly painting the eyes and doing some skin pores. And then, then we're gonna move into trying to create a little bit of a detachable face here. So with that said, let's just go ahead and get started here. Now for the eyes, I'm just going to left Alt and select that. And to go into poly paint mode for saying I want to do is go ahead and hit add and make sure that's turned off and just have RGB turned on that way though it were coloring something and we're not worrying about adding any sculpture to sultan. If you hold down shift, you can do the same thing and we can just soften out any mask. Now these aren't going to be traditional allies. These are going to be sort of like mosaic, Cyberpunk, ghost eyes a little bit that I had decided I wanted to do. So let's go ahead and start with that. I'm going to go ahead and turn this to black. The whole reason, the entire mask, the rest of the face goes black is because I didn't assign anything to it. So if you want, you can go ahead and assign a color to keep it from turning black. In fact, it might do that. Now, leftover, click on there, click color and just Fill object. Now it's set to whatever the palate is here, which is white. So let's go ahead and select back into our eyes again. We are back in our eyes. Alright, so let's go ahead and start with black. And I'm just going to kind of make sure first of all, standard is selected. Rgb, Ziad is off. And need to change my stroke back out. All right. Go ahead. And similar to how it was before, see what I'm doing is something where I'm just kinda of establishing some eyes just to start off with. And then going back to white. And I'm going to go down to a smaller brush size circle in the center, which is kinda work my way and just try a small focal shipped. And I'm just going to slightly, very, very slightly kind of just add chip away with the white brush so that the black is kind of losing. It's just becoming more and more subtle sort of. Then you can do something maybe like gray, something a little bit with the eyes here. Maybe you can go black. Just to add in a little bit of shadowing here. Then I'm just kinda holding shift and bring it down a little bit. Too much blood. That's okay. And you see, I'm just kinda having fun. So we've got something that's just a little bit more reading for eyes. As we go through. Let's go ahead and just work. As you can see, I'm just kinda draw it a little bit fake and the shadow a little bit here. If you want, you can, if you want, put something in the center there. Well, I kinda like it to stay. Can do something like that. Maybe. Just kinda painting the outline. Kinda personally like the ghost eyes. Look a little bit more. That's just me. You can, again, this is going into experimentation mode. You can do anything that you want off of this point. But I got to say, I kinda like, I'd just like to experiment, just kinda get the eyes to be something like that. And that's going to be okay for me just for now. Okay. Now that we have the eyes somewhat detailed out, I wanted to give sort of like a ghost dies impression. Let's go ahead and start in with the, the noise of the skin pores. I like to do a couple of moves on this. The first one's going to be, I'd like to work with establishing sort of like a baseline of skin pores, kinda like Photoshop, how you layer details over details over details. And that's kinda what we're gonna do with this. So to begin with, we're going to do that with noise. Surface is where we're going to get that noise. So go ahead and go the right tab here. Look for surface. Click on the button that says Activate noise. Now your face may be very far off in the distance. So if you can just try to re-center it and you should get it back like so. And the recenter is just on this upper left corner, right here. And if you can, don't don't go too crazy with the noise, you can. Probably now, maybe that's a little too much where you're really going to notice it. It's kind of based on trying to gap, capture scale correctly. And it's probably more than likely going to be something very, very close towards 0. So it's going to be a little bit subtle. Let's go ahead and see that and see what that looks like. That's kind of a good baseline for skin. So at this point when you hit Okay, Try to remember that there's no sculpted detail on here just yet. It's sort of just the baseline for skin. So to get there, we're going to do a couple of things. I'd like to do a mask. I don't want the lips to be affected, so I'm going to mask a couple of things like the lips, for example. I may be a little bit of a soft mask. When it comes to the lower eyelids. Maybe just a very soft subtle mask here. Little bit of a soft mask on here. I'm just kind of working some and variances definitely a soft mask on the ear and just kind of picking some spots here to kind of break up the noise so it's not consistent because that's kinda what I'm going for here. So I'm going to hit apply to mesh. Then clear the mask off. And you can kinda see how some of that noise is prevailing in some areas and a little bit smoother and other areas. So that's going to be our baseline. Next thing we're going to work with is I'm going to read mask those lips off. Like so. And then I'm going to invert what I have. And I may just do this also with the eyes. And I'm going to hit the B key. I'm going to go do a brush that's a little bit underrated and it's called crumple cripples, a good fast brush for a beginner to use. And that's why I'm choosing that. Now a lot of people, when they're detailing out the lips, they're either going to go through dam standard or an Alpha 2 typically that detailing crumple, sort of like that beginners trainer, training wheels for the beginner that I want people to be aware of. And it's good, nice, easy brush to have. To start off with. Crumple starts its way by. If you want any crinkles that are vertical, you can kind of just paint horizontal. And if you want any horizontal wrinkles, you paint vertical. So let me show you what I mean when I say that, you know, it's kinda see a little bit of it work. Kinda get an idea what that does. And one thing I forgot to do is read the term my RGB off for this because I don't want to go and bring that in just a little bit. I want to affect my lip line too much. So let me go ahead and do a little bit. Oh, crumpled here. Maybe need a higher C intensity. Here we go. Pretty odd. I got to also turn on my smooth brush and kind of see how crumbles kind of work and a little bit more. Some kind of see a little bit more of the detail on it. Crumbles. Just sort of like one of those nice brushes I kinda like to enjoy with. So now another one I'm going to do now is going to go into my standard brush here. I'm going to go ahead and hit control, see and change myself to either spray or color spray, whatever one you do, make sure you have a low flow output and choose an alpha like alpha 40. And just kind of do some, I would say some crinkles again, RGB is turned off on, so make sure you turn RGB off and Ziad back on. And from here, hold left, all mean kinda bring in a, just adding some detail noise on here. And then I'm just kinda doing shift. Kinda see how it's sort of slightly coming closer and closer together. And I'm just kinda shipped using shift to kinda. Breakout. Make sure that nothing on here is consistent. So in a way, I kinda want you to kinda look at this a little bit like you're decorating your character. Alright, so that's kind of what's happened in here. And you know, the better foundation you have, the more it's going to pop. So let's, if you want, you can also do again another layer of noise. And if it seems a little too strong to prevail event, one thing you can also do is go back to the edit and really do a sort of a turndown of strength a little bit closer. See what that looks like. It's a little too much. You can go ahead and work some of that in. That does. And another fun thing you can do is you can also just sort of use, how shall I say this? This is more of a complicated maneuver I'm about to do. Use morph target. Delete morph target because we had one originally on there for our eyebrows. It store a morph target, then go through to surface, bring noise back in. Apply to mesh. And now go back to morph target, switch and hit the B key. Now, with that turned on, you can kind of draw in all of the baseline that you want. If you are finding certain areas around here that just look a little Ashley, I say a little bit bare. You can kinda work with it a little bit more. So having said that, there's not much more we, I'm going to do. I might do something like maybe put a little small mole or something on there. You can always do that. I have to go into standard again. You know, you can do something like just a quick little mole with, but you're going to have to also do a little bit of fun work with Z Intensity. Kinda do something like that. You kind of just bring in a little bit and of a mole if you want. Maybe just smooth it in. You can also experiment. Try something with your inflate. You keep repeating all this like this. You can do all sorts of things. So with that said, that's kinda where we're at with the end of our character. As we can see, this is sort of are going to be our goal. If there's anything that you want to change, feel free to change it. You know, your character. If you want to make these eyebrows bigger or more pronounce, you know how to do that. You can just go through weave and then you can kinda bring it through. Sure, you hit X. And if you want to take a little bit of a snapshot, you can do that too. You can just go ahead and just hit BBR, do a quick little Render. And kinda see it's looking a little bit more closer to what we want. So that's going to be sort of our stopping spot for this character. Now we can do still some more things, but as we say, this is a character creation core. So we got a lot of other things. We slapped a continue onto, but if you got it this far, really pat yourself on the back. This is already a good place for you to stop before moving on. One thing I will have said is, is that in the next section, we're going to work on the detachable face. We're going to work on trying to get some of the cool features like Booleans and convex Booleans to work so that she has a face that's detachable. You're going to like what we do next. So with that said, stick around and stay tuned.
66. Creating Face Cavity: Okay, so let's continue in this lesson. We're going to move on to the next phase of our characters creation, which is going to be creating that detachable face that's going to be on the right side of the eye here. And to get a little bit more of an understanding of that, go ahead and check into your resources folder and download the latest references. That's an OBJ file and also a 2D reference file, depending on which route you like to take from a beginner to an intermediate split screen mode or spotlight mode with 2D reference images. So let's just go ahead and break down what we're gonna do. Since we are going to be having a detachable face kinda come off of here. What we need to do is kinda carve in a little bit of real estate, a little bit of surface area around here. Now, to do that, we're going to be doing that through a mass extraction, which we will then convert into a Boolean. We haven't done anything like that yet. So we're going to walk you through the process of this technique and how we do it. We do something a little bit similar down the road with the my other hard surface course. So you'll get a little bit of an idea what that is when we go through this. So one of the first things we'll do just to get started is I want you to check your sub tools. And I want you to take a look at mine. And what I have is right now folder that has holding all of my clothing articles, a base mesh, my bust, the eyes, and two sub tools indicating my eyelashes, which I suppose I could combine all down. But right now what I'd like you to think about doing is switch on your head and make sure you size up the head. If it seems a little bit small like this, you can kind of see it's slightly small. One thing you can always do, and I'm just gonna go ahead and do this right now, is I'm going to turn all the sub tools on. I'm going to select my main base mesh, clear off the mask, go into transposed mode. I'm going to cut off section where the head is because it's occupying the same space. We're going to hold down Shift Control, choose trim curve, and just kinda draw out a curve. Just the cut off and trim a certain section that way. I think we can go ahead and go through this turn transparency mode off. We have, we don't have a base mesh occupying the same spot as there, so it's a little bit easier. Now if you feel in any way, like for example, the head seems a little bit small. One thing we can always do to fix that is hit New Folder, hit Return, drag the head in there, drag the eyes in that new folder and both the eyelashes if you want. And then while the folder is selected, click on that car, hit transposed set. Everything should go little bit dark. That's because everything now in here is being manipulated through the transpose Qy. So let's go ahead and make sure cemeteries off, hit the upside-down teardrop here to center it. And from this point on, you can go ahead and just maybe scale it a little bit if, if you feel like you need to make it, for example, a little bit bigger. And you can kinda just see if it kinda adds up correctly. So I'm just going to leave it like that to turn it on or off, see where my mouse is right here. That can just disable the transpose all. So that's just something to do, just if you want to readjust any of the scale of your head, if it seems too small for the character. Well, you got a little bit more real estate to work with. So I'm gonna go ahead and turn all that off now. And I'm going to get started on the head. So let's open that folder and I'm going to just turn off the eyes. The eye lashes, the visibility of all those things and just have the visibility of my head taken care of right there. Now, just go up to my top subdivision level, somewhere around 1 million, which is little higher than what we typically need. But we're going to we're not going to be too picky with them. All right, so now what I'm gonna do is I'm going to make sort of a block out of the mask in which is going to take the appearance of the shape of the detachable piece. So if I hold down control, make sure free hand is selected. I'm just gonna kinda, just kinda put a rough mask in this area. Then I'm going to subtract away from it, which you can do either through the stroke or in my case, I'm going to choose the curve. I need to kinda move some real estate that maneuvers around the eyes, the nose, all the landmarks that we sculpted. So I'll just, this is going to, if you're using curved, make sure you know the space bar trick that's in Section 2. So we're just going to kind of draw out and just simply do some masking here. And I am also going to say, feel free to do iterations here. Okay? Don't, don't hesitate for a second if you want to do some kind of iterations of what your shape is. I like using the mass because I'm getting a nice clean curve right here that we can work with. Maybe that's a little too far. You can kinda see how slowly but surely this is starting to take a little bit more shape down the road. Like is say All I'm doing is I'm just kinda haven't been with all this. Maybe I'm one to do so in there. Well, I think I had the wrong one there. Kinda see. I'm just kinda having some fun. Make sure when doing this you have carved out some relatively shallow pieces. And if you can try to make it look somewhat mechanical in nature, there we go. Something like that. Maybe. I'll hold that. And so now that you have what you want, the next thing we're going to do is we're going to do an extraction. Now for that to happen, we need to go down to sub tool, hit extract, and let's just go ahead and do a preview. Once you hit extract, you get a little bit of a preview of what it is now it's a bit, it seems like it's a little bit wide. Actually, it's grotesque legal worldwide, which is okay. It's not the end of the world. You'd want to have some degree of thickness on here, something like that. Maybe something that doesn't really do too much heavy impeding. Because what we'll do is we'll select the back of the mask and just control its depth through there. Let's just go ahead and start with something very basic and simple, such as that. Sum. I'll just go ahead and hit Accept. And that will make a new sub tool down here. I'm just going to clear the mask off that and select this guy. I'm gonna go into solo mode so we can see what's going on here. And you can kinda see the extracted mass piece that we have here. And I want it to be obviously a lot thicker. But the issue that we had is if we tried to do any more thickness down here, it started really breaking apart and crumpling. So this is what we're gonna do. If I hold Shift F down, you'll notice wonderfully that there's a poly group back here, which is always automatically generated with an extraction from mask off, isolate, select, drag, or just left-click hold Control off and empty. Make that no mask. And then invert the mask. So it looks something like that. And then I'm going to hit the W key. But if you don't see anything come up, go up to your head up here. That's because it's your gizmos in 00 space all the way down there. So let's just recenter it and then click on there. Try that once more. Let's see what things look like now. Kind of see where we're going to go with this. We're just going to we're just kinda moving and creating thickness and a different way. Now obviously you see no geometry. That's okay. Let's just go ahead and then hold Shift Control. Make sure you have trim Curve selected. Not just click on it and click over there. And let's see if we can just draw out a straight line. Or even if you want, you can do a just something that kinda cuts off like that, maybe. Okay, so once you have a Boolean kind of blocked out here, Let's go ahead and take it out of solo mode real quick and continue just doing some more revisions to what we have here. So like one thing that we can do is try to remind you that you don't have to necessarily sign off on any shape just because of whatever you make in mass, just you haven't Live Boolean that can be editable and three sculpt double and adjusted because it's a mesh. If I hold Shift F, it's just a mesh that's being instance to push into the geometry to give you preview of what it subtracts off. And you can kind of update that. So if I go ahead and hit show like transparency, you'll get a better view of that. And using trim curve, you can kind of already get like a little bit of an idea if we do some sculpting around here. Like you can kind of see, like make sure you gotta do it in like pretty broad sculpts. But you can actually get some pretty decent shapes out of all of this. Because like right now all I'm doing is I'm just kind of just experimenting with my shape. Much the premise that I'm doing here. So like a, it's just an iterative process that is going on. So you can kind of see how I'm just continuing on with the sculpting that shape and how I'm pushing into it. And it's just all, like I said, something that you should do a good try to do a good job of taking your time on because it's going to have an impact on you when you go through and from this point on as you go through the course, because that's going to be the shape of your detachable face. So try to keep that in mind. So once you get the shape that you want, just go ahead and just convert this mesh now into a sculptor mesh. Because right now if we turn off our Boolean, you'll see that it really didn't do anything, it didn't change anything. I'm going to go ahead and turn the mask off. And the idea with a Boolean is, is whatever you want the Boolean, the effect has to have the visibility turned on. And in this case it's just the head. And everything that is above the Boolean in the sub tool sections is what the Booleans going to have an effect of in subtracting mesh away you're seeing here. So once you go through this process, go ahead and select your head. And when you want to convert this into a sculptor will mesh again. Instead of an instance geometry kinda like what you're seeing right now, every time I toggle the boolean on or off, we just go through and we hit C Jiang Boolean under sub tool and make Boolean mesh. We click on that and it's going to take few seconds here. And you'll see it kinda going through. And then if we go all the way to the top here, you're going to see one piece that's turned into a Boolean, that's an extra tool up here. So we now need to get that tool into R sub tool. So let's go ahead and hit append. And we're going to append this tool in like so. Now if we turn off the visibility of both of these and just go into our lowest sub tool. You'll have, as you can see, a new bool sculpt double boolean mesh. So with that said, one thing I want to point out, you come across these ribbons here. Let me go ahead and show you something. I'm going to turn these two Booleans on the Boolean and my original mesh on. If you come across this here, we can go ahead and just go through and polish that out by going through deformation. Going up to where it says polished by features, make sure to click on the circle here. So it's a hollow circle and just kind of drag it along cross and then do once again another Boolean mesh and you'll get a little bit more of a smoother clean out. So that's what we're doing. We're establishing sort of real estate to put something in there. That was what the whole purpose of this meshes. Now if you want to make any more adjustments to it, Feel free to, you know, have some fun doing what you want to do with this. If you feel like something like he see here, you want that to be smoother. You know, just go ahead and have some fun with just remembering that the Boolean can be manipulated, it can be moved, it can be adjusted. And all those things can happen here if you want before signing off on something. So in the next lesson we're going to talk a little bit about how we can go ahead and make a, the, a detachable head piece using a convex Boolean. You were seen as more of a concave Boolean cave going in. And convex is going to be a, what we do to create the sculptural piece. So just to make sure that you have a good checklist, just going to go ahead and delete this off. We'll more time. So everyone is on the same page because it's a little bit complicated. You should have a bust that has nothing affected by it. You should have a boolean that is cutting into the bust. And then you should have, if you go down to sub tools to where it says Boolean and you hit Make boolean mesh. You should have a constructed Boolean arm, sorry, constructed head piece with this built geometry built-in. And once you hit Append, below that, you should have your new piece. Now this is very important that you have the piece that is sculpted in and the piece that is not sculpted in as two, because we're going to show you how to create the missing piece detached from here in the next lesson. So with that said, stick around and stay tuned.
67. Creating Detachable Face: Okay, welcome back. In this lesson we're going to continue on working on our detachable face, which will go and kind of sink in side here. And to that end, we're going to use a convex Boolean to carve out that detachable face and do our first introduction to a demise Boolean and how we can speed up our workflow creating all the wires and such. It's similar tau and alpha works and we haven't gone over it yet. It's nothing new in many of my courses. But once you see what a customized boolean is and once you download it from the reference folder and follow along with us, you'll get a better understanding. So to get started, let's go ahead and do the first part of this, which is actually create the detachable face off of here. So to begin with, you should again have three sub tools. You should have the finished piece, which is shown through the poly groups of the cavity here that was done in a, in a make Boolean operation which we appended onto here. And then you should, if you look at the sub tools here, you should have a mesh that is fully complete, still hasn't been touched. A boolean that we made and crafted that kind of intersects into it that was used to cut into the face which resulted in what you see here. Now what we're going to do next is we're going to do that same operation we just did, except we're going to do an inverse Boolean. So that's like a Boolean that basically says if I turn this on and show you if everything that's inside this shape is basically going to be visible and turned into a mesh and everything on the outside will be cut away. To give you an example, if I go ahead and select my head and turn on the visibility making my inverse Boolean active. You'll see how it covers everything. Let me turn transparency off and then go ahead and turn on my head. Now all I need to do to make it inverse is just simply click on the very far right in icon on the Boolean sub tool where my mouse is right over here. And it will inverse this Boolean piece. So now let's go ahead and do a make Boolean operation for that under sub tool, just go and make Boolean mesh. And once that's finished, just like we did before, we will append that new LEA created mesh into R sub tool arsenal hair. And then of course I'm going to go ahead and turn everything off. File, scroll down to what we have done now in hit shift up, you can kind of see if I turn on the visibility of our lowest sub tool, you'll see our newest pieces attached. So now that's a very advantageous thing for us. So what we're gonna do now is we're going to duplicate the two pieces because we're going to have one piece that's going sinking in to the head and then one piece that's going to be coming out of the head. So this piece on the top, that's going to be our piece that kind of sinks in R, I'm sorry, that will sync out of the head this top piece. In fact, I'm just going to go ahead and rearrange it so it's above here, so I just have these two pieces together. Next thing I'm gonna do is I'm going to do a quick little Z remeasure so I can get rid of the skin pores because this is the piece that's going to go inside the head. But before I do that, I'm going to do just a tiny bit of cleaning on the Boolean. I think I'd like to actually make little piece right here. So I'm going to do a trim curve just so I can make a little poly group there to make 0 measure a little cleaner. So if I now go to geometry, go to crease on crease all, then crease poly group to crease the poly groups there and everywhere else to make a clean Z remeasure. Once I hit that, keep crease, detect edges, keep group and 0 mesh. We'll have a little bit more of a cleaner piece to work with. And most importantly, it's going to be a piece that doesn't have any skin pores. And as you can see, it is done. Now I could do that again if I wanted to. It's not really absolutely necessary, but I would probably say that's probably all I need. I don't really need too much beyond that. But if I just divided a couple of times, That's probably all I really ever will need. Just make sure you hit Delete lower. Now that we have accomplished this, let us go to the next phase of this lesson, which we're mainly focusing on in that's going to be customized Booleans. First things first, let me bring in a customized Boolean so you can see what it looks like. And again, this is in your resources folder, so make sure you download it. I'm going to go ahead and click up here on the Tools section here where the cylinder is hit Import. And what you're going to look for is the sci-fi Boolean OBJ file. Sci-fi boolean dot OBJ. And it will show up here if you draw it out. And go ahead and I'll first appended. We go through sub tool. We go ahead and hit Append. We will see our little square tray right there. And let's click on that. Now let's Z out, hit F twice. And you'll see this is our customized boolean. It's sort of like a creepy crawler little place set. So what this is, is you can kinda see how the wires are inverted in. That's because this is all entirely a boolean. A boolean that creates, that pushes up against a mesh and creates the look on the inverse. It may not make sense the way I say it. But once you see it work with the matchmaker brush, you'll understand a little bit more. I'm going to hit F twice. And this is also a good time since we're framed out to go ahead and click on that detachable face, hit the W key. Any Boolean that you create an append in here will have its center reset. So let's just go ahead and bring it back up there with that. Now I'm just going to go ahead and just scale this guy. And what we wanna do is we want this side here that you're seeing, this side pushed up against that side of the face. So E and just kind of flatly align it. Like so. Make sure it doesn't intersect into the face. We don't want that. And if you want to give you an idea, since we have Boolean mode already open, if you turn this into a Boolean and kinda press into it, you can kinda already given a feel for what it's supposed to look like. And if you hit Shift F, you can get a little bit of a preview of it also. As well as hitting transparency, you can get a little bit of a preview of it. You want to have the Boolean as best as you can flatly aligned onto here. And within this square. If you want. And just do a couple of practice pieces. Remember transparents, you can't see what the Boolean does without transparency mode. That could be something right there. So then this is what we're gonna do next. I want to go ahead and turn on my full head. That way we have a full head here. You see a little clipping right there. That's because I made a little adjustment. It's not going to be a big deal to it, but that's from the trim curve that I did when I created poly group there. Now, what we're going to do is we're going to select the Boolean, and that's what I have right now, my sub tool, you can't see it because again, it's not on wireframe mode or transparency mode. Now it is. And we're going to place our Boolean as flat as we can to our viewport. I'm going to hit the brush key and I'm going to look for the matchmaker brush. The quick key for it is be MM, brush, and then matchmaker right here. And then just left-click drag from the center of the Boolean. And you'll see the Boolean convert to the shape of the head. From there. We're going to go ahead and then go out of transparency mode and then just simply push the Boolean in. Like so you can kinda see how it affects everything. Let's go ahead now turn off the head. Because this is all we really want to see. And this is up to you, whatever you wanna do, You can do, okay, is, is actually a little bit of your case scenario. You can, if you want to just kind of smooth it out. You can smooth this guy out a little bit. But if you feel that this is two organic, the face of the head has a little bit too much of an organic feel to it. You can just see there's smooth this out or do another subdivision. I personally think that it's fine this way. And then once you have what you want, Let's go ahead and hit a Boolean, make Boolean mesh. And we're going to now have a Boolean mesh there. Now we're almost done with this. We're not done yet because we still have some other things we gotta do. So now that you did your Boolean mesh, Let's do as we did before with the detachable face piece and the cavity of the head. Let's just append that in. And now let's turn off the visibility of our two Booleans and take a look at our new mesh piece. So now we just have a few more things we gotta do. We're going to do another Boolean. This time we're going to custom make this one. And for that we're going to hit append. And we're going to hit sphere. And I'm going to turn off perspective just for a second. And I hit F to frame out and bring this guy all the way back up here. And I'm just going to bring this sphere. And from this point on, I'm going to go into Solo Mode. Give this a couple of subdivisions. And then I'm just going to create sort of like what we're gonna do is the cybernetic. I, so let me go ahead and show you what I mean. When after doing a couple of subdivisions, I'm going to hit Delete lower and then I'm just going to draw a mask. And you can see what I'm doing right now. Just drawn some masks. And then I'm just going to hit some group loops. Or if I don't have to do it that way, I can just sum, I can just divide it quite frankly a couple more times and our need 2 million. But see you can do something like that. Or inverse, something like that. I'll probably do something like this. Oops, Don't forget the inverse. And so, and you can kind of see what I'm doing. I'm just holding control and don't be afraid to make some fun patterns here, please. It's very important. Just have some fun with it. You feel that it's a little bit like the mass can't get something good, just give it another subdivision. May feel like you're a, you don't need that many subdivisions. But the other alternative is go through a whole bunch of headaches with group loops. I just not I don't think is too necessary for, I think for that though, I may to a couple of things. I'm going to turn that there. And then that delete. I'm going to delete the lower subdivisions just so I can put some group loops and in case I need something more. Here we go and clear the mask and kind of see what I'm doing. I'm just kinda making a pattern here, holding Control out. And this is all, this is going to be as basically a Boolean that I'm just gonna kinda cut into. Not going to make this too deep just yet. I want to be able to measure it against the mask. But once we do this, you can do a couple of things. You can kinda shrink it down, matchmaker it up against the face. But I don't think we need to do that. So now let's go ahead and get out of solo mode. And bring this guy in. Because what I'm going to want to do is, is I'm one to have like an sort of an, a whole socket for wires that come out of. So right now it's a little too big. That's okay. Go ahead and have some fun. And that's all we're doing is we're just having some fun. Now it may not be able to have any real estate right now. That's because the sphere is to three-dimensional and not working too well with everything. That's OK. And now you can do a couple of things. First off, shrinking it down is one of the easiest ways, but you got to work with it. You just got to fumble around and look for that right angle. Sometimes just shrinking it in also helps a little bit. Because then you can push in a little bit further and not go through because you don't want to go through else that's going to turn the Boolean pretty much hollow. So keep that in mind. Bringing this guy and a little bit more. And kind of see how we're having some fun. It's starting to take a little bit of shape. So whatever you can get and just kinda bring in. If you need to just go ahead and hit the key. And then what I'm gonna do is I'm going to hold Control and just bring it, bring it down here. Just to have a little bit more fun with this. Just to make things a little bit more easy to enjoy. When I make a second piece of a boolean for it to carbon 2 down here, makes sure it aligns. And because this wraps, this is a face that's going to wrap around so you're going to move it around. So the one thing I want you to think about in the placement of these spheres, look for areas that are not over the wires, like you see right here. Maybe have a little bit of fun just kind of looking around for negative space areas. Think that might be where I want it. Like because like what we say, wires are going to be coming out of here, so we're not going to be seen too much of this. And if you want, bring it in one more place. And once again, make it just a little smaller. That's what you need. Okay. So after you finish pretty much making all your adjustments on here, everything that needs to be played out is a Boolean. So just bear in mind a couple of things. Like, for example, the, the shape can of course be edited like what I'm doing right now. Just make sure you understand that it's going to then you can work. That means you can work with the move tool. Technically, you can work with the trim Curve Tool. I'll go ahead and always forget to say this but save. Like for example, you can work with the trim Curve tool. And if you don't like, maybe you don't like the area right here. Maybe you want to kind of cut that through. Again. You can go ahead and do that with these Boolean pieces. And you can kind of bring these pieces off if you want. I kind of still like what that look is, so I'm going to keep it there. But once you got what you want, just go ahead and go through geometry. And I'm going to look into something here. We're going to see, looks like I can't do it because I duplicated. Okay, so one more time I'm going to go through geometry. I'm sorry, not geometry bots. So tool and ensure that my Boolean pieces so calculated, also making sure that the masks on the boolean are cleared else and may not show. And go through and do one more make Boolean mesh. If you are having problems in any way with the Boolean operation, go to your original piece before this that you, you put your customized boolean on and do another Boolean mesh on top with in combined with the customized Boolean piece to make this piece work. This is a little bit of a repeat for beginners. If this is your first time, it will take a little quite a bit of practice if you're new to it. So just kind of take it slowly. But like I said, it's fun once you get it down. But you gotta remember a few things. Don't use clip curve on any of this. Try to use trim Curve when you're trimming down a Boolean because you'll get non manifold edging errors if you try. So it looks like it went through. So now what I'm gonna do is I'm just going to delete that piece. That not my boolean spheres because they're quite frankly extremely high and intensive. I'm going to bring in my newest face piece, which is down here. I'm going to turn off that piece and select into that. So that's kinda what I have right now. So let's go up to my original cavity piece and we can kind of see it's got something already taken care of. And that's sort of the look that we want. So we kinda have a little bit of an area. We have an area to put some wires out of four are detachable face. We got, we got a whole bunch of options now. So it you can, if you want to just remember again, it's gotta reset the area there. Just remember if you need a little bit more depth, you can work with it a little bit more. I wouldn't try to mess with it too much. But you can do some things just a little bit more. It is quite frankly a very intensive piece for what I would say is a lot right now It's, this piece alone is 3 million. So I'm probably thinking we're going to need to do a manual form of reach apologizing or go through an auto reef. Read topologies, you know, be either the Boolean piece or the original piece. And have it shrink wrap on top of here. But that's down the road for reach apologizing. We'll get into that later. So again, please, please, please re-watch this as many times as you need to grasp the concept of it. But we're going to go ahead then and move on forward into the next section of this, which will be the detachable face piece. So that said, stick around and stay tuned.
68. Detachable Face Back Side: All right, Welcome back. In this lesson we're going to continue on working with our detachable face here, working on detailing it out. Now, some things to remember here, we're just going to go ahead and give you a roadmap of what we're expecting next. In this lesson, we're going to work on detail, detailing the backside of this piece. Eventually we want to move on to this area here as well. One thing that I want you to do before you even consider detailing anything with a customized Boolean because we're going to use another customize Boolean here is, is that I want you to think about cleaning up anything that looks like this right here. And what you can do is sort of just angle the the the subject piece or the detachable face. And then just using your trim curve to kinda cut in so you can have something that's a little bit more clean and consistent all the way through like that. So with that said, you can do that a couple of times. I there are it's pretty much subjective. If there's any pieces or any places that you want to go to kinda create like little synthetic blocks if there's any final editing means that you want to do, you can go ahead and do that here as well. But once you've gotten all your pieces created, go on ahead and hit through and bring in your Boolean piece. Now remember, you got to click off to the side here too in a separate tool. Before importing it in LC will replace that tool. You'll replace this piece with the important piece. So make sure you click off, hit Import, and remember to download your sub tool, your Boolean. And again that's your sci-fi Boolean. And then click back into your sub tool. And if you hit sub tool underneath this, you should be able to then append that sci-fi Boolean and it will show up right there. So let's go ahead and then just click on that. And if you click on that, that you can't see it. But if you had f and I should say hit F or F twice to kinda see that it's a little bit big when it comes in. So again, like before, let's just go ahead and bring this up. Size this up, rotate it around. Oh, I'm sorry. The because this is important, also going to scale this down. Bring it in. And you'll notice that the piece, the detachable piece, all the mechanical details are on this side, not this side. We're going to still be projecting from this side. I've found that I got some really weird wonky results when I tried doing it the other way. So I'm just gonna go ahead and just try to do it this side. If you tried to do it this side, you could. But matchmaker has some weird results for me that I've been having a trouble trying to get past. So I'm not going to try to do with from that side. So I'm just going to be doing matchmaker from the outside here. All right, So you can kinda make sure to turn perspective off. I know it's a little bit weird that way you have a little bit more of a standout. And then of course, he turned transparency with ghost off to help see your piece. Now you may think at this point you just need to do a matchmaker here. But believe it or not, I would say you can. You can probably just, I would suggest turning on the whole piece. But that makes it a little bit easier to be, a little bit more complete. So to get that matchmaker brush again, just hit B m and you can hit M again, but matchmakers right there. Okay, so once you get to this point that you see in right here, I'm going to have you go ahead and just hit the quiz. Because there's something that we want you to take note of here. And that's once you, I'm gonna go ahead and turn off sub tool. There's a known glitch that does happen with batch breaker match maker brush in the 2021 version, I don't know what it is why. But if we try to do like a projection, sometimes we get a very big distortion out of that. And of course, if I hit undo and do that same projection, sometimes we just get it to hit on the spot. And then of course there are other times and these are the extreme scenarios where if a Boolean, if we do a projection. Some of it gets projected end, it ends up going all the way across, way over here. And if that's the case, I always say get to this point right here or the previous point, and just make sure to do a quick Save, quit out or not necessarily do a quick Save. You can just do a normal Save as well. Just quit out and restart because it's apparently some kind of a known glitch with our This software of ZBrush. I don't know why it does that. So once you get there, Let's go ahead and move on. The next thing we're gonna do is we're going to slide this guy back. We're gonna do, I were, I was originally going to do a projection from in front, but because the skin pores, I didn't want that to show in the back so we can override it with history, recall brush, but I'd rather just go ahead and do something simple and easier. And what I'll do is I'll just kinda of size this guy up and maybe make it a little bit bigger and just do a projection. If it looks like that, that's fine. If it keeps giving you some mistakes, just undo, try with transparency off and see if you can get anything better. If you see this little bump here, don't let it to tackle you too much. That's just the eye. So go ahead and just make sure to turn that off and try again. And now let's just go ahead and see if we can just scale that up just slightly like so. Now you'll notice all these jagged IDs that are occurring. That's from all of this here. So we may need to scale and size this up a little bit more as we go through like so. So with that said, you know, we can, we need to turn this now into a Boolean and just push, press this against there. So to do that, we're just going to convert it into Boolean mode, go up to render, go into Boolean and Live Boolean mode, and now it will disappear. But if you hit Shift F, it's still there. And now we can just kinda press this lightly against there. Now you're going to see a little bit of fighting going on from the left side and the right side. So feel free to do a combination of things like maybe you want to just barely tackle it like that and switch into the what is it? The customize Boolean or the detachable face piece. And maybe you want to do something where it's like Here. Let me show you. We do a mask like this and we can just simply bring the mask in. Course, my gizmo is off to the center balance, so let's just go ahead and read, bring that in by clicking on the top of the head, it F press W. And that is definitely not helping. There she is. Alright. And then of course, let's turn our Boolean mode back on. And we can just sort of bring out the details that way as well. Now, for what I'm doing is you can see as I'm actually I'm moving the the piece on the sub tool that detachable face piece inward. Basically. Now this would be a lot cleaner if we did a dynamic subdivision, but it's going to be a lot of work for something you don't really ever say. So I'm just kinda doing it with this. Now. You see all these artifacts right here, and sometimes it's a little bit of a mind game. You don't know what is really part of the backside and what's not part of the back side. So I'm just gonna go ahead and leave it like that. For now. I'm not going to push the Boolean too much in, but one thing I'll have, you know, what I did do was I took this piece. If I take the customized Boolean off, it won't project anything more. I'll turn the visibility off. I basically just moved it back. By that much. We can put a group loop on there, but we'd probably lose some detail and we can get a cleaner sheen. But that's another more advanced lesson. I'm going to say for, for now, I'm just going to go with this. Don't worry about this artifacts because that's not going to be what we work with and are focused on. And once you do a Boolean, make Boolean mesh, you'll really know what artifacts are real and what artifacts or not. So let's just go ahead and do a make Boolean mesh to kind of see and then we'll review what it is we did if it's good. So now let's go ahead and append that in with another tool. Well, let's go ahead and disable the visibility of the Boolean and the detachable peace. Peace. And you'll see it looks pretty clean, looks like there isn't any artifacts. There's a little bit of work here, and we need to work with here right around there. So one thing we can always try to do to help clean up this little messy area is we can go through geometry and we can do like a really high res version of a DynaMesh to alter the shape to help clean up with all of that. So that will help clean that up. Now if you lose anything over here in the face, would say just apply it a little bit more. But what I did was to clean up some of those artifacts I just went through and DynaMesh all of it. One thing to keep in mind, it would take a hell of a lot more time. But you can do preserve the groups that were made in all of this. But the problem is, is that if I hit Undo, There's a bit of groups that are going on here and here through there that might actually create some weird artifacts issues. Now, I'm going to still say this much what we did. And I'll just go ahead and do that again. And did it. So I'm going to have to go back up again. What we did on here was we went through and we tried to take something and put a Boolean on it. And if there was any sort of non manifold geometry that existed, we use DynaMesh to close that up and to sort of remeshing that all out. And that's basically what it is because we saw some flickering that was going on here. If you scale back in the video, you'll notice there was some flickering and we wanted to close that up because we're going to do some more Boolean work with all of this. Like for example, we might do some more Boolean work with all of this, creates some Boolean cavities to make this look more synthetic. But if we have that flickering going on, we may run into some non manifold geometry issues and we don't want that to happen. So that's why we DynaMesh it. So because DynaMesh It's just kinda, kinda remeshing it and close up those holes that are sort of overlapping each other. It's like a quick fix. You can preserve some of the groups that you have. I'm, it gives you a little bit sometimes unknown results. But because I'm going to be manually read topologies in all of this. It's not going to be like my biggest priority, this backside is not going to be what's seen the most. What's actually going to be seen the most is these trimmings that you see. So that's just sort of how we're going to take care of that backside here. We'll go ahead and then move on after that into the sort of the edge group here. If you feel you want to make any further adjustments, you can, you know, you can kinda like work on trying to make a little bit. For example, up here you can make it a little bit more consistent. You don't have to be too like critical about damaging the anatomy because the face is a little bit off but or detached so you can't see it proportionately as much. But you can maybe use like for example, your Move brush and just sort of work on just trying to get a little bit of a consistent thickness going on in certain areas. Because again, all that stuff is going to be a very useful down the road when you are doing your next phase, which is going to be detailing the thickness of the detailing the thickness of the mesh that you're seeing right here. And I'm just making just small little adjustments. Often too insane, often too crazy. Just stuff like that. So once you're at this point, get comfortable, re-watch this lesson as much as you can. The again, the matchmaker brush requires a couple of tries at it. But if you get a major scenario where you are unable to get anything working, make sure you start at its default flat point with a customized Boolean and then save that out and then restart again. And that's going to help you a lot in the process. So with that said, we're going to move on to detailing sides next. And then after that we're going to work on the wirings that connect the two. And then we'll move on to hair. So stick around.
69. Thickness Detailing: Okay, welcome back. In this lesson, we're going to continue on with our detachable face piece. And what we're going to work on now is we're going to be working on trying to detail some sort of synthetic cavities just to kind of finish up here. Now this is going to be sort of an interactive process. And by interactive, what I mean is is that you're going to, we're going to have an exercise with for you towards the end. Now, the way we're going to approach creating these synthetic cavities is very similar to how we did the backside here. And that is, we're going to use booleans to carve out our own pattern that we want it now, again, I want to stress this about this lesson. Don't get tunnel vision to doing exactly what I am doing. You are free to please go on ahead and do your own pattern. But if you want to follow along just to see what it is I do and then see if you can read, duplicate the process with your own pattern. That's fine. Towards the end, what we're gonna do is we're going to give you some extra little nuggets for you, sort of an exercise nugget for you to work on towards the end. So with that said, let's get started. Now, you'll notice that the, the edging might be a little bit different than your piece on here. That's because I used the Move brush to sort of kind of wedge in and out and adjust that a consistent thickness all around. It's a little bit thicker here that but you can kinda see, I kinda push very small little pieces around, just like so, so everything kinda looks a little bit more consistent around. And now if you can try to work on getting anything straightened out, like you see something right here. You can just kind of use the Move brush if you will. And you can go ahead and just kinda readjusted everything as you see fit like that. So with that said, let's go ahead and go ahead and continue on here. I'm going to now try to establish an insert brush on here and with a primitive. And then I'm going to separate that primitive off as its own sub tool and then use that as a Boolean that I can duplicate several times over to make my own pattern. So let's go ahead and get started on that. First I'm going to hit the B key. And then I'm going to hit I to bring up all the insert brushes. And what I'm looking for is Insert Multi Mesh Primitives. Now try to select this one, but there's one that says Insert Multi Mesh Primitives H. Do not select that, just go ahead and select that. And you'll have yourself some pieces above. And if you press M, You can also see all the pieces as well. So I'm just going to write now take a very simple, I'm just going to select a Q and just draw Quran like that. Once you draw an insert mesh, everything masks off. And then of course you have are your little unmasked section is where everything is inserted in, which is kinda nice because you can then do some adjustments. It also sets you up to go into sub tool, which we're going to do and hit split within sub tool and go split unmasked. Now from there, we can turn this one cube into a whole bunch of cubes that we can potentially use. And we're going to show you what that looks like in a sec. But first, let's go ahead and enable this into like Boolean mode. So for, so go up to render above here. And I'm going to choose render Booleans, select Live Booleans toggled on. And then I'm going to turn my sub tool into a Boolean. And of course as expected, It's going to disappear. But if we hit Shift F, we can see that sub tool like so. So now I'm just going to kind of push it down a little bit and I can turn Shift F off. We'll see a little bit of a cavity right there. So now we're going to do something that we don't do. Traditionally. We're not going to duplicate, we're going to duplicate this cube a whole bunch of times, but we're not going to duplicate the sub tool. We're going to duplicate the cube many, many times within just holding this one sub tool. So you're going to see a whole bunch of cubes, but it won't increase the sub tools at all. So it'll be like 20 cubes in one sub tool. So to do this by hit Shift F to give you an idea, make sure you have w toggled. On for your Gizmo. And now just kind of put your mouse over that Move toggle hold Control. And just while holding Control, drag out and you'll find that you can duplicate something like so. And of course, the previous piece, take note that it has gone on ahead and mast itself out that way you're not affecting anything. And that's kind of a nice thing. But also what I also want you to take to note is that you can kind of show a little bit of technique and the manipulators, so something like that. Now, one thing I do want to caution you out at is this. We zoom in here. You notice that little shaded gray area. What we're dealing with, Booleans and Booleans when we convert into a mesh through the Boolean, make Boolean mesh which is over to the right here. Sometimes we'll have undoing errors, errors we can't calculate. And a lot of the times it's very common is when a boolean is perfectly overshadowed exactly in the same spot as another Boolean. So to combat that, I always, every time kind of either just kinda press down or maybe press up a little bit. It's up to you. That Boolean, that way you won't have to Booleans sharing a perfect amount of the same space. So if you're gonna duplicate something, that's fine. Just make sure that you are content in changing its height so it doesn't share the same amount of space in this area as the previous Boolean. So with that said, let's just go ahead now. And what I'm gonna do is I'm going to a Z back. And I'm just going to kind of carve out a pattern, a synthetic pattern that I'm going to reuse over and over again. So if I hit the W key, like so. And maybe if I just go through and use toggling of the tools, I can go through. And I'll switch back and forth between Shift F and so that I can kind of see what's going on, make sure to change the height. Maybe I would like it to hire something like that. Maybe we can do that and then maybe duplicate it again. Maybe I'd like to change this so that it is just maybe something fun. I want you to, this is the part where you're going to want to do a little bit of experimentation with. So like for me, I'm just going to go ahead and duplicate that again. Marie scaling the size, maybe even. And again, I'm Maggie gone too deep. One thing I'm going to caution you out as is, don't go too deep, don't cut too deep into these. And there's a reason I say that in that is is that I don't want you to try to lose detail in the normal map baking process which comes during the texture in phase. So kinda keep that in mind. Maybe something like this. And if you have to manipulate some things like maybe rotate, for example, I'm probably going to try my best to keep it like that. You can do so now you can kind of see a little bit of a synthetic piece here already forming. Now, once you're done, I went on ahead and clear the mask off. So everything is now selected and we can continue the process of what we're doing by RE, establishing yet again, a whole piece or a Boolean piece like so. And you can even adjusted or you can hold down control. And again, go through the whole process you just did. But then given entirely different scale or better yet, to make it look a little bit different. You can also just bring it down like so you can kinda see how I'm getting creative. And that's kind of what I'm looking for you to do. I want you in order for you to learn this, you've got to be willing to experiment beyond your bubble, Not to get too bogged down in anything. Maybe something like that perhaps. Or maybe something like that. And it might be a little too thin, might have a little bit combat errors her see if I can. And again, what I'm doing here is I'm actually kind of taking my time establishing an interesting looking shape for all of this before moving on. Because now what I'm gonna do is I'm just going to hold control and I'm going to press W recenter, this guy back in and then just duplicate the whole thing. And then we're going to just kind of repeat the whole process again. And this time maybe like to repeat it. And remember the terrain is going to change. So that means you're obviously going to have to do some finagle in here. You're going to have to do a little bit of manipulation to the tool. You should also be prepared, for example, if it feels like it's a little bit off or that the scale of here are the spacing between the edges off. Don't be afraid to use button to scale something down, either on the y or the x or both the x and the y with that center yellow square. You can do that too. And all we're doing here is we're just kind of we're just trying to establish something that we can put towards the end. Now, mind you that I don't want you to think in your mind that this is it, that this is all there is. That's not really something I'm wanting you to be in the mindset of. What I want you to kind of do is think, how shall I put it that you need to do a entire row of these all around here. But then repeat the process you just did with a cube. But maybe this time you want to try something like a cylinder or a sphere. And you want to put like maybe a sphere at the end or something like that or better yet, maybe do a cube and do little notches of bevels that go all the way around here. Now, just to get a little creative, I'll show you what I mean when I say notches or pebbles. In fact, all it even give you an idea what that kinda looks like. Okay? So now this is all just starting to become sort of like a, it's a, it's a patient's game is what it is, is all of this, you know, you just need to take your time with everything. Maybe you want to get creative with something like right here with the edges. For example, you can kind of see how the edges when combined can do something more interesting. I'm not going to do something to terrible with the edges because I think like if I'm going to read a topology guys this, I'm not going to reach apologize these little bitty parts. I'm just going to go ahead and I'm not going to make it in other words, like too deep is what I'm trying to say. Because I might find myself, for example, I might find myself just wanted to do a straight line and across and let the normal map, for example, do the rest of the work. So I'll just go ahead and keep it there. And you can kinda see again just to using rotate to get everything readjusted. Maybe a little close to the end there. So I'm just again readjusting on the y scale, holding Control down. Once again, like I did up here, just doing right over here. And maybe you can kinda see how I'm going along this now. So you should be getting sort of like an idea now of what this is. You know, you can also change the frequency. I have this pretty long, but bear in mind maybe you want your pattern to be shorter. And again, maybe you want your pattern to be something completely different. That's what I was saying pretty much at the beginning of this course, I'm sorry, this lesson. It's that you need to be able to experiment beyond this lesson. I don't want you to be constrained or get tunnel vision here into thinking that you must do it this way. I'm also going to tell you. I'm probably going to grasp the content better if you are experimenting with your own pattern. Now that's not to say if you want to copy my pattern exactly, it's gonna take you a little bit time to get it like dead on. Perfect. But now your call how you want that to be. I'm just saying that I want you to express your own creativity. It's important that you develop sort of that gene as well. So keep that in mind. I can tell you right now, this is going to be one of the more fun or ones to reach. Apologize. Oh boy. You can kind of see now as we go through all this, making our progress. And if we're a little bit lost, just hit that shift up, bring that guy. And so that helps you out with the angle. Oh, yeah, I'm whale course. Here we are. Okay. So now I'm going to go ahead and now I've done that demonstration. I'm gonna do a couple more demonstrations. Now. I've seen, now that you've seen what you're going to do once you are finished doing something like this, Your go, I'm going to do a few more demonstrations of some more ideas you can do to detail around here as I'm going to continue along here. But once you're done, make sure because all of this is masked as you can see. So you're going to need to make sure to unmask this before hitting Live Boolean mode. So bear that in mind again, that's just not a big deal. So just kinda work with it. But some ideas that you can do, you know, don't constrain yourself just to cubes. I'm doing cubes, but that doesn't mean you have to do cubes. You can do something, something completely different. Like maybe down here, I'll put some different patterns here. So and I like Upon looking on it, these are going to be the areas right here that are never ever going to be seen in my render. But I'll still put some detail there just to make it complete. I know that if I was working in a studio of any kind, anyone like Blizzard and they'd probably say this would have to be every inch complete. So we'll just go ahead and keep putting stuff in there. And remember again, to not make it too deep, we don't wanna make it very deep. Because one, if you read topologies this, you're going to bump into a problem in the normal map creation. The normal map creates the illusion of the bump on here. And if it's too far away from its silhouette of the shape like this is very, very deep right here. So we may want to just kind of bring it a little more shallow, flatten it so it's a little more contour and then repress it back in again. And now if you want, try to do that, try not to make it 2D. That's a very important thing about all of this that you're doing is, is that you don't want to do something that radically changes the silhouette. Imagine this kind of like a very editable way of dealing with an Alpha. Editable way of using an alpha, I mean, but the only difference between a, the biggest difference between this and a Boolean. All right, in terms of an Alpha and a boolean is, is that a, a alpha relies on geometry and the resolution of the geometry. And a Boolean doesn't require it. It just projects the preview on there and then it just changes the geometry. Think of it almost like it's a displacement map. In a way. It's like a displacement map basically. But you have a lot more flexibility and add any unit as you can kind of see like right here. And again, I'm just sort of taken my time. I don't have to worry about anything. I'm just the goal here is to make this all look essentially synthetic. And I'll like just that little added spots. Now, again, we did tell you we're not signing off as this as being our only method of making this synthetic, it is a choice. So if you're a beginner and feel free to stop at this point and pat yourself on the back because this is about as far as we want from a beginner. But if you're an intermediate, then you might want to start to practice different patterns. Of course you can do so with the beginner as well, but we want you to have a strong, solid foundation before you get there. Let's shift up. This is going to be our last one and then we're going to be done with this one. Okay. Maybe make this one a little bit wider to grab some real estate. And then let's make sure it's not too deep. Which means we'll have to finagle with the rotation so that it's flatly surface so we don't have to press into deeply. Like so.
70. Thickness Secondary Detailing: Alright, so we got to what we started with here. This one feels a little bit yeah, I'm okay with that. It's a little bit bigger here. So maybe do something like this. Another thing we can do is we can clear the mask off and remember we have access to all the Boolean. So one thing we can do is we can go through geometry and turn off SMT and just divide it maybe once or twice. I probably say once. And then if you want, you can go through the Move brush. And now we have another way of editing everything. So maybe we want everything to sort of line up a little bit more consistently and kind of see it's just sort of like that special touch to kinda get everything go on, line things up. Maybe a little bit here. Here we go. So we got some a little bit more there. So once you have something like this, you could try to do and make Boolean mesh, but I may find myself just putting in. You can also do things like adding more things in here. Like for example, let's go to sub tool. Before I forget, we have active Booleans, a lot of active Booleans on here. So make sure you're going to hit quick safe. If you don't hit quick save, you might get a you might get a crash. So it just happens for slower computers. It's always good. So I'm going to disable the Boolean here, turn off the visibility. And now I'm just going to go ahead and draw in a sphere. And like before, I'm going to go ahead and split unmasked points. So it's going to be like that, come down like there. And now we'll turn the Boolean back on and we'll go through. And like before. This can be used. This is just me giving you an example. This can be used again to add or compliment. It's a lot easier to function. If you want to do something like this, you can kind of do something like this. Maybe if you want to change the scale, just remember it's a little pixelated right there, so you might have to divide it and just something like that. And remember, if you divide it though, you're not going to be able to duplicate it the same way. So just remember to go through geometry and go ahead and delete the lower. That way you can kinda bring it across. And you can kinda just do the same thing you did before. Do your best if you can, to try to get some good equal space. If you can. It's we don't want to make them too deep. But, you know, you're doing it that way. Spacing, spacing, spacing. What I'm doing right now is I'm just kind of doing just sort of a continuation of this. Now, this is basically where we left off. We told you we're going to have like a practice exercise for you. Now, this is basically where the practice exercise is going to be. The practice exercise is going to be for you to do your own piece. It's going to be basically to take everything you've learned and you're going to now try to make your own pattern very similar to how I made mine. Now you can use maybe a, for example, let me see. You can use a semicircle or maybe any of these primitives that you see here. Maybe you want to use trim curve and cut one of these cylinders in half. So it's a semicircle looking thing right here, or a capsule where you want to combine with the cube. I want you to start learning to think outside the box here. So with that said, I'm going to go ahead and just make a few more adjustments. Here. We have a lot of Booleans that are pressing right now into this. Sub tool, which is, I guess a good thing. But we also want to make sure that we can get it converted into a, into a Boolean mesh. So again, don't make any of these circles too nasty or to deepen, make sure you're pulling them out. And I kinda have that one div. So I'm going to have some normal map problems if I don't fix that one. So just make sure you're going through and playing it safe. And we're going to stop right there because I wanted to and to actually do some stuff up here. I'm just gonna do a couple more circles here because I'd like to finish this lesson by doing a make Boolean operation for you. Now remember what we said if we ever run into some issues with Booleans or a error with a Boolean and it won't work. Just always remember to convert the boolean into a DynaMesh that is, has a very high resolution on it. That way you won't have any troubles saw it won't have any non manifold edging. There shouldn't really, I'm looking at this one and quite frankly, I don't think that there's going to be anything wrong with this one. Don't forget to know is do fun things too. I want you all to be thinking outside the box. You got trim curve going here. You can also edit Booleans through that trim curb mode. And you know, you can always do fun things there. In fact, you can carve out little pieces like you see here. And then this shape you could duplicate all the way around instead of this standard, the standard, the standard sphere technique. And another thing you can always do, just like we did before we use the Move. Go ahead if you need to, just bring it in or maybe you wanna do trim curve. And this is me not I don't know what I'm going to get here. But this is me just kind of experimenting here. But you can kind of do things like that. You know, if you want to keep that edge right there where you see it, you can just go hold Shift Control, change the stroke to a rectangle and maybe just like draw out and drip and just so you know, just kind of cut it across like you see there. Remember to use the space bar trick and then hold left Altis minus it off. You can do something like that. If you're hitting corners and you want something a little bit more complicated, you know, you can do something like that. There are no rules in ZBrush. And of course we can do the same thing again. Like so. So I'm gonna go ahead and finish across all of this, but before that, in the next lesson, see this duplicated everything you've seen here you already will see pretty much in the next lesson. But I'm going to go ahead and do real quick a make Boolean mesh operation so you can kind of see what it looks like all the way around here. So let's just go ahead and select onto our piece right here, make sure the visibility of everything else is turned off. That includes the eyelashes. I think when I did a Boolean operation, I had the eyelashes accidentally turned on here. So I'm going to have to minus that off. Let's just go ahead and just see if it's up to the task. Let's do a make Boolean mesh. And it looks like it's not going to fight me. You'll get it with some several warnings. That's okay. So now we're just going to turn everything off like so. And then we're going to append a new boolean mesh and then select into that. You kind of see now we have a little bit more of a mechanical side detailing that we can go through. Now remember, you'll notice again, I kept my Booleans shallow. That's because when I read topologies over this, I'm not, I don't want the normal map to be fighting really heavily with me. So that's very, very important for you to remember. Also take note that you can do things like on the edges here. You can put like omega cube and make it into a rectangle and then make it like rotated around and bevel it and make little segmented bevels on here. Or you can have fun and do like what you did here. And just do a trim curb rectangle and make very disproportionate segment cuts into those bevel rectangles. So it has a little fun right there. You can get really, really creative with. So again, that's part of why a once you're this to be a U lesson so that you can just make your own, decorate your own, and please show me some more of any pictures of your own pattern because I always loved seen that. So with that said, we're going to move on to making the wires. And if we have time, we're going to show you how we can move everything in conjunction as one piece. And then finally do some clean up around here before we move on to hair. So with that said, stick around and stay tuned.
71. Creating Slug Wire: Okay, Welcome back. Now, in this lesson we're going to start working on creating wires that are going to connect between this detachable face and the face. So we're going to be doing some wire work in this one. So we're constructing separate pieces between these two. Now, as you can see from the last lesson, I went through all around and I kind of did some Booleans and just kinda stamp them all around just to give some sort of a synthetic look over here. So if you got something like this or maybe your own pattern, then you're ready to move on. So to recap, what we're going to be expecting to do next is we're going to be taking this detachable piece that you see here. And we're going to move this detachable piece out. And between this head in this piece we're going to put some wires in between there. So again, that's what this lesson is going to be about, just making those wires. So let's go ahead and get started. Now, to begin with, I may hit I'm going to go ahead and hit Append. I would like to bring in a two, like a cylinder perhaps. And of course, when I do that, it's going to go to the bottom of the sub tool. So I'll click on that. You won't be able to see it. So hit F and frame out and they're Shelby. And I can probably go through, maybe scale it up a little bit more, make it a little bit smaller. Not going to move it on the Z or the x-axis. I'm just going to just try to create a sort of a relative idea of the scale in this. So and I'm probably going to choose something along this line. Yes, something like that. Maybe thinner. I can see something thinner than that. But there's no right or wrong reason no matter what you make, remember that you can always continue on to scale it like cell. So let's go ahead and turn off our other sub tools. And keep in mind, we are going to in the next lesson, kind of clean up all our sub tools. So that's going to be part of the clean-up area. I was wanting to do it earlier, but I thought when we do placement, that would be a good time to clean up. So now that we have all of this, Let's just go ahead and hit Shift F. And you can see that we need to put a couple of division, so on all of this. So if I hit can Command D or Control D, maybe once, maybe twice, and maybe just three times. We'll give ourselves something up here. I may even do it just one more time, just so we can have some fairly good resolution. And then I'm going to go through geometry, and I'm going to delete the geometry, the lower sublevels. And that's because I'd like to use my trim curve and get a clean cut on the top there. So then I'm going to hold Shift Control and I'm going to choose trim curve. And then I'm just gonna go ahead and just make some clean cuts from the top and the bottom. Make sure your perspective is turned off because LC or cuts will be a little bit uneven. And then from here, what we are going to do is we're just going to try to put some strip nodules of along here with a basic Alpha that is supplied to us and modifying that Alpha. So let's go ahead and go to the Alpha here. And I'd like to choose Alpha 28 right here. That's probably good enough for me. And what I wanna do is I want to modify this alpha. Now. I'm going to say right now what my plan is as I want. I'm, I'm right now just bringing up the Alpha in the brush mode. But if I hold down control will go into Mask Mode, you see that that alpha disappears. So let's go ahead and make sure it's there. I just wanted to kind of illustrate that. You get a different amount of brush settings when you're holding down between brush and Mask Mode. So moving on from that, Let's go up to alpha here and see if we can modify it. And let's work with no wrong one. The V tiles V stands for vertical. So I'm gonna go ahead and just put a whole bunch right up there. And you'll see how the Alpha just modified itself like so. Now we can do something like maybe put something here, but that's not really what I want. What I want is to hold down control and notice that the alpha's still there in that mode. And then I want to change my stroke to drag rectangle. And you can kind of see we have a little bit more of an interesting An interesting masking pattern that we have here. Now we have some issues we have to work with on this masking pattern. For example, the fall off and the fact how do we keep it consistent with the bottom? So let's go ahead and go back and address the fall off. So we'll go to photo shipped, make it really low. Try again to see if it's something that's acceptable. And I forgot to say, when I addressed focus shifts like the alpha, i only address my brush if you want to change it. You add a hold down Control and then change the focus shift, which is what I forgot to do. So now when you hold it down, you'll notice there's no fall loss of fall off. So the next thing I'm going to do after that is I'm going to go through transform and I'm sorry, there it is. And activate my cemetery and went to mess around with the symmetry keys. Now, if we go through and try to go through and hit this, you'll notice that it doesn't really do much for me right now in this state. So I'm going to make sure I have activates symmetry on. And then I'm going to choose. Now I'll start with y. So you can see a little bit more. Now, if X is horizontal, then if you want the bottom to come up, you're going to need to change it to y. And that's going to have an effect on getting something a little more even there. So now using that concept, we can kind of just drag ourselves something that's a little bit more consistent in its little wider in that area. But we can go ahead and do some about, but I'm going to hold down control, drag down again, going to Something like that. Now, at this point, there's still some more options you can do. For example, you can go ahead and just try to work with what you have. But I want you to take into an account something that if you are unhappy with your resolution as is, you can give it one more subdivision. I'm not going to I'm right now unless until I see the results. So what I'm going to do is after I drag the mask off, I hold down Control left-click to invert the mass so I get the wider strips unmasked. Then I go through deformation. And I'm just gonna go ahead and just give it a, just a slight little bit of a nodule right there. Now, keep in mind, this is one look. But I want you to be in the mindset of the idea that you can obtain many different looks by combining something. Maybe if I did inflate this way and then clear the mask, what does it look like from this point? And I can look something like that. Or maybe if I did it like that and then hold shift and maybe just do some sort of soft a smooth like just barely tapping it. It could look something like that. But I wanted to give you this first demonstration. Before we move on, I want you to take your time getting to this point because what we're going to do is we're going to take this mask that you see here, or this tube that you see here. And we're going to reuse it several times over. So now we're going to move on into the next piece, which is going to be duplicating now that you see before you. So I'm just going to go ahead and duplicate it. And I'm going to turn it off. And now we're going to work with a different set of sub tools within our, our gizmo, which are called transform types. And they work a little bit like deformation. And what we want to do is we want to create and manipulate this shape into different shapes so it looks different from its original silhouette. Let me show you what I mean by that. So if I scale this down just a little bit and maybe bring this guy out just a little bit more. We have already the makings of the first aspect of this. So now if we did that and then we went on ahead and did something like taper. Notice I hit W, clicked on the cog, hit the taper, got the keys and the handle manipulations. So if you pull on any of the orange cones, you're gonna get a taper or a squint, if you will. It's going to pinch and kind of see something like that. Let me undo and just continue on. Or if I want, I can do bend curve. And with bend curve, you'll see an orange dot here and an orange dot here, which doesn't really mean anything. But if we increase the number of orange dots, one shows up now right in the middle. And now we can maybe just snap it to the center there. Do something interesting like that. And then we can go around back to taper if you wanted. And then we can just sort of bring ourselves a little bit of an interesting curve. And we're flushing these shapes out really quick. And that's why I like them so much. P1p2. You can also go back to curve again. Maybe make it a little bit more curvier. And so now we have ourselves a little bit of a good starting proponent and we got a good head start. Let's see what else we can do to this. Let's see if we can do, for example, twist and twist. Just like taper has some ax handle cones, we just work with them. And again, all of this is you're probably thinking, Well, you're not explaining what they are. I'm explaining what they are through example right now and application. So you can kinda learn that way. So kinda looks like a little bit of a tapeworm. And now that we have that. And to like the bend curve, deformer, twist has its own handles, its own combs like the top and bottom cone of this box can just basically do as it is explained. It creates a sort of twist to it. So I'm going to go ahead and give that a little twist. And that's going to conclude us towards our first part of this lesson. In the next lesson, we're going to then continue to add on into this tube and we're going to expand with our booleans by using radial symmetry a little bit more. So with that said, stick around and stay tuned.
72. Creating Synthetic Strip Wire: Hello and welcome back. In this lesson, we're going to continue on making more wires for our connecting to between our detachable face in our main face. And right now we kind of gotten halfway through it by making our first piece from here. But now what we're gonna do is make a separate, separate wire that intertwines with this wire here. And it's going to look very different from this piece. Which means what that means exactly as is, we're going to create sort of like a singular piece, like a mechanical synthetic hard surface piece. And we're going to repeat sort of a pattern, an array pattern that goes intertwined with how this twists like so, so that's what we're gonna do in this lesson. To do that, we're going to be working a little bit more with radial symmetry. So that's why I say, if you did go through this lesson, which went through detailing the thickness through Booleans. It's, this is basically going to be building off of what you learned here and applying it to something like radial symmetry to get what you want. So let's go ahead and get started. I'll show you what I mean. So now where we last left off, this is what we may. Now if you recall from the last lesson, I also duplicated a cylinder before creating this one. So I'm going to go ahead and continue on with this one and just sort of reshape it and use something different. To get started. I'd like to smooth out all these nodules here, so I'm just x. And if you check your Transform up above, you have radial symmetry with y and eight count turned on. And all I'm gonna do here is I'm just gonna kinda left-click and drag and just really try to add, just seemed to slim this down, smooth it out by holding Shift. Now, next thing I wanna do is I kinda want to shorten this up. I can either just shorten it up through this way or I can just do a trim Curve which I need to do to kinda cut off these edges here. So what I'll do is I'll hit X to turn off radial symmetry. I'll hold Shift Control and get my trim curve but curve and just simply draw some simple curves right there. So we have something like that. And from here, I'm going to go ahead and turn off my background piece. So we have just that. So now we have something that should look pretty simple, pretty easy, not very high. It's somewhere around 14 thousand. You can either 0 measure DynaMesh it down, but you want something that's relatively low. I'll go ahead and maybe slink it down a little bit more. Center that up. Now. Now that we have all that, we're going to work a little bit more with our booleans. But before I do, Let me see if I can just do some one extra thing. I'm going to, I'm going to first of all press W and I'm going to hold Control and just toggle to duplicate. This, makes sure that your subdivisions or deleted so that you can do this. And then I'm going to scale this guy and just a little bit and then scale on the y to bring it out like so. After that, I'm going to go ahead and clear that mask off. And then from here I'm going to hit the B icky and look for my insert primitives, not h, but just insert multimap primitives, IMM primitives. And once we do that, I'm going to hit M and I'm going to look for that insert cube. Now this is a good time to kinda hold shift and snap to the top and hit X. And what we can bring our radial symmetry back. And what I'm gonna do is try my best to try and get like a perfect, a perfect up top view. And I'm going to drag out some cubes. And you notice as I drag them out, trying to make that line look as an jaggedy as I would call it as possible. Now when you use your insert multi mesh tool, of course everything goes into shadow. So let's go ahead and split these guys off so that we can turn them into booleans and start working with them. I also want to take this moment to remind you that if local cemetery is off, you want to go ahead and turn that on. Because we're going to be manipulating scale very often and we don't want this thing to scale as a whole. We want all the cubes, the scale individually as one. So from here, now that this is the unmasked section, Let's go to Split and go to split unmasked. And you'll see it up here. Just below. It disappeared because I had the visibility turned off. So let's turn that back on. Now I'm going to go ahead and select sub tool for the queue. And then I'm going to go through and get into Boolean mode, turning that on by turning render booleans and then Live Boolean. Then I'm going to turn this sub tool into a Boolean because we can pick and choose. And now this has become a scenario where we can just have fun just like with DI, detailing the thickness of the eye. You know, you're picking your area of how I would say the fun areas in what you wanna do here. And remember, you can, if you want just to, just have some fun, you, if you want to just remember if you do anything where you suddenly lose it, just remember to hit the F key and maybe go to the very top on the head there. And you'll get that guy back. Like so. If you lose track of your, your cubes, you can just kind of just kind of hit Shift F and you'll get them. And of course we can duplicate these, like so. So let's just go ahead and bring this sin. And I can choose pretty much whatever I want to choose. It's, it's pretty much a crap shoot of fun. Now if you get anything that's a little bit uneven, just go ahead and just try to do your best in. You can redraw the shapes again. Like for here for example, I kinda, it looks like it was a little bit off. And I keep drawing that back out. Toggle, see if we can center it like so. And I'm just kind of have it a little bit of a just taking my time is what I'm doing is just 12, go ahead. Maybe something fun like that. We can do a little fun. Now from here what I'm gonna do is just work on Cray. I'd like to create some little segments that would kind of cut into all these areas right here. And of course you can manipulate those segments like so. And then once you got what you want, you can also do something like this, where you can do deal, where we can maybe widen the segments out, make sure they're consistently pushed in on each end. And then hold Control, drag out to duplicate these guys. And if we turn off Booleans for a second, we notice it's unmasked. So we could just go ahead and say split on mask to unmask final pieces there. And I'll show you what I mean. Will be turned off and that will go back on to being a Boolean again. Make sure the eyes turned on so you can make sure it's going through like so. And then we can turn these guys back on. Oops. What I'll do is, is all once again reshape all of this. Kind of Sam, just having fun. What I'll do is I'll go to the very top. Go through hold Control. Whoops, hold down control. Should the very bottom hold control to the very center. Hold control to that very center, hold Control, left-click to that very center. It's just the way to evenly distribute everything without losing. With getting a good amount of space. We're measuring space. Okay, so now that we have that, let's go ahead and touch up anything that we don't like here. Do some like that. We have something a little bit nicer there. Now that we have that, let's go ahead and do a Boolean mesh here. Let me see if I'm going to check out all my areas here. I may do a trim curve just to see if I can clean that up just slightly higher. We go something like that. And now I'm just going to go ahead with all this stuff here. I'm going to make a Boolean mesh. So let's go down to under sub tool Boolean make Boolean mesh. Let's append that in there. Append it should be at the end there, and it will be at the sub tool at the very bottom. Let's go ahead now and delete the visibility of everything we made. Click on that sub tool. Now we got ourselves a customized little boolean piece. So now that we have that, let's go ahead and turn on our our piece right here. Now, if you haven't remembered, I duplicated in the last lesson this mesh twice. Now if you haven't, that's okay. Just go ahead and append and make another cylinder and make it, you know, clear the mask and just go ahead and go hit R and scale it down to the same similar piece, similar width, I should say. And it looks like my rotational values were a little bit off, so I'm going to hold left, all center, all of that. Now, what I'm gonna do is like before, I'm going to go ahead and I'm just going to smooth this guy out. I don't really need him to be anything special there. And then I'm just going to go ahead. And I'm going to lower the width of this. Like so. Now the next thing I'm gonna do is I'm going to switch back into my Boolean piece. Probably best to bring the sub tool that has my two below, so it's right below. And I'm going to go through, and I'm going to widen it. Now, this is a Boolean, so that means if you hit the R key, you'll notice that the pivot point is off. So what we're gonna do is go to the top of the head there, hit F, and then center the piece. So it's now on top of there. Mary are looks like we had a little piece that was accidentally put in there. Let me go ahead and clear that guile for their probably have to, whoops. Go ahead and do a split on mast. And let's just go ahead and delete that guy. Oops. Now, from here, we're gonna go ahead and reset or that piece back. Let's go ahead and then scale our guy like so. And I'm probably going to scale it probably at that point. And then like we did before, we're going to start at the bottom here. And I may scale. Yeah, probably something like that. Just for now, just to see what it looks like. Hold Control. Scale them to the top, scale into to the center. And then scale to the middle. Scale, or a whole Left Control and drag. And you'll have an even amount like before left, I'll click. Let's bring that tube now down. And this time I'm going to scale this tube in so that it looks super thin. And then I'm going to drag. On the y. And then I'm going to hold left control and read duplicate the results. Want that to be a very fair even amount of spacing so that it looks probably slightly out, just a smidge. Alright. So now that we have something like this, we can now go through and do a little bit of funneling here. Now if you're a little too high on this, this looks a little bit too high. You can always go through and DynaMesh this down maybe. So like for example, do a quick demonstration. You, I wouldn't do it with these mechanical pieces, but with the tubes you can do like maybe a simple quick DynaMesh just to see if you can get something easy to see, but you'll probably need to turn up your resolution, something like that. Maybe. Let me go ahead and give myself a little bit more room. There we go. Then you can just divide that up. Now that we have that. Let's just go ahead and combine what we've done here with. We need to combine the sub tool that we did, this sub tool with this sub tool, I'm gonna do something where I'm going to shave off the tubes on the top here. So I'm going to hold down Shift Control and just maybe I forgot I'm going before I can do a trim curve cutoff there, I gotta delete the subdivisions, My bad. And I'm just going to cut that right off on the top and there I'll show you why I'm doing that. And that is mainly because I would like to combine the sub tool with the sub tool of these two tubes. So let's go ahead and go to geometry. Or I'm sorry, sub tools. Merge. And let's see. We're gonna go with merge down. All right, so now that we have that, let's go ahead and go back to our guy right here and see if we can just go ahead and hold down control and toggle. And that was kinda why we wanted to cut the top off so that it would kinda stack nicely with the next piece there. And then I'll clear the mask recenter the final tube, and then go ahead and scale this guy back down again and reset him. Now one thing that's nice is, is that I can always, because this is all one poly group. If I wanted to do more scaling with this, I could always do that like so. Just to kind of give myself something a little bit more wiggle room, I can always do something like that. And course, if I wanted to separate the tubes again or I could always do that because they're so easy to mask. Once again, just kinda drag this guy out. Do the same for the other piece. Just drag that out. Now we have all that. Let's go ahead and see if we can work with a twist to former that might be able to work to align this up. And that will conclude this lesson here. So let's just go ahead now and recenter our piece. Go through bend. You'd be twists probably first. And then same thing on this and oops. But one thing I do, do kind of recommend is you to have a little bit of fun and just kinda go through and experiment. Let's go through Ben curve. And now like before I change the orientation, if you're on Ben curve to read, put one more cone in the center so you see an orange dot in the center. And again, we're doing the same thing we did before. You'll see how it kinda lining things up a little bit. And you can also do the same thing you did before. You can also do like for example, a taper. So things kind of match up in a similar fashion like before. We can do that as well. So that's kind of the just the area that's like the next part of this area, if you feel anything is a little bit off. Like you can kind of see. I can still like work with things like maybe scale this so that in all of their directions with the yellow square to make this wider in the center, then kind of scale on the y to bring everything back down. You can do things like that. You can go back again and do taper, but please just kind of good this to be understood. It's not like don't get tunnel vision in the video, in following my steps as long as you know the basic idea, because your model might have something that's very, very different from what I have. You have to. Like I say, it's more about understanding calm concept before mimicry in all of this. So bear that in mind as we are going through all of this. And now that we kind of have something that's starting to take a little bit more shape. I want you to now think about what you're gonna do in terms of the the placement. Because in the next lesson we're going to be working on combining these two sub tools. Once again, like we did before, the top one and this one. And then we're going to work on putting a bend curve across here, deforming it into completely different shapes and twist deformers on these completely different shapes. And then of course finally, finishing up after placement of the eye, detachable face, et cetera. We're going to go ahead and do secondary details like the small wires and things like that, some fun stuff like that. Then we'll finish up with some final details like putting more cavities into the face and so forth, sort of like touch ups to here. So everything here is sort of like an incremental process. So this is where we're at right now. Again, take your time in getting here. After you watch the video. The most difficult thing is trying to construct this piece. Once you understand how to do that, it's just a matter of repeating similar to how the deformers were here. But after that, just stick around and stay tuned. After that, we'll go into hair. So.
73. Placing Detachable Face: Okay, Welcome back. Now in this lesson we're going to continue working on our detachable piece in for that, what we're finally going to do is start getting started in working on placing everything that we've made so far. So like our piece that we made for our detachable piece, we're going to start placing that outward. We're going to start placing the wires so that they're inward. All sorts of things. Now before we get to that point in the egg, get ready to do that. I'm going to go through my sub tools and start cleaning them up because awfully, we made a lot of sub tools throughout here and out of Booleans. And the original pieces still exists through I'm just going to go down the line and start deleting everything. For example, you can keep this P separate if you want, just as a reference if you would like, but I don't really need to, so I'm just going to go ahead and delete that off because I have just a second. I'll show you. I have my new piece which is this, then I'm going to be using so I can delete that off if I want. And so I'll just go down the line and see this was another piece I made from a boolean for my backside. I can just go through, delete that and I'll just keep going through the line. This is the mechanical piece, so I obviously need that. That's the Boolean that I carved the backside to. I'm probably going to need that or I'm sorry. I'm going to delete that. And I were just going through the line. And again, that's the piece before the thickness strip. Now if you're a 100 percent sure you're done with the thickness strip, just gone ahead and delete that sub tool. We don't really need it. We're just doing basically some cleanups. This area here is the Booleans that I duplicate it all the way through on the thickness. So again, don't really need that, so I'll just go ahead and do duplicate that. Now this piece, I'm going to keep this as an optional piece just to show you one cool, fun thing that we can do. Kinda towards the end here, it's probably they're going to be in this lesson or the endless. And that can be doubled up as a fun little extra detailing concept that we can use. But so I'll just go ahead and just keep it for now. There's of course are detachable piece. So I'm gonna go ahead and hold on to that. We do. Of course neither are Eyes, eyelashes our years. And of course this little piece is the construct of what this eventually was. So that cylinder, I don't really need that unless you have any more extra strips you want to make. Go ahead and delete that off. And all these pieces here, like for example, let me go into solo mode. That's just the Booleans with the Boolean mode turned off. I'm just going to go ahead again, delete that All. And that last piece right there. I'm going to delete that off as well. So now that we have all that taken care of when we get out a solo mode. Let's go ahead and start combining some of our pieces like this piece, I'm going to combine with this piece. And again, I can always separate the two if I want to, because this little piece in the backside here is one poly group and I can use that to mask and then do a split by mass procedure of phi. Won't need to get these two pieces separate. So I'm not going to lose anything here, so I'll just go ahead and merge down. So that is now one piece. Click on it. So my pivot point resets there. And now what we have left are, if I turn everything back on, the exception of the Booleans that carved out the thickness, is sort of our, we should be having a spot that look like this. Basically, I'll put that to the top. So now what I wanna do is I want to move this detachable piece off to the side here and have some wires connecting between the two. Now, to do this, if I just go ahead and click on that attachable piece and press W L. Notice there's some other things that are staying in place. So I want the eye and I want the eyelashes to move with all of this. And there's a fun trick feature for that. If I press the W key and I press the Move tool or I'm sorry, the W key which the move gizmo comes up and you see where it says. You can't really see it there, but it's going to be lock slash on Lock alt to unlock. So it's going to transpose all selected tools. Sorry, I was reading the one over my bad. What's going to happen is, is that when you do that, you're moving everything that is pretty much with the visibility turned on when you click on this, and if you click on it again with that single line, you move the individual sub tool. So here's what I wanna do is I again want to move this the I and the eyelashes, but I want to keep everything else the same. So I'll first of all go ahead and turn this off and make my way down. And I'm going to turn on transparency. And what I'm gonna do is I want to hold everything in place with a mask. So I'm going to end that way. I can move just the detachable face. So I'm going to hold down Control and just left-click drag a mask there. I'm gonna go to the eyes and I'm just going to left-click drag mask there. So when this moves, that does not move. Same thing with the eyelashes, left-click drag. Same thing with the face. Left-click drag. And yeah, Even same thing with the tube. Left-click and drag a mask over. So now if I turn transparency off, bring that back on, hit the W key, and then right-click on that transpose all selected sub tools. And again, that's just transposes pretty much only the sub tools that are visible. So like for example, you'll see this sub tool right here. This is our base mesh originally. But if I were to move, the base mesh would move. But I turn this guy off and move this. And I'll then you'll see the base mesh still stayed the same. So bottom line transposes this sub tool that is a transpose is all visible sub tool. So that's what I'm trying to get at. So now we can move this around because everything is masked like so and the eyes, the eyelashes, the face, and you can't really see it. But if I left-click, you'll see the mask there. And from here we can kind of go through and I'm just going to bring this up a little bit like so I'm not going to detach it too much. I'm just going to give it just a little bit of wiggle room right there. Maybe. It, everyone is going to have a different result. So don't get tunnel vision like, oh, this is the only result that you can obtain. There are plenty of others. Trust me. So I'm just kind of move around with it. I can have a little bit of fun. And now that that's taking care of, Let's go ahead and bring up our next tool, R sub tool that is holding the strip. And let's go ahead and show transparency, clear off that mask. And our gizmos a bit off on the center. So let's go ahead and recenter that and then left Alt click to reset the rotation. And now let's bring that in. I'm sorry. For our God to say, what do I need to click? Again? I got to click that guy so that now I can just move this back. So what I'm gonna do now is just work on trying to get this guy to just sort of match up to this piece right here. And I'll turn transparency mode off. And then we're just going to go through. So feel free to think outside the box in a way you want. One thing that we can always do is we can either maybe shrink it down, bring it in. Don't worry about it kinda doing some weird stuff here. We'll fix that in a second. Maybe we want to make it a little bit bigger. We can do all sorts of fun things there. Maybe the, this needs to come out a little bit more. So again, not going too crazy in like trying to what does it, trying to commit to one shape or anything? If I see more editing in one area, well, I'll happily turn it to a different location here. If that means I can get more wiggle room with seeing the connector of the tool. Here are the little to connect to that we made. Let's click on that. This point. If you've gotten this far, Don't feel free to click Save, so you have a good spot. Maybe. And now from here, I can go ahead and maybe have some fun either with Ben dark or maybe Ben curve. Again. Let's go ahead and go into solo MSC that better, two dots or wrongly aligned. So let's go ahead and change the axis so it's two, these two ends. Let's put something in the center there by clicking on the orange cone manipulator. And now let's just go ahead and get out a solo. And you can just go ahead and have some fun with there if you want. Maybe you wanna do something like that. That's always fine too. And I'm not worried about it lining up just yet there. I'd like to get my placement correct before doing anything here. I'm right now also just experimenting with the shape. Maybe I want it to seem a little bit more twist on the top here. You know, it's just basically taking what you've learned and just experimenting with finding something fun here, maybe some fun kind of silhouette. Now, I'll also remind you that this, we're going to have a lesson after this to do secondary wiring, like really small little itty-bitty wiring. And I'm also going to tell you that usually that's what sells these things, the secondary small wires. So kinda keep that in mind. So let's just go ahead now and go into our bend curve again. It's a little bit off and the tough there. So maybe we can just bring that Guyon. And again, experimenting with just to see what things look like a little bit. Just to have some fun, really. And then once again, going back to Ben curve, I'm not conforming to the dome to get too like you're going to have to make your own adjustments. So don't be like thinking, Wait, he said this weight, don't get tunnel vision and everything I'm looking at, just watch the whole video throughout and just try to see what it is I'm trying to accomplish because this is sort of an organic impromptu learn as we go sort of scenario. Well, let's see if we can do something there. We can bring something out towards the end, like maybe twists might have some fun towards the end here. A little bit like that. Maybe. Yeah, something like that maybe and get a fun little silhouette out of that and do that. Now I'm talking to myself. That's a habit I always like to do whenever I'm working. Let's see here. All this is just sort of work in progress of just trying to find the shape. So now that that's kinda right there, Let's see if we can rearrange the head seat that looks like up here. Up here can do anything you want. I kinda like it a bit more. So in there, Let's go. Might be a little too foreboding. So maybe something like that. Let's see if we can start constructing maybe a little bit more of a cavity now to that mask. So again, there's little mass right on it currently, let's clear that off. Well Left Control, left-click drag. It's going and transparency mode so we can see a little bit easier and let's change hold it while holding down control, go to stroke and maybe click on a circle. Now thin really all that's special about this one that's just gonna be, you know, nice little fairly clean circle that we're just going to draw and then hold Control to invert, press W and then center it right there in the center. Then reset the orientation so that when you can push it back, It's just nice and clean. Let's take off Transparency. See if that helped a little, you know, and it gave it a little bit more depth to which is also kind of a nice thing. So let's go ahead and continue on with that. And so what I'm going to be doing, I'm going to also warn you that when I did do this, the first time, I spend actually around oh, probably say maybe an hour, 30 or 40 minutes actually, ours a little too much, but just to simply have some fun. Now, that's pretty much what we want to kind of get out of. It, will probably hold onto just a little bit more of the pieces. Here. I'm going to work a little bit more. One thing I'm going to do is I'm going to kind of experiment with different angles and different rotations. One thing I also want to take into mind, this has been known to happen in ZBrush software. A lot of people like to hit PPR just to see what it looks like. And I always ran into a glitch when I did this. So I'm going to show you something here real quick. I want you to take a look at this. I'm gonna go ahead and hit BPR right now. Every once in awhile. It looks and comes out fairly decent, fairly good. Looks like I have nothing but masks on here, so I'm gonna go ahead and make sure everything's cleared. But you're probably wondering, what's my point to all this? My point is, is that every once in a while, if you hit BPR, you're going to run into a scenario where you're going to get these black line bars. And that's just some, every once in a while your computer is just going to be overworking itself a little too much. So to counteract all of that, it's really simple. All you have to do is just do a quick save and just go back to a older version or an older version. It's like reloading. It's just a graphical area or you're just need to give your computer a little bit of working time. It's basically like these really thin line black bars that show up. So I just wanted to go ahead and give you a heads up on that. This is a quick BPR render for it. So now what I want you to do is I want you to kind of take what you see in construct your own unique piece. I'm going to go ahead and drag my picture. I did a screenshot of my own unique piece already ahead, and I took about a good 20 to 25 minutes doing this. This was done in a much shorter amount of time, like when we say 18 minutes, I'd say it took about 25 minutes to get something looking similar to this. This is a screenshot right here. And I took this as a shot to show you sort of like how much more you can see what's going on here. You can also see a little bit more at the display of the wires. You can just see it a little display of the secondary wide array, The second part of the wires. And then of course we haven't gotten to this point and you see these small wires here. Well, we're going to be working on that in the next lesson. But what I want you to do is I want you to get to a point, a comfortable point where you can make something and make it look good. Without the small secondary wires, the small, itty-bitty, very thin wires. They're like the selling point for the piece, but try to get something that reveals and shows the wiring silhouette here. Because it's a little tricky with the face mask. You can kind of see on my end that it's a little, you can see it, but you don't see as much of the back plate as you can. And so I kinda want you to be self-aware of wherever you take this. So keep that in mind when you're adjusting all the pieces where they should be. In the next lesson we're gonna go over again how to make these itty-bitty small secondary wires. And then we're going to finish up with doing some final detailing on everything, just trying to check it all through, making sure everything lines up. So with that said, stick around and stay tuned.
74. Creating Fine Wires: Okay, Welcome back. Now in this lesson we're going to continue on where we last left off and put some secondary, small thinner wires into here just to finish up our detachable piece. As you can see, I went on ahead and did some more finagle things so that you can see a little bit more of the silhouette profile of the tube off to the side, which I think is going to go well once we put some wires and twist and wrap this around, if we get a little more time, I'd like to go ahead and make some adjustments to the face here. So there's a little bit more of a thickness between the head in here. And if we also have some more time, I'm going to show you a trick that I'm going to only do exclusively in ZBrush. I'm not going to take and reach, apologize it out, but just meant to be a ZBrush only render feature to make this look cooler using what we did with the Booleans that we saved. Again, I told you in the last lesson to say that, so I hope you did. If not, that's okay because it's not going to be planned in the read topologies in process. It's just sort of like an extra caveat. So let's go ahead and continue. Now. First thing I wanna do is I want to create those extra small wires, that sort of cell what this looks like. So to do that first I'm going to go down to append under my sub tool. And I'm going to look for a plane 3D and click on that. Now will be at the bottom of the subdued. So I'll go ahead and click on that. And if I hit F a couple of times, see either to either zoom out or zoom it in and hit Shift F. That's kind of the resolution we want. So one of the first things I'm going to do, I'm going to give a couple of divides there. 23, maybe four. And then I'm going to go through geometry and I'm going to delete the lower subdivisions so I can carry out operations that require no subdivisions. Next, I'm going to hold down control and select my stroke and collect a circle there so that I can draw out basically randomized dots on here. That's essentially what this is. It's just the very simple process. I do this a little bit also on my, my my other courses because I always like the results that I got through it. But if you can try to make these dots as to the best of your ability, a good amount randomly scattered, like maybe have that one really small dot up there, or maybe that one really small dot down here, but it's different from the upper right. So because it has maybe a couple here and then one very jet it off. You just really want to have like a whole bunch of like spacing That's really random in all of this. Like so. So we can just kinda go through here. And, you know, like I say, feel free to take your time on it. Just kind of getting through the whole process. And I'm just doing random sizes. And one's cool too close. May want to also hold yourself from not doing anything that's too obvious. We consistent in size. And like I said, this is just a random place. Dots that we're just kinda put. I know. Now I'm just gonna go ahead and after I get a good amount, I could probably fill up a little bit more here. Like to have one centralized area that has maybe just a little bit more. I'll just go ahead and after that hit Control W. And then because I deleted my my subdivisions, I can go through group loops here, switch the loops down to two and maybe do some group to establish a much more cleaner area. So that way, when I go ahead and hit Shift Control, I can isolate, select those dots, drag a mask out, and then bring everything back with Shift Control in empty space, then hit W and make sure perspective is turned off. And then let's just go ahead and drag these guys out so I could drag them the other way. So my bad, let's go ahead and drag them this way. Whoops. I have to also invert the mask. And there we go. That's why everything was looking inverted. And I'm just going to make it look like that. So from here on out, I'll go ahead and clear the mask off, hold Shift Control, and then go to trim curve. And let's cut off that side there. Now from here, it's, we're we we don't have a lot of wiggle room. There's not really any edge loops that can really segment this off. So we're going to have to rematch all of this so that it can bend and fold properly because there's no edge loops between here and the other. And so it's like one single poly group gone states. So we have to go ahead and give a couple of edge or a couple of divisions. So to do that, we have a couple of options again. So we can choose DynaMesh for example. And if you want, you can choose project and give yourself a good amount of projection just to see what it looks like. And maybe just go through and do a real quick DynaMesh. And that's a little absurdly high. I think I went wrong there. Well, that's not do 7.5 million. Be a little bit to absurd. Something like 128 is probably all you need with project turned on. You might even be able to get a little bit lower. But one thing you want to check for is is that if any of this happens, like what you're seeing over here, you can kinda see because they're so close that they kind of meshed together. I'd just go ahead and just simply hold Control. W recenter it and just kinda move it a little further away. Dual more DynaMesh to see if we can get something. And again, I'm just going to go through and check to make sure none of the dots stick to each other. So once that's taken care of, we add a little bit more of a readable amount here. Let's see. Just want to make sure that's all fair. We'll go through and wold, go ahead and do a 3D mesh further in the Topology section to get this into a much lower resolution. But for now, let's just go ahead and work with this. So now when we do that, I'm going to hit W and I'm going to bring this guy over at to center pivot point and just scale this guy down like so. And of course, very similar how we did the two. We're going to be working with our bend deformers again. So roughly rotate it to the angle that is very similar to here. Don't worry about it intersecting into anything we'll fix and clean all that. I'm just kinda get it positioned roughly in the right area. Now. It still doesn't look like it's sold out as wires. So let's go ahead and change that now by working with some of the transform types.
75. Deforming and Placing Fine Wires: So if you can go ahead and hit that W key and break up the COG and hit that cog icon. And we'll start off with Ben dark. Now we'll go to the side so it's perpendicular. Look for that green cone and just give a little bit of a slight bend arc right there. Then click the COG again. Let's go to a different one. And again, I'm just trying different deformers in these transformed types. You can try twist and it's kinda use the manipulator to start twisting things around. And it looks a little bit like what we want. But let's just go ahead and scale it a little bit further down. Like so. Just to make those wires little finer. And then let's just go ahead and we can do a couple of things. We can either work with what we got, maybe bring it closer in, like so, and then maybe work with a bend curve. And again, reorient the two. This direction is the red cone. Which barrier? And then give it a go ZA. I'm just kinda reminding you right now, I'm just kind of experimenting. Maybe I just want to look for something here. We're not scared about any of this. We can clean that up, but I just want to right now just look for my shape and all of this look for my silhouette profile here. Now something that can actually be seen, looks like the lines are little two-way these. So maybe I might to go through and again, just see if I can tangle these wires up a little bit more with the twist. It looks like it will straighten it out. Let's try the other side. Before we go. There we go some a little bit more like that can work. Let's go ahead and recenter that. Bring that in. Scale that down a little bit more. Just kind of, um, kinda just having a little bit of fun is what I'm doing is just, just kind of looking for my shape and all of this. Looking for a fun looking shot and all of this. So that it kind of masks a little bit more. Interestingly. And then I like to just kinda take my time having fun with where this goes. Often. Say, let me go ahead and if you ever find a stopping point, we can't get what you want. Remember a couple of things. You can always just kind of reorient yourself and look at the safe history of everything you've done. And if you are still at like a stopping point like right here, I like what I did here, but I feel now that I want to hit the R key, maybe make it a little bit bigger. And maybe I want to then work with bend, curve here. Instead, you can do that. So don't feel like you've hit a point of no return. You can always reset yourself again and again over and over again. Also, another thing you can do as well is you can hit Control W and really, really try to see if you can make something in double. But I wouldn't do it this route unless you want to have a lot of fun with her topology. This is definitely where we would kinda crawl into Z remeasure territory. But for now, let's just go ahead and show you what I do. If once to deal with this, I can just go ahead and just trim curve this off. Just cut it off right there. And then I'll clear that mask and maybe push that in a little bit more. Why am I doing that? I'd like to have a little bit of a little bit of wiggle room here. Let's go ahead and tuck that guy in a little bit more. That guy. But the two yes. Let's go ahead and bring in transparency. I want to get it so that it kinda goes into that hole. There is something left all to also bring it in there. So remember, if you feel like there's too many wires here, you can also just kind of work with probably what I would say, different volumes. So like for example, let me go ahead and give you a point. If you get to this point, you can make a second amount of tubes. And it probably has 1 third the volume of this amount with just another plane like you did before. And we can also do that. And also you can use the Move brush to kind of bring it around to, but I kind of little bit more concerned about that. But what I think works for me after funneling through, it's probably this angle. And then I'm going to go through sub tool. And I'm going to say to myself, duplicate because I like all that. And then I'm gonna go back to the original piece that has all my history. And I'm going to go and bring it so that it's once again set like this. And one thing you can do, and I just want to kinda show you all the different things you can kinda do. One thing you can do is just hold down Shift Control. And just hold Shift Control, left-click drag, release, left control and shift, but still hold down left-click and then hold down left Alt to minus some of this stuff. And you can kind of cut down this sub tool with the same concept as before. Then simply go through geometry, go through modify Topology and just hit Delete Hidden. And now you've got something new here. We make sure to check. Yep, that's what we want. So we can now do this to go to go through. And we're going to fill out maybe for example, the bottom of the area here. And then like before we do bend arc, put an arc, go through and we do twist. Maybe we want to do a fun little twist. Maybe I just want to do the twist here. Maybe I want to do the twist here. It's all about trying to just have fun finding that spot and then controlling, manipulate everything through Ben curve and kinda see how I'm just kind of alternating and switching between all these different transforms to get what I want. And not trying to break anything down to a, a scientific like thing. It's very aesthetic and you have to be willing to now not constrain yourself into this video, but I'll find your shape is basically what I'm trying to say. Look for your shape and all this. So then we had ssh shift up. Like it's a little bit. Here we go. Now we can go through, cut everything up, trim it away. Oops. Hold Control Shift. Go through trim curve. Cut this area out here. Left Alt, left-click to switch to this sub tool, trim curve, all this stuff out. And go back to this guy because I think a little to-do. That would go and areas. So some point that Let's see if we can put that a little bit further into the eye so that it doesn't just stop there. And click on. Maybe launch it in a little bit. Kinda just say I'm just kinda of like feeling for shape and fill in for a little areas here. I'm just having fun. And that's all it is. Having fun looking for a fun shape. Now, we can do a BPR of this. And you can kinda see it looks kinda gnarly. It kinda looks like it's a little bit fun how we have everything kinda situated. You get to this point, the first thing I want to tell him, quick save or saviors ETL file out the normal way. Now, once you get to this point, what I want you to do is start thinking outside the bounds of your box and have some fun with your own things. So like for example, if we showed you where to find insert mesh, but we only did cubes. What about if you hit Insert Mesh primitive and you wanted to go through the whole thing and insert different things. Like for example, maybe you want to put a, either a lip ring or a sort of a little bit of a eyebrow ring or some kind of thing. I can click that cylinder pipe. Maybe just put something right there and then just go through person. We're going to click on this guy the head. And I'm just gonna kinda click-through, hit the R key. Kind of scale that guy down a little bit. And I'll hit sub tool and split unmasked because that piece is unmasked. And we'll go down to the sub tool below that. Maybe give it a couple of divisions just to kinda rounded out, looks a little bit like The Lord of the Ring. Rain, precious, you know. And so you can kinda put that in there maybe. And then maybe hold down Control or well, firstly, we have division, so on and so we got to delete those divisions, hold down Control. And then just kind of angle this thick. I'd like the big ring to be on the outside. Then bring these guys in a little bit more. So it looks a little bit something like that. We can do that if you want to move these two pieces separately, even though they're in the same poly group. We can also do B, m and move topology. And that will go ahead and just select individual pieces to move without affecting its adjacent piece. So you can do things like that. And now I want you to get into a mindset of having fun, experimenting and going beyond the concept. I'm just really trying to give you more an idea of what to do. Other people might be inclined to work with the chisel brush and maybe go like to a really low setting. Like I don't know, draw size 5 for per se and just kinda go through and maybe do some sort of a word on this guy. Maybe you just go through and do some sort of turn Dynamic off. By the way, I hate dynamic. We can just kind of go through and maybe just have some fun doing some kind of cool little design like you've seen here. You kinda see how I'm doing like a little bit of a cool design here. And then maybe going through and smooth, it looks jaggedy, so maybe just smooth that out just a little bit. So far, everything I've done in this lesson has been with mouse. So it's not really with a Wacom tablet, but you can kinda do a cool little design right there. And now just to kinda surpass the concept, the original concept, you can do things like that. And then again, you can also pick and choose what you want to see. So that's kind of just some ideas I want you to get through. You like, but don't feel constrained. Start getting ideas like for example, may want the ring there on the ear. Maybe you want the ring to be duplicated a whole bunch of times on the ear. And maybe you want to lip ring, and maybe you want the lip ring to have a ring with a sphere attached to it, or maybe you want to have a whole bunch of weird piercings. Then you go through the process of looking up reference for pure scenes and you get the idea to put it on their bottom line is if you can get to this point with all the different things that we have taught you, then you're at a point now. Well, quite frankly, you should have been at a point along time ago where you can combine concepts and do something different. Now I'll show you one last thing for ideas and concepts and getting creative. And that's that remember those Booleans that we did at the very beginning. If you go ahead, we use them to cut into the thickness here. If I turn them on right now, you can go ahead and just kinda bring them in to get yourself like one cool looking little edge area. And maybe use the Move brush, for example, to kind of bring in all the pieces. So once again, you have that extra sheen of like detail. I'm not going to leave though that outside the reach apologizing phase because quite frankly, I want to stop it right here. You're going to have a lot of things to reach apologizing. Your most greatest challenges are going to be the head and the wires when going through all of this. So bear that in mind. So with that said, this is there a stopping point we're going to be at with the face? We're going to now move into the hair, which we're going to talk about things like fiber mesh and base meshes of sculpting, two things like that. So that said, I hope you're, if you've got this far, pat yourself on the backend, stick around for hair. So stay tuned.
76. Constructing Base Mesh Hair: Okay, welcome back. In this lesson, we're going to continue on into hair. Now as you can see, I did fill out some rings and do my own kind of thing. But if you want you, like I said in the last lesson, you're welcome to kinda expand throughout your own little detailing. But we're going to continue on in this video. We're going to work on making a base mesh of the hair in which we can use to trace all our build off of all our fiber mesh hair around. Now, that is actually going to be a very important thing to do because we will use this base mesh to having, constructing this base meshes basically going to be an opportunity for us to go through many iterations that we like and don't like about the silhouette of where we want to see our hair go. So we have a nice quick way of doing it. So if you haven't already, make sure you're downloading the references that are attached to this video in the resources folder on the site. And if, once you do that to go through texture and go ahead and hit Import and bring the hay hair based underscore reference JPEG in, and then click on that and add it to Spotlight right here. Hit Shift C and you'll see the base mesh here. And if we zoom in, we can kind of see what it is. It's basically a very simple base mesh. And you know, what I liked about this was that we had a chance to just go through and quickly iterate what it is we wanted to see what kind of hair we wanted to see. So that way when we create our fiber mesh, we can easily realign it to all these angles that we see. But trying to create fiber mesh first and then going through so many iterations. Now, that takes a little bit of time and a little bit of getting used to. And the other reason is, is that if you wanted to take this down the route of things like alpha cards, you can then take this base mesh into a 3D software. But then again, alpha cards and all of those things. That's a little bit down the road to a different course, more in texturing, which will be upcoming separate course from this. So let's just go ahead and just continue on. If you haven't already go through the process of clicking off to the side and import the 3D model if you want, because we do have a 3D dot OBJ mesh as well for you to bring in. And once you bring that in through the Import button, click on back onto your main menu and append that hair base mesh and you can kind of see what it looks like. So from there, I'll just left Alt and click. You can kinda see what it is. So to create this, we thought we'd give a good opportunity to demonstrate curve tubes and how we can modify strokes in a brush. Not Alphas, but strokes. So curve tubes is one of the most visibility best known opportunities to show what is exactly happening. So I'm gonna do my demonstration of modifying a stroke through here so we can create these little strips that kind of taper off at the end. So first of all, a little breakdown in case you're new to this. This is a curve brush. And so if I draw out a curve, it will create a tube here. And if I kind of changed my draw sign, so I can therefore change the size on width of the tube. And if you hover over the curve, you will notice you will have continuous opportunities to sort of edit rounded. Now, we won't be spending as much time with this one as we will other modifiers, but this is sort of a nice one. Let's try to remember that the draw size brush, which is red and this curved manipulate or draw size are two different things. It's green and draw size for everything else, it's red. So just kind of keep that in mind. You can also change the brush like so. Now, after you kind of mess around with that, once you draw a curve and you can just sort of click off anywhere to be done with it. No make the or disappear, like you see right here. So that's just sort of the quick dry run breakdown of how that curve brush works. Now, let's go ahead and show you something real fun here. Preview a o, which is a 2020, 1.5, is a fun one when we start going through renders. So it will drive up a little bit of your draw time, but just want to make sure that's turned off. So let's go. I know I detailed away from that. I just had to show that because I had so much fun with that. So once you to get this taper that you see, Let's go ahead and go through stroke. And let's go through curve modifier and select our curve. Now, let's go ahead and then bring this guy all the way down to the bottom. And let's just, first off, I'm going to go ahead and dock this by clicking up here. So it can be here. And I'm just going to click on a stroke to show you what it does. Now, it's pretty much the same thing. So if we put 0, if we click on two here into the very center, maybe make a little bit of a dip, and then we'll see how it does nothing. You would expect something, but what am I missing something here? And I'm going to show you that's this. It's size that has an effect. So let's go ahead and do it again. And you'll see that the representation of what you're seeing here, where it really gets wide and thick and high is shown right here in the center. So everything that is on the left represents what happens at the beginning of your brush. And everything that is happening towards the right is showing what happens at the end of your brush. So if I bro, brought this up like so and really clicked it, I would have an update to that brush. And if I decided I wouldn't need to do some really insane like maybe something like this and have something like that. So that's kind of the idea of this you can kind of go through and just kinda look at all these shapes and just kind of do your own little design. And what I like to do, what OMB preferable to doing is I like to go through and I'll just undo. And I like to kind of go through and first of all, take Dynamic off and I'm going to draw some mount, change the width of that. So it's something like that. Maybe slightly smaller. And then I like to go ahead and mess around with the brush to just work with a little bit of the curve. So like maybe I want something smaller here. And maybe I just want something. Let's go ahead and turn it off like that and see what that looks like. You can do something like that, for example. That's definitely a possibility. Maybe. And if you don't, if you don't have any radical control here, just go ahead and move your mouse down and then move it to kinda left-click into it. And then you should be able to bring that guy out. I don't know why they don't why they have such a finicky look and radical. But what I'm doing right now is just sort of working with trying to find something that will be a little bit like, similar to this. It's a bit narrow over here so I can do a couple of things. It can probably maybe raise this just a little bit. See what that does. Maybe something like that. You know, there's, it's really just all sorts of fun things. And you can do. See I, maybe I want some more width over here. So let's see if I can do. And you can kind of see like how I'm doing this. Just like everything that is on the left is affecting it. Onto the right, which is towards the end. The higher it goes, the wider it gets, the lower it goes, the thinner it gets. Since all I'm doing is just going through the process of just kinda carving out the perfect shape that I like. And then just so you know, that's kind of a nice one right there. Let me go ahead and draw another one out. Yeah. That's actually workable right there. And if I want, I can go ahead and save that out. You can save this curve to the disk. So once you get to that point, once you get to a point where you're feeling a little bit more comfortable. In the next lesson, we're going to begin the process of drawing our curves all around here, like so. But this isn't just for that. I want you to also feel free if you want to, you can mess around with different brushes. The standard brush, a lot of people, even like using the clay tubes, brush with intensity turned on to mess around, but I never really do that. I kind of prefer just clay tubes in its default state, but there are definitely some options. So now when you hit Z back and kinda go through here, you can go ahead and go through Z. And you'll notice that the curve still remains the same. And that's because it undo does not affect this part of it. So don't worry about anything being affected there. So the next thing we'll go ahead and do after this is we're going to get ourselves ready to set things up here. If you want to use your reference, you can. If you want to do this without reference, that's fine. And when I say Reference, I mean either the 3D reference or the 2D reference that you have imported to help you draw out something similar. Or if you want exactly the same, you don't have to do something similar because it will take a lot longer. And I don't want you to get tunnel vision and into a failed feeling like you're failing if you're not getting the exact same results, don't worry about that, you'll still get some pretty cool results. So what I'm gonna do here is I'm going to turn the visibility of everything off. So like for example, I'm going to turn this everything except the base mesh of the head. Everything that we're looking at here. So like this, like this, like this. And then we're just going down the line. So the only two things that should be on is this and this air base. So that when we go into split screen mode, we can hit F and we can start carving out our shape. Now, that's pretty much what the next lesson is going to be. And see if I can go ahead and do a smaller one like that. Yeah. And for that lesson, what we're going to do is, is that we're going to also show all sorts of different ways we can manipulate this curve and its placement because we won't just be using this curve that you see here will also be using other deformers to gain access to what we want. So with that said, stick around and stay tuned.
77. Drawing Out Base Hair Mesh: Okay, and welcome back. In this lesson, we're going to continue where we last left off. We now are going to work on drawing our curves in our tubes out. Now that we've established a modified stroke from our curve modifier and under the clay, the curve to brush, we can now create sort of like a stroke that we would like to see. And we're also going to go over things like how to manipulate size variation, a bunch of different techniques along the way. So let's go ahead and get started. And as we kinda go through, we're going to be showing you, for example, different things we can do like transformed types or maybe just simple little inflates anything we want. So with that said, I'll just go ahead and just start drawing something here. So like I'm looking up at the head and I'm using split screen mode. But again, you can go ahead and if you want more of a challenge, you can just use the 2D references as well. And you can just sort of draw out ahead like so. One thing I'll also show you is if you notice that this is a curve brush, and if it goes through the mesh-like that, one thing you can always do to remedy that is go through curve and hit Snap. And that way if you go through like before and then maybe just tug a little bit on the curb towards the end there. You can kinda get something that's snaps through there. For me. I'm going to tell you right now, I actually prefer to do this without it and just do my own manipulations through. So like here's one curve. I'll go ahead now and draw, make my draw size smaller so that I can make the curves smaller. I'll go ahead and I'll then say, Yeah, that's good enough. So I can either move this around now with the the current curve that is blind through here. Like so. That's one option. And you can kind of see how that works out. Then only problem is, is that the spline sometimes creates some sharp angles that I just kinda don't want. So one thing else that you can do is if you hit W, Make sure it's centered. And let's go ahead and take the curve off by clicking off into the mesh. We hit W and hold left Alt and then just kinda move the rotation angle or the Translate of the pivot point and then hold left old again and just sort of rotate this around so that it lines in, imagines a straight line across. We can use a transform type like Ben curve. And that's one of the ways we can kinda get through this. And I like Ben curb quite a bit. So because we can really kind of make something without having to, it can get sort of a wavy look without having to have fear of maybe, for example, working with the spline curve, you saw it towards the end here we made a real sharp turn off and that happens quite a bit. I'll give you more examples as we go through. Maybe make it a little curve right there. So I'll add another dot and just sort of bring it in there. And you can kinda see how we are transferring this around. After that, you can just simply hit Accept and you know, it can even go even further. For example, you can hold shift maybe and then maybe that's too thin. So maybe you want it to be a little bit thicker up here and a little bit thicker down here by holding Shift and collapsing it down, you can do that. So again, there's no like a formula of exactly, you're supposed to do something a very specific way. And now it's really not something so complicated. So it's just kind of messing around and funneling with the whole process. And so it but it is a pretty good pay off when you can establish something similar like this. So we can go ahead and do that. I'll go ahead and do a couple more on here. Oops. Let's go ahead and just go ahead and hit up. Let's go through, since it's not part of my quick menu, I'm going to have to hit B to reselect curve brush and maybe draw out something again. Like so. Perhaps even looking at it. Maybe I'll just go slightly smaller. There we go. That's nice. Let's get rid of the curve. So I'll click into the empty space and then maybe just work with Translate. And we showed you now curve. But don't be afraid to use our old pal move as well. Maybe we want to work with that as well. That's not a problem using a combination of move and shift smooth or adding onto maybe a little thickness towards the beginning of its roots. You can do that. And again, you can also even combine that up as long as things are rotating properly, are aligned well enough. You can hold left Alt, rearrange and do once again bend, curve. Like for. So like something like that maybe. So you can kinda get an idea and see just all the possibilities that you can get out of this except leftover and bring that down. And maybe I just want to like so. And then again, continue on working with all sorts of different things like we did in the past. We know what inflate deformation is. Maybe we want to add overall volume there. We can do that. You know, it's just sort of a process of many different things. So to kind of recap Fourier, we've gone through now three different ways in which we can manipulate the brush. First, there is the curb method in which we want. We can go ahead and manipulate the brush this way. And now we can go through and maybe create a little bit of a crease like so. And if you wanna do with this way, you can remember there's no wrong or right way. Might have to do a little bit of push and pull to straighten it out. But if you get a little bit too much for crease for just remember after you're done, you can always just maybe do like a small shift key. So that's the one way that we do it. The other way is the spline method of bend curve under our transport form type. And again, to do that you have to do just a little bit more extra work. Then that is holding left Alton making sure that the rotational axis is properly aligned. Like so. And then of course, going through the process, so kinda making sure you have the correct access and the correct number of points. And just kinda go on through the same thing as before. That a little bit more work, but quite frankly, you can also be a lot more quicker and to establish your direction or your shape where you want to go a lot quicker once you have it. And then we're going to have the next method, the last method we talked about, which is the most simplest of methods, and that is the The Move brush method. Now that's pretty much a standard old school one. And that's just kinda like where we click off to the side, delete that curve, bring up or moved brush. And we can just simply go through. And you notice, I'm not exactly at a hearing to anything, you know, I'm not I'm not completely following my reference and I so want you to understand that it's okay if you wanna do your own like hairstyle or your own hairstyle through this approach. But if you can try to do it with these tubes, because as we do fiber mesh further on down, we're going to be making use of these tubes as guidelines. So like I said, this whole lesson is pretty much fundamentally about getting you more comfortable with establishing how to manipulate all of these tubes through those three primary ways. So like maybe like for down here, I'm probably going to like try to also break up my silhouette like so maybe something like this. And then maybe something like that. Maybe. Another thing that I forgot to say is in addition to the Move brush, don't forget to use be empty. Move topology brush. That's when you don't really need a mask. If these are all separate meshes, wherever the radical is, it will move that one mesh and not affect adjacent meshes intersecting in very nice way to deal with a lot of this. But just kinda wanted that to be known. And so, you know, you're just going to basically go through now and try to fill out this whole thing now I've already done it once, but this is going to be sort of now your turn to do something similar to what I've done. And don't be afraid to take your time on it. Please don't feel like you have to rush through this. Makes sure if you want to change, for example, if you draw a piece out, remember again, that you can go through and change the diameter of it. Well, the size of it, the thickness of it by changing again your draw size. So like like that. Maybe then bring it in like so. Maybe then go ahead and manipulate it a little bit more here. And then click off the curve and then just smooth it a little bit. Do that. You can also work with the manipulators, all sorts of different things you can work with just to sort of make this fall into place. So I'm going to do a few more examples of this. And then you're going to fill in, you're going to fill in the rest. It's very similar to how we did the hands, where we did a demonstration with how we sculpted through two fingers and then you fill out the rest. So we'll keep going. Say maybe I want to work on that one a little bit. I can also see I'd like to also work with that going down. So let's get a, another brush tube. We can bring that in. And don't forget once you do this, don't forget to save your curve out. If you are in the middle of this wing that and a little bit too small. I'll go with that recenter that now put a spline in there. Bring that guy and maybe want that to be a little bit bigger. Maybe also, you want that to flow a little bit more. We're putting it through like that. You can do that. Again. If you can try to get some smooth and maybe go through this whole thing and do something like that. Let's go ahead and draw some front face pieces here. Let's see if we can do those a little bit smaller. So brush Clay Tubes, let's make them. It's going to be some front hair strand. So we're going to probably have to be a little bit more. It's going to center that, bring that in. And let's put a curve on there because this is complicated little strand here, slightly thick. But we can go ahead and do something about that. Again, I'm not worried about Strep stretching any topology or anything like that. Again, it's slightly thick there, so that's okay. We don't need worry about that. We'll just put something there. Maybe also slightly too long. There we go. So again, you just kinda taking your time. I'm actually going to say I'm going awfully quick like the one I use too. One thing I did when I was making this was I took into account silhouette profile. Silhouette profile is sort of this right here. You can kinda see it right here. This is silhouette profile. You kinda has a very noticeable look about it from the front. That's something that I took into account. So kinda try to see if you can get some year strands to jut out into their own space so they can get some fun attention. See, now I'm just going to again, I'm all I'm doing is I'm using the combination of manipulators like rotate scale. And then from there spline Ben curve, change in my values. And again, if it seems a little bit too much, a little too thick, don't worry. You already know what to do. Just go through and scale it down. Or if you want a thinner, just go ahead and you can just bend it out. Or I should probably say do it like that. Now. Bring it in. So again, that's just one of many different ways we can do this. There's no, like, for example, there's no real hidden trick or anything uniquely different or special that I'm doing here. Just sort of I'm using a culmination of different things to establish it, and I'm doing it in different orders.
78. Finalizing Base Hair: No, it's very random here, like very chaos random. So do a little bit more here. These are the areas that we're going to talk about here is as you noticed that I left some of this area here blank. And there is a reason for that. As I've mentioned before, we would like to do two different techniques. Sort of a a technique for how to address these tubes and a more traditional style technique for how to dress. A dress like surfaces like you see here. Because quite frankly, there's quite a few different ways to deal with fiber mesh. And, you know, it's it's why I'd say it's probably you shouldn't come to a conclusion of one way over another. Just know the basics of some ways, For example, like the basics of knowing that if you can try to minimize the amount of geometry that is being expended on. That's one thing you can do. And we're going to, like I said, after we go through this, we're going to sort of demonstrate an example of what we mean by that. Because fiber mesh has, it's like there's no right or wrong way once you learn how to do it, There's definitely several techniques that you can learn to establish a cool looking shape that you want. And this, there's one for the surface approach and then there's one with using transform types to handle these cones that you see here. So I know that's probably not going to make too much sense right now. But once, once you see it, it will make a law. It will start coming together a lot more. So again, be a little bit smaller. Good. Remove it around, see if we can sum. So we're going to, now, we're going to probably do about half of this. And this is again the par where I want to go over that. The other half is going to be done by you. It's sort of like your tests to sort of get you creative. Wanna kinda hold your hand on this particular area because it's pretty, it's pretty self explanatory. You just need to have a bit of practice as long as you are able to get through the three primary methods in transforming this. Either by the brush curve, the transform type of your Gizmo using Ben curve or using a Move brush. Or that's, that's probably like the three main types of methods in manipulating the size, shape, and position of this. I'd probably say, if you can get that down, then you're probably going to be set. Let's say a close distance. That would also be, don't forget using the transform manipulators as well. So it's just all, just kind of a process and all of this, you know, you just have to go through. And again, there's just no no right or wrong way and you just got to simply take your time. One thing I try to say also on here is try to if you can, it's not really a game over if you do, but try to avoid duplications to save time. For example, like try to avoid hitting W and then hitting Control. Reason I'm saying that is if you hit Shift X, Shift F, you can see all the different poly groups we have. But if you hit Shift Control, they're going to be sharing the same poly groups theorem. There's, there's definitely like options that exist for you by holding the poly groups around. So kinda bear that in mind when doing this. So because it does make a difference. Remember you can only manipulate the shape and size of this curve as long as that curve is standing. So kinda keep that in mind. Once you click off, left-click off, and no matter what you change your brush to, it's not going to rearrange itself. So kinda bear that all in mind. Oh, so things can be seen a little bit better. Again, this is major speeding along. And actually, I expect and spend at least if you grasp it really quickly, any, you can spend a good hour just trying to make this go through and you don't have to spend that long, but I would recommend it just so you can get the practice in. And also you can get some fun shapes and as well. So, you know, going through again, if you want, you can go through and have something more interesting. Don't forget that. And I'll fun interesting, look with Shift F. So bear that all in mind. You can do all those fun things. I'm going to go through and bring sums right here through. And if you want, another thing you can do if you're really dedicated is you can also feel free to change the curve, brush, the stroke of it. We did a modification to the brush. In the stroke menu. You can change the curve modifier out so that you might want something that's a little bit more interesting or, or fun or just something that shows variety in the end. But like I said, we're not going to be too concerned with whatever it is. Remember what the goal that we're doing this for is. It's about having a guideline for us when we lay out our fiber mesh. It really does help in the planning process when creating fiber mesh that we have something here like this. Whoa, people are going to be tempted to do something like this. Where they kinda go through and hit Shift F, go through the whole process, and then go through back into PR curve. And I can do that too. It's just try to remember again that if you do Shift F, you're going to it's not going to be to truly mandatory, I guess. As long as you click off, invert the mask, make that a different mass. So there are two different poly groups and I just hit Control W. You can do something like that. So bear that also in mind. We can do another one. Ring that guy out. Maybe kinda do something like that. Maybe given curve continues to remain there, just click off of that. And again, this is a really quick crash, Crash Course process that I'm going through with this hair, I would actually be spending quite a bit more time, but because it's on a video and we have a time limit constraint here. I'm going to just sort of kind of speed through this. Just to kinda give you an idea of like what to do. Not worried also about things like stretching my geometry out. That does not in any way whatsoever concern ME because we're going to be doing a quick move to reach, apologize this to really even out the geometry. And again, not a 110% necessary to do, but is something that helps clean the mesh up. If in case you want to do extra things, for example, maybe you do want to do some sculpting on it. And that that's fine to a, you just need to make sure that you have evenly spaced geometry and 0 measure helps with that. I'm just kinda bring in this guy. Oops, I forgot to delete the curve. So when you try to rearrange everything passed a curve brush, you gotta make sure to click off the side or else it's going to revert back. Fortunately, there's trim brush though we can do and see if we can just sort of bring that up. Again, just don't be afraid. So one thing I also will say I kinda like to do is before I do anything, I like to go to the very end and just kinda pinch this and downward that way when I do any translation and we'll kinda, just kinda fall into place. So another nice thing that this mesh can be used for is if you want to transfer something over 2, for example, a, another 3D software to do something maybe like hair cards, which we haven't talked about. You can do so for those that are beginners, hair cards are kind of a, it's a technique used to generate hairs typically for games, but can also be used for different purposes. I think when we do our texturing process, we're going to be using hair cards quite a bit. So now that we are getting something a little bit more towards what we have, just to a few more strands. Let's bring that one in a little bit. And then remove that curve. Center that around. And this is pretty good practice for you if you're looking to master the gizmo move brush or the bend curve. So once we got something that's relatively what we want, this is a pretty quick, fast rendition. You'll notice that it's not exactly the same. I took a little bit more time with this one than I did with this one. This one took around 33 minutes to do. But like I said, I would take an hour to just sort of scour throughout once you're done. Now, what we're going to do, and I wanted to show you this is this, we're going to go up to sub tool. And this is what you're gonna do. You're going to notice that this is part of one mask. I'm going to turn off the visibility of the reference or the 3D reference if you were using it. Take this subtour, left-click and drag and put it to the very bottom here. And now I'm going to turn off my split screen and go over and hit the button. Split two parts, not split by groups, split two parts and I'll hit Accept. And now what I'm gonna do is I'm going to, what it did was it took all those parts that I had separate parts and split them off since those were all tubes, they were all split apart. So then after that I'm just going to go through and click the next one down. Hit Merge, and then down. And I'm just going to hit always. And keep going through and rearrange the sub tools to merge all the way down. Like so. There's definitely some missing artifacts on my character head here. So I'm just going to merge those and won't matter too much because we'll be reached apologizing over that. And once you have that, you will have in you should have two things. A separate sub tool for the hair and a separate sub tool for the the face. Let me go ahead and see if I can click on the hair. Hair. Looks like that supposed to go below. So let's go ahead and split that. And now after we do that, what we're going to do is we're going to go through a real super-quick process of just kinda cleaning the mesh up with 0 measure. So let me show you what I mean. If you can kinda see our geometry is all a little bit stretched. Let's just go through real quick and hit geometry. 0 measure. And then we're gonna go through 0 measured keep groups turned on and then just do a real quick 0 measure like so. And you will have a more equally distributed piece like you see. So that's what we did there and that's how we got a rough idea of the base mesh. I'll really want you to take your time on your base mesh, spend as much time as you want. And also remember, remember, please, you don't have to have this base mesh if you want to just go straight to using my base mesh, that's fine. We'll be using my originally created base mesh that I made from this point on when constructing fiber mesh. In the next lesson, we're going to do a quick breakdown of fiber mesh for you, how it works, and go through some of the more important and vital settings in tweaking everything. And then after that, we're going to begin to create our first strips of hair. So with that said, stick around and stay tuned.
79. Fibermesh Introduction Basics: Okay, welcome back. Now that we have our base mesh established in this video lesson, we're going to start focusing on creating fiber mesh. Now at before we can begin to create the fiber mesh that traces along into the hair strands that you see here. We thought this would be a good video to do a quick, quick crash course to the absolute essentials and basics of what fiber meshes, how it works and what its limitations are, and some of the more important functionalities to it. So let's go ahead and get started there. To begin with, what is fiber mesh? It's basically a built-in hair system to the software ZBrush. It's been around for some time now. And what it does is it creates a lot of spline curves for us to create hair strands. It's their hair rendering built-in software, again, only exclusive to ZBrush. You may have a question as you're hearing this right now. Like, what if I want to have my hair in a different software? Well, like I said, we are going to go ahead and progress into different techniques of creating hair, but that's going to be in the second course that regard some texturing since alpha cards fall until the line of texturing. So we're going to show you more ways to create hair in addition to fiber mesh will, but right now we just wanted to give you a fiber mesh as it's opener, because quite frankly, it's super easy to use and it can actually make some great, great results. It's really easy to get some really nice and good results, especially if you've done it correctly and take your time on it. So let's go ahead and get started. We're going to show you the traditional way most people like to do fiber mesh. And let's just go ahead and just show you real quick. I'm gonna go ahead First off, and I'm going to go through and turn the base mesh this off. I'm going to go through and put, scroll down here and look for the fiber mesh tab on the right side and open that up. And right now, if you hit Open, nothing's going to happen. You're just gonna get a pop-up menu for a saved file. That's not what you're supposed to hit, which you're going to want to hit it just to give an idea what fiber meshes is, just simply preview. And if you see that hair, little itty-bitty short hair strands are kinda populated all the way around here as you can see. Now, you can choose to control where these hair strands are. But one thing I want you to know is as we move this around, you notice that the fiber mesh temporarily disappears and then reappears once you stop moving the camera around. That's because again, you're in preview mode. You're not actually having anything to work with or sculpt with. This is sort of the mode you use to actually construct the type of fibers or hairs that you want to actually be produced, generated upon your 3D model. So one thing to take into account though, is, is that you notice, take note to the density right now, let's start with the head. Take note to the density on the top of the head here. And you can kinda see how it's all split across. So if I turn preview off and then on, the density is the same. Now if you want to control where the hair shows up, you only need to basically hold Control down and make a mask. I'm going to do it with symmetry on like so. And now within that mask, if I hit preview, that it will, the fibers will be generated in that location. You'll also notice that the density is a little bit more thicker than it was without the mask. And that's because what it's fiber mesh does is if I open up something called the modifiers, we can, you can kinda see how many, five, and you'll see Max fibers here. This little slider basically controls the number of fibers that are being displayed. So if I go ahead and clear my mask or they will automatically turn preview off, turn preview back on. It's 50 drivers in that area, but now it's randomly spread, evenly distributed throughout the entire area. Now, if I turn, go ahead and just do a mask on here, that 50 has been all allocated up to here. And as a result, it's a lot more denser. So that's the first thing I want you to take into account. The next thing I want you to take into account is experimenting with the max fibers. You turn it down a little bit, you're going to have less fibers. Another very, very important thing to take into account is to look up here, right up here. I'm going to turn on once everybody to kinda put their attention to here and I'm going to make an adjustment. And I want you to keep looking up there. And you're going to see an update to the amount of fibers. For example, fiber mesh contains about 17,776 fibers composed of, and I think I accidentally here 74 thousand vertices. So that's actually going to be very, very important. Anything that is, what we're going to try to do is a hundred and thirty a hundred and fifty a hundred and seventy thousand in the worst-case scenarios, at the most, a 170. But ideally, I'd like to work on fibers that are below a 100 thousand if you Canton, which means that you're going to have to really play around with the settings of the max fibers. Now, if I go ahead and turn that up, you can increase its density and you'll see it goes up. Now it's gone up to a 182. Now it looks like fibers are at 2 million. That's obviously too high. So you can kind of just mess around and you can use that number that you see on the top to allocate the correct number of vertices because you're going to want to try to be a little bit polygon efficient. So the next part that you're going to probably want to look at is just something called length. And with that, we can kind of determine the length of the fibers. Now, one thing to take into account is as if you can't see what's really going on here. Go up to here where it says render edit. You can do a quick little render of your fibers. And right now it looks awfully thin. Which kind of brings us to our next little dial which is down here. And it's going to be coverage. That's gonna kinda make us give us a little bit thicker strands. And you can kind of see it definitely has an impact on their kinda see all the hair is definitely significantly different. So let's just go ahead and just make some adjustments to those fibers. Maybe just like a 130 thousand probably is going to be good enough for me. And let's see if we can bump up the coverage just a little bit just to see what we can get there. And you can kinda see we have some pretty fairly good. We have a 130 thousand That's actually covering this whole area. Now when we are going through the whole process of making our fibers as individual strands, which is going to be sort of like the next step up from this method. Because right now this method is showing a method we're, we're simply drawing a mask on to the head and just controlling what we want. We're going to have to, again, adequate and find a happy medium to get what we would like. So the next one down that we're going to do is this. We're going to take a look at thin. We have slim, which basically makes them thinner, which is kind of the opposite of coverage. And we have color profile. And I am not going to go into the depths about color profile in this curve because that's going to be a little too difficult for a beginner. So I'm just going to tell you to focus if you want to work on color, You can sign color for example, I will. There is a a base and it tips. So what that refers to is base of the hair root and the tip of the hair roots. So in other words, the end and the beginning at the scalp, right up here, and then the end, which is the tip of the hair. So if I made this, let's say red, and I made the other one, let's say green. Now, what will happen is, is that these two dials will kind of give us a little headway into how much do you want the red to show, which is going to be based colorize dial right here. And how much you want the tip of the green to show, which is again, tip colorized. So it's kinda like an area to control your base your base amount of hair. So you can kind of control hair that way. And it also allows us to see some of these patched areas here. So the next one up which is going to be important is right now I'm going to always keep my profile at one. It's not necessary for me at this point, but I'm going to actually talk about segments. Segments are essentially, if you can imagine. It's like this, let me go ahead and give you a good example. Make the hair length a little bit longer. And then maybe I'm going to work with gravity. Gravity is going to push it down. Let's look at how the lookup here now, take a look at the top of the hair. You see these little guys that how Angular it is right there? Well, if you put segments in there, now it drops down. That's because it has more subdivisions to work with that allow a more curvature process to happen. A lot of people like that, but keep in mind though, Segments is something that you want to take into account for things like, I would say alpha cards, if you were going to try to generate alpha cards, we haven't talked too much about alpha cards, but one thing I will go into saying is, is that even though I'm going to probably keep my segments still on its default, which is three, because even though I get these tangles here, when we do this and do a render, the BPR actually gives us a nice little curvature sheen. And since we are going to be doing our rendering in ZBrush for this first course before moving on to into the texture into show a different workflow and hair, we'd like to go ahead and try to optimize a low polygon count. So adding more segments is going to increase the amount of polygons and we don't need to really keep that high right now. So keep that in mind.
80. Fibermesh Paramaters in Segments: Now, the reason that you're probably wondering, the reason that you're seeing a round spline has something to do with not export curves, not there it is. Bpr servings. Let's see. It's going to be the subdivisions here. Let me go ahead and see if I can do something to show you. It's the subdivision, it's called BPR subdivisions. That's this question right here. Renders and the best preview render, you can also hit Shift R to make a render out of this. If you, if you basically can think about dynamics, subdivisions, and how it can kind of smooth something out without it having to be divided. Think the same concept when a render is going through, It's just basically smoothing it out without having to divide more segments. That's what this BPR subdivision smoothness is right now it's at 0. So if I gave it maybe three and well, let me go ahead and just turn it to 0 so you can see on 0, it's just going to stay the same because we're not telling it to sub-divide at all. And in the BPR render, we're telling it to produce a render that looks basically like a more smooth interpretation. So that's sort of like a getaway, get around for that. Now another thing that we want to take into account is is that if you really, really crank up the subdivisions you just saw right there, you're going to get a long-long render time. So bear that in mind. I liked only keep it at three. So now that we have that, now that we kinda went through the most important parts of this, there are other important areas like for example, gravity. Well, if we go back up to modifiers, we have the gravity slider that can basically is contingent on whatever the camera is. So if I turn gravity kinda down a little bit more, you'll see that it just kinda goes this way. But let me say let me show you some mortify, put it sideways. And now I'm going to turn the gravity slider. Which way do you think it's gonna go? It's gonna go that way because again, it's basing its gravity on the camera angle. So down is right now this phi go through and do it the other way. And then it's going to do it that way. So that's sort of the way that works. Now, if you notice nothing here is really sculpted will, nothing can be really touched. And the reason is, is because even though we went through all these modifications, we still haven't created a setting to begin sculpting. This is all just to get things ready. So when we are ready to sculpt our hair, what we do is we go through and hit Accept. And it will say, would you like to activate it past preview? Yes, because fast previews. The next thing we're going to talk about. Now, fast preview. Let me go ahead and show you. First of all, let's turn our visibility of our heads so we have a little bit something to go with. Fast preview is basically a preview that helps us get through grooming with a little bit quicker without having to go through any kind of lag process. So to get through that, let me go through fiber mesh again and go through preview settings. And there you'll see fast preview is already edited. But if you look here, the preview fibers are there. I can switch that all the way down to its smallest one. And then that will make it easier and quicker to comb through strands of hair. This is also important to notice you see all these like little tangles here. That's a lot to do with the fact that we put low segments on here and we're planning on doing a BPR with high segments to make it more curvy. Again, if you were wanting to do something like alpha cards, we would put maybe one more segment in there just to smooth it all out a little bit more. But every hair systems a little bit different and there's a lot, there's also a lot of different ways to create alpha cards except for fiber mesh. So like I said, to manip, moving on, we're going to talk a little bit about manipulating fibers. And right now if we hit the B key and the G key, which will bring up the groom brushes. We have these preset groom Bosch's that are built-in to fiber mesh. Like for example, groom leg, lengthen, which can be used to actually move the brush like so we hell, so here let me go ahead and bring it up sleuth lightly like that. We can also hit. Through Let's go with grim, toss. Him kinda create sort of like a directional flow out of the whole process, you know. And again, you can also hold down shift and really collapse this down if you want. And if you did a BPR render, take note at the density of the mesh and how many fibers it is and see if there's a change, which there is a change. And that's because again, the, this is getting us a BPR render. Now if you're worried about things like hair line, let me show you right here. Hair line. If you want a little bit more of a natural hairline. One thing I always thought I forgot to tell you is that when going through fiber mesh, when i'm I'm going to paint a different spot here. Probably going to be a little bit more, is going to want to do this through the hair. Let's go into solo. Like to actually it's going to be my last demonstration here is trying to get a little bit more of a fall off in hair line. Let's go and through fiber mesh. And let's go ahead and I, I forgot. Now when doing a fiber mesh, one thing I did kind of forget to explain is that the geometry on here, it has a, pretty much a fall off. That is how I put it. It's based off of the softness of the mask. So what that means is is that let me see if I, if I do, let me go ahead and really lower down the length here. And let me go ahead and divide it a bit more. If I give you a preview and kind of see where the hairline is. Now, if I click on it and maybe really saw, whoops, really soften this mask a bit more. And let me go ahead and turn down the fiber so you can see it a little bit better. You can kind of see that the hair line starts dissipating in both length and quantity. And the thickest amount is where the mask is most dense. I thought that was an important part if you ever wanted to do hair like that just to remember, you can control the how far, like it starts to pick up. So keep that in mind. You can always go even farther than that. You know, you can just really, really, really trying to make it soft and just get different results as, you know, as a consequence. And that, that was something I thought those a little bit important too. So again, all these demonstrations were just assorted. Gets you the understanding an idea of what fiber meshes and how it works. Again, I just made the fiber mesh longer with the length right there. And I just kind of up to slightly and that made the mask even more softer. So there'll be a more natural fall off in the hairline. Again, all those things are pretty easy to control. So I just wanted to give you the basic rundown of this because now that we've graduated from understanding fiber meshes by painting a mask, we're going to use that concept to create individual strand fiber meshes, basically long hair strands through a polygon plane. And then we're going to show you how to manipulate that through the transform. So with that said, stick around and stay tuned.
81. Hair Strand Construction: Okay, welcome back. In this video, we're officially going to be starting to make our hair so that we can begin to directly apply it to our base mesh that we have. To give you an idea. We have our hair strands in what we're going to make this as just sort of a example of some of the hairs that we're going to be making. And as I said, it's just basically some hair strands that we're going to be reusing over and over again as we apply it directly to our base mesh that you see here. So to begin with, let's go ahead and get started with just constructing a base template of what type of hair we want to pull out. Now, you have already been given sort of a crash course in the last video of what to expect in fiber mesh. And this video, we're just going to expand based on what we learned in the last video. So to start off with, we're going to create a polygon plane. We're going to append to polygon plane into the sub tool. And we're going to be building all our hair through that polygon planes. So first let's go to sub tool, hit append. And we're going to look for plane 3D right over here and bring that in. Now you're thinking, well, wait a minute. In the last video we were, Aren't you going to draw on the scalp? And the truth of the matter is, is that we want to have a piece of geometry that's separate and detachable from the head so that we can move it around in different places and get it in the right locations quicker and faster. You'll know what that means in a second. I should say, you'll know what that means in the next video when we start transposing are different hair strands across. So if you have already put that plane into the same area that you see of your head. So let's go ahead and click on the sub tool, that plane. And let's hit F again and bring that up here. And we're going to shift snap to make this horizontal. And then I might just go ahead and just shrink this guy down a little bit more. Now from this point, let's just go ahead and hide everything in the visibility. And let's just start constructing our hair strands. Now. Everyone's going to have a very different setting on what type of hair they want. So don't think that there's an official setting in regenerating your hair. Generally speaking, I'd like to keep it ideally under a 150. Phi can get anywhere close to more like under a hundred, ten hundred points. That would be super great. And again, you'll be able to tell up here where my mouse is kind of going, how many points you have. So let's just go ahead and just bring up our fiber mesh tab and get started. I'll turn on preview to activate it. And you can kind of see some fiber meshes just activated. We can't see it too well. So let's change that right now by opening up modifiers and changing our base to white. And let's change our tip to white. That way it's going to be a little bit easier to see in this black gradient, black background. So one of the first things I'll do is is I'm going to change my length. I'm going to go ahead and maybe I'm going to crank this one up to something like this. Maybe a brown know, 11, 13 for length. That's good enough for me. And remember it, you can kinda always check the thickness by just kinda taken a look on here. And that's a pretty high count as it stands. So one thing I'm gonna do is I'm going to try to compensate by making a smaller area volume here. And then that will give me the excuse to turn my max fibers down a bit more. So let's just go ahead and turn preview off. Going to make a little bit of a bigger mass here. And just make something around that size. And I'm going to click on Control, left-click on there to soften the mask off. Turn my preview back on. Well, I have something a little bit more like that and it branches out a little bit more natural. And you can again do another preview. It's still the same number of fibers as before, just more condensed, loosely packed in to that mask radius. So the next thing I'm going to do after changing the length is I'm going to work on my max fibers and maybe turn that to around four. So once you do that, you'll notice up above it says 33 thousand vertices. That's very, very good. But also, I'm thinking we need to have some room for sculpting our hair. And. One thing that will be very important to have that is if we bump up our, our segments slider here. Now if you bumped the segments slider up, the number of vertices is gonna go up significantly. So just kinda, you've got to find that happy medium. I'm going to try somewhere around 12 to see what I can get. And you can already see we went from 13 to like a 108 thousand vertices. That again is a little bit high, but I can probably work with that. As long as I'm sparing. You can go a little bit lower, but I think I can work with something like that. Maybe I can go with lightly less and then I might just go with just a little bit thicker coverage. So maybe I can see some fibers little bit more. I'm just kind of like I said, I'm going to just type it evenly at 13. Do quick little BPR. So something like that, maybe that can help me a little bit more. So I'm looking at this and this is pretty much good enough for me. Like I said, everyone's going to have a different amount here. So don't think that this is the only settings, but for me, this is going to be just fine for thickness. So once I have that, I'm just going to go ahead and hit Accept. And I'll go ahead and say yes for activate fast preview because I want that anyways. And we'll have ourselves a sub tool here. Now I'm going to go up to sub tool and just going to go ahead and I'm going to turn off the polygon plane 3D. So now let's go ahead. What we have to do is I'm going to first of all hit the W key. And I'm going to look for a gizmo and you notice it hasn't popped up. That's because it's at the very bottom of the plane 00 floor. So let's just go ahead and move this head to the top. Hit F to reframe it and bring that back to where it's at. Because it's going to be very important that you start off with maybe getting a good center on where your pivot point is. So once you do that, what I'm going to have you do is I'm just going to have you duplicate your fiber meshes about three more times. So 1, 2, 3. So you should have about four fiber meshes. And then we're going to go through each of these and try to duplicate what we made here. And I'm just going to go ahead and transpose set so that we can kind of have a little bit of a reference here. If I can get an opportunity, I'll give you some 3D reference to help you out. Or 2D reference on this because fiber mesh doesn't export very well on 3D book platforms. Are right. So what we wanna do first the ball is we're going to start from making each sub tool here similar to each one of these. So this one is going to be to this one. The next sub tool down will be to this one. The next sub tool down will be to this one. And the next sub tool down is going to be to this one. So like I said, there's a whole bunch of different ways we can do this. But one thing I will have you do is, is I am going to ask you to go through the process of doing BPR checks to make sure you don't create any fragments. So to begin with, I'll go ahead and just kind of start with Let's see. Let's go ahead and turn that off. Go ahead and start with this guy. Disable visibility here. So I want to make this look similar to this one right here. So one trick we can do to make that happen is, is we can go ahead and hit W key. And this example is done through transforms, deformers specificly taper. So all it was, was a very simple and easiest one. We just simply adjust the cones like so. Now this one's kinda nicer because you can kind of create a modification. I'll whatever washed, how shall I put this? Wherever you decide to set this one at. It has a base default of hair with very little detail. Now it's pinched in towards the ends here, mainly because of the fact that it all the hair strands that you see are sort of like. And I may like in their hair they all kind of cone out. So this shape is going to be representing a lot of those cones, but also it gives you a flat canvas for you to do your own editing once you set it in. So it's kinda like your blank canvas. Go to shape that you can do a whole bunch of editing too. It's a nice one to use. So I'm just kinda go in through the whole process. So just bring in the sky in. And once that's there, I'm just going to go ahead and hit Accept. And I can even rename this library hair blank canvas. Blank. And then we pretty much got the first one done. So let's go ahead and I'm going to disable that. And then we're gonna go to the next one. Go ahead and bring that hair strand over. Now I'm looking at this one and probably thinking it's a similar to how we did the first one. Except we're taking it one step forward by adding some sculpting into the process. So let's just go ahead and first things first. Let's take a look at our top here. Yeah. Okay. Go ahead and maybe scale this slightly. And we're building off of what we did before. We can do taper or we can go ahead and do one of the groom spike brushes go down and then do taper swirl. Really doesn't matter which arrangement you can get to. But I think for me, I may just do the taper first off so we can kind of build off of what we did. And then just kinda take it from there. Right? Then I'm gonna go ahead and hit Accept. And now I'm going to bring up a groom brush. So we're going to choose groom spike, BGP, quick key. And now we can just go ahead and adjust where an app to take a couple of practice strokes to know what we're looking for here. And we can just kind of do maybe just like one through here, like so might just leave it that. And then we can just go ahead and do Twist. Go ahead and hit Accept, rotate it around. And again, don't feel like you have to stop there. If you want to add more to it, you can. But like I said, I want you to take your time on this one. And if you give too many tangles, just go ahead and just real gently with your wax tablet, just kind of bring it back in with smooth. You can go ahead and do whatever you want. But most importantly, once you're done and you need to make sure you take a BPR rendered and make sure you don't have any ballooning artifacts because that can cause some issues. So that's kinda like the rough idea where this one works. Let's go ahead and just do one like that. Kinda like that. Look a little bit more. Once we go through that one will move on now to the next one. Take a couple of practice swings with the take a couple of practice strokes swings on this one. If you need to, go ahead and maybe just smooth it out a little before you go through the process of taper. I'm sorry. Before you go through the process of twist my bad. Sorry about that. Just to kind of have things a little bit more of a swirl. Mm-hm. Kinda do something like that. Reset the transforms. And you know, you can do anything you want on here. Don't just, I am challenging people to go through the process of expanding beyond the concept of what they see here. This is just sort of another example. So don't also get tunnel vision very important. You don't get tunnel vision and try to copy exactly what you're seeing because it is so much more important to understand the concept and not get hung up on mimicry. Please don't do that. I really would like to for you to see or try to build off of what you're seeing to do your own techniques because that's really how you learn all of this. So let's go ahead and move now onto the next piece. Which will be similar to how we did the other one. It's just building off of what we did before. Start off again. This one's a little bit more challenging of one to do because it requires grooms spike, but you can also do some other things on here as well. So let's go ahead and we can do taper again or another fun. One lot of people like to do is pinch. Now, pinch sometimes works and pinched sometimes doesn't work. But I wanted to kind of get that in there so that you understand that you can use some of the other brushes in ZBrush. So like for example, I'm kind of using pinch right now. And you can kinda see the different results that you get. And I can combine pinch with groom, lengthen and just kinda bring this in like so. And then maybe I can, if I really want to get that sharp spot, maybe taper can help me in some places occur right here. And then as we did before, we're going to do spike, groom spikes. So let's go ahead and look for that. That's this one right here. And let's do some practice swings on those because we don't know we're going to get so little too much. Kinda bring it out a little bit more. And now let's just smooth it once again. So it's kind of see where we're at right now. When kinda see that we're getting a little bit of what we want. Feel free to maybe smooth and this out just a little bit. And again, if you feel the need that you don't have to do, maybe a couple of others. You can, you can go ahead and go outside of my concept and you'll get some different results like you see right here. I'm not really wanting you to get too hung up. Now, if you're looking to do more like complicated designs, remember, you see this tangling that's happening? Well, you can probably reduce that by either smoothing it and a little bit or adding a little bit more segments into your piece. Just remember your polygon count is got your active point count. It's going to go up. So kind of bear that in mind. So this is sort of just kind of touching on and expanded a little bit forward to me, it looks a little awkward. So I'm kind of going with the whole philosophy. Less is more. And if I want to add more, I can always do it in the editing phase when applying these altogether. So we're done with that one. Let's go ahead and now move on to the next hair strand so you can see what that one looks like. Okay, so for this one, we're going to now just go ahead and take a look at the top here. You kinda notice I cut half of this off. If we do a BPR render again, we'll just want to reiterate this that we have it a little bit thinner than the other ones. So we're going to try to do something very similar here. So first off, old Shift Control, make sure that select rectangle is selected and we're just going to kinda do a quick little BPR render to get things kinda cut off so we can kinda thin this out. Let's go ahead and see if we can lengthen this up. I'm choosing the bead, the quick key into groom, lengthen just to kinda bring this in just a little bit and a little bit. And then maybe just hold shift and smooth that out. I'm going to hit BPR because again, I want to just kinda do tests. Bpr is to make sure I'm not giving any ballooning artifacts. If you do, make sure you just kinda go back a few steps and just kinda smooth it out if you can. So let's just go ahead now and move into grooms spike and see if we can get some interesting piece. Interesting patterns here. Maybe even just take your time here. See, I'm just kinda go on around right now and just and I'll just take my time. Just not really. Worried about anything here and just kinda do my own thing. Me a P in at this point after doing a couple of really chaotic random spikes, maybe just go ahead and just hold shift and smooth and just kinda ease these back in so you can have a little bit more work with the segments and then do a real quick BPR. You can get something like that. So that works pretty much okay. So the next thing we'll do is we'll go ahead and hit the W key and bring up our transform types by clicking on that COG there. And let's start off with taper. And that will get our first little look. He noticed that nothing came up. And if you're going to give you a second to pause and think why nothing came up. And the biggest reason for that is going to be because we have partially hidden geometry filed shift control. It will come right back up again and we can have stuck to work with. But I like to go ahead and just delete that geometry so I can perform the taper function. So I'll go through modified topology, hit Delete Hidden. And now let's see if we can get taper back now. And now we got a taper go transform for us. And kind of see now it's kinda coming along. We can have something there. So now just go ahead and hit Accept. And now after that I'm just going to do well more transform type and we'll do twist. And that's kinda how we get this piece that we see. After hitting, doing a little bit of a twist, feel free to go back into grim brush maybe in just to go back to groom, lengthen and you can go ahead and just kinda bring this in and maybe give a fun little wave if you want, or maybe bring it a little bit thinner here. That's bringing the solo. You can do a whole bunch of things. It's, it's just sort of some fun. That's all we're doing. So I want you to take your time and then before you set off on anything, make sure again you do in that BPR render. Let's take a look at something down here that's a little bit of ballooning right down here. See if we can kind of clear that out. That probably happened because of a combination of, sometimes when you stretch and pull some of this geometry, you can get to a little bit of the whole process of ballooning a little bit through here. So now you got to just kinda work with what I did there was I just kinda smooth it back down and then just slowly collapse to down with Shift and just kinda race lengthen to backup. It's, you gotta do that a couple of times, especially in the extreme cases. So it's patience is a virtue on here. So now that we have the four strands that we see here, the next thing we're going to do now is we're going to take what we've learned in, we're going to apply these four strands by reduplicating them across the base mesh. And we'll show you how to apply that like so. So with that said, stick around and stay Tim.
82. Hair Strand Application Break Down: Okay, welcome back. In this lesson, we're going to officially begin applying our hair strands onto our base mesh of our hair. Again, we made this base mesh at the beginning of the section so that we could have a guide when we put these four hair strands and apply them to there so that everyone's on the same page. We're gonna do a check on our sub tools and give you a sort of a checklist. Right now I have a couple of folders. The first one is a hair strands folder that has all my hair strands on here like so. And of course, I have an untitled folder where I have everything that fills in the rest of the pieces for hair just so I can kinda I'll toggle that on and off. And of course have finished sculpt that's holding the rest of my clothes on to. Now. The one thing we're going to go also go over is, is some guidelines, some do not dues because it's going to be very important. You capture, conceptualize all of this. It's going to be some important like guidelines when applying these across that will just going to run through at the beginning of this video real quick before we begin. And to do that, I'm just going to go ahead and give you an example. Guideline number one is, let me go into solo mode and bring my first hair strand across. When we apply this hair strand or a duplicated version, we will be duplicating this hair strand quite often, or any of the other hair strands quite often. But the way we do it is through duplicates sub tool, what we will not do is hold down Control and translate across and there's a good reason for that. So let me go ahead and show you one more time. If you hold down control and translate across, take look at the change in this, the visual change. It kinda suddenly looks very wispy. And that has a lot to do with the curves disappearing. And it becomes officially more of a geometry. Now this is a bad thing because it takes away our ability to add any additional grooming or sculpting to the hair whatsoever. So let me go ahead and give you a good example what that is. If I press the B button and choose one of my favorite grooming tools like grooms spike for example. And you do a render. Well, then you're going to have something there that works. It's fine, but let's undo and I'm going to hold down control and translate across if I tried to groom spike again, you can kinda see it's not coming out right. And I'm pretty sure BPR render, both of them are kinda messed up. Like so even this one's messed up. So that's one thing. One reason that how why we don't want to duplicate in that manner, please do not do that. The next one is going to also be trim curve or any of the trim brushes. If you hold Shift and Control and try to use something like trim curve and try to go through, you'll notice it once again translates across and again like before, you're going to have that problem where it just doesn't add up very well. So try to resist doing all of those things. So that's just sort of your guidelines. One thing we may run into and I'm hoping I can have the opportunity to duplicate the air is, is we're going to run into some ballooning. This happens in a BPR render where we see some blown-up balloon areas. I never really get any sort of fix online for this, but I do know that whenever I come across it, usually I try to smooth it out or maybe comb it through Hair toss. It does require some rearranging and it is a pain in the butt to do so. If we get there, you'll see how I troubleshoot through it as we go along. So let's go ahead now and get started. So in this video as we apply hair to these different areas, we're going to be spending the next couple of videos just kinda doing that kind of covering the whole area here since hairs, something that takes awhile. So in this video, I'll start with putting a lot of time and attention to this front hair strands. Since in a front profile that's the one you're going to see the most. And I'm probably going to choose between either this one or this one. I think I'll go ahead and go with this one here. Instead of this one because it kinda like the little overhang pattern that I created. And that might go Interesting for that. Like I said, you're welcome to try your own variations. I think I'm just gonna go with that one. So let's just go ahead and disable all of these. And I'll just go ahead and go with this one. Now what we can do some things on here, for example, we can, if we want to, we can kind of thin the herd on this one a little bit. And just to kinda help us out, or we can just kinda keep it like a little bit low, just so it can be a little bit thinner and easier manage. And then we can then go through geometry and then go ahead and do modify Topology and delete hidden. And let's just go ahead and hit W in size the sin. So I'm just going to go ahead and try to just kinda position it using the gizmo, rotate and translate manipulators to get this to look a little bit more fairly scaled. So just kinda go on through. And once you have it in a fairly correct position as can be, we're going to go ahead and then, and then toggle up to the COG here, and click on the transform and choose a bend curve transform type. Now, don't forget to toggle that red axis cone, so it runs this way. And don't forget to pull on that orange curve. So we have one curve in the middle. I always start with three points or three dots, orange dots, because we can get the most movement out of that. And then any other further adjustments we need, we can adjust with incrementally more dots as we go. So let's just go ahead and just as I'm looking through this, I'm kind of noticing something up here. It kind of bends off in this kind of is a flat widespread. So I'm going to go ahead and just kind of undo this and see if we can just real quick change the taper. That a little bit. That way. It's a little bit more forming. Go ahead and hit Accept on that. Let's go ahead and get back into that bend curve. And you'll see I'm just simply going through the whole process, the motions. Just bringing this in like so. I'm going to add one more dot in between. So we can just add a little bit more. And you just comes more apparent. We're using our, our base mesh as a guide, as we guide this all in. Now I'm going to kind of get this all prepared to be tucked in a little bit more. And as a and it's just a work in progress really. That's all it is. Now I'll go ahead and left Alt, left-click and click on the base mesh. And then I'm going to isolate, select this piece and just make it disappear. So I can get that out of the way for myself. So we can go ahead and move forward. So now that we have this, we have a whole bunch of things we can do, we can work with on this. But first things first, I always like to do a quick little BPR. Make sure it's in the right spot. You can kinda see it is kinda fallen into the correct area. So let's just go ahead and just kinda if you want, you can go ahead then in proceed to do any additional sculpting. Like for example, maybe you want to smooth out and add a little bit more variety with the smaller brush, of course, maybe just kinda bring something in, smooth it in. But any adjustments, I'm just going to warn you right now, any adjustments you make, like making another stripe there, make sure you're doing a BPR. So you don't have any ballooning or anything like that going through. You can go through this whole process if you see it like a little wiring and a little tingly like you're looking at right here. Again, that has a lot to do with the number of segments that we have on here. It's just because we didn't put enough segments to it, but I'm not really too concerned about it. We can go into solo here and that might actually help. And also trying to gain access to some things you can kinda just see. Like if I'm trying to make a spike here, I'll maybe smooth this out a little bit here. Too much. Maybe some stuff there might work. And make sure you do a BPR. Look for anything that might be out and see it's a little bit off. So let's just go ahead and go through that again. Kinda see we've got some hair go in there and we got some workable hair. So like, like I said, this is this is taking more time in one strand that I want to. I want you to understand though, that, you know, you don't have to necessarily settle for. What I would say is just setting it in and you it is ideal if you can do it to make some adjustments like here. We did make some adjustments through the whole process. So please keep that in mind. If there's anything that you do on legacy, I'm all this is done through grooms spike. There's anything you do any extra for every spike you make. Make sure you're doing a BPR. Make sure you're not like creating any balloon blowups. If you do, just go back, undo, smooth out and redo again, because it's very important you avoid that. Alright, so that's one piece right there. So now you get an idea of what to expect. So if we want, we can now move on to another piece. For example, we can do a full hair right piece right here. And maybe as I'm looking at this, I want you to take a look. And one thing I want you to notice is is when I did this piece, I didn't duplicate it. But that's okay because this is going to be a common mistake you do, and I wanted to do this mistake intentionally so I can just quickly show you if you go ahead and forget to duplicate your piece before you start, just go on ahead and just duplicate it on. And then take that new duplicated piece that has just two orange bars and just simply drag it outside the folder. Go back to your original piece. And I'm just going to turn it off so you understand and just scale all the way back to the default state. Don't worry. You still have what you need right there. So just a little heads up for you in case you lose your way. So now that we have that, let's go ahead and just kinda go through all the strands. So in case you figured out that's like just one strand, but again, that is how we do it. So like as we said before, we're going to go through the next few videos, setting through and putting hair strands across each cone. So we'll do with this top one here. So again, I'll go through and I'm probably going to like this one here. Probably, let's see here. So this time around, I'll go ahead and duplicate that guy. Take it outside the folder. And let's go ahead and just bring it in. Like so. Let's see how it looks. It might look good, it might look bad, but let's just go ahead and do one thing here I'd like to try is I'd like to go into solo mode. And I'm going to just kind of rotate this round for an interesting profile that I would like to look for. That guy hit wrong one. I like that profile a little bit. Maybe. It's just kinda, I'm just kinda doing some quick BPR hours just to see if I like something here. Maybe something like that is kind of interesting. Just kinda what looks intriguing from a side view profile is all I'm doing. So I'm just kind of taking it around the corner here. And maybe something like that. Work. All right, so again, let's take out a solo and just bring it in. And again, like before, we're just kind of, it should be pretty simple. It's all we're doing is we're just kind of bringing this in and we're adding a curve. We're bringing in the curve and just resetting the piece, like so. And that's not too hard, is it? I spent a little more time on the first one because I wanted to get you in understanding the feeling of, you know, you can make more additional changes or edits as you want to go through. So let's go ahead and click back onto our base mesh. Shift-click, left-click. And now I want you to, I'm going to hit left, Alt, left-click back onto this mesh. Once you to expand your horizons a little bit, do one BPR and then do a little test here. Try to understand that if you want, you can go through and hit the pinch brush and maybe if you want. You can kind of pinch that in. This is also kinda why I wanted to do pinch. Just to show you have other options. I also want you to be very, very careful about using pinch brush because that also is a trigger for some balloon artifacts. So make sure you take your time on that. I kinda like it to those segregated. But as you go through on right now, I'm just setting these in. So let's just go ahead. No. It's okay. There we go. And if you wanted to kind of explode a little bit, you can also go through the groom brush, maybe check out blower, and that might like kinda of free up some of those pieces so that you can get maybe, maybe not such a sharp little spike, but more of a natural feather off. You can do something like that. Maybe if this got to be a little bit more straight, you're going to just kind of tapped Shift. You can do something layer like there. And again, don't forget, you can go back. Maybe experiment with taper a little bit more. Don't forget. Yeah, like I said, you can work with still the transforms. And like I say, I know I'm kinda going on. I just want to just kinda remind you you can keep doing more even after you've created the original first piece. I'm going to probably leave it at that and move on to the next one now. And that's going to be tabled for the next video as we're going to pretty much cover the whole front area using the same tricks that we wanted to go through. So we kinda wanted to sort of take the time to show you how this is done. And then in the next video we'll move a little bit quicker pace in tackling like the front Hemisphere. After that video, we'll tackle in a couple of videos to add the middle hemisphere of the hair and then finish off in the back hemisphere. So with that said, just take your time, do your own practices of you remembered not to be constrained at all on the choices of strands to use. It's not a rule that you have to use the exact same ones for each strand as you see in the video. Please don't get tunnel vision to do that, please deviate away and try to explore your own styles. On here, it's very important, important for you to do this in order to grasp and learn the content. So with that said, like I said in the next video, we're going to just go ahead and finish off the front hemisphere of the hair. And from there, we'll just continue setting the rest of the hair in place the exact same way. So stick around.
83. Fibermesh Application Front End: Okay, and welcome back. In this video, we're going to just sort of be a continuation from the last video, which was sort of like a rundown breakdown bit of the basics in how to apply some hair strands to it. We're just sort of going to be now doing a lot more examples in this video then before, because we only did two, just to sort of take our time to give you an idea how far we can take it. Again, this one, we're going to do a lot more examples. So we're going to probably be a little bit quicker. And the process, just to show you how quickly you can go, we'll be tackling the front hemisphere of the head so that we can work with that. And then after that, we'll spend the next couple of videos on the middle hemisphere of the hair and then finish off with the back. So let's get started. I believe it was this piece for the front and this piece for the top. One thing we can do for a much bigger chunk piece like this would probably be this main strand fiber. So let's go ahead and like before, we're going to duplicate that guy, bring it out, collapse that in. And we're going to bring this one in a little bit like we did before. Nothing's changed here. Kinda starts seen the pattern. So this is the third piece strand that we're doing here. I'm going to turn a lengthen it, but I want to make sure to is known as a trigger. Want to do a test to a my test BPR in case I didn't lose anything. Okay, good. Go on through Now bend, curve. Whoops. I have symmetry mode for some reason turned on. Let's turn that back off. Let's get back into bend curve. Start with three. Increase number. And let's get that top part. Tuck in a little bit more. Let's bring in an extra cone. Right? So now we're going to left or left Double-click ring that make that disappear. Just going to kind of smooth this around. You can kinda see what I'm doing. It's just sort of like funneling and working my way through all of this. Now this is not again, the only way to work. Fiber mesh. There's definitely a lot of different ways to do it. This is just one of many different, one of several. So kind of keep that in mind. So now we're just got a little bit of fiber mesh there. Maybe just go through and I can try spike and see what I can get from that. No one should also be kind of having fun with experimenting with other things as well. Maybe just one spike. Then making sure. Let's do a quick BPR. So one likes to be a little nuisance. So I'm going to have to turn off some of that hair Lego. So you're going to have to go through the whole process of kind of finding that happy medium. Kinda goes with the territory. Bring in a test. And then maybe just go through and pinch so we can bring this a little bit closer together and kind of see what I'm doing here. Don't be afraid to work with different brushes. Like I say. I don't like to work too much with some of the groom brushes because like for example, grown toss was a little bit of an extreme that resets everything. But if it does, it is kind of fun for you to just kinda do and experimentation just to see what it looks like, just for kicks and giggles, the maybe re-simulate like clumps or things like that. But one thing you should know is this. When you do this, it does kinda move around the mesh that is intersecting. So be very careful about that when going through the whole process. Let's go ahead and try taking care of that front strand. So again, let's go ahead and we'll use the thin fiber here. Again. I'm just going to go ahead and duplicate this off. Like so. Now I kind of want you can go through and just kind of do a quick little render here. Guys. Whatever you do. Don't ever ever tried to reset rotations because then you're going to have to deal with some of the hassle of what comes with trying to realign the rotation so you can do a curve. You won't be able to take advantage of this bend curve if you have, if you reset the rotations. So I'm sorry guy, wearing one Morin. And all comes down to just having a little bit of fun. Duplicate that one, and bring this in and maybe make it a little bit smaller. We're that pieces. Just deleting that string. I'm just doing quick BPR checks and make sure everything's all right. Let's go thins out a little bit. So let's go ahead and dump that down a bit more. If I do a taper, one thing that my instructor always said was taper can sometimes condense it, but it can also be a cause for an artifact. Maybe I can produce that. If not, we'll have to wait till a future occurrence. Alright, so let's just go ahead and make this kind of go along with like, but now it's obsessing me to a point. All right, I gotta do something about it. You just need to have a little bit more of a kind of a dip there. Okay, so I'm just going to now just do a couple more strands and then we'll go ahead and pick this up in the next few videos. So this will be like one part. Like I say, these are all going to be used as sort of like I would probably say, kind of like standard. All of them are going to be sort of a continuation of the same thing just to show you how we put something together. Basically. Let's see here, I'll go ahead and use this one. Bring that guy out. And if you want, you, if you get your self a little too long here, so feel free to go ahead and bring in a a folder to contain all of that. And I may do that later on down the road.
84. Finishing Front End Fibermesh: Gonna to bend, curve, cut my curves back down to three. Bring it in, push out. Like so. Add a next curve, ring in, push out, check my profile from the sides. Now. We then add one more curve. So we can just kinda bring that in. Lower curves down. Now. Maybe I just want to kind of do something a little bit different there. All right, Let's click on that. Give ourselves a test BPR. All right, so let's look in our AI, but maybe I'm thinking I'm going to click on this. I'm left Alt, left clicking. And looking for a place where we can probably meet. Part right up here. News and move brush to kind of give myself that wiggle room. And we'll do one more here. And let's see, for that one will go ahead and do just maybe just like a small simple clump. Maybe that one. So duplicate. And I think I'm going to use it for that because it has such a cone flat out. So I'm gonna go ahead and just try to have fun with that guy. Bring him down. And we're going to set him out. Oops. Again. It's just like before, just kinda keep in mind all the options, all the tools that you have available to you. And I'll taper, pinch, brush or twist transforms of Ben curves. Or in, those are the ones we do go over, but that's not the only ones there. So it is important, it is again, essential that you are doing. Your experimentation. Even transforms like this. Just so you know, I just did a, a stretch through the y-axis of the gizmo. Always make sure again, any kind of stretches you do, do a quick little BPR render just to make sure everything's lining up. Kind of like to just keep it like that and maybe just scale out and then push in and see if we can do maybe just a little bit taper. I will probably work like that. So we're gonna do that. We're going to hit Accept. Bring that in a bit more. Kinda see it's not that hard. It's just revolving. It just takes time is what all this is. This is all just basically like a time measure for him. Then curve drawn in. It's really, really a good practice to get you into to learning. Gizmo transforms. Really is very good there. Let's go ahead now and click on the mesh and get rid of that guy. And kind of see. So quick BPR. And don't be afraid in any way of anything that like for example, you want to deviate or maybe go again, be two. Maybe go through and blow that guy up a little bit. And then do a quick BPR just to see what the change of it is. Maybe it's a little bit thinner. Maybe the strands are just slightly different and that's fine. You know, you got to just simply take your time on it. Just to have some fun. And just to learn. You know, you can get something very simple like that. We can go back to spike if you want. It's it's all there. Like I said, don't commit to anything if you don't want to. Kinda like there we go. That's probably all I need to do for that one. That's probably all I need. So like I said, I think we'll do I know I keep I keep saying it, but I'll I'll probably do just one more. And it's going to be this strand because it's a little bit close to the front hemisphere. Then we're going to work on the middle hemisphere and the next course. And then we'll do the back. And then we'll finish off with doing the side here. So we'll do this one last piece right here. So let's go ahead and just go ahead and choose another piece here. I'll choose this guy here. And again, I'm just going to bring that down and bring that through. So it just kind of all like that. We're just kinda going through and it's again the same thing. Then curve. And then we're just going to play that like so. And then bring this out like so. And will have ourselves a little bit easier time. Hopefully, the more you practice this, the easier it's going to probably get because right now, if you're doing it for the first time, it's going to be a little bit. It's good, it's good. You're gonna get a little overwhelmed by the number of steps. But if you're repeating this and that's kind of the beauty of it is as if you are kind of going through repeating this. You'll get the hang of it pretty quick. In fact, Let's do a quick little BPR again, like we did before. And just trying to do test. As you crank these up, you're going to have a whole bunch of them kinda cut through here. That's fine for mayor I here. So bring it out one more BBR. Just need to go ahead and see some spots. You want to check for bald spots a little bit on the hair. And might be something like right here, which is fine by me. I think what we can do is just simply use the Move brush. Maybe break something in there. And that should help considerably. And trying to get something you want. Not going to be doing any top renders bug and you get the point. So what I want you to do now is, is that after you get as far as this point and I want you to go ahead and finish off by taking care of this one piece on your own. Once that's done, I want you to take all of the sub tools like we see here. And like before, we're going to call them new folder, front hair. And we're just going to go ahead and bring all of this stuff in here like so. And we're just going to kind of categorize this folder because it would be nice to turn this on and off so we can speed up our render times, like so. And I think we got one more piece that was missing from the other side here. Yep. Piece that we missed before. So once you get to that point, we're going to move on now to the next point, which is going to be the middle section of the hair. It's probably going to be our heaviest hitter of sections and then we'll do the back section lasts. So that said sticker.
85. Fibermesh Application Mid Section: Okay, welcome back. Now in this video we're going to do sort of a continuation of what we've been doing so far in the last video. Except now we're going to kind of tackle closer to the middle hemisphere of the hair all around here. And then as we finish up, we'll start tackling the back side of the hemisphere. And then we're going to finish up with some hair off to the side to sort of fill in some of this rooted area that you see here. So let's just go ahead and just get started. Now again, as you see in the sub tool, I did create sort of like up front hair section so that I could make that disappear that way, I can have a little bit more visibility to access this area. Panda course, like before, we're just going to go ahead and just kind of work our way through different iterations. So I'll just go ahead and start here. You're just going to it's just going to be video footage of me doing this throughout the whole process. Just fill in in the hair. Nothing too fancy, nothing too and crazy. So let's just go ahead and dive in here. I'll do my best to narrate as well so that I can tell you the hotkeys that I'm pressing. So you're never left out in the loop. So I'm going to go ahead and once again, take a look at this guy. And I'd like to see if I can do some about the shape here. Maybe I can do something with just experimenting here, BG and blower. And I want you to do the same thing. I want you to experiment. Just kinda blow it up a little bit. I'm so very important for you to do that though, to experiment just to kind of see what's something can look like. Relax it down. Let's follow that up with a taper towards the ends. And it looks a little bit closer like we have here. We can even add a little bit of a swirl or maybe just a twist that we want. Let's go ahead and hit Accept. I always hit the keys BG, so I can just have everything really quick there show up for us. And this is similar to how we did the other one. Quick BPR render. That's what we want. Could be PR. Sometimes having someone jut out like that's kind of nice. So let's just go ahead and bring it in. And like before, like we always, always do, which is kinda a line it up with the gizmo. And I'm just rotating that in. And like so. And then let's go ahead and do a bend curve. Change our access to go along here, and then change our rotational value. We're just kinda make sure to rotate that camera from every angle. So before moving on to that next spike, now we can bring it in a little bit more in here. Bring it through here. You want to bring it out pretty far there. Do Quick BBR rendered and make sure you're not stretching anything too crazy. We have any artifacts. Let's go ahead now and shift control and make that guide disappear. All right, so getting that taken care of, That's one area. Let's go ahead now and we're just going to move, keep moving on now. So now that we got that, let's go ahead and move on to the next piece. We'll go with this little slant right here. It looks like a fun piece. And I think I'll go with this piece right here. So again, we're going to want to readjust my front hair so it's a little bit closer. So once again, duplicate. And once we do that, let's go ahead and bring that guy outside. And bring through to saying, too crazy. Maybe we wanna do some little bit of a different angle here. We can always try doing that. Was rotate. So be careful. You can kind of see what I'm doing and just kind of taking my time, rotating this around, setting this end. Maybe even shrinking this down. Like so. And then we go into curve to finish it off, bend and curve. Like I said, this is going to be really the best practice you're ever gonna get when it comes to getting acquainted with the curve brushes here. Once you're done with the main curve, let's go back into left Alt, left-click to switch the sub tool here and shift control to make that guy disappear. All right, so we've got a little bit more is going through, right? So go ahead and move into the next one here will take this guy on next. So again, we're gonna go through the whole process. You go through duplicate and bring it down here. Maybe you want to do some modifications with this one. Feel free. Maybe you want to try twist, Feel free. If you want to try and twist with, taper. It again, I'm just giving you a whole bunch of ideas here. I'm not really just kind of giving you an intended, like sort of only one way to do anything. And maybe you want to now add something like twist and spike grooms spike and I don't know what that's going to really do, but it might make something interesting that's worth checking out here. If you do, make sure you go through the process of just sort of taking your time filling it out. I did blow up to kinda give a little variation between here and there. I don't know what it's going to look like. One thing I'm gonna do, and this would be a good opportunity is if you want to change your background here, we didn't really go over this sort of a beginner thing, but you can always go through and change your range out. That way. You kinda have a little bit more of an easier time seeing all of this. So that way when you want to do a render, could be a little bit quicker and simpler. Korea. Yeah, that works just fine for me. See? So again, I did a taper on the top and the bottom did a couple of groom spikes, decided to change that center spike in there to do groom blower. And we have ourselves something that's very different. Let's go ahead and I think I'm going to work it on this one. I kinda like the idea. Let's go ahead and take that guy and just kinda see how easy it is. I'm kinda speeding along on trying to fill in all these areas here. And so again, scale this in a little bit and then bring this in a little bit. Now, let's go ahead and turn it in a little bit. Right? Let's go ahead then and hit bend curve. See if we can do something here. Disappear bit more. And again, if you want to give some more interesting silhouettes here, you can just go ahead. I always pretty much go through spike on everything I can go through twister. Twister doesn't really give me the intended hair style that I want though. That's kinda why I'm choosing spike because that's sort of matching. Like what it is I intend to make out of all of this. And now one more. Just kinda give us a sense of, you know, a little bit more messier hair a little bit. I kinda like messy hair on. This is sort of an intention to make the hair just kind of disorder or a little disorganized a bit. And as long as your whatever you do with grooms spike, always make sure any additions you make to groom side spike. Check for those artifacts, those balloon artifacts, that's why we do our BPR renders. So let's go ahead and make sure that it fits fairly well. Right? So let's just go ahead and keep going. Now that we have that, let's go ahead and switch into this front side here needs to be coddled and then we'll go to this one here. Gotta do a little bit more over here. So let's go ahead and bring in yeah, I'll take that one. So we'll just duplicate that. And feel again to put me on me. If I sound suddenly a little redundant, I apologize. Some people who just want to keep getting it through the head two, to get the process done rather quickly here. And they want to hear the call outs of the quick keys here. Oh yeah. If you have a scenario where it says you're trying to put a deformer on there and it won't work. A lot of that has to do with having a partially hidden mesh by old Shift Control, you can kinda see that's where that partially hidden mesh is coming from. So what I'll do is I'll just go through bringing that back in with Shift Control because I like to have some volume there. Run that through. And we're just going to bring that in like around there. And it looks like it's kind of feathering backs and let's just go ahead and bring it feathered back a little bit more. You can kind of see where we're going with it. It's just taking your time. Might do something a little bit with taper here. So let's click on that COG, bring up a taper so we can bring that in a little bit more. Maybe some like that. Then we'll just hit Accept. And then we'll go into our bed curve. And everything down with that, go, remember we're using that orange cone at the very end to toggle the number of times, number of dots or pivot points that we want. Once we've got that, hit Q, left Alt, left-click, and bring that out. Let's go ahead then and get back into this. Mean that in a bit more, somewhere around here. I'll hit except for that one. And I'll also change my pivot point to the root there so we can get it to jet out a little bit more.
86. Finishing Mid Section Fibermesh: Okay. Now worried about tucking their root in there because we're not going to really see it too much. We'll do a quick pass if we have time here. So let's go ahead and take this guy on here. This is important one right here. And this is an important one right here. So because they are so indicative to the silhouette, so we wanna make sure we have two different strands for this one. So I'm thinking I'll do the typical normal one for this one for this upcoming strand here. So we'll just go ahead and hit duplicate and bring that in. We'll just go ahead and just kind of sign it right through there. And we're going to sling it down just a tad. And then we're just going to go into bend curve mode. On second thought, not bend curb mode. I'm gonna get to twist just to give it some fun here. Something like that. Maybe E up. And then we're gonna go through curve, turned down our bend curves to three. Like we have been doing pretty much on every one of them when we originally start, we always start with three and bring in one, kind of tuck it in, one more to tuck that out. And maybe just bring it through. Just a slight but it's a little thick. So I'm going to have to be careful on that. Don't think I necessarily need that one. I'll just go ahead. And it is tempting to see this very simple piece that I would like to do. Some spike curves, break it up because it's kind of standing on its own. Yeah, it kinda is standing a little bit on its own. So maybe just the spike, EEG into spike. And then a little too high, I have it a bit high. Let's bring it here. This might be asking for a little bit of trouble. For artifacts. Do one more. And it's not so bad once just go ahead and just make it a little bit bigger here. Now maybe something like that. So kinda sticks out a little bit more, might be more interesting. Once go ahead and move on. All right, now, let's go ahead and tackle this guy right here. And I'm thinking I'll go ahead and use this one right here for. So again, we're going to duplicate that, bring that out of the folder and scale this guy up. We're going to try to take a couple of render shots from which angle we want this to look. Probably this angle is my angle. I just want to have some fun little silhouettes for down here. That's probably going to work for me. I'd like to see a little bit of a splint split and an a swirl go on here. So scale this up a little bit more. It's kinda nice thing about these is they relatively do kind of translate pretty well. Can do one more BPR render because I did some scaling there. And scaling can trigger. This. Doesn't look like I'm losing too much though. And that's fine. Okay. Let's go ahead now and get into get out of solo. Dynamic there. Then the curve. Bring it in to round here. Let's go ahead and add one more. Just to have some fun with the silhouette here. Let's go ahead then and get rid of this piece. We can do a couple of things. We can maybe hit taper, see what that kinda looks like on here. Just to kinda bring this in, you can also use pinch except for select. Let's do a render just to see where we're at. As we do more of these fibers again, the BPR, it will climb, it will climb higher and higher. So it's just so it is a renderer taxing machine hair. You can do a little bit of tapering here and see what that does. Just to bring it down a little bit more. Yeah. That's fine. By me. Might make that one out of my own personal recognizance a little bit longer. So all major call it that. I'll just drop it down to three. And now we're getting to a point where this is really starting to kind of cut into the head. Because right now we're one thing we want to remember is as we add a color that really hugs the neck here. So now we want to start taking into consideration things like the rest of the sculpt here. See how it kinda plays in right there. So now we add a start looking into maybe making some sort of an adjustment, perhaps in here for that. So that it can kind of fall in to a fairly good silhouette. That's probably for that one. Pretty works right there for me. Just go ahead and hit Accept. Now the same thing goes for this guy. I'm just going to left all left-click on that. And I'm just gonna go ahead and try to get a curve going there. It's just basically, what I'm doing is I'm just kinda rearranging this to fit a little bit along side the head here so that it doesn't clash too much into the silhouette. So that we bring this all in, makes a little bit more sense with everything that you see here. So kinda keep that in mind. Not going to do a BPR or render from this one because it's going to take too long, but you just want to kinda keep that in mind when you're doing all this stuff like as we're going to, especially towards the back. You know, you're just going to want to just be very, very cautious of that. And again, we know how much this is. We add a lot of polygons to decimate out of all of this. So just bear that in mind when we're making all this. Have your visibility turned off, make sure your hidden quick save, like so. All right, so we're just going to probably do maybe Two more strands on this side. What we focus on the other half. So nothing too crazy. Maybe this one here. Bring it out of the folder. And again, we're just going to lose. Click on that outer white cone. All the way across here. Make sure you're checking everything. Might taper off a little bit here on my one, I have that sharpen out with a taper here. Except it then curve. Again. It's that will more cone on there. There we go. Something like that maybe. Makes sure we if the if the renders are getting too large when you're doing your render checks. Don't necessarily go through the entire render. You can also just do a quick render of this on its own, just to do a quick little BPR check. It's a little bit, it's a little bit here, kind of showing a little effort of spline action. So we're going to have to be careful on that because we did stretch this a little too far, so little bit of an artifact ballooning. Let's just go ahead and just kinda smooth this down. Just do some quick tests here. May just go with something like that, something very simple. All right. Oops. Except we're going to have a very displaced curve here, but I don't care. I think I can work with it. Since I'm a little bit off on some of this, this curves being a little bit on the stubborn side. Let's go ahead and bring in go a little bit more and make sunspot. It's a little old, so I'm sure what's going on here. Let me go ahead and I get new, a stuck spot like this. I'm just tempted to just kinda bring it back to its original spot. Getting a little too crazy here. And then just simply just by Pig, bring it back to its original spot. You can kinda put yourself in an easier position of fixed. Yeah, that's fine by me. Alright. Let's go ahead. Now we've been neglecting this other side here. So let's go ahead and just finish up trying to get some of these pieces. These are a bunch of small little pieces that we can work with here. So I'm probably going to go ahead and make the middle section be a two parter video because we're certainly get a little bit long here. In fact, I think I'll just go ahead and take a stopping point here. And then in the next video we're going to go ahead and just finish up this middle section and then go to our back section, which shouldn't take too long or as long as the middle because there's a lot more strands going on here. So with that said, and now it is again, take your time with the whole process. Go ahead. And if you haven't already kinda go through and put these all into a new folder like we did in last video with the new folder and just drag them in. And we're going to, in the next video, we'll continue working on the adding more fibers to the other side of the middle section. And that will be finishing up the middle section, the video after that, we'll just go ahead and continue on with our fiber mesh. With our fiber mesh towards the back section. And then again, we'll finish the whole hairs tutorial by putting in a fiber mesh area for the side of the head. Just sort of like a short buzz cut area. That will be sort of our finish up for all of this. So with that said, stick around and stay tuned.
87. Fibermesh Application Back End: Okay, welcome back. Now in this video, we're just going to go ahead and finish up to the backside of our hair. And as we can see, we don't have very much. It's just going to be a couple of strands right here. And then once we're finished with the strands in the next video, we're going to go over trying to fill out some hairs and some bald spots that might come up and give you some pointers on like continuing to go beyond the concept if you want. So let's go ahead and get started. So let's see, As you can see on my folder again, I put everything on top. So this is the mid section and if I turn that off, the mid section is off. I have a folder for the front section again, and I think I missed out. There we go. And so all we're going to be really working on is the backside which, you know, that can be its own character. It's interesting how all these things happen because it's like this could be a character as well through the whole process, but we're just going to go ahead now and just continue forward. So let's just open our hair strands folder. And since these are really big clumps, I'm going to work with. Again, the main strand, blank canvas strand, sort of start off. So let's just go ahead and position this guy in. And we're going to be applying the same concept as before, except we're gonna do it just like we did towards the end of the last lumps and where we're going to just do isolate selections and then sculpt out our tool there. And in solo mode we're going to do BPR is just to make sure written what we want. So again, just kinda get it to new, a nice little fairly good spot. Go through our bend, curve, rearrange our access so it's going up and down with the red cone. Go to the orange cone to put one more dot right in the center and start going into town. So again, checking the profile, the side here. And then let's go ahead and curves a bit. So let's add some more dots in there so we can start to fill out the Profile silhouette of our base mesh that we're trying to chase here. Like so. Let's go ahead and add one more dots. And now that we can kinda bring in a little bit more, tuck in just a bit more. Like so. Once we got where we want it, let's go ahead and hit Accept. Go into solo mode. And we're just gonna go ahead and just have just a little bit of fun with some spikes here. So nothing again, you can do whatever you want. No rules are no one's going to tell you the right or wrong way in any of this, we're just kinda go in through, maybe do a quick BPR on this one just Seward it is a little bit or I put, uh, kinda like it like that. Literal string, Chuck side here, maybe some a little bit there. Now let's see if we can work with that inch brush. Maybe we can do something. They're just bringing it in. Be careful with pinch, pinch likes to create artifacts too. And it's alright. And I'm just doing some experimentation with a twist here just to see if I can get something fun, maybe. See how it stacks up out of solo mode. Not just yet. Let's go ahead and bring that hair and let's go ahead and go through a bend curve again. Male last or profile just a bit when we did this, which is fine. Just go to rearrange everything back, get everything back. One more. I might just try to get this to go through like so. Go back into my spike, just have some fun up here. Little, too much. And this is going to cause some tearing here. Well, let's go ahead and delete this guy out. That's fine by me. Okay, so let's just go ahead now and we notice one thing you didn't you probably figured it out. I didn't duplicate it. Alpha there. That's okay. We'll do it right now. We'll have duplicates and see how that orange bar changed. Let's go back to the original one that has all the history. And let's just see all the way back to maybe this point. And let's just go ahead and go through the whole process again. Except maybe I'll do one little addendum change and that's just bring this so it's a little bit more. It's not intersecting so badly in with the other piece. Switch and bring it in here. Kinda saves just a matter of having some fun. Maybe lengthen a little bit. It except it's go through Ben curve once more. Turn our cones back down to three. So we can start doing the maximum amount of manipulation through this. Like so. We wanted to do something like that. Let's go ahead and maybe do it a quick little taper, maybe just to have a little fun there. It, except let's go ahead back to our bend curve and make that just a wee bit longer. Maybe just kind of go through and kind of seeing it's just the matter of readjusting. Okay? So now we got that and we're hidden W to go to accept. Let's go into our solo mode. Will start with my spike and draw them. Draw size will go down a bit and it's okay. It's just kinda look into bring in a little bit of fun. Now let's go ahead and see what that does. Like that a little bit. Okay, let's go ahead and turn solo mode off. Bring in a curve, make them pop a little bit more there. And then we're going to hit Accept. Let's make that disappear. Now. Let's go through a quick little BPR renders. See how these two match up with one another. Remember any spots that are bare we'd like you see right here, don't get too hung up on it. It is not going to be as much of an issue as you think. Because again, we're going to go ahead and try to fill out that underneath area with some short hair. But now you can do a couple of things that you want here. Just remember the context of the mid hair. There's a spot right there that probably could be using a little bit more. Just a little bit more areas surface here. Alright. Let's go ahead and turn it all back out. Go into our hair strands. You'll notice we still have three. That means we didn't duplicate something, we didn't return to that original one, but that's okay. We're just going to go ahead and find this guy here. We're gonna go ahead and once again duplicate that hair. And we lose our history up here. So let's go to the original one we duplicated from. And on. That's the wrong one. And here it is. Now we can kind of get it sort of positioned to a new piece. Now at this point, I'm thinking we'll do one more and then we'll do the rest with the other strand, the thinner strand. So I'll go ahead and just bring this in. I am aware. We are just going to go ahead and type that up right here. Then curve. Start off with three year hopefully at this point, you know, with the law, all the videos you're starting to see the pattern and all of this. And it's not that difficult, but you just gotta give yourself a chance to kind of see through it. And with enough examples, it will make more and more sense, especially after you do it. Your own amount of time. Good, do quick, smooth. Then let's go ahead and see if we can get a quick little spike there. Do some like that. I may bring it back out with solo, ben curve. And it likes to bite me. Pull that out a little bit so it doesn't sink in underneath here. And then we'll just go ahead and make that person disappear. Again. Feel free if you can't make things work with the spike curve. Go ahead and make sure you understand pinches available to you. Let me. Once I select a left click, there you go. Remember pinch. Okay. So now we got just about four more strands left in. We are done with this. So let's just go ahead and just finish that up. Let's start with this one as R, to change things up a little bit more. Oh, I almost forgot. Duplicate. Go back up and slide through back to the beginning and bring it back into that folder.
88. Finishing Back End Fibermesh: Now, let's just go ahead and choose our one-piece. Didn't do it just yet. And I think we can go ahead and just go with this one here. And think I'd like to go with that one. A little more fun to pre-K through, go through the process, and then just bring it through like so. And we're just going to go ahead and just again, Ben curve. Start off with three Ben curves here. And like so a little bit off putting here. And so all right. We're just going to keep going through the whole process like that. And then we're just going to add one more cone to get it so it can tuck in a little bit easier. There we go. This point, I'm just going to go ahead and delete that guy out. And I kinda like the look of that, but let's do a quick little side profile view of the BPR will work for me. And again, you can go ahead and do your own thing to, again, experiment. I don't want to make it any worse than a want, but same time, I don't want to. Okay, I'm just adding a one little niche to it. Alright, so do this one next. Bring that one. And I don't feel like I need a taper on this one. But I do like that little fold and then I definitely like having that there. So maybe I give it slightly a taper. And are there are rare except bring in translated to the tube that we want. And I keep reapplying this structure to you guys. Make sure to have fun creating your own strands, but also don't forget to experiment with different sizes and the coverage setting. Because, you know, deck can have an effect on your render as far as like far away renders will respond better with the wider strands and close renders will respond with less coverage. So, Alright, More. Think I can just go ahead and cheat a little on this one and duplicate that one off. I think you've got lost my I think I lost my pivot point for some reason when I duplicated that and so on. Let's just go ahead. Oh no, I didn't lose my pivot point. I did not lose my pivot point. I accidentally duplicated my base mesh across. Let's go ahead and delete that pace mesh off. I don't need it. There we go. Let's go back into our duplicated mesh. We made we didn't make it yet. So I want to make sure I don't have any duplications anywhere. All right. Let's go ahead and now duplicate that GOT properly. And we're just going to. Skill him around just a bit. And again, we're tackling the the base, the back of the mesh here. So be wary about again, that color. As we go through all of this. Let's do a quick turn on of the sculpt CD40. Say this is what I'm referring to right up here. This area right here. We just gotta make sure to one doing this, just to kind of either smooth it back in or smooth it back down a little bit, or go through the whole process of now I would say probably kind of readjusting all of it. So we're going to have to kinda work on that like right here, for example. Let's go ahead and maybe make some adjustments so that it doesn't kinda go in there. Maybe just hit smooth and just kinda cut it back. Same thing for here, maybe same thing a little bit PR here. There are those stubborn. So that's good. Do just one more duplication. And bring this in somewhere, like say right around there. And I'm going to call that for it, all of it. So we'll do a quick little BPR render the backside. Make sure to check that again. See I have a little bit to artifacts here. So I'm just kinda hidden smooth to kinda tuck them all back in like so. I think this might be from the base mesh. So I'm just going to hide that. And there's a couple more pieces going on in the back here. So we'll have to go through and maybe if you want you can hit Transparency, kinda look at that spot. And then maybe just click on one of the pieces and turn off the finish area. Somewhere around there. Kinda just work your way through there. So once you have this taken care of and you have filled in every strand. And like I say, I were passed there right now, but I want you to like, just simply take your time with it. We're going to go to the next phase, which will be in the next lesson, we'll be talking about working on our side hair, sort of like our short hair, which is pretty fairly easy. Quite frankly, it's not like a concept that's too like horribly difficult, like so. But, you know, a lot of people are a little bit leery with hair. And as we go throughout the course series, we'll talk about different forms of hair. Like I said, it's pretty self-explanatory. We're going to be using sort of more of a basic approach with the short hair. That's going to be a lot easier to manage. This was more of a complicated, complex way of getting hair. It's a little bit more lengthier, but like I said, one of the nice things about it is is you get tab a little bit more one-on-one time with each strand and isolating that and working with that. The downside is, is that your BPR is can definitely go off as a result, your best preview renders, especially when you start adding more things to it, like more complex render settings into it. So always bear that in mind. But, you know, I can say if it's like a freeze-frame of one shot, I'm happy to wait that long to get that. So with that said, just stick around for the last video where we're going to conclude on our hair sculpture, stick around.
89. Generating Side Hair: Okay, welcome back. Now, in this video we're just going to work on just detailing a little bit aside hair in here for anyone that wants to just kinda touched something up a little bit more. We have done now is pretty much finished our back hair. So it's just going to be a pretty simple straight through process. First thing I'm going to do is I'm going to kind of turn the visibility of everything. All my detachable pieces might detachable face, my hair strands I'm going to remove and turn that off. Everything's basically going to get turned off. So it should just be your head right here. So now the first thing I'm gonna do is, is I'm just going to kind of do a shadow mask of all of this. Make sure symmetry is off. And before I do that, I'm going to look at this cavity here and I'm going to hold Shift Control to so that I don't kinda cut into there. And I'm just gonna kinda just draw a rough spot of a mask, just nothing to you and saying, remember the bigger your mask, the thinner and more fibers you're going to need to use. So I'm not going to really try to overburden myself with this right hemisphere so I can conserve on fibers here. I'm just gonna kinda leave it right around here. Maybe. Just something very simple. Silhouette. So something like that maybe. And then after I accomplish that, what I'm going to do next once I have, my piece is, is I'm just going to make sure the ear is a little bit in off or not massed in, because that's going to be very important. And just kinda go in through cleaning up, make sure you go around the ear as best as you can. And so what I'll do now is hit Control W. So this is a mask. I'll hold Shift Control to bring everything back and then shift Control left-click again just to isolate this. Now, one thing I want you to know is is that now that we have our mask like so let's go ahead and undo this. I want to show you. Let's go ahead and duplicate the sub tool. And now that we have the duplicated two heads here, Let's just turn off one of them and Shift Control, make that one disappear. Now, as you can see, I kinda have a little bit of artifact there. I'm not too worried about, I'll just go ahead and just get rid of it that way. And then I'm gonna go through Geometry, modify Topology, and hit delete hidden. And so it's just this little shell, this little chunk piece. So from here I'm just going to go through to Z remeasure and I'm going to go ahead and turn my target polygon count just a little bit down and do a quick 0 measure so I can get a little bit of a simplified mesh. I'll one thing I also would now, if you need to feel free to use group loops before you delete everything, if you want to have maybe like some smoother edge controls, it's also going to have an impact on how clean your 0 meshes. Let me go ahead and just give you a little example. If I go through to edge loop and go through to group loops like so, which will have some fun. They're not worried about the polishing are losing detail. Shipped, control this guy out. And let's go ahead and delete some of all these areas here. Let's go through modify Topology and delete that off, and go through now 0 measure. Just go through a nice little cleaner 0 mesh. Give it a second here. Now that you have something there, Let's hit Shift and kinda see what we got here. Let's go ahead and do one more to make it a little bit more cleaner. Nice. One more again, just to clean it up here. Yeah. Right. So that's a little bit cleaner for us. So from this point on, Let's just go ahead and generate some fiber meshes on here. Now, from here, there are some extra ways we can manipulate this, for example, through sculpting individual strands through here using group normals, which is a little bit more of an advanced approach in fiber mesh. We're not gonna do that one just yet, but just wanted to let you know, don't constrain yourself just to the examples you see here. If we pinup time, I might update that approach. But first thing I'll do is I'm just going to hit preview. It, Shift F, go through my modified modifiers and change the color here, and go through that. And as I'm looking at this right now, the first thing I'm gonna do is I'm going to turn off control. I'm going to give this may be just a one subdivision. And I'm going to go ahead and delete that because I'd like to be able to go through the process of softening the mask towards the edges here. So what do I mean by that? It'd be nice to create sort of like a fall off. So let me show you what I mean here. So I'm going through here, I'm going to first of all, turn on my front hair. And I'm just going to also turn in, turn on my mid hair. So I have a sense of reference here. And now I'm just going to just hit Transparency. And I'm just going to kind of use the hair as sort of like a reference basically. And it's a little bit too much here. So that's okay. Let's just dial it back. And that's why you wanna kinda scoop out more than you can handle. Maybe just a little bit more. Then I'm just going to click over to the mask and soften that up a little bit. And if you feel the need to do the same over here, feel free to, if you want to make like for example, you can go through and maybe by undo the soft so little bit. And maybe I want to create a little kind of a process and kinda do so and see how that we want to unmask an unpainted this, these ends here. Because we want the ends when we hold left control-click to kind of soften up so that when we do a, a fiber mesh preview, it kind of gradually blends in. So now the next thing I'll go ahead and do after that is I'll just go to invert this, makes sure everything is being produced a little bit to its proper point, proper vantage point. Just a little bit more. All right. So let's just go ahead and turn everything off just for now. And let's go through fiber mesh and see if we can generate some fibers. And this is just going to be a simple process. That's wrong direction. Let's turn off transparency. And let's just go ahead and try that again. Invert the mask, turn the preview on. So right now we've got quite a few fibers. So let's go ahead and turn that down. And our length is t high. So let's go ahead and turn that down. And let's mess around with our coverage. Maybe we can get away with some, something like that. Maybe let's do a render just to see what that looks like. Let's try that without the UPR. So, you know, it can be something like that. Maybe. Let's say this is now the part where you can just feel free to explore a little bit more to your own. Maybe you want to see it a little bit lengthier. Maybe you want to see little bit more fibers. You know, no, no such thing as the wrong maneuver. You can get away with less segments. I will say that maybe like two. And you know, once you feel like you're fairly comfortable, just go ahead and, you know, if you, if you feel like, for example, you need to soften this masking kinda see how the fibers sort of gradually kinda come in there. You can do that. There's really no right or wrong way in any of this. So just don't think like there's only one way to process this. But after that, just go ahead and hit Accept. And once you have the setting that you want, you can just go ahead and delete that mask off and turn your face back on. And from there, it's pretty straightforward. You can go through the process of combing it, maybe with Hair toss, groom brush if you want. I kinda like it. Stayed like that a little bit more. But overall, that's the general process in doing our fiber mesh on the scalp. Now I did mention earlier in the sub and this that there's a lot of different ways to sculpt fibers. One is the do kinda like a low 0 measure, often extrapolated piece like we did, but then go through group by normals and turn it all the way down so each polygon surface is abnormal. Then modify the brush so that it only sculpts onto every single polychrome poly group of one polygon plane at a time. It, it's, it's kind of a complicated process. I would say it's more of the advanced version. It's actually even more advanced than how we did the tubes. But if we have time, I might update my course to have a little bit more explanation to that. So once you get through this and once you have everything done, you'll see what this is. And we'll have basically some short hair for ourselves. So now that you have, that, you have a little bit of an idea of how this works. We pretty much have finished the full body. So now the only thing that is left for us past this point is DO read topologies. And once you reach apologizing, wold talk about the merits and benefits, pros and cons and advantages that come with it. So with that said, kind of pat yourself on the back for getting just this far. It's been sort of a fun ride just to get this far, I hope you can skip around now for the upcoming lesson, which is going to just be about read topologies. So that said stick around and stay tuned.
90. Adding Overall Detailing of Face: Okay, welcome back. Now that we've gotten our hair done, I wanted to give you a little bit of a fun little bonus section we wanted to give you just to see if we can add some more detail in case. Like for example, you've got some interesting here, but some of you might want to add more interesting detail than just the face on here. Maybe something that reads and transfers out as a little bit more Cyberpunk in synthetic on the left side. And we thought a quick little trick, we could just give you just the kind of cell, it's slightly more and give you some ideas for some new techniques as well as your learning going through ZBrush character creation. Now this one is just again, an example of surpassing the concepts. So we want you to build off of this and come up with your own ideas and have some fun with it. So let's go ahead and get started. Now what I'm gonna do is I'm going to try to create some sort of a synthetic seem that is going to go around this eye here. And there's a lot of different ways we can do it. And we loved this way the most of all because masks are simply easy to control and manipulate. So what we'll show you in a second. First, I'm going to hold down control and drag, rectangle a mask in here like so. You can make it any size you want. And then I'm going to hold down control, change my stroke to curve, and then just simply do some minusing basically. So you can just sort of have some fun with that. Maybe you wanna do like a little bit of a minus right here. So you can kinda give something there and you can do that. Maybe you want to use the space bar trick. It definitely will come in handy here. Go ahead and do a three-quarter turn. Maybe do, perhaps like a horizontal minus. And remember that's holding down Control and left Alt while dragging something out and you'll be able to subtract away. And then remember hold down Control chapel to get a Bezier curve, use the space bar trick and remember holding down spacebar trick pans and maybe, and then left all to subtract that away. Maybe we can do a little bit like something here. We can majors to something just kinda like that just to make it a little bit more angular. So that we have sort of like what we want. You can go ahead and make it lower. And there's no end to like how you want this piece to be. So remember it's your piece and have fun with it. So now that you have that, just go ahead and hit Command W or Control W. Now we'll turn it into a poly group like cell. And from there, I want you to go ahead and we want to put some group loops over this. So this will have a very smooth end. But if we isolate, select this and do some group loops, we'll get some group loops, but we're also going to get a really smooth piece. So let's go ahead and fix that. So I'm going to undo that a little bit. I want you to hit B and H key and you're going to want to look for the history, recall brush. And the history recall brushes we remember it preserves detail. Take sort of a snapshot, saved point on, based off of the history bar here of whatever is sculpted. So if we hold down control and left-click on that bar, everything that is in this detail is going to be, can be painted back if we lose any detail. So let's go ahead and hold down Control Shift. And let's go ahead and put some groups loops in there. And now that we got those group loops in there, Let's go ahead and see if we can paint back our details once more. So once you get there, go ahead and hit Shift Control. And you'll have a nice smooth little area there. Let's go ahead and drag a mask in there. Change your stroke, like so. And then let's go ahead and shift select the head here. Let's draw a mask over that as well. And now you'll see because we hit Group loops, there's some group loops that are all kind of running around here. But I don't want that. I want to soften that so that it looks like it's kind of pouching in making the skin sort of look like it's folded into the siem. So let's go ahead and hold down control. Left-click. And let's just kinda once is all we need and see if we can just kind of match something there. So once you do that, and let's go ahead and hit the Move key and just, we're going to simply push this all in mind you, I'm going to have to make some adjustments on that little mole there. So you'll probably see an updated version of that. And then of course, as we go, I do apologize. I've accidentally brought up Siri. So then we'll just kinda, you can kinda go through here and just very gently glide along and maybe just do some quick little very gentle smooths, for example, you can do to kind of bring that in. So that's the basic concept. If you want to take it any further, feel free to build it off of other concepts that we did like. For example, do the insert mesh approach that when we created our synthetic Boolean and create a Boolean process, go back to the concept of what we did back in the, the moments of creating the thickness of the detachable feet piece. You remember all of those things that we did. Like, for example, we created a little cube here. Then we separated the cube in with the split function and the unmasked function. Then we turn that cube into a boolean and then we kinda worked it around to try to create some synthetic finiteness around here. I want you now to start applying that on your own. I don't want the video to help you on this. I want you to be able to learn on your own now in kind of grow beyond the video. Okay, so that's why it's important. We don't get too tunnel vision. We start grasping the concept of our own. We start getting creative with things on our own. So that's kind of for you to do. After that. In the next video, I'm going to have my own little pattern and you can kind of compare your pattern to my pattern. And then from there we're going to then go ahead and move on to read topology. So with that said, stick around, stay tuned, can't wait to see what you've put. Yolk also see what I put. So.
91. Retopologizing and What To Expect: Okay, welcome back. In this video we're going to talk to you a little bit about read topology Ising now that we are done with making our hair, head, and body. And we're going to talk to you about what reach apologizing is. Why do we need it? And a couple of examples of what it can be used for. And also kinda give you a little bit of context towards the end to help you understand that reach apologizing isn't just a process exclusively that can be done in ZBrush, but can also be done in different software. So this is sort of a breakdown what to expect. Now, in this section, we're going to go through and take every high res model and we're going to draw a, basically polygons, low-res polygons over this model in a process called reach apologizing. Essentially it's where we take something and create a 3D model that occupies the exact same space and is shaped to the exact same silhouette as that high res piece. Now why would we do this? Well, there's several reasons why we would create a low-res model that would be read topology into a high, from a high res model, one can be that can reach, apologize with that low-res model divided up then a couple of times. Then go ahead and go through a process we're going to show you, which is reproject all the details from that original first high risk sculpt over to that low res model that has subdivisions on it. And then we can go through a process. If we do that with all the sub tools, we can then engage in a process with transposed master to make this character pose in all sorts of different ways without destroying completely all the, the, so, how shall I say destroying all the details that we sculpted in higher divisions. Now, the other thing is, is because there's so many itty-bitty little spots all over here. Its transpose mass are kinda helps us out and combining everything into one sub tool that we can transpose. And it will always resort to its lowest Rey's setting, which is going to make it a lot easier for us to get a pose out of that. The other reason is, is again, we might want to just simply take the separate low-res model and just simply export the T-pose that we have been working without. And just go through and rig UV and rig that model out for the sake of animations or further posing in a different software. Because again, there is other stronger forms of rendering softwares that exist out there. And having a low-res model is going to be required to kind of hold all the details that can be projected and baked onto from the high res model. So again, in a typical process like for the next course, one thing we're gonna do is we're going to export this low-res out. We're going to export our high res out. We're going to import our low-res into a 3D model like Blender Maya. We're going to UV that out. We're going to organize the UV sets and then take that into a texturing software like Substance Painter. And we're going to then take the high res model and also use that as a template to bake all our details on to that low-res model. And then we're gonna do some crazy texturing on there. So that's sort of a kind of foreshadowing into what the next course is going to be. So with that said, I would kinda want to just break down all of this into now Z. What the two methods of reach apologizing are that exist in ZBrush. And basically, ZBrush is compiled of having a manual approach and read topologies using an automatic approach in reach apologizing. Now we're gonna go over the, both of them a little bit. But the, in terms of pros and cons, and we're going to start with automatic approach first and talk to you a little bit about what that is. And it's going to be something you already have a little bit of practice in. And we're going to then go into manual afterwards and talk to you about the pros and cons there. So to begin with, the automatic approach to read topologies arising within ZBrush is typically done through 0 measure. Now we're going to use ZBrush guidelines to help guide the flow of everything which will be done in the next lesson, you starting with the shirt, because that's going to be where we do our example of automatic read topologies rising for the first time. So we've kind of already did it when we create a clean base meshes, but now we have something a little bit more complicated and we never really work too much with. Zbrush guidelines. So we figured that we're going to go ahead and do a demonstration with that. After we finish the process of automatic read topologies sizing what we're going to do. And this is going to be the same as we do in every piece with manual read topology Ising is we're going to then take that low res and put a few subdivisions on there. And then we're going to do something called a history save on the high res, and then go through the history brush recall, and use it to manually restore and project all the details back on from the high res to that new cleaner topology which you have access in a low Rey's as well as a high risk because you got to remember all the pieces here. They don't have subdivisions. And having subdivisions that go to a super low form can really help with like frame rate, also transposing and being able to use transpose master to transpose your character into cool poses. Having subdivisions that can really go to a super low res for you so that you can move things much easier is very helpful. So the pros on pros and cons about automatic reach apologizing was 0 measure is, as we say, it's faster, It's simply is faster. And you can get some pretty good results. Some of the cons is, is you can't necessarily read topology guys. Everything. There are simply are some shapes that really do require some attentive business of just going through and read topologies rising manually because it requires a certain kind of edge flow. Now, the other thing that is a con, is that you don't have complete control in 0 measure on what your topology is. You can create circumstances to manipulate the edge flow in a certain direction and really create favorable conditions to make 0 measure gave you usually some good results. But in the end, you're never going to have 110% complete control of every polygon and where it is allocated. In terms of maximizing the silhouette. As a manual approach of reach apologizing offers. As a result, you may have scenarios where there could be a change you need to, that could involve like collapsing for example. There are scenarios where like you need to really take it to a very low res read topology guys target poly count and as a result, you start getting some collapsing and concave areas. A can be avoided if you take a manual reach apologizing approach. So again, those are sort of the cons regarding 0 measure is that those two main things, and again, the pros are, it's super easy and it's definitely something you can use if you can recognize the right kind of meshes that it would work with. One thing that it never hurts for anyone to do is to just simply go through and just do a 0 measure test before resorting to manual reach. Apologize he just to see what 0 measure can handle. That's a common thing newcomers often do. So that's the breakdown of the automatic. Let's just talk a little bit about the manual method and the manual method of reach apologizing has several. Originally back in the day, we had Z spheres and already I'm going to tell you we will not be working with C sphere. In fact, I wouldn't even offer any course tutorial. We'll see spheres as it's one of the most atrocious ways in my opinion to reach apologize something. So but I will say that it came out it's been it came out more recently of last year, is a form of read topologies seen in z model or that involves edge extrusion. Now Edge Extrusion is a pretty handy reach apologizing method. And it's probably going to be the method we use most common in read topologies seeing this whole area. Now, Edge Extrusion has a set of pros and cons, just like Z remeasure, the automatic method does. And Edge Extrusion. Again, that's a manual method. And as your extrusion basically is where you're extruding the edges of a polygon across and creating the edge flow that you see. Now, as you can guess though, you're dealing usually for the most part with one polygon. But if you tap all, you can go through like a line of polygons or I'm sorry, a line of edges that you can kind of just bringing all the way down. If you hold left to Alt, you can kinda do a ring all the way around. Now, the pros and cons about manual read topologies, scenes such as edge extrusion. Well, edge extrusion because you're dealing with one edge at a time or a group of edges at a time. It's going to take a lot longer than a one rematch button fits all. It's just simply going to take a little bit longer. You're going to have to work on make every food has to make sure it's properly snapped. Another con that is involved in manual method of reach, apologize. And with Edge Extrusion, it is a common thing where you will create non manifold edges or edges that just as you're trying to pull across or maybe you're trying to pull up vert across it suddenly 0 modeler is not responding. If that's the case, you have to learn to be a you have to learn to troubleshoot the problem, essentially for, so if you come across non-responsive verts moving or come across edges that are just no longer moving. One of the first things I would do is kinda hold Shift to see if there's any verts on birds stacked upon verts or edges stacked upon edges. Another thing that I would do is go through display properties and hit double. And to make sure there isn't sort of any non manifold edges that had been accidentally turned around. And we're basically creating a back face choline scenario where we can only see how do I say it. You want to go through display properties, hit double because you might be looking at a polygons back face culling, which is usually invisible. By turning it double, you'll be able to see that going through another situation. And again, I go through all these situations as we do it. But as we go through another thing that you can do is, is that it's very possible that the edge or vert is really deepen the mesh and it won't respond. So you're going to have to go into solo mode and pull it back up again. And so that's going to be a kind of a pro or I'm sorry, a con. So you gotta get there's a multitude of different things you got to troubleshoot. And that's considered a con, a pro is, is that you have complete control over the edge flow in the direction of where you go. Another pro is, is you can problem, troubleshoot a lot of areas a little bit easier with manual method of reach, apologizing by redrawing or deleting. One thing also I forgot to mention is if you also have any kind of troubles with any non-responsive edges are verts, go through the face modifier, hold down spacebar, hit Delete single poly and just start deleting the police and re-extract the edges. One of the most common ways to fix something. Now, in this section, you're going to basically be given a breakdown of how all these things work towards the beginning. But as he kinda go, it's going to sort of get a little redundant. You're going to hear a little bit of negative space. Because again, we've gone through the whole process of explaining all this. So it's going to just be sort of like documented footage of watching me read topologies, this whole thing. Granted, I'm gonna go ahead and continue to talk with you, but I wanted to let you know there won't be as much talking or as much learning. It's just sort of more practicing the process. But again, you'll be given a high res in 2D reference as well as a low-res metal low-res model to work with. So in closing with all this, we're going to talk to you a little bit about how z, z modeler of edge extrusion and 0 measure. They're not the only ways to read topologies, guys, ZBrush isn't the only software that is capable of reach apologizing. There are other 3D softwares that can reach apologize, certainly Maya and Max and blender can reach apologize. If you ask me what my personal workflow is in terms of reach apologizing. We'll also level with you and tell you the truth. I do reach apologize. And Topo Gun three. I do find it tremendously faster. However, it also costs a bit of money. It does costs about a $100 and that's why it's not on here. Okay. I don't want you to have to go through and spend a $100 trying to invest in another software. I'd rather you, you can learn this stuff for free and I don't want you to, to advertise any kind of software further and be sort of like a salesman, spokesman for another software. So that's why I'm not going to be talking about Topo Gun three, even though I find it faster and even though it works better, It's not going to, it is quite pricey. And that for that reason, I'm leaving it out. I would prefer to just simply use the minimal amount of software's necessary to get through this course. So because like I said, not everybody has Topo Gun three. But if you taking this course, you pretty much are proving you already have ZBrush and that's all you need. So with that said, just highlight and go over one last time. This course is going to be going through read topologies in a low-res model over all the sub tools. We're gonna go through them and restore and transfer all the details of the high res onto the sub tools. And we're going to then use that to transpose these models into multiple will into a pose which we can go through eventually and render. We're also going to show you how to export the T-pose of the low res as well as the T-pose of the high res out after we finish reach apologizing. So with that said, let's go ahead and get started, reach apologizing.
92. Retopologizing Shirt: Okay, so welcome back. In this video we're going to officially be starting our read topologies rising phase. And like before, we're just going to take it really slow and easy with some simple examples and build our way up as we move along to some more complex examples like you see in the detachable face or at parallels on the jacket and so forth. So to begin with, we'll start off with some easy ones like the shirt or the pants, and then moving on from there. Now, as you can see before we begin, the sub tools have been organized. So now if you look through here, you'll see like for example, a folder containing my detachable face pieces folder for the three folders of hair that I did. And again, that is all been explained in the last section, and of course, a folder for my remainder pieces of the sculpture. So it's going to just sort of help you to just keep yourself clear and organized. If you want, feel free to disable the visibility of everything. But I like to keep one of them open like the finished sculpt to just simply see what the next piece is going to be. So let's go ahead and get started with that. First things first, I'll going to hold down left Alt, left-click, and I'm going to select my shirt. And we're just going to take the shirt and just kinda move this guy out with the down arrow so that it can go all the way through the process of pretty much being outside my folder. And then we're just going to now, now that it's outside my folder, Let's go ahead and just put it in solo mode. Can do that. And if we hit F, We can just frame that up here. Now we're going to do automatic read topology guys seen for this one because this is a simple shape, this isn't like a very complex 10 measure can get away with this. We don't have like massive, angular hard surfaces and it's really very organic looking as ZBrush does a good job on organic looking. And as we go through this, you'll learn discretion between what you want to do, between automatically topology and manual read topology. Again, automatically topology is more convenient. It's quicker, it's faster. And it saves a lot of time as long as you can get a fairly good enough shape. And it gives opportunities to do things like transposed master. If you want to transpose your character or transfer it out of the software to be something like a game raise character. That's the importance of reach topology. So let's also take a moment if you can. I want you to do this. I want you to hold down control and left-click so we can do a little quick history saved, that's going to basically save all the details that we see here. And now I want you to go ahead and hit the B key. And before we do any 0 measure, let's go through 0 measured guides. And what that is, again, it's B key. It's pretty much usually the last brush and a default setting of ZBrush. It's basically telling 0 measure where to deflect, direct the flow of traffic in edge flow when it does its little piece. When it does, it's really mesh. So if you just kind of very slowly guide the lines a little bit and kind of see. I don't have to go all the way through maybe something like that. I'm just kind of what I'm doing is I want you to try to pick out something like the, the most distinguished really, really deep areas. And if you can try to work on, just try to work on making sure that C brush understands. Hey, look, there's a little bit of a line here that we need some help on. And of course, changing the size of the brush means that it's probably going to, it's a good way to avoid having it attracted to the other area. We're not going to talk about Snap threshold just yet, but there's also a setting we can do to help go through that if we get enough requests will go through that process. So once you go ahead and pick out some good areas, we can go through now and 0 mesh this now before we see Ramesh this a one everyone to just go ahead and take a moment to hit Shift F. Makes sure to also get rid of these poly groups at the edge here. We don't really need them, they're not necessary. So I'm going to hold Shift Control, left-click and delete them off and go through Geometry, modify Topology, and delete hidden. Now you're probably going to need to be, you're probably going to need to delete the lower resolution, which is fine. And now let's just go ahead and do a 0 mesh. Now don't forget, don't know. If we're reached apologizing this to a low resident, go with its standard, tried to go with something a little bit smaller, like maybe 0.5. And just look to see what that's going to give you. For Settlements. Good psalm, it's not. But as this is 0 meshing, I want you to take note up here to this bar and see that gray line. We, that's where we hit Control. Left-click it sort of telling us, Hey, this is where you made your save in terms of where you want to have detail remembered at. So if we divide this again, you can go back to this and restore detail based off of this line. And again, we'll show you how to restore that detail here pretty quick. So as you can see, we got our line, we got our remeshing like so which kinda go around and just kind of make sure to just check the area if it's all right, you know, it you've got like a pretty good edge flow here. I did keep some creases when I did that poly groups. That's why I got this clean line that's going around here and I did have keep creases turned on when I did this. So just bear that in mind. So now next thing I'm gonna do is I'm going to divide this a couple of time. So it just Control D maybe. And then I'm just going to hit the B key and look for that history recall. And now this isn't the only way to project details. We'll go over that down the road, but it's just like one of several ways. And you kind of I always like to go up higher so I can have the maximum amount. I don't know why history recall does this but change the focal length of pretty high so that you can have a little bit of a soft bevel. Like so. Then. And you can kinda see I'm restoring my detail. And what's nice is, is i now and creating access to giving myself both a low-res and a high res mesh. So it's pretty nice, but there are still some tricks and some things you got to look out for. So let's go over that when you're using the history recall brush. I want you to watch out for pitfall number 1. Take a look at this. I'm gonna do something where I'm just going to go off. And I'm going to intentionally create an error here. And look what we got. That's because it's trying to project stuff on the other side. So what, how do you fix this? Always try to do all your projects based on whatever is facing you in front of the camera. Don't go around to the sides. Tried to really narrow your strokes to being limited to what's in front of you. And then just simply change the profile and just keep going on that way. So just kind of keep that in mind. And then after you put something on there, just kinda recheck the profile like you didn't pull anything as you go along. So again, just keep it like that. Now, pitfall number 2, let's go over that one. This is another one we want to be little weary of. And this is also kind of why I chose this mesh because it has edges. If there's no backside at all, you're going to create tearing on the edges here. If you try to do a brush through here, let me show you. We try to do some tearing like right here you can kinda see how it messes up. Let's go through now. And you can kinda see how it messes up. It doesn't handle the ends very well. So that's pitfall number two, again, you want to go ahead and do your best to sort of keep yourself away from the edges as best as you can and just sort of smooth it out a little bit there. You can go ahead and make your brush size maybe just a little bit smaller and looked like a tour right there. So you've got to be careful. Not too terribly bad. So you just gotta be very super careful moving around to the side so I'm losing it. So let me just go ahead and shift smooth that out and reproject accordingly. So a lot of this, again, it's done pretty much through smoothing. It's hard to really get these guys to smooth back out. So just kinda bear in mind that I don't do too much smoothing here because quite frankly, it's not really seen. So it's not really a big deal to me, so I'll just kind of keep it a little bit smoothed out so it blends in. So that's pitfall number two. Now, if you can get through all of that in then the, you'll have a pretty good advantage of what you can do now once you account, once you finish this. Because now what is happening is, is you have access to both a low res and a high res mesh that you can go through once you're done, kind of smoothing everything around. And you can kinda look with the act of points. Here's our low-res. You can go up. Here's our high res, so you can explore two resolutions out, and then those resolutions can be transferred over to a 3D software. And that 3D software can, you'd be using to bake something out, which is really, really helpful, really advantageous for you. So it's pretty much one of the most important steps is to just be having ZBrush at the end give you the opportunity in all character development, I should say. You need the opportunity to export a low-res and the opportunity to export a high res. So if that's the case, you just go through Shift D, export this out, up, D, decimate it down, which is important, and then export it out. Now of course, we're not going to go over that just yet. We're going to go over the exporting process with a little more depth once we finish our reach apologizing. And then we'll talk about the remainder stages and where that transfers into the next course. So with that said, this is piece number 2. We'll finish up with just simply making a new folder with it and call it re pathologized. And now we have our first read topologies piece. So if we, I'm just gonna go ahead and just kinda turn the visibility of this off, get out a solo mode. And now I'm just going to go ahead and left Alt, left-click into the the pants. So that said in the next video, we're just going to go ahead and do the pants. Feel free to do anything like maybe move this guy up and move it in. You can do something like that. It's also why I don't like to read to or do any UV-B because I'm I find myself wanting to do some readjustments again. And I don't want to have to mess around with the mesh before going there. So like I said, that's what we can do now. Let's just go on to the pants, which will be the next video. So stick around and stay tuned.
93. Retopologize Pants Trim: Okay, welcome back. In this video, we're going to start on working the pants and reach apologizing that. And we're going to do our first manual read topologies approach. And we're going to pick something simple on the pants to do some manual reach apologizing so you can get the feel and grasp of using Z model or understanding some of the different functions on here. So let's go ahead and get started with that. Now one of the first things I'm going to do is go through sub tools here. And I'm gonna go ahead and disable the visibility of everything. I've already hold left Alt, left-click and drag my pants out. So let's go ahead and label the visibility here. And right now we just have the pants and a shirt. One thing I wanted to tell you that was very important for you to know and I forgot to say it is. Is that when you go on shirt, every time you finish something, make sure to rename it. And this is going to be very important during the baking phase because of the suffix at the end is going to be used as an identifier to help bake and give a better quality bake through Substance Painter. I'll give you an example of that just now. So for this one I'll say shirt underscore high. And you can say all, notice that it's case sensitive. So now everything here is going to be underscore high. So every sub tool has to be case-sensitive with high on there of lowercase. If you want to make it all uppercase, that's fine, but they have to be consistent to this same suffix words underscore and then high at the end, no spaces. So I'll just go ahead and hit return. And now I'm just gonna go ahead and turn off the visibility and so we can get started. So we're going to do again the manual approach of read topologies in using Edge Extrusion. And on here we have the pants and we have the trim. Now we're going to do the trim first in this video because we want to have a simple, simple practice exercise for you by doing this one, it's a lot easier to grasp everything for the first time with some simple example. So that's kinda why we're going with this one. So let's just go ahead and I'm just going to split. This is all one group. Just go ahead and split these pieces off. I noticed mine is so I'm just going to hit split and split to parts and any merged meshes will become detached. I'll disable the visibility of that and just work my way across with just this. Now, we have to trim pieces that we need to read topologies. But first things first, let's just go ahead and frame this up with F and click on the mesh to recenter or rotate pivot point. And now let's bring in the brush that we're going to be using, which is going to be z modeler. Now, what we want to do before I do that is first off, I'm going to hit the B key before you can do anything yet is the model or requires some form of geometry to be placed on there. And we're going to use insert primitive mesh H. Do not go with the one to the left where it's just primitives at the end. Make sure it says primitive H on the end. That's because single poly is available at above and we want to go ahead and just draw that in. So I'm just going to draw it in like so. And just kinda drag like that. And then I'm going to go to split. And I'm going to go through on mast. Let's go ahead and click on that. Now. I'm going to hit shift up so it can be a little bit better. Maybe even scale it to so we can get a little bit more of a better opportunity. And now we can go ahead and bring in our Z model or brush. So that's going to be b, z, m. That's going to be right there where that brushes. And we're going to do some modifications to explain the model or we need to give you a little bit of contexts if you're a first-time user. So first thing I'm going to do to make you see this better is, is I'm going to go through, and I'm going to solo this and go through some of the more important to know functions regarding Z modeler. Now the first thing you'll notice is if you take your mouse and hover over a polygon like this, there are three areas that you can select. It's either the face, the edge, or one of the four points that you see. And while your draw is over any of these places, for example, like the face and then you hold space bar. You'll notice a whole bunch of actions that you can do or performing actions you can do. For polygon faces, not edges or vertices, just actions pertaining to the polygons face. If we go to the anatomy of the edge. And hold spacebar, we get again a whole bunch of different menu of edge, edge, Dell, forgive me, edge actions. And then we got a methods of behaviors to tell how we want these actions to go through. So again, lots of experimenting, but this is more aligning towards things like hard surface ZBrush. We did a lot of very anatomy like sculpting. So we didn't go too far into this because it wasn't like the most important thing. There's a lot of areas and disciplines of ZBrush sculpting. But the most common ones that we do is pretty much like anatomy sculpting. And that's not typically used with C model are, but we still want to show you this. Now again, if you hold over point, you're going to get again, some different actions like so. So to build off of this, we're going to modify all the actions that we want between the face, the point in the edge. So let's go ahead and start with the face. If I click on the edge and I just simply click on it, a line will show up. And that's basically like creating a new vertices and an edge between. And that's again because if I hold down space bar, it tells me insert single edge loop. And that's basically what we got. A single edge, edge loop that went across this polygon. Insert is going to be an option. You're going to want to remember as we're going through Z model or read topologies busy. So now let's go to the main, main function that we're going to be using and z model or which is going to be edge extrusion. So again, hold down spacebar. If you can't guess what it is you're looking for, Extrude. And then from here, we're going to have options. We're just going to leave blank for now. But it's going to be an edge, extrude edge the loop. So let's go ahead and take off Spacebar and show you what that does. If I drag across, you'll see an edge loop kinda comes out. Now utilizing this concept. Let's go ahead and hold down spacebar again. And we have below all of this, some modifiers, in other words, like behaviors that tell us what to do once it's on there. Some additional like movements to help us get along. And one very important one is to look at this free to move and change it to snap to surface. What will happen is as you draw this through, it just simply hugged the geometry piece like so. In addition, something you should know very important is that if you want, you can just bring the piece out and then hold down Control. And just simply bring out more of these pieces like so. And that's one approach you can do. So we're going to use this concept we have now our edge set. Let's set our point to do something similar. Right now we just want to move it around, but which is already set for us. But we also wanted to have a snap to serve as because if we start doing adjustments, it's gonna go off of the high reds that you see here. As for the face, let's for now just go ahead and leave it as a do nothing. So we click on it. Nothing is really going to happen. So now that we have that all set up, now that you know how that all basically works. Let's just go on ahead and just click transparency and turn off ghost mode so we can see things a little bit easier. Now using everything that you've learned so far, Let's just go ahead and just drag some pieces around. We're just gonna do a very this is like I said, when we chose the Cufflinks, the little areas here as sort of like an easy mode start off for you. One thing to be careful though, is as you're screwed the edge extra drawing off, you see it go into this little hard shadow that's because it's now hugging the backside. So be careful of that. I'll Z and undo back. Kind of see what we're accomplishing. Now, things get a little too. Wiring. Remember you have that vertices that you can move around in case things are getting a little too crazy there. So let's just go ahead and draw through. You can hold Control, but sometimes control just kinda likes to do sort of like a, it's, it's possible to do it. It's just sort of little creates sort of like a straight line that you need to be a little wary of. And also another thing that's fun is sometimes people like to just kinda go all the way through and then just change their modifier between and go through and do Insert. And you notice when you do Insert knot, it doesn't stick to that area. Doesn't really do much Fourier male. So wanna do some inserting here. If you want, then you can just simply go to sub tool project. And then you can just go through projectile and try to get everything kind of reorganized back to where it originally was. So again, that's just one thing you can do to change myself back into extrude. And now we're just going to go through the whole process. Hold down control. It's hard to find a little spot there. So now when you get to a certain point and you start catching up with the, the other end, you're probably wondering how we merge all of this. Well, we do have this already set to merge. If you drew this all the way over, it would merge automatically it well itself. But another thing you can do is just simply drag it over and push it across. So now that is it, That's all you had to do. So let's put some topology in between all of this by holding down space bar and doing insert. And you already got a little bit of taste of Insert Edge Loop. Let's just go ahead and just do one more. And I'm also going to do a little bit down here, a little bit. Actually, I'll just leave it like that. Now. Now I'm probably kinda like a holy nudge to keep it from collapsing if once I give it a couple of divisions. All right, so let's turn off transparency. Now. I'm going to give it some subdivisions. So let's go ahead and hit Solo divided a couple of times. So one, oops, looks like it didn't go through correctly. So let's just go ahead and oh, couple of areas that are a little bit to off here. This might be a good time for me to show you how I can problem-solve something. Let's go ahead and now change the modifier to delete. Now let's see what we can do. Take off solo. And I used it to lead modifier because we just simply saw something there. I hovered it over the plane. Let's see if that helped a little bit. Slow to three. And if you want, give it a fourth one. Not really too crazy. And you can kind of see what we're gonna do then here is this. We're going to project everything that you see onto this little piece right here. Now, one thing I wanted to show you also is that if I went back, you may wonder, are we going to do the backside? We can do that too. Here. Let's time, Let's go back and transparency. It shipped up so you can see it. Let's go over and hover over a polygon plane and hold space changed the delete modifier to extrude like everything else. And we're going to tell it, this is basically asking in a target, what is the target of things you want to extrude just like a single polygon, all polygons, or maybe you want to do all the poly groups in one area, or the poly groups in one area of a border, you have all these choices. So for now, we can just go ahead and just do a little quick extrude out like so. And then maybe P1, you can kind of bring it in a little or anything like that is fine. Okay. And now if you want to, What's nice is when you create an extrusion, you can kinda see that the mesh on here, it's got a poly group. And because it has a poly group, that means we can use that geometry crease Poly Group option, which is always very nice. So let's go ahead and go through crease, ungroup, and now let's divide it. Now we're not going to need to worry about any sort of holding edges. So we can just delete those now. And we'll go maybe one more. So the next thing we're gonna do is I'm going to turn transparency just a little bit off here. And we're going to now try to project some of our detail on here. Just take your time on this and try to make sure everything is. Fairly occupying the same spot or same space if you have to go through the whole mesh and just kinda make sure everything is roughly in the same area. Feel free to do that. I'm just gonna kinda go around like so. Once you feel like you're in a comfortable spot. So let's go ahead and we'll just read topology or reproject our details. And again, to do that is similar to what we did before. We go through our history. Do a Save history by hitting Control left-click. And then we go over here and I'm just going to go and solo. Since this is a poly group, I'm just going to project my details over this. So again, I can use just the history recall and bring back my geometry through that way. We can also do it another way, like Project history, which is under sub tools. Although you've got to be careful about that one now one can sometimes legal little bit of issues up here that are very difficult to fix. Some times, it's just sometimes a lot easier to just kinda go through and just sort of kinda spend a little bit of an even amount of time. I don't know why. I'm always left with. But again, I'm also hugging an edge. So that's another issue here. But to be just a little bit careful, especially like in an area right here. Let's go to our Z mandala rush and see if we can fix that a little bit. Honestly, my true recommendation is probably to go through and use the history, recall brush and do as we did in the shirt and just simply do it in the front camera angle. There's nothing wrong with that. If you also feel you need to go through and maybe do some things like smoothing out areas that look like they need to be smooth top, honestly, this top part is not ever going to be seen, but you can always do that just by kinda mentioned it down. All sorts of fun things. And the other thing that you can do on here is, is that we are trying to typically, in most cases, they most cases would dictate that we have the just simply the projected piece, which is this piece. And we would just decimate this piece, export this piece out as the high rises, and then this piece out as low-res as separate pieces. I'm still trying to get them on both because I would also like to do some transposing in this as well. So that's the other reason I'm kinda have in that. So you can do to one of two things. You can go back into your pants now and simply duplicate what you've seen over to this piece. And so you don't have to read topologies it all over again, which is pretty easy. Or you can go through a process of getting more practice in by just three topologies in this piece. So with that said, that was a breakdown of read topologies Ising manually for you. A very easy, simple crash course. We're going to go over more complicated processes with the pants and just kinda go through practices kinda like my approach in how I would read topologies, something like this. And from there we'll move on to the jacket. So stick around and stick temp.
94. Retopologize Side Pants Pocket: Okay, welcome back. In this video, we're going to now start on doing our manual reach apologizing of the pants. And last video, you add a little bit of a warm-up to explaining how manual read topologies sizing is. So now we're going to give you a little more challenges and goals to accomplish with a little bit more of a complicated silhouette. So let's just go ahead and get started. So one of the first things you'll notice is that if I hit the topology, I went on ahead and duplicate my mesh and reshaped it over here. And of course, I went through the process of renaming it to trim are high and trim our L high, I should say. So. Now we're going to be working on the pants before I actually officially start in on the pants. One thing I always like to do is I always like to establish like an edge flow to light key parts of the area so that a good bake can occur. So built-in silhouette and geometry is there for, to support a good bake, I should say, which comes in a second course. So like what I mean is this, I'll build in topology edge flow here around the, the plate of this little patch design. I'll make sure there's a little bit of edge flow here. Of course, in some of the deep mark areas of the, the wrinkles, I'll build in edge flow here before I officially begin the process of reach apologizing because it helps me to connect things that way by doing it that such a way. And so think of it like what I'm doing right now is a slow version of establishing Z guidelines. So let's go ahead and just begin. Like we did before. We're just going to choose our insert multi mesh permanent h because it has that single polygon. And let's just go ahead and drink, drag that guy in there like so. And then after that, I'm just going to go ahead and go through split. I'm going to choose unmasked from there. We're just gonna go ahead and turn both permanent and hit Shift F to go into wire mode and select the sub tool for that. And then transparency with ghost off. And now we can go into our Z model airbrush ended fit. I'm not going to just go over all of it all over again, but we just want to get some practice in on things like again, getting you to get firmly how to set your model or brush. Hold down space. Choose, Extrude. Choose snap to surface, set your point. Now, hold down space, choose Move, choose, Snap to surface. Now, make sure the face is now set to do nothing for now. And that's all we need. So let's go ahead and just get started. And of course maybe turn down here. Draw size so you don't have too much of a crazy time. So I bring that in and we can just kinda do with something like this, even where we just kinda go through, maybe you just want to kinda go through the whole process this way, that's completely fine. And then maybe from here, we can just switch it off into insert, build our geometry and through here maybe. And then from here with just sort of rearranging the births, like so. I think for this, I'm going to just sort of make sure it's met its base symbol. Just keep following the line C. And then from here, I'm not going to worry about that any further. Let's go ahead and do an extrude. Whoops, not going to set it back. To extrude. If you want, you can even left-click on it and you'll get the previous display. Let's go ahead and just kinda give you some like the kinda see how I'm working the geometry across which is kind of establishing edge flow on here. And this is obviously, as you can see, it definitely is. It takes It's taking a lot longer than what you would normally do and see or measure again, this is part of that pros and cons between automatic read topologies and manual reach apologizing. Again, it's just going to take a little bit longer. But quite frankly, you do get better results. You're always gonna get a little bit better results as a result of all of this, which is always a nice thing in the long run. So I'm just not going to go through here. If you tried to do a read to pull it or GI Xen and 0 measure on this. You could do it and you could probably get away with it. But it wouldn't be as clean. And I think that's kinda why we wanna do the pants to kinda show you an illustrate the difference. The biggest and best advantage out of all of this when doing all this is, is that you get full control over where the topology is. Think I'm gonna go ahead and just kinda push this and pull this across, trying to guess how many votes from one side to another. So I'll just go ahead then and build in a little bit of time here. And now one thing we haven't covered here is the left Alt button. And how that can extrude a sort of an edge loop process. If I hold that down or tap that and hold it down and kinda grid a little bit more going through a, a sort of edge loop that goes all around your mesh, if you will. But it's not very applicable right now. Let's bring that in. So liberating love to happen. See if I can find my piece here. Murder is right over there. To undo that. It's too far in like it is right there. One thing that is a little bit new sensing and you saw me do a save on bro of the high res. We can always just kind of bring it back out again. And kinda see I'm fighting on this one area and go through and project. And if one, I can click on the high resin, the mesh whole control left-click. Now go through here and just project history so that we can get sort of a clarified process here that will kind of allow my bird to be more easy to pull out. That's kinda why I was finding across with that smaller. Right now we're just kinda doing the very meat and potatoes work. The sort of the precision, if you will, seal, keep their 9. Do quick look on that. It looks roughly the same except that little plus right there. Alright. So now I'm just going to drag all this stuff across here. And one thing we can do when dragging this crosses as we can bring it out. And we can also tap left Alt and we can just drag out this read of this group loop like so. So, you know, just kinda like you see here. And one thing I can do is I can rearrange some verts to help me out here so that it falls in a little bit of a line to an edge loop that I want. Now, looking at this, I am thinking I'd like to build some geometry right around here. So what I'll do is I'm just going to make an insert edge loop here. And we'll bring in probably around here, through. And there we go. Get that edge loop. Sort of a legacy. This is all like a game of patients really. See, please, please, please just sort of give yourself a moment, take you time. If you want, you can do a quick little check to see what it is switched off in a solo mode where this girl likes to actually just go through. How did a hell of a time trying to get that to fall through? A little bit like that, a little bit like that. And now we get a little bit more wiggle room there. Perfect. Now I'm just kinda work with a little bit of topology here. Sometimes it's a real kind of stubborn little person that you deal with. Kinda go through all of this. If you are having a hell of a hard time. It's remember, worst-case scenario, mascot. And then center pivot point and force it through. And I always hate that. Let's go ahead now and see if we can go ahead and do the rest of this. Okay? Now the fun part, kinda see how Just kinda something you gotta take your time swinging. Let's bring this guy in a little bit more. I guess. So you don't have to have perfect topology in here. You just go to have something that's going to build in a silhouette. All right, so now we've got some roughly around here and we do see you. Not sure if I like that. No, I'm definitely don't like let's just delete that. So close. Stubborn. She doesn't want to snap. Let's go ahead and delete this guy. It's also pretty hard to see sometimes with all these things where it ends and where it begins. Like I said, this is the challenge. And you just got to be able to give yourself a moment to kinda get in and hypnotized and adapt to it. Solo and get that go into display. So we can look at them from the other side, then hit double. Or you are. And there you merged. Something. So simple can be so much of a pain.
95. Retopologize Side Patch Pants: Now let's solo. Let's go ahead and bring out everything else in here. Just if you can try to get the geometry to conform to a roughly nice spotlight, see if you can try to get an edge flow here. See if I can do something with this mush. Give a toy plus maybe second here for it to load. Actually, I should have just gone to the other one. Here. Let's go to sub tool and just change the two toy classics so we can see a little bit better here. And that's a little bit easier. So awfully reflective though. Skin shader might be as easily easiest one I think we're going to probably go with skin shader from here on out. Right? Kinda just see, I'm just going to go through now and readjust everything, cleaning my topology throughout. It's a little bit on even here. So one thing you can always do is you can just kinda hold Shift, kinda relax it around here, and then just go through, and it's going to go through the process of projecting your history. And we already went through how to get your history back. So now we'll just go through and bring this all throughout. Like so sloped ALT, bring them out and she doesn't want to snap. Just go and just kinda bring some more topology. And I'm thinking we can tie something off here because it is unnecessary to have all the Try it again. And then if you bring in, actually extrude, press old wants to go back and change your form. And like I said, everything here is just a fun little iterative process. Some people go through, do this. It would take them forever and other people can do this really, incredibly fast. Sort of those happy in-between perfectionists. Simple. All right, let's go ahead and just give it a nice clean little edge flow here. Kinda see now this is, this is something that to me is going to be very important. The rest of the pants is going to go buy a lot quicker. But this Tibor area right here that you're seeing, it is geometry that is built-in. And it is some work that we gotta just kinda take the time to hammer through. Let's go. I think we got a little bit of a error. That's what was going on. The finiteness of dealing with these problems, starting to do this edge extrusion. And I was like, What is going on here? Let's go ahead and hit a point x2. We can. There we go. Now we got our extrusion bug. Nolli. Hi. There. We go. A little bit of an issue here. X true. We are. Now. 0 is the stubborn on right there. Don't be afraid to kinda just take your time and just simply troubleshoot tastes, kind of things. They are not to a fun deal. It is legacy. It's all like a iterative process. You just gotta take your time on a one-to-one. That's okay. Merge those two. Definitely things you gotta work well, look out for stuff like this here. Back in. So as we're getting closer and closer now towards the end here, just going to want to make sure to just sort of double check your work. Okay, so you lose anything. Maybe by going into solo mode. Something there. Now as we can see, let's just do a quick little project to a string case. We forgot everything. This is go ahead and make a little bit too adjustments to this. Maybe smoothing this hole out a little bit more. And you can do that. Law that says we have can. And then once we have what we want, Let's just do a project history on to that. So now we have a little bit more of a cleaner mesh in this area. Looks like there's a little bit of peace. This is what I mean when I say double-check your work, just kind of find a little bit of a stray, like right here. Sometimes it can be a little bit hard and tricky to move. If not just mask over it and invert the mask and bring it in. And you will have that now that's just some built now you may think Jesus, did he generally take that long on just that area? Not necessarily. Like I said, the rest of the pants goes a little bit quicker. I'm not going to be like trying to look in, try to say, Hey, this is area right here that I need to reach. Apologize. This is area right here. I need to read apologize. No, not at all. I just want to do this in places that have an extreme silhouette that needs a customization to it. So with that said, we're going to move now onto the next lesson, which is sort of like part two of this, what we're going to fill out the rest of it through reach apologizing. It might be this video and the next. But again, we want to take our time when it comes to manual reach apologizing to get something correct here. So with that said, stick around and stay tuned.
96. Retopologize First Half of Pants: Okay, welcome back. In this video, we're going to continue on with where we last left off in creating our peace, our reach topology of our pants. As you can see, we had one of, we wanted to go ahead and read topologies, this advanced section here. Since it has its own unique little silhouette, we wanted to make it easier when we reach apologize the pants to have certain edge points that line up a little bit quicker. So with that said, let's continue. Let's go back into our transposed mode so we can go ahead and do some work here. Don't forget to set your brush like you have before. I always have DynaMesh turned off and I never want know why. Let's just go ahead now and just choose a spot tray here. Maybe we can do something. And let's just bring this guy here. Now I'm just kinda get in the mode, not really being too overly concerned regarding how I get through all this, just trying to I'm not worried about the spacing will just relax that in when the time comes here. And I can make it just about stop right there. So that's going to be some one piece that I'm going to go ahead and put. Now there is a specific edge flow I kinda wanna see if I can establish here. And that is I want to see if I can get the pants to kind of bend in as well. But first off, let's go ahead and, and just to see if we can go through the process of smoothing all this out. So again, let's just go through and I already did a history save, so just revert back to that. Here we are. Something a little bit easier. No. Oh no, no, no. I am getting that stubborn mule of a vertice c That doesn't want to move unless I give it its absolute attention. There we go. You know, kinda see how we can get through this a little bit quicker. Now. See here if we can bring that works for me. And kinda see, and now it's kinda go on a little bit quicker. For me. Bring in some edge loops in here. And I'm just kinda get nol creative. Go ahead and every time I do some edge loop, bring Insert Edge Loop. So always one to see if I can just kind of line it up there. Whoops. Search. Let's go ahead and just think I accidentally put a delete that guy. And there we go. He's gone. Now let's go back to extrude. And let's move some of these verts in a little bit more to this kind of work in the topology. Out. One side. See what I did right there. Let's go ahead and project its history now I can move. I should be able to move it a little bit more. There we go. If you are having trouble with any sort of movements, there's a whole bunch of reasons why that can be. Sometimes it's because of things like, oh, sometimes it's because of its too far into the mesh in which you're going to have to go through Project history. Other times it's going to be because of the simple fact that your mesh is just, you may have double-clicked and insert edge loop and it's now like causing trouble with you. And a whole bunch of reasons why something can not exist through. So kinda keep that mind. Let's go ahead and bring in another Insert Edge Loop there. And bring this guy in through a Extrude. Given the insulated perfect example right here. It's a fun little guy that just wants to be stubborn and you just gotta kinda find that right angle, which you can try to. There we go. Find our smack. Lot of the times it's the draw size being just too small from the angle of the distance of the mesh as well. No, no, no. And we need an edge loop going through here and loss silhouettes really peak in here. So let's just go ahead and code to insert something in here. And then let's do a force. There we go. Let's see. Delete that. Beautiful kinda see, I'm just kind of building things through. Sorry. One thing again, I always like doing this is just kinda like to go through the whole process. So just kinda relaxing it a little bit. You need to, you can kinda just use the, it would actually be better if you're gonna do this teased loose cloth brush. But we can go on the island at different time. Just kinda just sort of bring out everything a little bit more and reproject. Wherever you lost, see like right here, we want to make sure they're silhouettes That's peak in right there. And if it's not from your project, might want to go ahead and just increase the distance so that you can capture that. Next one wants to see if we can see what we're doing here. And from here you can in theory just kinda go through the bat to be zm. And you can just kinda go through and just do an extrude across. At this point. It's going to, if it has an angles, It's going to fight you a little bit. So it's kinda why I always hated doing it this way. Because extrude just has this massive chip on his shoulder. If it doesn't have everything that is go in through like perfectly straight, it would just kinda collide into itself. So it's it does take like sort of a like some usual times to just kind of get a little practice in cell C. We'll just go ahead and now I'm just bring it up starting from here. We'll cover in some area, geom True Cross. Go ahead and change my mode by hidden left Alt x. Excellently. One thing you're going to want to try to do is try to establish an edge flow that goes all the way down here that can be repeated throughout. This would go and they'd like us say it is just simply a process. You just got to just take a little bit of time to do and play a little bit of patients with it is a pay off. Because like I said, we do this for a whole bunch of reasons that range from things like posing through transpose master or maybe transferring two different softwares where you can have this to bake a high res off of the main, It's part of the process. Now if you're going through and just going to keep it in ZBrush, sort of just do your your whole process done in one I would say is just in simple render in its T-pose, then yeah, I would probably tell you that it's not 100% necessary then to go through DynaMesh xin or I'm sorry, not DynaMesh him that go through trying to reach apologize. Any of this. Here, let's go ahead and delete the point. Let's think. Go ahead and do something there. No, no, no, no. Just to dilute the face. There we go. We're going to just do a little bit of reconstruction so we can kind of get away with a little bit more, less tries to move, move this back to strewed. Good. Smooth this back to nothing. Except I want to delete that. Remember, go Draw size is too small, it's going to probably are too big then it's going to want to mess around with the two births instead of one. So we're comin up on trying to get this area here. So again, you can go through the whole process of smoothing this out a little bit, maybe. Think I'm okay with that word is.
97. Finishing First Half Retopology: So now we're just going to have to tackle sort of like the backside here. Let's go ahead. And I'll just start from down here. It looks like we got some this is just sort of made doing some checks on scene, some things here, making sure you don't have any weirdness going on, which we do. Right about here. Let's delete that. And let's go ahead and go through display properties and turn off double so we can see things a little bit easier. So that's given us a little bit of a stretch going on here. Nodes whose go ahead and leave it like that. Now if you feel like you need to do anything like add an extra vertices, you're free to do so. Or an extra edge loop to any places where you feel like the silhouette can be improved. Definitely do so then relax it in and then just go through the process again just to simply projecting it like we have been doing. Let's go ahead and do this now and some bigger chunks. One thing we can do is we can go through, and sometimes it's a little hard to get an entire extrusion from a whole chunk down. So you can always try to like just pick a smaller amount to extrude by extruding a little bit more like an individual piece like maybe these horror at a time. So let's start with here, and then the rest of them, left Alt, left-click. And you can do something like that just to sort of make things a little bit easier for you. It's not a problem. Stillbirth. Right now and see if we can make this meat in a little bit more halfway. See if we can do another extrusion or from the other side here. So it's a little bit too difficult to do it this way. So let's left all left-click little bit. And then from here, left I'll left-click. And you're having a little bit of a problem right there, That's okay. We'll just have to go ahead and as we it's going to get tricky in between the legs. So make sure there's a good enough gap that will help you go through if you have two. Sorry to say this, but if you do have to just go ahead and go through the whole process of, you know, and just taking it one polygon group at a time, or better yet, to two poly groups at a time. As you kind of bring it in. You just do your best to try to extrude very slowly up. Remember, if you can't get a merge or a snap or out of anything, you're going to have to make your brush size small and just get in there. Let me show you what I mean. Like there is a tricky one. And this can be a process, like I said, it is definite, definite process. Another thing we can always do, which probably should have been done a bit longer of a time. Is that my make things like infinitely better. Let's go through now and just simply read this. And then repeat a little bit here. Move, find yourself a little bit with the different number of poly groups. That's all right. We can just go ahead and start typing some stuff off here. And if there ever was a place to tie stuff off, it would be in the inside. Same so like so something like that maybe. Then we just kinda go through and see if we can turn it to bring this slightly bigger. I'm just going to weld these like so not concerned in any way about things like the like the like the edge flow at this point. Again. And relax the edge flow and reproject everything. So I'm not going to be concerned too heavily. I'm just going to try to get everything sort of connected in here. Perfect. I'm just going to cheat. I'm just going to tie everything. Often cheat a little bit. There we go. Whereas this guy come in from, it's coming from all the way up there. Square root. Probably have him move down here just a little bit more. It's basically kinda cheating and time everything off. Alright? So now that everything's a little bit more into it, Let's just go ahead and just simply clean the so-called slight bit by just doing some quick little relaxing and cycling here. And then let's just go ahead and project history back onto it. Let's write our mesh backend and you can kind of see now we have about half of this read topologies. The second half is going to be even easier than this half because we don't have to worry about time anything up and we have less wrinkles. So with that said, we're going to finish the pants up in the second course. So stick around and stay tuned.
98. Mirroring Pants Topology Over: Okay, welcome back. In this video, we're going to continue where we last left off and we're going to just simply finish the second half of this. We're going to use a little bit of a quick shortcut trick and we're going to just reuse some of the base mesh of this left side to duplicate over to the right side. So let's go ahead and start with that. First, I'll duplicate the sub tool here, and then they go through the deformations and hit mirror. And then as we can see, we mirrored it over. But take note and a couple of things we have built in our topology over here to be a pouch. And that's one of the first things I want to get rid of. And we don't have a pocket over here, so we need to edit that out. So let's go ahead and just kinda not those things out before we do a project. So let's get started there for so I'll go into solo mode. One of the first things I'll do is I'll just kinda, I'm going to go ahead and just kinda make a mask in all the topology of this pouch that encompasses this pouch as you see here. So we'll just kinda bring it through here. I'm just kind of going through stopping on this edge loop basically. Let's see what that looks like. We're missing everything. Looks like we missed a little bit down here. Yep, there we go. Let's just go ahead then an invert that and delete that off. Like so. Now we can just go through modify geometry and modify Topology and delete hidden. And for the rest of it we can just maybe just merge some of these points and we can always do that. Sure, you have a small enough brush size. Course. This will be a very stubborn, stubborn mule. And I think I'm also going to just projects so that this can also be a little bit easier because a lot of these guys, if they're too deep into the mesh, you can't really grab them. So let's go ahead and go through sub tool. We have saved our history. If you haven't already left Alt left-click, and left all left-click on the history bar so you can have something to save so that this isn't grayed out. This project, some history there. Whoops, I did the wrong side. Here we go. I'm only doing that just so it can be a little bit easier to grab these guys and merge them in a little bit. Course I may find myself a little bit messed up. Looks like there's some topology that's kind of messed up here. So I'll have to fix that. That's probably because of this here. So we've got something going on there. So now we have a little bit of work to do. We still have a little bit more work to do here. Maybe we need to relax and smooth some of this stuff. Wow. So one of the first things I'm gonna do is I'm going to now delete a bunch of this stuff because I don't really need it. 90 need to go through the process of having this. So I'll start with just the stuff here. Let me see how high I want to go. So let's just start from here. And I'm just sort of reconstructing everything I did using just to process. That's a little bit easier because we're going to be able to just do a simple extrude write down after we get the topology and the edge flow of all of this up. So let's just, first of all, we just isolated, selected some stuff. Let's go ahead and hit Delete Hidden. And where we can use our brush. Kindness, snap and Let's change to insert and bring something in there. Let's see, oops, change back to extrude some stuff in. And I think that's all I need to do there. Let's delete some one here. To leach process of deletion there. That's not necessary. And that's about as far as we need to take it. So we get a little bit more room here. Move back. Two, not one, that I cannot reach it. Because it is so far n sub tool. It's project that in. Now, we can get it. So now we've got all this stuff in here. You've got a very ugly little piece right here. And this was me getting a little bit lazy. I guess I can go ahead since I'm here, I'm going to probably want to just clean this up. It is bothering me. Yes. So we'll just go through the process of just doing a nice little simple search. Hmm, little bit easier. Probably should have done it like that on the other side, but I got a little bit lazy and cheated simply because of the fact that it was a little bit on the other side. It was in the end seem so it's not really going to be something that goes through and gives me a whole bunch of hustle. And this is a stubborn little hurt that we're going to have to just simply push back the hard way with the sub tool. You're having a weird time with that guy. Turned down the history a little bit. And I'm just simply just sort of reconstructing everything I did on the other side and just simply reusing it. So now, if we want, we can do an extrude once, see if we can get this. So that we can try to get it looking as flat as possible here. Kinda like that a little bit. We go probably need to do that one more time. Simply get it. That I'm trying to do is just kinda prep openness so that I can do a little bit of an easier time with edge Extrude. And if you can't, if you can't get like a complete edge, I come trying to do. One thing you can do is you can just simply drag it all the way down like so. And then project the history to all those points. And then just simply fill in the blanks of the area. Which is pretty easy. It's a sort of a now why don't we do this with the other place? Because the other place has built-in custom geometry to it. This point I also would like to, before I add any insert edge loops, I'm going to want to combine these two up. That way. They have similar densities. I can see with Shift. I can kind of look here. You can kind of see how it's put, Insert Edge Loop, so anywhere you want. Then we'll just go through and again like before. So to reproject all that stuff on there. Like so you have a little bit of problems like hadn't right there. Don't worry about it. Don't freak out on it. Either. Increase your distance. Then just simply do some sub tool. Smooth. One thing that is kind of an a regrettable scenario is this an can't really can't really do much when it comes to untangling this the edges. So I'm just going to go ahead and just go through the process of maybe just deleting a little bit of this. And that way go through, and I can just go through Geometry, modify Topology, and delete hidden. Just reconstruct everything back again. Oops, keep doing the wrong thing there. That some tool is really, really hard to get a snap. I'm having a hard time getting the snap because it's so dug into the mesh. There we go. Remote in smooth and around. Rare to see a little bit more. I'm going to hit our center point that kind of see we now have our pants is finally starting to look correct here. One of the only things left we have to do here is we just need to merge the pieces up here and then we'll be done. We'll be able to just simply from this point on, go through the process of little bit sensitive.
99. Finishing Pants Topology by Welding: Of reprojecting the details that we have created. That's going to be a fun one and deal with once is good and clean up all this stuff here. So low. I'm just simply moving these verts over. As always, some finiteness air craft. Let's just go ahead and go through and delete so we can make this a little so convoluted that sometimes you just needed to lead something. Right? Come on. Oh, come on. Don't change the whole energy. So let's go ahead. We got a little bit of a hiccup that we got to take care of here. This is why I would also say why I liked top organs so very much right there. And kind of see the problem. Really stuck over there. Once disco, I'm just going to drag a mask center to that point, see if that will change it. Yep. No, we can get a little bit control back, figure out where this guy is supposed to belong to. The same thing with this for figuring out where he's supposed to belong to an edge. Right there. See just how difficult it is to kinda maneuver the the hands, especially on the same here. Sure. Look and just where we wanted to look up the pants or the fantasy bet you thought the pants we're going to be a simple one done. Yeah. Trying to get these come together is just one of the I guess it's just one of the fun little challenges that we have to go through. That's her and I added an extra piece up here. So we're going to have to go ahead and see if we can go probably close it up. You can kinda see all then microsurgery I was doing on that one. And that's why you always want to make sure you have a wider gap is much there. It's just not very fun. I will go on record and remind everyone this is why I like doing topo, especially when dealing with asymmetrical pants. Alright, so now that we have that done, let's go ahead and just, just do a little quick process of project history. Make sure everything is hit. Let's go through and divide it once. Do again our project history. Let's turn off transpose. And we're doing it all right so far. So let's go ahead and divide it one more time. Injector history. And we seem to be doing right. Let's give it another world, reject history. Let's turn off the sub tool so we can see what we're doing here. And looks like we have a little bit of an issue. This is probably my forgot to do here. Right up there. Apparently. Did something wrong for a couple of areas to unmerged births is basically what I did. Let's go ahead and see if we can. Let's try that one more time now. Let's try just projecting our history. We're going to actually do geometry. Turn off as empty so I don't get any kinda collapsing and then do a divide sub tool, project history. There we go. That's a little bit easier to do it one more time. Jitter history. Let's go now. And we can probably smooth it out. And if there's anything we miss, That's her. I will just go ahead and use the the history recall brush to help us out there. You get a thing like this, for example. Worry about that too much. Just remember to check it at its base. Make sure everything is sort of allright there. If there's anything you need to change and just feel free to do so. But, you know, you can just go through and just smooth it through. Like kinda like as my back to my normal one. Pound of just real quick. Just kind of like that. Still gets the errors. And also just kinda use a little bit of the. A little bit better. Oops. Course, we're going to probably have that kind of an issue. So I'll just go ahead and hit geometry. Delete hidden. Try from here. Sub tool. There we go. We'll do better. More. We're just kinda of reconstructing everything. May just leave it like that. There's anything more I feel like I need. I can always do that. But right now, we zoom in. You can kinda see there's definitely some resolution. So I may just give that one more hit. And I feel tempted to just simply clean it through the history. Recall brush. Just as though kind of a way to help out a little bit here. Might be a little bit more of a viable solution. You know, some of us seem work here. And you just, just give yourself a little bit of time on it. So that is all that we got for that that reminder is going to be a renamed mesh. So don't forget to do that. Don't forget to rename the mesh to a pants. Pants. Hi, like we did on the other ones. And we're going to bring in our mesh like so and just kinda bring it in there. Kinda just see how they all look. We're going to go ahead now and move on to the next piece above, and that's going to be the jacket. So with that said that was a map modified, that was a manual method of read topologies using that one was a little bit more trickier because we had to create custom geometry. That is going along here. So kinda keep that in mind. When doing that. Let's just go ahead and do quick lower. Relaxing there. When we go through the jacket will have a little bit more wiggle room and less work to read topology guys very specific like areas because like I said, we hit Shift F on here. We had to come up with some very customizable geometry. To make all of this work. You can try to make it work through 0 measure, but it is kind of a pain and it can be a little bit of a hassle. You might get some ugly results in the process. But again, you're welcome to try 0 measure. I don't recommend it if you are like, for example, in the industry and you were asked to do something, I would suggest though he's doing manual reach apologizing for something like that. So with that said, we're going to move on to the jacket. And from there on now we'll just take it one message at a time. So stick around and stay tuned.
100. Organizing Jacket for Retopology: Okay, and welcome back. In this video now we're going to officially be starting our jacket to reach apologize this. But before we start any form of reach apologizing, we want you to take a look at the jacket or the jacket that you made. And we want to go over some of the basics here because as we can see, we have some decisions that we have to make on how we reach apologize this. And what I mean by that is this, look through this. All of these pieces here are essentially one separate pieces. So our decision has to come from, should we read topologies this as one piece, which is a very simple over-simplification, or should we reach apologize, separate pieces just to speed up the process and have cleaner edge flow as well. And the answer is we wanna go ahead and just choose the areas that have a distinct silhouette change, like for example, this front flap, that's the sector piece we can reach, apologize this as a separate piece too, to help us out. We can go through and we can look at this sash and say that's a separate piece. The reason we want to reach apologize. Separate pieces kind of falls back to the pants. Now, I'm gonna go ahead and just explain this to you. In the pants. You saw. How long it took to reach apologize this one area. So imagine if we did, we had to build edge flow all throughout here. We've also kinda built this, then show you how long it would take if you try to read topologies this all as one piece, it would be a nightmare. So that's why we do do some separate read topologies here. Now, in theory, if you were to take the high res and just sort of just reach, apologize over this and build no edge flow. You could in theory create like a normal map out of these pieces. But there are some pieces like for example, this sash here that wraps around that's completely separate and trying to build edge flow for that is just too hard. It just would be easier to do separate piece. So now that we have a little bit of distinction, we can still make some exceptions. Like for example, take this piece here, It's a separate piece and yes, you can reach apologize it individually if you want to or you can read topologies it combine it with this main of Jack and model and just simply go over it and let the normal map when doing the baking process, fake that detail out. And again, normal map baking, that's all texture and stuff that we go into in a separate course that's going to be upcoming soon, if not there already. But I digress. We can also, for example, combine this strip in and just kind of reach, apologize over it. Let the normal map sort of do its work here. You know, there are areas where we can make a decision to just combine it up and just simply make polygons just cover over it, but not necessarily build specific edge flow. Nevertheless, I'm when I say build specific edge flow like we did over here, you know, there was another example I put extra on here, like a little zipper here. We can maybe do a little bit of cheating here and maybe just sort of cover it up and lead to again, the normal map, just sort of fate for it. But, you know, the thing is, is that by doing something like this, if we go through and left all click, if we just reach, apologize these separately. As he can see, there's very simple pieces and we could probably get away with Z remeasure on there. And that would save our time quite a bit of time because then we wouldn't have to really take our time with Edge Extrusion building complex topology to support this. Same thing with this area. You can do this maybe separately as well. We'll have to see, but I think we can get away with a little bit of 0 measure there. So ideally, you want to get away with as much 0 measure as you can before trying to resort to manual reach apologizing. And you got to set a good high standard for yourself with clean topology, we see you measure because if it is an acceptable, you just going to have to go manual approach to fix it. And some more examples. Take this helmet or the shoulder. You can probably guess by looking at it. Are we going to do a separate reach apologizing? Are we going to combine this with this? And the answer should be pretty simple. It's its own little edge flow. It should be read topologies guys separately. Sam, with these pieces trying to read topologies, this and these little nodules as one piece would be a nightmare. It would just be so much easier just to put some cylinders in there and then do some edge extrusions and make those all separate read topologies pieces. So we got to come up with organizing our mesh in a way. So it's done. Saying here, this would be so much easier to do if you just read topologies this piece separately. In some cases may get away with 0 measure. I don't think I'm going to try it, but there is some people skilled enough for that. I will say I'm probably going to go ahead and keep this one a seamless mesh because I can kind of see some issues like if this is a separate polygon, lower mesh-like some edge, low res, kinda cutting in Angular throughout. It would just be easy to make this all this with the jacket, one seamless mesh here to help with that. So there are some areas I may give an exception to. So with that said, let's go ahead and get started. So one thing I did was I took all my jacket pieces and just put it on a temporary untitled folder. That way I don't have to sift through the finished sculpture. And what I'm gonna do now is I'm just going to left Alt, left-click into all the pieces that I'm not going to reach. Apologize. For example, I want to really read topology guys, the two longest Greek pieces that are going to take the most, which is probably going to be the shoulder and it's probably going to be the main jacket. And then the next longest will be here. So it's going to be the main jacket here that I'm going to sculpt first. So I'm going to make, turn off the visibility of everything else so I can just focus on merging everything as one piece. So let's just do that. I'll just keep going through adult left-click and then just kind of left, all left clicking then moving onto the next case. Adult left-click. Again. Apologize this separately over quick. This can be done separately. Let's see. Let's go ahead and disable zippers. I think we can do the zippers separately to and like I say, there's no such thing as the right or wrong answer. Just sort of choices of why we choose one over the other. Going through choosing a VCS. Apologize this separately. And then I'll see Ramesh, that seems pretty easy. This goes with the sash, so boring to just go ahead and turn the visibility of that one off. And I'm just going to turn that off. And this is barely sing. So I'm thinking I might just leave that guy. I'm going to go ahead and just delete that sub tool ceases fairly seeing will make my job a lot easier to remember is just the previous union. So basically our premise of the main areas. So now the next thing we do is we have all these visible sub tools that we can go through. And our next process we have to do is this all seems like one seamless simplified mesh that we can make. This silhouette isn't too predominant, not too huge. We can easily reach apologize across all of this and easily more importantly, reproject the details through all of this. Now, this Sippar may give us some trouble and if that's the case, you may go ahead and down the road. Just kind of for now, just put it in a poly group. Just sort of dry a mask over it and put that Nepali group. We have any projection issues with the zipper than we can just go ahead and 0 mesh that separately. But everything else, we're going to now take and move out of the folder that we put it in. So left Alt, left-click this guy, bring it out. Like so. We'll bring this one out. And just hit that down arrow just to kind of shift everything down. Once it in bringing all those pieces out. Mu just going through. So. So now I'll just go ahead and turn all this is my older men. Sure. I got everything. You got to get this guy. So let's go ahead and bring that one out. Now let's go ahead and turn off the folder, see if there's anything else. Yep, It's everything. So let's collapse it all down. And now we're going to merge all these as one piece so we can officially begin our reach apologizing of this mesh settings. Just go ahead and click on the sub tool. Merge, merge down. So you just keep doing that. So now we have something to work with. We have our first name piece. Now this is going to be the T cell will take the longest because it has so much surface area relatively to work with. So you will need to draw upon a little bit of what you need to know like before you're going to have to build some topology around the shoulder area right here. Not necessarily have to do the same thing on the other side. Because again, for the other side, we just need to have I would say yeah, probably see that a little bit easier. We can also do the other side. We can just kind of reach, apologize, over all of this. We don't have to have any built-in like edge flow that goes around this area because again, a shoulder a shoulder pad kinda covers all this up. So there's not much point in really doing it. Just going to be doing it mainly for here in this area. And then after that, we're going to go ahead and just simply, we can also apply what we learned from our previous lesson where we copied detail that we made on one side and then just sort of duplicated that and just simply mirrored it over to the other side and just simply reprojected the details. That's one thing we can do. But don't forget whatever choice you do. Do. Make sure you're hitting that control left-click to make us say whether you open a file up are not always make sure to do with history, say so you have details that you can constantly project back and you're doing aren't your project history? Alright, so to recap, this was a video mainly to talk about a little bit about discretion regarding merging pieces together in terms of what you can get away with. The notice, like for example, this is a separate piece and this is a separate piece in the silhouette isn't too huge. So when you go ahead and do a project, you can probably get away with something here. That's pretty easy. In addition, if you were to take the low res out into a different software and do a bait of a normal map, which is a mapper texture that projects all the high res details onto the low res. You, the silhouette is not going to be too terribly affected because it's all one seamless area here. So as long as you know the silhouette is closely hugging the main jacket sculpt. You can just merge it in and just simply reproject your details on there. Or, sorry, merge it in and then reach, apologize over all of this. And then reproject your details onto it once you're done. So that's sort of the basic idea. And again, the other reason we did so much merging on here, but didn't do a completely seamless topology of light, for example. And I'm trying to reach, apologize this and reach apologize this as one mesh. Try to imagine again the pants where we did the pouch should we built in the edge flow? Remember how we tried to, how long it took to build in that edge flow. If you tried to do that same thing and merge this piece with this piece and build edge flow along here. That would take a nightmare of a hell of a long time. And it would be a real pain. And honestly, it would be absolutely necessary because like here, it's not really necessary as the silhouettes closely hugging butt here will be necessary because it has such a complex process, so it's just easier to reach, apologize this separately. So that's just sort of like up Crash Course, kinda rundown of the basic. So we're kind of going over, this will make a lot more sense as we go through it, through out. So in the next video, we're going to officially get started with shielding or reach apologizing are Nash we'll start off with trying to block out this area right here so that it can be a little bit more sexualized, like so. And then we'll probably stop center here. What we want to make sure is we have a clean edge loop that goes all the way around here, a clean ring. And then we're just going to extrude all the way down. And we want to, if we can get away with it, whatever details we make here, we got to remember to put over to the left side. So with that said, that's sort of the basic rundown. In the next video, we'll get started. So stick around and stay tuned.
101. Jacket Retopology Shoulder Pads: Okay, so let's go ahead and get started. Now that we have everything established, let's just go ahead and bring in our topology. And I'm going to start with the building in sort of some custom build topology around this area here. That way, things are a little bit easier for me. So first thing I'll do is hit the key. And I'm going to choose my insert primitives H and choose that single poly. Once just go ahead and drink, drag that Pali in, and then you can make it any length you want for reference. I may just put that length and we'll go ahead now and split that unmasked point 0. Let's go ahead and collapse that folder and go down to our polling. Now I'm going to shift depth, go into transparency mode in turn goes off. And let's go into our model of brush. So let's go ahead and reset everything. Now, we do have, there is a way to kind of loaded presets and C model or brush. But I kinda want you to get some practice in accessing the different menu over and over again until it's like repetition is embedded in your head. So first thing we'll do is we'll go with Extrude and make sure our Extrude is on snap to surface. Choose our point in we're going to choose move and that's also going to be set to surface and make sure our bases are as well. Do nothing. That's always the default we start with. So it's just feel crazy. And then move this guy along here. If you want. You don't have to necessarily put it on top of here, but we just kinda leave it there. And then just cleaning it up polygon right there. And I'm just kind of matching it to the number of segments in this jacket here. Will put him through here. Easier. Hence the batch. Do another It's shirt, just doing some kind of setting the scene. What this is going to be. Then are here. I'm going to stop it, maybe just midline. And the reason I'm stopping at mid line is because I kinda wanna do an extrude just one more here. So that when I extrude this up, a little bit of topology on this area. This is just an area and we'll crucial Ohno, I'm a lot more forgiving when it comes to the oh, the wrinkles. So we can go up or we can go down. So see your call light to kind of go just a little bit like this up. And then just simply bring a mask in and sort of sky to hop in a little bit. So you just bring it through like that. This would be an excellent time to make sure you have your art, your history recalled brush. So if you haven't already hit Control, left-click. Go back to the mash CUP. Go ahead. And just simply some edge loops there. And maybe insert signal patch. Let's do some magic. Project history. Miss some spherical spaces. That's okay. Just cranked up because it's a little bit. Do it again. You get some math. So now let's just go ahead and make some adjustments on our verts here. One is bigger brush, you get through a little bit more. Yeah, full screen. So I'm gonna go in through how we wanted to do this. Each line I'm probably going to go through. I'm just going to put like an edge right there. Was still a orange field, a little bit. Mantissa, this area here, current takes a little bit of the longest. One, a little bit we do in any of the custom geometry on seven. And she just kind of move it around. So we go to these points a little bit. So the line up fairly well, I think that thing through SEO, stubborn and UPF to access one, just go ahead and square mask. When she sees Islam to cool. Handle those really stubborn masks that you just deal with because they're so deep into the mesh. Here, within there. You see it's a little bit like it's losing its silhouette just slightly. Let me go. See. This one looks like it's just 10 and the really deep in the mesh and that's always why. So, so fun to do the verb point. Bring it out that way. So say a little bit more. We go. Just trying to do is to sort of establish that lead line detail. You can be a little bit of a process. This is just like it was with the minus. We have a problem. Just do I can't reach a bird. Solo. It mascot out first the mask. Maybe I'll see some more. It's like there's a little bit of issues here with this one. I fix this. She is. So turning to organize this a little bit more sense. Thanks. And he say, this will be probably the longest mesh to do in this section. Because it just has this topology that just wants to fight certain areas. It's nice to kind of going solo mode and mumbling. Anymore. Wants to know if I have a preference besides reach apologizing, I will go on the record as saying my personal software I use it is I've mentioned it before is Topo Gun. I'll see you never have any problems like this through it. But only column might do have about Topo Gun is the fact that without pay quite a bit, it's a bit of an extensive software. It is justifiable, but because you can mainly get through everything so quickly, but it doesn't necessarily mean you have to spend money on it. Alright, let's turn off the same on dynamics and doesn't disappear off like that. So here we can go ahead and do some extra things like we see a little bit of a bump we can go through and maybe old windows, the insert. Now you can drag in maybe a mesh, one. Scc, NHD. See you. Maybe you do that. You see sort of like captivated. So a little bit. So that's like the exact history of that. A little bit of a bump going on. If you feel that you need more subdivisions or anything like that, you can go ahead and just add some more here. And then once the project history get a little bit more fun, just something to kind of keep you in noun wire. Alright, so as we go through this and then attempt to do, go on ahead and merge these guys because I might not necessarily mean necessarily that many vertices. One, Let's go ahead and keep them just for now. We might need them because you can make them fan out. Okay. So now that we have that, let's go ahead and use that to extrude. It. Doesn't want to move. This stuff. You need workmen go smug. Want to choose certain points and just going into a nice now I'm going to try to draw an edge flow. It goes around here and then goes all the way back to the top here. But before I do that, I'm probably going to go ahead and just finish this area here. And then once we have our built-in topology there, we can just build off of that to just sort of encompass the rest of it. You can move along a lot quicker. So let's just go ahead now and just simply draw that out. I'll start with the shoulders. Go ahead and something inside. Something easy. We'll go, we'll do about here. Signal that the signal that the rest of them in snap in a little bit. Ecn saying buildings and then she leaves here so you can make the adjustments. Number the direction of where the edge loops are is based off of that. You can see that orange line right there that will tell you the direction he actually goes. If you just move it towards that direction. And if you wanted to go in this direction, good evening. You need to go into this direction. You just kinda move it slightly into the perpendicular angle. The skin, when we go a little bit techy, little bit hard to get down for the first try. The street as you can see that a little bit more. Let's just go ahead and wrote all this stuff and then put T births moves in secret, the merge those. Let's go ahead and see what we are known on here. Yeah. You have extra edge loops. Fun. It's okay. You go ahead and just delete some of them. Was his narrow, we can just go ahead and write for one student. So we just sort of building and just the topology for this area. This is the only area I want to really have some sort of definitive topology because the other areas, I, it really helps if you're going to do like a portrait to have, maybe if you're gonna see the shoulders, he definitely want, and it's going to be a close up. You're going to notice the details around the shoulders. That's also another reason and rationale behind it. So now that we have a little bit of a spreadsheet format here, Let's go on to more or less the data area. Well, we go through this one thing I do is sort of circle around and give you the TOPO one tutorial on this. One also is a little bit fun. C, C, C segments. See what? You're more. Men. And these guys move up a little bit. We're almost done getting the shoulders taken care of there. As we go to the back. We're going to not necessarily, we're going to just sort of fan out a little bit in the topology that we have and that's okay. Just he just needed more. Just a little bit more. We'll move just a little bit more. So a little bit more organized. I swear if you have OCD, this is probably the best thing you could ever will probably be finding yourself just having all sorts of fun in the whole process. So just kind of obsessing over all of these things. So this is like a fun one for the people that have that condition, right? Insert sets. But, you know, ahead and Spearman, those demos, one is merged in. There was a method of where each apologizing that came along before Edge Extrusion for ZBrush. Man, did I hate that method? Fact that method really did drive me over to Topo Gun. And that was the spheres and lot of people like to use it. And I think it's just one of those things. It's been around it's been around, I think even before. It's either 20092010, there hasn't really been a change in hows these here as functionality really weren't that much. And it was the process where you had to really go through every single bert instead of every single face like we're doing right now. And it was definitely like a nightmare scenario of flight, just spending a long, long time, hours on end. And this was of course before Z remeasure even came out. It was like the only way to reach apologize for at the time, not very fun approach that I would recommend to other people. But this pixel logic has come along since then quite a bit. But yeah, to remember that this is in fact still primarily a sculpting software. It is not a it is not a primarily a UV in software or for that matter, and reach apologize in software, it is primarily still a sculpting software. And for that reason, we do still wondering why there isn't more features. There are still more tricks you can do. Like again, we did the trick of just duplicating meshes over. You also could have done the same thing with the cylinder where we could cut off at button in the top area. Now there are tricks that can be done throughout.
102. Finalizing Shoulder Pads Topology: To see this along, but we really want you to have a set of practice before getting to that point. 0, 0, 1, which is the similar age strip here to here. Edge folded. Want to screw. You. Kind of like what we did before and just make one big giant sweet stirred and just formed spots. I loved to do in Topo Gun, but the top of them, you don't have to switch through so many modifiers. Screw. Better. What is going on? The more geometry just kind of be heating around here. And just change it to insert some sleep. Long. Project history, say standpoint. See. Even the stand sky is definitely see from the mental nerve side is certainly a southern meal. That is the mode. So almost no mass. What would be a bit again? One thing that will all say hope is that we didn't move with the edge a little bit easier than going through. More. We got this established. In theory, we could go up for a full rein then with Edge Extrusion around, it's going to get messy in my opinion. Now if we do this case, little bit, c, c, I just won't do this, planar, this one and do it sooner. So CPUs can knock that out. And this will be an issue right here. We already know when we do our projection. So 1, 2 builds the topology over that. Or we can just go through the high res each, maybe tuck that in a little bit more. So B was it emits you, which I think would be a lot easier, just kinda moving this little piece with brush Move Topological. Now we'll hope that a lot. Instead of having to build geometry around there to make it work. In God, we don't have to do this on the other side. So that shoulder pad but no, it's just kinda goes to show you, we just need to build this like straight line topology all the way across so that we can kind of set ourselves up to move along a little bit faster down the road. We're building off of this concept where we choose our landmarks. Build off of that too. The jet stream. And that would be malls. In a shop. Maybe just one more thing that we just add one more edge loop of process throughout all of this. Right, along the same lines right here. I can just get some more. Not just going to kind of tie things off here. I have a satisfying conclusion in this first video. May think, oh, we just got so very little of this done in series. Now, not necessarily. This was, we're going to be one of the more difficult areas. It will go a little bit faster once we go through this, especially on this side and then mirroring it all the way over to the other side of what we needed to have something here to kinda give us like a foundation head start when we extrude over, duplicate the process, fill in some insert edge loops and then we apply the concept. So with that said, let's just sort of how we are. With that we can do also maybe one just to kind of fill in the gap. You're noting virgin couple edge loops, the fill in the gap. Little bit more interesting. He said a modular. Once you get to this point, even probably just go through the process, may be given like an extrude down from there just for with one out, something here and go through that, all of that. We'll just go ahead and hit the process of just extrude and down, just similar to how we did to take some shortcuts. It's still going to take a little bit of time. But like I said, this was the most important part, just laying down the tracks or foundation of everything through here so that it will make a little more sense as you go this way and go down this way from every angle. So with that said, that's where we're at right now. Next lesson, we'll continue on. So cigarette and stay tuned.
103. Retopologize First Half Jacket Body: Okay, welcome back. In this video, we're going to continue on now with our greet apologizing of the main portion of our jacket. And again, this is going to be sort of a little bit quicker process. Now that we have our custom geometry, that we have, we have sort of like a headquarters foundation where we can go this way and we can go down this way. We're probably not going to do anything front yet. Just because we have asymmetrical topology over here. So I'll probably just go with topology going down this way, topology going down this way, and then just build topology a little bit more closer to the center and then duplicate and mirror that over to be used for the other side. So let's go ahead and just get started. So one of the first things I'm going to do is I'm just going to sort of take my time into establishing a good foundation of edge flow here before doing any sort of extruding. So I just kinda want to pick a spot anywhere that kind of represents a center. And I'm just going to drag some polygons strips down that way. If you haven't already, don't forget to create a save history in to your high rows. So I'm just going to bring this in like so and bring it across. You could do the same thing again. And I think I can probably just stop it right there and then bring these guys across because this has that angle. And then from here, I'll just go ahead and just center that. Let's bring in some sub insert mesh. They're right, they're probably right, they're probably right there. Just enough to sort of give us a good start. And let's see if we can do some projecting. Alright, so now we've got something going on here. That's good. We want now let's go ahead and we can just kind of back into extrude. Bring this guy out here. If we want. We can just kinda bring it around a little bit. All right, So something like that, maybe do some just a little bit more similar. We can if we want if you want to hold leftover and you can risk and and kinda like to take my time throughout all of this. It's wide. Definitely don't like risking or write their adult is so tricky sometimes to make work. That's why I always like to just sort of drag maybe just one guy out. So then from there just kinda bring in its parents and it's going to solo mode since going on, Why am I something here? To look at that real quick line with that is backwards piece here. So we're going to have to do some investigating with that when the time comes. Might have to troubleshoot that. Just the su yep, there you are. Just delete that. And again, I'm hovering over the face, selecting my delete modifier, and then moving on from there. Let's see, we'll fix this in a second. That's something that definitely needs to be fixed. That's definitely something that needs to be fixed as well. So we've got some things where you're going to need to fix before, after we get this done here. And I'll just kind of show you how I troubleshoot some things. I'm right. Let's see here. Let's delete that out again. There we go. Much better. Hello, delete, delete. All right, bring it in to about here. Let's insert some edge loops to match it. Or not, That kind. Right? Not in set 1, 2, whoops. Or three, or five. Let's merge that one and now and, and just change it to extrude. Bring it in, bring it in. And I'm not worried about edge flow. I'm just going to relax all this one side connect everything because all I'm doing right now is prioritizing everything to sort of connect in, fall in right. Now that we got that, let's go ahead and go to the top area here. Will start right around here. We can. Here's something that's a little bit tricky. If we go through and hold shift will have scenarios where we kinda have like extra edge loops throughout. So one thing we can always do is if you hold shift, we can find them. Like here's one. And so you can just kinda go through the process if you want to. Like for example, you can move it and it will like maybe just move the burden. You can merge something in there. That's one reason if you don't, if you see like basically non manifold edge loops happening and holding down shift can actually reveal them a bit more. Another way you can do it is you can go through Delete, Edge Loop, complete this one's a little bit risky because you might run into a scenario where you might be deleting excess geometry. Looks like we got that. Solo this out. Oops. Roomed. We can bring things out through that way. And it looks like I deleted the missing culprit edge loop, will still got that other one to deal with. So bear that in mind. Yeah. Looks like we got another one that's just FRD on vert some time. So I'll just simply go back underneath and just kinda extrude it and bring it back down. Let's go ahead and just bring it through that way or meal. I always like to just kinda hold Shift to make sure I haven't missed anything. Right now. I'm just going to bring it through. Not too concerned about an edge flow, just simply trying to build something in that's going to match up here. Center, reset, bring that in. So it's a little bit more angled. And I don't think that's good enough for me. So now let's go ahead and relax all this in evenly distribute some of the geometry around here. Fortunately, so one thing that does happen, and I wish wouldn't be the case is we do tend to lose half to do manual spacing like in areas like here. And bottom areas like here. So which is part of the process. And going to relax and stuff here, right? So maybe just move some stuff over. And just kinda created and a little bit equal, equal pacing here, right? And then just kinda move my brush up a little bit more in a read topologies it again, and then project up back in there. Like so. All right, So we're now getting to a point where we can just simply duplicate what we've done here. Before. You do feel free to just kind of go through and fix some things. Like for example, if you want to, you can just kind of glide over and hold Shift to kind of see if you see any of those split ends like he saw, like we saw earlier. There is definitely something here right there that has to be addressed. Turn think how that happened. Might have deleted an edge group. Let me see. Horribly lost them, my silhouette that not too bad actually. Let's go into solo. It's merged of Verdun. If we can't, then we'll just go ahead and delete that guy out. And I just want to snap. Let's go ahead and hold shift, shift, shift. And let's just go ahead and hold Shift. Nothing. So I'm just kinda tapping shift and just kinda left clicking to sort of See if I can find anything that's missing there. Same thing with this guy right here. This shouldn't have happened. Let's go ahead and delete that edge. Not crease the edge. Delete the edge. Doesn't want me to do that. So let's go ahead and delete them right here, and that's just what I like to do. I'll just go ahead and just delete it and rebuild it. It's kind of the simplest and basic solution to do for first timers is just to go through and just delete it and rebuild it there that way. Alright. Now let's go ahead and just move. I'm just making some final last minute adjustments before I duplicate this over. I think that I'd like to delete these two guys and not too wild about why I left. It looks a little bit easier. Yeah, that will be a little bit easier. Alright, so now we got something that can be now reused if you want it. Now I'm not I didn't I left this area a little bit open because again, it's asymmetrical over here, so I'll have to build it a little bit different. But for now, what I'm gonna do is just duplicate that mesh over and hit deformation. And then we're going to hit mirror to bring that guy over to the other side. We'll go through our projection to reapply that to the other side, move some verts around. In the process, we're going to have to do quite a bit of for moving actually. Now that I look at it, but it will come out just fine. You'll say for, but first things first, I would like to go back to my other piece and just finish off that side. So I'm just going to now project this through. Nice thing about this as I kinda give myself a convenient little workflow to kinda work down this extra edge here for where I may have MY needed an insert edge loop right there. I'm sure it's projected. Well, if not, just hit that projection button, there we go. Yeah. Go switch back. Okay, so from here it's just kind of the same routine as before, which is going to just simply draw a mask all the way down here. And then once it's through, if you get it getting a little bit crazy or it won't go any further. You can just kinda bring it through like that. Maybe then just go through and delete, can see my want it in different spots. So from here, you can just kinda strewn across just like before. You're going to have to do is you're going to have to find a little spot. Where did that come from? That's a weird place. And it's like we have a whole bunch of things we had to see me pretty much go through and do all sorts of fun. We go, we're going to have to find an edge flow to create a five-star junction right around here. So let's just go ahead and I'm probably going to just add some insert edge loops around this area. And I think what I'll do is actually going to just go ahead and fill in some insert edge loops here. My match it with what the number I have up here, 234567, and then projected. And so now we got to sort of extrude, ring it through like so, and get through, bring it through and through reading and through. Make one more insertion. You can kinda see I'm just kind of trying to create topology where it kind of lines up a little bit. I'm not worried about the stretch in too much. Can probably work once we relax it a bit more. Again, everything here is just a little bit of a process. Insert one more in there. The beam pick in avoiding triangles. And from here, just go ahead and relax this mesh back in like so. And we're just going to just re, distribute the edges. So they're a little bit more evenly marked. Just a bit more. We've got two more to go all the way down here, so see if we can do that. All right, Let's just bring all these out and just, just re, equalize the distance between everything. That might be good just for now. And before I bring this guy down and want to preserve that edge and just kind of where we go over here. Looks like something funky. Delete the record. When I say delete that weird way, I'm quoting a character from death note. Yes, I am a little bit of a nerd. Forgive me. Didn't eat is mainly about a guy who was very obsessive here. And you would say the words delete as ease this death note. Very funny, very humorous. And all right, so now that we got that taken care of, we're about halfway through this. Now the next lesson we're going to go ahead and just extrude along the same path as before. Again. Now I don't think I projected everything, but we can just go ahead and take care of that right now. Beautiful. Let's go ahead and no solo mode on transparency that off in kinda see we got that all lining up like so, which is good. Feel free to add any more subdivisions, like right down here. I might do just a little bit more on the subdivisions, might just bring it, for example, I can bring it down if I want, like maybe so like this. And then just kinda reproject history there if I want to or I Phi one. I can also add an insert edge loop. And just kind of not that kind of Insert Edge Loop. More like a single kind, but we can kind of add ourselves a little bit extra room here. But from here on out, we're going to then build off of what we did and do the sleeve next. So with that said, stick around and stay tuned.
104. Jacket Retopology Sleeves: Okay, welcome back. Now we're going to continue on where we last left off. Again. We finished the whole side of this. Now we're just gonna go ahead and move on to the sleep. So let's just go ahead and get started. So first thing I'll do is I'll go back into my transparency mode and probably switch back into extrude. And this time around I'll just see if I can drag out a just a small piece like that. And I can't get all of it across. And you can always just Bring it in this way. Kinda want to make sure to save everything is sort of lining up. I'm sorta just bringing out pieces a little bit left and right. Sometimes it's a little bit difficult to do that because they all want to go zigzagging everywhere else. And I'll probably just go ahead and do it the old-fashioned way. Just simply through here. Try to re equalize everything and I'm just going to and just bring it all out. And basically this similar process of what we did before, just kinda applying it. Now this is going to be a little bit more complex because we got all this fun, fun looking geometry to deal with. Like that. For example. I'd rather just go ahead and undo and just clean Extrude. Probably going to be easier doing it this way. I'm just going to simply rearrange everything. I have to make my draw size just a tad bit smaller so I don't push and pull stuff all around. Just, just trying to avoid complications here. Alright, so let's go ahead and rearrange things over here. So things might add up a little bit more. Make room a little bit person real estate. Couldn't scooch this guy over a little bit more. Excel and beautiful. Now we got some kinda going around here. So first thing I'm probably going to do, I am thinking is I'll go ahead and just add my topology from probably the edge loops first. So that I have a good strong base to extrude out a here, an easier time with it. So let's just go ahead and just switch into Insert. And we're going to want to put a good amount to the areas which require probably a lot of attention. Like the silhouette of the wrinkles. For example, keep, do nothing. These angles are killing me. And then we'll just kind of bring it through. Let's just do a project and see what that will give us. And that's so bad. Need to do a little bit more adjustments like right here, that's one place that needs a definitive edge. So let's just go ahead now and just kind of work with what we got here. I'm just trying to make some of the edge flow just kinda come form around the wrinkle that I'm saying. So we've got a little bit more wiggle room here, and let's see if we can bring her in a little bit here. Oops, excuse. Now we got a little bit more of a silhouette matching. They're not too bad. Back, back Isn't have really two heavier profile, but there is, you've got to relax a little bit because it's a little bit lost here. So let's just go ahead and see if we can get silhouette topology going. Some real. Let's go ahead and bring it through here. And I'm just going to do Sultan here. Just going to add one more edge loop. That derivative is all sudden done just in that area. So this one in and just reproject that. Now we've got some, a little bit more of what we got going on here. We can do maybe one more if we want just to kinda play that out. And we got roughly what we need, I'll still maybe put some more edge loops around here. Because if you were wanting to do something like say rigging this, you would want a good amount of supporting topology around this area. Anyways, for where the elbow bends because it's going to get a little ugly. So since I can just go ahead and put some more there, too. Perfect. So now we got a little bit more of a silhouette here. We've got a little bit more workflow. So, you know, if you want, you can keep adding more and then just maybe doing like a project history. But overall, it's going, I'm pretty happy with that. I'll just go ahead now and try to do my final adjustments through here. So first things first, I'll go ahead and hit click Save so I don't lose anything. Right?
105. Jacket Retopology Sleeves Trims: Now I'm just going to just sort of make some final adjustments here. Not that way though because we have topology there. But something like that. Whenever we go back into our Laura's. Okay. So let's go ahead and bring it about what's make maybe just a clean edge flow that kinda goes around here. Let's see here. Some of it's kinda protruding. Move it's not, it's going to be fun. All right, so B, z modular, bring it through its extrude something out. No, extrude. Let's get that going. Probably somewhere like right around there you go. She stood kinda bring some topology out. I'll put all of this, I'll put an insert edge loop in between all of this. I'm just going to make some real estate real estate to make it easier for me. All right, so let's go ahead and put an insert edge loop through there. Just so we can get some going. More like a little thickness bubble you want, you can go throughout and maybe just do a few like little adjustments. Nothing too for wherever that might be needed in an adjustment. That's something going on that might be jutting out, but chipped history. It's like some of these guys don't want to actually play. Well, wonder why that is. Excuse me. All right. So now we've got that TO situated. Let's just go ahead and just do an extrusion on one of these guys here and just bring it out here. And same thing as before. Let's just go ahead and line it up, do another extrusion and then just bring it around and sell. There we go. Bring it through. This is just kinda like the very first one where we're doing the pants trim. If you can remember back to that one. This is just the same concept. Move it around here first. Yeah. She does not like being moved. Probably has something to do with that. Let's go ahead and just think what I'm forgetting is gonna do my history says, There we go. Now we're getting this situated here. Let's go ahead and bring in Insert Edge Loop. Then just do a quick little project history on that. Me just go pretty much one more area to cover. And then we're going to be done with this one. So let's just go ahead and just, just kinda muscle through the last part of this. C here. Let's go ahead and start with I'll go to a drill soon as there we go. This is all just sort of a patient's game here. Looks like I accidentally drew something here. Let's see. Here. We're going to un-solo. See where our problem is. Some kind of a extra in guns. So what do we do? We delete that guy out. Probably right there. Let's bring everything back. Let's move. There is always fun to deal with these guys. Let's go ahead and just say this, this. Now you can't hurt me anymore. No, man. We can delete it through the edge as well. 12. Beautiful. Nothing's working and nothing snap. And it usually means that there's something wrong with that polygon like right around there. And it cannot be the same one is I dealt with, got to be fun as S1 to deal with, dealing with this guy. Let's go ahead and see if we can delete it through. Point. Play this game, cat and mouse with my character here. And this would be like I say, like examples of, you know, the process of trying to get through something and just constantly trying to troubleshoot because it is sad to say it, but you are going to deal with, essentially, you're going to have to deal with this too. If you're in a work in Z remeasure, it's sort of a process to just kinda go through. You gotta be if things are not working or they're not moving around very well, you got to be able to troubleshoot them and fix them. So let's just see if we can fix something. We'd got that taken care of me might be squared away here. From NOT will be C You like right now there. One thing you need to be very super weary of is it's very easy to accidentally click on the edge. And I guess that could be because my draw size book to you. It's always good to just kind of do like a ship smooth check to make sure everything's there. Because this is fundamentally one tricky little last part scenario here. Good. Start on the other side here. All right, so now that we're kind of finishing things up, now we're going to go into our next section of the helmet, which is going to be the a jacket on the other side. So with that said, that's this one that we have here. We're going to have the arm sort of fill in the spots that we want. We can do an extrude, but it's not going to be necessary because the arm is going to probably cover it up. If it doesn't, then we can just go ahead and fix that. It won't be too hard. But as you can see, we've got about half of this taken care of. So let's go ahead and get through the other half and then we'll move on to the next piece. So with that said, stick around and stay tuned.
106. Mirroring Over Jacket Body Topology: Okay, so welcome back. In this video, we're going to continue on where we last left off and we're going to do now the other side of this mesh. And if you look in, remember, we did duplicate in the first video what we made in this topology scene. And it's sort of what we did in the first one. But when we officially started read topologies sizing and we kinda brought it over to this place. So let's just go ahead now and just get this lined up. So first thing I'll do is I'll just work a little bit with move to see if I can just kinda bring some, some of the details out. We'll have to rework some of the mesh. But one thing that is kinda nice to do is is that you don't have to be really critical about edge flow topology here. And the reason for that again, is because it's pretty much gonna get covered up in the shoulder piece so we don't have to worry about building in anything here. Same thing with this. There's like a little pendant here. There's a little strap that goes underneath here. Just a bunch of things that are kind of like getting covered up a little bit so you can just kind of give yourself a slight break there. Take a moment also to kinda go into solo mode. Look for anything like right here, seen some artifacts. Just go ahead and just go through Z modeler and just delete some of that stuff off so you don't trip yourself up later on all of this. So I'm probably going to take the time to do that right now. If I can find a right angle to even get an and if I can't, I'll just go ahead and do this through point. Simply. Let's go ahead and delete. Know her. Here we go. I'm just gonna kinda go through all this and just look for my spots where I have all this kind of situated. Sometimes again, helping with shift can help find the culprit and all of this. If you want, you can even just kind of to that way. Or you can just hit Shift Control and that will also help. And then to Geometry, Topology and delete hidden. And that will save some time. So let's just go ahead and solo and let's just read extrude these guys. Let's bring our brush size down. And now that we have some a little bit what we want, Let's take a little bit of time up here. Like I say, it's not crucial to get it right here because again, we have a lot of our brushes, pretty much covering out all of these things. So you can just kind of see, use your brush or move brush if you want to just kinda get it in the relative spot that it was before and then just kinda do a project. And like I said, don't forget to do a history, save on your high res to get that project. So we do that, let's say transpose sub tool. We want to go through Project a and Project history and we can get stuff back that by, as you can see, we're getting our history back. So that's pretty nice. Let's just go ahead and, and go back nor z modular. And let's just see if we can bring that in. Not so, okay. We are. So now I'm just going to take this point to just kind of push and pull some birds and get things situated here. I'll probably just go in and do an edge extrusion and just taper it off. Because again, none of this stuff is going to matter anyways, because it's all being covered up. All right. So let's just go ahead and get started. Let's begin. Let's see. First thing I'll do, I'll just drag down a poly group. And I'll bring that in to somewhere around there. Same thing again. Nope. There. And then go horizontal. Know why did I do that? No, go ahead that I seem to be all right. Go ahead and then spring in our topology through here. I'm not going to add any Insert Edge Loop tool. I can count the number here. So I'll just go ahead and just bring it in here. So now we can just change it to Insert, go through 1, 2, 3, or 5, 6. Let's check that down and then let's merge those in. Let's go ahead and put something in there. And we have a stubborn bird. So let's go ahead and see if we can fix that one. See if we can go into solo. First thing I'll do, like before hold shift, and there is our culprit. So let's just go ahead and bring him back. Snap a man and see if he'll snap. Now, let's keep holding shift. Maybe we have a bird. It looks like we have it all the way through. So let's see if we can do believe some topology. This might've got transferred or go over across when we did the duplication. So let's just delete that now. Go back to point to one of my own and see where extrude. And there we go. Looks like he moved in. Hello off. See if I can move that one and it might not be able to see you there because it's too deep. It is. And since that's what we do, we just first we check, see if we can do a quick project history. There we go. Sometimes it's a bird on verts, sometimes the vertices just simply too far and deep. So now we gotta hedge flow. We can put all the way across here. So let's just go ahead and put some insert edge loops here. So 1, 2, 3, 6, 7, right? One more in. And bring this home. Here we go. Probably going to make things a little bit easier. We do a project. All right, so from here, let's go ahead and rearrange some of the vertices, vertices down. Now, bring these down, all of them. Now we're going to go ahead when we get to our chance, we're going to go through the process of merging these two in. And then on the next video, we're just going to go ahead and put do finish this main mesh off with the sleeve. And that's going to be a little bit easier because there's less wrinkles. So let's just go ahead now and just kinda lacks some of the stuff. Equalize the mesh a little bit. So we get something a little bit more easier to work with paycheck, so with that history back. So last thing we'll do here is just to make sure there's a little bit of a double-check on the wireframe here. Alright, that's good. Let's go on ahead now. And let's just simply merge these two meshes together. There we go. Alright, and we're just going to select the top one and hit Merge Down. No merch sub tool down. And if you want, although I don't recommend a completely new cemetery, to kinda bring them all in. If you're not grabbing the other one, could be a whole bunch of reasons why that is. Probably the biggest reason is is because we have relaxed it a little bit. Since that's the case, I'm just going to go ahead and take advantage. And I just do little quick real quick process of just relaxing all these and then just going through again project Jackson history. And there might be a little bit easier to bring these n or at least one of them. And I should say, Let's go ahead and still can't turn off cemetery and just kinda go down one side on either end. Little bit higher. Then we got some, I think what I did here was I added an extra edge of a polygon strip up here. So we'll just go ahead and extrude some of that. Let's move some of this backup. No move makes so just to get some of the song so that I can do a Extrude and just bring it all the way across. And you can kind of see that this is taking a little bit quicker time. That's because again, all our main work was done around that very first 11 when we started the jacket, where we started just kinda working our way through just to establishing of edge flow pattern that out. Alright, now that we have all that, feel free to give yourself a safe as pouch spotlight right here if you want. I think that this all kind of gets covered up anyways, but it's, it doesn't hurt to just kind of do like one more little strip in case none of this goes through or are you see something underneath the zippers? You kinda just kinda have sort of like a safety net, you could say. I'm pretty sure at this point at the juncture when it comes up to around here, Around here anyways, it kinda tapers off anyways. So it's just sort of like a safety spot. And I'll do the same thing again over here and just give myself a little safety net spot to incase we see through the zipper at all or the body just to give myself something a little bit extra. And pretty sure I have Anyways, pretty sick spot from there. And again, just go through and relax some stuff around. Make it a little more uniform if you want, and then just do one more project. And so now that we got that all figured out, we got that all situated. Last thing left to do is going to be the arm. And then we will project are details on this main bet base mesh. So with that said, stick around in, Stay tuned.
107. Jacket Body Layout Retopology: Okay, so welcome back. In this video, we're going to continue on where we last left off and we're going to do now the other side of this mesh. And if you look in, remember, we did duplicate in the first video what we made in this topology scene. And it's sort of what we did in the first one. But when we officially started read topologies sizing and we kind of brought it over to this place. So let's just go ahead now and just get this lined up. So first thing I'll do is I'll just work a little bit with move to see if I can just kinda bring some, some of the details that we did out, we'll have to rework some of the mesh. But one thing that is kinda nice to do is is that you don't have to be really critical about edge flow topology here. And the reason for that again, is because it's pretty much going to get covered up in the shoulder piece so we don't have to worry about building in anything here. Same thing with this. There's like a little pendant here. There's a little strap that goes underneath here. Just a bunch of things that are kind of like getting covered up a little bit so you can just kind of give yourself a slight break there. Take a moment also to kinda go into solo mode. Look for anything like right here, seen some artifacts. Just go ahead and just go through Z modeler and just delete some of that stuff off so you don't trip yourself up later on all of this. So I'm probably going to take the time to do that right now. If I can find a right angle to even get a and if I can't, I'll just go ahead and do this through point. Simply. Let's go ahead and delete. Know her. Here we go. I'm just gonna kinda go through all this and just look for my spots where I have all this kind of situated. Sometimes again, helping with shift can help find the culprit and all of this. If you want, you can even just kinda do it that way. Or you can just hit Shift Control and that will also help. And then just to Geometry, modify Topology and delete hidden. And that will save you some time. So let's just go ahead and solo and let's just read extrude these guys. Let's bring our brush size down. And now that we have some a little bit what we want, Let's take a little bit of time up here. Like I say, it's not crucial to get it right here because again, we have a lot of our brushes pretty much covering out all of these things. So you can just kind of see, use your brush or move brush if you want to just kinda get it in the relative spot that it was before and then just kinda do a project. And like I said, don't forget to do a history, save on your high rows to get that project. So we do that, let's say transpose sub tool. We want to go through Project a and Project history and we can get stuff back that by, as you can see, we're getting our history back. So that's pretty nice. Let's just go ahead and go back nor z modular. And let's just see if we can bring that in. Not so, okay. So now I'm just gonna take this point to just kind of push and pull some verts and get things situated here. I'll probably just go in and do an edge extrusion and just taper it off because again. None of this stuff is going to matter anyways, because it's all being covered up. Right. So let's just go ahead and get started and let's begin. Let's see. First thing I'll do, I'll just drag down a poly group and I'll bring that in to somewhere around there. Same thing again. Nope. There. And go horizontal. No. Why didn't I do that? There we go. I had that. I seem to be. Alright, let's go ahead and then spring in our topology through here. I'm not going to add any Insert Edge Loop tool. I can count the number here. So I'll just go ahead and just bring it in here. So now we can just change it to insert, go through 1, 2, 3, 4, 5, 6. Let's check that down and then let's merge those in. Let's go ahead and put something in there. And we have a stubborn bird. So let's go ahead and see if we can fix that one. See if we can go into solo. First thing I'll do, like before hold shift, and there is our culprit. So let's just go ahead and bring him back, snap and men and see if he'll snap now, let's keep holding shift. Maybe we have a burden. It looks like we have it all the way through. So let's see if we can do bleak to some topology. This might have got transferred over across when we did the duplication. So let's just delete that now. Go back to 0.1 of my eye on and see were extrude. And there we go. Looks like he moved in to solo off. See if I can move that one end. It might not be able to know that's either because it's too deep. It is. Since that's what we do. We just first we check, see if we can do a quick project history. There we go. Sometimes it's a bird on birds, sometimes the vertices just simply too far and deep. So now we gotta hedge flow. We can put all the way across here. So let's just go ahead and put some insert edge loops here. So 1, 2, 3, 5, 6, 7, right? And one more in. And bring this home. There we go. Probably going to make things a little bit easier if we do a project. Yeah. So from here, let's just go ahead and rearrange some of the verges vertices down. Now, bring these down, all of them. Now we're going to go ahead when we get our chance, we're going to go through the process of merging these two in. And then on the next video, we're just going to go ahead and put do finish this main mesh off with the sleeve. And that's going to be a little bit easier because there's less wrinkles. So let's just go ahead now and just kinda lacks some of the stuff. Equalize the mesh a little bit. So we get something a little bit more easier to work with paycheck so that history back like so. All right.
108. Finishing Jacket Body Retopology: Last thing we'll do here is just to make sure there's a little bit of a double-check on the wireframe here. Alright, that's good. Let's go on ahead now. And let's just simply merge these two meshes together. There we go. Alright, and we're just going to select the top one and hit Merge Down. No merge sub tool down. And if you want, although I don't recommend it completely, news cemetery, to kinda bring them all in. If you're not grabbing the other one, could be a whole bunch of reasons why that is. Probably though the biggest reason is is because we have relaxed it a little bit. Since that's the case, I'm just going to go ahead and take advantage. And I just do little quick real quick process of just relaxing all these and then just going through again project Jackson history. And there might be a little bit easier to bring these and at least one of a man, I should say. Let's go ahead and if you still can't turn off cemetery and just kinda go down one side on either end. Little bit higher. Then we got some, I think what I did here was I added an extra edge of polygons strip up here. So which is go ahead and extrude some of that. Let's move some of this backup. No move mics. So just to get some of the songs so that I can do a Extrude and spring in it all the way across. And you can kind of see that this is taking a little bit quicker time. That's because again, all our main work was done around that very first 11 when we started the jacket, where we started just kinda working our way through just to establishing an edge flow pattern that out. Alright, now that we have all that, feel free to give yourself a safe as pouch spotlight right here if you want. I think that this all kind of gets covered up anyways, but it's, it doesn't hurt to just kind of do like one more little strip in case none of this goes through or are you see something underneath the zippers? You kinda just kinda have sort of like a safety net. And you could say, I'm pretty sure at this point at the juncture when it comes up to around here, Around here anyways, it kinda tapers off anyways. So it's just sort of like a safety spot. And I'll do the same thing again over here and just give myself a little safety net spot to incase we see through the zipper at all or the body just to give myself something a little bit extra. Sure I have Anyways. Pretty sick spot from there. And again, just go through and relax some stuff around. Make it a little more uniform if you want, and then just do one more project. And so now that we got that all figured out, we got that all situated. Last thing left to do is going to be the arm. And then we will project are details on this main bet base mesh. So with that said, stick around and stay tuned.
109. Retopologizing Long Sleeve: Okay, and welcome back. In this video, we're going to finish up the jacket by going ahead and just projecting some reached pathologizing the sleeve here. And then we're going to try to project some of our details that you see here. So let's go ahead and get started. First things first, let's go back in our transpose mode. And I'm just going to simply drag out a strip like so. And I may even make that stroke just slightly smaller. And like that. Maybe. And I'm just going to go ahead and just kinda bring that guy. And if you're having any trouble with any of the emerges between here and here, just go ahead and kinda zoom in there and just kind of fix it there. Again, we do have a little bit of wiggle room. But you want to kind of make it a little bit of adjustment room for your space because it can really create sort of a spiral concepts. So you kinda wanna get it so that it tapers and a little bit. Okay, let's go ahead and bring another one in, C, the snap. And then another adjustment. It's kinda nice thing is as we get to have nice little clean edge flow for us to work with where you go. And you would think we could get away with something like let me just do an extrude from everything aligned. But we get a lot of messed up scenarios that happened because of that. Just geometry like finally poking into each other. Let's bring it in. And again, let's tuck that guy and let's work a little bit on the other side here. You can already tell from our silhouette here we're going to put some good and some geometry in there to kind of break that up too much. Here. Can't see it. So let's move the angle the camera. And if you can't find it, let's just go ahead and then just okay, so we got to troubleshoot this one. Nothing's really warping. So first things first, let's just hit shipped to test it out. Let's go into our solo mode with this. And let's see what we got. Good at something over there. And select nothing's really having a problem and might just be my chess, be that it's too deep and there we go. Take it out solo. Let's go ahead now and bring this in. Spring it there, just go ahead and do our snap room here. It's like we got another one. Let's go and do some project history here to see where it's at, where we are. And one more. And I knew that would help him bring it in that far. And we are now officially halfway there. Now, let's go ahead and turn off dynamic. And let's start putting some edge loops around here. So we got definitely a silhouette that we need to think about here. So let's go into our Insert Edge Loop action. There we go. We want to go with insert single edge. Put one right there. Definitely want to put some here. And I'm just kinda looking at the silhouette and where it kind of needs it. Let's check that in there. And we've got something there. So we're going to have to now look around. We may need to put something right there, sort of help out silhouette just a bit. Definitely something needs to go there. Right? Almost there. Okay. So now we have a little bit of work here to just kind of make some adjustments. I'm just going to kind of look for places where we could probably fix to kind of make it a little bit less blocky. We have like some of these topologies are like kind of being used in some areas and others are like barely barren. And it gets pretty dense of edge loops going on here. I'm kinda just get a little bit more. That'll be great. All right, so now that we have that, let's just go through the process of extrusion. Again, you can do the extrusion this way. I'm not the biggest fan of it to be truthfully honest that way because it just and why is it doing that for me? Something must have happened here. Something clearly must have happened here. I extruded this. Apparently had something going on here. Yeah, we may just have to just kinda fix that because Sultan definitely happen there. Like we're losing a whole bunch of time by just fixing that, but we just want to kinda cover our grounds here. So let's go ahead and just reapplying. We're just gonna do it one more time and we got ourselves, our piece. So it looks like it's all there. So now let's just go ahead and extrude up here.
110. Reprojecting Jacket Details: You can kind of bring it in like this. It's not my favorite way to do it, but because quite frankly it's a little bit messy in my honest opinion, but because we are still rearrange like birds and such, but you can bring it in this way if you want. Kind of just sort of like chunks. And this is a little bit of a different variant than we did before. But with this, we can produce a little bit more of a process of of skipping a few steps. But the problem is, is they like to collide in with each other. And there might be a little bit of a trick to get around that is setting, but I have not completely sure just yet because like I said, this read apologizing method, quite frankly, it's definitely something that is doable, but I will strongly say there's other approaches that you can take to reach apologizing it. Again. Topo Gun probably would be the easiest one, but you can probably still get away with this ring that in. No, not Karen and just bringing it through, which is good justice, hug it all in. So now we'll just go ahead and again, some insert edge loops into here just so we can fill out the silhouette ejector history through there. Get a little bit of a lost projection. You can always again turn up the project history a little bit more. If you can't make it work in any way, then we're going to have go through the process of having the fun stuff of moving and snapping it up here. So nothing. Let's go into MOOC brush, bring this and so it's a little bit closer, must be really, really deepen their right around here. There we go. I'll just go ahead and insert one more in there. Just to project it. Can mash. Good. All right, so we're almost there. We're at the home stretch with all of this. So just bear with me. Hi. Okay, so now that we got that, we have our piece, that is our piece that we have done now that we have all those things taken care of, we now have completed pretty much our main piece. This is one of the longer pieces again for this mesh. But now that we have all of that done, we can now go through the process of projecting detail back on. So let's go ahead and get started with that. A checklist you have to do. Here is, is that it's pretty easy to lose anything. So you kinda wanna just divide it up a little bit more. And here's another one right here, you want to look for those areas. So I'm gonna Z back down to its low resolution area here. And I'm going to go ahead and look for a couple of areas here. We can kinda see one area that's a little bit off. It's probably because of something. We can just taper it and this is not to. Similarly, we can add geometry with an insert edge loop or we can just taper it and I'm just going to be lazy and do that. So again, let's go through the process divided up a couple of times. We'll cover some open-ended geometry like we saw in the cuff lane. And it doesn't look like we got any. So let's just go back to our lowest resolution projector history, X1 up, projector history, next one up injector history. And on this one, we're going to have to you're going to see me having a probably clean this area up here. And that's okay. Because the I like doing that. Remember Project history just sort of gives us a head start in all of this. So say just like to smooth it, just kinda take care of it there. And it's like another area that we forgot. Maybe need to projector history through. Whoops. Took the other side. And it's fine. Get some stuff over here to work with. Don't worry about that one too much. Just always make sure to kinda, if you can, try to make an effort to and check the other side of your history, recall as well. I knew that area was gonna give me trouble. Say so I'm just kinda smoothing, reprojecting. It's like it's going through fine here. Smooth reproject, just kinda fixed in some areas, That's all it is. Smooth reproject. Little bit crazy here. So let's just reprojected, make sure that you're facing. The key to all this is making it face directly towards your viewport to concern about all this stuff. So let's go up and division and projects and more history now. It's a little bit cleaner, little bit crisper. Still got some area right here to work with. Let's just kinda bring it all in. Little bit clean. And again, we can just kinda That's all we're doing. We're just sort of re, re, projecting topology and Little bit somethin errors going on. So maybe like a Bert de Birch, D smooth, I'm just kind of smoothing it through each subdivision, kinda working it out. Not worried about that or that. And maybe just a little bit of that. Take that back. I might be worried about this part where we go out here. Just kinda pushing it back down with smooth and repopulate backup with history, recall, and making sure the viewpoint is always facing towards me. This one's a little, like I said, this one is just a little bit more of an advanced example to be doing all this on. So give yourself a bit of time in re-establishing detail. It's not like the other ones. It's not like the shirt or very simple object. Definitely need to take your time. All right, let's bring it up one Let's take a look at what we got. And I said I don't really to freak out over this shift, bring it in, shift, bring it in, bring it in. Then maybe bring it in from an angle. You can doesn't handle the overhang concept very well. There we go. So more slowly getting there. Slowly but surely, see if we can ship bring this down. There we go. Shift crossed again. And I guess that's as good as it's going to get from that angle. Not too concerned about this stuff. At the very least, and wasn't maybe something like that. I'm just kinda doing iterations of shift. Just so I can get cleaner and cleaner and cleaner. Holding Shift iterations. Cleaner and cleaner and cleaner. This backside is what I was always fearing because I didn't make the adjustments on this little tag here like I was supposed to. So I'm going to run into a little bit of troubles and that's a good thing for you to say. See you can kinda know the pitfalls of limitations if you will. Let's go ahead and bring this. And remember he get a different projection result based off of where your camera is facing directly right in front of you. You're gonna get a different result. We don't have very much going on here. And to my surprise, Let's go ahead and bring that in. All right. Let's go ahead and honestly, I bring in another subdivision and kinda see where you can try projection history. But I'm afraid I might make things worse at this juncture. That's a little bit nicer actually. And that's because we really took our time with that shift. Now, one thing I will have you note we do need some topology here, which means we might need to do another subdivision, which is fine. Just make sure you have a good foundation of just relaxing this topology and like so. So right here. This is definitely going to be one of the fun ones right here to handle. Then bring it in. So I'll come and around. And where are we at with that? It's going to be a little bit jaggedy, but we can do one more. That might just be the one we need. And I may just stop with that one. I'm just going to do some sort of clean up here. Like so. And that might be all I work with to re-establish my details. You may be wondering where I'm going with this one. And again, this side isn't as prevailing isn't as important to me as the other sides. The other sides we're about how shall I say it? It's going to be covered essentially. And, you know, there's some kind of get in a little bit lazy on it for good reason. But that is not acceptable. Which means I might have to go down some subdivisions. So I can bring that in insurer to check the other side when you're doing that. Let's see, I'm just going up as subdivision in each subdivision, I'm just smoothing out that tangle meant checking the other side. Going up one more. Smoothing out the tangle meant check in the other side. Going through one more. And again, we've kinda been a little bit lazy there as well. So we gotta go through that process. It's pretty narrow. Going to have to maybe go with the smaller brush to deal with this. Smaller brush size will get the mean. Kinda see how we're doing this restoration process. All right. So that is our jacket. So if we go through this and now when we hit W, We got a good read topology guys jacket. And when you move it around, it kind of rises to its own area. It's something that's low enough that can be transferred over. So only thing that is left is just to export it out. So with that said our rename it and put in the reach. Apologize. So with that said, that's this one. We're going to move on to the next one here pretty quick. So stick around and stay tuned.
111. Armor Retopology Layout: Okay, welcome back. In this video we're going to continue our read topologies rising and move on to the next piece. And for that, we're going to be doing the next most difficult piece, which is going to be more of a challenging puzzle for you. And that's going to be the shoulder piece here. And that's this piece we see here. If we take a look at our read topologies piece, I move that again in our folder and I renamed it main jacket, underscore high. Remember it's underscore all lowercase, so it's consistent with the underscore lowercase high and everything else. Again, that's all because of baking option we want to take advantage of and Substance Painter for the upcoming course. So let's go ahead and move on. So first thing I'll do is I'll just go ahead and turn the visibility of this off and hold left Alt, left-click on this little piece right here. Now I'm just going to go ahead and like before I'm going to just open up my jacket and just the folder of my jacket, and just move that sub tool with this down arrow until it's out of the folder. Now once you have that, you can just go ahead and click on that. And you can then just go ahead and turn the visibility off. So let's hit after foramen and see what we got to work with here. So looking at this, I can kind of see there's a little bit of a jigsaw puzzle in this. First of all, we need to build edge flow topology around each one of these circles. We also need to build edge flow topology that is around all these, this area right here. We also need to build edge flow topology around all these. So a little bit of a jigsaw puzzles. So the first thing we'll do is, is we can't always control the density of how many polygons are here. And we do have a little bit of choice as much as where, we don't know exactly where the points are going to be though here. So let's go ahead and build circular topology around here first. And then we'll go ahead and take it from there to build edge flow topology that connects into all of it. Now, we are not doing this through 0 measure because 0 measure more than likely if you tried to 0 mesh any of this, There's probably going to be some tears here. Could use poly groups to kind of save around this area and do some crease edges. But there's probably going to be some tears of six-star junctions going on here that will really mess up your subdivisions and give you pinches in your subdivisions and some issues with your bakes. So we're just gonna do a manual approach breach apologizing since it's got a complex silhouette. So let's just go ahead and get started. First thing we do as we always do, we just going to go ahead and hit, we're going to go ahead and hit the, put a polygon. Polygon, insert mesh in there. So insert multi mesh primitive H, switch it to single poly. And let's just drag one or right in there like so. We'll just go ahead and make our edge flow with this. Let's go ahead and split it across. Let's go ahead and just do a split unmasked so we can work with this guy here. And I have myself a little bit. If it's a little bit too high, I might just do a real quick see plug-in process. First of all, I'm going to duplicate this so I don't have any an issue. And I'm just going to go through C plug-in, decimation reprocess current, just going to make this a little bit lower rows so I can give a slightly more higher frame rate going here when I'm doing my edge extrusion. So just chose, taken some samples. Here. Just be really quick, and I'm just doing this so I could lower the polygon count in decimate this down a second time. Once you do that, let's just go through see plug-in and let's just estimate that down. That way. This moves a little bit smoother for us. So let's just go ahead then and hit Shift F. Let's get into our ghost mode, and let's turn off transparency. And let's get into our ZBrush, be Z M key. And start setting everything up like we always do. Holding down space bar and choosing extrude, snap to surface, holding down the Move brush, choosing snap to surface. And for now let's just hit, do nothing. So all I'm gonna do is I'm just going to kind of just kind of take my time on this one because what we'll do afterwards is this will reuse, this mesh will duplicate its topology around to other areas. So that will make it a little bit easier. So one thing you just wanna do is just now be precise. You can do any form of density that you want. You may, you can choose this density or you can choose a lesser dense version. If you want. Kind of see what I'm doing and just take my time. Now again, this is going to be the second longest piece for the jacket that we're going to be making, even though it's a little bit smaller. And that's because the topology is a little bit more complicated, a little bit more challenging. And we thought that might be a good thing for you to have that backup. Right? So let's go ahead now and just rearrange everything. And so perfect. So now when you have that piece, you make sure just go ahead and just kinda center or through and you can just hold down control and drag that guy out. And we can just go ahead and just simply just going to kind of adjust my rotation so that my z is perfectly straight. So that way all I need to do is just kinda size it up and push it in. And I don't need to worry about anything. And now like before we just kinda reusing our topology so we don't have to do all of this over again in case it can't be overstated. Let's just go ahead and go back to our higher reservoir. And let's go ahead and click on that left Alt, left-click it shift. And now I'm going to go ahead and hit down Control to do a save. Histories. Say that way. When I go back to my other guy, I can do a history projection. You can kinda see we get to save ourselves, which is still a little bit of time, just those small tricks again. And we're just wanna make sure after you do the history project, just kinda take the moment to kinda take a look at the, do some adjustments here and there comes one right over there, for example. Whenever we are, one right over here, and little bit one right here. So we've got a little bit more of a circular topology. So we're gonna go ahead and just do this again, just going to hold down control. And we're just going to apply the whole process again throughout all of this. And I'm just kinda surface lining all of this right now. And it's pretty much all I'm doing because this is a different surface and the different angle, what to do, of course, project again. And we're going to have to make our adjustments. Sometimes you'll have to move that Ang, you will have to really angle the camera so you can see things a little bit easier. All right. So let's go on ahead. And we're gonna go through this just a couple more times to fill out the other areas here. And one thing that could be made is that if you want, you can go through and do an extrude and just kinda go downward. It does give me some functionality. It just gives me a little bit of golf. I've had it happen in mind, but it's just sort of messed up process where I'm projecting and it kinda gets stuck. Weird spots that are uneven all the way around. And it's kind of weird and funky. I don't want to have to waste time here, turn to show it, but it's a little bit off. Okay. So we're just going to go ahead and just bring this in. Scale it though. Well, actually we are going to scale it, but just simply, once again, just making some adjustments. And we're going to push it in. Like so. Then may try to go through and we'll just keep it there. Kinda boat that slant and then just work a group loop through there. Let's just go ahead and project that. Now. We're going to have some issues starting with up there. Worried, Don't worry. So now we're gonna do this one more time. May just go ahead and rotate this around so I can take advantage of that flat edge over there and work with what I got and just kinda push it in like so. If you can try to see if you can kind of rotate it around so things might be able to line up here. Would be kinda nice. And let's just go ahead and push it in a little bit more. I just need to just do a project and then work our way around it. So reject that history out. And again, it's just work the bird so that they're lined up properly. You're going to see if I can make some of these just sort of match up to a little bit of an edge flow. Let's keep it like that. All right, so we've got that side taking care of. This side's a little bit of cheaters side. I kinda have a little bit of an issue going on here, so we're going to have to work with that. So let's just go ahead and just take care of those two. So first thing I'll do is I'll just again hit Control and translate across with it. When I say hit Control, I should say holding down control. And this is almost like before, you know, it's like you're trying to build your topology. Let's check that now. And let us go through rotate that. Now we have one more left, so just go ahead and work with that now. So we'll just go ahead and hold down control. You'll notice we got a new challenge ahead of us here. So we can reuse the flood area again. We're just going to have to go through again and just maybe I'm thinking one thing for here. I don't think I want to cheat on this one. I think I might just go ahead and redraw my topology on this one. So what I'll do is I'll go ahead and do an edge extrusion and do a insert loop here. And then just change it to extrude. And let's just see if we can just make something cleaner. Here. They go. Just say that. Just see how I'm just taking my time on this one. I'm trying to go through any kind of a rush here. Let's just make it go up here. We'll go ahead and just to sue and get something there. Error is little bit of change. Also very stubborn. See if we can see if we can bring that guy out a little bit. We're having trouble moving that bird. Looks like they're there. And make sure that everything is copacetic. Not. There we go. All right, so now that we have all our pieces here, we're going to start working on trying to connect all these pieces to one another. So now the next, that's going to be the next task in all of this. So more we'll do now is we'll just kind of bring a mesh here. And you just, it's kind of like how do I put it? Like a where's Waldo? Sort of a jigsaw. Not a where's Waldo, but just kinda like it's like a crossword puzzle a little bit and quite frankly. So I'm just going to lay out the foundation for this area here. And kind of see how this kind of all snaps in together here. And good, it's a good thing. It is a little bit Angular, so we can actually work with this. You can actually get away with some fairly clean topology through here. It's a little bit high, so let's just reject or history. And do not know why that is so high. There we go. And kind of see how all of this sort of kind of angles up a little bit. Like right now you don't have to go this way. Sometimes it helps just kinda go through now this way. And just sort of rearrange the puzzles here. It is sort of like a puzzle piece. It's just where it goes. But when you do that suddenly becomes pretty obvious. Now you just kinda fill in. When you start from a different end, he kinda create sort of a viable solution for you to see the other side like this way. So like right here. And obviously it should go without saying that when we do this, we're always going to be doing quads in all of this. So never go with more than five sides in any polygon. So let's just go ahead and just, I'm just holding Shift and sort of relax. Seen all these guys out. In fact, might be able to hold shift on all this. Now, some of these areas, it's not going to give me a not going to give me a good result. Switches have to live with that. Let's see. So a little bit too much of the cheap scenario. Let's go ahead and reproject that. There we go. I think we could have done maybe something that gone down here. So let's just go ahead and delete that. And delete this guy. Delete that guy. Let's bring something now. There we go. Well, it's just kinda see the difference here. All right. So now that we have, that we have sort of a good base start off. It's just like with the pouch. It's just like with the how we did the shoulders and we just laid out our foundation of connecting spots basically like the key noticeable areas. You're probably wondering why. I didn't do a key noticeable area right here. And the reason is, is that I wanted to not guess. I didn't know how many polygons I would need here to coincide right here. So I decided, since this is the more complex area, I will extrude and use whatever polygons are necessary to fill here. And then I'll just extrude this across from here to fill in all the spots. So that's just how we got through to that next video. We'll go ahead and just do the other side and we have time. We'll get started on this top bed here, which will be like the final challenge. So with that said, stick around and stay tuned.
112. Armor Retopology Filling Landmarks: Okay, welcome back. In this video, we're going to continue where we last left off and we're just going to continue to read topologies, guys, based on the landmarks that we've carved out here. So let's just go ahead and get started. So from here, I'm going to go ahead and now do this quadrant section. So I always start with the easiest stuff first. When doing any of this. That way it makes it easier when you fill in the gaps to see where your options are as you close in on this area. So that's kinda what I'm doing right now. This stuff is relatively easy. Itself. Probably do Insert Edge Loop right here. Maybe we'll just do one just to bring it in. And then we're just going to go back into extrude kinda bring something out there that way when I bring this in. So it's just going to make a little bit more sense. I'm just gonna just kinda work with what we got here. And oops, that is really getting crazy. So let's just go ahead and just maybe just bring it out just like that. And then I can yeah, I can. Here we go. It's just going to go ahead then and just to the next area here. Just start from here. I don't like having to have to resort to so many triangles, I can tell you that much. But triangles are considered, okay? As long as they're not to fall primarily turned into an opportunity to create like six junctions or anything like that. So we're going to be our right there. Let's go ahead and bring this guy and more. We are. Now I'll tell you again, nice guys all to snap is like a baby sitting a little bit. What I'm gonna do is I think what I'll handle out. So I think I'm just going to kind of bring it here first of all. It myself. Another row. Now. Now I'm sorry. I'm just going to go kinda looking at it right now and I just kinda like the topology kinda behaving certain way. It's not really going to do too much. I was gonna just kinda bring this guy all around, but I kind of prefer it to be a little bit even and clean here because we can just simply go up here. No, I'm not going to try to fill it out. I'm just going to go ahead and just work things out on this side now. Do not know why I'm struggling with that vaccine. Okay, so now we've got something going on now on this end, let's just go ahead and do what we do and just kinda sort of relax at all in any places that you have tries is not going to hold up very well. You've gotta be careful. Put it right there and just do a quick little project history. And now we got something going on over there. So now the next part is going to be a challenging one for us all we showed what topology looks like connecting into these areas. Now we're going to have to figure out a way to connect these three areas and make it line up here. So we got some options here. First thing I'd like to do is sort of encapsulate, if you will, some of the geometry. So it's a little bit closer in and we can see what we're working with. So let's just go ahead and do that. So I'm just going to maneuver through here. Like so. Taking care to know, just making sure that those births are lining up at that edge, that little edge here. I'm gonna kinda tuck this guy in a little bit as we go in and it's going to get awfully cramped up here. And that's okay. Now I'm just kinda thinking about lining everything up here with the edge loop I have. So maybe this edge loop will be for here. This edge loop might to work. Truth be told the social him probably would work right here. And then we'll just do an Insert Edge Loop may be here. I really wanted to take some time. I'd actually realign the edge flow to this to go all the way back down here. But that's not going to be too terrible. Let us take off to nothing. Need this one to here. Now. You can kinda see now, what's the pattern? Connecting everything through? Let's go ahead and make it into Boyd ourselves a six-star junction or anything like that. So here, here, here. And essentially I'm just going to now add a here to what we got here. So we're just getting ourselves closer. Like I said, you can kinda see how it's a little bit like a jigsaw puzzle in some regards. But every extrusion, I'm always making sure that that increase that little line there is being respected and there's a vert right on top of there. Because that's going to help a lot when we do our and we do projections. Okay. We're probably going to need more lines somewhere along here. So we'll have to build in some topology there, but we gotta good start. So now let's start working on connecting these three. Or if we want, we can now work on just kinda making a little sheen go across here. Either way. We'll start off with, I'll start with the connections here. Now first off, just us, just start making a connection and just seeing what you can make from it. Maybe some sort of an edge, Insert Edge Loop so we can start to ridging something here. So let's just go through insert way we can traffic off. You're going to find yourself also looking at some insane and I kind of like to four when we just did it, like maybe like this. And then just kind of meat in it and the sun are there. No2 is an option. Right? So we've got something that's a little bit more making sense there. Let's try now this end. Let's just go ahead and stop it there. See if we can connect something here. And I'll start once more. Maybe around here. Just kinda see, you know, does help to do a little bit of planning. Let's do a little quick check here. See something. Solo. Let's go through solo. No. It's just to lead something. I'm just kinda checking my topology, making sure that there isn't any double-sided faces that are anywhere around here. Doesn't look like it. Right? So let's just go and keep going. Alright, so it's looking like we got a little bit of misalignment cone up here. We got to make a choice, maybe just kinda bring it in here. Or better yet, having this Tauri star junction kinda instead go down here, which would be probably nicer school in to delete this face. Screw up. Let's go ahead and delete one of these. So let's go through and complete. Okay. Let's just go ahead and try one of these guys off. One thing I can do is rearrange the words here.
113. Retopologizing Armor Middle: Let's go ahead and go through and think. And what I'll do is I'll try to rearrange one of the edge flows so I can kind of cut through. There we go. So hard sometimes to try to get these guys to play nice with one another. No, I got it. So if you're supposed to slide, but it won't sometimes. Here, I think I might know what's wrong with this one. Well, let's solo that one. And if you don't want to stick, delete. Beautiful. Why did I go through so much held to just do something like that? Well, because I want to put an edge loop a little bit over here. So let's just go ahead and insert, bring it in and bring this guy. And now we can have some, a little bit more convenient here. All right, so now we've got something going on here. So we've got a partial taking care of in this one. So now we're kind of making our way around. Looks like we got a little bit of a issue here. So can fix them. So now we're just going to keep it right there and just work on another PRO, another section and just we can align them up. You get to a point where you're just getting a little bit lost on not sure where to go. Just start back to the basics again in another area. So like for example here. See if you can just start lining things up. And I start with what you always know, you know, this year sure. Is going to be a good place. Or this place will be a good place. And you're looking down here. So maybe an Insert Edge Loop might work. So like I said, a crossword puzzle you're trying to make things fit in. And so again, we just go back not too sure. And we want to look straight. So go ahead and bring it in. Insert edge loop here. Tied in here. And then let's see here. Maybe we can extrude here. So now we have a little bit, kind of a little bit, we have an unpleasant start junction. I'm not too happy with. We can just draw in maybe just one more. Insert. Here. Go into Delete mode. Oh crap, no, delete edge. There we go. Well, good thing I deleted that. Let's see here. So now that we have that, let's go through extra, let's fix that. Kinda just C or just kind of work in the pieces out now. And there we go. We can now just sort of go through create little bit more of a commonality here. Of course, by shifting that we kinda dug up a little bit of a piece for us to either merge or delete, delete, hold Shift to make sure you get rid of it. Good. Now we're just back on track. Course. We're going to have to do some air and we're going to have to merge these guys in. But let's first of all project because I just relaxed everything. There are two quick check here. Good. All right, so we've got ourselves a little bit more topology. We got it to taken care of here. So we're making our progress. Let's go ahead and just go through just continue the process. So we say when you're not sure where to go, just always helps to just start in a different spot. Now, you can kinda see, do line up a little bit here. Just an insert edge loop in there. Oops. Just to kind of work with myself. One piece. Let's just move that in. No, not that we're done with that. Let's go back into our extrude. Let's just from three mesh, all of that greatness ouch. Just wanted to go ahead and just put something in here to line things up, get a little bit smoother and go on one or play with my okay. That's all right. Not hurt. Probably would've been a good place for my insert, but I'll just do it with another try. So we're almost getting there. Got a little bit more of the topology to work up here. But we are getting through this. One thing we can do to sort of finish up this session is going to be just kind of closing the gaps in here. And we got ourselves a string, which is fine. We always like to see them. Let's go ahead and it turned to leave this guy out of there. Hold Shift C, ring in order next. Well moray. So once I see this, I'm going to try to come to extrusions that go up here. There we go. That's why I'm not getting a one ring that in that woman. Let's go ahead and bring this on. This point. I'm almost tempted to just cheat a little bit, little bit careless here. Let's just delete that. Let's go ahead and bring that out. That is horrible. And delete this edge. Let's just put a simple Insert Edge Loop go through here. And I will just make things so much easier when we extrude like cell. So we'll just go ahead and bring things and all the way to the top here. Like that. Let's bring in our insert edge loops to kind of meet all these guys. And the center here. I am having a hard time with my take. I have my my face brush. Delete is set and the setting that I don't want. And that is why I'm having to delete over half of the things there. Right? So now that we got that, let's go ahead and just knock out some pieces here. Force project that. Q. Let's go ahead and shift round. No, nothing in there. Oh, where's our guy? He always got to meet it at a certain angle and you, before you can get through this thing. So let's go into solo mode, see if we can manipulate this. If not, we can just delete this edge, but we want to, we have here to leet. There we go. And now let's bring it back in. There. We can't figure anything out. Delete. Well, we can go ahead and settle for it. I'm not too keen about that odd ball Insert Edge Loop that I put in for a solution. So I might just go ahead and bring it out and then just kind of tie it off somewhere around there. All right. So once again, I'll just go through like I missed a few spots over here. So I'm just going to fix that in a sec. Just re equalize the mesh and then reproject. And now we just got a few more spots here who looks like I accidentally went through and went through and smooth something out there. So we'll have to go through. All right, Here we go. We go. And now let's project that history. Good. Now we just need to do a couple more places of clean up. And then we'll be done with this session here. And that's going to be down here. And one more over here. And if I don't get any sort of horrible, I don't want to have to go through fighting this all over again. But if I get something like this going on where I'm deleting edge loops and other things are being deleted. It's usually a good sign that I'm having some manifold geometry that's being stuck to another area. So it's actually a good thing. It's better to just simply rebuild that. And instead of having to deal with all of that. Like so. I guess one at a time. Let's do this again. I'm alright. So now we've got that all taken care of and do a once-over on here just to kind of really smooth and Michelle and then reproject it. So now we got it once again looking keen. There's anything else saw on here. You feel you need change, feel like you need to change that Sarai, but this is where we're are stopping spots going to be and we're going to try to finish off the underside here and then see if we can do a little bit of work. Probably not by much, but just a little bit of work underneath. So with that said, stick around and stay tuned.
114. Finalizing Armor Retopology: Okay, welcome back. In this video, we're going to now try to see if we can continue this session and if possible, Let's see if we can finish this one up. So let's go ahead and begin. First thing I'll do is now that I got the hard work out of the way, let's just go ahead and read topology guys, all this stuff that's at the end. And if we can, let's see if we can get away with some edge loops in the process. So first things first, I'm going to want to go through and maybe just fill in all these areas here, just get those out of the way. Now again, if I hold left Alt, I will access all the a full ring edge extrusion. And again, that's not necessarily holding left all to, it's just tapping left Alt. And you can kinda see an extrusion go on here. It's just a different mode of edge extrusion. I'm going to just go in partially. I don't really need to take it any further than that. And I'll just do the same again. Just kinda bring it in and just kinda bring it in a little bit more. Same thing again. Throughout all these. Really need to complete any of them. So like so. And then one more. All right. So now we got a little bit of thickness in all of here. So we hit Solo, we can kind of see. So that's going to help us a little bit when we're doing our projections. So now that we have that, let's just go ahead and just go through the whole process of trying to get all this taken care of. You can, if you want to remain in the left Alt state, if you wish. But I might do this one piece at a time just to sort of have a little bit more control. And if you have any issues, like to work with a little bit of enabling consigner already know that I'm probably going to run into some issues with moving vertices here. There we go. Kinda see how it just kinda we make our way across. It's pretty simple process. It's putting that out again and try. Let's make it my way around here. Like so. Until we hit a little bit of a spot, spraying that back. Alright, so now that we have that, we can just continue on here. Just go ahead and we have pretty much just these two spots here. And that will be all, just sort of just the section that you see. So it's not going to be too terribly difficult here. It's just sort of a formality. Everything's kind of a formality at this point. Let's bring it from here. I'm just kinda speeding through this. Kind of bear with me. And as one catch it. Some fun there. It doesn't wanna catch it. Right now I got two vertices, one here. And we got also some extra stuff here. Let's go ahead and smooth this out and see what we can look out here. All right, Since delete that, no more burdens, merge that in somewhere. Okay? And now let's just take one more row down. We should be good to go. This brings some of these back in a little bit. I'm gonna say I'm not too terribly worried about time things off here. Because again, none of this stuff is going to really deform them much. And closer in the last section here. So as you can see, it's not really all that difficult. Now I already did a history save. Again. I did a history save on. My not the second this mesh, but the mesh I duplicated. So I'm going to project my details from that one. So we should know now how to do history saved. So the next thing we're gonna do is try to restore our details off of here. So first thing I'll do is I'm going to delete this piece here, like so, and hit Delete. And now we can go ahead and just if you want, just hold down Control left-click and in case you haven't done the history save. And now we can just go through the process of reprojecting some of these details. So we'll begin that. So the first thing we'll do is before we begin anywhere, we're just going to divide it a couple of times and look for some open geometry anywhere. And it doesn't look like it's too terrible. But we would like to kinda investigate what's going on up here. So I'm just going to hit shift a little bit and it looks like we've got some going on here. And there you are. So just want to divide to look for some Abner, moralities. Not sure if that's some are not. Let's take a look. Might not be known. It is. So we've got some backwards facing Pauli's. Right? Let's keep going. Now. Do a couple of divisions. See if we get anything here. Now we have that band that because we tied something off there. So that should give you an idea of what, the consequences of what happens when you to do too many tiles. So we'll go ahead and just simply bring it in. And that just kinda go in through this. It will confer any weird spots. Probably a weird spot here. That's probably because of the little tile that we did. That's definitely a tie off. So first thing I'm going to do is I am going to just sort of rebuild a little bit of the topology here just to sort of clean things up. So I'm just going to go through the whole process here. We kinda have it just like teetered right on that edge here. I may just let it go. Let's go ahead and now I've got a hole here we left. So let's fix that. It looks like that hole was somehow because when we deleted, something must have also must have automatically rearranged itself. So like I said, we're just going through this all to clean up. All right. Let's turn that off. Do a couple more divides, sue, God, it's a little bit cleaner now on they're definitely some stuff there, but not too much for me to worry about. If there ever was one thing I wanted to worry about, it's probably here with the five-star junction. Hear me take a look. That may not be an issue for me just yet. Could I need to rearrange a few things here? Sure. Everything is lining up. And truth be told them okay with it. But one thing that we need to be careful is when we divide we kinda lost or border. So let me go ahead and fix that and do this. Week 8 all the way through. So that's probably where we're at. Good. Remember every time I divide, I also just want to every time I divide, I also want to make sure that I have like I hit undo so that I don't roll off of that because that collapsing in sort of what you put on there, that's also kind of y. When I do something like, for example, Project history. And I turn geometry SMT off again. That's so that when I divide this up, I don't have to worry too much about collapsing because S M T subdivision smooth modifiers that will make that collapsed down. So we gotta be careful on that end. Also make sure when I undid that I think I got through. Which is basically just kinda go on through and I'm checking everything out. Smooth modifier though turned on is kind of what I used just to kinda pick up on to make sure I have like found all my collapsing areas. Sometimes also hitting double-sided helps me. It looks like everything's there, so let's just go ahead and divide it. Will do it once. And then I'm going to project my details on there with Project history. And it's a little bit more closer. And make sure to go into history. Recall brush. Let's do it again and see you might need it. Check places out here. Polices out here. And I'm just kinda on this, sorry. We're gonna do it again. Just do a divide. And let's just go ahead and do our project history. We're getting at we're once again, we're restoring that detail. So let's just go through and find all our spots. Again, got something going on here. This is going to be a little bit tricky, but again, you don't really see any of this stuff that is going around here. So I kind of just let it go. When I mean is is like my I I don't really go through and tackle these inner areas because cylinders are kind of covering up, sit with it. So I'm a bit forgiving on this part. Right? Now we got that. Let's give it another divide. Project. We're getting a little bit closer now. The most important places are starting to take form. And that's mainly like the edges here that we say. Not to Corinthian, not like the craziest about here. But then again, there's a lot of geometry that's required to hit those marks. Give it another. Well maybe I'll just go ahead now and just go through smooth modifier. And this is going to clean it up quite a bit. But let's just go ahead and go through our project history. And you can kinda see we're slowly getting that detail back now. And now let's start Nick. Come together. Little clean here, but I'm going to have to maybe smooth this stuff out if you get a little bit of a jaggedy edge, just to go ahead and do like we did before. Start at the top, smooth yourself out. Go through around. Smooth it all around. Again. Same thing if it gets a little jaggedy, just kinda start at the top and smooth your way around like so. And we'll be doing this one more time. We'll just kinda go through this just to kinda one more time, just one more time. Smooth it around. Because the project History Brush are the just the project History tab. It doesn't really capture everything as much as Project history does. And that's because having it's got to face the right angle, it's got to face the top view for all of this, the work. And then we'll just go and check the sides here. Everything seems to be going through C here. So far, so good. We'll go one more subdivision. And then again, if you want, you can kinda just smooth this all out or recursive it out once more. Like so. And again we got, again another read topologies piece we can work off of. That can be then projected off of. And we have another sub tool that is high res and low res access. So this is going to be the last really tough piece of the jacket section. So if you can get this rawr, really good job, it could also be one of the most difficult piece is probably the second most difficult piece. And that's because of the fact that we have to get, we've gone through and had to kind of create a little jigsaw puzzle for connecting all of these spheres with a fairly, fairly decent topology. The one thing that we need to really be keenly aware of is that we didn't create any like five-star junctions or anything like that. So that's pretty much what we accomplished. So it looks like we got that taken care of. Now. It looks like it's a good piece right there. So we're gonna go ahead and rename this piece if we want. And we can just go and call it Shoal shoulder underscore main. And then we're just gonna go ahead and we're going to put that in with the reach apologize pizza right up there. So.
115. Trim Pads Retopology: Okay, welcome back. In this video, we're continuing on with sculpting our jacket. And I thought we'd go ahead and take a break from complicated stuff and do some very simple stuff to work our way through. So let's just have ourselves some fun with some simple things. So we'll go ahead and start with these pantry or sorry, these load jacket trim paths here. And so that you can have a little bit of an easier time just sort of to keep yourself from burning out. So from here, it's not really all that complicated. All we're gonna do is like we have been before, we're just going to draw in a poly group. We can use a cube also to project some of the details on. But there's some topology a cubed does when dividing that I'm trying to kind of stray away from. So let's just go ahead and just keep it simple and stick to what we know and build a foundation off of that. Also, forgot to take dynamic hope of my soul. Here. There we go. And let's go ahead and say before we begin, I forgot we got to move these pads now out of the folder since we are going to be read topologies using them. So I'm just going to click on it and just bring it out. And then I'm going to hit split on masked. Let's click into that now and turn off solo real quick. Turn off the jacket and our reach. Apologize, so we can keep our canvas a little clean and easier to work with. And from here, it's just going to be simply just kinda go in through. We can just kind of scale this guy up like so. So you can see That's not a really complicated piece to reach. Apologize, but now sometimes it's easier just to grasp in the basics. And then let's just go into RZ modeler brush, so BZ m. And let's just go ahead and hold down space, go through extrude, and go through our points. Make sure everything is snap to surface and will right now just keep the polygons to delete. Or I'm sorry not to leet, to do nothing. And let's just, just kinda move some things around here. Don't forget transparency. And let's take that off. So many things to go in through. We're just kinda bring in all this. And so now I'm just going to hold left Alt and just bring out a piece right there, go into shift up so we can see a little bit better. And from here, I'm going to then just put an edge loop here. And just one edge loop right through here. And just move these round. Just keeping it all simple. I'm working on trying to have as best as I can a good footing on there. Okay. So now that we have that, we can go ahead and maybe just do an extrude on all of this. We can do an extrude theoretically with left all again, bottom kind of I feel like I would like to just kind of pace myself a little bit because, you know, holding left all down can kinda create all sorts of fun stuff, all sorts of troubles that we may not want to deal with here. Turn on my brightness so I can see it a little bit better. Just go ahead and go through all of this and kinda see how it loves to just tear around when it does that. Of course this is a regular mode extrude. Just kind of like to use every now and then. And still it doesn't give me any good options, so on and just hold left all to do this one piece at a time. Said, I don't need to really go too crazy. I just need to kind of establish, show some, some foundation edge flow points here. And we're pretty much almost done with just reach apologizing this piece again, it's a pretty simple piece. Like so. Nothing too insane. Reaches one to do something a little bit thicker up here. And let's just taper these guys out. And make sure, you know, just to kinda go around, have a good distance of separation here. Mess with that one year. Alright, so now that we got everything that we have just sort of a basic simple shape. Well, that's just now go ahead and hit, Go do a history save. So let's go to our high res. So left, Alt, left-click into this mesh, hold down Control left-click, or just hold Control left-click to do a history save of this detail here and see if we can do a projection of some of this stuff. First of all, go through geometry, turn off SMT, so nothing collapses too badly here. And then I'm just going to first off, do a standard projection of just to make sure everything's lined up. Seems like we got some ne'er, so let's just divide it once. There was no collapsed because we turned to SM TO let's go ahead and bring it in one more time. Bring it in one more time, bring it in. One more time. Bring it in. And we're just kinda bringing it in. I know we're missing one mistake and we should be kinda, every time we divide, we should just be kind of rotating around and checking or mesh. Fortunately, there doesn't seem to be anything going on there. And I'll probably give it one more right there. And that should be enough for me right on that spot. So nothing too crazy. This was a pretty simple piece right here. So next thing I'll do is just kinda go through down to the lowest quadrant, maybe hold Shift to look for any sort of split it out words or anything like that. It doesn't seem like I got any. Now one thing to take into account. I'm not really constrained to having a budget polygon groups. So that's kinda why I can do some of this stuff here. But if you feel the need to do anything like maybe put more poly groups here, like right here for example. Let's see. So you can kind of like for example, I'm looking at this right now and this might be the resolution I'm going to choose. You don't necessarily have to say, oh, this is the resolution. You can go to this resolution and make some adjustments from here as well. Some very easy, simple adjustments like maybe first things first. We're going to have to, if you want to do that, we have to remind ourselves again, you gotta go through and delete your subdivisions out and just kinda start from here. Maybe some right here. And you might want something maybe along the lines of here. And then you can just do sort of a projection. And now you can do that too. That's also so that way you have a little bit more of a silhouette. Don't forget if you feel like it doesn't meet its area. You can also turn up that distance so that the projection is matching a little bit more closer. So again, I can just go through, again, do a projection, divide, do another projection. And throughout, we can just kinda re-establish our details like so. So that's how we do that. Let's go ahead now we don't have to repeat this process. All we have to do is just because it's got subdivisions, we can't do our control translate. Let's just go ahead and duplicate it over to this pad here. So with that said, let's just go ahead and hit the D duplicate T, Control Shift D or duplicate, and bring this in. And just kind of use the Translate Gizmo to kind of position this guy. Like so. It's pretty simple and so Explanatory at this point. Just make sure to rotate the camera around like so. And you're going to have some stuff right there. So from this point on, Let's just go ahead and delete this. We don't need this decimated version. We can just simply go and slit. Ok. And now we have two sub tools. Now we can merge these down, but keep in mind if you merge them down with your subdivisions, turn to the lowest, you will lose all your upper subdivisions. So try to, if you can have highest subdivisions on both sides, that way, when you go through and merge these down, like we're gonna do right here. See, let me look for my merge key. Or you are going to merge that down. We can always just hit Shift D and go down like so. If for whatever reason one subdivision is higher or lower than the other, you know, keep in mind, you can reconstruct the subdivision history and continue on that way. So that was a pretty simple one right there. So the last thing we're just going to do is just rename this trim pads underscore high. And then we're just going to go ahead and turn that on and just kinda put that in with all the other low res pieces that have subdivisions as well. So again, this is all for the sake and purposes of going through and establishing a low-res with high Rey's divisions. That way we can repos this perhaps in transpose master or maybe you want to have a low res and a high res one that can be exported out to another software and then a high res that we can eventually decimate and then take to a 3D software of some kind. That's basically what this is all for the sake of doing. So with that said, we're going to move on into the next piece of our reach apologizing, which will be the trim that is pretty much surrounding the jacket here. And as you can see when we do all this stuff, you can kinda see how the jacket kinda tapers off. We're going to once again have to go through and make some adjustments and reconnect everything like so. So that's just something just for you to keep in mind. I would say so with that said, stick around and stay tuned.
116. Jacket Trim Retopology: Okay, welcome back. Now we're going to work on the trim here next. And after we finished our trim pad here. So let's go ahead and just kinda left Alt, left-click on that, opened the folder and drag that all the way down to about here. And let's just close out folder. And now, once we've done that, let's just go ahead and do some read topologies rising of here. So let's just turn the visibility of everything else off so we can just focus on this. Now, in theory, you can do some Z remeasure on this. Make sure you do a DynaMesh because if you have anything that's decimated to measure likes to sometimes get caught and stuck. So just keep that in mind. I'm going to go ahead and go through the path of manual reach, apologizing again for this because once again, sometimes 0 measure really scrunched his in and doesn't give you a good idea of like how many it gives you many unnecessary edge lines and areas we don't need, so it's rather inefficient here. So let's just go ahead and go with that. So first things first, like before, we'll bring in a insert primitive, change to a single poly here. And then we're just going to go ahead and drag out a piece like we see right here. And then after that, I'm just going to go through and hits split, unmasked, and then just change everything to transparency. And now it's a little bit easier for me to see. Let's just bring this in like so. So we can kind of get through this. This one's going to be a little bit long, but it's it's basically like a more advanced version of the trim paths that we did. So let's just go ahead and do a history saved now because we're going to want to have something to projector details onto. Now let's go ahead and switch into our Z modeler and set our extrude to snap surface and our point to snap surface and our our face to do nothing. So I'm just going to kind of bring this along here. And it's now really going to be anything too crazy. I'm just gonna kinda just project along here, like so. And transparency goes mode my make that a little bit difficult for me to see. And you can kinda see how quickly we're getting through this. It's not very too terribly difficult. Like I said, the most difficult one we got through and that was the the shoulder piece. So we're done with that one thing pulley. We do have a little bit more challenging process to go through with the the head as far as at a hearing to specific topology, if you want my opinion on one thing and that is is this a try if you can, to avoid doing automatic reach apologizing with the head sometimes, for the most part. I've only seen if you can make 0 measure work on the head. It's because you have a lot of experience in time trying to manipulate Z guidelines to work. However, for most people, it's not something I recommend for beginner, I'd probably say. And you need to first know the edge flow before you can tell where the Z guidelines are going to be. So that's just sort of my recommendation on that. Now, as we go through this, we do have some options in making this little reach. Apologize. As you can in some ways, just reverse the normals and do like a a extrude to everything. But a lot of times and it's sadly more common than I care to imagine. The extrude doesn't always give you the results that you want or go in the direction that you want. We can try it right now just to see if we can maybe take a shortcut. Because if not, we're going to have to go through and we're just going to have to reach apologize the ends here. Which again, that's not necessarily a bad thing per se because we don't really see the insides of the ends here. But if you're looking for, It's always nice to experiment all for the sake of a shortcut. So if you want to extrude in to try to get some thickness, the first thing I would probably do is go ahead and have you flip the normals so that they're facing the other side. And then hold down spacebar, choose, Extrude all polygons and just see if you can pull it out. A lot of times you can get what you want right here. And that's for us. So fortunate case. But if you have anything that goes off, I'm going to go ahead and hit Solo and check these out. We hit flip again. It's just going to kind of we can kind of see, Let's turn double off. This is where the normals are inverted. So let's go ahead and flip it out. Now they're facing outward in the right direction. If you have any problems doing it this way, just go through and do an edge extrude and work your way all the way down across here, like so. So it's not too terribly difficult to get across. But that's what we're going to do. Finally, let's just go ahead and go in a solo mode. See if we can just do a quick little project history and make sure those back sides are facing properly. And then from here I'm just going to go ahead and hit geometry. Turn SMT off, do a divide. Let's go through sub tool now and do a project history. Divide again project history. Let's go into so remotes we can see what's happened in a little bit easier. And it looks like it's kind of going through just fine. Good about another divide, projector history. Little bit wonky here, but that's not too bad. The pads are going to be covering that up, so I'm not going to be too concerned there. This is kinda look around here. So far, so good. We'll more Divide. And it's coming along for the most part. There's any places that you fill that are kind of left down. Remember, we can go through our history, recall and just kind of touch up on any of them. It should. And kind of fill in the gaps, so to speak, like right here, for example, right here. Be careful when you're doing this though. Because the backside is going to give you some trouble. So fortunately, we can just simply hit Shift F because this was a poly group. We can China just kinda cheat a little bit here without having to worry about affecting anything. Too terribly much. This is something a little bit like that, you know, not too bad. We're going to just simply do a little bit more projections here and there. Just the sort of clean everything up and just keep it fairly simple, fairly easy. Like that. Again, once you've got everything taken care of and do row quick rundown, check on that top side. Just kind of work your way around. What really ever see this side. So I'm not too concerned. I'm almost tempted just to delete it. If it's geometry that's not saved. Let's do one more Divide and projects. Some details in there that might be all I need for this. So with that said, we got that taken care of. Let's take it out of solo mode and delete are decimated one like so. Let's turn on our read topology and turn off transparency. And if you want, you can go through and switch to the shift D to the lowest subdivision and work your way around. I kinda like it at this level of detail. So I'm just going to go through geometry. And I'm just going to go ahead and hit Delete lower. And from here, I can maybe bring this up perhaps, or bring this out perhaps. So it's not affecting the other side. Now, we can do a whole bunch of things here. So it's just the process of tucking in and bringing in. And of course, we'll need to readjust our pads here. So like for example, this pad is going to have to be just a little bit bigger. It's like I lost my gizmo a little bit. So let's just go into top head. And then recenter that guy n. Same thing with the other guy. Recenter over here. Just kinda bring it in. Like so. All right, so now that we get everything situated here, we can kinda move on to the next piece that we're going to do. You could just take a look. It's all up to you where you want to go. If you want to keep using these videos as reference, I think I may go ahead and go with something that's a little bit to slightly more of a challenge, just open it, getting warmed back up again. So I'll choose probably this little piece right here, this little strip here. Then we'll make our way from there into this piece and then go with the sash. Know, actually looking at this, I am thinking that I may want to just go on ahead and finish out some of these small pieces. So I think we're going to go with this next. So some of these simple pieces just the sort of knocked them out and get them out of the way. So we'll just go ahead and work on doing stuff like that in the next course or the next video. So with that said, that's where we're at right now. Like I said, take your time, please take your time on all of this, you know, reached apologizing through ZBrush. It can be a little tricky and it can be a little bit hard, but it just requires a little practice to get through. So with that said, stick around and stay tuned.
117. Jacket Discs Retopology: Okay, welcome back. In this video, we're continuing on with our reach apologizing. And with that, we're going to go ahead and do some more work with just getting some of these small things kind of knocked out of the way a little bit quick. Last couple of videos have been like that and this one's going to be somewhat similar. We're going to see if we can captivate and do this mesh right here. And if we have time, we'll go ahead and move on to these little nodules the place in. So let's go ahead and get started. So I'll start with something simple like this. I'm going to go ahead then and turn the visibility, open up my folder. And then after I've selected that mesh, just going to go through and narrow it down and out, like so. And after that, we're just going to collapse the mesh in. Now, before I forget, one thing that I forgot to do is I forgot to name the naming console. So I'll just do that real quick. Belt or I'm going to call it jacket trim, check it. Lower. Trim, underscore high. Bring that in there. Like so. Let's just go ahead and close that up. And let's take a look at this and turn the visibility of everything off. So now we just have these things to reach. Apologize. So let's get started there. Now we can go ahead and do what we've always done and just sort of draw in another polygon plane and just to put some Insert Edge loops are all around. Another thing we can do just to sort of expand your horizon and your mindset is we can just simply append a cylinder in there, like so. And we can hit F twice to frame out. And we can just simply say to ourselves, you know what, I can top part of this as a good starting spot. And so let me give you an idea what that looks like. I'll hit Shift hold Shift Control and drag this little cube out. So it's just these two areas. And also minus that piece off by holding Shift Control left-click and then releasing Shift Control left-click, but holding left mouse button. And then I'm going to hold down left all to turn it red. And there I'm gonna go to geometry and then modify Topology and delete hidden. So let's just go ahead and re-center this back in and get started in placing this right in the direct center of one of our little capsules we have here. I wouldn't say a capsule more like our disks. It's probably a better word for it. So we'll just go ahead and process and put this all here, scale it down and maybe go into transparency modes who didn't start seeing things a little bit better. Make sure ghost is turned off. And we're just kinda placing this. It's almost kinda like when we did those topology rings are over the main shoulder base. It's the same concept, kind of. So let's just go ahead and just kind of check the profile and all sorts of areas. And I'm just going to really scale this down. Let's bring it in. And I'll just kinda size it up here to kinda look and make sure everything looks string. And can even use this area here to this little marking to see if it's right on top. And then let's just kind of scale it further and maybe some more, some more like that. Just bring it down. And then this would be a good time to hold left Alt, left-click, click on that, do a history saved by holding Control, left-click and then switching back to your trim. And let's go through sub tool. And let's go through project and project history. And we're going to smack that right on there so you can kinda tell where we're going with this hopefully. So now we can do, is we can just go ahead and just simply hit B, z, m. And we're just going to go ahead and change our edge action to extrude. And we're gonna make sure we have snapped surface turned on, have some of the points also in the same spot snap to surface. And let's see if we can hold off on doing nothing just for now. So you can guess already what we're gonna do and what's going to happen. So let's just take our time on this. No, Let's just kind of hold on. I'm just going to drag one out and just hold left Alt. And that's it. Do the same thing again if you want or if you feel it's a little bit off, you can readjust like maybe this distance is a little bit off from this distance and that's fine. We can just go ahead and maybe just recenter it around horse project again and go through. So feel free to do this as much times if you go too far, like it's kinda clipping a little bit. Think that has to do with the going outside the viewport, but not a 100 percent. Think it is. Here we go. So we can kind of get something going on like that. So from this point on, you can just go ahead and hold insert and bring in maybe like a couple of insert edge loops around here. Like so. Just to kind of make everything kinda nice and neat. And if you feel like you have too many polygons or anything like that, you can just delete any, every other one. So if like, for example, I'm hitting delete an edge loop create, complete. You can kinda go through and delete every one of these, every other one of these. But I kind of would say if you're going to do any of those things, I would start probably at the center and just do merges with just this area because it's a little bit finicky. So let's do one more force project. And we got ourselves our cylinder here. Now this is all we need really. We can do one more extrusion just to kinda cover this area right here. And that could be that the other thing we can do is just simply hit Scale and see if project history can help us out a little bit. Just got to really line it up though. Something like that. You can do. Alright, so let's go ahead and hit Solo. Turn this off. That's about what we want. So let's go ahead and divide it a couple of times to check for any holes we missed. Looks good. So I'm just going to give it a couple of Jot, drives and do force project. This one's not too complicated of a force projection, so we can just sort of re topology guys the stuff. And let's just delete that just for a second. Not to leave put to turn the visibility of this off. Get anything like right here with these Jagadish. You see right here, little bit jaggedy here. Again, we know what to do. We should know what to do. At least. It's hit BH history recall. And let's just sort of, and now simply relax it in like so. And then just sort of reprojected around so it's a little bit smoother so we can clean it up that way. So again, if you see that around areas like right here and kinda just kind of relax, it kind of looks fine to me at this point. I can do one more division just to see if I can get some more. But that's pretty high for polygon. I might just go with something like that. Course. Let's go ahead and do a force projection on that, we might see a difference. So we've got something that's pretty clean here. So now that we have that taken care of, the next thing we're going to be doing is, is we're going to go through the process of duplicating all these meshes throughout. So if you want a couple of things you can do is if I chose to go a bit high, this is quite an extreme if you ask me, but we're going to have some zoom in through our final render and that texturing course. And I don't really want to, how shall I say this? I don't want to lose. I don't want to have some of this tessellate it detail show up. If I mean, if you zoom out, it's fine. But if you zoom in, you start to see it. So that's kinda why I have this. So I figured I'm just gonna go ahead and just start with the low Rey's. Decimate this down and then bake it out in the substance painter software. So right now that's fine for me. Like I said before, I digressed to that and let's get out a solo mode. Now. As we can see, there is a tool spots here that we need to repeat this two. So what I'll do is I'm going to go through and I'm going to switch it to the highest division and just realign it that way. But first I need to hit duplicate. And we're just going to realign all of these pieces to that area. We didn't necessarily I hope you notice, we didn't necessarily go with all the spots of the backside and again, We didn't texture the backside because the backside, it's not really seen. So we're kind of happy about that. If you want to turn transparency off so you can see its proximity a little bit easier. Definitely. Go for it. And just do your best to sort of habit, be occupying the same space as you can. Kinda see it work in there. And then once you do that, do well, more duplication. This one, you can fudge a little bit on them. This is also a nice, I accidentally bent this one and so it's kinda nice to just sort of replace it. So I don't have to worry about that anymore. Not only my replacing, I'm replacing it with something with subdivisions, which is always nice. Now we've got that, let's just scale it in a little bit. Alright, that looks roughly about there. And so now that I got all that, I made sure all these three subdivisions are on high. Let's go ahead. We're going to hit Delete and we're going to hit OK. And because they're all on high weekend, they're all starting in the same spot. We can just merge these down and then low read them all as one piece. So let's just merge down. Oops. Merge down, hit. Okay. We have a very high poly counts, so that's probably why we're dealing with that. And it's reconstructing my high subdivision levels, which also is going to be something that takes a little bit of time. All right, so we do that, kind of just see our polygons go down. If you did this on the lowest level, you would not be able to get your high levels back up again unless you did a projection. So might as well just have them in the high. We've gotta do one more merge. And then we show be complete. So let's just go ahead and merge that down. And so now when we do the nodules that are around the piece, you're going to be doing pretty much the exact same concept. Once again, you're just going to start with the cylinder and just kind of repeating it. Except we're also going to be taken it one step more by creating sort of an extra extrusion all the way down. So it's, it's roughly the same concept in some ways. In some theories. In retrospect, you might even be able to reuse what we made here as a base starting spot. Let me go ahead and show you what I mean. Just the sort of save some time once it gets through here. All right, the full reconstruction, full mesh. So I'm just going to go ahead and rename them now. And I'm going to call these disks high. And we're gonna put that word quickly, duplicate that, put one of them into the sub tool. And then I'm just gonna go through and delete these two. And then go through geometry, modify Topology, and delete hidden. Alright, now that we have that, Let's go. We lost our or trans, or pardon me, my gizmo translating tool. So we got to re-center that and I'll just back it out so I can see it. So now let's go ahead and turn on our next piece of the jacket and we see these little nodules that we have right here. Let's go ahead now and read topologies guys, that
118. Retopologizing Nodules: Okay, welcome back. In this video, we're going to continue on where we last left off. Now we finish the disks that we see here. And if you can see I renamed it disk shy. And like all the other pieces, they now have subdivision levels that you can now work with. Course I'm going to keep that down for low. So in this video, I'm just gonna go ahead and finish it off by clicking on left, clicking Alt, left-click on here, and reach, apologize these nodules. So like before open the folder it's in, and then just go ahead and collapse the reach apologize folder and scroll this all the way down like so. And make sure the visibility of everything else. The jacket, for example, it's taken off. And now we're just going to essentially just pick one of these guys. It's your call, which one you want to do. I just make sure you go ahead and inspect it and that looks safe. And what I'm gonna do is I'm going to drag a mask over this one. And then I'm just going to go through and hit Split masked. And then I'll turn the visibility of the main ones off. So it's just that one. That way when I do my projections, it doesn't go through restoring my details. It doesn't get clamped to other projection adjacent nodules essentially. So now if you could guess it, we're going to do very similar like we did before. First of all, I'm going to hold down Control left-click and do a history saved. So we have something to go off book. And then I'm going to go then to hit append. And like we did in the last video, we're just going to append a cylinder in there. Let's go ahead and scroll down to that cylinder. And let's just go ahead and Shift F and wireframe that out. Or sorry, Shift Control 2 and left all to download that and don't forget to delete your topology or else the Z brush or Z model or brush won't work properly. Now let's just go ahead and recenter that back on and get this over to here and scale to the proper place. So let's not going to be too hard bringing it in. So of the same concept as before that we did, except now we're going to just be doing just an extra extrusion. It's basically the exact same thing. In fact, this shape is quite a bit the same as well. So let's just go ahead and just kinda line it up. As best as you can. Remember. We can just do a project history through R sub tool to sort of clamp it on. But before I do that, I always want to make sure I have it centered as absolutely as possible. Before we go there. Let's just start with here. Looks roughly similar size. So let's just go here. And I'll just readjust to from this point and from here, I can just do a project history. Alright, so let's get into our Z model or brush B, z, and we'll see it right down there M. It's just our Edge to do extrude. And let's go ahead and do snap to surface. And let's go ahead and make sure our point is on snap to surface, I'm doing this over and over again. Instead of loading a preset that way, you can get the practice in knowing where everything is and feel more and more comfortable with this. Okay, So from here on, let's just go ahead and just extrude an edge and tackle to bring them all in. We're gonna do that a couple of times here. And I'm probably going to do it maybe just to just a small amount there, just to kinda give it some geometry. And then something along the lines, somethin year. Kind of given it extra subdivisions that to work with here. All right. Let's go ahead and want to get, get it to that edge there. So let's just do one more. Okay, and I'll just go ahead and make my adjustments. Accordingly to what we have here, go ahead and turn up my brightness here. We have something probably just going to bring in an edge loop that goes, they'll fit around here and then just reproject that. So I'll just bring that will save me from trying to extrude this any further. And check around some stuff we gotta do over here. And I accidentally forgot to hit, do nothing on there. Let's just keep moving this surround. That's all we're doing. This because it's got that extra edge. We just kinda want everything to line up just a little bit, trying to set ourselves up as best we can. When we do our Edge Extrusion down. In theory, we could get away with what we want, but I just want to make a little bit clean on this and just take your time. It's kind of a very patient little game here. All right, so now that we have what we want, Let's go ahead and take a look. We need to put an edge loop probably right there. So I'll hold spacebar over an edge and hit Insert and make sure to have that. And let's see if we can put an edge loop right there. And then see if we can do a project to get that. Just a little bit more comfortable there. Now that we have that, let's see what we can do next here. I'm gonna go into solo mode, and I'm going to go down here to display properties and hit W just for a moment so I can see the backside. What I'll do is I'll just hold down Control invert mask and bring this guy down. Kinda like that. And then from there I'll draw out my edge loops once again like we did on the top. Let's clear that mask off. And I'll draw another edge loop just below that line right there. So somewhere like right there. And then again, I'll do the same thing down below. And then just one more, like so. And just for good luck, I'll put a little bit of an edge loop right there. So let's just go ahead and take a peek on solo mode. We don't now, it's not gonna make much sense, but if we hit sub tool and projects some history, it makes a little bit more sense. It does a good job for the most part, but still some areas. It's a little bit wonky. I mean, I can mess around with the distance, but I'd rather just play it safe and just kind of just readjust what I have here. And like I said, this is all going to be for the sake of getting a little bit of a smoother projection, you can get away with less, quite frankly, you may not even need to put an edge loop around here. In fact, I just kind of did so feel free to go and DBA from what I did and just kinda do your own thing and maybe work with less poly groups maybe, or something like that. Let's just go through, well, this should have just done a projection one and then put the edge loop through and then projected again from there. Oh, well, and you can kinda see I'm just kind of rearrange and everything coming up towards the end here. She's too few more to this one. Alright, perfect, So now we got something going on here. We have a good template to work with for doing a projection and restoring some detail. So the first thing I'll do is I'll go through geometry, turn off SMT so it doesn't collapse in. And in fact, one thing I'll do is I'll turn it on real quick just to give it a couple of divides and check my mash, look for any holes and then I'll just z back on. Dude doesn't seem to base all turn SMT off. And like before, we'll just go ahead and just project history down there. And if we can do it again, project history and I'll stop right here and start going into our BH history. Recall brush just to kinda help me out to with just trying to look for any sort of areas where I might be have been off a little bit like right here. Maybe. I'll just simply gently, kind of very gently just kind of go through the process of very smoothly behaving smooth and then just kinda reprojecting everything out. Keeping in mind of the camera angle. Like right here, maybe. Smooth camera angle. Again. All the good stuff that comes with this. I'm trying to very carefully not mess around with that and just flip it like that. It's a little bit wonky here. I guess that's just the detail. Okay, Fair enough. Let's give it one more now and reproject some more history when we get in this back. So that's a good thing. You just need to rework a little bit of this. Not too much we can do there. So it's just kind of and again, one thing to take into account is when you're doing this, be mindful of your brush size. And thing I. Because like if your brush is too big, it will wrap around. This is going to be a little bit of it. This is a very round, round piece. So it's going to be a little bit more complicated of a process to handle. Like right here, we need to have something, maybe a little bit here. All right, so we'd get in a little bit more out of this. Let's do another divide. And I can do the history, recall project history, or just manually go through and just draw everything through. Kinda just interested in just doing it like this right here. So that's a whole since that's the most flat plane. But you gotta be careful of this stuff here. Sometimes just kind of go in through and hidden it through this angle can kind of also help. So we need to be mindful of the size of the brush. This one does take a little bit of a long time because it has such a flat surface here and such a round surface here. So you're kinda fighting a battle of projections on two different fronts on this. And in all fairness, honesty, you could probably get away maybe with a mask, something like that. Maybe just hold down Control. I never really mess around with the mess too much with them. I am just experiment in right now. Then just that way we can kind of go through hold Shift, bring something in, which bring something n should bring something in. And it's just kind of an art to just kinda look for storing detail in all this. So it's a little bit Chris, there. Of course we can invert the mask and maybe just put it on hold and then just kinda do the best we can with the number of divisions that we got. A again. You should test it and like put it close right directly in front and put it right in front. And if you see a good projection then, or any difference in projection, then he kind of now. You gotta go through all of them that way to Sam. So definitely funky here. So again, we'll just kind of mess around the same way we did poor and hold down a mask maybe. And be really smooth it out. And why we're not messing with too much of the detail on here. Just kinda holding Shift and smoothen it out very lightly. Again, again over and over. I said it's just the brush. You gotta really practice down on me too. Okay, so now we've got some a little bit. They're beautiful. This time around. I'm just going to divide it one more time and make sure smooth modifiers on so we can get a little bit smoother on there. And you can actually work with just this amount of detail. It's not really necessary if you can bring a little bit out. I don't really see much of a change. There will probably be changed though if I push it in here. Yep. So again, we're just going to go through the whole process again and just kinda refined and restore the detail out. I'll go ahead and bring this in. Usually I'm just gonna go ahead and kinda just quickly. It's smooth all around. Not going too far of an extreme on it. And I'm just kinda go into foreign. Mean, kinda see the whole process as we go through. It's just please understand. It's basically practices. All it is. Let's go ahead and go through the area here. Right now. I'm just kind of bring it all around. And again, the size of my brush is crucial because it will mess up. It goes into here and it starts messing with these edges again, and they get the right projection. You've got to move it over to this side. So it's directly facing you. So shift relaxing it in, reprojecting. Alright, so one more area left. Let's just go ahead and protect our details of that trim area. Building controlled soften the mask little bit. I'm just gonna kinda, kinda push on a bit on all of these. This is a little bit more time than I took in this one compared to the last one. All right, so now we've got our details now reprojected back on. Let's go ahead now the next step to do is we're going to go through and just delete our decimated version. So I'm just going to hit Delete now. We hit Okay, let's bring back our nodules. And one of them seems to already be in its place. So let's go ahead and fill the other places. So make sure also urine the highest subdivision. So let's go ahead and hit Duplicate. And it's kind of the exact same thing as we did before on here. So it's not really that difficult. Make sure your center pivot point is there.
119. Placing Retopologized Nodules: Sometimes hidden transfer transparency off can help as well. What we're doing here is we're just sort of sizing this up. Now all of those places. And again, it's just a little bit of a process. Duplicate that one now. Bring it over. And then again. So we've got the middle part done. So go ahead and do the front part here. So we'll duplicate that. Bring it over. And again, you're duplicating all of these and leaving them in there. High resolution, highest subdivision stay. Because again, when you merge down, it deletes the subdivisions and does a full reconstruction to its base subdivision all over again. And so they all have to be in the same subdivision level when going through here. So keep that all in mind. Little bit off here. Alright, duplicate again. Now let's tackle the back. So we'll duplicate that again. All of this is a patient's game. Really. More time. Yes. Couldn't know for me. So now what I'm gonna do is I'm just gonna do a quick little check. Turn the visibility of all this off and turn my reach apologizing on, make sure everything is fitting in the correct nodule. So like for example, may see the solute could go a little bit bigger. So you can just kinda leave it right there. Turn transparency off so this can be a bit easier to see. Alright, Good. Bring it back up through and kind of see the bottom so we can go through again. This one can afford to be a bit bigger. Just by not much. Megan took this in. This one definitely can be tucked in because I don't want to have to look at the I don't want to have to look at the floor of this thing. So this one I can kinda see a gap in there. So let's just pull, push him in. Like so. Okay, so they're all on the highest subdivision. That's good. So let's go through the process of. I'm putting these in to one sub tool. So to do that, let's just go ahead and merge these down. And it's going to take a little bit because again, it's going to have to read to rebuild its subdivisions every single time. But overall, that is the whole process now. So next thing we do after that in case you'd guess that is it's going to then be we switch it back to its lowest subdivision level and then rename the sub tool and then transfer it back into the reach apologize area. So this is a kind of a big sub tool because there's so many of them. So we need to keep the subdivisions a little bit low until we do like high renders or decimate the mesh itself down and the case is severe enough, we can split the pieces into a couple of sections to help us with that process. But now what you'll see is this basically I'm just merging the sub tool of all of these urge to just a couple more left. One more. Okay, Now that takes care of that we have no reason to keep our original piece. So we can just go ahead and delete that one and go back to our pieces with subdivisions on it. And now what we're going to do is just simply rename them shoulder nodules, nodules high. Bring that now all the way down to its lowest subdivision level. And now we have those three topology guys. And we'll just bring that in as well. Now we have that process I'll reach apologize what we're going to handle next. We're just going to take a look real quick here, is we're going to work on some of the wider pads here because we just have pretty much 0, 1, 2, 3. And then these two strips, which can be for things technically, if you want to duplicate one of them and resize it to the other side. And once we do that will be pretty much finished with our jackets. So with that said, stick around and stay Tim.
120. Jacket Fold Retopology: Okay, welcome back. In this video, we're continuing on with our jacket here. If I hold Shift F and turn wireframe on and do a quick little BPR here you can kind of see all the dark spots are the areas we have not read topologies yet that we need to read topologies guys. So it's just this spot, this spot and the front pad. And then a real quick burrito reach, apologize on the zipper. So that's kinda give you a little head start idea where to go. And again, they all have subdivisions on that which we read topology guys. So let's go ahead and keep going. So I'm gonna go ahead and do this piece right here. And I'm going to just kind of hold left Alt and left-click on there, make sure symmetries off. And I'm just going to just work on this piece that you see. So let's go ahead and start with that sub tool. Bring it out of the folder. And we'll just hit the down arrow until it's out. And then we will then turn the visibility of everything off and take a quick look at here. And let's say we have a little bit of work to do on some of this, but overall, it's going to be pretty easy to do. It's not really too cumbersome. In theory, you could do a 0 measure, but we may get a lot of scrunched in inches here. I'm just going to go ahead and just kinda get a little bit free on this one. So I'm just going to hit the insert mesh brush. And we're doing primitive h, choosing our single Pali to drag that in. Hit Shift F. Let's split that off. Now. Don't cancel. Split, unmasked. Let's select that, go into transparency and then ghost mode. And then let's set up our model or brush. Remember I'm just doing those same repetition over and over again. Just so everyone can have a sort of a repetition of understanding everything here. Normally I would load my presets of myc modeler in, but I just want to kinda get you to be comfortable selecting everything and getting in the habit of looking at all of this stuff is kinda what I want. So C will go through extrude again, snap to surface, point, snapped surface and face. Do nothing. So let's just go ahead and just kinda get started on here. It's pretty, pretty simple process on this one. This is not really too terribly difficult. We can just go ahead and maybe just reach apologize this one area. And then afterwards we can just perhaps go through the hole process of extruding. Let's put something in here. Quick insert. And before I forget, that reminds me, hold left Alt, left-click. Let's hold Control left-click and do a history save on that bar holding Control left-click to history Save, you'll see it kind of get to a lighter orange tint. And let's just go ahead and keep projecting what we put on there. Right? Let's continue now. We're going to reset back to extrude. Bring that in. Honestly. And it could cheat quite a bit here. Just simply bringing it in and kinda giving myself a very simple profile shape here. Each of these areas, I'll just go ahead and give myself like maybe just a few big three edge loops here. Three edge loops here, three edge loops here. Some pretty simple. One more there. Now, it's going to probably give me. Alright, so let's go ahead and troubleshoot some stuff here. Reject in rejecting. I think I'm constantly adding something here. So let's just go ahead and change this into Delete and try that again. There we go. All else fails. I think I've been adding extra extrudes and they've been coming edges on top of edges. So I just went ahead and just simply deleted that out. Started again. I'm kinda see how simple this one is. Pretty easy one that we got here, we're just kinda go through and just trying to grab some simple masks here. Now let's go ahead and fill some insert edge loops in here to start filling our silhouette here. So things are matching up. So let's change Holober the edge. Let's go through and hit our insert and bring it in. See if we can. Oh man, I forgot. We go to Insert. We're going to hit projects so we can grab, and then we grab that vertex. He is really stuck in there. Really stuck in there. Man. Okay. Put it up here. Is quite a bit of a silhouette here in this line. So let's just go ahead and just kind of real line everything so that we can get things a little bit cleaner here. I may do the same thing, just the sort of improvise here. And since I'm looking at this, maybe we can just do like a little bit of a clean drew to kind of cover up some of these areas. So I'll just bring this in and be around here. Like so. Little bit cleaner, a slightly cleaner, I should say. So that's just slightly better. Let's just go ahead and insert edge loop across there. And then we're just going to see if we can add one more extrusion across. I'm not so sure we can get some clean here. We can try and do that again. Kind of branches. It kinda does its job, but not really to Larry on it. I think I'd rather just play it safe and just extrude manually because I'm going to have to go through and do all of this readjusting anyways. So, so I'm just drawing one out, tapping all to change between the modes here, Maria range and everything like so. And doing it this way can actually be a little bit advantage, advantageous for us. We may not. I may actually just go ahead. What I think I might do is I'll just go through and hit Move and I'll bring it down to the bottom here. No, not delete. When did I hit Delete? Move. Just kinda move it down here and then I'll just run an edge loop in here and then project all that detail. We call it right back on track. So I'm just gonna go ahead and bring it through and see the next spot is going to be here. So we'll just bring it here. And I'll just go ahead and put one more insert edge loop here. Then project that and I'll do another one right here. Get that off, delete, tired or deleting that. Now the one we're right around here, and let's project Those little bit cleaner and we're getting there. Extrude back, readjusting as we go. And this is its definitely longer, but we're kind of taking a little bit more time to it now. And again, I'll just run an edge loop through here for some of these areas. Small and Insert Edge Loop and project in-between here. So sometimes a little bit there. Little bit of a silhouette is in play. New sums up there. Some of this. We're going to have to delete something here. And so little bit off here. Move it a process that seems to be off. I'm just trying to rework and rebuild some of the stuff here so that it makes it a little bit more sense. When we go through here. I was struggling with that so much. Now we can move that. Wherever we go. Back on the tray. Square root, I go keep going through here. So let's bring it here and then just going through and you can see. Sometimes these guys that really do like to be a little bit stubborn as I would say. And I'm looking at those sins just again, a little bit of a process. Just kinda see where everything is. You can get a right angle, choose a different place to extrude and meet up with that area. Just to help yourself out. A little bit of a point. Know, looks like we haven't been an issue right here. So let's just get rid of that mesh. Since inquiry just inadvertently created a extra twisted polygon, or it might just be easier to bring it out that way. Like I said, if you start extruding and suddenly come to some non-responsive actions or it just doesn't extern it anymore. Take a moment to pause and just troubleshoot the issue. That's pretty much what I do throughout. More gray here would be one area. Just going to drag it out and put it together piece by piece. Here we are. Alright, let's see if we can bring an insert edge loop around here and add some thickness to compensate around this bit better. Okay, I might need to do one more, but not entirely sure. He just yellows transparency and see where we're at losing. We could in theory get away with just the checked a little bit easier. We're curious to see what it looks like just with one more edge loop. Not too terribly much of a difference in the silhouette. Alright, so we can probably just go ahead and get away with this if you want, you can go out. Feel free to just maybe add divisions in areas you feel need. It. It's up to you. Like say the varying degrees are all up to you as far as how far you want to take it. But like I said, if you're doing this for a game, you're going to always want to make sure you have. You're going to always want to make sure you have proper. To fit the polygon count limit that they give you if they provide the specs like that. So with that said, we're gonna go ahead and then now try to work on projecting our details in here. So the first thing we'll do is I'm just going to just hit Shift F and divided a couple of times, look for some holes and it looks like there's one right up there. So I got to troubleshoot some up there. So I'll shift undo that to look for that area here. Looks like and it was an edge loop that was done that didn't connect here. I think I'll just delete the edge loop fact switched to delete, do complete. It's now delete it through. Let's hit its troubleshoot some more. We don't see too much of anything else, so we'll go with that. All right, so now let's just go ahead and we're going to go through geometry, turn off SMT, go through sub tools, and let's go through project, and let's start up. So one projects in history. Let's go ahead and I'm going to switch now to Brush History. All right, so I think that's part of it. So let's go ahead and do some more. Do another division projection history a little bit more. As we're going through all this. And at this point you can even take some time to I always turn my focus shift up when I'm doing this. Just to kinda make sure everything is where it should be. Let's do another one now. I now turn geometry back on because we don't need to. Silhouette should hold. Now, let's check some history. Again, I'm just holding tapping shift and just kinda relaxing a little bit and then going back up again, going back up again. So what's all this is? Just going back out. Okay. Let's projects more history now. We've pretty much got what we need just with this amount, but we can do maybe just for say well more. And then we'll do one more. And just, you can just do it manually if you want. Or you can just go through Project history that way. And if you do that and it's probably going to get some tearing right there. So you can do a couple of things. Maybe to first try your, your distance on a lower setting with Project history. And if that still doesn't work, after a couple of tries, you can just do it through the SR, your history, recall brush, select it. Did it correct that time. I'm just going to still relax it through and go through all of this now just to make sure everything's lining up. Unlike cell. So now we got to our piece, we got our high res. Let's go ahead and delete our decimated version of this hidden delete. Okay, let's rename it now and we'll call it a jacket. Sorry. Caps on jacket. Underscore whole old. If I can spell high. And then I'm just going to put that now into the reach apologize section. So once again, we got another one added to our collection, going to switch that down too low. And now we're just moving on. And if we look at it, we got some more left to two main areas that we have are these two areas and then we'll finish off with these CIPARS last. So with that said, stick around and stay tuned.
121. Retopologizing Collar Inside: Okay, welcome back. In this video, we're continuing on where we last left off. We did our front little jacket fold. So now we're going to do something that is just a little bit more complicated, but just building off of the same concept is this, and that is going to be this color piece now. So I'm just going to left Alt, left-click open that folder backup that, that I've always have untitled. And I'm just going to move that out like so. So that way I can just go ahead and just turn off everything and just focus on this. So this is going to be similar to the last one. We're just going to do an extrusion after we do a full plane polygon process out of this, let me take a look here for some things I want to make sure I have figured out here. Just to make sure there's a, you got a little bit of an inversion of polygons, but that's okay. I don't really mind that we might get a little bit of a problem in our projection on this area. But that's okay because if that's the worst-case scenario, I'll just delete the geometry that's around here, gives me too much GF. So let's just go ahead now and get started. First thing I'll do is I'll turn off Double, go back in and draw a polygon plane in there. And I'm just going to pick a spot where I want and just draw some edge loops around. Now, the spots that I have to pick are going to actually be, I'm going to choose something with a strong valued silhouette. So maybe this wraps around really definitively. So it might be best to just to establish the necessary edges to make it around here properly. So I'll just draw some right around here. And then I'll split that off. And that will be, we will now begin transparency. Let's get started here. So we'll just rotate this and it's like before, same routine into BCM, our Z modular. And if you haven't already, just feel afraid to start one-year ready. Well, so before I forget, let's do our history save. Cannot forget the history save. Let's go ahead and do extrude. And let's start doing some extrusions here. It's definitely something needs to be placed here. So let's put some inserts on here. And one right in here. And let's just project those in. Check on my silhouette so it doesn't taper into the backside. Put something here. And I think I can put something maybe here. And let's project those and do nothing so I don't mess with that. Let's see if we can bring that up. She's underneath. Same problem here. So I got to really just kinda, kinda dig for it underneath there. All sorts of finiteness. Okay, So we are quite a few lines here. So it's going to probably make our process a little bit more fun to deal with. And it's like we're going to probably need something, maybe around here too. It's quite a few polygons needed to actually work on this one. But at least we have sort of an idea now of how many we have to taper along here. It's going to be hard to do a little bit of an extrude from this angle. So we'll just go ahead and just take it a little bit at a time here. It also, I never really do talk about the extra options here, but, you know, please experiment with the modifiers here. They are there to help you with all your options if you can. And now, you never know when you might find something that you might like in all of this. So it's definitely something that I hope you do. I don't think. Like, for example, it's just something that just helps you to get you to learn through ZBrush. Essentially are, sorry, z modeler. It's hopefully something that will help you to get through the whole process of everything just a little bit more quicker. You may even find extrude options that are just simply better for you. And all of these. And bring that out. Like I said, this one's going to take a little bit more of funneling, little bit more time in the process because we're going through this. And if you want to few losing your angle, just go ahead and center. Bring that angle just slightly in like so. Project whole thing in case you're losing and checked. And then just do your work here. No. We've got a stubborn on right here. So we'll just go ahead and mark it there. So clear the mask off. I think that's why I was having a problem there. Sometimes it's hard to see the mask. And now every time you do an extrude, you just gotta kinda work through it and make your adjustments as you go. But once you get around it and it's just gonna be, once you make it all the way to the end, you will have to do very little. Then pass that. So again, as it's getting to a point where it's certainly a straight now. Let's just go ahead then and do as we did before. Maybe just scratch that. Just this here. Bring it around a little bit. So I'm gonna kinda tapering. Because bottom line is this, this side should be getting bigger and wider. Well, this while the inner side, the other side should be getting more tapered in as it curves in. Because of this. Because of that, we're going to have to probably add one Insert Edge Loop right around here. So this is a little bit different than we did before. Let's go ahead back to the free angle. And the angle actually beautiful. And if you can't move anything, just feel free to do it that way to take the time. Also, if you can move anything, be a little suspicious, you know, just do smooth and maybe look for something like right here. What happened was, as you're seeing right now, you kinda scene points have been merged and I kinda did a double edge extrusion underneath here. So see if we can maybe delete that. Delete. See if we can do Pali loop. There we go. And that might help us a little bit. Now, when you're moving, Yep. Do an insert here. We'll project it. Same thing here. Project. You don't need to necessarily have that many. You can just, it's up to you how far you want to take it. Right? So we're just kinda slowly making our way across here. It's going to be a little bit, but we'll make it through. Surprisingly, this does take, even though the concept here is pretty simple. One thing that we can try to do, I'm a little hesitant is just to do in a single extrusion of the poly group around here. But my problem and sphere has been like if I extrude the backside or it projects into the backside, that's kind of what I'm a little nervous of happening and that's just going to be its own little unique pain. So I'm kind of leering away from that. One thing I can just simply do is this like maybe go through and do like for example, maybe something like draw it out across center pivot, point it and just bring it all the way in to like maybe just this angle. And just extruding from here, you know, I'm just simply adding the Insert Edge loops from this angle. We can try something like that. Maybe what you're going to have to work with the gizmo and reorient, reorienting the rotational tool by holding left Alt and just moving it around to project to make it snap on there, you can do some like that. No no rule says he can't and then just kinda line everything up in this way. Perhaps. Again, no one says he can't do it this way. And then just drawing in your edge loops accordingly to wherever you need them. Let's see here. We may have lost one, so let's go ahead and, oh, not that one. Single Poli. Then poor ring it to an angle that makes little bit of sense. There we go. Something like that maybe. And then of course you can just simply then go through Insert Edge Loop. Maybe clear your mask off, bring it in. And I'd probably just start with the most definable place, probably right here. And then just projected on there. Yeah. That's nice and messy. And you'll come across stuff like this right here. So you're ready for that kind of fondness. Do the same thing again. And let's just project. And again, that's like I say, another way this can be done.
122. Cleaning up Collar Retopology: Kinda helps out quite a bit, but you're going to have to still do a little bit of clean up and like, oh, do one at a time because it's a little bit convoluted here. Seem to be putting an edge. And on one of these areas here, I do not want that. And I shouldn't be so conscientious about this bottom part because again, not all of it really gets seen. This whole area kinda gets tucked in. So I don't like to necessarily do a whole bunch of work in areas that aren't seen much. Just kinda make sure to have the main area that we want. And it might be easier. I'll probably have to run an edge loop through there. So again, this is going to be this as it tapers in like this. This is definitely going to be one of those areas where you're just gonna have to try your best to work with what you got. Because it's going to be, it's going to test the hub little bit here. Go ahead. I can try the same thing I did before. But as it wraps more and more around here, I'm going to probably find out that sadly, projecting all this on won't be as easy as can usually be done. Just go ahead. Probably bring in like as far as that point. Then we'll just bring see if we can do an insert edge loop here. Go through there, go through there, go through right around here, clear the mask. Let's project the history on. It's not too bad. My turn it up a little bit, just those see if we can nail it. Probably the most important thing on this is just trying to get it on there. Anything that doesn't project like over here, we can just sort of move the birds and just get them to snap on there. And then again, we can just kinda go through the whole process of doing something like, for example, once you have it. Here. In this last area, you can clean up the edge flow quite a bit by relaxing it through and reprojecting it once more. So let's just go ahead and try that real quick. And we'll just kinda make a uniform process on all this. And then we'll just bring it back in. So it's a little bit cleaner, a little bit off here, but that's okay. We'll just bring that back. Once I can leave me, I'd rather be doing rather be doing the the Insert Edge loops going around then my extrusion because that will honestly cause me work that will make it difficult and more troubleshooting, difficult and troubleshooting to find. So we'll just go ahead and just work. Be content with accidentally putting an Insert Edge Loop cell. Be fine by me. All right, so let's go ahead and see if we can do that one more time or a couple more times, I should say. Ring it Here. Let's rotate it. So it's a little bit easier. Again, it's going to be a little bit to, especially you can scrunch it in a little bit. And let's add some insert edge loops. Excel. And let's just clear the mask. Get that on there. Like we got a little bit of a kinda going over there as I expected. So I just turned down my distance here so it's not going to go through. And that helped us a little bit. We're going to have to still once again, go through this whole thing of trying to kinda line everything up like that. Definitely need to move all these guys back up here. Let's just bring it out, bring them up. We're just moving these all up here like so, so we can just make room for the bottom row here. So maybe give us a little bit of opportunity to just kinda real line the angle of the the frontline edge flow. It's traveling across here because he can kinda see it's it's kinda of veering off course a bit here. Need to get it. It's a little bit more like that. And these guys didn't get projected at all, which is terribly to them. But now we're getting to it a little bit closer. Let's see if we can relax it a little bit more. And projected in. There we go. We're gonna do this just one more time. And trying to align the camera. So that when I do this, I'm gonna do a nice straight horizontal line and just bring things in through there. And you know, I prefer doing this over extrude because I can work with rotation a little bit more here on this. And can kind of see a little, I can work with rotations, scale, and so forth on here. With that, said, let's go ahead and bring this guy and then let's add some of those inserts. All right, perfect. So we have this extra edge loop. Let's see if we can delete that. Really matter. Which one? Just going to delete one of them. All right. So we got it all taken care of over there. And if we want, we can just kinda go through the whole thing. And maybe you just do a quick little relax so that everything kind of lines up a little bit more. It looks a little bit more uniform. Just go ahead and reprojected n. All right, so now we got the last area, which is going to be probably the most complicated area, which is this little fun stuff right here.
123. Projecting Collar Details: Not something as simple as just dragging and dropping everything and reprojecting it. But we can do maybe just a couple before we get to that point. So let's just go ahead, add an insert, one, insert in there. Or actually I should just move it down. We're just going to kind of bring this guy in somewhere around here. Maybe angle this a little bit wider. Then I'm going to my insert edge loops in here. Let's just project that in so we can get started on that. All right, so let's just do extrude and play this out. Tap all to go into a single mode and turn off, delete. All right, so now that we have that, let's go ahead and see if we can throw in just want probably just want to go through let me see here I'm seeing it. Let's go ahead and just finish this area here. Right here. Just going to go ahead and bring these two guys together like so. What an insert edge loop around it to add in some more geometry. And then we'll start projecting some stuff and we're storing our detail. That brush a little bit wider so we can grab that bird. Bring in one more Insert. Now let's project that in a little bit here. We'll go ahead and just do a real quick back up here. And it looks like I may have done something off here. See if we can insert edge loop this guy. All right, so now let's go ahead and try to do some extruding to create some thickness on here. So that we can do that now normally for this case, if we're going in, we're going to reverse the normals. Show you what I mean. Let's just go ahead and do an example. We do extrude through here and we do all polygons. We push in and kinda get ourselves a weird little wonky surface. So let's go ahead and show double so we can show a little bit more that it kinda gets in there a little bit, but it's a little bit off-putting. So I always like to flip the normals and then just push from the other side. And then see if we can just do like maybe a the project. But we can't. I'm going to have to just go ahead and just settle for this. Either go on the outside, which I kind of don't like to do. Flip. We could do something like that. Let's go out of solo. Only problem is, is that we have to kind of realign everything so that it's properly in its place. Because trying to project this from two different sides. And it can be a little bit troubled. Neck that can be a little bit difficult to do. So I'll just go ahead and take a shot at it. I did an extrude that was outward instead of inward. Which means now I'm going to have to repeat all this stuff back out again and see if I can make any get a projection out of that. That's what I was afraid of. The fun of it all. It's about what we want. I'm going to try this, this time. I don't want to have to go through moles saying read topologies in the backside. So I will go into here. Let's go ahead and go into solo. Let's make sure our normals are facing this way, right? Display, map, display properties, I mean. Alright, so they are facing this way. Right? Too terrible. See if we can do checked on that. Wasn't too bad. A couple of areas is a little bit messed up. I don't know if that's what I was afraid of. Projecting history in an area that's like a little bit too much. I can kind of be where we lose our details a little bit. So here's what I'll do. Since the backside doesn't really have too much of any kind of detail really on it. I'm gonna see if I can project just the front side details and leave out the backside. So for that means that we are going to have to go through and read topologies or divide this up a couple of times and manually do this with history. Recall now we can do this because we have this broken up into poly groups. So I only need to work on just this front side. So let's go ahead and do geometry. And I'll turn, I think I'll go ahead and just turn smooth on a couple of plays and just mask out the back side, like so. And then I'll soften it. Now we can just restore our detail without having to worry so much about creating a whole bunch of traction. Say, because we're not pulling anything from the other side. So again, this is definitely something I would most certainly certainly say, Please Take your time. No rush. You know, look. Especially in this area here, makes sure that you have a very definitive camera angle. Can captivate these details here. Right? Now I'm going to close the masking, trying to go through this again. So now I'm just going to go ahead and just simply restore the details on all of this, like so. And a little bit fuzzy. So this is chord of how we're getting through this mesh. So we're going to be finishing up on this here pretty quick. Now once, whoops. Once you get through this, the next lesson, we're going to go ahead and tackle the sash. So I'm gonna go ahead and rename this and we'll get started. So with that said, stick around and stay tuned.
124. Retopologizing Sash: Okay, welcome back. Now let's go ahead and continue on. We're going to go ahead and just work on the sash. It's going to be closer towards the last thing before we handled the zippers here. So what I'll do is I'm going to hold left Alt, left-click, and switch to that when I open my folder and I'm going to take a look here and bring my sash out. But if I do that and maybe turn off the sash, may notice there's still some extra parallel here. So what I'm going to go ahead and do is I'm not going to reach apologize these pieces separately because they're kind of part of an extension of the sash. And we can just fake that through the normal map. So what I'll do is I'll just append these pieces over the sash. And we can just reach apologize over that like so. So I'm just going to left-click left Alt on to them. Like so there's one more piece. I have. Let's go ahead and turn now everything off. So it looks like it's just these pieces. I'm going to go ahead and make sure everything's turned off here so that all that's left should just be this zipper strip. So let's just go ahead then and go through the process of merging all this stuff down. So I'll and simply hit Merge Down and hit Okay, merge down and I'm going to hit Okay. And then I'm gonna do a quick little history save. So I'm going to hold control and left-click so that we can get started and begin. So this is a pretty standard one if you wanna kinda reference back to what we did in the color and the front fold of the jacket. It's a similar concept. We're just kinda dragging some pieces around and then we're going to just simply do an extrude from them. So let's just go ahead and start with that. Now, to start with, let's see if we can just go through and draw in our polygon. And again, insert multi mesh primitive h, choose your single poly. And you can, if you want, just make sort of like a, a modestly big piece like that. Let's split that out under sub tool split on mast. And now we have that piece. So let's turn it back on. Let's hit Shift F to go into transparency mode and turn ghost off. Let's go into our Z model or brush be zm and set up our extrude to snap to surface or point to slide along with, move along with snapped to surface and are do nothing. And now I'm doing the same thing over and over again because I want you to get this foundation memorized before you go in through anything. Because again, we're where our audience is also beginners as well. So if we are frustrating the intermediate people, I do apologize. So I'm just going to then draw something simple. This is a little bit easier because it's not like as taxing as the other piece was, it really bent around. But this is an awfully flat terrain surface that we can get along with here. So I'll just go ahead and just kind of bring in three wide areas. Let's see if we can get away with just dragging something along with just this. So I'll hold, tap one out while still holding left-click, tap left ALT, bring one out like so. And then do it again. And then go through the process of just kind of arranging everything. I think this time around, I'm going to simply draw out, we're going to do it similar to the front fold method. We're, we're just going to draw everything out first and then just add insert edge loops. It's kinda like when we did the sleeve of the jacket, which is kinda like drew one edge out and just kinda moved it all along. We'll just go ahead and do it that way. And kinda see again, I'm just going through and respect and the whole process of all this and taking some time. And once we get to a fairly straight line right here, which could be right around this point. Center this. And let's just go ahead and reset the rotation left Alt, left-click on there. Some point that maybe let's snap these guys back in. And again, Oh, that's right. Probably need to remove the mask sometimes it's a little bit hard to see you don't have a mask does roll around a bit. So let's just kinda go with that. Bring it down to about something like there. And we'll just go ahead and just move it all the way to the bottom there. So something like that. Bring it all the way to the bottom. And again, we're going to have this sort of snap. Once we get it aligned as best as we can. Make it go like maybe to say here. Put it around to around here and we'll add more topology all over around so that we can make it work a little bit better down here. So let's just go ahead, clear that mask. And let's just begin adding some topology in here. So now let's to insert. And we did do a history saved so we can just project the stuff on under sub tool project. Whenever you're going to do make sure. Grab that answered. Because it's again, like before. In the other one, you're going to find scenarios where this things are going to be on the other side. Like I can't grab this one because it's on the other side. So even if I go to the other side, it's going to be a bit of a pain in the ass. So we're going to have to go into solo mode and maybe just go through and do a mask, invert the mask. So we can bring it out that way. Another way we can do it, it's just move on. That's another trick we can do. Bring it back in and check the history, should be able to move it in. This one is stubborn and let's go ahead and move this friend over. Let's bring him out a little bit further. See if we can project the history. Maybe just a little bit better. Let's go ahead and add some more topology. And again, just some history. We're going to lose some of it over here. So let's just go ahead and bring that guy out of little bit more so that he can be projected on there. Perfect. Might not need to go through such a process here. So let's go ahead now and see if we can line up all these farts. And that they're a little bit closer to the edge here. Because I want them right on that edge. All right. Little bit more over here. All the process. How many times am I going to say that? All the process definitely can put something here. Oops. We can probably put one here too. So we can fill up that spot a little bit more. And, and you know, even though when you put it in Insert Edge Loop in there, as I say over and over again. It's not projected. It's not projected at all. So you gotta go through the process of either projecting it by snapping in on through the move vert or the project history. And I usually go with mover because Project history majors bring it to the other side. And again, that's not necessarily what I want. I don't want it to project to the other side because we'd be running to the same pitfalls that we deal with when we're doing the the color. So it looks like we're getting closer and closer to our goal here. Let me see if we can. That's right. I wanted to do some down here. Might be to just go ahead and put one more. There are certain area right around here. Beautiful. Starting to take its shape. And again, like we did with the color, we can just go ahead then and just go through the process of just doing an extrude and extrude, we'll go through and give us a mesh where we can kind of have poly groups created. So like what that means is this like, for example, the front side will have a poly group and then with that front side that's the detail will be extracting. Those are the details, all the details that will really ever need. We don't need to go through the backside and do extracting because we didn't sculpt anything in the back in because it's kinda mainly hardly ever seen. So you can just kind of, Let's now just go ahead and add some more edge loops going down now. Namely somewhere around here. Up to hit Insert, holding space down, spacebar down. Nicely. Actually filled out while see what you do. Project the history. And they're like came out, she's fine. And one more down here. Just came out just fine. So let's go into so lemme take a look at this. Make sure there isn't any dipping births anywhere. It doesn't look like it. Right? And I may just add some extra topology around here because maybe if you're rigging, you might want to have some topology, extra topology to deform, like if this is going to be rigged, for example, you'd want to have some degree of flexibility with topology to deform all this. So clot, the clot that is detachable, that can have the opportunity of secondary animations. You're going to want to make sure that you have a little wiggle room for that. Let's go through extrude. And we'll go through this really super quick. It's pretty easy one here. Nope. Like so. All right. So now once you have all that taken care of everything is where it should be. Let's go ahead and see if we can create some thickness now out of this with a function. Okay? So I'll hover over the face and a hold space bar, space bar down, hit Extrude. I'll choose all polygons. And then I'm going to go through, and I'm going to go into solo. So I can see this better. And I'm going to inverse the normals because I'm extruding that way and extruding into the normals can be it can it's known to iPad issues happen where this has gone fine. Like you get this kind of an issue where it's inverse like that. So whenever we're going to extrude in Word, I go through display properties. I hit Flip and double because we're flipping the normal solo go that way and double so we can still see and do an extrude from this angle. It's basically showing the backside of it. And we just do a basic extrude about that depth. Then if you turn double off, you can kinda see it's worked itself out. Yeah, you don't really need to hit flip again, but that is that we've got something that's a little bit more clean. So now that we have all this you can go through if you want. You can. I wouldn't try to relax any of these because it's so thin around here that when you do a projection it may clamp into the other side. So you might want to just be careful of that. But from this moment on, let's just go ahead and go through geometry. And let's go through a cheerful want to hit SMT on this one, we're going to get a little bit of collapsing, but I'm thinking I might be okay with that. Why am I okay with that? Because SMT is going to make all this stuff Angular. And I don't wanna do that. Never really had that kind of a problem with the others. But now, let's just go ahead and play it by ear and see what it gives us. We can, let's try to do some crease poly groups on here. And if possible, I just went down to geometry and hit crease poly groups that hold the edge here. And trying to think how I'm going to play this without it having a collapse down on my crease, this edge here. So I'm going to go ahead and hit. Okay, now, what I'll do is We're going to hold down on the edge, hold space bar down, hold crease. And I'm just going to increase that edge right there. So again, yet again, another function for Z modeler will use to help us out here. So that way, when we divide this out, we can smooth it and it won't have to be so angular looking here. We can get something like that. So first thing I'm going to do is undo to the beginning, going to shift select, left-click. And I'm just going to apps. Divide it once. Should coupon, and then just go through, do a project history on that. Divided it again. I can try doing a project history, but I'm afraid of the other side getting screwed up and torn up like that. So my chest go ahead, shifts select again, project some history and keep that backside clean. Divide it again by holding Shift arm, sorry. I need to first of all, divide it this way. Then shift left-click select. You can project some history back. And this is a good time now to get into our history, recall brush and thing we might be seen we're losing who are not there. But let's go ahead and see if we can do some like right here. This is a good place to start work in some detail. It looks like there's definitely some detail that's getting a little bit lost. So let's just take our time on it. Because the better the silhouette is or established detail is. At this point, the easier time it is down the road. All right. Let's give it another divide. Let's bring it all back. Shift Control, left-click, give it another divide. And let's see if we can project some history into there. It's getting there slowly arriving at our spot. Let me take a look on this. Yeah. We didn't do any projections here. Let's go ahead and just kinda, once again, I'm re, smoothing, rotating this around again. You just want to make sure that camera is facing right at you when you do the details, don't go all the way around, like so. Unless you run into that. So keep it all in mind. We're slowly getting there, we're getting our details back. My to be tempted to see what's happening down here. No. You got another Let's do a little bit of troubleshooting here. Who? Looks like we've got a little bit of fun stuff to deal with here. I think we have ourselves a non manifold edging that's going on here. See if we can bring it out. Yeah. Go ahead. Yeah, I know What we did. The reason we had that weird little topology in case anyone wondered was because I was dividing isolated selection. So I apologize on that. Let's see if we can get everything back here again. So I'm just gonna do this super-fast now I'm just going to rush through and get this all back a little bit quicker now because you know what to expect at this point. So I'm gonna do crease, poly groups crease. And we're going to do another crease. This time. Now we can do it in a higher state, but it's a little bit difficult in a little bit more trickier, but I figured I'd just go ahead and forgo because I really do some you definitely want to take time with perfect scrunched on that right angle. And kinda Sam work in a little bit quicker. And I'm also working with the smaller brush so I don't cut into the wrong areas. And now let's bring it back. Isolate select. Really nice if that was all I needed. You can just go ahead and give it another division, but I don't think I'd like to. There we go. Alright, beautiful. So bring it back. We got our topology and we got our thickness. It's about what we need. We don't technically need this backside, but, you know, I would still keep it there anyways because Some engines, some game engines, if you were to take it into a game engine, don't support back face calling still, even though they should at this point. So you'd have to build in some topology and the backside. So if I would just keep it there just in case if you can't, you can just delete it at anytime you want. So it's sort of a safety measure. So with that said, we're just going to hit sub tool. We're gonna go ahead and delete our original now we don't need that and we'll just hit Delete and make sure it's the right one. And then we're going to rename this guy sash, high, almost hit uppercase and I don't want that. It's underscore all lowercase, it's high. So we now are getting now closer to a point where we are getting to an end with our jacket. We just have one more piece left. And that's going to be these fun little sub tools of the, it's going to be these fun little guys up here. The zipper is basically going to be our last piece and then we'll move on after that. So with that said, stick around and stay tuned.
125. Retopologizing Zipper: Okay, welcome back. We're going to go ahead now and finish up that jacket. We have just one more section to doing that sort of the zippers. Now, they may seem simple at first, but the zippers can be a little bit complicated because if you remember when we did the zippers all the way back, we did it through an insert mesh brush, which means all of these you see in here are actually separate pieces of topology. And what's more is, is that there's little gaps in between here that if you try to do a history save and then reproject the details, you'll get a whole bunch of spikes that are left out and jutting out. So we're going to have to kind of tread carefully on this one and kinda come up with some new techniques to deal with it. So to start off with, let's just go ahead and do is we always did. Let's get that out of there. It will be our last piece. I'm just going to go ahead and just simply move this last piece out of the folder. Now that I've done that, I'm going to go ahead and turn everything else off. And as we have done so many times, let's just put a strip in there. So I'm just going to hit B i. And then I'm going to look for my insert multibeam rash. And then I'm just going to choose single poly and we're just going to be drawing Pauli's all the way through here. So just draw one end like so. And then I'm going to split it off with split unmasked. And then we're going to go Shift F transparency turn goes off BCM. And let's see if we can get this guy to set it to extrude snapped surface point, snap to surface. So let's just go ahead and just draw strip. That goes all the way through. Now that's probably going to be sadly enough, the easiest part of this whole things. So let's just get that out of the way. So I'll just go ahead and just bring it in through here. Like so. And I'll just go ahead, even put in some insert meshes right here and here. And here. I'll go ahead and do just for the sake of temporary control, left-click to get that in there. That way we can do a projection history. So do one more right there. Injection history. Alright, so just kinda keep in consistent with the very edge here. And I'm just going to do some extruding along the lines, just keeping it fairly even. All right. Will be adopting a very similar principle like we did before. We'll just go ahead and get the sky too. The pretty much at the top, so okay. Easy-peasy, pretty much the same thing as we've always been doing. So nothing crazy or new on that juncture. So now that we have all that taken care of, Let's do as we did before. Let's do a quick little project history. Our m sorry, and extrusion. Just a quick one. Now, this is where things could get a little bit dicey, so kinda bear with me. What I'm going to do is I'm going to first of all go through display properties. And we're going to hit double. We're going to go over to the face, hold down spacebar, hit, Extrude as our choice. Whoops. And we're going to do all polygons for our target. Make sure to hit Flip. And just bring on some of these guys out. Like so. It looks like it was a little bit off. So I'm going to undo something here. Because I want this to actually line up as much as possible before I start in on this facto Go ahead and uneven. Do a quick rundown. Everything, making sure it's looking consistent. That's a pretty flat spot right there, but it doesn't matter. All right. Maybe. Let's go ahead and flip those normals. And let's just see if we can get a little bit cleaner of an extrude. So now that we got that extrude, Let's just go ahead and we're going to first thing I'm going to do is I'm going to duplicate that mesh. And I'm going to turn the visibility of that mesh off. Next thing I'm going to do is I'm going to go into solo mode and I'm going to put some creases around this area. So at first off, we'll start with creases around the poly groups. Because I'd like to divide all this and I want it, but I still want it to hold its shape. So again, I'm just going to, if I hit D, Command D, you can kinda see how it collapses. So let's go through geometry. Let's go through crease poly groups, increase the poly groups, and if we do that, it collapses still on the corners, but everywhere else it's fine. So let's just use z modeler to hover over an edge, hold spacebar down, go through crease, make sure it's just one edge. And let's just nail these creases. Alright? And if you're with me so far. Okay, so now if I hit Control day, we got a little bit more wiggle room to work with. So now, after we've done that, let's go ahead and go back into solo mode. The next thing we're going to do is, is we are going to kind of turn transparency just a little bit off. And I would like now for you to hold down spacebar and go into your Move brush in case you haven't figured out this piece is not going to be read topology guys. Let's go ahead and make sure in sub tool, Let me go ahead and undo that. Of all. Make sure the visibility of that is off. What you've seen me do is I'm trying to create basically, let's take a look over to this piece over here. There's like these little transparent holds. That's because it's an insert mesh. So what we're doing is we're trying to fill in the gap there with just some kinda fill it in with a piece, reusing our read topologies piece like cell. And I'm just kinda going through and doing that now making it too horribly deep. But we're just kinda go in through the molten left Alt and then left-click and just kinda push in. It's slightly down in. And I'm just kinda make my adjustments. Like pretty easy, pretty basic. Right? Now that we have our adjustments, we're going to now just make some, we're going to go to the side profile and check our side profile and push in anywhere. Just to sort of push in if you want. Basically trying to just create this. And then I'm going to hold Shift F to so I can see it a little better so it makes sure it's not protruding out. On one like right here. I'm going to hold shift up, maybe tuck it in a little bit. So we don't see any major protrudes. Left Alt, left-click, pushing away from right here. All right, so now that we have that taken care of, Let's go ahead now and take this piece and merge it with our high res. Now our high res is on top, so let's just move that down. And then let's just simply go through the process of merge down. Select the higher one. All right. Now that we have that taken care of, we can go back into our reach apologize piece. And in fact, we can also hold and do a new control left-click to make a new history save. And let's go back into our other piece for now and see if we can do something very similar to what we did here. Now, for this, it's not a 100 percent always necessary. I don't recommend you going through and trying to do a projection on here or a project history on here because you could still wind up with some very tangled the results, I can't really guarantee good results out of this one. Let me show you. We can try it, but I'm not entirely sure the results are going to be that good. I normally would be more daring towards probably trying to do something along the lines of you have. Probably we can try it, but I'm not really too sure you're gonna get some good. So let me go ahead and just do some crease poly groups and then see where we can go from there. So let's go through geometry and go through crease, creases, those poly groups. Let's go into our Z modeler brush BCM, and you still have the crease modifier open. So let's just go ahead and crease these guys. And from here we can just divide it up. Give it right now, just maybe couple divisions like that. I'm not really too sure this would work under Projects history. If not, we're going to have to do is we always did because I I've always seen it kind of end badly, but that's not as bad as I thought. Let's just see if we can undo and maybe tried more distance. Bring that to the top. Okay. It's not too horrible. No, no, no. Vh is true. Recall. Yeah, that's what I was always afraid of. So what we're going to need to do is for me, when I like to do is just to go ahead and mask off the backside. Maybe feather it a little bit and isolate, select, and bring in my topology this way. So with that said, let's go ahead and give this guy, whoops. Couple more subdivisions. See if that does some something like that. Maybe you can kind of see. We're getting our details sort of restored back. Got two angles. The work here, one is this one, and then the other one is this one. Okay? So as you can see, we have our topology re-established. You can try for something like doing the sides. I don't really think the sides give us too much of anything that matches too well, like over to here. So one thing that we can do to deal with that is either a make the brush smaller, but even then you're still going to run into things like that. Probably the one thing I prefer to do is just go through mascot, everything off like that. Its center pivot point and just bring this guy out. You can just sort of move this brush a little bit over. So what I'm doing. So it's kind of like that little bit. So that's kind of how we deal with this mask brush. And now it's not the easiest one, but you'll get a projection out of this either way. The other thing that you can do is, and I hate doing this one because it takes probably the longest. If I'm going to be truthfully honest, is go through the process of. Doing an alpha mask that can go through here. Alpha masks, however, are texturing thing and we're going to talk about alphas and alpha cards quite a bit, not an alpha mask when an Alfa car do like one single polygon strip that can go all the way through here. So that's sort of how that all works. So what I want you to do is now that you've seen that side of it, I want you to see if you can read, duplicate the same thing over two and do the same thing again to the second side. And then now stick around and stay tuned as we go to the next piece, which will be the belt and shoes. Now, before we go, I'll probably just duplicate this once. And I'm going to go down to my lowest res version. Bring this guy in. Similar pivot point, center rotations and deformation. I think I might have to do a mirror. Yep. Highest subdivision goes by. Can't do a mirror without with sub-division, so on. So I have to go delete my subdivisions, go to the highest subdivision it to delete lower, go through deformation. And I'm going to hit mirror. So it's now on this side. And then we go through geometry and reconstructor subdivisions. And if you remember your training to the Alpha masks that we did in our the why do I keep saying alpha masks? The hair strips, then this should be a walk in the park for you. Unless you are once again, curse with multiple subdivisions. I never had to do it that way. Okay. So I'll just go to the highest subdivision and go through a bend curve. Just to sort of find a little cheat process and all of this like a little shortcut to deal with it all. Kind of see where we're going with it. Let's go ahead and just take the side profile, which has a lot of work we need to do. And if you need to rotate it, you can. Another one here, just too many. Let's turn that guy off and reconstructor subdivisions. Geometry reconstructs. So here we go. Now we've got our subdivisions back. So let's go ahead and check this out with the rest of our jacket before we merge anything. Let's see here. Some holding Shift D to go down and just move that in a little bit. Okay, so that looks like it's going to work. So I'll just go ahead then and go through the whole problem. I see I have to kinda go through tucking this and now. Well, I might actually just leave it like that. Actually, I kinda like how it is. I'll see what I do. Know. It's all process. That's the nice thing about having read topologies subdivisions though is as you can definitely work with seeing like the result or the end result of everything. And you can move things a lot better now that you have subdivisions and you don't have to worry too heavily about things like stretching any UVs because you haven't UV to anything either. Bring that in. When you can kinda see what I'm doing, I'm just kinda make him my reference and my adjustments. And then we'll see if we can bring this back end. Alright, so we've got some nuts there. So we can definitely be happy with that. And the nice thing is, is that this really will make things a lot easier down the path. If you, wherever you go in the texturing phase, if you wanna do new movies, we're not sure if we want to recommend UV master a 100 percent as your solely in only functional form of UV. But as we go further in, we'll give you a breakdown on what we think of that in the second course. So with that said, we're moving on to the belt and then the shoes. So and then we'll finish the arms and being the last area which is going to be the head. So that said stick around and stay tuned.
126. Retopologizing Main belt: Okay, welcome back. In this video we're going to continue last where we left off, we finish the jacket now and now we're going to move on into the next pieces and it's going to be the belt section. After that, we're going to move down to the feet section and then we're going to finish off with the hand section, which will leave us last the head and the detachable pieces that come with the head. So let's continue on. So the first thing I'm gonna do is I'm going to turn off my read topology guys sculpt so that we have a little bit more angle views here. And you can kind of see, we just wanted to make like a real quick fill or belt. We didn't want to it doesn't really get seen very much, so we're not going to really do too much with it. Our main detail is going to be on the other side. So what we'll do is I'll start by making the belt, that strap that goes around there and then we'll take it from there. So let's just go ahead and just open up the belt. And let's bring that out of that folder by hitting the down arrow and r sub tool. And let's go ahead and close out the finished sculpts so that we just have this now, It's pretty basic and straightforward of version. One thing I will say though, which is kind of important, is, let's take a look at these rings. Let's see if we can append these onto that belt. That way we can merge these and that way we can project the details of these onto our reach, apologize, sculpts. So let's bring that out as well. All right, so now that we have that, let's just merge these two down. And let's just do a, let's turn off the visibility and we'll do a Control left-click to do a history. Save on that. And we can then go ahead and just proceed to begin with the belt. Now this looks very similar again to our Trim of our pants. In fact, it's almost dead on similar to it. So you shouldn't have any problems with this whatsoever. So to begin with, we're going to first of all, just go ahead and hit B i and bring in insert multi mesh primitive H, Select or single poly. And it looks like our single poly comes out a little bit funky fide here. Let's see here, There we go. A little bit of a smaller. Bring this in. Maybe just, You gotta remember to make this a little bit smaller with here. So get a good standing point. You wanted to be able to come somewhere in the middle of the trims there. Let's go ahead and split on mast to our wireframe transparency, switch onto here, turn off ghost z and set everything up to begin. Right? So it's pretty simple what we're going to do from here. You already know what's going to happen here. Pretty easy. I'm just bringing it as foreign as there. And maybe like it's foreign does there. We're going to have a hard time turn it. We're going to have a fun little time trying to get that guy already know that we're going to have some fun with him. Hold control over that bird. Let's bring it. Let's invert the mask center point on there. Bring that guy and somewhere around there. So it's right behind there. See if we can then just real quick do a basic projection. Yeah, good. So try that again. There we go. So let's just go ahead and just extrude along. You can already guess what comes after this. It's pretty much going to be an extrude on the faces. And then we'll just go proceed to reproject our details through everything. Hello. Kinda see, we're just kinda reopen along here. Mary was concern that there's going to be a little bit of an issue with how this is going to kinda play out towards extrusion. We bring this in and we'll get there. I'll put one more Insert Edge Loop across there. That way I can kinda taper off the end. Also will give me more 1.5 to go through such high subdivisions when I'm trying to reproject in that ring. Alright, so let's go ahead and do an extrude, hold down spacebar, and do an extrude. Well, I forgot all of them. All polygons. And I forgot to do a flip the normals as we're going inward. So I'll go ahead and do display properties, flip those normals, and we can do it from this side. And just maybe just if we can't, then you can just hit double. Alright, so now that we have all that taken care of and all of that situated, we have a little bit of a basic readout. Let's see if we can go through geometry. And well, we could do one. Yeah, I think we could probably get something there. Or if you want. This was extruded. So we have poly groups, we can do a crease poly group and then maybe just divide it that way. Might be easier. So now that that's all situated and done, next thing we're going to do is isolate, select one of these. It's going to solo mode. Isolates selecting this going into sub tool, and let's just project that history. Little bit off here. Let's get into our history. Recall. Oops. Gotta remember we're doing. Let's also just mask some stuff out. So that when we do whatever we need to do over here, we are not going to run into any issues of projecting it over to the other side. Just kinda check and around the sides here. And let's clear that off. Oh, shoot. Oh, I forgot to bring everything back. Let's make sure that nothing was there. Leave it a few more to three. And let's just go ahead and do the same thing we did before. Let's just hold a mask and bring this and look at that. Given some results, you need to do one more subdivision. That's fine. I'm not really going to press it too heavy past this point because it's not really a main feature attraction. The clothes are covering a lot of this up. And that's kind of why I'm not like going to be like, Oh guide. It has to be done perfectly like this. It's not like a huge deal. Oh boy. Let us try doing isolate selection. Get it looking like that. Let's clear off the mask. Let's invert now the selection. Now. Let's change ONJ hold Shift Control. It's changed into a lasso. So we can grab a little bit more monstrous, see if that works. At dam. Just going to have to resort to a smaller brush. That's going to be stingy place. Same thing over here. Let's bring it all back. I'll just go ahead and I'm probably doing some texturing that I don't really necessarily need at this point because you never do see. Alright, so now that we got that, we got to some of these details. Restored, hold Shift D down. We've got our low res. Let's go ahead and rename that now. And we're just going to rename that to be Belt main underscore high. And then we're just going to put that underneath the topology. So now we can delete this piece. It is no longer, are no longer necessary. So now, what we're going to work on now that that is finished is first, let's go off into solo mode so we can see, see if we can work on trying to get some of these easier pieces which shouldn't take us too long to accomplish. Some of these can be done with cubes and basic one place extrusions. But the belt, as you can see, it goes by pretty fast. So with that said, we'll be done with that. We'll move on into the shoe in no time. So stick around.
127. Retopologizing Belt Pieces: Okay, welcome back. We're going to go ahead now and finish off the belt by doing some quick read topologies of these pieces here. One thing I'll start with, I'll go ahead and start with this little main piece and get that out of the way here. So first thing we'll do is I'll turn off the visibility of the Brock of the folder. Scale this out of the folder. Like so. So now that we have that, we can just kinda get started just focusing on this. So one of the first things I'll do is I'm going to try to simplify this one pretty easy. All I can do is just hit B. I bring in a polygon plane. So we'll just go ahead and do that with our insert permanent mesh. Just draw one in real quick. And we'll just kind of scale, kinda rotate around, make sure he's fairly flat. And we'll just kind of scale him up and bring him slightly above like so. And then I'm just going to just simply push him in just a little bit like that, just trying to get them as flat as possible. And this is a pretty simple one we can do. All, all we're doing is now we'll go into Z model or BCM. We don't even have to do really any kind of read topologies on this one. I'll hold down, go for insert edge loop and we can go into so low here. But first thing we need to do is split this guy off. And I can just simply just going to draw a couple of insert edge loops. Like so. It's almost like we're just remodeling this one from scratch and then just simply deleting all that. And then we're just go through Geometry, modify Topology, and delete that off, delete hidden. And then let's just go ahead and do a quick little extrude here. So we'll just go through, make sure we got the function correct. And let's go through display properties, flip the normals and hit double, kind of push it in like so. And you know, you could divide it, but let's go ahead and see if we can increase, maybe just these corners here. We can, we can also do geometry, crease, cruise poly groups. And you can also delete this backside if you want because it doesn't get seen. Change our z modular edge to crease. And, and kinda see how quickly we're getting through this one. And it's not really a very complex piece, It's just pretty simple z modeling process. And wants do some real quick here. Let me just do a real quick well, belt buckle for us. All right, so now we got that a little bit taken care of here. And let's just go on to the next piece. Careful of that. Let's go ahead and do. For another alternative to this. If you're getting too much of a hanging drop over here is you can just not crease these edges and just do an Insert Edge Loop like somewhere relatively close on both sides for each corner. And that can be a good alternative. Alright, so let's go ahead and take that off. We are now done with that. I'm not going to just do anything with that just yet. I'm just going to go ahead and delete that high res this in the end. I'm just going to upper as this and just keep it stationary for a moment. And I'll just go through, turn on my read topologies, rising. See what we have here on my reach apologizing, but my finished sculpt have a little bit of a mesh we can do here, We can do it any way. We can do a cube in fact, so if we wanted, we could use BI insert multi mesh primitive. We can go through and do like for example, a insert cube, whether it's a high cube like so. We can just kinda flight. Hold left Alt, left-click and just drag one on there. Another one we can do is just the insert h cube. And you can kinda see Bye. Doing that to what the differences is, there's a little bit better topology with this one to work with. So let's split that unmasked thing off and bring both of them out into the open here. Right? Now let's just go ahead and it's almost like scaling everything back. You know, you just a lot of this is just gizmo scaling work here. No, not too insane. Seen pivot point that all right. So invert that. And we go similar pretty much. We have nice little place if you want. You can also draw in some extra edge loops. So BZ am, whoops, hold down spacebar, go through with insert. And we probably also have to change our geometry. Kind of see how we're just kind of getting through this pretty quickly. Now one thing I can do here is I can hold down control and take all these and invert and then hold down control to these guys, then center pivot point. And we can just kinda bring this up just to kinda around that. And then we're pretty much done with that one. So once again, we can just go through and delete this high res version off just by hitting delete, did eat. And then just maybe give it a couple of subdivisions. Nothing to him and saying. And now we got that piece on. You can kinda see how fast we're going through because these are pretty small, simple pieces. They're not really too crazy or anything insane. So we'll finish up with one last piece here that we're going to read topologies guys, that those two pieces alone just took like one, almost eight minutes, pretty much. So let's just go ahead and just take the last piece here. We're just going to reach apologize one of them and then just duplicated across. So same routine as before. We'll just go ahead and just simply I'll go with some standard uneasy BI put a plane in there. So bring him in, scale him. And this one definitely since it has detail, nuts, we're going to have to now put some detail into this. So that's also what we're going to be doing here. Before we begin. Let's go ahead and split that off with split unmasked. And then let's do a history save, hold Control, left-click. Let's go back into our piece wireframe trans pose and turn goes off. Let's go now into our Z modular brush museum. And which is going to now hold spacebar, spacebar extrude this out right here. Maybe. Then maybe just one more insert there. And let's just go ahead and project that so we can clamp it down or we can just I'll just leave it like that. We may not need to project that too much. Al, just go ahead and I'm going to add one in there just so we can have less subdivisions. Project the history on there. We've got to go and good. Now all we need to do is just kinda do a quick little project history. So let's just go or an extrude. So hold down spacebar, choose your extrude, choose all polygons. Let's go through display. And let us hit Flip and double. And let's extrude this guy out. And that will give us a little bit of an extrude process there. If you want, you can also maybe put a little bit there, but I'm not really going to need that. So now that you have all that, all that is left is to maybe just do like go through and I'm just going to simply. Go through the process of kind of projecting what I see here. It looks pretty much solid. Collapsed them quite a bit. So that's probably because geometry is turned on or we didn't do any creases to our poly groups. So you can do either or. So I turned SMT off smooth modifier, did one more project. And looking at this, let me see if I can just do it from here. I'm going, I go into solo mode so we can see what's happening. What I'm doing is I'm just kinda given it to division, going through geometry, smoothing it out. Given a couple more divisions, maybe total of five. Let's see if we can get some fair hair and restore it all with history. Recall. Yeah, that's actually okay. One more. And that's actually good enough for me. You can do it to it's a bit high for that. We're going to do that much. Let's just go ahead and delete the backside. We're not going to need that. So Geometry, modify Topology and delete that hidden. Now. Now we can delete. Now. We are going to have to actually get rid of some of this. Fortunately. There we go. Beautiful. So now we got all of that taking care of who went through pretty quick. So let's go into solo mode. And we can go through and just duplicate the sub tool that we did and just reposition this guy up. And again, this bell could have had more detail to it. But if you see what I do in detail on the face, you can kinda see I've made my choice to kind of limit it there. Of course would have been probably tenfold longer a foos that case. Let's just go ahead and delete that off now. And now what I'm gonna do is I'm going to go through the process of merging all this stuff on, but I'm going to make sure I'm on in the highest subdivision for I go for he do any merging. Always, make sure you have quick save on and get through this. Hit Merge. Merge down, and merge down. Let's just make sure we're on the right one. Yeah, Merge Down and merge down. And now if we hold Shift D, we have some low res pieces. If you feel that you want to have a lower res division, just remember, you can always just hold mask and split mast or invert it and say split unmasked and then go through geometry and hit reconstruct subdivisions. I don't think it's going to give it to me because this is already on its lower, lowest subdivisions. So yeah, say operation cancelled. So that is that. So we'll call this, rename this belt pieces. All right. Once again, we're going to move that out of there. So now we're pretty much done with making the belt. So we're going to move down lower to the next section, which is going to be the the the shoe. So with that said, stick around and stay tuned.
128. Retopologizing Shoe Pieces: Okay, welcome back. In this video we're going to continue on where we last left off. We are now moving now into the lower leg section and we're going to read topologies this, since this is now our opportune chance to go through, we can now go through and just try to read topology guys and duplicate over as our next opportunity. So just go ahead and get through that when you can. I'm going to start with this piece, the SOC sort of area, and then we're gonna move into the strap, which will be pretty easy and it'll be just like we did with the belt. So let's just go ahead and get started. So this one is Scott, a lot of wrinkles and such, and we can draw a palm will our previous experience, one thing I'll do is I'm going to try to make an attempt to 0 mesh this. So what I'll do is hit B, it's some Z guidelines, and I'll just start drawing some guidelines around here. Like so. Also, don't forget you can turn on the lazy mouse with the L key. And just to help you kind of get a smoother strokes if you want. And you can go up to stroke menu. And you can then go under lazy mouse and change your radius to be longer if you need to. For example, I can do a little bit longer radius that way I can get a little bit of a longer step. Now, you can do something like that. No problem. So all I'm going to be doing of drawing some lines in here. And it's not like poly groups where it makes an exact line edge flow. But it does think of it as these lines, these guidelines, they direct the flow of traffic on here. So it's very useful in that regard. And in terms of helping come up with a solution. Measure to work. So all good stuff. And if it sticks a little too much, you can just make the brush size a little bit smaller. We can get something like that. So we're just kinda sudden everything out. So let's go through sub tool. And now let's go ahead and open our folder up and drag that guy out, like so. And we're just going to go through now Geometry 0 measure. And let's go ahead and turn down the polygon count size a bit and see what we can get under the target polygon count. Make sure to just draw that down. Now one thing, That's not too bad, It's little bit all right. One thing we forgot to do is we did forget to do a history saved, so we can do that. Now. Let's go ahead and kind of seaward side each secret and go just slightly lower and see if we can risk a little bit more of a lower topology. And if you ever get stuck on your Z remeasure, just hit Escape and just maybe restart the mesh if it gets too crazy. And that's probably a little bit better for me. So I'm just going to divide this a couple of times, maybe four times, go through sub tool and go through project. And we can reproject our history now. And we got a nice low res mesh we got to work with. So let's go ahead and put that under reach topology. And if you want, you can go further and just kinda delete the inside geometry. Or, you know, sometimes though, I'm going to warn people, 0 measure has a pitfall, unknown pitfall, and that is it. It creates spiral geometry. So if you ever come through that process, just know that's sort of what the pitfall of what Zero measure has. It doesn't do a good job of fixing it spirals. And that's why manual reach topology will also be a little bit better. I'm gonna go ahead and go get away with it with this amount, though. That's fine by me for my purposes. So I'll just move on now. So now that I got that taken care of, I'll turn solo off. I'm going to go ahead then and just put that my reach apologize folder. And I'm going to just rename that sock underscore high. So now I'm just going to then hold left Alt, left-click, and move onto my next piece. And then I'm just going to move that out of the folder so that we can begin to get pretty close towards the end after this one, we'll only have five scopes left and that's just on to the head. All right, so let's just get started. Same routine, pretty much the same routine here. So it's going to be B. I insert multi mesh primitive. Let's just go ahead and drag a guy in there, like so. And so little r dynamic mode is on and solo. Here we go. Let's turn everything else off. And let's turn transparency on. Bringing this. And I think I'm going to start over here actually and snap them right there. And I'm gonna go ahead and hit split. Unmasked, turn ghost mode off, go into our piece, go into Z modular, easy M. And then we're going to set everything correctly. Our Extrude is going to be now snapped surface or points are going to be snapped to surface. And let's do as we always have done. Let's just get this guy. Rich apologized. Again. This is just like before. Same routine. Shift up so we can see things a little bit better. I'm just bringing this around. All right. And you can see and I'll once you get the hang of everything, he can start going through things a little bit quicker. One thing I'm planning on doing is doing some emissive effects on this arrow. Place seeing right here when we get an a texturing, think it might be pretty cool. We are. Let's go ahead and hold left all left-click. Do a history save on there so we can serve project in that MIT. Let's go through projection and make sure everything's clamped. We go. It's kinda like the same thing as before. And then I'll just put a simple Insert Edge Loop cross. They're slow. We can bring some guy over there. And then we'll project all of that. C-h. Stretch. One more piece here. You can kind of see I'm just kinda tuck in it and underneath them just cheating a little bit here. Right. So now that we got that, let's just kinda go through a change. Anything that needs to be changed. What do we got in the backside here? Something a little bit funky here. Shouldn't have any kind of a polygon that does that. And if we do, then I'm probably just going to go ahead and write. So let's hold spacebar down, go into extrude, and make sure it's all polygons. Let's go through display. We're extruding inwards. So I'm just gonna go through display and I'm going to hit Flip. And we can just see it on the other side. We'll just draw it from the inside. Like so. And let's just do some to some creases here. Since we have created ourselves in poly groups here, creases. All right, so I'm gonna give myself about five subdivisions and I'm going to just use the history recall brush to restore the rest here, going to solo mode so we can do it. I don't know why history recall it gives me a hard focal length like that. I remember having this problem. See here. Definitely was a problem. Hopefully. So let's just go ahead and do an isolate, select and change our lasso. We can grab it. I hope that doesn't do anything. Correct? Right. So let's just play it out. Let me give a couple more and do it that much. Now we can start to reproject something here and see where I was struggling while it's struggling was it was reprojecting. It was one into reproject on the other side. And so it's been an issue proximities always been sort of an issue to smooth this guy out or be very careful not to hit it. Because it is one of the issues regarding the history recall on why is it doing that. I wonder, kind of see like how I did this. It is a process to just kinda iterate through. No go. Alright, perfect. So we add a little bit more of this taken care of. So what we're gonna do is call this p, so rename shoe strap. And then we can just delete the main. And I can probably work a little bit more with that, maybe with rejection, history and distance. Now that I have it's hilt silhouette closer in there. So we'll get to that when we have a chance. For now, I'm just going to switch that into low. Now that we have that, let's just go ahead and move that piece. So it's a little bit more closer and in the end, only complain about areas that I'm never going to see. So we've got a couple of pieces there. So now though that's left is going to be this main shoe piece and the bottom shoot piece. So 4k on just trying to make this bottom shoe piece and then work from there to this piece. So with that said, stick around and stay tuned.
129. Retopologizing Shoe: Okay, and welcome back. In this video, we're going to start on the next main body of the shoe. This is going to be the biggest part and the longest part of the shoe. And we're just gonna go ahead and do a read topology optimization over this. And so let's just go ahead and left-click, left shift and click on that, and move that out of our palate menu. Let's go ahead and click on the zipper that we attach to it. And let's go ahead and duplicate that as well. Not necessarily duplicate, but just move it down and out of the pallet so that we can go ahead and merge these two pieces because we can use the normal map and project all that stuff on there. So let's just go ahead and do that right now. I'll just first off all make some adjustments on the shoe. Just to make sure everything is barely in the right spot. Not going to make the two hi there. So let's just go ahead and merge this down. Like so. And now we can go ahead and go through the process of reach apologizing this. So what I'll do first is I'll do an edge extrusion. It's just like the pants. We're going to start by establishing our key edge flow areas and then build off of. So we'll read topologies this area first, make a ring that goes up and then make a ring that goes down. So it will be fairly self-explanatory once we get there. So let's just go ahead and get started. First things first of all, put a insert multi mesh plane on there. And I'll just go ahead and draw that guy in. Then split that plane off with an unmasked point, and click on that new sub tool created hit Shift F to go into wire-frame, go into transpose and turn ghost off. And now let's go and two BCM and set everything up here so that we can go ahead and go through the process of apologizing. So I'm just kind of going through making sure everything is correctly placed. Like so. I'll just kind of it kind of pretty simple here and it's nothing too crazy. And you can kinda see just how we can read topologies this through. So I'm just going to start with a line here. And I'm just making these super, super big chunks, as you can see. Just trying to get along, just trying to get a line along here, just establishing the rough out draft of it. So I'm making very large extrusions here. And then I'll fill in the gaps on where we want to go from here. And I'll probably take it all the way down below. Like maybe something like here. And once again, extrude. Again, we didn't do too much detail on here because our main focuses on the head, but which is kinda put something in here just so we know we have something. All right, so now that we have something there, Let's go ahead and simply extrude down like before. Make some quick adjustments to our mesh. Just like core. And kind of see, we definitely need an edge loop right there. Probably more than anything. I'll just right there because I was massively desperately needed one that I'll just go through project. I don't have any history saved, so let's go ahead and just hold Control left-click to save some history. Do a history. So then we could just get this guy on here. There we are there. We are needed another one right there, but I'm not going to worry about it. I just want to kind of get all these areas here just kind of established because this is going to be our main base line. Main base of operations sort of speak. And besides, it's kinda nice to keep it low res and simple like this. Here. Let's go ahead and click on that. That way we can get a better rotation of the pivot point. And maybe just suddenly drew an extra one that we didn't need there. Once again, we'll just go through just sort of fill everything out there. So now what I'm going to do is I'm going to then just have a very simple process of just bringing an edge loop that goes along here. So we're just kinda bringing something along around this corner here. Sort of makes sure there's said we're going to fill a lot of this out. But first, we want to make sure we have some nuts a little bit more pronounced. It's awfully blocking in, I am aware, but we're going to fill all of that out with some insert edge loops and some projections that will start to make more sense. So now with this point, we can just go all the way up if we wish. Like so, you know, tell you right now if you're a beginner, sometimes low poly can be a bit easier in terms of trying to understand before we make it higher Pali. Know what I mean in a second. Okay, so I'm getting it a little bit closer. So now that we have it in this quadrant, we can start extruding things from here. Just going to do it single Pauling. This point. Reaching. Once we get this far, we'll go ahead and begin working on filling in some insert edge loops, which everyone's like, what do we do in it? Come on. Now let's see. I think we need to just put one in here for things that make sense a little bit here. Check. Here we go. And like everything else, it's just going to be a solo process. No need to necessarily fill this part out. Because again, this part right here kind of gets covered up. So I may just taper at all around here. Because remember we have a soul to do after the sun. And it's not necessary. Luckily for us, we go. So I'm going to be completely necessary. Just one last extrude. Now. Begin to add our edge flow. Okay, so first thing we can do is take a look at our silhouette here. This is probably the spot that needs it the most. So let's add an insert edge loop. Let's switch into our insert by holding over spacebar over an edge and just put it in an insert edge loop. We're going to need a spot right there. We'll probably need a spot to go around right there. And definitely a spot right here. Going up the canvas I can see. Oh, probably one. Not necessarily. Does it really need it that badly up here? But you can use one right there. For the sake of genome. Now, we can just leave it like that. Definitely spots. Let's go ahead and just do some project history so we can just get that in there. It's a little bit more a uniform definitely spots that need it are right around here. These are pretty important areas for projection. Having topology and such. Kind of see, we need to have some silhouette going on here. So maybe just slow, go ahead and just do a couple of insert edge loops through there. And between that maybe even just so we can put something in there, you know. And then we'll just make our adjustments on this. Kind of see how we're kind of making our way around it just to get through it. Okay. So we're probably going to need a few more insert edge loops on top of that to kind of branch out here. So what I'll first do, we'll probably need one right here. And I'm just gonna go ahead and put the edge loops on the top just for now. Sort of at the top edge that way. And then just kinda make them grandchild that way. When we go through all this. Because probably the place that it's going to take the most time on is going to be this front part here. Definitely. We need to put some there. There we go. All right. So once you get there, just go ahead and just once again put a quick little Insert Edge Loop in there. You can put a little bit of a cone there or you can just wait till afterwards just to kinda help you get through it.
130. Finalizing Shoe Topology: So from this point on hold space bar and we'll do some extruding, will take it to about roughly around there. And we'll just kinda extrude along the path here. And one side complete the circuit. I'll go back. Eventually puts an insert edge loops around here. Remember we're not too freaked out or concerned about what was going on there. Note, for some reason I cube mesh on nine, not ever want my guys getting a little bit funky here. Fun part on this one's going to be tying the cell. That's going to be a great time. Probably should have done a sphere. That is actually one good thing that we could have talked about is the sphere. It can be something that can really tie some of these things. And let's go ahead and see, whoops, I accidentally DynaMesh this. Let's go ahead and hold down control, invert the mask, see if we can do something here. And just bring, stretch this all the way in flat, cone, all the way on just a bit more. And see if we can reject it. Then let's see if we can add some insert edge loops around here. Well, we're, now, here's an interesting problem. If you're trying to add and insert edge loop. And you don't, and it doesn't make its way around, just make sure you're going about the process of holding shift look for any sort of non manifold topology. Looks like we got a little bit of it there. Let's keep it like that. Okay, So a fun one to tie this off. All sorts of tricks can be done. It's like we got some here. So let's just go ahead and hold space and delete, delete that guy. And let's extrude something new out. If we can. Yeah, a little bit of a more. Well, do I, did I accidentally, now that's what I did. Symmetry are so fun to work with. Alright, so now that we got it up here, Let's just go ahead and see if we can do something here. We can go about doing it kinda like this. You know, just kinda bringing it in and just kind of finding a way to reduce our edge loops. I'm not going to judge if ye take that path. The other way you can do is just tap left Alt and bring it down and bring it across. Like I say, I'm not going to judge it, but if you have too many, it just don't pinch it all in. Because sometimes having too many, like a 20 start junction can really screw up with your what you would call it the projections. And quite frankly, you're baking. Let's go ahead, do nothing. So we got three here and let's get three to line up on this side. This a little bit of a longer way to do it, but you can kind of see now why this takes slightly longer. So now you would just simply hold spacebar insert and then just kind of wine everything up. Maybe you want to just kinda bring it in, kinda like this. And you can do that. One more edge loop there are going to encounter like that. And so from here you can just simply do some edge extrusions down here. Do here. Let's see here. Will do more. Insert right here. And then go into extrudes that lines up a little bit more like that. Then from here we can just, first thing we'll do is we'll mask this bottom part here so we don't let it give ever. And here, you can just kinda smooth this all out, kinda like so. And then clear the mask. Project your history back in. Kinda like that. So once you have sort of a grip on how to do that, the next thing we'll have you do is we're probably going to see if bout doing thinking. Probably we're ready to do a restoration of the details. More projection. We go. Let's take a look at it and solo. And we've got our, we've got our piece. You can add more edge loops down here if you want, or maybe more edge loops across here. So you can just keep doing it. All right, so let's just go ahead now and just tried to reproduce and reproject our details on here. So again, let's just turn off this high res. We have it all there. So let's just turn off. Whoops. I think I did forget some must have accidentally deleted some over here, and so on. First things, first, one thing I forgot is, by the way, this is right down here. Let's just turn it on real quick. Nothing too crazy. I'm just going to tie everything off here because it's the bottom of the shear, no one really cares. Just bring it across and cross hatch. Same thing again. We're just kinda you can kind of do it this way, but remember there's soles underneath you don't necessarily have to take this route. C. And that is that. All right. So now that we got that settled, so work on trying to reproject Samovar details now. Just want to go through all this, makes sure everything is handled. There was a little bit of a problem here. Beautiful. Let's go through and go and solo, divided a couple of times. Let's look for things. It's like we got something down here. So let's take a look at that real quick. Select something didn't line up like it was supposed to. And it's okay to buy this again, see if we got anything. Now worried about this bottom sole area that's being taken care of. Not sure what the hell happened here. What on o must have been some bird on vert action here. That's rather on, maybe it was a queue mesh that I was working on, accidentally hit. Okay. So we divide a couple of times. It looks like all the potholes are fixed. Let's just go ahead now and just hit geometry, turn SMT off just for now so we don't get any collapsing object history wants. Let's do it again. Projected again. Look at everything. You're getting through it. Rejected again. Let's get through that. Just trying to get through the main piece here. Switch into our history, recall right here. And take a look at some things. I'll go ahead now and change into and smooth modifier. And now I'll just go ahead and get manual with everything. Maybe I can just test this, test the waters with a project history and see, you know, my problems here and just fix and all my problems. All right. Another project a little bit messy up here. She's holding ships, smoothen it out, and then just using Project history to reaffirm it a little bit of something. Here. I'm going to cheat a little bit and just give it a couple. See if I can work with just skipping a few beats. Now as you can see, we're getting our detail back here. We're storing everything in and just holding Shift smoothing out, holding Shift smoothing out, holding Shift, smoothing out. It's basically relaxing. Sharpening, relaxing R3 sharpening. Within the caveat of something going on here. Wonder what happened here? And having some fun with this guy. A little bit better now. All right, so now that we have this starting to kinda go through a little bit better, a little bit easier. I'm going to just go ahead and just name this, rename this. So she'd say shoe main are underscores shoe base. And we can just go ahead and go through the process of deleting the decimated version of this. It's a soldier or the Jairus were just delete that off now. And with this guy, we can go through and drop him in our read topologies rising area. And just go ahead and turn on everything. And also maybe hit Quick, say after you're done, don't forget to do this. I forgot to show this in the last lesson, but definitely don't forget, you know, you're duplicating this and you're bringing it to the other side. So again, you're going to hit, you're gonna go first of all, all the way to the top. And you're going to duplicate it across. And then you're gonna go through geometry. You're going to hit Delete lower because marrying something over with deformation requires that you delete topology. So once again, after you do that, you're going to have to then go around and hit geometry, reconstruct division, reconstructs division and keep on going back until you're at your base again. So that said, we are now finishing most of the shoe. We just have one more piece of this left and that is going to be that. And I believe that is the the sole of the shoe, which is pretty easy and pretty quick. So with that said, stick around and stay tuned.
131. Retopologizing Shoe Soles: All right, Welcome back. In this video we're going to finish off the shoe and then move on to the hands. With this. We're going to be done with the shoe and I'm just about done with the main aspects of the skull because it will just be the hands, arms, and legs, which are going to be super easy. And then we're just going to have to tackle the head. And that is going to be the last major form of read topologies rising. So we'll go ahead and get started here. So we have just the soul left to do. As you can see, I duplicated over the other mesh. So let's just go ahead and move this piece out of the finished sculpt section here. And let's just go ahead and turn the visibility of everything off. Now if you remember how we did the soul, it's pretty much already reach. Apologize because we read topology guys, if I hold shift down from a much simpler version of this and that was this piece here. So, I mean, you can in theory use this almost like as a template for yourself if you want to kind of go through the whole process again, API would like you can even go through and do something like for example, geometry, crease. And let me go ahead and first of all, let me give you an example what I mean. So like if we have d, we hold down Control left-click to do a history save. And we can go ahead and delete the higher now and just go through geometry. Crease here. Crea increase all. And then we'll just create poly groups. We can do maybe just like a Z remeasure. And maybe even if you wanted to try to aim for something like slightly lower, like I said, if you followed the course of the tutorial, you should have something pretty easy to work off of. And then from here you just kind of do a project history to back onto the shape that it was meant to be. Maybe do it kind of a whole reconstruction of the base mesh if you want. Definitely nothing wrong with that. If you would like to go through all of that again. So just sort of a pretty easy process. And of course we'll just have to anything we don't see working, we'll just go through and reproject with our our history recall. So you can just simply bring some stuff in here, a masking in tapering and so I don't pull anything off from the sides. I probably should have done that for the bottom as well. So let's just do something like that. You can just sort of take your time just going through trying to restore some detail like we did before. So and it's not that hard at all. It's just pretty simple and straightforward. Our mean given maybe if you want just one more Divide and do the whole process again, break that out like so. It's roughly the same area. So you can just sort of break it all in like this, just kinda smooth and bring it back. Okay? So nothing too insane on this one. It's a pretty self simple one. We only need to have that many poly groups for the whole thing. So very easy, very simple. We'll just go ahead and just rename this. Then. We're going to call it the shoe base. Call it R underscore shoe base. Hi. And then I'm going to duplicate this, go up to the highest subdivision level. And I'm going to go through the process. So leading the geometry. Hitting delete. That way we can access and not be stopped by the mirror function one and bring it over there. And then we'll just reconstruct or subdivisions which is just under subdivision. And of course we've got that there. So let's rename that same thing as before, except this time we'll hit L underscore shoe base under score high. And now we can just put that underneath here. And we are officially done with our belt and shoes. So now all we have left is just the arms and the head. And once we finish that, we'll be doing our final of walk-through, which is going to be the detachable pieces that you see here. And those will be the fun ones. It won't be too terribly difficult or scary as you might think To, there'll be fun. So with that said, stick around and stay tuned.
132. Retopologizing Fingers Block Out: Okay, welcome back. In this video now we're going to go ahead and continue on into our hands section now. So we're going to basically be doing the rest of the, all the body parts except the head. Because if we turn the head off for a second and you can kind of see, this is all we need to do. We just need to do region and this region and duplicate it over. So one of the first things we'll do is once you get to a comfortable spot, you just want to in making your final adjustments in the hand, it will go ahead and take it from there. So first thing I'll do is I'm going to move this out of here, like so. And I'm just going to turn off the visibility and just do an isolate select. Actually, I'm going to hold down Control left-click to do a history. Say, we'll zoom in on there. And let's just go ahead and we can look at the hand right now there does, there is certainly some shortcuts we can do on here. Some of them can involve, like for example, like just trying to put maybe like a cylinder or a tube across to save some time. So that's one way we can do that. I can show you that real quick. So if we do an append the cylinder, we can just hit F to frame out. You can kind of see that Garrett there, we had to shift f. We can kinda look at all the pieces. You might look at it and see this is a little bit too many segments and it could be a little problematic. So what we would have to do is go through uni unify and a different tube-like right, right here. And go through the process of going through initialize and maybe taking, doing some adjustments through that way. So I guess it would probably be now either this way, maybe something like this. We'd have to go through like here we'd mess with the V does divide and the axis divide. So we can find something that is equal in number, maybe like, for example, 88 can probably give us what we need. And we can then just we can either go through it like that maybe, and then just manually assign all are necessary. Piece divisions through an Insert Edge Loop. We can do something like that. So I'll go ahead and make that now into a poly mesh and go back into our tube here, we don't need that excessively high cylinder, so let's delete that and append that newly created peace. So we've got some a little bit cleaner here. Let's go ahead and get rid of those sides there. So hold Shift, Control, left-click and then left all to delete that and go through Geometry, modify Topology, and delete hidden. So now what we're gonna do is we're going to try to just kind of frame this around one of our fingers. So now we didn't go too deep. We did a little bit of an explanation on fingers and hands on when we created our base mesh, but we didn't go too deep. And that's because I plan on doing an update to this course regarding how to do gloves, sort of like biker gloves. So you could say over this, so kind of keep an eye out for an update because I like to actually show we can extrude gloves and cloth material over here and add more. And but for now we'll just go with this. So what I'm gonna do now is just kind of fit this guy in like so. What I'm trying to size up and when is that? See where it's flat like that. I'd like to actually get it. So it's kind of flat like that. So it's a little bit easier to adjust. We can kinda just eyeball it here. Like so. Just a little bit of work to work on here. So we can just kinda looks like we have a little bit of work to do. So let's go into BZ am and maybe put an Insert Edge Loop some, in some of these places, do see what we can get with the projection here so we can project history on here. It's like it did most of its part. Fruit and certain areas like right there. So let's just, just move it up and continue on. Try it again. Little bit easier. Came together a little bit better. It's a transparency turn off ghost. And it's now set our Z measure up. So we're trying to basically give ourselves a head start on this piece that we have here. So once we do that, we can one of the key areas that we have to look at right here. So let me hold down spacebar and go in to snap to surface and let's go through extrude. Well, may not necessarily need Extrude just yet. Let's just keep it out. Insert. And I'm right now thinking I like to, It's a little bit tricky. I would like to kind of create a poly group Polly loop row right there. All right, so now let's set our face to do nothing. We don't want to extrude anything unnecessarily here. We can do maybe like an insert edge loop right there. That just means we're going to probably have to end up. All I'm gonna do is just sort of readjust everything now. And it's like we're able to get most of that taken care of. I'm not gonna put any Insert Edge Loop on there just yet. I'm going to probably see if I can get away with a little bit more time for moving on. So what I'm now going to focus on is a couple of things which is going to be the top part here. And then we're going to have to probably put an insert edge loop right here through here. That's, that's going to be the case. You want to get a really good foundation to this area. And you just want to make sure it's just set up just right. Let's go ahead and now go and to extrude. For now, just so we can get something going. We have unevenly spaced. Bert is always jarring. Sometimes that face can really be a fun one for us to deal with. I'm going to go through and I'm just going to simply take my time. And you can kinda tell where I'm going with all this. You're probably going to come to the conclusion already that I'm going to duplicate this cylinder across. But at what point I'm going to duplicate it is what I want to highlight. I'm actually not going to close this whole end completely just yet. Why? You may ask? Because it's going to try and to readjust the ends on. Every shape and length is going to be a little bit tricky. You got some hair. Bring it through here. See like right here is where we can do an Insert Edge Loop. Okay? So let's see. Now let's take a rundown check. Let's get everything. Sort of. Rejected as best we can under the circumstances this guy seems to be really stuck in. So it'll be a quick little projected history that might help a little bit. So like we got an extra astray vert, let's delete that off. Let's get into solo mode so we can see that a little bit better. Or we can merge this down. If you can't see it on the other side, just go to Play and hit doubles so we can see where it's out. There we go. It's like nothing's being messed with. Let's get out of there. Turned double off. All right. So I'm actually going to leave it pretty basic like this. And then I'm going to go through and just I'm going to probably hit duplicate just to play it safe for now. Not going to hold Control and Shift over because it might not give me what I want. Because when I'm kinda go in through here, you're going to want to notice something on here. And that is that the you have to do quite a bit of adjustments on here. And those adjustments are easier to do with less polygons. That's why we didn't fill out everything. So let's go ahead and duplicate that again. Now. We can go to the original one since it's closer. Size, duplicate that, bring that one over. And maybe just left ALT when Trent, while holding translate down to kinda, or maybe just scale it down with the y, not x because that's going to make it more narrow. Like before. We'll just kinda you can kinda see. And because I kept it so low Pali that we have an easier time to work with less births for us to move around. Or just maybe mess with the angle here little bit make get a little bit narrow. Some kind of fudged with the like I said, I'm going to probably have to do a little bit of work on the hand. Hands weren't like my main wanting to do feature because I was wanting to do one thing I wanted to do with this course was a kinda wanted to do a glove of some kind. If I get enough requests though, telling you right now this if I can get enough common requests, I will do a mechanical arm. But I gotta make sure the audience wants that. So we'll leave it at that. All right, Let's see. We're almost getting there. Just go to make a few more adjustments. Just trying to set it up as best I can when I do a projection. Alright, so let's go over to this one and begin our projection on this one. Yeah, That's probably will also another reason why I'm doing this on each separate sub tool so we can sort of project this as best we can with our history. So another thing I'm gonna do is I'm going to try to turn off all of these. That way. I can just be focusing on one at a time here. So this is our first one, is probably going to cling to the other side the way I see that. So not too bad. So let's just go ahead and just kind of move it around a little bit more. Let's keep it nice and tight. So let's move this one up. I'm going to move the sub tool up. And once I'm done doing all the necessary projections. And we're gonna go through see an all merge it with the other piece. Go. So let's go ahead and now emerge these two in. And once we have that down, we have two choices here. Some people can just connect these two guys. Like so. Others are going to want to maybe build a like a polygon strip that goes sort of in-between here. No judgments in where you want to take your edge flow, it's just completely up to you. So let's first of all hit BZ am, get back into our poly frame. Let's just do one more project. And then let's just go ahead and we can do an edge extrusion on these to snap that one. And then let's just go ahead and snap that guy. And so now we have a little bit of a polygon there. And let's just do some adjustments. Kinda like that. So we're getting there. Now, what's this? Go ahead and get through to the next one, which is going to be this guy up here. So I'll just move that up and above in the sub tool palette. And we'll go ahead and clear that mask off. Quick little project history. Seaward is we need to move some things around here. So let's just readjust these verts because we're trying to get everything to line up here.
133. Detailing Fingers Topology: All right. The other side looks like it's good. One more project and silicates, good. So let's merge this down in. So we're going to hit Merge Down. And let's see if we can bring this guy in, connect this one and like so. Right now remember you can put like an edge loop between here to kind of fill in the crevice. That's up to you. All right, One more now. Let's do our project to get that to snap on. One is a little bit weird and it's just kind of check things out here. Is no. And that's why try that again. Better. Sometimes it's hard to see the history on these. And I'm just moving these verts over so that we can have something that this lines up with. When we merge this down. This guy a little bit further in this guy a little bit further. And sometimes these things don't like to snap like they should. Not really sure why. Alright, so it looks like it's lined up correctly. Let's merge that in now. And hit, Merge Down and hit Okay. And like before, we're going to see if we can project this guy out. Might have a little bit hard time finding my spawn. This one, so I'm just going to have to eyeball it. All right, so now we got all this set C here. Oops. No, I'm just kinda creating sort of a scenario where I can do clean extrusions between along here. You can kinda see how much prep work this is just to get this all matching up, like just right. It is just sort of a scenario where we just kinda have to match at all, just kinda perfectly here and trying to get it as perpendicular and can make sense as much as possible here. Then do the same thing upon the other side. Just make sure now you have a clean topology between here and here. Clean topology between here and here. We've got something that's a little clean here. So now we get to have that taken care of once you're getting into that point. Just go ahead and do another extrude. And do another extrude. And another one across here. And you can kind of see how it's all like starting to kinda come together here. Do the same thing over here. New Extrude. Extrude. That mouse is a little bit. Pull in too many words across here. All right, so now we've got that all situated and taking care of. All that's really left is we have to just take care of the thumb. And then after that, we're just have to take care of the n tips here. I think we can just fulfilled in tips right now as we go through and it won't be too much of an issue here. And I'll just kind of pull it alongside here. And it'll still run to the end. Kinda see you need some edge loops there, there's definitely room for loops. Yeah. So we'll just do that through here. Like so. And kind of see, we're struggling a little bit on this because it's so embedded in, it can be also because of camera angles. Like right here. See that? Let's go ahead and just bring it in this way. And see if we can connect some Robertson. It's a fun one. And do the same. Now, the other side, this one's a bit deeper. It is that the Broglie say we need a silhouette here. And like I said, woul, go ahead and establish our silhouette. Damn you. Do nothing. Will establish our silhouette. Once we have everything connected, like I said, I'm trying to keep everything is blocky as possible in all of this. So that all we have to do is just fill in silhouette, our fill in insert edge loops throughout. So, you know, we'll see an insert edge loop here. Could see another Insert Edge Loop. Go across here. I have to say, oh, looks like we have little bit of a storyboard that didn't want to go through here where you are. And kind of see the how much we're dissecting that's trying to get this all to fit in just fine. We got one more area here. Then we'll be ready to start in. Check that up. Not sure why we're done. That could be why for some reason I thought I snapped at the surface, but apparently I didn't. Which definitely makes a difference when you do that. Can't get it there, then just take it on the other side. All right, almost there, almost there. Beautiful. Now, let's go ahead and start filling this up. So let's see, we need insert edge loop here. I need one there, there. And let's do some adjustments on this one. Which means we'll need to do little bit of adjustment here. Right? Now we get in somewhere. Once go ahead and reject the history, we're given some geometry back a little bit. Currently nothing was something went wrong here. Let's go ahead and hold Shift to look at this to see if we got any turn off the handle. We got a little bit of a problem here with this. So let's just delete and do some surgery. She is. Why these guys here we go. And it's our it's on It's probably somewhere in there where you are. Go double. Well, we have to fix this here. That's where our culprit was right there. That's why we are getting a complete edge loop to go through there. Never fun. Oh, that's always the loveliest thing to deal with. Alright, let's see if we can put an insert edge loop on there. Now, beautiful. Do that again over here. Beautiful. All right. Let's bring back our, well, let's bring back our hand. Sketch out a solo mode here. Bring that in. And let's just project the history we're getting there. Now we should be able to project a hand all the way across there. Do some more projecting, get that right there. For now, I'm going to go with this. We'll add a little bit more down the road. But now what I'm gonna do is I'm just going to work on trying to put some segments all along here. And you know, one thing I will say is you can try to put adequate amount of topology on here. Because quite frankly, it's going to be necessary if you want to do transposing, even if you wanna do triggering like for each segment joined T1a probably have at least three areas like right here. I like to put one like right in the middle, but so sum up here, some up here, and then go through here. Of course, if you want to do one up there and can same thing again. Here. Kind of see where we're going with the reproject that in. Then we're going to do something similar right up here and bring it in like that. So we can do something like that if you want. You can also just kind of go full-blown and just tried to do like an even amount of topology if you want. Again, that's not going to be like anything. I'm going to judge you on it's your model. So just feel free to take it where you want it to go. So like that. Alright, so we got our hands and your fingers in the right spot. And we, if we want, we can just sort of put as one piece or we can just go with what we have here. In the next lesson, we're going to go ahead and work on doing sort of a clean up and adding a little bit more topology may be towards the ends and working the thumbs and see if we can establish a baseline. Finally on the hand. So with that said, does stick around and stay tuned.
134. Retopologizing Thumb: Okay, welcome back. In this video we're going to go ahead and continue on refining our fingers and then try to round out these areas so it can fit the projected history a little bit easier and just get a num so they're rounded, not so angular like that. And then we're going to see if we can tackle this thumb and hopefully we can get through to getting a little bit of a silhouette to edge flow that can be established here. So we can just simply extrude down and all the way throughout. So with that said, let's go ahead and get started. So the first thing I wanna do is I want to kind of round these out a little bit more. If I do an edge loop, I'm going to run unnecessary edge loops all the way through. And I don't want to really do it that way. So what I'll do is I'll just hold Control and just make that into a poly group right here. And then from here, I'll just go ahead and first thing I'll do is maybe put some some edges on there. From here, I'm just going to extrude this poly group out. So hold down spacebar, choose Extrude. And this time I'm going to choose poly group all, not all polygons because that's just going to extrude all polygons. I just want to extrude all the poly groups that I'm on top of. So I'll just bring him out, kinda like that. So from here, I'll just go ahead and hold down control. And it looks like a weird little fungus. And I'll just frame out to center that back on. And I'm going to use the Y key to just sort of just snap this and like so, looks like we might have a little bit of a stray verts. So let's just go ahead and real apply that. Beautiful. So now from this point on one I'm just going to do is I'm just going to really shrink this guy in like that and just putting them in like so do a quick project history maybe to snap him on like that. And just simply kind of position I'm kinda like in the center there. You can kind of guess where we're getting going with this now. Or at least you should at this point, if you've been watching all the videos, we've gotta go now to insert. So let's go ahead and do, do nothing here. And let's just go ahead and clear our mask. Take solo off and see if we can put a, just a couple of a insert edge loops in here. And now it's up to you how many you want to pull it. And I can put two, maybe three. It's all up to you. And then we'll just take it off and then just do a project history so we can get something that's just a little bit more round throughout. So we got a little bit more of a makings of a silhouette. So I'm going to repeat that a couple of times for you to kinda get that through. So again, first things first, marquee select, Let's make, I'm just gonna make poly group on that top edge flow. I'm going to go ahead then and just simply extrude that guy out. And like so. And I'm just going to kind of position my mask, hold down Control, clear off the first mask and just invert, hit R to bring up my gizmo recenter point and just scale on the y. And then scale all the way in with the mask still turned on. So, and then again, just kind of reposition it somewhat in the relative center and do a project history to it right there. Clear off that mask. Let's go into solo. Hold down spacebar. Make sure inserts on there up to you how many you want you can do to this time if you want. Just go through the project history. And like so. Let's just go ahead and we got that one taken care of. A worry. We'll do this couple of times. So again, got to make sure I'm on the right angle here. Hold down Control. Bring that in. Let's just go ahead and extrude this guy out and make it a nice little fungus. And let's just hit center pivot point, scale it through the y, bring it down like so. Turn solo mode off so we can see this a little bit easier and scale it in like so. And then we're just going to. Keep going through this. And then of course, project that to snap to Surface, Go back into solo mode. Just go through and draw out our masks. Clear off the mask and do a quick little project history. And last but not least, probably the one that needs it the most is this one. Right? Nope, not that. So once again, just trawl mask out, invert. And let's recenter that guy up to here. Let's draw an extrude. Nice big one. And let's just go ahead. Draw a mask. It's clear off the first mask. And invert center. You can go. Who miss something up here? There we go. And then just scale it in. And now let's just go ahead and get on a solo so we can just kinda see where we're at real quick. Project or mask and roughly to the spot we want. And then we're going to just go ahead and go back into solo one more time. So can be a little bit easier to do our edge loops and to clear off the mask. And we can now do a little bit of a project history. And like I said, it looks like it's a little bit uneven up here so we can just kinda clean that up a little bit. Maybe it's like a little bit on even here. We could just reprojected once more. Now, if there's any unevenness or you just kinda wanna give it a little bit, get the topology, just look at a little bit more uniform, just kinda relaxant and smoother through. Same thing back here. And just relax and smooth forward. Relax smooth forward here. So you've got something going on. All right, so now we've got our fingers taken care of if you want, you can go ahead and just kind of poly group that out. Or you can undo that and just kind of go through like for example here, you can draw a mask over this guy. Draw a mask over per se, this guy. And make that just one Poly Group. Whoops, let me go through one poly group. So it's just like that. And we can use that for our thumb. So let's just go ahead now and we're going to duplicate this mash and just do this all one more time, but we're going to do it now for the thumb. So all recenter this, rearrange this and just kind of isolate, select this and delete the hidden. So I'm just going to go through Geometry, modify Topology and delete hidden. And let's recenter the sun and get this kind of rotated around to our thumb. And our thumb just has a little bit more of a curvature about it. And quite frankly, might not necessarily need the same number of edge loops. So if you feel like you want to kind of make some adjustments on here, then feel free to It's just kinda right now all I'm doing is sort of positioning this. Another thing you can do is just reopen that low block cylinder and just kinda fill it in. Maybe like something like that. Maybe you want to do. That's fine. Let's just go through and just kinda make sure our silhouettes kind of roughly in the same spot for we do a projection. So like let's see, maybe some like this, maybe something like this. And then let's just go ahead and just make this rest of this stuff disappear by Control Shift, left-click drag, and then while holding left-click, hold, hold down left all to make all that disappear. Then we can just go through and Geometry, modify, delete hidden. See if we can project that in there. And it's a little bit wonky up here. Didn't really come out the way I wanted to. So I'm going to go ahead and have to rebuild that. Just not the biggest fan of it. What can I say? So what we'll do, we will just go ahead and delete it up here. And again, delete hidden. It's just not projecting. And in the same way, I mean kinda see, that's why we didn't finish the tech tips at the end. We just duplicated them with the in this state. So it was worth a try just to see if we could get it. But now you know why we deleted the tips. So let's just go ahead and get this guy in here and we'll just take it from here. Now. Let's say roughly coming along. It's going it like that. Let's project that in a little bit better. Alright, So we've worked with this. So let's just go ahead and just kind of rebuild the topology up here. We might not necessarily need to, but first thing I'd like to do is I'd like to combine these two pieces so that I can see where I'm going and see where everything's matched up. So let's hit Merge Down, right? Good. So the first thing I'll do is just get some things out of the way. Let's just go ahead and take care of this top part here. It's turned display, double off and start extruding here. So let's go into extrude. Allele, little construed right there. Three Amigos and just going to be like going to make it going to make it kinda make it an IRA. Now we can get that, right. So we've got someone wants a little bit there. And this is kinda why I like to doing all this and low topology and I probably should have done this all through with low topology. So we'll just go ahead and rebuild this little bit different. We might just be able to get through this without necessarily needing to rely on the same technique as the other. For the other four fingers. 0 will say here in a sec. No, not one. So now let's go ahead and pipe through an Insert Edge Loop right here. I'm going to get through to extrude. Like we have a little bit of an issue here. Mary are a little bit of an issue. So we're going to have to take care of that. Norway, our new kind of see, I'm just kinda trying to troubleshoot if someone's not snap and that's definitely a surefire sign that you got to fix something. Alright, let's do a quick little project here. And we're going to just do project history. And we can bring that in like so we don't need to go through anything to severe. That's just fine by me. Alright, so now what we need to do is we need to find a way to connect this in with what we have over here, which is going to be a little bit tricky to do so to keep it uniform, I'm going to start a little bit over here so that I can know where everything lines up. Like we do need a little bit more space here and bring it in over here. All right. Now we got it going through that way. Now what I'll do is I'll just go ahead and bring this through week. So I think will do is now that we have sort of the thumb kind of tackled rum going to want to do is maybe just do a pause here. And in the next lesson now what we'll do is we'll see if we can finish the hand by doing some quick little up and over tricks. So I'm not going to go ahead and I think what I want to do is just have my stopping point B right there. And that's probably where I want to see it. I want the hand to be kinda like right there for everyone. You can do a couple more areas. But I'm going to be pretty happy actually with that. So with that said, we'll go ahead and just kind of do some up and over techniques and then finish off with just doing something really quick like an extrude that goes around. So with that said, sick around and stay.
135. Topology Connecting Techniques: Okay, welcome back. In this video, we're going to go ahead and do some up and no verse just to do a little bit of a demonstration, we're just going to sort of build some separate geometry to accommodate these knuckles here if we want. And we're going to see if we can connect it through here. So we can have sort of like a, kind of a cleaner edge line around here while still having some topology to somewhat supports some of these knuckles that can move around. Now again, this is something a little bit new. We haven't discussed this, but up and overs or just sort of edge flow technique. Several one of several edge flow techniques. So Let me go ahead. It can be a little bit complicated if you're a first-time user seen this. So I'm going to try to do this in a way that makes a little bit more sense for you and kinda put it to you in an easy way. So I think we found a little quick trick that helps to visualize it a little bit easier. So here we go. First off, I'm going to go through select my extrude. And I'm going to take these two edges here and I'm just going to just simply extrude, pass the knuckle here. Like so. And then I'm going to do the same thing across all of these like so. And we're just gonna keep going along here. And just make some of your adjustments accordingly. You can kind of see everything's kind of coming together slowly. So now the next thing we'll go ahead and do after that is, is just to make this a little bit easier for you to visualize. I'm gonna go ahead and I'm going to cut off the top part here. So these are all like separate islands. So real quick, I'm just going to go in to hold down insert. I'm just going to just kind of put a couple of insert edge loops across here. And then just simply delete these guys off. So it's a little bit easier. So now from here, what I'm going to do is I'm going to go back into my extrude option. And I'm just going to go ahead and once again extrude. But this time I'm going to extrude out like so. And then from here to here, I'll connect. And from here to here I'll connect. Now you can kinda see it. What it is, is it's basically this up and over, sort of like an edge flow that goes around. Sort of to accommodate the knuckle and tie off two pieces. The other nice thing is, is if you are in a situation where you want to, if I can hold down spacebar real quick and delete this edge here. Kind of painful to do when you're trying to do it through. There we go. So if you merge these two areas here, through extrude an up and overs. Real primary function is to sort of tie off like two edge loops together. Like so, so that in the end when you keep moving forward, you have one edge loop. So that's kind of the main function of an up and over. And you can kinda see you can put rows and rows of up and over until you reduce the amount of extrusions. Because like if you can imagine this edge loop kinda cutting edge and this edge loop cut in, in the end. They kind of just kind of nicely loop around. Now we have one more in there and that's fine. I'm completely alright with that. I can either put in up and over for this edge loop to the next up and over that's here and just tie these off. But I'm not really going to necessarily do that. What I really wanted to do was just kinda give you the opportunity to kind of see the avarice potential of this and give sort of like a demonstration of it. So I'm just going to go ahead and just simply tie these guys off. And then I'll make sort of a the more accommodations or I guess right here. So let's go ahead and just do a couple of more practice ones here so you can kinda see that. So it's going to be like this far, this one, this one. And then this one, it's just a pretty easy up and over edge flow. Then we're just kinda, once again, just kinda rearranged in everything around the knuckle hair. Just to kinda give you a little bit of a potential. And then once we get a moment to connect all these, which kind of see right here. You can kinda see there's potential for acquired extrusion across like that. Do one more here. And so now we can just go ahead and just extrude across. Now of course, if you want, you can also run an edge loop all the way through there. If need be. Just to kinda help you reduce all of that. But we'll do that possibly later. Right now, I just kinda wanna get this guy taken care of here. Once we get that kind of situated here, we can kind of run an edge loop that goes directly across. And that will help us out quite a bit in. Did I get that merged? And it's going to help us quite a bit. In establishing silhouette profile. Once more. Loops. First connected here. We're getting closer and closer here. My hands are probably going to be the finest one. And that we thought the face is going to be probably right. So, so now at this juncture, one thing that we can do now that we got this all taken care of is you can go through and run an edge loop across here because it's right now, pretty square. So we really do need something to go in there. Let's hold down spacebar and do an insert here. So we can kinda collapse this down. And let's also run some insert edge loops across from here. That way you can kind of get to a little bit more of our silhouette back and let's just reproject that and we can kinda get that to kind of fall down a little bit. So it doesn't look so robot Nick. Right? Now, just going to simply tie off everything here. So we'll have an edge loop or an extrusion kinda go through here. And then this guy can probably just kind of run along here. You can kinda see I'm just kind of mapping out the real estate on this edge loop here. Taken some nice big chunks. Just to kind of get something all situated out. Pre-plan this a little bit more to be thinner. Right? Let's just bring it in a little bit with some more. Let's fill in the silhouette there. Beautiful. So we've got our real estate of things to fill out on this end here. And let's just go ahead and bring. And we got an opportunity for edge flow to go around here. So let's just go ahead, clear the do some extrusions across here. Now. I'm going to stop it right about here. Because I think when I want to tackle next is going to be the thumb. So let's just go ahead and just fill out our thumb. And maybe if we can see if we can tackle into the other side, can see how far we can get with it. So let's see. We need an edge loop here. Need one right here. Rejected them as we go. Conscious. Looking at this says we all go. Don't think that guy likes to stick to all. Got to make the loo. Let's bring that down. And you need to put some more Insert Edge Loop surround here, maybe one to ring, just add in my real estate in here. Switching back into extrude seems I went through and I kinda did this a little too low. Probably should have gone through and did this a little bit, little bit higher. Just go ahead and bring it in here, somewhere around here. Just bringing it in a little bit closer so we can do this. Then we'll just go ahead and again, just reproject again another insert edge loop around here. In this nice long elongated area. So we move a few extras which, And so, okay. Because we still got to make this tile. Let's go right here. Wants to delete all this geometry or just kinda bring it on, kinda comes together a little bit here. So let's just kinda smooth and relax this a little more uniform. Cross. Put another insert edge loop around here. Reproject that. Right, and let's bring something across here with Extrude. Let's bring them all the way across and do the same thing with this guy. Now I'm not going to really do any up and over is here, at least. Not for the moment. I don't think we're just gonna kinda just look for ways to establish lining up the edges here. So we need something to go up to here to here. So like right there, right there is project that and right here, here. Kind of see, I'm just kind of eyeballing all the places I'm going to need my topology to line up out here. All right, so go. So we added a little bit to tie back in there. Now we can just kinda go around here. Probably just going to turn this guy off here. All right. So got that taken care of. So we're just gonna go ahead and continue on. In the next lesson. We're just going to just simply continue where we last left off and see if we can extract this just further down. So that said stick around and stay tune.
136. Retopologizing Palm: Okay, welcome back. In this video, we're going to kind of build off of what we've learned in the last one regarding these up and overs and see if we can start tying off some of these little pieces in-between here, like so. In addition, we're going to see if we can troubleshoot some six-star junctions along the lines here and then go over sort of another tie off procedure that's commonly used in games to just kinda showed, give you more options on what you wanna do. So let's go ahead and get started. So first thing I'll do is take a look over here. We have ourselves a little bit of the same concept. I want to kinda tie this edge loop and this edge loop off using this kind of pattern. Except this time around, we're going to do it with a bit more of a process of how we have done it before. We just kinda are just going to kind of extrude here. And then just bring it out here. Extrude again, and just simply tie it off here. Let's go ahead and bring that a little bit. So it's a little bit smaller for us. It's just once again kind of working with what we have with just simply a smaller amount of geometry. So just kinda doing a little bit of the same thing. But this time around, you can kinda see we have less topology because this edge loop tied off over here instead of going straight down. So again, you can do something like that if you want. And as I'm looking over here, I'm seeing a six-star junction. I probably it's a little bit nit-picky if you're a beginner. But as you get more advance in topology, you're going to have to actually correct some of these things. So you see this, you see six sides. You're going to have to actually 0.123456. You see something like that and you start dividing. You're going to see a little pinch there. And it's going to be a little bit hard for you. So you're going to have to actually troubleshoot some of these areas and maybe just rebuild the topology to that area just to make it all work. So kinda bear that in mind. That's part of the whole process. So let's see here, bring that in. Like so, and then just maybe bring it in here. Doesn't look like it's snapped and all that. Well, here we go. So now let's see. No somewhere along the lines here there's probably some helps us a little bit. Kind of see now we don't have ourselves. So six star junction there, which is very, very advantageous for us. So again, that's just the one thing you can do. Now, go in through here. If you want, you can repeat to your six-star junction anywhere, maybe you want to or I'm sorry, you're up and over a process anywhere. So maybe like you want to do an up and over between here and here, you can do that. And again, that's just going to require again, a few more of the topology, few more extruding along processes. So you know, which is bringing out to around here. And then just simply just kinda bring it through here. Bring these guys out. Oops, my bad. I think this guy merged with him. We go new, kind of just kinda tie that off again. And then sort of just building off of what we've done already. Then you can kind of just bring it a men again. Right here. Or maybe if you want just a little bit closer here. And if need be, you can kinda bring this guy in to something like right around here. And if it's a little wonky, a little bit crooked, and I'll probably say that the best solution would probably coincide to being just kinda relaxing it and reprojecting. So we'll do that once we build more topology Across. Think what I'd like to do is just simply can just get away with that. I'm just gonna go ahead and then swing this all the way around now that we have it kind of in our grasp here. I'm just going to swing it all the way across here. Now that we mentioned again at the beginning of the video, that we are also going to do another simple little tie off that isn't necessarily, it's kinda like an unwritten rule, which is something you can do. You can just kind of just make things very simple. Tie off and just do something like triangles. Now, just a little warning, you're going to have to address your brush size to get these guys to come together. But, you know, you can do this as well. And that is acceptable. Granted it's a little bit it's a little bit of a cheating process because you are dealing with a little bit of a six-star junction, a little bit here. But I've seen this done couple of times also, but I would say this is sort of do at your own discretion. You gotta have to be a little bit careful on this one. Because you can really get, a lot of people want to just kinda take the easy way out. It's it's acceptable but I wouldn't oh, if I was like Pose doing this for like a major studio, my caret, my senior character artists probably would probably have may redo the hand on this one because of excessive six-star junctions. Because one thing about 66 star junctions is that they can actually go through and they can give you problems and baking, for example. If there are two prevailing hunt, they're also very difficult to smooth out, which is another very common problem. But it's just something you got to be a little bit careful of. So let's just bring this guy in and I'm just going to extrude this kind of all the way across here. I can just gotta kinda tap it a couple of times to get that to merge. And you can just kind of hold down, snap in and see if you can merge it in there. Maybe you can delete that. One little nuisance seen edge if you can. Now I guess you can't because it is quad right there. All right. So that said you can just also do something like this where we just kinda go through similar to what we did before. We can just bring it all the way across now and save ourselves some time and just kinda extrude. And extrude again. And just kinda meet somewhere, maybe somewhere over here. And then simply count the number of insert to edge loops like 1234567. And then of course, if you haven't, make sure you got that history project so that you can go down here and just go through split project that there. And just, it's just a matter of merging them all in. Bring this same thing all over again. We'll just bring this all the way across. Move it up, move it up to our history. Just once again. Insert some edge loops, cross like so. And just hold and extrude this out, like so. And just project all that stuff in there. So again, we're back to the other side. We can just continue to do a couple of things like, for example, we got a couple of edge loops that definitely need to be relaxed. And I'll tie my R. They look like they could definitely be relaxed quite a bit here. So if you see any places you wanna do Tai offs, you can, I'm not too keen on doing anymore. Might just go through and just relax some of them through. Go ahead and mess with something a little bit closer in. So I'll just bring all this across. As we get a little bit closer here. Ones where you had a leg all the way around here, we're going to have to start thinking how this is going to kind of to pr over encountered, just bring it in like this. It's a little bit, Let's see. You can also just kinda bring it over like this. Then just kinda bring it in like that. Some point, some of those, it's going to have to actually taper. And let's see here. Let's just do a real quick and make sure we got everything. Because right now we got a little bit of spiral and geometry happening around here. And I'll just go ahead and just bring this, end it right here. Okay, let's see if we can just maybe just relax, just, well, I'm going to bring it down to here and so I have a little bit more room and then I'll relax this out a little bit more. Then we can probably work with this. Too happy. I don't know why. I'm just like that. He liked that face is tearing quite a bit. Let's go ahead and delete the little punk. We didn't. We can maybe bring it in here, maybe just kinda improvising the process here. I got my brush size is way too big here. Alright, let's just see how we can taper this fun little mouth off. Here.
137. Projecting Hand Detail: I will get some months, at least not as bad. Here we go, and we'll just extrude. That's what I get for trying to extrude an edge loop. Just do this the easy way. Bonus points that anyone who can message me. The movie that says the easy way. A hint you have to be an eighties kid of the eighties. We're almost through that. Okay. Let's go ahead and just bring this in. Going to mask this over and just bring it out and scale it like so. We can put some Insert Edge Loop rings around here. I can get in on it. Check that in spring that distance that did not do very good. And that's probably because that's cool. Bring that in now. Rotate this around now and just kinda bring it out on both ends here. It looks like we got most of it, but some of it was just TO little too far away. So we'll just have to kind of manually snap it on with our move to snap brush. You gotta go and let's add some more insert edge loops now that we got what we want to add something in here, bring this up. And now we've got some one last area here. Let's see what we got here. Something happened in this line here. Let's just see what happened. And think we may have extruded some to no extra here. Yep. When it came down. Right there is where we kind of left off and that's this whole tricky thing about z0 modeler is you just gotta be able to look for these kind of things. And it is something that requires troubleshooting. And and it's, it's kind of the downfall of all of this. So again, we just gotta kinda look through and make our peace with it. Now I'm just going to count on, try to see if I can reconnect some of my stuff and just kind of project this back on their hit Project couple of times. So that should do it. See if we can, again, see if we can do this Space bar insert and bring it in, bring them in. There's crossed. There it is. Right. So now that we got all that taken care of, Let's go ahead and just go through a process of just smoothen some of this out, getting the mesh to be a little bit more uniform. So we can just kinda go through and just kinda break it down a little bit more. Right? So a little bit too stretched up here. All right, so now we got to this look like we want to know, all right, so now that it's sort of starting to resemble everything, we will like, just go through and just divide it a couple times and look for some holes like here's one right here. Looks like it's a vert just kinda went string divided again. Let's go ahead and check the sides. Are you now? So look for some hair, anything you want. And it looks like it's gotten through pretty cleanly. So I might just just go ahead and give it like maybe one more and just do a project history on that, just get my results back that way. So I didn't really have to do too much here. Let's take a look at some stuff here though. Might need to go through and history. Recall that. Here we go. Did I do anything on the other side note? Bring the guy up. Good. Who are you? I think I know what that is. My be an issue pertaining to a vertex that is underneath here. So again, this all requires a little bit of troubleshooting. And unfortunately I got to delete subdivisions to get there. So let's just go ahead and do that. Geometry. Delete higher. Let's just go through and delete. There's got to be a vert somewhere around here. Where is it? Maybe I can't see it through the display properties. So let's go ahead and there's my hurt. And again, I went too far. I gotta go through and delete the Geometry. To retire. Here we go. Try this one more time now. So tool projector history in. Got it back. Right. So we got everything that we need. And if you are missing only thing you know, you can just kinda go through and make your adjustments or maybe give it one more subdivision. So okay. So now that we have that taken care of, we can just go ahead and just rename this thing right now. And we'll just call it arm or I'll call it to L underscore arm. Under score high. We'll just we can do just a simple little process of reprojecting that. And then if we want, we can just duplicate this guy over deformation. And let's go ahead and mirror. We got to first delete our lower subdivision. So you gotta make sure you're on the highest subdivision. Go through deformation, go through mere, bring that over there. And we'll just keep that guy open for context and put them in subdivision low. And we'll rename him our underscore arm. And then we'll do underscore high. And so now we just go through the process of geometry. And again, we can reconstruct our subdivisions down. It's one more. Alright. Now that we got that, we can just simply, just to hit W, recenter it over here and bring this and like so. And you can make your adjustments with your piece here. And then finally, just go through, if you want, you can just kinda go through the whole process of I think you need to delete off some things for this to work. So I wouldn't be surprised. So like let me see. Let's go ahead and just, I'm just kind of I masked off and isolate select hidden and just did a Modified Topology Delete Hidden. It's going to tell me I need subdivisions to be taken out. Let's hit Delete lower on that. And now if you get a scenario like I have right now where you can't reconstruct your subdivisions. Go ahead and hit control and do a history say from that point. And then just simply undo. And then go to the lowest subdivision and delete higher. And then from there, delete hidden, divided a couple of times, go back into subdivision and do a project history on that. I think I went a little too high on that one. And then with that, you can sort of regained your your details with subdivisions on there. So let's just go ahead and back out of there again. Let's go back to this guy here. And now what we're gonna do is we're going to finish off by putting this arm and see if we can reuse this arm. I, I kinda like its shape, might just go ahead and try to reuse it or actually we're just got the shins left and that's not going to be too hard. So that's going to be a super quick one and then we're going to be finished with everything here. So stick around, stay tuned.
138. Retopologizing Shins: Okay, so this is going to be super quick one. We're just going to take a cylinder and just constrain this to make some legs here. So let's just go ahead and hit append and bring in a cylinder 3D here. And I'll just go ahead and turn everything off super quick here. And as you can see, I've dragged my high res shins out of the untitled folder. And now I'm going to be on this piece right here. So I'll just go ahead and hold Control Shift, drag out a, a select rectangle and then change it by holding left ALT. And we should be able to make the top and bottom disappear. Let's go through geometry and we're gonna go through and delete hidden under modified topology. And then we're just going to bring everything back, including the shins. So first thing we'll do is get her history save off of this by holding Control left-click. And then we're going to go through the process of just simply shrinking this guy down. And then we're just going to go through and just simply do a quick little process of I mean, this and you can kinda see, now, feel free if you want to use the the deformer like the curb brush, you can. And because this is awfully far away, so we may not be able to get the maximum amount in here. So feel free to use the curb brush if you need to. Let's go ahead and see if we can tell a little bit of a look. That maximum amount. All right, so we're getting that a little bit right, but it's going over to the other side. So one thing I'll go ahead and do to save on that is so I'm going to left Alt, left-click or left Alt left-click. And then I'm just gonna make this guy disappear. And then I'm gonna go through geometry. And I'm going to delete the hidden and do a new history saved by hitting Control left-click. So with that said, let's go back into our other piece here. Let's go ahead and want to shrink it down so it's below the line here. On the bottom and the top. That way I'll have less issues. And I'll do a project history. And we can just kinda get ourselves something here. Now it looks like we got a little bit of an issue here. So we can just simply smooth that out. Go through Project history and then just kinda rework it till it just kinda brings out something. It's going to be a little scrunched in there. So let's just run that guy out. Kinda see and everything that we can on this silhouette. So let's just make sure we check our topology. And now we can delete. We have a lot of wiggle room here. So we can work with something of deleting it. So let's just go through Geometry, modify Topology, and delete hidden what we subtracted. And let's just divide it a couple of times and just go through geometry, Arab, sorry, go through sub tool and hit Project history. So now we got everything there. Let's go ahead and delete that shin now. And let's rename this sub tool. We're going to call it R underscore shin, underscore high. And then we're going to duplicate it and rename that one L underscore, shin, underscore i. And then k. We're going to have to now delete the lower subdivisions again because we're using deformation in defamation requires no subdivisions to mirror over. And then we're going to go back into geometry and reconstruct our subdivisions like so. So now we got that taken care of those pretty easy. That was pretty quick and simple. We'll just go ahead and drag these guys in. And now all we have left. All that is that which were mains is our final piece, our main last hurdle. Now, believe it or not, when we go up here, the detachable face pieces and going to be as hard as it should be. Mainly because we're going to be taking stuff that we read topology guys to just simply reapplying it to this side and just do an extrude across. Same thing with like the wires. Those can be 0 mashed. And we can do a test to see if we can take what we did here and maybe just reprojected along the backside, but we may have to just read topologies that on its own. So with that said, that is where we're at. We're going to now move on to the head the final section of read topologies and we're in the homestretch here. So stick around and stay tuned.
139. Face Retopology Eyes: Okay, welcome back. In this video now we're going to go ahead and continue on and move to the last section of this head body and it's going to be the head here. Now we've gotten pretty much everything. Read topology guys here, as you can see. So the last section that we have to do is this head and it's going to be sort of like you're graduating phase because there are going to be some fun challenges to do. The head. It does require a certain sort of topology, edge flow that will kind of ease you into. So to make things simple, what we're going to do is we're going to take a look at this. We're going to try to read topologies, the anatomy landmarks separately. So for example, we will read topology guys, the eyes separately. In a lesson, we'll read topologies, the nos Berkeley will reach, apologize, the lips will read topology guys, the ear. We won't connect any of these for now. We're just going to read topologies them separately on their own, figure out how much is needed in the silhouette of edges and polygons to match this silhouette. And then finally, we'll draw some polygons strips around to show you how we can connect all of this up like so. So with that said, let's go ahead and get started. Just going to turn off everything right here. And we're just going to go, I'm just going to click on that so I can recenter my pivot point. And what I'll do is I'm going to do a quick little history save, excuse me. And now I'm just going to hit the B key and we're going to draw in a poly, just like we've done before. And we're just going to bring them in there like so maybe just a little bit lower and we're going to split him off into his own little place, like so. So we'll just go ahead and hit split on mast. Now we'll have that there. And we're just going to hit Shift F, going to transparency mode, turn off ghost and go into our Z modular and set everything up. So hold down space bar and go to Extrude snap to surface point is going to be to snap to surface. And we start our face modifiers with do nothing. So from this point on, just focus on this lip line where it kind of extrudes and that just kinda going to be giving the necessary topology that's needed here. Now I'm going to be this one. I'm kind of taking a little bit more time, I should say, in trying to captivate this edge flow just as I want it. So I'm going to be a little bit meticulous when it comes to the eye. In certain areas. We can kind of see I'm just kind of matching that out. And I want you to do pretty much the same thing. I really want you to take the most amount of time just trying to establish something as clean as you could make it here. Like so. And we're just it's probably one of the most important spots for me. This is one of the most important places to be at. So that's where I'm going. Just kinda move this along. I'm not going to reach apologize in here. I'm just going to do an extrude in in, probably leave it at that. I'll draw in a, I'll probably draw in probably some kind of a insert edge loop around here and have it snap to the surface to finish up. Maybe something around there. Gonna see just the spending time. We want something that works here. Right? So now we've got that taken care of. Let's go ahead and add an insert edge loop here. And let's just project that in. So we're going to go into project and get our history go in there. So that's something's kind of making sense. So take a look over here, see if we can put a, probably going to put one more edge loop there just to kinda see if there's anything that I was missing. So it's just kind of lining up, just trying to get this to essentially line up like so. Now if you want, you can, you can go through and just maybe do an extrude edge loop like that if you want. And then just start realigning the vertices from here. That's fine too. As we kind of go along here, I want you to kinda get in the whole process of kind of just being mindful of how this is going to connect in. See, right now I have a little bit. It's not like the highest polygon count per density, really. It's not really even that much. It's a little bit modest. But what I'm doing right now is just kind of I'm doing this one vertebrae at a time. I'm not relaxing this or anything like that. All right. So as we are taking a look right here, we may need one more. So I'm just going to bring things in down here so we can kind of fill out the silhouette here. And then we're just going to insert one more. And like I said, this is an area I'm taken super extra care with establishing. Alright, so now that we have a, to a situated right here, let's just go ahead and just do one more single edge extrusion into here and then we'll move on to the nose section next. So we're just going to remember we got to do, I'd say need to do a little bit. We just need to just kind of bring it in a little bit here. Again, you can do this through extrude and just do maybe like a poly group. But you got to remember to kinda do this on the right angle in order to make that extrude work. And even then doesn't like to give the best results. So I'll just hold left old. I'm also gonna just kinda tap through Shift and hold it down to kinda make sure everything is kind of there isn't any split offset anywhere. So I'll undo that. And we'll do this one last time. And I'm not going to go all the way and I'm not going to worry about things like trying to connect this end or anything like that. But one thing I will have to do is since there's so many polygons here scrunched in, we going to need to really start tucking all this stuff in here. Maybe even going a little bit deeper. So so It's not going to be too difficult for just kinda making sure everything kind of want to have a lip line that just kinda goes through here. Now one thing you can also do is if you want, you can have more polygons. There's no rule that says you can't have more. Some people would probably say if this is just for print purposes or gleich single-shot renders or anything like that or something like for a movie. The polygon count that we've been doing could be higher. And again, that is up to you. If you want to do that. We're going to make it gonna make it, gotta make it go to Mexico to make it not. Okay. And that's pretty much all we're going to do here. We're just trying to establish sort of an edge flow for the anatomy to fall around. And again, I chose pretty much a very specific detailing line. This should actually work just fine. So in the next lesson, we'll go ahead now and we're going to move into establishing edge flow through the nose with that said, stick around and stay tuned.
140. Face Retopology Nose: Okay, welcome back. In this video now we're going to go ahead and start on our nose. And like I said, we're trying to establish all our landmarks or nose or mouth, our ears. So that way, when we lay out the connecting tracks of topology throughout between all of this, we can have a little bit of an idea of how many poly group or edge loops we need throw in there. So with that said, let's go ahead and get started. This one's going to be done in cemetery since we have a complete nose here and it could just be a little bit easier to line up with this. And so we're going to do it that way. First thing I'll do is I'll go ahead and react draw in a polygon plane with the Insert Multi Mesh primitive. So I'll just kinda bring it out somewhere around here. I like to always start sort of like in the center here so I can just draw some edge, loop, edge flow around the nostril. So we have to please paste two pieces here. Let's go ahead and split that off. Split unmasked. Let's go ahead and select it and hit Shift F and go into our Z modular so we can get started here. So I'll just go ahead and start off with just kind of doing some edge extrusions around here to kind of help me out with edge flow around the nostril before beginning. So maybe something like this. Just draw something that makes a little bit more sense. I find it is a little bit easier to connect every drawing out nose topology, it's a little bit easier to start in areas that require loops established. So we'll just go ahead and just kinda bring this in like so little. Make our adjustments around here. Once you do that, you can kinda just connect the pieces, sort of speak. Because sometimes this can be a little bit of a jigsaw puzzle. So we'll go ahead and select trying to solve a jigsaw puzzle sometimes when you're doing topology. Right? So now that we have that taken care of, Let's go ahead and see if we can draw out some more topology here. Oops. One thing that's very unusual about read topologies in general. Sometimes it's really hard to, for C where the edge flow is supposed to be. And, and in, out. For example, if I'm starting here, it can be easy to identify edge flow. But if I'm starting like maybe around here and drawn an edge flow around here, it might be hard to then line everything up on the inside out. So that's why. And now I kind of start at different spots. You could say, just so I can help myself out, sort of give myself a little bit more of a kind of a clue on where my next polygon or my next poly group is. See here. Bring that in. I'm honestly this would be a cool raid spot to put another edge loop around. Smooth. Let me see here and bring them through. Here. Might be a little bit easier. So like for example, I'm having trouble seeing it right here, or having trouble sooner right here or here. Or here, might be easier to see you doing it this way. For example, we can establish sort of the outline. And so now if I do it this way, you can kind of establish edge flow that can kind of Where is it? There is apparently somebody that got, Let's go through display and hit double. We're having a little bit of a trouble Harris and maybe something we can see. Nothing. Okay. Well, let's see where our culprit is. Having trouble making something move here. There we go. So sometimes just having something that you can sort of extrude along can help also in trying to identify. So maybe I can see like for example, symptom right here and then followed by maybe a triangle right here. And then by looking at that and kind of look and see maybe if we want, we can just sort of do. Perhaps it's a little bit blocky, so let's just go ahead and put something here. No, that's not what I wanted you to have the edge flow there. That's probably a better outcome. So it's easier to troubleshoot if you can kind of shift your perspective on to different places. So something like that, maybe it's having trouble seen that picture. So now we can just keep going. And if it's a little bit blocky here, we can just put again an edge loop through, through and insert. And let's go through and it's sub tool. Let's go through and hit project. It's getting a little bit clearer now, which is good. Let's go ahead and extrude. Now. You can kind of see all of it mainland kinda fallen into place. And so it's been sort of sometimes again, it does take a little bit of practice to kinda see where your next extrude is going to be in one of the easiest tricks to deal with it is to just simply now take a break and start in a different location. And habit neat. Oops. See, there we go. A little bit of a piece. Here we go. So now we've got to have this edge loop kind of move itself along to somewhere around here. So again, what I'm gonna do is I'm just going to kind of connect it. And wanted to connect right through there. Let's go ahead and bring this out. You can kind of see the work that kinda gets put into trying to think that through. I think I'd like to check this out, to delete this guy were merged, I should say, bring him in. And kind of see, this is kind of the process I kinda wanted to illustrate to you sort of the working it all out. Figuring it out like it's a jigsaw puzzle, pretty much. This one a little. It's just easier to delete this and try to figure out the nightmare. Right? And then I can leave a try here. Look, so okay, so we've got ourselves a little bit, some hair. We can now just to go through and extrude the center here. Bring it in a little bit easier. Then we'll just put in in certain project that, and that's going to make it easier for us to go through and kind of close this up. You can either merge it in, you know, like we did before, or we can just simply go through and just bring it across. Which I kind of recommend over that because I'm always going to be against anything that has like a crappy amount of crappy amount of birds. That dynamic off. Beautiful. Same thing here. And then bring this and we'll just go ahead and add and insert right down the center for this immersion with just rearrange all of it? No. I don't know how I went back all the way that time, most of its own. And then let's just projected in. And we got our nose. It's kind of a funky looking nose. But it is a nose. I'm okay with it. Let's go ahead. If you want, you can kinda go through the whole process of maybe relaxing some things out and projecting them back in. And finally, if there's anything else you want to do, you can just kind of do sort of like a insert or an extrude. I mean, oh, whoops. Around here. Yeah. It's why we can't do that. There we go. I'm just gonna kinda give it a little bit of thickness here. So now that we have that, let's just go ahead and merge our nose and our eyes together. So we'll just go ahead and hit Merge Down under sub tool. And we're going to hit Merge. Now we got a second part. So now we can just kinda go through and I'll first make sure you have your key set to subtour your how shall I say this? You need to have your cemetery set and turned off when you're making the adjustments support to kind of fit around here, like so. Okay. So kinda have the that part taken care of. We'll go ahead now and move into the next part, which is going to be the lips. So with that said, stick around and stay tuned.
141. Face Retopology Mouth: Okay, so let's get started. We're going to work now on the lips. And again, that's going to be done in cemetery mode like the nose. And we're gonna go ahead and just draw in separate polygons and then merge that in with the main landmarks that we've done so far. We're going to go ahead and then build off of the basics of the Up and over when we link the bottom and lower lip. And so with that said, let's just go ahead and get started. So now let's just go ahead and select our mesh here and just going to go through and hit R. Insert multimethods H, select our single poly. Let's make sure we're in x mode so we can draw in cemetery mode. And let's just draw in a couple of guys and split that off in under sub tool with an masked. Let's click on the new sew tool that creates going to shift f switch into BZ m. And let's see if we can just go ahead and just go through and make sure everything is where we need it to be. So let's just go ahead and get started. So first thing I'll do is I'll just kind of, it's, it's a little bit similar to the concept we did before. We're just kind of bringing this in like so and kinda tapering it off. I'm just kind of, you know, it's it's the same routine, similar to the eye. How we're just kinda doing some extrudes here. But this time around I'm just going to skip a step and just simply do it this way. Why am I doing it that way? Well, because I'm going to extrude this guy out first and I would like to kinda go through and the lower lip established. So we can kind of have a little bit of a lip line here. And then we'll just like before, we'll fill out the rest of this with our our edge loops and projecting them. So just go ahead and do that. So now we get to this point here. We got to find a way to taper that off. So if you remember a little bit about that up and over concept, first off, all hold x. Just for now to turn off symmetry and hold space bar to choose Insert. And I'm just going to put, well, I could probably do it just with this. Let's see how we just kind of go through with just kind of bringing it in like this. I don't want to kinda go through and fill this in until I create my up and over. So let's just hold extrude. Go back into Symmetry mode on. Bring this n2 right around there. Just before you meet into the dimple. Like so. Thing here, like so. And if you remember how this works again, you just kind of bring that in, that in. And then we just sort of kind of do sort of like a concept where we're extruding out o and then we're merging it in like that. Okay? So one thing we can do using this concept is, is that if you want, you can then build an edge flow that goes around the lip line like that. Another thing we can try to do if you want, if you want this to be where the Up and over goes, we can just simply just undo this real quick. Because we've showed you a little bit on the edge line here. Let's just do the same thing now just with this area here. Let's show you some mouse and hold x. Now I'm just going to show you a little bit something. We can just tie it off here then if you do it that way, you can just make the worrying go around on the inside of the lip. So we showed you a little bit of a prelude to kinda go and outside of the lip. And then we can do one that's going inside the lip as well. So same thing. Again, same concept. We'll do an extrude and then we'll go ahead and extrude that guy down. We'll do an extrude of the sky. Let's go ahead and project. Some of those were losing a little bit of our ability to pull anything. We need to move this around a little bit. Might have ourselves some geometry that's a little bit hard to see. So let's go ahead and hit Delete and clean that up. Let's go through double so we can make sure we're not missing anything. There he is. There's the culprit. So let's go through bring it out. Bring it out. Like so. Then from here it's turned down or draw size just a little bit. We can bring it out like this. And then we'll just kinda go. Now, if we do it like that, we can kind of just kind of relax the rings around here. Have a little bit of an edge loop that kind of wraps around here. So the placement of your up and over is up to you. If you want to go on the outside of this, that's fine. If you want to go on the inside. That's also fine too. I went on we're going to probably just go on the inside here and then we'll just bring this guy out. So again, We didn't do it on the other side. That's quite all right. Because if you forgot to turn symmetry mode OK, you know what to do, which is simply delete half of it and merge it over more. Do a mirror and weld, so on. Let's see here some like that. Geometry, modify Topology, Delete Hidden. And then we can just simply mirror and well-done. It's a little bit wonky with Maren. Well, That's why I hate doing it that way. So see if we can center it in law. Hi, are you are similar? I don't think we can get away with Maren weld this way, but we can try. Oops. If not, we can just simply went over It's a little bit of a pain sub tool. Duplicate deformation. And let's mirror it across its quack and the other one on. Or we can merge the two down. It's like they are on. So we can kinda have our topology all mean. And we can go into Symmetry mode and continue on. So again, we can do it this way as well just to sort of help us out a little bit with our topology using an up and over. Because then you can just kind of, if you want, you can just kinda put an insert edge loop across here and just kinda fill it out in here. So let me go ahead now and let's just go ahead and bring in one more and project The through. And let's just do a little bit more adjustments here. Perfect. So now once again, if you want, you can try to just do one more duplicate. So our extrude, I mean, by hitting X, we can try and extrude. That's a ring around here. Sometimes these work. Sometimes their diet in case you're wondering why I didn't go across, we did do one thing we've forgotten that is as we forgot to do our our mirror and weld process. So let's just go ahead and kinda bring that in. So just going to kind of move the verts around so that they well together like that. And we can just bring something in like that. We got to be super careful not to go too far and intercede with the nose topology. You gotta keep a couple of edge loops clear. And we'll just go ahead and just sort of readjust everything here. Like so. So we got to a little bit more of a approach here. We add a little bit Morrow working area. Probably go through and make my adjustments up here so that we have some room to work with on our nose topology. And then we'll, we're going to do now is just like what we always do. And just simply kind of move this all in with the mouth. So let's just go and click on that. It's above these two pieces. So let's just go ahead and hit sub tool, merge and merge down. And now we have our mouth topology. So with that said, we're going to net then move on into the next section of the anatomy landmark in it's going to be the last one. And it unfortunately is going to be the most challenging one. It's going to be your the ear. So that said, let's stick around and stay tuned.
142. Retopologizing Ear Outer Layout: Okay, and welcome back. In this video, we're going to now start on the ears and that's going to be a fun one for us. So probably the ears could be the most difficult part of this lesson. I'm not going to do too crazy of the perfect topology because the Earth's, they'll get really seen over the air. But we figured we'd go ahead and show you something. So let's just go ahead and get started. First thing I'll do is I'll just go ahead and left. Click onto the mesh. Make sure to hit X to turn my symmetry odd. And let's just go ahead and switch in and draw a polygon with our Insert Multimedia H switch to single poly. And I'm just going to go ahead and draw in a ear piece right there. Then I'm just going to separate it off by hitting split. And I'm going to go ahead and hit unmasked. Let's go ahead and select into that. We are now ready to start our ear. So it's given to our Z modeler brush and start extruding. Let's make sure I got everything set correctly. So usually one of the first things I'd like to do is just simply go through the whole process of making a kind of a rough draw out, rough draft right around here. One thing you can do also is this. You can make it like super blocky, like maybe like right here, maybe do some real long chunks and then put some insert edge loops around it to kinda make it fall into place. You can know cosines to find as you do this. It's a little bit, it can be a little bit frustrating to kind of tackle for first time. So let's just kinda bring it through like that. And now we can just go ahead and just put some insert edge loops and make this less blocky. So just hold down over a spacebar, put insert, bring this in. And I'm going to cheat a little bit with the topology on this. And I'm going to definitely be resorting to tries in creating this Because not going to, it's going to take literally forever. If I tried to do up and overs everywhere I go. So little space bar and delete. That guy does not want to be touched. Let's see if we can reject him on there. We go. More in there right around there. Like I said, I'm not going to say I'm like as critical on the ear as I am with everything else. Like mainly because the ear isn't really seen too much, but it's not, you can tell it's just never been my favorite piece to work with topology wise. But nevertheless, we should leave now. Stone unturned here. So we've got just a little bit more. Let's do an extrude here. And then scroll up here. And that's more here. Chuck that on there. Looks like we have a little bit of topology that's kind of sticking out over here. So let's see if we can get rid of that. And then try project in the end again. And then, you know, when doing this. And now it's kind of result quite a few open interpretations in read topologies using the ear. I'm not, I've seen it done quite a few different ways. In fact, I've even seen the ear successfully done auto read topologies guys. And I'll go on record as saying, unless you have Topo Gun, TOPO God, three, then I wouldn't try to do it with Z remeasure. It can be done in 0 measure, but I don't recommend everyone tried to pull it off if there are beginner because the people I've seen accomplish it are really good at manipulating C refresher to how they want it are really good at what they do in manipulating through manipulating things, through Z guideline. They really know like the all the areas in which to put a z guideline to. And if you can't do, if you can't find those same guidelines. So you may run into a little bit of trouble here. So I'm just going to see if I can bring in a little bit of topology around here. See if I can connect it up to here. Which is going to be a nice little fun scenario. Just kinda dissecting this off a little bit. Yeah, one storyboard. Kind of see how this is kind of a can definitely get a little muddy down here. So you gotta do a little bit of surgery here on skill into our solo mode and see if we got everything that we need. Display, go through double and we got a culprit right there. Cancel right about there. So let's delete him off. We go and we got one right there. So again, this is part of what you can kinda see is part of the process. So it just kinda making all of these areas work here. You gotta kinda do a little bit of microsurgery on this. Because every time you see something that's not working, you're going to have to, this is probably the most common for beginners. You're just going to have to go through and you gotta go through and fix it. By, I'd say starting with just kind of getting double mode in display properties to look for anything and then maybe just holding Shift down and seeing if there's any verts on top of births that come apart. So maybe maybe I can just bring this through here. Like some. Now the one thing I'll go on record as saying again is that trying to dealing with read topologies in the ER, it's kinda like playing a game of improv or a crossword puzzle a little bit because you gotta kinda just find all the places that fit into the right area. It can be a little bit fun, but it does require a little bit of attention. And patients here, let's bring in an insert here. Let's go through and project that. What is going on here? That guy, okay, So this guy may be neither. We have ourselves a bird on top of it, or we have just stuck to foreign. Anyway, and I'll just delete it. That's thinking. What I'll do is I'll run this edge flow right down here because the silhouette does kind of break out here. So we'll just kind of real line this. Whoops, can bring it all up here. Might just be a little bit cleaner. One, this is all said and done. You're going to want to make sure to do a double check on the backside here. And that's because symmetry may not be working correctly on pick your choice, but if it doesn't match up, That's okay. We'll just go ahead and reprojected. Or I should say we'll duplicate, we'll just delete that side and just duplicate the sub tool and just mirror it over. That's the one thing you can always say that year is a nice fun little jigsaw puzzle, jigsaw puzzle challenge. Let's go ahead and put a little bit of an insert edge loop right here. And let's project that n. And when you're this close and click on the outside of the box here, outside of the wireline box here. Now we got a nice little edge flow we can go with down here. And, and stuff from the way a whole little bit about a whole process of just kinda bring in everything and just kinda collapse in it at all in trying to find ways to tie it all off here. So think of this like a game of improv and problem-solving. Or free, free read topologies, free-form read topologies and you know. Because everyone's edge flow is going to be a bit different as you go through this. So you're going to have to just kinda little bit of peace with that. Kinda see what I did. I kinda taper that off a little bit because right now I'm not too sure if we need this many poly loops go in through here. Let's see where we go. We have one that needs to be we just need to do one more here. Delete all until you get to a point where they're getting so small. I'm going to have to lead some of these. And that's also a nice thing about having doubled on. You can kind of see what's happening. So we're closing the gap and this is not necessarily an area I'd feel too comfortable about. Going through and doing a relaxed, smooth project process here. Probably would be best to just simply manipulate the verts for you. This one's a little bit stubborn. All right, we're going to have to just delete this one. It is just getting in our way. And I think I've extruded it out quite a few times. Do anything here. So let's just go ahead and just break this down. Let's just go ahead. Right.
143. Retopologizing Ear Cavity: So now we're coming up closer and closer here and kind of see the backside of that as well on the other side is kinda showing. So one thing we can do, we can start tying things off here to make it a little bit easier. Because it doesn't look like we have very much that's going to match over to the other side here. And if you remember the time off when we did the inside poem, and now we can do some simple like that. No, I'm not really too concerned about doing like that many tries and the process because it's just going on the inside of the ear. So we can just slit see if we can roll with that. So I'll just go ahead and just do some more tiles here to another one up here. Bring it on. Extrude this from another angle. That's probably better. No, I don't want to extrude. All right. Perfect. Cheat a little bit. All right. So now that we got to a little bit of the ear, we have the pretty much the major hard stuff out of the way. Let's go ahead and turn off the double on our displays because we're going to read topologies rising downward from this point, I'll pick a spot. And that's very, let's click on here, left-click. So we can now just rotate around the sky. And then go and r sub tool get back in your ear and think and what we'll do is not sure where we'll take it. We'll see. I'll go ahead and just kind of pause it right there. And then what we're gonna do is we're going to finish up the ear and make an edge flow that kinda coincides like a loop. So with that said, stick around and stay tuned.
144. Ear Retopology Border Edgeflow: Okay, welcome back. In this video, we're going to go ahead and finish our ear topology and established sort of a round edge flow loop that kind of coincides similar to how we have our eye topology done over here, and our nose and our mouth. So with that said, let's go ahead and get started and finishing off this ear. So one of the first things we gotta do is we got to take notice that we gotta kinda get a backside going on here to make this work. So we'll just go ahead and finish that off here. Pretty super quick here. So let's just go ahead and make sure we have snapped to surface turned on. And I'm just going to kind of bring this all around here. We got a few poly groups to go through or extrusion, so I should say to go through. And that's going to be a little bit difficult to see. So going to have to just kinda once again, do you do your surgery? It's it's it's again, tedious work, but it is necessary work. Couldn't get him down here. Might be why I'm having trouble with my snap to surface here. And my snap to surfaces a little bit off here. So let us delete this guy and see what we can bring this. One thing I can also do, I'm very tempted to do this is just cheat my way through it and just kinda do a, maybe just, I don't want to have to do two rings of manual one at a time, edge extrusion. So I might just go ahead and just bring these guys up like so. And just kinda maybe put them around here. And then when the time comes. So we'll just go ahead and put some rings around there to help that out. Now to make this a little bit, what was going on over there? There seems to be a poly group that kinda went through. Yeah, it looks like is this some sort of a weird poly group here? So looks like we got ourselves a little bit of the string over to kinda go on through here. Still there. And you're going to have to go through and troubleshoot lists before we can go through any further. Maria's. Now let's flip it. And then I can delete to lead a. Let's flip it back. Now. Snow, that's a little bit easier to see. A little bit of cleaning up, we still gotta do like here's another area right around here. Let's go ahead and take a look at that. Yeah, definitely some stuff we need to work on here. And let's see what Aligns to go into solo, ring that guy out, delete him. So we got a little bit and we have to kind of it's pretty easy to extrude and get these guys out, then kind of lose track of them. So we got to, you know, kinda find where the problem is deleted out and rebuild the topology. So right back on track. All right, so now one thing we can do is let's see if we can add an insert edge loop around here like that. And let's project that in so that we didn't don't have to go through this whole thing twice now, hopefully you did your history say not. Go ahead and just do one right now. Click back in. Once you have everything kinda situated and everything kinda taken care of. And a little bit more of wiggle room. Just go through and you can do one more. Or you can also do what I'm probably thinking about doing and just kind of tying off some topology like we did in the palm of our hands. Now we can do that. But before we do that, I want to see where I need to tie something off at when I start meeting topology from the other side. So I'm going to leave it just like that for now. So with that said, I'm going to also take a look over here. And it looks like there's quite a bit of things that I need to fix that didn't get pushed onto the other side. So what I'm gonna do is first hit X to turn everything off, hit Control Shift, and then left all to kind of delete that. And I'm just going to hit geometry, modify Topology, Delete Hidden. And then we're just going to go through sub tool, duplicate that into deformation then. And then we're going to hit mirror. So that that kinda comes over to the other side. I'm going to make sure that lines up well, here it looks like it did. Yep. And then will just merge the two ears. Merge down in okay. We'll merge that with the face with what we reach apologized. So now we got the ears, we got an edge flow that wraps around the ears. We have now the eyes, nose, and the mouth here. And so now we're going to create a sort of circulatory system of topology that is separate from all of this to where we can get all these pieces to meet in the center. So with that said, stick around and stay tuned.
145. Face Retopology Guide Breakdown: Okay, welcome back. In this video now we're going to go ahead and just use the mask tool to sculpt in a couple of pieces here for creating edge flow when we connect our topology together here. Now, this is pretty standard for creating certain edge flows for a human face. So we'll go ahead and get started with that. And now we have a little bit of a challenge that's unique because we have asymmetric coal looking face here with this little gap here. So we got to be a little bit careful. So what I'm going to first of all do is I'm going to select onto my face. And if you want, you can duplicate that mesh or out to sea, you have an extra one. And then I'm going to go ahead and hold Control left-click. And we're going to kinda make our brush size a little bit small, hold down Control. And I'm going to go through stroke and turn down, turn on lazy mouse and turn my lazy steps on. And the reason I'm doing that is so I can just draw out some topology here. So what we want, it's just going to be like some sculpting guides for edge flow. So for example, I'm going to first starters draw out sort while holding control, sort of an edge flow line. And that has to kind of coincide. Something like that. We're just kinda, what I'm doing is I'm just trying to illustrate to you where we got to go. And another place we have to go for edge flow is just kinda bring it up here. It looks like it got stopped by my mesh. So we're just going to have to be a little bit careful. And so we need an edge flow that's going to have to go through all the way up there. Now we're are going to need some edge flow that is going to go something like this. And of course, you can kind of fudge a little bit in which direction it is, but something has to go through along here. Now, for here we're going to need to have an edge flow that kind of coincides with something like this. Kinda bring in something in. And then we gotta have a little bit of a, It's gotta be roughly around that. That's a bit far back. But kind of you get, you kinda get the idea. It's gotta be something roughly around this area. So we gotta have something that wraps around kind of this direction as well. And then finally, of course, we need to have something for the chin. So maybe song, then a little, I'm going to hold x and put something down here. So we can just kind of give you an idea and then this can kind of taper off. So this is sort of the idea of where we want our edge to kinda go through. It's just kind of drawing out the direction. So where we want everything to kinda line up at. So I mean, there's going to also be, again, you should know already the, the lines of topology here. Should already have all of your pieces here. And you should already have the edge flow pieces here because that's what we were spending all our time doing. So it's just kind of just going to kind of bring it in little bit. Same thing with here. You already have the edge flow pieces done here. So that's kind of the gist of it. We're going to then just kind of work our way through. And now I'm just kind of making some changes here and just kinda. Mapping out all the main spots here that kinda line up. So that's just going to be a little bit to what to expect. So one thing I'll do, I can just go ahead and just kinda invert this and maybe helped myself out with maybe just put in a push on here. Remember we duplicated this, so we're not losing anything. And I did do a history saved. So I can maybe just kinda push it and just slightly just so we can kind of give ourselves a little bit some just kind of to help us out in where all our edge flow goes. This, on the other hand, one thing I will say is this right here. This probably can go all the way through one. Let me go ahead and show you what I mean. Go ahead and bring this in. Let's bring him in and write it like right around here, probably where I should've put them and kinda see how I'm just kinda I'm basically just making a small little blueprint map of everything just to kinda help me out. Maybe somewhere like right here. You can do whatever you want and just kinda take a couple pack to strings right here. You can bring it right about here. And then maybe make the line if you want to kinda go through to make sure you have something there. So Put them right now, just select that. I'll deviate away from that a little bit so we can make it so more and more closer to here. Because where this X is, I'd like it to be a little bit more towards there, but that is pretty much where we want it. So again, I'm just going to go through and just kind of punch it in. I'm not going to poly pain any of this because I just don't feel like it it's going to take a little bit longer. So we'll just do it like this and will now go into our topology. Hit Shift F, make sure you're in transparency mode and let's just get started. So BCM, and let's just start making some topology here based on what we're saying. So it gets a little too distracting, you know, reminder. You can just go ahead and just switch to the other topologies piece. There we go. I think we're getting some the results. So go ahead and bring this in. And then I'll bring it into maybe somewhere around here now. So this guy kinda has to coincide underneath here. So let's go ahead and just sort of create sort of a roadmap to help us out there. And just making some large, large extrudes. This one I am working a little bit off of. Let's see, judge. Do nothing. We know that's going to actually have to go underneath here. So let's just go ahead and bring him through. We having that parolees while I'm struggling, I forgot to hit Snap to surface. Let's mall also check our display properties, see if anything is hidden underneath there. Sure enough. Let's go through Delete and get rid of all that junk. Your new kinda see what I'm trying to do to use sort of the little sculpted edges that I did right there. Kinda coincide. And we'll probably need to go through and just kinda line these up. This is part of that improv. We just kinda have to kind of work our way around that. And then I'll stop there. That's probably where I wanted my mesh to be. So let's just go ahead and just continue on. And then I go what I want. Let's just so we have an edge loop that goes underneath here. We need a second edge loop that is going to go through here. So that means there's two edge loops. One is here, one is through here, and there's only one. So what will we do? We just go ahead and put an insert so we can split that off. Then go back and do extrude. And again, kinda go on through the whole process. Again, just kinda reconnecting everything. And what we'll do is we'll relax all this stuff and maybe not the mouth. And so I will try to mask that. We can relax the rest of this. And again, we're going to have to do some improv, improv, improv immunization here. Square root, extrude and go through like that, Something like that. Now let's just go ahead and just simply bring this through. We got ourselves that main edge flow. So now we got to put an edge that goes all the way down here. So we're going to kind of find where I have to pick a spot where this splits off. And I'm thinking maybe somewhere around here. Because you can kinda see we have quite a few poly groups that we got to line up with this piece. So let's go ahead and just be very careful to take our time. Because we can do this right? We can just get all these topology to fall into the lib end. Since that has more, you put it over there first. So let's just go ahead and I'm going to bring some insert edge loops around. So maybe one for here and here. Definitely some round for here and here. And let's project a man.
146. Connecting Face Retopology: This would be considered our chin line. And we're going to leave it right there just for now. See if we can do some editing up here. Bring this across. Like so. It can I accidentally extruded someone didn't want, which is now gone. Mm-hm. Kind of see as I'm doing, this is kinda like the, it's kinda of like the ear where the puzzles all kind of fit into place here. You're gonna kinda also see an extra areas like right around here, I'm going to need an insert edge loop, so we'll go ahead and put that in there when the time comes. But for now, let's just keep kinda stay the path. Now. These three guys are pretty much going to be extruded across. Like so. They too will be needed to go through and we're going to have to. Now, in case you're wondering where to start, we know we still need to have topology that goes all the way around here, so we need to make room. One thing that kind of has me thinking little bit is maybe just doing a quick little duplicating of this lobe mesh of the just the jaw topology. Just so like this jaw edge flow onto the other side. But I'm thinking I'll wait until the air is all connected before taking that route. We'll see we'll see where it takes us. First of all, there we go and think. And not actually could be a good spot. To start put in an insert in. We can project it in. And then we can do to clean extrudes cross. Once we delete that little right there, kinda see how the soul kind of winds up a little bit more. I could do projectory around here because I really want the edge flow. And kind of fall into line here. That's where we get our sixths or junction. That's not going to be too good. Well, maybe I can just go ahead and cheat a little bit. Okay, so now what I'm doing is just sort of working on just sort of reclaiming up any extra topology or just kinda weird little diamond shapes on here. So I'll just probably do maybe like for example, there's could be something here. I can probably do another Insert Edge Loop right around here and check that in. And then just kind of Extrude. And if you are in any kind of need for anything that needs to kind of fall in line. Just go ahead and just take a moment to analyze the mesh. And sometimes just still waiting it off. Or backing up and deleting something off. That can help quite a bit. So let's go ahead and add, insert here. And kind of see, I'm just kinda taking my time, just turn a correct the mesh here. I don't necessarily need this just for now. Just go ahead and we'll just kinda leave it like this. Go ahead and just kinda relax it a little bit. Let's get in there. Good. One thing that has to stay consistent is, is we do have to have a little bit of an edge flow that will kinda go here. So may just have to just kinda deal with that. Now that we do have to have some kind of an edge flow happen in right around here. So that when we go through and kinda do it either up here or you can do it down here. Honestly, I kinda like it this way. Might just broke my own rule and just do it that way. So Let's take a moment to see what that looks like. That's not too bad of an edge flow workflow. So let's just rebuild it now. To be on top of here. And then we'll just go ahead and finish up by filling in spots all the way around here. Problem I have is a little bit like right here. And that's kind of why I say got to be a little bit careful because at least by doing this, I can kind of maintained a little bit where I wanted to map everything out at, which is to have the eyes sort of coincide. How does a terrible, terrible policy, group choice? We can just sort of grid sort of like an edge flow and kinda coincides a little bit more cross here. So we have something that wraps around here. Week. So someone just bring him over. That. We're just going to simply just kinda switch into our other mesh here so we can see having to be trickled by the noise. Think that's where we want to keep him. Alright. So what we'll do is we'll just go ahead and just simply bring in the mouth here. Build in our edge loops to be around here. Too far back. Because on right now and just kind of experimenting. Once we do that kind of stuff, publish sort of a edge flow here to the center. And can build a couple of inserts and they're inserted, build a couple of edge loops in there and see what we can do. And then we'll just relax them out through extrude and see how that looks. And I had to deal with a little bit of a no, I hate those. Let's see. Easy. This would be if I could just tie that off. Well, one thing we can always just do is just simply add an insert edge loop up here. Then I'd have to do too, and that's quite a bit. Let's just go ahead and move these around over as far as we can. So we'll go ahead and take a break and finish that one off in the next video. So with that said, stick around and stay tuned.
148. Retopologizing Forhead: Okay, welcome back. In this video, we're going to continue on and work on trying to make and pull out an entire mesh here on this side. And then we're going to see if we can take anything we did on this side and read duplicated across to this side to finish up. So this may take a couple of videos to do, but we're in the homestretch of being completing one of the most difficult to read topologies pieces. So let's go ahead and get started. So now the first thing I'm going to want to play off here is I'm going to go ahead and hold Shift Control and draw a mask over there. That way, when I do any sort of movement with my verts, I can kind of not worry about the whole process of things getting screwed up here. Another thing I need to look at is this. It's clear, I'm going to need to do some Thai ofs here. So it's going to be a pretty simple process. It's pretty much like what we did in the POM. And that's just kinda where we just hold down and minimize and draw down our size. And we're just kinda creating sort of a area here to work with some real estate to deal with here. So like maybe one for I'm just kinda lining everything up with what I see. Like maybe one for here, maybe one for here. And so I invert the mask, maybe like one for here. Not just kinda work my way down. And if it gets too much like he's still don't have enough worry, we can still do more tiles. So let's see here. You can do on right here for example. Let's go ahead and make sure we got everything snapped to surface or let's go ahead and also make sure we have our saved version. And let's project some of this so we don't lose any details. No, don't seem to be losing any details. Let's see. I think I could use tie him up to here. And I'm just kind of sewing these guys on here. Oh, it's all, it is. Kinda like that. And again, these are all going to be kind of tricky to do. If you can't ever do a tie off, you know, don't don't shoot yourself too far in the foot. Just simply, I always just delete it. Delete the bird, clear the mask off, and just kind of go through that like that route. If I want. Same thing like with this piece. If I can't get this to go through and you can just collapse the edge. Maybe even delete the edge, you know. And just simply tried to do it that way. A lot of times when this happens, one thing that I do get pretty glittery on as his thinking maybe that this might have something to do with a other problem that might be happening. So just kinda be on the lookout for any sort of on some verte on vert problems. I don't think we have anything to worry about, but I could just keep oneself vigilant. Another thing that we can do is we can just simply try to work on like a little bit of a process of just bringing these guys down a little bit more. Now, I am probably going to say at this point, I would just rather just simply. Extrude around here like so. Maybe try to have something that's just a little bit kinda like that just to help now. And then I'm going to do the same thing. Probably also going to, I am tempted to do some more tiles, but what I think I'll do first is just get through all of this and would like to extrude all the topology that I need before I bring it around. This guy needs to be up here. And it will go. One thing we can actually do also to help us out as this weekend maybe just to help us reduce some of this out. We could in theory. And then up and over there would be a lot easier to pull off though if we had a symmetrical face because that's what I'm usually used to. All right, so now we add something a little bit more like that. Let's just kind of make our adjustments through here. Again, I'm just going to kinda work the births, the topology and try to direct the traffic over. It's going to be a little bit clunky and a little bit blocky as we move this along because we can always just throwing some edge loops to where we want to help us through this. Kind of think I could use an edge loop right? Through something like that. Maybe. That's probably why I like insert, project this out. Let's go ahead and get that guy merged in. And I'm just extrude in this noun. Now let's just go ahead and bring it in here. Or we could just bring it in all the way in here like this. So we can do the head and just kinda like create some surface details. But I will say it's too far away. Might need to project some details in there. All right, 123. Let's bring them in. So we're going to hit Insert 1, 2. And wrong side. Looks out again. Yeah. That is of noxious beautiful. We'll just go ahead and merge all these guys and then I guess we do and assert their right. So it's coming out a little bit easier. Only one thing I'm going to probably look at as I'm getting through this is really optimize the side here. New to start thinking about what we're gonna do on it. Like right now. Not the biggest fan of these two is scrunched in Mertz here. And it's clear we gotta do something about that. So we're going to have to do an up and over there. So let's go into extrude and bring that out. Like we have done before. Which is kinda doing it again. Let's extrude. So I'm going to have to do this twice as long. We will change too. Project. And let's just go ahead and relax at now. If we can.
149. Finishing Forehead Connecting Ear: We'll get some air. Can't get them to play nice with each other. But I think we can get employee Nice. So it's a little bit off symmetry here. And you can use slide cloth, maybe. Rush. Yeah, but I don't really want to turn to go through and screw with dynamics just, just yet. Good. I'm just kinda doing this so that to get this look in a little bit more uniform because I'm not too happy about how that she's kinda rearranged itself, trying to get that up and over to be as centered as possible. And again, this is all because I'm dealing with sort of an asymmetrical face. Just dawned on me. I could have done that a little bit easier over there, but oh, well, so we're getting this slowly but surely covered and see if we can make it a little bit further in. So DPCM, it's going to hurt mode. So I'm going to go through and I'm probably just going to do a sum similar to what I've always done. And just do like an extrude. I'll just once see if I can bring this cross. C or D. I'm just going to bring it maybe to about here. And then just kinda do my work due diligence on this one too. Just kinda go through and then I'll just stretch it all the way to the back and fill it in with insert edge loops. So I don't have to kinda repeat the process with just kinda go through and just constantly doing one extrusion out of time. So let's see if we can wondering where it was centering over. Again. Creating that too. There we go. And that to the very back, somewhere around there. Let's just see if we can flatten it in and put it like right there maybe. And then we'll just go ahead and put some inserted loops in there. And with enough we can probably go through and clean this up. Probably not going to get any sort of projecting out of that. So we've got to be honest. That's okay. So long as we can get it to kinda go on through to the back. Which is going to, once again, we flatten it and then just kinda rearrange it. And to be fair, we can probably do the same thing I want to. Kinda flatten that one to kinda like that. Just kinda bringing it all in. And let's just see if we can. We're going to have to crank up the history projections couple of times already. You know, what we can do is we can just go through and just do some inserts and here, like that. All right. Let's come along. Can just make some adjustments over here. No. Now let's go ahead and smooth this out. Excel and reproject. It's getting a little bit better. And a little bit more uniform, a little bit. Reproject. It's coming along. Reproject, reproject, some will come in along. So now we just go to start to make some adjustments over this head. So it can kind of extrude along path here. Once we can, if we can just clear this point, we can just reuse this to the other side. Know, we do know one thing about the sonata's is that usually like to have these ideally kind of move themselves around to the neck. Kind of show you what I mean, kind of like that. Kinda want to try to see if we can perfect world, try to get it to kinda go up there. And then just kinda counter edge loops through and we can kinda bring him up here. So that is the sort of final end objective. Well, we've got to, first of all, just kinda walk before we swim. Kinda like that. And I'm not gonna do anything more to have established edge flow of the lower chin because that also is going to be an issue. Kind of see, we're kinda getting along. We're going to have to do a little bit of read topologies, cuisine all the way to the under chin area. We're going to have to meet this guy up here. We're gonna kinda do some work, a little bit of work here. So we'll, we'll do is just kinda, since this is the lower number, we'll just go ahead and match things up here. And then we'll just kind of try to figure it out as we go along. I'm gonna delete something. Probably this. Insert here. One more, one more here. And you can kinda see this is now just kind of building the topology along in places. I go check, display a doable in case I miss something. Doesn't look like a right? So let's come to campus to do some sewing here. Okay? So it looks like it's part of it. Alright, so again, it a little bit closer to it. So let's just go through and do her thing and relax this a little bit more. And then just go through and Soap tool and project the sun. Kinda like so. Now, one thing we'll do is as we go through this, we got through quite a bit. But only thing that we need to do that's left is this. We need to sort of take some of our topology and whatever we did on this left side, we're going to see if we can read, duplicate the ear and the connectivity of it on this side and walk about and see if we can reuse it. We do have an edge flow with the I established. So that's going to help us quite a bit. But the only thing I don't like is this, like how it, when I relax, that kind of moves the the head of this thing a little bit over like a giant little spindle. So let's just will probably work in a little bit more tweaking of trying to adjust all that stuff down the road. Honestly, I'm thinking I probably should have just left it alone and just let it branch out a little bit more, but oh, well, that's fine by me. So with that said, when we, in the next lesson, we're going to see if we can just see, do the backside of all of this, see if we can taper it off and then see if we can duplicate any OH, geometry in probably a candle, some of the underneath geometry down here. And duplicate it and see if we can get, reuse it to this side here that you see. So but that said stick around and stay tuned.
150. Retopologizing Opposite Side Head: Okay, welcome back. In this video we're going to start working on the other side here. I was going to duplicate this piece and just kinda move it along here, but there's too much, but different topology gonad going on here that I'm going to just have to manually do this. Also, it has been now I know I made this little up and over, mainly because it's not symmetrical and there's a significantly lower amount on this side because of its asymmetry. It's kinda kind of give me a little bit of a gulf that I kinda wanna just fix and get out of the way. So I'm just gonna go ahead and just rework this a little bit more so that I have a little bit of wiggle room, a little bit more of an easier time trying to get through this. So let's just go ahead and just fix this piece of first. So what I'll do is I am just going to kinda just do kinda like what I did before. And on a much, much smaller scale here. And just to kinda give myself a little bit more of an opportunity to correct myself a mistake I made. And that was I had this pretty much on a too high up and it was really messing with my edge flow uniformity of my bus. So I'm going to fix it now. And that is part of one of the things to take note is this kinda stuff. You shouldn't. It's always nice to show you how we problem-solve things. So I'm just going to go ahead and just bring that in. One of two things. We can either just build our topology out to kind of fall into a sort of a edge line like right here. That is an option. Or you can just sort of move it along here and just sort of kind of habit extrude out. So we've got all sorts of choices we can do here. At least when we do this, it's going to fall inside this little bit easier. So that we smooth this out. We'll look a little bit easier on the eyes. We go through and project this through. We can do a couple of things. We can either have this tie off here, not the penis about it, to T9 off right here. Kind of like the idea of just deleting that guy and just making an insert to edge. Just kinda go through like say right here. Kinda prefer something like that. Maybe. But at least you don't have this weird coinciding topology. Let's see here. We do have one other thing we got to take care of. It's right here. Oops. Let's project that in. Does not like to stick. Ok. There we go. So think I kinda like that a little bit more than what I had before. At the very least, it's a little bit more slightly uniform throughout. So like if we kind of relaxed it a little bit more in, probably get something like that. So that's something that's one thing that I got wanted to get fixed that's been bugging the hell out of me. Oh, okay. So now that we have this taken care of, I'm going to go ahead now and just hit Shift F. I'm gonna see if I can bring in some of the details from here over to this side so we can save some time. So one of the first things I'll do is I'll hold Shift F and just kinda isolate, select this guy. And I'll just invert the selection so we can make them disappear. And then after that, we're gonna go to geometry and delete hidden. That way we have some stuff deleted. Now, you can kinda see half this face is not been used. And so what we're going to do is, well, look in at it. I'm kinda flight planning things out to my head on where I want to take this. And we can really just read. I made a little bit of a poly group through masks by holding Control, you can hit W. And I kinda just wanted to block out some real estate to kinda put onto the other side here. So that's what I'm thinking I'm going to just do. So what I'll do is just go through sub tool and I'm just going duplicate this sub tool. And then just isolate, select this guy and go through geometry, delete hidden, then down to deformation, and go to mirror. So we can bring this over to the other side. That way we can have a little bit more of Cemetery, working through all of this and go through anything like maybe you want to delete some of these little edge loops and such. You can go through and just kinda work your way through that. And the nice thing is, is now we don't have to go through the whole process all over again of real cementing a sort of a recent venting ourselves to making the ear tied on, on this side. So that's one way we can get out of that. So let's go ahead and merge these two down. We're going to hit Merge Down. And now we kinda have ourselves a good little ketchup spot where we can make things work out, continue to make things work out. So I'm just gonna go ahead and just do some edge extrusions here. And maybe just like do another one right up here. Then we'll just go through and do an insert, maybe around here. And maybe one like right around here. Actually, it's kind of a good spot for me to go through. Shouldn't have deleted that guy. So we'll just go ahead and rebuild that. And I'm just kinda lining everything up now you can kinda see. So just kinda put everything back together again. Through here. One more place for here. Let's see if we can rebuild our topology. And I'm just kinda rebuilding the topology so that it kinda lines up a little bit easier. We'll do one more insert here. I'll maybe just do like a real quick try right there. So now it's just kind of falls in that we are kind of see as it skews once the play the tug of war game with me. So we'll have to kinda go through and relax this in like so. They don't want to play nice. Just to go through and project them. There we go. So we get that little bit taking care of a little bit quicker. Because by reusing some of our groundwork here, which is always a nice thing. And we'll just reproject this back on. And kind of see, we're getting our head. Now. Reach apologize to cross. So let's just go ahead then. We just have to we don't have very much left to do on the head. We just have to kind of extrude this guy crossed and maybe just count a CPU edge loops through here. Or we could just kinda, if we want, we can just go through and just extrude another place up. Maybe. To this point. Oops, no, I want him up. There. We go. Project. Just once again, go through and count our inserts. Here. 123 or six. That's how many we need. Probably put one right up here. Maybe make it go up here to check that on there. So start welding it in there. Well, put put enough in there. If I didn't, it's because I'm getting tunnel vision by staring into my piece for so long. So I did put one too many in there, but that's okay. We'll put one more in there. Right. All right. Smell it says go ahead and go through and just kinda relax these guys in. Let's go ahead and do this in symmetry mode. Maybe we might get some are more uniformly and so some a little bit like we'll go ahead and you got to topology. We gotta make work up to here. And then topology we got to make a work on the front with the sternal clean, clean, a massless. So we'll worry we're coming up on the home stretch, but we do have to build something here. Go. Insert in here. Mmm, project that down, more and project that down. And I'm just probably going to, since one thing I can just do is for my own cheating six and here's going to be covering up behind all this stuff. Not going to be too worried about losing out on topology. I don't think we're going to have any problems in deformation that much and the back of the hair. So to do an extrude here, not sure we have enough here, but if not, we can just delete some topology out. Yep, let's just delete some of these. Do edge loop complete here, then here, and here. Okay? Alright. So that was pretty easy. Just relax them in. Now we are pretty much trucking along this now. So in the next video we're going to work on trying to establish the neck line and reach pathologizing the neck. We have already a good headstart. We're almost done with the most difficult piece in the whole series. So with that said, stick around and stay tuned.
151. Face Retopology of Neck : Okay, welcome back. In this video, we're going to start working on our neck here and getting things a little situated as such. So we're not we got just a few more areas to reach. Apologize like maybe the depth of the cavity and the neck and that's just about it. So let's just go ahead and finish this piece off. So I'm just going to kind of bring this in and just kind of work through this like so. I'm probably going to work on the jaw line a little bit more so I can get a little bit closer in. Over here. We didn't do too much with the jaw on the other side of here. So as probably would be a good opportunity to kind of work with that. Let's see if we can swing it up here. Just make things all fall into place here. Like that. No, I'm just kinda wherever there's a roadblock hold, just build a and extrude in and just kind of see where it takes me. I can just leave it like that if I want. There we go. Same thing with over here. But I'm not going to build any extrudes. And just yet I'm just gonna go ahead and try to bring this in a little bit more. And since we are there, Let's go ahead and do this stuff through cemetery mode. So we can kind of just build something in here and just align the neck. Turn off symmetry now. And let's hold space bar and do an insert. Back to extrude, kinda see and get everything to line up. I'm thinking I might just go through Let's check the stuff on so we can get this lining up a little bit better. So now we got to work with connecting the top to the bottom here. And before I do that, I'd like to go ahead and bring all this down. So because I don't want to have to do like 20 extrudes based on this subdivision, not just rather pipe in the inserts after I'm done the Insert Edge loops. So I'll just go ahead and just bring it across like this. And again, I'm not too concerned about how blocky it is towards the ends here because well, we're going to go ahead and just cover the self with the shirt. So it doesn't really matter that much. Right now we just need to connect in with the upper part. So let's build in our topology, make sure it's there. We're going to go back and forth. And again, we might also do something like build in. Either we can put in some extrudes here, or we can do some Thai ofs. I'll just do some extrudes or I'm sorry, it's some inserts. I mean, put in some inserts. Probably something like that. We've got a quite a few of them. And then we'll just go through and relax amount. So let's just go ahead. You want this money? We don't have much in there. Go ahead and Wu. And then in their project, relax this stuff and spread it out. So we can do this again. Looks like we're going to have to delete out some stuff here. In fact, let's get back to work around here. All right, let's just do an insert here. Projects, some stuff, checks and stuff, projects and stuff. Just giving myself some of the topology. And this is going to slink down quite a bit. Is the goal, oh, turn on Cemetery so we can get something a little bit more symmetrical. Like that. Will bring it in that way. So we're building in some more topology and just bringing it through. Let's get back into it. Let's turn off the symmetry here. I think what I'll do is I'll go ahead and start over here too. See. I'm just very tempted to just say screw it and just kinda tie it off here. We got just literally any sort of insert edge loops. We need like 20 more of them to make it over here. Let's see. See how much fun I'm doing, just trying to make all this stuff line up. I probably should just kind of extruded down on this one. We're just going to have to relax this all out. Again. Just cheat our way out. And one more. Right to the very end. There apparently was quite a disproportionate amount from the neck. Here.
152. Face Retopology Cleanup: Okay, welcome back. In this video you're going to see me doing a little bit of fixing now on my mesh. Now that we have it pretty much completed, we just have to do an extrude that's gonna go in here. One of the things work I kinda looked at as I was checking my mesh was this area right here seems to be a little bit messy. And so I wanna go ahead and delete that. And I believe when I did a Insert Edge Loop, it created sort of a spiral geometry that I'd like to work on. So first thing I'll do is just delete that unintended spiral and start deleting some the islands so that I can re, pipe through topology to be correctly placed. So I'll just kind of go through all this and I'm just going to do this pretty simple. We just kind of delete and clear off everything. And then we can just do an insert edge loop. And we can just make something nice and clean right here and just make sure it's projected through like cell. And now once we have that, we can just kind of go through and do some extruding to kind of create sort of like an edge flow that kinda gets through here and it's a little bit easier to access. And we'll try to do the same thing now, once more her here. And once we do that, we can just either try to do a little bit of wiggle room work here. We can just bring through either topology down or topology forward. So it's not going to be too hard. And now go left or go right. I think I might just go with the surround. So now from here, I'll just go ahead and put an insert edge loop and go back into extrude. And I'll just bring this guy in and bring this guy. And so now you can kind of see a little bit more of a cleaner mesh. Got another topology. And again, this is all just about cleaning up your mesh. So I might just make that guy disappear so we can make something a little bit easier. So now that we got that taken care of, Let's handle the other side of this and we can pipe the, something similar here. Now let's see here, it looks like I'm just going to delete just a few of these faces. Sometimes just deleting some of these faces off is the easiest way for you to reset and see something you didn't see before. So r, Now that I got that taken care of, I can just kind of see sort of like the areas that need to be handled. So maybe symptom hoops, maybe we'll extrude like that. To make it easy. Let's see where the edge line of this goes with this goes all the way up the edge. So let's see about doing something similar. So just kind of see how everything's just kind of fallen into play. And I can actually live little bit with some of this here. Go ahead and bring this out. And let's take a look at some of this topology. So maybe we can read borrow a tie off here. Because I see one of these tie off. See my country like, Oh hey, maybe up now that I have an extra place, maybe I can loop this around. Some kind of see what I mean. Let's just kind of fallen into place a little bit easier. Now that that is happening. Yep. We can go ahead and now we have a little bit more of a cleaner mesh around the neck.
153. Ears and Neck Retopology Cleanup: Okay, so now that we got that taken care of, we have these edge loops that we want to get rid of because they're a bit excessive and we can try to relax them out and then try to do a project, but they'll just scrunch in like that. So let's see if we can work on trying to fix this here. Before I do anything, I'm going to make sure to take a look at some of the polygons here and make sure that they're kind of equally distributed across that way. It has a little bit more room to kind of reach over 2. And that's going to play a little bit of a role, a little bit, just a small amount, I should say. So when looking at this, I can take a look and some of the things we can do is we can do, I'm going to do a combination of maybe deleting some edge loops and also doing some simple, basic tai ofs. So make sure you have your head topology with a full ring. Before you do so. So let's just go ahead and take a look here and see where's spot. We can delete something off ACH. You can either delete something here or we can delete something here. I think I might try here. So a holdover space bar and go into Delete Edge Loop complete. We can just maybe delete a tube here, or you can delete again a tube over here. Tempted to just kinda do one here and then do sort of the opposite and here. So we can we can make one right about there. Yeah, it looks just about right. So with that done, we can now go to the next piece. We can just, just, we want just to begin to sort of tie some of these off a little bit and just bring them kind of across. So they have a little bit more room to travel across. Like so. Just me trying to make things a little bit easier for you. Alright, so let's go ahead and go ahead and delete some polygons here so that we can extrude this around. Excuse me. And now that we have that, let's just delete these edge loops down. So that will be next challenge. Edge loop complete. Let's go ahead and coach Luke complete. So now all we have to do is extrude and bring this guy. And so we're doing a combination of two things really. And you know, with the renovated space, we can now just sort of move some things around. And now if we try to do a little bit smoother process, Let's also before I forget, let's put one more edge loop around here just so we can protect some of that. So we'll go into insert, maybe go through, insert a single edge loop just to put something there. And let's see if we can relax now some of this kind of gently at first. And then just kinda relax it and equalize it around. And if you want to, you can kind of also just do it to one group at a time. Like with a very small focal length, you can just kind of project it one at, just kinda run it along and hold Shift and just kind of relax it across one length at a time. Then. And that can help a little bit too. All right. Then let's just sort of redistributes some of these Pauli's around. So that kind of helps quite a bit. It just makes it a little bit easier. Now, you can do either or you can actually pick it up a little bit more and do more tiles if you want. Like we just did, we just did a certain number. Like I think we only did just two. If you want, you can do more. But we'll go with that. And then I'm just gonna go ahead and just try to relax the the deleted edge loops. Like so. Because this isn't exactly, this chin isn't exactly a symmetrical, because we ended up with an asymmetrical face here. So keep that in mind. And then which is something like here, we'll just reproject. So now we got that taken care of. Let's start looking for some errors around here. We pretty much got this. All finish. All we have to do before we start looking for errors, Let's go ahead and just create like a little bit of a thickness piece here so that we can have something to go off of. So I'll just kinda extrude down here, like so. And I'll make it relatively small. And we'll just kinda creates sort of like a little bit of a gap here. Files and Maya, this would be a lot easier because they could just simply extrude all the way in. But oh, well, taken this far, I'll take my time. And again, keep in mind, we're covering all this up, so we'll go ahead and move the other way around. Now. It looks like we got something going on here. We're going to double verb equip. And yes, I knew it. There we go. Culprit and eliminate it. And always, always, always be suspicious when your of your modifier on your ZBrush action isn't. Always investigate. So now that we got situated and taken care of, we're going to move into cleaning more of our mesh up by just kind of running through this in dividing a couple times, look for some holes. Now we got some over here that we need to work with. So let's just go into solo mode so we can see it better. If we just divided a couple of times. There are some holes right there we need to fix. Let's see, looks like there's some holes right here we need to fix. I think that's because we skipped something here. Let's just go ahead and fix that. We divide that. Still had an issue here. We got one more right here. So let's take a look, skip to another extrusion. So no. Okay. So we got that taken care of now. So let's just divide it through. Looks like it's right. So Z undo and we had some stuff over here that we need to address. So sometime all the way down to here. It's like we just have to maybe just move the verts a little bit more on top of each other to see. Looks like we got that. Looks like we also got to fix the ears. So let's just go ahead and fix the ears. So let's see here. 1 error is right here. And another one is right here. Where's that other one? Right there. Just go ahead and and I think we have a Walmart or deal with here right in the back. Looks like it's I'm just going to cheat a little bit and just put a mountain right there. So I'm guessing we have the same problems over here since we didn't do a check. So we'll just real quick take a look and fix this. Then we can get ready to finally project this guy out. No, I guess it's not really. There. Was good often solos and I can snap in there. Okay.
154. Projecting Face Details: And once again, this guy, what to do with him? So again, we now have our mesh. Now finished. What it looks like, reach apologize, mesh. So what we'll do now is we'll just go ahead and do a couple of quick slick processes of Extrude. Just what I'm doing is just barely tap and it just kinda relax the edge flow around. In areas that might look a little bit on even. Just to kinda straighten it up a little bit and clean a little bit more. And we'll just go through and then just project this out. And then what I'm gonna do is I'm going to hold control and make this one polygon mesh. And the reason is, is because I'm looking at this right here. I'd kinda like to when I divide this, I would like to keep this creased. So I'm going to need creases for the top of here and then every angle point. So to do that, I'm going to have to go through and I'm going to have to look for poly group. And I'm going to tell it to behave in the form of a poly loops so that when I do this poly loop will, poly group will be formed based on the Pali loop. And then for these corners here we'll change our modifier action to crease. And we'll just do its scale to a single edge. So we'll just kind of put some creases around here. And I'm doing this because again, when I divide, I want to have some holding edges. And then finally I want to go through geometry. And I'm going to hit crease. So this one had a lot to do. You had a lot of things we had to do to make this one work. And we're still not out of the woods yet now we're going to have to do a little bit more finessing with all this with the project history. So we're almost there, but not just yet. So let's just divide this up. We can kind of get ourselves a little bit more of a process here. Let's take a look at our mesh. It looks like we have one more crease right there. So I'm just going to undo this to that state and put a crease right there. And then it should give us something to work with. And then let's see if we can do a project on this. It looks like we got most of it handled. Here. It's going to be some areas where we can we're going to need to take a look at like right here. We need to take a look at what's going on here. And I think no, no. It's either a crease or it is a stray little polygon. In any event, it's gone. This looks like one I messed here. Check that history out, moves like we got most of it in there. So it is conforming. Do have an edge loop that is going around. So that's good. Let's go ahead and give it one more. Actually give it two more. And we'll see what we can do here and this resolution, because I think I'd like to do this manually at this point. If I try to do project history on may not get the results I want. So it's kinda push in it. Yep. That's what I was afraid of. You can always try doing that same amount again, but maybe like lower amount, but this is probably why I would want to go through and just do this the other way. Looks like it's kind of there, but you can kinda see it's a little bit off here. So I'll go ahead and just reach, apologize this or forget me. I will go ahead and just paint this on here. All right, Let's do one more because we're just going to have to do that. And again, we are working with making this so that it faces us. I don't think it's really necessary to have 6 million. It's not really all that different of a change. So we'll just kind of step it up that oh, my goodness. What do we got here? Sit on the other side as well. Now. Adds Okay, we're going to cover that. But let me just go ahead and because I'm a little bit of a perfectionist and once go through geometry and just go through, and I just have to I can't help it. All right. Oh, yeah. That's because it has some for summaries and it has crease on there. That's okay. Like I said, that's the ear that's covered up, so I'm not going to even care. So let's just get this on here. And let's just go ahead and just bring it all in. And this was the hard one. This was the one that really got us our heads go and you're going to have to little bit of clonal now one, Let's work on establishing out I okay. So now we're getting this all situated and taken care of. Let's fix a few more things right around here. We should be good to go. We should be disco. Ride on here. All right, so let's go ahead and bring it out. That's all right. And so okay. With by me a little bit of an issue right here, we seem to have I don't know what that is or why that happened. Let's just go ahead and go into Solo Mode. Bring that out. Maybe you might've lost it. Not sure why on God's green Earth, they would keep that problem. But I will fix that. You want to try your best to kind of add here to that little issue. Yeah. If it's on the lowest subdivision, that's our eye by me. That's all I care about. And I'll just go through and just took care of it and the high subdivision. Solo. Yeah. Well, I'll just leave it like that for now. Yeah. Like that. Why it is a bit of a pickle? Because this was where we wanted to this is where we got it at. Well, so this is probably the one thing that I never liked about z modeler was this, Oh God, I only got the ears. Think, well, when we projected the ears over on the other side, we got that look like grunge look right there. That's probably what that was. Never go. So what I'm gonna do after that said and done, I'm just going to go ahead and do some more fixing around here. But overall, this is pretty much the mesh we have that we wanted. Just need to do one more thing. And that is we just need to bring it in a little bit more here. Maybe. There we go. Let's bring it in here. Okay. So we now got this head done. Let's go ahead and rename this main head. And you score high. And we're just going to now and simply bring it in. And it is our last piece, it is our last big piece. And I keep making the mistake of bringing that in the wrong way. So let's go ahead and just bring that in again. And let's see if we can just kinda keep it there. There we go. Topology brush. It can be creepy and it can sneak up on yes, so just be mindful of it when you're working at all right. So now that we have that taken care of, we have all these accomplish. Let's just delete these two heads. You don't need them anymore. And that was what we started with four, and now we can just go into solo, turn everything off. So the next thing we're going to do after this now is going to be work on are detachable pieces that come with all of these things. So with that said, let's stick around and stay tuned.
155. Retopologizing Eyes: Okay, so let's continue. Now as we last left off, we have our model now completed. The next thing we're going to do is just the small stuff to take a break for everything. And the next small thing we're gonna do is the eyes here. So let's go ahead and get started with that. Now, the eyes is a pretty simple one. And that is going to be where we just simply go through the process of going up here to a different tool. We're going to hit sphere 3D and maybe just hit Shift F. Right now we're in initialized mode, which means we can go down here to initialize. And we can go through the number of divides that we want and make ourselves a low red sphere. So it's a pretty simple process. So, you know, you can kind of take what you want and make your choice. For example, this could be what you want or maybe you want to go down to something like 16 and then feel like that too. You can go ahead and settle for that much. Probably like for example, I can go a but because we don't really need to have two terribly, I'll go 10. Something like that. You can just kind of take it to wherever you want. Just experiment around 16 by 16 is pretty much okay for me. But the divide I might go with, let's start with 2004. And you wanna kinda have quite a few on the divide because of the fact that needs to conform to the shape that h divide. So it's up to you. You can go anywhere from some super low to some relatively high. And then what I like to do to just kind of give myself a little bit of case, I'll just go ahead and hit make polygon in 3D. I can just go through and just maybe delete some of these. Maybe like up to here. And just to go through geometry, modified topology, and just simply delete that hidden. And now we can just go back to our mesh here and import that new IN will just hit Append. It's sort of just like a, a low reds eye is what it is. I think we may have chosen the wrong one. That was the wrong one. Let's go and try that again. Pen. And there's our real, I mean, you know, you can just take this guy up here. And it's pretty simple process. Well, we can do on this one. Let's go ahead and click on the attachable pieces and bring our eye out of here and cycle that all the way down to the bottom. And before I forget, let's put our head into our area. So that's read topologies. And now that we have that, let's turn off our detachable pieces and store moving this eye in where we want it. I'll turn transparency all so we can see it a little bit better. You kind of see all the stuff that we have here. And sometimes it's hard to see with transparency turned on. So we're probably going to do our best to. First of all, we need to scale it to the right position and then we need to rotate it to the right position. So let's just get this scaled. Kinda see, I'm just taking my time on this one. All right, so once you've got that, let's just go ahead and give it a couple of divides. May good, just one divide and maybe just kinda once again, just bring it in. Scale it up and we'll see if we can do a project with what we have. So what I'll do is I'll just quickly go into my eye and do a history save. Go back into my other piece. And let's just do a project history. It says Would you like to pause project pallete pain? Absolutely, I do. So let's see if we can get that poly paint on there. And let's see if we can go into toy plastic. I was just real quick here. And it looks like we got what we wanted on here. So it's a little bit, you know, it's just a little bit. And we give it one more. I think we can work with that. So let's just go ahead and not turn on detachable face. Yeah, that looks about right. Let's turn on or reach apologized. Head. Looks just about right. Bring it in. Yep. That's looking about right. So we're getting it correctly placed. So let's turn that back off again. And let's see if we can make the material snap on there. So let's go up to here where it says RGB, change it to em and go through fill color and just say fill object. So it will always be like that. So now that we have that, let's just go ahead and just bring this over 2. Let's turn our eye reference back on and just simply duplicate that I over so that it's in the right spot again. And go back to basic material now. And we're just going to see if we can line this up. Like so. As you can see the eyes a bit of an easy one for us. Let's turn off those detachable pieces so we can get her I shaped in switch between these two. I'm going to turn them both on so we can kind of see this is ours, this is ours. And kinda looks like it's in the same spot. One thing I forgot to do, and I'm actually going to have to take credit for this. I kind of forgot to duplicate this over, but I kinda like how it just kinda of going through the wrong one here. Let's go ahead and just forgot to do one thing that was pretty important. So let's delete that. I duplicate that I, and let's bring them all the way to the top. Go through geometry and delete are lower so we can mirror it over so we can get the same eye shadow. Deformation, Mirror over. Sub tool, bring click back on an MRI, center him. Take off, detachable. It's roughly in the same area, but we kind of To be very, very careful. This is a little bit of a shift. Kinda see how meticulous domain right now. This. All right, so let's go ahead and turn on our face. And let's turn on our detachable stuff. All right. So it looks like everything's there. I'll go ahead and switch that back on again and make sure the other eye is turned. And not just yet. Let's go ahead and click into the sign. One thing we do need to do is this. Go slightly a little bit forward and make sure it's on the highest subdivision. And then we're going to merge these two guys down. And then we're going to we should have, if we don't, we can just go ahead and go through geometry and reconstruct or subdivision. Like cell. No. Say a little bit of a difference here. So let's go through just like L was in my other eye. But you can just go ahead and just simply I really like how everything was mapped out on this one. Maybe I shouldn't have probably should've looked at right there. Kinda see what I'm doing. I'm just kind of just making sure everything kind of pulls them to play a little bit. It's going to go ahead and turn it on. So it is slowly kinda looking like it should. I'm just kinda being a little bit super meticulous on this one. I'm going to capture everything here. Alright, so it looks like we got it taken care of. So I'm just going to go ahead and kinda bring it down to its low level and just go to this one and say goodbye to the eyes. Now that the eyes are done, Let's just go ahead and rename them eyes high. And let's bring those in and move on into the next piece. So we're going through this. We got a few more things here. We'll go to do some, will do some relatively simple stuff like the wires. We can just 0 mesh lab. So I think we'll go ahead and start that next. So with that said, stick around and stay tuned.
156. Retopolgizing Wires: Okay, welcome back. In this video, we're going to go ahead and reach, apologize some wires and knock out some of these slip rings just the third, get our way through all of this. Now this isn't too taxing of a process. It's pretty simple really. We're just going to use G, Z remeasure to get us through this. So if you can just go ahead and hold left Alt, left-click, go down to sub tool. And all I'm starting with the ring, the little piercing rings just holding left Alt, left-click. Just select them. And I'm just going to go ahead and just do a pretty simple basic 0 measure because it's a pretty simple shape, It's a torus. So let's just go through geometry. 0 measure I have a crank down all the way that LOW. So we'll go from 8000 points all the way down to some like 652. And that's okay for me. You can always just divide them up and get them back up again if you want. So you have a high rise in a low-risk. I'll keep that there for a second and we'll just go to the next one and do the same thing. It's geometry. And just do a real quick super low rev Z remeasure. Maybe that's a little too low, but yeah, something like that. I would probably work. Let's see here. There's a couple on here that we don't really need. So b, so I'm going to go ahead and hit brushed topology or I'm sorry, brush move topology. And see if we can move some of these guys out of here goes, we don't need them. And geometry and modified topology. Delete it. And so we just got it even a little bit lower. So we got some of that go through and click into here. And why that's white. Solo, okay? Just making sure there isn't any special hidden ones in there. So let's just go ahead and go through sub tool and just click on that next one and bring that guy out. Bring it all the way down. I'm just going to simply hit Merge Down. Just going to be okay. And now we have ourselves our topology ring. So we'll just go ahead and rename those rings. Piercings, baby, here, c, here. C underscore higher. Whoops. And I put a little slash there so we can't have that. It's got a, it's case-sensitive. It's gotta be named just right. So we're just going to put that in reach topology. And now let's just go ahead and do the same thing. Let's do some 0 machine on some of these wires here that we have going on here. So I'm going to go ahead. We're just gonna do the thin wires just to account for and maybe some of the tube wires. So let's just go ahead and hit Solo. Now if you remember how we did these, we'd had poly groups on here. So what I want you to do is I want you to hold Control Shift to isolate, select to make them disappear at the end here, and go through Geometry, modify, delete hidden. Then from there, let's just go ahead and do a 0 measure. Maybe some like this amount. Simple 0 measure will work for this. And we'll get a little bit of a timeout. So if you ever get that, don't fret. You know, sometimes it likes to mess around with us. That case usually happens. I always just kinda change the target poly count. So you can kind of see, we get a little bit of our result here. And if you want, you can kinda go lower, but be careful you notice they kinda dissipate the lower you go. So be on the lookout for that. So you've gotta kinda find that happy little space, that happy medium. And you gotta be careful about those timeout pop-ups as well. Yeah, that's kinda good enough for me actually. And remember, we can duplicate these around as well if we want to get higher. So we'll just go ahead and bring this in. If you want. You can just kinda move them and move them out just to kinda bring them in there a little bit more. Now on your model. So we're whatever you wanna do. And so we'll just go ahead and bring those wires out. And I'm just going to put them down there. And then we're gonna do the same thing with the next set of wires. Just gonna kinda just go through solo. Take a look at them, see those poly groups, those orange, purple poly groups. Again, we're just going to hold Shift Control. We don't need those. So let's just delete them off Geometry, modify Topology, and delete hidden. And again, we did that. That's what happens when you hit the trim curve and just cut it off all the way. So just keep that in mind. And again, we'll just go ahead and kinda roll through it. Remember if you go too low on the target poly count, you're going to lose quite a few of them. So just keep that in mind, but you can always just kinda regain them back. I think this one had twice as many, so it's probably why that had that. So that's okay by me. Just wanna make sure that you have all that kinda taken care of. So we kinda have a little bit more. And kind of see how I'm just guiding the sun. Quick little BPR and make sure we're that's something that works. Yeah. So it kinda can see everything working a little bit. Some different varieties of wires. Cbm team. We can move that one piece over. I ever see like any stray pieces, I just kinda mess around with it. And there we go. Something like that work. So now we're just gonna go ahead and we're just going to move that set of wires down with the down arrow. And we're just bringing them all down like so not just merging them down. Yep. We're going to hit Okay? And these are going to be pretty easy to UB out. So that in mind. Okay, So now that we're kinda getting through all this, let's just kinda quickly toggle off the wires. And all we have to do now is just sort of work a little bit with C, This piece right here. And this piece right here. You can kind of tell when this piece is sort of a, well, it's a little bit of a fun one. We're going to have to do some split to parts to get everything separated here on this one. So couple of things we'll do is I'm going to read topologies, these areas here out. Because I just want to have some extra, just want to kinda clear the space here. So let's just go through here. And again, 0 mesh this. I'll go ahead and first of all, drag a mask over whole control over. We need to get it separate from here. So I'll just bring it back. And then we're just gonna do split to mask. And once we got that, we'll have our piece right here. And again, we can just see Ramesh, this, it's pretty simple, not too hard whatsoever. Geometry. And let's just bring this down low 934 points and see if we can fix that. That's a little too high for something that has virtually no silhouette. So let's see if we can make that a little bit more efficient. Now if you get stuck at 0 measure and it just suddenly gives you like a minute, two to minute lag where you get a timeout. First of all, try adjusting your target polygon. If not go into DynaMesh, and then from DynaMesh go into 0 mesh. Okay, so now we've got some interesting things here. This is a good example. What I mean when I say go into DynaMesh, who, once again, little bit weird, I think I know what I did here. So I'm guessing that what I got going on here is the geometry of the tubes has been duplicated across, which can be a little bit problematic. So we got to when it was like this, basically two tubes were occupying exactly the same space. So we get to have, this is where we got to improvise. We've got to start coming up with solutions or problem-solving. So let's bring this out here and see first of all, what we can do. Let's try split to parts to see what we can find out of all this. And you can kinda see all the different pieces that are kind of just going through. And I'm going to have quite a few pieces. And now it's starting to make sense as far as why we had almost a million trying to figure out how it got to that point. Now we can DynaMesh all this, but that's also going to inevitably result in a merge of intersecting geometry with the tubes. And I don't want that. So any place that I'm going to just start merging and kinda looking ahead and seeing if anything's occupying the same space. Merge Down. Now, okay, So this is occupying the same space. So let's just delete that. It's not necessary. Chip this piece. This is different. So let's merge down now. And that's occupying the same space. So we're going to merge that, or sorry, we're going to delete that, right? Merge that down. Then we're just going to kinda look at that again, occupying the same space. It's like everything was sort of split on top of each other and that's what's nice about split to parts. It splits all the different separate topology parts away into their own sub tool to help us troubleshoot. Sweden, merge this down. And we can delete this one. And that looks like it can be merged. So we'll merge that down. And again, we can take a look here. Yep, can delete that. And we can delete that. So this is the original piece. This makes a lot more sense than the million. So we just troubleshoot did that. Let's go ahead and try the 0 measure one more time. See if we can get something a little bit more clean. What do we got? We've got a cleaner to, but it's a little wonky here that makes a little bit more sense. But we can also go quite a bit lower. That's definitely better. Just gonna kinda try to push it just a little bit more. We might lose some mare. Now we didn't. So we can live with this. So let's just go ahead and merge. Well, I'm not going to merge that one in. I'm just going to have that to be its own little piece because I wanted to be part of the main wires. Now actually I might just have it be seperates thinking ahead on the bake. So we'll just go ahead and go through project or not project but Rename. We'll call these small fine wires underscore high. And bring that back in. And let's just go ahead and turn that back off again. Now one thing we're going to do also is with these eyelashes. So this is definitely an important one to discuss with you. Eyelashes are something that we have done the eyelashes in a way that is privy mainly to ZBrush. When we take it to the next step in texturing, I'm going to replace these eyelashes with cards and something called alpha cards, which will be used to texture these. So when we do the export, we're going to be leaving this out and we'll go back to this again when the time comes. So we can just take eyelashes out there on the export. And you can call them eyelashes just to keep it organized. Well, it will not go the final rough draft. All right, so now that we have that, what we have left to do is for this is pretty much three things. This face here, this big wire, these pieces here which we can remake over and over. And this guy, which is going to be our last fun one. So with that said, we'll also go ahead and take a look. If you remember what I said when I appended this in, I told you that this would also be a ZBrush only feature like the eyelashes because when that time comes for texturing in such, we're going to go ahead and do like sort of a revision of this in a 3D software, whether it's blender or myo, we haven't decided yet, but we'll cover it up with much lower Pauli's here. So again, I'll just do this. I explained when I drew these in that these were Maya or ZBrush only features for the sake of the render of ZBrush. And we'd replace these again in a 3D software. So I'm just going to rename these odor components. I'm just going to that again into there. So now all we have to do is let's just go through and rename triple big wires. And I want to rename that again. We're bowl big wires high. And we'll bring that. And we gotta make sure that's we haven't divided it yet. So let's just give it a few subdivisions because that's pretty much what it looks like. And that state. So we're just kinda bring that through. Put that again on low. So now all that's left is going to be the distal face piece, the main little detachable face. And these pieces. So we're just going to work on this next and we'll go ahead and get started with it. And just to do as we did before, and we're going to do a split two parts process. So that's going to be a pretty easy one. So we'll get your setup before we conclude. Here we go. So split two parts just once. And that's going to split all these parts across. So now we can work on them. So this is pretty nice because all we need to do then is just like for example, select one of these and reach apologize them in kind of reduplicated add them across like cell. So that's going to be pretty easy and then we'll be left with this piece. So with that said, stick around and stay tuned.
157. Retopolgizing Segments: Okay, welcome back. In this video now we're going to start to reach, apologize, our little connector pieces, and it's not going to be too complicated in this process. All we have to do is pretty much just maybe just reach, apologize one of these and then just duplicate them across like so. So that's not going to be too bad. The one thing I'll have you do though, is take a look at which piece you want to pick. I just chose this piece and just decided to take it to the very bottom of the sub tool like so. And now I put the remainder pieces, an untitled folder, which can be toggled on and off. So looking at this piece, we're trying to look for a one thing that we can do is we can do what we've always done and just do extrusions all the way around. For example, drawing a polygon and just kind of extruding all the way around. That's an option for you if you would like to do that. And it's probably one of the more simpler approaches. So with that said, I can probably give you a good opportunity to do that. But I also kind of know you're at this point, you're very capable of doing it. And I wanted to show you how we can do thing with just some basic primitives as well. And that's a good opportunity just to simply learn more features in ZBrush and just kinda get your mind more flexible to different options for different scenarios down the road. So to start off with, I'm going to go ahead and put a cylinder around here. But first I want to modify the cylinder in a way so that there's a poly group on top and a poly group on the bottom. And that's going to be just sort of just the kinda get you practice more to new tricks. So because this is in a different location than this. So let's just go ahead and I'm going to hit onto cylinder up here. And I'm going to hit F to frame it in. And right now it's in, it's initialized mode. That means its mode where it can be edited for the number of caption. So it's now really sculpt double if you press on it. And one of the first things we'll do is change the number of accesses under the h divide. So I'm gonna go with about 16. And then I'm going to take off the v Divide another words, the vertical divide as subdivision count. And we're just going to have nothing in between here. So that's pretty simple enough. So once we do that, let's just go ahead and hit make poly mesh 3D. Next thing I wanna do is, is I kinda wanna make the bottom and the top poly groups. So I'll hold down control and drag a mask over and make that top part a poly group. And I'll do the same thing and make that bottom part a poly group. So there are two different poly groups that way we can isolate, select, and move these independently of each other. Next thing I wanna do is, is there may be some chance when we projectile this and divide it up. There may be some resolution that we need, and we might need to put a few insert edge loops around here to help us out with that. So right now do an insert edge loop around here is going to be very hard because these are all tries. And so we need to kind of extrude this in to sort of help us out. So one trick we can do is we can just simply go through, see modeler brush B, z, m, and then hover over this point here. And just hold down spacebar and choose Split. And by doing that, we can kind of create sort of a scenario for us where we now have opportunities to put more, more Insert Edge Loop rings around. So I can now just put something in there. Like so. Now will be enough. But if you look, we can't, we still have this problem down here. And if we hit X, well, we can do it here, but it doesn't work for some reason as well. On the other side of here, for example, let's see. We go through transform trying to give you a good police show. You doesn't suddenly become accessible like it used to. So you kinda run into a little bit of a problem when you're trying to do things that way. So we have to once again, problem-solve, improvise. And one thing we can do is just simply go through sub tool or I'm sorry, not sub tool but Geometry, modify Topology, and then go through mirror in weld. Now Marin weld isn't gonna do anything right now. See if you hit it. But if you go over here to where the, this x and then shade it out y, z, you can kinda change that. I'm going to click on the Y and turn off the X. Do that mirror world again. Now you'll see the options coming around there. So we have, I just wanted to give you a sort of an opportunity to show you some more things that have been there before for awhile. So now that we have that, when we have that, all that taken care of, now, let's see if we can just sort of maybe just delete this stuff here. So I'm going to hold down spacebar, go through Delete. Now I'm gonna, it's gonna delete the edge. But I wanted to do a complete delete around there. So we have something like this. So now we have something to work with. So now that we have that, let's go ahead and go back to our main tool here and append that created cylinder. Seems a little bit complicated over what you've been already practicing I now. But by doing it this way, we get a couple more we get more practice working things in. And we get a little bit more opportunity to learn some more features. So that's kinda why I'm doing this. I just kinda want to show you more tricks that we can use to kind of save time. Truth be told, this prep work takes probably the most time in all of this, but once you have it, you can kind of just positioning pretty much where you want. The problem I always had with using Z modeler in this particular cases is because we had to go through so many verts to just kind of push and pull. So right now what I'm doing is I'm trying to do as best as I can. Just sort of fill in the space a little bit. Sort of speak on where all this goes, sort of just kinda matching the spot. Let's go ahead and hit transparency. And let's see. We're going to need to scale it and maybe this direction. Let's go ahead and just bring it in this way. Home doing is just sort of kinda getting on to line up as best as I can. Now we can just kind of take this one step further. Now hold troll. Looks like I'd like we have two poly groups here. So let's make these one poly group. I'll hold down control, drag a marquee mask over there. And voila, we have one poly group. Make sure you clear the mask off. Isolate, select again, drag mask, invert the mask. And then you can now kind of control where this goes. And this is sort of nice because we kinda save ourselves a bit of time. And you can now see why we didn't want to put any subdivisions in between any of this. And I'm also holding left Alton left-click to kinda change the axis of the rotation. And essentially I'm just trying to align this guy up both in as best as I can, both in scale and rotation can help sometimes to turn transparency off Horrea, because that will always make a difference. So let's just go ahead and bring her over here. And I might just make it just a little bit bigger, just to do my best to sort of get this as best I can. So now it's clear that mask do the same thing over here. There's a poly group on there, so I'm just gonna go ahead and combine those two. And we're just going to go ahead and just simply hold Shift Control. Drag a mask over there. Well, do that again. You have to clear the mask. And now let's recenter this guy. See if we can do our best to also reset the rotation. So it's kind of Angle as best as we can like that. Alright, so let's just drag it in. And it's just again, just another process we gotta eyeball. Now it is hindsight to say, Why don't you just go ahead and if you remember how we made these, we made these off of these very straight cylinder. So if you wanted to, you could do, if you kept the peace. You can, if you want to just sort of do this office straight cylinder. I kinda liked though the the approach that how these things all kind of did in turn a little bit. I was thinking about seeing if I could do sort of like a Teflon rubber texture in all of this when it's sudden done. But for now, we're just gonna go ahead and leave it like this. Let's just check. Sort of, right? And let's see. Maybe just a little bit like that. Alright? And we can definitely work with that. So now we got it kind of situated. Let's go ahead and go through geometry now and go through and crease, increase peachy or crease poly group borders. Sometimes that likes to disappear. So let's just bring that back in. I'm pretty sure I'm going to begin that for awhile. Okay. So now that we have everything situated, Let's do a couple of things more that we forgot to do. First off, let's go back to our high res and do a history, say by holding Control. Left-click on that bar. Now that we got that, let's just turn that off. We don't necessarily needed just right now. And let's just go ahead and put some insert edge loops around here. So I'm, I'm still in my Z modeller. I'll hold down spacebar and just choose Insert. And we can just do something like that. Maybe if you want, you can add a few more. But yeah, um, and just a few more. Maybe something like that. And now let's just go ahead and divide this a couple of times. Probably that many. That's a bit high and extreme, but I'll just 753 to 196. Nice number. So now we go to probably the most challenging part of all of this. This is where we go into our history. Recall brush which we've been doing and using since the very beginning, that's be HR. And if you want, you can kind of just what I do is I just take a directed focal point like right here and just work my way around and start with the edges. So you can start at any point. This might be a better point right here. And then maybe give myself one more. So I'm just going to take my time on this one because this one yeah. Let's face facts. It does have it has a lot of curves and you gotta be little bit careful on this one. Fact I have an awfully big brush which might be sort of Maya undoing. Has, is that new kind of Sam, just kind of starting with the edge is because these are probably the most complicated areas that you'll run into. Again. Beautiful. Let's go ahead and go to the top here, see if we can fill in just a re thing. We missed. Getting a little bit close to the edges here, so I'll go with a smaller brush size. We go, That's what I mean, right there. Might want to also try and take him dynamic off, but it's also killing me. I always found that the dynamic Rush was the worst thing bunching about ZBrush, but that's just my opinion. And this is all detail we're really not going to see, so we're just printing it right here. Alright, So we kinda have that all situated. So I'll hold Shift Control and maybe drag a mask over and invert that mask. And that way I don't have to work with screwing up anything here. I may also kind of draw in a little bit of a curve maybe to help protect a little bit of that border there. Because this is a little bit of a process hold down Control. And let's see if we can. All right, so now I can probably just like reproject some stuff without having a go too crazy into the other side. One thing else I can do is I can also kind of cheat and just kinda do sort of the other side and all of this, which is probably something I should consider. Yeah. Because again, this is a tricky, tricky little area 2. This is probably one of the more trickier ones to kind of project in. Won't we can't let that one go.
158. Positioning New Segments: All right, now just go ahead and just sort of fill in the rest here. In theory, you could also use maybe like a planar flatten to deal with some of this area and never really touched on it, but it's just another brush we can use. Okay, So now we're gonna kinda do the same thing. I'm just going to hold Shift Control, invert these and kind of draw a mask over these hold down control switch to rectangles. So I can just draw a mask over both. And then go ahead then and see you have that mask. Let's go ahead and just sort of finish up and probably just showed on a curb mass down Control. Alt, make a little curve. Same thing over here. So pretty simple. Work with. Let's go ahead and soften that mask off. Now we can kinda just projects some of these details without worrying about affecting what we've done. Probably, again, probably one of the most challenging pieces is this one. I'm sorry. Probably one of the most challenging, challenging to do projections is this one. That's kinda why I wanted to kinda just do this one so I can give you an idea of like how far you can kinda take something as hard, go restoring something or projecting something. Let's go ahead and hold down Control going to freehand. Just going to hold Shift and just bring that in like so. Hold Control left all to subtract away. Let's keep going. You know, honestly, I could probably do another subdivision, but these are pretty high as it is. This is a pretty high active polygon count. So one thing that kinda has me thinking Is this, like if I take this into a first off, you're not going to really see the tessellation of all this jaggedy stuff go through in far away. But one thing that you can do is you can just kinda taken another subdivision, reproject it, and then decimate it. That way you can take it into a 3D software to pay click Substance Painter, like we'll do in the next course. And then we'll just sort of reproject our details through there. So that's one thing to take into. We've done decimation a little bit, but we're really going to have to do decimation probably more. In the export to high rows. Okay, so now that we kinda got that all situated, we've got our low res. And now you can go ahead and just be satisfied maybe with this. Or you might want to take it to this subdivision that's up to you. So now that we have that, we can do the next thing which is just turn on our folder here. And we can just first off, just simply duplicated across. Or if you want to, you can. I'm pretty sure we can do it this way, which might actually be easier, just kind of just go to its higher as and then hold. And we can't do that. I knew that. So now that we kinda have it this way, this is where I probably would say just hold down Shift D and kinda bring it to its lower as position. And just go through duplicate, bring it across. And just sort of position it over through the untitled folder here and choose our term that guy off so we can see it a little bit better. Maybe transparency might help. Turned off. Can't hold down control and translate again because of, again, the fact that it's got subdivisions on there now. So let's just duplicate that, bring it through and just kinda bring it across. Like so. So this is all just a matter of transposing this around. We can duplicate that. And then you done this part already before. Several times. After you're done with this, you will go through the process, so of just sort of merging these down, but you gotta make sure to merge in the high red states so they have to be in higher as or else this won't work. And one thing you got to also think about is if these get to be too big for you, you can do these in several different states. So like you can merge like two or three of these at a time so that this whole thing culminates to like three sub tools. That's one thing that we can do is we go through this, give you a couple of examples. So we get through duplicate, similar Hadoop points. So it's a little bit easier to see. Just kinda bring it in. And I'm not making these perfectly match because again, that's not really going to be an issue. You can imagine now as we go through these, can you imagine actually wanting to God? And other thing you can do if you want as you can. It's something you can do is like you can work with the deformers to taper. But one of the problems that you're going to have is to see it's going to have multiple subdivisions. So you can go to the highest subdivision, delete the lower, and then do a taper to sort of match things up as well there. So that's one other thing you can do. Or you can do a project history and reform. Everything like one sub tool at a time. For me, I'm not really going to do that too much. I'm just gonna kinda go through the whole process of just simply transposing these roughly into the right place. And then just simply duplicate them through. Just go to few more. Then we'll go ahead and do the final test, which is going to be to turn on our three wires and make sure they're running through everything correctly. Like I said, this may drive up your poly count like substantial, but remember that if this is in low res mode, you can kinda see everything just fine. But if you get to a point where this one's actually a pretty normal most transposed one. We're going to have to work the wires to match around that. Certainly. Once we go through the export to the high res, we're going to again lowered the amount that we did across here. We're going to lower the pieces down by decimation master in before we export our high res. So you can kind of say, well, we'll go ahead and make a special note on that here. So let's just go ahead and just kinda make sure everything's kind of warmed up in its place. Kind of bring it all in here. Yeah. No go. This one is a little bit of a tricky one to throw out because it kinda like twists and here, so finding that happy medium is going to be joy. Alright, so now that we have that, let's just go ahead and left all left-click and just delete these high res ones out. Let's see. Actually, we can delete all of them. Cancel. What I'll do here is, since there's so many here, we'll just go ahead and turn this off. Just for now. Then we'll turn on our Rich apologized piece, pieces of our wires. And then we'll just simply go through here Terminal 5 head so I can see a little bit better go through here. Now. I can kind of see where the wires are and just simply rearrange everything. So it kind of fits that spot. A little bit easier to see and I can scale it. Same thing over here. So the wires are kind of the main important place. These like three little cylinder wires. Rotate this around. Let's bring this back in a little bit. So it's kind of all just about placement at this point. Let's do some improv, brush move, topology, something here, and bring it in here. And transparency, bringing that in a little bit there. And that's why it's Discord of improving a little bit more. All right, see, you can kinda see we're just kinda match and everything around. We may not need these. If in fact you can look at are detachable face. Now to kinda gets cut off here. So let us go ahead and delete that guy. Go through, delete that guy. And we'll delete that guy. So little bit of shaving. So we've got that taken care of. Alright, so now that we have that all situated and done, the only thing that is left is to go through and merge all these pieces that you're seeing here. I think. Here we go. We're going to delete that guy to just going to go through. And you can see them right here. They're all like in big chunks. So you don't want to have one sub tool that has the collected amount of active points here. So if you just hold left Alt and just simply go through the process of just like bringing it to the top point. Bringing it to the top point. Again, bringing this to the top point, and then just merge these three down. So we're going to show you here real quick. I'm going to bring now this all the way to the bottom of the sub tool. This all the way to the bottom of the sub tool, and this all the way to the bottom of the sub tool. So now it's going to be merging down these two, these three points. And then it's, it's taken a long time because it's once again, it's trying to reconstruct the subdivisions out. So again, we can do like for example, two at a time or three at a time. And just doing that so that we can kinda keep the sub tools sort of, you know, so we don't have too many of them. So like for example, now that we have these two sub tools, we're going to rename them segue, segue men segments 11, underscore high. And then we bring this now to the very top and put that into the read topologies folder. So that's kind of what you would do then for all of these. So like again, you would repeat that where you bring this all the way to the bottom, bring this one all the way to the bottom. Make it fully hi Rey's. Make it fully high-res, and then merge them down, rename them, call it segments to underscore Hi, and then put it into the reach apologize process and then do the same thing with these. So that's what you will do with that. In the next video, we'll kinda show you the end result of what that looks like and move into the last connector piece before we go to the detachable face. So cigarette and stay tuned.
159. Retopolgizing Slug Tube: Okay, welcome back. In this video now we're going to learn to read topologies guys, this funky little segment here. And that's not going to take us very long at all. But before we do that, let's kind of recap on what we just did in the last one. Now we went through this a little bit, but we wanted to make sure that everyone had a good understanding. We've read topologies and renamed our segments and broke them up with separate pieces, usually two at a time, with one being the third out. So that's like segment one that you can kind of see underneath here for high. Then if we go through, there's another segments, segment two. And again, we're just kind of have subdivisions sort of on there. And again, Segment 3, which has three subdivisions on there. So you kinda turn these all on. You can kinda see all these kind of fall into their place right through here. So don't worry about how everything, this is where the detachable faces show reference on there. So all that is pretty much done. I made sure also to make these on low res. And now let's just go ahead and move on to the next piece. So this next piece is pretty simple where it's, it can be done through 0 measure because it's kind of has that waviness that see Ramesh handle really well in organic shapes. So first thing I'm gonna wanna do is I want to go ahead and snip off the ends here so that we can have some straight. So to do that I'll hold Shift Control, go up to my selection tool and change it to a trim curve and see if I can just find a good parallel point here and just maybe just snip something off right there. Do the same thing again. Just kinda snip this off like cell. And if you see again we have a poly group that's just left there and that's what we're going form. So make sure you have a nice flat Poly Group. And then just simply hold Shift Control in the main body to make that guide disappear, go through geometry and hit modified topology and delete hidden. This is going to make it a little bit easier for 0 measure to read and pick something up. Now that you've got that taken care of, Let's just go through geometry and tag in 0 measure. I don't even have to put in a very specific guidelines on this. I don't even think it's going to be necessary to use ZBrush guidelines. You are welcome to do that though. And just to sort of help you out, you can draw like a ZBrush guideline that kinda helps establish it said edge flow, but this may actually pull it off without ZBrush. Again, you're gonna get different results from May. So every meshes a little bit different in kind of see minds just a little bit tangled up here. So some things we can do to help with that. We can do two things. One, we can just kinda go back to this and just 0 mesh at that same target poly count again, get something a little cleaner, do it one more time. Something a little bit cleaner. So we kinda have something that's sort of falling into place slowly. So you can do that one more time. And that's something that can work. So now let's just go to our history brush, right? Or our history bar right here and bring it to somewhere around here, not at the beginning, but somewhere where you deleted the mesh and choose a place to kinda do a history saved by hitting Control left-click. And when you can go now all the way to the top, we can just go through sub tool. And with all those many different times we did 0 measure. We can just sort of get what it will collapse. And a few are 0 measure so many times because I, I hit Z remeasure like three or four times. And one thing to keep in mind is that when that happens, it's going to collapse more and more down even though the topology gets more and more uniform. So again, you're going to have to go through Project history, maybe just kinda help out a little bit and try and establish those some line flow detail like So, I wouldn't do it too many times. You might pick up here, for example, might be an area where like artifacts might just kind of stray away. Just go ahead and kind of mask out that area. So nothing kinda gets a little bit stranded. It's going to do it probably over here. So we'll just undo. And again, just kind of project that history like so. And it's all jaggedy because that's kinda where the segments were. So even kind of do it this way just to sorta help. It's not really like it's going to do too much trouble. And then from here you can maybe just kind of give it sort of a divide project, the history, give it sort of a divide projects and more history. You can kinda see how you get everything back. And now. And that's just sort of, you know, how we just get this back. So it's not really a very complicated mesh. This part right here might be a little bit of an issue. So if if he start get in the tearing, like right around here, just go ahead and undo and just hit Shift F. Maybe just give it one more, try the project history on there. I wouldn't even try to if you're still not getting the results you want like that, just go through and start working your History Brush. And that's again where we're just kinda bring it in. Of course, history may not work there. So let's just go ahead and just do a little bit of a project projection with a smaller amount of distance. And see if that will help too. Because I forgot to say one thing that was pretty important, history brush is probably fight you. The history, recall, brush is going to fight you like crazy because this is so thin that I made it. But you can still make some adjustments. So again, that's one thing I forgot to say. Again, we have to kind of go through take the time to be a little bit attentive in detail on some of this. That's not going to do good on the other side, I bet. You can kinda just give it one more. And that should be probably all I need. Sort of just troubleshooting a lot of things that we say, but we can just kind of just get our details back this way. All I did was pretty much turn my distance down a bit. Just did a little experimenting. Also just kinda looking for small tears here. To kinda rework a little bit. Like so. Something a little bit crazy here. And just sort of kind of going through the whole thing and just kinda clean it up where I see it might be an issue, like right here is an issue. Something here and build something a little bit there. So I'm just kinda, kinda going back and forth and and this is pretty much good enough for me on this one. It's not really too terribly complicated process. It's pretty simple. So now that you have that, let's just go ahead and rename that slug to us, what I'll call slug to underscore. Hi. And I'll just simply put this under my read topology guys folder. So now we're kind of coming out towards the end here. We just go ahead and turn this on, for example, and bring this up. All we've got left in here is just to do two more pieces pretty much and will be gone. And those two pieces are going to be the face here that we see and the back face here. One thing we can also do if you want, I'm not going to still recommend you bring this into 3D software. What I recommend is putting like a single face cube on here. But we can go into so low and you kinda check out the points here. We can 0 mesh this too because it has such a strong adherents of angles. For example, let's go through poly group. And if we go through group by normals, it's going to be reading the normals of the mesh and making a polygon group there. And because all of these areas are very much 90 degree angles, if you can kinda turn the group by normals down to anywhere like 2025 and hit Group By normals, you'll be able to get something there that where every face is going to be its own normal. You do that. Then you have access to geometry and crease. And then you can increase the poly groups. And if you can have poly groups and you can go through and do like a nice, easy clean 0 measure to bring that down a little bit. Again, I'm not like the hugest fan of this whole thing because again, the there's a couple of issues I do have. Like for me personally, I would say that the easiest one to do is just to kind of go through all of this in, put 3D, like make just a cube and just put it there throughout. Because all we did was hit Control and just kinda sling this backward a little bit and just turned it off and that was it. So it's just easier to take this into a 3D software or the low resin to a 3D software and just put cubes across there. So let's see. Run that through one more time. You can even go through a little bit lower, just kinda lower the polygon count a little bit, but that's just kind of like a real quick, easy way to just bring things and sort of just to get the overall shape kind of reduce down. So once you have that, in the next lesson, we'll go ahead and work on our detachable face next. So with that said, stick around and stay tuned.
160. Retopolgizing Detachable Face: Okay, welcome back. In this video now we're going to go ahead and work on reach apologizing this detachable face. And we're going to see if we can find some ways and shortcuts we can use by reusing certain aspects of the mesh of our already read topologies face just to sort of give us a head start on it so we can find some shortcuts and kinda keep you in the mode of thinking outside the box. So let's go ahead and get started with that. So first thing I'll do is I'll left-click on here and I'll hit Shift F to kind of give you an idea of what Tim seen here. And I want to go ahead and take a, I want to duplicate this mesh here, since we're going to be using it again In C. And I'm just gonna go ahead and hit duplicate. And I'm just gonna make this guy all the way to the down. Or I could just hold Shift left-click to make that go all the way down. Now that we have him down there, Let's just go ahead and check on geometry. And we don't need all these really high subdivision levels. So let's just go ahead and hit Delete higher. After that, Let's go through deformation. And then let's just check off mirror. So he's over on the other side there. Now that we have that taken care of, Let's go ahead and just go into solo mode here so we can take a look at our guy. And I'm going to hold Shift Control to just make it so it's this. In fact, I'll just hold off and just hold control and make that one poly groups so I don't have to worry about this. Now what I'm gonna do is as I'm looking at this, I'm going to basically cut away pieces and just cut out a section here through a poly group. So I'm just going to use my mask to form a poly group in this area. And I'm just going to also kind of watch my edge flow here. Some may be something that goes somewhere around here. And might be able to do something up here. No alum doing is just kind of looking for I'm cutting intentionally bigger than the piece that I want. Because I don't know how big of a piece I'm really going to need. So I'm just kinda cut and around it to hold Control W to see if I got everything, I want to make sure I have a clean edge flow here, so I don't think I need this and I don't think I need this. So I'll undo and just kinda hold control all to kind of unmask some of these areas. And this is why again, edge flow is so important and definitely because we did all the work on this, we can kind of give ourself a little wiggle room. Right. So something there I can get rid of. Well, I think I'll just play it safe and just make this all one poly groups. So I'll include this. We'll find out how much we really need in a second. So I'm going to cut out that section. And then I'm going to hold Shift Control. Whoops, I forgot right there. Let's try that again. I'm going to hold Shift Control now. And then I'm just going to go through geometry and then go through modify Topology. And I'm going to hit Delete Hidden. So now that's taken care of. Let's get out of solo mode now and turn off our reach apologize folder. So the only thing that we really have is just two. I have this piece as well as this piece. Now, I might be able to once again reuse this piece against this piece, but there might be some editing necessary, necessary to do so. I'll just go ahead and duplicate that and turn that guy off before I begin. Now, let's go ahead and turn transparency off. I'm going to hold shift left or left Alt left-click to bring this detachable piece out. Then we'll just go ahead and collapse folder. And now we have our two pieces. Hit quick Save at this point. Now, before I forget, don't forget to hit our control. Left-click for a history. Say that way. You won't run into any issues there. Now what I'm gonna do is I'm going to go back to my mesh. And I'm going to hit center pivot point. And I'm going to go into solo mode, maybe just make a little bit of adjustments on here so that it's a little bit closer to the eye. So just like left Alt, left-click. Holding left L and just kinda bringing this is centered to where the eye would probably be. Something a little bit like that. Now let's get out a solo and let's see if we can translate this into the same spot as best as we can to the eye or the detachable face. So I'm just kinda just work in the gizmo manipulators hidden that WK turn attacked beta. Eventually I'm going to hit transparency and first I want to get everything lined up as best as I can. Or we begin. Just sort of shininess. You can kind of see how much time I'm kind of putting into it and just kind of making sure it's all like perfect, like lining up that I will go into transparency mode and turn go stop just to make sure everything's as perfect as convey. I'm just really, really focused on trying to get that. We can just ride might be able to see it better and ghost that lip line. Just to sort of bring it in. It's just kinda bring it through just making the adjustments. Not through trump scale. Just like that. And see if I can do a little bit more just with a basic Move tool. That might help a little bit more. Okay, so now that we have that and we should have a history, say we can kinda just now use this all as a template to sort of help us get started. In all of this is kinda making a few more adjustments here. Okay, So we're looking at this now. Well, the next thing you can tell, if you can guess is we need to go ahead and delete some of this excess geometry and redraw it apart. So like for example, this is way too far out. So let's go into Z model or which is B, z, m, and switch our face into Delete, delete. And then we're going to go through a loop and just simply choose the direction the arrow goes and bring it out that way. Let me see. Yeah, we'll do it that way. Just kind of make sure that the new kinda have it leering that direction. Might even go just a little bit more. We can see and I'll turn off ghost. Make this smaller. So I'm just gonna kinda go through all this. Cut no way pieces that I don't necessarily need. So maybe one more. And I can probably I can probably work with this. Well, I could probably work with that Even fact that might be easier. Let me see. That's probably the easiest one right there, maybe. Yep. So something like that. That works for me just fine. Next, so I'll just go ahead and slip my point to snap to surface. Hi edge to extrude with snap to surface. And let's take off, do nothing so we can just start getting into it. Alright, so now that we have this taken care of, let's just go ahead and, and sort of work our way around with these points. Before I forget, we can also try to do a project, but we're going to meet some resistance right here. So I'm thinking I might just kinda get these tucked in a little bit before we go through a projection. And just simply kinda give ourselves a little time here. So now we can just sort of dissolve. Now just sort of turning into incidentally extruded some where they're just sort of bringing this all in and get it underneath here. And taking my time. Going to have some issues with that. So let's just leave him there until I get this all situated here. Right now that's all tech 10. Let's see if we can do a projection to get all this snapped on there. Perfect. So now let's go ahead and see if we can do some adjustments to hear. Necessarily need this book. Now it's become sort of like a very similar game to how we've done it before. In reach, apologize in the face. But fortunately with a lot less to do here. Because all I want you to really be thinking of is this really just getting yourself to a point where you can just get the front of the face. So it's not going to be like, Hey, I had four because we did get through all the crazy, crazy details work. We did. We went through all the very tedious and fun to get out of the way. Edge flows that we've reworked here. Alright, so Project history. And that will work. Let's go ahead now and just extrude some stuff. And then we'll go ahead and not going to make any decisions and putting insert edge loops in here just yet. I'm just going to be satisfied with what I got right there and move on to a different side because there might be something we need here. I need a certain edge flow to happen here. All right, so we do need to start adding in some topology. Somewhere around here. Let's delete that guy off. Right now at this point, we're just doing single, were just doing kind of an improv. In the improv to the detail or the edge flow that we need. Since this is kind of a customized job here. Probably bring him like somewhere around here. And just bring him in here. All right, so just finishing off some stuff here. Then we'll add some insert edge loops right around here. Project our history and then continue on with extruding. All right, so now that we have that taken care of, we have our customized piece here. Now we just sort of built off of what we already did here and just simply reuse some of our mesh for different things. In the next lesson now we're going to go over how to project and do the thickness so we can handle the other side of this. So with that said, stick around and stay tuned.
161. Detachable Face Thickness Topology: Okay, welcome back. In this video we're going to now start to work on the thickness of our detachable face. And we're going to try to do an extrude and just sort of reset the birds back in. One thing that we're going to do though, let's go into solo mode. If we, before we get started, we have to be honest. If we do an extrude, we're also going to be extruding this eye hole. And considering that the back of the head doesn't have an eye hole, that could be a little bit problematic. So one thing we can do to get around that is we can go ahead and if possible, try to read topologies guys, the eye hole so that it kind of closes up when you do an extrude. So we're gonna go ahead and do that now, just sorta real quick just to get it out of the way. So if we kinda go through here like so maybe we can just do something really, really simple. Again, be Zm, you should know now how to set everything. We can just kinda bring this cross. And we can just go ahead and just simply not going to get into an empty space here so I can kind of bring it across like this. And then just put some sort of edge loops there. So hold down. Maybe like like one right there. One right there, one right there. It's just it's a little tricky to do when they're not to project it in, kinda want to be somewhere else. Do nothing on. Here. We go. Let's just project that in. Then we can just simply go through just fill in spots. I'm just kinda do simple extrudes here, kinda just bring it all in. And this is just sort of like the first phase of it, you know, just sort of getting things prepped when we do an extrude in so we don't have to worry about dealing with this eye hole. That may give us some problems here. Because there will be extra poly groups and it's going to be a fun little escapade to try to fix all of it. So we'll just go ahead and see if we can just kinda blocks and things out. Alright, let's put one more. Insert Edge Loop in their head around here and right around him. There we go. Keep in mind. Might have to do some here I think we have a feature of extrusion where we may have accidentally hit crease somewhere. So what we're going to just sum the lookout after. All right, so maybe just kind of in the center here, kinda relax it a little bit. So we've got one more here. All right. So now we got the I covered up and it's just do a quick little check on here. We do anything shouldn't run into any issues. We got a little bit of creasing going on. So let's just go through geometry, go through and increase all. Try that one more time. A little bit easier to see. Okay. So now that we have that taken care of, Let's go ahead and do an extrude and we're going to do a very short extrude so that we can guide it in a little bit more manual way because some of these pieces kind of walk out into different places. So let's see here. Go into Shift F. Let's go down to display properties. Flip the normals, and let's make sure doubles turned on, hold down spacebar over a face and go through extrude. And let's go through all polygons. Just kinda be very careful how you bring this out. Now you can just kinda bring it out to maybe just some kind of a thickness like here. So you're going to run into issues, are ready. Let's go ahead and go on to so low. See what we can find. Like right around here. Basically there would be a hole here and geometry would have to fight. And that's going to be fun trying to deal with on a projection. So from here I'm just going to hold down control and drag this over and guide this end manually. I'm also going to see if I can maybe just flatten this out through the gizmo so that can make a little more sense. Let's turn off dynamic. So I'm just bringing this in probably somewhere around here. I'm going to hit center point, change my rotation. And just simply maybe just flatten this down just a little bit more. Just to make that a little bit easier. If you just rotate it around. And if possible, possibly, maybe even shrink it in. Now, everyone's going to have a different position on there. So please remember that. We're going to need to go through and still do one word at a time. Just sort of troubleshooting like you can kinda see this edge flow right here. See if we can get an easier polygon. Let's see if I can just draw a mask just over this. Maybe we can get a color that's a little bit easier to contrast the line so we can kind of pull the births a little bit easier. Now the thing we need to worry about here is going to be right around here. It's kind of a little bit. We can just deal like that. Does definitely give me some ideas on where I can take this. And we'll just kind of leave it like that for now. Alright, so let's just go ahead and simply guide this in as best we can. The front view. We could try to project it, or we could just try to snap it in one verte at a time. It's going to get a little bit ugly. Like right here, for example. I expected it to be a little bit of gouache because of the fact that there's so much topology all around here. So I'll just go ahead and kinda work my way through this one word at a time. So let's go ahead and get started with that to make sure you have snapped a surplus on here. And probably the most important areas to be at are probably going to be right up here. I'm just gonna kinda move the vert so that it kind of snaps into place. One thing to take into note that we have here is we have a good ability now to do nothing. We have a good edge flow of an insert edge loops that we can put around here. Now, that's pretty key important for us. Because if we don't have that, we're going to have to be dividing this like ten times to get the necessary. Projection here, which will really drive up this 20 times here more than we need. So it's kind of a good thing for us on this area. And accidentally hit my head. And I lost my spot. Thing I'm doing and some just simply going through taking my time on here and select. These are kinda soft areas. Really anything too concerning. Once we have the edges sort of established here. We'll go ahead and relax this side and conjunctions see if we can get this to be a little bit more. See that we've got to get this out of the way. Get this down here. Gotta get this stem here. No, I got to move these guys down so we can make room. Or this guy right here. Now again, this is just sort of a one way you can do it. The other way is you could just sort of 3D mesh the whole thing manually. Just extrude by holding left old and just going from the front face. That's a, it's an easier way to do it as well. But you do it this way. You can kind of get through the backside a lot quicker. So it's kind of the reason I kinda did it this way. I'm not worried about one, I'm going What's going on here? At least them not yet. Let's see. Right here maybe in a little bit tricky to see what we can do it. Some storms cleaner and up here to get this to line up because we need those same spots to line up over here that we do here. So we are getting closer and closer and you can kinda see how it's bulging out from the orange area. That's okay. We'll just take our moment of time. I'm gonna go to the other side and start on it. Meet it on the middle here. All right, So it looks like we got to the important parts here. So now we're going to first of all put some insert edge loops in to this area. Clear off that mask to that again. And this is going to be important because as we divide this cross will have, it will divide up some geometry. For the backside. Think I might just go ahead and do just a good amount right there. And then from here, I'm going to hold Control Shift and left-click to get this area Control Shift. Left-click in this area. And let's see if we can relax this in to a proper uniform space.
162. Projecting Detachable Face Details: Like that a little bit. You can project it, but you can kinda also see it's a little bit more cleaner now that we have it. So now that we have this area kinda complete, the next thing we're going to need to do is we're going to need to divide this. But before we can do that, we need to do some creases because we need to keep the areas kinda clean here. So the first thing I'll do is assign creases to the poly groups. So geometry, because I want, we can just kinda keep the creases here, keep the creases here. That's where the poly groups are. So we'll just go, I'll hit on cortisol and then just crease poly groups. And then I'll go through the important areas. So like in my C model or I can hold space bar and then go through crease. And then I can do Let's see, crease edge loop, see if we can do something like that. Maybe not, maybe just partial. Because if we can't do, it's going to go all the way around down there. So here's what I'm gonna do. I'm gonna delete these edge loops to save myself some time and then we put them back in there. Do Delete Edge to complete and delete all these edge loops. Now, that way I can just create one of these at a time and then will reinsert the edge loops. No, no, just one edge air we go. And I'll just go through increase all these places that are important. And it looks like yep, that's right. Increase here, crease here. We're going to crease here. An increase here. Namely we'll just a little bit off on this one. So let's just go ahead and change him. Crease there. And we're going to crease here. And we're going to go up here and do a crease right there. Alright, so let's reinsert now our edge loops in there, right here, here. And here. Might just wanna do it as simple as that. If you want, you need more, you can certainly put them. I am tempted to just go a little overboard here because I don't want to have to deal with fall out of falling through this short, but might not need that many. Alright, so now that we have that we have our history file saved, we can just go ahead now and turn off the high res. Do a quick Save at this point. Now, let's just go ahead and see if we can divide this a couple of times. When we should have a backside That's a little bit crinkled. Let's just go through maybe just go through and just kinda smooth that out a little bit. And maybe just to add a couple more times and you might be able to just get away with that. Now, it's a subjective how you wanna do this. You want to do this projection or history. Recall it's completely up to you where you want to take it. Some people can just be happy like with this, for example. And pretty much the same way on the other side. Like but just kinda keep in mind that this is pretty much going to be areas that aren't really seen that much through projection. So like maybe makes sure just any areas that are kind of horribly skewed and you can just kinda go through and just kinda bring it in there. And again, do the same thing. Bring it in. Just got to be a little bit careful is all. I don't spend too terribly much time in this area. It's not like the most watched area. So I just go through and kind of invert this and restore my detail here. The same way. Might even soften the mask a little bit. Like so. And then of course, don't forget if you have any issues, just kinda just make sure it's facing your angle of the viewport. Shipped, smooth it out and just relax it. And then probably the most important area. And last but not least, is this area. Let's see here what we can get. You can get a bit of detail on here back. But if we want to really get the best detail, might need to do one more subdivision up. And I am tempted to do that. So what I'll do is I'll clear the mask that about one more up so that I can kind of bring maximum amount of detail in there. And then when the time comes to export this all decimate this mesh down. This could be, in theory, it's most expensive mesh. Looks sort of. Let's go ahead and do this again so I make sure that I'm not pulling anything that I shouldn't be pulling. Like right here. Let's go ahead and turn on the eyes. Make sure everything is there. Looks like it's coming in. All right. Let's go ahead and just give it that extra. Just gonna see if I can relax some of this out. A little of this in. That's why we don't do it that way. You can see how easy it is to kinda lose track in some of those. And you get something like that. Those thing I like to do is just kinda go through sometimes it's just simply easier to kinda go through those and kind of start yourself back. I know it's a little bit frustrating, but that's kinda what I do. And I figured I could edit this, but I'm not going to want you to be able to see my mistakes. You need to do that from a different angle so I don't get a projection wrong. Now it's a little bit cleaner, a little bit more making sense. Now we just need to kinda do a once over to a checkout. Anything we've missed I don't want is a little too deep for me. Okay. So we got that taken care of and let's just go ahead and do this last part. So everything's mass. Let's bring it. So a little bit easier now, let's just do a once-over, kinda make sure we got it. It's like it's good. Perfect. So that is establishing your detail for that piece. So we got that, kinda resolve them fixed and handled. So now that we have that we only have one piece left and that's going to be our detachable piece coming up. So with that said, let's just go ahead and rename this a detachable face underscore high. And let's just go ahead and bring this guy up above here into our read topologies area. It's a bit expensive of peace, but that's okay. We can deal with that. Just going to bring him in and just to go through and delete that piece that we don't longer need. And we're going to move on now. So with that said, we will be reached apologizing our last piece next, stick around in Stay tuned.
163. Retopolgizing Back Face Piece : Okay, welcome back. In this video now we're just gonna go ahead and finish up our read topology. So now we just have one more piece slept and it's this back piece that you see right there. And it's going to be used to just simply, we're going to be using this front piece here sort of as a way to recycle as a template to just get this back section now all read topologies guys, it's sort of a small hidden area, just sort of like backspace that we can just put in so we don't have to go too crazy on it. So with that said, stick around. We're about to start now, one thing I forgot to mention, empty, I'm going to go to move topology, maybe make some adjustments that before I'm beginning, I'm kind of doing some adjustments on some of these wires here. Mainly because I can't just want to see a little bit of little bit more of a simple silhouette. So these are kinda just like Judd it out and just kinda stuck in free flow of free flow space like this one right here. So moved topology, not move brush helps with that. Let's get that guy kind of bringing them in there like so. Well, so I should go on record as saying, we can combine all of these. We can just do sort of a curve to form or to help us out. I'm sorry, I went, went we went on a tangent, but I had to go ahead and do that. So let's just go ahead now and just go click on this guy this time I'm going to hold Shift left-click to bring this all the way to the bottom here. And now this is going to be our last piece. So let's just get this in. Let's get it taken care of. So we are, We said we're going to reuse this piece. So I'll first thing I'll do is duplicate this. And just like that, I'm going to hold Shift left-click and bring that to the bottom as well. And I'm going to go through the process of geometry. I don't need the resolution details because we're going to be projecting different details on there. And I'm just going to hold Shift left-click and then go through modify Topology and delete hidden. From there. I wanted to go ahead and just simply turn off read topologies. So it's just these two guys. Go ahead and click on here and do a quick little history safe before we begin. And then I'm just going to center point, center pivot point this, and just sort of match this up relatively the right position, right point of view. So this is just the little more elbow grease work with the read topology or sorry, the gizmo brush. You're going to have to be as calculating in edge flow on where it goes here because you know, a lot of this extrudes into the mesh and is never really seen like the ends and the borders here. So kind of bear that in mind. In fact, I can just kind of smooth all this stuff out if I want to. And we just are going to kinda move all of this roughly in the same area. And then just go around here right now and just kinda taken my time as we kinda projected. And what I'm gonna do this in for this one is I'm going to see, instead of just doing a normal project, I'm just going to kind of ease this in through the Move brush, really, because this is going to get really wonky in a projection. So I'm just using kinda like left halt. Just kinda getting this to kind of be situated in the right places. And then we'll go into transpose one place. That's a little tricky as we can see. This little circle area here. So we're going to have to maybe move this circular topology that we made around there just to kinda bring it in. And this is just all working with the Move brush right now. So I'm just holding left ALT is simply kind of ease at all in this one. I don't really take too horrible of time on this piece because this isn't really a, this is sort of like a back fill or piece really. But one thing I will try to do is if I can, I'm going to try to get this to kinda. As close as I can into the silhouette of the shape here. Well, like for example, look at this and try to see if I can move edge flow. This little loop that we created and see if we can just kinda something a little bit started here. I'll write that in a little bit more. And then I'm going to go through and kinda makes sure that all this is kind of inside the high res. Not very concerned about meeting the edges like I was with the detachable piece because that required another side, the backside to be read topologies. Now this is just simply sort of filling in a gap. So just kind of bringing it in maybe a little bit here. We could probably just sort of get it in there. Then might even turn transparency. I'll just kinda see where everything measures up here. Maybe bring this a little bit closer in. Just see the TM put an ANOVA. Yeah. I don't think I should try it this way, but you can also just kinda do a history recall brush and push it all in and then maybe just kinda smooth it out. That y little bit foreboding though and the kind of creates a little bit of a crack. Transparency. Sure, everything's kinda where it should big. Okay, so we'll go ahead and do a little test, render our test of subdivisions here. And if we can get something that's workable or roughly in the right area, we can just go ahead and do manual projection through history. I'm probably thinking of using the history recall brush on this when we go through, but let's just see what we got. So first off, I'll bring up my history. Recall It's just see what we can get out of this. Let's turn it off. And let's just divide this few times. Do a quick little projection if we, one thing adjuncts some don't want to have is like massive, massive tearing. So let's just make sure to That's if you get that through projects history, then you're gonna have to do it a little bit over. Doesn't look like we have too much to worry about. A couple areas like to think we can fix that. Maybe right around here. See a little bit of it here. Do something and got something right here. That's because it was way too far away from the mesh. So let's go ahead and mix this stuff out so we don't mess with it. And we got a little bit to work on here. And just kinda laying down the foundation right now. Looks like we got a little bit to work with here for rejecting. And if I can't get that to project, I'll just leave it like that and just smooth it there. All right, so going a little bit here, and you can just kinda see where I'm going with this and just kinda kinda working the mesh around.
164. Projecting Back Face Piece: All right. So the most part we got to the main areas at highlighted in there. So that's a good thing. See if we can just sort of now take it up a couple more division levels. We don't have any massive excessive tearing. Let's just bring it slightly here. Module. Worry about that. Why? Because I'm going to have massive amount of wires. In fact, I could almost get away with saying, I'll delete this whole thing out of my way of saying screw and because it does kinda go in there. So it's just not going to be a priority. Was it pretty much gets covered up. As you can kind of say. Okay. Let's go ahead and bring this up and then just give it. That's probably enough for me. And this is kinda cool because it's kinda like seeing things kind of being brought into focus, like it was blurred. Now I could if I wanted to really go through the process, again of just sort of read topologies, the manually like an area of circular topology perfect around here. But this is kind of like a personal call on my end. Now we're really going to I don't really necessarily need this for the projected details that I'm going to get on this. So I'm just gonna go ahead and leave it like this. I can get the, what I want out of the normal map. But also, the other thing is, is that I can also, I'm barely going to be able to see anything here. Anyways. And I'm really have this philosophy not to put huge amounts of time into areas that are not seen or visibly seen very well. So what if I get enough requests from students to see a projection of that? They want to see this root. Apologize, I will go ahead and accommodate. Okay, so once we have that taken care of, we got our read topologies piece here. It's just a pretty simple little jaggedy piece. Let's go ahead and make some more adjustments. Maybe do some relaxing a little bit. Which we can go through and do. Because the more we relax. One thing I'm just going to make one little adjustment on here. And I'm just sort of kinda Moving and rebuilding the subdivision. So it's a little bit easier. And it's just smoothing and relaxing, rebuilding, reprojecting. And that's a little bit easier now. I could do now that same concept down here as well, where I can just kind of reproject it. And just kind of smooth relax, reprojected again, smoother relax, reproject again through here. Now, just doing pretty much the same concept. Forgot one thing I need to do is turn off the RBG that up their color fill object or you go. Will never hurt anyone again. No. Not too worried about this area though. Because this area is going to be covered up. So I'll just probably leave it right now just kinda as is. Just go back out of the two were originally was. Alright. Now that we got that all situated and taken care of, we're going to go ahead now and just take this piece. And it's going to be our last piece here. And just sort of bring it through. Again. It's our last three topology guys piece. So we're just going to kind of bring him through here. And we're going to delete the mesh of our final piece. And now we turn everything on e, have our piece. Remember another thing that might be pretty important for you is, is that you don't necessarily have to go with anything that is like, for example, if you wanted to, you can go with this subdivision or you can go with the other subdivision on here. My rule of thumb is, since this is sort of like a kind of a back piece, it's not really like the biggest importance to me in terms of light. What I want to have. It's not like really like a centralized from peace. It's just sort of a back piece filler. So that's kinda why I'm kinda leave in it little on the frets here. But I figured I'd go ahead and just show still something. If you want though. You can do like we did before. If I get enough requests, I'll go ahead and do a manual read topology of clean geometry around this area here. And just free go through the whole process. But I'm pretty happy with this result. I know already I can get the results I need out of this with a bake map. So with that said, that is concluding our mesh, our high res mesh. The only thing that exists now for us to do is to go through the process of exporting. So with that said, stick around in, Stay tuned.
165. Exporting High Rez Sculpt: Okay, so now that we have a high reds and a low res model in every area, we can talk to you a little bit about how, what the next step is, and that's going to always be up to you. Maybe your goal is just to transpose and have a model that you wanna do a render of with a certain kind of pose. We'll go over that in a couple of videos down the road. Maybe want to take this and turn it into a game character in T-Pose and have it rigged in a 3D software. And in that's the case, that's fine. We'll talk to you in these next two videos. This one included on how we go through the process of exporting our models out. So to begin with, I'm going to go ahead and just simply start by beginning a sort of foundation of where you need to be at in saving your files at this point before you do any exporting to anywhere or like a high res or a low-res. You need to make sure to go up here to tools and hit Save as and maybe create a new folder in here, such as finished sculpt. And what I did was I named it Cyberpunk girl, high, underscore low. That means that we have the high res and the low Rey's and it's in T-pose. So once you have that all done and you have that all process through, we can talk to you a little bit about exporting out our high res. Now, before we do this, let's just kind of go over some of the basics here. If you want to export a high res out, you need to first of all, decimate the mesh down. In other words, reduce its poly count. And you can kinda get an idea where that is in the act of points. If I divide that up, we've got about 48 thousand, which isn't too terribly much. But we go to this jacket here and divide this up. We've got about 1.7 million, so we need to decimate that down to a lower count before exporting that out, remember, you need to make sure to have this saved so that you can read access your low res again, because when SUID decimate something down and go take this through a process called decimation master. We're not going to be able to regain our details back unless we read topologies all the way over. So make sure you're saving this file. In fact, I'm gonna do something just to be safe. I'm going to hit Cyberpunk girl and then I'm going to go under and call this one high. Res. Deaths have made it. So that's just going to make things a little bit easier and have ourselves a little bit more control. So now let's go ahead and go into solo mode and do a demonstration of using one of our z plugins called decimation masters. So first off, go to the very top here, look where it says Z plugins. You can kinda docket off to the side here and kinda scroll down and look for decimation master. Now decimation master main function is to decimate these high rises down so that you can export them out. Because if you try to import them into a 3D saw texturing software and try to bake out some maps. You, it's going to slow you down. So the first thing you're gonna do is you're going to hit preprocess current, which will basically do a prop preprocess of valuation of the mesh and more specifically the sub tool of the mesh. You can hit preprocess all. But sometimes it depends on your computers, sometimes that my work and sometimes that might not. So I'm just gonna go ahead and hit preprocess current. And then I'm going to hit decimate current. And you can kinda look, I'm going to go undo this just one, kind of see how far we go. We go from 1.761 million active points. And it went down to 352 thousand. And we didn't even lose any details. But if we hit Shift F and kinda zoom in, it's all triangulated, and that's what we want. So from here you can kinda just click on this and kinda just hold Shift Control to bring this down. And afterwards you can just simply turn off the visibility or yeah, you can turn off the visibility just for now. So let's go out of solo. I'm going to do a few more of those and then I'm going to let you take a shot at it. Let's go ahead and choose the next piece we want to probably have decimated Pro, Let's try the pants. So first thing we'll do is we'll go to the very top. And that's about 2 million active points. So we're going to hit preprocess current. Again. We've got a lot of sub tools. As you can see, we gotta go through. So I mean, I'm not sure if you want to see video footage of the three moves over and over again. So I'm just going to give you a few examples on here and then we're going to cut a head on the video. So here is preprocess current on the sub tool that we selected here. And now that it's done, we're going to hit decimate current. And we'll look at that 2.4. Now we're down to 450. So we got that done. Let's go ahead and hold Shift and to move this guy down, turn off the visibility, and move on in to the next piece. So that can be any of these pieces, that can be this piece right here. Again, preprocess current. If it hasn't fallen upon you to realize, we're going to go through the process of doing this for every sub tool. And then once we get through that will show you what happens next. So we're just gonna do a little time skip on this one. We've got through. And now let's hit decimate current. And it went through, lowered it. Let's go ahead and take it out of the folder. We can just kinda hit it one more time. And we'll just go ahead and do just one more demonstration on here. Let's turn the visibility of that one off. We'll do the shoulder next here. So let's just bring this to the top. And I'll do the shoulder last. It's not very expensive. Let's try the color, see if that's something that's pretty expensive. So let's go ahead through preprocess current, not decimate current first, we do preprocess current. And we're just going to go ahead once again and let it compute its processing. And hopefully this is enough examples for you now to get started with going through all the sub tools here. So what we're going to do next, once we finish this one, we're going to hit decimate current again and bring that down. We're going to now go and Shift. And just maybe if you want, you can also just click all the way to the bottom and just change it like that. So now that you have all that taken care of where you're going to have you take the helm and go through all your sub tools. Switch to the highest subdivision, go into preprocess current in decimation master under Z plugin. After it computes it decimate current, Take it all the way out of the folder, and then just go ahead and turn the visibility on. Move on to the next one, rinse and repeat. So we're gonna do a time skips. So hopefully you are on the same page as the rest of us. So here we go. Okay, welcome back. Now that you can see, what I did was I read topology guys every thing, I'm sorry, not read topologies but decimated everything through decimation master through hitting preprocess current. So now that you can kinda see everything you see here is all decimated. If I kinda zoom in a little bit more, you'll see everything has been decimated. You'll also see a dramatic account of the total points count. So this is all been kind of reduced significantly. So now that we have all this, let's go ahead and delete a few things so that before we officially begin exporting this now, hair is not going to come with us at all. In, because it's fiber mesh, there is a tick trick to use, to use export fiber mesh curves into other 3D softwares like Maya for X Gen. But that's a little bit more advanced stuff. And it's definitely not something for a beginner at this juncture. So I'm gonna kinda leave that out of there. The reason we're also leaving hair behind is because in the next series course, we're going to talk about alpha cards a little bit more and showing you how to do hair in a different way than was done before. So that's the other reason we're going to do that. So again, I'm going to just go through and I'm going to hit the folder containing hair. And since we already saved our decimated file and we have a file that contains the hair. I can just go ahead and hit, Delete all and hit Okay. And I'll do that with the mid hair. Just simply hit Delete all I can hit. Okay. And once again, I can go through the end hair, hit, Delete all, and hit Okay. So now that we have that taken care of, The next thing, next to things that we won't be taking with us is these guys right here. As I said, we can just put some cubes in 3D software that we're exporting this into in the next course. And we'll finish it out there. So I can just go ahead if I want to and just simply hit Delete. You can keep it with you, but it's quite a few tries and it's not necessary. And finally, the next thing is our eyelashes. Now our eye lashes can also be done with an alpha cards, so it's not going to be a necessary component for me in this course, so for exporting out. So I'm just going to go ahead and delete that out with, okay, so now that we have everything, we have all our necessary components. This is where we would go through a save as file and we would choose Cyberpunk girl high res decimated because everything that is in the high res has been decimated and is ready to export. So now that we have it all decimated, we have two methods we can decimate. We can either merge all the sub tools in guesstimate hours and export it out as an OBJ. But then we won't have any of our naming conventions which will be used in Substance Painter to identify separate sub tools to do better bakes. So one thing we can do is try to export this out in an FBX format. So again, exporting any model out of ZBrush, you can either do it as a dot OBJ file or a dot FBX file. A dot FBX file has a little more options with you that you can take. For example, the preservation of the sub tools and they're naming conventions is the big one. So we're gonna go with that. So now going up to where you say Z plugin to export an FBX out. I'm going to go through Z plugins up here, choose FBX, and I'm going to choose visible. I'm just going to turn everything on. You can choose all but to some people like to do either or. And then you just simply export this out and you can call it hot Cyberpunk girl, high res. Or if you want, you can just kind of just do it the same naming convention as all the sub tools and just simply say underscore, Hi, so that everything is they're just sort of consistent. So we'll just go ahead and hit Save. And this unfortunately is going to take a little bit of a process. And the reason is, is because what happens is is that it's going to go through all your sub tools. And it's going to kind of compute all the way through and do an export one at a time. And it's gonna kinda, it's, it's basically shifting and moving one sub tool at a time into this one FBX file. That. And in this one FBX file, it's going to have all the sub tools with their naming convention stored in there. And remember it's all decimated. So if you, That's the very important part. You have to remember. If you look when we deleted our hair, we're now down to 7.3 million. And with this amount of work put into this character, I'd say that's fairly modest to be expected. So we're gonna give this a few minutes because it's going to take a little bit of time at this. I can tell you right now I have a MacBook Pro 2016 on this. So I'm doing at a slightly lower older computer. Just to show you can still be done. So again, don't do any FBX export without first decimating. Just want to make sure that's clear to everybody. Again, we export these out along with a separate file that will be our low-res. That way we can just go through the process of baking the details of that FBX file onto the low-res FBX file using Substance Painter. And that's again, all going to be shown in the texturing course coming up. So we'll give it a few times. Some of these may just take, some of these sub tools will take a little bit longer than other sub tools. And that's again, base contingently on how many active points there are. So we'll just let it go through. Let's take a few more minutes. It's got a segment to go through. It's got the wires to go through and sketch out a few things to go through. And you'll get the wheel of death, so don't freak out on it. All right, should becoming a little bit close. See what we got. And when it says file exported, you will have your file exported. So now we should have a FBX file in your folder. So at that point, when you get that q, just do a double-check and just know that is how we bring a high res in, export that out of ZBrush. So now again with that, you can use that as a template to bake high-risk details onto the low-res that you're going to export, export out, which is going to be in the next lesson. So with that said, stick around and stay tuned.
166. Exporting Low Rez & UVS: Okay, and welcome back. In this video, we're going to do a couple of things in the first half, we're going to talk a little bit about exporting our low res out what requirements you have to have. And then we're going to talk to you real briefly regarding UV, as it's a sort of interesting topic a lot of people want to know in terms of where it plays in the order of the production pipeline in making 3D characters, whether it be in games or such. So we're going to have a couple of things to talk about. So the first thing we're going to have to say is, is that now that we got our high res out, we can also go back to our original z t l file and go ahead and export out a low res. Now, a low-res is basically going to be your main file that goes into wherever you want it to be, whether it's 3D Maya and it's gonna get rigged for animations or that can be taken then again back into a game engine which can be imported in there. It can also be taken from there to a 3D, or it can be exported out again and put into a 3D software and arranged in, had its UVs adjusted and then organized in a way that taken into Substance Painter to be textured. It has a lot of functions. So it's sort of the main finish product of where you're going to have. So to export that low-res out, we have to do a couple of things if we're going to be doing it through Substance Painter and one of them is this. We have to go through our sub tools. And I'm sorry to say this, we got a rename The End Sub tools all to say the same thing. But underscore low. Give you an example like this one. If we rename it, we gotta hit our underscore, shin underscore low. And I know that sounds like a drag because we had a lot of sub tools to get through. And there's a couple of things that we can do as far as options go. Unfortunately, there is no copy paste concept where we can just kind of underscore on with three name and like select portion. We can't really do anything. I'll paste does work, but it's kind of it's a little bit sluggish. It, it doesn't really copy or allow you to kind of highlight certain areas. So that's a little bit unfortunate. So one thing that we can do is is that we can just simply table it for now and not rename these and export the 3D low res out into a 3D software where we can actually expedite the process by just simply hidden, underscore low in, instead of having to go through and type out detachable face or going through and typing out belt main, we just have to hit underscore low in the 3D software. That 3D software can be Blender, Maya or max. And now you just export that lower as out and rename all the sub tools through there. And then after you do your UVs, when you export that out and get it ready for going into Substance Painter. So that's what I'm going to do. If you don't have any of those 3D softwares or you just want to kind of take it a little bit slow then that means you're going to have to go through and rename all of these like so like trim, underscore, pads, underscore low because it's the low res. And then of course, kinda take it out of the folder and if you want, just kinda put it underneath. So once you, if you're doing it that way, whether it's going to be just having to rename them all in a 3D software, which would be easier or if you want to go through and after you finish getting through all of these and renaming them low, the next thing you would do is go through Z plugin. And you would go through FBX. And then we'll choose visible and we'd go through export. And we would just simply say cyber punk, underscore girl, girl. And then we'll just hit low. Or you could just kinda do the same naming convention as the high end. Just simply say underscore low. And then you just kinda, it's just going to do its thing. Remember we selected visible on there, not all. So it's just going through the sub tools that are visible. And as you can see, it exported that FBX low. So that's how we got through it. Again, the idea is you want to go through each sub tool in either rename all the sub tools with underscore low, or just simply export out the low res and bring it into an FBX. That way you don't have to retype the entire name all over with underscore low, you can just simply delete the like the last five. Underscore high and just simply replace it with low just to make things go faster. And you can do more copy pasting there. So that is how we do that. We're going to briefly also talk to you now a little bit about UVs scene. Now you V01 is a process that is mandatorily required and is a key feature in either the game production workflow or even the, even when making 3D models in movies, any 3D character would call this a main character production workflow. But UV in ZBrush unfortunately hasn't had major huge strides that keep up with certain workflows in substance painter. So I'm going to go over that first. One thing I'll just start by saying is, is that UV a1 is essentially taking a 3D model and creating a texture set of coordinates that is used to store texture data onto. So like for example, let's go ahead and give you a good example here. Let's just left all left-click. Go into solo here. Take these guys in order to UV into ZBrush, you would have to first of all, not have any subdivisions. So that means you've gotta go through geometry and hit Delete higher. After that, we would go through Z plugin and we would go through UV master. And we're just going to simply hit unwrap. And if we flatten them, these are UVs. These are, or to be more specific, these are UV shells all placed within a square that we call 0 to one space. Kind of, as you can see, it's taking up the whole quadrant here. And then we can export, when we take this into something like 3D software, if we just took these standalone models here into Substance Painter, we would have that entire area to work with for texturing, along with texturing upon a 3D model itself. However, one thing to take in mind is, is all the different types of 3D models or sub tools that exist on the character means that these have to become much smaller for all of those UV shells exist in. And that's kind of one of the drawback with UV in Maya. Or I'm sorry, you've seen in ZBrush is that it has a little bit of a limitation when it comes to organizing UVs. Or I should say, organizing UV shells so that they're maximizing the necessary resolution here. So it's a very complicated process. But in the end, what I'll say is this. If you want to do UV in ZBrush, my recommendation is to either UV all these sub tools out individually and then go through the process of exporting them out and then reorganizing them in a 3D software. Now, again, why are we not doing it right now? Why are we not going through all of these? Like for example, why are we not going through just going UV the entire model, again, you V01 is considered a portion of texturing. And texturing is our second course so that we kind of delve a lot more deeper into that. It's a very depth full little beast and we give a lot more of an explanation. There were kinda breaking it down just a little bit just to help you out so you can kinda understand like, what to expect down the road. But I like to make things a little bit more clear. When you bring a 3D model into Substance Painter, it's going to need to require UV shells organized in uniform and equally scaled and making efficient use of all the empty space that you see here. And as you can see in ZBrush, we don't get really much of a choice in how we scale everything. In the end we're going to have to hold control and maybe hit lasso and try to see if we can. You can kinda see that. Just try to work with trying to scale just some of this without trying to mess around with the other siding RAC well, I have to do is just kinda zoom in a little bit and kind of take it that way. And then of course, to control and use my gizmo to kinda scale this down. Now I want you to think about how long that took me to do. Now imagine trying to do that with 39 sub tools which have like two, like two or three UV shells around, anywhere around each mean kind of see I already missed one out. That would be quite a bit of a pain in the ass. And we have to go through that because UV master automatically lays its UV shells out for us and doesn't give us any kind of control to maximize the resolution. So in 3D softwares like Maya and Max or Blender, we have a lot more control in this. So that's also why we're not really focusing too much in Ewing. But we still figured we'll just go ahead and do a couple of examples. And if you want, you can try to practice a little bit with UV master on your own, and then we'll show you how we can organize them. So like, let's take, for example, these UVs by kinda, kinda go back right now. And if I just want to kinda bring these to the very bottom by hitting Shift Control will hit on flatten. So that's one set of UVs we can go through now to a next sub tool like these two polygons here. And we can just simply hit unwrap because we don't have to do very much here. And then we'll just go through flatten arms. I forgot to say. In geometry, we have to go through and delete the higher. Let's try that one more time. Now let's go through flatten. We've got two UVs, but of course we got to rearrange these so that they don't overlap with these guys here. So again, that's part of the challenge. What we would have to do then to handle that is sort of kinda take these two guys. If we wanted to, we could go through transpose master and just simply hit T pose like that, which will combine them in. And then we'll go through UV Master, hit on rap again. And we hit flatten. And it automatically has arrange the UV shells into a coordinates in a way that doesn't intersect with one another. Now again, you'll notice. You, again, you notice it's not making efficient use of all of its space because we don't have that control. So again, we have to kinda go through and mess around with all the space here. And that is kind of a issue that I don't really like very much. So there's faster ways to deal with this bottom line. So then after you go through all that, we just go through a transpose master again, T-Pose and it's grass mesh, has UVs transferred to pose, you'll say yes. And what's going to happen is, is that it's going to go back to the separate sub tools that we had. And after it's done that we go through and to UV master to select flatten, you'll see the new place meant of all these UVs. So again, try that. And this kind of all in their perspective play. So we didn't have to merge these two sub tools down and lose the naming convention in order to get these automatically rearranged. Now again, the, the, I'm gonna just kinda close out by saying sort of the pros and cons of UV master. And how it's a good thing and how it's a negative thing. And then I'm just going to go ahead and close it on that UV master through ZBrush is good for getting some really quick UVs out. It's pretty simple. It's you can assign poly groups through there and define your seams through poly groups if you want. It's pretty good at Lane stuff out and getting individual sub tools quickly uv. Now, again, because it hasn't had many updates throughout the years, It's a little bit behind with the workflow of other 3D softwares. One of them, one of the disadvantages is it's very limiting and very clunky and slow when it comes to arranging individual UV shells to maximize. A negative space in the 0 to one area like what you saw me do. It's also not, doesn't have a capability of exporting out multiple texture sets, which is something all 3D softwares have. And it's a little bit. Now shall I say, it doesn't have any unfold or relaxing options for me, which like Maya for example, they'll have those kind of things. So again, those are sort of the disadvantages, the pros and cons. One thing I'm certainly fine with using UV map. Certainly, if you want to do like what we did and you can just simply unwrap something like really super quick in like a 3D software. And then just simply go through the process of just exporting it out and rearranging the UVs in that 3D software. That's something that can be done like for example, this, this is pretty simple right here. It's got poly groups kind of defined so we can just sort of just delete the higher. Do a quick little unwrap and hit flatten, mean kinda see that it sort of gives us these nice clean little flattened out shapes. It's got a nice little sheen there for us to work with. And, you know, that's pretty easy and pretty simple. That's what I mean when I say they're pretty fast as far as unwrapping throughout. Another thing you can do is like for here is this you can kinda go through and maybe do like polygon group right here. And just simply do like a quick little poly group here. Do the same thing. Do another poly group through mask, like right here. And then just soak, go through geometry and delete the higher. You can then do an unwrap. And you can get a pretty good quick, fast unwrap like that. That's definitely something that you can do. Think go nothing you can also do is just work with Seymour can trying to use something like poly pain control to protect things. Like right here you might want to protect something and just kinda see if you're going to hold it right there. And if you can try, you can get like therefore different results. And as a result, you can get something that's a little bit cleaner here. I was a little lazy when I made my mask, but you can make something a little bit cleaner and help you out with a jacket, for example, like that. So again, you got some options. But some of this stuff I kinda like doing through UV mass or I'm sorry, through 3D softwares, Maya or blender. So, but I still wanted to demonstrate that in case you wanted to kinda go through the process of UV, anything, you just have to look at all your models like very flat slabs. So like this piece right here, you gotta kinda look at it and see, okay, like the hairs piece right here. Here is a piece, this little blue part. This can all be one poly group here. And so we'll just go ahead and just delete the higher and just do an on-ramp. And then we can just see a flattened. And you can see we get some pretty fast quick UVs. Again, that's not really where we have a problem. The problem is, is organizing them. So that's the downfall, the kind of the issue that we have with it. So one thing, so like I said, either export the low res out, don't do any UVs and UV master and move on where we officially do UVs and the next course. Or if you want, you can take your shot at practicing a little bit and each individual sub tool in UVs master and then go through the process of exporting that out. And then you can rearrange it in a 3D software, much, much easier. And again, we'll go through how to get that arranged in that 3D software and the next course. So, but that said the next lesson we're gonna do is going to be closer towards the finish up. We have just posing and renderings. So stick around and stay tuned.
167. Transpose Master Breakdown: Okay, and welcome back in this video now we're gonna go ahead and just do a simple little transpose using everything we have completed. Now we're gonna go back to our original file that had the ZTE OWL file of both the low res and the high res subdivisions in there. And we're going to work with transpose master. Now for those of you who don't know, transpose Master is a pretty cool nifty little feature in ZBrush that allows us to take all our sub tools and kinda combine them up into a single sub tool that we can then transpose easily. And once we're done, we can separate the sub tools back with the preserved subdivisions and with the naming convention of all are subdivisions place. So it's pretty nice and pretty simple to do. So let's just go ahead and get started and show how that works. First of all, just go ahead and dock Z plugin over here. I'm going to choose transpose measure master and just go through TPP hose mesh. And that's just going to go through all the visible sub tools here and just bring them all into a single transpose piece right here. Now, from this point on, we're just going to go ahead and hit W key. And we have our gizmo right now enabled. And I'm going to go ahead, turn that off. I'm just going to first of all, hit the R key and just kinda go into center mode. And then I'm just going to go through to transform on up above here. And I'm going to turn off that Gizmo 3D so that I can have a transpose line available to me. Now this is pretty nice and nifty in its own way, but it can also be a little bit, a little bit confusing. If you're a first-time user to it. This is what we use to go to before in the old days of Z rush. So what we're gonna do is we're going to use this transpose line to create sort of like masks on here, or at least give us a kind of pretense for it. So first thing we'll do is we'll go ahead and turn on the R key for rotation. And we'll go ahead and hold down control and then left. It looks like we're not in R. We're going to hold down control. And once I get this off, try that again. Kinda do something like this. And we're just kinda, kinda give ourselves sort of a headstart to a mask. Now, I'm going to want to sway this arm down. So I'm going to hold down control and drag a mask and then left told to kinda unmask that. And then just gonna kinda work my way around with just sort of masking out the remainder of the area here. What's nice is we can work on this nice long subdivision area and now worry about too much in terms of what we might lose. So and the high subdivisions. So once we got that, let's go ahead and hit R and just kinda dry out a little transpose line like so. Let's go ahead and bring everything back with Shift Control. And if the orange circle here changes the pivot point, and the red circle inside allows us to do some transposing. So you can kinda see when we move it around, there's still some areas we've got to work on. So let's just go ahead and work those areas out. Maybe a little bit more here. Let's just try that again. You can kind of bring this in a little bit more, right? See, just going to kinda bring a little bit more in there. Just make it a little bit of adjustments. Like so. Another thing you can do is you can kind of soften the mask just to see if you can get a little bit better results. Which is kind of better. Then we can just kind of readjust the transpose line like that. And then another thing we can do if we want is we can go through the gizmo to former and try to work it as well through there. Right now I think I'm okay with working this out. Don't forget we can hit W to kind of displace. Shift this around. But rotate kind of is a nice little constrain are then kinda see what I'm doing here is I'm just kind of reworking the mesh. Once you move some details, you just gotta kinda rework again the mesh count and see. So little bit of a process to do. So. I'm going to now try that again, except this time we're just gonna kinda transpose a right here. So let's go ahead and draw the line off on the side and hold Control. And just kind of transpose maybe somewhere along here. And if you want, you can just kind of mask this out. Do another transpose line right here. Make sure you're on rotate and you can kinda, just kinda do a little bit, something like that. Let's make sure we up the backside of that r again. And if it looks like it's stretching a little too much, or school, go ahead. And we can just soften that a little bit maybe or something at the other direction. Like so. And you can work with also like the gizmo deformer as well. It's a little bit the same concept. You just kinda have to work a little bit differently. So like you can just go back into transforms and turn gizmo on and then just kinda hold Control and just kinda bring something out like this. And then left ALT. Bring something in here like so. Gizmos sort of the same concept as transpose line is some people have an easier time with the transpose line though for some reason. I couldn't tell you, but just remember to just sort of soften the mask, work the gizmo, and then just kinda bring it out here. So bottom line is, is this one's going to be sort of a e. You get to take a little bit more time to do something like this. You don't want to have to rush any of this off. Permuted through here. From the mask out. Kinda bring little bit more. Because I'm kinda wanna put her hand in or pocket here. And then and we can just go ahead and isolate, select this guy. And that's again, the nice thing about having all of these different poly groups is this. We can just count. Go through here and usually simply work this out. Let's be careful and something like this though. I want to be careful with something like this. And then we just kinda work the MOOC brush, like so. And then we can just sort of bring this guy down a little bit. Same idea. Maybe just a little bit more, less control over lowering the shoulder and the ligase. So don't rely anything on anything like just the transpose. Make sure you're working also with the Move brush in here. Like I'm doing. One thing you get good at doing now when you work transpose enough is the Z kinda get a little bit more of a wiggle room in terms of, well, I don't know. I said Faster button control. See if we can know. Let's say.
168. Posing Character: Squared. Square around with this a little more. Taking care of salt in the mouse, and then maybe just have a few more things. Sam, just a few things out. Now it's clear the mask off, going to rotate. And let's see if we can. Hello. Yes. Sucks this at all. This just sort of rework to do. This is also important, important for us to know and remember that this is but one way to transpose something. Remember that another thing we can always do, which is quite frankly going to be a lot easier and is part of once again, my processes. We can go through the whole deal of rigging. Rigging is definitely something I do. All right. Let's see if we can get the rest of the lasso. More time. I'm going to make it Yeah. Definitely not going to care. Yeah, it's just what we want. Hello there. So we can just simply Let's get him back up their backup there, maybe rotate it a little bit more and then go through. Maybe it just simply hold down lasso tool to two week on going beyond the neck. Let's go back. I'm just kind of switching back and forth. Now that we've taken care of. Now, you can just kinda
169. Adjusting Hair to Pose: Is take it wherever you want at this point, you can just kinda, She's gonna do a quick little YouTube or on this guy. Rearrange the pivot point. So this dopant only tries and it makes you a little bit quicker in terms of what you want. All right, so now we got ourselves a fairly decent pose. For a start. We can do more transpose master can give us quite a bit. But this was like a pretty fresh quick one, like done and almost around 25 minutes. So now once you're done with that, what you can do next is just simply go through transpose sub tools, T-pose sub t. And what's going to happen now is, is it's going to kinda take everything you did in that pose you created. And it's going to do a transfer back into your original sub tools. So now if we take out solo were not only in our new state, but we also have sort of a sort of transpose to where we were before. So that's kind of the gist of it. You know, you can just simply kinda go back now and upper as everything you can go through. And just sort of bring everything back up again. Now. But the next thing that you're going to have to be a little leery of is, is that the hair is, once again, not in the right spot. It was in its default spots, so I didn't want to do that. So one thing we can do is we can go through like transposed set with hair and just simply move the hair over. Like so. And just sort of get that to be and the right location. So like for example, when we bring this out, this is pretty much transposing the three sub tools. I'm sorry, I'm trends posing like basically one folder in at a time. And just kind of committing what I did memory in all of this. So what we'll do from this vantage point is we'll kinda circle around and fill our hair in the same position, roughly about the same position as before. Just real quick. It's a little bit off. And this kind of a little bit, maybe a little bit like that. We'll just go ahead and go into the next one here, which is going to be this one. And then we're just transpose on this guy, which will be a little bit different. We gotta kinda hit F to center that backup there. Course we can do the same thing with the back here. Just click on that. You see anything like this, for example, any issues of mass. You can kind of do some correcting on it. Just with like sub tools. And you can do something like that, just kinda help it out. And you can also work the eye a little bit and just kinda make it kinda shy a little bit down if you want. But again, that's entirely up to you. Maybe you just want to bring the eye just a little bit and you can do that. One more we gotta do and then think that's about it. Put, don't forget. If you're going to move the hair or make sure you move and readjust that area beneath. Let's go ahead now and just go through the last part, its transpose this. Let's go ahead and insurance pose a little bit. We have a little bit of an issue. Here. Cannot move in a way. Another thing I can do is I can cheat. Mooc ha, ha ha, ha. Now it's something I would do in my low-res rigging, but something I can feel pretty comfortable with here. Alright, so now that we got to ourselves our pieces taken care of, next step is going to be how to render some of this stuff. Now that you have it.
170. Bonus Rendering in Zbrush: All right, We're going to finish now everything out in this video with a little bit of a crash course in breaking down rendering, we're not gonna go through every single nook and cranny on this one because this really has its own level of depth that could fill an entire another course. And I kind of prefer doing that down the road during later series. But we're just going to kind of give you a sort of a rundown basics of this. So what we wanna do is we wanna kinda output of fairly decent render and if possible, maybe even a wireframe that can help. We can maybe try to overlay. Now you, in this, we're going to work with Photoshop, but it's not mandatory photoshops just sort of that extra added on. If you have a trial version of Photoshop, you can just get one of those just by creating an email. But if not, you can just simply export the beauty pass or render image that we get. So let's just go ahead now and just get started. Now the first thing we wanna do is sort of make some adjustments to both the background and the size. Now, to do that, we're going to, first of all, let's mess around. We never really did too much focusing on Talking about the background or size. But to access both of them, we're going to go up to here where it says document and simply just kinda doc that over here. Now, the first thing we'll do is we'll work on background. And, you know, if you see where it says document background color, if you hold left-click down, you can kind of basically you'll be sampling the colors all around here. So like for example, if I choose blue and like something in the blue palette, maybe just kinda hold left-click down. I can just kinda work with maybe something, a little bit of it. Saturation here and such. And that's just sort of giving you an idea just how we can sort of manipulate color. Now there are more ways to do this with the range and center, and we're gonna go through that in a second here. But first, let's just go ahead and change the size of this whole document and see what happens to the background as a result. So I'm going to choose something like 2048 by 2048. And to do that, I'll just first of all hit 2048 and just hit Tab and automatically chooses height. That's because we have this constraint proportions. So I'm just going to turn that off and then type in 2048 and then just hit Tab. Nothing really changed. So let's just go ahead and hit resize. Now. Just go ahead and hit Yes. And you're going to see everything kind of stretched out quite a bit. So let's just hit Control N or Command N to clear that and redraw our guy out and take a look at that background. It also changed a bit. So we gotta kinda work around to make some adjustments. And one way we can do that is through the range if we want. And so we can kind of make some adjustments. So that way, you know, you can just kinda, kinda up to you where you want to place it. So maybe something like that might work. So let's go ahead and switch this back to white, so that is there. Now the next thing we're gonna do is, is if you look at this, this is actually not the official scale in size to 2048. He's still pretty small. So let's go ahead and just tap in, zoom out. Or I should say, I accidentally got the wrong one. Zoom in is what I want to do. And it's the Zooms factor slider that we have to kinda mess around with. Apologies on that. I'm a little bit of a brain fart. And we can just sort of creates sort of like a little bit of a pose for all of this. So maybe you want to go through a post like this. Maybe want to go through and do a pose like this, you know, something like off to the side. And now it's up to you. Now you're going to see in my computer shows anti-aliasing. That's because it's sort of on half width, so you can't really see the best pre renders. There's a solution for that, but for beginners, I'm not going to really go into much of it. So the next thing we wanna do is is just kinda go through sub tool here. And I'm going to go ahead and turn all my hair off and give you a kind of breakdown of rendering. Now rendering we do have had already quite a bit of experience with using hair systems with the BPR. But once you have, the more hair you put, you may have realized the higher your hair goes up. Well, that's not the only thing that drives render time's up. There's all sorts of things. Samples of the subpixel anti-aliasing and render settings that you put in even the mesh. If it's on a higher subdivision, that will definitely make it go up. You have options and sub tools to hit things like all know, to switch everything all low. And that's just going to kind of give you a quick little BPR. And by doing that, we can kind of give ourselves a cool little, like a pretty decent I would say, probably a decent looking example. And we can probably just, I'd rather just do this perspective off. But you know, it's just what I want you to do is sort of go all low and do some tests. Pepfar's in different situations like this one might be one situation. Maybe want to go up to document, mess around with the range a little bit, to kinda mess to see with what you can produce. Maybe you want to move around like that and just do another BPR. And you can just sort of see that come together. So now that you have that we want and just kinda introduce a few more things to you before we start taking our render a little bit more seriously. Now the first one is going to be light. Now lighting is a pretty simple concept. If we bring this open and just kinda click on that mouse and dock it over, we can kinda change the angle of the light. And then again, maybe just do quick little BPR renders to kind of illustrate anything that we want to see in kinda do the same thing, maybe make it down here. I mean, kinda get maybe some kind of a cool look in the course. If you click off to the side of these corners here, you can make the light kinda go behind the sphere. And by doing this, we can kind of create like a little bit of what I would call a rim light. And which is pretty good if you have like very dark backgrounds and you want to establish something like silhouette, and you can create sort of a light like that. Now you can all see all the lights that we have here. So you can work with more than one light if you want. That's completely up to you. So kind of bear that all in mind. Now, the other thing that we can do is, is we can work with establishing a second light to work with. I don't normally go with a second light, but that's again up to you. If you want to do that. Just gonna make sure my hair is in frame. Looks like it's a little bit out of frames. So let's just bring that in. Excel. For example, you can click on a second light here and just double-click on it. And you'll have options like the previous slide where you can do things like do light types, keep that to sun and you can kind of kinda do sort of like a lesser intensity just so that you don't have like as necessarily hard shadows onto the side. And that's definitely an option that you can work with. Another thing you may want to think about is as you're doing all this, you may want to actually just kind of not have the most fullerene light because of the fact that it might kind of getting your way in like in a way a little bit. We should see. Because when I say might get in the way, it might get in the way of a scene, some of your edge lines or your edge flow. So just kinda be careful with the intensity where you take it. Something like that could probably be enough. And truth be told. I do kind of like to just simply work with one light as long as it's positioned properly like that right there could probably work for me. So once you have everything taken care of and you have what you want to render through. What we can do now is we can go through and just maybe hit quick saved, kinda save that spot, like really quick. And then we can now kind of take it into all high mode. Now, just like there's an all low subdivision, there's an all high so we can kind of bring it up there. Once that's the case, it will project all the sub tools, which is a lot easier to do than trying to go through one sub tool at a time. And then we can just turn on our hair. Now, it's hair that pretty much makes all of this very, very, very long render times. So I'm going to give you a little bit of a taste on that. So I'll just go ahead and turn two of these off. And I'm actually going to real quick go back to all low super-quick so that I can just kinda just do something in the front hair. Now if we hit a BPR with just we had a fairly good render speed on here. But take a look at the hair when it finishes. What you'll notice is, is that the hair, it comes out okay, but it's a little bit noisy on here. And there's two ways to help reduce hair noise. One is having a big document size so that you have enough pixels to work with and also enough race to work with. And what I mean by that is is turning up your subpixel anti-aliasing renders. So I like to crank that up. And let's see if we can just do another renders. So now we're rendering with 64 samples. And there are again more settings in ZBrush to go over as far as like making this even better. We're not gonna go too deeply into this because we also want to give a little bit of time into Photoshop. And this is again like character creation. We're in the process of creating. The goal in here is creating a 3D low-res and a 3D high res. This is more like a bonus course. So you can kinda see a little bit of a difference in the hair in so far as it pumped out. So we're going to go ahead now and we're going to just simply turn on everything and go all Hi. And what we're going to do is this. We're going to just go ahead and hit BPR and just do a quick little render based on that. Now again, one thing before we do anything, this is sort of introduce new into ZBrush is this we have a preview, a 0, which is kinda cool, which helps us out in terms of getting some cool looking shapes. Another thing that's pretty neat is that if you want, we can just kinda do like it's turned hair off real quick and see what that gives us. You can just do like a quick little BPR just to see what this kinda outputs. But preview A0 is sort of like adding that extra layer of ambient occlusion on there. I'm gonna go ahead and just turns back down to three so I can get some a little bit quicker. I'll give you a little bit of an idea of what that looks like, that preview ALL. And having that preview a o can actually bring in some things. Make some things we'll kinda cool and accentuate some of the cracks and crevices there that are not there before. It's going to display 0, 0 problems. So now that we have that taken care of, I'm just gonna go ahead and turn it back into sub tool, subpixel seven. And now what I'm going to do, I'm just going to do a export on this with sub-pixel is seven, and I'm going to have preview A0 turned on. Now, this is going to make our renders go up massively. You can kind of take a look at how much slower it's going. That's because we have that turned to sub-pixel levels seven so that we can get a little bit more of the hair fibers in. We have a little bit more. We have the preview a 0. And, and to be truthfully honest, if we add another light, this probably also would give us a little bit more render time to work with that we would have to fight. So I'm going to let this render out and then we're going to skip ahead after this. Okay, So when you have your final piece there, Let's just go to the next piece. We're we're just going to export that out under document. So just go ahead and click on that and we'll just choose our render compiler folder. I just made a new folder for myself on there. And I'm just going to call it to beauty shot. And I'm just going to save it as a JPEG. And now it's going to zoom in pretty far. I'm not really too concerned about this because if once I hit Okay, I can just simply go through and hit into here and you'll see it kind of pops up correctly. Now it's a little bit dark, but that's quite all right. That's a byproduct of ambient occlusion and shadowing. Don't worry, we can always fix all this. Well, it's just one thing after another. Okay. So once you are now finished and done with your shot, like I got here, you'll notice there's a little bit dark. That's again because of the previous shadows turned on if you want the hair to be a little bit lighter or of a different closer to the color than just got to turn preview shadows off, do a render and then have like the two renders kind of compiled on top of each other and Photoshop one with the hair and one without, you can mask out some of that hair and just make some of the hair on the lower layer kinda show through. So one of the first things we'll do here is I'm going to go ahead and export this model out. I'm just going to hit Export and we're going to put it into a folder. I'm just simply going to call it a beauty shot. And it gives us this pretty zoomed in view, which I'm not really too worried about because once you save it and you open it up, you'll notice it opens up to the right spots now that it's a little bit slightly dark and that's quite all right because there are things in Photoshop we can do to just sort of tweak and fix that. So the next thing I'm gonna do is I'm going to kinda take it that one step above and go through render passes. Before I forget though, I forgot to say this. If you want, one thing you can do is you can go through and just sort of export this and just kind of bring it in here and do some adjustments like contrast. Or if you want, you can do brightness a little bit, or maybe even gamma a little bit more just to kinda bring it out. Those are things you can do to sort of make it a little less dark. But for me, I like to do all those adjustments in Photoshop. So let's just go ahead now and take it to render. And up here, and let's go down to where it says BPR render passes in. Every time you do a render pass, you're going to get sort of a certain set of images to generate. For example, one of them can be a BPR mask, which you can hit Save. And the other one can be BPR shaded, which you can again hit Save. I don't really touch that one, but some people like that one. And then render of BPR depth, which again you can hit Save. And I don't really need the shadow that much. So it's not really going to be much of an issue for me here. So once you have all that taken care of, I'm going to try now to render out a sort of a wireframe. And we're gonna go into that next. And then afterwards we'll just kinda do a quick breakdown of Photoshop and bringing all of these. And so to do a wireframe, I'm first gonna kinda turn off my hair because I don't need that. And I'm just gonna kinda go through and I'm just going to simply hit all low, like so. And then if I'm going to change my material over here to flat, and if I hit Shift F, Let's see if we can just maybe do something like right there by hit Shift F, we can kind of get ourselves a good example. Let's go under Preferences. I'm going to duck this over here. I'm gonna go over into Draw. And from here I'm just going to change, make sure my PF color. Is set to black and my PF fill is set to 0. My poly fill color set, opacity set to fill my poly frame anti-aliasing is on. This is set to PF color, this is set to white. Let's do a quick little BPR. See what we got. And you can kinda see we have ourselves a little bit more of a shaded area. We're going to do this again, but this time around, I'm going to go through and I'm going to hit sub tool. And what's pretty important is to remember not to mess around with the position or the location. Return the eyes off and turn the eyelashes off. Let's do that again now. Perfect. So I'll go ahead and export this out now. Same thing. So I'll just go through Document export. I'll just say wire underscore beauty. And we'll go through and just hit Okay for that. And then we'll go through are just the same way references. I'm going to just, I'm going to mainly just need the mask. And I'll just simply go with that to not just say wire mask. And we'll have that as a JPEG. And so when we kinda go up here, all I have really just see the wire. Is there, the wire beauties there, the wire mask is there. And the beauty BPR mask was there. And with those five images, I'd say that's about all I need. So in the next video, we're just going to be the second bonus. What we wanted to do in this first bonuses is in case you don't have Photoshop, you can just have like basically this as your render. But then like as you go through export, make sure just to tweak things like gamma when the pop-up spring comes for it. And then you'll have something like this again. Well, if you have Photoshop, which is going to, we're just gonna kinda do a real quick crash course of bringing these all in there. Then we'll kinda show you the end result of what that looks like. Photoshop, like I said, it's cheap but also there's free trials of it. You just need to make an email and then you can kind of put something together with that. Pretty simple. I got a little bit of an older version of it. So with that said, we'll go ahead and show you how in the next lesson, the last lesson of how we just go ahead and put these altogether. So stick around and stay tuned.
171. Finalizing Render in Photoshop: Okay, so welcome back. In this last lesson, we're going to finish off our course with just doing a little bit of a breakdown, just doing some quick compositing is to just give us sort of the basic idea of how to learn just rendering and getting a fairly decent render out. Again, this isn't like a main course requirement, but because creating the character, creating a 3D character, creating the high res, those were all the main components that we wanted to teach. This is just sort of like a bonus lesson. Sort of give you something, a little extra. So let's go ahead and get started. So first thing I'll do is I'm going to go ahead and just kinda Shift-click and just open all of these up with Photoshop. And we're going to just paste like so. And then from here I'm just going to simply go ahead and select my marking. Just kinda drag over and just simply just hit Control. And V, or I guess it's all Mac, so it's going to be Command C and Command V. And then same thing again, Command C and Command V. And we'll more time Command C and Command B. So now that we have that, we can just go ahead and get started. I'm going to double-click on the original one to unlock that. And just going to put that on here like so. So we have a whole bunch of things we can do here. For example, one thing we can do is we can like maybe lighten up the filter a little bit. So let me go ahead and give you an example. We can add some, go down here to where it says levels and maybe just add something to just sort of give us a little bit more of, a little bit more brightness to it. Like so just sorta kinda give us something that's a little bit easier to see so that we can see a little bit of the hair back. Another thing we can do is we can go through channels and we can just simply add an alpha channel. And I'm just going to turn that off for now. And with that done, I'm just going to kinda turn on my depth mask. And I'm just going to ahead and Command C, copy that and just simply paste that on here, like so. It's now really complete requirement. But it's something we'll do a little bit later down the road here. So I'll go ahead and then just continue on. Now that we have a little bit of everything that we need, one extra thing we can do is, is we have a mask here that we can work with. And that mass can also be used as our, as our piece to copy if we want. I want to make sure I think I copied the wrong one here. So let me go ahead and just, I accidentally copied my mask to my alpha. I want to copy the deck max right here, this little depth piece, because that was a bit of a mistake. So now we have that there. And that's going to help us with a little bit like things like blur to Lens Blur to help us work out. So let's just go ahead and feel free to do anything you want on this if you want, you can just leave it like this. But remember you have like a fill layer, a layer mask and all these other things that you can use and sort of bring all this together. So kind of when you're done with that, just go ahead and just hit merge layer. You want to delete the background, you know, you can just go through mask and kind of go through that and just hit W and marquee, select some of that stuff and maybe taper a little bit of it off. And you know, kinda bring it through. And you can kind of just sort of change the background color of the mask a little bit. So like for example, let's see. We hit W, I think we just went through and Colombian. Give an example. Do this command shift high. We can just maybe go through and go through color radiant and make some adjustments through the color. And I did that wrong. You can just go through and just simply make like an example would be like right here, for example. Bucket. Kind of see like all the things that we can change with that this screen. Let's take that out. So now we can kinda go through and maybe just work around with different colors here to kind of just work with something that's a little bit more matches. Or you can also just set it to maybe overlay or multiply. Or if you want, you can just add a mask and just simply go through and hit B. And you can kinda see, I'm just sort of having some fun. You can just sort of, you know, mask certain areas here that will occlude down to this area if you want. Or you can just kinda take it to a much higher resolution. And you can take the opacity to a much higher tone and just kind of kinda bring it in. So it becomes something a little bit different down the road. So it kinda gives it something a little bit easier. Then we can just sort of do something like modifying it a little bit. Now you can kind of bring it down a little bit more. Now you can do something like that if you want. Let's bring back just divide that a couple of times so you can do something like that if you want. So now that we have a little bit of an idea, this, let's go ahead and bring our wireframes in so that you can kinda see how that works. So I'm just going to again open that up with Photoshop. And this time around, I'm going to go through, and I'm just going to click on my, my mask or my selection tool kind of go through and just sort of drag it out and hit Command C to copy and just paste over. And then I'm just going to hit W. And then I'm going to hit Command Shift I to invert the selection. So everything on the outside is affected. And we can just simply delete all of that because we don't need it. So with this, now what I can do is I can just hit Command I to invert or Control I probably for you. And then with here. One thing that I can do is I can just simply copy this over with Command C and bring this over to my beauty shot and hit Command V. It's a little bit off, so I'll just maybe hit Command T to kinda bring it roughly in the right spot. And if it's not in the right spot, we can always just make some adjustments. Just get it there. And here we can just set the blend mode to screen. And now we've got a little bit of work to do here. So let's just go ahead and hit E. Maybe just go through and kind of blend this out. And then you can just sort of duplicate this a couple of times and merge the layers down, like so. And reapply the Screen blend filter. So that's sort of a little bit of a last minute helpful thing. We still have the blur to deal with. So one thing we can do, I'm not sure if we can work this just yet because I think we need to merge the layers. But one thing you can do is just sort of hit Merge layers on here and do a filter blur and do Lens Blur and checkout Alpha 1, you notice that's there and that's kind of using that depth mask that we put to kind of bring in a little bit more of a blur there and we can kind of turn up the blur just a little bit if you want to kind of give us some, it's a little bit cooler. And then we can just sort of reapply the screen. Don't forget the screen layer. We can change its opacity. Maybe it's a little too much or for bearing, we can do something like that maybe. Or if you want, you can do something like this where you kinda bring it down just a little bit so it's still somewhat noticeable. And then maybe just add like a masked, like a quick mask down here where it says Quick Mask. And just click on that mask. Go over here to where it says gradient tool. Maybe just simply kind of go through and You can kind of see what we're trying to go for. We're just kinda try and blend this in. Like so. Then maybe we just want to go ahead and just sort of bring it down. So that's sort of the gist of that. So when you're kind of done with that, the first thing you're gonna wanna do is maybe just hit save. Remember we can always reapply our masks. Back on here if we want to make some more changes, anything like that, we can still do. But once you're kind of done with that and you just go ahead and hit Save. And you can just save it out as maybe just like a beauty shot too. You can save out as a PSD and just go through and just save as a JPEG. And you know, there's more things you can do. There's tremendously a ton of things you can do here. You know, it's not just what you see here. You can also, you know, take things a little bit more prevalent, like you might want to see. Okay. Yeah, it's I want to turn it up, but I want it to be seen just on this sash a little bit more. You can just hit B. And then just sort of kind of make sure you're on the brush that is white so you're occluding more. Here. It's probably going to be enough there. So let's just go ahead and just go here to a whole on out. And then gonna go to full black to cover the mask up. And then I'm just going to switch it around, go back into a white brush, turn my opacity down a little bit and I'm going to maybe like slowly pain it like right here or maybe I want to I don't think it's been seen very well right here. Maybe I want to slowly paint it right here and now, or maybe I want to actually get a little bit more here, little bit more here. But I don't want it to be seen as much here. And I could just hit X back to black and just kinda paint it away here. Okay, So maybe you can want to do something like that. You can do that. It's not a problem at all. So other things you can do, you can go through filter and do things like add noise, like maybe just a pinch of noise. You can just kinda do something like that just to kind of bring a little bit more of a like a little bit of sharpness through it. This is kind of where we go. Tell you to kind of have fun with this and experiment as you've been experimenting in ZBrush. There's a lot of things we can do. We can go through and do a whole bunch of things like Render. Clouds are under Difference Clouds we can just keep going and going and going on it. But again, this isn't my Photoshop class. I'll probably do some a little bit different from that. But now if you look at this, I want you to get in the mindset mentality. Maybe you can put like something a little bit bigger, like maybe text or something or like maybe you want to do like a little bit of a face that is little bit more of a close up to see what you made. You can do things like that. So that's how that works. I just wanted to go ahead and give that breakdown to you. So with that said, we are now officially done with the course. And if you've got this far severely, I say this to you, pat yourself on the back. I'm very happy that you made it to the end here. And I really am. I mean that to the bottom of my heart that it is indeed a true testament to your skill of getting through this course all the way to the end, like that. It's not easy. And if it's just all about practice, effort and effort. So again, congratulations, and I truly hope that we see you again on the next upcoming course, which is going to be focusing on texturing. So with that said, for the last time and hopefully to the next course, stick around and stay tuned.
 Sean Fowler, 3D Instructor