Transcripts
1. Class Introduction to Substance Painter: Hi there. My name is Sean
Fowler and I've been a three D freelance artist
for over ten years. I'm thrilled to introduce
to you my latest course, Substance Painter 2023,
from Novice to Pro. In this course, we'll
delve into the world of three D Texturing
using a PBR workflow. As well as explore
how to seamlessly integrate these textures
into the Unity game engine to ensure hands on
practice will provide you with both low resolution
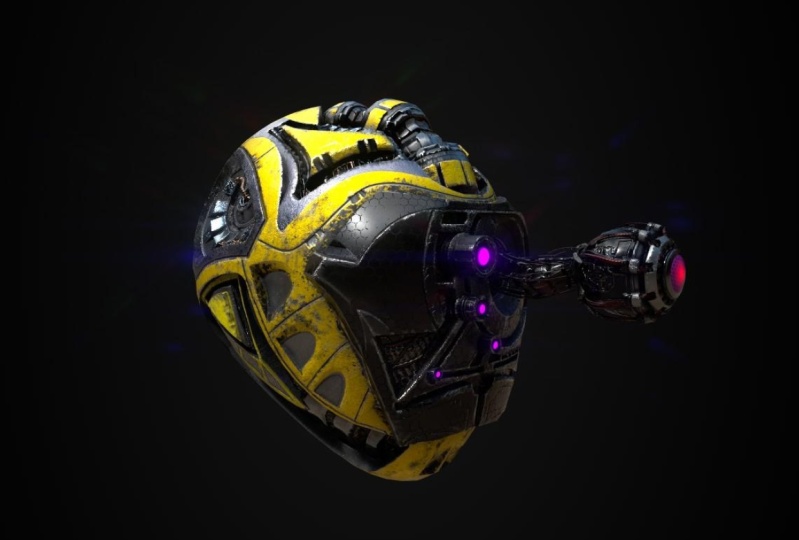
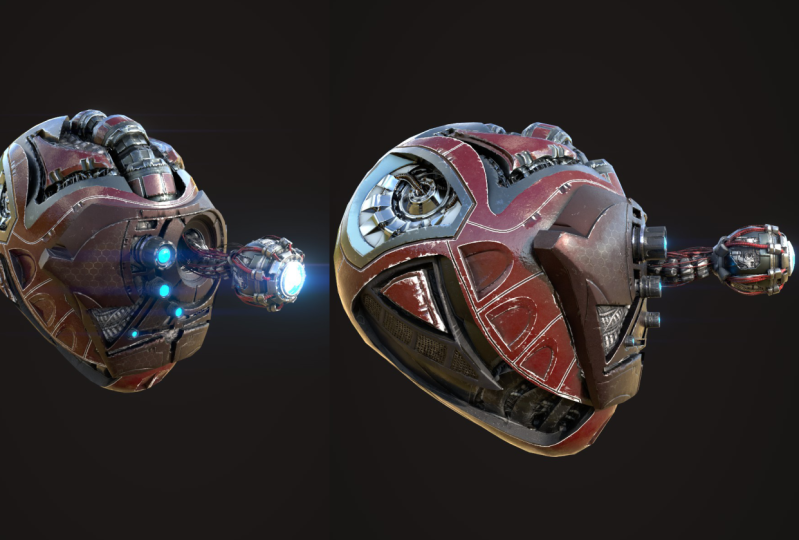
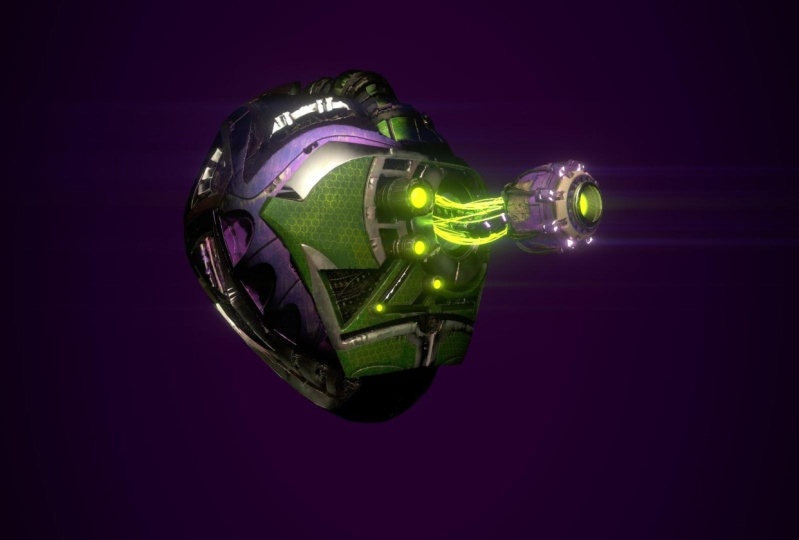
and high resolution Si helmet models to
help practice with and experiment various
texturing techniques in substance painter. Now on top of our
helmet tutorial, I've also included several
introductory lessons that cover the essential features
tailored to the beginners. As a quick review now for that, you'll have the
opportunity to work with a low res flying saucer model. This beginner exercise
will allow you to understand fill
layers and how to manipulate base
color through masks. Setting a strong foundation
before we progress to more intricate aspects of texturing with our
sci fi helmet model. Now my goal is for you to gain the necessary knowledge and expertise in three D texturing. Become proficient in creating
detailed three D models in a remarkably efficient manner through the power of
substance painter. Now without further ado, let's dive into that
exciting world and begin this creative journey
together. Let's get started.
2. What to Expect Here: Okay, so let's get started. In this video now,
we're going to go ahead and do a breakdown of the course material in terms of what to expect
in this tutorial, as well as give you a couple of tips to help you learn and maximize your
educational process when watching all these videos. So one of the first tips I probably would have is
that before anything, this is an online course. So if there's any
point where you feel slightly overwhelmed or
maybe I'm talking too fast, take advantage of that
fact that this is, again, a video course tutorial. Stop, rewind, re, watch as much as possible
but you wouldn't even how much you would also catch additionally
watching it a second time. So feel free to do
that as many times necessary to get through
if there's any point. Again, if I'm talking too fast, please by all means,
stop, rewind, rewatch. The second tip that
I have is this. Don't necessarily
constrain yourself to what you're seeing
in front of you. Go beyond the concept, that means go ahead and explore different concepts of the
same thing that I'm teaching. If I'm going through and
teaching a particular color or doing a demonstration
of the helmet and texturing through one color, I want you to have fun
exploring different colors. If I'm demonstrating
smart materials and generate smart mask
manipulations through it, please go through and try different smart
materials just to get yourself exploring
more and more by then. The objective here is to get you to not be constrained
to a course, but get you to understand
the concept of it. So you can be free to try different things comfortably
and confidently. Because that's really how you
learn any three D software. It's not by constantly constraining to know
only what is taught. It's about exploring past
it, by experimenting with. That said, let's just go
ahead and get started now. This course is
outlined with a couple of models that you're
going to be working with. The first one is going to be a introduction to the basics
for which you will be importing a supplied
flying saucer model where we go over the basics of substance painter for
that first time beginner. Now this beginning section is only for the very
first time beginner. It does not require
somebody who is open substance painter or
understands the basics. If you wish you can move into the texturing helmet
section where we begin the interface
breakdown for that. But to get started, the introduction to the basics, we go over things like importing the model,
the interface. We'll talk to you a little bit about baking out those maps for the first time without a high res in that
particular situation. But most importantly,
we go over things very simply by just constraining
it down to color. Now substance painter deals in many different
channels and maps. Roughness, metallic,
specular, glossy, miss of many different
types of maps. For some that can get
a little bit crazy, we want to take it very
small if you're a beginner. In this introduction
to the basics, we'll only focus on
how to apply color, starting off so that you
can get a little bit more of an idea of how to
manipulate things. We'll do that starting
with brushes, fill layers, and
selection tools. And we'll advance how we can do the same thing
through fill layers and manipulating and
painting everything back through masks
and generators. Now once we move on, we begin our texturing
of our helmet. Now this is where
it starts to get fun for us now this
is where we get to enjoy the real power of substance
painter and we give you a little bit more of an intro to more channels like roughness
and metallic maps. Now from here we're going
to just again go through the process of applying a bake. We're going to bake out new maps for that
and we're going to use for the first time a high res to project
all the details down to. We'll then begin
to start texturing the helmet through various
means by using generators, smart masks, and
emissive textures to help give us an
interesting glow effect. Then from there, we will go through to texturing
the face plate, where we branch slightly off from smart materials to
working a little bit more with creating custom fill
layer materials and how we can blend that
in with smart materials, just to have a
little bit of fun. From there, we go ahead and
go through the process of exporting out our textures
for a three D software. Now we'll be using the Unity game engine
to make that work. Where we go ahead and
demonstrate how we can bring a Three D model in
along with its textures. How to set up a shader and plug all the texture
maps into that shader. Lastly, we go back into substance painter and go through the process
of setting up our missive textures and have
a little bit of fun with rendering with Substance
Painters built in renderer. With that said, let's go
ahead and get started.
3. How to Import Model: Okay, so let's officially get
started in this video we're going to begin our course off by going over substance painter. First we import a basic three
D model of a flying saucer that we're going
to use and go over the interface in the
process afterwards. Now again I remind you we
have two different models. We have a flying saucer for this beginner section and then later on in the
next section we're going to have a much
more detailed Si helmet with a high res to go with that. We'll go over later
on down the course. Let's just go ahead and
just bring our model in. If you've opened up
substance painter, you'll probably
have a prompt sign which you might
have to close out. But once you have,
go up to where it says File and hit New. Now one thing I'd like to talk about before anything is in this beginner section learning substance painter can get
a little bit complicated, especially when you start
entering into the PBR workflow. Mainly because that has all
different types of maps, from normal maps texturing
to a mi metallic roughness, channels, all of things that
you can go about texturing. But before you can learn
all that you got to, it's like learning how to
crawl before you walk. So we're going to start
off with something very simple in terms of texturing, where we just focus
mainly on color. And creating color on a model
and exporting that out, which comes towards the
end of this section. Let's start off
with new project. In the template, there are many different types of
templates that we can go through that have a
variety of different maps. For now we're just going to go a non PBR, specular glossiness. A good way to start off with
the document resolution. I'm just going to
change to 2048, the normal maps we're going to go over in the next section. We're going to leave some
things out because we just want to get you just
started easy in here, but we'll talk a little bit more about normals in
the next section. Now to bring in a model, take note to where it says
File and hits select there, you're going to
see flying saucer. Now that is the OBJ file
that should be attached in your website that you
download from the resource file. Hit open and you'll see it
right there, get loaded. Everything else you can
just leave for now. We have UV's attached
to it so we don't have to do anything
special. Let's just hit. Okay. When that happens, you'll get a flying saucer. Now if you're working
with a mouse, you can just wheel up and
down to zoom in or out. Additionally,
holding left option and right click and dragging horizontally can also zoom
out as well as vertically. If you hold left
option and left click, not left option and right click
like this but left click, you can go ahead and
rotate this around. And finally, left option, middle mouse pans this. Let's go over
everything around us in the interface and start
talking about that now. To begin with, in
the default window, the default viewport
you're going to see on the left a viewport of
the three D model itself. Ideally, you'll be doing a lot
of texturing through here. If we go to the
right side of this, if we wheel up and down, this is like the UV's that
come with this model, which are typically done in another three D
Modeling software from Blender, Maya or Max, or even Z Brush to
get established before we export out and
bring into substance painter. Now one thing I'd
like you to note that if you hold shift
and right click, you can change the light
lighting around here. If it gets a little shaded over here and you want
to texture something, just hold shift and
right click and you can start texturing like so let's go around now to all the places on here and start talking about the interface
a little bit more. If we, I'd like to
go ahead and make your main focus on to
the very far, far left. And you'll see a series of icons vertically
going up and down. It's like how
Photoshop is laid out, where it has all
these icons laid out. A lot of this has a
similar structure to it, and if you can take
a look at paint. Polygon, Phil? Those two are the ones you probably want
to focus and write down If you do the most because you'll be
working with these two the most in manipulating
masks and texturing, take that into account. Now we go through a eraser is for things like
if you have a paint layer, you can erase things
that you make on here. It's pretty standard
if you look at it, like if I try to
left click on paint, I drag across, I can do
a little bit of a paint. Tap that paint brush, we can see physical paint, which I want to also keep a little bit away
from just for now. Hold, right click
down and you can see all the parameters of the paint brush along
with manipulating things. You can see right
now it's white, we change it to red, now we'll
get a whole bunch of red. Then it goes to the brush, we can simply erase everything. Now, the next thing I
want to talk to you a little bit about is
it's one last thing. It's changing the
size of the brush. Now this is done either by tapping right and
just making it big. Or you can just hold
left command and drag across and that will
also change the size. If you drag up and down, it will change the softness. If you hold left command, left click, you can
change the rotation. Finally, left command and left click across changes opacity. It's like four
different things there. The last hot key, I would say a look
up to where it says edit and see where
it says undo a stroke. This is going to be different
for PC, as you can see. For Mac it is command Z. If I hit command Z, we'll go through the process
of undoing things manually. Now if we go through fill
properties is something that pertains mainly
to manipulating masks. And we're not going to
talk too much about it, but it will be something
further on down the road. We want you to know that when
you are texturing anything, please experiment
through all of this. For example, we have a smudge
tool similar to Photoshop. You can go through and create a smudge effect as
you see fit on here. Let's keep going
now to the right. We're not going to go
through every single one, We want to go through
the most relevant ones to keep you going. But to the right, we'll
see an asset library. Now this assets
library compiles of several different
tabs represented by a horizontal set of icons. Smart, starting with
materials which are like preset textures that are built into
substance painter. Smart materials are the
same thing as materials, except they use a
procedural process through baked out texture maps
from high res models, typically to establish a very unique and more
advanced aesthetic look than that of materials. It also is a little bit more taxing in memory
when you use them. Smart masks is using the same principle
as smart materials, except it's just
showing you how to occlude the layers
of fill layers, paint layers and
even materials and smart materials in a
procedural process. Now these three are
probably the most important three of the bunch. The only other one that
you're really going to have the most
use on is brushes, where you can see a whole bunch
of custom preset brushes. It goes without noting
that these little dots here represent a dynamics, a dynamic simulation
that goes through. We do a little bit of that dynamic simulation in the more advanced
helmet process. Now we're going to be
tabling that as well. Think of material or the assets library shelf
as like your spice rack. It's this thing that has a
whole bunch of ingredients that you pull from and
synthesize together. Some materials here,
some materials. Here you're changing out the
attributes in the channels, blending it with your own
personal fill layers. Or blending it with your
own personal paint layers. Where do you put all
of these things at? You will take note where
we put them over here, where it says layers, it's like. Dragging and dropping
everything across here. This is a good example of one. I'm going to hit Undo to give you a little bit
of an example of that. But right now, none of
the smart materials work, mainly because there's no baking process that was applied. But let's keep going here so we can get through all
the user interface. Now up to the right here
is the texture set list. This is usually
where you see the UV's that come with the model, which since there's one
UV set on this model, there's going to be
one set of UV's. And it should go without
saying that a model can have more than one UV set attached to it by assigning multiple
different shaders. You'll also learn
that traditionally in the more advanced helmet model, as we go over that
in more detail. Further on down the layers here we see a tab called layers. If this is like the spice
rack of ingredients, This area right here
where it says layers, this is like the cooking cutting board where we mix and
mesh like the pot, the pan that we
put everything in. It's basically like
your work space. You're going to be manipulating all the different
pieces and ingredients. Almost like a director tells
an actor how they should behave and where
they need to be in all these different
spots in the model. All right, if we click on
the Texture Set Settings, which is the tab to the
right of the layers, we'll see general properties. This is an important
area when we are starting our whole process
of importing a model. What this is, is
a place that has a viewport of all
the channels that come in a typical fill layer and which you would see here. Then we have what's called if we scroll down
here, mesh maps. Now mesh maps is one of
the first things that you're going to be working
on when it's bake mesh maps, that's the first
thing you're going to be hitting even if you don't have a high res baking, a model of the low res
onto itself can yield some beneficial results in assisting you with smart
materials or smart masks. In order to take
advantage of some of the strongest procedural
processes in substance painter, you need to be able to first bake mesh maps out and you can see all of these different
maps that can be based out. You might be even
thinking these are the maps that get exported
once you're done, but that's not true at all. These are default maps that
are used to be plugged into all these smart materials to help give it an
aesthetic look. A good example is let's take the curvature model,
the curvature map. If we baked out a curvature map, we'd see like a whole bunch of white highlights
across the corner of here baked out in a flat
UV map representation. And then it would
then be plugged into one of the channel attributes of a smart material or a smart map making The smart
material of say, old iron show in
certain spots here, while a lighter iron on
the curves would show up. It's a very important process. It shows a lot more when
you have a high res as opposed to baking just the
low res on top of itself. But still it does give you
some noticeable results. Now one last thing
before we end this, and that is that substance
painter comes with both a unique viewport for baking mesh maps out as well
as its own built in ray, its own built in rendering
system called Ray. To access for example
baked mesh maps, I can hit that left
click button and you can see the whole process of
the maps being brought in. You also take a note to some of these hard spots right here. That was me personally making an intention of
hardening the normals. Demonstrate how this software looks for any hard
edges and tells you, hey, these normals need to
be softened or averaged out. We made them pretty hard anyways because we
don't have any, a high res to go through even though it's
displaying an error. The error was made
intentionally on here and it's just a feature that's extra that comes with substance painter. But as you can see we have a whole nother viewport
for baking out our high. We're going to, of course,
in the next video, go over a little bit more detail in talking about
everything here. Then afterwards, we're going to talk to you
about conveying color. Because remember, we're
not going to go too far deep into this where this
may all feel complicated, but like I said, we're just
going to be focusing on color right now to help you
out and get you started. Now to get out of this,
just go ahead and hit that return painting
mode and we'll show you the viewport for
rendering real quick. So you understand that if you go all the way up to here
where it says brush, just hit ray, we can see the default ray again is covered towards the
end of this whole course. We show you ways, how
to manipulate and take away this background and give us a pretty cool result that's
pretty unique for you, but it does work
similarly the same way. Hold shift, right click. You can manipulate the lighting. You can change out
the lighting of the background image so that you have a different
look and so forth. Don't feel like you're
constrained to it. This has been a breakdown
of the viewport, a bit more the interface and how we're
working with everything. The only thing we have
led to cover properties. The properties is basically detailing the anatomy of the
component you're selecting. I'll give you a
real quick example. If I assigned a fill
layer onto here, you would see
properties gives us detailed information about
the fill layer here. If I added a black mask on here, then I wanted to texture it. We see brush is highlighted here and
all the things that we can go through to bring some occlusion to show
that black fill layer. And then we can
change everything. And it's showing brush because
brush is selected here. Additionally, that just happens naturally when you
select a mask. If you select the fill layer, you'll see different
properties are shown. Of course, if you
go into mask and change that other
one to polygon fill, you'll see four different
selections and not as much. The bottom line is
a properties gives us a lot and sometimes a little, but it's just the right amount
for what we need to make our necessary changes
essentially broken down. It gives us detailed
information of the anatomy, to the component in
which we select, and it's like our
controller system and how we obtain everything. I select UV shell, now we're making everything
on this UV shell black. We'll go a little
bit further deeper into that as we go through, but I just wanted to give you
a heads up on properties. With that said, we've gone
over importing our model. We've gone over talking
about the left side of our spice rack that we have, or as I like to call
it our materials. We wanted to not go too far into anything here with filters. We really want to keep
that away from you, just for now, since this
is a beginner course. We talked a little bit
about our brushes and these four tabs are going to be the main tabs you're going
to be focused on for now. So with that said, let's go ahead and move
into the next video, which we'll talk about
is baking out the maps. So stay tuned.
4. Baking Out Maps Breakdown: Okay, so let's continue
on in this video. Now. We're going to go over
the process of baking. And it's going to
be a very simple, simple process of baking. Nothing to advance
or calculating here. Now, in the last video, we went over bringing
our model in. We broke down all
the viewports and highlighted the ones that are special and
take the longest. Now one thing we will say
is we didn't go through and go through every
single button on here. One thing we forgot to mention
that's very important, is that please, please take the time to experiment
and press buttons. If you get to a point
where you create a Viewport window
that you're not sure of Trpl around and
getting back to it, but you can always just
hit reset I under Windows, please remember you can
process through now. There's still some important
ones to go through, for example, like
the display setting and the shader setting. But again, we'd like to go
further down with that and talk about that down the
road with rendering. We leave that out for now. Now let's just go ahead and do a bake of some maps on here. If I go through to do a bake like before we go through
Texture Set setting, we go through bake mesh map. Additionally, you can also
hit Baking up here or eight. Let's click on that croissant. Now if we see on here we see our three D model
in a new viewport, you also see some purple lines. That's an added feature that helps you say
that these normals are hardened and you need
to take it back into a three D software and work
on them to average amount. Now I will say I
intentionally made it, so I made these normals
intentionally like that. Just so you can see
it, because there was no normal math that
comes with this low res. That's okay for now. Since there's not going to be a major process that goes
around for a high res, I'm going to go ahead and
move over to where it says mesh map bakers and you can see a checkbox on all of these. These are all the maps
that get baked out from what would be
presumably a high res. Again, since we're
baking this onto itself and it's not
exactly a high res, we don't really need these. Let's just go ahead
and I'm going to take off normals and ID map. I just want to mainly focus
on ambient occlusion. If we click on
ambient occlusion, you can also see the quality of the ambient
occlusion you can make. For now, I'm just
going to leave it at secondary rays. 64 rays. You can raise that for higher, but ambient occlusion rays
really take a long time. We go over a little
bit more detail about each of these in the more
advanced section of the helmet. Let's keep our map simple. It should also go without
saying that the output size reflects the texture size
of all the maps we bake. We have 512. We can also
bake up to 2048 if we want. If you put map or your
mouse over everything. If there's anything I don't
explain or get right, just put your mouse
over something and you will get a and just
let it stay there, You'll get a little bit of
a detailed explanation. You'll also see it
down here as well. Moving on, this is the place
where we would put a high, but again, we don't have a high. But if we did, we would click on this little high definition
mesh and it would give us a finder where
we plug in a model, like a model you
bring from Zbrush. In this case, we're
going to be using the low poly mesh as a high poly mesh. I'm
going to click that on. A lot of things that you
see through here are going to be manipulated
through max frontal distance. Now you can see it since there's no high res mesh to compare differently
from here. But once you bring a high different file from the low res which will be definitely demonstrated
on the helmet, you will see a visual
representation of a cage that gets bigger or smaller based
on how you tweak max frontal distance
anti aliasing. I can turn up to super sample four X. I like to keep
it there but you should know that does drive up
render times or baking I times mesh by name. We're going to go ahead
and leave for the helmet. Everything else is going to be something you won't
have to worry about until we bake out our his. What's going to happen when
we bake our textures out? Well, this is what's
going to happen. Four maps are going to be, be, ideally for most of them, it's going to be all of
them as I would have it. And so we can have as
many smart materials, take advantage of as many things as possible for a parameter. But since this is
just a beginner model where we want to focus on color, we're just going to
focus on these four. And you can see the process of this whole
thing being baked out. Map to map like so You can see it's going through and
establishing all the variants, all the different types of
curvature maps and you can get a little bit of a
representation of its progress. The green maps, I believe we're
now on the thickness map. It should be finishing up. The thickness map and the
ambient occlusion map in any bake will be the longest. Once you have what you need, you can return back. Now, it doesn't really
seem to change that much, but you can see a little bit of a difference representation
of it through here. This is all the ambient
occlusion spots where our separate
model is showing. Furthermore, if we go through the Right In Texture
Set Settings tab, we can see those
F maps baked out. This was a demonstration,
a real quick, easy demonstration of
baking out our textures. Again, we wanted to
do a limited version for a beginner start
off before we go into a more advanced one
with our helmet that's going to be
down the road when you start in the next lesson. Now we're going to
work is going to be how paint layers and also the newer paint along path feature in
substance painter works with that said stick
around and stay tuned.
5. Learning the Paint Brushes: Okay, so let's get started. In this lesson we're going
to talk about paint layers. And the paint along path in substance painter that this
is going to be, again, more of a newer feature, especially if you
are working on the 9.0 version of
substance painter. If you're working
on an earlier one, you might not have
the paint a path. It's not a big deal as
long as you're on 8.3 But you can still get away with this course being useful with
an earlier version. But ideally, you want to have your latest subscription update Before getting started
with that said, let's do some
demonstrations of how layers work and have everybody
now understand this. Very important that when we
are texturing our helmet, we will be taking a
fill layer texturing workflow which is going
to be contrary to this. But we want to make
sure you understand the basics of how paint layers work and how they
contrast with fill layers. Let's go ahead and get
started with that. To get started, we first need to make a paint layer or a layer. This is similar to
Photoshop in a lot of ways. When we are on the layers tab, we choose add layer,
that's that brush. Now on here, it's basically
represent a paintbrush. If we choose left
click paint brush, if we right click, we scroll all the way down to
the height of the emissive. You'll see all the channels
that are on these come with the preset that we set at the
beginning of our project. Don't worry about any
of them right now. They're not going to impede you, but I just chose green for
the color that I want. And now I'm just going
to go ahead and paint. Now you see a little bit
of a bumpiness there, so I'm going to go ahead
and get rid of that for now because I don't
want you getting too wild about seeing depth
or normal maps that right there that seems
to be manipulated through height and normal. Let's go ahead and take care of that and repaint
all of that again, and you can see there's
no bumpiness to it. Now let's go ahead and undo
both of it by hitting command z D. And you can see all
of this through now, you see a little bit
of a haze glow there. That's usually because of the other attribute
materials coming in. Again, this is all entirely
about just expressing color. I'm just going to
disable them for now. You can see strictly only
color is being put through. Now if you want to change
the opacity of the color, you just hit right
click and you can see all the presets from
flow stroke capacity. And you get a representation
of all of that through half capacity you
can work with as well. You can see also the size
and options are up here. Additionally, if you want
to work with anything different now spacing is another one I like
to always have on. But it's really coming
down to just going through the process of hitting paws and just experimenting
with different colors. Now you can go through and do a manual process of coloring
all of this through, but it's not really going
to make a difference. Now if we hit the two key, or up here where it says As, we can also erase all of this. Now as it stands right now, I have a little
bit of a default. So I'm just going
to go ahead and just hit the eraser
button on there, make sure I have the
right racer elected. I need to make sure of one other thing that is
why it's not doing it. Take a look now for anyone that's wondering
why wasn't erasing. It's because I had the
diffuse turned off. That brings us to our next
point that this eraser can erase specific attributes of
what you want to disappear. Like for example,
let's say you want to erase everything
except the spec, but you want to keep,
that's the color, gloss, height, and everything else you can erase off of there. Let's give you a good example. I'll start in my brush, I'll go ahead and put height on. Let's go ahead and just put a little bit
of a brush there. Two. We're now in Acer mode. Now if we right click, we get all the
attributes for As. Let's say I just want to
erase just the height, but I want to keep the
color we just go through. We can do that as well. That's giving you an
idea of how that works. Of course, if you go through and hit color change on here, you can have all of fun working with different
colors as you see fit, having all of fun working with
different attributes like. So let's go ahead and now delete that layer
and make a new layer. Once again, a paint brush. We'll finish this off
now with the path, the paint, a long path curve. Now this is a little
bit more of a trickier. One first thing we're going to do is we're just going
to left click on that. We see our mouse change. Now the path is an
interesting one. It has a little bit
more flexibility for editing and it's
good for creating things like stitches or maybe a little seams on
clothing, welding points. It can create a lot of things. But first we got to
understand the basics of it. If I hit left click, so you can see a path. Now you're probably wondering
what this pattern is. Let me go ahead and undo that. And go back up here. Reset to the default
and change back my alpha to something a
little bit easier and circle. Let's try something fun. You can see a little bit more
of this is how curve works. Now take note in a
couple of things, you see four points and it
works like a Bezier curve, but you can actually add more points as you
see fit across everything to have a
little bit more fun in manipulating every curve. Like now, this isn't too
heavily mandatory right now, but it is an extra
feature and I think it's really shines good when you're making shoe lace leather
or things like that. The other thing that
we want to take, if you hit right click, you can continue to
edit this on the fly, like for example spacing. Or maybe you want to have a simple pattern like so perhaps you want to experiment
with the jitter of it. This is now where we
start to have a lot of fun doing a lot of different
unique things on here. We want you to be, well, I would say
experimental on this. Of course. We can choose
different colors. You can see it
updates on the fly, That's one thing that
it differs from. The paint brush is
that we interactively update the curve that we are on. Now when you're done
with your curve, you can just simply
hit return. Now be it. Now if you're wondering how I connected the two paths like so, pardon me, all I did was hold left command and just click on the very end
to connect the two. It should go without saying that if you want
to delete a curve, you can just marquee, select over the two and delete. Same thing over here. You
can just click and delete. Let's now apply this and
how we can see this in the process of erasers because this is how
we're going to finish it up for the erasers. We're just going to
hit two like before. We're going to go through
and check out everything. We have spec gloss. Let's turn it all on now. What do you think
is going to happen? It's going to be that
everything gets deleted. What if we, instead of
height like last time, let's just do color and have
everything stay the same. Let's go through and just
choose just the color to be the thing that gets deleted but everything
else remains the same. You see, it's a little bit
of what we want to see, but I'm looking at it and I
would like to see for now. Just one thing. If we go back into, for example, diffuse, we'll go ahead and
delete everything there. That's because what happened we, when we hit the erase, it was everything here. We were basically
erasing everything. Now let's do the inverse to show you everything
in reverse. Let's do the diffuse this time. And you can see the
opposite happening. One last thing I
want to talk about, let's take a look over here. Let's say we want
to erase this area. Make sure everything
is turned on. Now you're going to find yourself pretty much
erasing everything. First off, let's make it
a little bit smaller. Right click, and let's
go find alignment. We see a tangent wrap, Let's start with B's and do that same area you
can see we can now erase without having to
adjust to areas next to it. Makes it a little bit easier. That helps us to do
adjacent racing, but like I said, this
is something you can definitely have
fun with if you want. Change out different patterns, make different shapes
to see the same thing. It's something that you can have fun with because
this is Editable. First you click on the curve and then you click off of it. It should also be
noted that you can do 90 degree curves by
just double clicking like and then making it return. You can do that as well. So with that said, what we've covered here
is the basics of brushes. We wanted to go over how
to manipulate brushes, how we can plug in different alphas and experiment
with different things. Another thing that we wanted
to do was talk about how we can in certain
parameters, for example, if we wanted to erase
nothing but just the color, but keep the specular
information there, we could. That was something that we
wanted to see have happen. Any interesting highlights that you might want to
do, you can do. Think about how that
applies to bump and normal. This is about showing the expanded boundaries of
what you can get away with. From there, we're
going to then move on into the next layer where we're going to
be talking about, fill layers and masks. And that's going to be
a super important one. We wanted to show
you this one out of context so you
understood the tools of the newer substance painter
so that you could do what we have very encouraged everybody to do and that is go
beyond the concept. This is an example of having
an arsenal tool that you can use creatively to go beyond the concept
for texturing. Please feel free to
use the path along in addition to anything
that we texture with. That said, stick
around and stay tuned.
6. Understanding Fill Layers and Masks: Okay, so let's continue
in this lesson. Now we're going to be working on giving you an introduction
to fill layers. Now fill layers is going to be the bread and butter
workflow that we work on with our main and more advanced
model, the helmet. Understanding the
anatomy and how to manipulate it is going
to be important and how it differs from paint layers and why we're
going to be choosing that. Finally, we'll be
finishing this off with doing a
demonstration of creating a mask over a fill
layer and how we can manipulate it with the
basics in substance painter. Let's go ahead and get started. Now if we look at everything, go ahead and left click
and delete all layers. Now before you will take notice that there is a add
layer paint brush. Now that is how we
create a paint layer. But to the right we want
to add a fill layer, That's that bucket with
a drop coming out. Once we do that, we see
a fill layer come in. Now your color may just be like a default gray
and that's just fine. But if I change
around the color, you can see all
different colors. Basically, a fill layer affects the entire model or more specifically the
entire texture set list. Now as we said earlier
that fills that the properties little tab workspace details the anatomy
of what you're selecting. Since we're selecting
a fill layer here, we can go through and check out all the
different features. Let's go ahead and
dive into that. If you look this
little representation, this is what covers
all the fill layers. It's in the UV section. If we go through, we see like how everything can be manipulated through
the tiling of it. It's actually nice to do that, but if we take repeated
off and hit none, we can manipulate fill layers to be in quarantine sections. Now, we don't normally
do it like this, but it is nice to give you an idea of what this little border
barrier represents. If of course we turn the
UV rep back to repeated, it doesn't matter really
if we turn it down or not. Let's go ahead and
go through all this. Now, in fill layers, we have different channels
representing different maps. Now, these maps
don't necessarily represent the maps
that we baked out. They're just maps based
off of the preset that we created when we went up here
to hit file, new project. In this case a height map, spec map, normal map, glossy and emissive
map is plugged in. There is no custom maps that we made like our
ambient occlusion. We can see nothing gets
plugged into here, it's just a blank slate. Now as we go through
the more advanced ones, as we go through different
set ups or presets, like when we go to File
Project and hit New. As we go through different
templates we'll see different, will have different settings. Like take the PBR, metallic roughness
with alpha blending. That's going to have
a different set of channels for
us to go through. Like for example spec
will no longer be there, it will be more of
a roughness map. Glossiness also taken out
will also have metallic maps. It's different presets but we chose this one because
it's a little more simple. Additionally, like we did with the eraser and like we
did with the paint layer, we can disable all
these channels. We can only effect
a specific thing. For example, left
clicking on each of these channels means
whatever happens, we're not going to
affect spec glossiness, height, or anything like that when we are working on here. Now if you recall, I did say that we are going to be working primarily
in color and how to manipulate color through fill layers
and masks because it's a very important
foundation to have a strong skill tube because it translates
to so many things. The other thing is,
is that fill layers create things a little
bit easier for us. For example, it's just one color at a time per layer that
we're dealing with, as opposed to a mass. As opposed to a paint layer where you can have
like, for example, a multitude of different
colors going on in one layer. And that can really, really get pretty confusing when
you're trying to clean up. Because some of the more
advanced texturing processes that are done in
substance painter really do require
some organization. If we can keep things labeled
one thing at a time like this fill layer is red color, we know that it's just applying to a
diffuse of a red color. That's how it works. It affects the entire model
and it's pretty easy. We have extra features here which we are not going
to go too much into. But you always want to make sure everything is simply put on repeat and the projection
is done this way. We're going to go ahead and
do one more demonstration, and we're going to try
to show you how we can manipulate fill layers and
give you through a mask, give you the basic foundation of our fill layer
texturing workflow. What I'm going to do for that is I'm going to go
ahead and right click. And you can see where it says duplicate layers from
the Mac it's command, it should be a different
key for the other one, you'll see a copy
of that fill layer. I'm just going to
go ahead and change the color to a blue. The whole model changes again
because it's a fill layer. Now this time what
I'm going to do is I'm going to put a mask over it. In other words, think of it like a black sheet that covers
everything up on here. That what happens is all you see is what's below,
which is the red. To do that, I'm going to left
click on that blue icon. I'm going to first
double click and hit blue Color. Do that again. Left click on that blue icon. Then right click and
hit Add Black mask. Now a mask is represented
by a little bit of a second color icon that's
usually white or black, or any gray value between that goes
adjacent next to this, you can see what happened. It basically covered
everything up here. It's quite frankly,
near invisible. It's almost no different than turning the visibility
of the layer off, just like you would with red Turning the visibility
of that eye off, again, that's because
of that black mask. If we go through left
click on the mask, we get a whole
bunch of options to manipulate that mask,
including invert mask. Now if you want to know
what invert mask means, it means taking every value of what is black and
making it the opposite. This is a black mask, it becomes a white mask. If it's a dark gray mask, it becomes a light gray mask. It just inverts the values. If we make it now a white mask, we see everything that's on top. Now the whole layer of the blue color fill
layer is being shown. Now this is nice because
what happens now? I'm just going to go
ahead and just go back to add black mask covering this up. As we see right now, we get a little bit
of an understanding. Everything that is white, you see through
everything that is black, is darkness, It covers it up. You can go through and apply this principle in
any way you see fit, including for example, just editing it and painting certain portions of the mask. Now we're going to do this, we're going to go ahead
click on this black mask. Now there are four primary
ways to manipulate portions of the mask that we see some of
it coming through on here. Or inverse the mask to have some of it bleed
from the mask that is below. Those four ways are we can
paint the mask like so. If we left click on the mask and then left
click on the brush, we get an opportunity
to paint it through white or black values
through the gray scale. If you hit the right
click mouse button, you can see all the
different types of gray that you can go into and we can paint
the mask back like this. The second way, which is also very common
is we can select portions of it through
the polygon Phil. Now the polygon Phil has
four subcategories of its own in how you want to
bring back more details to. Let's go ahead and talk
about that for a second. If I left clicked on this
and just reset it to a black mask covering
everything up and I wanted certain things
of the blue to come in. Well again, I could do it
through a white version and bring in that blue
because this is a black mask. And we want white to be what has some things up
here come through. Or we can go through
polygon Phil, and select the different
ways we can do it through portions of the model. Like in this case the first
one is one tri at a time. We can go through and do
it through polygon Phil, which is two tries at a time. We can also do it
through mesh, Phil, which basically covers
any separate piece of geometry like you see here. Or we can do it through
the UV chunk fill, which if you look over here, is determined by the UV's
that are set as you can see. Now the last way is more of that updated version
of everything. It's the way through
the paint, a long path. You can edit it through
that way too as well. But you've got to
remember to set the proper gray scale to be opposite of what
the mask is here. You can see you can do
the same thing here, just like we did
in demonstration. We can manipulate
mask flow that way. It can be a little
bit confusing, it can be a bit crazy. I know that was three
ways and I said last. But the final way was
through mask generators. That's going to be something
in the next lesson that's going to
get its own area. But I wanted basically
to recap and give you an understanding
of how masks work. Again, if this is a blue layer and we want
to cover it up and have certain aspects of it show add a black mask and then
click on the mask. Decide what you want to see
in this blue layer like so, either through the
process of painting it manually or selecting certain pieces to
be blue through the UV chunk fill or doing
it through the path along. Or finally doing it through which will eventually be showing you mask generator. Again, this is all done
through a value of white. Because we added a black
mask, it's the opposite. So we're having
things come back. If we added a white mask, we would basically say
to ourselves, okay, what do we want to bleed
underneath here, the red shows. Well then again, you would
first then have to hit the X key to switch the value or hit right
click to go back down. And you can just
simply punch holes in the mask to allow
the red mask to see. It's a little bit of
a tricky thing of a process if this is the
first time you're seeing it. But we thought it
was very important to do the basics here. But feel free to hit the x
key and just switch between, you can make all sorts
of funky things, but this is the basics
that we want to go through to get you
an understanding of it. The next lesson
we're going to go over mask generators and how we can edit things a
little bit more procedurally. In this whole process, we're going to be building
off of what we've learned. Again, my advice to everyone is re watch this video but
also keep practicing it. Again, keep practicing
understanding what white does to a black mask, what black does to a white mask, and how it gets affected
to the layer below. Just practice with two layers, one with a mask and one
without to really grasp it. With that said, stick
around and stay tuned.
7. How Mask Generators Work: Okay, so let's continue
now that we've, hopefully you've
gotten a little bit of practice going back and
forth between adding white masks and applying brushes with the
opposite value to understand the process
of what black mask does to cover up or versus white mask on a blue that
lets things bleed below. You've gone through
and practiced that a couple of times,
If not, that's okay. We'll go ahead and we'll
just go through this some more because
you're going to get a lot of practice on this. It's a very important
foundation to understand what I'm going to do. Now, I'm going to show you
that fourth and final way, which is creating a mask
and adding a generator. Now a generator is
like a smart mask, and I should probably talk
to you about a smart mask. If we go to the left here in the assets and go
click on smart masks, you see all these weird
looking interpretations of types of occlusions through
black and white values. You may be wondering
what all these are. Well, these masks take baked out maps that
we made and apply them into certain channels
to procedurally generate a look through a mask. In other words,
it's covering it up in a stylized way through a procedural process
and you get all sorts of different looking
procedural processes. It may seem a little
bit weird and off the best example is just simply to get in
there and show you. Now, smart masks
and generators are almost the same thing because pretty much
all the smart masks, almost all of them,
pretty much are using a generator
in the process. That's what we're
going to be doing. But we're going to just be doing things a little bit more broken down by simply manually
adding a generator. A generator is going to
be a procedural process. It's going to be used to blend these two fill layer
colors together. We're going to go from there. I'm going to left click on here. I'm just going to
start new and fresh. We're going to just go ahead
and just click on here. Delete the fill layers. I'm just going to start,
I'm going to make one fill layer through
clicking on that bucket. I'm going to turn off all
the channels because again, all I want to work
with is color. And I want to teach you how to manipulate and only organize
things through color. Next thing we're going to do is we're going to
choose a little bit of a greenish gray like that. Then I'm going to call this base color. It's going to be the
color we see the most. I'm going to go ahead and
create another filler, and I'm going to
drag this below. And I'm going to go ahead
and do the same thing. Just give you any
opportunity for repetition to just say this is all about manipulating color. Let's not think about these
other channels just yet. Say that to the more advanced. I'll start by clicking on
this little clicker here. I'll get that color. But then maybe a little
bit more of higher value. I'm going to call it Edges Edge. Where, all right,
what I want is I want this layer to affect
things on the edges. And I want this to be my main
base color for the model. First thing I'm going
to do is I'm going to apply what we've done before. I'm going to add a black mask. Now we're going to
add now a generator. By first clicking on the mask, right click on that mask, then then saying, a generator below a
generator will apply. Nothing's really changed and everything should be expected a dark mask covering up
this darker base color. Let's add a generator. If we click on generator, we can go through and
choose a variety of things. I'm going to choose metal
edge were if we click on it, we can see a difference
in what's going on. Here we see a little
bit more of a shade. It right now is giving
me the inverse opposite. What I want is this light color to be on the edges,
not the dark color. That's because I assign
this as a black mask. When I should have done white, if you're dyslexic, it can
get a little confusing. Not a big deal because when
you get a generator and you assign a parameter onto it, you get a whole bunch
of new parameters to work with and to
invert everything. So that you see the
opposite effect of this and switch
places on everything. You just simply hit invert, and now you can see a
more parameter version. Now you're wondering
how does it know to go onto all of this, see how the white is
now bleaching in, in all these metal edged areas. How does it know to do that? That again goes to how the
maps that we broke out, like curvature map as well as
the ambient inclusion map, they're all being plugged in to work a certain look on here. We should have baked a
world space normal to help, because it does use that as well to give us more of a look. But we can go ahead
and work with this. Now if you take note there's a whole bunch of parameters
and I want you to just simply go through
and mess around and start having teach yourself how
to know what affects what, you cannot learn
anything without first going through the process of moving things around like metal edge
smoothness like that. A little bit more
curvature weight should always be maxed out, but you can see already
right off the bat, we have a little bit
of what we want. However, there is a
little bit of a problem, this whole generator affecting
just the entire model. Maybe I don't want it to
affect the entire model. I want it to affect certain portions of the model.
Well, that's possible too. We can definitely work
with that as much. To do that, we're
going to have to show you and explain some of the limitations
about a generator. When you add a mask, you can edit it through paint, through patho, the
polygon fill, and so on, but when you add a
generator on there, you can no longer edit anything. So we're going to talk
about how we can manipulate that and get that back to help you organize
a little bit better. But one thing I do want
to take into account is now that you
have what you want, feel free to manipulate the color of this
a little bit more. Because that's what I
like about all this. It's not like a paint layer. Once you paint it, you got it. Once you have multiple
colors, you got it. It's one color at a time, dealing with anything you want and combining it in as
many places as you want. In the next lesson, we're
going to talk about how we can manipulate this mask here to cover up certain areas like maybe this bulb here is
not what I intended to be, or maybe the lights here are
not what I intended to be. Just to help you get your
bearings on everything. With that said, stick
around and stay tuned.
8. How to Edit Generators : Okay, so let's
continue this one, we're going to do some editing. Now to our generator we see we have a basically
consistent cloudy texture. So we want to go ahead and see if we can
clean some of that up. First thing I'm going to go
ahead and do is I'm just going to go ahead and
duplicate this layer. Now I'm just going to go ahead and just add just once again, another black mask on here. What we'll do is we're
going to simply paint back all the areas around here
like we can ourselves. A little bit more
of a variance of control different from before. Now if you're
saying to yourself, well maybe I want to
cover up this area. I would use like
this globe area. I would use another
fill layer and assign a texture for
that on its own. You can see what we're
doing is we have the exact same color
covered up with a black mask and it's covering the procedural processes that we see covered up all around us. This can be helpful in making the revisions of
deciding what you want to see in this procedural
process before and after, to give you a little bit more of a variance if you would like, just to give you a
little texturing. That's just something
that's fun, that we can do. Just to give you a
little bit of an idea. Now I've been
covering it up with 100% pure and 100%
black or white. Don't forget, you can
also turn down the flow. Hit the X key to
invert it and maybe bring this down a
little bit if you want. Maybe go Y or X
key again to bring it in just very subtly, you have different
intensities on the side. It's not 100% loss. Now again, we're focusing
only on color and how to manipulate color
in different opacities. Keep that in mind. Now next thing we're going to do
is we're going to take everything we've learned and we're going to see
if we can try to apply the same concept to
this little barrier here, this little border area here. And this little outer ring here. Finally, to the fin, this little fin
that we see here. Let's go ahead and see
if we can do that. I'm going, I'm going to double click and call this
base color correction. Now we'll go ahead and make a new fill layer with this fill, we'll call it trim. With that, I'm just going
to go ahead and disable all the channels because again we're working
just with color. Then I'm going to go through and turn the visibility of it off just so I can
see the color here. Because what I'll
do is I'm going to click on here and I'm going to click on this little here. And then left click to get a
sample of the color we have. And maybe then bring
it directly down. We have something a
little bit deeper. We click on that again,
we can see what we have. All sounds good. Looks good, Everything's there. Fair enough. Let's go ahead
and add a black mask over it. And I want you now to try
and use everything you know to get to manipulate
this black mass, to color around the corners here and color the
area right here. Now an easy trick, just a little heads up, is to do it through the UV
set section right here. Just keep that in mind. If you have to switch
your alignment right now, I'm just going to keep it at tangent wrap and see
what it looks like. But I'm just going to hold
left command, right click, and translate that up
for a hard texture. Left command, right
click to change the, the size, the radius, size of my texture here. It's like it's a
little trickier here. All right, and I'm just
going to go through here. I'm just going to take
a look right now. I'm also going to manipulate the space as we see here down. So I don't have anything
going too crazy. I'm just going to
bring this across now. It's going to look a little
bit dark. That's okay. I'm just going to clean up
a little bit like this. I'm just going to go ahead
and just bring it in and then I'll just minus it off
on the outside now. It's a bit dark, so let's
go ahead and change that color out. All right. So something like that maybe. All right, we're getting a little bit more of what
we want to see here. Getting a little bit of
an easier time on here. Let's go ahead and go
through the process of just minusing everything off
here. Let's click on there. I'm going to hit B. I'm
just going to simply, this is again the practice
where you're just practicing hitting x key and back and forth between
the x value and the y value to just give yourself a little bit
more of a tangent space. I'm shipped also and doing it in short burst to
give myself a little bit of a room to execute, it looks like we got
a little bit there, can kind of see what I'm doing. I'm just taking my time. All right. A little
bit more here. That was the wrong one. You
can kind of see what I want. I just want to have a
little fun taking my time. All right. So we see
that taken care of. We can do the same thing
now with the strove lights, but I'm going to
save that part for the last part, this whole area. Now as you can see, we have a little bit of our trim taking care
of now that we have. I want you to take
note that diffuse like Photoshop has different
blending modes on here. I want you to look at all the different types of
blending modes that exist. Like for example, there's
a screen mode which is a, you know how screen mode. If you're familiar with how the blending modes
work in Photoshop, this is pretty
much no different. But it's also
important to note that you manipulate the opacity, So I can also take
that same color, and if I go in to multiply
and turn it down, I can get something
very similar to what I have here as well. That too is an option If
you're looking to go through, I see that we have
forgotten this area. We can go back here.
We don't have to go through brush
to brush on this. Let's just go ahead and just simply deselect it
through our polygon. Fil. With that said, as you've seen it done here, your next lesson is going to be about trying to get
the same thing done. But this time I want you
to do it for two areas. I did a demonstration
on this border area. Now I want you to do
the demonstration for this outer plate area. I want you to also see if you can do the sub area down here. It's not too easy to see, but we're just going to go
ahead and let you do it. This is about exercises quizzes. Now that you've
seen it done here, recreate and do
the same process. Remember the color
that you see here. Look again at trim dark, I set the blending mode to
multiply and then I turn the opacity of the entire layer down here to make it re blend. Keep that in mind, you have to be experimenting with
all sorts of variables of functionalities on what substance painter
can do with that. Said, we'll do a real quick one. I think I'm going to texture
the fin out as red here. We'll go ahead. I wanted a
pure red black on there. I just want to put
it in like so. All right, so we got a little bit more of that taken care of. When you see the next lesson, you should see something very similar to the outer barrier. Again, we're not doing the outer barrier on video
because we want you to do it yourself because it's
the exact same thing as we did right here. With that said, good
luck on trying to get the outer portion
of this textured. This is your big quiz
before moving on, and don't forget to change the opacities after
you set them from multiply down to 57 or
whatever you see fit with. That said, good luck and
stay tuned for the next one.
9. Emissive Breakdown: Okay, so let's continue
in this video. We're going to finish
up by showing you a second way we can
manipulate generators instead of simply just adding another fill layer on top
to edit everything out. Finally, we're going to go over how to go through
a bonus part of this, which is give you
another channel to work with on emissive effects. Just to get your feet wet, to surprise you with a lot of what's to
come down the road. Now, I know we said we'd
be focusing on color, but since we're
ending the near end, I wanted to introduce you to
a second channel to help you understand and get you warmed up to the PBR workflow
of texturing, because you're going
to be working with multiple channels
like roughness, height, normal, et cetera. So let's go ahead and get
started Now, before anything, I'm hoping that you did the
texture border your way. Now, some of you may have done it the old school way like we did in the video where you just hold shift and went
all the way around, very well could have
done it that way. Another way you could
have done it was you could have just
simply gone through the whole process Just by
selecting everything and hitting X and selecting
everything back, that too would have
been acceptable. Either way, as long as
you get the result, that's all I care about. What I'm going to do now
is I'm going to show you one last way we can
manipulate generators. Now. Again, let's turn this
base color correction off. I'm going to show you how we can manipulate generators
through folders because I want to also give you an opportunity to
introduce folders into and how we can organize our layers through
a folder structure. Because that too is going
to be a big, big deal. Because if you think
this is a lot, you should see how
far we can take it further down and folders really helps us
keep us organized. First things first, let's
look at that base color. That's the one with
the generator. As we know, when we try to click on the left max of
that generator, we can't do anything in any
value, we can't edit it. One thing we can do though is
we can create an ad group. Now ad group is just going
to basically add a folder. You can call it base color folder and then left click on
that layer and drag it in. If you click on it, you can
collapse it or bring it back. Just like fill layers, you can just left click
on the folder and add either a white
mask or a black mask. I'm going to add a white mask because I don't want
anything to change. I'm just going to click on that folder structure and then you can see we can manipulate
things that way as well. Of anything that is on the
bottom is going to show, whereas anything on the top
will not, bottom will show. That's pretty. Anything on the bottom will show because we're covering
up what is on the top. That said, that's just
one way we can do that. I just wanted to point that out before we bring our
folder back in. So with that said, let's go ahead and talk to you a little bit more about
emissive because I'm going to do one last texturing revision and we're going to add a little bit of Is 0, missive texturing
onto the saucer, particularly on the bulb and possibly these
lights around. Like before, I took my
fin name for the fin, I just simply called it N fin. I'm going to add
another fill layer this time I'm just going to turn off everything
except gloss and emissive. Now emissive is a channel we
haven't worked with before, but if we turn it up, you can see how the
ambience is cranked up so high it doesn't really
do anything to us. It just makes it pretty
high and bright. Pretty much cancels
out all noise. With that, I'm just going
to go ahead and call this bulb more bulbs and I'm going to add
a black mask to it. We can now paint
this in any way we see fit from a process of making a soft mask with a
low flow and just bringing the missive
in That way We can, of course, if you do
that, don't forget you can see when I pass
it splashes onto here. Let's go ahead and hit
right click and look for alignment and change it
from tangent wrap to UV. See if we can do the
same thing now and we can get our results like so. Now if you take a look, let's see if we can
duplicate this again. I'm going to double click
and call it small bulbs. And I'm just going to
add a black mask again. This time I'm going to change
my selection to polygon. Phil, I want to select all these bulbs
around here and here, make sure my value is
straight to white. And I'm just going
to go through, I'm just going to
select everything. See how fast I'm
getting through it all. That's how it's meant to be. I'd like to change this to
a different color, maybe. All right, so we have
a different color now. This is all stuff
that I would say, we're getting ahead
of ourselves. We were supposed
to really be about just talking about color and
keeping you focus on color. But again, we wanted to show
you a little bit of missive. Now if you're wondering
where's the glow, I will say the glow
is part of an effect. An effect for every software requires enabling
different features. Like for example, if we
go up to where it says display settings and make sure that activate post
effects is turned on. Let's say over across
and turn glare on. Then once glare is turned on, let me see if I can
and I'll choose the shape to be bloom again. We're going to go over this in a lot more detail in the final
rendering of the helmet. Then if I go down to shader
settings and go through, let's say missensity,
You can see now that post effect
look that we have. You'll also notice
another thing, and that is that it creates the same glow
across everything. So if you're looking
to manipulate different variables on this, you can just go up to where
it says emissive and change the intensity down
individually through here. Okay, So keep that in mind, this has been more or less just a taste of things to come. Now, in the next lesson, we're going to talk to you
about how we go through exporting everything out that
you're seeing right now. Okay, that's everything from
going through the process, going through the process of seeing whether or
not it's diffuse color. And since we're employing
emissive effects, we're also going to be
showing you how we export out the emissive effects
through presets and so on. That said, please take your
time, have a little fun, enjoy the whole process of this as we go through
everything from there. We'll see you in the next one. Stick around and stay tuned.
10. How to Export the Maps: Okay, so let's continue. In this video, we're
going to go down a brief basic crash course
on exporting your textures. And again, this is why we
wanted to keep our textures so low because we wanted to focus just on color so we could keep things simple for you
to understand it first. We also wanted to let you
know that we are going to go through this
process all over again. A more advanced scale with the textures for the helmet
as that will be more. And of course, we'll show
you how we program and plug that into other software such as the Unity Game engine. Let's go ahead and get started. Now that we have everything that we see here,
we have a color, we demonstrated a little bit of things to come
within a missive glows. If you try to render anything, you're probably
going to see some black and white gray scale. A lot of that has to do
with our non PBR workflow. I'm going to say right
now if you went through new project and through
the same thing with P, B, R, metallic
roughness, alpha blend, you'll probably be
able to get what you need for a render on. But we have a non PBR workflow.
Don't worry about it. We're not really doing
rendering with this asset, we're doing rendering
with the next asset. And of course that
comes at the end. With that said,
let's go ahead and demonstrate how to
export textures. If I go up to file
export textures, let's go ahead and take
a look at what we have, a course three tabs. I want you to take
a look right now at the flying saucer that's
pertaining to the shader. And if we go to the right, we have the general
export parameters. Output directory is detailing the location in which the
textures will be exported to. This is the course,
the template. If you want to learn more, you can go ahead
and click and get an idea of the maps that
will be coming out, but more importantly,
the list of exports. These are the maps
that are going to get exported out with your texture, size, and file type. In this case it's
going to be 2048 PNGs. You'll see diffuse emissive
normal spec glossy. Now the reason you're
getting four is because that's the export process for the non PBR
specular glossiness. If you go through and you can see those four in a
little bit more detail, we go a little bit further
in trying to understand this in the more advanced
export for the helmet. But you can cycle
through and see all the different presets of different maps that
we want to go through. But again, we're
keeping it simple, we're keeping it easy. All we want to do is
just design by left clicking here and finding a place for a file that
you want to go through. I've already designated mine. You go on ahead and click
and designate yours. Everything is going
to be PNG for now. Once that goes through,
let's hit export. Okay, now that we've hit export, you'll see a
confirmation of that. But let's go ahead and take
a look at what we have. I'm going to hit cancel. I'm going to bring in our list to see what we
just exported out. Now if you go through all of this like so let me go
ahead and bring it up. One, you can see the color
map we exported out, and you can see emissive
map that we exported out. But take note to this, this is the normal
we exported out. This is the glossiness
that we exported out. You may have already noticed that they're
completely blank. The reason that was was because if we look at
all our fill layers, we did absolutely no work of creating normal maps or
establishing normal maps. We did no work in enabling any unique texturing on
the Glossiness channel. None of that, it's
going to stay gray. All we wanted to focus
on was just a color map. Right now, the emissive
map was a bonus, but not 100% necessary. Now again, when we
go through this and we're going to go through
this again a second time, we're going to go through
it with a lot more detail, with a lot more maps, Including an emissive map
that's pretty much all black and has all the spots covered
for the camera on the helm, including the emissive
camera inside. Just keep that in mind. This was just to show you
how we export a texture out. When we get to the export
texture of the helm, we'll show you how
we plug those into a shader for another three
D program like Unity. With that said,
this is the basics. This was the start off, you just want to get this far, no farther, don't
worry about rendering. Don't worry about anything else. Just get as far as this point. Understand how to move
the light around, understand how to pan, understand how to apply a fill layer and
put a mask over it. And understand the various ways of manipulating that mask. Through brush, polygon, fill, excuse me, polygon fill
through paint a long path. And of course, through assigning generators as well
as smart materials, I'm sorry, smart masks. That was the main gist for
establishing the basics. And we're going to be building
a foundation off of that into the next lesson which is going to start with bringing in your helmet and baking out
a helmet with a high res. We're compounding what we
did before and adding more. Now if you want to know the
difference between that and this saucer and the
helmet in the saucer. We were just baking its own
model out against itself. Now we have a very
high res detailed mesh created in zbrush and it's projecting those details
to a low res mesh. And that's going
to be normal maps, ambient occlusion maps,
curvature maps, et cetera. We're going to go into
a little detail on that in the next video. So with that said,
let's get started.
11. Baking Interface Breakdown: Okay, so let's get
started in this video. We're going to go on ahead
now and we're going to work on our helmet. First things first, we got to bake out the textures
for this helmet. Now if you remember in
the beginner section, we were trying to do something
simple which was just to make color on on a object, just to show you
how color works. But now we're going to go ahead and take it a
little bit more advanced, where we're going to go with
a PBR texturing workflow. And now that means we're
going to have to bake multiple maps through a high res projected onto a low res. Let's go ahead and get
started with that. First things first,
let's go through file and hit new Change your project. We were starting with
something very simple like non PBR,
specular glossiness. Let's just do something easy like PPR, metallic roughness. From here we need
to select a low res to plug in and that's going
to be our low res helm. Let's go to File Select. You're going to go ahead
and take the FBX file from the website and download
that off and bring that in. We'll hit Open
Document resolution. It pertains to the texture size. I'm just going to go
all the way to 496 and we're going to show you
how we can down that. Just for starters,
normal map format that pertains again to the
normal map on a Mac, but we're also going to be
bringing this into Unity. Let's just do this. Open G L. This model will
also have its own UV, so we don't have to
worry about Unwrap, although that is a feature. Ideally in the game
production workflow. You do want to try and do your own UV's so that they're
readable and clean. But just so you know, a substance painter
does offer that option. So let's get to, okay, we have our model in here. You might get a few
errors down here. Ignore that for now. That's not going
to be a big issue. Go ahead and go over here
and hit the K to the right. You're going to be
looking at a whole bunch of who of UV's. But the one thing I want
you to take a look at is up here where it says
texture set list. Now that is important because we are going to be making two maps. That means that this model
is divided into two objects. One is the the other
one is the helmet, and they have therefore
two different shaders. And this allows us to create
two different UV sets. Now, all this was done through a three D modeling
software of Maya, but it could have
been Blender or Max. It's just where you separate off all the meshes and combine them out and
assign a shader to it. And then whatever
UV's you put in that area will match here. Now, why did we do it like this? Why does it have two
different texture set lists? Well, that's easy because we wanted to give
you more practice. Usually it's one UV map. If you're more advanced, we can talk about
Dems on a later day. But typically we want
to keep things simple. This is a practice
educational model. That's why we have two different texture
set lists to get you practiced at creating and applying high res to
multiple texture maps. With that said,
everything is going to be a little bit different from older versions of
substance painter. This version of substance
painter has a pretty fun, unique workflow in
baking out its map. To do that we first
have to go through and hit underneath
texture set lists, you'll see a tab that says
texture set setting there. We have bake mesh map. You can also look
up here to where this croissant is,
where it says baking. And you can access it there as well along with
hitting, just simply a. Once we do that, we
get a new viewport. It may be a little bit intimidating for some
seeing all these things, but this is going to be
pretty easy cakewalk. Now in this viewport, this is where we take that high res and project
the details on. First things first, let's
load in a high res. Now if you look in
mesh map settings, we can see a whole
bunch of things here. And if you're wanting
to project a high res, that's going to be done here. But first things first, let's go through the output sizes. Now you can choose in
this I'd like you, the student, to go with 2048. If you have a super fast
computer, then go 40, 96, but for most people
I'm going to suggest 2048. That's one of those
things that can really crank up your
rendering time. I'm doing 40 96, just to bypass all of that. As I go down here where it
says high definition meshes, that's where we load
in our third model that we have of the course, the highs of this helmet. Let's go ahead and click
on this little paper piece here and click on
Sci helmet high. Now again that's found in the website from
which you download. Now that we have all of
this we can go through, we see anti aliasing. I'm going to turn this up. We can do supersampling 16, or we can do supersampling four. I'm just going to go with four. For now, there is match which has always
and mesh by name. This model was an optimized
for a mesh by name. And we wanted to do it that way intentionally because we wanted to explain the errors of what happens when you have
mesh by name, not there. Now you may have noticed
also this changed into blue. That's mainly because of our
high res coming in here. You can even see a little bit of those details coming
in right now. Additionally, you get some
baking visualizations, but we'll go over that later on. The second half of this
bake, now that we have that, if we go through,
we're going to talk about mesh by name towards
the end of the course. And of course, low
poly mesh suffix, high poly mesh suffix
applies to mesh by name. Again, we'll explain that. The mesh map bakers, these are all the maps
that get baked out. The high res maps that get baked out and they
are then in turn plugged in and used for procedural purposes of smart
materials and smart masks. For example, there may be a curvature map that maps out all the curves
around here and creates a pretty cool she smart material can make a cool little
sheen map where all the curves are
and it's using procedurally baked out processes
from the curvature map. Again, this is why we
need mesh map baker so we can work with our smart
materials and our smart maps. Now with that said, I want you to take
notice that again, texture set list is up here and we're going to go ahead and left click on
the attachment. First means that we're
going to be baking this out twice because it has
two texture set list. We're going to start
with just the first one. If we hit bake
selected textures, it's probably going to
bake everything out. I want you to bake one
texture set list at a time and if you select bake attachment
under this triangle, you'll get that
for the most part. Another thing that
we're going to mention is that if we go back
up to common settings, you see this little cage here. This is one of the
big features that came with 8.3 And
it's a pretty nice, cool feature that we
can manipulate size with through the max
frontal distance. It helps us see all the errors that we'll get if we don't have the proper expansion of the high res cage
where the rays cast. Because we'll get some errors here if we don't cover this up. Generally the idea
is you want to try to keep this as
tight as possible and by of course eliminating
all the red fragments. Now with that, I'm going
to say this right now, even though that's
usually the idea, it's not 100% perfect. Even if you cover up
all the red areas, you may still get some
errors in certain places. You might have to
go still old school and do a couple of
revisions like so. With that said, we have
everything we want. The only thing we need to change down here is ambient occlusion, and for that I'm going to
overkill the secondary rays. For you guys, I'd say 90 to 120 is probably where you want to be if you
have a slow computer. But I'm going to go
all the way to 256, then I'm just going
to bake this. Now again, this is
baking the attachment, in other words, this piece here, and all the UVs for this area, because I have it selected here, it's selectable down here. Let's go ahead and make sure everything is
available to us. Let's just hit Bake, and I'm going to do a time skip so you can see the results. Okay. So now that we've finished out our
bake for the map, that's basically this model and the UV set for this
model that we saw. We got to go for
the second UV set which is for the helmet. Again, this model comes
with two different UV sets. Traditionally, a
model doesn't come with two different UV
sets, it's just one. But this is, again, a practice educational
texturing model. We're trying to give you as
much practice as possible. If you'll take a look, there's nothing right
here that you're seeing. And that's because
we're on helmet. But if we select back into
the eye, the one we just did, you can see all
the maps now that have been generated
because of that. That's confirming that
the bake went through. Another way you can
confirm is if you go to this baking visualization
and turn the eye off, you can see some of the work that went
through in all of this. That said, last thing I would
say is if you hit the key, you can cycle through all of the different maps that
you went through with. That said, since we're now on the baking visualization
and we said we'd go ahead and try
to explain this. This is what we got right
here where my mouse is at. This is a feature added to the more newer
substance painters to help identify visualizations. For example, under the
high definition mesh, we have color coordinations
to help us see. For example, we can have visualizations of
the color here. We can change the color coordinates to be
something different. If you want those match
errors that you see, like when turn,
distance is turned off, you can sign different
errors there. Let's go ahead and undo that. Of course, for the cage is the baking area for
the rays that we see. You can see a yellowish
tan that surrounds it. So you can sign again, different color to represent it. But same thing with the wires
if you want help with that. The UV seams are meant for
troubleshooting anything from non manifold geometry to
softening normals on here. That's a quick
breakdown of that. What we're going to do
next is we're going to repeat the process again. If we go to return paint mode and select
our eye attachment, you can again see all the different UV's that
went through for this. Of course, if you want to
bring it back to its default, you simply hit that key like so. So let's get back
into the bake mesh, either through our
little croissant icon or bake mesh maps button
or hitting the key. Let's go into helmet now. We're going to go ahead
and click on helmet. You go ahead and
set that to 2048. I'm doing 40 96 because I
know my computer can hold it. But I don't want you to
get overly bogged down. If yours can't anti aliasing, I'm going at four X right now. Match by names. We'll explain that
after this next bake. Well, we may actually explain it right during the baking process. But everything
else, if you want, you can select all maps, but make sure you want
to select all meshes. Once again, make
sure to double check your ambient inclusion
rays anywhere 90-120 If you do 256, like I'm doing with
496 output size and anti aliasing turned on, you're going to
have a render time if you don't have that
GPU rendering again, 2040, 84x sampling on anti aliasing and of course 90 to 120 on your
ambient occlusion. So we'll just go into that. The last thing I want
to talk to you a little bit about is actually going to be regarding
the frontal distance. Now, the max frontal distance sometimes works a
little bit differently. I've tweaked a few numbers, and even though we've covered most of the area right here, the max frontal
distance, I found 0.017 And hitting return
will probably give us a little bit easier time
covering some areas that get missed on here point
like maybe down below. And then of course 0.012 on the rear distance
I found helps. That goes back to what
I was echoing before. That just because the cage
is covering and eliminating all the red spots doesn't mean that you fix
all the red spots. There still can be areas in these red spots that we
haven't seen before. Bear that in mind. One thing I also
forgot to tell you, we made our model intentionally, a little bit flawed, so you can understand this hard edges here. Let's go ahead and
do a demonstration of what we're talking
about here on this. If we turn off the mesh on here and give you a
demonstration through the cage, we can see there's
some geometry flaws. That's the stuff that
you want to look for and try and fix
as best you can. Now this stuff may
actually be a little bit more with some things
on the high res but we wanted to make sure that you understood
a little bit more about what errors you can run into that
you want to double check and make sure
are sound and okay. This is what it looks
like right now. We have made sure to bake this through before
giving it to you, and we wanted to make sure it was a sound and clean model. Don't worry if you
get any errors. The bake will go
through and you will be able to texture on
these three D models. We'll go ahead and give
you a little bit more of an update as needed
as time goes by. To recap frontal distance, we put 017 max rear
distance, 012. We're on the helmet one and
you know your output size. Make sure to click on
here, click Bake Helmet. From this point on, let's just go ahead and hit bake helmet. Now we're going to be baking
out this helmet like so. Now one thing to
take into account, and we thought we'd
mentioned this, now it's currently
baking the helmet. The second part of this, if we look over here to our eye, we can see some details. But I want you to
take a look right now at this wire that
you see right here. Notice how it's baking,
also onto here. There's a couple of
reasons why that can be. One is maybe there's some more tweaking to
do in the max distance, but sometimes the
right setting can't get everything because you might be able to
get it right here, but then you're going to get
some issues somewhere else. One thing that really helps is how a three D model is prepared. This FBX Low Res was intentionally prepared so that it could reveal mistakes
and how to fix them. Most of our other
substance painter courses we have optimized a certain way, so this doesn't happen. But we wanted to show this to you intentionally so you could understand a little
bit more about how to fix this problem. One of the most
common ways we do it is if I go over here
where it says match. You may recall earlier that I said there's
a mesh by name. If you switch it to that and then then go through
a baking process, nothing's really
going to change. It's still going to be the same. What you have to do additionally
to this is mesh by name. You have to also make
sure your model is optimized with all the
right naming conventions. That means that all these pieces here have to be separate pieces. With a proper naming
convention of a low res that matches a proper naming
convention. Exactly. Caps included with a high
res and has a suffix that corresponds
with the low res and a suffix for the high
res that corresponds. I know that sounds like
it's a what I just said, like huh, wait what? I'll break this down again. Imagine you are taking this low res three D model and bringing it into
blender or Maya. And you've broken up
all these pieces. Every little individual
piece is a separate piece. This little piece right here is a W's separate piece
from the model, and we call it wire
underscore low, just as it's said here. Caps is important. Then we export this out. Then we take a high res and do the exact same thing,
wire underscore high. Then what's going to
happen is if they're the same piece with the same prefix matching but with a
corresponding low fix, What's going to
happen is, is it's going to bake and match it, name to name to this place. And leave this area right here alone and not
bake anything to it, because this will have
a different suffix name that will keep it
from splotching. Another example like
let's say this is low res here is wire on E
underscore low. We would also have to go into
our high res and make sure this exact same wire is called
wire one underscore high. And then they will match
together and bake only here and they won't
splotch into here. Now in most of our other models, we just had them already pre
created in a different way. But we wanted to
show that to you and reveal some of the flaws. If you prepare a three D
model in a certain way, what it can look like, sometimes you can fix some of this
and sometimes you can't. Now let's take a
look at these wires. You may look like there's some
baking errors right here. Well those baking errors are
because the high Res does not have any wires to match in the exact same proximity
base for baking. But that's okay. We're going to go ahead and cover it up anyways with some color and you won't know it's
even really there. But that's said, let's
just go ahead and let this bake and we'll
finish the lesson. Okay, so we finished our bake
now and we have our model. Let's go ahead and it
out to return to paint. And you can see now we have the designated model
that you see before you. If we hold shift
and right click, we can rotate around and
see everything on here. Now the next step will be to go on ahead and
Texture again. If you want to hit the key, you can go through and cycle through all the
maps you went through. And then of course if you want, you can go through and hit
the M key to return back to a default if there is anything
that you want to fix. For example, this
area right here, we see some blotchiness
that comes from. Again, two separate
areas that mesh by name could fix
right around here, But it's not really
too big of a deal because it's going to be
very dark and covered up, so you're not going
to really notice it. But aside from that, feel free to experiment
as much as you want. One thing that I
forgot to mention, that's going to be
real, super quick. Now that you get the idea of
how a baking process goes, one thing you can do is, first off, after
you've established your bakes for both maps, go ahead and save out the file and make sure
everything is saved. And then go through the process of maybe select all mesh maps. One thing that can
be done is you can just select just
the ambient occlusion, Select your rays to
be really super low, and then go up to
common settings, Select maybe like 1024 and
turn off super sampling just to do a quick little
bake that you can do some guest tests to revive
all around the area. That's just going
to be something to take into account
later on down. That's said we're going
to move on now into the next lesson where we
will begin texturing. Stick around and stay tuned.
12. Laying out Frame Base Color: Okay, so let's begin
now in this lesson, we're going to go ahead and get started texturing our helmet. Particularly the
frame that surrounds all the areas such as
the temple region here, the mandel jaw area, and the cerebral area on
top in the face plate. We're going to start
there, of course. To do that, we're
going to be working on doing a start off
base palette with some smart materials and then how we can categorize
and organize them under a folder through
which a mask will be in control of designating what gets seen and what doesn't
get seen through all of it. Let's do a demonstration of
all that now before I begin. If you're on texture
set settings, go ahead and choose a lower
resolution if you want. For me, 40 96 is fine for now. But I wanted to do this so I could show
you that you could just down to lower versions to help improve your frame rate. That's just for you to know. Let's go over to layers here. If you remember, our
little spice rack. This is all the ingredients we pull over to the
right side here. Let's look for something like
steel scratched for now. I'm just going to go
ahead and work with that. You hold shift and right
click. You can see that. All of that. I'll also put in, let's see, plastic glossy. These are two smart materials
that I'm adding and I'm drawing them all
the way over now, one is covering up the other one if I turn the visibility off on the top one and then you'll see what's colluding
on the bottom. And of course,
we're going to just go through showing you a little bit more
about smart layers. Now remember, smart layers, or I'm sorry, smart materials, my bed are basically
a material that's compiled of several
different layers to create a desired
looking effect. If I like, they're
generally going to be identified by having their own little
folder structure and a whole bunch of layers. Some are small, like three, others can be seven. You can then go through all
these layers and of course, edit the attributes
as you see fit. In addition to this,
if you can recall, we are now working on
a PBR metal roughness. If we look up in a layer, you can see a channel for each of the materials
that we start with. We can now edit the opacity
through that. What do I mean? Well, let's take a look here. This bumpiness
that you see right now from the plastic glossy. Let me turn that
off. Let's go ahead and maybe tone down
this bumpiness now, what causes that,
you should ask? It can be either the normal map or it can be the height map. Generally, we can test
to look for where it is. We can start with height
map and click on that. If we click on that, then we
can go over to the opacity. And we can see already
that by changing out the opacity to
make this a little smoother can have
some effects on here. No, I'm not sure if there's too much manipulation
on normal map from it. But you can experiment just
to see how it changes. It doesn't look like there's any really it was height map that was affecting
all that bumpiness. Now we have a little bit
more of a sheen here, but think about roughness. You see some areas are dry, some areas are a little
bit specularly different. Again, what would that affect? That could affect the
roughness channel. So you can go ahead and go to the roughness channel and then manipulate
things like that. It's almost like working a
fill layer that's custom. Now that we have all
of that taken care of, let's make a folder that's
going to basically have a mask attached to it and it's going to hold
these two smart layers. And it's going to basically hover and cover out
all of the frame. To do that, we need to
first make a folder, and that's usually
in the folder icon above ad group to switch
back into base color. Again, let's go ahead and drag in our two smart materials. I'm just going to
double click on that folder and
just name it frame. Now from here, let's just
simply add a black mask. Adding a black mask
basically means everything in the folder is now covered up because
the mask is black. Anything that's white, it shows anything that's
black, it covers up. Now we can paint
this and reintroduce certain sections through
either a white brush or a selection tool or so on. Again, I can paint the mask back like I
just clicked on a brush. I went all the way
down here and this is where we manipulate
our gray scale. In addition, you can
hold right click and get the same process here. I'm going to hold
command Z to undo that. Again, hoc keys for
undo are also up here that we can paint
things this way. We can hit the X key
and paint back out if we want because
we're switching between black and
white over here. Or we can do it through a
selection polygon pill, which if we click on here, we see things change again. We can do this
through polygon pill, we can do it through mesh pill, or we can do it through
a UV chunk fill. Now of course I'm going
to choose UV's because I can recognize the UV's
that I want to see, and I see a white mask. I can just simply
direct marquee, select everything that I want. You can see how
quickly I can get, all the pieces want to have
textured applied on here. Now if we take a
look around here, we've got most of everything
that we want on this frame. However, some areas like right here are going to have to
have another solution, either brush or maybe polygon. Phil, where we can go
through the process. We can try it like this,
but you see you wanted to hold through this line. Maybe a brush might
be a better solution. Make sure it's hitting
X and you can paint. Additionally, hold
shift, tap, left click. You can do it this way.
It also goes without saying because this is a newer version of
substance painter, a fun one to work with is
also going to be the paint, a long path like right here. Let me show you
with an X modifier, you can see that's what we
mean by paint a long path. So let's go ahead and do this a little bit
so you can get a idea. Because I want to show you another way we can
do this before we end this one
paint along path. We can also do as
well where we just simply can manipulate things manner. That's also an
opportunity as well. I want you to think
that there's a lot of different ways that we
can do all of this. If we want, there's no right or wrong way arriving at the same
solution several times. Go ahead and go through, just get through all the pieces here and see if you
can get a frame. Make sure that you get
this area right here. That also means if you need to, maybe modify the
brush a little bit. Maybe for example, the
hardness of the brush, That's fine too, just to give yourself a little
bit more time on it. Take your time, because
in the next lesson, once you finish this area, we're going to talk
about blending these two fill layers together through a generator and continue on with our lesson of
combining smart materials. Because again, don't just
drop smart materials, Do something with them, edit them in any
way, shape, or form. Like for example, we're
going to be doing a generator to cover up some of this to allow the steel
scratch to show through. As you can see, that's going to
look pretty good. But that said, stick
around and stay tuned.
13. Creating a Frame Generator: Okay, so let's continue
in this video now. We're going to learn
to blend together our two smart materials
that we created. And we're going to also
learn a little bit more about other
assets that we can use in our asset shelf such
as dynamic brushes as well. To blend a little bit easier
between the two materials, as well as learn the
symmetry feature within substance painter. Let's go ahead and
get started now. One of the first things
we're going to do is we're going to do a little bit of editing on the smart material
plastic glossy. Because blue is default color, that's not necessarily
what we want. I did remind everyone we want to keep things a little bit on. Remember, it's used
for a base line, it's not taking
it at face value. Let's change the color. Let's keep it simple. Let's just worry about looking for color. If we do that, we first of all open up the smart material
for plastic glossy. We say to ourselves, okay, I want to
change the color. Probably the first
layer where it says plastic base is where
color is going to be. And you can already
see the anatomy of the fill layer in which
you can go in and change. I'm going to choose maybe like a little bit of a red
is looking color. Maybe a slight
dark, reddish look. Something along those
lines right there. That might be a little
bit easier for me now. From there, we're going to
close up that plastic glossy. And now I'm going to add a generator to the
plastic glossy. It starts covering up
parts of that material, the plastic glossy, so
we can see a little bit more of the steel
scratched below. To do that, first we'll
add a white mask. You're going to
add a black mask. A white mask is what
I'm going with. And I'm going to say hey
add generator again. I left click on that mask and then right click and
hit Add Generator. Now a generator is almost like a manual set up version
for a smart mask. We may go a little bit
further into smart masks as they are pretty important for substance painter as well. But we wanted to get
you started with this since metal works
really well with it. Once you get a generator
and you're clicked on that, let's just click on
the generator and I'm usually going to
choose metal edge. Were if you look at it, nothing really changes on here. It just seems almost like
it's covered up in some ways. Let's go ahead and invert
that mask already. You can see some of the details now that show because of it. And I'll show you an on and off representation
feature there. That's one thing that we can do. Now feel free to go ahead and experiment with
the generator and turn all sorts of ***** so you can get the desired
effect that you want. But I wanted to give you an
idea of what this looks like. Again, if you want
to invert that, you can either invert the mask by hitting
right click invert mask. Or you can simply go to
invert down here and generator and
invert it that way. Maybe I want to go with a little bit more
smoothness on here. Maybe I want to go
through the were. Take a look right
now and you can see a little bit of
bumpiness going on here. What that is is that's the
steel scratch that's making that bump because it's bleeding in and it has its
own bump value. If we turn that
down a little bit, you can make that
go away as well. Additionally, I might go through the normal and just play
things a little bit safe just on both ends. So we can have something that focuses more on roughness,
on all of this. It's like a worn paint. Let's go through this generator. I find that the wear is a
little bit high to my liking. I may want to just keep it something simple and
relatively simple like that. Just to start off with, once that's taken care of, one thing to take
note is when you assign a generator or
even a smart mask, you can't really do
too much editing into the mask because it's
procedurally plugged in. You can't edit it like we
did with the folder frame. When a procedural generator
is attached into this mask, we have to do a couple
of other things. One thing I'd like to
do is just simply add another folder and put
that folder in here, and I basically will call
this folder a plastic. To keep track of
everything that way. Now if I wanted to
occlude everything, I can just simply add
a white mask and go through and paint and continue editing more
details on top of the procedurally
generated details that we have attached here. Again, this goes to you. There's no wrong
way in any of this. You can go through and edit this all to your liking
where you see fit. This is not something that is a right or wrong
answer right now, it's just you having fun. I'm going in with
something like this. When we're done with this, the last thing that we're
going to talk to you about is the symmetry feature
and how we can manipulate it with
some dynamic brushes. Now, dynamic brushes are not something that we talked about, but similar to generators. Dynamic brushes take
advantage of what's going on with the map
to give you an idea. If you look at that generator
we scribble down here. You remember those
maps we baked. Some generators use
different things, but in this case
they're utilizing what was baked out from the
high res of the curvature, the ambient world, space, and position to help us
give us this desired look. Dynamic brushes,
which is all the way up here, does something similar. It will probably
work with the normal to help create a dynamic
flow work through. Let me give you a little
bit of a demonstration. I went to my assets. I chose where it
says brushes here, and I'm going to go
with leaks for now. Now what I'm going
to do next is I'm just going to go to that
mask that we just made. And I'm just going to
paint through like. So now I think we
got a bit of a, I forgot one thing I
have to do with these. You got to double click them. But if we paint through, you can see a dynamic effect. Now it's of course on a mask and this is a white
value. I got to hit X. And you can see a little bit more of an effect go through. You can see we're having a
little bit more fun now. Again, this is editable on
top of the procedural because we're working on a second folder and we're not working
on that generator. Also, don't forget if
you hit right click, we can maybe lower the size. May have a little bit
of fun with the flow. You can reset everything
if you want to default and see what
you can get there. We can have a little bit of
fun with the flow jitter, just to look for
different effects. Just like a wear
and tear effect. Maybe I'm going to start
here a little bit below the line and give us a
little bit of a look. You can see how it just
skews off and that's through the normal map
projected on here. You can get an idea of
how that works here. Now go ahead and feel free to do this
with a lot of things, but we're going to go ahead
and we're going to just close this lesson up with talking to you a little bit more
now about symmetry. Symmetry is activated in
one of a couple of ways. One you can do is hit L, You can get symmetry
brought up like that. You'll see a little
line come up here. And of course, if we go on here, we're going to get some options
like setting right here. We have the X access, so it's moving left or right. We can change that crew
here with the setting. I normally keep it at default, that's why you want to make
sure it's always centered. Definitely, you can
do a little bit of fun with the brush this way. Now another thing that we can do is as you see me
painting through, you may want to break it up, So don't be afraid
to hit the X key. That way we can cover, we'll get some negative values. Now I'm just going to
go up and down on here. I'm just going to
break up the piece. As we see, you can see this
is just with the leaks. One, I'm not really
trying too much with some of the other
dynamic brushes. I usually see them through the little purple
spot right there. But another thing that you
can do is hit right click. Maybe choose the size of the
brush a little bit more. That way you can get
different variants of leaks in different spots. But try if you can to not have anything
that is consistent, like don't have a perfectly
same straight pattern. Break it up through the x value through different areas and just have a little
bit of fun on here. You can see it like this. I hit the X key here and then maybe go through and
hit the X key again to minus it off or
minus it off with a different size value under
black jus simply go through, you can see how the dynamic
strips down on here. What I want you to do now, I'm going to go back
because I liked it the way I originally had. I'm just hitting control, I'm just going to go ahead
and fill in my area. Then I'm going to hit X, make it a little bit bigger, slightly, and do that one. You can see I'm just having fun, just having fun with the leak. Now this is one dynamic leak. This isn't the only one and I want you to
get into that habit. There's 1,000,001
features on here. Don't go through and just think this is where
you start. Spawn spread. Spawn factor. You want to
see what these things do as you experiment through
the size fade radius. All those things are
going to really have a factor in the thing about the life of how long these areas run in. Keep that in mind. That's said, we want to also conclude by saying that just as there's a
generator on here, you can also have a little
bit of fun by trying to go drag and drop different materials on here just to see what they look like. That's a very big fun one to do, that a lot of people enjoy. That's going to probably
be something that is up to you if you ever
wish to go through, But for now, we just want you to get an idea
of how that works. In the next lesson, we're going to continue on
with our texturing. So with that said, stick
around and stay tuned.
14. Texturing the Frame Borders: Okay, so let's continue
in this lesson, we're going to go
ahead and do some, add a few more materials in here to help break up the frame
so it's a little bit less, just one color for that I'm, let's see, I'll choose
steel, medieval style. And I'm going to just
put that right now above the plastic but
still within the frame. And you can see, again, like it covers up just
about everything. Let's just go ahead first, I'm going to go
back to base color and add a black mask
to cover it all up. I'm going to paint
everything through. I'm not going to
use anything fancy. But I will have you
notice that I do have my L on for symmetry. I'm going to choose
to paint around here. This area maybe
around here as well. And the border that
is around here, just so I can get some
defined border areas. Now you stylize maybe want to go with something that's a little
bit a little bit easier. We can do basic
hard, basic soft. It's up to you on all of it, but whatever you do,
make sure you have that spacing set down as
low as possible. You can see already we have a little bit of a
good head start, but notice I'm going
to probably go with, let's see, probably something
along the lines of this. I'm probably going to go ahead and just choose for now, this. And then I'm going to show you a trick if you want to switch out some of the materials
and try something new. Let's just go ahead
and don't worry about any get everything
relatively painted out here, I'm just going to bring
it all around here. I'm not holding shift but you can because I'm going to be cleaning it
all up afterwards. I'm also making sure to grab that line because
there's a little bit of darkness that will help us segment and see things
a little bit easier. And you can see it's also showing up on the
left hand side. If you're wondering
why that's the case, you can't paint into there. That's mainly just
because we didn't paint the mask on the main frame
folder to have this, that's why you're
dealing with all that funness right there. Make sure we have
a little room on the folder of the black
mask so we can see. All right, so now that
that's taken care of, let's go ahead and
do a little bit of trimming and cut some things off just to have a little bit of fun I like. So even here, feel free to hold right
click shift and drag across to see a bunch of
different areas if you want believe that that is
from the main frame mass. I got to clean that up there. Okay, so we got a little
bit more on here. Let's see, maybe go ahead
and paint this top guy out. I think that might
be all that I need. I may paint that back
area a different color, but we got this top
area right here. We got to also deal with, let's cut and trim that out. Make that that isn't going to
be giving us any problems. If you have to hold
command right click, drag across to change
that mouse going ahead. Okay, so let's say
we have ourselves. I'm going to show
you now how we can switch these materials around. Let's say for example, we have what we want, but we feel it's a little
too overly speculate. I can't really see
the difference between these because
the light is reflecting. Maybe you want something
that's duller. Well, we painted a mask on here. I don't want to have
to repaint this mask. One thing we can do is we can go to that style medievalisedjust. Simply go through and hit Copy
Mask, which is down here. And we can make a folder and
bring that all in like so. We can just title it border frames and then add
a black mask on there. And the left click on the mask and then right click
into Paste Into Mask. You'll get that same
mask put in there. Now we can just simply drag
any folder we want in there. That also means dragging any smart material we want into that folder to see what
results we can get. Maybe that might give us a little bit of a
different case. Good example of that,
maybe we can do. Steel gun Matt is duller
but easier to see. You can see it contrasts
a little bit more. That's mainly because
there's no specularity. You might want to
do something like that and see what
you can pull out. That's definitely a possibility. It also helps you
to a little bit of the areas you missed and
that we can clean up. Or if you want, you can just
have both of them on and maybe turn down something
like for example, let's go to roughness. Since it's the seal gun, matt's roughness that
makes it so different. We can blend between these two to give us a
little bit of a sheen. Another thing we can
do is we can simply add a fill layer on top of that. Disable all the channels. This is, again, I'm not going
to necessarily do all this, I'm only doing this to show you the idea concept
behind all of it. That's mainly it. I'm not really
going to be showing you like or say do it
this way, do it that way. The official way I'm doing it is going to be done through
the steel medieval. I like that one
probably the most. That's going to be
the one I go with. But I wanted to give you
these other options because I wanted you to
experiment with it. If something like Steel
Medieval is too much, you can change out the
roughness with a fill layer. Because it's on top
of Steel Medieval, it's in the folder and you can help get yourself
something a little bit easier. Additionally, you can do
something like plug in a, let me give you a good example, Clouds, then let's go ahead and maybe put
in a texture in here. And change the scale of the texture in any
way, shape or form. That was probably
not the best choice. We could probably do
something more fractal. We can just choose a different way of
exploring all of that. As before, all of this is really being
done to just give you an idea of all the things
that we can do on here. That's just giving you an idea, that's just trying to get
your mind in thinking, working mode about
things you can do. So what I'm going to do
next is I'm going to take a look at the sides here and do just some minorizedleanups that will be involved in me cleaning between the
border frame and the regular frame and making
sure that everything is being seen necessarily
that I want to have seen. With that said, stick
around and stay tuned.
15. Establishing the Mandible Base Materials: Okay, so let's continue
in this lesson now. We're going to be moving on into the jaw line section here. The last section, we
finished up a frame. This time we're just
going to go ahead and texture out
the mandible here. Now if you look at everything, we have a folder pretty
much for the entire frame. Here we have that steel
painted clear coat that we have experimented with
in the last lesson. To go ahead and take that off, just like what we did
in the frame area. We're also going to now
try to do a little bit with now the mandible area. I'll go ahead and
make a new folder and call that jaw job. We're just going to try to
create a little bit more of an opportunity to do something
similar to what we did, except this time
we're going to use the UV textures to help guide us along through the maps of the ambient inclusion
that we baked out, what that looks like. Let's go ahead and just put another steel scratched
in there like before, you can see everything
gets encompassed. That's because this
is above the frame. Let's add a black
mask over the folder. Not the smart material. Then let's re bring
back in just this area. Now I can choose a whole
variety of ways we can do this. I'll start with just doing
it through the polygon, Phil, making sure UV
chunk Phil is selected. And we can bring
everything in that way. Now that we have that,
we're going to do one more smart material. We worked a little bit
with that steel paint. Let's go ahead and try steel paint material
and see if we can do some editing manually with the UV's to get it
in certain areas. What I mean is I'm going to
drag this steel paint in. I'm going to put it above
the steel scratched. I just want to. In
this area. This area. And the strips here. Again, I'll go ahead and
for that add a black mask. And we can do this
one of several ways. You can use the
curve projection, then you can get the
projection going this way. Of course, you're going to have to make some adjustments to your size as well
as your hardness, because that's all going to be, again, important to get
the right diameter of. When you're done, you can
just just hit return. I'm going to keep things
a little bit simple here. One thing I forgot to mention is make sure that you
have L for symmetry turned on since we can
affect both areas here like so we're going to go ahead and use brush to cover up my way. I turned the hardness
up and I turned the spacing so that we can
get everything that we want. Again, I'm selecting the mask of steel paint and I'm just making sure it's
on a white value. Let's just go ahead and
we can do this here. Just like you see
different color hold shift and right click, you can get something similar. I'm going, you can, for example, draw
it through here. Don't worry if you go
outside of the borders, that's not going to
be a big deal yet. Then I'm just going
to hit the key, hold command shift, right click. And we're just
going to hold shift to minus all of this down. Sometimes that's
just easier to do. Then the other way, you can always do
that the same way over here you'll notice again we're affecting
both sides of this. Be careful not to cut
into the blade though, so you do want to check in
like right here you can see it's a precarious. All right, Now that we
have that taken care of, maybe I'll do a little bit of
a mandible area right here. Let's do steel
painted after that. I think I might go
ahead and call it. You can see the
area here as well. Let's see if we can show it a little bit better like
right here, for example. This will be a good spot where
we can draw in our colors. But I'm just going to
go ahead and do it. Nice, elongated pattern
just to bring something in. Then I'm going to
hit X to mash away. Now again, you can figure
out ways to do curve, but sometimes it can be a
little bit tricky to find all the right places in which curve is going to work and which curve won't work. You got to decide of personal call whether
or not you want to do curve or just brush
when you're doing these manual revisions that
you're seeing right here. Of course we need to clean
up this area right here, you can see a little
bit more here, we get a little bit
more of a cleaner area. It's just double check
that other side. I'll do L to turn that off because I'm only going
to be cleaning here. Like that's all she wrote. That's all we really
need to do again, just take your time cleaning up all the areas
that you see fit. If you want to make the steel
paint also for this area, that's certainly your choice. That's optional with that. That's all we're going
to start off with for the base beginning part here. We're going to move into the
second half of texturing this mandible jaw that said
stick around and stay tuned.
16. Finishing Mandible Texturing: Okay, so let's continue
now in this lesson, we're going to go
ahead and move on into getting the rest
of this textured. And we're going to
show you how we can apply some tricks with
the mask to help save time by inverting masks
and giving examples where inverting masks
can become helpful. Let's just go ahead and
start with that now. Let's say I want to now
texture all of this. Do I have to repaint it? Not necessarily. Let's say I want to do something
right around here. Maybe if I want to
add a generator. Do I have to repaint
everything? Not necessarily. Which should I start with? I need to add a generator to do something similar
to what we did here. With the steel painted
black here, it bleeds down. That's not a problem. May
have a mask right now. Let's first things first, let's go ahead and click on
that steel paint and copy that mask. Not clear that mask. Do copy the mask that's
going to be down here. Now I'm copying the mask because if you're going to
add a generator on here, a generator needs to go here. Therefore, you need to put this whole material in a folder, just like we did in this one. Let's go ahead and add a folder. Put that in here, call it black. Add a mask on there. A black mask, of course. And go ahead and we can just paste our material
right in there. Like that allows us now to make this into a black
mask or a white mask, depending on which
way you want to go. And then we can add
a generator to it. But if we add a
generator to it and do the classic way like we did before and invert the selection, we get something very similar with like features
that we can program. But I feel like we have an opportunity to
show you something else. One of those
opportunities is to go through and discuss smart masks which are like generators. Basically, they essentially
are where we drag these materials in the asset
section under smart mask, all the way over into
where the mask section is. Let me go ahead and give
you an example just so I can get you to
get experimenting. Let's start with occlusion. You can see how occlusion gives a different result and has a different set of
parameters under the mask, you even see the
generator right there. And you can then go around
and tweak some results. Of course, you can invert the process to give
a different look, and you can see how it
gives us different results. Now I can just go
ahead and delete that, because I just
wanted to show you, well, just one example. If we hover our mouse mask, mouse over all the
different types of pieces, we can come up with some
very intriguing results. Like here's one called
dust occlusion. That might be an
interesting one again, Go on ahead, drag it
into the black mask. Make sure you clear
the last one, and then just simply go through and see what
everything looks like. Just have a little fun with it. It might be an interesting look. It may be a intriguing premise. It could be something where you could maybe
put some color in here. Between the black steel and the steel scratched
right around here. No such thing as that
which you cannot do. You can do all those things. With that said, I'm going to
put now a texture over here. We're just going
to leave this now alone for just a little bit. We can make the changes
of our choice later on, but we're just going to leave
this alone just for now. We're going to go over
to Smart Materials. I'm going to go ahead and
look for steel painted and I'm going to drag this into
my mandible jaw right on top, since it's only
covering this area. It's covering everything up. But I just wanted to
cover this area up. Well, do you remember at the
beginning of the video when I copied the mask and
added a black mask? Let's just do that real quick. I'm going to add a black mask
over that steel material. I'm going to, once
again, as I did, this will be a second time
I'm going to paint that mask. It comes in the same places, but if I left click and invert. Now we have everything
that we need right there. That's the whole
interesting part about all of this
that we can get into. Now this is again a
mask that we're doing. But we can repeat what we did here and maybe add a
generator to this area. That's entirely possible. If you want, you
could if you also wanted to just go
through and maybe add, maybe you want to add some. See what I'm doing right here is just like texturing
this all area out here. You can do something like that. Not a big deal. Not a big problem. I'm just going to go ahead
and then I'm just going to simply go through base here and I'm just going to
mess around with the color. Maybe make it a little
bit more green. But the nice thing about Phil
layers is that we can go up a little bit more fun with coming out with looking
materials in all of this. Like we can do maybe a desaturated
dark green if we want. I'm not going to tell you
which color you choose, but you can see I'm editing the smart material
to be something a little bit different that you can have a little bit
more fun with it. Then of course, with the wires, I'm just going to
go ahead and choose a steel painted default for the wires and
see how that looks, what results that can give us. Maybe I'll just add a black mask and just do it traditionally. Good old fashioned way. Just do things this way. Now, it's pretty hard
to see with everything, all of the materials because
it's blending in here. Let's go ahead and go to that black steel and mess around with
the generator and see if we can invert that. See if there's a
curvature slider here or anything like that. No, but give ourselves a little bit of a cool
grunge look on it now. Don't get too tunnel
visioned on what I have. I may have something that
doesn't necessarily have to be what you have to settle, for example, I got
the steel painted. Maybe I would like to do a
different color Noise on here. Let's see here. Hmm, let's see if we
can do something. Something maybe like that. Slightly bluish. A little bit. Just to have a little
bit of fun then. This is the game is
I want you to J. Once you learn and get
comfortable with everything, just start messing around
with different inclusions. If you don't like the original
one out of black mass, go into it and do a generator
like we did before. Maybe metal edged tear. See how that looks Inverted. Probably go with that. Helps us see the lines
a little bit more. When we see the grunge, grunge mount, that helps
a little bit more. If you really want, you can maybe add a little bit
of what you see over here. Over here. That's
possible as well. Don't try to find yourself getting too
bogged down on anything. We want you to be very free to explore your
own interpretation. I may find myself
doing something like, for example, plastic glossy, bringing it into the
mandible section, add the black mask, and add a folder into. It will make a generator for this guy with the same
concept, invert the mask. Bring this into the
folder at a black mask. Then maybe I just want to
paint like for example, this area right here. I want this area to be
somewhat similar in a way to the frame.
You can do that. Just need to keep applying and giving yourself as much opportunity to
the rules as possible. I'll go through edit
out the material color, then I'll go through
the generator to do some work on the ware level. So if you find a bumpy, you can always go
and change down the mandible roughness or the height starting
to bring that down. So a lot of these things are definitely doable that
you can make work. I just want you to be open to the one rule that we're trying to apply is
repetition through practice, and that's why we are
reapplying the same one. Call this one red. Again, I want you guys to break through on being a little
bit creative here. I can do something similar to like what I'm
doing right here. You don't even have
to commit to red. In fact, I'm using Red
as the tutorial course, but it's not necessary, it's just what we're
using right now. You see right here, I'm just holding shift. I'm drawing these lines, See how we applied that. Again, this area right here
also can be manipulated. If you want, you can go through a whole bunch of
different materials and add something for that. It's not necessary. I advise a little bit
against it for now. I'm wondering if I'm thinking that we
might be able to make this pop with steel charcoal. Okay, let's see if we can put
a steel charcoal in here. We'll copy the mask here.
This is the one for the. I just want to test this. Just me going through and
testing something. That's all. And of course I'm
adding a black mask over and I am going to
paste into this mask. And I kind of like that one. That gives us a little more
specularity with the piece. But that said, I'm going to
show you one more thing that I did wrong and that
you need to remember, I had the L key on.
What does that mean? That means we don't have a lot of things going on over here. I'm going to go ahead and
finish up on the other side. And then from there
we're going to go ahead and move on
into the temple region. With that said, stick
around and stay tuned.
17. Texturing Temple Region: Okay, let's continue. We're going to now work on this little temple
region area right here. It's going to be our next area, like before, we're going
to do a couple of things. First, hit that L key, so we have some symmetry. Let's create a new
folder up here, make sure it's on the very top, and call it temple claps down that mandible jaw
so we don't get confused. We're going to do
something very similar. I want you to feel free to stray from me now
because I'm just going to be emphasizing
repetition we like before, we're going to assign a
baseline material onto here and then add a black mask into it. So then from there
we'll go on ahead, we'll add a black
mask onto the folder. So then since this is
a UV shell section, we're going to go ahead
and go through and just texture out just this
region that we see right here. Now I'm going to go ahead
and focus a little bit on the braces for all of this. I think what I'll do next, I'm just going to
open up my folder. I'm going to put a
steel painted piece through here in the same area just to see what that gives me. I'm going to add a
generator this time to it. Just like before a
generator can be anything, we can do generators
the same way we do, it's like we got a weird
looking generator. I think I may have added
the wrong generator first. We need to add a black mask. And we need to add the
generator. There we go. Now, generators can be done
in a whole variety of ways, but in this particular case, I think what I'm going to do, I'm focus the steel painted
material to be on the braces, only now that we have our edges, we can also work a
little bit on level and see how far we want to
bring all of this in. Let's see, the grunge. It's not too bad,
but I would like to. I'm just going to be
making a little bit of some choices here to
see what they give me. I'm making my own customized
ambient occlusion level. Now I'm just going to add a folder for that steel
painted to go into, I'm just going to add a
black mask over that. From there, I'm just going
to manually paint in these braces to point into
a area that we want to see. We get a little bit
more of a look. It's a little bit more
unique, something like that. A little bit Now feel free to change steel
scratch to anything else. Maybe to help contrast
a little bit easier. Maybe you want to see
different materials on here. Definitely no such thing
as getting that wrong. Like so it's certainly a perfectly fine thing
to test the waters, to look for something that
can contrast differently out. You can see a little bit
more of an interesting piece with maybe if you want
you can add a white mask. And then just maybe
do a little bit of a black mask over
the steel coat. Just give it a little
bit more of a sheen. You can do anything like that. Or you can have a little bit fun just working
with something like some light copper to work out. And add a bit more of a
contrast scene like right here. You can do that as well. Of course, you'll have
to hit X to trim back and clean up anything
that you want to see. No such thing as
getting it wrong just except as long as you're
choosing to experiment, you can't ever get it wrong. That's a very easy way
to get this through, like the idea of just
doing it that way. Keep that in mind when you're
going through all of this. You can definitely have fun
getting lost in all of it. But I want you to enjoy
just exploring everything. This is definitely
something that you should just be experimenting and just seeing what you
can do differently. Another good example
of experimenting, like let's say we take
this metal sheet. If you want to have a
little bit more contrast between that which is painted
with the metal underneath, you can always go under
something like frame and maybe edit the plastic
roughness down a little bit to give
an opportunity for the metal to sheen through
a little bit more. You can do something
like that if you want. If you're looking
for an opportunity to make this look a
little bit more unique, that's definitely a possibility. Please, please, please have fun. Have fun, because that's very
important in all of this. Of course, when we go
through everything here. One thing that
we'll go ahead and end with is don't
forget this part. One thing I always like to do is make a fill layer and call it a. It's not necessary
for every piece, but I like to test the
muddy waters with it. I like to put the
ambient occlusion in on the very top
and put multiply on. It's not necessarily
something you have to do, but it does give accentuation
like we see it right there. We change the color
because it's a base color. Here we go to color here. If we change it to multiply, we can have a little bit more of an
accentuation of everything. It gives a little
bit more contrast to the scene a little
bit more versus, as opposed to when it was
just all bleeded out. You can see a little bit easier what you're bringing
in all the crevices, you can see a little bit more in all the areas where
it was baked out. It helps to see everything,
Keep that in mind. With that said, the
temple region was just mainly for you to
have some fun doing. Just some fun stuff. Just you going through
having a blast, trying to make everything work from the roughness here you can see I'm messing around
with the roughness under the metallic contrast
to get something that's a little contrasting
with the steel paint. You can see all the different
areas that I'm having. If you ever feel
like you want to get another layer on there, you can always
just duplicate it. Then maybe turn it
down a little bit. You can give yourself a
little bit more shadows. This isn't even getting into
the post production phase. I'll probably just do one just for now because
I don't want to double multiply
anything out just yet. I'll just keep it like that. We're going to now move on
into the top region here, which will be the head that said stick around
and stay tuned.
18. Texturing Cerebral Section: Okay, so let's continue
in this video now. We're simply going to go ahead and fill in the top part here, which is going to be the last
section of this outer frame before moving onto the
face plate for this, this is going to be
real easy like before. We're just going to go ahead
and create a folder and call that head in that I'm going to go ahead and drop
a smart material in here. I think I'm going
to go with steel are this time because I
found that one gives us a good ambient
occlusion that I enjoy. We'll go ahead and put
that in there on its own. It looks pretty decent. Gives us a nice little
dark spot, crevices, but again, we have three spots that we're
going to look at. And that's like this
spot right here, this little slant face plate, this underwire Greeble
in this center part right here on that mark. I may just also hit the
Lk just to make sure everything is done just
right. We can go there. That said, let's go ahead
and add a black mask on there and reapply everything to the top and edit the mask. It occludes only to the top. Now I'm choosing polygon fill with UV chunk pill as
my selection tool. I'm just double
clicking on that. That's because the whole
area is like a UV chunk. Then we can get started. There's a lot of ways
we can approach this. 11 is I look at this
and I see what I like, I feel like the
ambient occlusion covers up a little too much. If you remember, on the
end of the last layer, I had ambient occlusion help
pop out all the details, but it made it a little
bit overly dark. I would like to exclude that. What I'll do is add a mask on there and turn my
value to black. And just undo that, That way we have a
little bit more viewing sight of this area here while keeping everything
else still popping. Now I'm looking at this slant, this is where I'll
texture it first. And just to save
myself some time, what I think I'll do is I
think I'm just going to go ahead and do what I did
in everything before. I'm going to move the frame
up just a bit above top head. I'm going to go ahead and
simply rearrange the mask. It includes this
area right here. Now I might have to do this
in two different areas because I want to see the
red which is under plastic. I believe that has
a white mask on there should just be
only the folder mask. But we may have to do one more. We'll see, it's all good. I may just go ahead and
take everything I did in leg work and save time by
reapplying the mask here. Again, that's not too
terribly bad of task. It's actually easy. You can do it in a matter of
real quick processes, super, super quick like
that if you want, just to give yourself a little
bit more space and time. And then I might do the same thing with
this area right here. Going across and hitting X and just cutting
off everything. Like maybe doing the same
thing, again like that, just having a little bit of fun, maybe making this go
down a little bit here, maybe just a little bit here. Let's just make it a
little bit more like that. There is something
going on right here that probably is
occlusion from another mask, possibly even the border frame. Yeah, the border frame
is causing all that. Let's just go back and
cover this part right up. That way we have a little bit
more of time through here. If there's anything
else you missed, definitely take the
time to go in and. Cover it through.
But you can see how we got through all of
that pretty quickly. In fact, on here I may just do something a
little bit different. Right here you can see
already we got like a pretty quick result in a
pretty short amount of time. That's pretty much what
we want to teach is getting good results
in substance painter and a very fast amount of
time, keep forgetting. All right, we go like that. I think I might just go through the border frame
here and you can probably just go
through and maybe just do the simple little U B chunk
fill and you can kind of see how quickly we run into everything as I did
it in the wrong mask. I want to maybe do
it on this mask. No, not that mask. You got to remember.
There we go. Because I had to do it
both on the frame to allow it and then also
on the border frame. So you can see we got that
done relatively quickly. We got ourselves a little
bit quicker of a model. So with that said, now
what we're going to do is, is we're going to expand into
doing the face plate next. Like I said, I want you to
take your time in all of this. I want you to take your time with experimenting,
with everything. Don't forget to make
an adjustment to the AO if you want,
not necessary. So that you can see
a little bit more of the wires in the back here. If there's anything
you want to change, there's no rule that says
you can't change it. Keep that in mind,
if you like this looking maybe a little
bit more bumpy, for example, with height, you can do that by
going back and looking at the steel scratch and
turning that back up. You can always do that if you want to see something more in the normals with steel scratch, you can also do that as well. Just make sure
you're constantly in an experimentation state to look for new ways
to bring this out. With that said, stick
around and stay tuned.
19. Creating Custom Fill Layers: Okay, so let's continue
in this video now, we're going to start work
on our front face plate. Now in the past when we were
doing this whole frame, we got a good amount
of practice with smart materials and generators. Now we're going to change
it up just a little bit to add a little
bit more onto there. And that's going to be creating some fill layers from
scratch and working in different ways with procedural
generation to see if we can create something
just as compelling. For that, we're going to create custom fill
layers to create some patterns of
hexagon textures and see how we combine that with smart materials to blend down. Let's get started.
First thing I'll do, I'll go ahead and turn
off my eye attachment. If your computer's chugging
along for any reason, you can do a couple of things. If the frame rates down, you can crank that down to 2048, or if possible,
if you want 1024. Another thing you can do
is get back into layers. You can just simply turn off everything around
you if you would like. That's also workable as well. I'm going to go ahead and
start by creating a folder, and I'm going to
call this folder face plate in this folder. I'm going to add a fill
layer inside of it. Make sure it's in there. I'm
going to call this folder X. Now if you take a look, you should have a little
bit of the anatomy of the basic fill layer
like you saw before. If there's anything
that's not there, just go through and add
what you want on here. If the opacity isn't there, go through and add opacity and
so forth through anything. But we seem to have everything
that we want as is. So I'm just going to
leave it alone with this. I'm going to put a pattern, a hexagon pattern,
on top of here. It's going to serve
as the baseline start when we start
combining textures up. Then we're going to put
a second fill layer across that addresses things
like color and specularity. It's like we're combining a
couple of things into one. Now I'm going to explain
why I'm doing two in just a minute or the end. But for now let's just focus
on getting this pattern. First thing I'll do, I'll hold an add black mask
and you may think, oh, he's going to
go for a generator and that's not necessarily true. Let me go ahead and
show you what I mean. First, let's go to the click
on this little square, change the base color to red. Now of course everything's
covered up because there's a black mask instead
of generator. I'm going to say add fill. Now you may be looking at this and thinking,
what's going on here? It should be completely red. Why is it pink? Well, that's
because the mask is gray. You're getting half of the value of what red
is, which is pink. And if you go down here,
you can change the value of gray to white to get that
full red or that full black. Additionally, you can also go in and click Gray scale and
put patterns in here. If you double click
and type in hex, you can feel free to go and find yourself a nice
little hexagon pattern. For now, you can get a
little bit of a idea. I'm going to choose this
one hexagon border, and you can see it's
completely black and white. So you're going to get a black and white representation of the full value of red and the
full value of occluding it. Right now, it's pretty big. You may be thinking again, do I adjust it in the
scale area of the tiling? Well, you could, but that's not going to do
anything because again, all that's going on
in this fill layer is just the red color. You could be thinking the
same thing here as well, but it's just going to repeat
where we need to change. It is in the texture
pattern itself, which is in the
fill that we added, which is being plugged in
with the hexagon border. If we do that, you can
get a little bit of a result if it seems a little squashed and stretched like it is right here. You can do some things
to change that. I'm going to get something
along those lines. I'll just click on this
little lock here so I can maybe change it that way I get it a little bit
squashed in the x value. Then I'll just go scoops
messed up with that one. First of all, get the
size that I want. Again about that,
click on the lock. Now let's change it to
the right about there. And I'm not going
to touch the lock then now that we got something a little
bit taken care of, I can do some things
like for example, I can change this
to a black value. That's definitely feasible,
possible if we want. Additionally, we can
invert the value of this, just like we do with
generators when we click down. Let's see here where
the invert is, right down here where
it's a fill parameters. It's right now in false. We ahead and invert
that If we see fit it's still
affecting everything. So let's go ahead and
add a mask on there and just simply
fill in the border. In this case it's going
to be a UV chunk fill. After adding a black
mask on the folder and selecting
polygon fill tools, we can just make sure it
affects just this area here. Feel free, again, to
adjust anything you want. Anything you want. It's not going to be a right
or wrong question on here. I'm going to make
it slightly bigger. I think that's actually what
I'm okay with right there. Look at me, Mr. Nitpick. I can do that.
Yeah, that's okay. We got a thing going
on here, that's fine. We got a little bit of the
texture that we wanted to see. If we go through
here right now and we see all the things that
we have going on here. One of the next things that
we can do is just mess around and I'm going to add a second fill layer,
you could say. But first things first, I'm going to add the fill layer. I'm going to put this second
fill layer under the Hex. And I'm just going to
call it secondary Phil. Phil. So now this one
we can go through and I'm going to add the same similar effects
like we saw before. You can see some things
are a little bit off. I'm going to disable
all the channels except roughness like to
actually hold onto those. A color put on a low stream that allows
me to see some of the patterns and
textures a little bit easier that we're
working with here. You can understand why
we want two layers here. If I disabled the
roughness here, then only the fill layer of what's going on here
is going to be seen. That's why we want
to have roughness. So we can see that
it goes both ways. If I disabled the roughness
on the secondary filler, you don't have a
second roughness to contrast up against
the one above. Because these are
operating off of two contrasting
roughness scales, allowing us to see all these
cool looking effects like. So that's neat little trick. You could try a second one
with a super glossier one, but I don't think you're going
to get the same results. If you do, then be very
happy with yourself. But it's not, I wouldn't
try to do it at all. In fact, I think this one's the nicest looking
one that we can do, even if you try to mess
with the opacity of the roughness and try
to do like a third one that sheens around it that
you can get something cool. If we turn it on and off, you can see the
difference between it. It's like you have three
different roughness scales. You can do something like that. It's not too much of a big deal. I like this effect
a little bit more. The only thing left
now is to think about perhaps tweaking color. That's probably the only area that I would see is
like the last stage, you can do color in a whole
bunch of different ways. For example, we can do color in a black
and white setting. Let me see if we can do that. Maybe we can have a fill layer. Like the fill layer we just
put up there for a area that manipulates the color and then these two manipulate
more in the roughness. I'm just going to go ahead
and experiment around, see what we can get
and see if we can have some fun with it,
something like that. Then let's see if
we can mess with the color a little bit more. Let's first of all
see the inversion of it just to see
how that looks. It's just, again, me having fun and then checking
the color value higher. I keep forgetting that one. And then seeing base color. Switching the blend
mode possibly into screen to see if you can show through
the layer above. It's probably not
going to do the best. What I may try doing
though is working with doing something like
this control copy put above, mess with nothing
but just focus on color the convert and then changing color
to a blend mode. Below, multiply, kind of, I keep forgetting,
see overlay on there. Overlay kind of
gives us something that's a nice, cool looking red. I kind of like that look, but I'll probably go screen
a little bit more easier. And then from there, something like that is
actually a lot more doable just to give a contrast
for both color and roughness to help see
the area a little bit more. All right, The only thing
I may change is maybe just a final tweak
in everything here. And don't worry, I'm going
to explain all of this. This is me just simply
having a little bit of fun going through everything. I'm going to leave
that fill layer too. I like that skill a lot more. 21, 29, there we
are. Bring it in. That is all I really need. All right, now that's all done. I'm going to make a
folder called this hex and then bring
everything in. This was me just experimenting and having a little bit of fun. So let me go ahead
and talk to you a little bit more
about what I did. One thing I took a
little bit above, it's just something that
was pure experimentation. Where I guided you to was
this area right here. And you can see through there that there's a
reflection change in color. However, there's not
a reflection change. I'm sorry. There's a reflection
change in roughness. You can see the difference of the hex pattern
through the shininess of how the light goes from
dull to shiny. The roughness. In other words, I wanted
to add an additional way because sometimes light in a certain angle will not
catch that roughness. I added a second hex
copy, I'll even call it. I misspelled that. Majorly diffuse. Now what I did was I just
simply duplicated this out. All right. I took the fill layer and I didn't want anything messing around with
it, like roughness. All I wanted was color to be
the factor in all of this. Everything else is
mostly the same, except for the fact that I
inverted the gray scale here. So that I could have a little bit more focus on the color. If you look at Hexa, fuse and look at
the fill for it. See the gray scale is like that. Whereas the gray scale
for here is white. That allows secondary fill
color to match in here. I wanted this to be
white on the borders. That way the color will affect which borders I want for color. However, if I changed
it to normal, it wasn't going to really
show out as normal. Mainly because of the fact
that the folder structure in here was overriding that. Well, it's actually
showing it now. I think it's because
it's on top. But what I was trying
to do is do it through screen
originally just to see if I could get some
blending modes that would help pop the texture piece out a little bit
easier than before. In other words, what
I'm trying to do, make this contrast through roughness and make it contrast
through color as well. We can see things a
little bit easier. Then of course, when you
have the whole thing there, you can go through the
process of manipulating all three of these
folders through here. Again, start with the hex, add your fill, get your
pattern established, make sure you have the hex
border in this area first, which you can manipulate
through invert. Choose your color value, which can be anything from here. Secondary fill, choose
your color value. This is again going to be what manipulates most
everything around here. And then have duplicate the hex across and make it only about manipulating the color
of the hexagon pattern. And it comes from this one. Again, we went through a pill, we inverted the
texture through here, and then we turned
the opacity down. I had a little bit
of a hard time making it work because
for some reason, normal was not working. Originally, I had to switch
screen and then I turned the opacity down so it wouldn't be predominantly like this. This is one that I would
say for most of you. Take your time in getting right. You may find yourself
having to go through this several
times just to get right. I think I accidentally
duplicated that. Definitely go through and
take your time on it, as I've always said, some fun going off the
grid of all of this. Have some fun with that said, that's a little bit
more complicated than just dragging and
dropping a material. Again, rewatch this
as many times as you can to really grasp
this area right here. Because we're going to
add now smart materials to blend with what
you have here. Stick around and stay tuned.
20. Establishing Outer Face Plate: Okay, let's continue
in this next lesson. We're going to now try to create a mask that creates occlusion. So this hex pattern
is in certain areas, for example, just this
front area for instance. We can have it around so that it doesn't go into this
back wiring Greeble. We're going to create
a secondary texture of smart materials
that are going to overlay on top of
here and finish off with how we can make
the two blend together. It's a little bit of
practice from here combining with how we can
make some of this come in. Well, let's get started. Let's go ahead and
create that mask mask that's mainly pertaining
to the faceplate. Now, with the face plate
as we have it right now, it's just covering
all the faceplate. But this texture that's going
to come up is going to be a secondary one that
handles the front areas, not the back where
this Greeble is. I'll first start off by creating a folder and calling it front. Then I'm just going to drag
the hex into there for this, going to add a white mask. I'm not really changing
anything then. I'm just going to go through and just occlude certain areas. Maybe use polygon pill, I can use it but I got to also make sure
to change it over here. First, click Polygon Fill. Click then into the
selection mode I'm choosing that you can see I'll just choose all my areas
here. Anything else? I can just simply clean up and
hit X to switch like that. That just gives me a good head start on everything. I'm kind of switching between X when going through all this. There's a little
bit of area here, a little bit of area there. Just kind of going
through all these areas. Yama, Just kind of see,
I'm just taking my time. I just dragging
through here and you can just see where we're going through and what
we're trying to get. It's just this front area
that's going to be a mask. The beauty part is that
if you take what you've learned in the cerebral
part when we did the top, if you can remind
yourself how we inverted the masks and went through the process of
inverting the mask. I'm sorry, that wasn't correct. It wasn't the cerebral, it
was the mandible jaw section. If you can now remember that it's going to do it like
this and bring it all, and bring it all back like that. Maybe do a little bit
more right across here so you can see a little
bit more of everything. That's our mask. Anything that we're off on, you can just simply build
back up once again. Now that we have our
face frontal mask, it's applying to the hex. Let's now put something
that goes over this hex. Now remember we can manipulate the shininess of this to help contrast as we go
through right now. We're just going
to keep it as is. I'll go through and take
what we've learned in the past and apply it and combine it with
what we got here. Now we'll start off
with steel paint. We'll start off with scratched. Of course, I'm going to
put that into a folder. Call that powder surface. And I'm just going to drop
it all into there for now. I'm just going to
add a white mask. We can do our editing there. Go through the smart
material of steel paint, then we just go through and
find where our color is. In all of this, we can do some
things additionally to it. We can add a fill
layer inside of this. For example, there isn't
the proper color we want. You don't have to necessarily constrain yourself to one thing. You can add color
additionally into this as well and get the exact
same result if you want. That's something
that's like FYI. But in this particular case, I may just go with
seeing what I can manipulate here with
the steel paint. Go ahead and see
what I can find. It might just take me
too terribly long. There's our color. Color right now is being manipulated through a channel
of the substance. Material, node steel, rust. Were don't necessarily
need to have that. Like steel painted, stained. I was going to change this, but I want to. I've been using the
same one for so long. I'm now kind of thinking maybe I might try to have a little bit of fun with
some other types as well. Okay, I like that one too. It has a little bit of a scratch or an
interesting shape on that. I may just go with that
and change my color. I was going to cut off the attribute on the
other one and replace it, but I think I might
go with this. Okay, so to recap, I'm going to delete
that Steel gun matt and just go with steel
paint scratched. Additionally, you can just do steel paint stained as well. That's going to have
a similar effect. It's cool too, but don't get too affected on
where you want it to be. This one is actually
a little bit nicer, but you can see what I'm doing. I'm just going through and finding something
I like and then just bringing it through
maybe something like that. The idea is whatever
you make sure that you are having something that contrasts from the
that's underneath. I'm going to hit black mask. I'm going to add a generator that's to the top layer
of that steel paint. It's getting a
little complicated in the order, so don't worry. We're going to go through and invert and get
everything showing again. But just to give you an
idea, let's see here. We first wanted to create a
folder for our front face. That's everything
that's masked here. And it has our hex pattern
we did in the last video. And this that hex pattern has three layers to it to
give us a specularity glare. Then on top of the hex
pattern are two patterns which are the steel
painted and steel scratched and they're being blended through
with the generator. Now these two smart
materials are in their own unique folder because I'd like to
edit it a little bit. Maybe I'd like to go
through and apply something so that I can see a little bit more into
this area right here. That's possible as well. We're going to go
through and make some extra changes on here
for the wear contrast. See I always like to walk through and find a little bit
more change here and there, make sure everything is
where I want to see it. Curvature weight is maxed out. I think I'd like it
a little bit messy. Then once that's done, I'm going to go ahead and
edit the folder outer dull. Is holding the two smart
materials so that I can see a little bit more of
the Hex material underneath. Remember, this is in
the front face folder, it is not in the
outer dole folder. I'm not going to be
covering anything up with the hex like we did before. You can do it a whole
bunch of different ways. You can create a custom brush or you can go back
to that other way. We did it with the
dynamic approach with it. We had those dynamic
brushes that we worked with that believe a
leak that we did. That's also something
that we can do. You just have to make sure
you're double clicking on it and you can put a process to it very similar
to how you did before. You can see a little bit of
the same pattern as before. And of course, you can
do a little bit more. Now you can see it
and you can see it. One thing that I would
have you do if you want is go through
the process of having a little bit of fun regarding contrasting the
hex edge so it can be seen a little bit easier on top of the red steel painted
smart material. That can be done
in several ways. We can do it through
the hex diffuse color, which I may just leave
alone just for now. We can do it through
a little bit more of a darker shade,
red, for example. A little bit easier time there. Then we can go ahead and do
it also in that same one, we can look at roughness
to see if we want to maybe see things a
little bit easier there. We can do that. That
will help us out a bit. It helps us to see those
streaks a little bit more then you can go back
into again, the dull surface. And then re imagine and go back and forth between
the x key like that. Another thing you
can do is take note, we can go through the whole process of
doing different values. Because right now what
I'm doing is a value of strict value of 1.0
of black and white. Can also do softer values if you want where it's somewhat
blending in here. Then you can just hit right click and then do a full one a little
bit earlier on here. You can do something like that. I think I just did it
wrong. I had the wrong one. It is interesting to just try
and experiment through it. You can also don't
forget to turn the size down to give yourself
some more room. I want you to just have some fun just blending
these two materials in. You don't have to
commit to everything. You can just start off again. Go through, you can add a
white mask to that folder. Start again if you want. You can start with
a different brush. That two is different. That two is possible, okay? Another thing you can do is just get in the habit of
being experiment. Just go through and have
fun seeing what things look like through the whole process with
different brushes. Whether they're
manual brushes or they're charcoal brushes or dynamic brushes like this could be an interesting
pattern that you can go. I want you to feel
free to go through F, the best one that gives you an opportunity to have fun with. Make sure when you try, try them at different value sizes like how I'm
doing right here. And then switch out the
map and make it a little thicker down here,
inverting the value. I want you to just enjoy having all sorts of
things to work with. Another thing you
can do is just add a mask on there at a generator. You can do the
same thing you did before and just do
a metal edged tear. Invert that mask through the
generator and see what kind of tear you can establish
just with this. That's something that's
possible as well. You can do things like turn
your grunge down quite a bit, go through and make it
like messy like that. That's definitely
something that you can do. If you do that, I
probably would say return back to making it less shiny, but
that's up to you. You can see that too, is a fun looking metal piece. But of course we're going to be texturing things like around here and here to be different. Don't get too crazy. Or if you want, you can just
simply ignore everything, add a white mask and go
to your leaks brush. That can be something
you can do. Even a sandstorm, which is
a fun one because they do these simulations and
these simulations are fun to show what you can do. I would simply go through, and quite frankly,
much fun as you can, just experimenting with all the different avenues
of possibilities. And make sure you're switching between both size of the
brush and the value of X, of black and white values
you're subtracting. You're putting in areas, just try to find
something that's a little bit aesthetically
fun to work with. Maybe I'll make the brush
a little bit easier, it freezes up like that. Just simply bring it
back and then we'll just have a little
bit of fun with it. All right, so that
concludes that the next one is we'll do some
secondary texturing around these metal spots around
here and on top of here and finish up
on the camera next. So with that said, stick
around and stay tuned.
21. Finishing Face Plate Texturing: Okay, so we're now
going to finish up our helmet here and it's going to be relatively simple. I'm going to fill
in this dark area with a steel dark age. And maybe go with something
a little bit more of a lighter steel here to help contrast with
some different colors. Let's just go ahead and
get started with that. To begin with, I'll go
ahead and go through my smart material and
select a steel dark age. And just simply
put that in there and see all that
steel dark stained. We'll go ahead and do that
way to show us what we got here to help out
save time with a mask. May just go ahead and
just put this directly in the underneath the
front face folder. That way I don't have
to make anything too crazy with a mask
in this area here. Finally, I'd like to
texture around here and maybe on top of here just to
give some extra textures. And that's not going
to be too hard. I'll just do a steel scratched, could do a steel rust surface. There's not really such
thing as a right or wrong. I like something that just want to go through and break down the
different areas. You can see all these areas. This is a little
too overly bright. I may just go with my
seal scratched on here. I'll add a black mask like so now I'm going to texture
these two areas above. That's going to first be
me hitting the L K. If you remember we did that
before. I'm sorry. I'm going to go ahead
and hit a black mask and then re texture it all that way with LK. I'll just do this a
little bit easier and quicker through the UV's
to get what I want. Turn L off. I can just do the same
principle over here as well, just to help us out. If you go outside the
lines. No biggie. Just remember you
can hit the X key, change the value to black, which changes the color of
the mascular texturing. Nothing is going to be too
detrimentally affected. To help blend that in, I'll take one quick over here to help me blend
that in a little bit. I'm just going to
go ahead and change the opacity of the base
color on this steel scratch, just to make it a little
bit as it goes through. In that way it matches
in a little bit more. It's just like that one
extra little piece. You can also feel free to break things up
a little bit more. Maybe you want to do
steel around here, just make sure
you're not defecting the wires and such through. When doing that, we get that. Of course, we can do
something similar in nature here if you want or if you would like
to do something fancy. You can do something like this. Maybe have some of
it be red and some of the stain just to help you out and get some
different colors in there. And bring a little bit
of this into it as well. If you want just to find
different spots to help you out. I probably where that is there. All right. You having fun,
you getting creative. That's all this is, All right. A good example of experimenting
that I'd like you to try right now and just
select your steel scratched. You can work with
just slowly blending everything if you want to
make things disappear. Just to have a
little bit of fun, just getting
yourself antiquated. And then of course hitting X
key to work your way around. This is mainly the centralized
theme about all of this is entirely been
about experimenting. And then just go through
and lighten the load of it by messing with the values to make them
a little bit lighter. Don't make it 100%
one or 100% two, just to have a
little bit of fun. All right, now that we have a little bit more
of this taking care of, we pretty much figured
out our model and we're now going to move on into the final part
of the helmet, which is going to
be the cameras, and that's going to
give us an opportunity to work with missive effects. So with that said, stick
around and stay tuned.
22. Assinging Smart Materials to Camera: Okay. So, let's continue on now. All we have left
is just to worry about is just these
cameras here. I'm going to go ahead and
get started with that. Now. To start with, I'd like to go ahead and
create a little bit of a, it's going to be pretty simple, but it gives us an opportunity
to work with a missive. Finally, for this character, again, I remind
everyone for a missive. If you're looking for the
extreme glow glare effect, that's a special effect and
that's going to come on later on in the rendering
process of this helmet. So keep that in mind, but for now what we're
going to be doing is just applying emissive
painting on here. Not the glow itself,
but emissive painting. First things first, I'm going
to create a new folder. I'm going to call
that folder camera. I'm going to drop in steel painted and steel scratched.
It's just like before. We've done it many times. First we add a black mask
and then we add a generator. Then we add some metal edge
Were then once you're done, invert the mask selection. Now once you've got
that taken care of, let's go ahead and go back to the folder of
the camera and add a black mask and choose to
only a clue in the camera. That's going to be done through
the polygon fill and I'm choosing the mesh fill for this. I'm just going to
click on all of these areas right here
and then deselect it. Now from here on out, feel free to make any
adjustments that you see fit on here in if you wish or maybe you want to
see what this looks like, just going through the
scales of the generator, all the parameters for it, just to assess like that right
looking glare if you want, and then constantly circle back into invert to see
what it looks like. Def, definitely nothing
wrong with that. I encourage you
to go that route. Like this route right here, I'm probably going
to stop on that end. Finally, we're going to go ahead and add some
emissive effects. That's not that hard really. All we need to do
is just simply add a fill air within
the camera folder. Let's call this emissive. Let's disable all the
channels because all we really need is the
emissive channel. And it starts off dark
and it goes in to light. And you can see how the ambient
doesn't change too much. I'm going to keep it like this, choose this as my color. If you can find a missive or
if it doesn't show up there, just make sure to double
check into your texture set list right here and
check your channels. And hit a, just find a
missive through there. They should be there with
the preset that we chose. But that's just the heads
up, of course, like before, we'll add a black mask and we'll repaint in the effects
where we see it. I'm choosing brush
and I'm going through and going to choose a
very soft brush size. But again, you can choose
anything you want, like basic soft you
can double click on, just simply bring in
the emissive effects, hold left command and right
and scroll across to make that a little bit smaller. You can see this overrides the, the dark material selection. And that's again because of
the fact that what is it? It's because of the fact that emissive is like the ambience being turned up quite a bit. Also, take note on how there's
still some ugliness here. The roughness isn't
really shiny, so it doesn't look
too much like a ****. Well, we can maybe do
something there with the roughness if we want. We can, for example, tweak the roughness that way. We might have to take
this out of the folder because the folder roughness might be overriding everything. But just on the safe side, one thing I like to do is go
to the roughness channel, make sure it's set to normal. If it is, I just like to
make sure Set that way. Also, if it's a normal map
issue or anything like that, then I'm going or
a height issue, I'm going to make sure all
of those parameters are additionally set to normal. And I'm just kind of going
through the roughness, I'm going through
the normal map, just making sure that
nothing is blending below. And that should help us
out a little bit more. But if we get a little bit of a, a color in all of that, I think the one thing we're forgetting is even though we
set everything to normal, we forgot to turn
everything off. The height was what it
was creating the most. Even though I sent it to
be normal and override, it still wasn't going through. I think the height is turned on. Normal didn't really need to be. What it was was the normal
map was being overrided. Materials below I'm the height map height
channel was being used, blending into this area from materials we
made from below. We set that blending mode in height to be normal and
not blend like it is here. That allows us to override everything that's
on top so we have a little bit more of a cleaner
sheen of a missive effect. That said, we're going to
go ahead and conclude this. We're going to now move
on into the attachment, building off everything we
did including the emissive, and take it from there. So with that said, stick
around and stay tuned.
23. Creating Custom Lens Layers: Okay, so let's continue
in this video now. We're going to continue on
into our eye attachment. We finished our main
helmet and you can see the hexagon pattern on this
front plate here and how we got that established through several different filler
customizations and how we blended it in with a smart
material on top of it. And how we went
through generators. We also went through a
demonstration of some of the dynamic brushes off to the
side to help you catch up. And finished with
a little bit of understanding of the
emissive effects, the Ems behavior
for the eye ****. Of course, like we said before, we're going to talk to you a
little bit about how those rendering effects glow later on down the course,
What that said. Let's go ahead and get started
with this eye attachment. First thing I'll do
is I'll turn off the visibility of the helmet and click onto my eye attachment and we now have a new map. Again, this is an
educational model for you to learn off of. We have all sorts texturing
maps for you to practice. I'm going to go ahead and
add a folder in here. Left click on that, and I'm just going to call it for now, ****. Now what I'd like to do, create a **** area for this eye
attachment to begin with. And for that we're going
to be working with opacity, roughness, and color. And we're going to have
three different fill layers to dictate and
control all of that. We'll then finish off with creating like a
metal barrier that surrounds all of that
with that metal barrier. We'll show you how we can edit a smart material to add a
little bit more height. With that said,
let's get started. Now, in this ****, I'm just
going to go this **** folder, I'm just going to ahead
and just click on it, add a fill layer. I'm going to call
this hex capacity. And we're going to build off of what we've
already done so far on here or build off of what we've done
so far in the last lessons. I'm going to first disable all of the channels except
the opacity channel. Again, if you don't have this
channel or the emissive, make sure you go through
texture set setting and add those channels in both through
here and look for opacity. If you can't find them, go ahead and make
sure you click on that shader settings
and be sure that PBR metal rough with alpha
blending is turned on. Let's keep going. We'll just click back into our layers tab. Now I'm just going to go
down here to Opacity and I'm just going to type
in hexagon or hex, and I'm going to
look for hex border. Now it is a alpha channel, the opacity and
therefore an alpha map. In other words a
black and white map is going to show up in this, repeatable in this process. Again, which is
black is covered up, which is white is showing. Right now we're seeing white
borders showing through. Let's go ahead and
invert that map. Let's just simply go to
parameters change false to true. And you can see the borders are now the ones
that have become black and everything
else is turned white. Now all that's left
is simply to change the scale of this
alpha channel up. Let's just bring this down. I'm going to choose
something like 1905. You see, it gives us this, but it's also covering
everything that you see, this alpha cutout. I'd like to go ahead and go to our folder and merely
add a black mask. Now that's going to
cover everything up. Let's re draw where we
want this to be at. Left click on that mask hold, left command, and right
click and drag across. Additionally, you can
just hit the Spacebar. Spacebar, but right click
to change your size. And we'll just go ahead
and draw it in that way. And I'm just going to
click it in like so. Now if we take a look some of the light by
hitting Shift, right click, and dragging across as
it stands right now, it's like an alpha cut out. It's not really
glass or anything. You can see the
light is reflecting, but it's 100% see through. The first thing I'd like to do is help you understand
this a little bit better. We're going to make a fill
layer that makes this look a little bit more like a
**** or a piece of glass. I'll just click on Hex Opacity. I'll click on Fill Layer. I'll double click
and hit Roughness. Actually, I'll just. Glass. Since this is being
affected through roughness, I'll turn everything off
except the roughness. Since this is on top, it's going to affect all the
roughness that is below. I'm just going to
turn this dial down. Take a look at that
light right there. You see where my mouse is. We put it over. Let me see if I can get
another angle on this. There's the light right there. If we put it over,
it's 100% clear. Let's go ahead and turn
the opacity a little bit. This can look a little
bit more like a glass. Now this is where we get
to work a little bit more with the various
base channels. To tweak the parameters, first thing you'll do is go to layers where it says base color, change it to opacity. And then left click
where it says 100. And change that down. Now it looks a little bit
more like a glass and you see a little bit more of the
light going in between. It has a little bit more
closer look to a glass. It now, additionally
with this hexapacity, let's see if we can change
out some of that color. Now, right now it's
just this default, high pitch gray, maybe. Let's have a little
fun with something a little bit like
that to work with. It's definitely looking a little bit more like
what we want to see. We still have one more thing
left and that we had to working like a white
border of hexes. It's got to be able to
blend well with the border that is above the
hex opacity borders. Let's go ahead and do this One last thing before
moving onto our metal border. For that, I'm going to
go ahead and hit Filer. I'm going to go ahead
and turn off everything except color and opacity because I'm going to be
manipulating these two. First thing, color,
I'm going to choose the exact same piece. Because what I wanted to do is I want it to be
the same pattern, and I want it to match with
this hexa pattern as well. If I look down here,
it's 1905 for tile. I'd like it to be
exactly the same when I drag it across in 1905. All right, Right now, everything is covering this up. Everything is covering
up hex opacity. And I'll even go ahead and
double click so we don't hex border color as it stands. All we have is just a
black and white channel. It's an alpha map. It doesn't have any
color or anything to it. What we got to do is
figure out a way to make this blend with things
that are below. If you look to the right, there are blending choices
that we can do since it's completely black
and white screen is one of the better ones to help make this go
all the way through. Now, you may have
noticed nothing changed. If you're wanting to know why it's because I'm up here and I, I'm still on opacity. I'm not affecting color. Let's undo that and
get back to normal. Let me choose base color again. Now, let me go ahead
and choose Screen. Now we got everything blended, but it's now 100%
solid. Why is that? Well, the answer
is pretty simple, and it is just that opacity. There's another opacity channel on top of the hex opacity. And it's right now affecting
everything that is below. If you wanted to, you
could dim it down a little bit this way to
affect what you see. Like for example, you can
change this to be like, for example, a little bit
lower down to here maybe. Then you can go through
and make some choices with the hexopacity
be changed as well. This is where that
tweaking comes into play. Additionally, you
can then work on making a little bit more
of a solidified color. You can make this go through
a little bit more easier. I am going to make it look
a little bit like that. If I find these white
borders are too strong, that two is something
you can work on. Let's go back to base color. I find this white too strong. Our hex color is on screen. Let's just turn
this down a little bit and you can make that blend. Now it's starting to look a
little bit more like a glass. Let's go ahead and get back
to it so we can review. The opacity of the hex color is obstructing the
opacity that is below, which is hex opacity filter. If we turn this off,
you're going to have the full opacity effects
of what this is. However, because we're on base opacity and we turn the channel much,
much lower down. We've allowed a lot of what
the opacity attributes below to shine through
and get some results. This does have a little
bit of an effect on that. We have to do some tweaking
to get what we want to see. For now, I'm going to go
ahead and keep it like that. If you want, you can make it a little bit more predominant like just you can see
how it's looking, a little bit more
like a hex shape. If you want that color to
look a little bit brighter, you know to go into the
base color and turn up the opacity there. This has been mainly about cycling through different
channels to help get you antiquated and familiar with adjusting capacity
difference is through here. Now that we have that done, let's just go ahead and
finish up by putting like a little bit of
a border around here. What I'm going to do
is I'm going to create another folder and I'm
going to take that folder, I'm just going to call
this folder steel ****. I'm just going to go ahead and take a smart material this time, nothing too crazy, and drop
it into that border like so. Then I'm just merely going
to add a black mask. I'm going to, I want this
to go the area right here. I don't want it to
go past this line. I may stop there, but I
just wanted to be a there. I'm starting off
with a white circle, which you can find through
a brush like for example, basic card, I have the
value set to white. Ideally we want to make it
just a little bit bigger. I'm holding down the right click key to go
through all the processes. I'm making sure my
spacing is down, I'm sure that the hardness is turned all the
way to the max. I haven't mentioned it, but if you can try to
switch this to UV, it helps a little bit, If you're texturing and creating like a little bit
of opacity in the back, it helps to separate
between the two. I'm just going to
go ahead and just draw in a little
bit of everything. It's a little bit of a process, it's like that, but it's
also like playing operation. Don't go outside of the lines. You might just hold the left
click down a little bit and just very smoothly. Just then I'm going to make a smaller
draw size and hit X. You can hold space bar
to do that as well. Then I'm just going to go ahead and draw a little
bit of a barrier here. A couple of things we
need to clean up on. You see those hexagon patterns? That's easy to fix.
But another thing is I think I want to
add a lip in there. We see a little bit more. What I'll do is I'm going
to add a fill layer. Turn everything off on this
fill layer except for height. And I'm just going to
bring it up a little bit, we can see it a little bit more. Again, if there's anything
that you wish to change, just take a look over anything that feels like it's
a little bit of, don't hesitate to
redraw it in any way. It's just very normal, like it's a little bit
thin right up here, maybe a little bit here. Just working it through and see how we have a little bit more
of a lip around there. Then you see those hex
patterns going through. Let's go ahead and
clean all that up. And I'm just cleaning
that up in the **** mask. I'm drawing that out. So you want to make your way of going all the way around
and cleaning up like that, that's giving you
a little bit of a breakdown on the
glass material. Again, just go ahead and
keep having fun with this. Remember that sometimes this is pretty hard to get
on the first try. That's why we have these video
tutorials so you can stop, rewind and re watch again
as you're learning. That said, we're going
to continue on with our eye texture and move
on into the next part, which will be the connector. Stick around and stay tuned.
24. Texturing Out Connector: Okay, so let's continue
in this video now. We're going to go on
ahead and just do the texturing of
the connector here. And that's not going to be too hard, it's pretty standard. We'll just go through
at a beginner point and just drawing a folder
and call it connector. Just do a couple
of smart materials and encourage just
about everyone in there to go through as many different
combinations as they want. For example, I might start off with the combination
steel painted. I'm kind of leering
towards steel gun, but we'll have to see also like steel paint and
stained or scrapped. It's kind of a little bit nicer, but let us go
through and just see what all of the different
variable choices are here. I can also do just
kind of drop it in, see what it kind of
looks like on there, and decide whether that's something you want
to see or not. And that's pretty good. I also don't mind the
let's see here right now, all I'm doing is just
simply taking my time, just going through and bringing in a whole bunch of
choices on here. See here, like for example, we got steel painted. I like that one probably has a bit of a little bit of
what I want to go for. I'll start off with
steel painted. I'll go with steel gun just to see the two how
they blend together. Now make sure that these
two are blended in. I'll go ahead and assign a
mask and make sure that it's only these areas here
that are getting seen. The connector, we'll start
with going into our Pon. Phil, I'm I could do it that way but I think
I'd rather do it to mesh. Phil, feel like that we'll get through
everything we need. Once we have that,
let's go ahead and add a generator into it. You don't have to add
a generator though. You can go through
the smart masks as well to get what you want, but I just want to see what this does if you get
this opacity look. That's typical of something that happens when you
don't add a mask. Make sure you're
adding a black mask. And then add your generator. Repeat this. I
added a black mask. Added generator. Now let's
invert that already. I'm happy. Little bit. For the most part of I don't want to do
anything at face value. For example, I would
like to go through and maybe go through the process of enjoying
a little bit of fun, tweaking out the colors
of the smart material, for example, or the generator. This is where, again, we're trying to get that opportunity to repeat the process so you can have as much
time as possible. Establishing a foundation
of experimenting with different sliders
through the generator, knowing where everything is, including how to manipulate
color and smart materials. Something like this could
be a interesting color combined with metal edge tear that could be an
interesting color. That to maybe edge smoothness doesn't give us too terribly much the ambient
occlusion masking. It's a little something we can do but then
I'd like to tear down the contrast and I'd
like to tear down were level and then see what more ambient occlusion
looks like on there. You want to keep at that point
where you just want to see all the different
choices you can make. Let's see here. That's probably all right with me right there. Now I am seeing a little
bit of where I don't necessarily want to see
the wires in all of this. I may leave the wires
out in this just for now because I don't know if I want to do something
else with them. One thing I am thinking though, I know I don't want to do
anything with these wires. But by that I mean I don't necessarily want to do
any too much texturing or anything like that with them. But one thing I want to do is you see all these artifacts and this comes from, again, the fact that the
high res doesn't have the thin wires
and the low res, it baked on top of that
right through to this area. That's why you have that look. I disregarded it
mainly because one of the things I
eventually wanted to do, and it's not part
of this lesson, is I wanted to do emissive
effect with the wires. I can give you an example. What I mean, I'll
take color right here and work only
the emissive channel. And maybe I'll turn that around by putting
a color into it that can give a pretty
cool looking effect depending on what
you want to see. Right now, I have a folder
with emissive wire, one, like for example, I have a folder that's only showing for the
emissive in the mask. And I put it in there I can do a deal where I
can create some glows. And I wanted to keep that from people for a while
because I didn't want too many processes going through because this is more
of the rendering process. But I'm thinking I
might just show you simply so you can get an
idea of what to expect. Let me go ahead and
give you an example, like if I go through and add black mask on this
and maybe have a couple of emissive
wires for this one. And then I'll duplicate that with control D or right
click and duplicate it. Add a new black mask. Go through and maybe change a different color
to something else. Just doing this so you can
get an idea of what it looks like or where we're
going to be going with it. Maybe something that's a little more complimentary
to the blue, maybe something a
little more green. Just to give you an idea where we're going to be going
with all of this, then I'm just going
to reapply again, different areas for it. This is just again, to show you the potential where
we're going with it, but we didn't want to do
it on this video lesson. We wanted to do it on more
of the rendering area, but to enable the
missive effects, you got to do a
couple of things. First, you got to go up
to shader settings and make sure not shader settings, you have to first
go up to display settings and activate
that post effect. You won't get the glow just yet. And it's mainly because of the
fact that shader settings, you got to go through a missive intensity and crank that up. You can see already some cool
looking effects on here. Additionally to that though, the checkbox tends
to be cut off, but you got to activate
post effects and turn on glare and then
switch shape to bloom. That's going to be where you find everything that
you're looking for. We were hoping to do
something like that on here. Later on down the road. As you can see, we didn't want
to go too too far into it. As you can see, we just, again, the reason that's not glowing is because it's on a
really low fractal. But you can see we can mess around with different variances,
different colors. You can see all the
different cases. Or you can have a variety of different red values
that too can wash away. Like maybe a red here and a more desaturated or
different color red here. We didn't want to
go too far into it, as you can see, we just wanted to keep that a little
bit of a secret. But we figured we'll give
you a little bit of taste of it and I don't think
that's all the wires yet. When the time comes
for rendering, we're going to dip a little bit deeper into all of that so you can have a little bit more
fun with emissive effects. Again, that's just
activating for things like the post
effects on here. We're not really even touching the surface on things such as, should we say it, things such as shadows aren't even
enabled here right now. As we can see, you can see them, but they're not like really
having high samples. But we just wanted to give you a little bit of taste of where
that's going to be going. A little preview once we
finish our eye connectors that said that was just to dip your feet wet and give you an idea where we're
going and why we didn't texture these little
wires the same way we did the main connectors that said we're going to move on
to the next part of the eye, stick around and stay tuned. And while you're at it, go
ahead and turn off the, the shader of post
defects by just clicking on display settings and hit Activate and stick
around and stay tuned.
25. Detailing the Eye Sphere: Okay, so let's continue
in this video. We're just going to go
ahead and finish up what we have here in the middle lie, which shouldn't be too hard. Now, I gave you a little bit of a taste on the emissive effects with wires and just for now, I'm going to turn that
off and save that later. And I just put like
a steel painted coat in there so I can not
have myself distracted. I'm going to go ahead
now and just start in with the center area here. We'll just do a couple
of smart materials, start off with plastic glossy
or let me look at this. We got some interesting ones. I like the plastic
scuffed plasty. Again, this goes back
to keep experimenting, looking for fun ones
to mess around with. You might find an interesting
shape in all of these. I'm not going to say like you have to get tunnel
visioned in what I do. It's not necessary. But please just always be in that state of constant
experimentation. And of course I'll do a
steel scratched on there, so we'll put those
underneath here. You may be thinking like before we're just going to
add a generator. We're going to do something
a little bit different. That is, I'm going to add a black mask and
we're going to put a smart mask in just to keep things a
little bit different. I'll go through
the assets library on the left here and
select my smart mask. And it's just like
creating a generator, but just a little bit quicker. You have all sorts of fun ones that you can
get through here. They are fun. I think I'll test run ambient occlusion strong to see what
that gives me. And I'll just click and
drag over the black mask. It already gives us our editor. Let's click on that mask editor and see if we can
invert some things. Here you can see we have
indeed inverted some things. We have a little bit of
a bump from our height. So let's go ahead
and disable that. You should have a little bit of experience there with that. Let's see if we can
do that right now. Let's go through height. Let's just go ahead
and turn down the classic just so it's a
little bit more readable. We like this effect. It's giving us right here. There's something to be
even said right here how it affects which could be
something down the road. Let's go ahead and put
this into a folder. Now, this is your part where you go and you
adjust the parameters. Repetition, Repetition,
repetition. I want you to start thinking of all the fun ways you
can have some fun here. And there may be a scenario where we may be wanting to
do a little bit of testing. But first things
first, let's edit this smart material
with the color. See if we can get it to
match something here, like our reds,
something like that. Maybe I do like how it just
blends into a dust look. But don't forget, steel
scratch is a base. Go ahead and drop
other smart materials in above steel scratch just
to see what they look like. Just to have some fun,
just to get comfortable, just to commit, any excuse
you can to do repetition. A good example, let's try steel, dark age that gives
us a nice strong ambient occlusion just to see what that gives us and you can see all the
details gnarled out. And that's a cool
look right there. See if what happens if we
just turn the height but the base color opacity down of the entire smart mask and get something
pretty neat there. It's intriguing. Again, let's go through height and mess around
with turning that down. That's got its own
little unique flavor. I like that as well.
Let's go ahead and turn the folder off and compare and contrast what we have. I like that style, a
little bit of both. It's up to you how you
want to take that. But now that we have a folder that's pretty much
covering everything, it's meant only to cover
the center main ball. I'm going to make that
main folder center ball. If you turn it on or off, you can see the differences. Let's go ahead and assign it to this main area that
we see right here. To do that, let's just
simply go through and add a black mask and
bring in what we want to see. I'm probably going to
choose the polygon fill. Polygon fill, but
the entire mesh pill because this is the main
area that I want to see. But I don't want the
UV shells covered up. Worked on that. I'm going to, since
this is a UV, let's take that off, make sure to hit X. We can see that a
little bit more. This is also another piece. Again, I'm working
with the UV's here. We got a little bit
more of what we want. Maybe one thing that
we can do is go through and edit some things like maybe our steel dark age, our plastic glossy is
covering some things up here. Let us see that more. What I will do is see
too much of that. I'm going to add a second. I'm going to add above
it steel for all of this and I'm going to see if I can maybe do a
little bit of work here. I would like to add
some steel here. Let's go ahead and
add a black mask. I'm adding a new material and choosing some new spots here for the wires. I'll add
a different material. I'll add, for example, something like a dark rubber
or something like that to address some things
differently here. Let's see if we can just
see what this looks like though with a low flow Pacy can just to have some fun, switch it out again,
make it a little bit lower just to have a
little bit of fun. Now it's going to be pretty simple stuff
from this point on. All I'm doing at this point is just adding some
smart materials in, in everything and I'm going to eventually put a folder for them all to be categorized
in steel scratch. I'm just going to say we'll
do something for the wires. So what do we got over here? We can choose maybe a rubber, maybe a plastic rubber
tire might be fun. Let's go ahead and do
that for the wires. We can have a little bit
of fun with the wires. Now let's add a
black mask on that. Let's see if we can add a little bit of a
fill for all of these places. All right, so let's
see how it looks. So far, so good. Not too bad. Now we're
getting there slowly. Got a little bit more
to work on here. For example, I see something
where we got to do, I'd like to maybe, how should I say it,
maybe a second dark age put over this outer area here. Or maybe some a dark steel, steel, dark coat like that. We're just doing individual
masks now to give us everything had a black mask. Let's see, here we mask. Looks like. There
we go, fixed it. All right, so I didn't
need to like texture it. I just simply put the steel painted clear coat
underneath the ****. That way this is coming out on top and everything
else is on bottom. That works a little
bit more for us. All right, we're getting there. Let's go ahead and No,
that's not what I want. See here, still fill in, see I like this part. I got to look over here to the UV's to see where
I'm affecting this. There it is right there. This is awfully bright
and I would like to something dark in there or go through the center eyeball and polygon fill and
just work all that. That means working
with some masks here in the plastic glossy. Be very careful how we get through all this because
we have a whole bunch of masks and it's going to
be filling up pretty easy. I'd like is to put
something here. I'm probably going to ask what would make the
most sense is probably the reason we can't
see it right now, even though we're hitting white, is probably because
the steel fill in is what's covering it as well as everything else when we turn these two off.
Let's go ahead. I'm probably just fighting with the speculator or the generator. I forgot. That's something. Oh well I'm just right now just making this
blend a little bit easier now. The red is a little bit
cherry and that's okay. We can just go through a different color or desaturate out the base in the
smart material. Do that. Something like that.
Maybe maybe a little bit, something more like that. That's definitely a possibility, but that's what we want. We're going to go
ahead and organize it all into a folder. Call it, take everything we've made and we're
going to go through it. All one folder that
have anything. Okay. Starting off this
steel painted clear coat, I wanted to have this
mainly underneath. It's going to be taking care
of things underneath here. The **** is coming over it. The reason I put
it underneath is because if I put it like on top, it would cover just
about everything that we made on the **** work. And I wanted to keep
that little barrier, that metal brace barrier. As far as the center goes, what we did was we added
a series of materials, individual customized
masks to them. For example, with the exception
of the center eyeball, that was done mainly through, that's this part right here, that was done mainly through two smart materials
blended with a smart mask, which is the dust mask. This one here, occlusion strong, you can see that being
plugged through the plastic, glossy and it's
bleeding down into the dark age smart
material that is also combined with
the steel scratch. Honestly, I like. I feel like we get a better
pronounce look with it. May just go on ahead and delete off the steel scratch
now that I see where it is. Because I like these shadows
that are going on here. Now after we do that, we go to the steel fill in. This is the stuff that is
around the metal of it. We just wanted to give some
different color textures. Feel free to go across and replay all of
these textures on here so you can have
fun just taking your time on all of
it is definitely, we only did like one panel
just to show you what we could do. That was it. But definitely you
want to be taking the opportunity to enjoy
going through all of that. The next thing that we did, we went going to the wires and trying to give a little bit more of
a contrast color. Finally, one thing we can do, I'm not sure if it
really is necessary. We have enough 0 on here, ambient occlusion on here, but I'm going to turn off everything except color
and see just what it looks like if we delete everything off
our baked maps come up and then set the base color
and then go to multiply. Now let's see how that looks. It's a little dark. Again, change the opacity. We can plug that through with a little
bit more opacity there. Now, again, if you've
gotten this far, everything I did
shouldn't be that hard. Including how to handle
even these bras. If you think these
braces should have a different color,
at this point, you know what to
do to experiment with having those Brac
go through, steal, fill in, even if you want and change to what
you want to see. If that's what you'd like to do. There's really no such thing as the wrong path at this
point for any of this. Another thing that
we can also do is we can go through and even add another smart material additionally to this
if you want just to. Again, just simply trying
to test the waters of what something might look like on just these braces.
You can do that. It's anything too terrible,
it's definitely doable. I certainly do encourage you to go through and be experiment, I would say be
creative, be creative. There's plenty of things that
you can go ahead and do, but don't get tunnel vision, that this is the only
thing you can do. Because again, we have I want you now thinking
about base colors and manipulating opacities
through base colors if you think that this
is siding in too much. This one also, let me see if I can manipulate
the polygon on that one. I think we got one of the plastics or the steel fill
ins that's affecting that. There we go. Thank again, just keep doing this. The other thing
that's nice about all this is that doing
this all gives definitely ample opportunity to test the grounds for troubleshooting like I
just did right there. Again, this is up to you
how you want to fix it. I'm going to go ahead and
let you make your own, and then I'm going
to make my own. And then we're going to
compare notes on the next one, which is going to be about exporting out the
textures to Unity. With that said, stick
around, and stay tuned.
26. Exporting Textures To Unity: Okay, so let's move
on in this video now. We're going to go over
the process of exporting out multiple textures now from our PBR texturing workflow
and how we can re import them into a three
D software package. In this case a game engine
of choice we'll be using, which will be Unity.
Let's get started. Now that we have everything
that we see in front of us, establish most of the
texturing that we want done, I may just do one extra thing before going through the process of exporting our textures. And I'm just going
to add a fill layer on top of everything because I'm wanting to put
a little bit of a glow in the center there. I'm just going to disable all
the channels on here except 0 missive and maybe choose a color that I'd like
to see on there. Like nothing too insane,
nothing too crazy. Something like a
desaturated color. Finally, I'm going to
name this layer glow. Now, again, there's no glare, there's no bloom
effects going on. We're saving that for
rendering an eye ray. So I'm just going to add
a black mask in here. Just going to left
click on that mask, make sure the value is white. And maybe go through
and just give it a nice little sheen, glow like. So. Then I'm going to go through all the
different channels up here. I'll start with the missive and turn the opacity
down a little bit. Has a little bit of
a blend look to it. Just one quick little
change I wanted to do. Moving on, let's get started exporting out all
these textures. Now, as you remember, this model has two texture sets. What that means is
that, for example, the helmet is going
to be exporting a series of textures out. The eye attachment
is going to be a series of textures out
as they have two shaders, therefore two UV sets. You may say it's
quite a few maps. Is it like this for
every game object? No, this is a three
D educational model. Just meant to give you as much practice and
opportunity as possible. Typically, asset will
have one UV set. If we're talking about U dims, it's probably going to come to another more advanced UV and texturing course
down the road. But I want the foundation
of everyone to understand the basics on UV. Let's get started on
exporting these all out now. First thing we'll do is
file Export Textures. Once you bring that up,
you will see three tabs. One is Settings Output
and List of Exports. Let's start with Settings Tab. If you'll see in the
Global Settings, this lists all the
different UV sets, A K, the different
shaders that are applied. In this case the helmet and the eye attachment
both checked on. Therefore, both are going
to have a setting for you. Now, if we move over to the
general export parameters, we have the location where
all the maps are going to go. We have the output template, which is an important one
for you to understand. We'll circle around
that as well, as well as the type of
file you can choose. Some people choose Targa files. Tga files. J Peg in this case
will be working just with PNG's
something very simple. We're also going to be
you can choose 2048. If I were you, I
would choose 2048. But I exported all
this out in 40 96, so I'll be doing my
demonstration that way. Now let's go over to
this output template. This is probably the most
trickiest one around here because a lot of the
time you look at this, this can be very
confusing because it requires a particular amount of knowledge understanding
what each map is doing. Fortunately, Substance Painter
gives us these presets for every type of software to help us make our job
a little bit easier. Let me give you an example. In this particular case, we would primarily be working on the Unity render pipe line
specular, which is this. And it gives us a detail of the maps that are
going to be exported. You have this very convoluted
looking line right here, but the only part you need
to pay attention to is the underscore that comes
after this texture set, which is in this case albedo. That tells us this
is the color map, there's the texture, this is
going to be our spec map. And then we see normal,
that's normal map. This is going to be a mission, that's a missive map. Those are the ones
that we're going to go through and export. In other words, you're
going to see four maps here on eye attachment and
four maps here on helmet. Now with that said,
I want you to go ahead now and open up Unity. I'm going to keep
this little option here open because we want
to do something here. If you haven't right now, go to your Unity project and
open up Unity Hub. Please feel free at this time to pause the video
to get this open. Now, once you've
had this turned on, go ahead and hit a new project. Hit Three D Core,
hit Create Project. And what's going to happen
is a loading screen is going to come up and
it's going to be a long, lengthy process of loading and creating a new
project for you. All right, now once
that comes up, you should have something
along the lines of this. Now let's go ahead and
just tackle into here. One thing I want you to do is before we export
our texture out, let's go over and find our
three D model in our finder. Once you have it open, let's go ahead and
make sure we have our scenes selected and
choose our low res FBX. And drag it in there. You should have your model along with two shaders attached. Now for now, let's just go ahead and leave
it just like that. We're going to look
at a couple of things about this model. One, you're not really
going to see it, let's just drag it in here and you'll notice it is super tiny. Small. Hit the R key and
just drag it across from left to right until it gets
bigger and bigger and bigger. Hit the key to
translate it across. And then hit the key
on this light to give us a little bit of opportunity to see a
little bit more light. And I'll just leave
it like that. After you're done
with that, let's left click on this little tab here. I'm sorry, left
double click on here. You should see an
orange barrier. So keep in mind, I'm working on Unity 2023. Let's go here and
see our materials. Now, materials is like
another word for shader, like the texture setlist. You even see it. It's
called Helmet one. What I'd like you to take
a look at right now, it's just edited out because I want to do this from scratch. What I want you to
take a look at is all the channels that we
can plug something in. You may want to take a look
at something like occlusion. Occlusion, referring to
the ambient occlusion is a map that we generated
from substance painter. However, if we see it's not one of the maps
that gets exported. This is why I wanted to go into talking about
how we can get and edit and put additional maps into presets in order to
match with the shader. In this particular case, let's not go too crazy. Let's just go ahead
and just simply add an ambient occlusion because it can get a little
bit trickier. Further beyond this, I want
you to try something simple. Go ahead and left click on that universal render pipeline, Specular, duplicate it, then
right click on it again. Rename it, let's
call it Unity to. It's the same one as this one. It's just another preset. But what we're going
to do is just add one more map for it to export. Instead of four textures. It's going to be 55 for this, 1.5 for the helmet to do that, let's just go ahead
and hit Gray. Let's ask ourselves, what was it that we wanted to export? It was an ambient occlusion map. We see ambient occlusion. Let's left click and drag
and put it in there. Not the alpha channel,
just the gray channel. And that's it. Now let's
go over to setting. And you remember
all those presets. Let's go down and we see
our unity two that we made. Let's just go ahead and keep
it simple and hit Export. You can see all the different texture maps
have gone through. Let's go ahead and check
our folder on here. Now you will see the
maps that we made. It should be a
total of ten maps. Let's go now back
in to our project, of our Unity project. We have our three D model. Let's just start
with something easy. Let's just go and create. Let's go through scene.
Let's just go ahead and let's just make this easy. Create a material. This material will
be for the helmet, so we'll call it helmet. And now we're going to
go ahead and left click, drag and apply it onto this
helmet that we see here. Okay. In this now we're going to go ahead
and put all our maps in. Let's go ahead and just
do something similar. Let's just drag in all
our helmet only maps. That's these maps here. And if you want to
go back and export these one at a time, go ahead. But you should be dragging in about five textures at a time. Okay, now let's go ahead and
double click on this helmet. And I'd like to change this
from standard just for now, specular start up just for now. I'm going to go ahead
now and just plug in. If we look here, let's go to our helmet albedo. We look here, there's albedo
and it's just matching it up like so. All right. Now let's go down to specular, Let's see, we see specular
smoothness right here. Let's click on the helmet
again and match that up so you can see it slowly starting to make
its way into here. We see the normal map,
let's bring that in. But oh, it looks
weird, it's messed up. We take a look, this texture
was not set to normal. You can fix it here with
now or you can set it into the normal map here. That will also fix it. But I like to go ahead and just fix it
through the shader. It's a, and you can see it's
starting now to line up. Now we do have a hype
map that we made, but it's a personal call I'm not really going
to do too much. Also, I look at
all these crevices and all this stuff could be
done with ambient occlusion. We see occlusion
is our next one. I'm just going to go
ahead and put that in. You can also see we have
a little bit of a dial for controlling things now. Lastly, I have the emissive map. I didn't seem to bring that in. Let me check to see
where the emissive is. It's usually identified by being a very black and dark map. And I can already look at
here and see this one's for the eye and yeah, this one's for the
eye and this one's for the helmet because there's several dots and there's just one dot for the
emissive texture. Let me go ahead and
bring that in right now and make sure that
when we bring it in we got it all taken care of. Let's click on that shader. Let's go ahead and look
to find a Emission. Now you can see this
little checkbox here. Let's click on that
and drop our map in, and you'll see the emission Now. Now that we've done
that, let's go ahead and we can create a folder. I'm right now just going to create another material
just to show you this one last time with
the material like so. And I'm just going
to left click, drag. And now I'm going to
go slightly faster. I'm just going to select all my textures out
this time around. It looks like that's
just about it. Now let's bring it all in. Okay, so we have everything
that we want to see. Let's go ahead and get
this started here. Let's start off with finding
our, our material material. Let's find the diffuse
texture for this. That's the specular
as it looks like. Let's look for the color.
And that would be this. Let's check that eye then let's go through,
bring it in there. Next one again I'm
looking at this metallic. Let's keep everything the same. I'm going to do
specular set up again. We're going to go specular. We see the specular smoothness. Let's go ahead and
click on that. And bring that in here like we need a normal map and we're going to have
to fix it afterwards. Let's go ahead and
bring that in. Hit then of course we
need an occlusion, let's bring that in there. That helps us with
the R inclusion. Finally let's go ahead and just plug in a
real quick emission. Let's check the box on. Let's go ahead and find
that little faded, dark green and bring that in. You can see the
dark green pop up. Now that we have that
all taken care of, you can definitely freely row, we have our textures put in. We can do one last thing on here for making this a little
bit lighter color. One thing that a lot of
people want to do to try to match a little bit
easier is if they, for example, click on a
texture of the color, See albedo two, and then
click on that little clock. If you go to the default, you can maybe get a little
bit more of a lighter, easier seen color
that might help. That's definitely your
parameter as well. Feel free to experiment, but that is how we
transfer our textures in. With that said, we're
going to now move on into the rendering phase and, and talk a little bit more about a missive and glow effects. Stick around and stay tuned.
27. Setting Up Emissive Effects for Rendering: Okay, so let's continue
in this video. Now we're going to start
to get ready to render. But first things first,
we're going to do some tweaking to our textures, particularly the
emissive textures, and how we can manipulate
different intensities through the base channel to give us
ultimate optimal results. And then show you how the rendering
process crash course works before we go
into the next video, which will be more of a more opportunity to explore deeper into
all of the settings. With that said,
let's start with how we can set some
emissive effects up. You can see already
I have a bit of a glow and you're probably wondering where that comes from. Well, I explained it before in the video when we were doing a demonstration
with the wires. Let's just go ahead and start. Take this fill
layer for example. You may notice it's been
masked to these areas. Now the reason it
glows is because the emissive channel is turned
on and the green glow is relatively high that tell substance painter to
glow around here. Now, with that said, to enable that bloom effect, you have to have a couple
of things again enabled. One is that you have to have your intense missive
intensity a little bit higher then that's under shader settings up here
in the upper right. Additionally, when we
go to display settings, we have to hit
activate post effects. Your bar might be cut off here, so you might have
to slide over to the right and look
for that glare. Look where it says Bloom. You can change that to
many different versions. I choose the Bloom
effect though. And then you can actually
manipulate effects that way. Don't forget though,
when you look at glare, make sure that box is
also checked as well. Moving on from that, I'd
like to now go ahead and since this is a little bit of an opacity of slightly
translucent ****, there's a model piece
that's built behind here. Now I'd like to get some
practice on establishing an emissive texture behind this **** so that
you can see it. Let's go back into
eye attachment. All right, when we click
on eye attachment, let's go ahead and
make a fill layer. Let's go ahead and disable all the channels
except emissive. And change the
emissive color to, we can do something
like a green. It's only glowing like that
because of our, our effect. We're going to change
that in a second here. Let's call this back **** light. Okay, at a black mask, since there's a little
model piece beneath here. If you look, this is
where the UV shell. If I texture it, you're going to texture into adjacent pieces. One thing you got to
be careful to do is find alignment and
look to do UV wrap. That way you can give a
little bit of a texture. Another way you can do it is just simply go
through the polygon fill and choose
the UV chunk fill, and do it that way as well. I like to do it though the
other way with a brush, if we want to be honest. Because maybe I can
work a little bit easier into creating like a
little bit of a fade effect. Now you see a little
bit of it already. But where I want to shine
on this and impress upon you is that we can control the intensity
of the emissive effect. Now, right now as it
stands, it's pretty high. If we scroll that down though, we can get something a
little bit more interesting. Again, I'm now in the display setting and that's
controlling the bloom. We turn that emissive
intensity all the way out. You can see that it's
like a hard line. We turn that down and we see
a now blend in that gives us that illusion of that color of a **** that's
right in front of it. Now with that said,
when we do that, it universally affects all the
glares and all the blooms. Let's just go ahead and
change that right now, if you take a look
at the helmet. You'll see that the opacity of the emissive is pretty low. If we want, we can
bring that back up. One other thing we can do, I'm leaning towards this, is just crank it all
the way up like that. And then just control all the emissive effects
that you have by clicking on the emissive to
the channel and then messing with the
opacity as the slider. That way you have
individual control across every one of these. Like we have the
green emissive layer, we're on the emissive channel, let's change its opacity. So let's go back to
the eye attachment and manipulate the back
**** opacity down. So we can turn that back down so you can see how that looks. Now with that said, there's just a couple
more things we can do. We talked about the wires. Wires are your choice on
what you want to do people. I don't want to do
this where I'm telling you to texture or put missive
effects on the wires. But think about
this for a second. You can explore and
have a little fun with adding some wires into
all of this if you want. But I do want you exploring
again with everything. Like you can see, like what I'm doing right
here with the wires. If they're too distracting or taking away from the lights, it's just blowing out to the adjacent and taking
away from the camera. Work with those emissive
effects now and just dial it down a little
bit, it's that simple. Or maybe the color is
just needs to be of a different shade so it can
contrast a little bit easier. Maybe a blue works a little
bit better. Go on ahead. I'm not going to do too
much on the lights, but I have demonstrated
that just for you, mainly because I want you to
find your own feel for that. The only thing I'm leaning
towards in adding in extra is maybe putting like a little metal
brace across here. Just a little bit of
something before we go on ahead and show you
a substance painter. This is something
I should have done probably in the eye attachment. I apologize if I'm
adding it in extra. All I'm going to
do is just simply, it's really super quick. All I'm going to do, add a steel scratched in there
right below the 0. Then I'm just going to add
a black mask on there. Go to the folder, This looks like
this part up here. I'll just texture. It's
super quick through here. I'm just going to hold
left click, hold shift, bring it across,
click shift across. Just get something
super quick in there. If I go outside the
lines, it's no big deal. Go on ahead and invert
this and cleaner up like so. All right. Just something to add a
little bit of a motel to it now that we have
this all taken care of, we have things set up a
little bit easier for us. We can now work a little bit
more now on our rendering. Now before anything, I'm going to just
show you real quick, super course, just how
easy it is to render. All you do is just go up to here where this brushes and
see where the camera is. Just click on that. You're just going to give yourself
a new viewport. Now I have a different
viewport background than you. That's because if you go all the way up here to environment map, this is the first thing
I would probably change. You can go through and
change it 20 where you want. I have this Dan
shipyard building, that's the one I
have for this one. I rotated by holding shift right click and dragging
across that easy. That's simple. With that said, we're going
to now in the next lesson, talk to you a little
bit more about the render settings
that are in here. And go a little bit more
depth into making sure all the qualities are where
we want to be to exit out of. Let's just go to that
brush right there, and you just click on the brush. Don't forget to
save your file when you get to this point.
And let's continue.
28. Rendering the Helmet: Okay, so let's continue
in this lesson. We're going to finish
up by going over rendering in substance painter and going over all the features. Now it goes without saying that when you do any rendering, whether it's in Maya,
Arnold Blender, you always want to be going through the
process of changing settings and lightings and doing test renders on low sending. Like for example,
the eye attachment that you see here in the helmet could both be down
to 1024 or even 512. This helps us get through faster iterations of the
lighting scheme we want. I do suggest that if you
have a slower computer, I am going to be
working on a 496 so you can see the results a little bit easier in real
time as we go. But as I said, you can go ahead and start
at a much lower pace. With that said, let's go
ahead and get started on our texturing I'm
sorry, our rendering. Now if you can recall, we went and we showed you how to enable Ray in the
substance painter. So we can do that
again. We'll click on that camera on the top here and that will bring
us to a new display just like where we left
off, this is where we were. We have a HDR image in
here and we want to an environment map called
Dance Shipyard Building. One thing I want to
do, first of all, I want to get rid
of the background. Well, if you take a look
at this display settings, you get in a whole
bunch of options and parameters to work
with on here to help you out in establishing a specific look to
Ray for your render. Now you can move
the object around the same way you can in the Viewport when
you're texturing. It should go without
saying though, that you do that. This will be a
little bit choppy. If you have like, for example, a four K image and a crap
load of smart materials, you will see it bugle
out a little bit. Now if you wanted to, again, change or rotate the lighting, you just hold shift and
right click and you can see the lighting change. Of course, for me, it's going
to be a little bit choppy. I'm just going to bring
it back to where it once was here, or
relatively speaking. Again, you can see these are the struggles and
the fun turmoils of navigating with
a high resolution. You may want to
think about going through and doing a little bit more of lower
texture resolution. Now I'm just going
to go ahead and give it just that point. Now if you also look, we see a little bit of specs and everything like this and
we're wondering what that is. It's a little bit noisy, a little bit grainy. Well, there's a
way to change that and improve the process. We're going to go over some
more settings over here. Now if we go through and
check off where we want, if we go through and see this
little magnifying glass, we'll see render settings here we see min
samples, max samples, the minimum samples
it's taking which is five rays and this
is the maximum 1,000 Now this max time is basically saying how we're going
to go ahead and create, how long are we going
to render this for, how many times are we going
to take these samples? Right now it's set for seconds, but you can see the
minutes and hours. I'm just going to go
ahead and just for now, crank that up to
say, 23 seconds. And you can see how it makes
changes based off of that. Another thing you're
always going to want to do is firefly enabled. In most of the time, I do have a samples enabled, but it does get in the way of other things as
you can see already, and that's going to
be the emissive. I will go ahead just for
now and turn that off. Of course, you see the iterations
as we're going through, it's going through all
the samples of the rays, which is going to be five
at a time, minimum of five. It's getting through this is. I would say the minimum it can give you is
going to be five. But the max, that's basically saying that
it's no less than five for 27 seconds and no more
than 1,000 for 27 seconds. Depending on the speed, we can go ahead and I
can change that to 100. Once we do that, we are going
to continue on to render. You can see how it
gets slowly and slowly and slowly and it
becomes less and less noisy. Finally, you want
to go ahead and change out the
override viewport. This allows us to change
our width and our height. Lastly, if you want to
save your image out, this is where you go to, where you can export
PNGs or Jpeg images. I'm not going to get
into that just yet. I'd like to go
ahead and just hold off because we've got a lot of other things
we got to go through. First things first, let's
talk about this background. I'd like to go ahead
and lose it right now. To do that, let's go under
dome and change it to sphere. That's going to get rid of
this ground that we see here. I'm going to also take away the shadow underneath which is turning off
the ground itself. To get rid of, complete
the background, just turn on this clear
color and you'll have a color image that
moves in its way. I'm going to go
also go ahead and turn this relatively dark, like a dark gray to help it will contrast
a little bit nicer, Let's just keep moving on. The next part is relating
to field of view, vocal distance, camera
lengths for example. This is going to probably, I'm going to just
experiment a little bit here on which focal length
I want to see the set. Well, let's go ahead
and bring it in. You can see this also
is the place that we want to go with
when we want to see. Yeah. The depth of field
that's like if it's blurring the background but crisp
in the foreground. What we're going
to do for that is first activate post effects. Move the slider
over. Click on that. Depth of field that's over to the right, usually gets cut off. What I'm going to have you do is just go on ahead and click the, the left option key in
the middle mouse button. That is going to change some settings around
here when you do that. And we're going to crank up the aperture to give you an idea of what
happened right there. The aperture is what can
blur the whole thing out. One thing to do on here, I said left option for Max. It's going to be left
command, middle mouse button. Just be left Alt or left control for PC with middle mouse button. But you can see
like what I did was I picked this spot
around here when I clicked those two and it made the background blurry
and the foreground a little bit more crisp to help us accentuate
and focus forward. Moving forward, I'm going to work on a little bit
of color correction. I had my own personal choice, which is 1.1 and 1.09 I'm
going to turn those on now. Just give us a slight change
in saturation tone mapping. I'm not going to just yet. Let's go over some other things. If you haven't turned glare on, that's what's giving you
your brightness as is. Be mindful on all of that. If you feel that this is a little too
streaky, too strong, the glare is pretty
much where you want to work your magic to. I probably will say that the best place that I would make the
settings change to In the opacity menu
in the layers. If you remember the opacity
channel that we manipulated in the emissive channel, we manipulated the opacity of, in the fill layers
through our texting. That was on the last lesson. So keep that in mind as we
can mess around with that. Moving on now let's
put a vignette on it which can help
make it look cool, which is like a darker border. Bring up the strength relatively good looking right
there already. We're getting something that's pretty decent, pretty nice. If you want to work
with **** distortion, you can just make sure you reset everything on
your focal distance. If you turn that on
temporal anti alias scene I've never had to work with, I'm not going to
touch any of that. But I will say that
you do want to, trying to get as
much experimentation on this as possible. Just turn dials and
see what it does. One of the last
things we'll do to manipulate this is
activate color profile. Makes a pretty dramatic change. That's because we have
no resource selected. But if you go through all these different color
profiles and you can get a different aesthetic
look in color theme. I like to go with the RGB and manipulate the white
point just the tad. Then after all that
is said and done, I'm going to go now back into see our tone
mapping and enable that. Let's bring this up now just
a little bit so we can add in a little bit more
exposure into this like so you'll see me work a bit between the white point and the exposure if I like. What I'm seeing
here also come to the conclusion that
maybe we need to make this a little bit more cooler, like just a bit if I find
this is too predominant, taking away if it's too
bright in the eyes. Remember what we said. We can go in there, we
can go into our layers, select our helmet texture, and select the
emissive channel and work with the opacity on there. Right now it's set to 23. Let's see what we can
do when we turn it down to cut it in half
to where it already is. It's chugging along now
quite a bit because of the fact that we're on 40 96. Bear with me, you're seeing the consequences of what a
couple of year old can do. Again, this is why you're
going to want to put in that lower texture resolution when you're messing
around in under texture set settings up here. There we go. We got a
little bit more maybe. Let's see what that does. That gives us a little bit
easier of a look like. So let's turn down
the aperture just slightly so we can see a little bit more
crispness up here. You can see how it's
coming together. Slowly coming together
the way we want. And at this point, it's a bit of a process in which we just go through and do just a little bit
of change at a time. Just a bit of manipulation. Just small, tiny
tweaks is all it is. You can go ahead and
tweak saturation, make it look a
little bit more red. You can make it a
little bit more bright. Just slightly. It is now
anyone's game thing. So with that said, this is the final thing I would probably tell you is that once you
got it where you want, make sure you go
through and hold shift, right click and you have all
the color that you want. Just running through. See if there's any other, do just one final run
through to look for any, how shall I say angle. I kind of like this
angle because it brings out a little bit more in the contrast of roughness in the plate
right here in the hex. Maybe you want to
work with that, but you're looking at
this and you're thinking, I do like it like that but it's a little
predominantly right. Again, work with the exposure, turning it down, making
sure gamma is there. Then go to the
white hot point and make sure that's not too crazy and you can kind of reapply everything
you've just done. And let's see if we can. So I'm just going to kind of, I'm just checking different
spots here right now for sort of like a areas in which aperture
would be a good spot. Like I'm choosing a
middle mouse on here with left command and
I'm going to try to raise the aperture
a little bit higher, just a tad bit so that we
can see a little bit more. Then I'm going to try it
over here just to see again, see as we do this I'm just
holding left command, middle mouse and getting
different spots, different locations
and you can get a feel for where you want
this texture to go through. So with that said, this
is a please, please, please take your time and experiment as much as
you can scenario here, like I said, there's no
right or wrong answer. It's about experimenting and
having fun with that said, once you're done getting
everything you want, you just go through the, say, render process and
export the text image out as if there's anything
else you want to do. For example, you want to catch a little bit
more of that light, turn it in a little bit closer, and go on ahead and
have some fun with it. If you want to make that
light a little bit brighter, you know what to do here. Now you manipulate
the opacity in the emissive channel for where we created that
emissive layer for. You have that knowledge, you have that ability
to figure it out. Like I said, I really, really hope that this has been a instructional and educational
and beneficial process of your texturing path of
learning substance painter. And I remind everyone
this model is definitely yours to use and
practice as much as possible. And also this can be used for
your portfolio if you want. You do have my permission. It is not to be used for commercial purposes of
selling or redistributing, or putting in for video games. With that said,
thank you again for all of giving us a chance here. Like I said, keep
texturing, keep sculpting.
 Sean Fowler, 3D Instructor