Transcripts
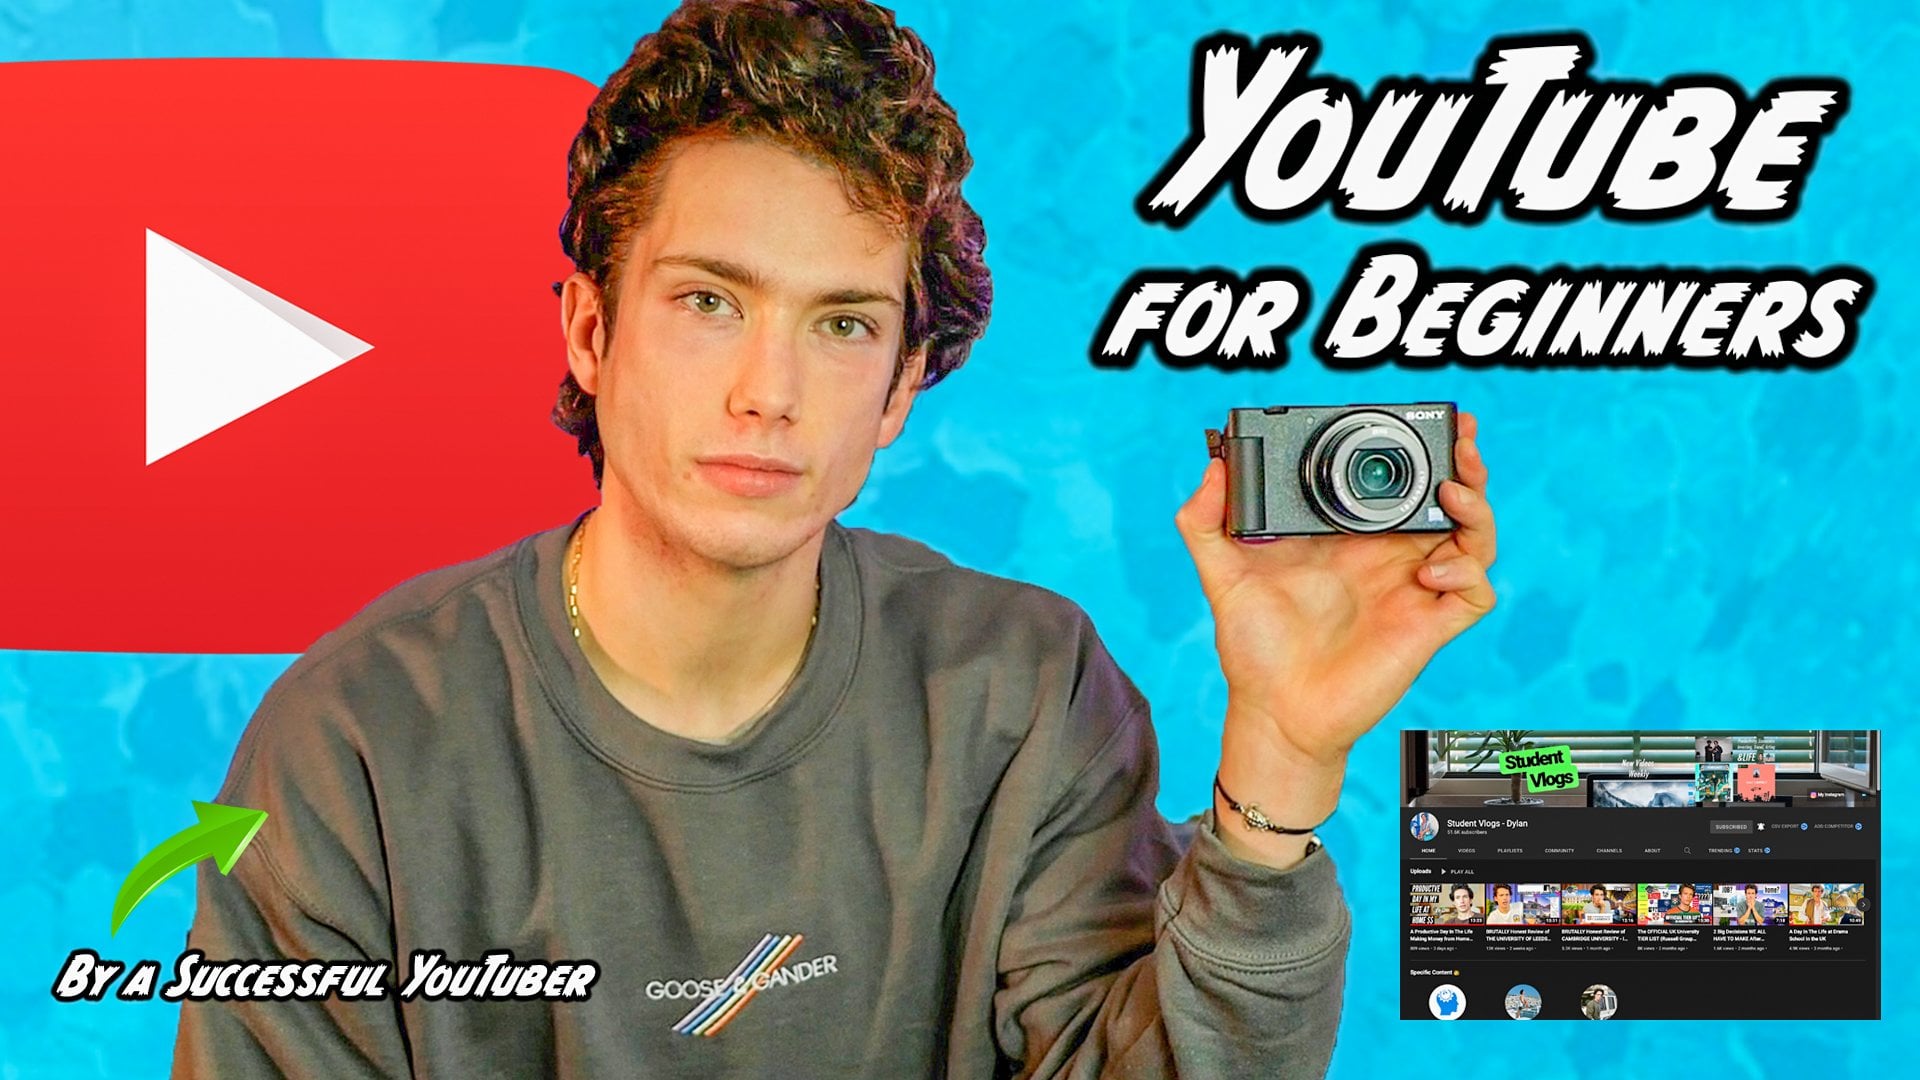
1. A YouTube Master Class - Welcome: So you've started a YouTube channel and you're trying to become as successful as you can on YouTube. Now it's a very competitive space. Today I'm going to be showing you all of the skills and insider tips and tricks that I've learned over the last five years of doing YouTube that have helped me create a quality channel so that you can hopefully do the same. I'm Dylan, I have been running YouTube for five years, I've gained over 46,000 subscribers in this time and over 7 million views. I've learned so many specific skills to do with YouTube, so many great insider tips and tricks that have taken me years to learn. I'm now going to share with you in this class, and hopefully, you can use this insider information to really make progress with the YouTube channel and to create a quality, long-lasting, sustainable channel.
2. Foundations - A Content Plan!: Welcome to Class 1, The Foundations. Now, part of the reason, I believe, my channel over the years has been so successful is because it has a key theme. Now, this theme is very specific and everything, my branding and my whole channel, is in line with this theme of the content that I'm producing. I made a channel called Student Vlogs - Dylan and my whole content was focused on university, being a student, exploring everything to do with student life. Now, one of the biggest mistakes, I believe, that people make when they start a YouTube channel is that they are very generic and inconsistent. Now, what I mean by this is one day, they might make a video in makeup. The next day, they might make a video on productivity. The next day, they might make a vlog. The next day, they might do something completely different. This means that every time a subscriber comes to the channel or a viewer looks at the channel, they're going to see this content and there's no clear pattern, so the viewer doesn't know what they're going to get if they subscribe to the channel. However, if, let's say, there was a channel specifically focused on student stuff. A viewer came to this channel, they saw a student video, they enjoy its student content, that viewer then would know that if they wanted to see more student content, they can subscribe to this channel and get this content. Whereas, if everything was so random, when the viewer would go to the channel, then enjoyed a video on a certain topic, but then they might not subscribe because they don't know if they subscribe that they're going to ever get the same content again which they like. I believe my channel became a success due to the specificity of my content. If anybody who's serious about YouTube, intermedia, and above, I believe that the step 1 in creating a long-lasting, sustainable channel is to look at your branding and your content. What I mean by this is to take a look at what content you want to produce. I'd suggest choosing three topics along the lines of what your videos are going to be about, writing them down, and then sticking to them three content ideas while you're growing your channel. For example, mine currently is student life, productivity/money, and acting. There are three areas that my channel is focused on. When I was just at the university, my channel was solely dedicated to student life. That is when I saw the most growth. Now I've finished my Economics degree, I've branched out into more areas because I can't make as much student content. The growth of my channel has been slower and less because, arguably, I'm not as specific. I can say firsthand that specificity does work for growing your channel from low down and up because that's what I did. Straight from the start, what is going to stay your channel apart from other people trying to become and start YouTube channels in 2021 is really being specific on the content you want to produce. Ask yourself, right now, this second, what areas you want to make content in. Narrow it down to three topics. For example, vlogs, productivity, and makeup. Once you know this, you can streamline everything else surrounding your YouTube channel in line with the content. It's going to work in a lovely, like circular, loop going forward. But we're going to talk about that more in the next class, which is branding.
3. YouTube Branding!: Welcome to Class 2, branding. Once you know the direction of your channel, i.e. the content you want to make, you can start looking at branding your channel in a way that is in line with the content you're going to be producing to once again, help viewers get a sense of who you are, what your channel is, how they're going to benefit from subscribing to your channel, and watching your videos. You can already see the key thing that's going to help you stand out on YouTube is branding and consistency within this. Branding covers channel art, thumbnails, display pictures, descriptions, titles, and even to a certain extent, the way you introduce or film your videos. It's your style. This is something that top YouTubers have on-lock whereas the new YouTubers often forget about the branding and the consistency within this. This is one of the biggest gaps that I've seen grow into myself as I become a big YouTuber, and it's something that I've noticed that all the big YouTubers do that the little YouTubers don't. You always know what to expect from a big YouTuber. The smaller ones, you don't really know. For example, let's take look at my channel art. We can see straightaway from my channel art that it's very clean and crisp. It's got a lovely desk background which suggests sleekness, somebody quite young, somebody who's hardworking like an office vibe, and it's quite fresh with the plant. Now, I do like this a lot for them reasons. Then I've also added on some text on the left that says, "Student Vlogs" because that's the name of my channel. As you can see, it's not too big, it's not too messy, it's not too overpowering. It stands out from the background, so you know straightaway that that's the vibe, that's my name. Then you've got new videos weekly because that tells the audience that every week, I'm going to be uploading a new video, so if they subscribe, they can expect a new video every single week. It really does provide them an incentive to subscribe to my channel. Then on the right-hand side, you can see I've got a bit of personality in there. I've got a picture of me and Vanesh, one of my friends. I've got also a single to my new song, promoting my new song. I've got some words explaining what my channel content is, productivity, investing vlogs, etc. That channel art really does sum up so much about me and my channel. Subconsciously, that branding is going to influence whether people subscribe to my channel and stuff like that. It looks good. It explains what I'm doing, and it explains when I'm going to be doing it. For that reason, people feel that I'm giving them information about my channel in a way that suggests something about my content. That, subconsciously, will help them make an informed decision about whether they should subscribe to my channel or not. In my opinion, the criteria is, you've got to state your channel name to cement it in the audiences' heads. You're going to state when you're going to be uploading new content, and then you've got to add a bit of personality/information about the content you're going to be uploading. My display picture is me in a red jumper. I've chosen this purely because the red jumper really does pop out from the background, and I feel like it's really good to have a picture that sets you out from the crowd because when people come on your channel and they see a distinctive display picture at a glance, they'll be like, "Oh, it's this guy." "Oh, it's her." Whereas if your picture which is very generic, they'd be like, "Oh, wait, who is this again?" Really, branding and setting yourself aside by having a distinctive display picture is something, again, that intermediate and top YouTubers do, but sometimes small ones don't. That's really going to help you stand out. For thumbnails, you can see that from the selected ones I've got on the screen here, the acting one. It's a very clean thumbnail. It tells you exactly what is going on. It's got a bit of intrigue, i.e the trailers. Am I really in a movie trailer? It keeps them guessing about, "Wait, is he in a movie trailer? Is he not in a movie trailer? That's pretty cool if he's in a movie trailer." I've got the element of cleanness because it's not too busy, there's not too much going on. It's very clear that there's me, there's a movie trailer, there's acting emojis, and day in the life of an actor. It's very clear, concise, and intriguing. It leaves the viewers wanting to find out if I'm in some big production. Another thing to the branding is that if your channel, like mine, is all by yourself, then people are often subscribing for you and what you're doing, so I always try and put myself in the thumbnail. As you can see on the left here, I'm nice and big. As you can see on the tier list thumbnail, once again, I'm in the thumbnail because people want to see my opinion. People want to see what I'm doing. If I actually put myself in the thumbnail because they've subscribed to my channel to see what I'm doing, they're going to be much more likely to click on the video. There was a study done that people are much more likely to click on a video thumbnail if they see it and there's a big person in there showing that clear facial expression and reaction. Really, when you're starting out on YouTube, really use that information to your advantage and really express emotion and yourself during thumbnails. As well because my brand is very slick, clean, young, fresh, bubbly, it'll make zero sense for me to have a thumbnail that had very dark colors, lots of writing, no pictures, and nothing like that because it would go against my brand. It's taken me five years to actually make this level of progress, and I'm still nowhere near getting it spot on. I've only just learned this. Five years in the making. If you can narrow this down and make this successful and really use this right now, this information, then you're going to speed up that process of creating quality content on your channel.
4. Creating Channe Art, Display Pictures and Thumbnails!: Class 3, exemplar channel art, display pictures, and thumbnails. I did touch on this in the last class, but you may be wondering, how did I make my channel art, my display picture, and thumbnails? I use Photoshop personally. What I did to make my channel art which is I think one of the key things of a channel, is that I went and downloaded a free template from the Internet for a YouTube channel art. There's plenty of free sites out there, and I chose this default background that I would use for my channel art. Then I opened that in Photoshop, and then added my personal brand, my personal twist, the extra information on top of that in Photoshop, because it's about taking the best of both worlds. Sometimes the channel art generators are good, but they really don't add your personal brand to it. Many people when they start YouTube, they just go to generic channel art template and leave it like that, but it adds so much more to your brand than your channel if you then customize that basic template, and a join spin on it, be unique. Wide tables, call the channel art, open it in Photoshop as you can probably see here, and then shuffle different layers where I've added in photos, text, student books, logos, and stuff like that. I would encourage you to get a template or an image you're happy with, then open in Photoshop, and customize it. The display picture, I mean, just open up your phone, your photos, choose any photo that you think really stands out and pops out, and that will be very good for your display picture. Then thumbnails, well, I made a separate class on YouTube thumbnails. If you do want to learn in detail how to make good YouTube thumbnails, please go check out my other class. In essence you want my opinion, I acquire the style of keeping it clean, keeping it fresh, but explaining exactly what's going on in the video while maintaining a bit of intrigue. For example, I already talked about the Day in the Life of an Actor one, my university tier list thumbnail. I've got me, the tier list in the background. Then to create intrigue, I've got the universities in a random order that probably wouldn't be the actual file loader in the tier list. I've really got myself, the brand, I've got what I'm doing, the tier list, and I've got the universities in the wrong order, which is intrigue. Really, them are three elements of what you want to include in the thumbnail, brand, and trade, and information about the video. If you can do that while making it look clean and crisp, you're on your way to a very successful thumbnail.
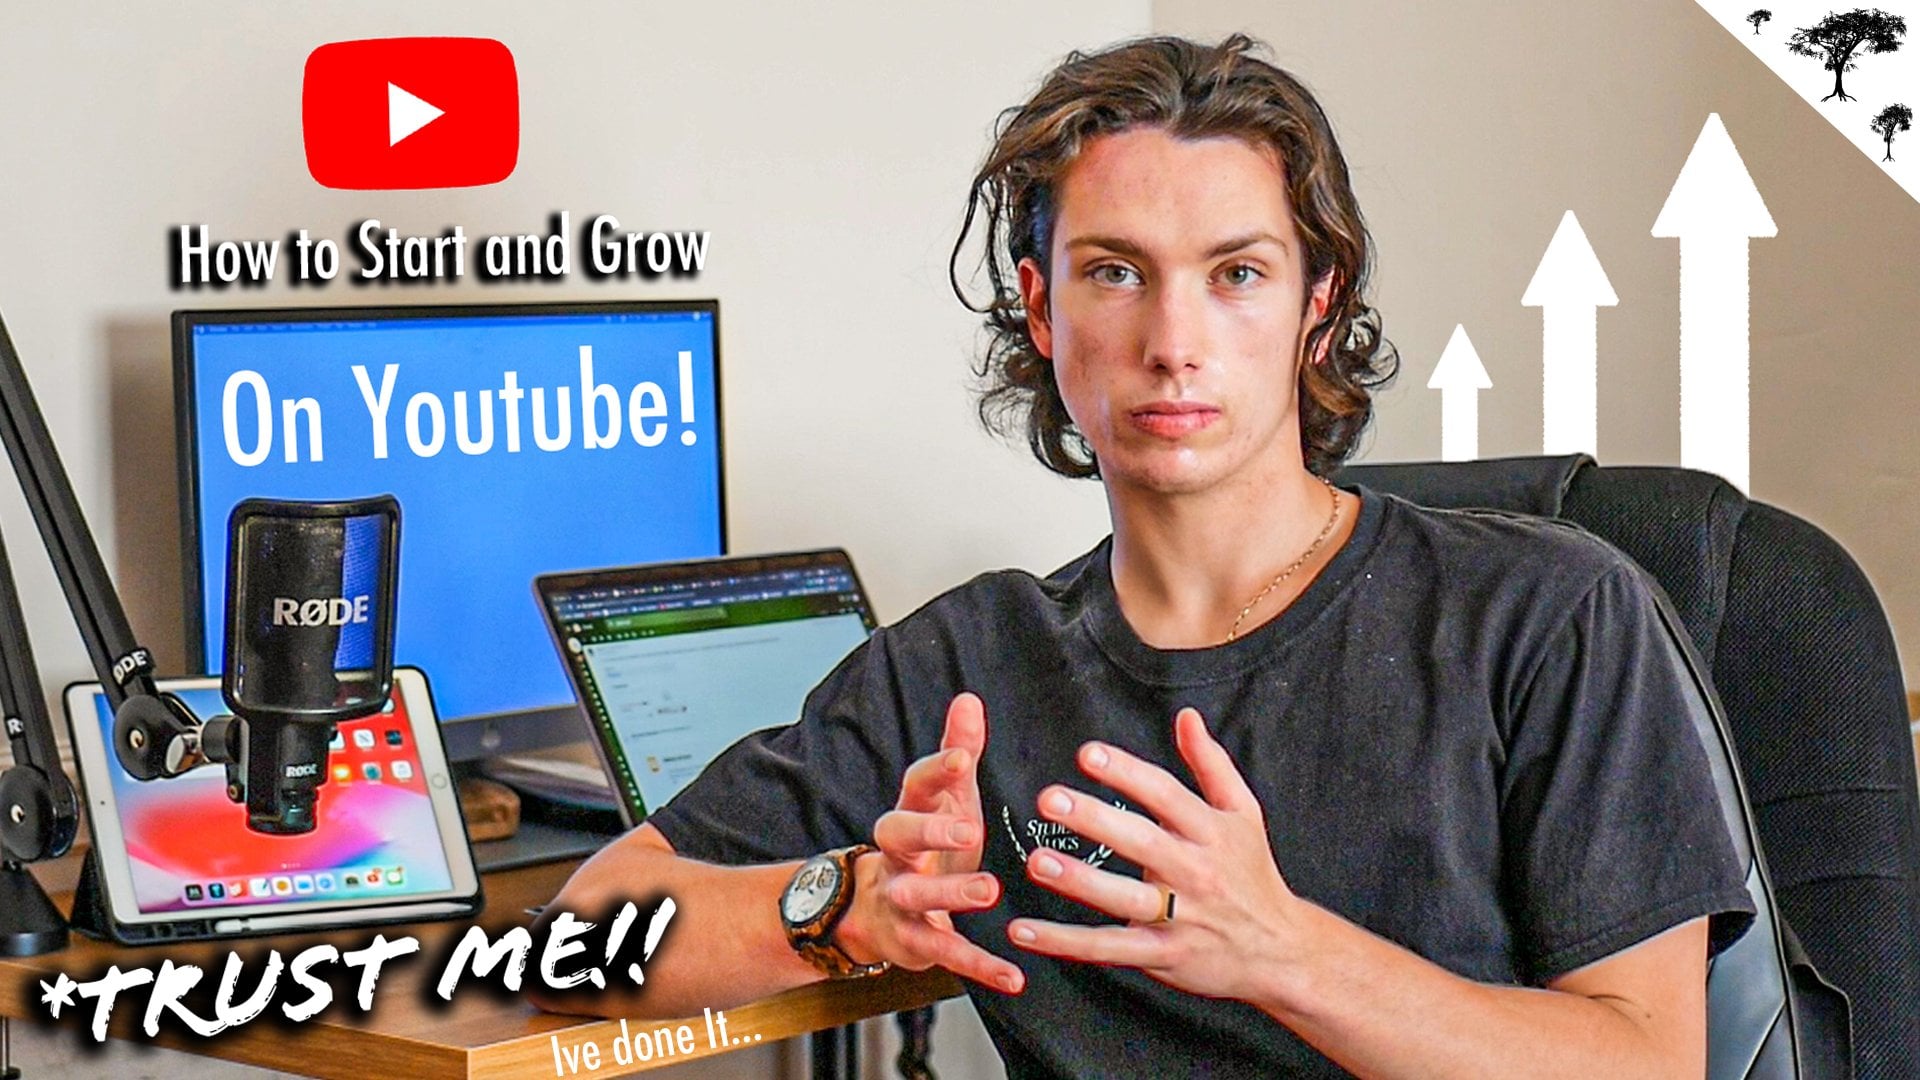
5. Pro YouTube Set-Up & Equipment!!: Welcome to class for filming videos. Once you've decided on your topics for your channel, you will then sit down and you start filming videos. You've set up the lights, the camera, the tripod, everything like that, and you start recording. In this class, what I'm going to do is show you my set-up and how off the several years, I finally got a few cheap items and a few more expensive items that have helped me take my recording setup from beginner to pro. Honestly the difference, something like an investment in your channel of a few 100 pounds will make versus not, is huge. It should be noted as well that the investment you make if you spend loads and loads of money, will bring very small additional benefits relative to the small investment. It's an economies of scale of things. What I'm saying is, the more money you spend doesn't create to better quality content every time. Once you've made the fast step of filming on your phone to filming on a camera with a mic, that jump in quality is going to be huge. But any jump you make after that, is going to be still good obviously, but you're going to make less of an improvement in terms of quality of recording. But anyway, let's jump into me filming the set-up right now. You can see I'm sitting on a chair with an iPad on the stool there to help me remember the notes for the video, always plan your videos. I made a class on that. You've got my camera up there my light, Soft Box lights are quite nice because they offer nice diffused light. So it doesn't look like too harsh. I've then got my mic right above my head on a stand and as positioned just out of frame. So you can't actually see the mic or the stand in the frame. Let me show you this, these are here right back and this mic was fairly expensive. The stand was fairly cheap, 28 quid on Amazon. But the difference between getting the mic stand and not having the mic stand is huge because when this mic was on my camera, there was still a lot of distance between me and the mic, which meant the quality wasn't quite amazing. But as soon as I get the mic above my head on this cheap tripod, the difference in quality was crazy. But yeah, cheap Soft Box light, expensive HD camera. The blow stand out feature of this camera is this lens because the lens allows me to get a lovely blurred background so that when I'm sitting down filming stuff, I can blur the background. I think to get a blur background, you have to look at the aperture capabilities of the lens. [inaudible] on screen now what lens does you need to get a blur background. Then I've got a Lumix G9, nice camera. Coming around, spinning around, you can see two other factors, I think, make a huge difference are this colored light here, the yellow one, GVM light, because the colored lights here, and here really recreate a nice purplish background and the lighting coming from behind myself just makes the background looks so much nicer than if it was just white and it also makes the shot pop out. You've got a plant there just for that fresh organicness. We got some more LED lights, here going along the back of my desk. It's more like coming from the screen and that's so decorative piece of lights here and that is my set-up. The thing about my set-up is the one thing that is so key and will help your video see more vibrant, more fresh, more new is good quality audio and a nice backdrop. I think they are the two biggest things that as a beginner, I didn't really think about, but are so key, so all these lights here may seem a bit unnecessary, but they really do create a vibe in the room. They really do look colorful on camera and the quality of audios, well, it's just the taste from a low quality production to a high quality production. I think my filming set-up really upgraded as soon as I decided to make the investment in this mic and tripod and then lights. I've recently got these lights and the amount of compliments I've had on, "Oh bro yeah, I like the set-up" and stuff like that is huge. You've seen my set-up and I think you should position your lights, your big light here and the same I did the mic far above your head if you can and then have a few lights facing behind you and maybe slightly coming towards you. Just create that nice bit of ambiance in the background and having light pointing behind you and in that space here, it allows that to be a bit of distance, farther distance between you and the backdrop. It helps create the illusion of a blurry background, I believe. Really having some back light, some front light to light you up, a mic above your head and a camera which can blur the background is key for your quality cheap set-up that will help booster your channel's quality.
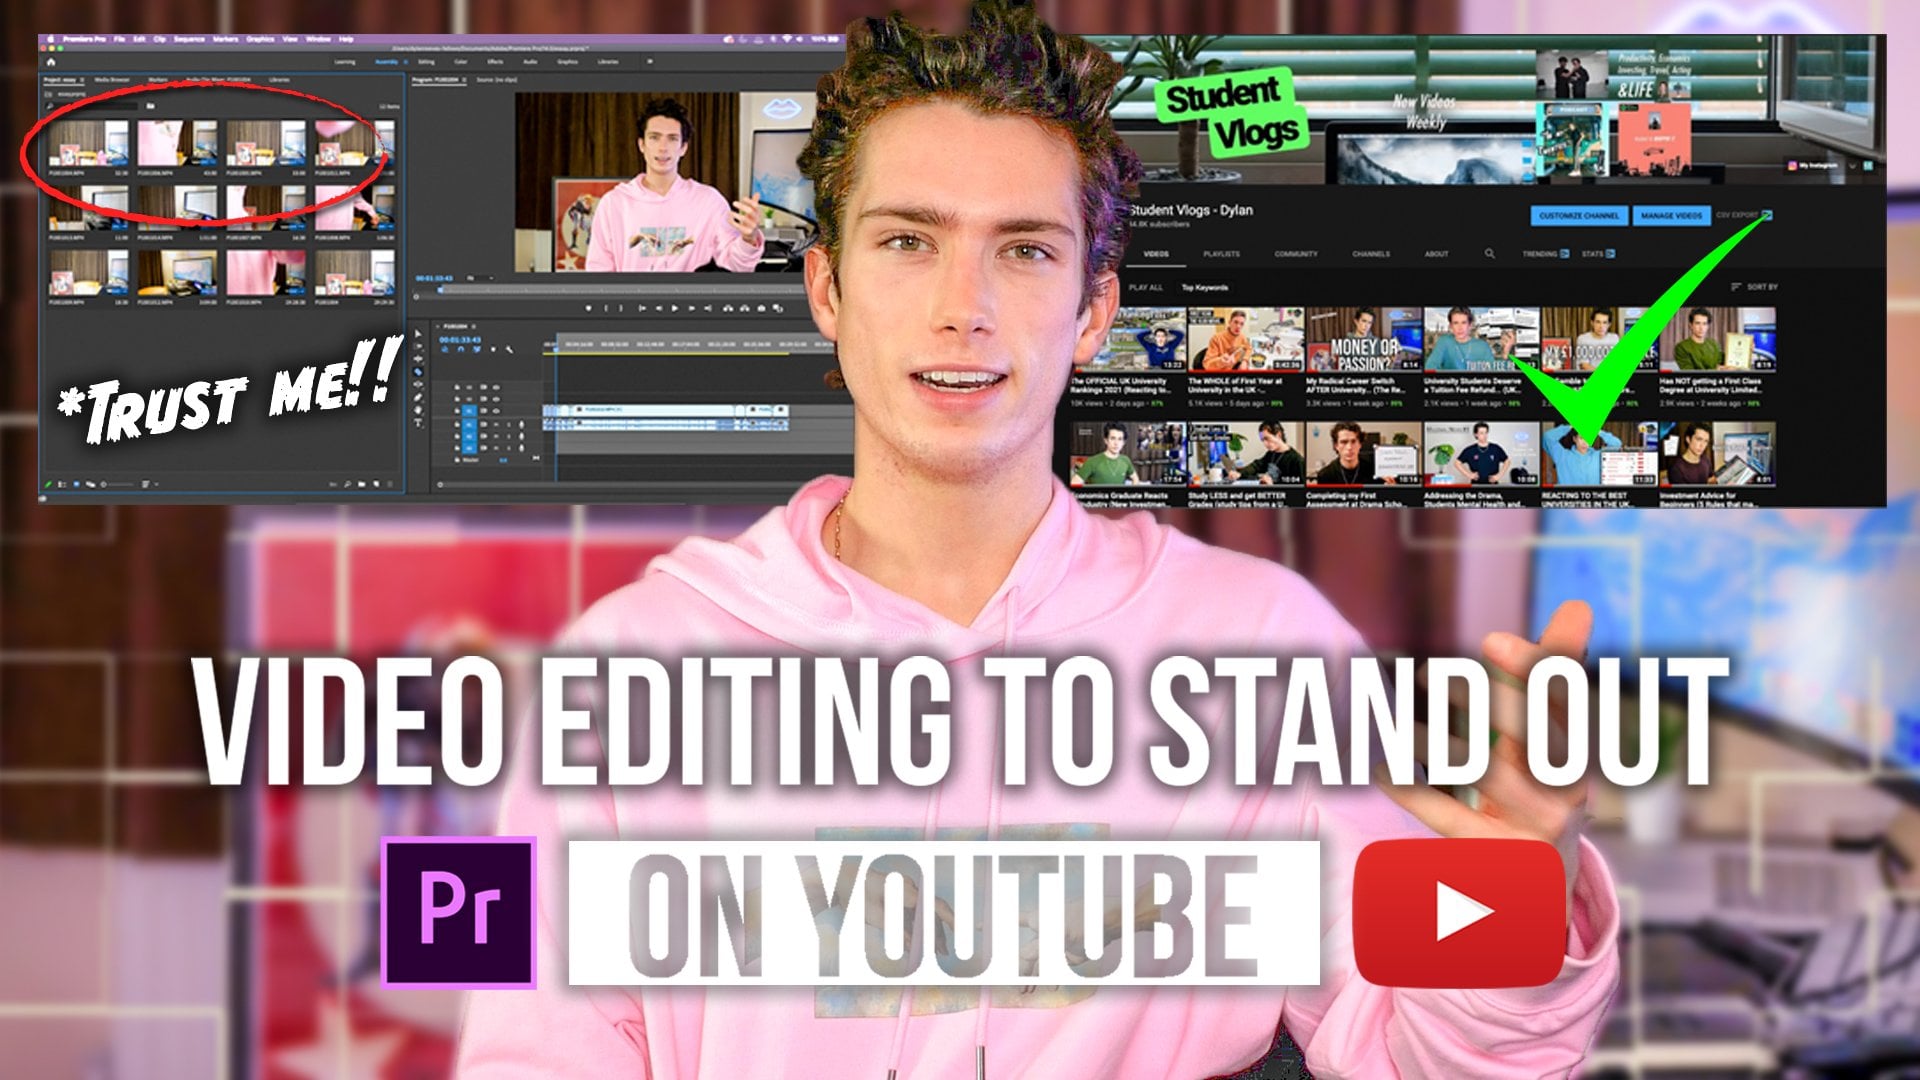
6. Editing To Stand Out!!: Welcome to Class 5. Now, I'm all the way down in the corner for the reason that basically I need to show you what's on my screen, so that you can see where to click once you're editing your videos. I'm going to assume that you know your way around Premiere Pro, as in when I tell you to do something, you know roughly how to do it. But I'm going to show you all of the extra tips and tricks that I've learned from all these years of doing YouTube that have helped my video stand out while editing. If you have a basic understanding of Premiere Pro, we're good to go. If not, then maybe you'd like to check out my introduction to Premier Pro class for YouTubers, which is also on my channel. But let's talk about how to stand out on YouTube during editing. I've got one of my videos here, Day in the Life of an Actor. First off the bat, something that some people do and some people don't, but it does work really well, is that you can see right here, I've obviously got a volume track of music in the background. You can see that I've chopped it up quite a lot. The reason why I've chopped this up is because I've adjusted the audio levels to slightly different levels, and then I've had to readjust them, and then I've had to load them down again. Now, the way I like to do it, because I think it gives you more control is I like to split up the clips and then adjust the audio levels individually. What I did was I got the cuts [inaudible] , split up the clips, and then I went audio adjust gain minus 1. Then the next clip along, I went to audio gain minus 2. Then this clip would be like minus 3 and so on, so on. You can see, it's minus 20. This one's a bit quieter, this one's a bit quieter. Then it goes to just normal level and then I build it back up again. It's going to be plus 2, plus 2, plus 2, plus 2, minus 2, minus 2, and bring it back down again, so that when the title card comes up, the music in the background is loud enough to be heard quite easily. At the start of the video, to give it that vibe, the music is a little bit louder. However, it slowly fades out so that when I'm speaking, you're focusing on my voice and not the music. Let's just show you what this looks like. Ladies and gentlemen, welcome back to the channel today. I'm going to be showing you what day in the life of an actor is like. Then after I do the intro, it starts to quiet down. Then let me move over to the volume rays on the title card. [inaudible] The volume rises and falls on elements when you open the video and when there's no talking going on, and when you've got a title card, they really add a sense of interest to the title card because a visual and music go really well together. Then in terms of the intro of the video, adding your music a bit louder creates a vibe for the video, it creates a mood, and it keeps people engaged. There's something about dead space in the background and silence that doesn't always work well. Always having some background noise is really cool. To allow the viewer to realize that there is a cool background, be it in the background, start a bit louder. Happy days. The next thing I wanted to look at to stand out in editing on YouTube is the title cards and the graphics. If you go over to graphics, what you can do is there's my templates and Adobe Stock. You can go on the Adobe Stock version and click Free for your premium, it's up to you what you want to buy or do, whatever. You going to see all these Adobe templates that you can use by simply downloading to license and download via that button. Then you can head over to My Templates and then templates will appear. I've downloaded quite a few and you can see that, for example, I've got one here that pops up as a little title when the video starts. I'll roll it right now. There it is. As soon as I say I'm going to be showing you what day in the life of an actor is like, the infographic that you simply know you find, you drop and drag. For example, let's say I wanted to use this one and drop and drag it. You drop and drag it onto a timeline. Then you can press T for text and change the title. Just having that cool infographic instead of just plain text that everybody knows how to do, the infographics really do set your video apart. The timing and placement of it is I like to do it when I mentioned the title of the video. I might be like, welcome to this video or this is the title. At the same time, at the start, near the star, I like to put up the infographic so that people know that this video is going to be good quality. There's going to be some cool edits, there's going to be some cool stuff. Then for example, there's this one I just made and it looks very clean, and obviously, you can turn the length of it. Info cards and infographics via selecting the graphics panel up here and then browsing and downloading the ones you want are also a very, very cool thing that I like to do. Along the same idea, this time, it's not a small pop-up graphic, it's a big one. We looked at it when I raised the background volume. You can see right here this graphic, where I've simply put a miniature title at the top, the big title here in the middle, and then the small title at the bottom. To add this in, all you do is a nice low drag and drop, and then you trim it to the space required. That's another very cool thing I like to do. Now, also, in the editing process, you'll see that I've got text, which is obviously everyone knows how to add text if you're an intermediate in Premier Pro, just press T and type. But throughout the video, I've got quite a few graphics that encourage people to like the video. Let me just get this up right now. Right here. The very start,54 seconds in, I do a subtle reminder to like the video via an infographic that I've downloaded from the same way, and then I've dragged and dropped it. The reason why I've done this is very key, is that the more likes a YouTube video gets, the more YouTube look at this video and think, "Hey, this is a good video because it's got so many likes." Then when YouTube realize that it's got a lot of likes, they decide to start promoting it. By adding this infographic to remind viewers in the video, to like the video, it can really help bolster your likes. If you bolster your likes, then you're going to be on your way to YouTube success because YouTube is going to promote your video more than if it had less likes. A key thing that I think is adding the infographics that remind people to like the video. Now, you don't want put in loads and loads because you don't want to overwhelm them and beg them to like it. But just a few subtle reminders can really help the video progress in the algorithm. In a 10-minute video, I've got one there. I've probably got one a bit later. You just saw it there, about two, five minutes, there may be three somewhere around here, three. I've got about three in a 10-minute video. Then the extra likes is really going to help me play the algorithm. As a new YouTuber, not many people know that, that is a really good thing to do, encourage likes, because by encouraging likes, you're encouraging people to get recommended your channel. That's how you're going to be successful on YouTube. There's quite a few cool things to do, infographics. Again, adding text on screen is a great way to keep viewers engaged. A little zoom in and Zoom out as, for example, here, I've made little text on screen to start, well, well, well, because it adds something spicy to the video. Then in terms of the color, to make it black and white, I clicked on the color panel and then I clicked on the clip, and then clicked "Lumetri Color" at the top. Then I just load the saturation all the way down, and that allowed me to get this black and white effect. I've also gotten the Zoom. To get the zoom, you want to make sure that the clip you want to zoom in is highlighted. Then go to the editing panel, Effect Controls. You see that all have to do, I'll just zoom in on this clip, for example. I'm going to lock this so it doesn't select this or the adjustment layer. You double-click on the clip, just the clip, you highlight, you select position, clock and scale by clicking that little stopwatch. Then you skip to the end of the clip and you'd zoom in, for example, like this. Then it's going to zoom in slowly over the time. If you, let's say I wanted to make it quicker, you could drag it shorter there and it's quicker. Or if you really wanted to make it jumpy, you could just play around with this. But I think a slow zoom creates quality within the YouTube video. That's way too fast, but that fast style might be used for comedy. Obviously, I've got a few pop-ups that I've accidentally deleted, but if I added a little pop sound so that when the pop-up comes up, it's a little pops so people know that, there's something new. This is coming up as recs, I've deleted the actual content. But yeah, adding the pop sounds and these elements and zooms, and black and white, and text on screen, and infographics and all things like that, and lowering and adjusting the background volume really helped to make you stand out on YouTube in your editing. Now, I might make a separate class on how to deliver YouTube videos coming very soon. I'm going to say that for then. But in the editing process, really think about being funky and creative. But some people like to keep it quiet minimalistic and I think keeping it quiet minimalistic is also a very cool thing. But you can see that throughout this video, I basically am doing the same things I've told you, I've browsed the infographics when necessary, put a few infographics on screen, while maintaining the storyline of the video. I've lowered and adjusted the background volume when needed. I've got a few cool pop-ups and light plugs. At very end, if you wanted to, you could encourage people to subscribe. You can see right here. Now, [inaudible] to remind you to subscribe at the end. Then I've included a little intro just to say thank you for watching. In my editing process, as an intermediate YouTuber, I didn't talk about this in my basic class, there are a few other things that once you know your way around your editing software, you should look at doing to really engage the viewers and stand out on YouTube.
7. Bonus: Editing YouTube Videos as a Beginner! (Key!): Welcome to this additional bonus class. If you are a YouTuber or aspiring YouTuber, a key part of being a good YouTuber and gaining views, subscribers, increasing quality content is making sure that you're good at editing videos. Because to start with, a good edited video is what's going to propel you forward and stand out in a crowd. If you saw the last class and you have no background in editing videos in Premiere Pro or you're looking to upgrade the top software, which is Adobe Premiere Pro, essentially, I've released a brand new class which is all about editing videos for YouTube for beginners. This class is one hour 20 minutes long. It explains everything in a step-by-step process and it's super easy to follow even if you have zero editing experience in Adobe Premiere Pro. It's even useful if you have zero editing experience in a Premier Pro, but you edit on other softwares, because I've talked lots of tips on editing efficiency, key things for editing on YouTube, and stuff like that. Really if you are looking to become a better editor on YouTube or you're looking to learn, then I'd recommend watching my brand new class which came out a few days ago. I'll say there's a helicopter coming now, but most definitely it seems like a long investment of time. But I promise you, if I'd invested in learning a one hour editing course way back when I started YouTube before I had 50,000 subscribers and before I've learned so many things across the journey, I would have saved myself hours, countless hours of time learning these skills if I just put in the effort to start with the learning. As this plane flies across here, I'm letting you get back into the class, and please do, if you're keen on learning how to edit videos, improving your YouTube game, watch my brand new class once you finish this one. Take care.
8. Case Study: Engaging Editing: Welcome to Class 6. Now in this class, we are going to take a look at a case study of an engaging extract for a video I made about three or four weeks ago. Now, last class, we looked at ways you can engage the viewers via editing in terms of graphics, pop-ups, like buttons to enable to use your [inaudible] to realize that this video is heavily liked, and thus we should promote it. This is a prime example of all of them things in action, so hopefully, you can see exactly what we were learning last class in action. This video went on to get way past my average views, notably because of the topic, because of the engagement and the way it was filmed, and the like ratio. We walk into this Greek tattoo parlor in Athens because it was the only place you could get your ear pierced. This guy is about 6'5", gray beard, tattooed, "Do you want ear pierce?" I was like, "Yeah, we do." Long story short, we bottled it because we get into this room and it's just this guy and he's huge. He said he can do it right now and I hate to say, my friend bottled it, and then I bottled it. So I came home and did what any check would do and got a clip-on to see if I liked it, and this is the result. But today I figured I should do a Russell Group, university tail list because after three years in university, you learn what the best universities are in the UK. You hear stories about certain universities. Now, I'm not going to name them just yet, but you hear stories through the grapevine, through your friends, you meet people, you visit unis. There's so much to learn that you don't find out before you go. Today, every Russell Group university is getting ranked and it's probably going to be chaos in the comments. You can see that I've got the tier list up on the screen with all the 24 Russell Group universities at the bottom. We're going to be ranking them A star to F, with F obviously being the worst. Yeah, the comments is going to be a bit crazy. Obviously, this is just my opinion. Stick around to see what ones I think are best and for some funny stories. First up, we've got the University of Liverpool. Now truth be told, I've heard good things about the nightlife in Liverpool, nothing really about what it's like to go there because I don't have too many friends to go there. But I think overall, it is a decent uni. I'm going to give it a C because I don't think it's bad. If it was popping off loads, I probably hear stories about it. Next up, The London School of Economics. Now, I've actually got a few friends who go there. They are very small, very good at econ, of course. A few of them are doing masters. They are saying that the academic side is very intense and it's very good if you're willing to put in the work. They definitely do a lot of groundbreaking research, so it's going to get a B because I feel with the university, if you're doing the undergrad degree, party experience is all about having a good time as well. LSE is going to get a B. University College London, again, in my circle.
9. The YouTube Algorithim (KEY!!): [MUSIC] Welcome to class seven, title, description, and tags. Now something that every video has is a title, and description, and tags. Now we can click on the question mark on YouTube that says, what you should do with your titles, a catchy title that can help you hook viewers. When you create video titles, it's a good idea to include keywords so your audience is likely to use when looking for your videos, and then the description is much the same thing. Writing descriptions with the keywords can help viewers find your videos more easily through search. Give an overview of your video, et cetera. So today I wanted to take a look at two successful examples of this in action to help people who don't quite understand what you need to do to create a successful title and description. This is going to explain what to do. So my recent video is called A Day in the Life of an Actor. 6:00 AM, wake up, Ubers & Coffee. Now this side of things is very much so just creating intrigue as to why you're waking up at 6:00, you get Ubers and coffee, it must be a hard day. But the real key-words here are a day in the life of an actor because lots of people on YouTube search for a day in the life of an actor. So the keywords here is this first half of the title. The second half is very descriptive of what happens to the video and what it's like. But really, that doesn't really help me get anymore viewers, it's just to actually engage people who attempted to watch the video. The key element of the title was also represented in the thumbnail as well. A day in the life of an actor, we've already discussed this. So the catchy bit is there, the search word is there. If you got a keyword in the title, what you can do is let say go on YouTube and then search "A Day In The Life of an, and you can see that it comes up in the search engine, which means that people have searched for it, which means it's a highly searched thing. Because if I was like, Ubers, coffee, and, nothing comes up. So you can tell this is going to be a keyword essentially. So really think about what keywords are. Again, for the title here, I've got The Official UK University Rankings 2021. There are so many different elements of search and the people are going to do when they're looking for this video. They might search University Rankings 2021, UK University Rankings, Official UK University Rankings, The Official UK University Rankings 2021, Reacting to Best Universities, Reacting to Best and Worst Universities, and there are so many keywords in this title here. UK University Rankings, rankings, best, worst, universities. This video actually blew up and they go 50,000 views because of how many keywords were in the title. So you can see we've got a very mediocre title here, gets the job done, for explanatory. That's all you need for this video. But the video that blew up is taken off because there are so many keywords in it. So really think about what keywords and search things you can get in your title. Because once again, you can type in university rankings. It's got university rankings, UK, university rankings, 2021, university ranking, university rankings, England, that sort of thing. A way to find out keywords to include in title, description, and tags is to just play around with this search bar, see what comes up first, and then you can do search engine like that. Another thing to do is, in your description you want to do the same thing as you're doing with the title, but include them in more of a paragraphy manner. So I've gone, this is officially the UK university rankings and league tables for 2021. I react to the biggest movers, universities that are up and coming, and Russell Group universities are falling down the league tables. University of Cambridge, University of Oxford, because they're very key universities in the UK, best universities in the UK, and you can see that. I'm basically taking the keywords I put in a title and re-working them into the description into paragraph form. Same here, then life of an actor while I was filming, film making, actor, acting, cast, and crew, then the life of an actor on a movie set. So you just got to really include all the keywords in the title, in the description as well, and it's the same for the tags. You can see here that acting in London then the life of an actor, acting Netflix. Anything relevant to your video on the topic title has to go into tags because people will search for how to get in a Netflix movie. People will search for a day in the life of an actor. People will search how to get into drama school, and that's what the tags you want to be including in the description and the tags you want to be including here. Some people make the mistake of including one or two tags. Just like acting Netflix. That's it. You want to include actual search terms along in the tags. Again, you can see here that this is where I've really done well. Best universities, university league tables, official UK university rankings 2021, and I'm really ranking up high in the search and for all of these terms. A good app and plug-in you can get is called vidIQ, where basically you download the Chrome plug-in and it gives you some recommended tags. When you're making your videos, the free version gives you three recommended tags. I'd recommend doing that because it shows you what tags are being searched for. Then it also gives you rankings for these tags about how your tags and how your video is performing in terms of the search engine. I hope you can kind of get a gist of what needs to be done when you're titling your video keywords, expanding on them keywords in the description, and including search terms in the tags as well. Then another thing to play the YouTube algorithm always include in a playlist, to make as many playlists as you need to. Include your videos in a playlist because that supposedly helps. You can see this has high vidIQ score. Make sure you add end screen, add cards, keywords. All stuff like that really helps. So I hope this is a lot clear on what you need to do now.
10. Class Project :): For the class project, I would like you guys to send me your exemplar channel art, display pictures, thumbnails, and video titles. What I'll do once I receive these, I'll then proceeds to give feedback on how you can potentially improve your thumbnails to make them more eye-catching, how you can improve your channel art to explain more about your channel, and hopefully from these elements I can roughly guess the content you're going to be making on your channel. Yeah, I'll provide feedback.
11. Recap & Conclusion - Thank you!: To conclude, the key things for your channel going forward are; you need to work out what your brand is and what your content is going to be going forward. Once you know these two things, you merge them all into one to make your brand reflect your content and your content reflect your brand. Your thumbnails have to be eye-catching and your set-up has to reflect quality. This is done by having the microphone as close to your mouth as possible, having light clearly in your face and a nice backdrop. When editing, adding your own certain style, whether it'd be graphics or color grading or a certain intro, it's great for standing out and creating that unique connection with your audience. Playing the YouTube algorithm via your titles and tags and description is such a valuable tool that not many people know about until they've been in the YouTube game for a while. See you can really master titling your videos, including keywords in the descriptions, and including keywords in the tags, this will help you get seen by the YouTube algorithm, this will help you move forward. Encouraging people to like your videos which you probably see every YouTuber do, is key for promoting your video within the YouTube algorithm as well. Because if people like the video, YouTube think it's a good video, they're going to promote your video because it's got a lot of likes and so on, another key thing that everybody wonders why YouTubers do it and that is why. Thank you very much for watching this intermediate level YouTube masterclass, I hope you did enjoy a lot. Obviously if you are a new YouTuber you might want to check out my previous beginner class. If you are a intermediate already then the pro class is going to be coming out very soon, so make sure you follow this channel, leave a review if you found this class helpful. Thank you so much for watching, and I wish you all the best on your YouTube journey.
 Dylan Reeves-Fellows ⭐️, YouTuber, AI & Professional Editor